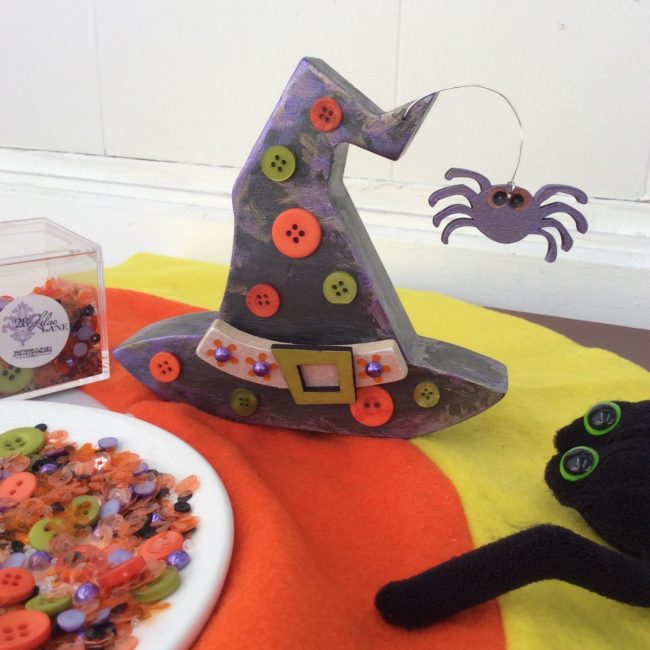
For this witch hat Halloween decoration I started with a wooden witches hat from Foundations Decor. The hat comes with a band, buckle and a cute little spider with a piece of wire you can curl any way you like.

For this witch hat Halloween decoration I started with a wooden witches hat from Foundations Decor. The hat comes with a band, buckle and a cute little spider with a piece of wire you can curl any way you like.
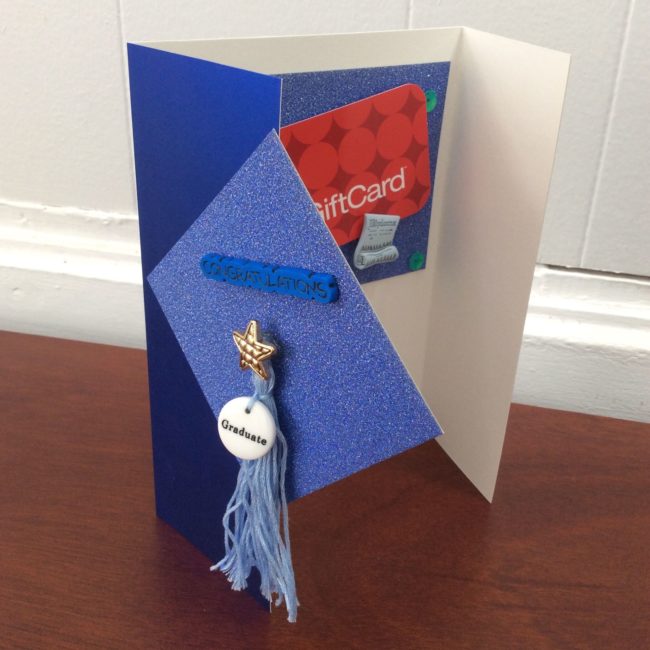
Create this unique graduation card for your very special graduate.
This card features a square on the top that looks like a graduation cap along and is adorned by a tassel. It is fun to make and embellish with buttons and elements from the Grad collection.
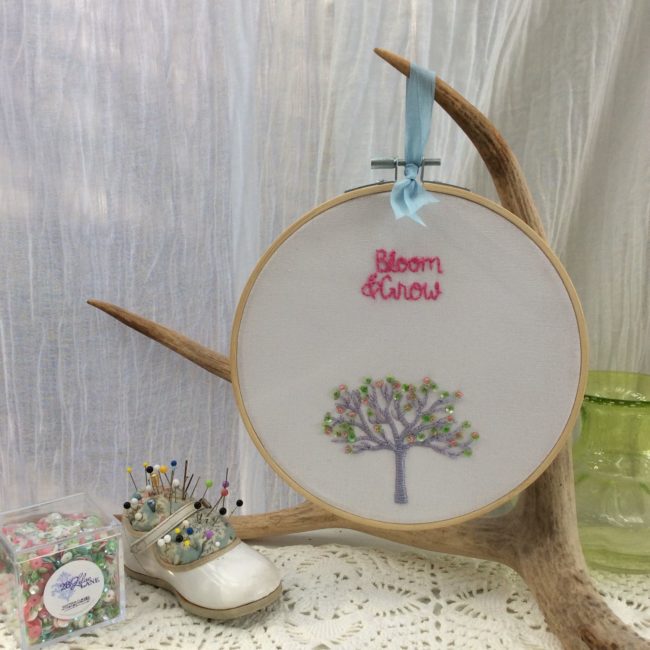
Tiny beads and sparkly sequins are the perfect companion to embroidery art.
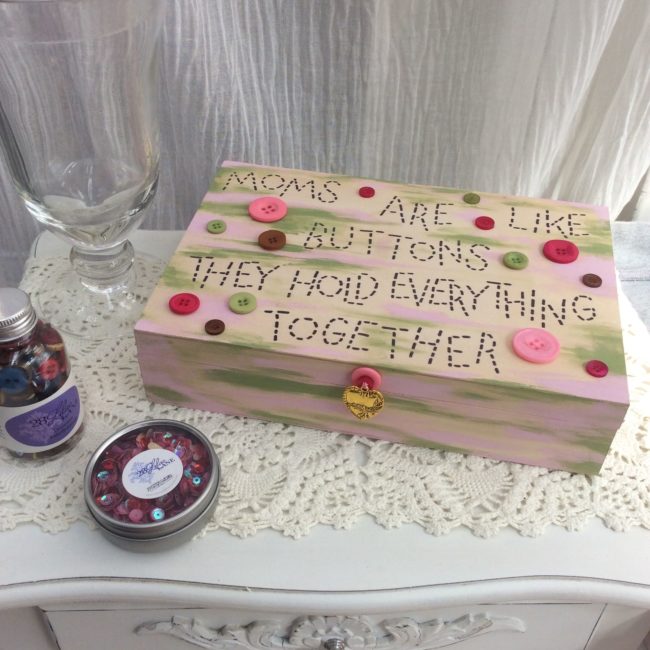
Here is an idea to keep Mom’s craft supplies organized. It’s both thoughtful and practical.
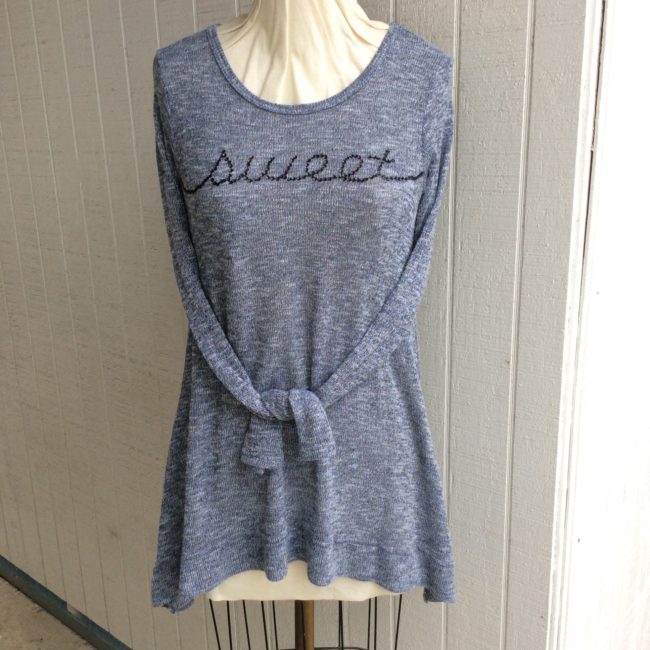
This is super easy! And you can do it with any word and any color sequins.
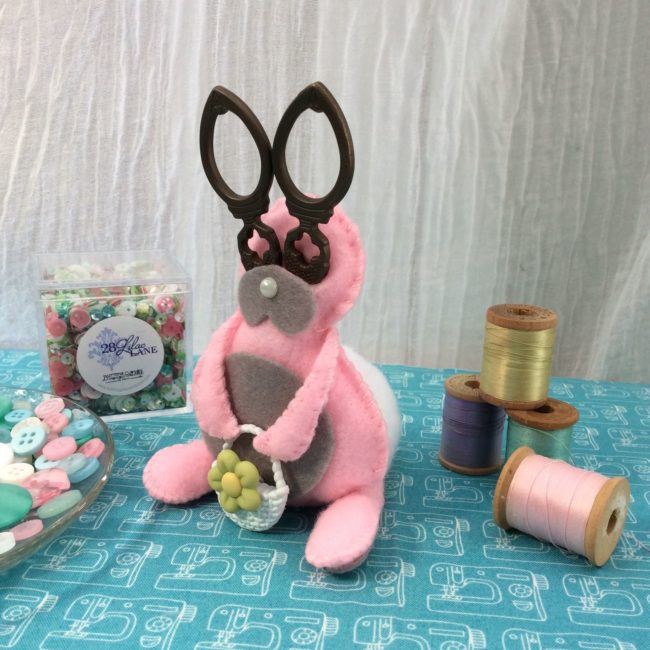
Making cute things to keep your sewing and crafting supplies handy on your desk can be fun.
I like keeping my scissors handy and I am also a big fan of vintage scissor cozies. I thought I’d make a scissor cozy by die cutting felt, stitching it up and embellishing it with novelty buttons from the Buttons Galore Spring Value Pack.
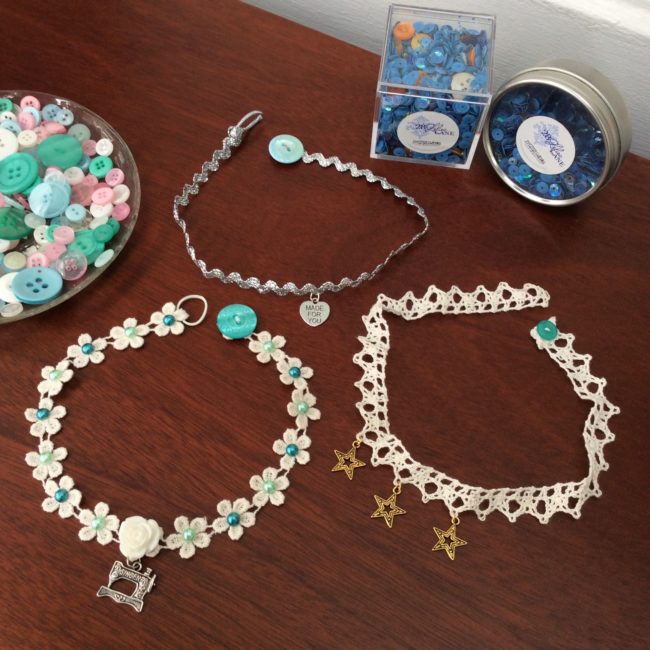
Make fun necklaces with the lace trim found in our 28 Lilac Lane Kits. It is easy to embellish the trim with the pearl flat backs, charms and resin flowers that can be found in each of our Embellishment Kits.
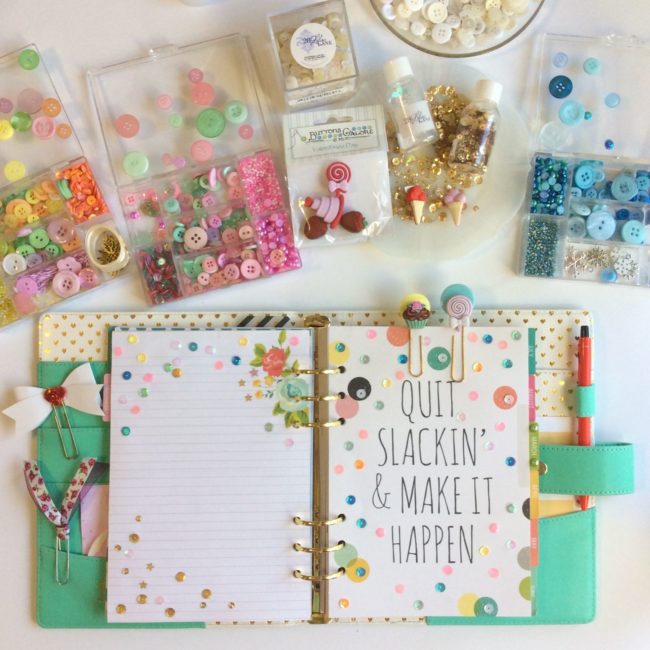
I like to make my planner pages stand out by adding a bit of sparkle and bling. A fun and easy way to make your planner unique is by adding some sequins and buttons. I used a variety of sequin colors from the 28 Lilac Lane line of embellishments from Buttons Galore.
Simply position or sprinkle the sequins on my planner divider page spread.
Once I liked the placement I glued each sequin down. I recommend using Perfect Paper Adhesive. It dries clear and there is no odor plus once dry, you will never see any residue of he glue. I have to say it was very zen. I like repetitive crafts like this.
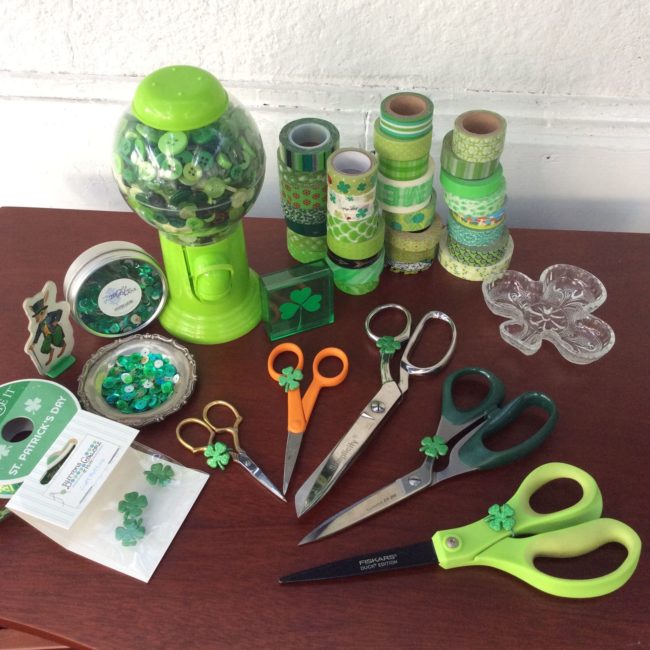
Everybody has a pair of scissors. Some of us, well, have a few pairs of scissors. In the past, I have customized my scissors with ribbon or decorative tape. I thought it might be fun to decorate the scissors for St. Patrick’s Day with Buttons Galore’s Glitter Shamrock Buttons. This is a fun and easy project for any level of crafter.
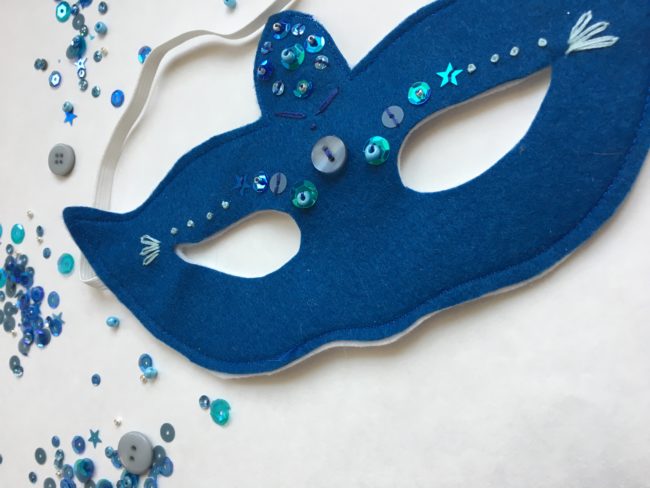
It’s Aimee here today for a little creative project to dress up your New Year’s Eve! (Although I’m still in denial that the holiday season is upon us in general.) This DIY New Year’s Eve mask project can be made with or without a sewing machine and is a great project for a novice stitcher – or even little hands wanting to get busy with a needle and thread. Continue Reading →
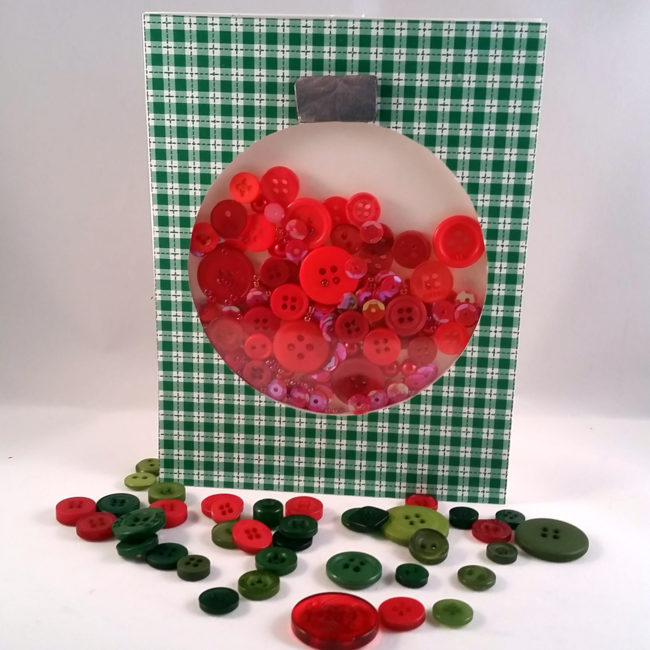
There are few card styles out there that are more impressive or fun than the shaker card. The 28 Lilac Lane Embellishment Bottles made this easy Christmas shaker card beautiful!
I made this easy Christmas shaker card using the 28 Lilac Lane Embellishment Bottle in “Dragon Fire”. The gorgeous red tones of the buttons, sequins, beads, and pearls are perfect for Christmas cards, and they all come together in one adorable little bottle! Continue Reading →
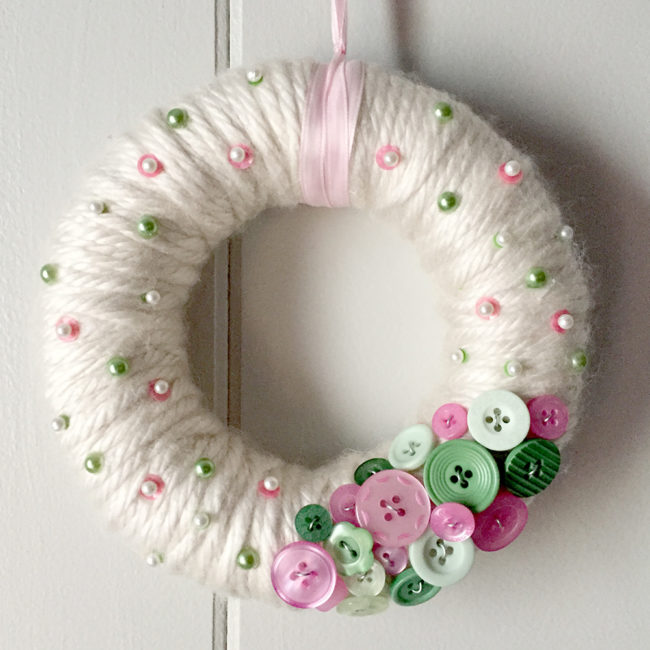
A beautiful wreath is an essential part of complete holiday decor. This yarn wrapped button wreath helps welcome guests to your home and allows you to express your creativity as well! Continue Reading →
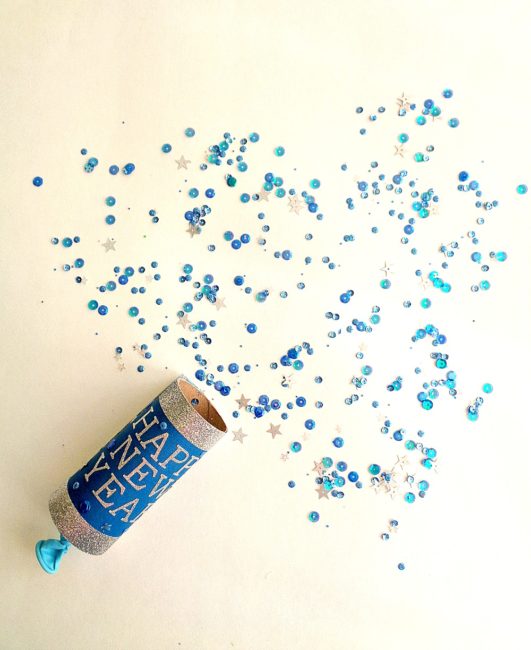
Hello Everyone! This is Katie from the Buttons Galore & More Design Team, and today I will be showing you how to make a fun project to celebrate New Year’s Eve: DIY confetti poppers!
New Year’s Eve may not be on your mind right now, but that doesn’t mean you can’t start gathering up ideas for the big day. One idea that you can add to your list are these easy to make confetti poppers! You may have seen confetti poppers before and thought that they were too difficult or too time-consuming to make. However, today, I will be showing you how you can make a stylish confetti popper in only 3 steps. Continue Reading →
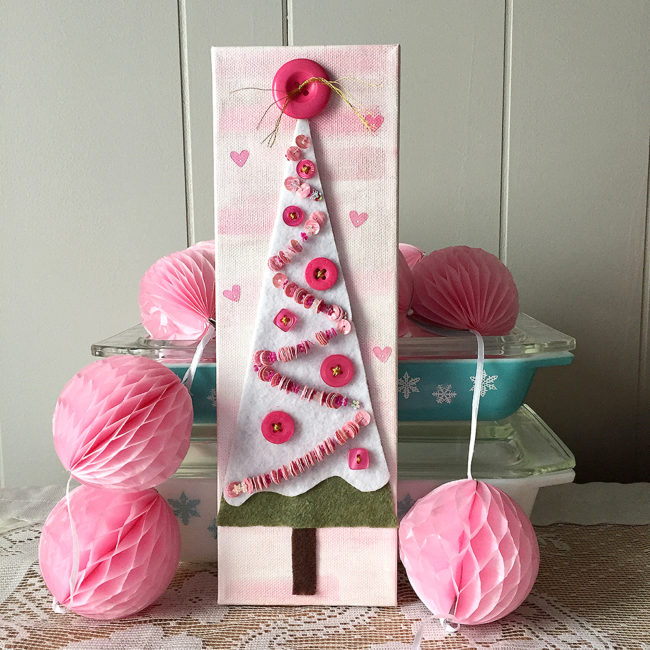
Do you love crafting for the holidays but just can’t stand making everything red and green? Good news – pink is trending this Christmas! Add this pretty pink Christmas tree decor to your decor to change things up a bit this holiday season! Continue Reading →
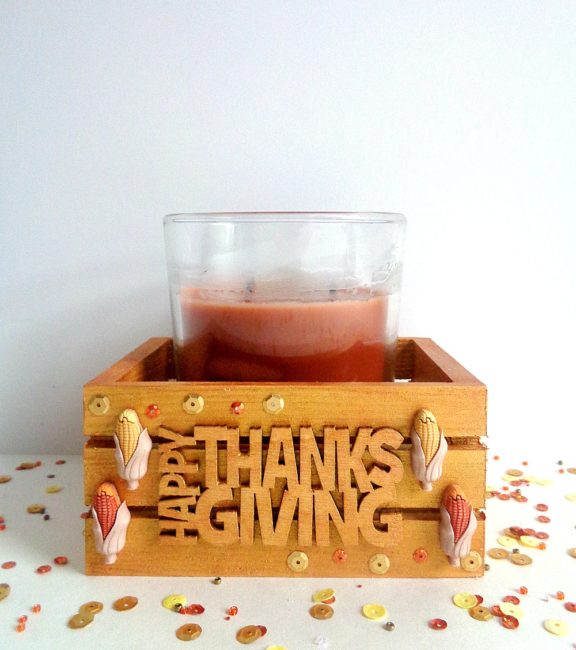
Hello Everyone! This is Katie from the Buttons Galore & More Design Team and today I will be showing you how to make a Thanksgiving candle holder for super easy decoration for your Thanksgiving!
Making decorations for Thanksgiving Day may not be on your radar, simply because you are most likely too worried about making Thanksgiving Day dinner. However, making some type of decoration for Thanksgiving does not have to be difficult or time-consuming. To prove it, today I am going to be showing you how to make your own Thanksgiving Candle Holder! Continue Reading →
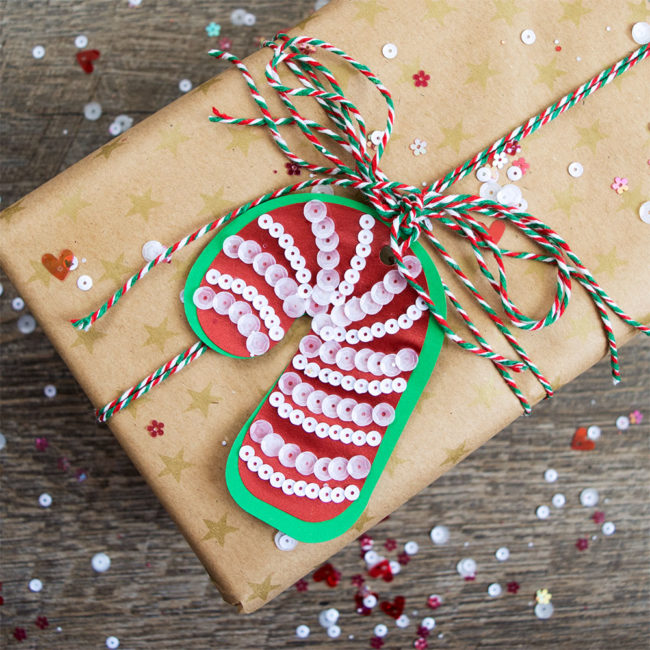
One of my favorite things during the holiday season are handmade gifts. But even more fun than making just the gifts, I love to make the tags and even the wrapping paper to wrap the handmade gifts in. I start making my holiday gift wrap and tags super early in the year and I put them on everything! These fun 28 Lilac Lane Candy Cane Sequins were perfect to make candy cane Christmas gift tags! It’s such a lovely mix of red and white sequins for the holiday season. The candy cane gift tags turned out so festive and cute. It’s the perfect little tag for a cute little package! Continue Reading →
Hi, it’s Connie here with the Buttons Galore & More design team! Today I’m sharing a handmade Christmas shaker card, using the Deck The Halls Shaker Mix by 28 Lilac Lane. The 28 Lilac Lane Shaker mixes are full of beautiful colors of sequins, beads and buttons, mixed perfectly together to get you into the Christmas spirit or at least in the mood to start your Chrismas shaker cards! Continue Reading →
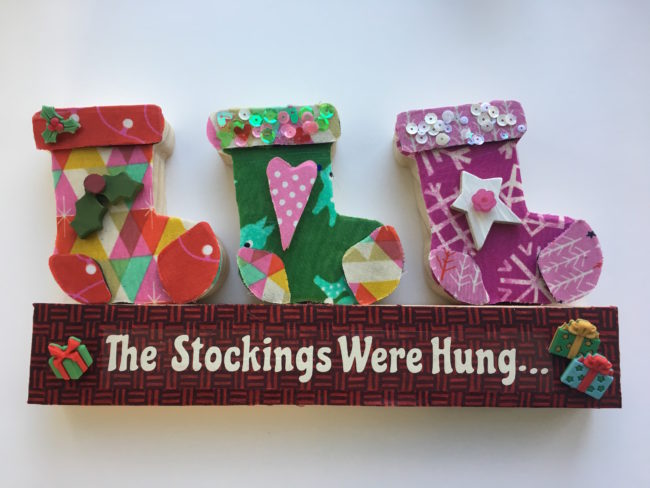
Hi! It’s Aimee here with a great project to add to your Christmas mantle decor this year. Using the new stockings set, I added a little fabric and some button bling to dress up these simple wood decor pieces. Continue Reading →

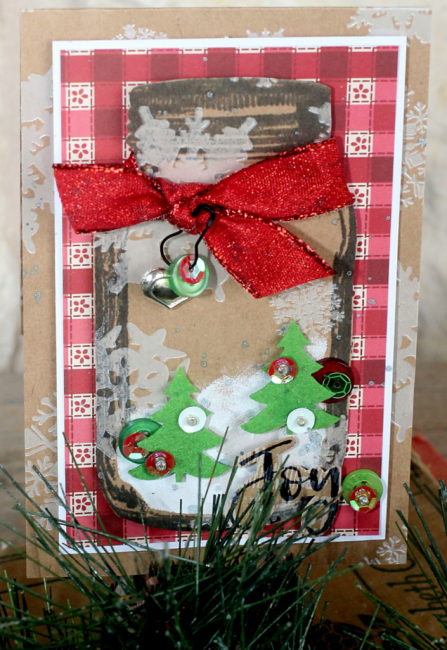
Hi, it’s Connie here with Buttons Galore & More design team! I have a fun and festive project to share today using “Christmas Tree with Presents“, one of the new Foundations Decor pieces that are now available from Buttons Galore. The 28 Lilac Lane O’Christmas Tree embellishment bottle added some green sparkle alongside some really cute Buttons Galore 3D Christmas buttons. Continue Reading →
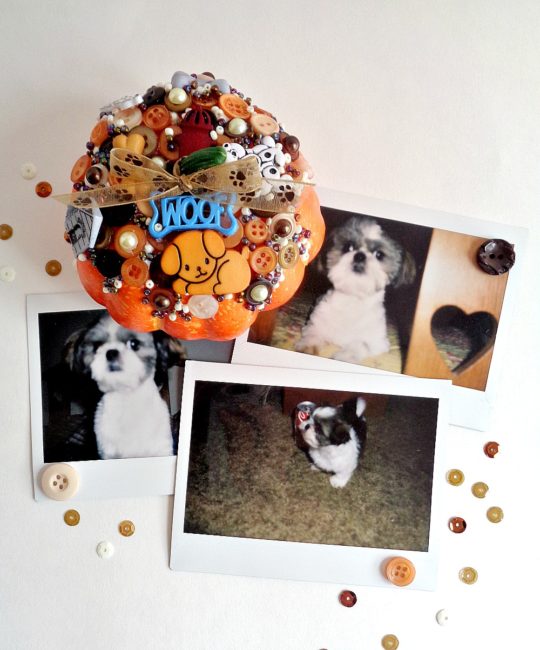
Hello Everyone! This is Katie from the Buttons Galore & More Design Team and today I have a cute pumpkin decorating project that involves your furry four-legged friend! Continue Reading →
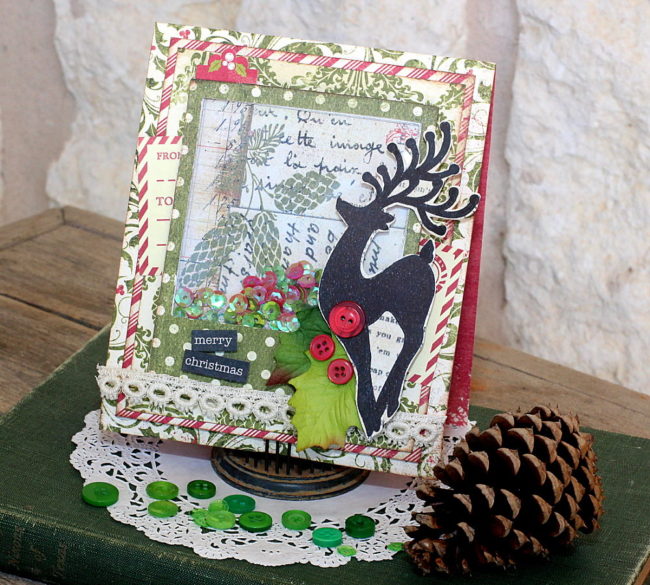
Hi, Connie here with Buttons Galore & More design team sharing a Snow Globe Christmas card using the Holly Jolly embellishment kit by 28 Lilac Lane. It is never too early to start thinking of creating special, one-of-a-kind Christmas cards for those special people you love. Our 28 Lilac Lane collection has put together embellishments kits that take the guess work out of creating special cards. Holly Jolly is the Christmas embellishment kit that is full of festive embellishments that will make beautiful cards – the cards people will want to keep and display! Continue Reading →
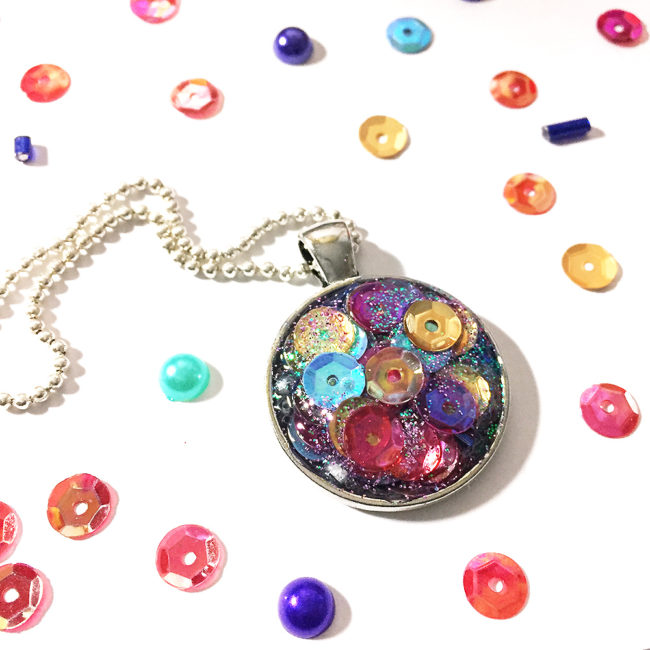
Who doesn’t love an invite to good party? I know I do! When you walk through the door (fashionably late, of course) you can be the center of attention in this quick, easy to make sequin pendant necklace! Continue Reading →
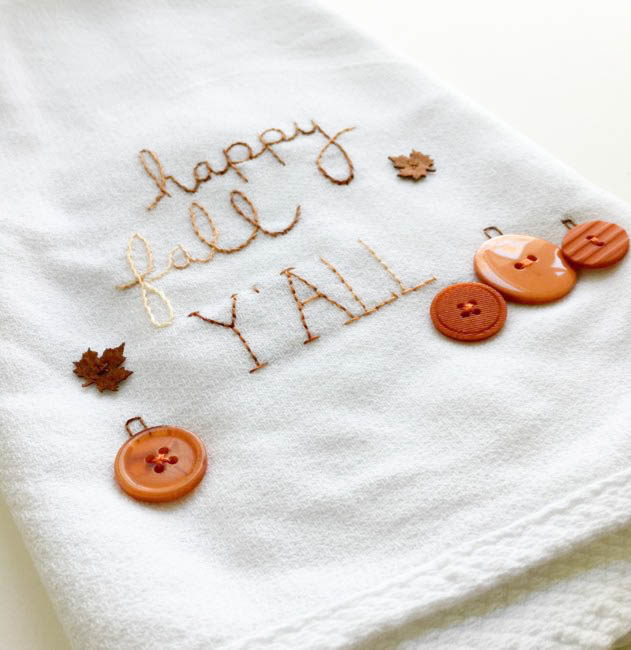 We’ve had so many crisp mornings lately, I have gotten so eager for fall! So bring on the pumpkins, acorns, orange and brown! Today’s project is a super quick embroidery project to add to your fall decor. Even the most beginner of embroiderers can easily stitch up this DIY fall tea towel. Continue Reading →
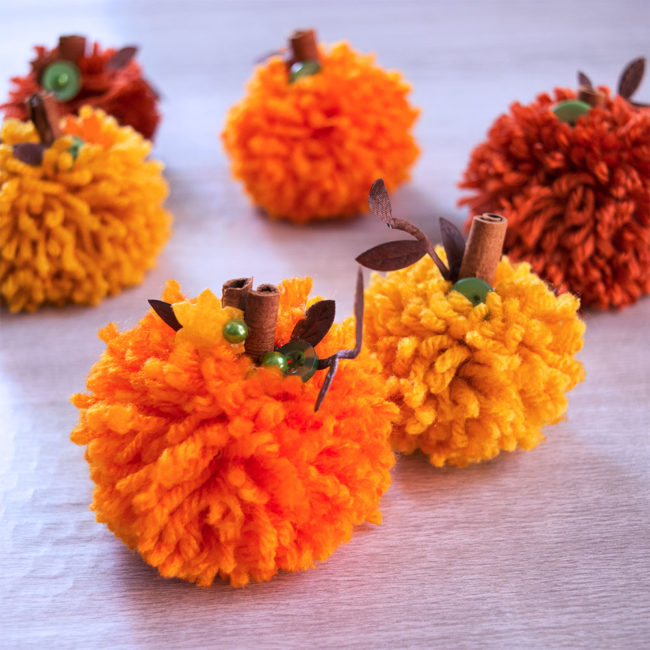
The weather here has started to cool down this week and so I’ve decided it’s time to bring out those pretty autumn colors. Pumpkins are my favorite seasonal decoration in the fall – I love using both fresh pumpkins and artificial pumpkins in my decor. Yarn pom poms are such a fast and easy craft to make. They can add a bit of whimsy to any decor. I wanted to make some DIY pom pom pumpkins to add to my fall decorations, and the beautiful Autumn Afternoon Embellishment Kit from the 28 Lilac Lane collection was the perfect addition to finish off these cute little poms! Continue Reading →
My project today is a sweet little pendant necklace that comes together pretty quickly and makes a great gift.

Don’t be daunted by the idea of sewing on the beads! It’s true that sewing beads can be a little fiddly because of their tiny size, but once you get the hang of it, it’s a great beginner project for jewelry making.
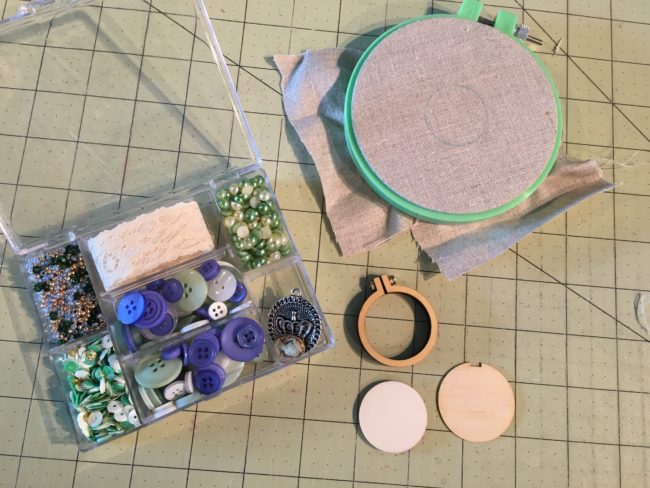
Here’s what you need to make this little beaded pendant necklace:
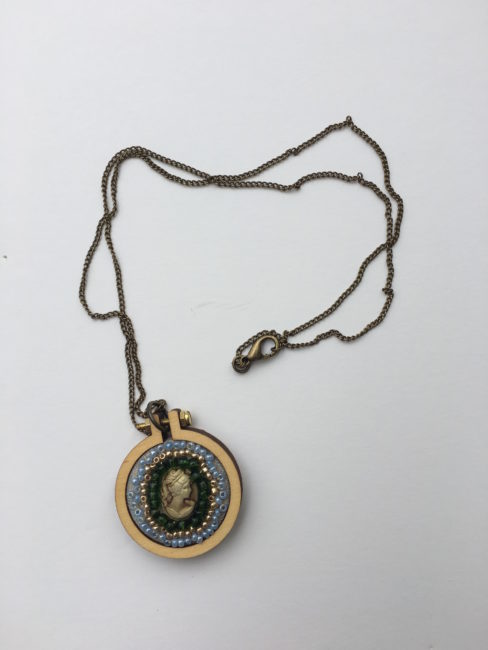
Put your scrap of fabric inside your embroidery hoop for sewing and outline the inside circle of the mini embroidery hoop with a pencil onto your fabric. Using the little cameo from the 28 Lilac Lane set, use craft glue to glue this to the center of the circle you just outlined. Let dry completely before moving on.
After your cameo is completely dry and securely attached to your beaded pendant, take a small plate (or use the lid of the Tea Time set) to pull out the beads. From your divisible embroidery floss, pull out one thread strand and thread your needle, making sure to leave a knot in the end. Sew a row of the larger green beads around the edge of the little cameo. Then repeat with the gold beads and then the blue beads.

To finish your beaded pendant, position the mini hoop on your design and draw a cutting line approximately 1/2 inch around the hoop. Cut it out. Place the cut design on the center plate. Then place the mini hoop on top and push it down to secure it. Flip it over and using a hot glue gun, place the glue around the inner edge. Push the fabric down in a circular motion. Add glue to the backing piece on the inner edge. Position it on the back of the hoop with the notch top and center.
You can either add a jump ring to your beaded pendant for your necklace chain to go through or thread the chain through the bolt in the center of the hoop.
Voila! You have a sweet little beaded pendant necklace ready to wear on a fun night out or to gift to a friend!
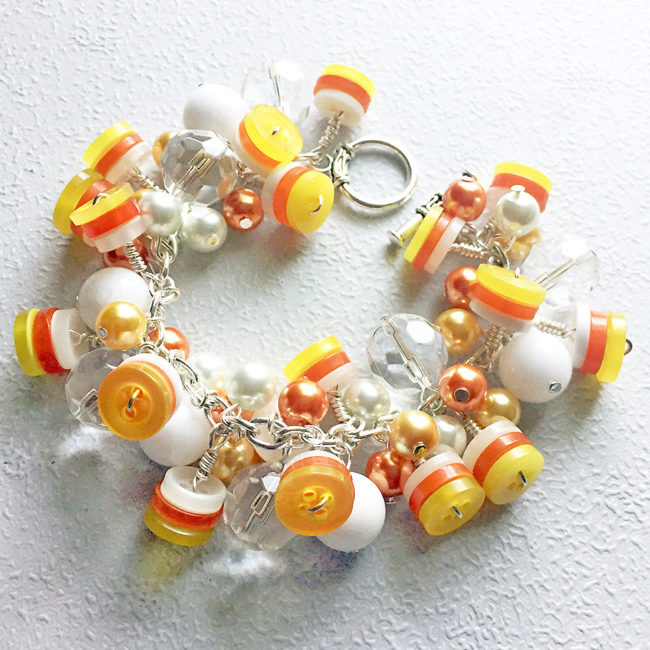
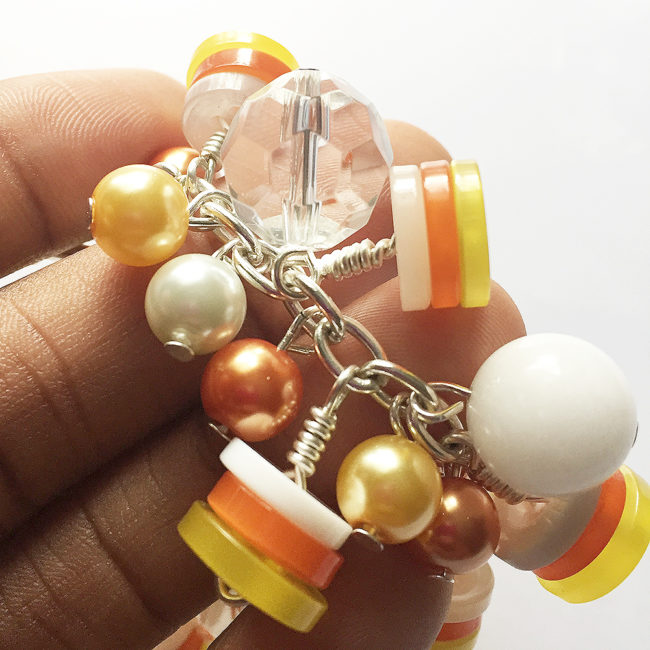
Hi everybody! It’s Anaya from the Buttons Galore & More Design Team. Halloween is fast approaching and I must confess, I’m excited. No, I’m not into the creepy scary stuff – I’m just looking forward to the candy! If you love Halloween candy like I do, I know you’ll enjoy making this super sweet candy corn bracelet.
Start your candy corn bracelet by separating the buttons by color and size. You will need to select buttons of a similar size to stack and create little button candy corn charms for your bracelet. Cut a 3-4″ length of wire and gently fold into a ‘U’ shape. Stack buttons with yellow on the bottom, orange in the middle, and white on top. Push the buttons together and twist one end of wire tightly around the other. Trim the excess wire and create a loop using round nose pliers.
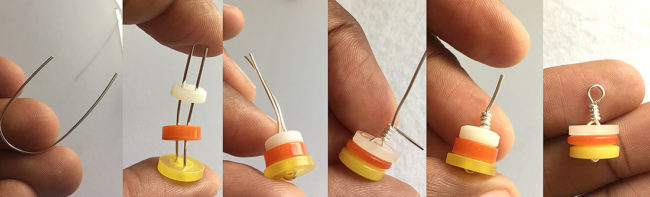
Repeat this step a until you have enough to fill your your chain. My bracelet is 7″ and I have attached a button charm to every other link.
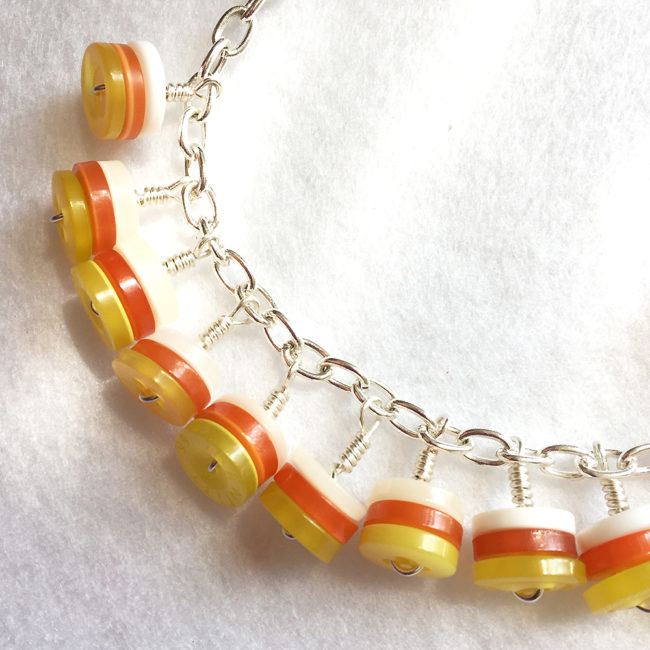
After filling the candy corn bracelet with button charms, gather your selection of beads. I am using 10mm yellow, orange, and white glass pearls along with larger clear and white glass beads. Using headpins, add 2-3 beads to each of the remaining empty links in the chain.
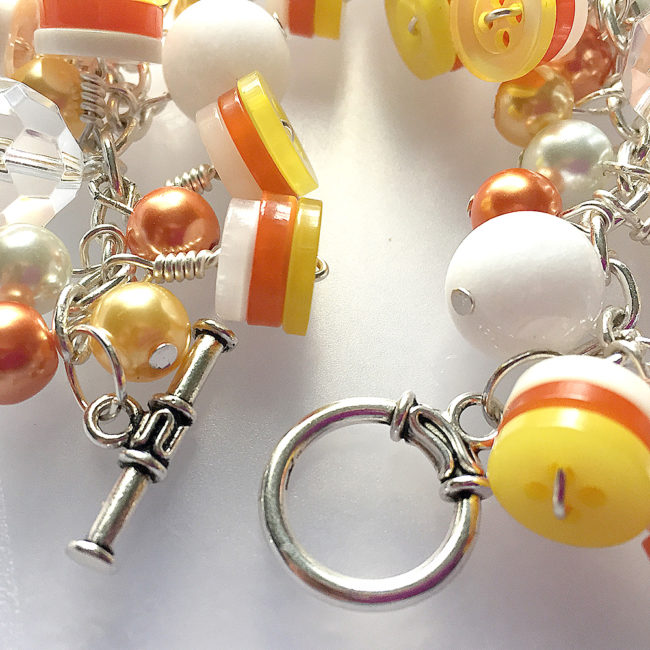
Once the bracelet is as full as you’d like, place a jump ring on each end of the chain. Attach the toggle clasps to the jump rings and your candy corn bracelet is complete!
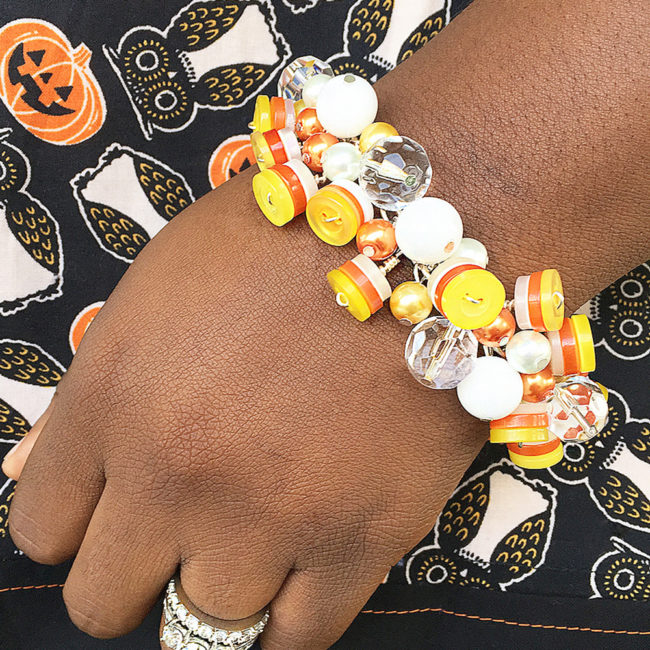
I hope you’ll give this candy corn bracelet a try! It’s so cute that it’s definitely worth the time and effort to make. You can even modify the steps a bit to create a matching Halloween necklace and earrings. With this kind of arm candy, you’ll be sure to get all the sweet treats you desire this Halloween candy grabbin’ season!
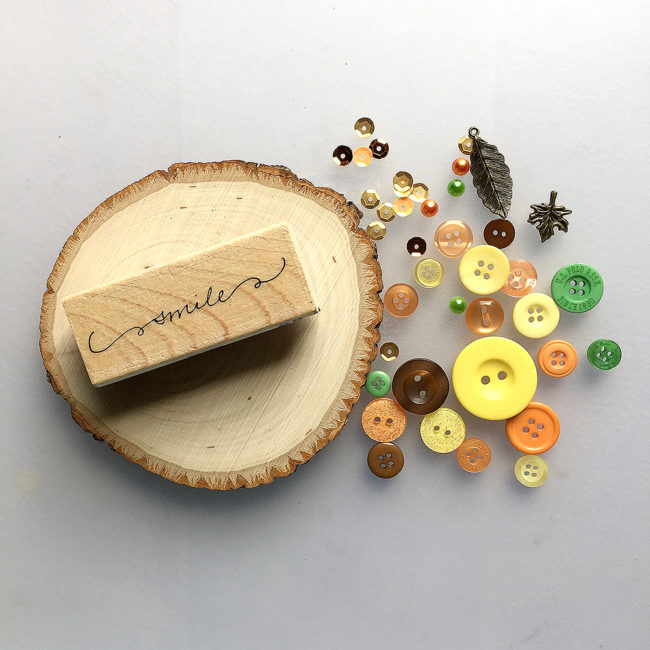
If you’re like me, you just can’t wait for the temperatures to drop. Now is the perfect time to get started on some fun and simple projects for fall. Today, I’m going to show you how to use the Autumn Afternoon embellishment kit by 28 Lilac Lane to create an awesome fall wood coaster wall decor piece for your home.
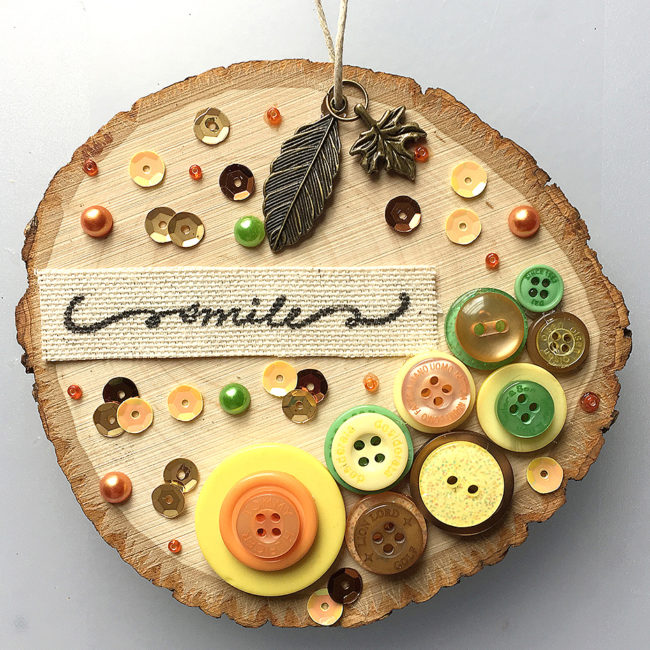
The first thing you need for this project is a wood surface. I’m using a 4 1/2″ round wood coaster that is about 1/2″ thick. Next, you will need to find a stamp with a word or phrase that expresses the perfect sentiment. I have selected a “smile” stamp. Smiles are always in season! You can of course go with something specifically related to fall. Most importantly, ensure that anything you choose will fit nicely onto your coaster.
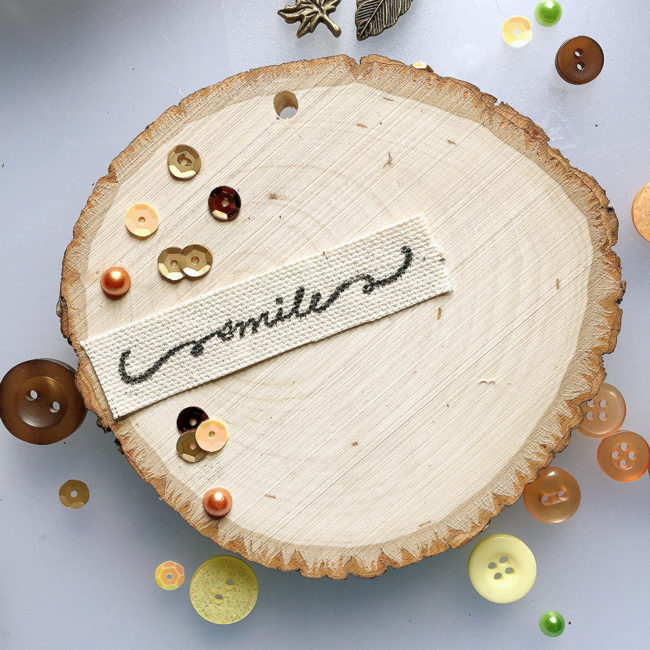
I have drilled a hole in the top in order to attach a string, but you may be able to find one that is pre-drilled for crafting. On a scrap piece of duck cloth I have stamped the word “smile” in black ink and then glued the fabric to the coaster’s surface. Then I used a clear-drying glue to begin adding pearls and sequins.
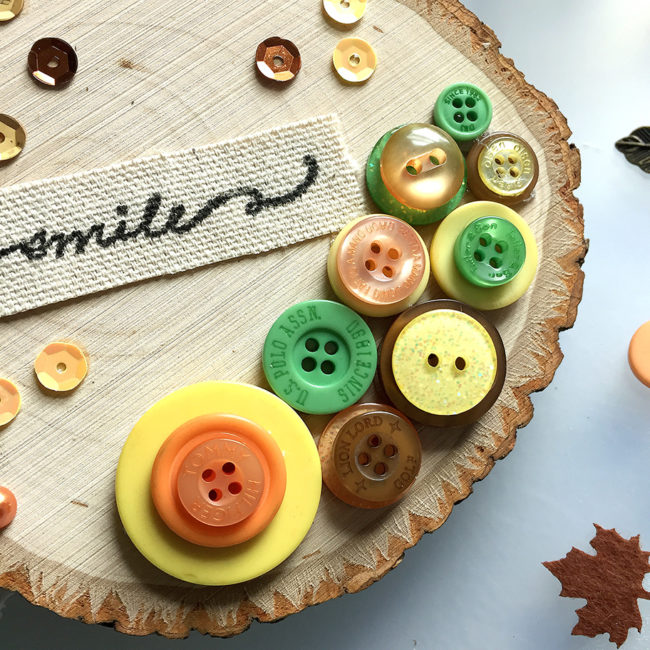
Don’t forget to leave room for buttons! Using a glue gun, I arranged the buttons closely together near the bottom edge and stack a few for extra dimension.
The kit includes leaf and feather pendants in bronze that look great hanging and add just the right touch for the season. I looped the cord through the wood coaster and each pendant. I used a 7″ length of hemp cord. After I attached the pendants, I just tied a knot in the cord to finish it off.
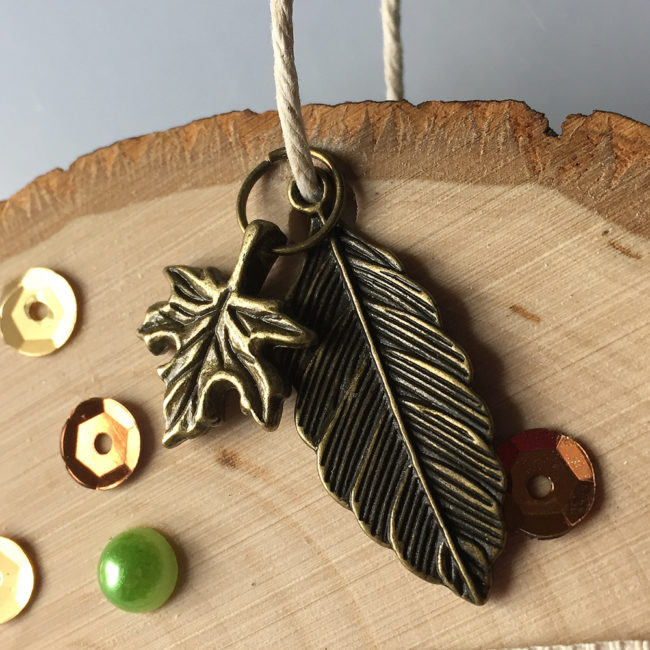
For the last step, I applied a few seed beads using the tiniest dab of glue. Using tweezers will assist in applying the beads exactly where you want them. As we all know, glue can at times get messy!
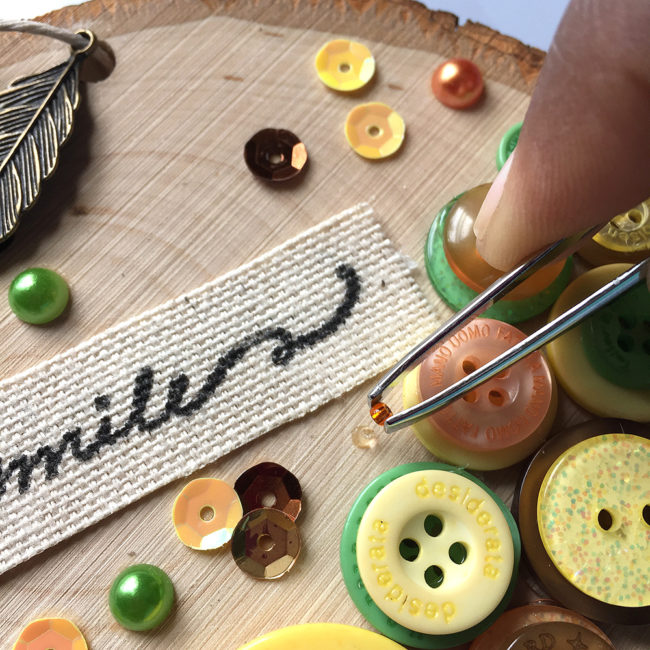
And its just that easy! Your newly embellished fall wood coaster wall decor is complete.
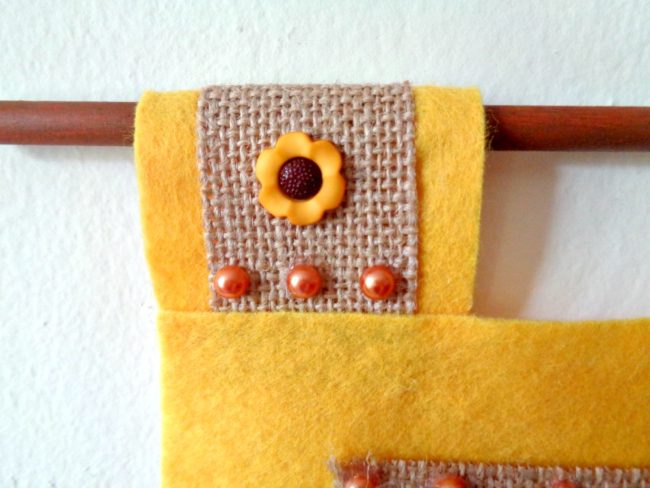
Hello Everyone! This is Katie from the Buttons Galore & More Design Team, and today I have a fun button pumpkin wall hanging project to get you in the mood for fall decorating!

This project is perfect to make if you are looking for an easy and inexpensive way to spice up your home décor for fall, halloween, and thanksgiving. I got the idea for this project when I saw a felt wall hanging designed for the 4th of July. However, instead of a pumpkin, the original wall hanging had a heart shaped flag made from felt and a few buttons. Personally, I thought the idea was cute but could be recreated in a simpler way. In today’s project, the whole DIY is only 3 steps and does not involve any sewing tools!
To decorate my button pumpkin wall hanging, I used two button sets for a majority of the project. Those two button sets were the 28 Lilac Lane ”Pumpkin Spice” Embellishment Bottle and the Buttons Galore Autumn Value Pack. Both of these button sets provided a wide variety of harvest/fall style buttons and worked really well together. My personal favorite out of both of these sets was definitely the 28 Lilac Lane ‘”Pumpkin Spice” Embellishment Bottle because you received a ton of beautiful orange colored buttons.
So, to find out how to make your own pumpkin button wall hanging, keep reading below!
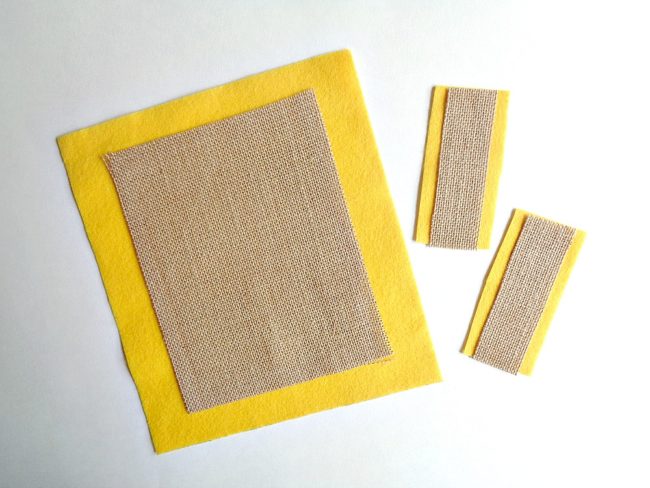
Step 1: Cut one piece of felt that measures 9 inches by 10 inches and two smaller pieces of felt that measure 2 inches by 3 ½ inches. Then cut out one piece of burlap that measures 6 ½ inches by 8 inches and two smaller pieces that measure 1 inch by 3 ½ inches.
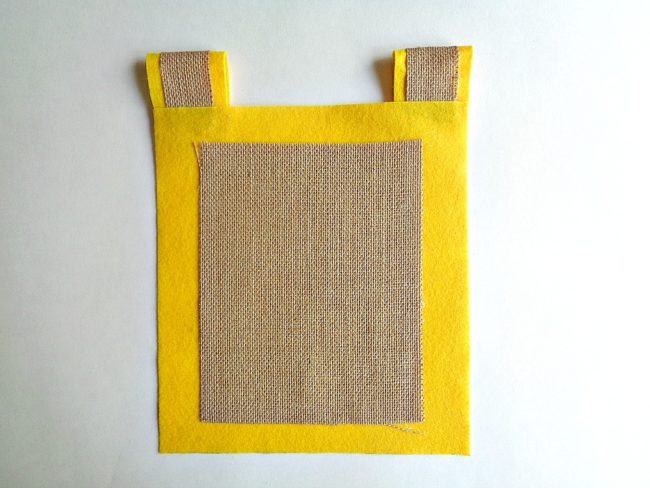
Step 2: Layer the larger piece of burlap centered onto the larger piece of your felt and glue it into place with your hot glue gun. Then layer the smaller pieces of burlap centered onto your smaller pieces of felt and glue them into place. Finally, create loops for your wall hanging by folding over the smaller pieces of felt/burlap and glue them in the corners of your larger felt piece.
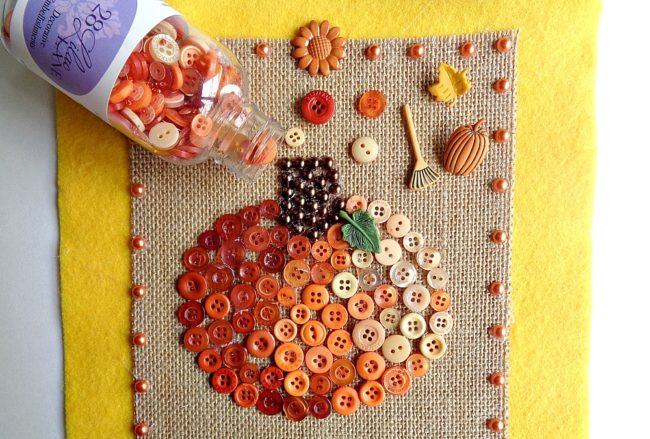
Step 3: Now take your pen and draw the outline of a pumpkin onto your burlap. Then begin gluing on your buttons around the outside of your pumpkin to create an outline and then fill in the middle with more buttons. For my pumpkin, I decided to go from dark to light buttons and then use shimmering half pearl flat backs for the stem. Finally, use the rest of your normal buttons and decorative buttons to decorate the rest of your wall hanging.
For my button pumpkin wall hanging I used the following:
Once you are happy with how your button pumpkin wall hanging looks, you are ready to hang it on the wall by sliding a dowel rod or wooden stick through the two loops!

I loved how this pumpkin button wall hanging turned out and I think it would look so cute as part of a gallery wall!
While creating this project, I did free hand the design of the pumpkin. However, if you are not comfortable drawing your own pumpkin (in step 3), you can always google ”pumpkin template” and print out a template to trace around. With that being said, if pumpkins are not your thing, you could always change the main image to be something else. For example, I think a leaf created from the 28 Lilac Lane “Toasted Graham” Embellishment Bottle would look really pretty.
If you made this pumpkin button wall hanging, what 28 Lilac Lane items would you use?
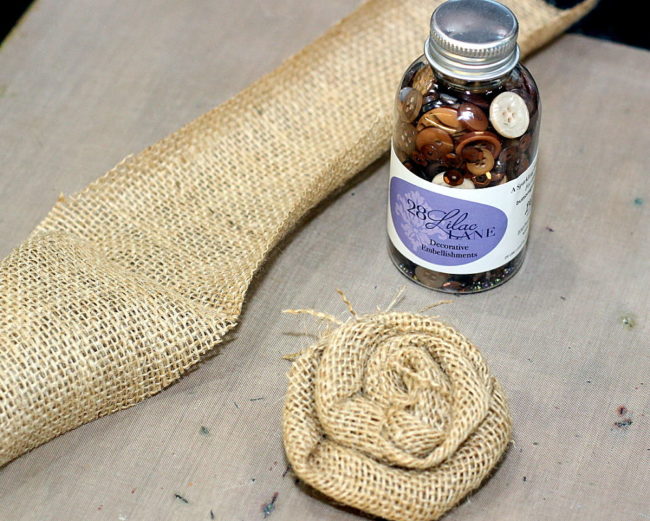
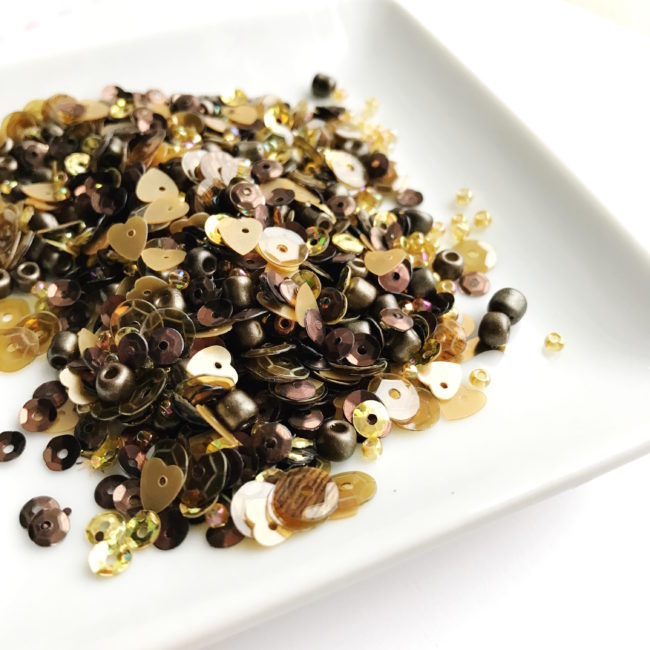
Hi, Connie here with Buttons Galore & More design team! Today I will be sharing an idea using the Toasted Graham Embellishment Bottle by 28 Lilac Lane. The contents of the bottle remind me of graham crackers, buttons in rich brown tones along with seed bead and sequins. Taking beautiful embellishments and adding them to clothing to accessorize is a favorite project of mine. Making a DIY button brooch, to add to a denim shirt or straw hat, is where I started!

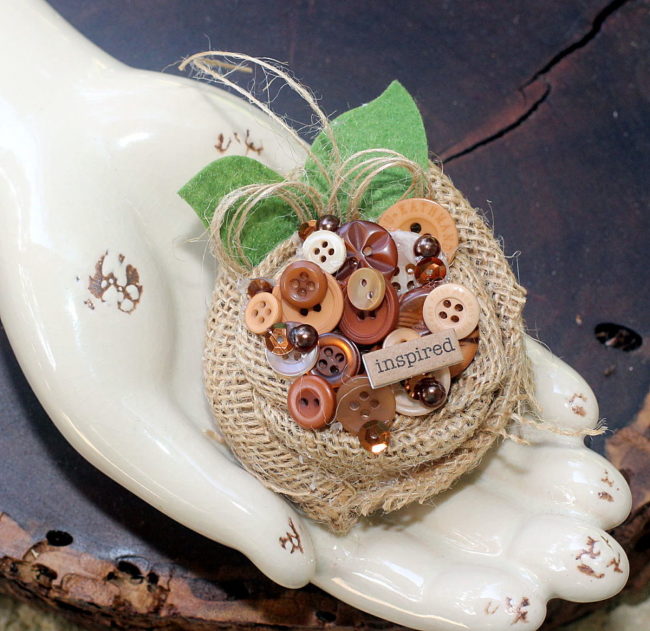
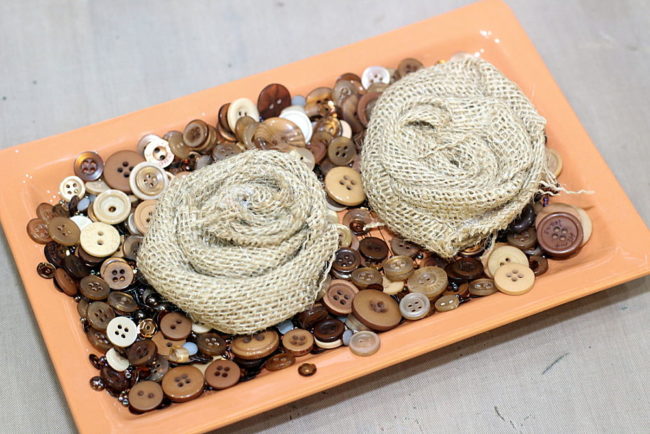
Take a small piece of burlap and twist it, to make an easy to create rose flower to serve as the base of the brooch. Coat the ends with a strong glue to keep them from fraying, and mount the burlap flower on a circle of felt, so the flower will not unravel.
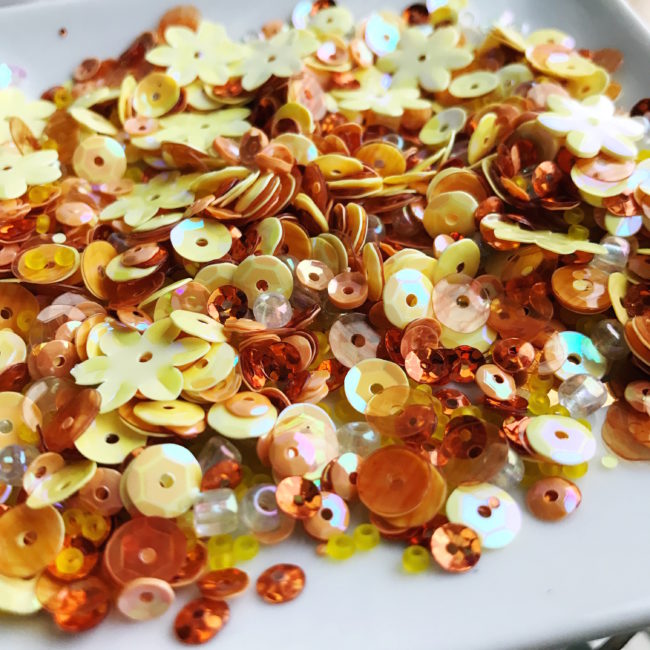
Now comes the fun part! Pour the contents of the Toasted Graham embellishment bottle on a dish (so you can see all of the pretties that are in it), and start selecting the buttons for the center of the DIY button brooch.
Using a strong glue, start gluing down buttons, sequins, pearls and beads onto the brooch. Overlapping the buttons and tucking in the sequins under the buttons will make a beautiful looking brooch. Add felt leaves and twine to finish off the brooch. Glue a pin onto the back of the brooch, making it easy to attach to a shirt or hat.
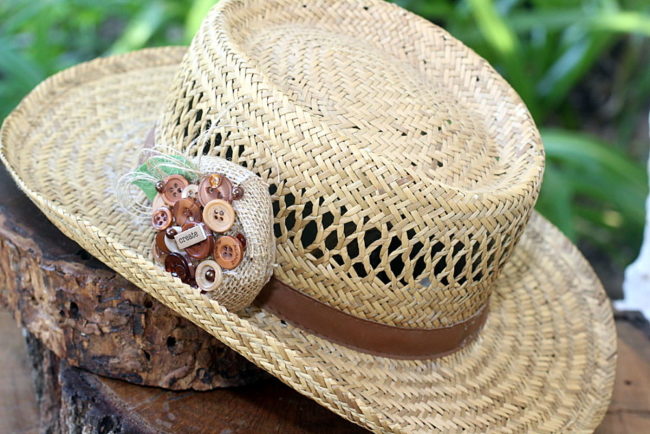 I love how the “create” brooch looks on this straw hat. It’s such a fabulous look for the fall season! Just attach it to the hat, using the pin that was glued to the back of the brooch.
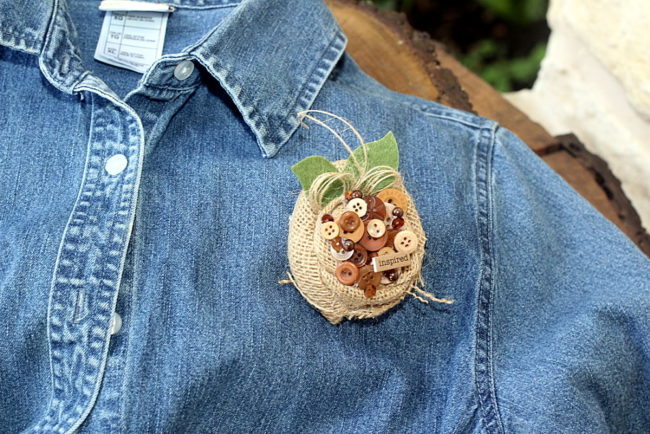
Here is the”inspire” brooch on the denim shirt. I love this look!
I hope you will give the 28 Lilac Lane embellishment bottles a try and create something to add to those hats, sweaters and shirts like I did!
Supplies Used:
28 Lilac Lane “Toasted Graham” Embellishment Bottle
Felt (leaves and back of brooch)
burlap
strong glue
word sticker
twine
Thanks for stopping by~
Connie Mercer/DT Member
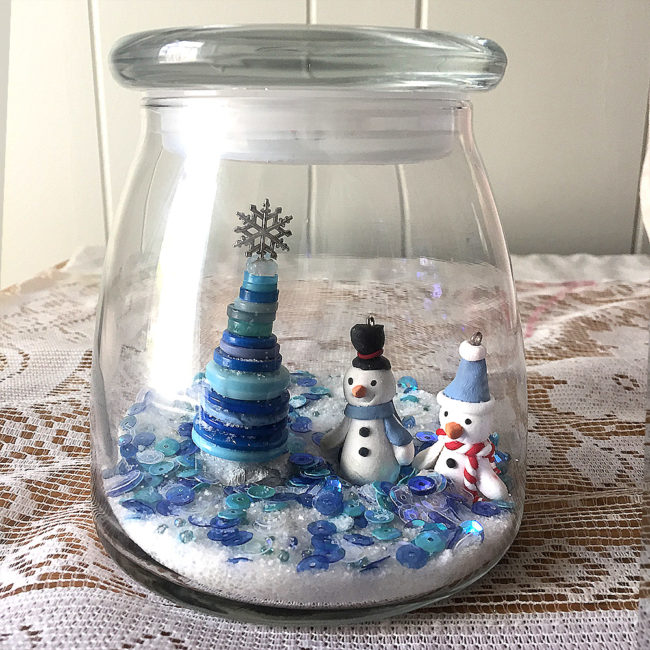
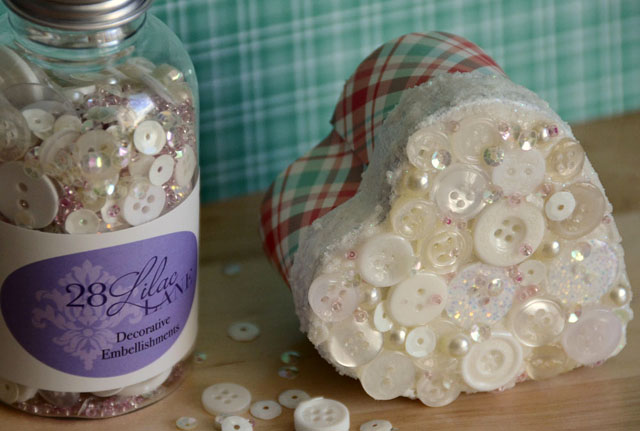
It’s Christmas in July! I’m thinking cool thoughts and making cool things, like this sweet snow scene in a jar!
Begin by rolling up a 1″ ball of aluminum foil, and then press it down to make the ball flat on the bottom. Cover the foil with a layer of white paint and allow to dry. To make the button tree, cut 6″ to 7″ inches of wire, and fold in half. Start with one of the snowflakes in the embellishment kit to attach as the tree topper. To keep the snowflake centered, apply some glue to hold it in place. Continue adding buttons from smallest to largest until it is to the height you desire. Twist the remaining wire and trim. Leave just enough wire to place in the hole of your snow hill with a dab of glue.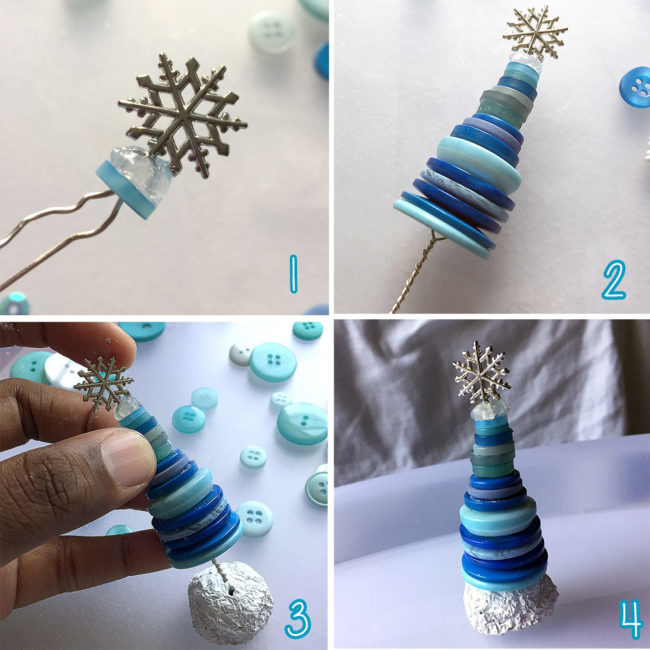
Glue the snow mound, along with any other little holiday figures you may have to the bottom of your glass jar. 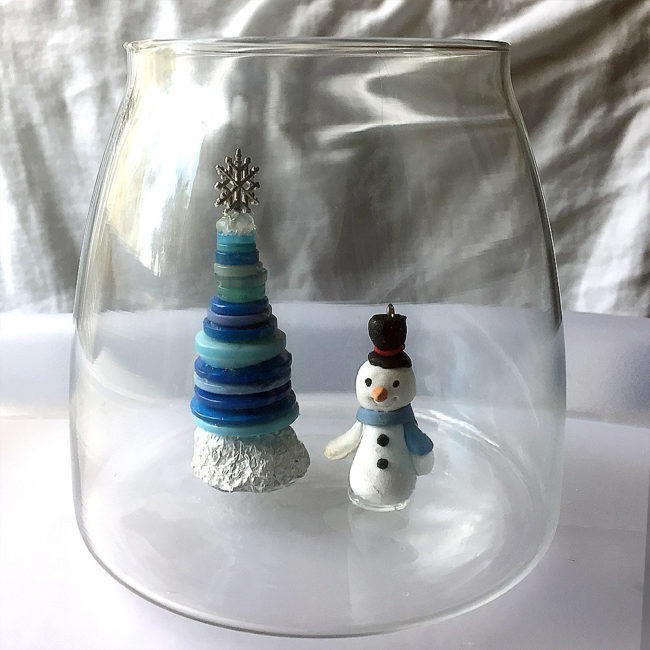
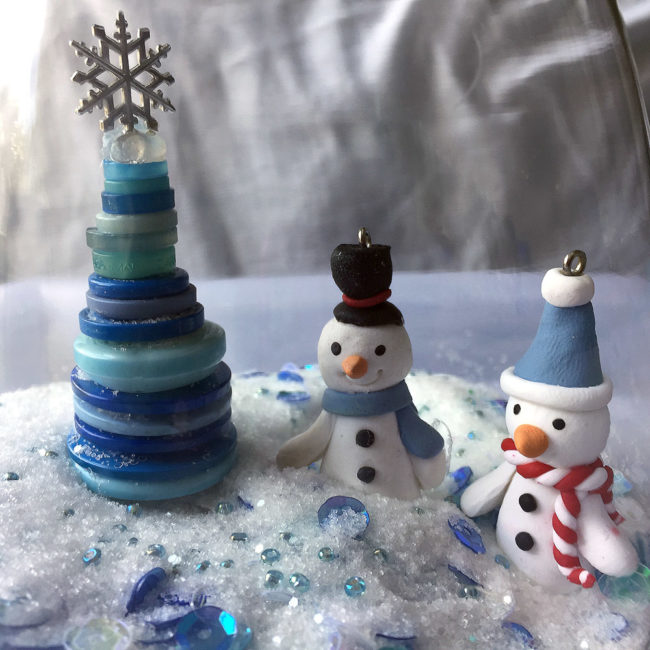
The last step is to add some sparkle and ‘snow’. Pickling salt may sound like a strange item to use in crafting, but it’s really awesome because it’s bright white and looks so much like snow! Also, the salt is heavy and will keep the sequins and beads from settling directly to the bottom of the jar. Pour in as much salt as you want until it reaches a height that makes you happy. Add sequins and beads from the kit, and then give the mixture a gentle swish from side to side to mix things up. That’s it! Your scenic snow jar is complete.
Have fun and experiment with various jar sizes and embellishments to decorate your home or give as gifts. This project takes just a little time and very basic craft skills. I hope you’ll give it a try if you’re looking for something quick and easy to craft up for the holidays.
Hello everyone! This is Katie from the Buttons Galore & More Design Team, and today I have a super fun DIY Sequin Coaster Set that you can make with your kids!
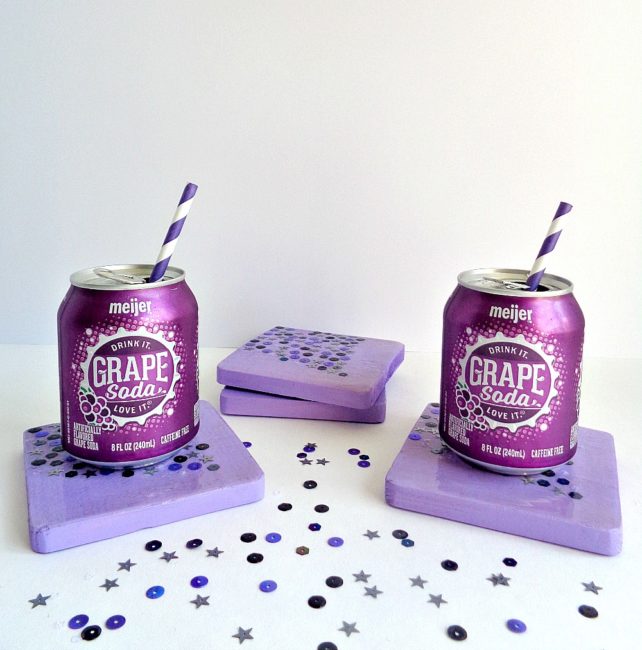
The project I will be showing you how to make today is a DIY Sequin Coaster Set! Now, you may be thinking that sequins and coasters don’t belong together. However, this DIY Sequin Coaster Set has a protective coating on top which seals in all the sequins and creates a barrier between your drinks and the actual coasters. In addition, this project is kid friendly and can be completed in just 3 easy steps!
To decorate my sequin coasters, I decided to use the brand new 28 Lilac Lane Sequin Tin in Haunted House. Now, even though the haunted house name sounds like it’s made for Halloween, these sequins have a more holographic look to them. For example, the tin contains silver, purple, black, white, and hologram colored sequins. In addition, the sequins are round, hexagon, and star shaped. For this particular project, I paired the sequins up with some purple paint. However, I think with the holographic look that they have could be paired with a variety of paint colors.
So, to find out how to make your own Sequin Coaster Set, keep reading below!
Supplies Needed:
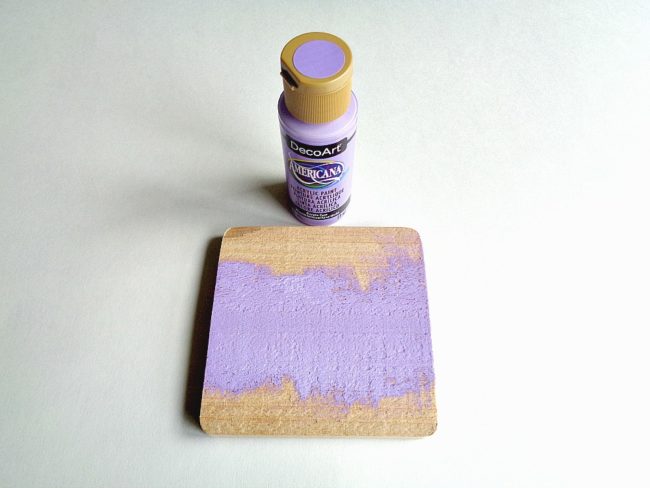
Step 1: Paint your wooden coasters on the front and back. Then set each one aside to dry.
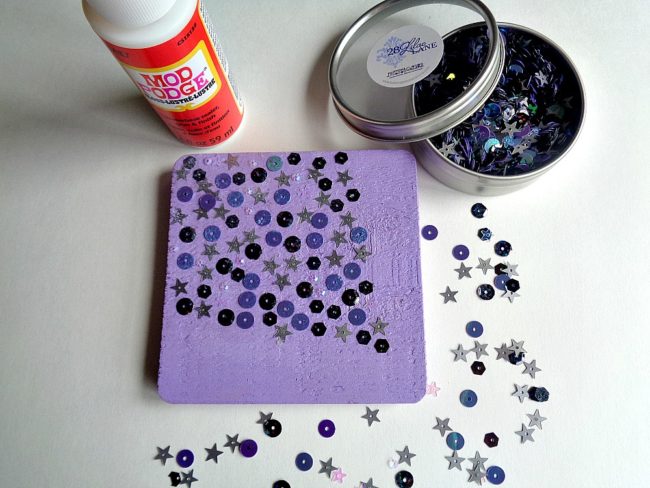
Step 2: Apply a layer of Mod Podge onto your coaster then begin adding sequins from the 28 Lilac Lane Haunted House Sequin Tin. While doing this step, you could add your sequins to your coasters in one of two ways. The first way would be to sprinkle the sequins onto the coaster and then spread the sequins out with a toothpick. The second way would be to add each sequin on by hand.
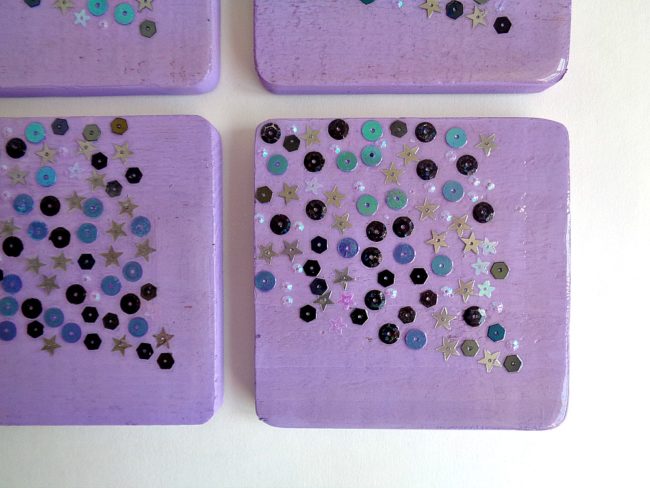
With that being said, no matter what method you use, you want to make sure that your sequins are lying flat on your coaster. This means that sequins should not be glued on top of each other and that each sequin should be lying flat by itself. Also, when making these coasters, I felt that that less was more. For example, I found that using a smaller amount of sequins (in a particular pattern) really gave the coaster a finished look. However, you can do whatever floats your crafty boat.
Once you are done adding your sequins, apply another thin layer of Mod Podge and set the coasters aside to dry.
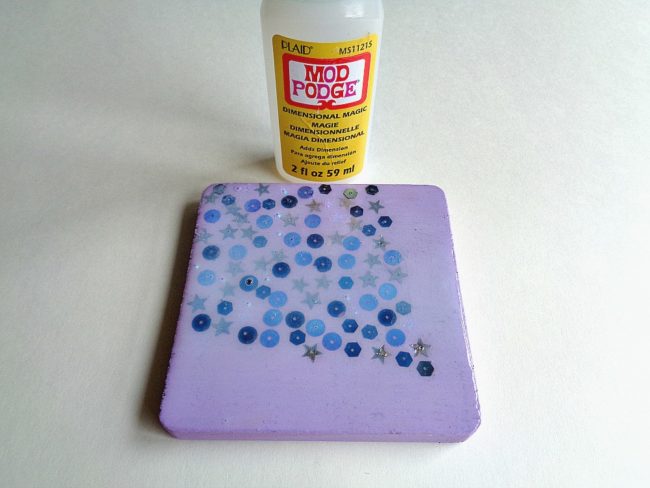
Step 3: Now apply a thin coat of Dimensional Magic to the top of your coaster. When applying the Dimensional Magic you may want to have a tooth pick handy so you can pop any air bubbles. At first the top of your coaster may look ”cloudy” but that’s ok because it will dry completely clear. After you finish applying the Dimensional Magic set your coaster aside to dry for 24 hours.
Keep repeating this process with your other coasters.
When the Dimensional Magic is completely dry, you are ready to start using your new coaster set!
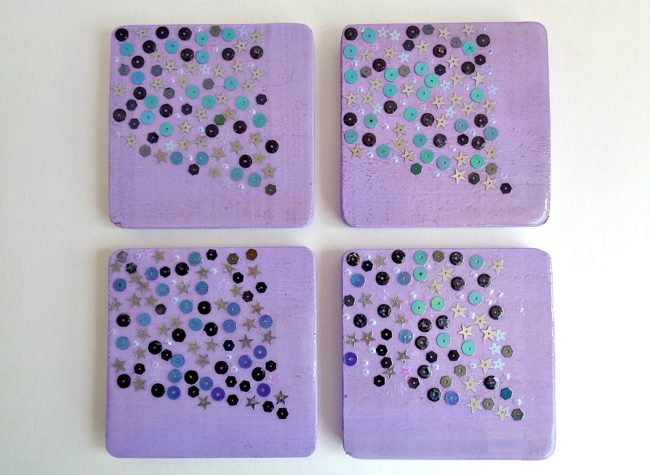
I loved how this DIY Sequin Coaster Set turned out! Now, I want to make a bunch of different coaster sets in different patterns and colors.
With that being said, this sequin coaster set would be a great summer project to make over the weekend with your kids. Personally, I made these coasters in the afternoon and was able to use them (after the Dimensional Magic had dried) the next day. Also, as coasters, they have held up really nicely with both hot and cold drinks.
This project could be customized with any color scheme that you’d like, of course. If you made this DIY Sequin Coaster Set, what new 28 Lilac Lane Premium Sequin Tin would you use?

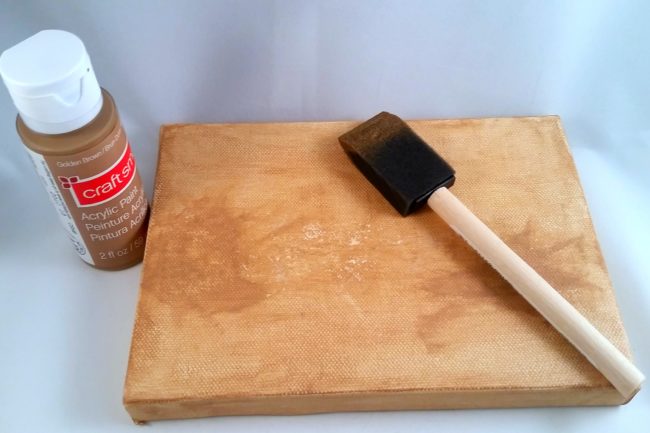
This project combines two of my favorite things: coloring and sequins! Using a pre-printed canvas, markers, and new sequins from 28 Lilac Lane, I made a fun project that is an easy way to decorate an ocean-themed room. This project is so easy that even the kids can do it!
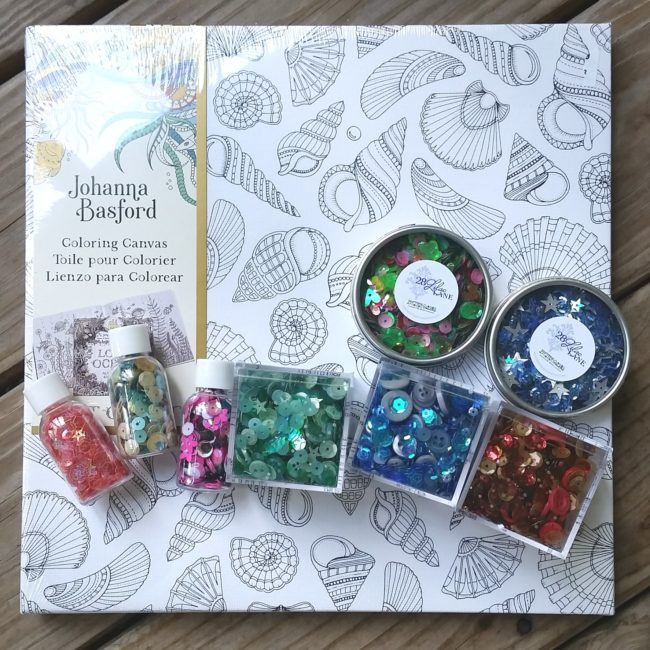
To make this project, you will need:
How to:
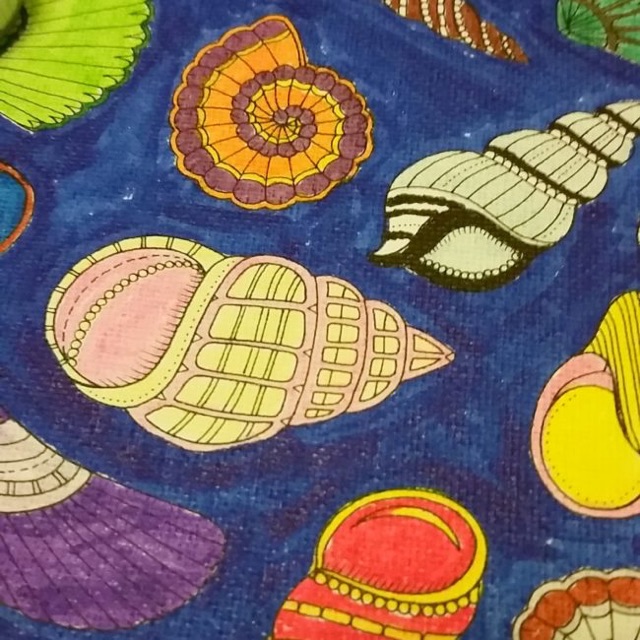
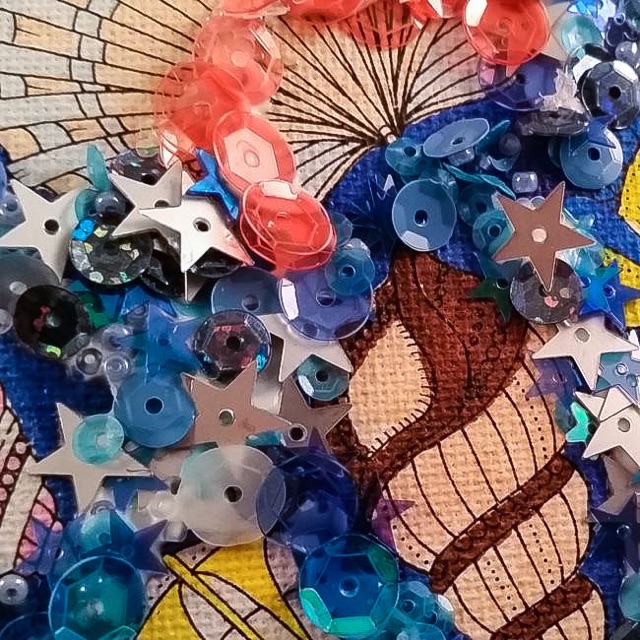
This canvas was so fun to make. I absolutely love to color so I really enjoyed getting out of coloring books and onto a canvas, and the addition of a little sequin bling just makes it even better!
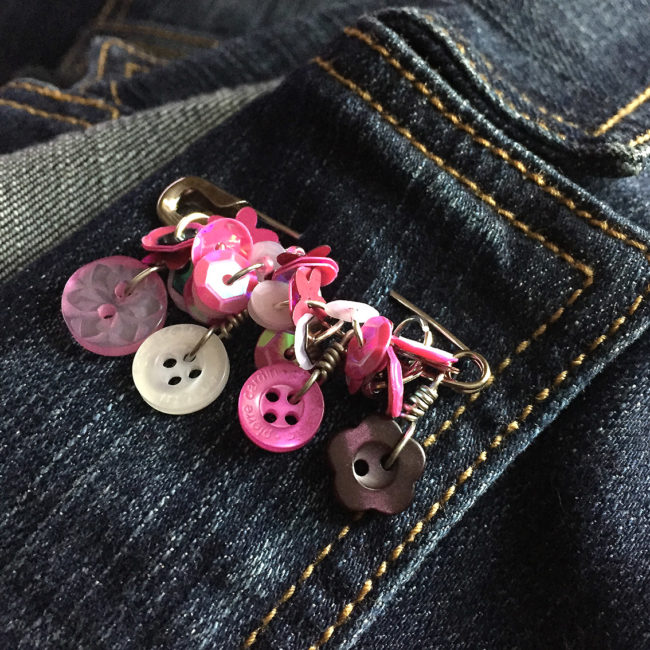
I’m constantly on the look out for fun accessories. But what I love more than looking for cool things is making my own. If you feel the same way, I have a beginner project to help you accessorize. In just a few easy steps, you can make sequin safety pin jewelry!
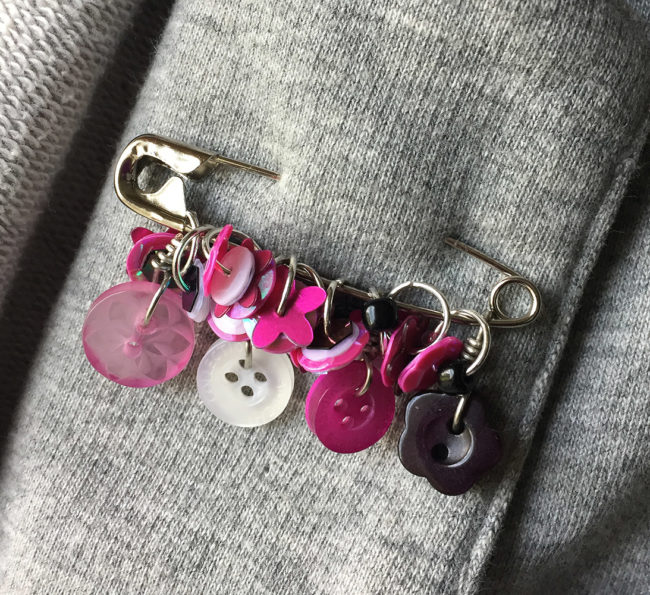
To start making your sequin safety pin jewelry, open the 8mm jump rings with jewelry pliers and add about 4-6 sequins to each ring along with a bead or two if you’d like. The rings will move around a lot if you start adding them to the pin as you go, so you may find it easier to just make a pile of completed jump rings.
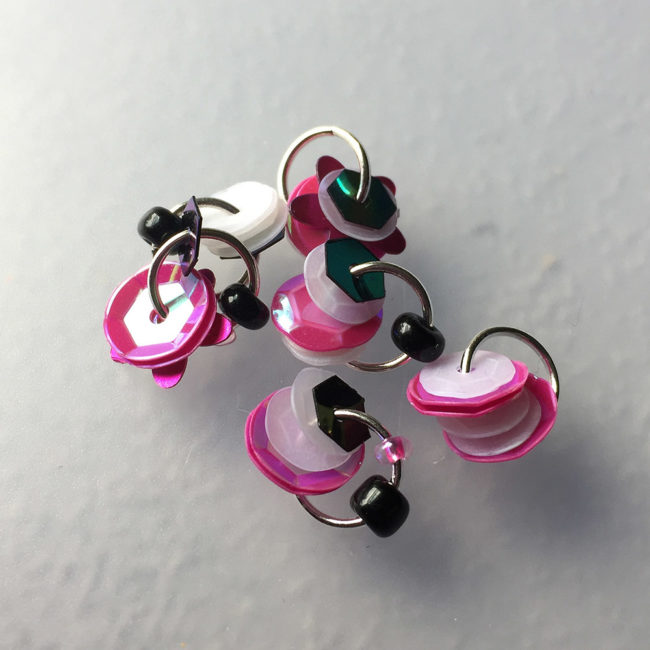
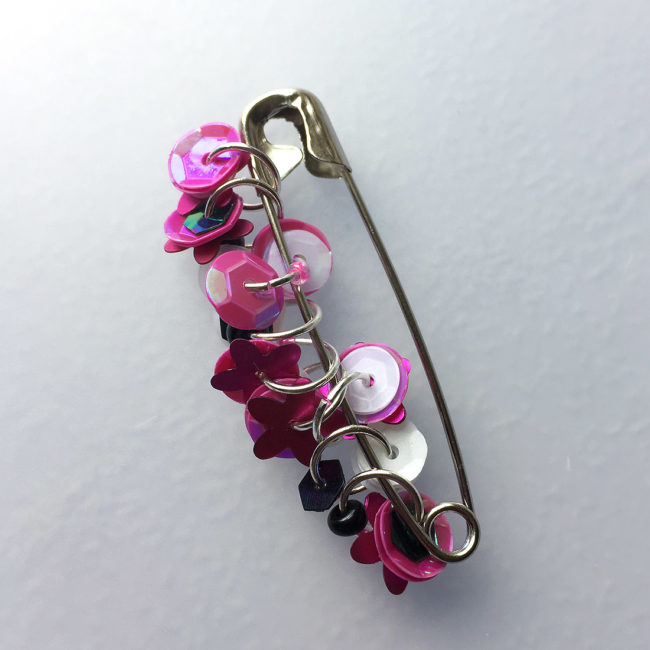
Once you have about 10-12 rings finished, add them to the safety pin. The jump rings should be added to the immovable side of the pin. At this point the pin will look pretty awesome as is, but I just love to add buttons to everything! I find the buttons not only give the pin a unique look, but they will also help keep the jump rings from floating around the loop at the end of the pin.
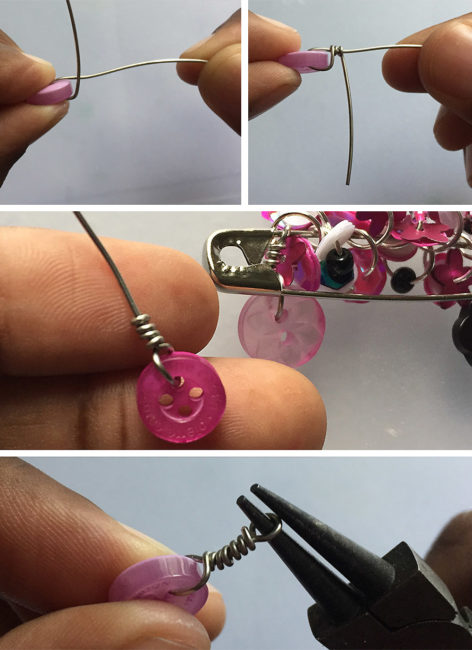
Cut a 5 inch length of wire. Place wire through one of the buttons holes. Bend one end of wire toward the back of the button. Twist that wire around 3-5 times and trim it. Cut the other piece short, but leave enough wire to create a loop.
Be sure to add a button before the first jump ring and behind the last ring on the pin. This will keep the jump rings from sneaking past the loop and getting away.
And your sequin safety pin jewelry is done!
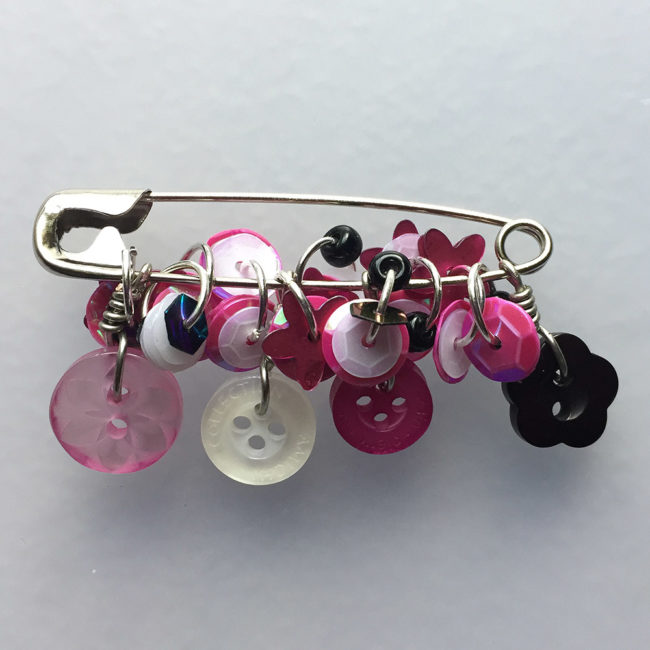
There are so many options and color combinations available that I have already made myself a nice variety of sequin safety pins! I hope you find this to be a fun and easy way to bring a unique jewelry touch to an old shirt, jacket, or backpack.
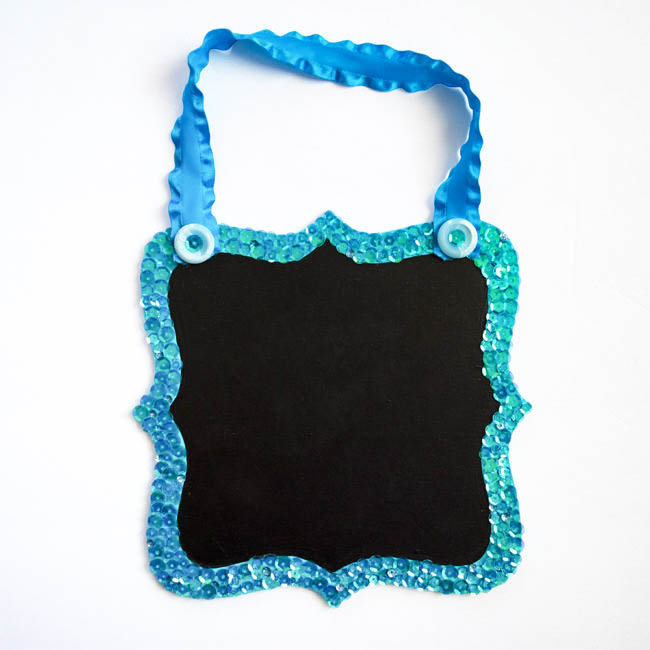
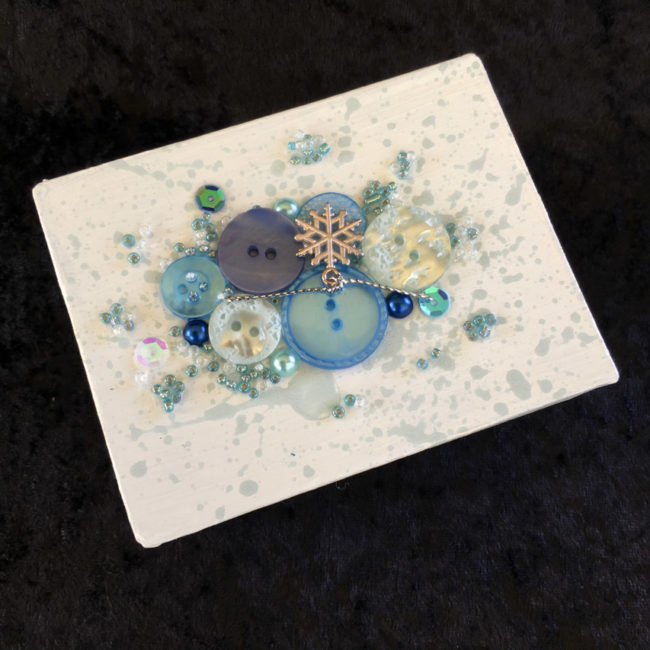
You don’t have to know how to sew to use sequins! Besides using them on cards, and in fun little shaker packs, you can glue sequins to just about anything for a fun shimmer and shine! I glued some gorgeous turquoise blue sequins from the new 28 Lilac Lane “Mermaid Tale” Premium Sequin Tin to a wood surface for a fun Mermaid Tale Sequin chalkboard. This craft is simple enough for a child to participate in as well!
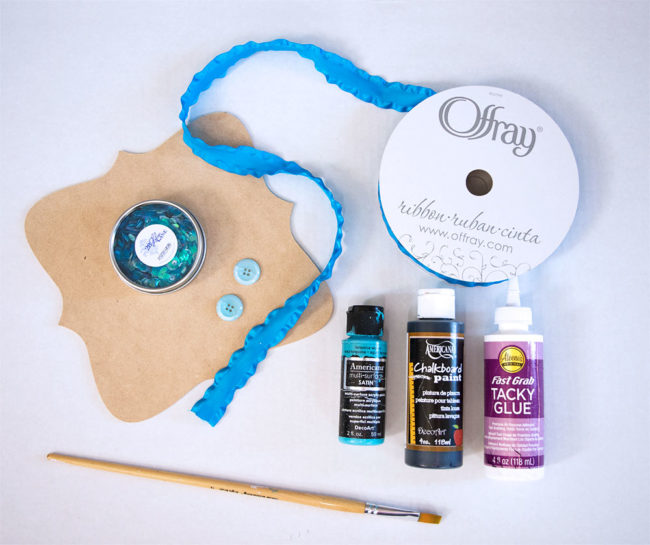
Paint the wood bracket shape with the acrylic craft paint. (This is a perfect step for little hands to help with!) I painted the front and back of my shape. Let the paint dry completely.
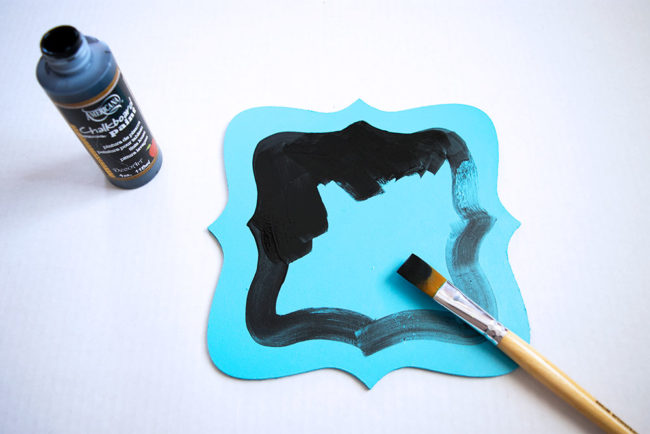
Paint the inside of the bracket-shaped board with black chalkboard paint following the instructions on your specific bottle. My chalkboard paint instructed to use two coats of paint and allow a relatively long cure time.
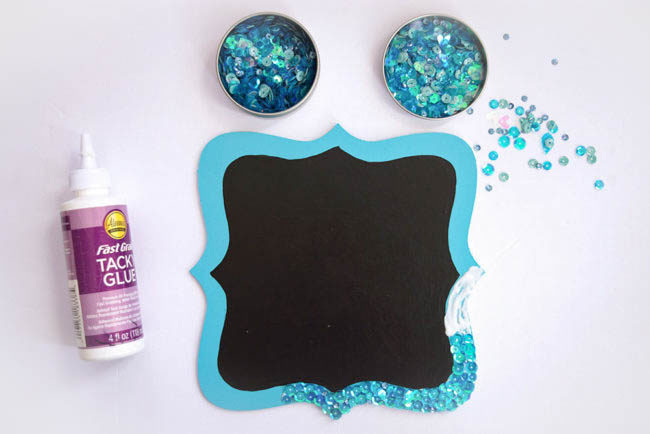
Glue the blue sequins from the 28 Lilac Lane “Mermaid Tale” Premium Sequin Tin around the outside edge of your bracket shaped board. I used three different size sequins from the tin all the way around the edge of the board. My kids had a lot of fun helping with this step! I had one helper finding the perfect sequins from the tin, and the other helper situating them just right on the glue I was spreading. In less than 30 minutes, we had the perfect Mermaid Tale border around our chalkboard!

When your glue has dried completely, add a ribbon to hang your chalkboard. I cut a length of ribbon about 12 inches long. Add a dot of glue to the top of each side of the board, and add the ribbon. I glued a blue button to each end of the ribbon and added one more sequin inside each button (at the direction of my little helpers).
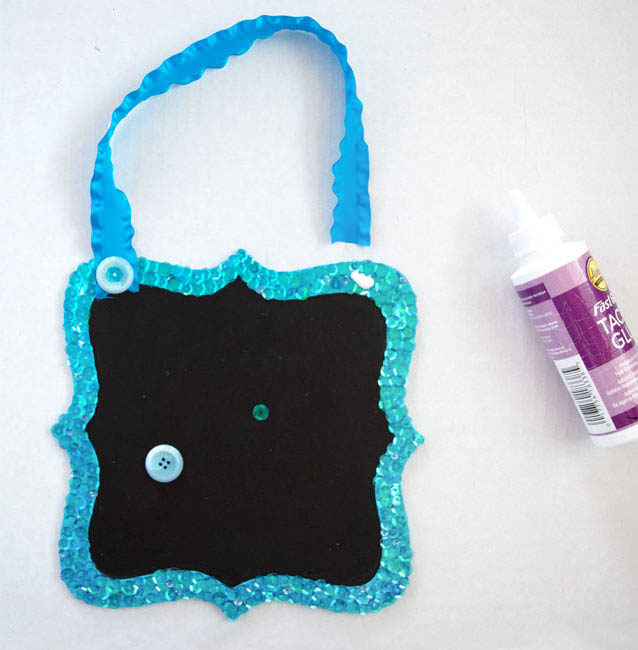
My daughter took the fun little chalkboard to hang in her room so she can write and draw her mermaid-y messages on it.
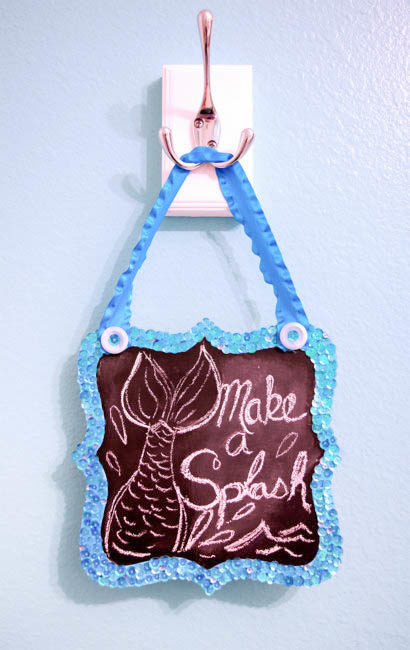
Using different sequin tins from the new 28 Lilac Lane Premium Collection could result in completely different little chalkboards. I want to make a house shaped Halloween themed one next, using the Haunted House Sequin Tin!
What shape and sequins would you use?
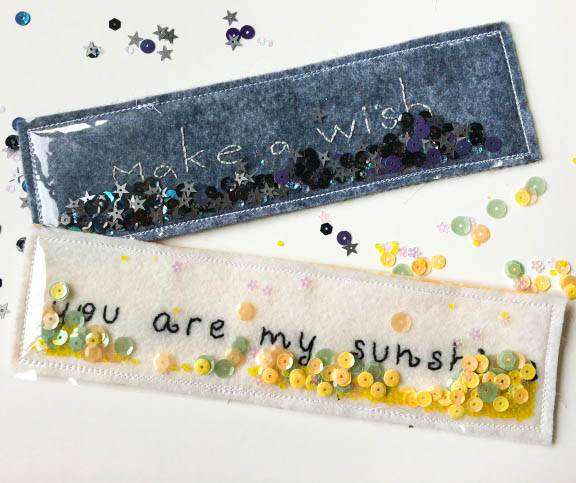
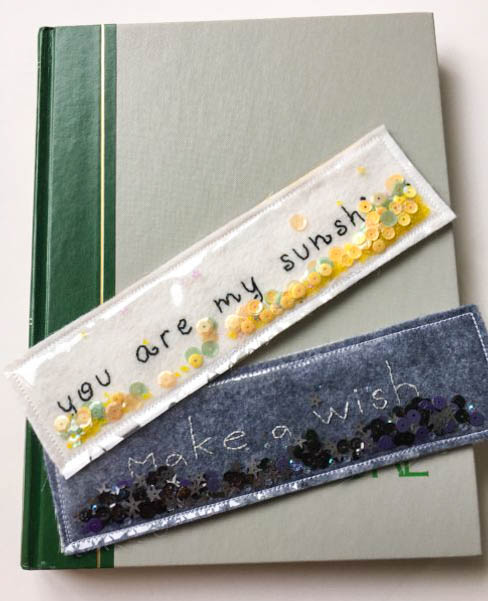
Aimee here with a great beginner sewing project for adults and children! These sequin filled bookmarks make a perfect little gift for all the book-lovers in your life.
 Here’s what you need to make your own sequin filled bookmarks:
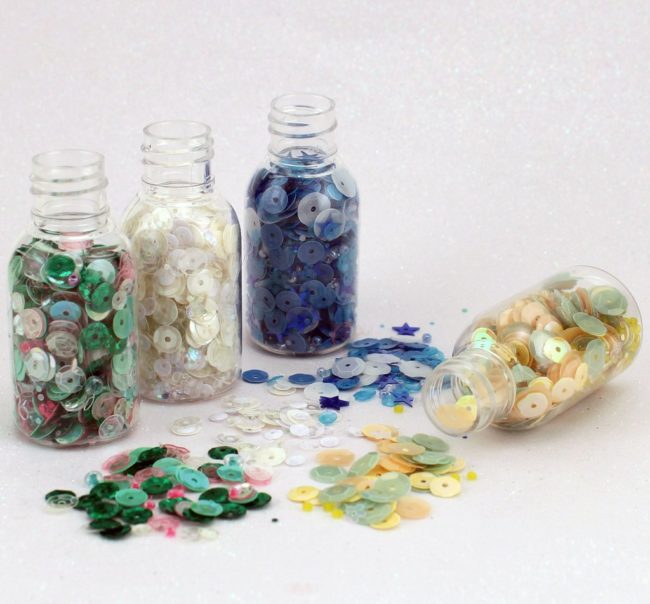
This project uses two gorgeous new 28 Lilac Lane sequin products: the “Haunted House” Premium Sequin Tin, and the yet-to-be-officially-announced“Pastel Dreams” Sequin & Bead Quartet that is pictured above. (Yes, you are getting a sneak peek of a new product today!)
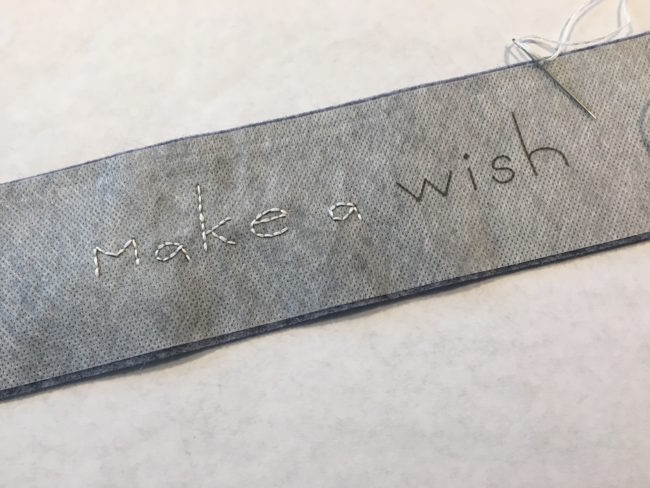
To begin, take your pattern (linked in the supply list) and using the dotted lines cut out your felt, clear vinyl and fabric pieces. To transfer the embroidery design to the felt I recommend using Fabri-Solvy. To use, print out the pattern following the directions on the package, tear off the backing and place your rectangle on top of the corresponding felt. Using three strands of embroidery floss; stitch through the felt and the Fabri-Solvy along the text with a back stitch.
Don’t want to embroider? You can easily adapt this project by printing the pattern onto cardstock. Cut out your bookmark along the dotted lines and continue the following directions. Most sewing machines will sew just fine through paper.

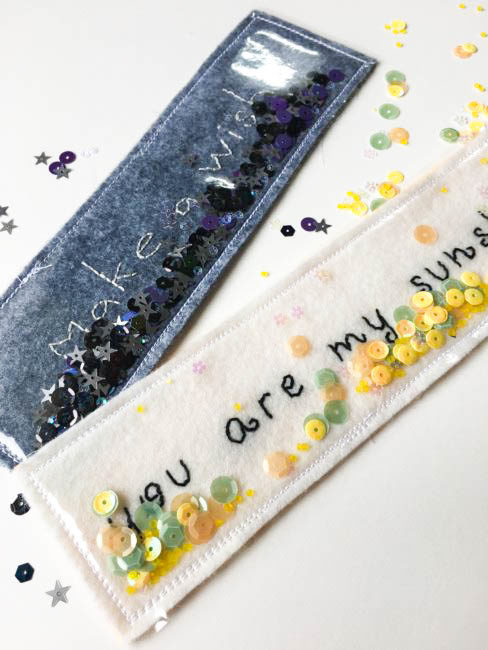
Now it’s time to put your sequin filled bookmark together. Lay your three pieces in this order: fabric (wrong side facing up), your felt embroidered piece (or your piece of printed card stock) and your piece of clear vinyl. Use a Wonder Clip or even a small clothespin to hold the layers together, and take it to your sewing machine.
Start your seam on the bottom long edge, making sure that you are leaving a hole to put the sequins and beads in. Stitch all along the three edges about 1/4 inch from the edge. (Tip: if you have a walking foot, this is a great project for using it.) Fill up your bookmark with the sequins and beads. I used roughly one tablespoon. Take it back to your machine and sew up the hole and all the way around the sides again. (This sewing could also been done by hand but it will be more time consuming, of course.)
There you go! Your sweet sequin filled bookmark is all ready for your next great summer read. (These also make fun back to school teacher gifts, too, if you change up the sentiment on them!)
We have an exciting announcement today for fans of our beautiful sequins: New 28 Lilac Lane Premium Sequin Tins by designer May Flaum are available now on our web store! This new collection of six sequin tins includes fun sequin options for fall and winter holidays, as well as for vacation and everyday.
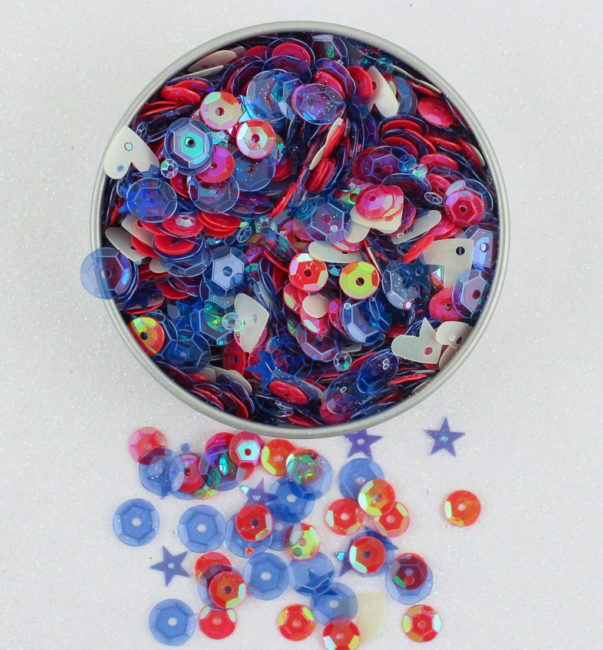
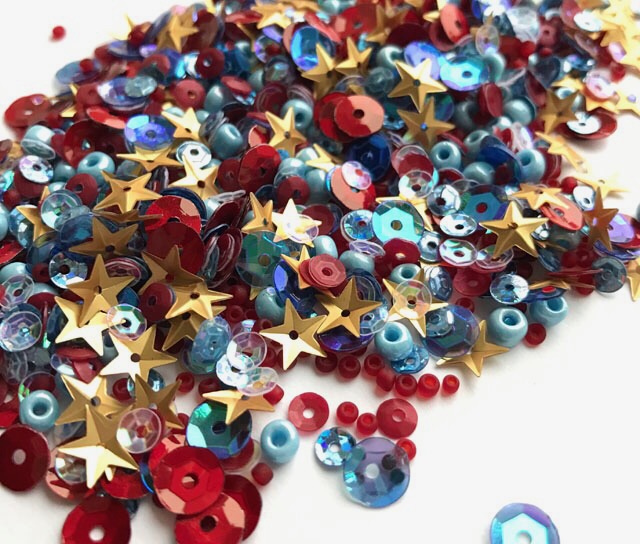
First, let’s take a look at Bon Voyage…a red, white and blue mix that includes 5 different kinds of sequins and features blue stars and white hearts! Use it for patriotic projects, scrapbooking trips to national monuments, and many other things!
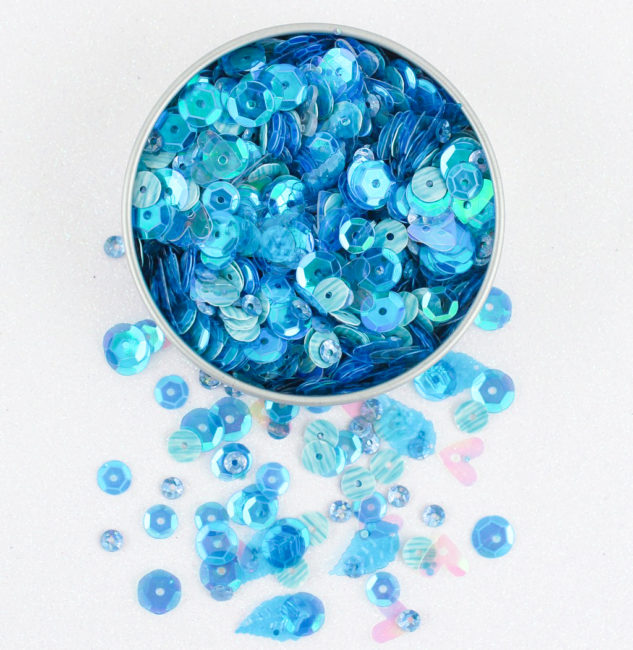
Next up is Mermaid Tale! In beautiful shades of turquoise blue, Mermaid Tale features pretty leaf shapes and stunning white sequins with blue tiger stripes. This mix is perfect for those beach or pool themed projects. (Or mermaids, of course!)
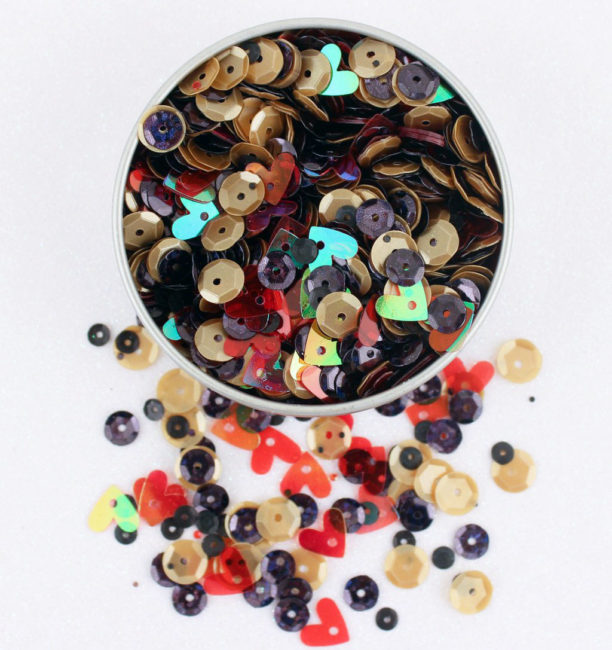
Pet lovers will love the new “Happy Place” sequin tin! This new sequin mix features red heart sequins, large gold sequins and a mix of brown sequins. Happy Place will be perfect for your pet projects, celebrating your love of autumn, or sending greetings to your favorite guy!
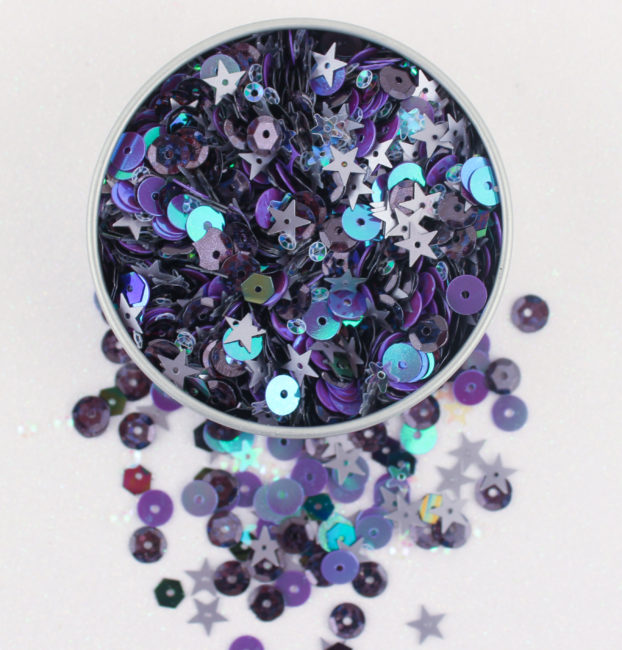
Halloween is coming fast, and we’ve got the Haunted House sequin tin for that! In a trendy purple and silver palette for Halloween, its clear and silver stars are paired with several shapes and sizes of purple sequins to create a mix that will give your projects the perfect spooky touch!
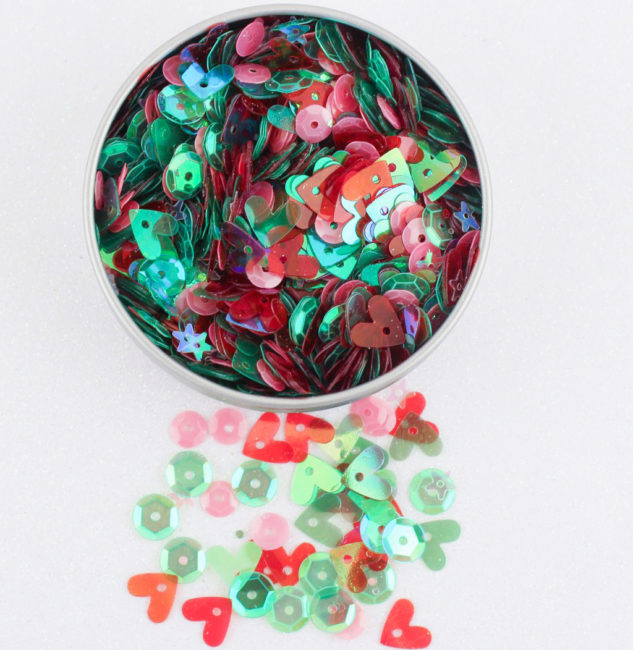
Of course, before we know it the Christmas tree will be going up…and you’re going to love the Retro Holiday sequin tin! This festive Christmas sequin tin features red and green hearts, clear stars, green sequins, and pink sequins (this year’s hot Christmas color!).
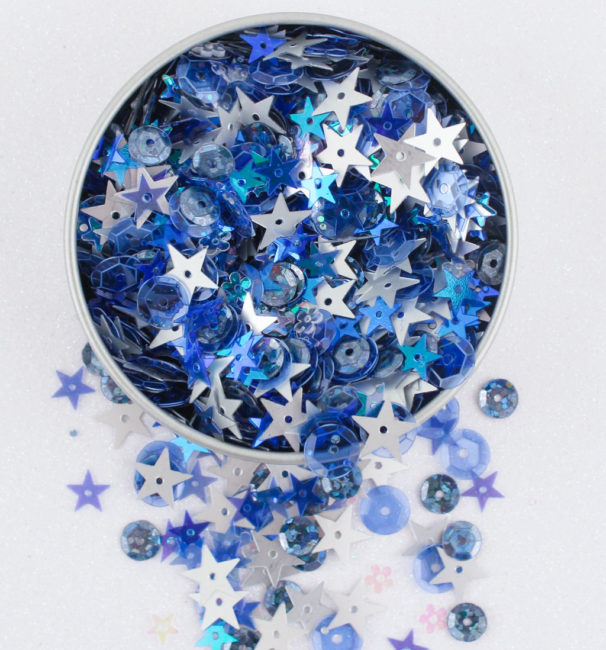
But just one holiday collection isn’t enough, so we’ve also got the shimmering Festival of Lights! This mix includes three different star sequins (silver, blue, and clear), clear flowers, and two types of blue sequins (large clear and deep blue metallic). This mix is perfect for many winter holidays (such as Christmas, Hanukkah, and New Year’s Eve).
All of these new premium sequin tins come packaged in a brush metal tin containing 30 grams of sequins, and are available now from our online store. Don’t miss out!
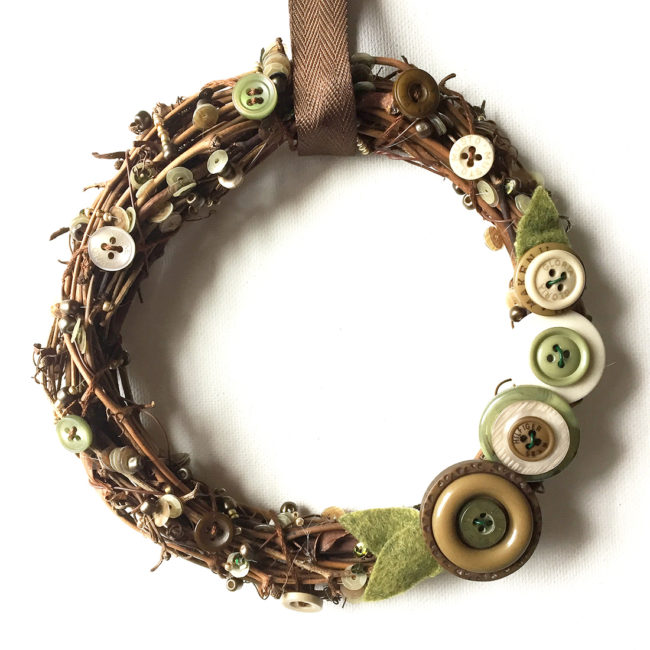
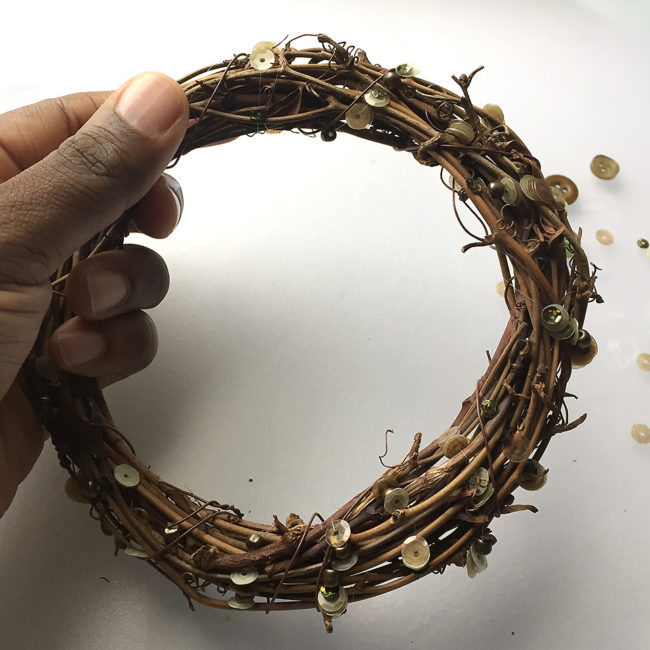
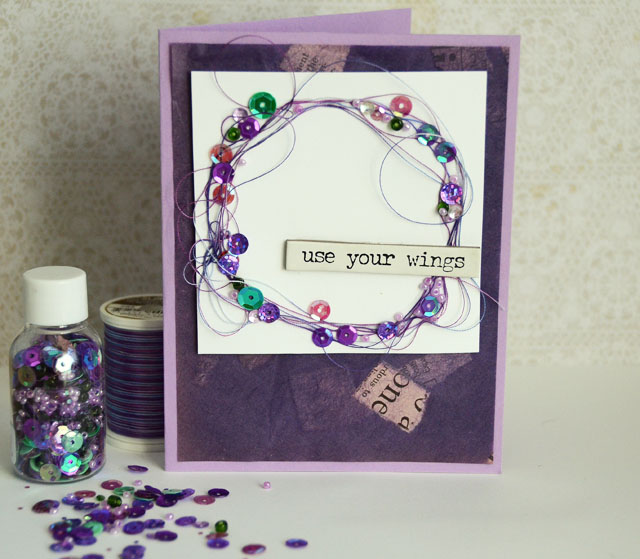
One of my favorite things to make are wreaths. There are so many ways to decorate them and endless opportunities to get creative. I put together this rustic vine wreath using the Victoria embellishment kit by 28 Lilac Lane.
Supplies needed:
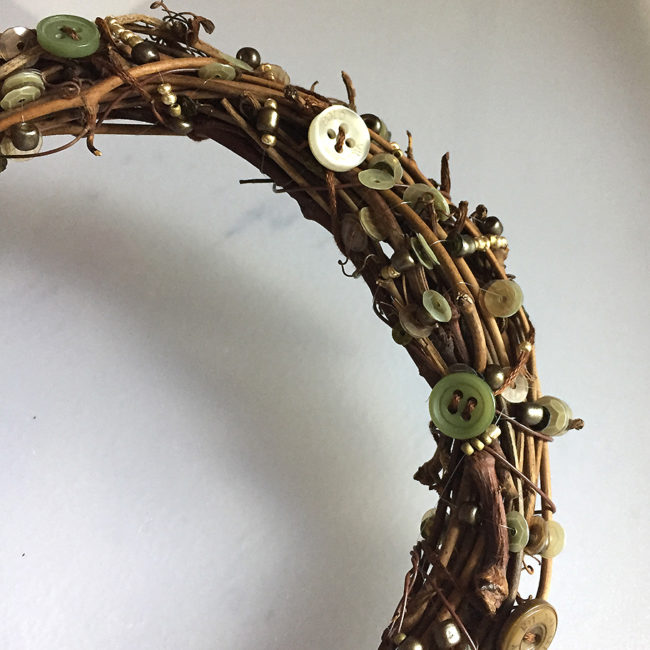
Start with the beading needle and invisible thread. Wrap the thread around the wreath and tie a knot to secure it. Stack beads and sequins onto the needle until you have about 1/2 inch or so on the needle. Wrap the thread around while keeping the majority of the beads and sequins in place on the front of the wreath.
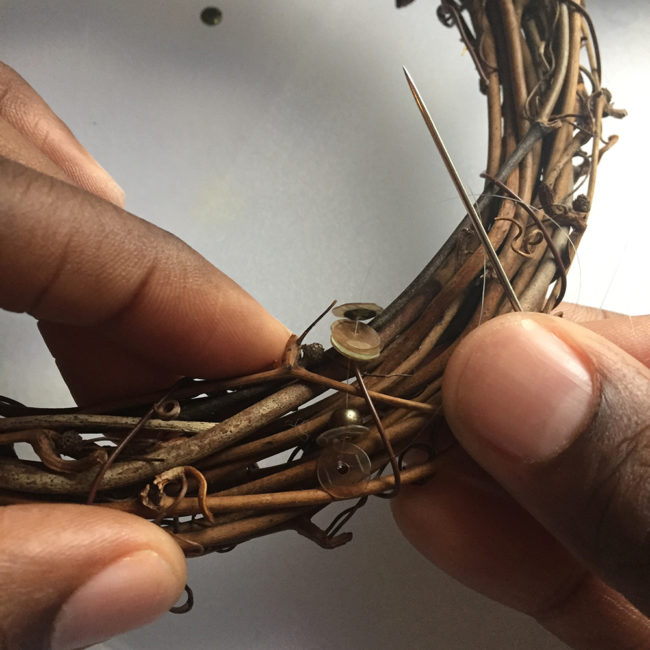
Continue wrapping the thread around the rustic vine wreath until you get back to where you started. You’ll get the best results if you wrap the thread no more than about 1/2″ inch apart.
After adding the sequins and beads, I repeated the process with embroidery thread to add some little buttons.
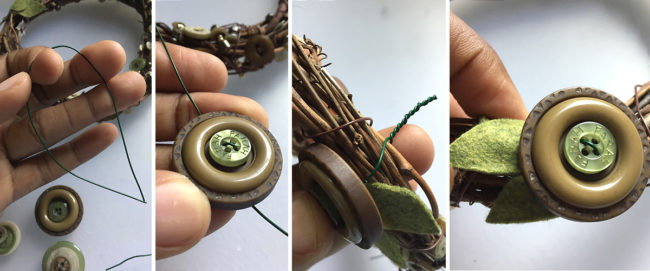
I cut a few pieces of felt to create leaves and attached them to the wreath with a glue gun, while leaving space for some buttons. Cut a length of wire long enough to wrap around the wreath. Stack 2-3 buttons and push wire through 2 holes in each of them. Wrap the wire around the wreath, twist, and cut the ends. Tuck the excess wire into the backside of the wreath so there are no sharp ends left sticking out.
After you have added as many buttons as you’d like, the last step is to tie a ribbon to hang your finished rustic vine wreath! I used a small 6 inch wreath for this project, but of course it can be done in a larger size. I find this to be a perfect size to decorate with inside the house. I often hang small wreaths around the house on the walls alongside my photos and even hang them in my work space at the office.
Looking for a wreath project but prefer a different style? Check out all our button wreath projects!
Hi, Connie here hosting the Buttons Galore and More blog today! I have a really cute scrapbook page to share using the Pirate’s Life Embellishment Kit by 28 Lilac Lane. This was such a fun kit to create with and couldn’t have been more perfect to create a scrapbook page with for the photos that I had.
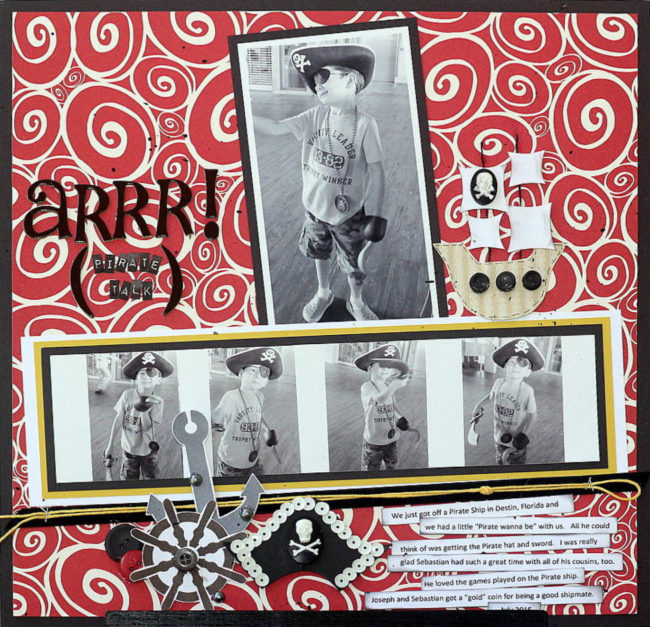
The Pirate’s Life embellishment kit by 28 Lilac Lane includes buttons, sequins, velvet trim, a charm, small seed beads and pirate skull embellishments. I used the Pirate’s Life kit to create my page accents and it was really fun. I looked up pictures of pirate images. Then I hand drew them out on cardstock, cut them out, and embellished them with the contents in the Pirate’s Life kit.
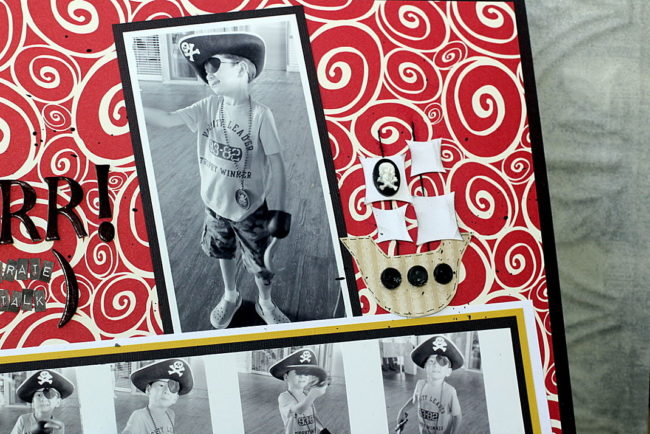 The first embellishment I created was the pirate ship. Drawing a pirate ship can be kind of scary when you’re not sure what one looks like to begin with. When you have a picture in front of you, it’s not so hard at all! Once the pirate ship was created from pattern paper and buttons, it was ready to put in place on the scrapbook page. It’s amazing what can be created with paper and buttons!
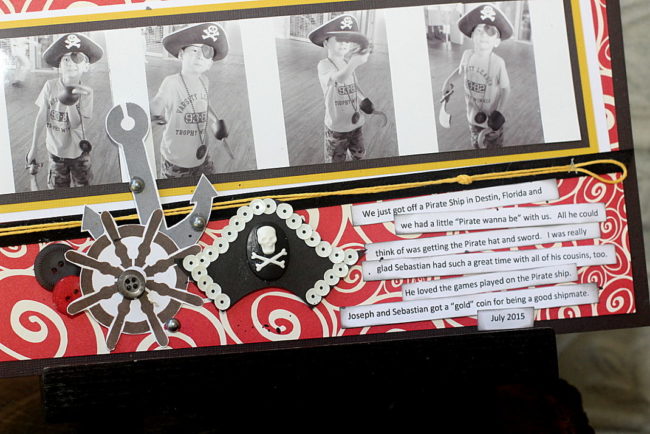 The next embellishment to be created was the pirate’s hat. I traced the outline of the hat on cardstock and then embellished it with sequins and the pirate skull from the 28 Lilac Lane “Pirate’s Life” kit. The embellishment cluster was enhanced with grey pearls from the kit as well. The black velvet trim was added below the film strip of black and white photos and I tucked in a few large buttons in the bottom pirate cluster also. Next, the journal text was created and added to the side of the Pirate cluster.
I hope you are encouraged to create unique, one-of-a-kind embellishments for your craft projects using the embellishment kits by 28 Lilac Lane!
Supplies used:
Thanks for stopping by~
Connie Mercer/DT Member
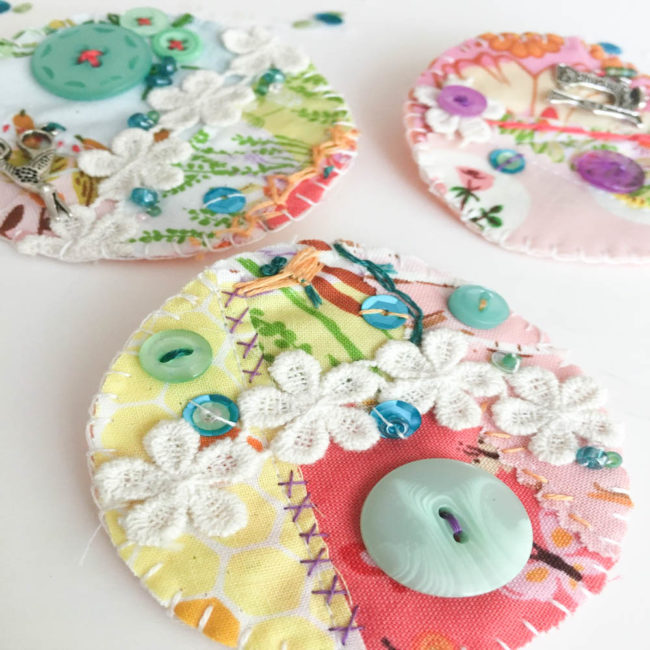
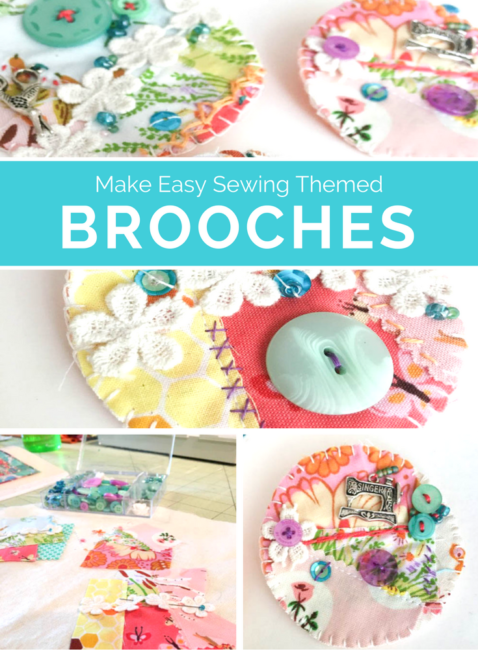
These little crafty brooches make a great quick and easy gift for the lady in your life who loves to sew and create. Use up some scraps of fabric, spread your creative wings and add some bling with a sweet 28 Lilac Lane embellishment kit.

Here’s the supplies you will need:
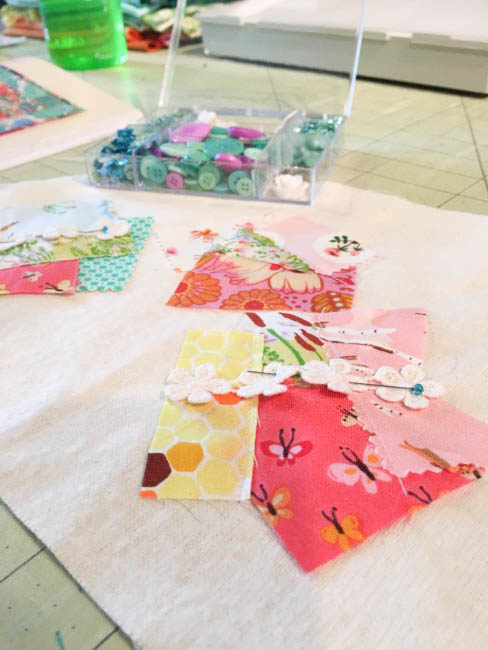
First, I laid out my backing fabric (I used a thicker cotton muslin that I had in my stash, but just a general cotton or even felt would work fine too). With a jar lid I had, I traced an outline of my circles onto the top of the fabric. Then I gathered up some various scraps of fabric and laid them out within the outlined circle. I used my sewing machine to sew down a few of the seams, but this could easily be done by hand with just a back stitch using a single strand of embroidery floss.
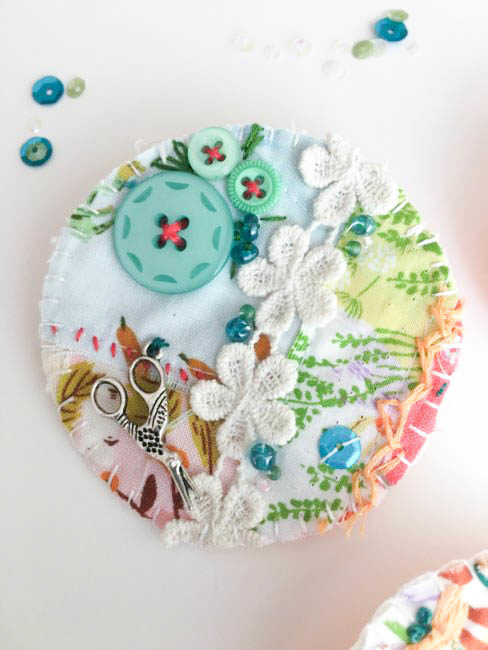
Next up, I laid out different elements from the 28 Lilac Lane “Sew Crafty” embellishment kit. The kit includes some trim, sequins, beads, buttons and a few charms. The trim lends itself greatly to being used as a typical trim or even cutting off each flower individually. This is where you can be creative and every brooch you make will be different!
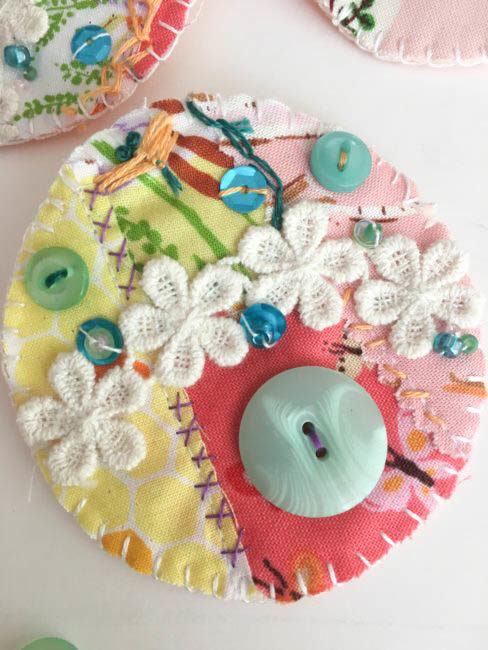
On a few of the seams I chose to add some simple embroidery stitches. I used two strands of divisible embroidery floss for all of my stitching. I made simple X’s, seed stitches, and a chainstitch. I sewed down the trim with a single strand of white embroidery thread and just stitched down on the flowers where the stitches won’t be seen.
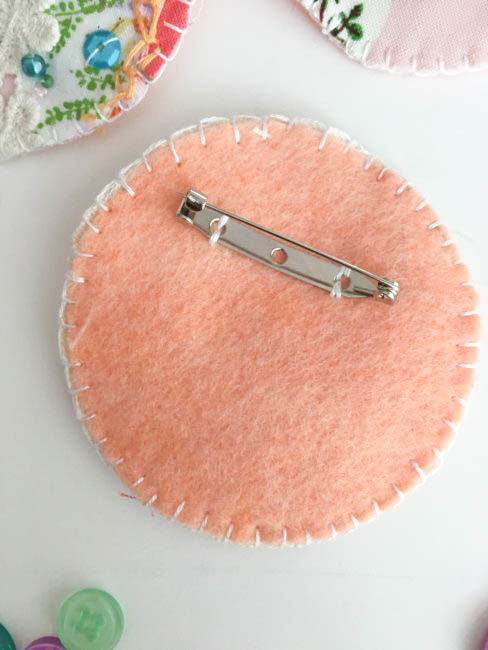
To finish out my crafty brooches, I took some felt and using the same jar lid cut out the felt and the brooch circles. The pin backs I used can be either sewn or glued down. I sewed down the pin back onto the felt.
Finally, I matched the top and backs of the brooches with wrong sides together. The brooches were sewn together using a buttonhole stitch to stitch the two layers together around the edge. There you have it!! Sweet little crafty brooches ready to wear!
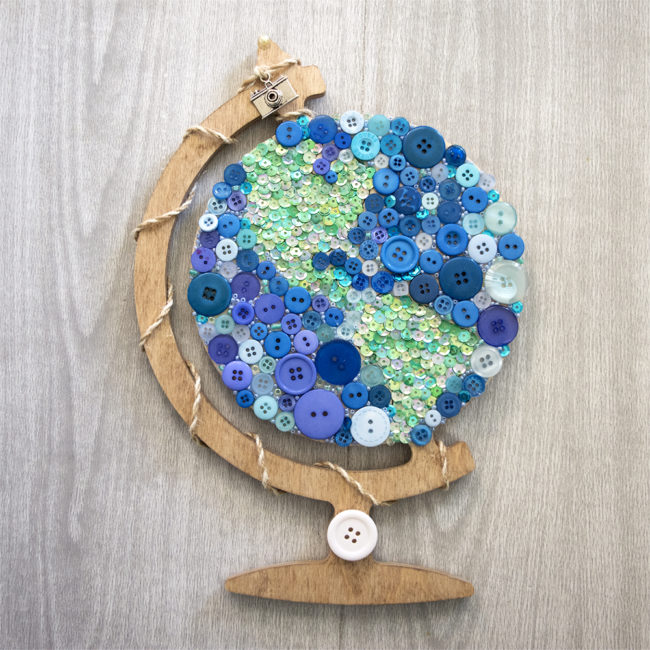
Hi! I’m Kelli, from the Craft Shack Chronicles blog and I’m so excited to be joining the Buttons Galore Design team! For my first project, I wanted to make a piece of home decor. I’m working on a gallery wall above my piano and I am having fun adding in lots of different colors and textures. You can easily add interesting depth and texture to your home decor pieces by using buttons and sequins to add color instead of paint. I used two 28 Lilac Lane kits to make this fun Button Globe Mosaic.

Draw the design outline onto the wood globe surface. You can trace it, transfer it, or freehand it. Draw the design onto the globe using a pencil. You won’t be able to see it when it’s covered in buttons and sequins so it doesn’t need to be perfect.
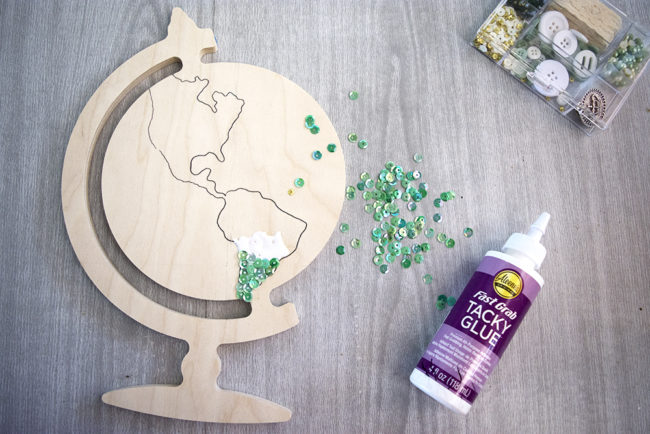
Use green sequins from both Lilac Lane kits to fill in the land shapes. Add a little bit of glue and spread it out. Drop the sequins onto the glue one at a time. I find it easy to use a toothpick to arrange the sequins in the glue but you could use whatever you have on hand.
The glue will dry clear, so you don’t need to worry if you get a little messy.
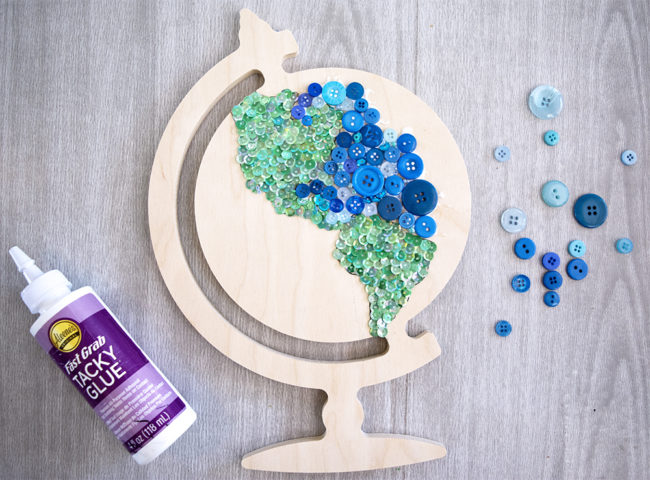
Fill the in the oceans with blue buttons. Try to mix large and small buttons into the mix to add interesting variations in the texture. The smaller buttons fit nicely in some of the small curves around the land, while the bigger buttons were easier to use further out in the ocean.
Cover the entire globe with buttons and fill in any gaps with seed beads, or blue sequins from the Lilac Lane Kits.
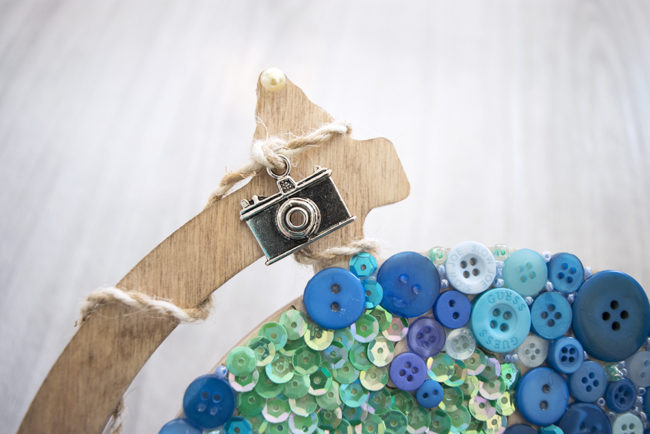
Use wood stain to finish the remaining wood part or fill it in with buttons that complement your home decor colors. Finally, use the beautiful rope trim from the Let’s Go kit to attach the camera embellishment from the same kit to the top of the globe. A big white button from the Tea Time kit was the perfect size to put on the globe base.
I’m thinking about adding a little red button heart in the general area where we live on the globe. Would you add it, or leave it as it is? I can’t decide! I’m so excited to hang my new Button Globe Mosaic on my gallery wall soon!
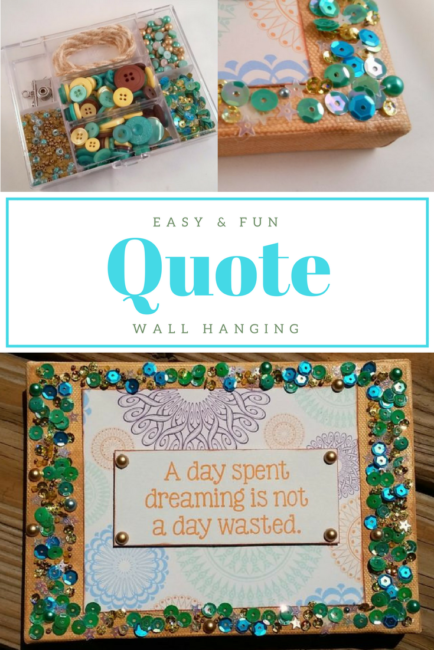
Hey y’all! It’s Lorrie here with my first project for the Buttons Galore team! Today I am sharing a cool wall hanging canvas featuring an embellishment kit from 28 Lilac Lane.

I had this cute quote that I loved and I wanted to show it off, so I decided to make a wall hanging using the quote and matching scrapbook paper on a 5″x 7″ canvas. Such an easy and fun project!
Supplies needed:
I started by painting the canvas using a light brown acrylic paint. I then cut out the quote and a 3″x 5″ piece of coordinating paper (the quote came from a sheet of quotes as part of a paper collection), and inked the edges.
I attached the paper to the canvas using double-sided tape. Then I used adhesive foam dots to “pop up” the quote — this is an easy way to add dimension to your paper projects. Next came the fun part: adding the embellishments from this adorable “Let’s Go” embellishment kit by 28 Lilac Lane!
I will let you in on a little secret — I am not a big fan of liquid adhesives. I use them on projects, but they aren’t my favorite, mainly because here in the hot, humid south they take forever to dry. So to hold the sequins and beads from the embellishment kit onto my wall hanging, I used my not-so-secret weapon: red liner tape! Red liner tape is a double-sided tape that holds just about anything. It is the perfect alternative to liquid glues.
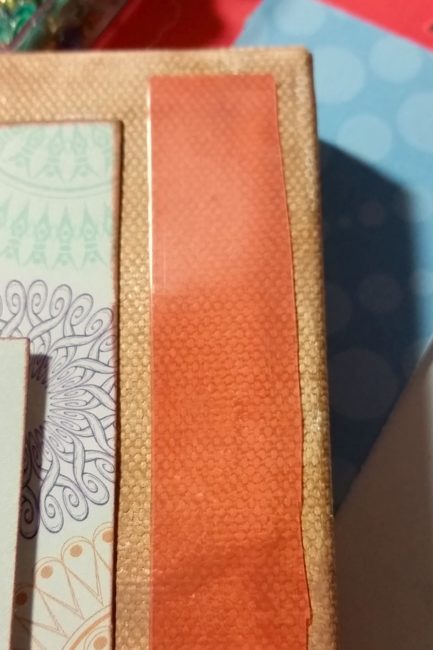
I applied red line tape to the edges of the canvas, and then sprinkled the sequin mix onto the tape. Just like when you’re using glitter, sprinkle the sequins liberally onto your project, then pick up and shake the item to remove the excess. Once most of the tape has been covered, fill in any empty spaces with the tiny seed bead mix and pearls from the kit.
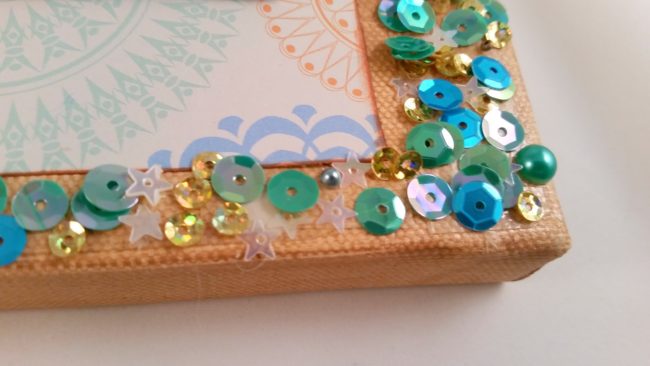
For the finishing touch, I placed gold pearls from the Embellishment Kit on each corner of the quote using mini adhesive dots.
Now you have a fun quote wall hanging that would look great on any wall in your home – and plenty of embellishments left over in your “Let’s Go” kit for lots more creative fun!
Hello Everyone! This is Katie from the Buttons Galore & More Design Team and today I have a unique but simple project for you guys to make this summer!
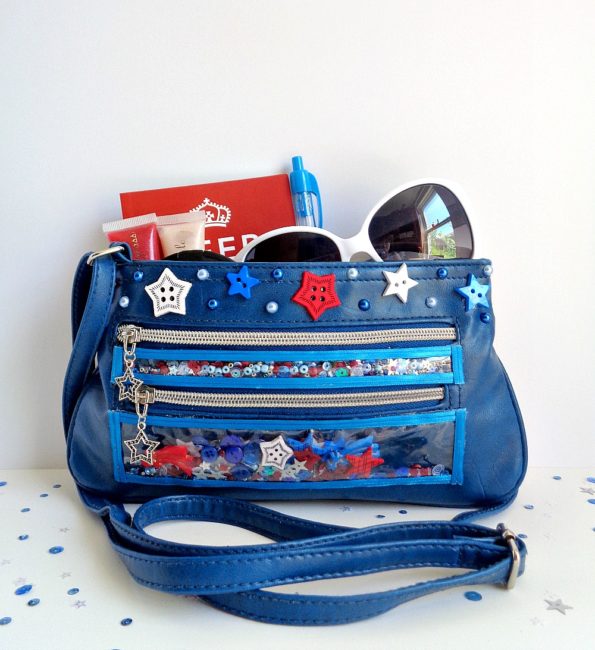
Today I will be showing you how to update an old crossbody bag by adding shaker elements onto the bag! What does that mean you ask? Well, if a shaker card and a crossbody bag got together, my project would be the final result. In today’s project, I will be showing you how to incorporate those shaker card elements into a bag. I will also be showing you how you can update a bag with items from the 28 Lilac Lane Embellishment Kit in Stardust.
In addition, I decided to go with a red, white, and blue theme for my crossbody bag. However, you can choose any type of theme and choose any type of bag style for this project. Just make sure that the bag doesn’t have any big embellishments on the outside and that the bag is cleaned (both inside and out) before you begin the project.
With all that in mind, below is the supplies that you will need to make this project!
Supplies Needed:

Step 1: Determine where you want the shaker elements to be on your bag. When doing this you will want to look for a ”small area” which is flat and that doesn’t interfere which any other components of the bag.
Once you have determined where you want the shaker elements to be, it is time to measure. Measure one area of the bag and then cut out 2 pieces of page protector which fit in that area. Then take your We R Memory Keepers Fuse Tool and fuse the sides and bottom of the 2-page protector pieces together. With that being said, make sure you leave the top of the page protector open. When you’re done, you should have created a little shaker pouch.
Repeat this step if you are creating more than one shaker element for your bag.
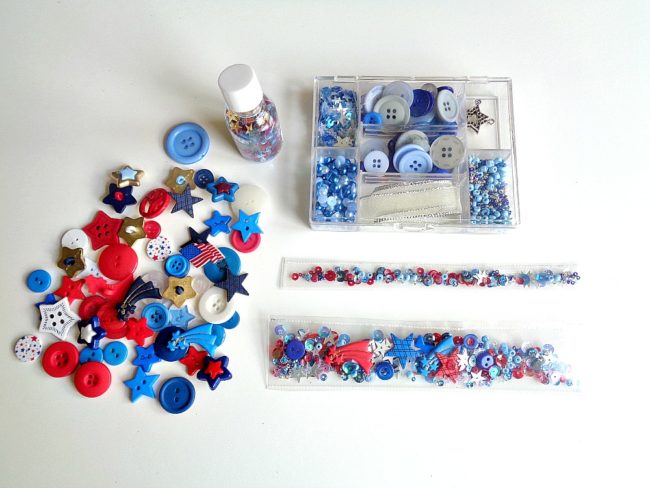
Step 2: Fill up the shaker pouch that you created in step 1 with buttons, sequins, and seed beads. For my two shaker pouches, I filled them up with buttons, sequins and seed beads from the 28 Lilac Lane Embellishment Kit in Stardust. I also used buttons from the Patriotic Value Pack and sequins/seed beads from the 28 Lilac Lane Sequin & Seed Bead Mixes in Stars & Stripes.
Once you have filled up your shaker pouches, fuse the top together so all your buttons, sequins, and seed beads are sealed in.
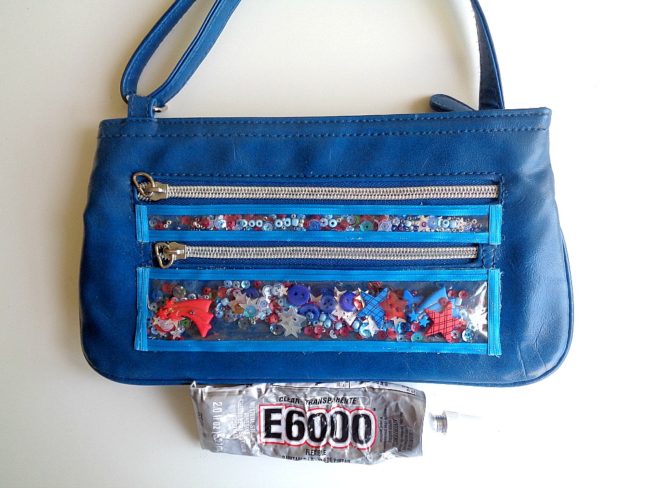
Step 3: Using some E6000, apply some glue onto the back of your shaker pouches and then adhere them to your bag. Then to cover up the edges of the shaker pouches, glue some ribbon around the edges of the pouch.
Once you are happy with the placement/look of your shaker pouches, set your bag aside to dry.
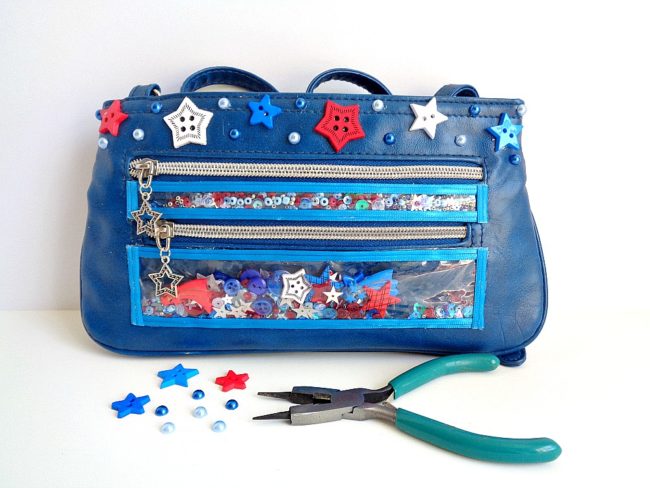
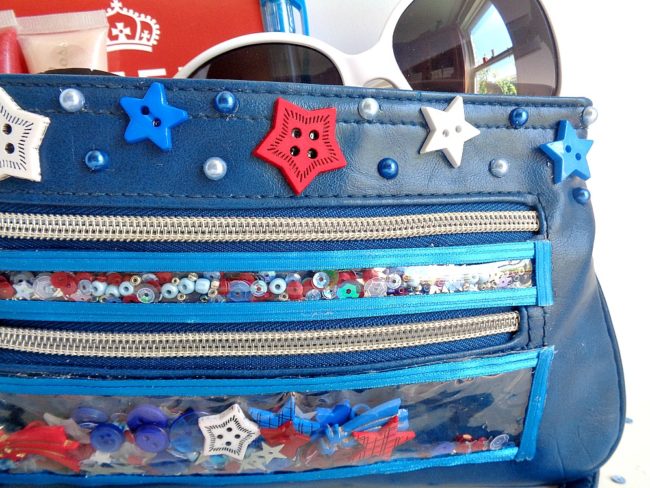
Step 4: Now it is time to decorate the rest of your bag! Grab all your different embellishments and begin playing around with how you want them to look on your bag. For example, I replaced the handles on my zippers with the star charms from the 28 Lilac Lane Embellishment Kit in Stardust. I also used the pearls from that kit to decorate the top of my bag along with some star buttons from the Patriotic Value Pack.
No matter how you decorate your bag, make sure you glue down your buttons with some E6000 and to set the bag aside to dry.
Once the glue on your bag has completely dried, you are now ready to wear it!
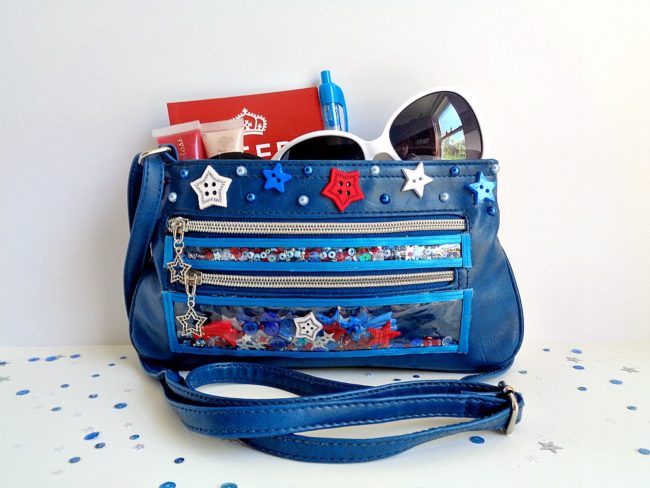
I loved how this bag turned out and think it would be so cute to wear to a barbecue! With that being said, I would recommend that you wear your shaker bag to functions which are more laid back. For example, a barbecue, going to the thrift store, and so forth.
If you made this shaker bag, what 28 Lilac Lane items would you use?
We’ve got birthdays on the brain around here in May. 28 Lilac Lane designer May Flaum was inspired to make her celebration a fiesta, with a card that features a watercolor pinata and a shower of 28 Lilac Lane embellishments!

Wondering what supplies May used? Here’s a look at her list:
This fiesta birthday card by May is so fun and easy to make – for the complete how to, check out her video tutorial below!
Did you notice that something was missing from the video? Here’s May’s explanation for that step that you don’t see in the video…
I did add the pink splatter you see here after filming. Intentional? Not quite… I was cleaning up spilled a bit then said oh to heck with it and went wild! Just a reminder you can always make it work.
Yes, even the fabulous May Flaum has crafting accidents! But as she proves with this cute fiesta birthday card, you can go from “whoops” to wonderful if you just are flexible and think creatively.
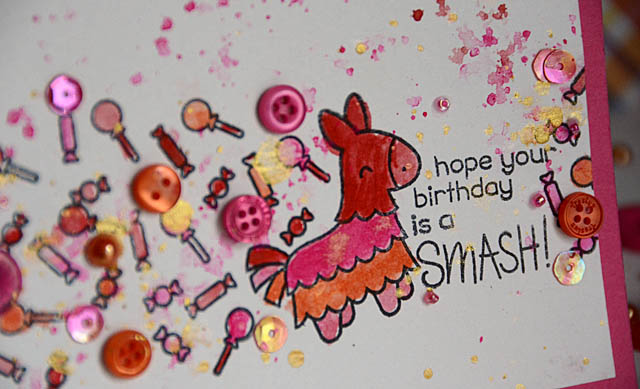
This fiesta birthday card uses the pink and orange tones of the “Fruity Fun” embellishment bottle. But with a change of background cardstock and by using different colors of watercolors, you could make this design work with almost any of the 28 Lilac Lane embellishment bottles. How about the pink and green of Savannah Stroll, or the red, turquoise blue and green of the appropriately named Fiesta? Pick your favorite colors and make May’s fiesta birthday card your own!
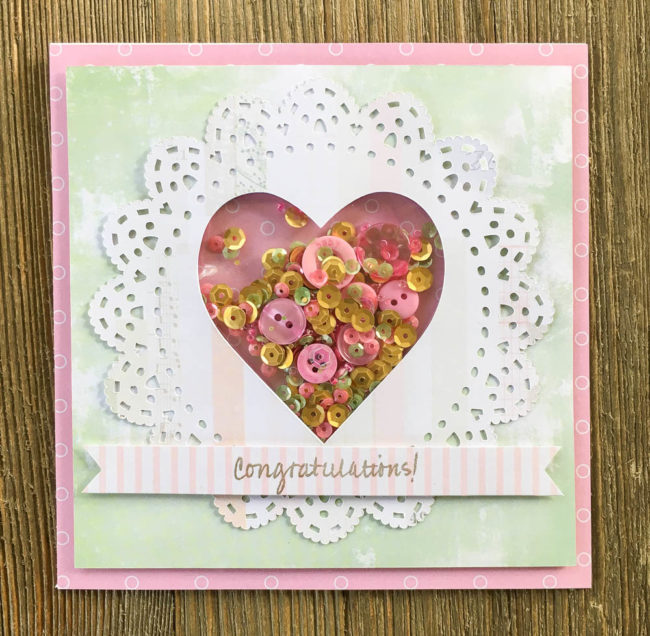
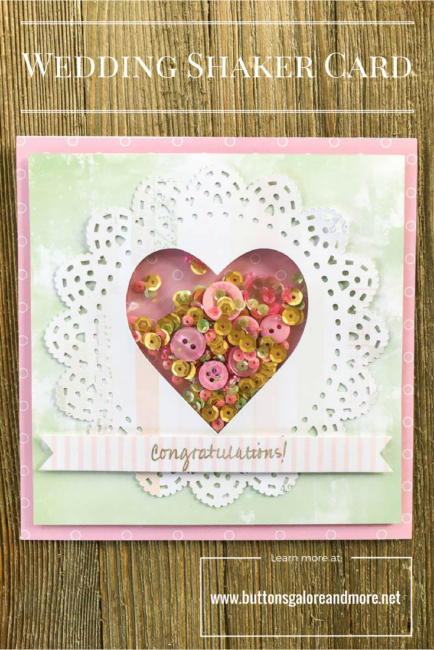
Shaker cards aren’t just a way to celebrate birthdays…they can also be a beautiful way to celebrate a more formal occasion like a wedding! This wedding shaker card pairs a sparkly shaker mix with a doily and die cut heart to celebrate the love of a special couple.
Supplies Needed:
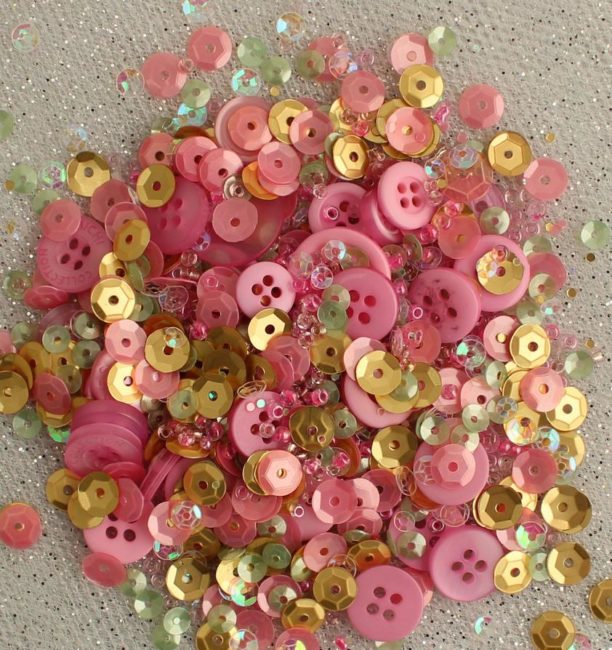
This shaker card features our versatile 28 Lilac Lane “Rose Garden” Shaker Mix that is a mix of gold, clear, pink, and green sequins, pink beads, and pink buttons to create the perfect shaker mix! Use this mix for occasions like weddings, to welcome a baby girl, or for a special birthday message.
Making this wedding shaker card is simple. Just die cut the doily for the card front, and then die cut the same heart shape out of both the doily and green layer of the card so they can be layered to create the card front with the shaker window. Glue the two pieces together and flip them over.
Using either a scrap of page protector or a Fuseable Pouch and Fuse tool, create a pouch that is slightly larger than the shaker window opening. Fill it about 1/2 full with the 28 Lilac Lane “Rose Garden” Shaker Mix, and then seal it with red liner tape or a Fuse Tool. Then use red liner tape to attach it to the back of the card front so that it shows through the shaker window.

To finish the wedding shaker card, attach the pink paper to the card base. Then use foam tape to attach the shaker card layer on top of the pink layer. Finally, cut a 1/2″ strip of paper and stamp the sentiment on it. Snip the ends into a banner and attach it with foam tape for dimension.
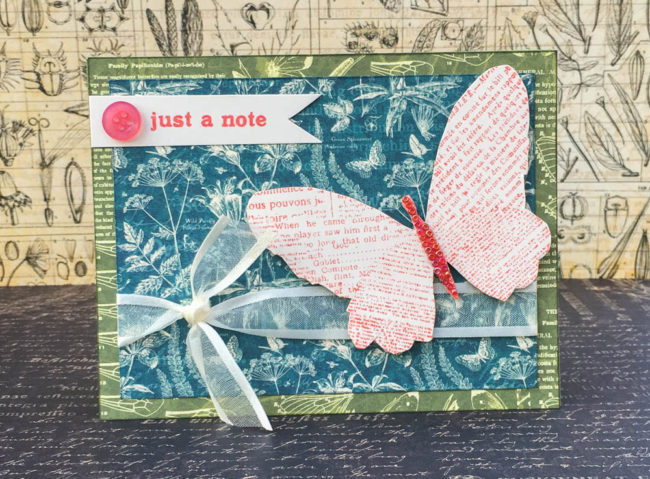
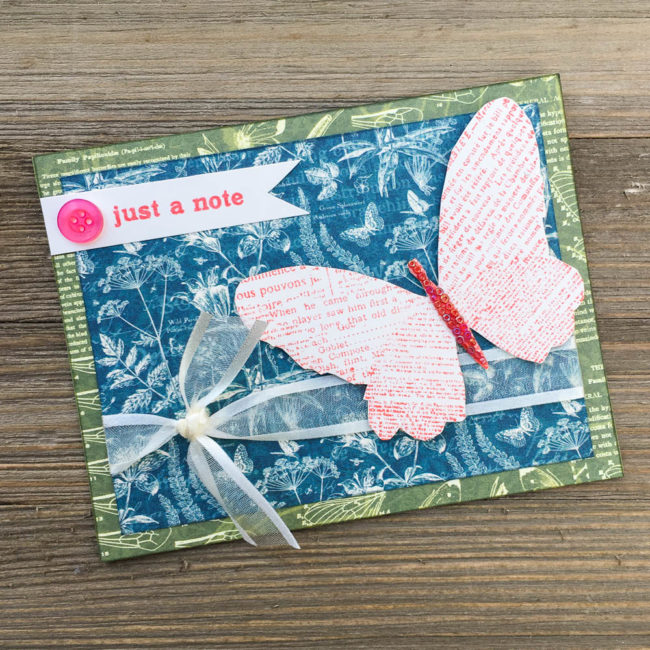
It’s officially spring, so let’s use some 28 Lilac Lane to create a butterfly card to send some spring greetings with!
Supplies needed:
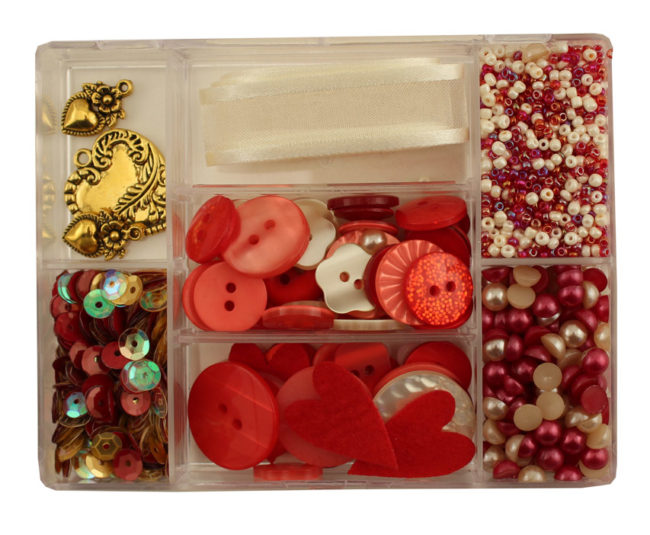
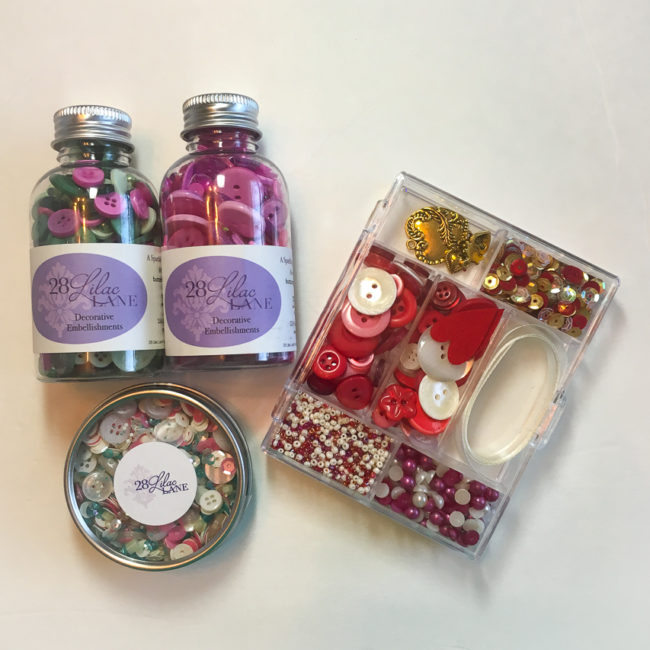
This butterfly card uses the “Love Story” kit by 28 Lilac Lane. With cream ribbon, heart charms, and embellishments in shades of red, pink & white, this kit is as versatile as it is gorgeous! Although at first glance this kit is a Valentine’s Day, wedding, or “I love you” themed kit, projects like this one are a great reminder to look at the kits for the colors of their contents as well as their themes.
 To start making this butterfly card, cut a piece of green patterned paper to 4.25″ by 5.5″, ink the edges, and adhere it to the card base.
Cut a piece of blue patterned paper to 3.75″ by 5″ and ink the edges. Tie the ribbon ends together, and then secure the ribbon around the back side of the blue patterned paper. Adhere the blue patterned paper panel to the card front.
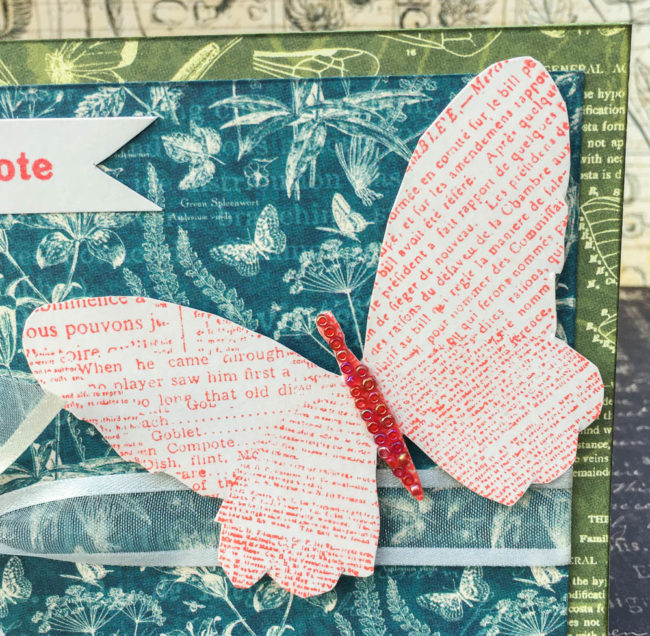
Stamp the butterfly and card sentiment on cream cardstock. Cut out the butterfly. Trim the sentiment into a 5/8″ wide strip, and snip the ends to make a banner.
Adhere the sentiment banner to the top left of the card front, and glue a button on top of it.
Squeeze a strip of glue down onto the body of the butterfly, and then layer seed beads on top of it. Once the glue is dry, use foam adhesive to attach the butterfly to the card front.
And your butterfly card is all finished, except to choose someone special to send it to!
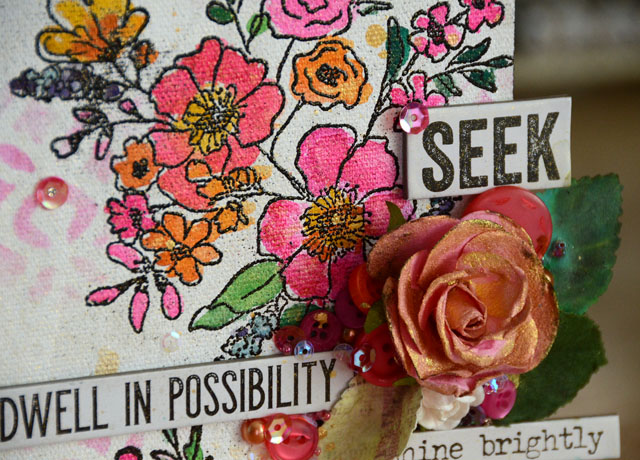
Our fabulous 28 Lilac Lane designer May Flaum is at it again, showing us all the beautiful things that can be done with her exciting new 28 Lilac Lane products that were announced at Creativation in January! This time, it’s a mixed media canvas with a profusion of pink flowers that will brighten your day – especially if winter is dragging on a little longer than you’d like!
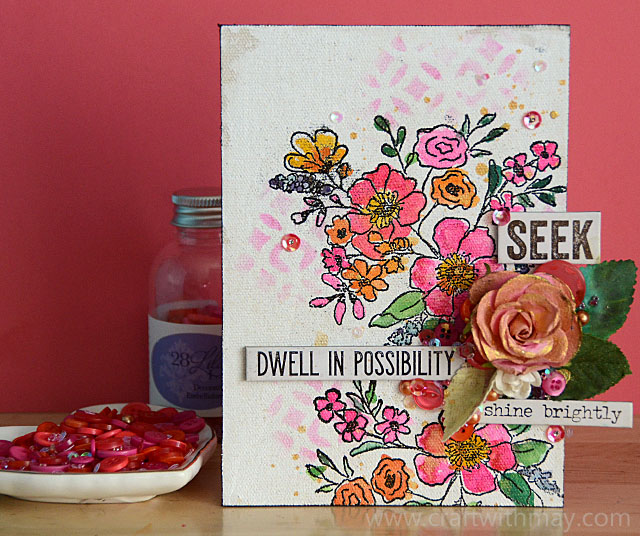
This surprisingly easy mixed media canvas project can be made in only three easy steps, with just a few supplies, and is easy to customize o a theme or color scheme for your home or occasion.
May’s project uses her fun new 28 Lilac Lane “Fruity Fun” embellishment bottle that features an assortment of shades of (what else?) fruity pink! These brilliant shades bring to mind summer berries, watermelon, a cool glass of punch, or even flamingoes. It’s great for summer themes, flowers, and oh-so-many things!

To see more of this mixed media canvas project – and get the full 3 step instructions – visit May’s blog. Also, don’t miss the challenge on the mixed media challenge blog this month that is based on this project! (Did I mention that there is a giveaway?)
Our “Fruity Fun” embellishment bottle is just one of six new 28 Lilac Lane embellishment bottles that are shipping now from our online store: Fruity Fun, Queen Bee, Fiesta, Gemstone, Stormy Skies, and Farmhouse. Get them all!
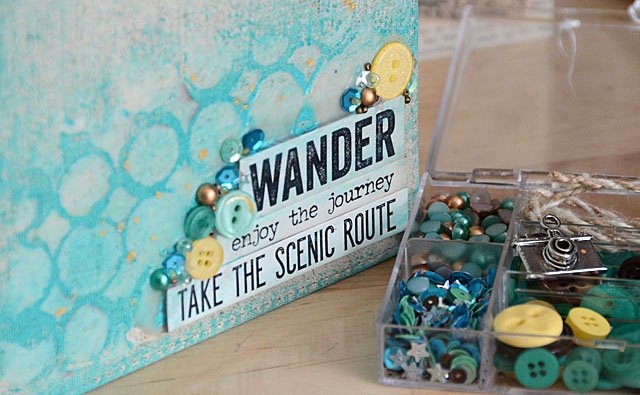
Travel journals are hot, and altering notebooks with mixed media is a great way to make them. In a recent journal project, 28 Lilac Lane designer May Flaum showed how her embellishment kits can make mixed media beautiful!
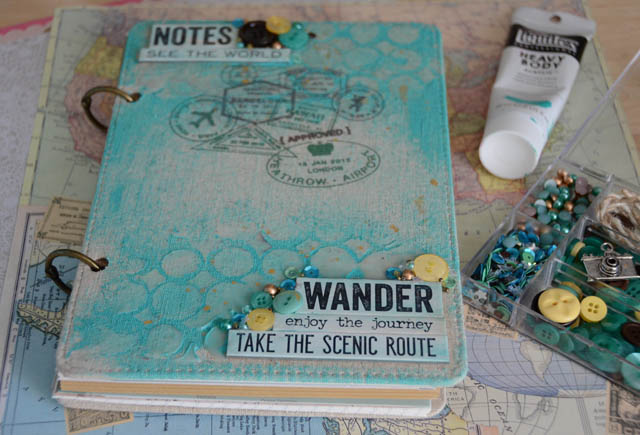
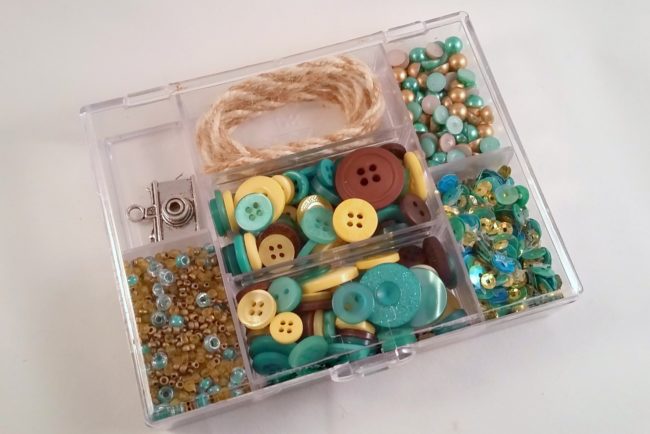
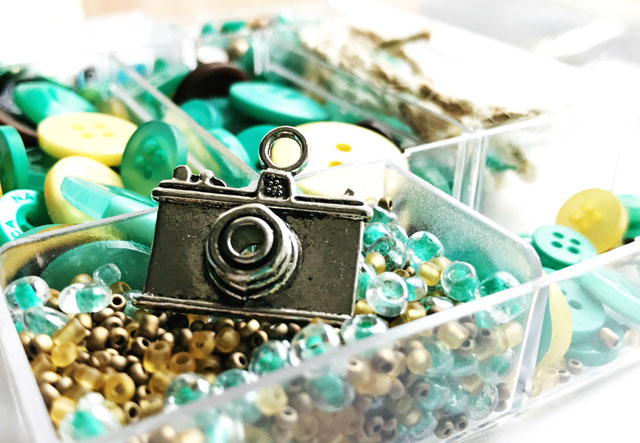
For this project, May used one of her brand new 28 Lilac Lane embellishment kits that was just unveiled at the Creativation show in January. “Let’s Go” is a beautiful combination of turquoise, brown and butter yellow with a few touches of gold mixed in – plus a gorgeous camera charm!
To see how to make this travel journal cover, visit May’s blog, or watch May’s video below to see the step by step techniques that May used!
With beads, sequins, pearls, and buttons, 28 Lilac Lane embellishment kits are a great match for mixed media techniques. Whether it’s a journal cover, a canvas, a scrapbook page, or another project…you’ll find just what you need in one of our handy embellishment kit boxes!
I’m so excited to tell you that the new 28 Lilac Lane products are shipping now – and are available in online shops like Ellen Hutson and Simon Says Stamp, as well as local stores!
Today I’m playing with one of my personal favorites from the new products- the Wisteria Hues Bead & Sequin Mix!
My inspiration for creating this Wisteria Hues mix was my backyard wisteria, but the arrival of Mardi Gras season got me in the mood to choose this mini bottle to use first of the new ones. I love this particular mix and I’m excited to share it – and all of the rest – with 28 Lilac Lane fans.
Despite the name mini, there really isn’t anything “mini” about how much is packed into these bead & sequin bottles! They’re a great value, and so easy to travel with that you’ll want to collect them all!
This ‘messy wreath’ is so quick and easy- and so much fun to create! Watch the video below to see the steps of exactly how I made it.
Today we’re sharing another project from our booth at Creativation. This button mosaic sun that I created brought a little bit of my home in the sunshine state to the show floor in rainy Phoenix!
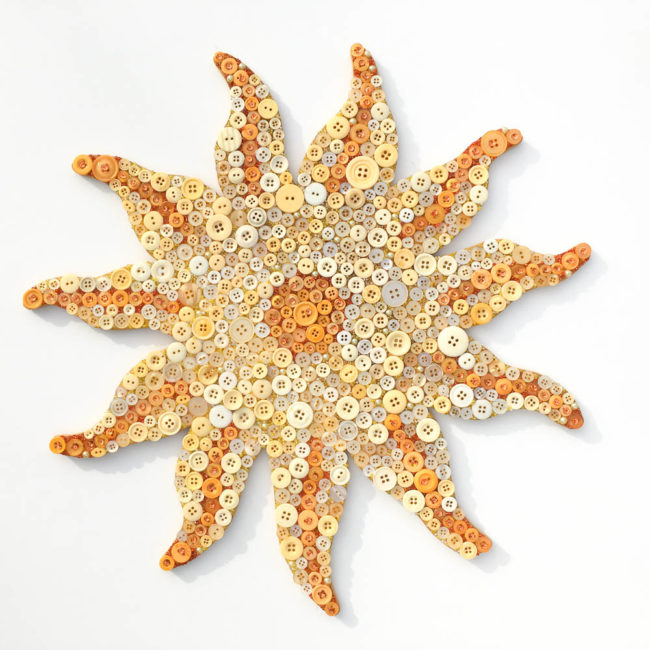
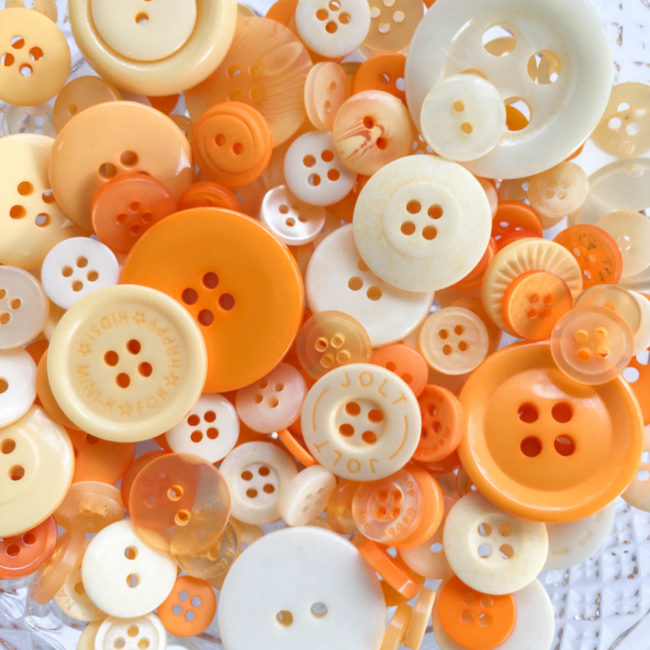
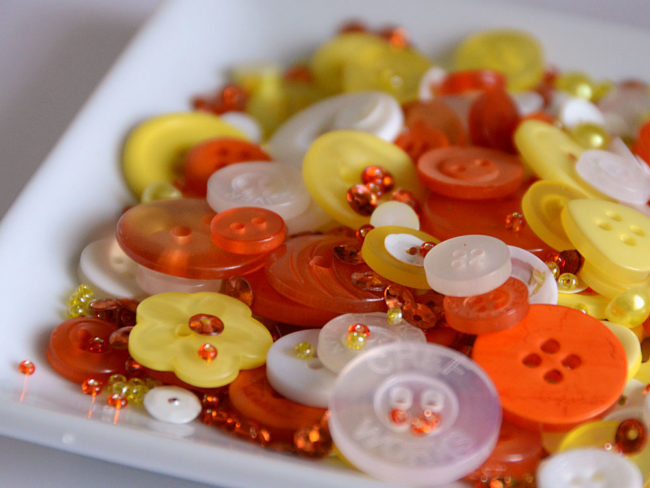
This sun looks yellow, but we call it….mango! It’s made with our “Mango Madness” color blend of buttons. This blend of delightful shades of orange and yellow is perfect for sunshine-y projects of all kinds.
Although they don’t look at first like they are at all the same color palette, I combined the Mango Madness color blend with a 28 Lilac Lane embellishment bottle called “Candy Corn“. I only used seed beads. flat back pearls, and sequins from the Candy Corn bottle. Used in small doses with these tiny items, the colors work well together.
 Button mosaics (or collages) are such a fun way to use buttons, and this one creates a beautiful piece of wall art home decor when you are done!
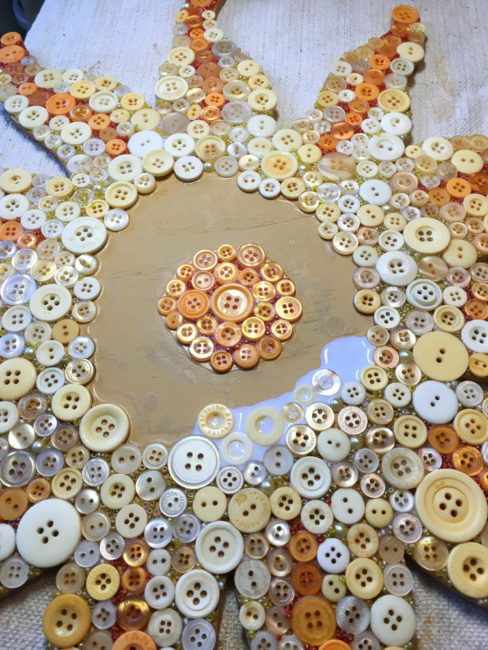
To get the full tutorial on how to make this piece of sunny wall art (or learn how to adapt this technique to make your own design), visit my website Craft Critique.
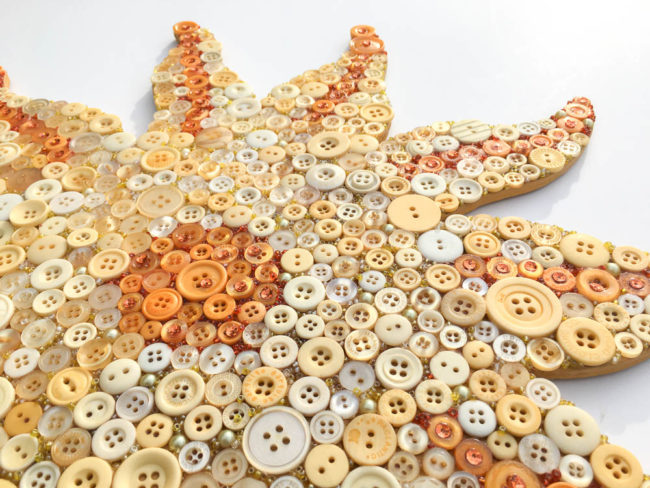
This project can be adapted to a lot of different shapes…how about an apple for teacher? Or a heart or flower for a tween room? The possibilities are endless! What will you make?
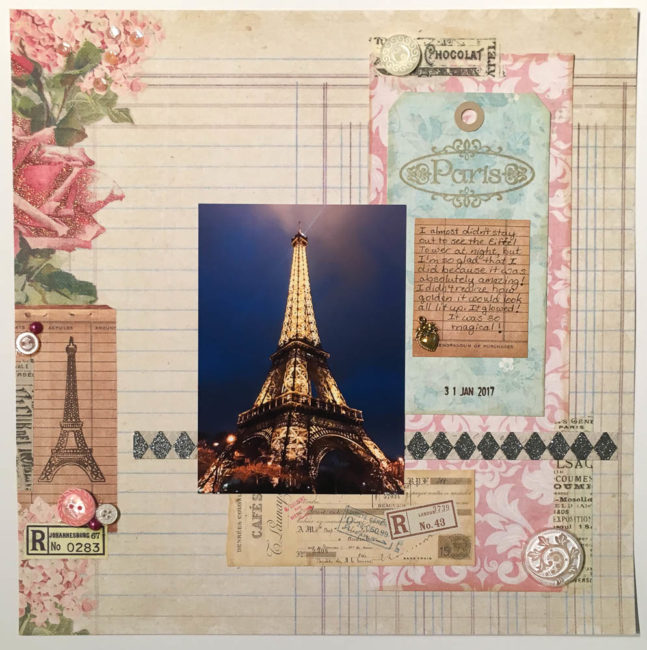
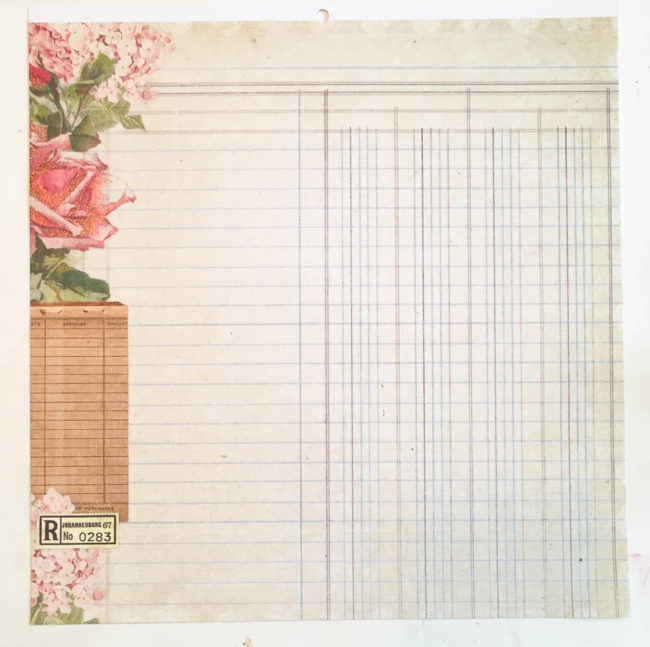
There’s many papers available for scrapbooking that are pre-designed to look already partially “done” as a layout. But how do you take those from looking flat to looking fantastic? The secret to fabulous scrapbook layouts is embellishing pre-designed paper with your 28 Lilac Lane embellishment kits! And I’m going to show you exactly how to do it with this easy scrapbook layout from my recent trip to Paris.
Supplies:
I started with a pre-designed background paper from DCWV. It is designed to look like a piece of ledger paper that has florals and several vintage elements layered on top of the left edge to frame it.
Because this paper comes from a paper stack, I was able to create practically the entire layout using pre-coordinated items from the stack. All of the paper items on the layout are cut from sheets in the same stack.
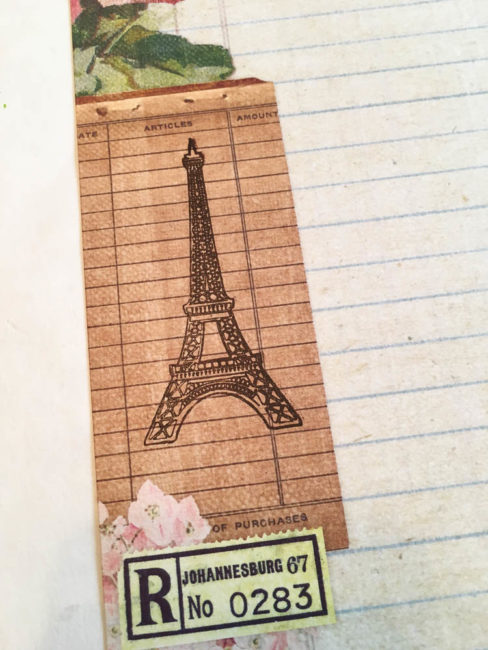
That large brown vintage receipt ephemera was white space that was just begging to be filled! It was the perfect place to put my Eiffel Tower stamp, stamped in dark brown pigment ink to continue the vintage theme.
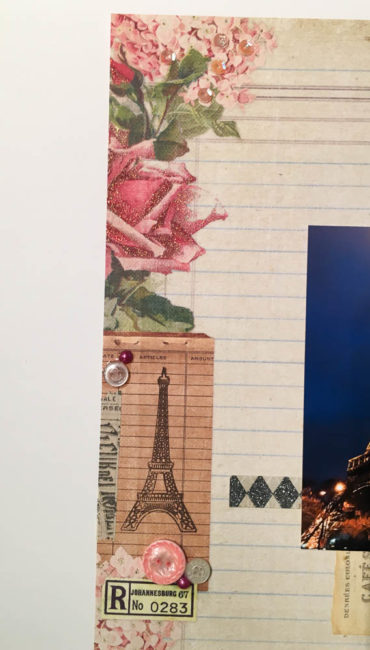
But of course, a stamp is still flat – and I wanted to add some dimension to this area. So I grabbed my 28 Lilac Lane embellishment kits, which are perfect for embellishing pre-designed paper! A few buttons and flat back pearls from the “Love Story” embellishment kit (along with a strip of tissue tape) were the perfect addition to finish off the area where I’d just stamped my Eiffel Tower.
At the very top edge of the page, I dabbed clear glue in the center of a few of the pink flowers and dropped a few pearl sequins on them to add a bit of shine and dimension to the flowers.
On the other side of the layout, I cut and arranged all of the paper elements. I stamped the Paris stamp with Shimmer ink, and used black pen to write my journaling (leaving room to put the charm on).
Once all the paper elements and the photo were in place, I tore and stuck down two pieces of tissue tape along the edges of the large pink block. These pieces served as grounding for my buttons.
I used button shank removers to cut the shank off of the large white filigree button from the Attic Findings kit, and glued it in place at the bottom of the layout. Then I selected a cream colored button from the same kit and adhered it at the top of the layout. Finally, I glued the heart charm from the “Love Story” kit onto the journaling block.
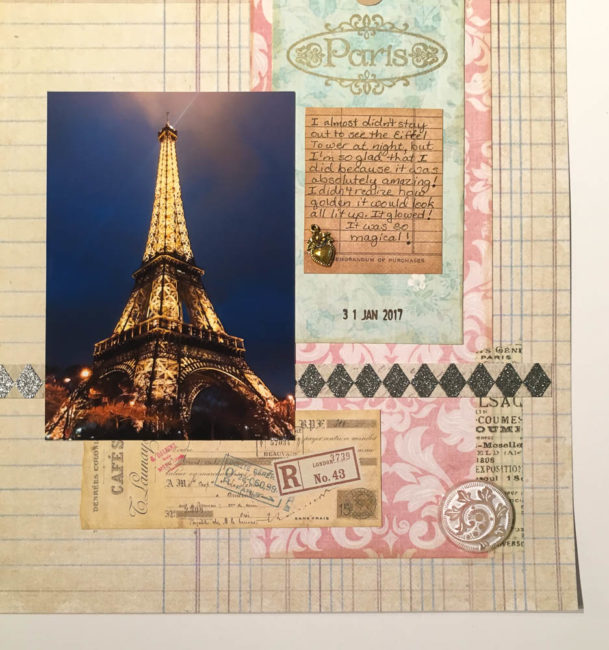
Having a selection of 28 Lilac Lane embellishment kits on hand makes it so easy to scrapbook by embellishing pre-designed paper. Select a paper, grab the kit in the coordinating color scheme, and in minutes you can have a beautiful layout!
We’re very excited to share today that Ellen Hutson is featuring our 28 Lilac Lane product line by May Flaum this month in their monthly Mix It Up Challenge, pairing their favorite products with their own Essentials by Ellen products!
As part of the challenge, 28 Lilac Lane designer May Flaum has shared two new fabulous projects on her blog that use her gorgeous new 28 Lilac Lane Unicorn Shaker Mix:
May’s quick and fun cards pair watercolors with 28 Lilac Lane embellishments to send love for Valentine’s Day (or any day). The first one uses sequins to add “pop” to an Ellen Hutson flower stamp.
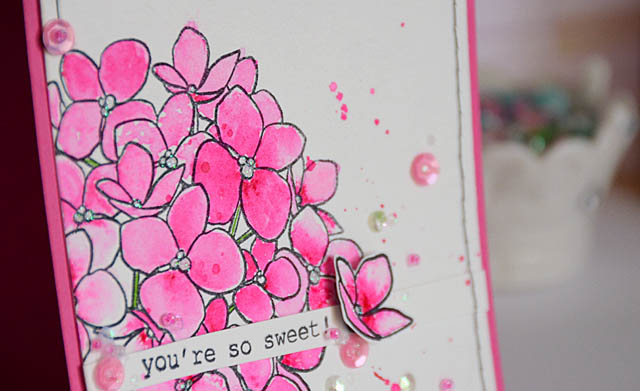
You’ll really “heart” the fun simplicity of her second card – a hand watercolored heart that is embellished with sequins! It’s a little bit artsy, a little bit whimsical, and a whole lot of fun. It’s easy enough that the kids can do it – but the grown-ups will want to as well!

To see the finished cards, instructions, and supply lists, check out May’s blog for all the details! And don’t miss the chance to enter the challenge on the Ellen Hutson blog – entries close on February 14th.
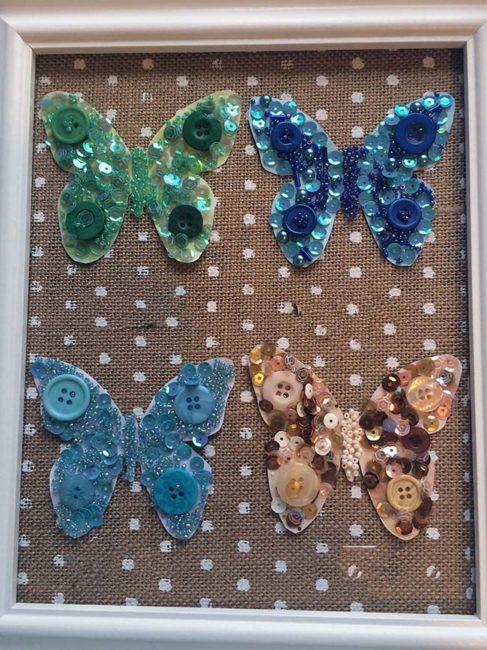
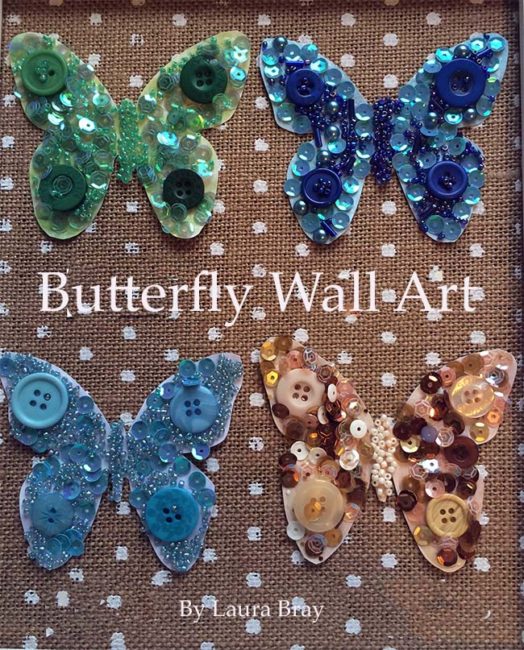 Hi! It’s guest designer, Laura Bray. Are you in need of a little spring joy during this long winter? How about creating some cute, button encrusted butterflies to be used in wall art? These would also be really cute on gift wrap, pins, or hair clips too! Here’s how to make them…
Supplies:
• Embellishment bottles and kits in the colors of your choice.
• Cardstock paper in colors that match your buttons colors.
• PVC glue
For framed artwork:
• White 8” x 10” frame
• Decorative scrapbook paper
• PVC glue
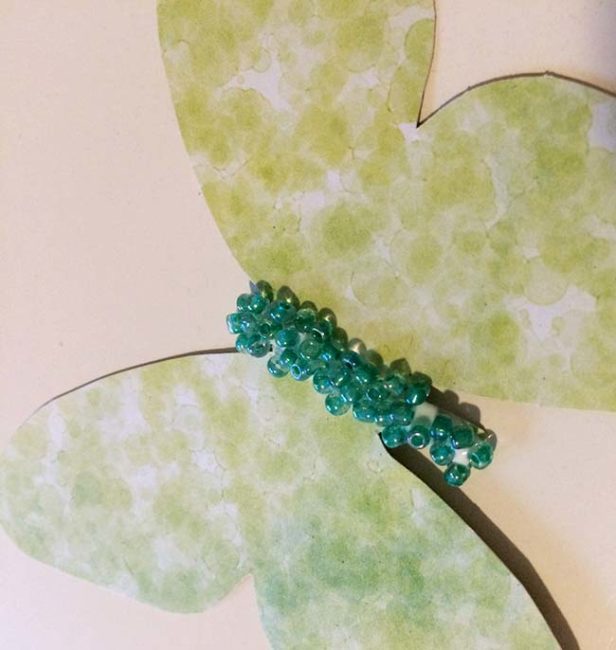
To create butterflies:
Today is our fourth and final CHA Creativation Sneak Peek for 28 Lilac Lane. (But stay tuned tomorrow for our final Buttons Galore sneak peek!) They’re cute, they’re colorful…they’re 28 Lilac Lane Sequin & Bead Mixes!
The twelve new 28 Lilac Lane Sequin and Bead Mixes retail for just $2.99, and are packaged in 20ml “nailpolish” style bottles. these special blends combine seed beads and round sequins with fun shaped sequins to create beautiful projects!
Easy to store on a shelf or in a drawer, these pretty bottles contain just the right quantity of sequins and seed beads for cards or mixed media projects!
The refreshing palette of “Citrus Fun” features crisp shades of orange and yellow paired with crystal beads. The highlight, however, is the large yellow sequins that will add a floral sparkle to your shakers or mixed media designs!
Of course, we can’t forget our furry friends! The brown shades and white sequin accents of “Puppy Paws” are definitely man’s – and woman’s – best friend in the craft room! And for the shaped sequin in this kit, what could be better than a heart to honor our furry family members?
Americana is an oh-so-trendy for 2017, and of course May has given 28 Lilac Lane its own interpretation of it. “Stars & Stripes” sparkles with a mix of blues and red, accented with gold stars. Use it for patriotic shaker cards or to accent that American farmhouse style project!
Whatever your need, there’s a new 28 Lilac Lane Sequin & Bead Mix for every occasion. Collect them all:
Visit us in booth #1227 at the CHA Creativation show in Phoenix this weekend to see the whole collection of new 28 Lilac Lane Sequin & Bead Mixes, as well as beautiful samples using the whole 28 Lilac Lane product line!
If you can’t attend the show, please watch our social media (links in sidebar) and May’s blog for more reveals! And watch for these in your local stores in mid to late February!
Today we are bringing you yet another 28 Lilac Lane CHA sneak peek – our newly repackaged 28 Lilac Lane Shaker Mixes by designer May Flaum!
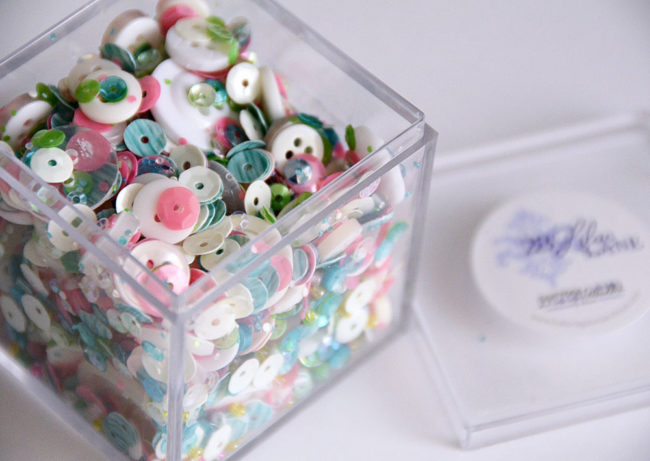
The 28 Lilac Lane Shaker Mix product line isn’t exactly new – eagle eyes may have noticed that it received a stealthy launch via our web store a few months ago. But now it’s getting the spotlight with brand new packaging – a clear storage cube that makes it easy to see the beautiful sequins, buttons and seed beads inside! These larger mix packages now have a retail price of $5.99.
This blend of embellishments is especially designed to make perfect shakers for all of your cards and other craft projects, but you’ll want to use these gorgeous blends on all your designs!
With white buttons blended with blue, pink and green sequins and a sprinkling of beads, “Rainbow Unicorn” will take you on flights of fancy! This is perfect for princess projects, welcoming baby, or whatever else tickles your fancy!
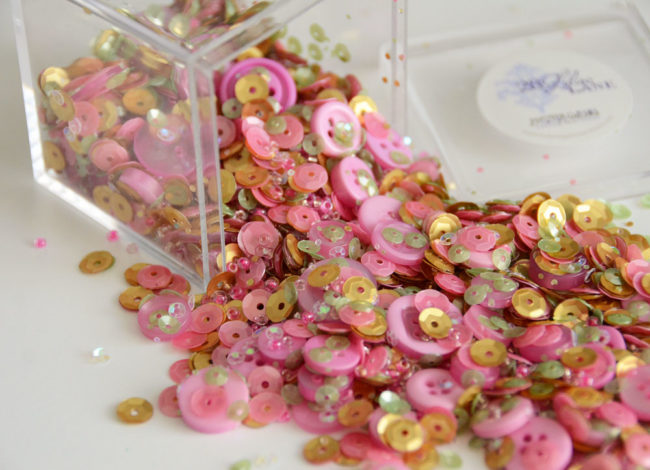
Winter blues got you down? Our “Rose Garden” is in full bloom, with lush pink buttons and embellishments paired with gold sequins. It’s warm, elegant, and oh-so-pretty!
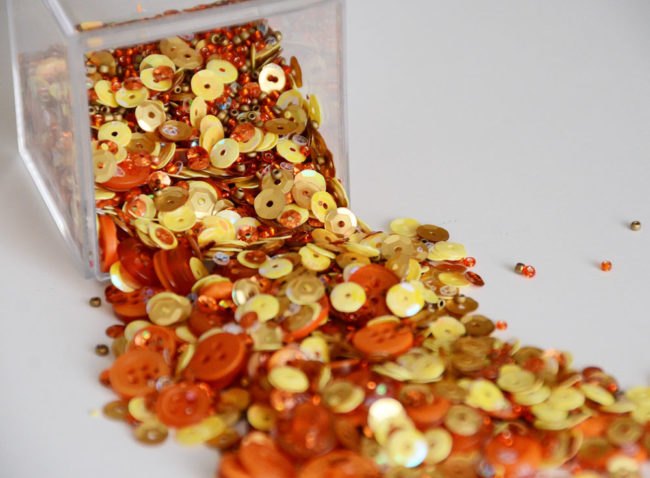
In shades of orange, yellow, and gold, “Safari Sunrise” will transport you to an African Savannah – or sunset at your favorite beach. Perfect for birthdays, mixed media projects and travel scrapbooking, these brilliant colors will light up your projects with color!
The first six themes in the Shaker Mix collection are:
Visit us in booth #1227 at the CHA Creativation show in Phoenix this weekend to see the whole collection of new 28 Lilac Lane shaker mixes, as well as beautiful samples using the whole 28 Lilac Lane product line!
If you can’t attend the show, please watch our social media (links in sidebar) and May’s blog for more reveals! And watch for these in your local stores in mid to late February!
Today we are continuing our week of sneak peeks for the CHA Creativation 2017 show at Buttons Galore with more 28 Lilac Lane previews! Today we’ve got two sneak peeks of new products to share with you from 28 Lilac Lane designer May Flaum.
Our first sneak peek is for lovers of our immensely popular 28 Lilac Lane embellishment bottles! May has designed six fabulous new bottles, to join the beautiful palette of 18 that are already available.
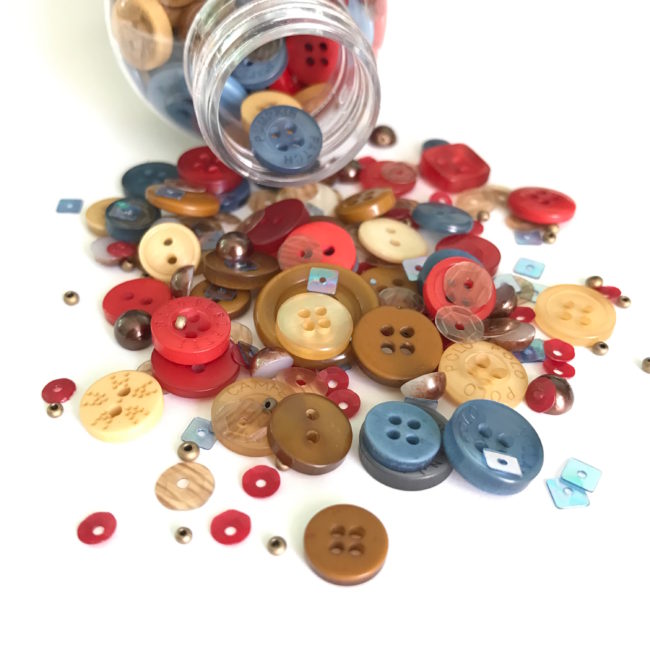
Do you yearn for the smell of fresh plowed dirt, grandma’s plaid dish towels, and berries picked fresh off the vine growing on the fence at the bottom of the yard? Then our “Farmhouse” embellishment bottle, a mix of Americana reds and blues paired with antique brown and creams, is just what your projects are looking for!
The full list of new 28 Lilac Lane embellishment bottles that are shipping to stores February 10th are:
The 28 Lilac Lane embellishment bottles include a blend of buttons, sequins, seed beads, and pearls, and retail for $5.99.
But wait…there’s more! We’ve also redesigned and added to our 28 Lilac Lane sequin tins!
Our popular sequin tins are still in the same great round tin packaging with a transparent lid. But now (instead of being a single round size) our new sequin tin mixes features a blend of 3mm, 4mm, 6mm and 8mm round sequins along with special shaped sequins. And the best part is the price – our new sequin tins are priced at only $3.49.
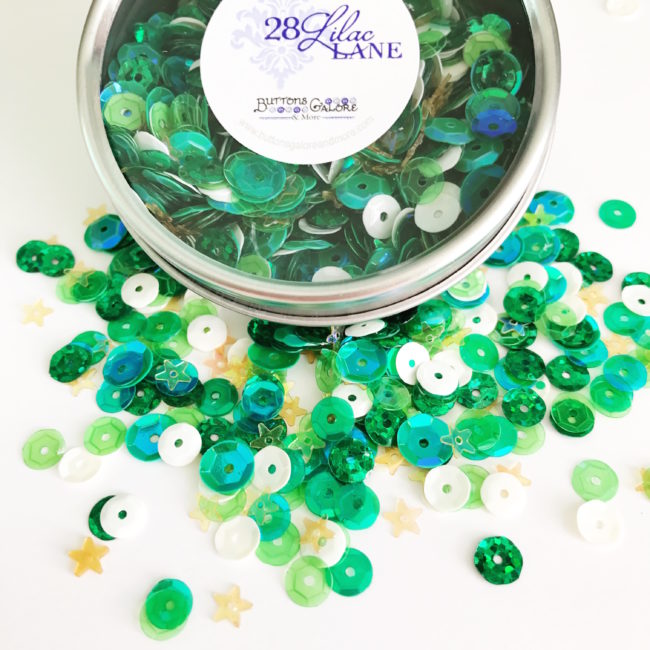 Are you ready for the wearing o’ the greenery? Lady Luck is! This new 28 Lilac Lane sequin tin blends shades of green sequins with white sequins, along with fun golden stars!
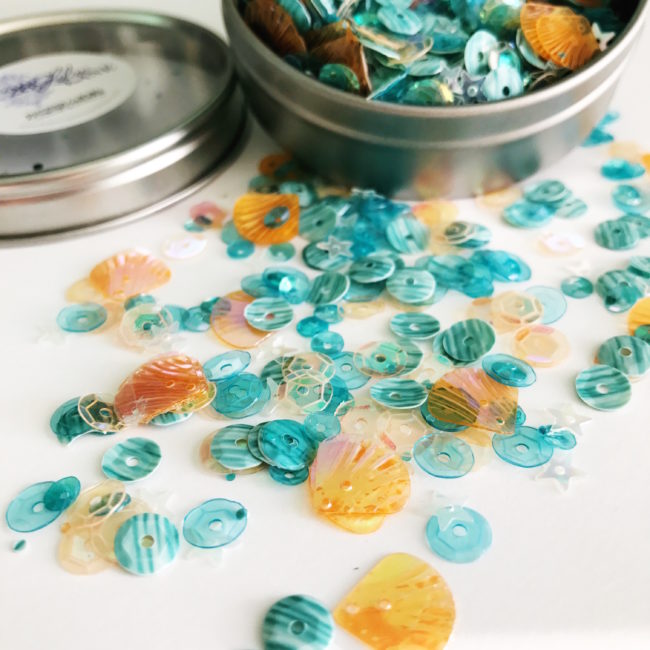
Tired of shoveling snow? A “Seaside Holiday” is just what you need! With Caribbean blues and golden sand sequins, accented with large seashell sequins, you can almost hear the waves and feel the sand between your toes!
The new sequin tin mixes debuting at CHA Creativation 2017 and shipping February 10th are:
Visit us in booth #1227 at the CHA Creativation show in Phoenix this weekend to see the whole collection of new embellishment bottles and sequin tins, as well as beautiful samples using the whole 28 Lilac Lane product line!
If you can’t attend the show, please watch our social media (links in sidebar) and May’s blog for more reveals! And watch for these in your local stores in mid to late February!
Today, we are starting five days of sneak peeks for new product releases for the upcoming CHA Creativation trade show that starts later this week! We’re kicking off these CHA sneak peeks today with some brand new 28 Lilac Lane products from designer May Flaum.
If you loved the first twelve craft embellishment kits that May designed for CHA Winter 2016, then you’ll love the six new kits that she’s designed for 2017! Here’s some sneak peeks of a bit of what you have to look forward to…

Ahoy matey! This treasure chest of pirate booty will shiver your timbers! Created in blood red and skull & cross bones black, the dastardly plunder of Pirate’s Life will make your lair’s party decor, invitations, and scrapbook layouts overflow with pirate character.
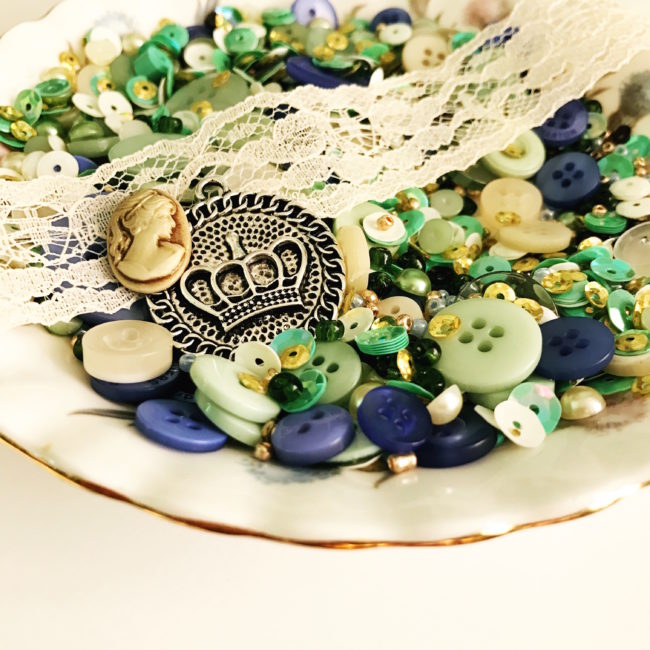
Tea and crumpets, anyone? Tea time, a collection of greens and blues paired with lace, a crown and a cameo, will have you pinky up and passing the finger sandwiches! This collection is perfect for card makers, vintage mixed media, and even travel layouts!
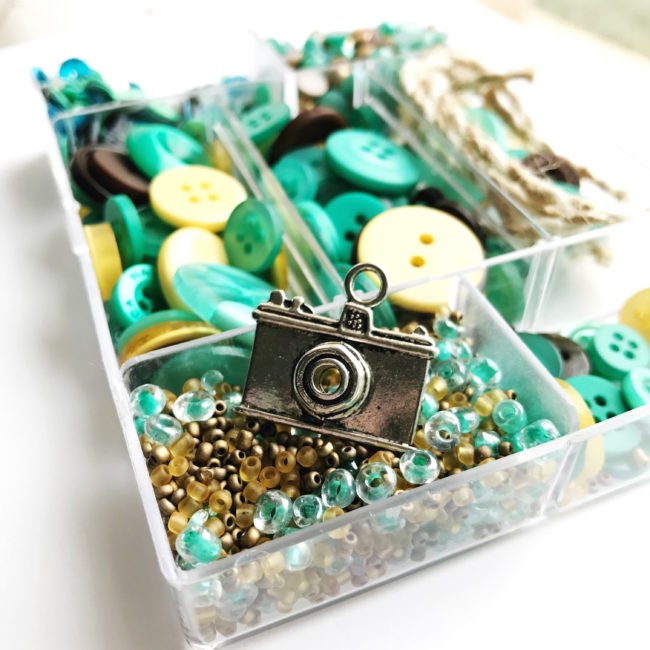
Click! Snap! Are you the wandering type? “Let’s go” then! It’s collection of turquoise, brown, and buttery yellow, along with touches of gold, will take you from sunrise to sunset and from sea to shining sea.
Above is just a preview! The full list of six new 28 Lilac Lane embellishment kit themes coming for CHA Creativation 2017 are:
The new 28 Lilac Lane craft embellishment kits retail for $8.99, and include buttons, charms, sequins, pearls, seed beads and trim in a divided plastic box – an all-in-one solution for embellishments that works beautifully for scrapbooking, card making, mixed media, sewing, and a variety of craft projects. The new products will be shipping to stores by February 10th.
Visit us in booth #1227 at the CHA Creativation show in Phoenix this weekend to see the whole collection of new embellishment kits, as well as beautiful samples using the whole 28 Lilac Lane product line!
If you can’t attend the show, please watch our social media (links in sidebar) and May’s blog for more reveals! And watch for these in your local stores in mid to late February!

Welcome to the Seasons Givings blog hop at Buttons Galore! Today, we are joining with a group of industry companies and bloggers to start 2017 off by saying a big “thank you” to the people that make us possible – YOU!
To say thank you, we’re giving away a goodie bag of 28 Lilac Lane products that will make your Valentine’s Day and spring scrapbooking and cardmaking simple and a joy! Your treats include one of our BRAND NEW 28 Lilac Lane Shaker Mixes, called Unicorn Rainbox – a mix of buttons, beads and sequins that is perfect for making shaker cards (and lots of other things, too).
One lucky winner will receive:
How To Enter: All you have to do to have a chance to be the lucky winner is leave a comment on this blog entry before 11:59PM US eastern time on Friday night, January 6th, 2017. Make sure you include your email address in the line reserved for it on the comment form (for your own protection, don’t put it in the text of the comment, where it will be visible to the public – just in the line labeled “email” in the form where only Buttons Galore staff can see it). We will need it to notify you if you are a winner. Winners will be drawn by random drawing from all eligible entries. One entry per person. Sorry, US delivery addresses only.
Thanks for visiting – and now, on with the blog hop!
Whether you are looking for a last-minute gift idea, or to brighten your home decor for the new year…this mixed media wall art project by 28 Lilac Lane designer May Flaum is just the thing for your walls. It’s an easy home decor canvas that can be completed in just a few minutes, but packs a visual punch!
easy home decor canvas by May Flaum
Only a few basic supplies are needed for creating this project:
The mixed media technique for this easy home decor canvas is messy and random looking – and therefore very forgiving and difficult to screw up! Just smear the shades of paint in one direction across your canvas – and remember to make sure it is nice and thick for a beautiful textured look.
Next, use your palette knife to smear a shape into the paint. Use liquid adhesive to add your embellishments and gold leaf on top of the smeared shape. Finally, spritz with gold mist for an extra touch of shine!
easy home decor canvas by May Flaum
It’s that simple to create beautiful wall art! And don’t forget that May’s mixed media technique on this easy home decor canvas can be adapted very simply to many color schemes and shapes. Try the 28 Lilac Lane Hello Sunshine bottle with shades of yellow and white paint to create a beautiful moon for a nursery wall. Or create a heart in shades of pink using Pretty Princess to add a touch of artsy elegance to a dorm room. The possibilities are as endless as our color palette of 28 Lilac Lane embellishment bottles!
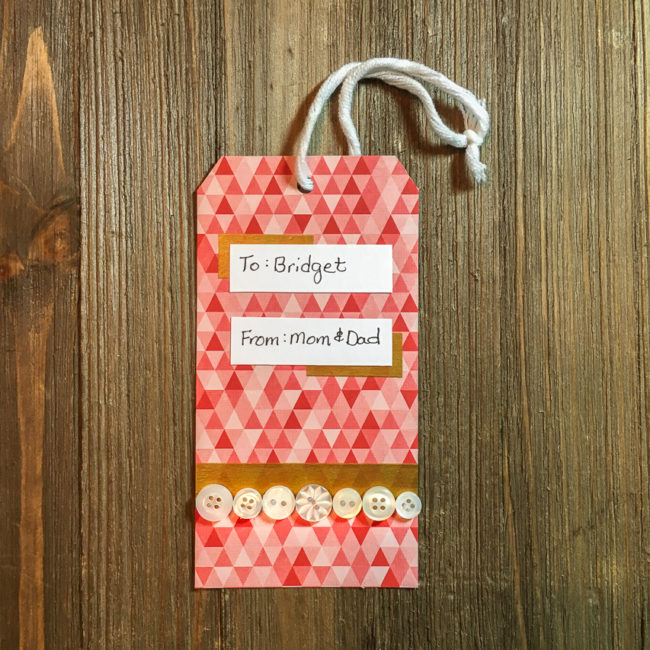
Think buttons aren’t a match for modern style? Our 28 Lilac Lane “Winter Wonderland” embellishment bottle, paired with washi tape, makes a quick and easy modern Christmas gift tag that will add sparkle and style to your special gift this Christmas!
Supplies:
To create the tag base, cut the 6×6 pad in half to create a 3×6 piece. Snip off two corners to create the top of the tag, and then use a hold punch to create the hole.
Lay a strip of the gold washi tape across across the tag about 2/3 of the way down from the top. Cut two more small strips and position them one to each side closer to the top.
Select buttons to create a row across the tag along the bottom of the washi tape. Adhere the buttons using white glue or a hot glue gun.
From the white cardstock, cut a 5/8″ strip. Write the to/from information for your gift on it, and then snip the pieces off of the strip. Adhere them using paper adhesive.
Cut a length of yarn. Loop it through the tag’s hole and tie it off to attach your gift.
This modern Christmas gift tag only takes a few minutes to make, but will definitely brighten up your Christmas wrapping for someone special!
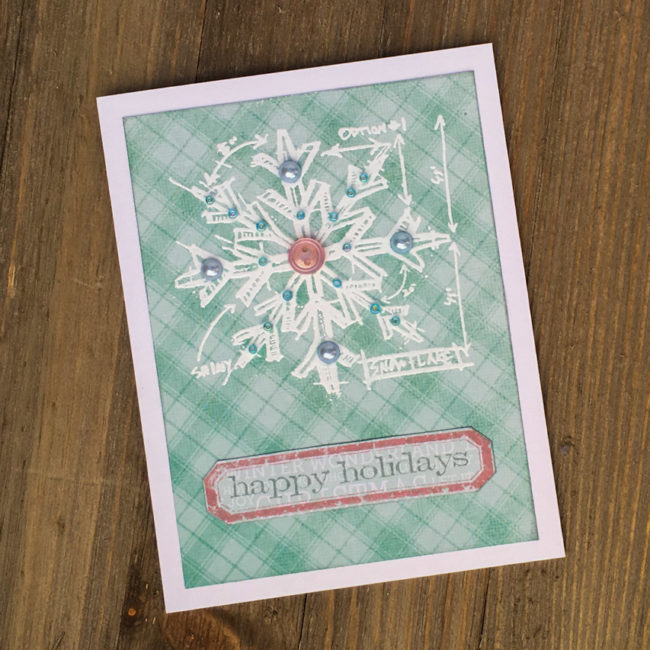
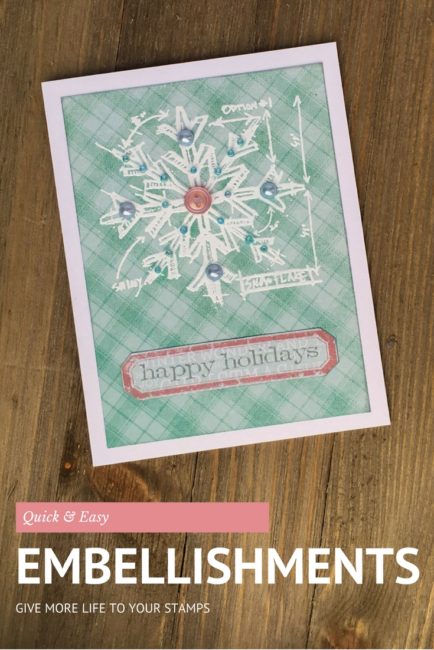
Stamps are a great investment because they are a tool that can be used over and over again. However, using them over and over again can quickly get boring…so how do you spice things up and put the fun back in your stamps again? 28 Lilac Lane has the answer!
Supplies Needed:
One of my favorite ways to make my old stamps look new again is to embellish them! And with the 28 Lilac Lane embellishment bottles, I have the choice of seed beads, sequins, flat back pearls, and buttons to embellish my stamps.
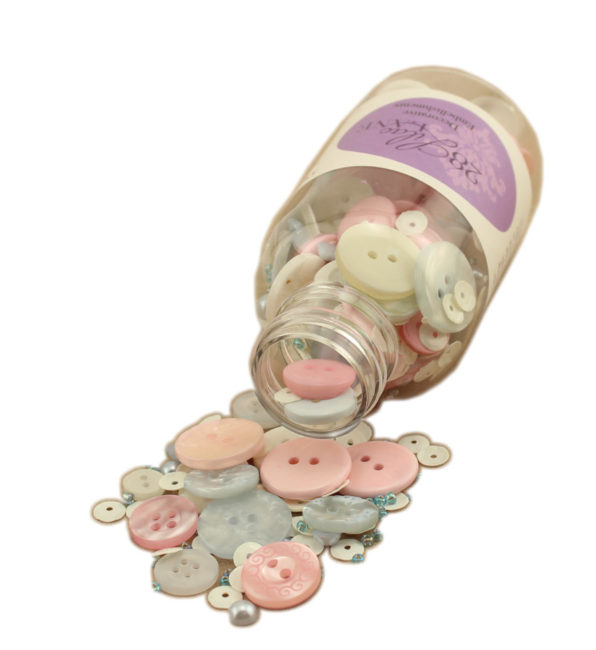
I chose the Cotton Candy bottle because it matched my paper pad. [The 28 Lilac Lane “Cotton Candy” embellishment bottle is available at the our online store, Scrapbook.com, A Cherry On Top, Ellen Hutson, Simon Says Stamp, Create for Less, and others, or check your local retailer].
To create this card, I first made a card base by folding a half sheet of letter sized cardstock. Then I cut a 3.75″ by 5″ piece of the blue plaid paper, and inked the edges in Iced Spruce before adhering it in the center of the card front.
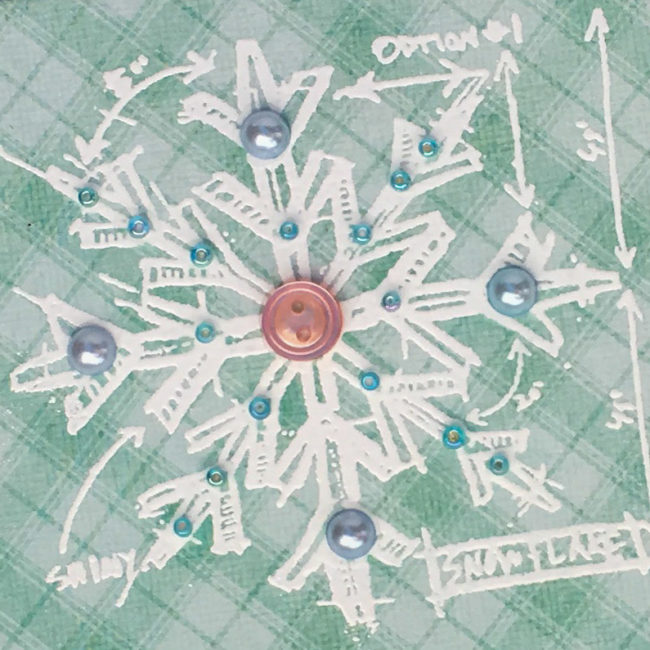
Next I used embossing ink to stamp the snowflake design on the top of the card front, and heat embossed it with white embossing powder. Once the heat embossing was cool, I selected embellishments from the Cotton Candy bottle and adhered them with small dots of clear drying white glue.
The sentiment on the bottom of the card front was created by first stamping the label outline in Victorian Velvet on the pale turquoise patterned paper. Then I cut out the label using scissors, close to the edge of the stamped label. I stamped the sentiment in Iced Spruce, and adhered the label to the card front.
What stamps do have that could be given new life with embellishments?
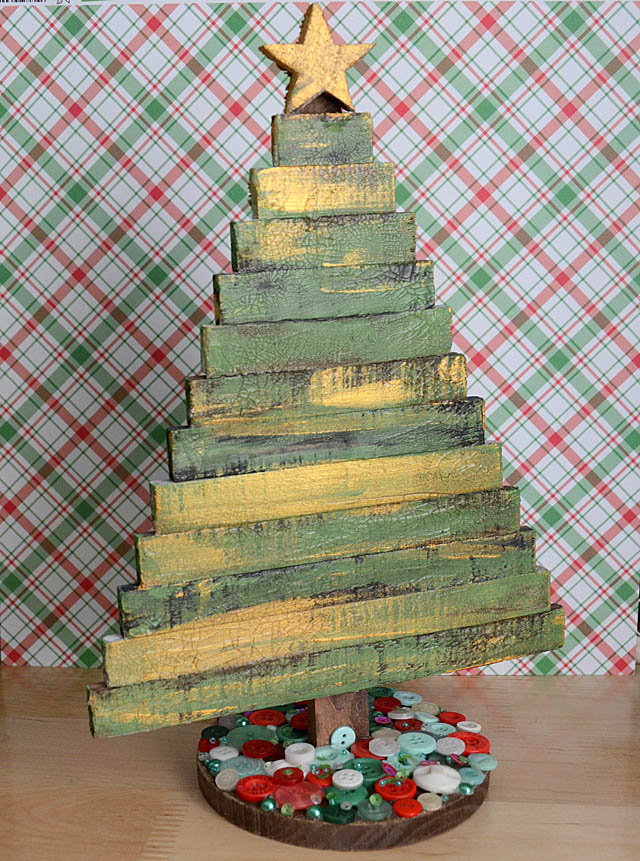
What’s sparkly, shiny, and shimmery all over? It’s a 28 Lilac Lane Christmas, of course! Here’s a round-up to all the projects that you need to make your Christmas a 28 Lilac Lane Christmas!
No 28 Lilac Lane Christmas would be complete without a tree! This little wooden Christmas tree bought from a craft store got a touch of alteration – including some 28 Lilac Lane button bling – from designer May Flaum to make it extra special.
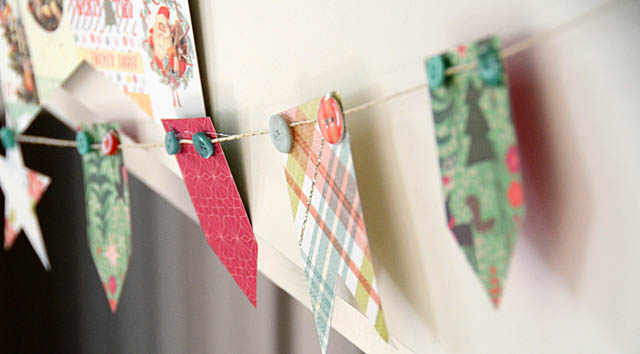
But why stop at a tree? Deck the halls with buttoned up banners that are fun and easy to make!
The gifts that go under the tree need their own sparkle too, and with 28 Lilac Lane, your gifts will look festive and gorgeous! A clean and simple understated look to your gift box is easy when you top it with charms and buttons:
Or go for a more luxurious look, with a button and jewel encrusted top like this one by 28 Lilac Lane designer May Flaum that is rich and feminine! This is one gift box that won’t be going in the trash after the gift is opened!
Since not everyone can get our Christmas wishes in person, how about some Christmas cards?
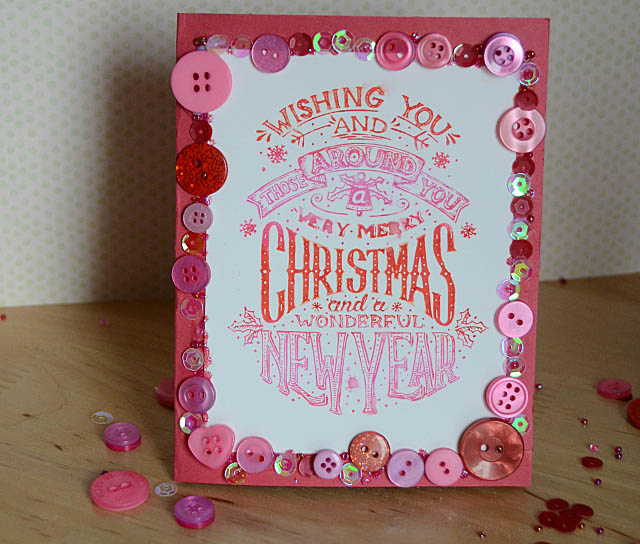
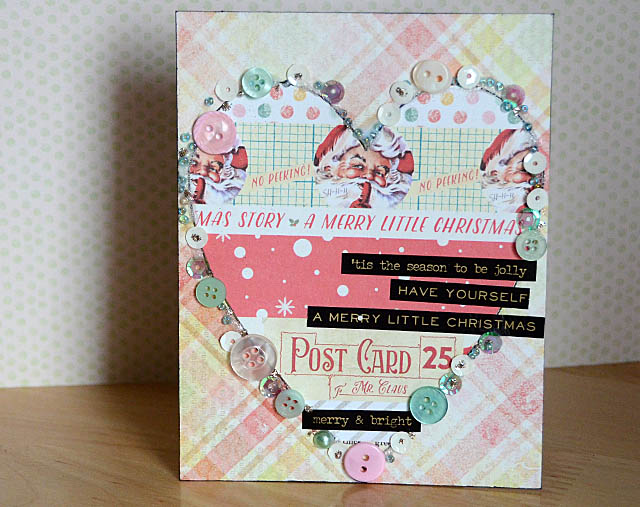
To see a video on how to make these two beautiful cards, and get information on a free card making class at Scrapbook.com that uses 28 Lilac Lane, visit May Flaum’s blog!
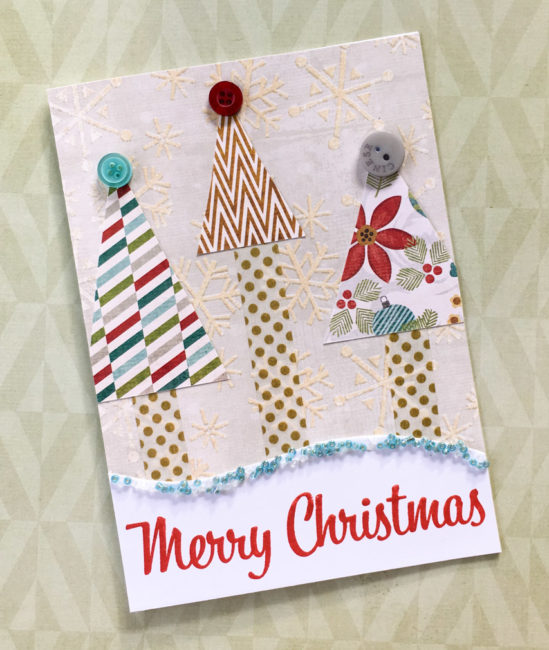
Or, if bright retro is more your style…try our funky paper pieced trees card:
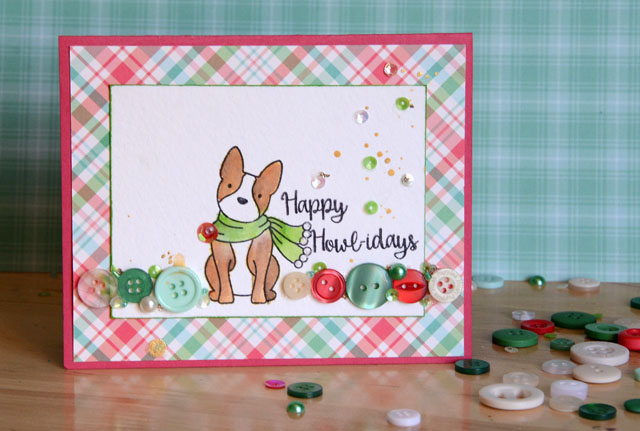
A button border makes any project a little more special. The 28 Lilac Lane one on this Happy Howl-idays card is spiced up with pearls and sequins for some extra bling!
Have you made a 28 Lilac Lane Christmas project? Please share a link in the comments! We’d love to see it!
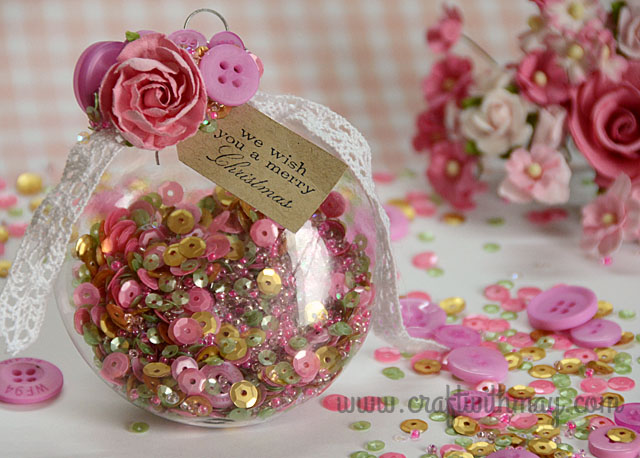
Pink is hot, hot, hot for Christmas this year! Today we’re sharing a beautiful rose Christmas ornament by 28 Lilac Lane designer May Flaum that will add a brilliant touch of pink and gold to your Christmas tree.

May’s rose Christmas ornament is created with one of her six brand new 28 Lilac Lane shaker mixes that have just been released. This pink and gold shaker mix is called – you guessed it! – Rose Garden. This gorgeous mix will take you from a retro pastel Christmas, into Valentine’s Day, or use it to create beautiful girly embellishments year-round!
And now, May herself will show you how it is done!
![]()
With the holidays fast approaching I am always looking for hand crafted gift ideas and special homemade touches. These new shaker mixes are great for so many projects including homemade ornaments. In this video tutorial I will walk you through creating a lovely rose garden ornament perfect for my aunt who loves pink & gold at the holidays.
Here’s a closer look at my finished DIY rose Christmas ornament project!
![]()
Don’t miss the chance on our Black Friday Sale to get May’s 28 Lilac Lane embellishment bottles for 15% off! Use code EMB15 through Friday, November 25th to save on all your favorite bottles from the collection. Don’t miss out on the new ones like Savannah Stroll, Winter Wonderland, and Coral Reef!
Tis the season to be jolly! Today I’m here to show you how to combine two of our holiday products that have a turquoise toned blue in their palette to make a fun retro Merry Christmas card!
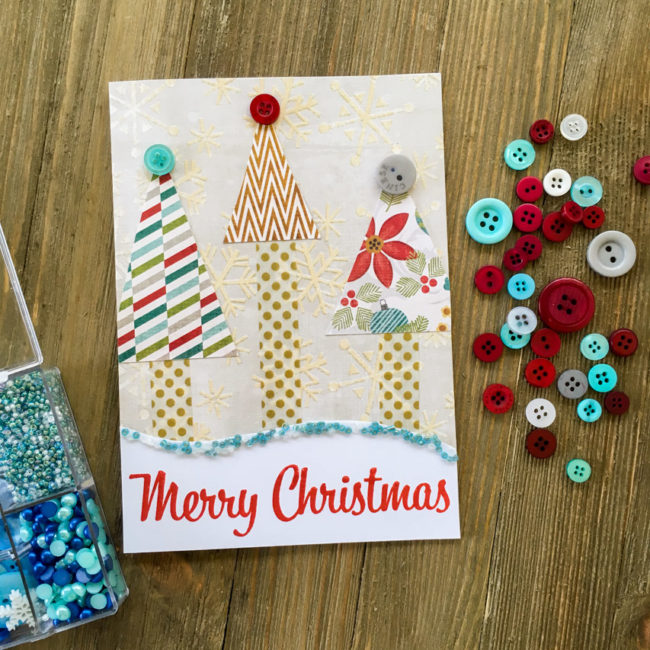
Supplies Needed:
This project pairs seed beads from our beloved 28 Lilac Lane “Let It Snow” embellishment kit with buttons from our new “Cool Winters” Button Basics. With similar tones of blue, these two coordinate together beautifully to add a pop of trendy color to holiday projects of all kinds.
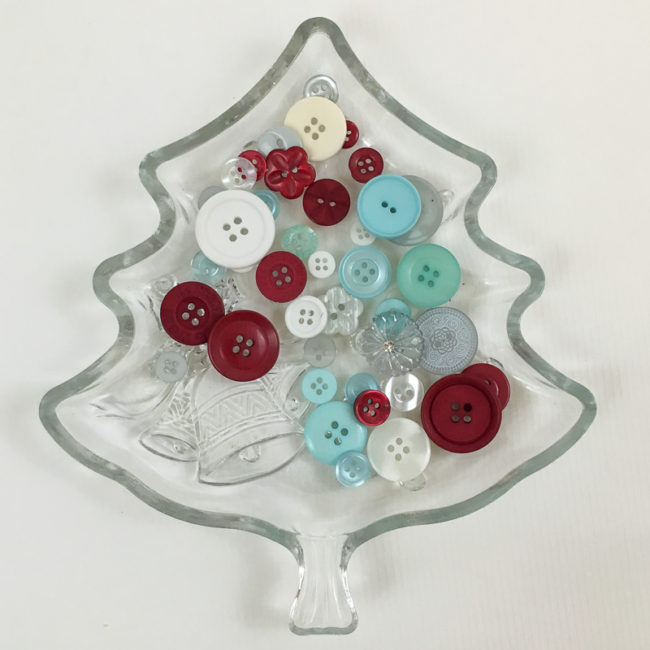
This card is 5″ by 7″, so to start my retro Merry Christmas card I cut the snowflake background paper to that size.
Next, I cut a 5″ wide strip of white cardstock that was a few inches tall. I stamped “Merry Christmas” on it with red ink, centering the image near the bottom. Then I used scissors to cut the top of the sentiment block into a wavy design.
To create the beaded edge, I started by spreading a bead a white glue along the edge. Then I sprinkled seed beads over the glue until it was covered, and set the sentiment block aside to dry.
Cutting the trees is easy! I simply used three scraps of paper and cut them into various sizes of triangles. The tree “trunks” are made from washi tape (but could also be made from strips of paper). Some of the tree triangles hung over the edge, so I just snipped them off. Once those elements were adhered in place, then I used liquid glue to adhere three buttons as toppers for the trees.
Once the glue holding the seed beads was dry, then I adhered the sentiment block across the bottom.
To finish my card, I used white cardstock to make a blank card and then adhered the finished card front onto it.
I hope this cheery little retro Merry Christmas card greeting will help you brighten the holidays of someone special!
Welcome to the Handmade Holidays blog hop at Buttons Galore! We’re sharing a faux wood pallet Christmas tree to decorate a desk or tabletop…but this tree is hiding a very useful secret!
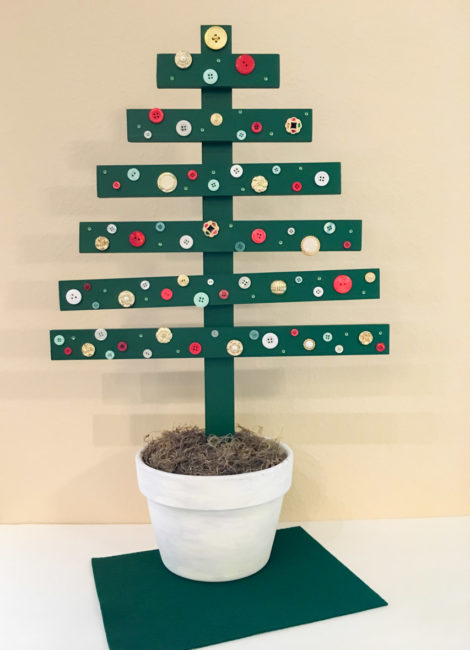
This fun little pallet Christmas tree is equally at home in a dorm room, or a farmhouse style decor. But at 17″ wide and more than two feet tall, it’s a challenge to store after all the gifts are opened. Or is it?
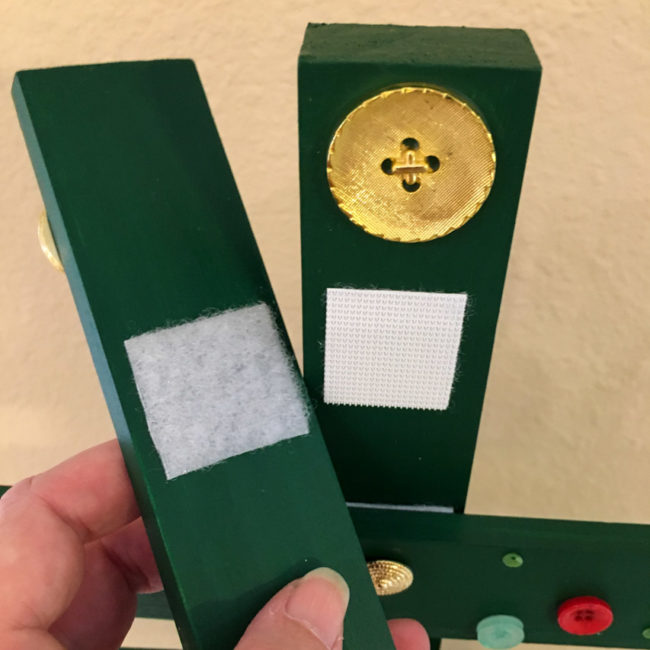
By using Industrial Strength Velcro to assemble the pallet Christmas tree instead of glue or nails, I made it able to be completely disassembled! Just pull apart the Velcro and instead of a big awkward tree, you’ve got a small bundle of wood that can be much more easily packed in an ornament box!
Disassembly also allows the flower pot – which is deliberately not seasonally decorated – to be used year round for flowers or other seasonal decorations when it isn’t being used for the tree.
Supplies Needed:
I started by cutting the craft wood into the following lengths: 6″, 9″, 12″, 14″, 16″ and 17″. Then I trimmed the 1″ x 2″ pine board to 26″ in length.
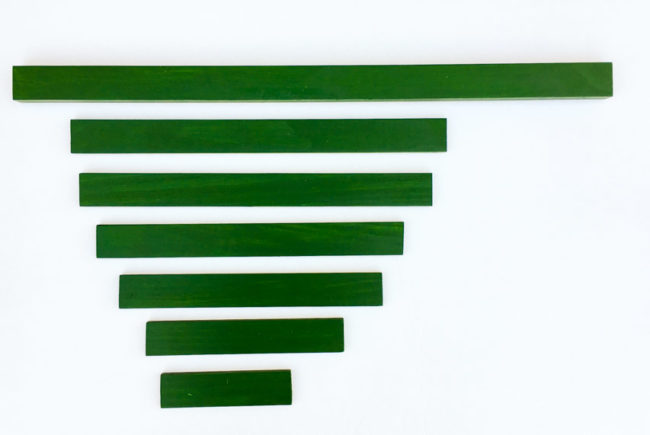
I used the Americana satin paint (made by DecoArt) in multiple thin coats applied with a foam brush to get a nice smooth finish on the boards.
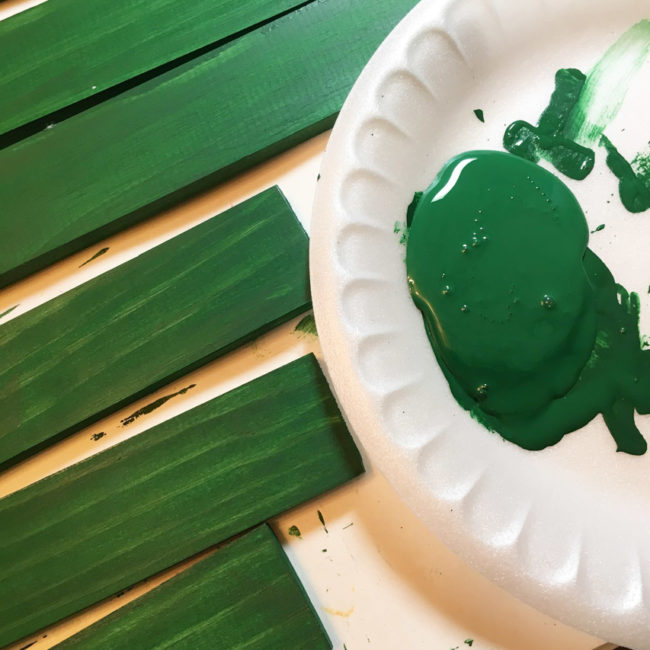
After the paint was dry, I laid out my boards in the arrangement for the tree. Then I started decorating my tree! I used Button Shank Removers to cut off the stems from the Haberdashery buttons, and filled in around them with buttons from the 28 Lilac Lane bottles and kit. Tiny green sequins from the Yuletide Greetings bottle added nice little sparkly highlights around various areas of the tree, too!
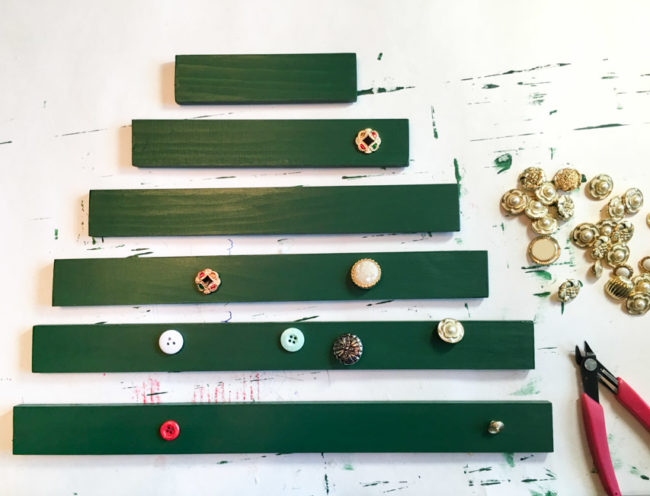
When it was all glued down, I was left with this! Notice how I hung some of the button “ornaments” off the edges of some of the wood branches to add some interest.
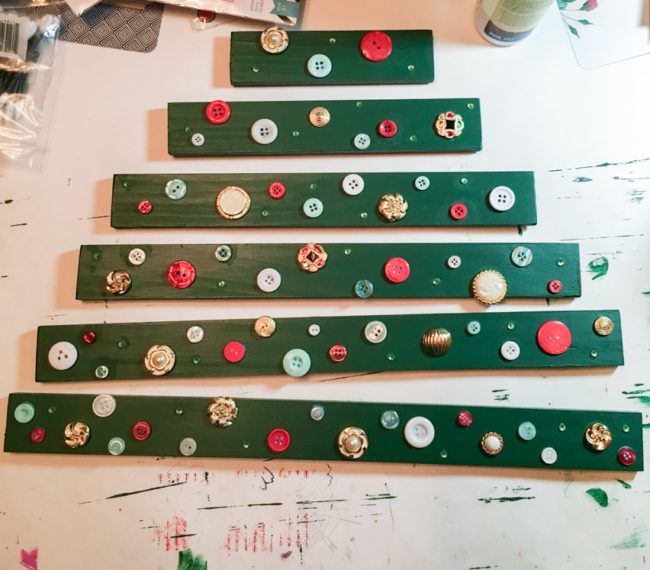
Attaching the branches to the stem was super easy with the Velcro. First, I cut 1.25″ squares from the Velcro. Then I measured and placed a mark at the center of the back of each “branch”. I peeled one side of the Velcro and adhered it centered vertically on the branch, using the center mark to get it centered left to right.
Then I peeled the second side of the Velcro and pressed the branches into place on the tree’s “trunk”. Once they were in place, I glued a big gold button to the top of the trunk as my tree’s top.
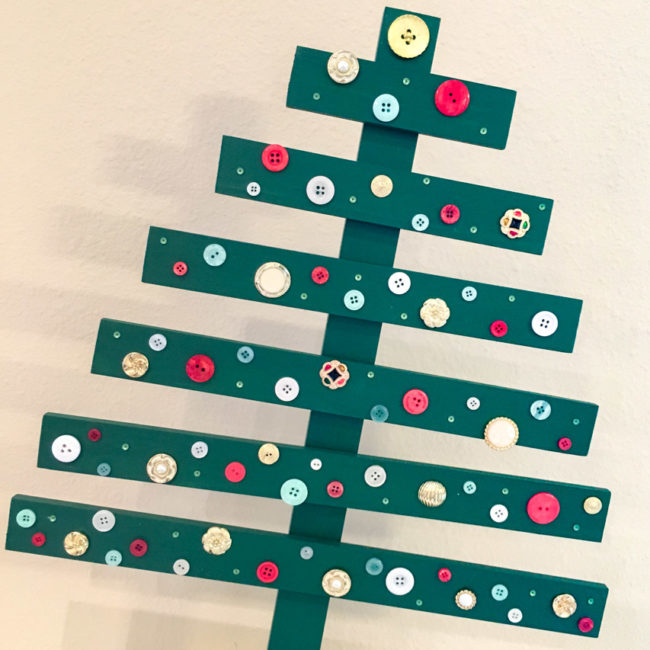
Painting the pot is fast and easy! I just dipped a paintbrush in water and then into the white chalk paint. This diluted the paint and when it spread, it created a whitewash effect. In areas that it didn’t spread as much as I would like, I just dipped the brush in water again and used the water to dilute the paint a bit more.
To create a second layer of paint for a mottled effect in the whitewashing, I repeated the technique with the more cream colored chalk paint. This time I just dabbed the paint instead of trying to fully cover the pot, and it created the textured look below.
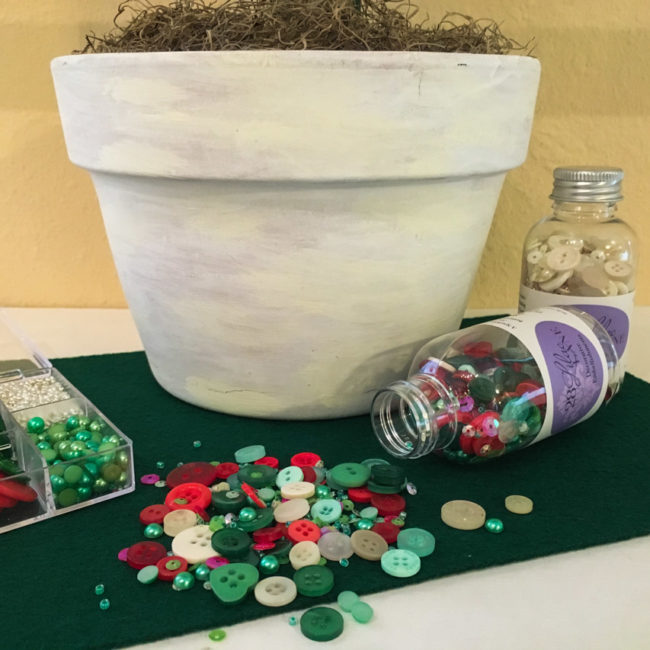
The base is part of what makes the pallet Christmas tree collapsible. I trimmed the foam so that it fit nicely into the pot, and then carved a hole down the middle of it for the tree trunk. To make the fit nice and snug, I wrapped the trunk in a strip of felt. This method makes the fit adjustable as wear and tear erodes away the foam base!
For the finishing touch, to hide the foam, I covered it in a layer of moss.
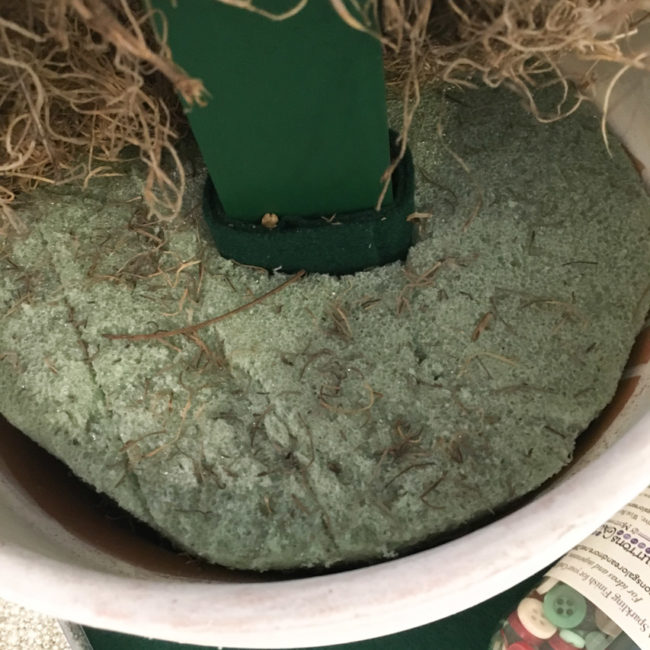
This faux pallet Christmas tree is the perfect decoration for a buffet table, an office, or a kid’s bedroom! There’s so many places to use it…where will you put yours?
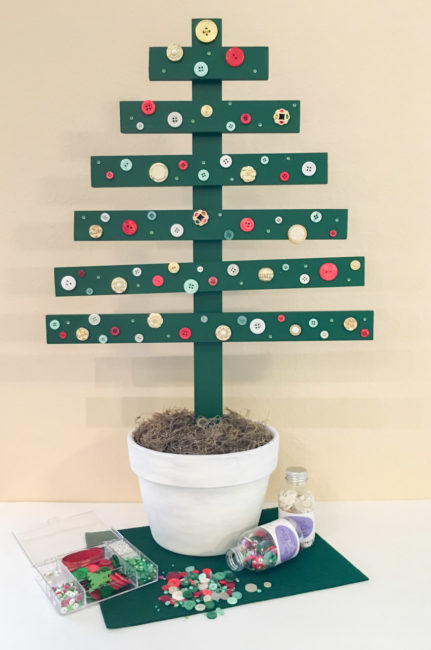
Now, it’s time to get hopping to see more holiday decor ideas. But before you go…how about a giveaway? Here’s a peek at the huge assortment of prizes that are up for grabs!
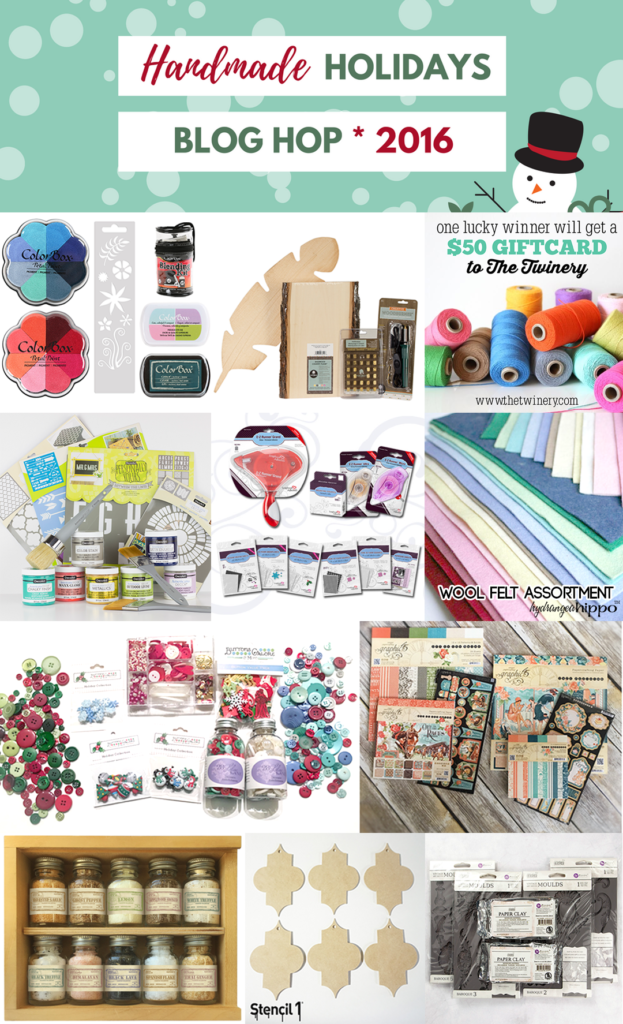
Use the Widget below for your chance to enter!
Thanks to all of our fellow sponsors!
Now…click here to visit the next stop on the hop – or click below to see the entire hop list:

A few weeks ago we introduced you to our six new 28 Lilac Lane embellishment bottles. Candy Corn, Winter Wonderland, Yuletide Greetings, Savannah Stroll, Through the Woods, and Coral Reef embellishments bottles are currently shipping, just in time for holiday projects and stocking stuffers!
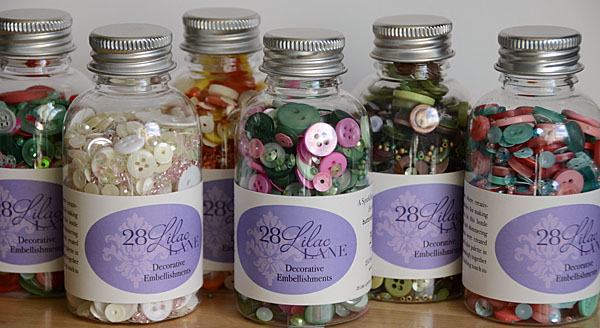
Today, I’m here to show you an up close look at a project by 28 Lilac Lane designer May Flaum! This project uses the gorgeous and versatile 28 Lilac Lane Coral Reef embellishment bottle, a blend of coral pink and shades of green that is seasonal year round.

The delicate tones of Coral Reef are perfect for using with watercolors. With its natural floral color palette, Coral Reef works beautifully for watercolor floral cards! In the video below, designer May Flaum shows how she paired her 28 Lilac Lane Coral Reef embellishment bottle with a stamp to create a quick and easy floral greeting!
Here’s a closer look at May’s finished card…just a sprinkling of Coral Reef embellishments takes this card from simple to simply fabulous! It’s simple, quick, and easy to do, but makes all the difference in the finished card.
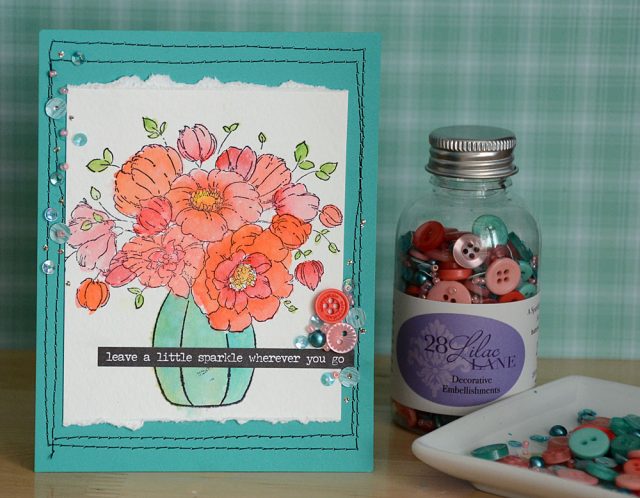
Check with your Buttons Galore local retailer or visit our online store to get your 28 Lilac Lane Coral Reef embellishments today!
Christmas shopping time has arrived…and so has Christmas gift crafting time! A custom piece of jewelry is the perfect DIY holiday gift for a friend or family member…and with 28 Lilac Lane embellishments, a surprisingly easy one!

Supplies:
This locket is built using a very simple process. Fill the bottom of the locket with a single layer embellishments. Start with the large items (the buttons) and then fill in around them with the small items like the beads and pearls. Vary the color and placement of the items. Select a charm but don’t place it in the locket just yet!
Once you are satisfied with the placement of your bottom layer of embellishments, get out your Ice Resin. Following the directions on the package, use the Ice Resin to fill in a layer of epoxy on top of the layer of embellishments. Stop filling when the layer is just slightly covered. Before the resin dries, press the charm that you saved earlier into the top of the epoxy. It should just be slightly embedded, protruding out the top of the epoxy layer.
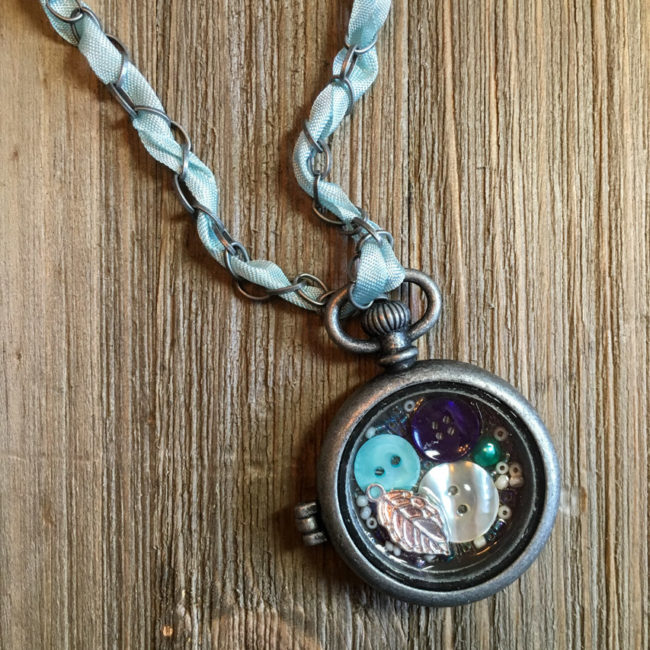
To create the ribbon embellished chain, thread a large needle (or a knitting darning needle) with the ribbon. Then weave it in and out of every other link the chain so that it is threaded into it. Tie the ribbon off to the chain at each end.
The fun thing about these DIY holiday gift lockets is that they can be created for any theme or color scheme, to perfectly match the recipient it is intended for! To see a different interpretation of this project in a pink color scheme, check out our previous mixed media locket article.
In only a few weeks, December will be upon us! For many scrapbookers, that means recording our December holiday celebrations in special page-a-day pocket scrapbooks. Our 3D buttons are a fun and simple way to add embellishment to your December album!
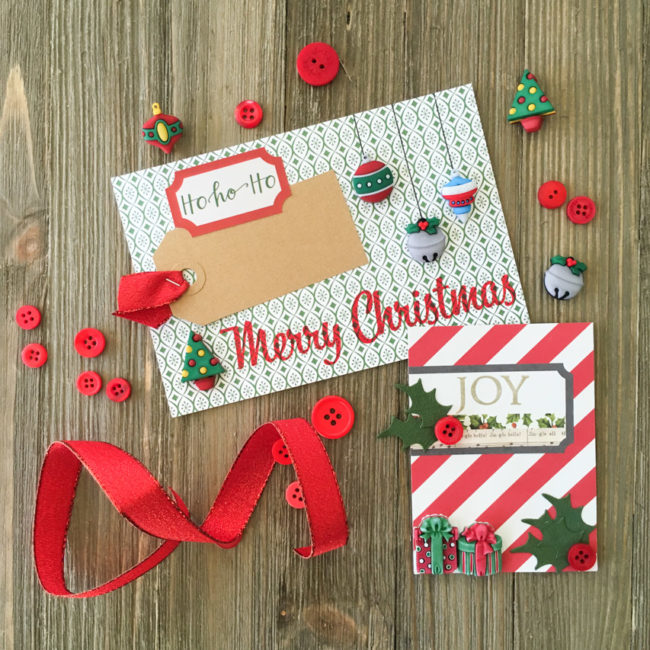
Most of us using pocket scrapbooks for our December album will have at least a few 4×6 cards in our album to highlight important topics or days. This journaling card could hold very large number stickers to put focus on a special date (such as #25) or the kraft colored tag could be used for journaling space!
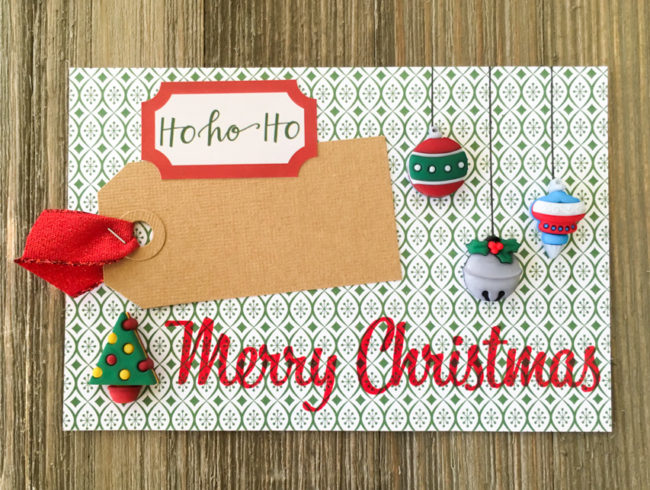
Supplies:
To make this card, I cut a 4″ x 6″ piece of patterned paper. Then I stamped “Merry Christmas” on the bottom right and embossed it with clear embossing powder. After I die cut the tag from cardstock, I looped ribbon through the hole, and secured it with a staple. I adhered the tag in place and laid the sticker in place on top of it.
The buttons were the final touch. These buttons are shank buttons, so I had to use button shank removers to give them a flat back. Before gluing them down, I used a pen to draw “strings” from the top of the card to the locations of the baubles that I wanted hanging. Then I glued all three buttons down on top of the drawn strings, and also added the Christmas tree in the bottom left corner.

Supplies:
I also started this 3×4 card by stamping the sentiment in the upper part of the white box. Then I added the washi strips in the bottom part of the box, trimming them so they fit the decorative shape of the bottom corner. I die cut the small holly leaves and adhered them, adding small red buttons as berries. Finally, I cut the shanks off of two 3D present buttons and glued them down in the bottom right corner using PPA Matte adhesive.
Whether you are using a kit or doing it yourself, we’ve got the perfect buttons for your December album. Visit the Christmas category on our website, or our new section to see our latest releases to find great options for your album!
October is half over and that means it’s beginning to look a lot like Christmas in most crafter’s work spaces! Today, we’re going to share a few ideas of how to embellish a Christmas gift box with buttons to make your gifts look extra special.
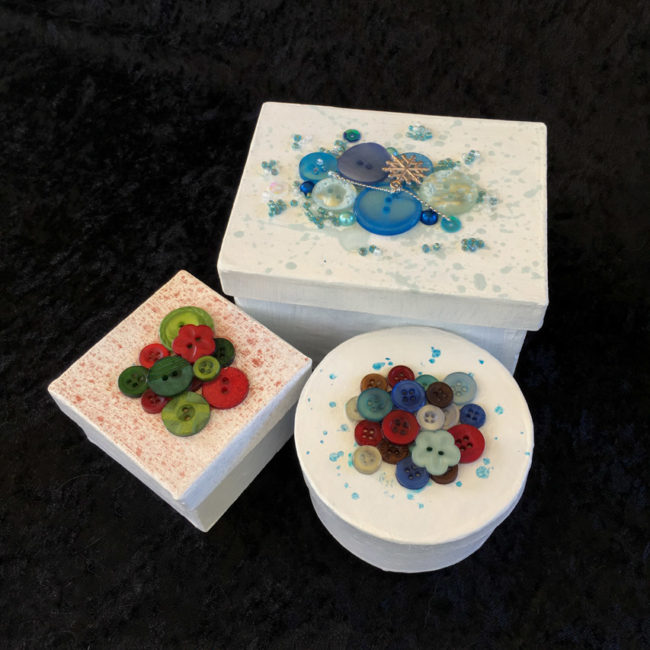
All of these boxes are created from paper maché boxes that are painted with white acrylic paint. Then the tops of the boxes were splattered with spray ink or paint to add some color, before buttons and other embellishments were added.
The large rectangle Christmas gift box is created with embellishments from the 28 Lilac Lane “Let It Snow” embellishment kit. To create this embellishment collage, I started by laying down a pool of white glue in the middle of the lid. Then I placed the large items first, creating the arrangement of the buttons. I filled in around the buttons with the small embellishments like the sequins and beads, creating a feeling of an explosion of embellishment spreading across the lid. For the final touch, I glued the snowflake charm from the “Let It Snow” kit on top of the button collage.
Supplies:
For the round box, I used the new “Winter Wonderland” Button Bonanza. I started this one by making the first layer of buttons. Then, once that layer had dried securely in place, I glued a second layer of buttons on top of the center of the first layer.
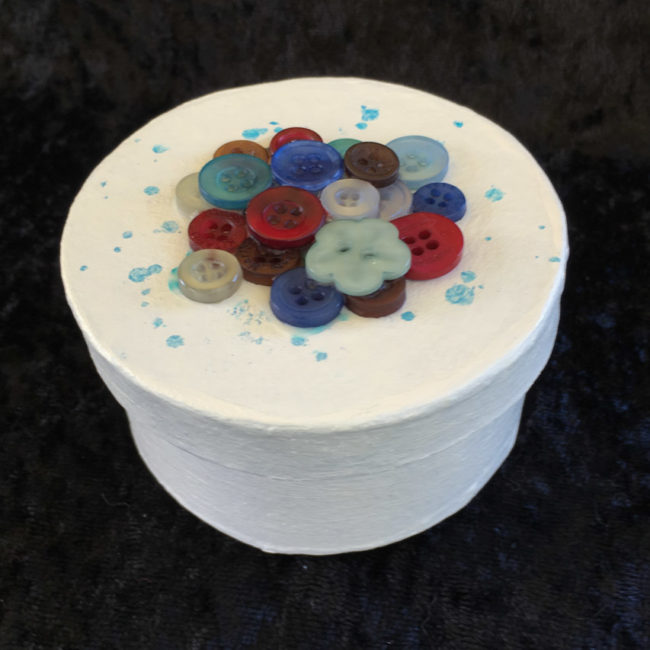
Supplies:
I used the same technique on the square box, creating a two layer collage of buttons one layer at a time. The key to making the prettiest collage is to vary the size and type of the buttons that you use. Also, it helps to balance the colors. On this box, the center has one of each color, and then there is an outer ring that shows the green shades alternating with red.
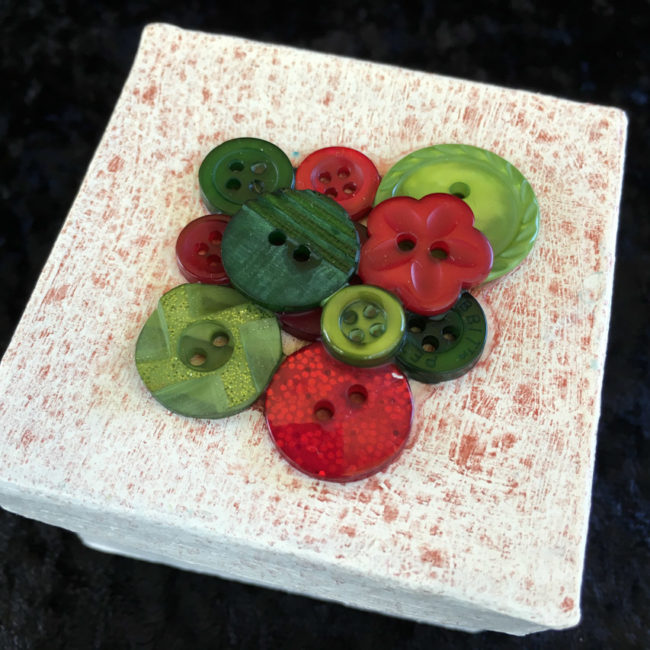
Supplies:
Grab some boxes…grab some glue…this project only takes a few minutes to make beautiful holiday gift packages. And it’s so easy that the kids can help out. What are you waiting for? Button up a few holiday gifts!
I could not be more excited to announce six brand new 28 Lilac Lane embellishment bottles. I’ve added in new sequin sizes, all new colors, and I am thrilled with how these beautiful mixes turned out. From scrapbooking to mixed media canvas projects to decorations for the holidays – there is a lot to love in these mixes and I hope you enjoy creating with them as much as I do!
Candy Corn is inspired by my favorite fall treat, all yummy shades of yellow, orange, and white just perfect for Halloween crafting and so much more. From citrus inspired creations to bright summer scrapbooks this mix will be perfect year-round. The best part? This mix is calorie and guilt free.

Coral Reef is full of rich aqua hues and shades of coral – blending together beautifully for a bright and beautiful mix. Feel like stepping outside the box? Try this embellishment mix for some non-traditional color palette Christmas crafts!
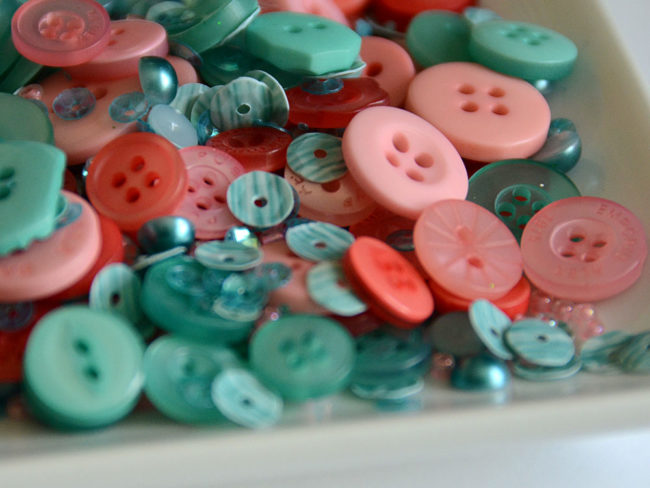
Savannah Stroll is inspired by the flowers and greens in one of my favorite cities. A city so perfect in spring time, I wanted to capture some of my favorite shades and bottle them up to use on all kinds of creative projects. From the soft green beads to the pink buttons I love every part of this lovely mix.
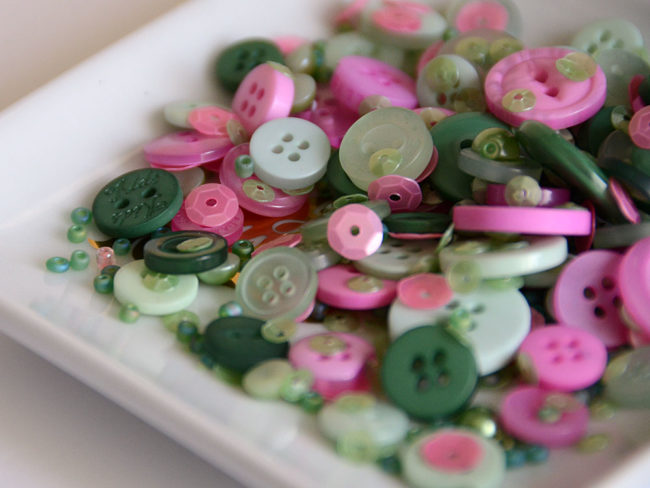
Through The Woods is as the name implies, a stroll through the woods! My favorite element in this mix is the woodgrain sequins. I can’t get enough of them and I love all of the rich green and brown hues not only for my camping and hiking scrapbook projects, but for all kinds of nature inspired creations!
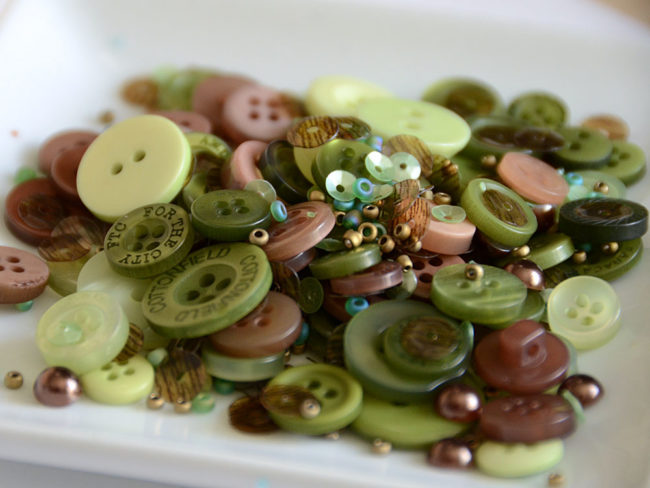
Winter Wonderland is inspired by bright fluffy fresh snow and all the shades of a white Christmas. While it doesn’t snow here, it seemed like the perfect name for such a mix. Of course if you’re simply needing more white in your embellishment stash or you have a special bride you wish to create something special for this would also be the perfect mix for you.
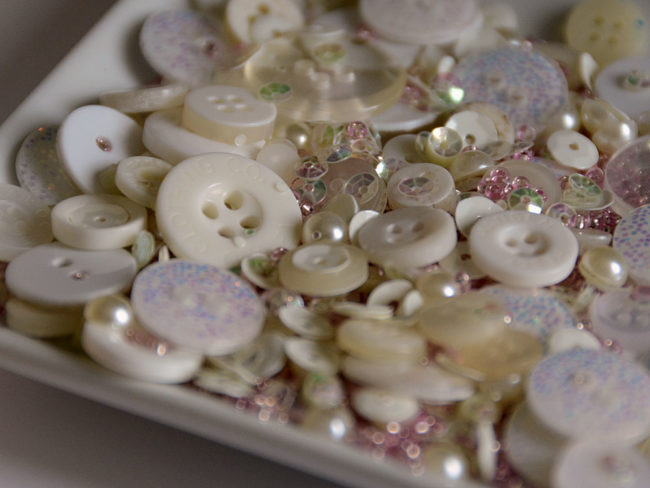
Yuletide Greetings is a season I can’t get enough of! From decking the halls to making things merry, I’m always in for a good traditional holiday mix like this. I am especially excited about all of the shades of green in this mix.
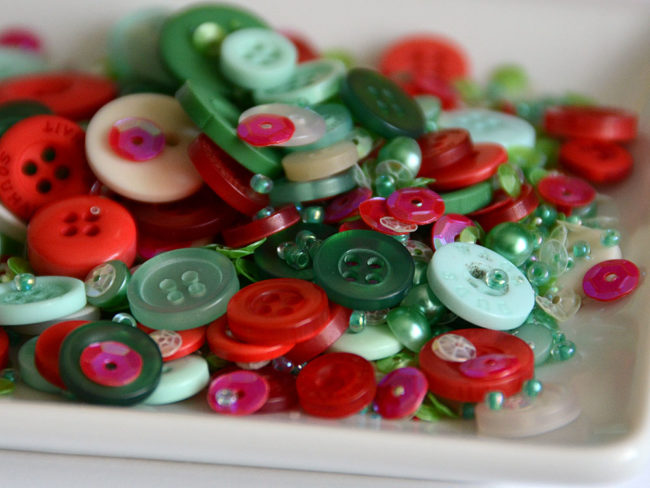
These new 28 Lilac Lane embellishment bottles are shipping now, so check with your local retailer about availability!
I’m dreaming of shorter days and weather cool enough to wear sweaters! This summer has been so hot and rough – I’m ready to be done with it! Oh, and it probably has something to do with fall being my favorite season as well.
Today I’ve got a card to share that features my fall inspired Autumn Afternoon embellishment kit from my 28 Lilac Lane line. Here is a look at the finished card:
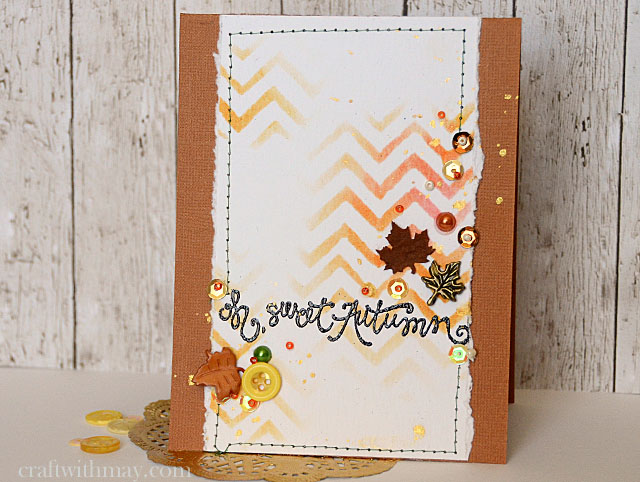
The process to make this card is simple!
It is really that easy!
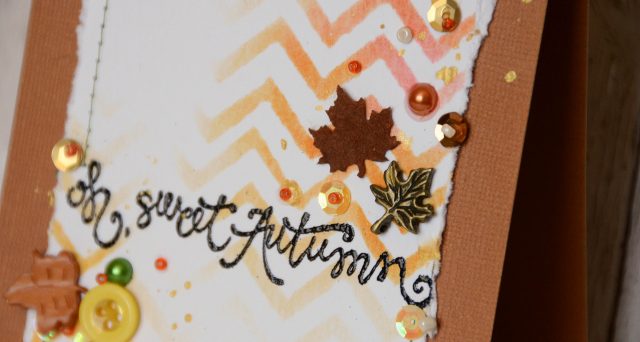
Now I’m back to dreaming of autumn, cocoa, and ending these triple digit days!
Autumn Afternoon isn’t the only fall-themed 28 Lilac Lane kit…don’t miss out on the 28 Lilac Lane Limited Edition Fall Mix that is only available in the Buttons Galore online store! Looking for some inspiration of what to do with my fall limited edition mix? Check out these bloggers! Ashli Oliver, Libby Hickson, Maura Hibbitts, and Rebecca Vick all have outstanding posts up. Enjoy!
We’ve got Christmas cards on the brain here at Buttons Galore! Since World Cardmaking Day the first weekend of October is the unofficial launch of the holiday card making season, we’re sharing another card idea today to help your Christmas card planning. Our buttons, sequins, and beads are the perfect easy and affordable embellishment to use for making loads of Christmas cards.
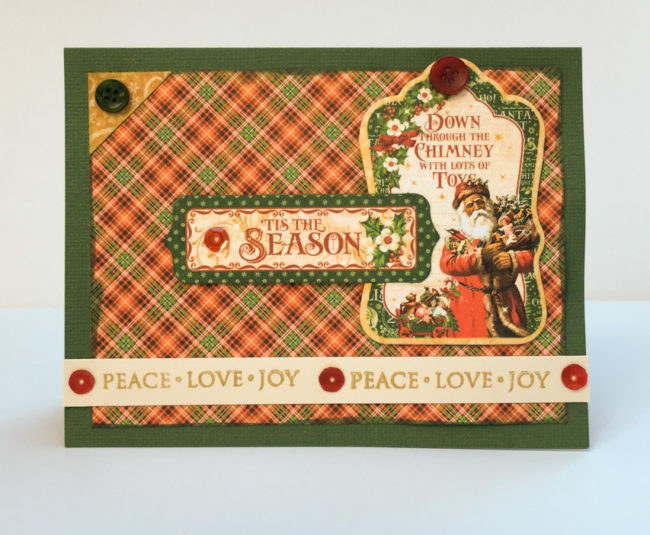
Supplies:
Creating this Christmas card is quick and easy with buttons, and pre-coordinated paper and embellishments.
Start by cutting a piece of plaid paper that is 5″ by 3.75″. Ink the edges with the green Fluid Chalk and adhere it in the center of the front of the card base.
Cut a triangle from the gold paper, and adhere it in the upper left corner of the plaid paper block.
Adhere the large chipboard piece in the upper right corner of the card. Adhere the “Tis the Season” tag layered on top of it, using foam adhesive dots for the end not on top of the chipboard.
To create the bottom text strip, cut a 1/2″ strip of cream cardstock. Use the Shimmer ink to stamp the sentiment twice across it, leaving room in the middle for a button. Adhere across the bottom of the card.
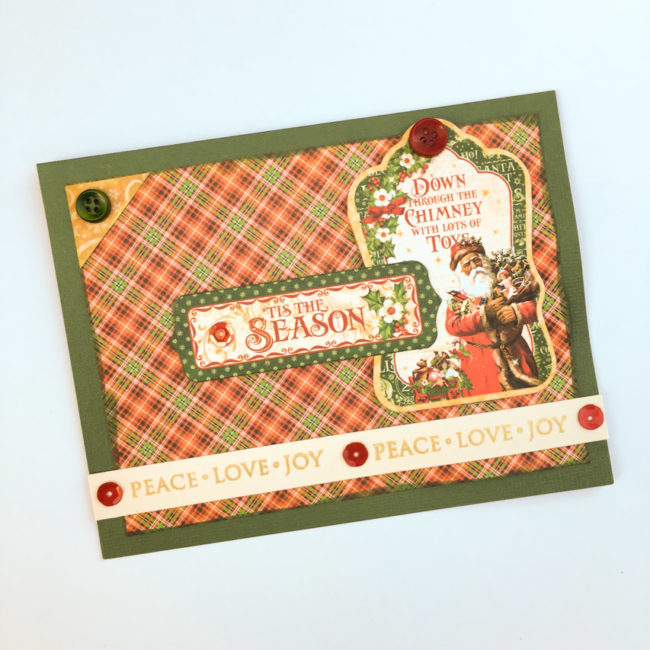
Using the PPA Matte Adhesive, place small dots of adhesive on the stamped strip and the sentiment tag. Press sequins into them and allow to dry. Also use the Matte Adhesive to adhere the buttons on the corner frame and the chipboard embellishment, and allow to dry.
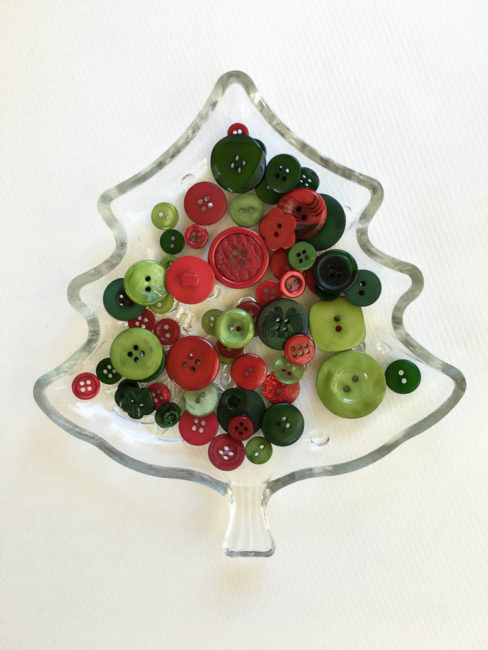
“Tis the Season” Button Bonanza is perfect for vintage color schemes, and if brighter is more your style, don’t miss “The Merriest” Button Bonanza, with bright green, bright red, and pastel pink & blue! We’ve got your Christmas cards buttoned up!

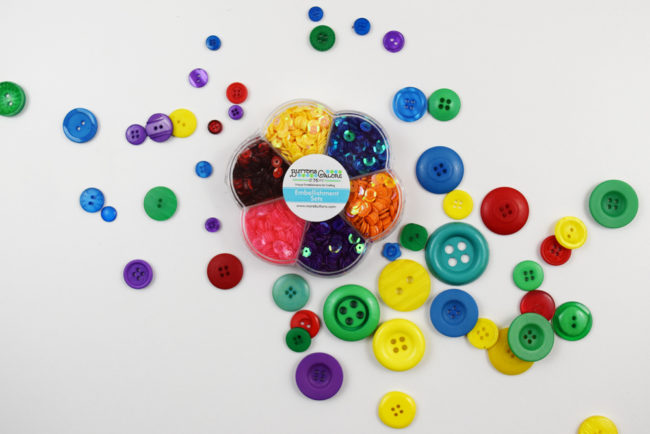
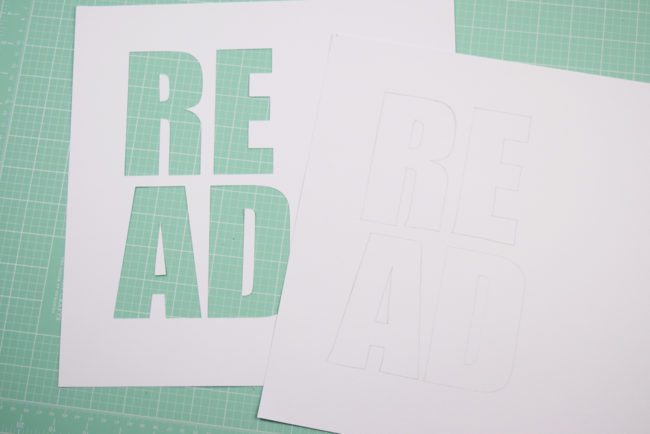 I started by cutting my title with an electronic die cut machine. I cut the “read” portion of the title out of white cardstock with large block letters. Using a pencil, I traced the cut portion of the title onto another piece of white cardstock. I used this as a template for adhering the buttons and sequins.
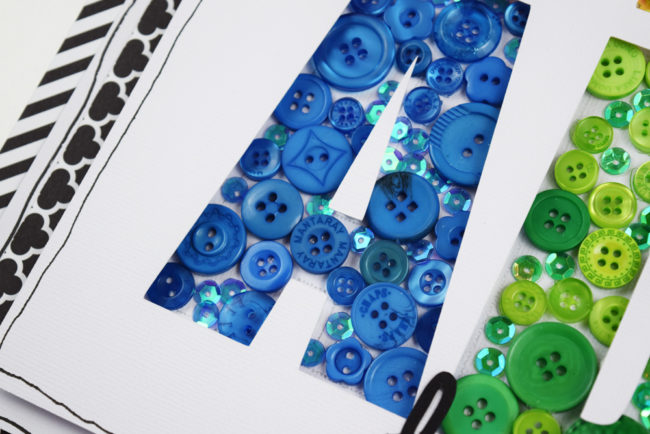
For this portion of the project, I turned on Netflix and started gluing buttons and sequins in place. I started adhering the larger buttons first and then filling in the gaps with smaller buttons and sequins. I would recommend using a strong adhesive for this technique as the cardstock can buckle under the weight of the buttons.
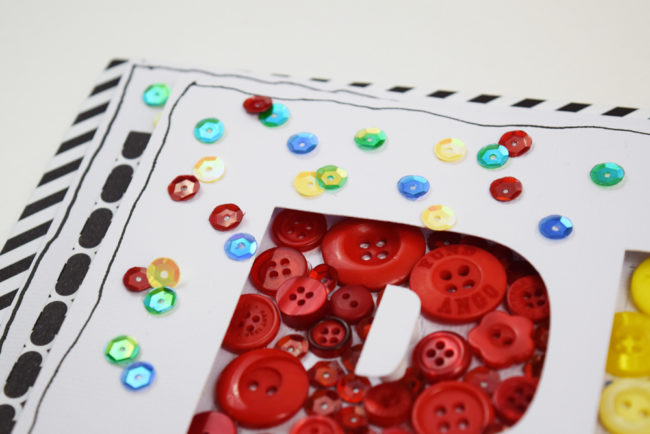
When I had all the buttons and sequins adhered to the background cardstock I used foam pop dots to adhere the die cut “read” on top of the button/sequin layer to create this awesome button title.
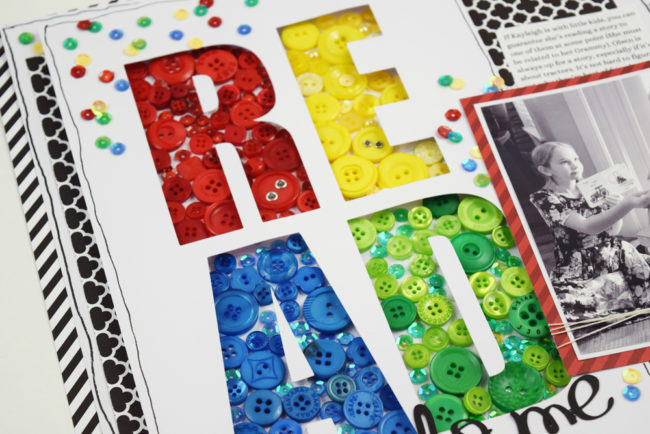 I finished the layout by adding my photo, journaling, and a few more sequins on the top layer.

The buttons and sequins made this layout stand out with TONS of bright colors and textures. I can’t wait to use this button title technique again! Thank you for stopping by the Buttons Galore blog today! I’ll see you again soon!
This week, we’re introducing a special Limited Edition 28 Lilac Lane “Fall Mix” embellishment kit by May Flaum! This kit is only available from the Buttons Galore online store – and stay tuned to the end to learn how to get a special introductory discount!
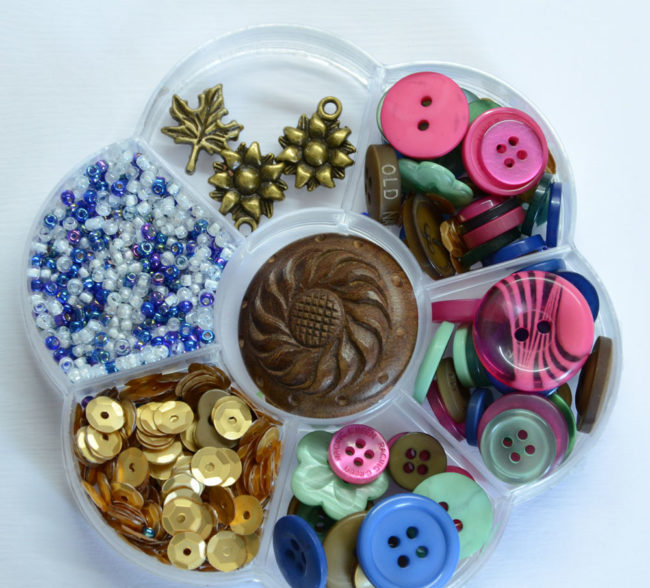
With jewel tones, soft green, brown – and gold! – this color mix by 28 Lilac Lane designer May Flaum is perfect for embellishing gorgeous fall projects that aren’t quite right for the traditional rust and orange tones of fall.
Here’s a peek of a thank you card that May created with the new 28 Lilac Lane Limited Edition Fall Mix, using a stamp from Tammy Tutterow:
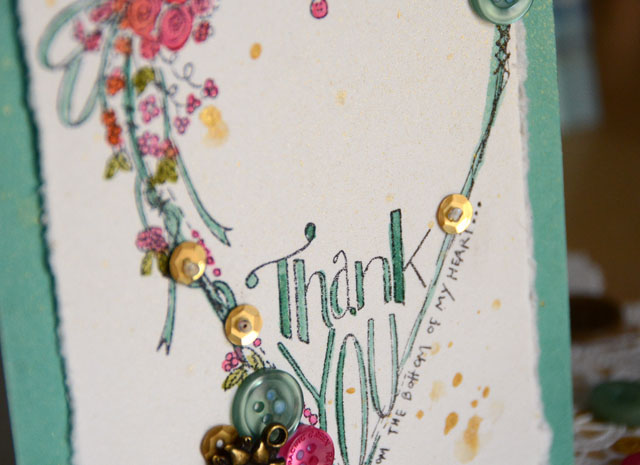 For the full how to tutorial about the card, check out the video below!
And finally, here’s May’s finished thank you card. The stamp is pretty by itself, but embellished with a few sequins, buttons and charms, it is extra special! This beautiful card makes the perfect thank you for any occasion.
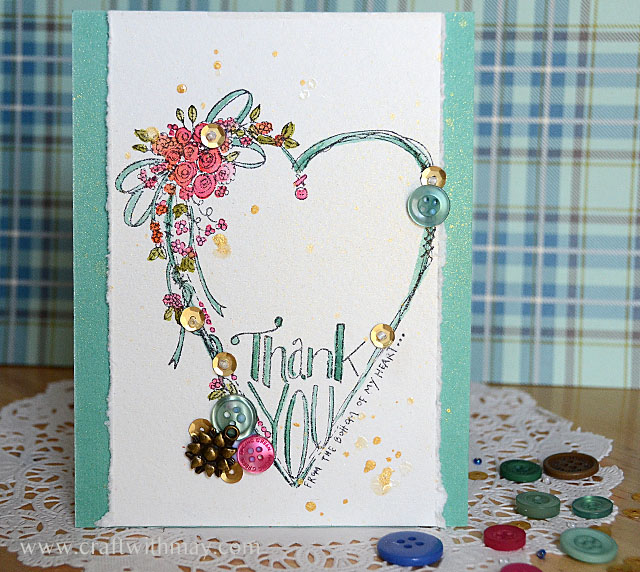
The new 28 Lilac Lane “Fall Mix” designed by May Flaum is a limited edition, so make sure to get it while it lasts! Use coupon code “LL400” until 11:59pm eastern time on Friday to get $1.00 off. Better yet, this coupon can be stacked with the Beat the Clock sale going on sitewide now through Saturday. The sooner you order, the more you save!
And don’t forget that orders over $30 get free U.S. shipping! We’ve got the entire collection of 28 Lilac Lane embellishments in stock, as well as six fabulous new Button Bonanza collections (including seasonal blends for Halloween and Christmas) as well as our perennial favorites like our Button Basics, 3D buttons, and Haberdashery collections. Stock up now for Halloween and Christmas projects and save!
Editor’s Note: Today 28 Lilac Lane designer May Flaum is visiting us on the blog to introduce her new Limited Edition 28 Lilac Lane “Fall Jewels” Mix that is available only from our online store while supplies last!
When I think about fall I think of cooling temperatures and cozy sweaters, bringing in jewel tones and saying goodbye to summer brights. Inspired by these things, I have pulled together this new limited edition mix of embellishments to celebrate my favorite season. For anything from back to school to falling leaves, paired with the autumn afternoon kit or used on its own – this mix is sure to inspire a wealth of crafting ideas. From a beautiful carved button to the berry, green, and blue buttons and plenty of matte gold sequins you won’t want to miss out on this special mix.
One of my favorite things to do is create a card with a simple hand cut or die cut shape, a sentiment sticker or stamp, and plenty of embellishments! Inspired by the large beautiful wood button in this mix, I started from there and worked smaller with my details. Clustering embellishments is one of my favorite things to do, and I always encourage people to start with the biggest and work smaller to fill any gaps or spaces.
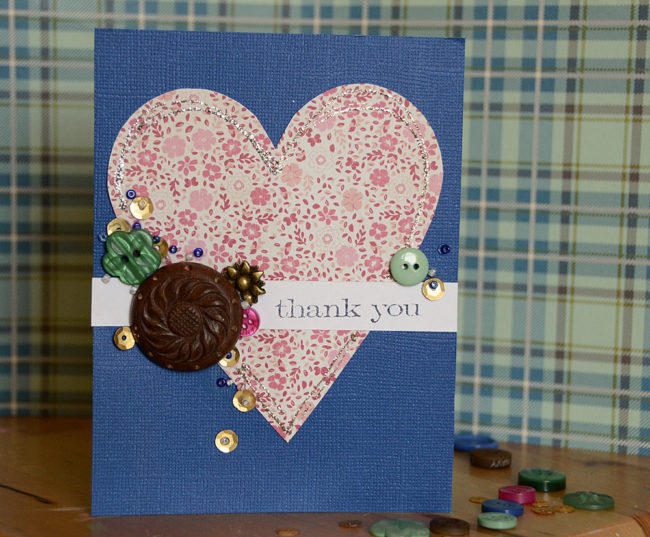
I do so love to decorate frames with buttons and embellishments, but this time I didn’t have a frame quite the right color. What’s a crafter to do? Recolor it! I used alcohol inks, however paints, staz-on ink, or other color mediums could also work well depending on your surface. To keep the focus on the photo and the project from being overwhelmed I worked in one corner instead of covering the entire frame.
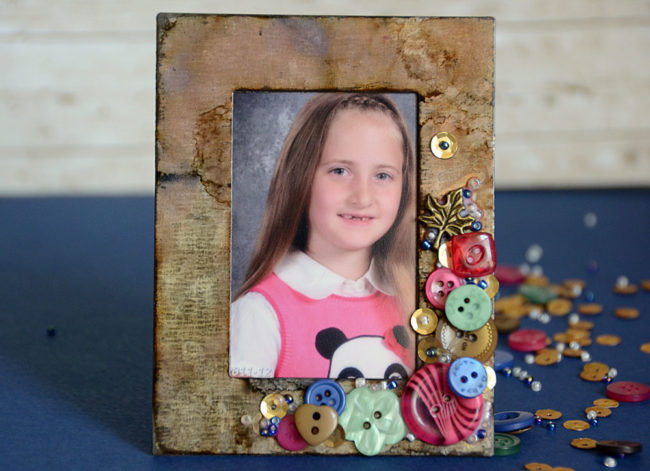
Both of these projects would work with any of the 28 Lilac Lane products, and this new mix is beautiful combined with a number of other kits and bottles such as the Attic Findings, Paws & Pets, Autumn Afternoon, Toasted Graham, Birds of a Feather, and more.
SPECIAL OFFER: This limited edition 28 Lilac Lane “Fall Jewels” kit, regular price $6.99, is available through Friday for a special price for $5.99 if you use code “LL400” when you order!
Don’t forget that all orders from our online store over $30 qualify for FREE SHIPPING!
You can find all of these products that May mentioned in her video in the Buttons Galore online store:
It’s always a good idea to have some thank you cards on hand to share your gratitude with others. This big thank you card featuring 28 Lilac Lane products will make an impact at a full 6″ by 6″ in size!
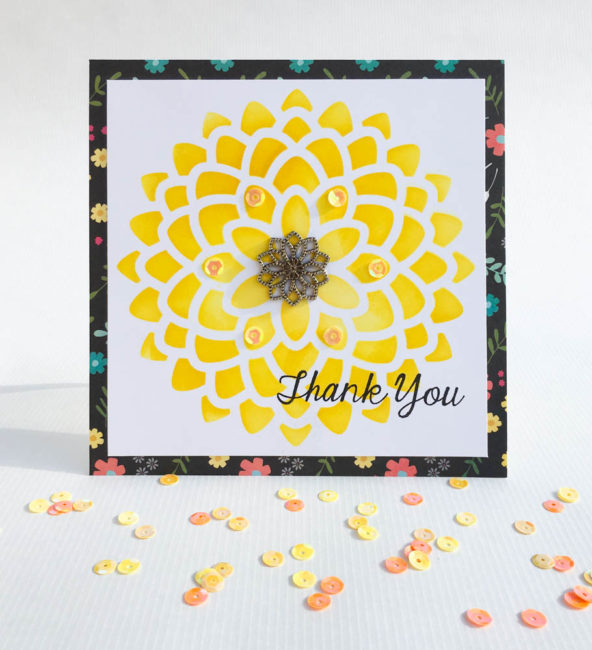
Supplies Needed:
When I was making this, I knew that I wanted a button to decorate the center of this design but wasn’t sure what until I saw this rosette button in the “A New Leaf” kit while I was creating my card. It’s very ornate, but it matches almost perfectly the mum design! The visual repetition that it creates is perfect. I could also have taken a regular button and tied it on with contrasting thread for some pizzaz.
I also like using sequins that are the same color as the background that I place them on as an embellishment! This technique adds a bit of shine and dimension to the design without the sequins being too garish. On this card, I used the sequins to create a sun kissed circle of highlight around the center of the flower.
To begin making your extra big thank you card, cut a piece of white smooth cardstock that is 6″ x 6″. Center the stencil on the cardstock. Holding firmly, begin to scrub the lighter color of ink (squeezed lemonade) into the design with the ink blending tool. A circular motion blends best.
Work the Squeezed Lemonade into the center half of the design and then switch to the darker color (Mustard Seed) for the outer half of the design. Once all of the design has been inked, switch to a clean blending foam and begin to rub in a circular motion to blend the colors together where they meet.
Once the ink is dry, trim the white cardstock so that it is just slightly larger than the stenciled mum design. Cut a piece of matching patterned paper that is 6″ x 6″ in size. Adhere the stenciled design on top of the patterned paper and attach them both on top of a card base. (The card base can be made by folding a 6″ x 12″ piece of paper in half.)
Stamp the sentiment in the bottom corner of the card. Cut the shank off of the featured button and glue it into the center of the stenciled design with PPA Matte adhesive. This adhesive is great for working with our buttons – it will hold the button in place but will dry clear and invisible if it leaks out around the edges of the button or through the holes in the button!
For the finishing touch on your big thank you card, select a few yellow sequins from the assortment in the 28 Lilac Lane “A New Leaf” embellishment kit, and glue them onto the design around the center of the flower using PPA Matte.
Floral design cards are great for many occasions. Instead of “thank you” consider substituting sentiments for birthdays, housewarming, or other occasions. This easy card will bring a smile to someone’s face!
Think our 28 Lilac Lane buttons are too beautiful to hide at home in your craft room? We do too! That’s why I made this this beautiful locket that showcases some of my favorite elements from the collection. This mixed media locket is a fun and eclectic piece of button jewelry that will let me show off my love of crafts in a fashionable way.
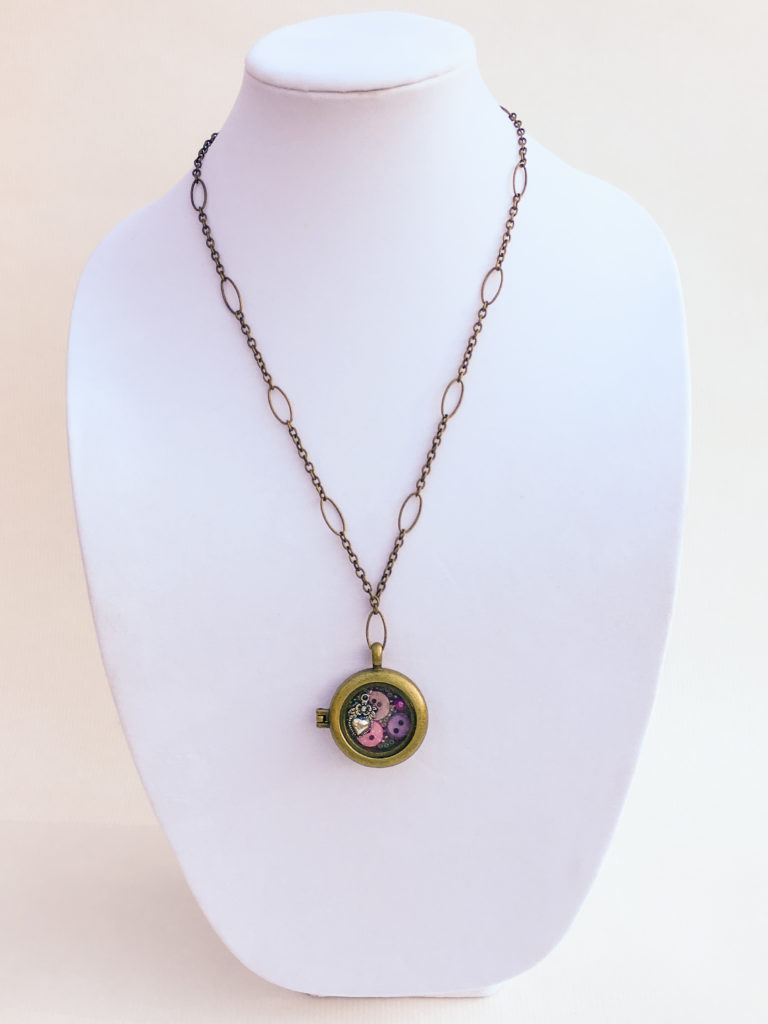
Supplies needed:
This mixed media locket is created by encasing 28 Lilac Lane embellishments in Ice Resin, a clear drying epoxy that is available in single use syringe dispensers. It’s a fast and easy project that can easily be completed in an hour or so, except for allowing dry time for the epoxy.
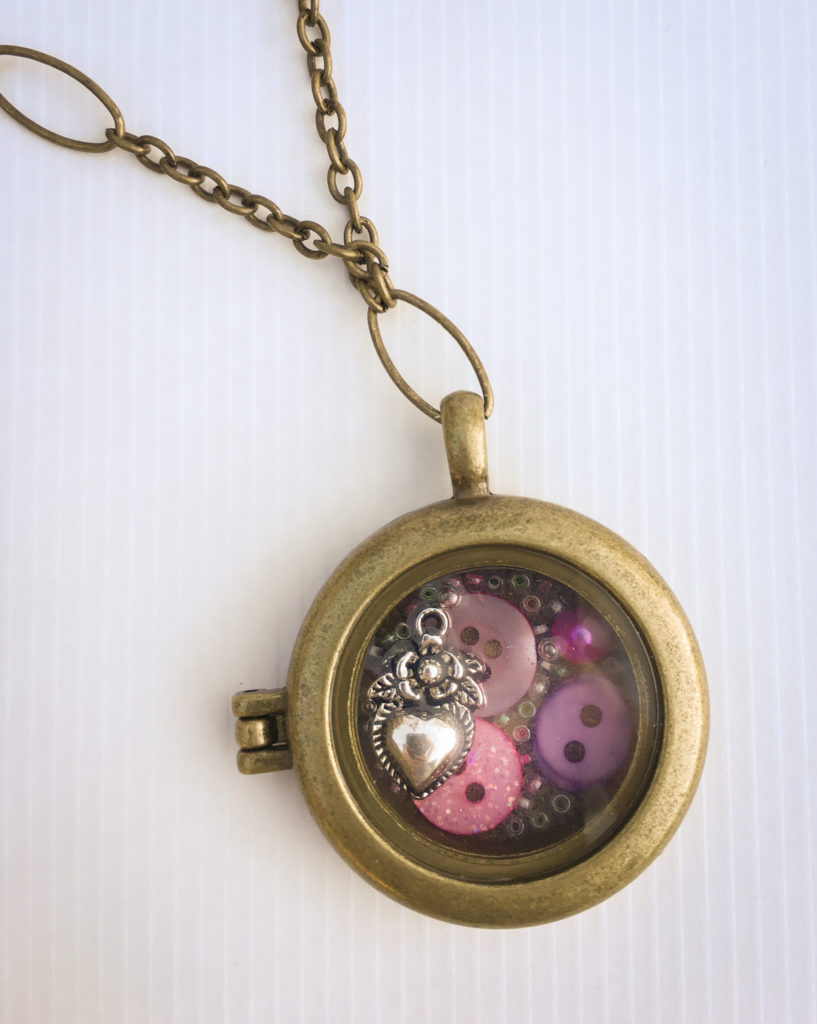
To make my design, I started by arranging the large colored items – the buttons and the flat back pearl – inside the locket. Once I was happy with how they looked, I gently filled in around them with the seed beads. This part of the process requires patience, as sometimes it means placing the beads one at a time.
Once the bottom layer of embellishments is placed, I selected a charm to place on top and set it aside.
Working with the epoxy was something I’d wanted to do for awhile but I was, I admit, a bit intimidated to try it. It turned out to be very easy – just push the plunger down to get the amount that you want, and stir! Once the epoxy was mixed well, I poured it over the bottom layer of embellishments to cover and hold them in place in the locket. Then I quickly pressed the charm down on top of the epoxy, so that it was just barely embedded and stuck out from the top. (Be very careful to not get your fingers in the epoxy! I suggest dropping the charm in and then using a toothpick or other tool to nudge it into place.)
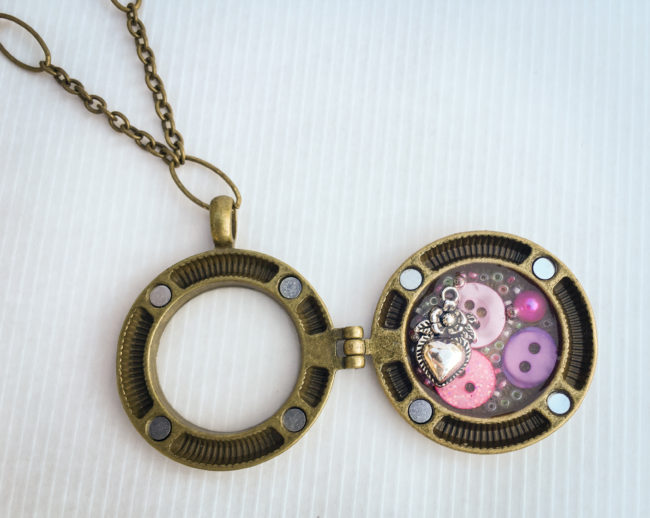
Once the resin is dry, you can add a chain to your locket. Then you can wear and enjoy your mixed media locket masterpiece to share your love of crafts – and 28 Lilac Lane – through fashion!
Shaker cards are a fun and easy way to make fast cards that look way more complex than they are. They pack a big visual punch, but are surprisingly simple to make!
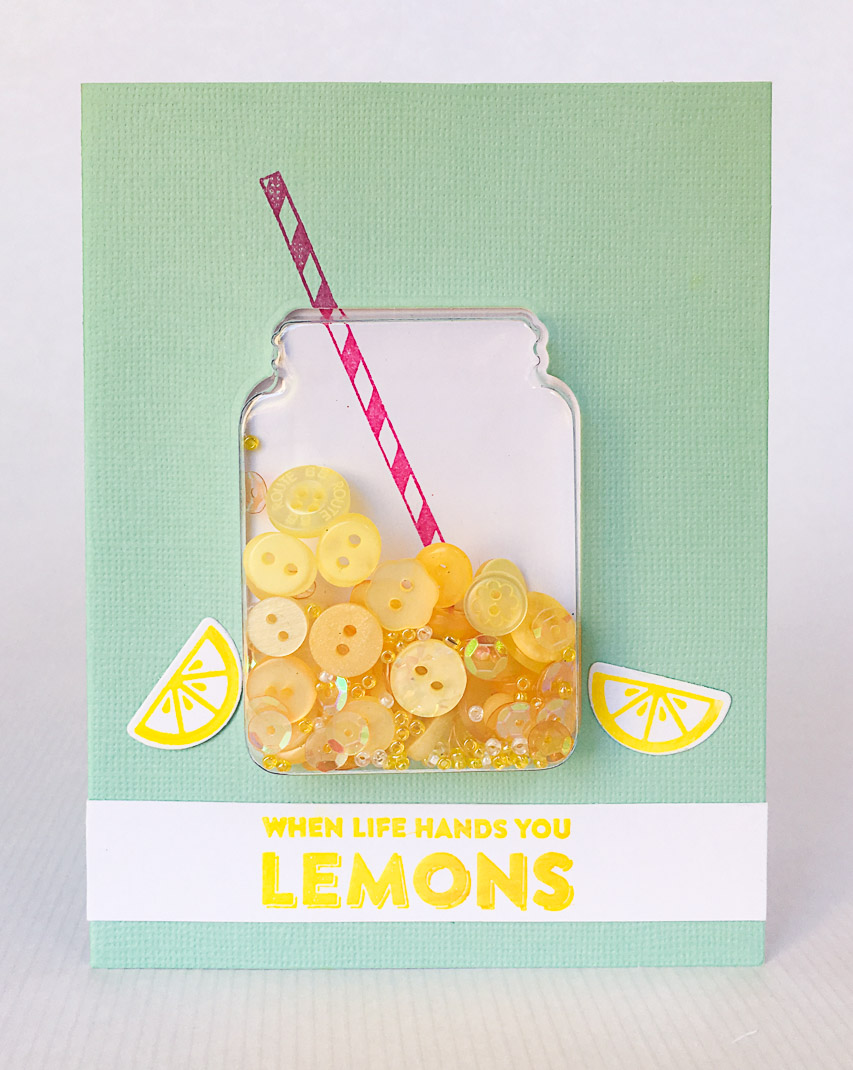 Supplies:
This shaker card is based around Jillibean Soup’s matching dies, stamp sets and shaker box inserts that make mason jar shakers. They are a great size for filling with buttons, sequins, and seed beads – the contents of our 28 Lilac Lane embellishment bottles!
For this card, I used the “Hello, Sunshine” bottle to make it look like this jar shaker was filled with lemonade. The sequins in the mix add a nice extra bit of sparkle to the shaker!
Filling this mason jar with a rainbow assortment of buttons would turn it into grandma’s button jar for a more generic sentiment like “thank you” or a new home welcome card.
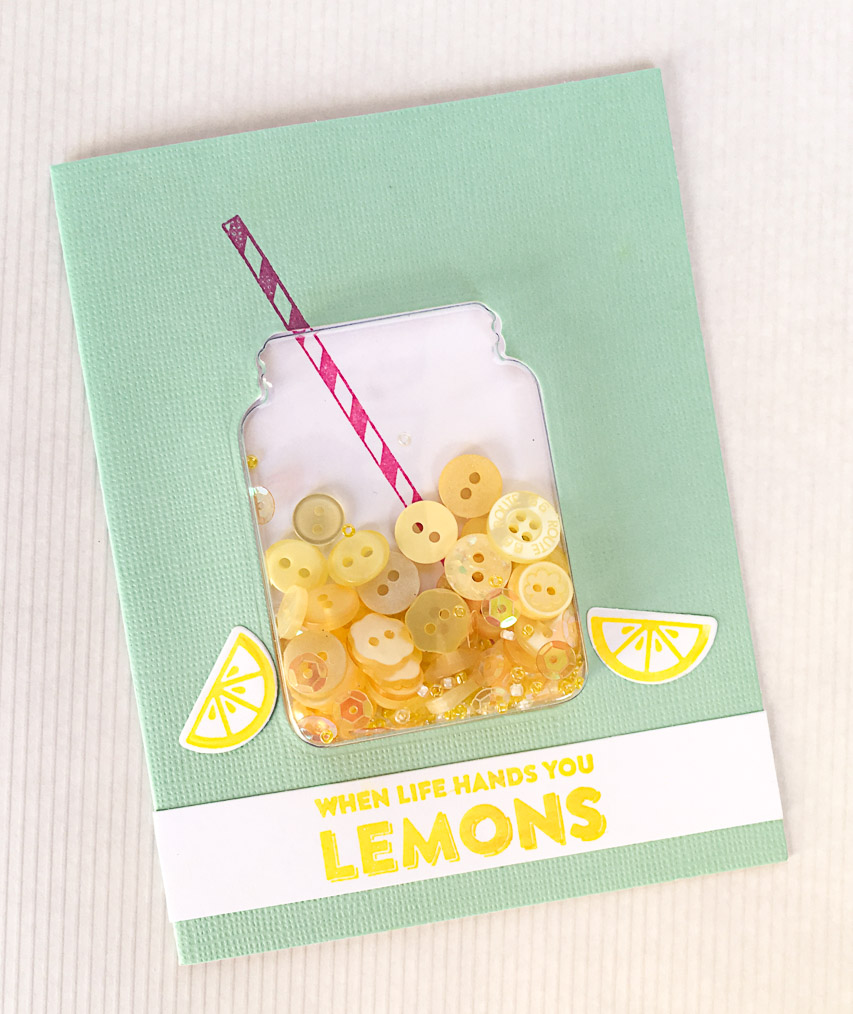
Don’t forget that if you are giving this card to a crafter, our 28 Lilac Lane embellishments aren’t just functional – they also make the card a fun little bonus gift! After the party is over, the recipient can recycle the card, open the shaker box, and save the embellishments for using on a project of their own!
Needles are easy to lose, and not the sort of thing you want to find accidentally in your sewing box (or on the sewing room floor). Our pretty and easy to make needle book will keep your needles safely organized and ready to use any time that you need them!

Supplies:
This needle book can be make in any size that you would like! Cut 2 pieces of felt the same size for the interior pages, and then cut a piece of fabric that is slightly larger than the felt to make your cover with.
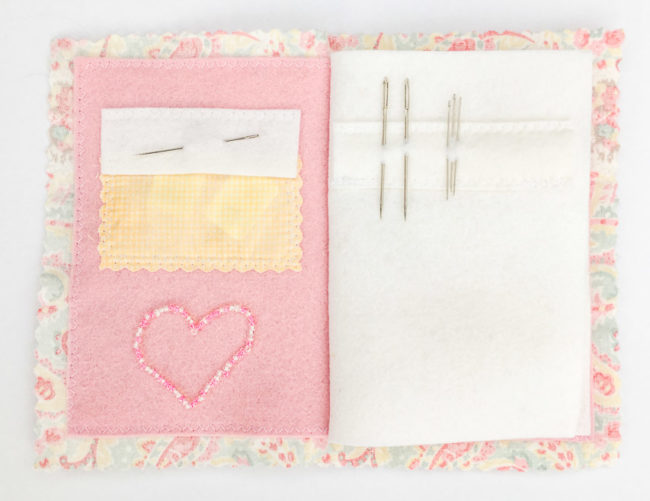 Start construction by working on the piece of felt that will make the inside of the cover (mine is pink).
Use pinking shears to cut a small pocket and sew it to the upper left side of the piece (inside the front cover). This will serve as a pocket for needle threaders! To keep them from falling out, cut a flap of felt and stitch it over the top of the pocket.
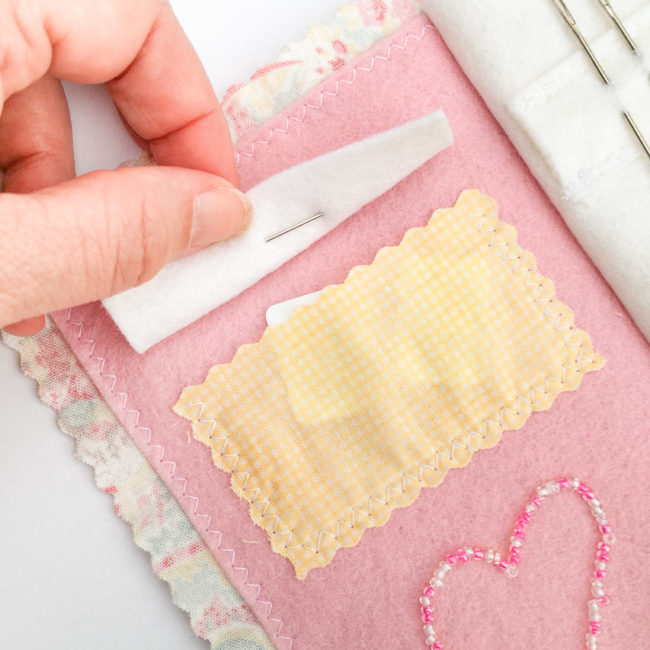
Below the pocket, draw a shape with a fabric pencil. I chose a heart. Use a needle and thread to sew seed beads onto the shape using backstitch.
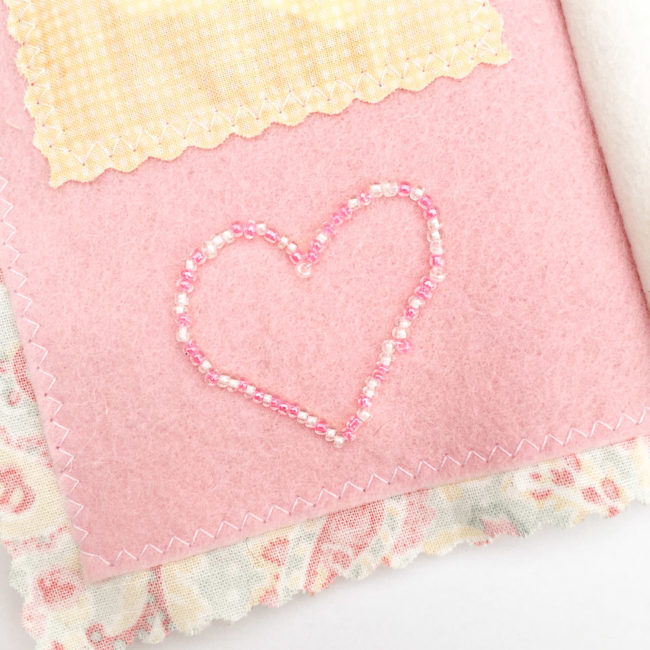
When the inside of the front cover is done, center the pink felt on the reverse side of the cover fabric. Pin in place, and machine sew using zig zag stitch or by hand.
To create the center page, cut 4 small strips of felt slightly shorter than the width of your pages. (My strips are 1″ high.) Pin them so two strips make a “sandwich” of the page, and one set of stitching will attach both strips. These strips will allow you to put needles on the book’s pages without them going through to the other side.
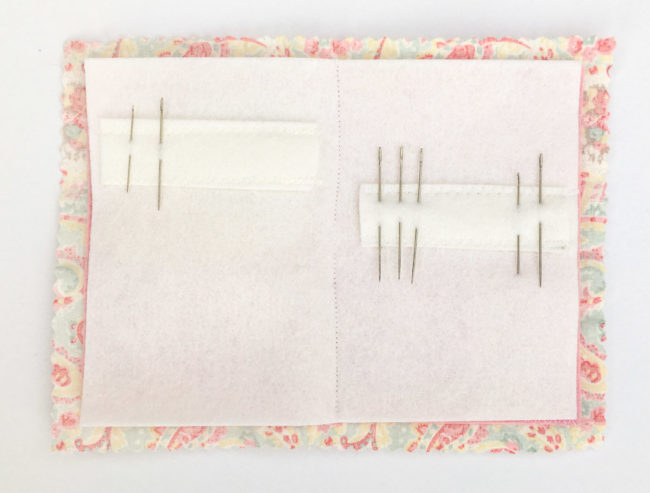
Lay the center page on top of the cover and stitch up the middle to bind your needle book.
For the final touch, finish your needle book’s cover by die cutting a piece of felt to make a flower. Use the flower and buttons from the 28 Lilac Lane “Hello, Cupcake” kit to embellish the cover. Attach them by sewing them through only the fabric layer of the cover so the stitching won’t show through to the inside.
This needle book is a great way to use your scraps, or to make a gift for a sewist or quilter! Putting pockets on all of the pages would allow it to hold packets of machine needles. Sewing in strips of Aida cloth instead of felt to slide the needles into would turn this into a great organizer for cross stitch and embroidery needles!
Our 28 Lilac Lane embellishment kits designed by May Flaum make the perfect finishing touch for projects like this mixed media tag! This tag thinks “outside the box” with our Paws & Pets kit, using its lovely brown tones as the perfect partner for some vintage style Tim Holtz products.
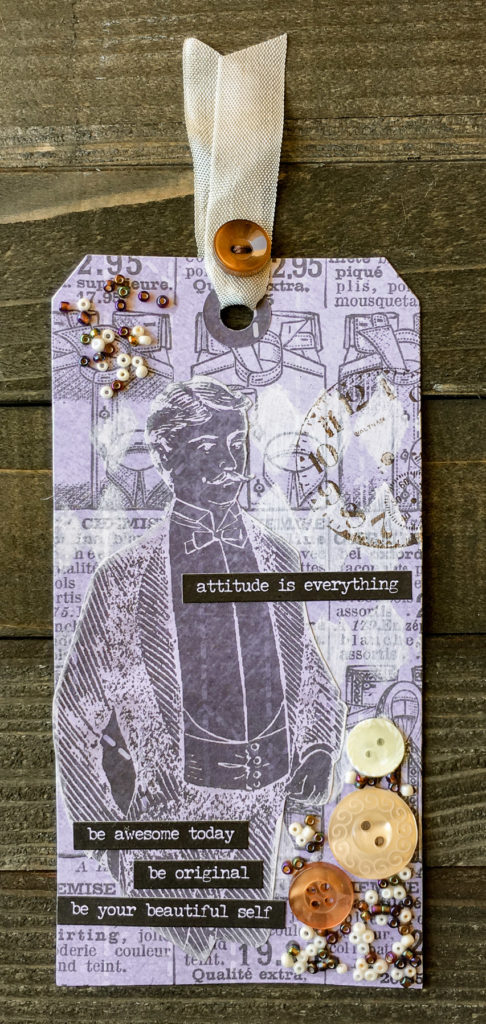
Supplies:
To make this tag, begin by cutting the dapper man out of the patterned paper sheet. Then flip the sheet over and cut the tag base out of the Tim Holtz paper and glue down the hole reinforcer.
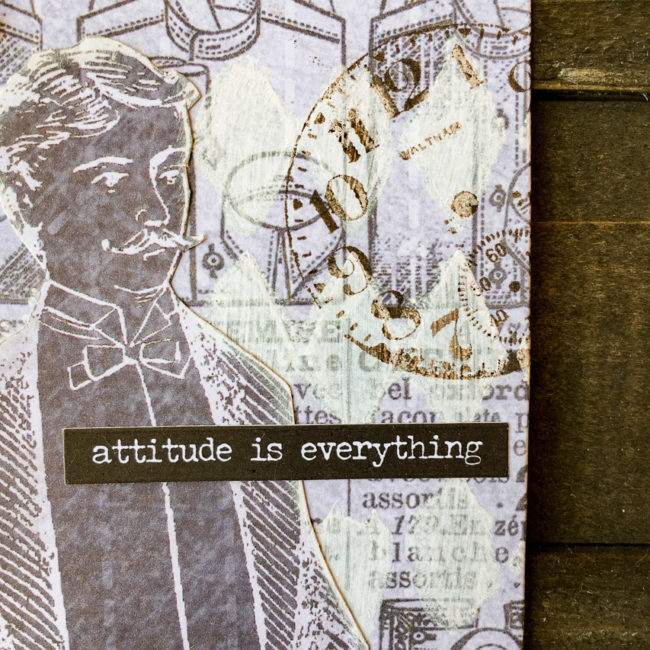
Using the Distress Paint dabber, stencil the harlequin design across the middle of the tag. Once dry, glue the dapper man on top of it. Stamp the clock image with Ground Espresso ink, allowing it to bleed off the edge of the tag.
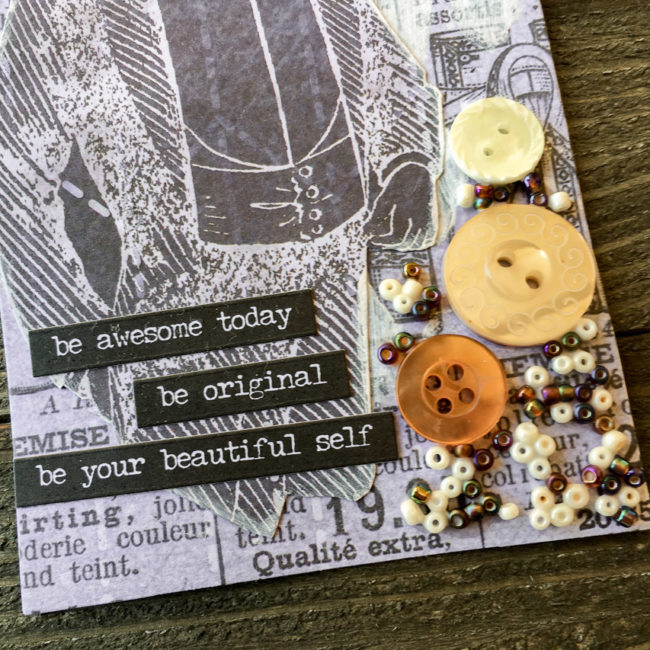
Lay down an area of glue in the bottom right corner of the tag and spread a random assortment of buttons and seed beeds throughout the area. (In addition to the Paws & Pets kit, I used one ivory button from the Vintage Findings kit.)
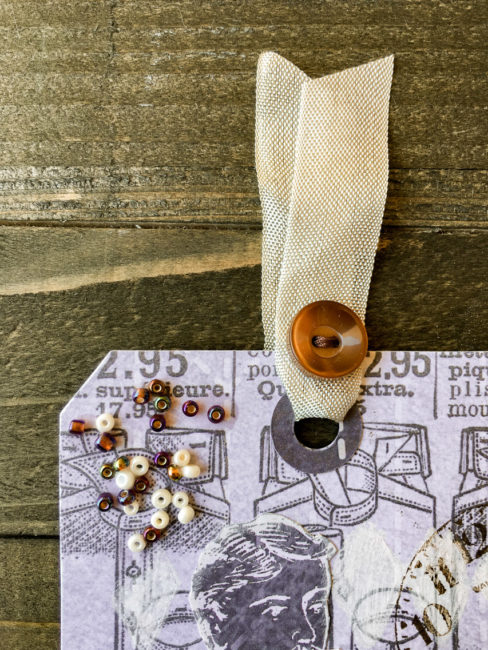
Lay down another area of glue in the upper left corner and spread another assortment of seed beads in that area. Loop a short length of the Melissa Frances ribbon through the tag’s hole, and stitch a button through it to keep it in place.
To finish off the mixed media tag, select some phrase stickers from the Small Talk set and place them over the dapper man. I selected phrases that reflected the man’s confidence and effortless sense of personal style.
Our pre-coordinated 28 Lilac Lane kits are the perfect quick & easy embellishment for all your mixed media projects. Don’t forget to look past the name to the color scheme, and “think outside the box” about all the wonderful things that they can do!
Wanting an uplifting, fun, and carefree kind of project this week I pulled out the entire 28 Lilac Lane line, some paste, liquid adhesive, and a 6×6 wood board to make a rainbow!
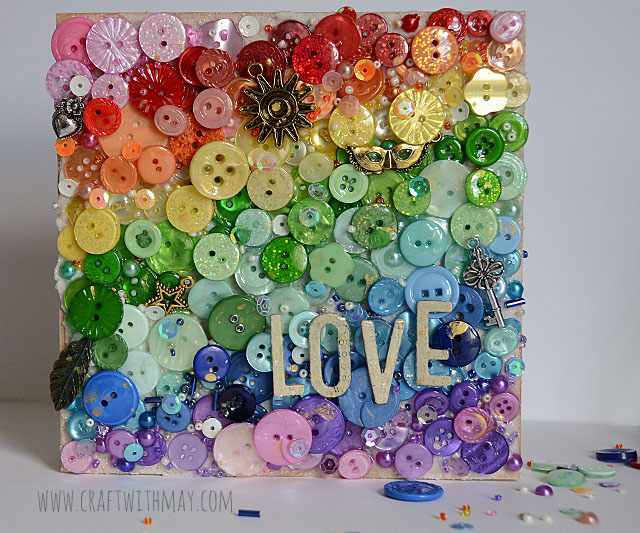
Did I really say the entire line? Yes, yes I did! I wanted to create a rainbow of buttons, beads, sequins, and pearls across this canvas and I wanted to have a wide variety. Beginning in the middle with green and working towards the edges, I just love the finished piece! Some charms from various kits as well as a few chipboard letters finished off my project before I used a glossy sealant to complete this piece. Note that I worked in layers, meaning that I built a base layer then went back over it several times to add more pieces and details. This project was such fun to make, and I love that it features at least one thing from every bottle and kit.
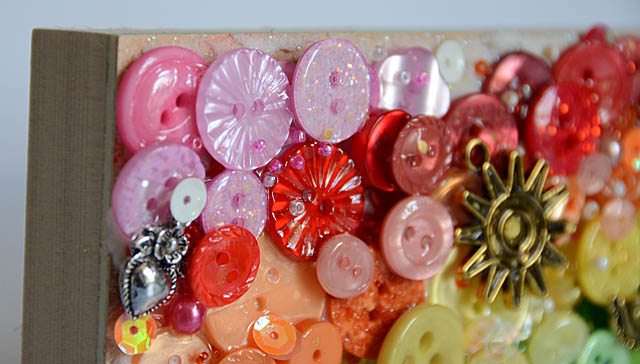

Want to make this with fewer items? Using the Dragon Fire, Pumpkin Spice, Hello Sunshine, Oh Christmas Tree, Winter Blues, and On Lilac Lane bottles would get you a lovely rainbow as well. I hope I’ve inspired you to create a bit of a rainbow with your next craft project, and get those fun buttons on display. For complete details and instruction be sure to watch my video below!
This time of year sees a lot of people we love embarking on new adventures, headed off soon to new schools, or new jobs. Wouldn’t it be nice to send a piece of ourselves, and a positive message, along with them? This inspirational mixed media canvas using 28 Lilac Lane products will remind them to reach for their dreams!
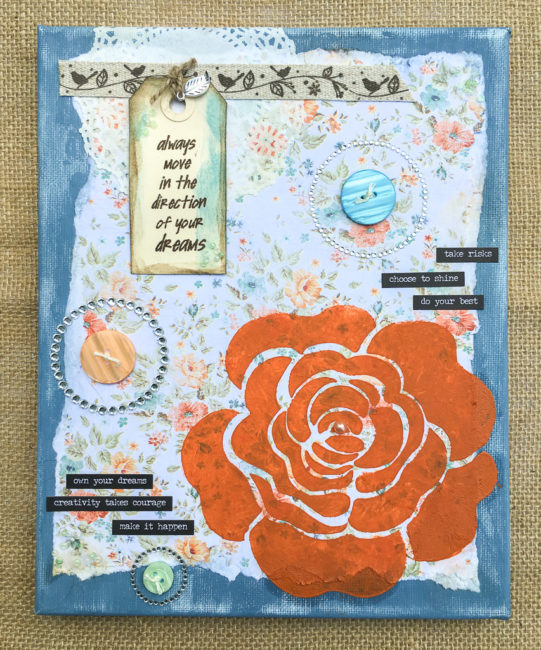
Supplies from Buttons Galore:
Other Supplies:
To get started on your inspirational mixed media canvas project, paint the front and edges of the canvas with the blue Milk Paint. Let the paint dry.
Tear the floral “Farmhouse” paper and adhere it to the front of the canvas using the PPA Matte Adhesive. Use a baby wipe or damp paper towel to smooth down the edges of the paper and adhere them firmly. (This will have the effect of also distressing the milk paint finish on the canvas.)
Once the paint and glue is dried well, use the stencil and stencil creme (in orange) to apply a rose design to the lower right hand corner of the canvas, over the paper.
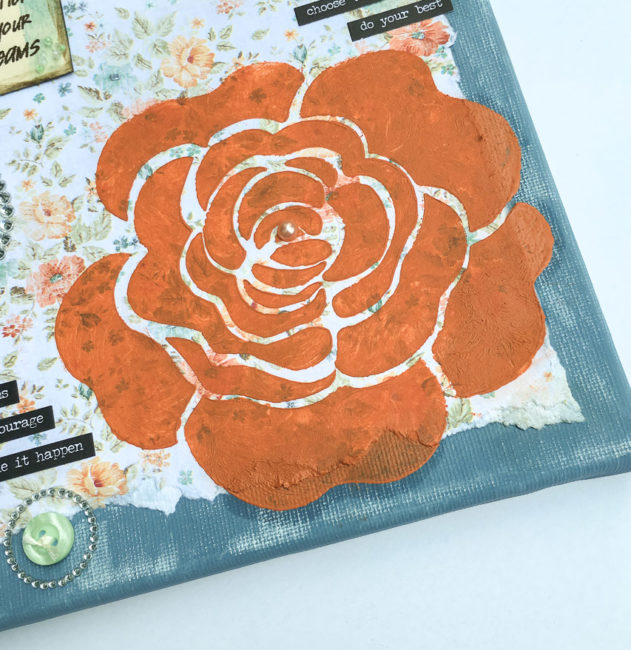
In the upper left hand corner, glue down a doilie on top of the patterned paper. When the glue is dry, smudge some Antique Linen Distress Ink on top of the cut outs in the doilie to highlight the design in them. Next, apply the twill ribbon from the “A New Leaf” kit across the top of the canvas.
To make the tag, die cut the tag shape out of a larger manila tag. Ink the edges with Broken China and Ground Espresso Distress Ink, and stamp the sentiment in Ground Espresso. Tie the charm from the “A New Leaf” kit onto the tag with some jute string, and glue some seed beads from the kit to the tag’s corners to finish it off. Glue the tag down.
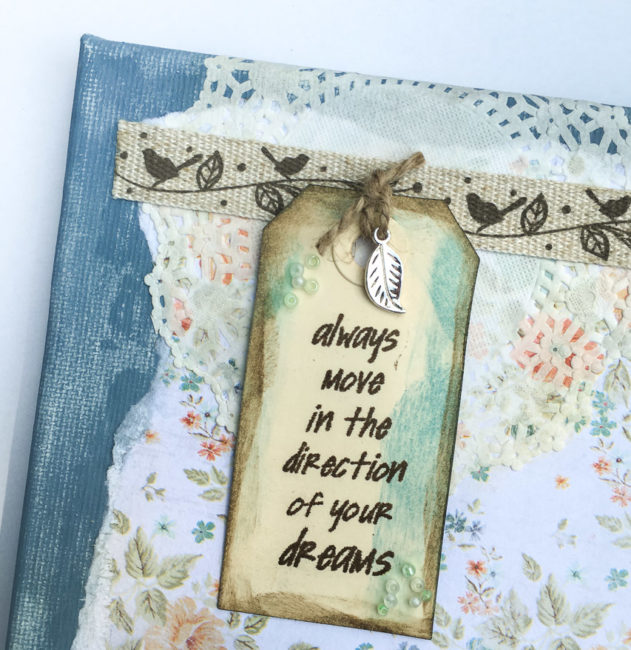
Apply some PPA Matte Adhesive in the corners of the canvas and embed some seed beads from the “A New Leaf” embellishment kit in it. Once that is dry, you can begin building the stickers, rhinestone and button elements in the rest of the canvas. Don’t forget to thread your buttons before adhering them so they look finished!
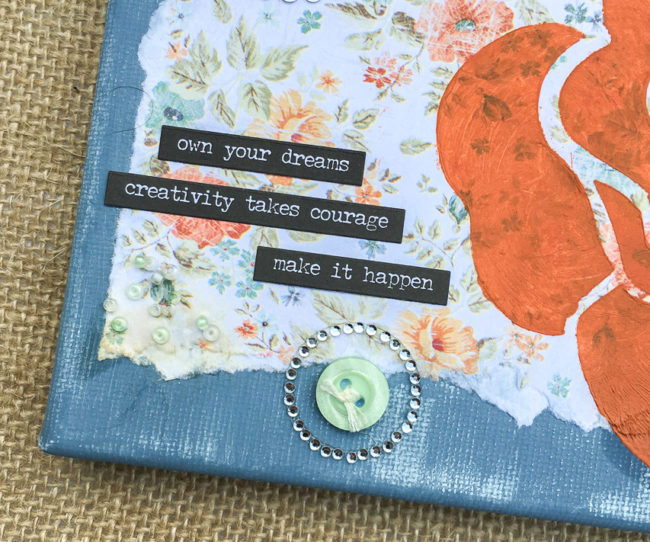
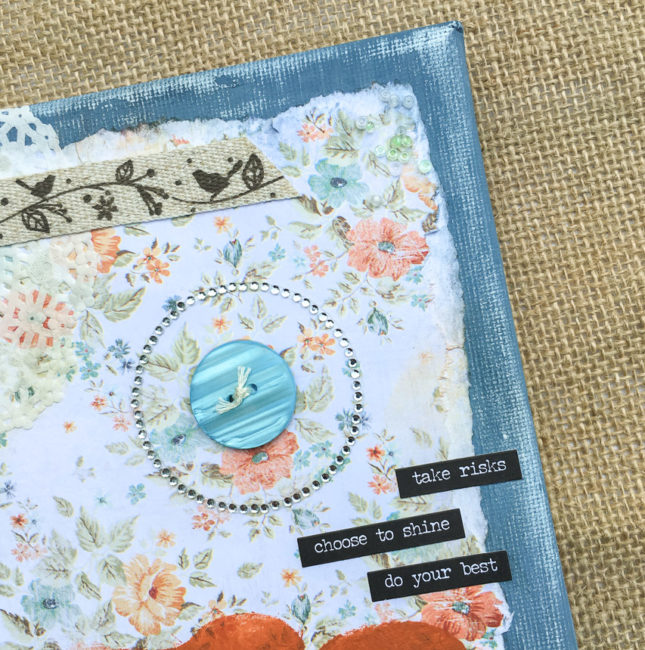
This inspirational mixed media canvas is fun and simple to make…and will let someone you care about know how much you believe in them. Who will you give it to?
Looking for an easy quick card idea? Look no further than your Project Life cards and your buttons and embellishments from 28 Lilac Lane!
Creating this quick card is simple – and fast. It takes only five minutes! This project uses leftover Project Life cards as a shortcut to creating a beautiful color blocked card. Depending on the style of the kit you are using, the design could be graphic, shabby, or cute in style.
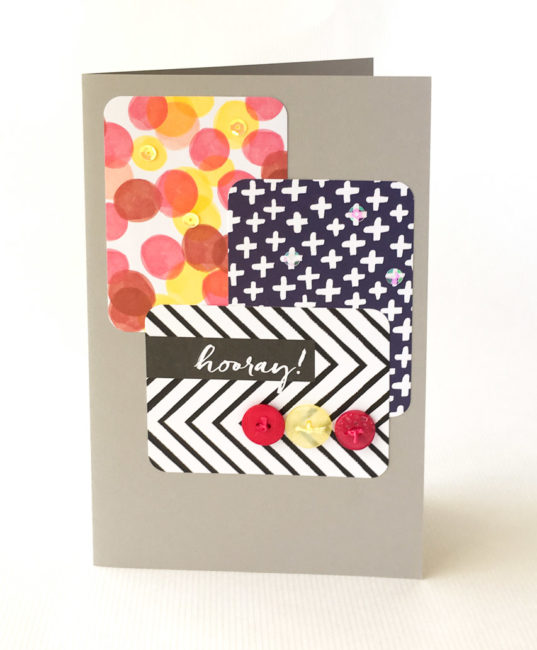
Supplies:
The key to this card’s fun design is to think in threes. All of the major design elements are arranged in threes, creating repetition and harmony in the design.
Start by folding a letter sized piece of cardstock in half for the base. Then select 3 project life cards and arrange them layered, as shown in the photo above. Select three sequins that match each of the top two cards, and arrange them in a triangle on the card. (Since my cards were very geometric, I chose to place the sequins centered on design elements.)
For the final touch, choose three buttons that match the cards. I chose three that matched the circles on the top card, to repeat the design element visually and bring that color down closer to the bottom for balance in the design. Tie embroidery floss through the holes of the buttons to make them feel more finished. Adhere in a row.
Variation: If you don’t find a card in your stash that contains an appropriate greeting or sentiment for your occasion, you can substitute a strip of paper with a stamped or handwritten sentiment. Just place it on top of the pocket card in the location where my card says “hooray”.
Artist Trading Cards are a fun way to experiment with colors and techniques. They are also a great way to use up random leftovers from other projects, like I did on this Artist Trading Card wth buttons and trim!
For those unfamiliar with the concept, an ATC (Artist Trading Card) is a 2.5″ by 3.5″ piece of art that is intended to be traded with other artists. The rear of an ATC is usually signed by the artist and indicates if the card is part of a series. A wide variety of substrates are used as bases for ATC’s but popular ones include manila, watercolor paper, mat board, and ephemera like old book pages.

Supplies:
This ATC card was created from manila cardstock, cut from a #8 manila tag. I actually stamped the trading card background stamp on the tag first, and then cut out my card base, to make sure that I got perfect placement of the stamp on my card.
Once the base was created, I used a tag stencil with some texture paste to create a flower in the corner of the card on top of the stamped design. Rubbing some Distress Ink on top of the flower gave it a nice pink shade, and I also colored in the image that I wanted to highlight with markers.
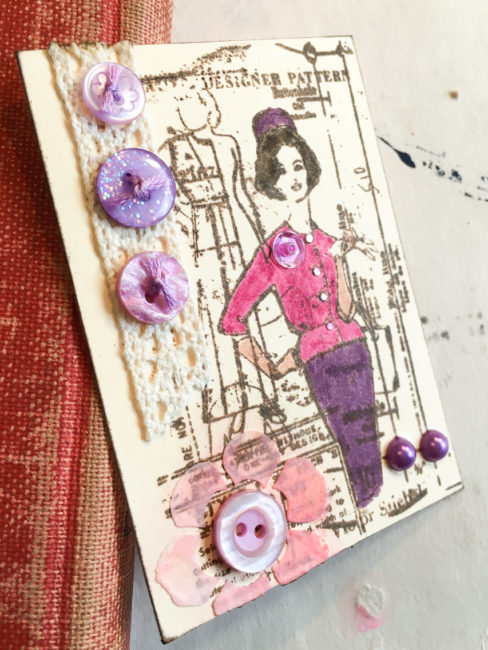
I used a scrap of crochet trim from the 28 Lilac Lane “Attic Findings” embellishment kit to fill in the area in the upper left of the card. Then I opened up the “On Lilac Lane” bottle and went to town! The pretty lady got some embellishment for her outfit (see how shiny her buttons are?) from some of the small beads and sequins in the bottle. Then I placed buttons and pearls around the card for pops of color. Some of these elements highlight certain design elements like lines in the stamp or the flower. I purposely varied the size and color shade of the embellishments that I chose to create a more random, artsy effect in the design.
The final step was to use the Archival ink pad that I had stamped with to edge the card and give it some extra “pop”.
Our embellishment kits and bottles are perfect for making Artist Trading Cards with buttons, trim, sequins, beads, and pearls. Their great assortment of embellishments will help you create a one of a kind work of art! Try one today!
For those of you following along with the holiday frame project, there may be times when you don’t want a seasonal element in it. Today, I’m here to show you a welcome frame design for your frame for those in-between times of year!
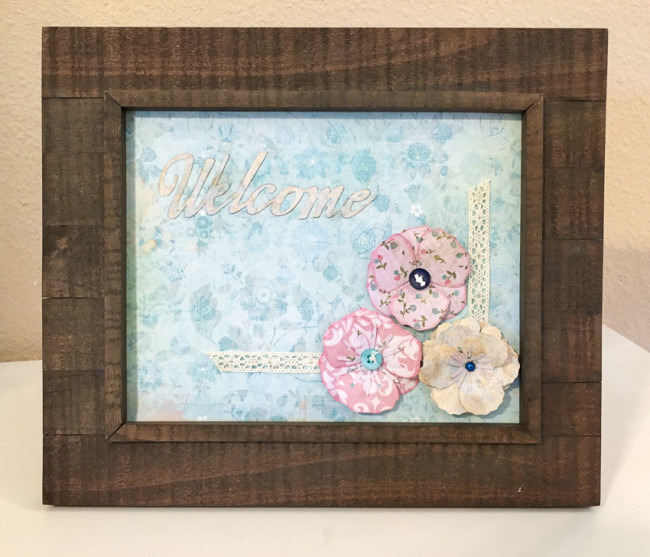
This simple design makes use of beautiful elements from our 28 Lilac Lane “Attic Findings” kit, as well as 3D die cut elements. All of the paper elements are created from a single paper pad for easy coordination of colors and designs.
To create this welcome frame project, the background paper was cut to 8″ x 10″ to fit the frame opening. Then the crochet trim from the Attic Findings kit was cut to create the border and glued in place. The word “welcome” was die cut (sized to just slightly more than 5″) and the edges were inked to provide a drop shadow before adhering it as well.
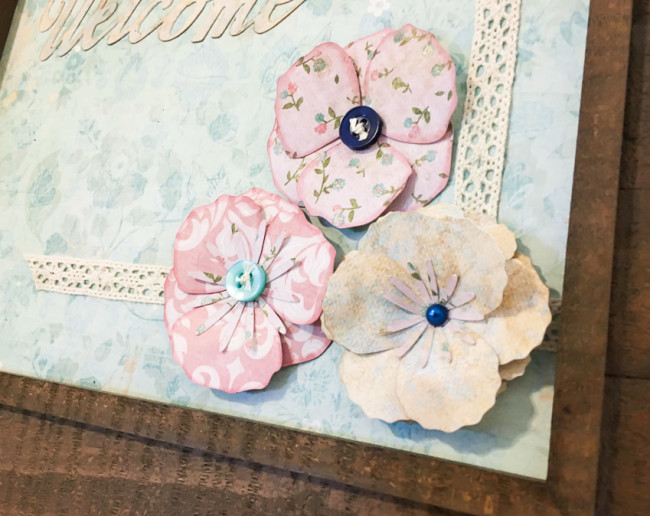
The three flowers were sized to about 2.25″ in diameter, and then cut from different papers. (The stamens on two of the flowers were cut from another flower design that wasn’t used on the frame.) The edges of the pink flowers were inked, and then the flowers were assembled.
The finishing touch on the flowers were the embellishments from the Attic Findings kit. Each flower got its own touch of contrasting color. The buttons were threaded with embroidery floss and tied off before adhering to give them a finished look.
Supplies:
This welcome frame is a beautiful way to fill your holiday frame in between holidays! In case you’ve missed them, don’t forget to check out the previous installments in the holiday frame series. What holiday would you like to see added to the series next?
Welcome to the 28 Lilac Lane blog hop on the Buttons Galore blog! Let’s make some spring flowers! Make sure that you stay until the end today for the giveaway!

Spring has us all thinking of flowers! But in some areas they aren’t blooming yet, or we may not be able to have them in the house due to allergies.
The solution is simple…fabric and buttons! 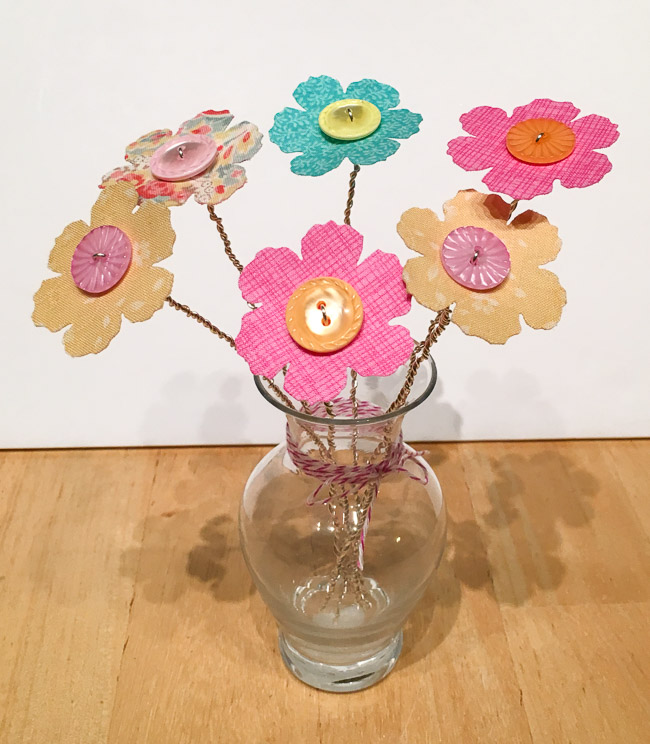
This project starts with fabric and interfacing. Iron heavy-duty iron-on interfacing to the back side of a small fabric scrap. Then, wrong sides together, iron another fabric scrap to the back side of it. This will create a double-sided piece of fabric, with the interfacing in the middle to stiffen the fabric.
Run the fabric through your die cutting machine to make flowers. Repeat with several different fabric scraps. If you don’t have scraps that will work for this project, visit your local quilt or sewing store and check out their fat quarter inventory for suitable fabric. Small prints work best for this project.
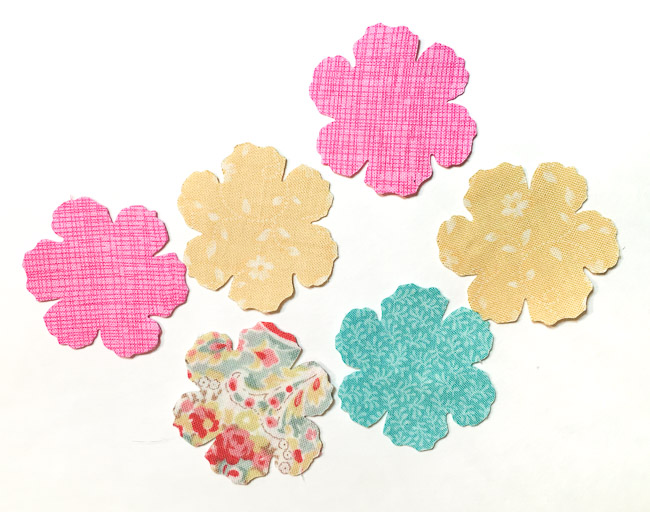
Select a large button to coordinate with each of your spring flowers. With a piercer or large needle, poke holes through the flower where the button’s holes are.
Cut a length of the German Style wire about twice the desired stem length and fold it in half. Poke one end through each of the button’s holes and the flower and pull to snug the loop down on top of the button. Begin twisting the wire together under the flower. Continue until you reach the desired stem length and clip off the wire ends.
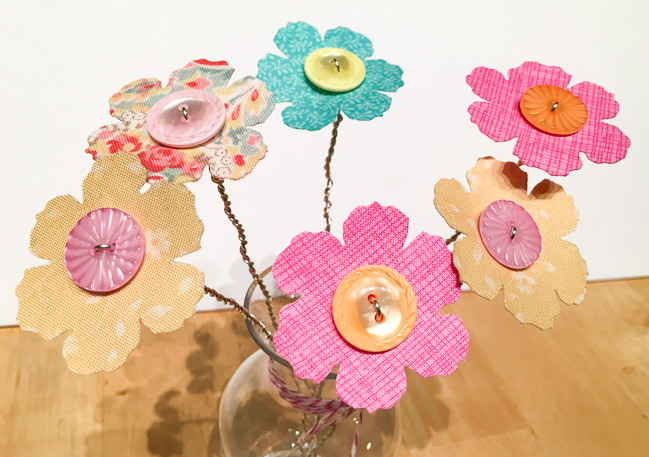
Arrange your spring flowers in a vase, and for the finishing touch wrap baker’s twine around the neck and tie a pretty bow!
Supplies:
Don’t miss the other stops on the blog hop:
To celebrate this blog hop, Buttons Galore is giving away a fabulous 28 Lilac Lane prize! One lucky winner is going to win two 28 Lilac Lane embellishment kits, an embellishment bottle, and a sequin tin – and the best part is that it is winner’s choice!
To enter, comment below and tell us which of the 28 Lilac Lane embellishment kits is YOUR favorite! This giveaway is open until Midnight pacific time on Sunday, April 24th. One entry per person, and only U.S. mailing addresses are eligible to win.
Thanks for visiting the blog hop and good luck! If this is your first visit to the blog, please make sure to subscribe to the blog and follow our Facebook, Instagram, Twitter, and Pinterest!
Today, the Buttons Galore blog is pleased to welcome Karla Yungwirth as guest blogger to share this beautiful scrapbook layout with us.
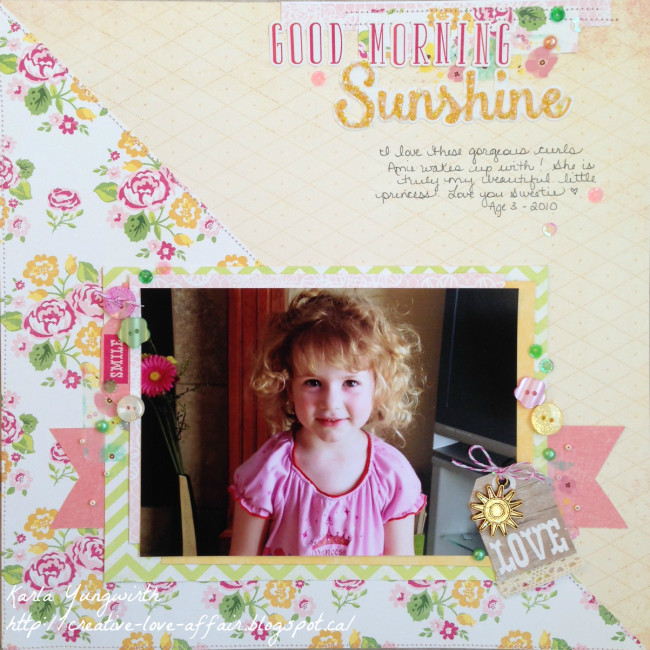
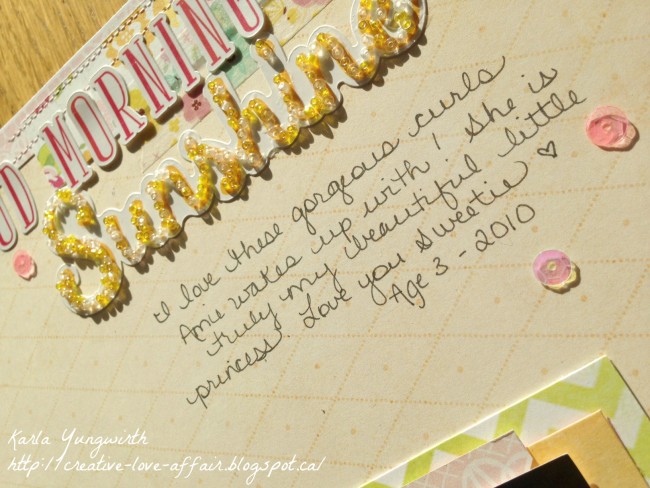 I wanted to create a light, spring-like look to my page, so I started off by using some of the white and yellow beads over my Sunshine title sticker, gluing them on with matte medium liquid adhesive. They give such a cool effect over the sticker!
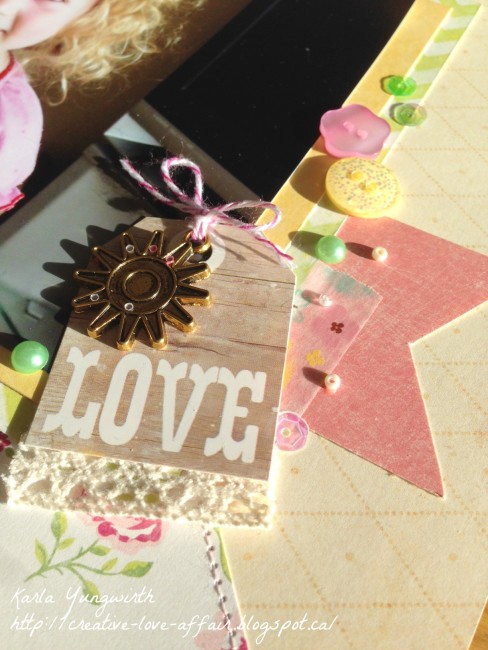
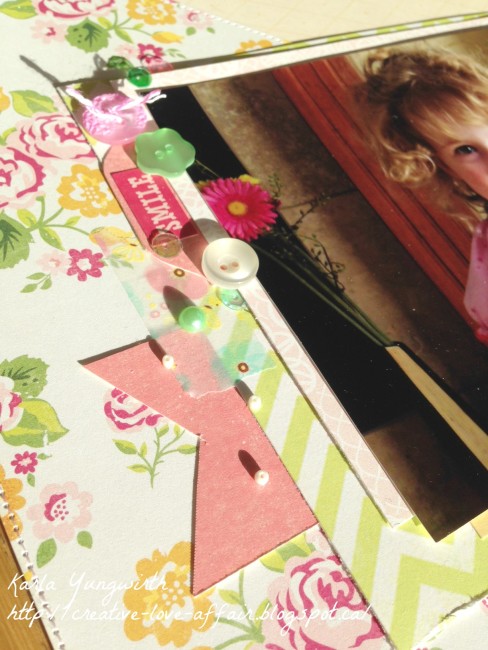 I scattered sequins around my page and near my title and stitched paper strips at the top of my page, along with another pretty pearl. It’s amazing how the embellishments in these kits can really make a layout pop! I had so much fun creating this layout, and I have so many more ideas that I can use these pretty embellishments kits on! Wishing you a happy, crafty and creative day!
 About Karla: I’m Karla Yungwirth, a Canadian mom to 3 beautiful girls, a wife of an amazing man, a scrapbooker, a card maker, a lover of gorgeous paper, a boo-boo kisser, a master Lego builder, a baker of lopsided birthday cakes. I have been crafting for as long as I can remember. My grandmothers taught me to sew, knit and crochet, and my mom was always repurposing to create something wonderful and magical – before recycling was even cool! I love being creative – it’s what makes my soul sing and my heart happy. You can find me on my blog at http://creative-love-affair.
Hello there!
Ashli Oliver here with you today to share a super easy mixed media card with big impact!
After swiping on white acrylic paint and drizzling liquid glue on top, I simply stuck lots of little goodies in. The key to making this work is sticking your buttons, sequins, and pearls into your painty goodness while everything is still wet!
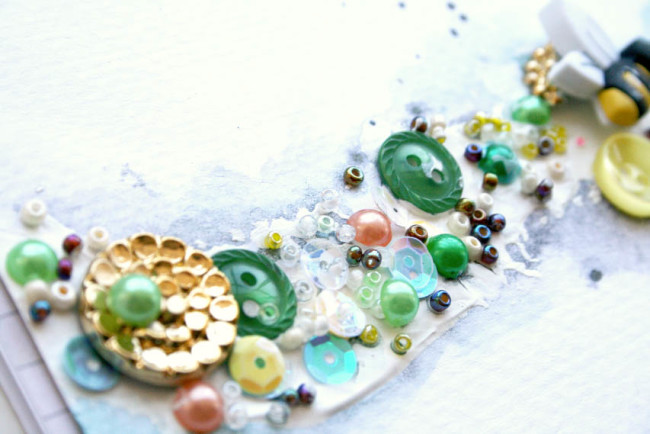
Don’t be afraid to get paint on your embellishments… that is half the fun, after all!
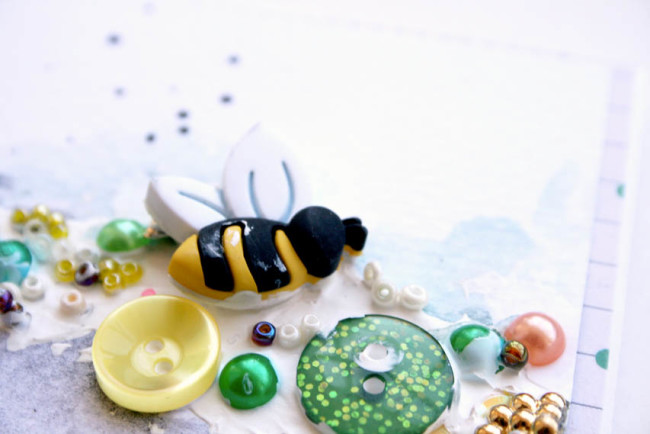
I used a three dimensional Bee Button, goodies from the Antique Tin set, and plenty of the amazing 28 Lilac Lane Collection!
TIP: Did you know that many buttons can be cut in half? That’s right! Using my Tim Holtz scissors, I cut one of the gold Antique Buttons right in half so that I could add it to the edge of my card and tuck the other piece behind my bee!
What a great way to stretch the stash too!
Oh, and of course… I also used those same scissors to cut the backs off of any buttons so I could adhere them to my card.
Once my embellishments were set in, I simply let the paint dry overnight. Then, I added in some watercolor and mist droplets. A piece of patterned paper layered behind the card front finishes this card off!
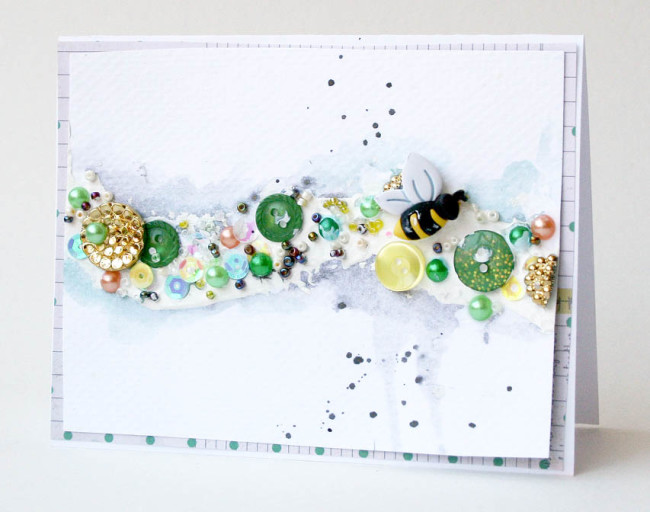
Super fun and a great card for spring! In fact, I think this will serve as a Mother’s Day card around here as my mother loves bees!
Thanks for stopping by today!
Supplies Used:
 Ashli Oliver (aka soapHOUSEmama) lives with her husband and four girls, age 10 and under, in a suburb of Atlanta, Georgia. Ashli is a recovering graphic designer and when she is not busy homeschooling her kiddos, you can find her drinking copious amounts of coffee while playing with paint and pretty paper in her studio. Not only does Ashli love documenting her family’s memories, but she finds great joy in the creative process… which, in her case, usually involves lots of messy, painty fun!
You can find Ashli, and her work, at her Website, YouTube, Instagram, and Classes.
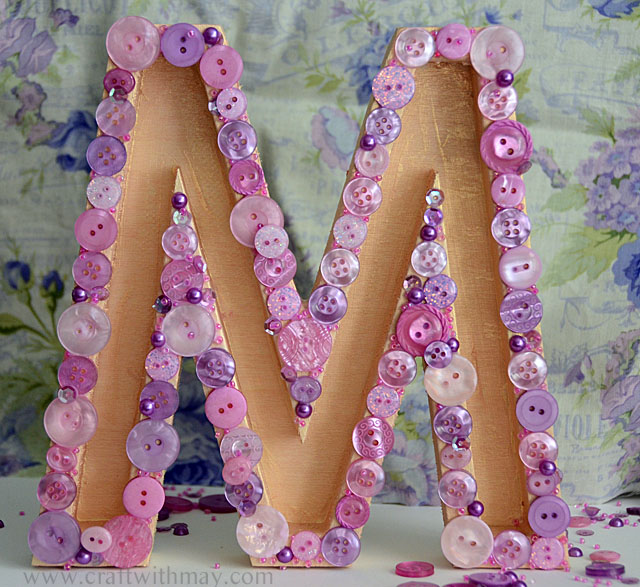
Simply gluing buttons to a wooden monogram is a fantastic project for so many reasons: It’s fun to do, it is easy and makes a great family craft, and it will look fantastic displayed in your home! Today I am sharing a video showing how I created the letter M for my studio with the “On Lilac Lane” bottle. Not to be biased – but this is my favorite bottle and color so it was the perfect choice for this project. From holiday or seasonal décor to bedroom décor creating not just button monograms but shapes of all kinds decorated with buttons and embellishments is a lot of fun.
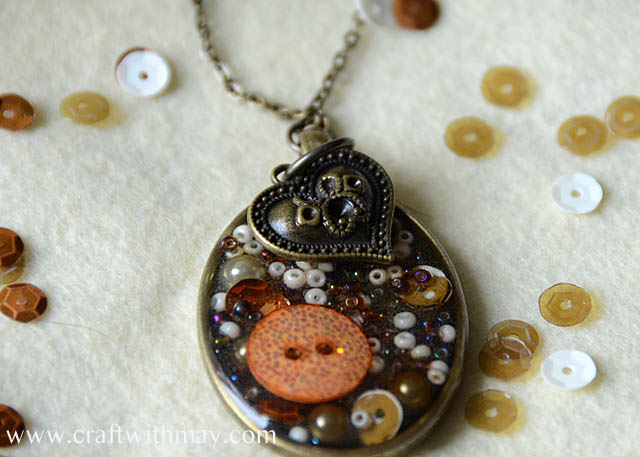
I am new to the world of resin, but I’m really excited to test out possibilities and combine it with my new 28 Lilac Lane kits! Creating a dimensional piece for my daughter to wear in honor of our dogs seemed like a really fun place to start, and I hope that you enjoy this video tutorial. There are so many fun ways to utilize the Paws & Pets kit, and all of the kits in this line!
I could not be more excited that 28 Lilac Lane is now shipping to stores! I can’t wait to see what everyone creates – there is a whole world of crafty possibilities awaiting inside each and every kit. One of my favorite ways to play with the line is to accent a single stamped and colored image on a card, tag, or small canvas décor piece.
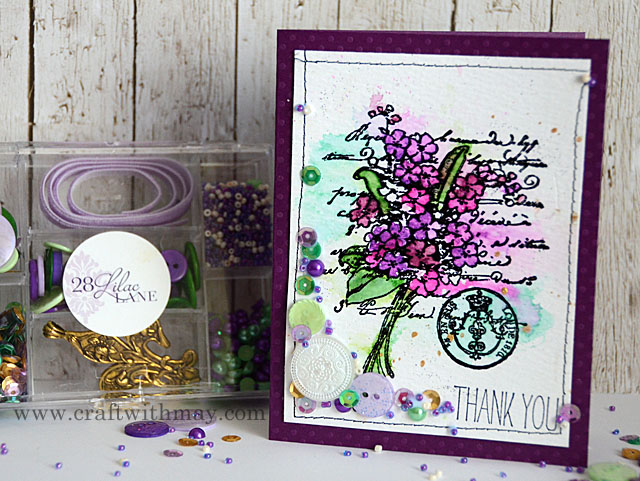
Today I have a video tutorial for a 28 Lilac Lane card featuring some lilac coloring and one of my favorite 28 Lilac Lane kits, French Quarter. My tip for keeping your embellishments in a tight cluster is to begin with the largest elements, and work smaller. This lets me fill in the gaps and create clusters almost effortlessly! Thanks to the variety of sizes in the kits from bigger buttons down to tiny seed beads, I’ve always got something that works!
I hope that you’ve enjoyed this 28 Lilac Lane card video tutorial and that I’ve inspired you to do a bit of coloring as well as some fun embellishing. Happy Crafting!
Sometimes you just want to send a card to say “hi” to someone special. This adorable donut card is a sweet way to do the job!
The new 28 Lilac Lane embellishment kits are now shipping, and they are perfect for cardmakers: buttons, sequins, trim and charms. They also contain seed beads, something unfamiliar to some cardmakers. In addition to making great shaker boxes, seed beads can be combined with glue to make great shiny embellishments. On this donut card, they give the appearance of sprinkles (or nuts).
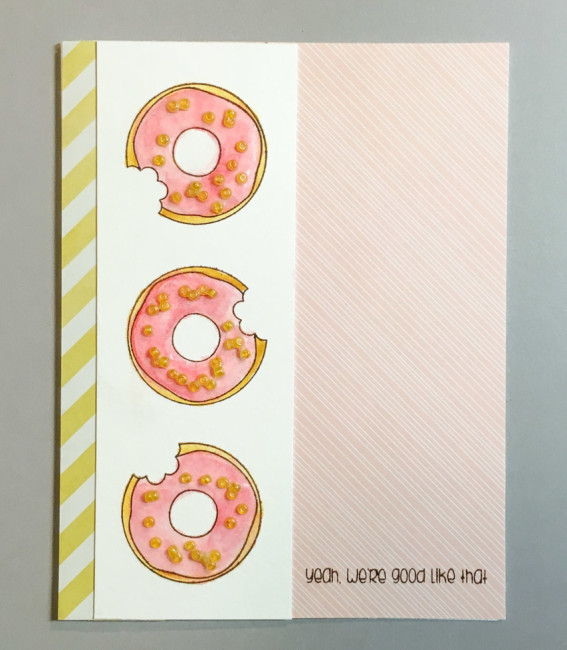
Cut pink striped paper to fit card front. Adhere. Cut 1″ strip of yellow stripe and attach along fold of card.
Cut a strip of water color paper that is 1 7/8″ wide and the same height as the card front.
Using Archival ink, stamp three donuts on the watercolor paper.
Paint the donuts with the watercolors.
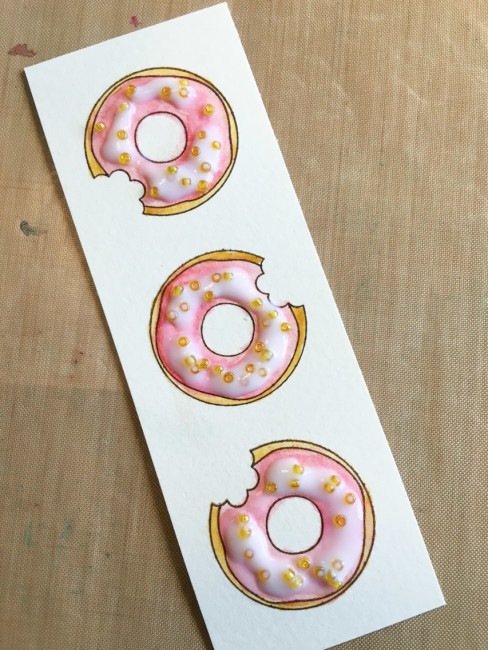
Spread a thin layer of white glue (I use Artquest PPA Matte) on the donut frosting. Scatter yellow seed beads from the Tropical Twist kit in the glue. Add a second layer of glue on top of the beads (above).
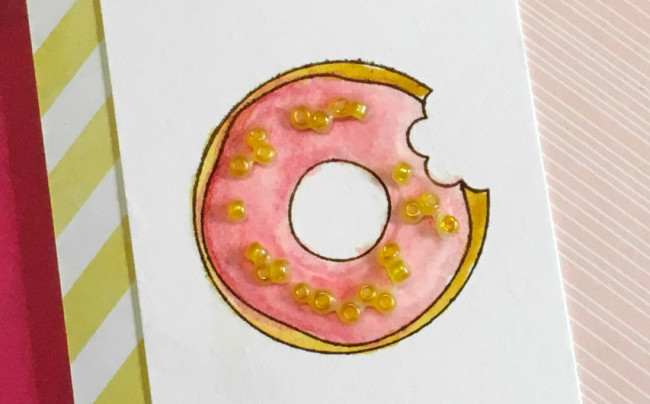
When dry, the glue will largely disappear. Any remnants that remain visible (as around some of the beads in the photo above) will just look like donut glaze!
Adhere the donut strip over the seam between the two patterned papers on the card front.
Stamp the sentiment in the lower right corner of the donut card front.
The new 28 Lilac Lane products are now shipping to stores! Look for them in a store near you!
As a northerner transplanted to the south, I remember all too well the dark days of February in the cold part of the country. This time of year it seemed that winter would never end! So today, I’m here to bring a blast of sunshine to February, with some help from the new sequin tins from 28 Lilac Lane.
This mixed-media inspired sequin card is very simple to make. By simply changing up the sentiment stickers, it can be perfect for providing cheer on a variety of occasions.

Supplies:
Instructions:
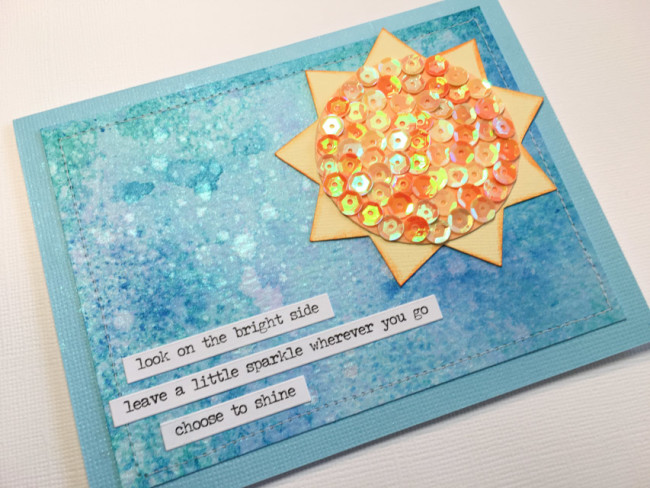
The sequins will shine on their own in this sequin card, of course, but the Mica Spray enhances the card’s overall shine and brings out the sequins’ shine. And the orange ink will make the darker toned sequins in the yellow sequin blend really pop!
The 28 Lilac Lane sequin tins will be shipping soon – don’t miss out on the entire collection of all six color blends!
When it comes to decorating plain frames, buttons rule! The only thing that makes it better? Having sequins, pearls, beads, and charms to decorate with as well! Dreaming of warm temperatures and swaying palm trees I’m creating with the Tropical Twist kit today. The bright colors and playful details make it a fun choice for a project like this, though this project will work with any of my kits!
Supplies:
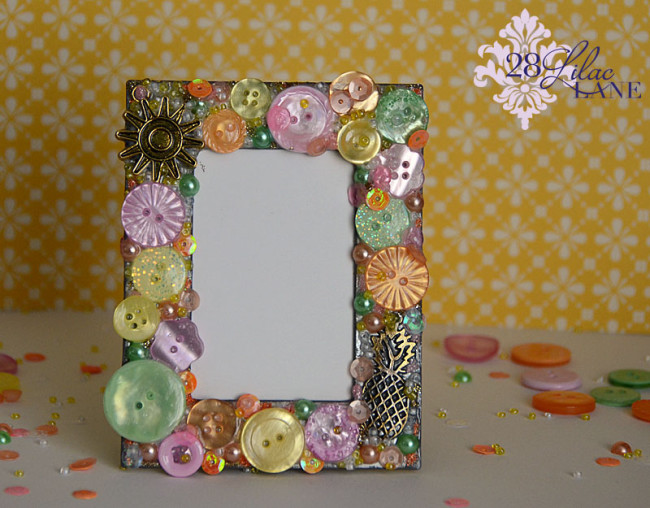
What would you put in a beautiful 28 Lilac Lane frame?
One of my favorite DIY décor projects is to take a simple little wooden birdhouse and add buttons, sequins, and more to it. Today I’ve got a tutorial featuring one of my new jars and a kit that coordinates nicely with it. I loved having multiple colors of buttons, pearls, sequins, and beads to choose from as I created this project.
Supplies:
Here’s a look at the finished projectt!
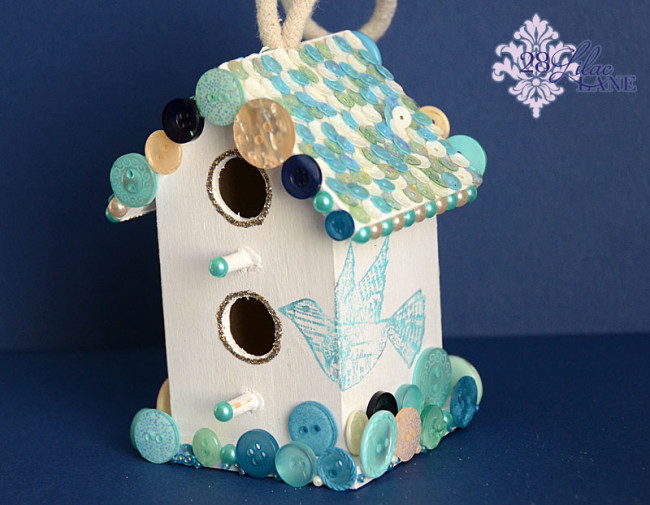
What will you make with 28 Lilac Lane?
If you follow our Instagram, you know that the whole Buttons Galore team spent a good deal of the last ten days in Anaheim, California at the annual Craft & Hobby Association trade show. It’s one of the year’s premier events to display craft products to retail buyers to make wholesale purchases for their stores, and also a great opportunity for people from all parts of the crafts industry to meet and share.
 The event took place at the Anaheim Convention Center and the show floor was open for four days.
Our booth, of course was wall-to-wall buttons – about 40 feet of them in all! In the picture below, that’s me (Buttons Galore social media manager Nancy Nally) standing in front of the rainbow wall of Color Blends, Button Basics, and Button Bonanzas. There’s so many choices, and they are great for my favorite types of craft projects that use a lot of buttons!
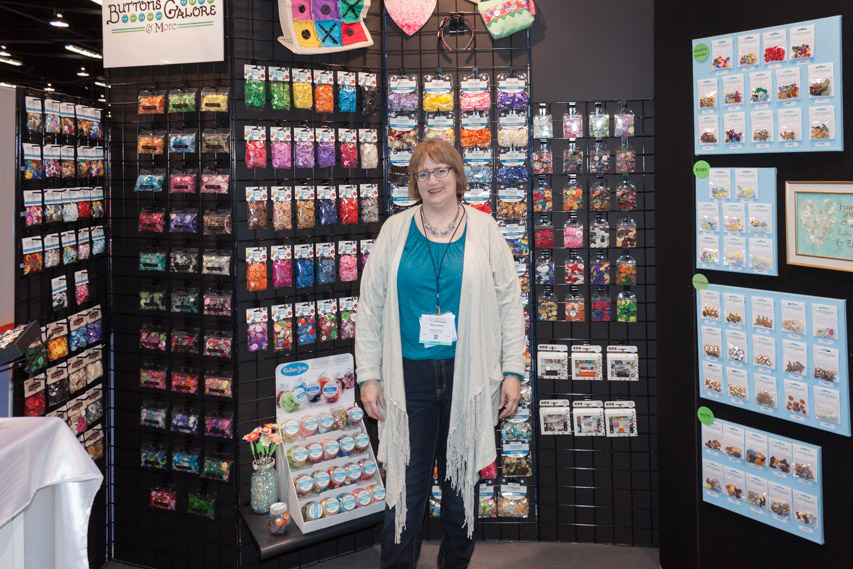
And of course we had walls of our 3D specialty button designs on display as well! This is just one small part of the huge wall to choose from.
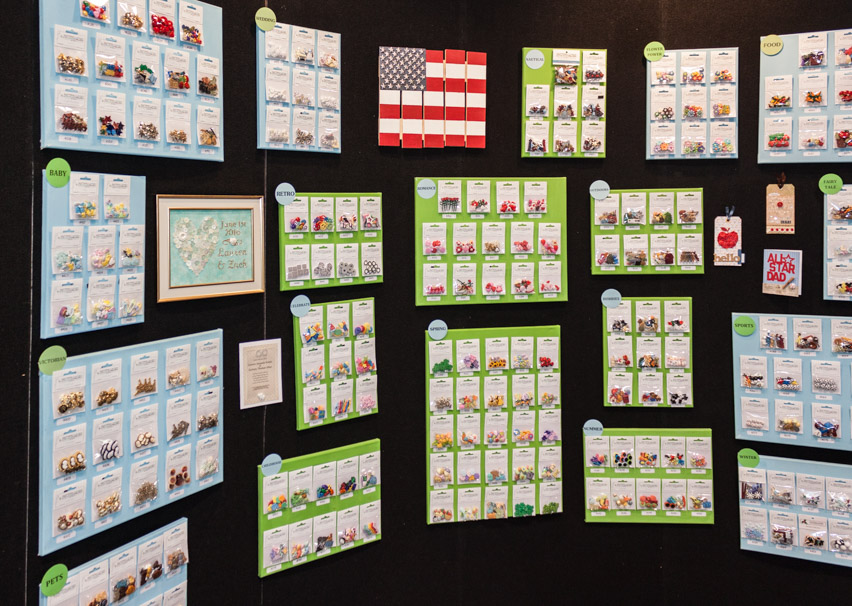 Mixed in with the buttons, we had lots of fun button project ideas as well. Many of these will be shared on the blog and on our social media in more detail in the coming weeks, so make sure you subscribe to the blog, Facebook, Twitter, Instagram and Pinterest so you don’t miss any of them!
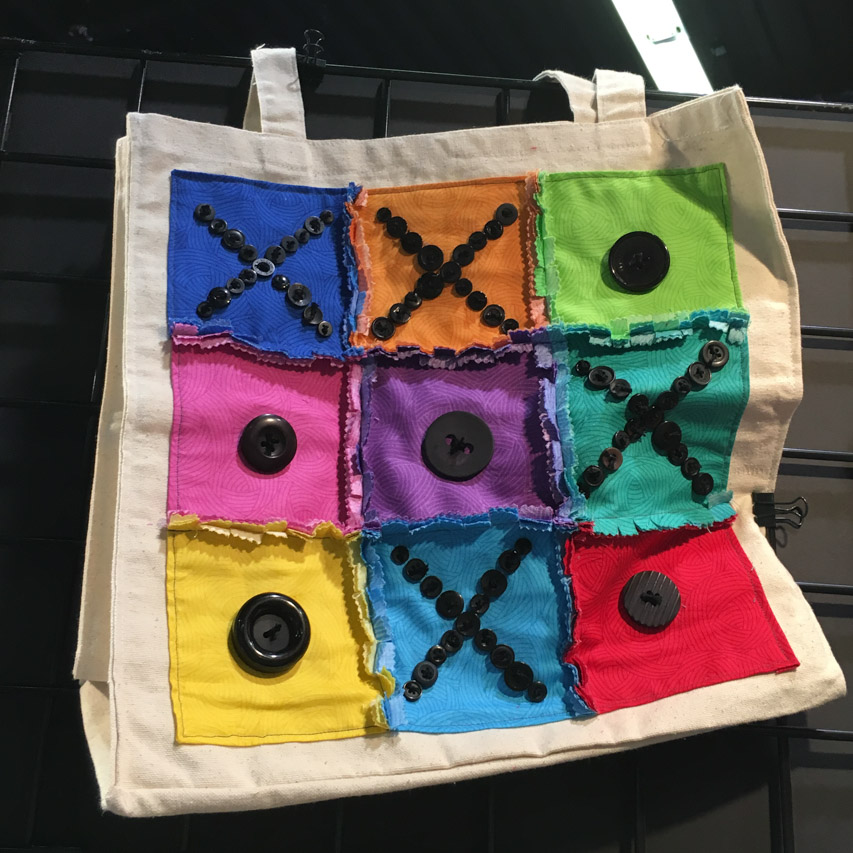
One of the projects on display may have looked slightly familiar to our blog readers….back in November I created this rag quilted patch tote in soft pastels for the Handmade Holidays blog hop. For this version, I went with bold fabric from a Lola charm pack by Quilting Treasures, and used a black Button Bonanza bag to create a Tic Tac Toe game on it. Circles win!
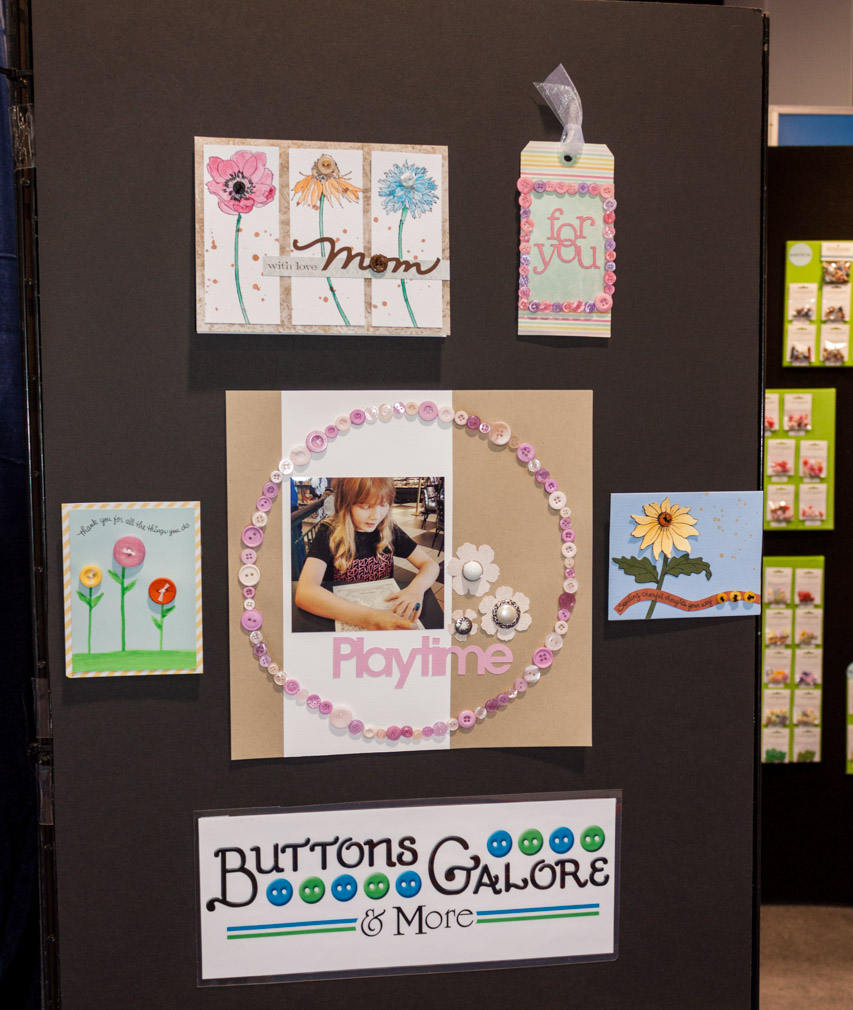
At the entrance to the booth, visitors were greeted by our papercrafting project feature wall. Buttons are perfect for cards, tags, and layouts!
We also took part in the show’s “Open Market”. At this immensely popular event – a first for the CHA Mega Show – attendees had the chance to purchase cash & carry product from us at discounted prices. We offered a selection of 3D specialty buttons, Button Bonanza and Button Basics bags to excited customers.
 Buttons Galore co-owners Dan & Lisa Hagenman were quite camera-shy in the booth but with some stealth skills I managed to get them on camera for our readers during the frenzy at the Open Market. That’s the lovely Lisa in the foreground, and her husband Dan at the other end of the table, helping customers find what they were looking for in the product selection.
Of course the biggest excitement in the booth was the launch of the 28 Lilac Lane line by designer May Flaum.
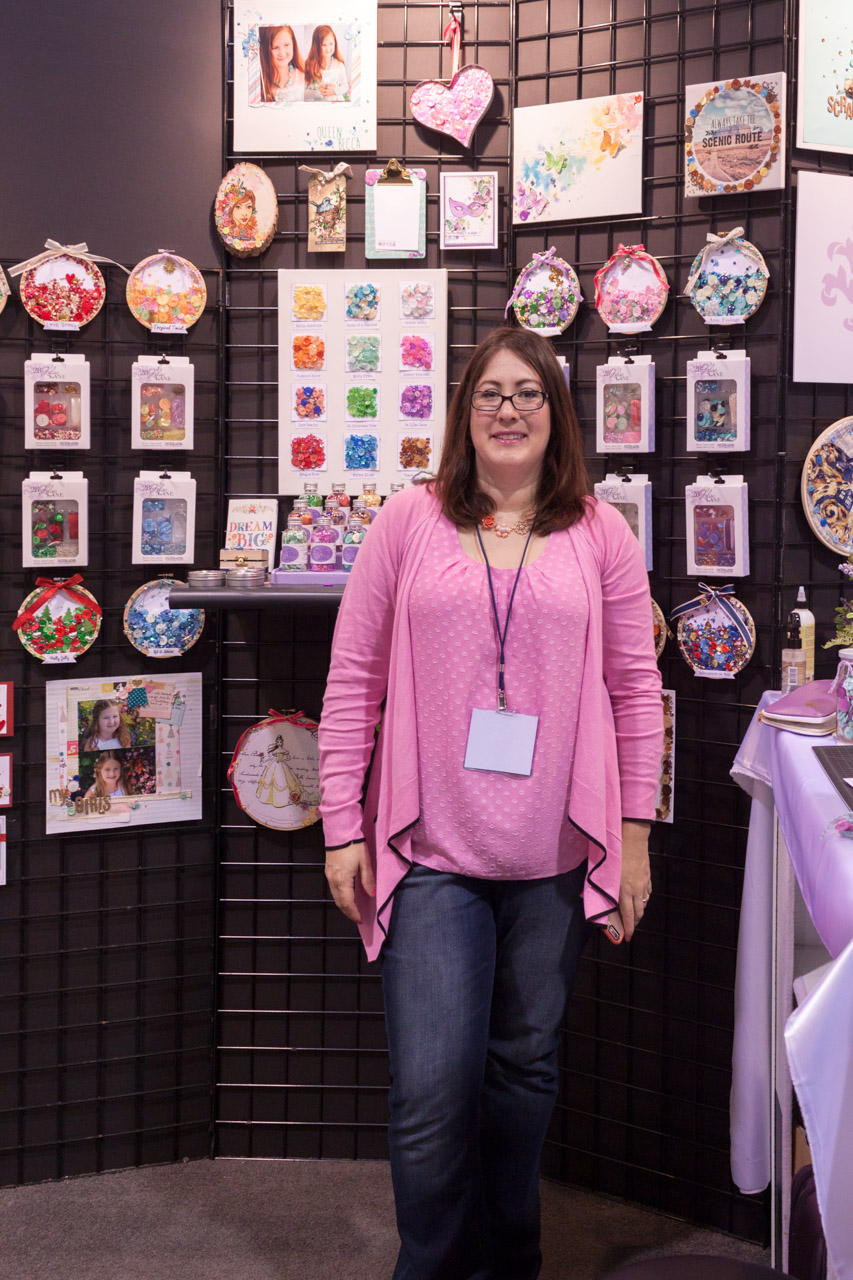
May created a huge display wall full of samples for the booth (you’ll see many of them on her blog and ours in the coming weeks) and a beautiful demo table where she spent hours showing visitors what they can do with 28 Lilac Lane embellishments.
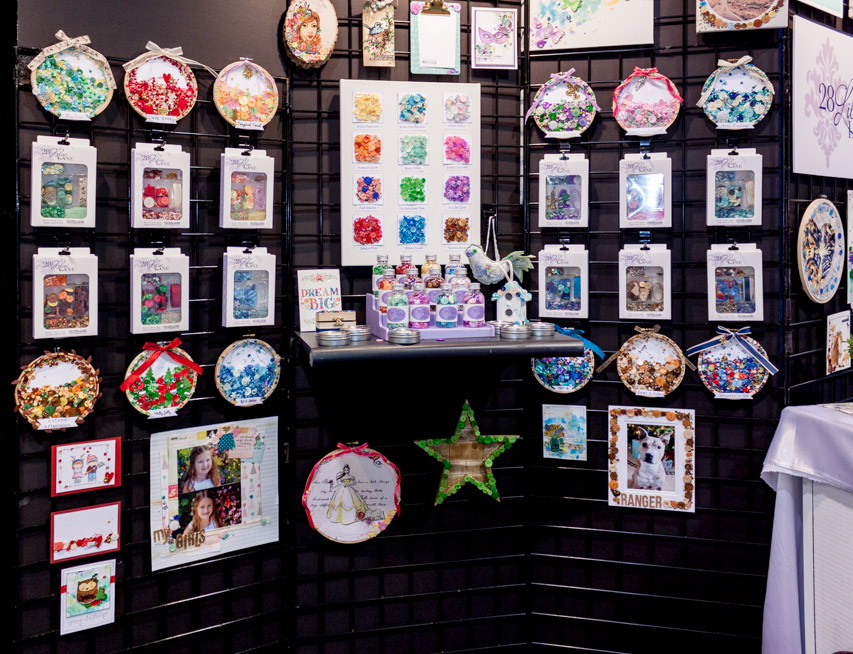
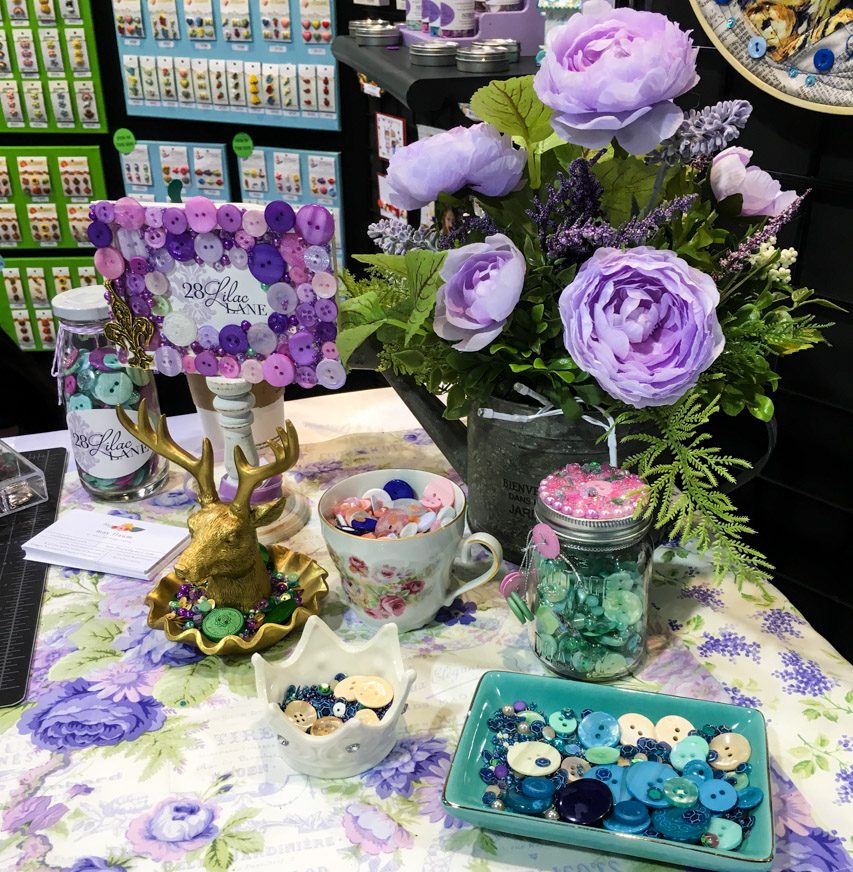
Of course, there had to be sample boards to show off the gorgeous color palette of the new kits and bottles! For the embellishment kits, embroidery hoop collages showed the entire contents of each kit. The hoops were even finished off with the ribbon or trim from the kit!
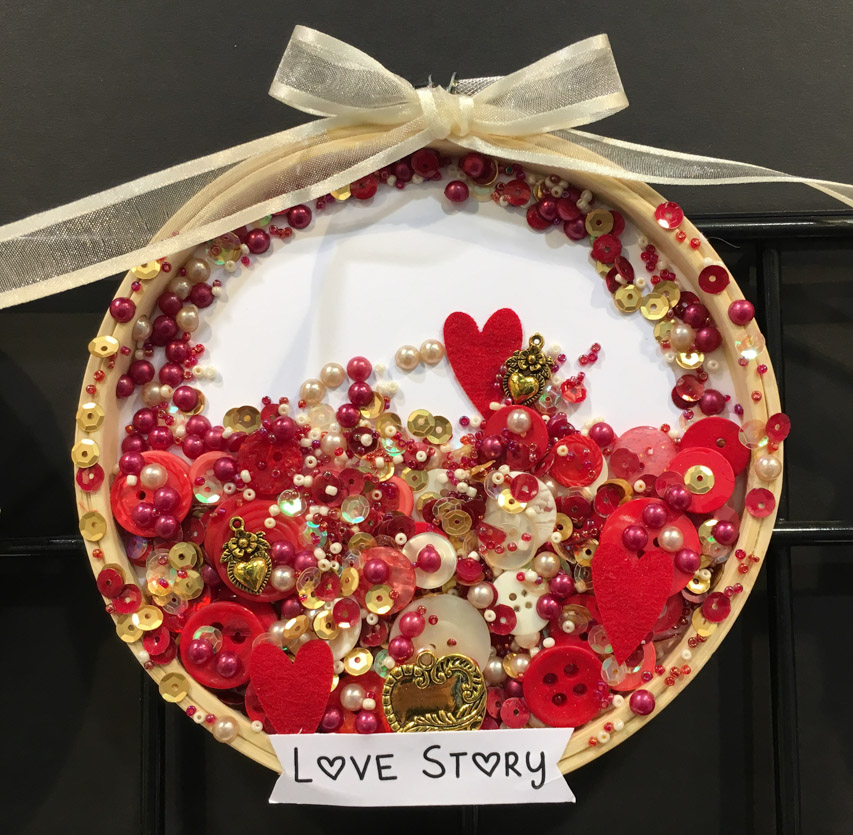 For the bottles, a color board shows the entire rainbow selection of all the kits’ schemes in one place:
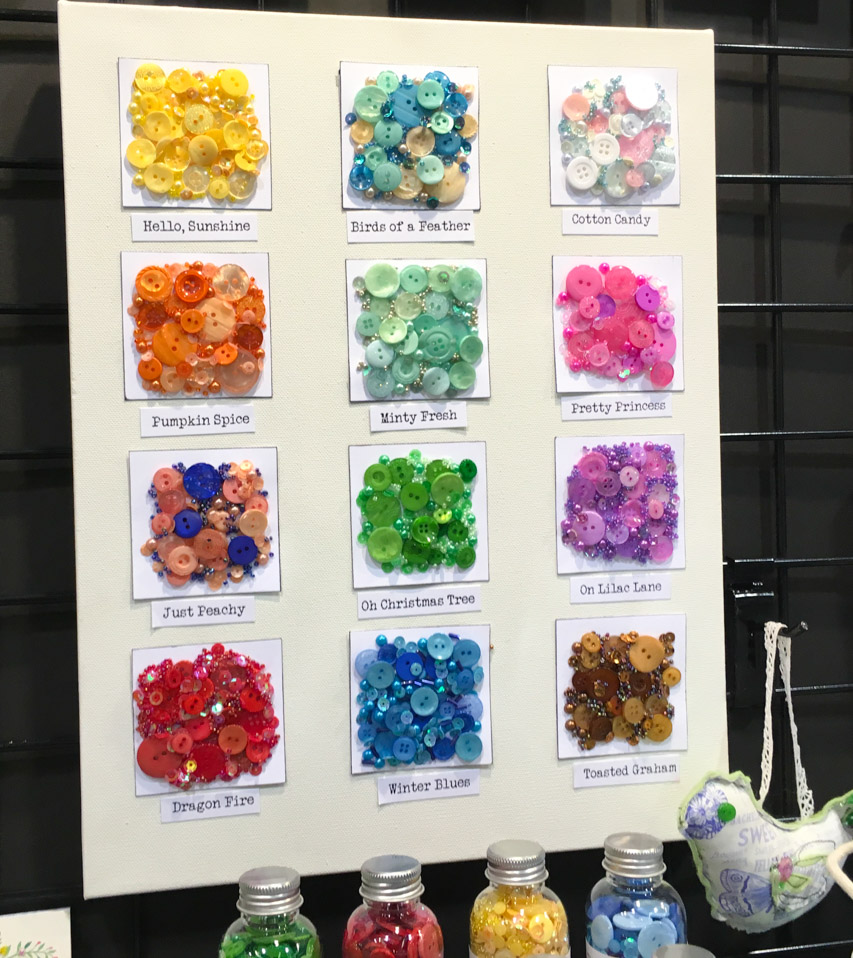

We’re so appreciative of how many people stopped by the booth to visit us and see May demo her 28 Lilac Lane collection! It was such fun hosting you all and sharing the new products!
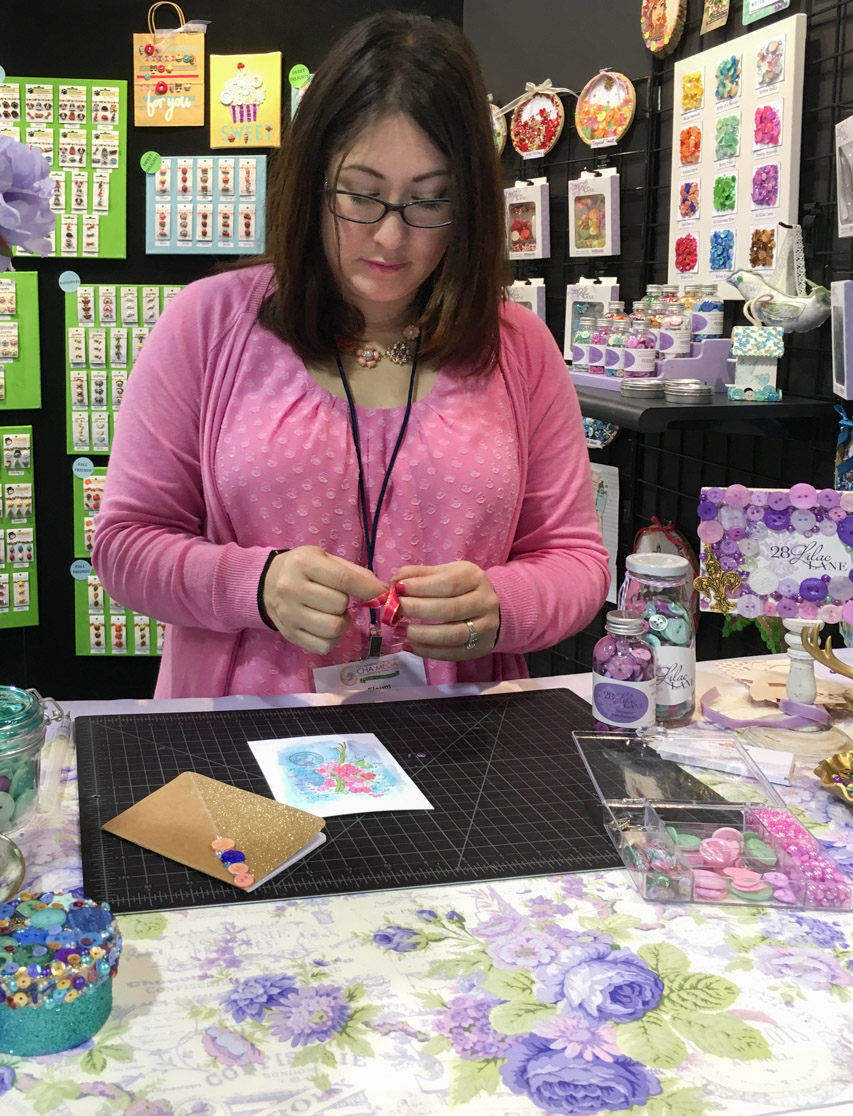
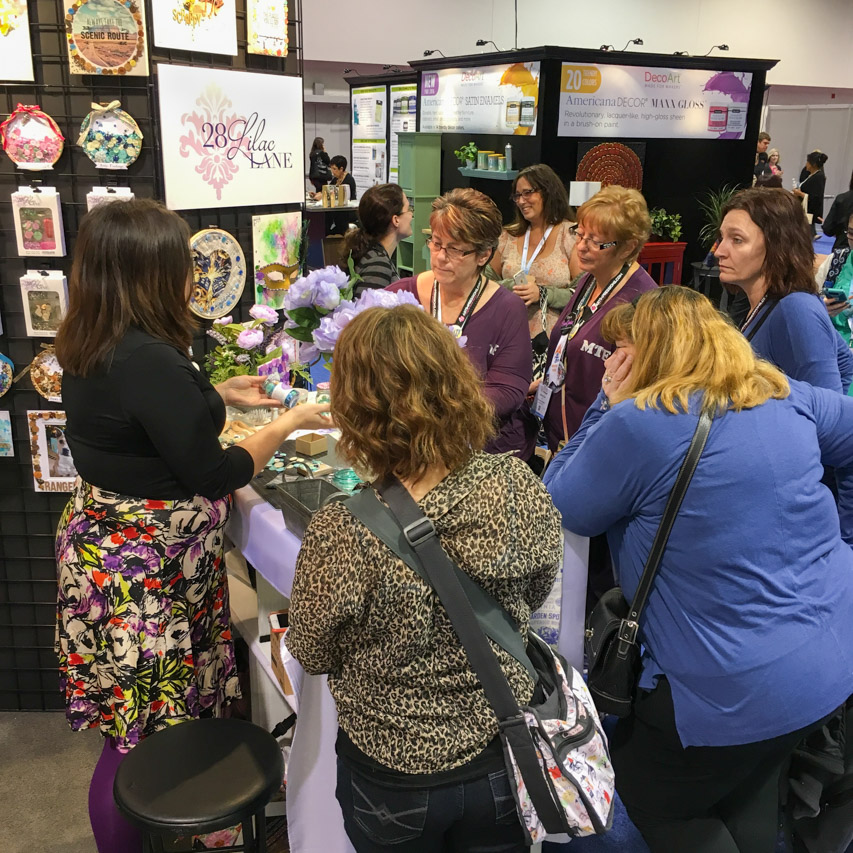
Here’s a peek at some of the friends that dropped by to talk all things buttons in the booth at CHA!
Scrappycampysisters stopped by and got a video tour of the booth from May personally:
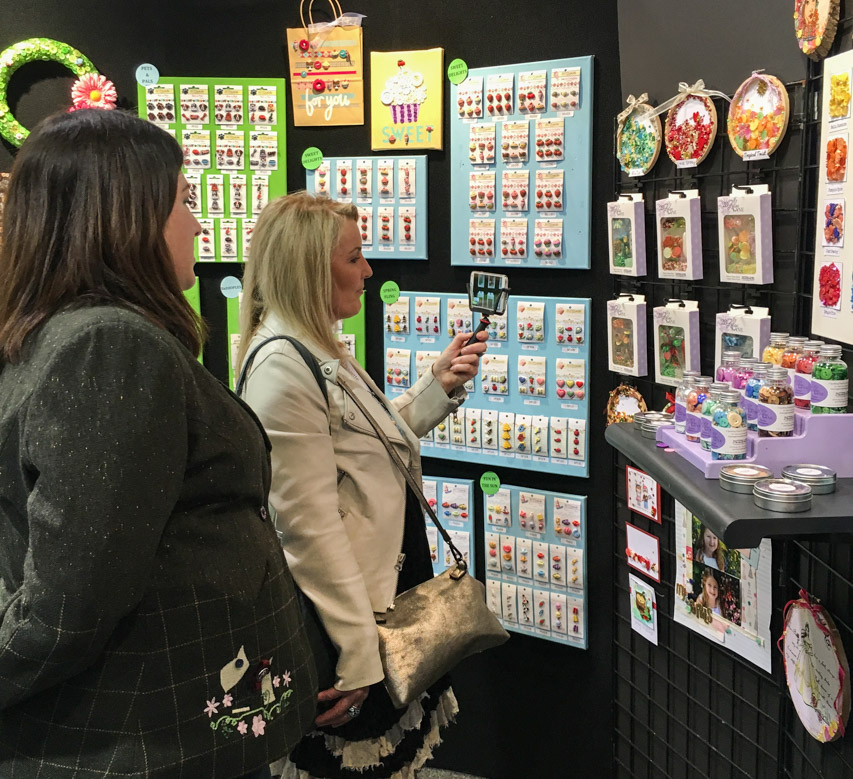
And I finally got to meet Erica of Clique Kits when she dropped by!
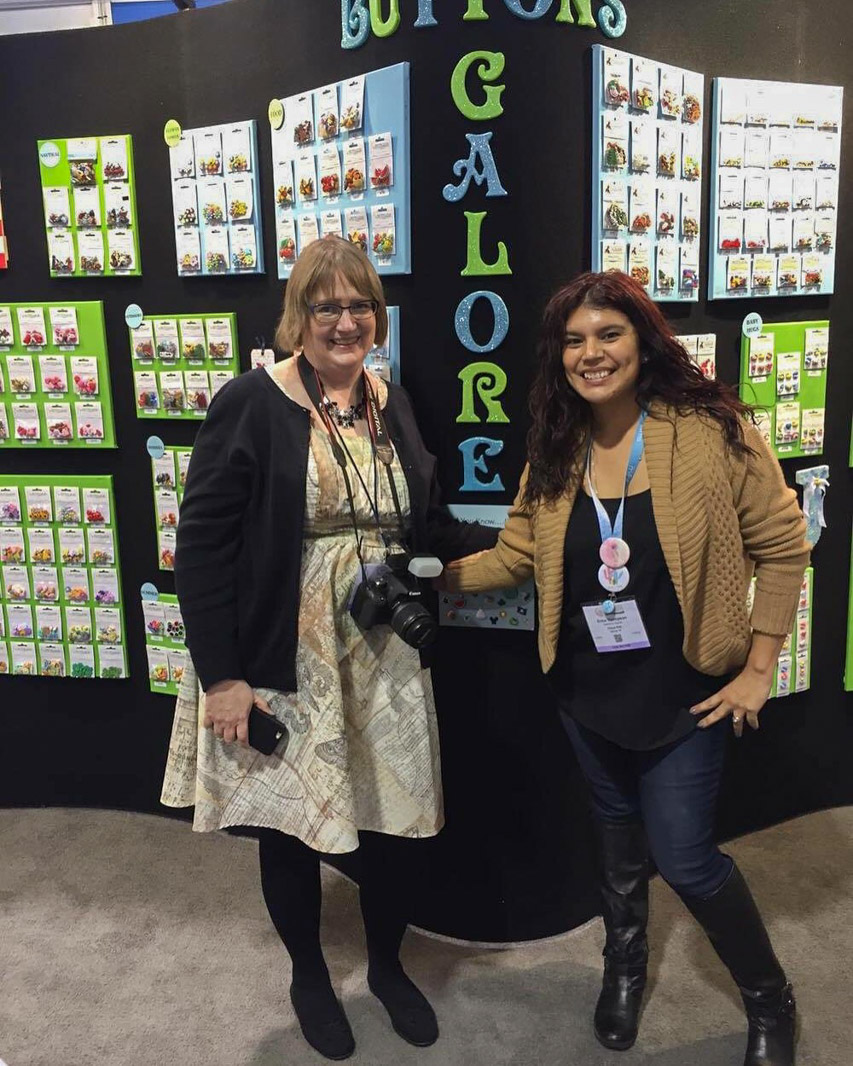
And last but not least…who can forget the Periscope of a Periscope that created an internet black hole with Cathy Zielske and Sandy Allnock? (And then we Instagrammed it too, for good measure!)
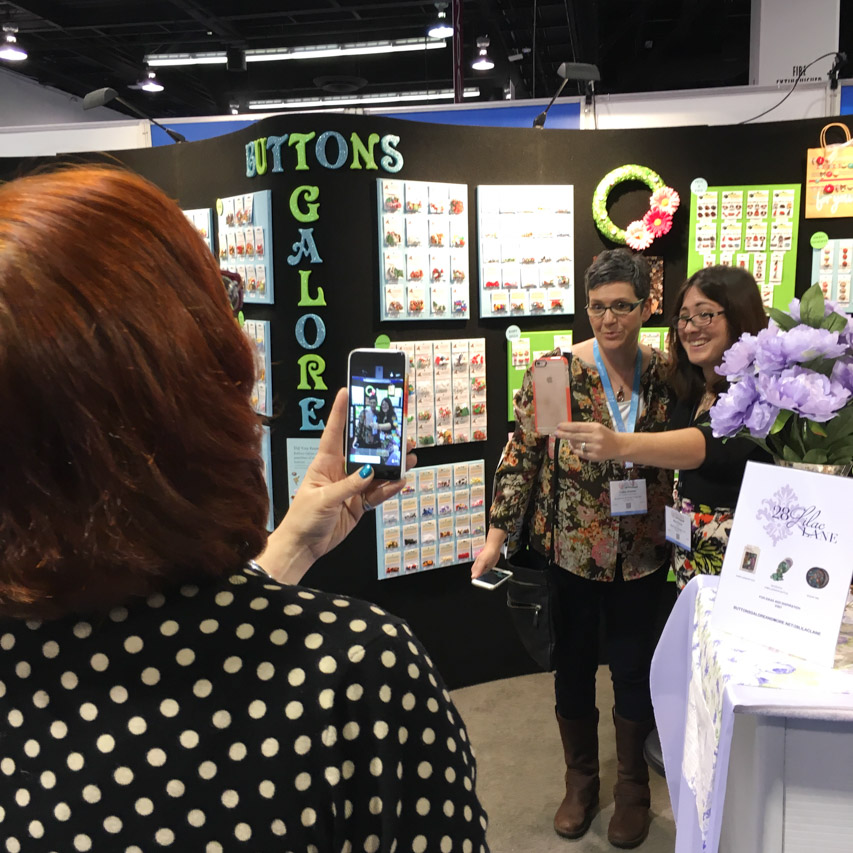
CHA was so much fun we’re taking the show on the road again in less than two weeks! European retailers will have a chance to catch Dan and the fabulous Buttons Galore buttons – including 28 Lilac Lane – at Creativeworld in Frankfurt at the end of the month. We’ll be located in Hall 4.2 Booth G50, across from the Creative Impulse awards display. Please do stop by and visit if you are at the show!
It’s the moment we’ve all been waiting for – the CHA Sneak Peek with the full reveal of the new Buttons Galore line by signature designer May Flaum called 28 Lilac Lane that we’ll be showing in Anaheim at the CHA Mega Show 2016. We’re so excited to share this with all of you!
There’s actually three parts to the 28 Lilac Lane collection being shown at the CHA Mega Show 2016!
Let’s start with the biggest element…embellishment kits! Each item in these themed kits has been painstakingly hand selected by May to be perfect for creating beautiful designs for paper crafters, mixed media, collage, fabric crafts, and a wide variety of creative projects.
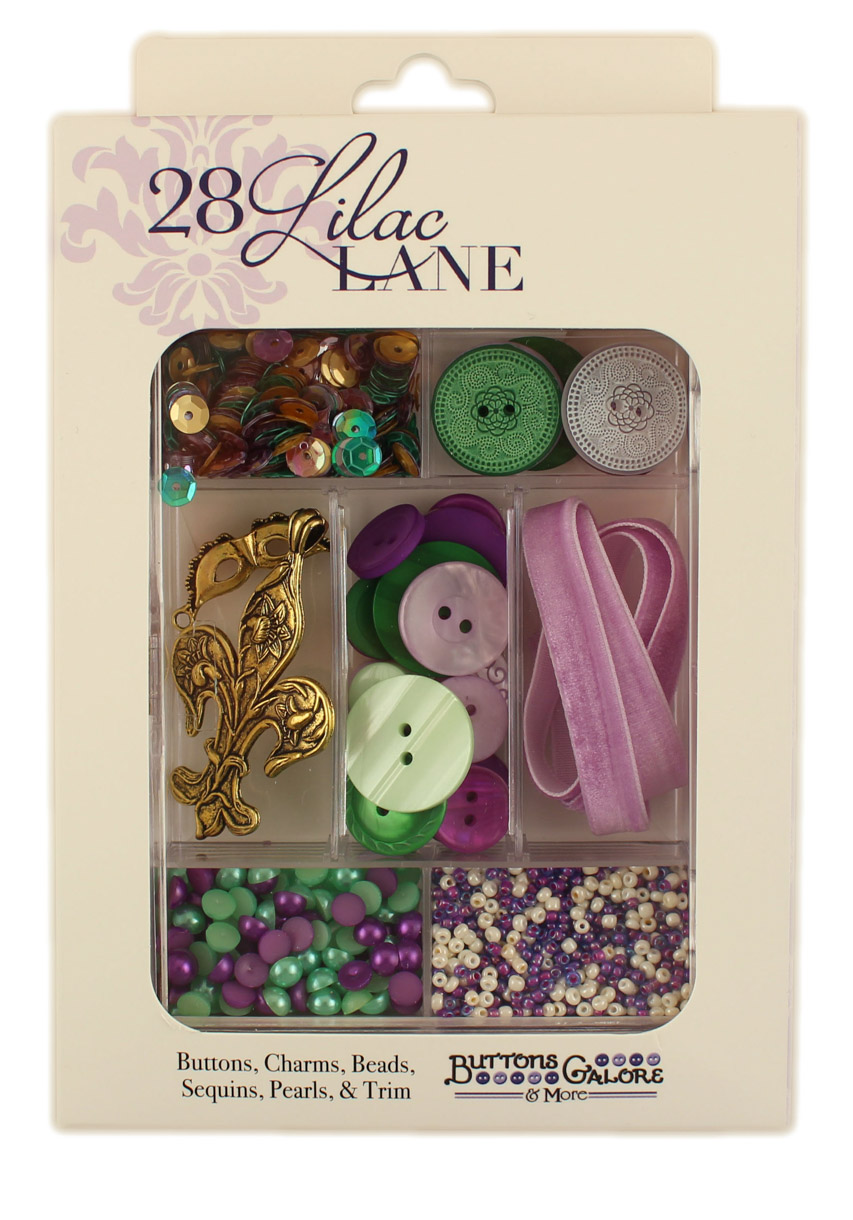
The kit pictured above is called “French Quarter”. The initial release of 28 Lilac Lane embellishment kits will include twelve themes:
The kits include buttons, shimmering pearl accents, seed beads, trim, sequins, and charms. Some kits also include felt shapes and/or novelty buttons. The embellishment kits will have an MSRP of $8.99.
Below (clockwise from top left): French Quarter, New Leaf, Love Story, Adventure At Sea
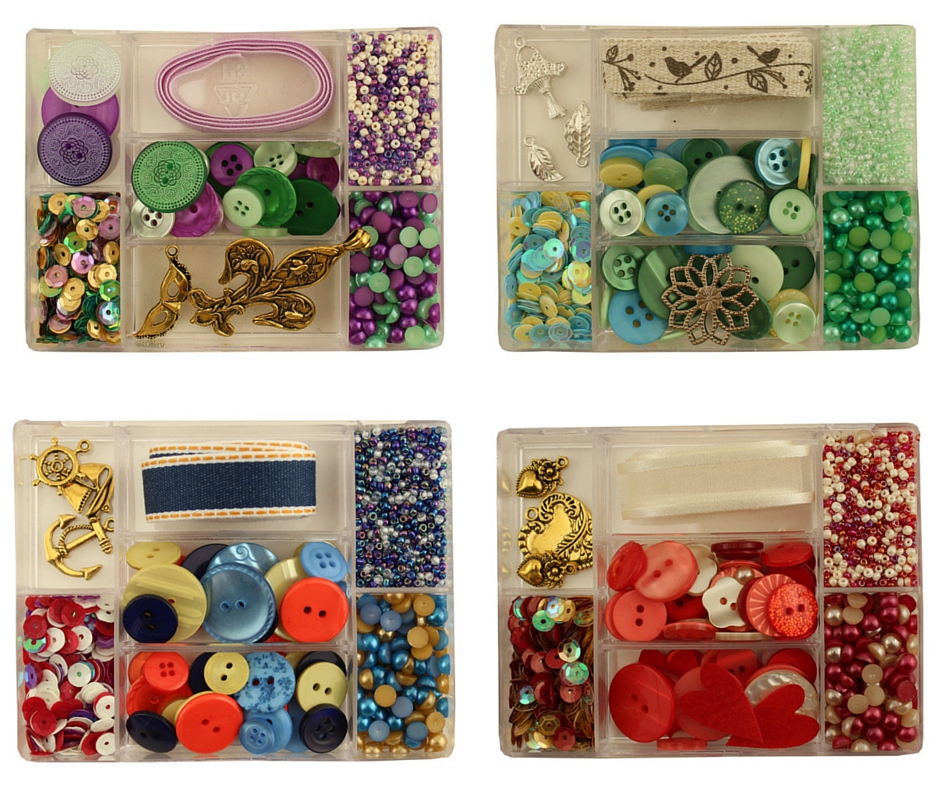
Below (clockwise from top left): Hello Cupcake, Party On, Paws & Pets, Attic Findings.
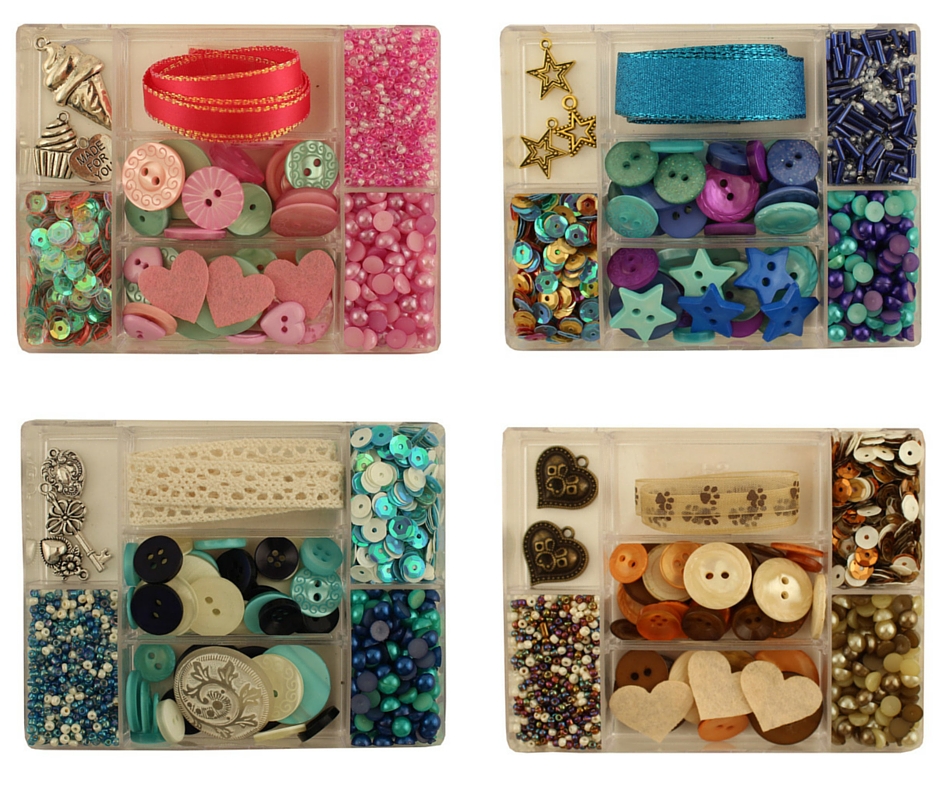
Below (clockwise from top left): Tropical Twist, Autumn Afternoon, Holly Jolly, Let It Snow.
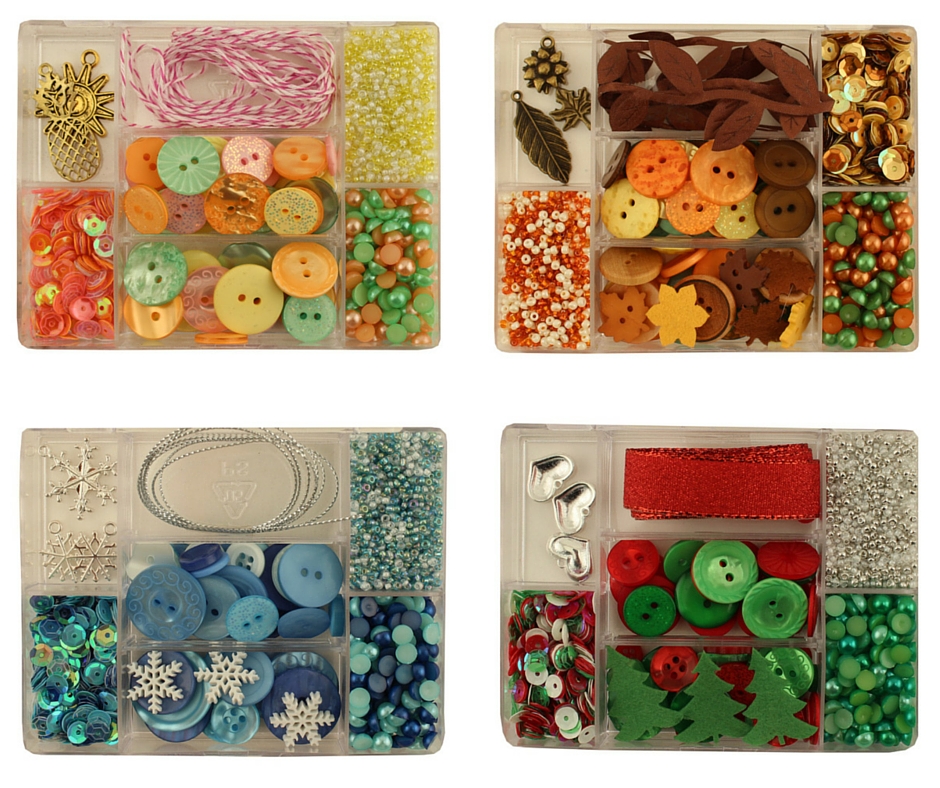
We couldn’t stop with all of that fabulousness though! You can never have too many basics like buttons, pearls, beads and sequins – versatile and useful embellishments for crafters of all kinds. So, May created a collection of additional decorative embellishment jars in color mixes especially designed to coordinate with and extend the embellishment kits!

These jars include 3 oz of buttons, 50 Pearl Accents, 10 grams of seed beads, and 10 grams of sequins, and have an MSRP of only $4.99.
The decorative embellishment jars come in twelve color themes:
Below (left to right): Cotton Candy, Hello Sunshine, Dragon Fire
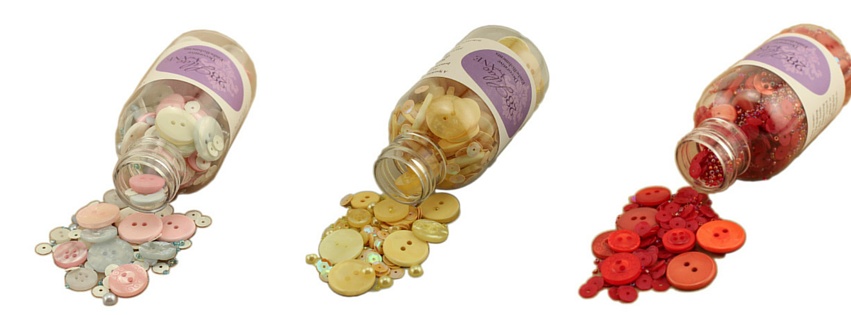
Below (left to right): Pumpkin Spice, Toasted Graham, Winter Blues
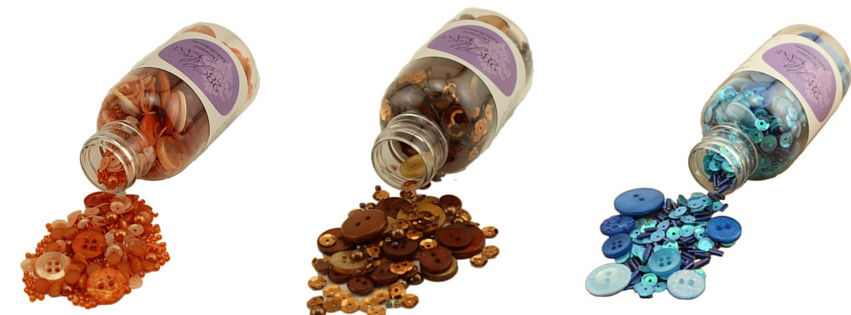
Below (left to right): Minty Fresh, Birds of a Feather, Just Peachy
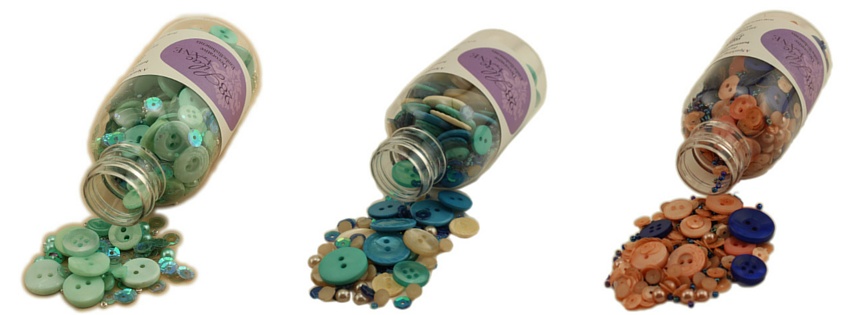
Below (left to right): Oh Christmas Tree, On Lilac Lane, Pretty Princess
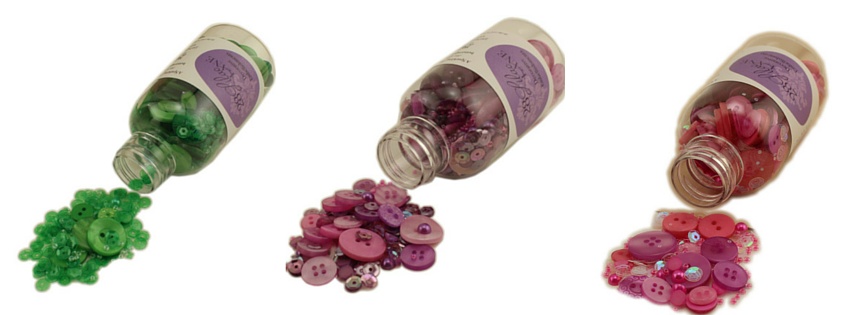
Now that is a lot of embellishment goodness to play with. But before we go…there’s one more thing. How about some sequin tins?
The final piece of the 28 Lilac Lane collection for the CHA Mega Show is a group of tins containing sequin mixes for those projects that need an extra bit of sparkle! These color mixes coordinate with the jars and kits above, so you can mix and match to create the perfect look for any project.
Below (clockwise from top left): Reds, Yellow, Pastels, Neutrals, Bold & Bright, Blues
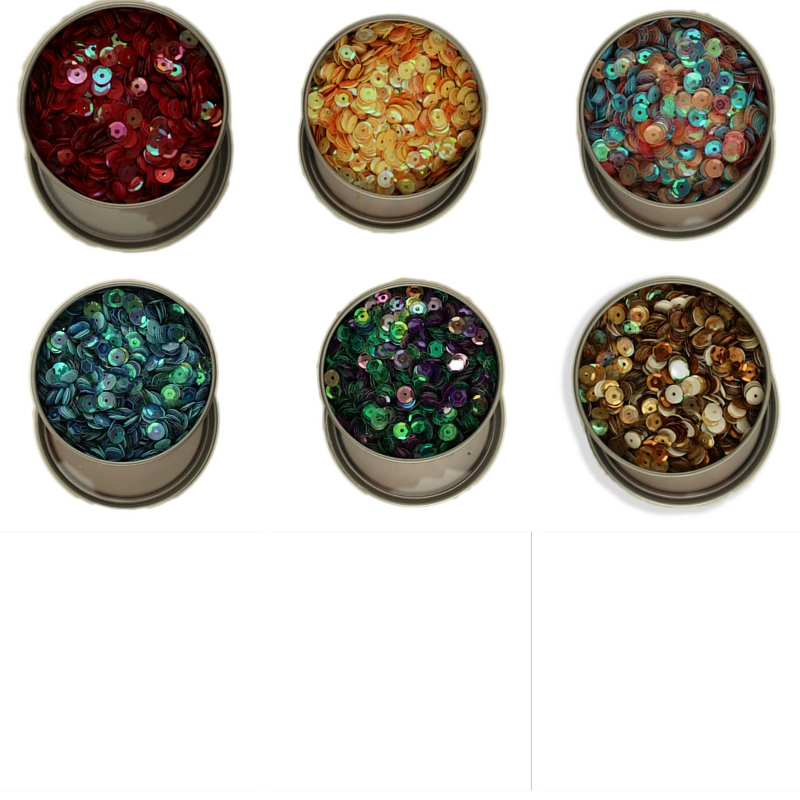
The tins contain 40 grams of sequins, and will MSRP for $2.99.
All of these fantastic 28 Lilac Lane items will ship to stores from Buttons Galore in February 2016!
Stop by our booth (#1809) at the CHA Mega Show 2016 to see the products anytime during show hours. May Flaum will be doing demos with the 28 Lilac Lane products on Sat/Sun/Mon from 10-11:30am and 4-5pm.

A few lucky attendees of May’s demos are going to take home a CHA exclusive 28 Lilac Lane button mix…don’t miss your chance to be front and center for her demos in booth #1809!
Also, be sure to follow us on Instagram and Facebook to get live updates from the show, including booth project photos and a peek at May’s demos!
Dying to know more about the new 28 Lilac Lane collection that is coming from designer May Flaum at the CHA Mega Show next month? Well, she’s here via video to tell you some more about it!
We hope that you enjoyed a peek behind the scenes at May’s studio and the new line! Keep your eyes open soon for the full reveal of the collection!
Today we are excited to share with the craft world that the Buttons Galore family is expanding! Well-known designer and instructor May Flaum is partnering with Buttons Galore to design a signature line of products, which will launch at the CHA Mega Show in January 2016.

May runs a popular blog and education website called Craft with May, and has worked as a designer with many major craft industry brands. She’s authored two books, Scrapbook Workshop: The Best Techniques From Your Favorite Craft Bloggers and Paper + Pixels, and appeared on several seasons of the PBS television series Scrapbook Soup. Prior to the launch of her own site, May was known to many crafters as a successful instructor at Big Picture Classes, where she taught more than 25 classes.
It’s fitting, May says, that her first product line is centered around buttons.
Crafting is all about the details for me. From a light splatter of color to a trio of little pearls, a seemingly random scatter of sequins to a cluster of buttons I love adding my own touches to my projects. As a kid, my favorite spot to hunt for treasures was a set of drawers at my grandma’s house. She had everything from vintage costume jewelry pieces to tiny figurines to buttons. Here in my studio, my own set of creative treasure drawers dominate my work desk and it is always my favorite part of the creative process when I get to dig in and search for the perfect finishing touches to whatever I’m making. Scrapbook layouts to mixed media canvases, décor project to playing with the kids I love using the bits & pieces that I’ve collected over the years.
The one item that dominates my collection is buttons. Small or big, fancy or simple, I adore the versatility and universal usability of buttons. When Buttons Galore approached me about working on a line with them, I thought about my creative process and style, and how the details are my favorite part! Thinking about all of my favorite embellishments, and beginning this collection for them has been a true labor of love. I am inspired by all of the colors and happenings in my own world, and I’m excited to bring this collection to you in 2016.
The new May Flaum signature collection for Buttons Galore will be sold under the brand name of 28 Lilac Lane. The 28 Lilac Lane release at the CHA Mega Show in 2016 will include embellishment kits as well as custom button mixes specially created by May.
“Buttons Galore & More has been my main supplier of buttons for over a decade, and I am really excited to be working with them on 28 Lilac Lane,” May says. “Their button quality and variety is unmatched, and they have been wonderful to collaborate with in bringing 28 Lilac Lane to life.”
Buttons Galore is excited to have found in May the perfect collaborator for its longtime goal of creating an embellishment line, says company president Daniel Hagenman.
“May is an incredibly talented designer who is very passionate about her work. Working with May has enabled us to bring to market a product line that has been in the planning stages for several years. It has been our goal, at Buttons Galore to develop a line of embellishments that complement our vast array of buttons. May has provided the knowledge and insight to make this goal a reality. Her attention to detail and knack for selecting pieces and colors that work perfectly together make these embellishment kits special.”
In the next few weeks, we’ll be sharing more details about the products here on our blog and on our social media. Wondering what they’ll be like? Here’s a hint from May: “I am so excited to dig into these buttons, pearls, charms, and more and get creative. From card making to mixed media, sewing projects to scrapbooks – this is a line of embellishments that will allow you to create in your own way, and in your own style. The finishing touches that bring that special something to your projects.”
For our readers who will be attending the CHA Mega Show, don’t miss your chance to see the products (and May) in person in booth #1809. May will be in the booth demonstrating and answering questions about the new product line during the hours below.
For an appointment outside of those hours, please contact Nancy Nally at Nancy [at] nallystudios.com.
Thanks for joining us for the “See You At CHA” blog hop!

Make sure to visit the other participants in the hop today, and don’t forget to enter the giveaway below to win a $500 Visa gift card!