Header

Archive | Organization

Embellish Planner Pages with Sequins and Button Clips

Planners … Put your own special touch on pages!

I like to make my planner pages stand out by adding a bit of sparkle and bling. A fun and easy way to make your planner unique is by adding some sequins and buttons.  I used a variety of sequin colors from the 28 Lilac Lane line of embellishments from Buttons Galore.

Simply position or sprinkle the sequins on my planner divider page spread.

Once I liked the placement I glued each sequin down. I recommend using Perfect Paper Adhesive. It dries clear and there is no odor plus once dry, you will never see any residue of he glue. I have to say it was very zen. I like repetitive crafts like this.

Continue Reading →

0

Give Your Buttons Beautifully with Faux Vintage Button Cards

Hi! It’s Connie here with my first post for the Buttons Galore & More design team! Today I am sharing a fun project using Button Galores’ “Patriot” Button Tote to make faux vintage button cards and a tote to store them.

Inspired by the navy, natural, deep red and white buttons in the tote, I created a button bag along with hand stamped faux vintage button cards. The buttons are beautiful and look gorgeous on the button cards! This isn’t a difficult project, just a project that requires time. The end result is a beautiful button bag, full of custom assembled faux vintage button cards, that can be used as a decorative way to store buttons, add them to projects, or for giving the buttons as gifts to fellow crafters.

faux vintage button cards with tote

Supplies needed:

The button cards were created using a button card stamp and beautiful buttons from Buttons Galore. Each card has a sample of the buttons that are included in the Patriot Button Tote. No card is alike, as each is created with different buttons. Each button is hand sewn on the card, for easy access and future use. They are created just like the faux vintage button cards (well almost)! Button cards come in all sizes – these are about 2.5″ X 3″. There is plenty of room to mix large buttons with small or medium buttons on the button cards. These are a great gift idea for a crafter or sewist who is crazy about buttons!

faux vintage button cards

The burlap bag is stitched with some scraps of material and more buttons, after all, it is a button bag. The embellishment layers are hand stitched, to the burlap, on the front of the button bag. The button cards fit nicely in the bag. and will work as a great storage idea or a gift that will be loved.

tote for faux vintage button cards

The finished project, with the faux vintage button cards inside the button bag, is all ready to tuck in a gift bag for a special gift!

Faux Vintage Button Cards in a tote - great for gift giving, storage, or using right on mixed media and paper craft projects!

3

5 Easy & Affordable Button Storage Ideas for Crafters

There are as many ways to store buttons as, well, we have buttons! But how do you know what one is right for you? Here’s our five favorite ideas for button storage so that you can always find the ones you need quickly and easily.

Mason Jars

Grandma had the right idea…”Grandma’s button jar” is a great way to store buttons functionally as well as beautifully. Mix them all together, or make a rainbow of jars to choose from for your projects.

5 easy & affordable button storage ideas for crafters

Plastic Zip Bags

They’re affordable, easy to get in a multitude of sizes, and everyone knows how to use them! It’s easy to see what you have inside clear zip bags, and best of all – they are easily portable for crafting on the go!

Hardware Drawers

Hardware drawer units aren’t just great for nuts and bolts – they’re great for small items like buttons in the craft room, too. So go ahead, raid the garage. We won’t tell where that hardware drawer unit went! (photo credit: May Flaum)

5 easy & affordable button storage ideas for crafters

photo credit: May Flaum

Resealable Plastic Containers

Looking for a button storage solution that is lightweight and unbreakable, but still stackable? Resealable plastic food containers might be the answer for storing your buttons. They are available in plenty of sizes, and in either disposable or heavy duty weights, depending on your budget. Try your local dollar store for budget options!

Compartment Boxes

These come in different types and no matter what you call them – jewelry storage, tackle boxes – there’s no argument that small compartmentalized boxes are great for button storage and for storing other small items, too. Easy to tuck in a drawer or a craft tote, these boxes are an easy way to keep your button stash organized.

5 easy & affordable button storage ideas for crafters

What is your favorite button storage method? Please share in the comments to inspire other readers with your ideas!

2

Sew a Quick & Easy Needle Book!

Needles are easy to lose, and not the sort of thing you want to find accidentally in your sewing box (or on the sewing room floor). Our pretty and easy to make needle book will keep your needles safely organized and ready to use any time that you need them!
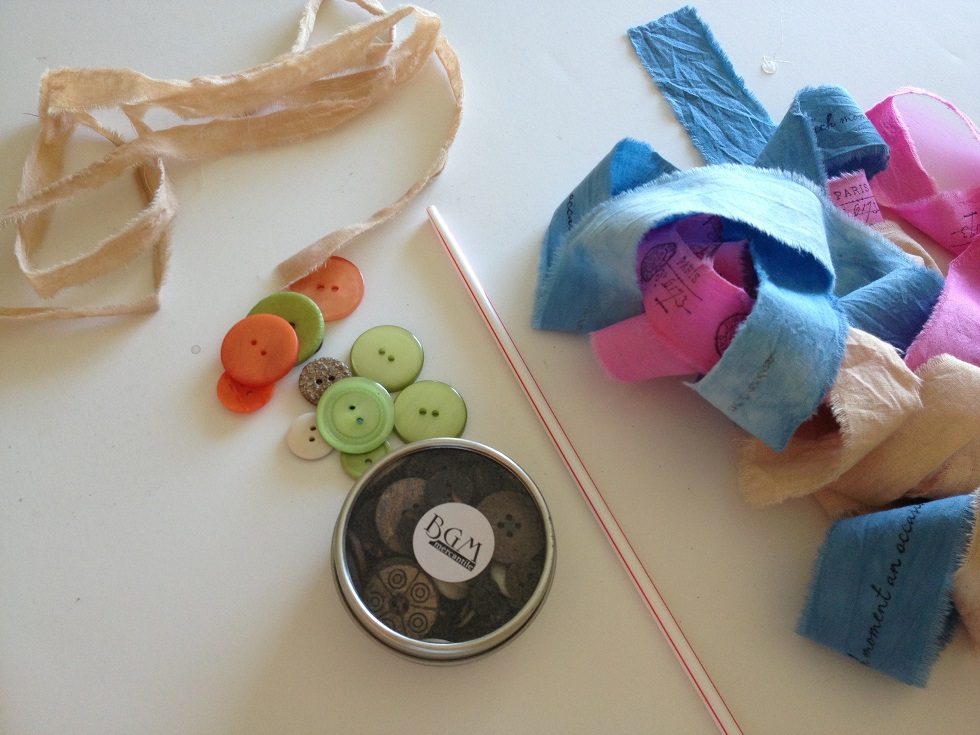
Needle Book cover

Supplies:

This needle book can be make in any size that you would like! Cut 2 pieces of felt the same size for the interior pages, and then cut a piece of fabric that is slightly larger than the felt to make your cover with.

Needle Book interior
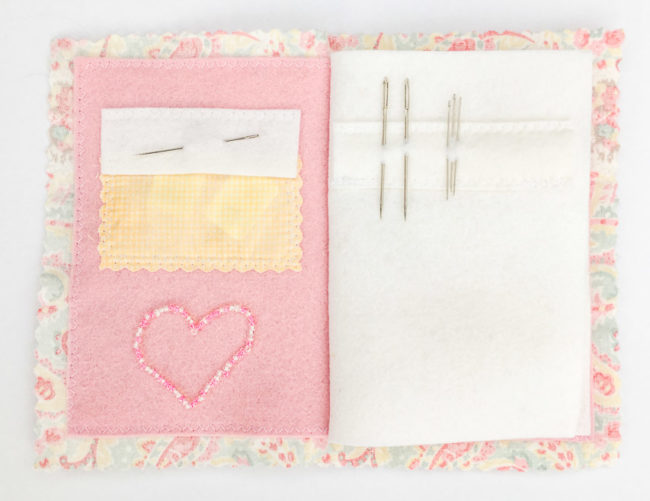
Start construction by working on the piece of felt that will make the inside of the cover (mine is pink).

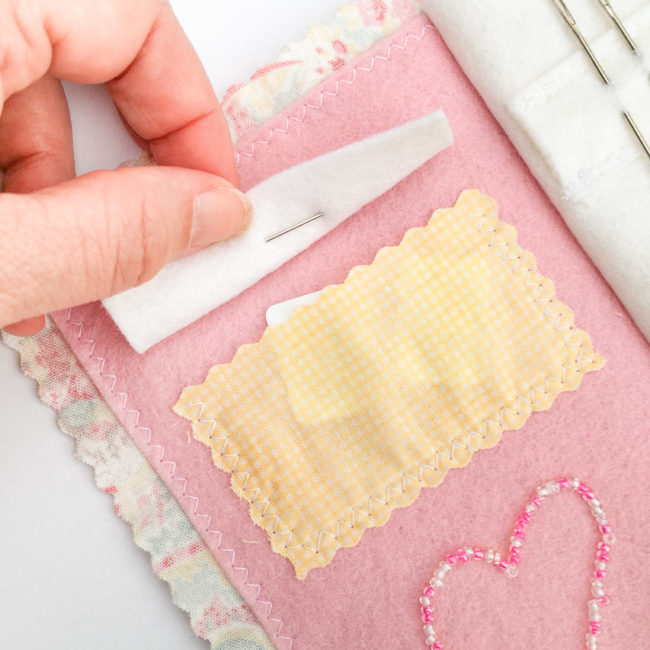
Use pinking shears to cut a small pocket and sew it to the upper left side of the piece (inside the front cover). This will serve as a pocket for needle threaders! To keep them from falling out, cut a flap of felt and stitch it over the top of the pocket.

Needle Threader Pocket

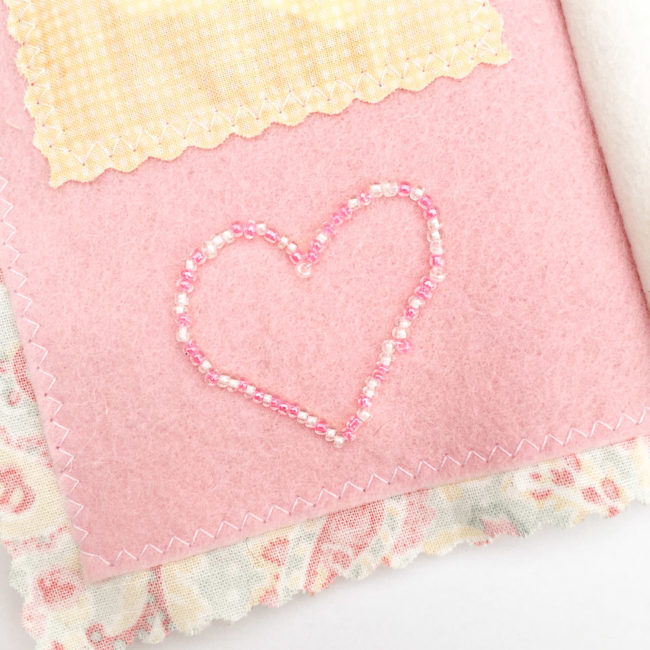
Below the pocket, draw a shape with a fabric pencil. I chose a heart. Use a needle and thread to sew seed beads onto the shape using backstitch.

IMG_6290-2

When the inside of the front cover is done, center the pink felt on the reverse side of the cover fabric. Pin in place, and machine sew using zig zag stitch or by hand.

To create the center page, cut 4 small strips of felt slightly shorter than the width of your pages. (My strips are 1″ high.) Pin them so two strips make a “sandwich” of the page, and one set of stitching will attach both strips. These strips will allow you to put needles on the book’s pages without them going through to the other side.

Needle Book center page

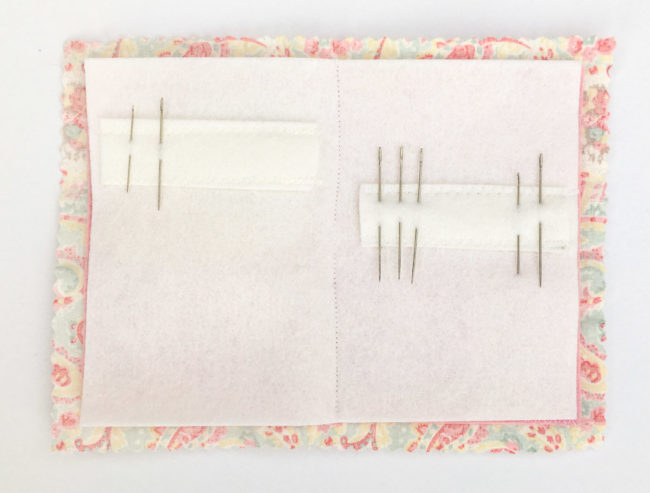
Lay the center page on top of the cover and stitch up the middle to bind your needle book.

For the final touch, finish your needle book’s cover by die cutting a piece of felt to make a flower. Use the flower and buttons from the 28 Lilac Lane “Hello, Cupcake” kit to embellish the cover. Attach them by sewing them through only the fabric layer of the cover so the stitching won’t show through to the inside.

This needle book is a great way to use your scraps, or to make a gift for a sewist or quilter! Putting pockets on all of the pages would allow it to hold packets of machine needles. Sewing in strips of Aida cloth instead of felt to slide the needles into would turn this into a great organizer for cross stitch and embroidery needles!

0

Ribbon Spools made from Buttons

rolled out ribbonsDid you know you can use buttons to create ribbon spools to hold your hand dyed and stamped ribbons and other trims? I ran across this fabulous creative living idea while reading a recent copy of Somerset Life by Stampington and Company. Oh so simple!

BGM buttons

I used these fantastic buttons from Buttons Galore and More along with Laura Kelly’s Hand Dyed buttons  (My favorite by the way)!

Laura Kelly Hand Dyed Buttons

The few supplies you will need to make ribbon spools from buttons:

buttons and supplies

First, thread a very fine piece of fabric such as organza or  lightweight cotton cut into a super thin strip and thread into a plastic drinking straw. I cut my straw down to about 1 1/2″.

threaded through strawNotice how my piece of fabric is sticking out of both ends.

threaded through button Then, simply thread through one of the buttons holes from the inside out and then through the second hole.

threaded through two buttons

Then, roll you trims, ribbons, etc around the straw! What could be a better use for buttons? Hand made ribbon spools for all your ribbons.

rolled out ribbons

Live Life Creatively,

signature


1

How do you store your buttons?

I love the look of buttons. The variety of sizes colors and shapes are just fun to look at without doing anything with them. So, when I store my buttons, I like to put them out on display. I found some great jars I like to keep them in. I can see them and enjoy them as they are but I can also easily find them when they are stored like this.

Store buttons in fun glass jars

Store buttons in fun glass jars

I think it’s fun to use different storage containers.

You can use jars, bowls, bags… keep them in the packaging you bought them in, whatever you like. Put them in bags and in a drawer so you can see them all when you need them but they are tucked away nicely when you aren’t using them. I also have a plastic compartment box I use and I separate the buttons by color. However, my favorite button storage solution is looking for interesting glass at the thrift shops. Some of my smaller buttons fit perfectly into little vintage spice jars – so cute! I keep everything on a couple of shelves, out in the open to see and it works great for me.

Jars of buttons

Jars of buttons

How do you store your buttons?

0

Powered by WordPress. Designed by WooThemes