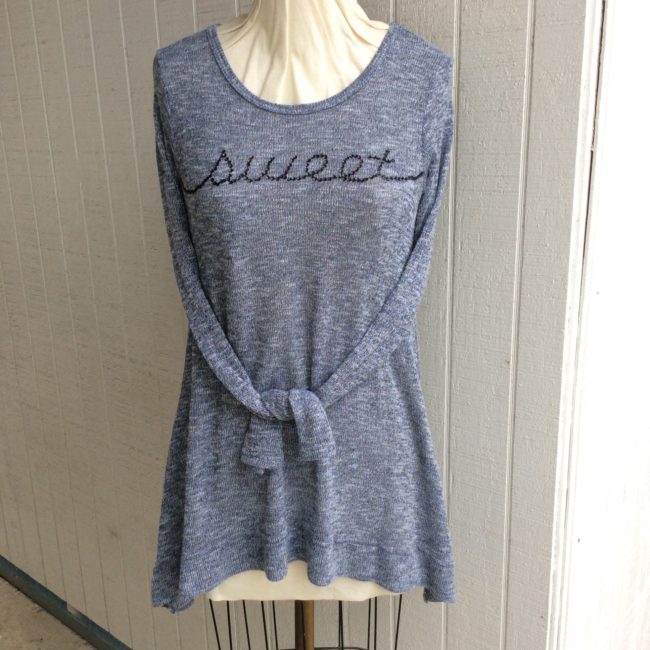
This is super easy! And you can do it with any word and any color sequins.

This is super easy! And you can do it with any word and any color sequins.
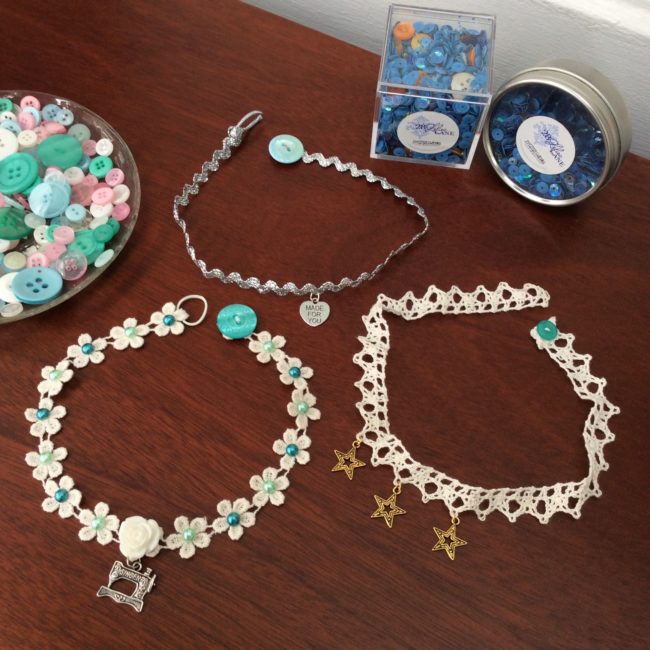
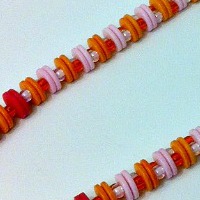
Make fun necklaces with the lace trim found in our 28 Lilac Lane Kits. It is easy to embellish the trim with the pearl flat backs, charms and resin flowers that can be found in each of our Embellishment Kits.
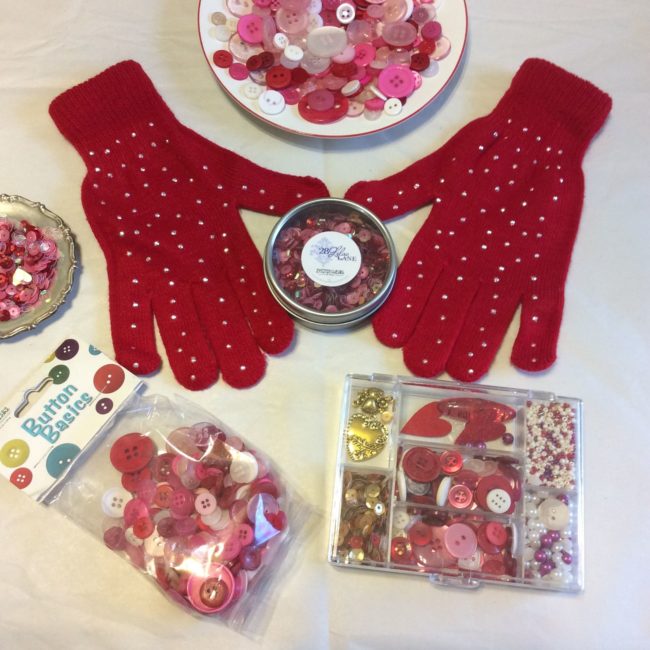
Hi, Stefanie Girard here with a quick and easy Valentine’s Day project. Embellished Gloves For Your Valentine make a great gift. The cuff of gloves is the perfect spot to add a bit of bling with your favorite buttons, sequins, charms and beads. Feel free to use any or all of the embellishments in the kit.
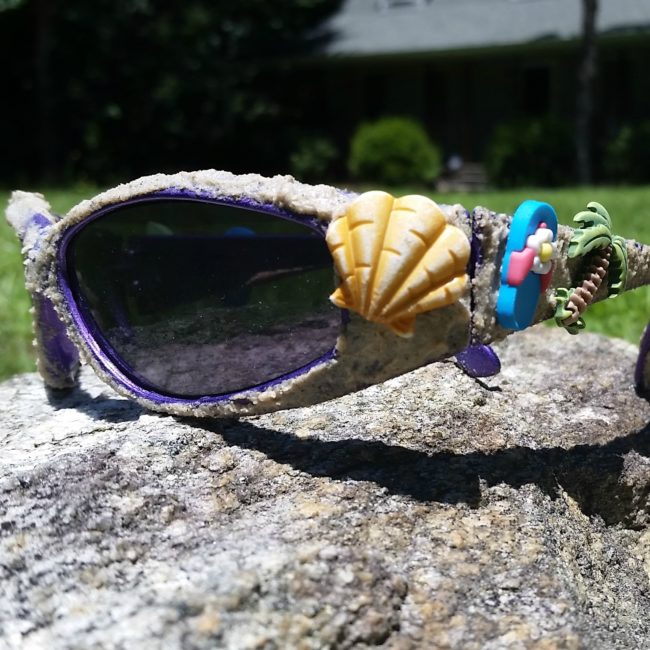
Hi! It’s Lorrie here, visiting the Buttons Galore blog today! Buttons are a fun and easy way to embellish your summer fashion, but have you thought of adding them to your accessories? Who cares if you can’t make it to the beach this summer? Bring the beach to you every single day with these super cute crafty sunglasses (that look and feel like they are covered in sand) featuring summer-themed buttons from Buttons Galore!
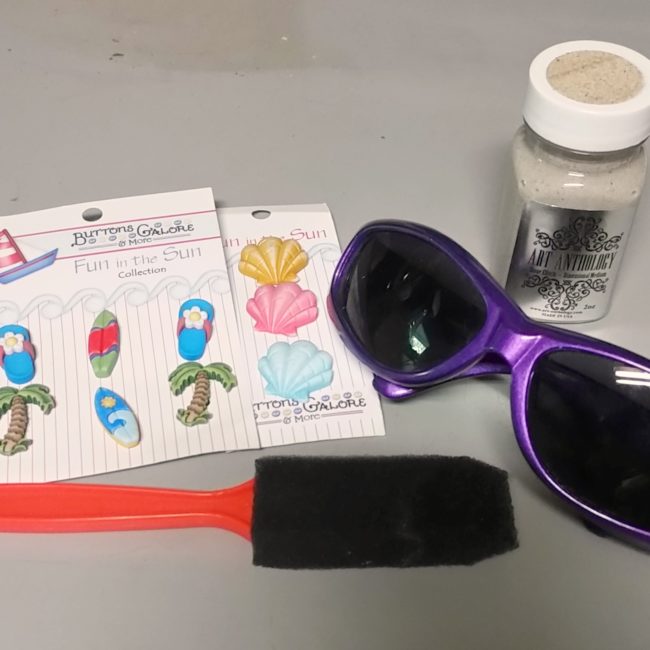
Materials Needed:
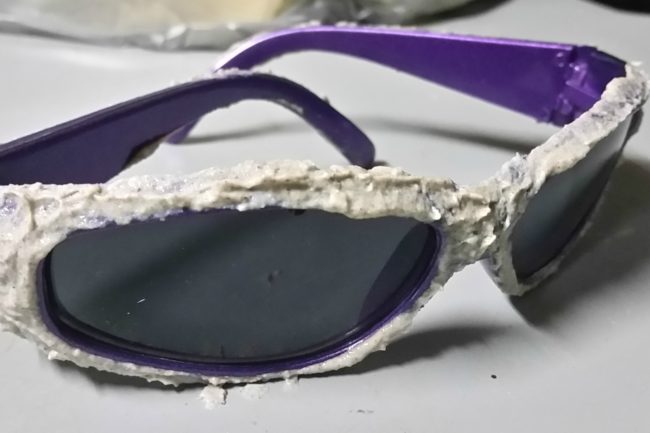
How to:
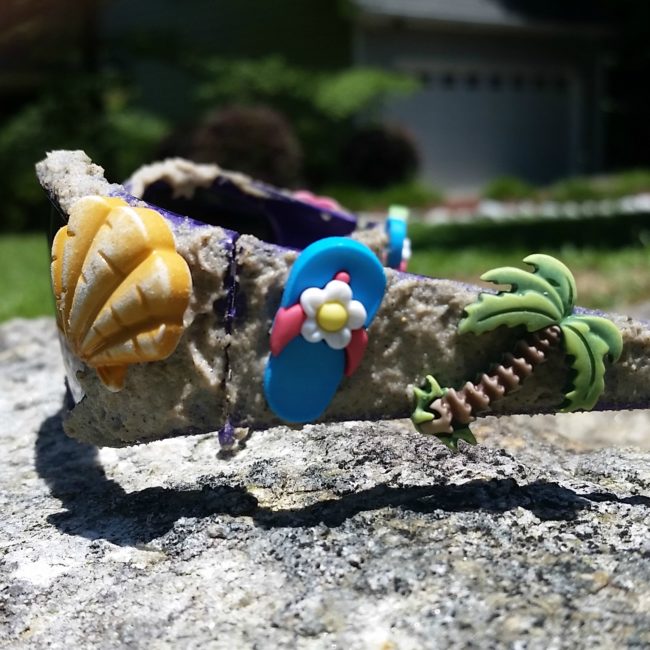
Now you are ready to hit the beach with your summer fun crafty sunglasses – whether the “beach” is your local pool or an expanse of tropical sand!
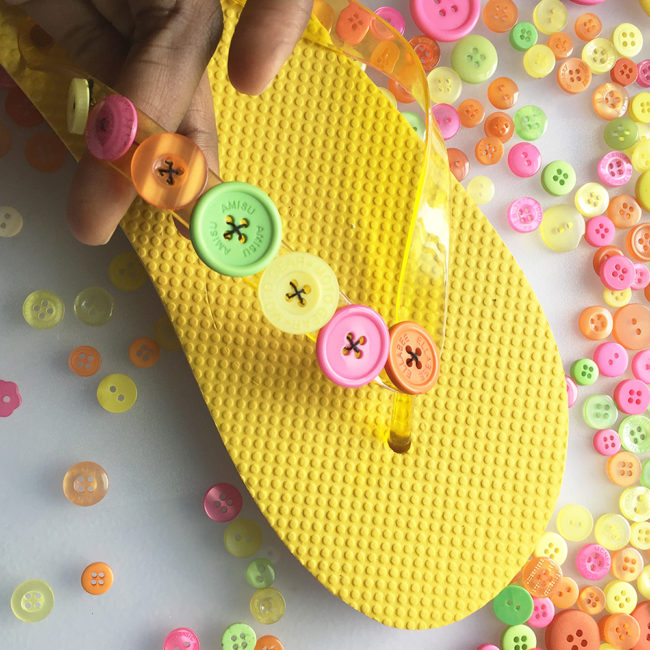
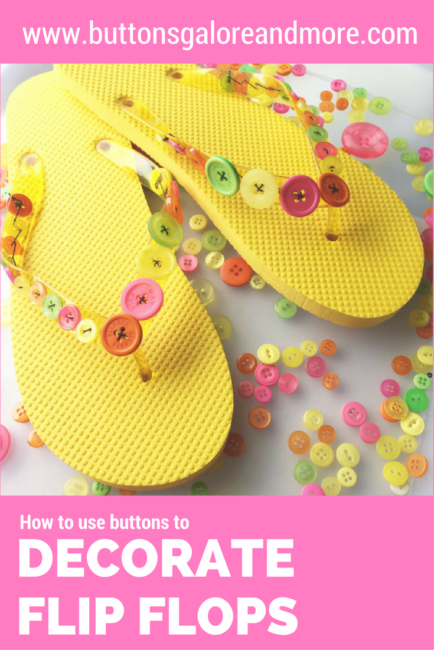
Summer is almost officially here! I’ve got a super easy project to decorate flip flops with buttons to keep you looking fashionable on the hot days ahead.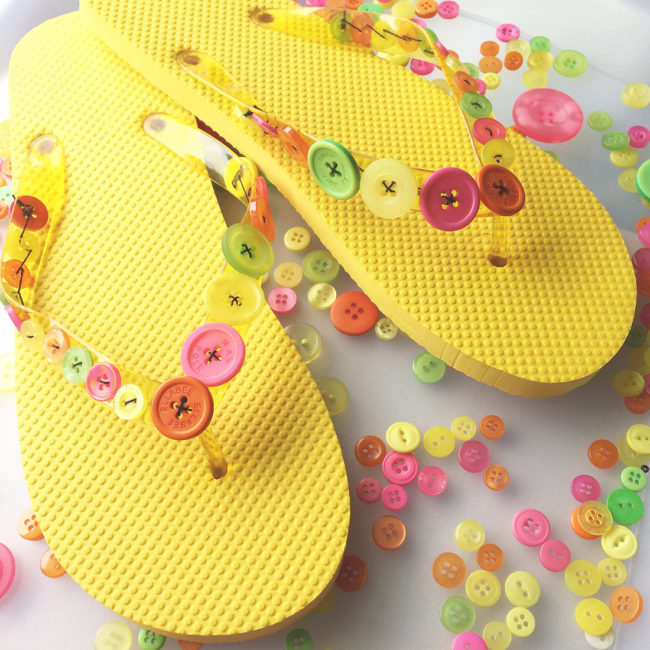
Supplies Needed:
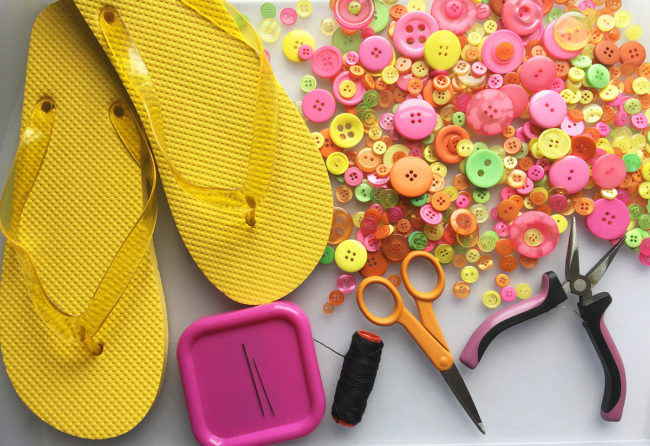
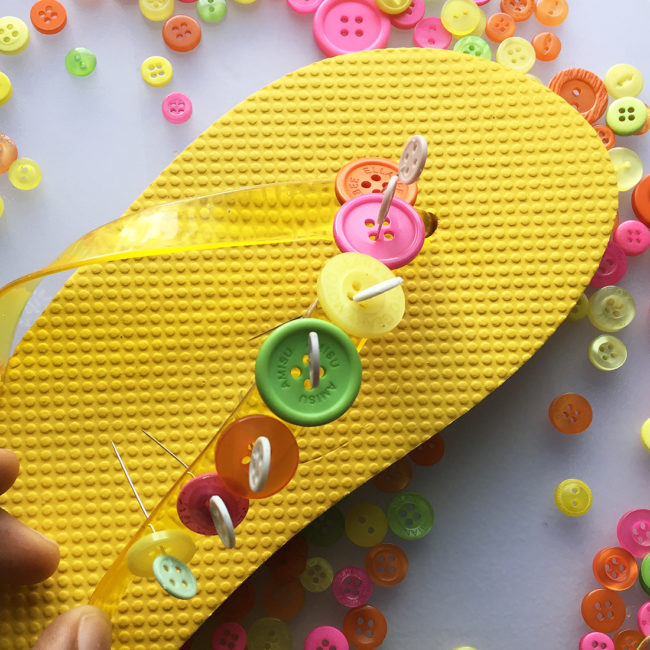
It’s surprisingly easy to decorate flip flops with buttons! Before you get started, make sure you have a thick strong thread. To begin, select buttons from the pack you want to use and line them up on the flip flop strap using pins. This step is optional, but it will provide you with a preview of way the shoe will look and give you the opportunity to work out the placement of the buttons prior to sewing them into place.
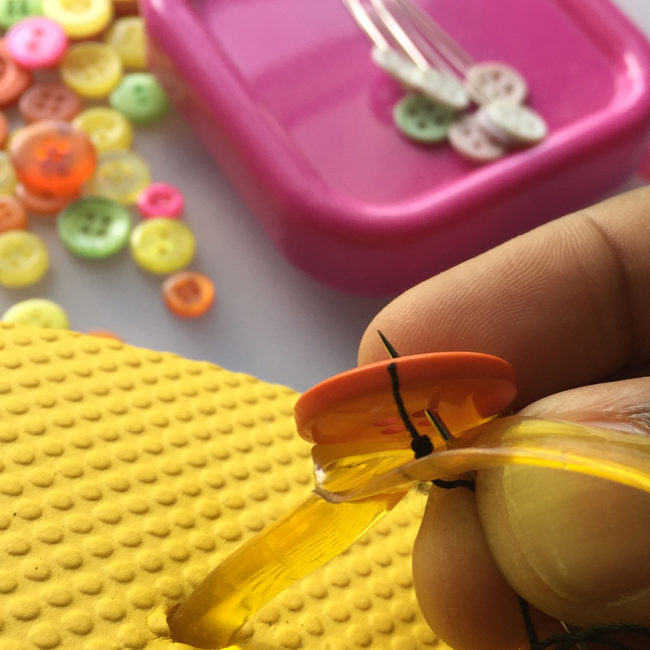
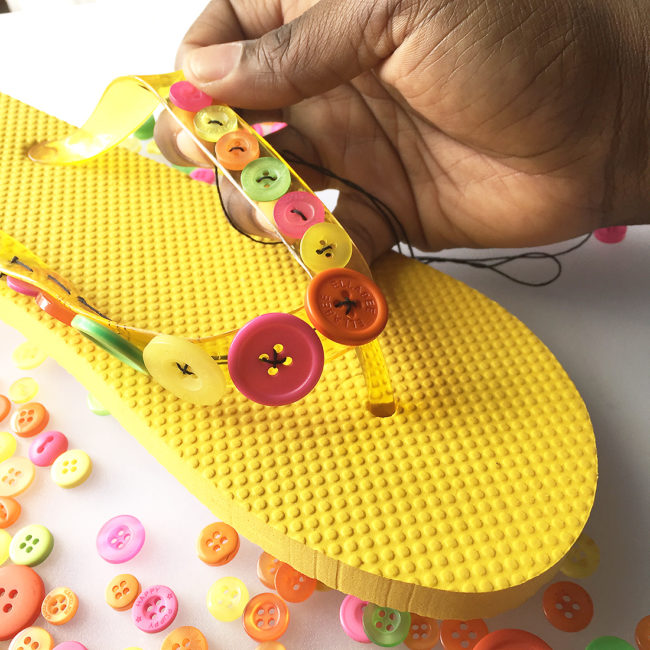
Thread the needle and start attaching the buttons starting at the center of the strap. The first stitch goes into the strap from the top. If you are using a very thick thread or clear plastic thread this will ensure the knot is not rubbing against your foot. After all, you want your shoes to be comfortable!
Be sure to tie all of your knots tightly. Don’t worry about the knot showing, as it will be hidden once you start adding your buttons. Depending on the thickness of your flip flops’ strap and the bulkiness of the thread, you may find it easier to push and pull the needle using pliers. I didn’t have any issues doing it by hand, but I would suggest you have a pair handy just in case you run into any issues.
Continue adding buttons until you get to within an inch or two of the end of the strap. After you have secured the last button, push the thread through so you can again tie the knot on the top of the strap.
Beginning at the center again, add the next set of buttons to the other half of the strap.
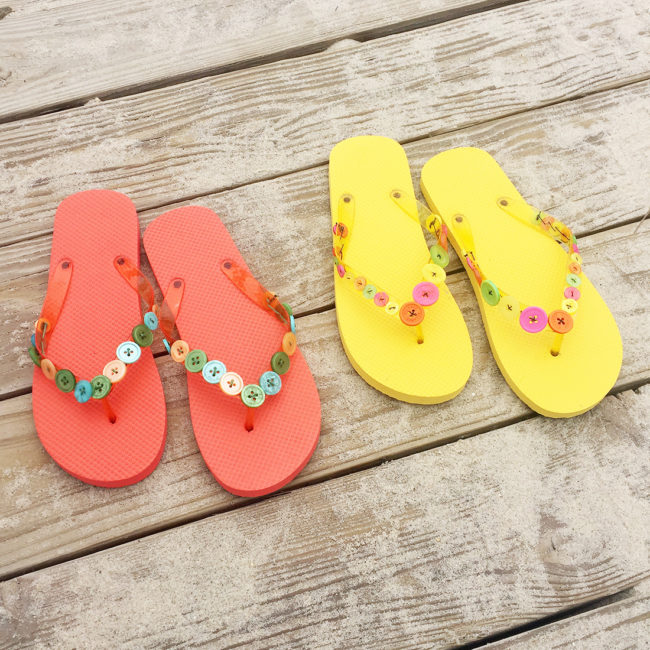
Now you just repeat the process for the other shoe and your flip flops are ready to wear! This time of year it’s easy to find inexpensive flip flops just about everywhere in every color you could need. It’s such an easy affordable project to decorate flip flops with buttons and you can make several a pairs in festive colors to coordinate with every outfit for your summer events. I had so much fun with this project I’ve already got two pairs ready for a stroll on the boardwalk!
Don’t waste any time…the beach is waiting! Grab a Button Bonanza bag and a pair of flip flops to start creating your summer wardrobe today!
Hello Everyone! This is Katie from the Buttons Galore & More Design Team and today I have a unique but simple project for you guys to make this summer!
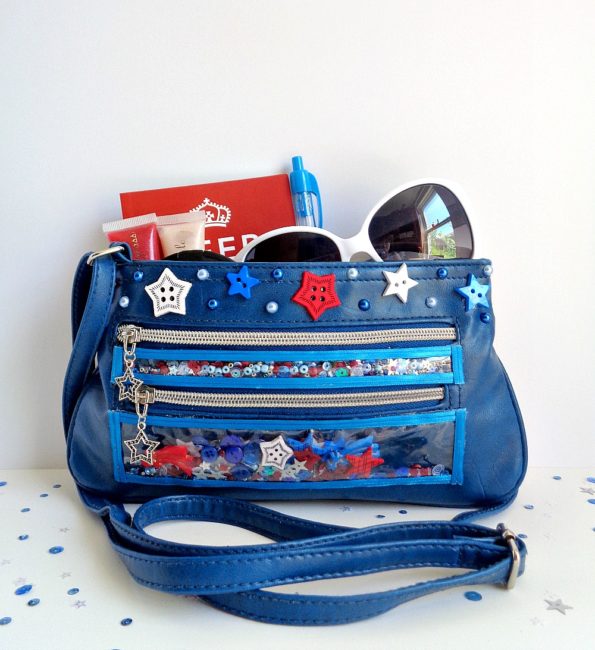
Today I will be showing you how to update an old crossbody bag by adding shaker elements onto the bag! What does that mean you ask? Well, if a shaker card and a crossbody bag got together, my project would be the final result. In today’s project, I will be showing you how to incorporate those shaker card elements into a bag. I will also be showing you how you can update a bag with items from the 28 Lilac Lane Embellishment Kit in Stardust.
In addition, I decided to go with a red, white, and blue theme for my crossbody bag. However, you can choose any type of theme and choose any type of bag style for this project. Just make sure that the bag doesn’t have any big embellishments on the outside and that the bag is cleaned (both inside and out) before you begin the project.
With all that in mind, below is the supplies that you will need to make this project!
Supplies Needed:

Step 1: Determine where you want the shaker elements to be on your bag. When doing this you will want to look for a ”small area” which is flat and that doesn’t interfere which any other components of the bag.
Once you have determined where you want the shaker elements to be, it is time to measure. Measure one area of the bag and then cut out 2 pieces of page protector which fit in that area. Then take your We R Memory Keepers Fuse Tool and fuse the sides and bottom of the 2-page protector pieces together. With that being said, make sure you leave the top of the page protector open. When you’re done, you should have created a little shaker pouch.
Repeat this step if you are creating more than one shaker element for your bag.
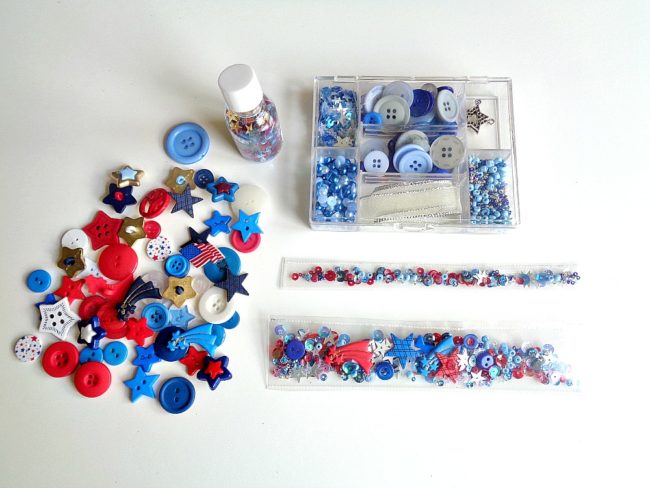
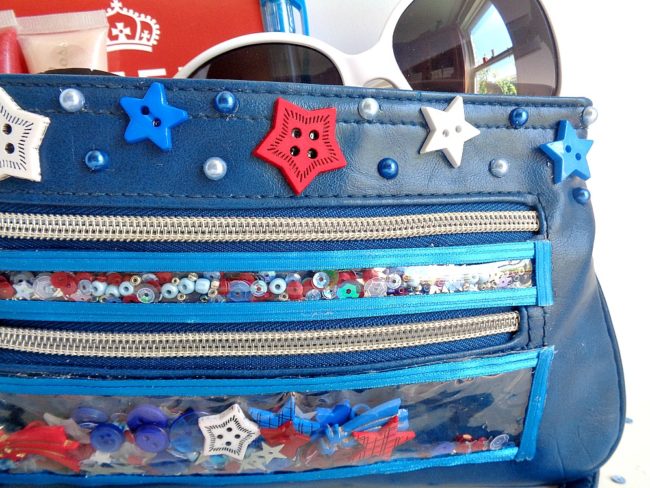
Step 2: Fill up the shaker pouch that you created in step 1 with buttons, sequins, and seed beads. For my two shaker pouches, I filled them up with buttons, sequins and seed beads from the 28 Lilac Lane Embellishment Kit in Stardust. I also used buttons from the Patriotic Value Pack and sequins/seed beads from the 28 Lilac Lane Sequin & Seed Bead Mixes in Stars & Stripes.
Once you have filled up your shaker pouches, fuse the top together so all your buttons, sequins, and seed beads are sealed in.
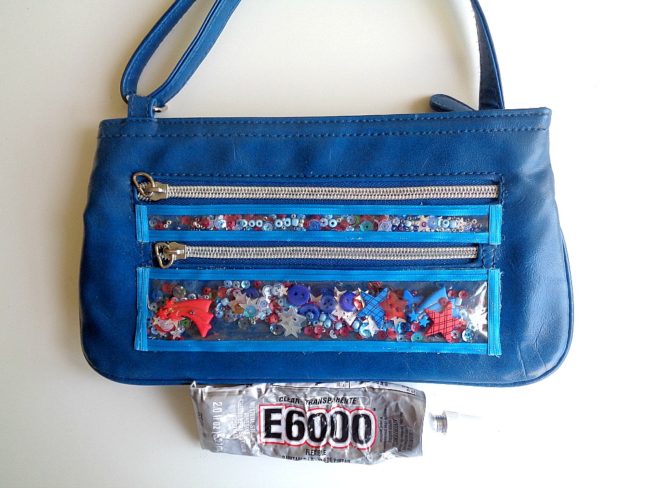
Step 3: Using some E6000, apply some glue onto the back of your shaker pouches and then adhere them to your bag. Then to cover up the edges of the shaker pouches, glue some ribbon around the edges of the pouch.
Once you are happy with the placement/look of your shaker pouches, set your bag aside to dry.
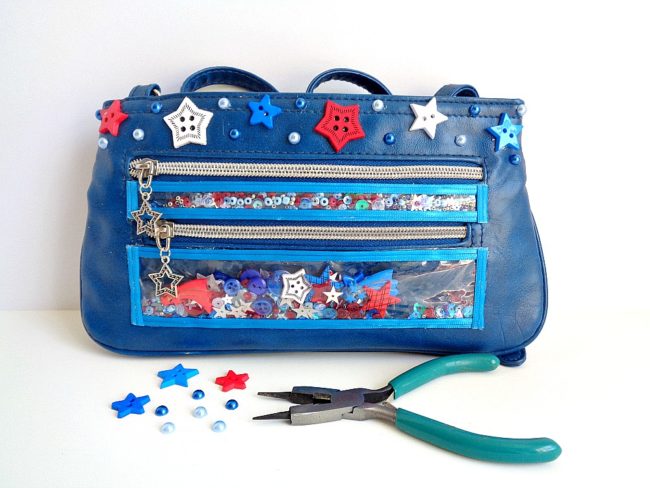
Step 4: Now it is time to decorate the rest of your bag! Grab all your different embellishments and begin playing around with how you want them to look on your bag. For example, I replaced the handles on my zippers with the star charms from the 28 Lilac Lane Embellishment Kit in Stardust. I also used the pearls from that kit to decorate the top of my bag along with some star buttons from the Patriotic Value Pack.
No matter how you decorate your bag, make sure you glue down your buttons with some E6000 and to set the bag aside to dry.
Once the glue on your bag has completely dried, you are now ready to wear it!
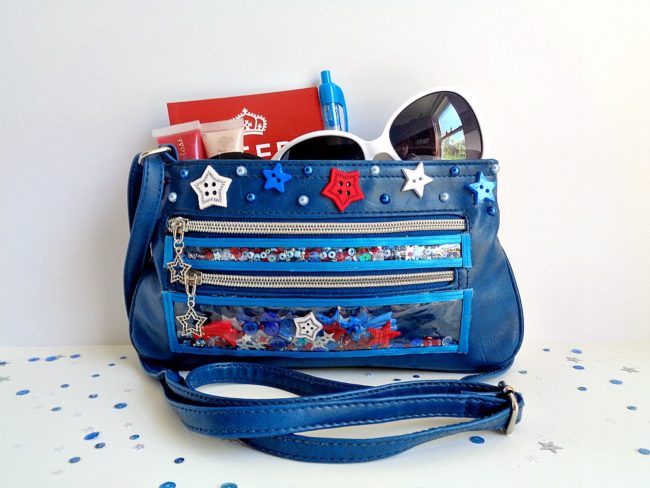
I loved how this bag turned out and think it would be so cute to wear to a barbecue! With that being said, I would recommend that you wear your shaker bag to functions which are more laid back. For example, a barbecue, going to the thrift store, and so forth.
If you made this shaker bag, what 28 Lilac Lane items would you use?
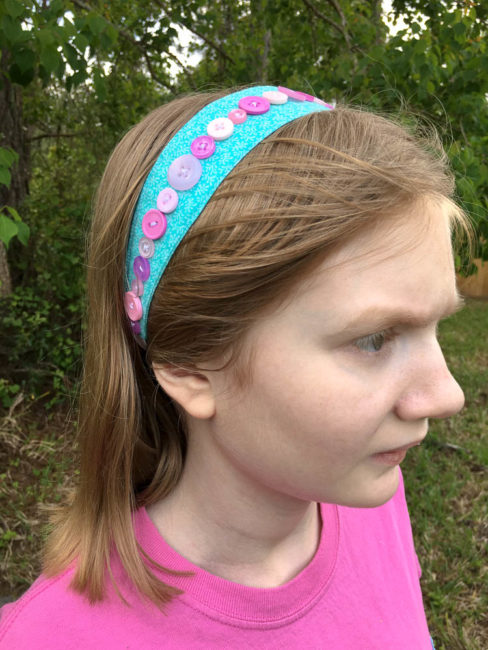
Adding buttons is a beautiful way to add some color and detail to just about any clothing item. On this button headband that I made for my daughter, the buttons create a pretty pink contrast to the turquoise and add some shine and texture.
Supplies Needed:
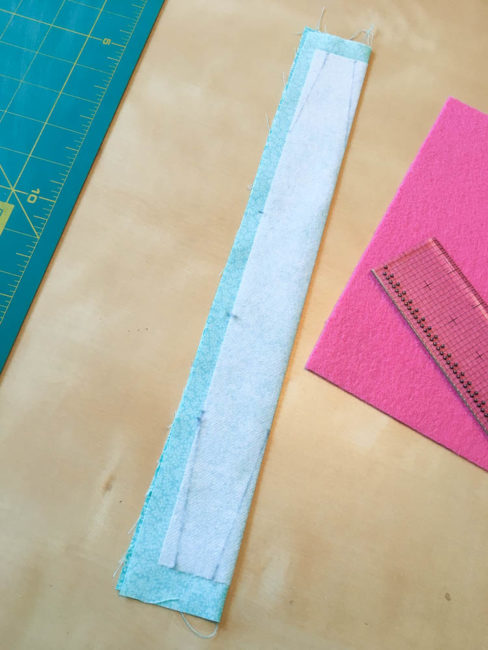
This project is a great way to use up scraps! To begin, I cut a 14.75″ x 4″ piece of quilt fabric. Then I cut a 13.5″ x 3″ piece of the interfacing. I then took them to my ironing board and followed the package directions to fuse the interfacing centered onto the back of the fabric. Before turning my iron off, I folded the piece in half along its length and ironed that fold in place as well.
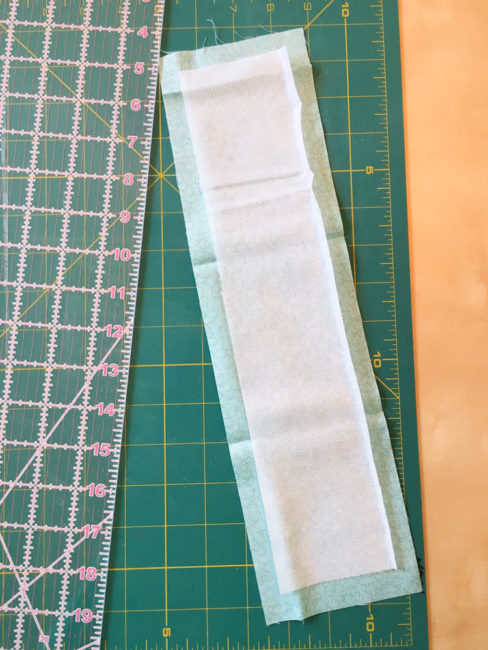
Then I returned to my sewing table and got out my ruler and a fabric marking pencil. I marked dots 3″ from the ends of the interfacing on each side, and marked a .75″ wide measurement centered in the middle of the interfacing’s narrow end. Then I used these markings to draw lines to follow to create the taper on the ends of the headband. I also made some markings to show where my sewing should stop on the long edge that isn’t folded, so that the headband could be turned right side out.
Next I measured around my daughter’s head and figured out how much elastic it would take to make the headband fit her nicely. To figure this out, I took the measurement of her head and subtracted the length of the interfacing (which would be about the finished length of the headband). That gave me the distance that the elastic needed to cover. Then I added about a half inch to that number and cut my elastic to length.
I laid my elastic inside the folded fabric with the ends sticking out between the two lines that I had drawn. I then pinned it into place to hold it securely into position while I sewed.
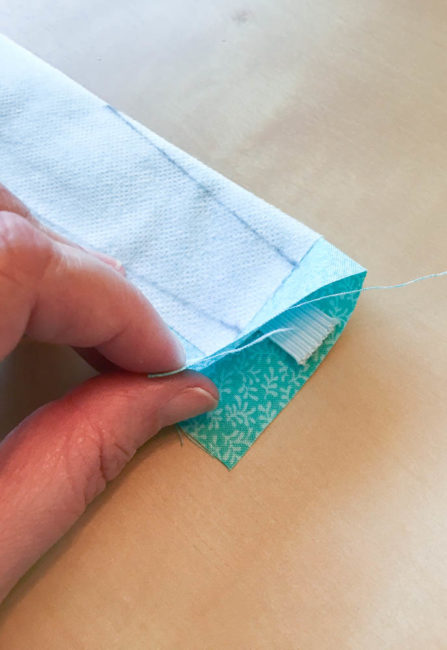
I then sewed on the lines I had drawn and across the end of the headband, reversing across the elastic a few times to make it extra secure.
Then, I pulled the fabric so it was bunched up on one end of the elastic, positioned the other end of the elastic, and pinned it in place to sew.
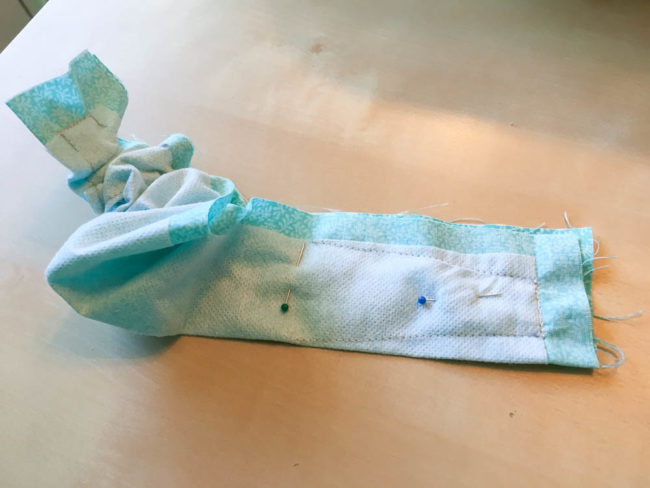
When I was done, I was left with a fabric tube with a hole in the side that was being gathered up by the elastic inside of it.
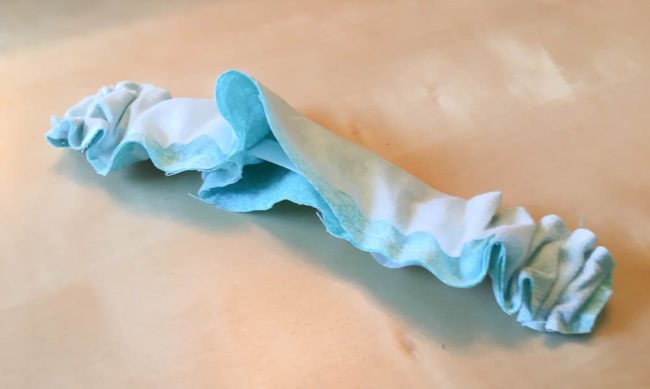
I used the opening I had left to turn the headband right side out, and after a bit of pressing, was able to fold under the raw edges of the opening and pin them together.
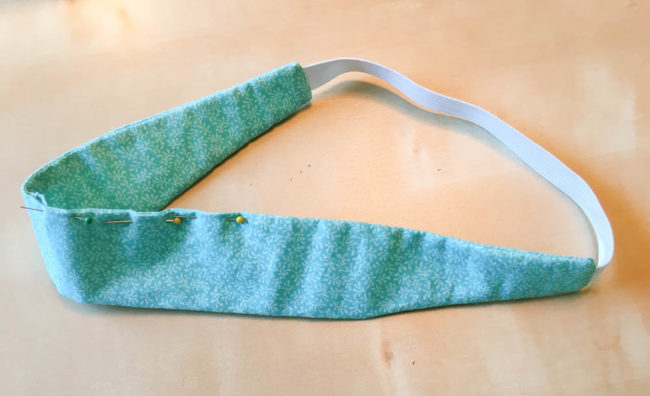
To seal the opening and make the edges of my button headband lie nice and flat, I topstitched around all the way around the edges on my headband. My headband was done…but very plain!
So to fix that, I sat down with a container of the “Strawberry Cheesecake” Color Blend buttons. These shades of pink range from bubblegum to barely there, but all are gorgeous! They are perfect for projects for little girls (and big girls) of any age. I got out a needle and thread, and one and a time sewed a row of buttons along the length of the headband. Yes, by doing this step last the sewing will show on the back side of the headband, but it won’t be visible while being worn. And doing the sewing after the headband is finished makes it easier to ensure the buttons end up exactly in the center, which is a detail that will be seen.
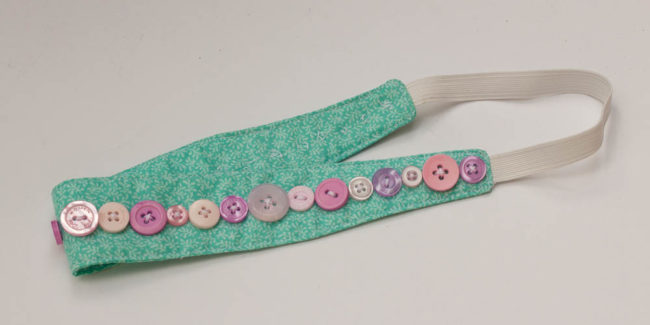
This button headband project is slightly time-consuming but definitely worth the effort! My daughter doesn’t want to take off her beautiful new accessory, and buying a similar one in stores would be much more costly. DIY a button headband for someone special today!
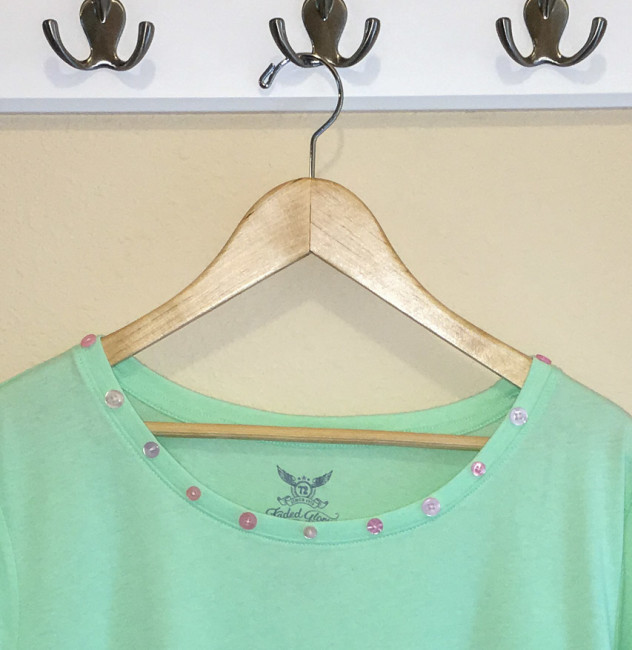
The weather is warming up and soon it will be t-shirt season! Using buttons to embellish a t-shirt is an easy way to add some instant style to an inexpensive, plain piece of clothing without the need for a sewing machine or hours of time.
This project can be done on any affordable basic t-shirt. The only supplies needed are buttons and a needle and thread.
To coordinate with this green t-shirt, I selected our Strawberry Cheesecake Color Blend buttons, gentle shades of pink that contrast nicely to the shirt’s green tone. But this project could be made in any color combination, like school colors, which makes it perfect for special events or creating a custom piece to match that hard-to-match clothing!
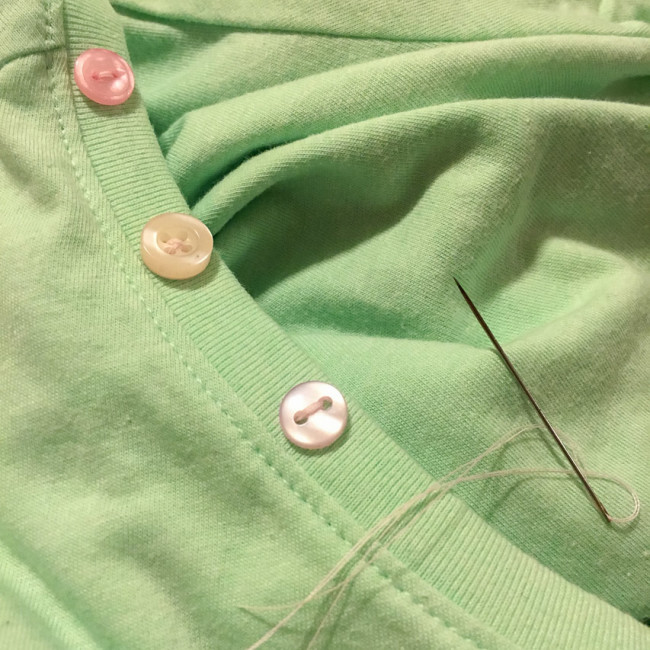
Beginning at one of the shoulder seams, sew the buttons centered onto the border of the neckline. The spacing of the buttons can be measured if you’d like, but I chose to estimate my placement. The spacing distance will depend on how many buttons you’d like to use. If you want a heavily embellished look, put your buttons close together – or even touching! Spacing the buttons further apart, as I chose to, will give a more delicate look to the embellishment.
For a more interesting design, you can vary the sizes and colors of the buttons like I did. I recommend, however, keeping them small enough on a shirt with a binding like this on the neck to stay within the trim itself.

The finished result is an embellished t-shirt that is affordable and simple to make, and an easy look that will still look “finished” around the neck if you skip wearing jewelry.

While you are at our webstore checking out the Strawberry Cheesecake Color Blend buttons, don’t forget to also check out our spring clearance sale section. Some items are as much as 80% off as we are clearing out inventory in preparation for moving our warehouse!
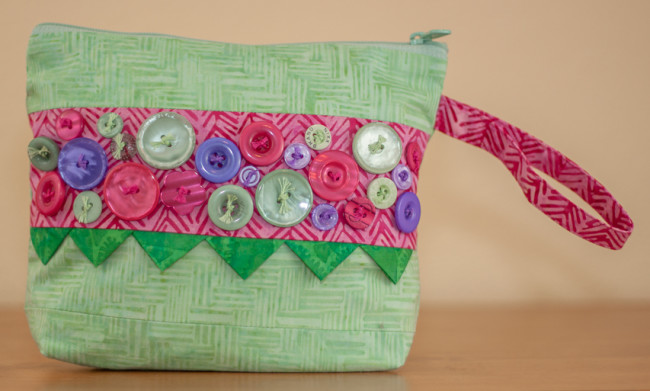
Regular readers of the site may remember this delightful zip pouch that I made last fall during the Handmade Holidays blog hop. It is from a pattern called Everyday Zips by Joanna Figueroa of Fig Tree & Company, available online or at local quilt stores.

Making the pouch was so simple and fun that I decided to make another one for the trade show booths in January…this time in a spring color scheme, and with a few modifications. Because you can never have too many zip pouches, right?
Supplies:
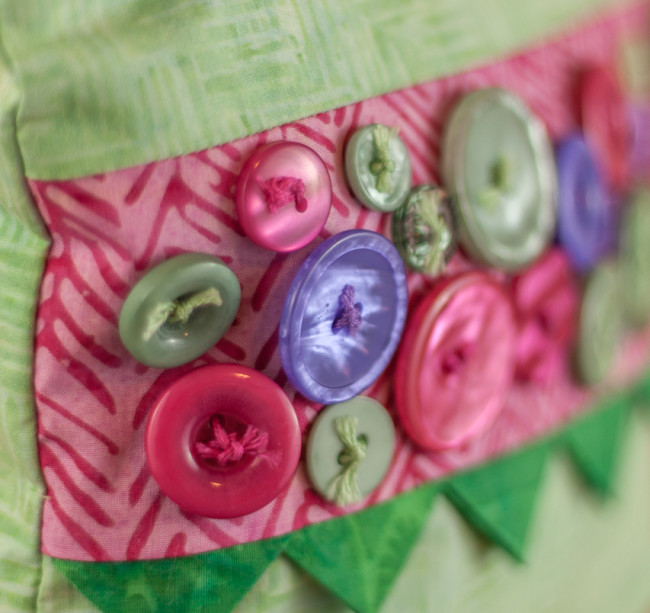
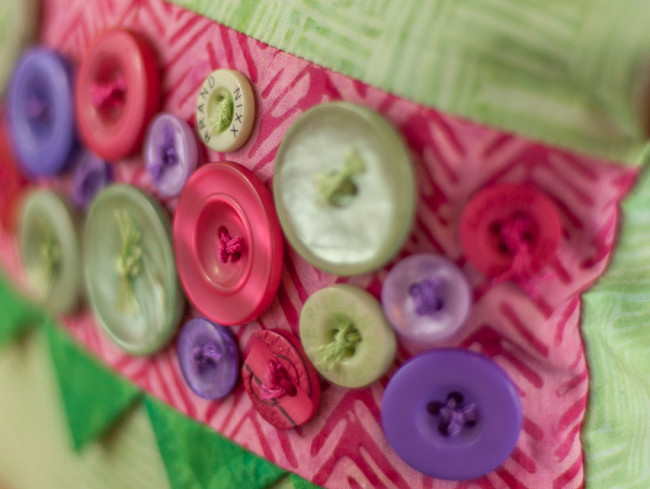
For this version, I created a totally different look. Instead of vintage style neutrals, the new design used batik print quilt fabric in spring colors. The light green fabric was used for both the exterior body and for the lining. The bright pink contrast panel and the green prairie points create an impression of leaves surrounding flowers.
Instead of just a few button accents, the spring zip pouch has a whole collage of buttons decorating its front panel!
As well as adding buttons, I also took something away from the front of the pouch. You might have already noticed that the zipper pocket isn’t on the front of the new design of the pouch. Removing it simplified the sewing of the pouch and made room for the large decorative button collage.
Making the change to remove the zipper from the panel was easy. I measured what each of the three pattern pieces for this panel would be in height after the seam allowances were removed. Then I added those three numbers together, added the seam allowance to the top and bottom of it. That gave me the new height I needed to cut my panel to. (The width is provided by the pieces for above and below the zipper.) Using those dimensions, I created the new pattern piece. The piece I ended up cutting was 3″ by 9.5″. I then simply skipped the steps in the pattern dealing with installing the pocket zipper and the pocket lining.
Zip pouches make great gifts for Mother’s Day, birthdays, and teacher appreciation! What occasion do you have coming up that a fun zip pouch gift would be perfect for?
Welcome to the Handmade Holidays on Buttons Galore! We’re joining in by sharing ideas for handmade Christmas gifts using – of course – buttons!
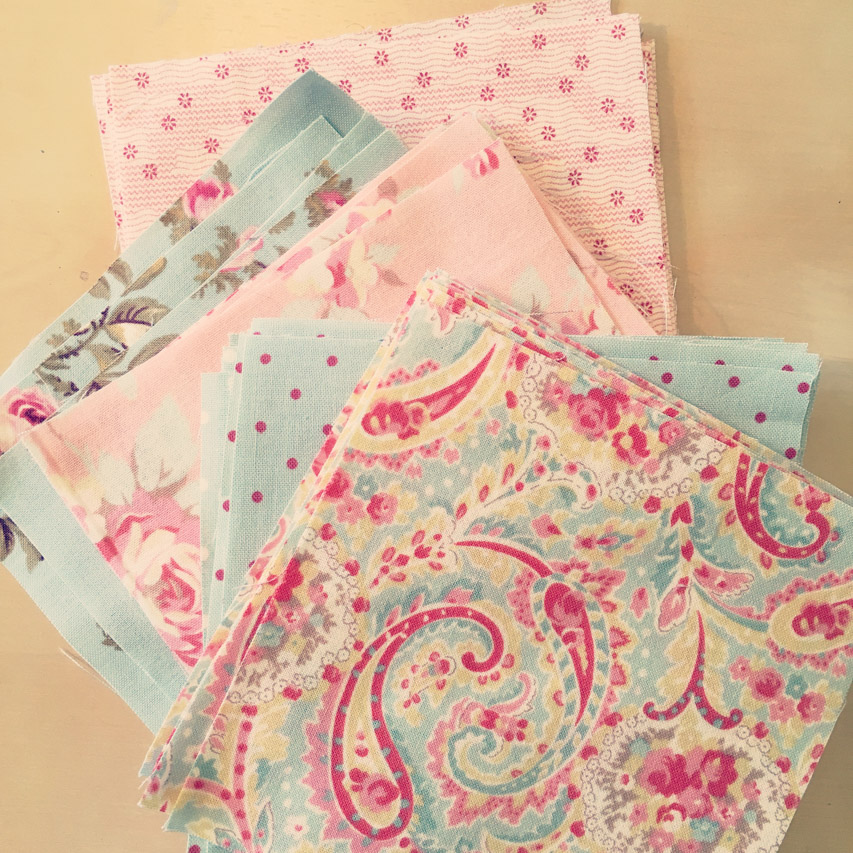
Today’s gift is both practical and pretty! You can never have enough tote bags, and today our gift is a nice sized one that is made gorgeous using an easy rag quilting method.

Supplies:
This bag is quilted using convenient 5″ charm squares. I originally cut these to use on another project but when I switched fabrics for that project, these charm squares went unused. It took 18 of them to quilt this tote: 9 for the front of the squares, and 9 for the backside of them (to help create the bulk in the visible seams).
Laying out the pattern is the first challenge. I inserted a piece of cardboard in the tote to help make it nice and flat while I worked on the layout.

Once your layout is arranged, the next step is to prepare the edges that won’t be quilted of the squares.
On the backing squares, each edge that won’t be part of a rag quilted seam should be trimmed by 5/8″.
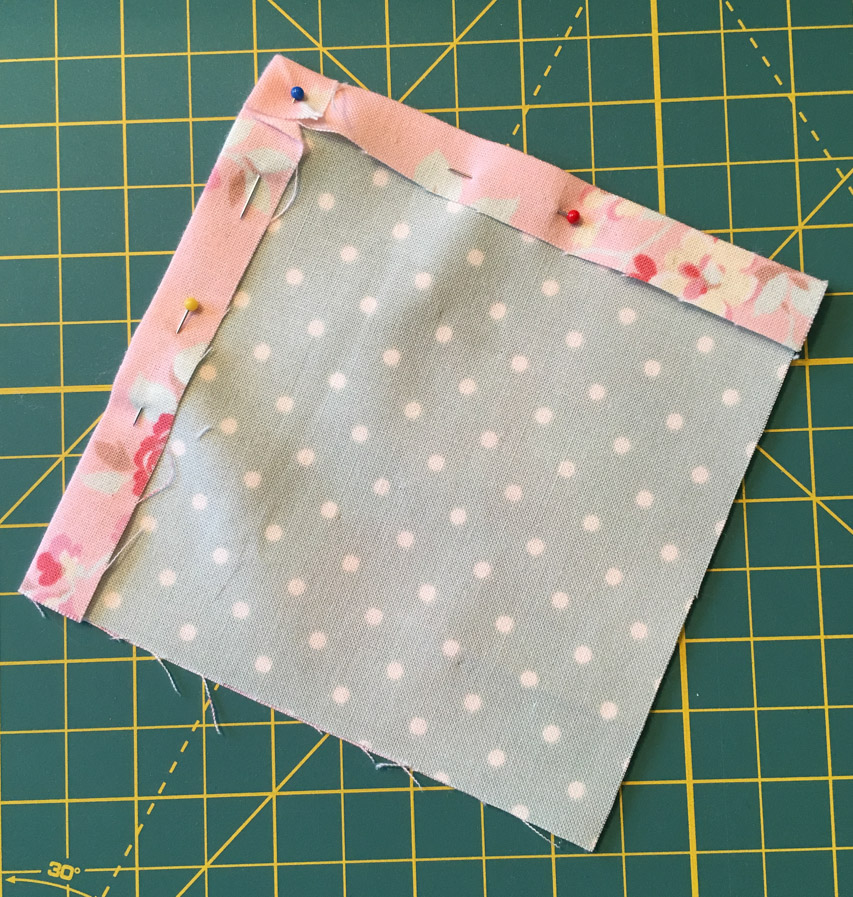
On the front (visible in the finished product) squares, press under a 1/2″ seam on each edge that won’t be part of a rag quilted seam. Miter corners where pressed edges meet for best results.
Stack the backing squares on the front squares, folding the pressed edges over the backing squares. Make sure that the raw edges for the rag quilted seams are aligned. Pin together.
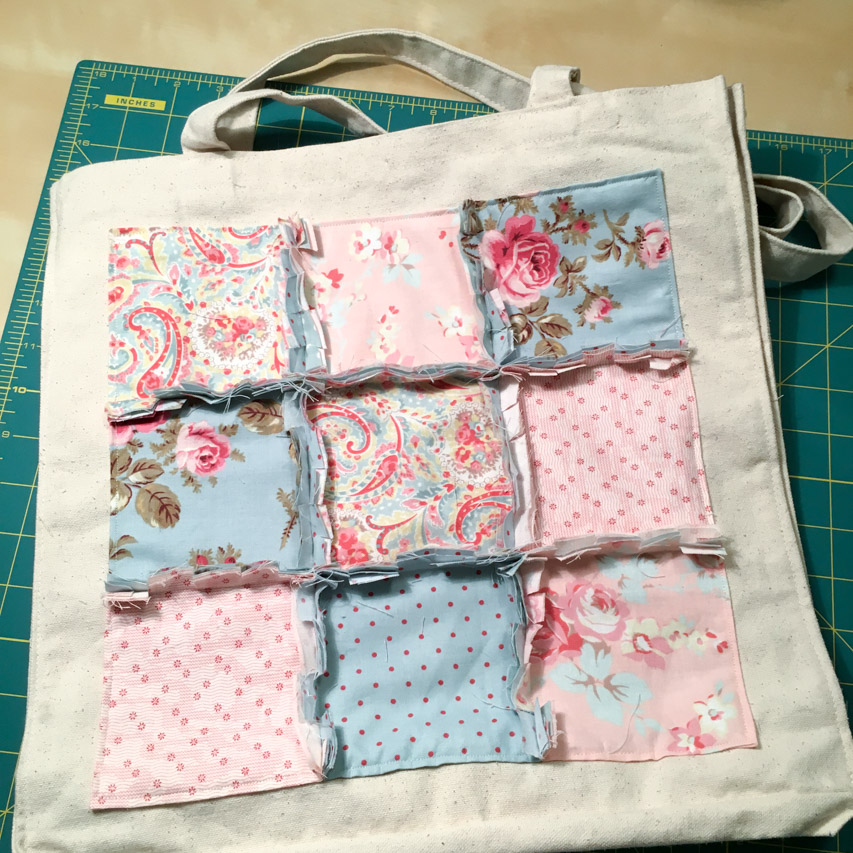
 Assemble the 9 blocks into a square by using rag quilted seams. (For easy instructions on assembling rag quilt blocks, see this wonderful article by Deby at So Sew Easy.)
Once the squares are all attached together, the block must be attached to the bag by sewing around the outside edge. This seam must be sewn one block at a time, without passing over the rag quilted seams. So it requires a lot of stopping and starting of your machine. Careful pinning is the key to success in this step.
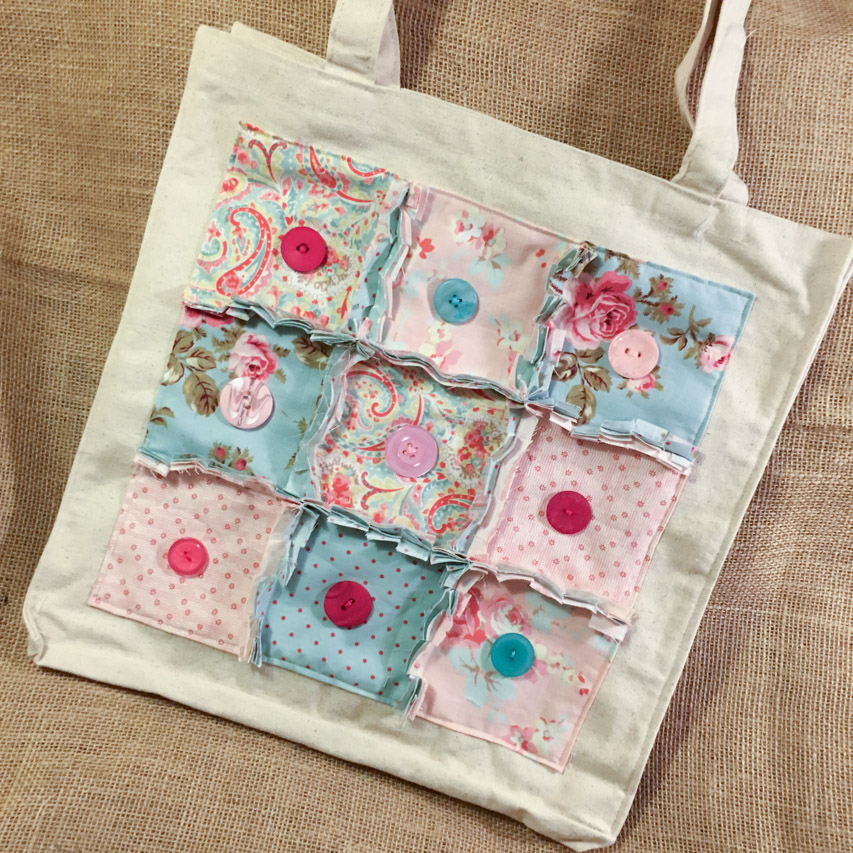
 The final step is to adhere buttons in each square. This project is a great way to use all of those really large buttons in your Button Bonanza bags! The buttons aren’t just decorative – they also serve a purpose as well, by helping to anchor the squares to the bag.
 And that is it! Your tote is ready to hit the street – or be wrapped for under the tree! The rag quilted seams will soften and fray as they are used and washed into an even more beautiful fuzzy fringe.
 Now, did I mention there are fabulous prizes?
We are having a giveaway of over $600 in craft supplies to help you make this holiday handmade! Enter to win using the widget below:
Many thanks to all of the sponsors of the hop and giveaway!
 Thanks for stopping by, and make sure to use the widget below to visit the other hop participants!
![]()
Thanks for joining us for the three days of the Handmade Holidays blog hop! Make sure you don’t miss day one and day two of the hop, too!
Welcome to Day 2 of the Handmade Holidays blog hop on Buttons Galore! Today, we’re buttoning up a fashionable accessory that will keep someone you love warm and stylish this winter! This project started with an inexpensive store bought scarf, but some embroidery and buttons turned it into a one of a kind keepsake that is practical too! 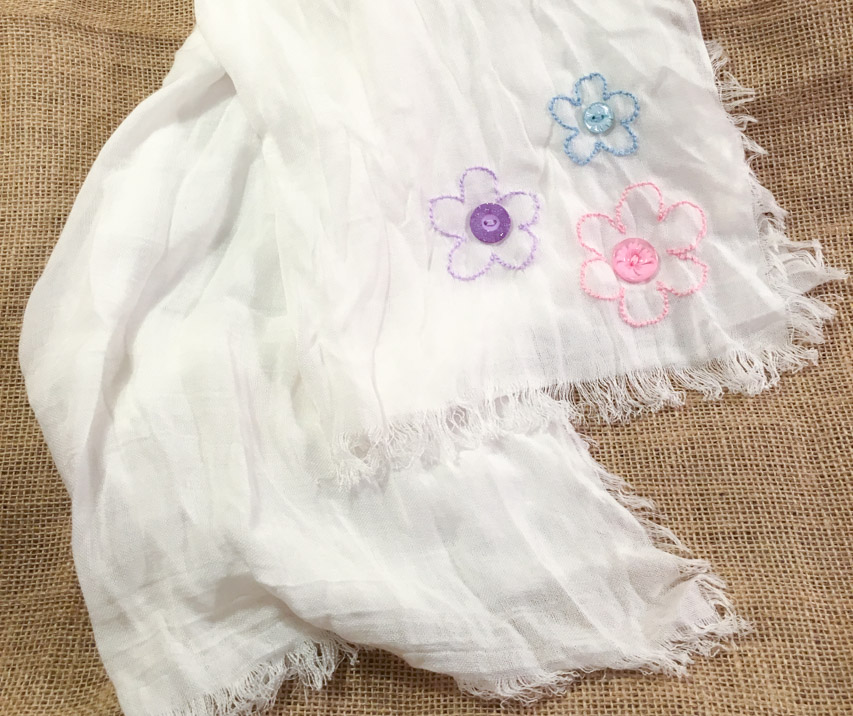 Supplies:
The fun thing about Button Bonanzas is that they are, like your grandmother’s button jar, full of an assortment of random sizes and styles of buttons. I love finding little treasures in them that have sparkles and other special designs. This scarf highlights several”fancy” buttons that I found in my Pastel Button Bonanza bag and turns them into feature elements on the scarf. 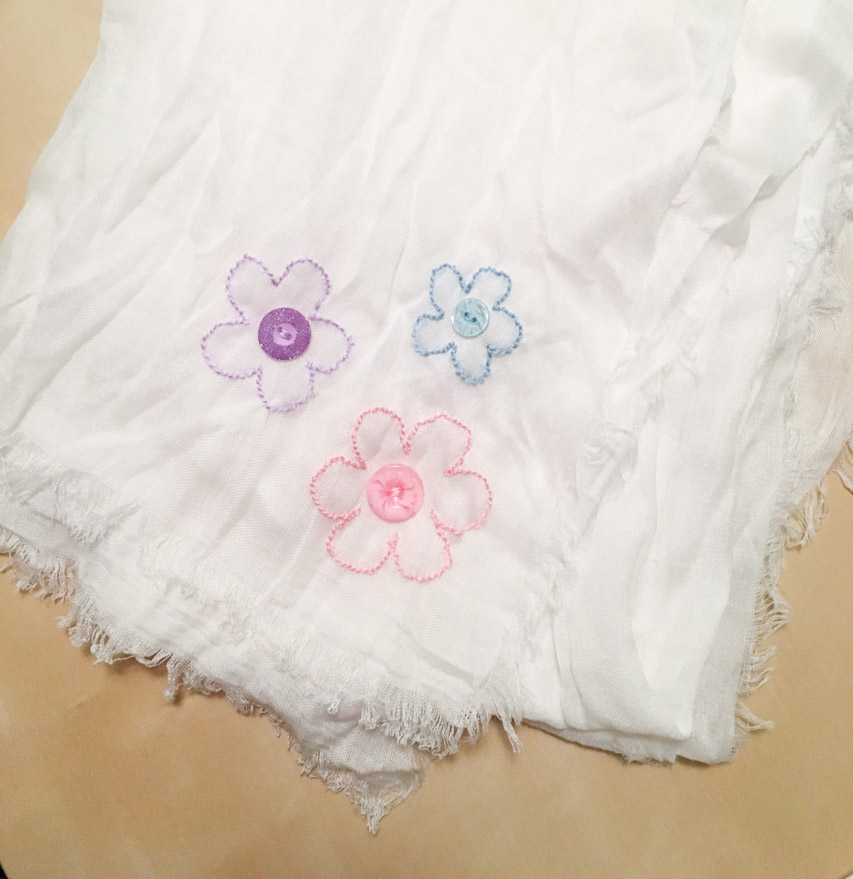 The design is fairly simple – the flowers are backstitched and the buttons are stitched in the middle of them. But how did I get my flowers the right size and shape? That’s where my secret weapon – my Cricut Explore – came in.
  First, I created the three flowers in Cricut Design Space, using files from the Cricut library. Then I used one of my Cricut pens to draw them onto some tracing paper. Once the flowers were sketched out onto the tracing paper, I cut them apart. One at a time, I attached them to the scarf with pins. Then I backstitched on the lines, through both the scarf and the paper.
 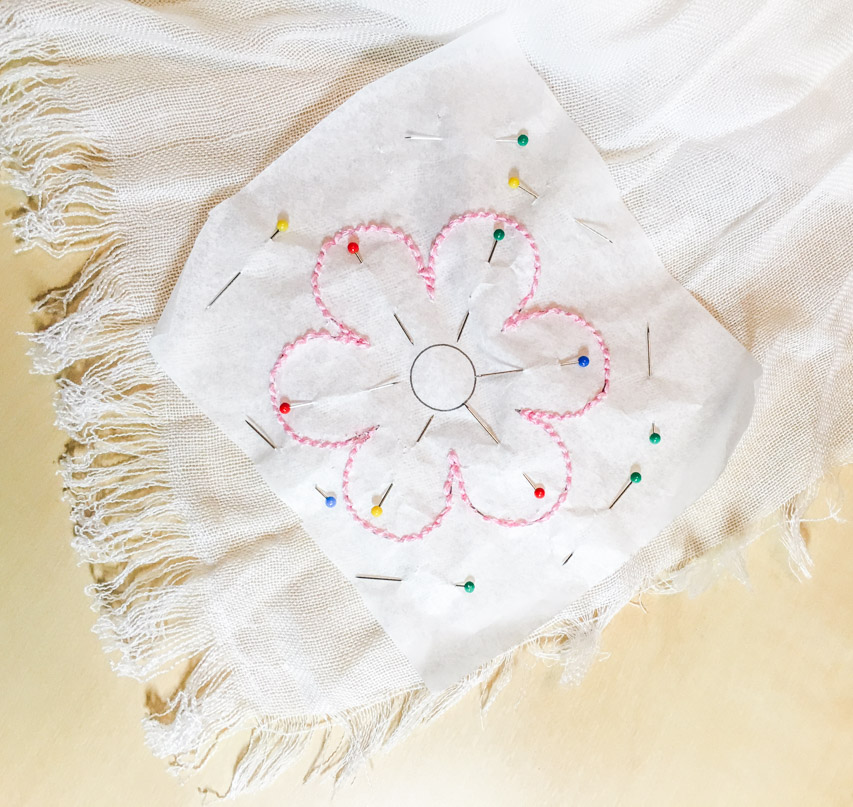 Once the stitching is done, the paper needs to be (carefully) removed. I used a combination of delicate tearing and a craft knife to tear the paper away from both sides of the stitching. The stitching holes serve as a sort of perforation that aid in the tearing away of the paper, but some effort is still required.
The final step is to use a few quick stitches through the holes to attach the buttons. And then you are ready to wear – or wrap! 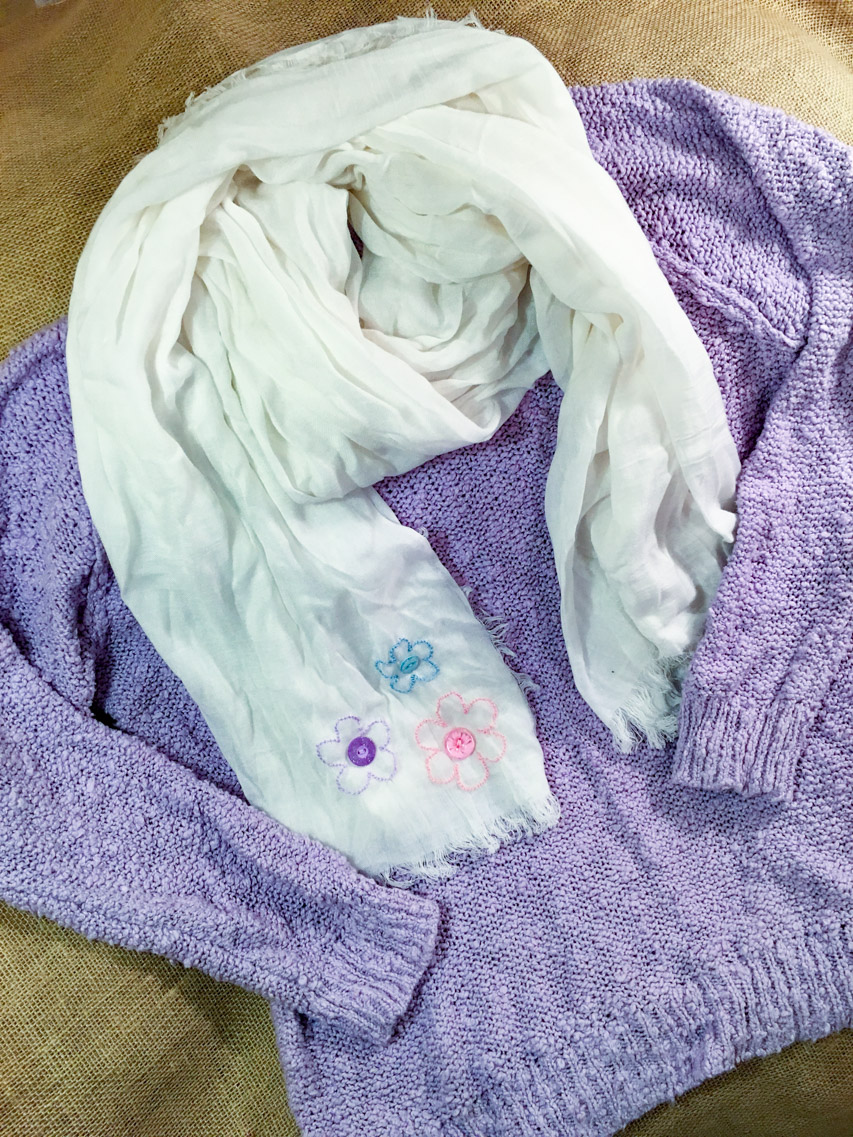
I recommend hand washing for this completed project, no matter what the recommendation is for caring for the scarf that is used for the base.
And now…it wouldn’t be a blog hop without fabulous prizes! We are having a giveaway of over $600 in craft supplies to help you make this holiday handmade! Enter to win using the widget below:
Many thanks to all of the sponsors of the hop and giveaway! Thanks for stopping by, and make sure to use the widget below to visit the other hop participants! ![]()
And don’t miss our contribution to day one of the hop….a practical and pretty zip pouch for the sewer or traveler in your life!
Welcome to the Handmade Holidays on Buttons Galore! For the next 3 days, we’ll be joining in by sharing ideas for handmade Christmas gifts using – of course – buttons!
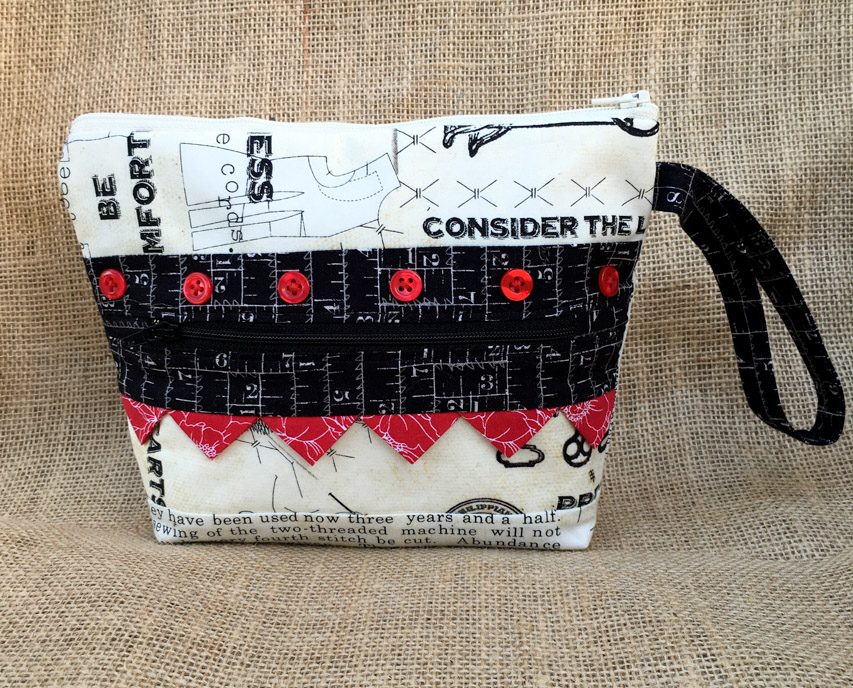
Our handmade gift project today is a handy little zippered notions bag that is perfect for the sewing enthusiast or frequent traveler in your life! It’s made from a pattern called Everyday Zips by Joanna Figueroa of Fig Tree & Company that is available online or at a local quilt store (which is where I got mine).
Supplies:
One of the most underestimated tasks in the success of a sewing project may be the selection of fabric. Just choose colors you like, right? Not exactly. Color, pattern, and other choices can make the difference between a project you are happy with and one that just isn’t satisfying.
On this project, the pattern called for the body of the bag to be a neutral colored lightweight canvas. But I had found this neutral background vintage sewing themed quilt fabric that I was in love with at my local quilt store. This project seemed like a great excuse to use it! Plus, since this is a “notions tote”, the fabric would reinforce the theme.
I also chose a light color for the interior (not seen here) – an ivory tone on tone chevron design.
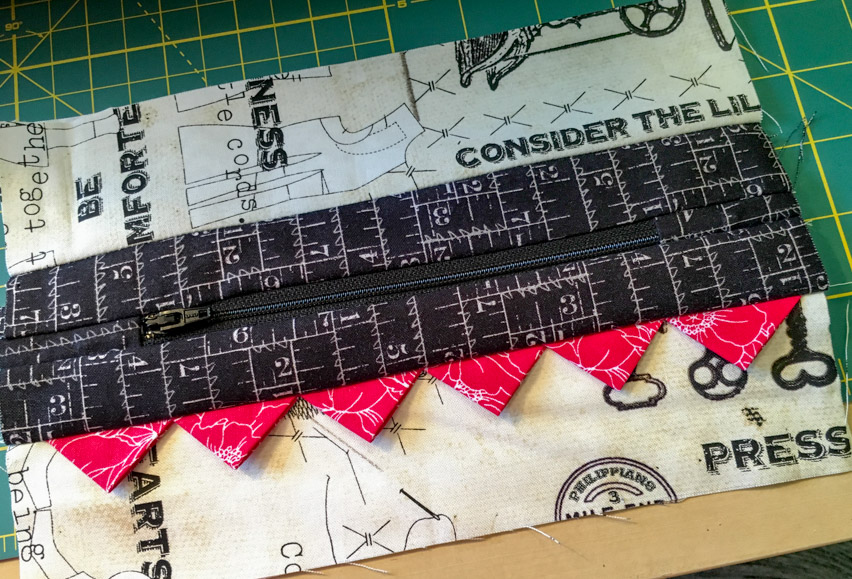
For the contrast panel, I chose the black rulers to pull the black out of the background and reinforce the sewing notions theme. That left me the prairie points to decide on. Red, white and black is a classic vintage color scheme, and so it seemed the natural answer here.
But as you can see above during construction, the red is incredibly stark against all that neutral. To me, it made the design look off balance. That’s where the buttons come in! By putting a row of red buttons above the zipper, it balances out the red prairie points and mutes their visual aggressiveness somewhat. And, as a bonus, the buttons add to the sewing theme!
Sometimes color choices make practical sense too. The pattern called for the strap to be the same color as the prairie points but I thought that would be too bold. The best alternative was to use the black ruler fabric, as it is the least likely of the fabrics that I was using to show dirt from while I was handling it.
Even the zipper color choices can make a night and day difference. I really could have used black or natural for either of the zippers. I could have positioned them so the zipper contrasted with the surrounding background, or so that the zipper blended with the background. But I’m well aware that sewing zippers isn’t my most proficient sewing skill. By choosing zipper colors that blend with the fabric around the zipper, I provided a bit of camouflage for any wonky sewing of the zippers. Choosing a contrasting color for the zippers would have the opposite effect: highlighting any errors on the zipper.
One thing that I made sure to avoid on a project like this that had tons of straight seams? Fabric that had stripes or other straight lines in the pattern (such as dots arranged in neat lines) was a no-no. Straight lines in the fabric would only highlight any errors in getting my pieces cut square or sewn straight. The ruler fabric does have straight lines but they are somewhat rough and not continuous so the pattern was workable.
Since the project is mostly just straight seams, sewing the zippers are the most challenging parts of making this tote. While I admit that zippers aren’t my best talent, I do have one secret weapon:
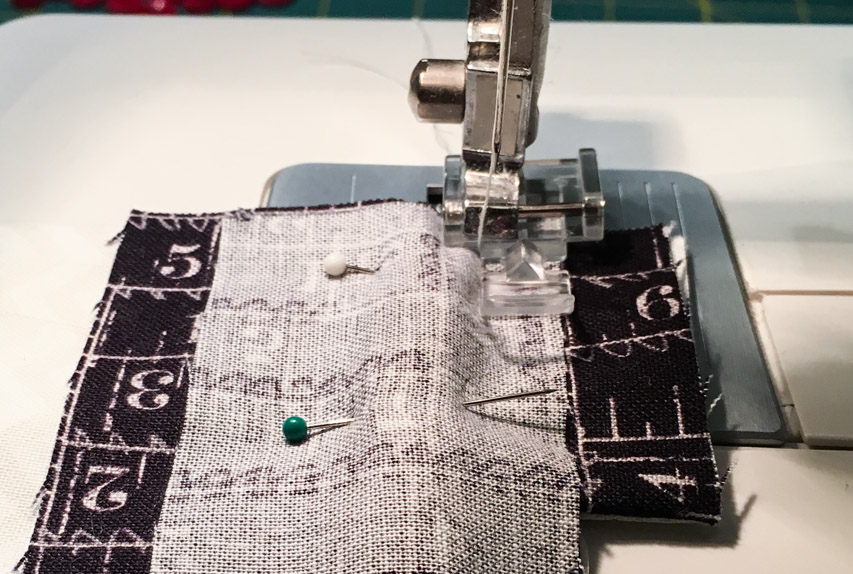
This is the zipper foot on my sewing machine. While it is possible to sew zippers without them, the zipper foot makes it infinitely easier. Having the right tools is often half the battle in producing a quality result. If you are going to sew a zipper, I highly recommend that you invest a few dollars in a zipper foot for your machine. You won’t regret it!
Now, to the blog hop…
Did I mention there are fabulous prizes?
We are having a giveaway of over $600 in craft supplies to help you make this holiday handmade! Enter to win using the widget below:
Many thanks to all of the sponsors of the hop and giveaway!
Thanks for stopping by, and make sure to use the widget below to visit the other hop participants!
![]()
So, what can you do with some button basics and a pretty piece of ribbon?
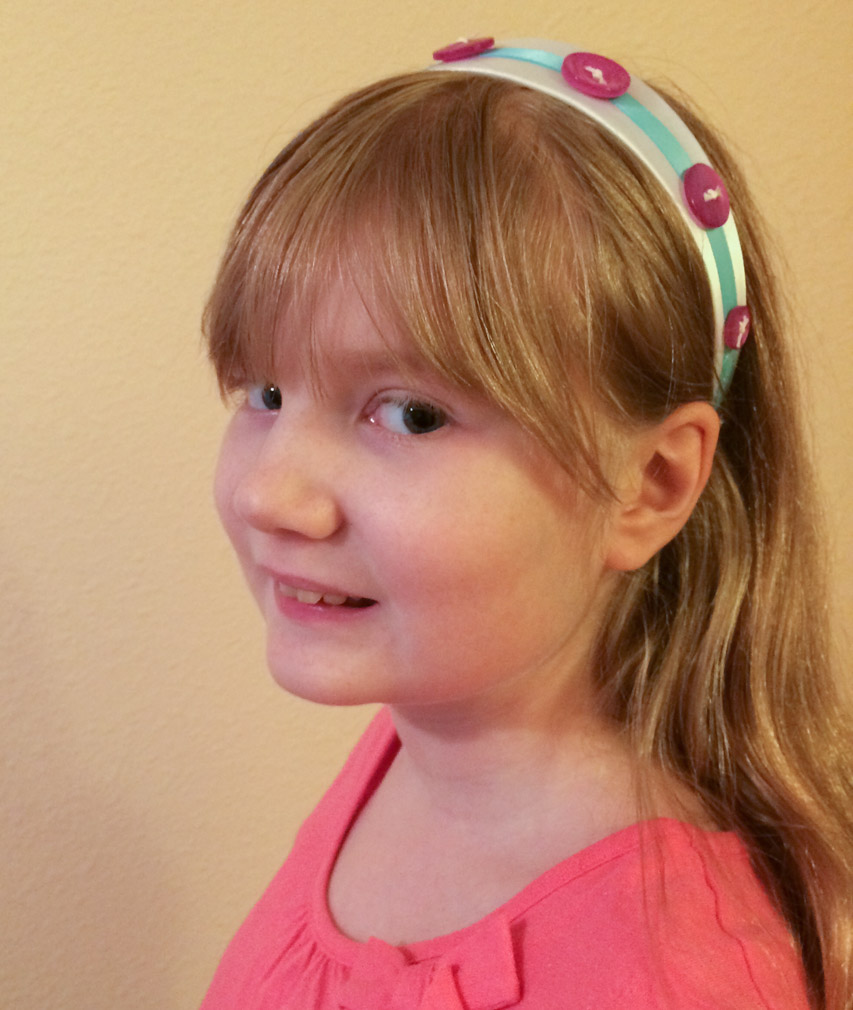
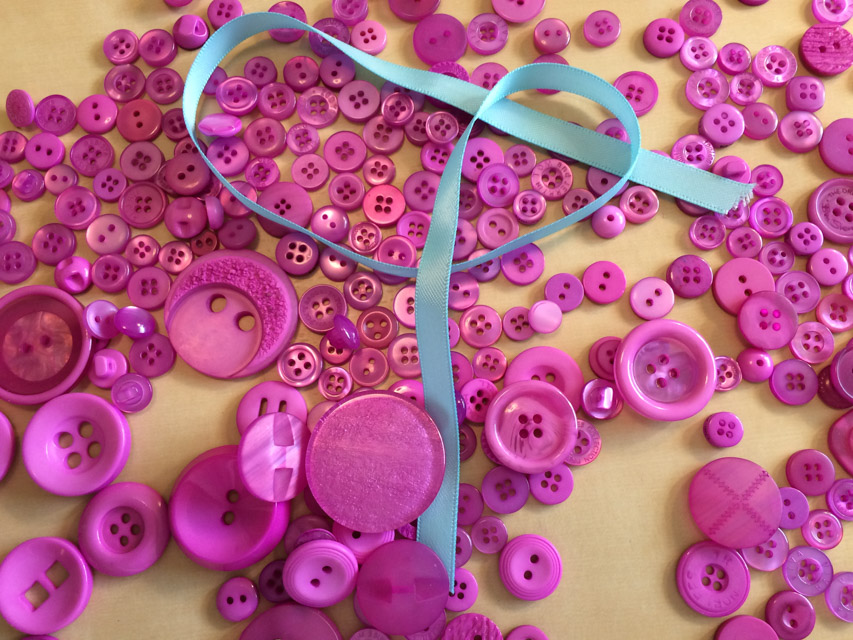 Add a plain satin headband to the mix and you can make a headband that is fabulously perfect just for the young style diva in your life!
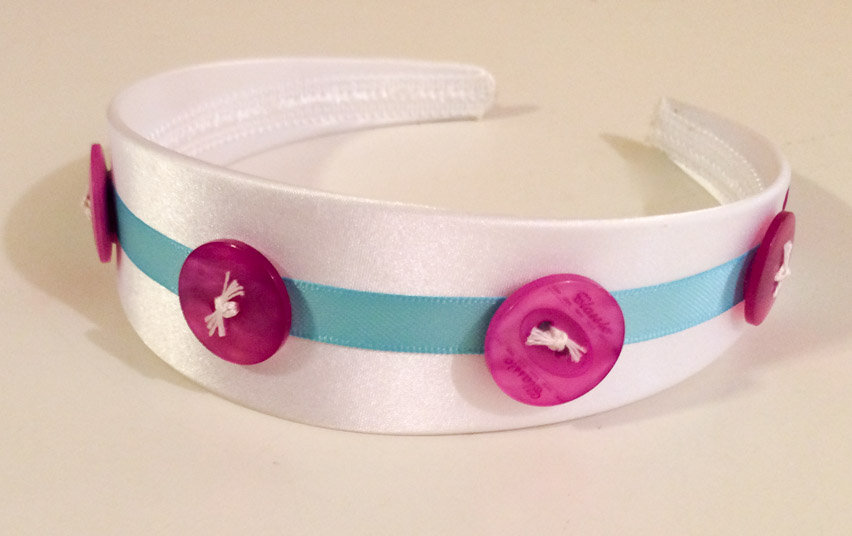
Making this headband is easy! Here’s what you need:
 Instructions:
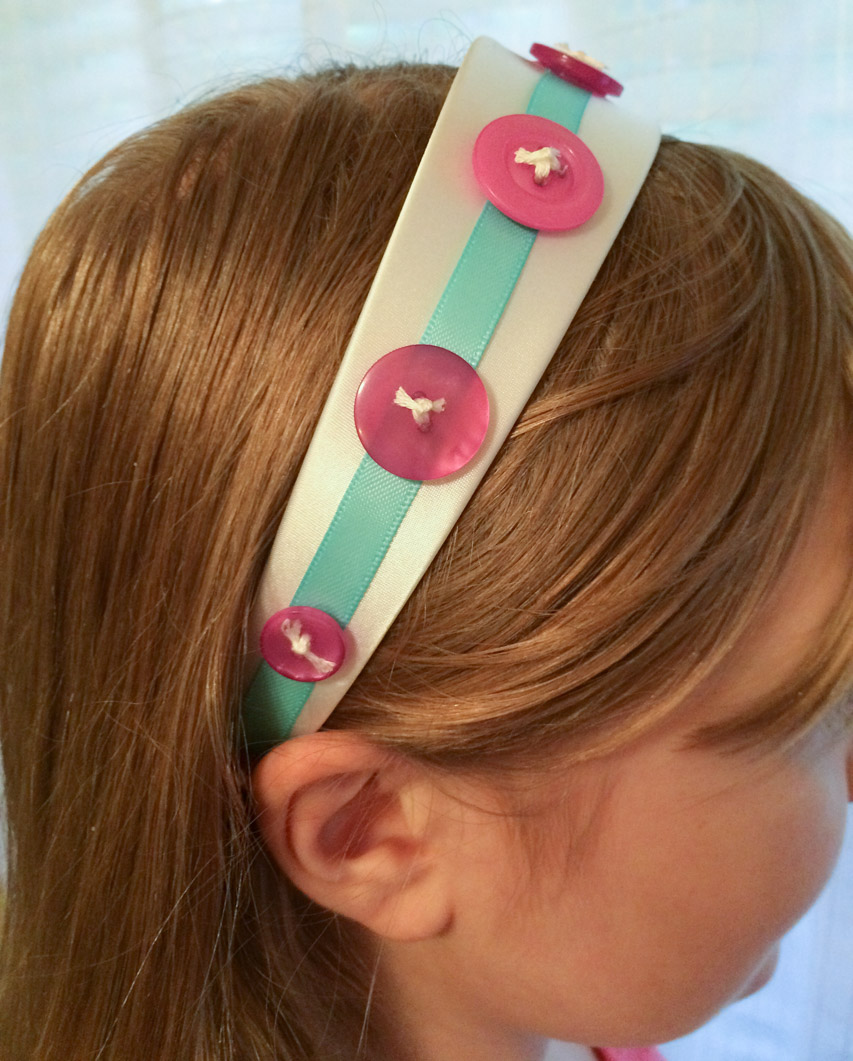
1. Glue ribbon to satin headband, turning under raw ends to finish them before gluing. If your ribbon is very thin or sheer, attach using dots of glue in locations that will have buttons over them, so the glue won’t show.
2. Thread buttons with floss and tie off to finish them.
3. Hot glue buttons to headband on top of ribbon.
That’s all it takes to get a beautiful custom accessory!
This headband is easy to make for any occasion or season – just switch up the color scheme and you have an instant accessory for Christmas, Halloween, or even school spirit! What occasion will you make a headband for?
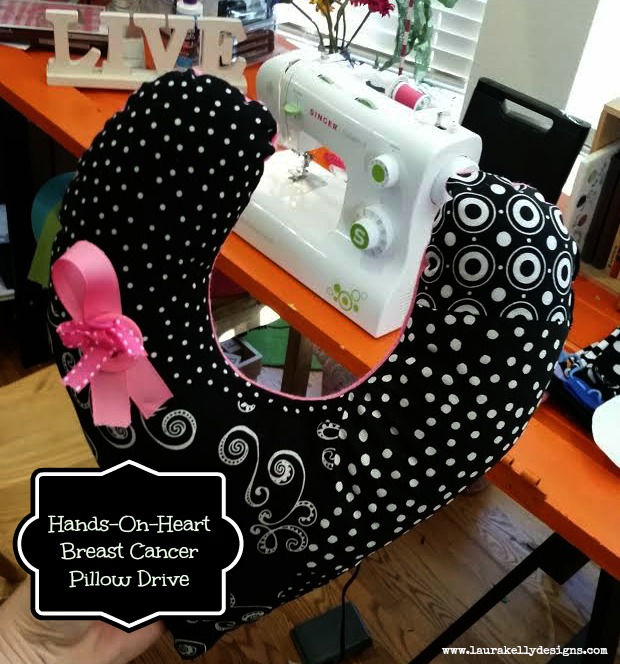
October is the month that we as women remind each other that we love, care and honor ourselves. The sisterhood of women strengthens this month as we stand together to bring awareness to breast cancer and what it means in our lives. I don’t think there is a life untouched by breast cancer. This little ribbon is a crafty project that you can make and wear to participate in not only the awareness aspect but also the celebration of the sisterhood of women. I glued it together with Aleene’s Max Tacky Adhesive. I used pink buttons of course. I attached it to a pillow for the Hands-on-Heart pillow drive.
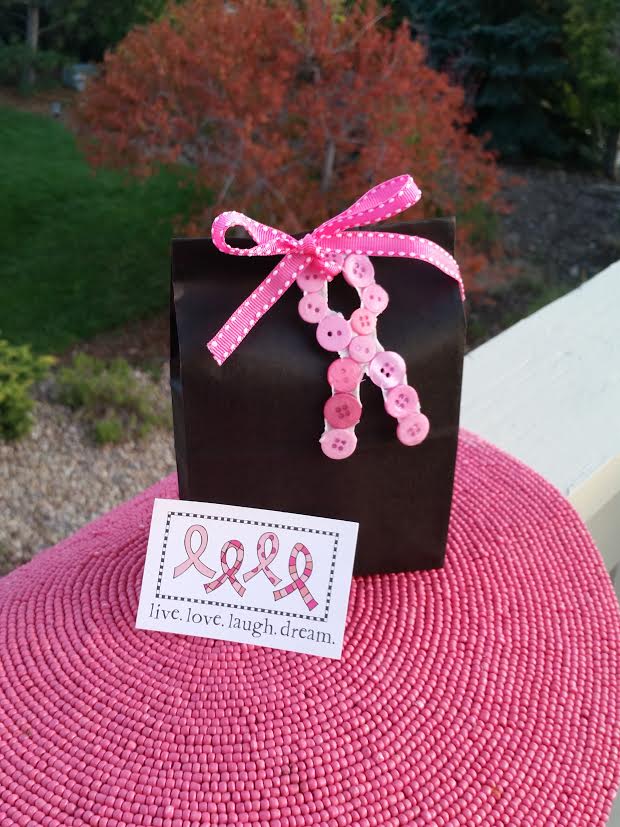
Here are a few other crafty breast cancer awareness projects that you might like. This button ribbon was created with buttons and glue!
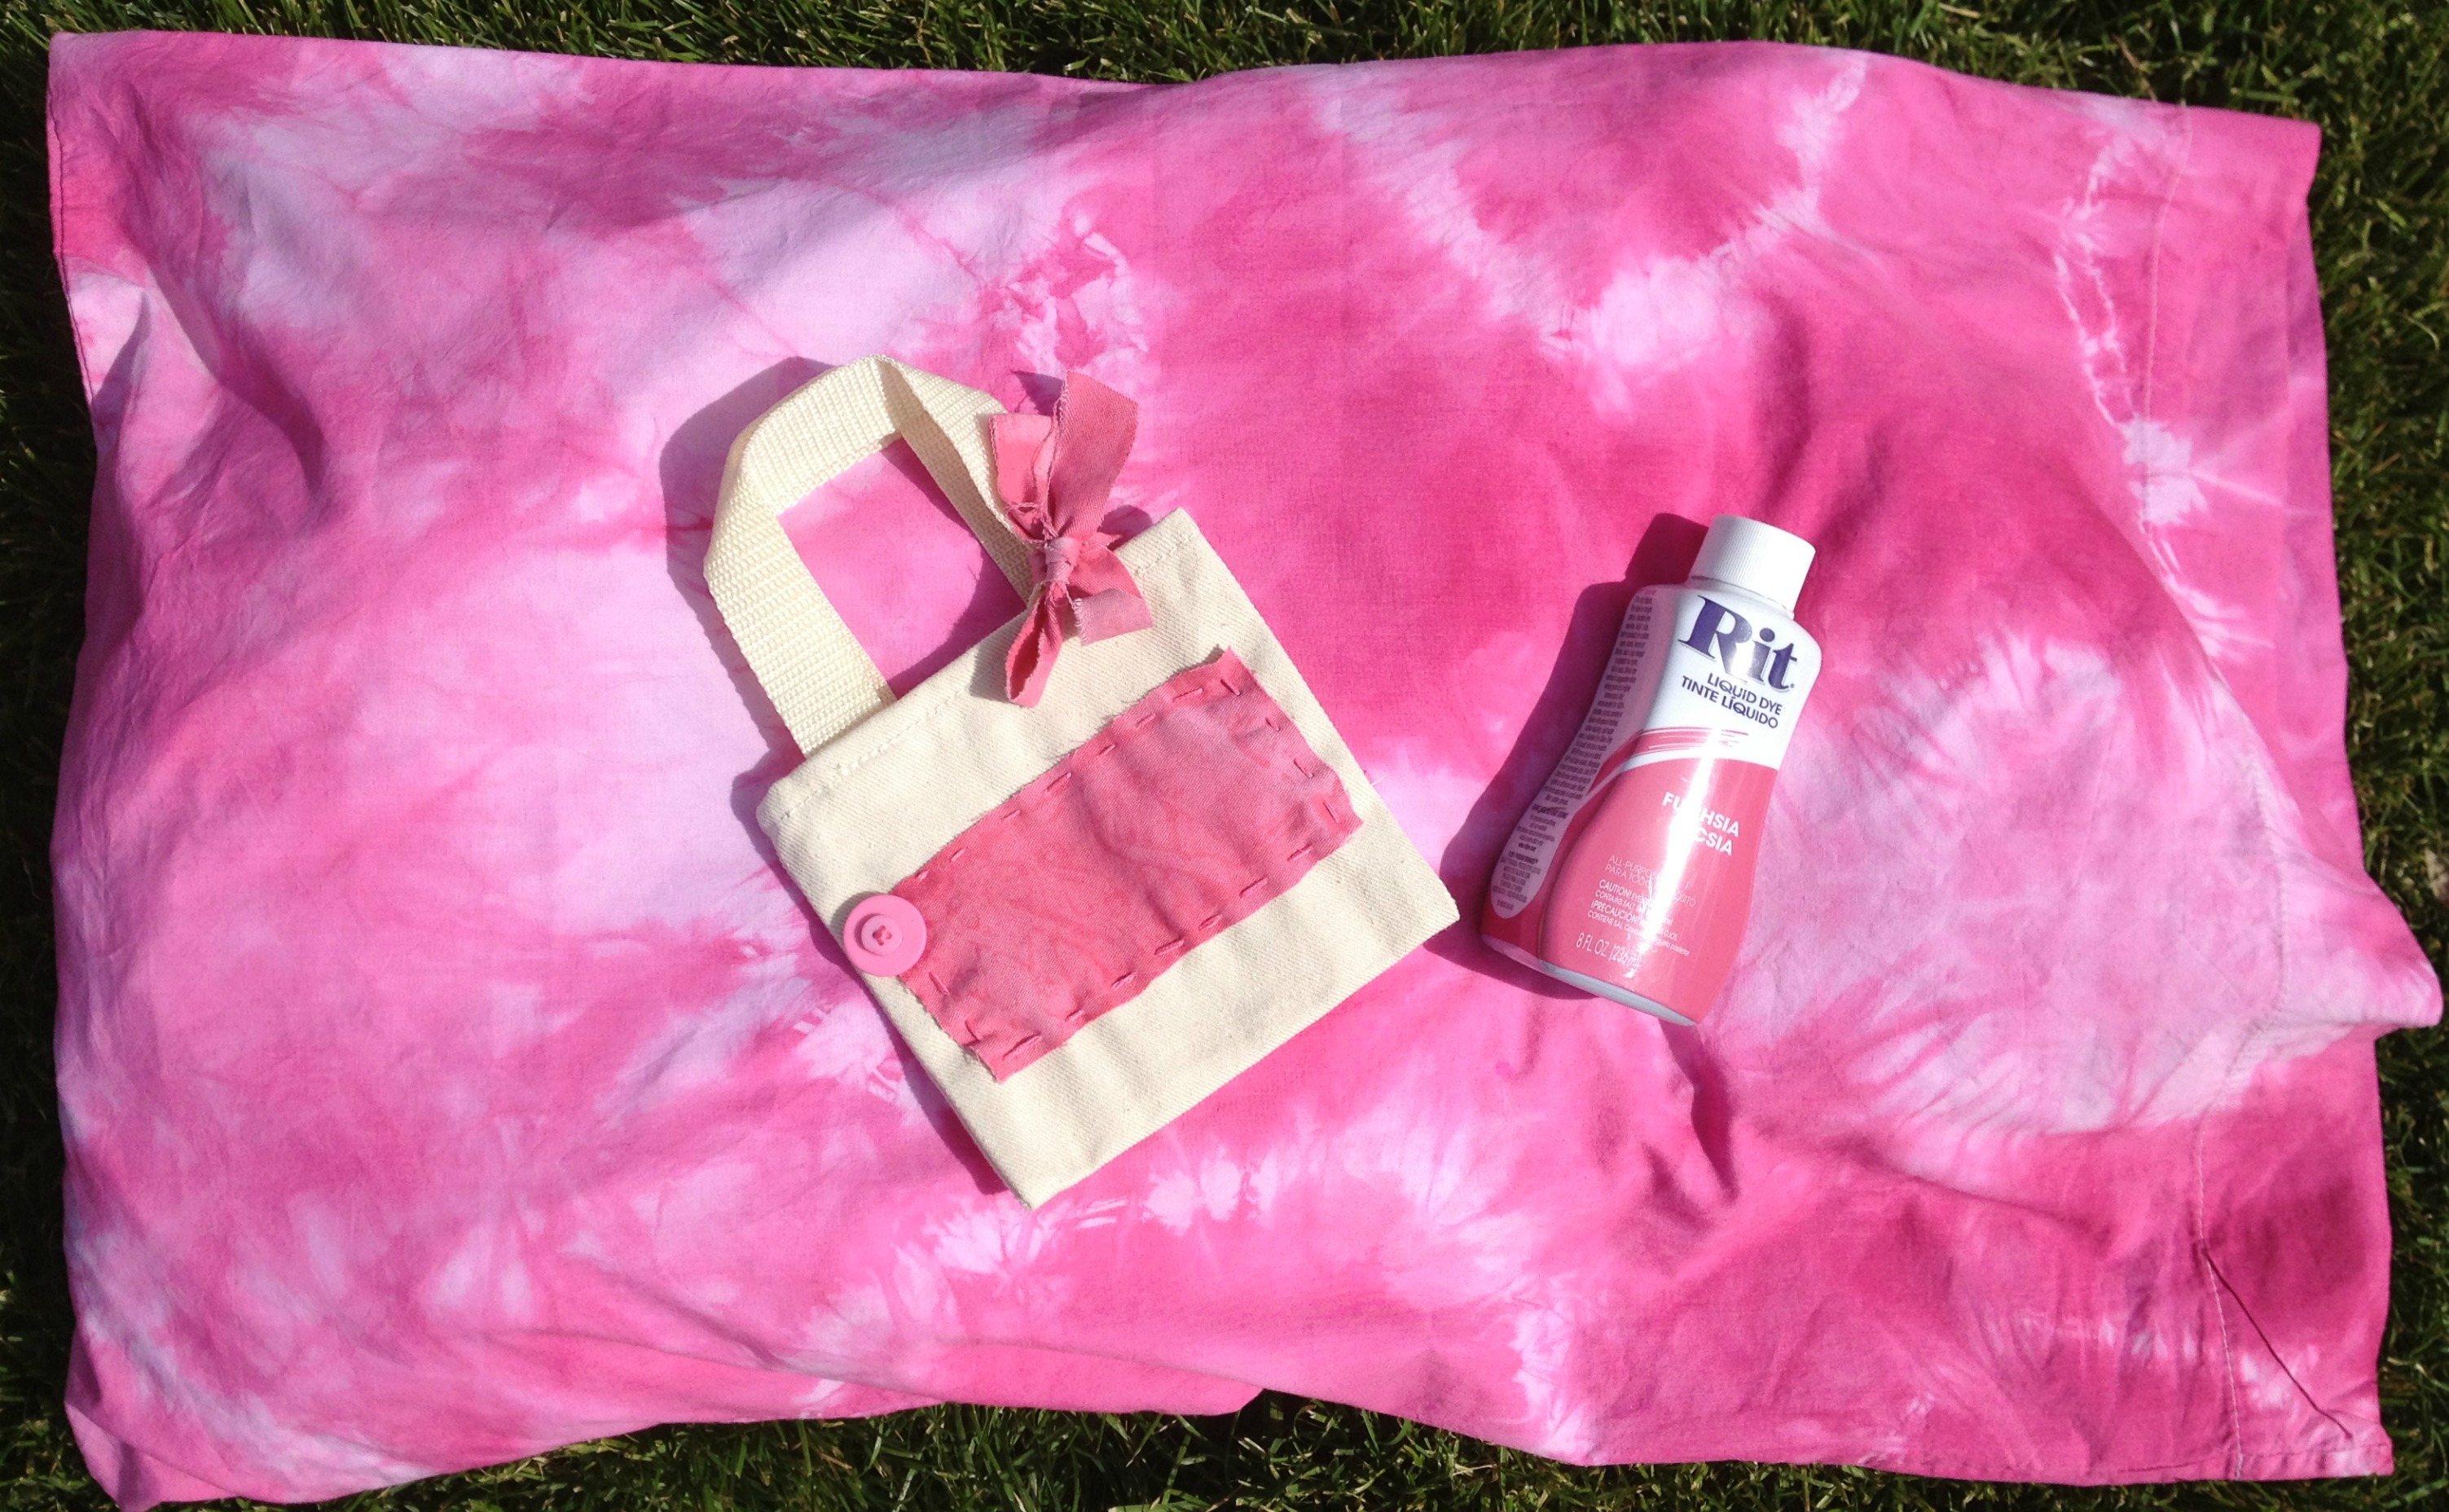
This tie dyed pillowcase fits perfectly in the tote bag that was created with the pink ribbon stamp from ClearSnap by Jen Goode. You can see lots of great things that were made with her stamp on 100 Directions.
Pink buttons can make a difference I think! What do you think?
Cheers,
Laura
For Earth Day (and every day) it is fun to up-cycle your resuable bags! I did this one with felt and buttons and few quick stitches and LOVE it.
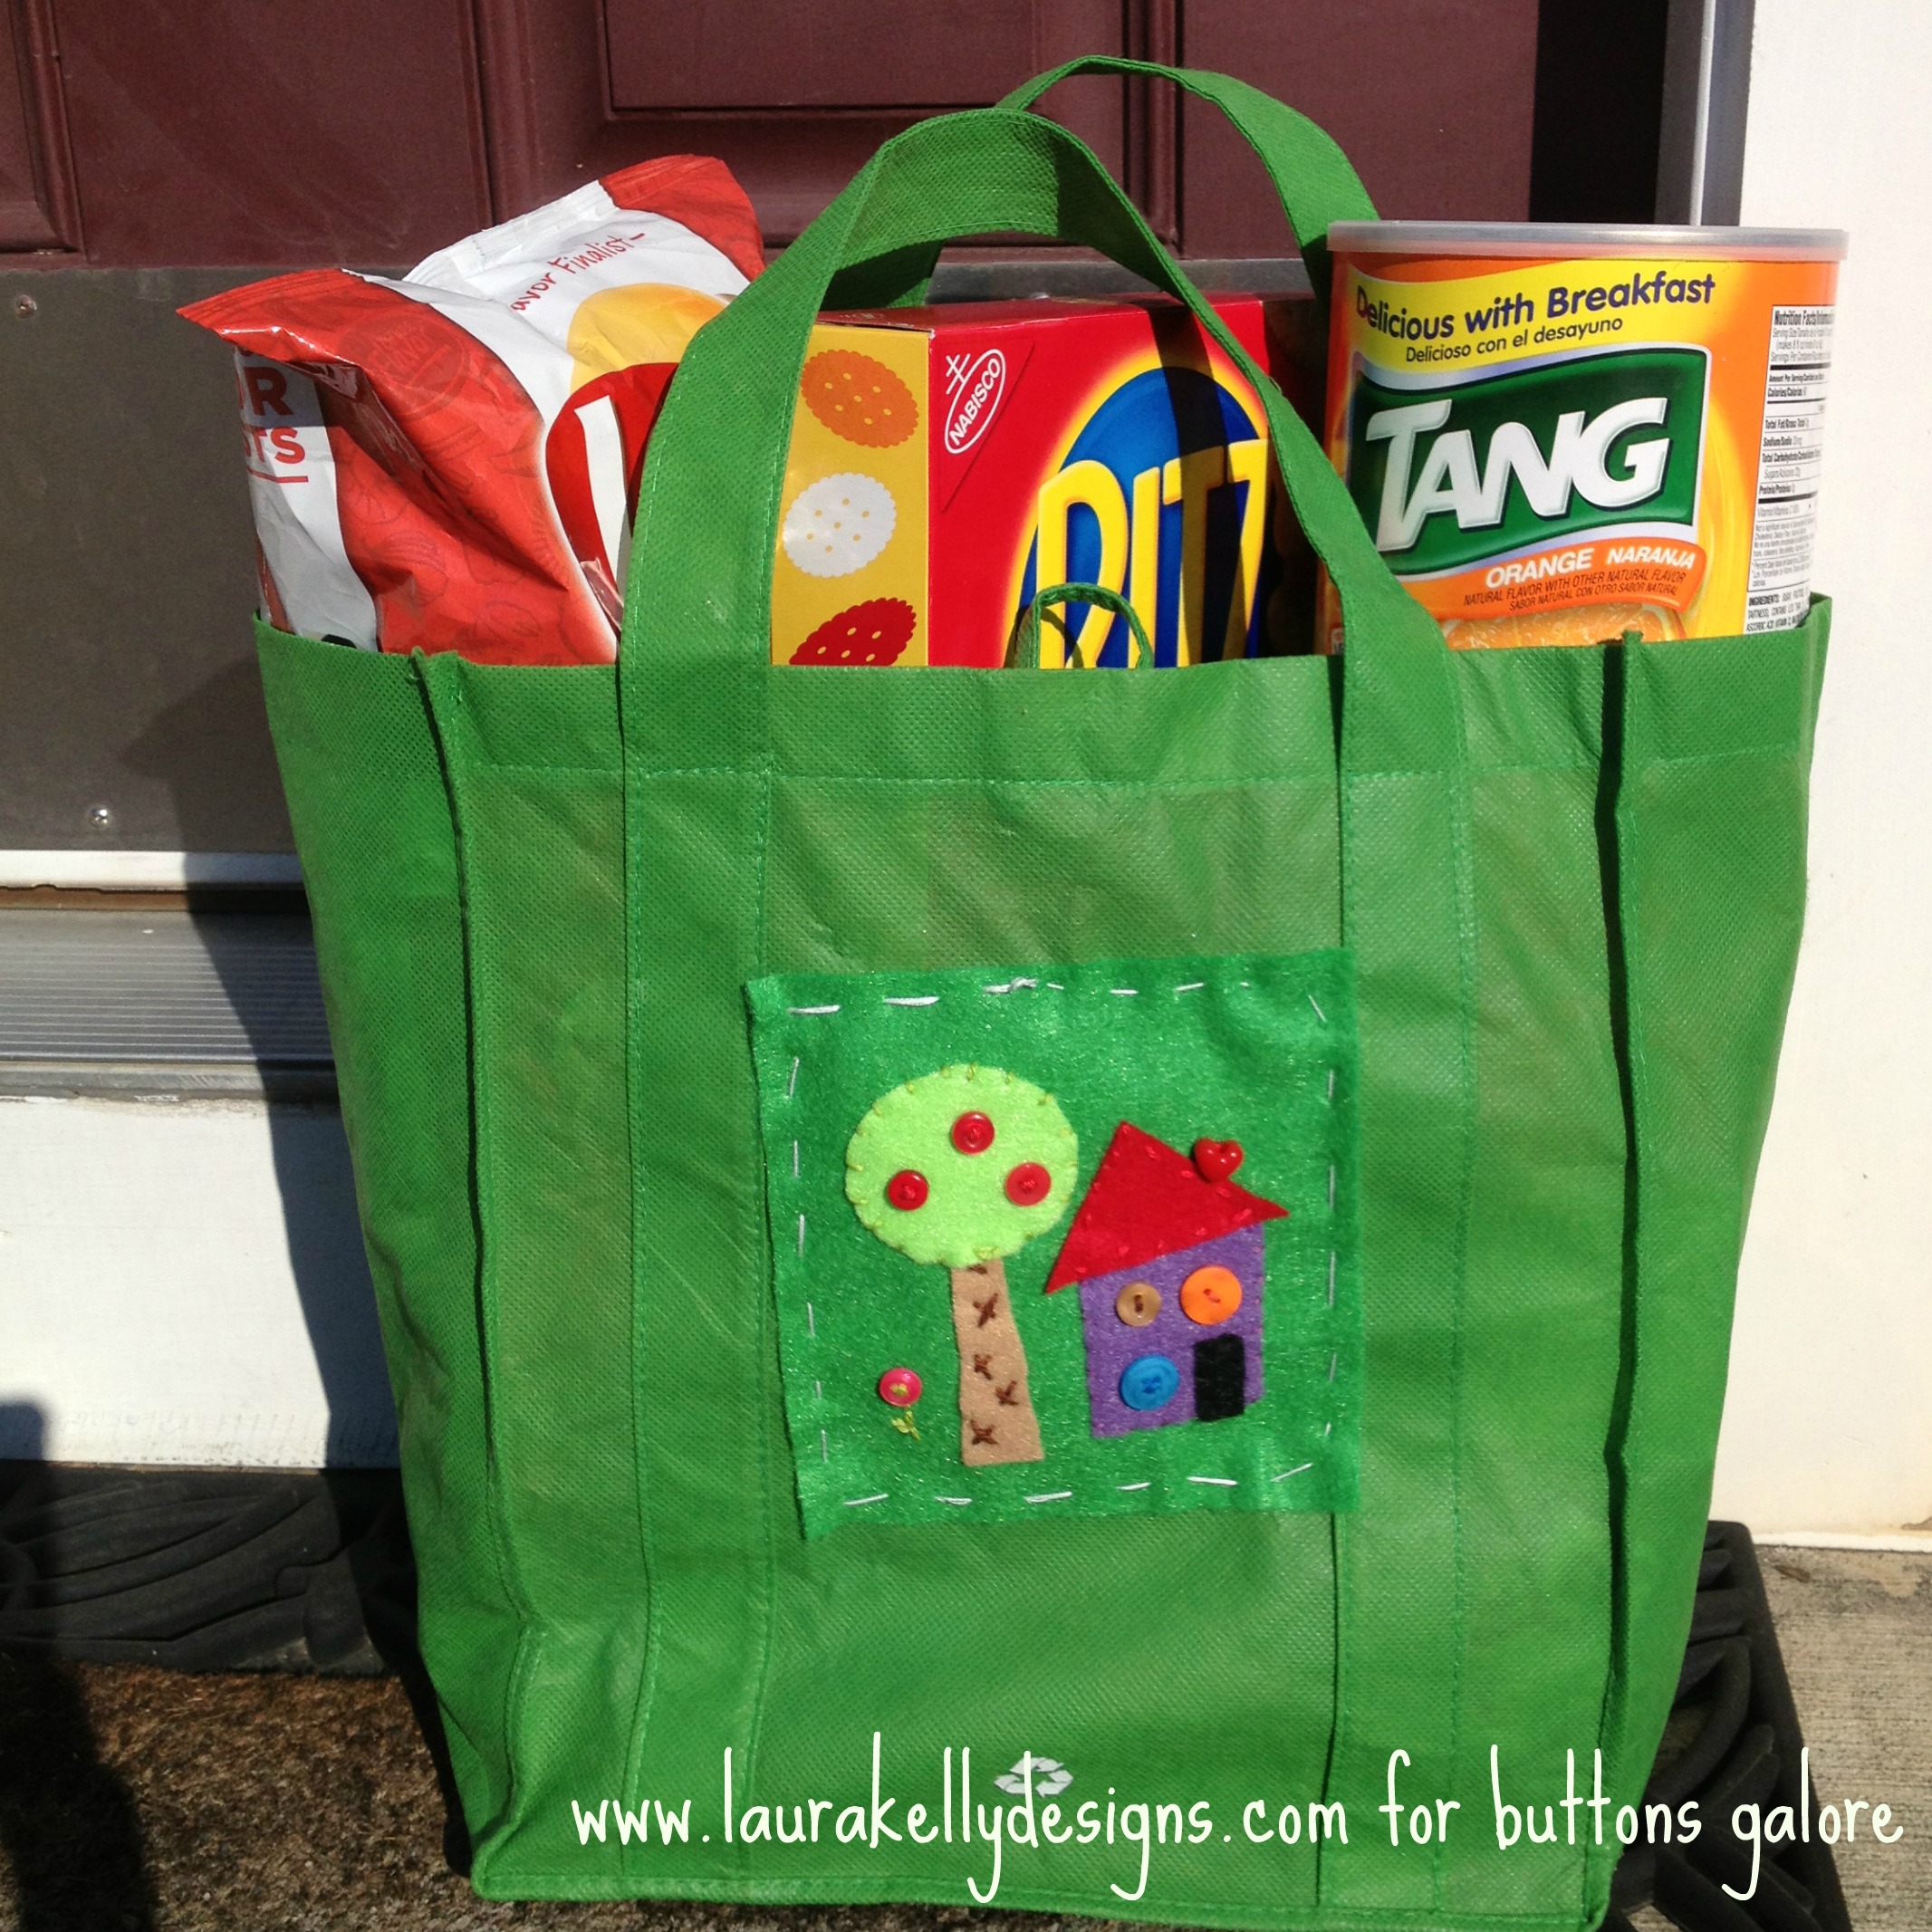
There is really no pattern needed. Just cut out fun shapes and stitch them to the bag. Add buttons to make it super fun and stylish.

Happy Shopping and Saving the Planet,
Laura
Buttons Galore was invited to join the Rainbow Blog Hop 2014 (aka RainbowHop14) with the color indigo. To become a piece of the colorful rainbow party, I took an old pocked from a pair of kid jeans and turned it into a mini purse, Welcome to the party!
Here are the supplies I started with.
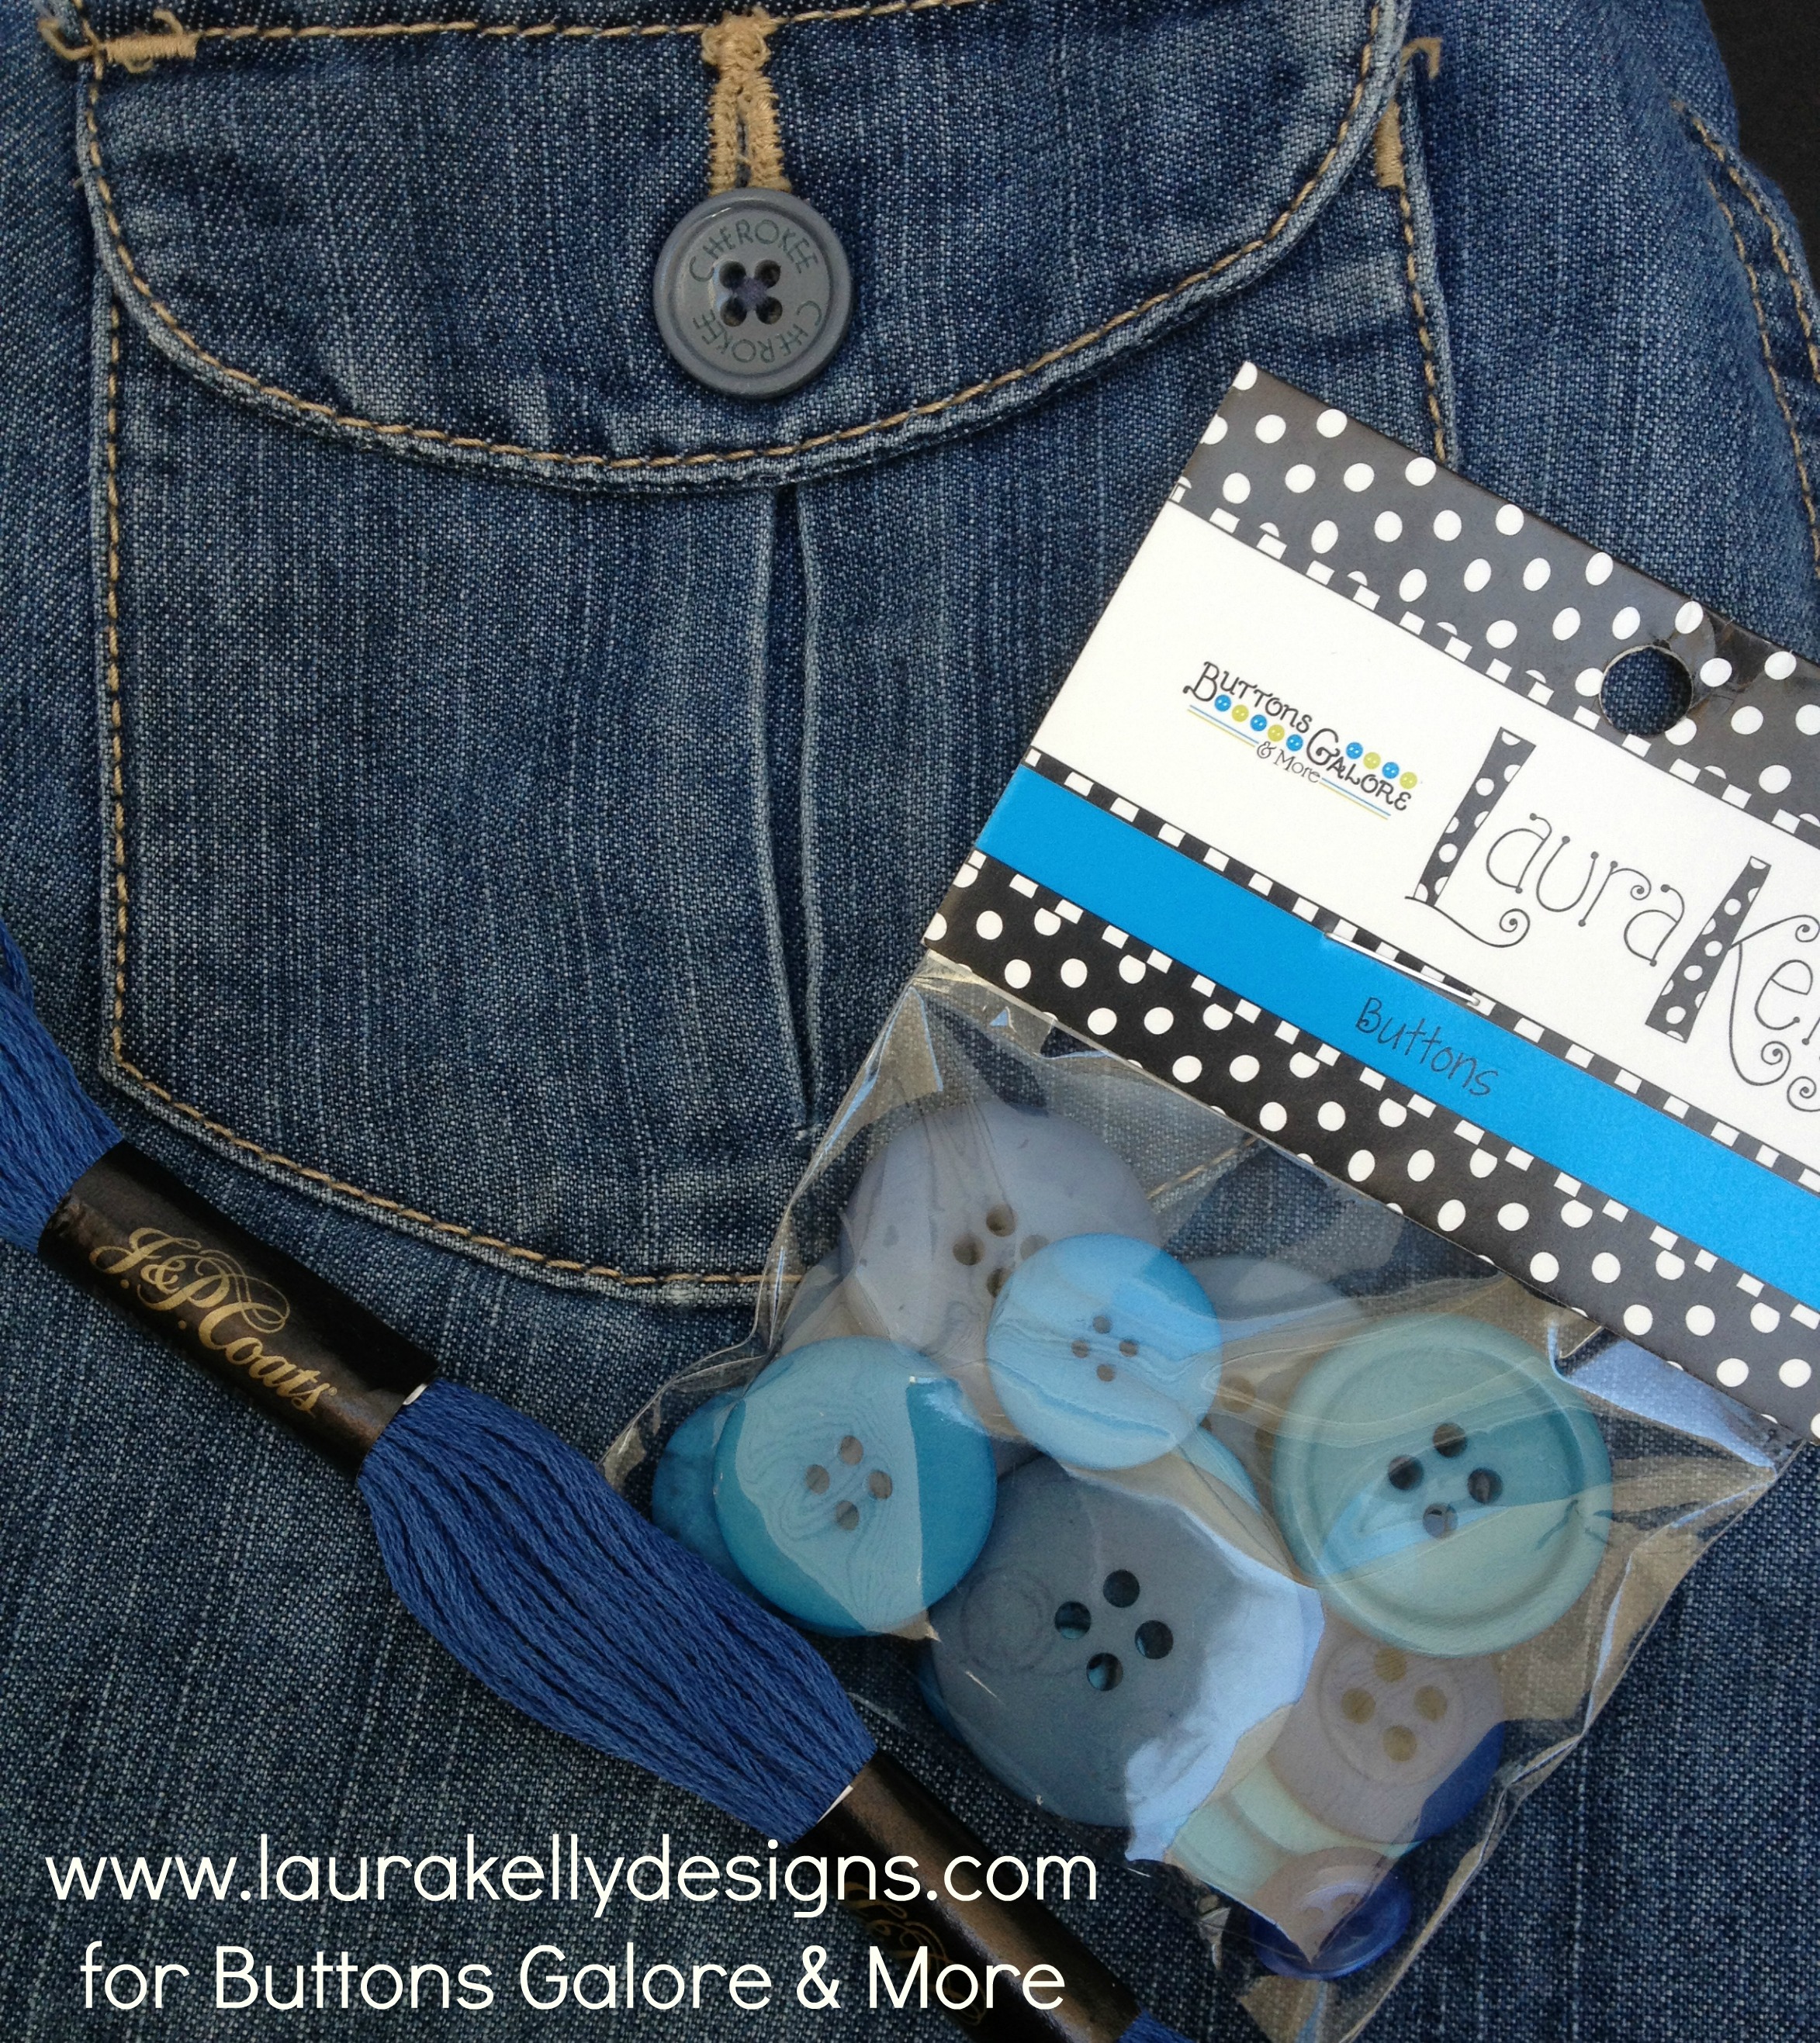
I cut the pocket out first.

Then I stitched on some buttons in the colors from my Laura Kelly collection that worked best (Robin Egg Blue and

It is perfect to hold important things in a bigger bag (ie: gym bag, backpack, pocketbook, etc.)!
Check out the projects in all of the colors of the rainbow. Lots of them use buttons!
Happy St. Patrick’s Day and Rainbows of Creative Love,
Laura
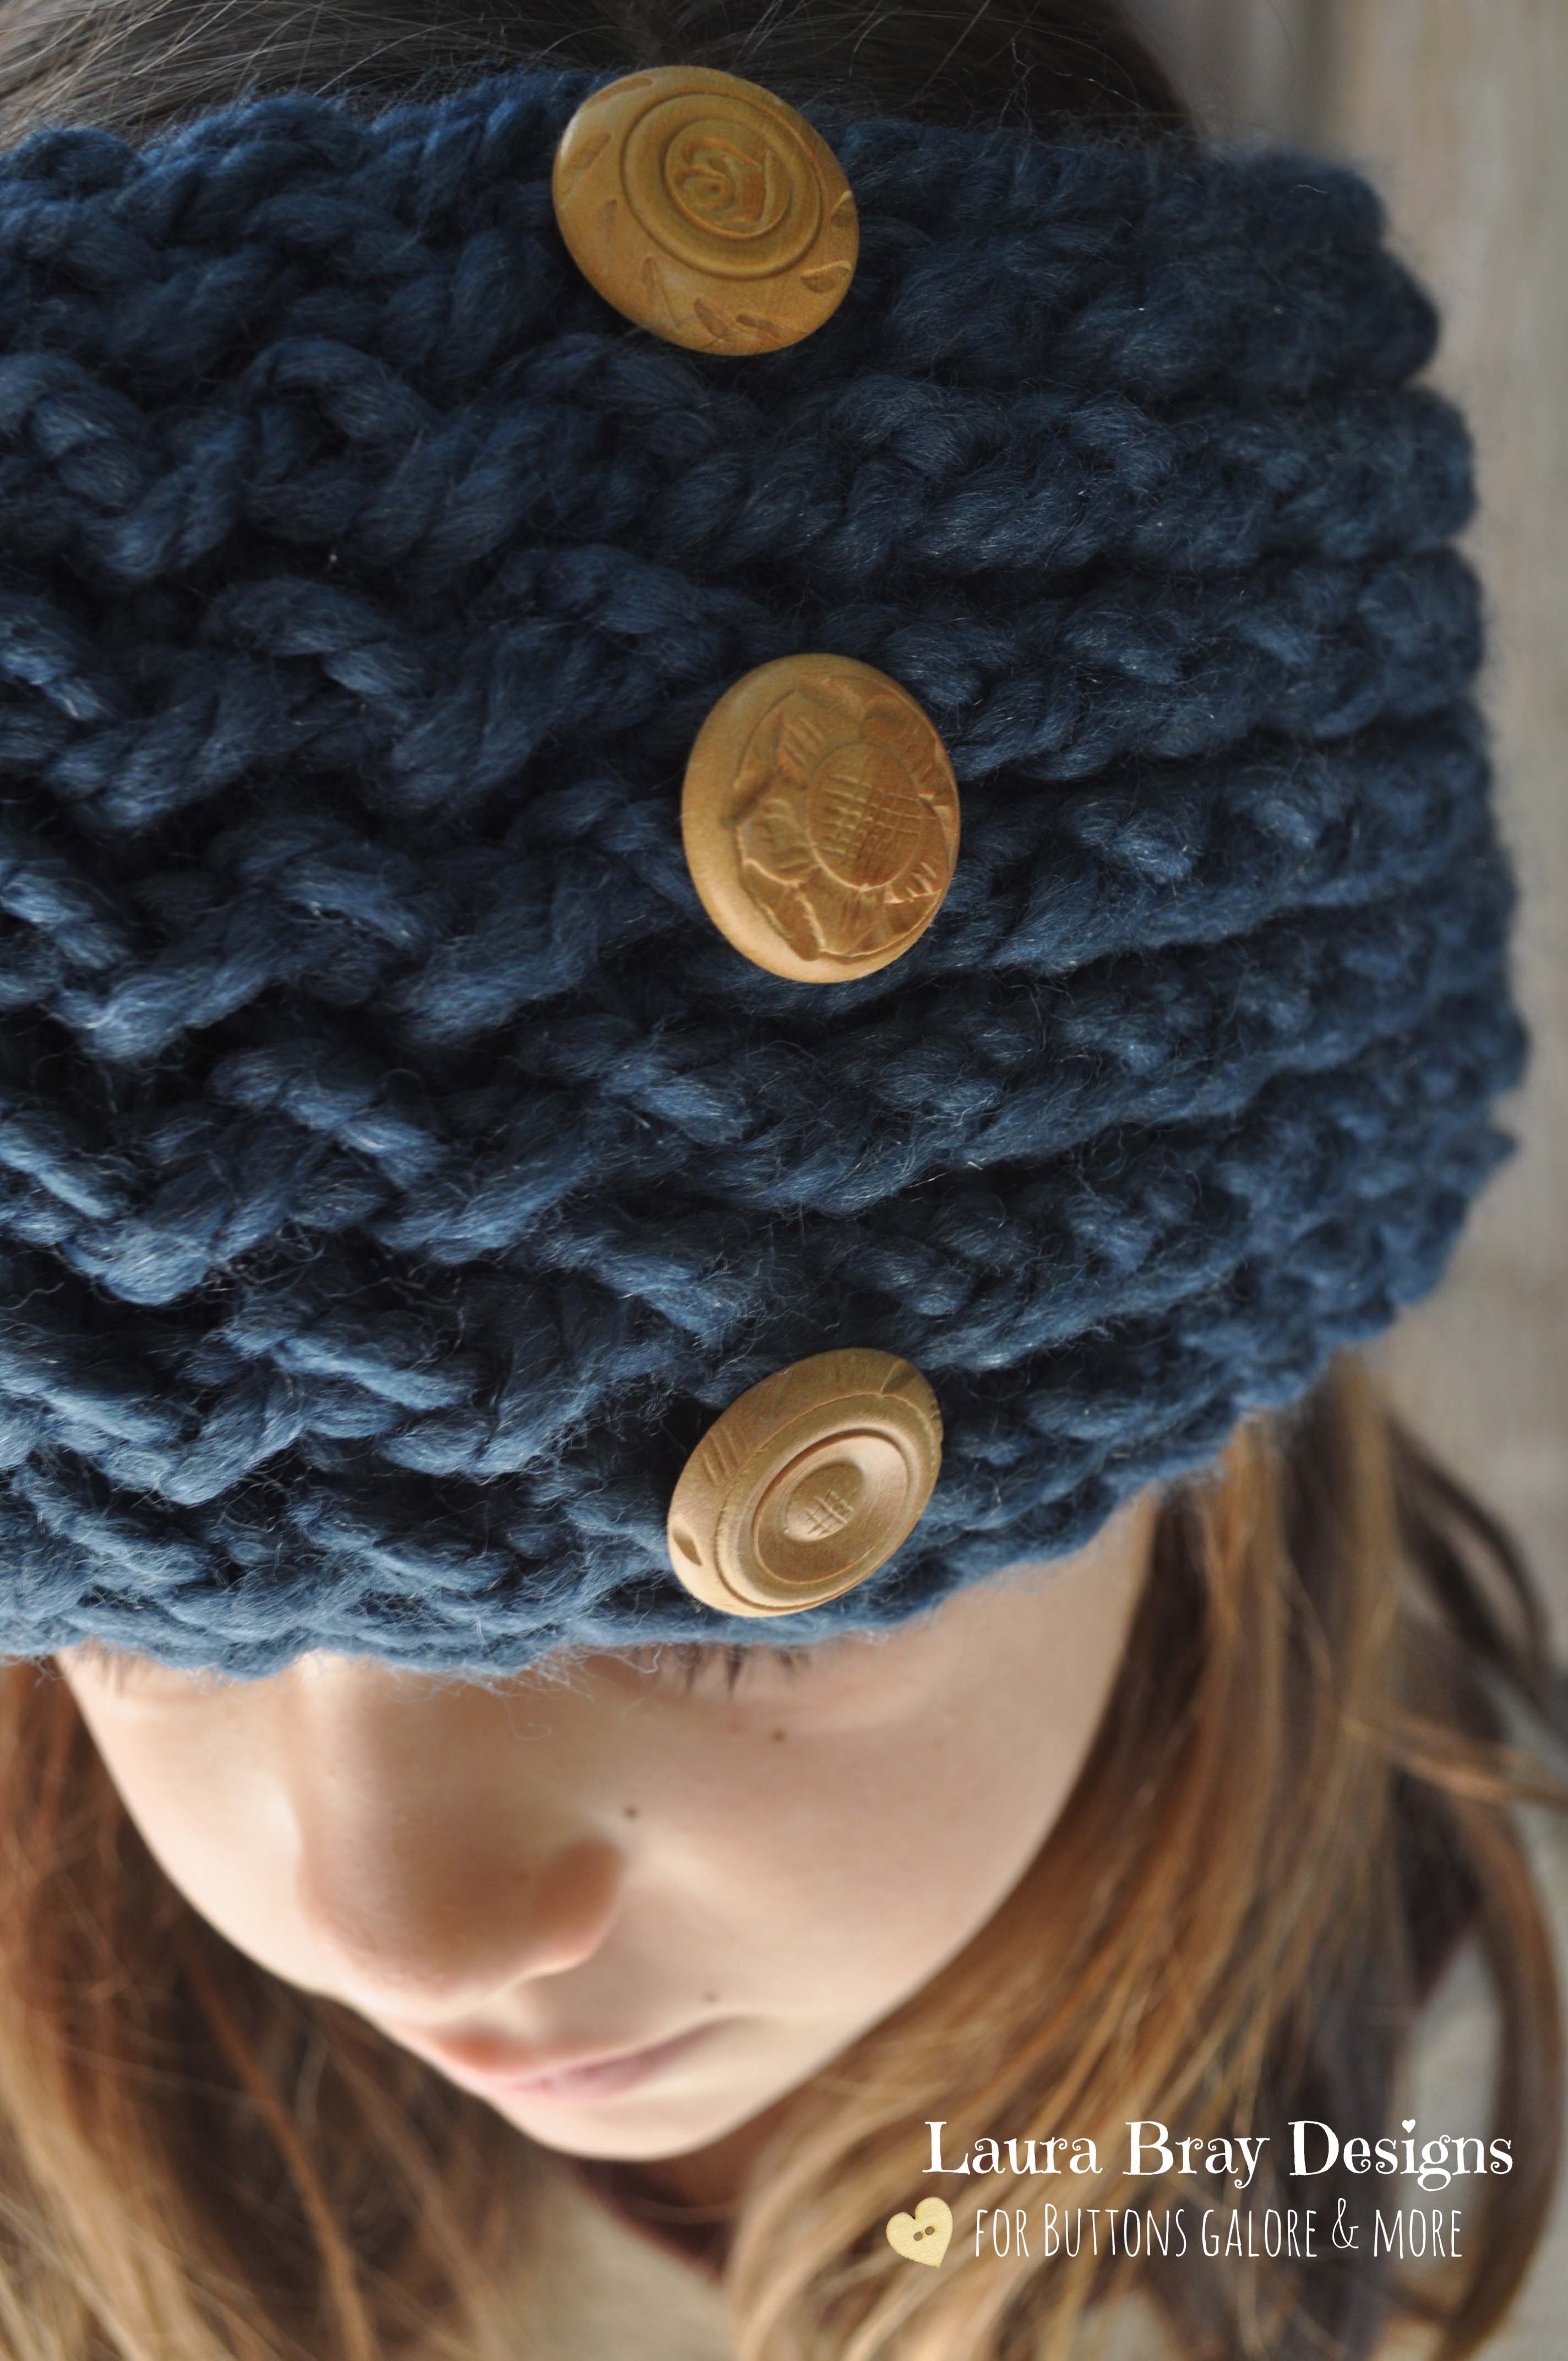
I have a secret to tell you. I can’t knit. Three people have tried to teach me and have failed. It’s the one craft I can’t seem to master. But I haven’t let that stop me. I can knit like a pro on a loom. You would be surprised by what you can make, looms aren’t just for hats and scarves. You just have to be more creative. I recently knit a headband on the loom. With wood buttons. Because there isn’t anything better than a nice knit and wood buttons. There is just something so organic about the combination of wood and wool. It’s winter. It’s cozy.
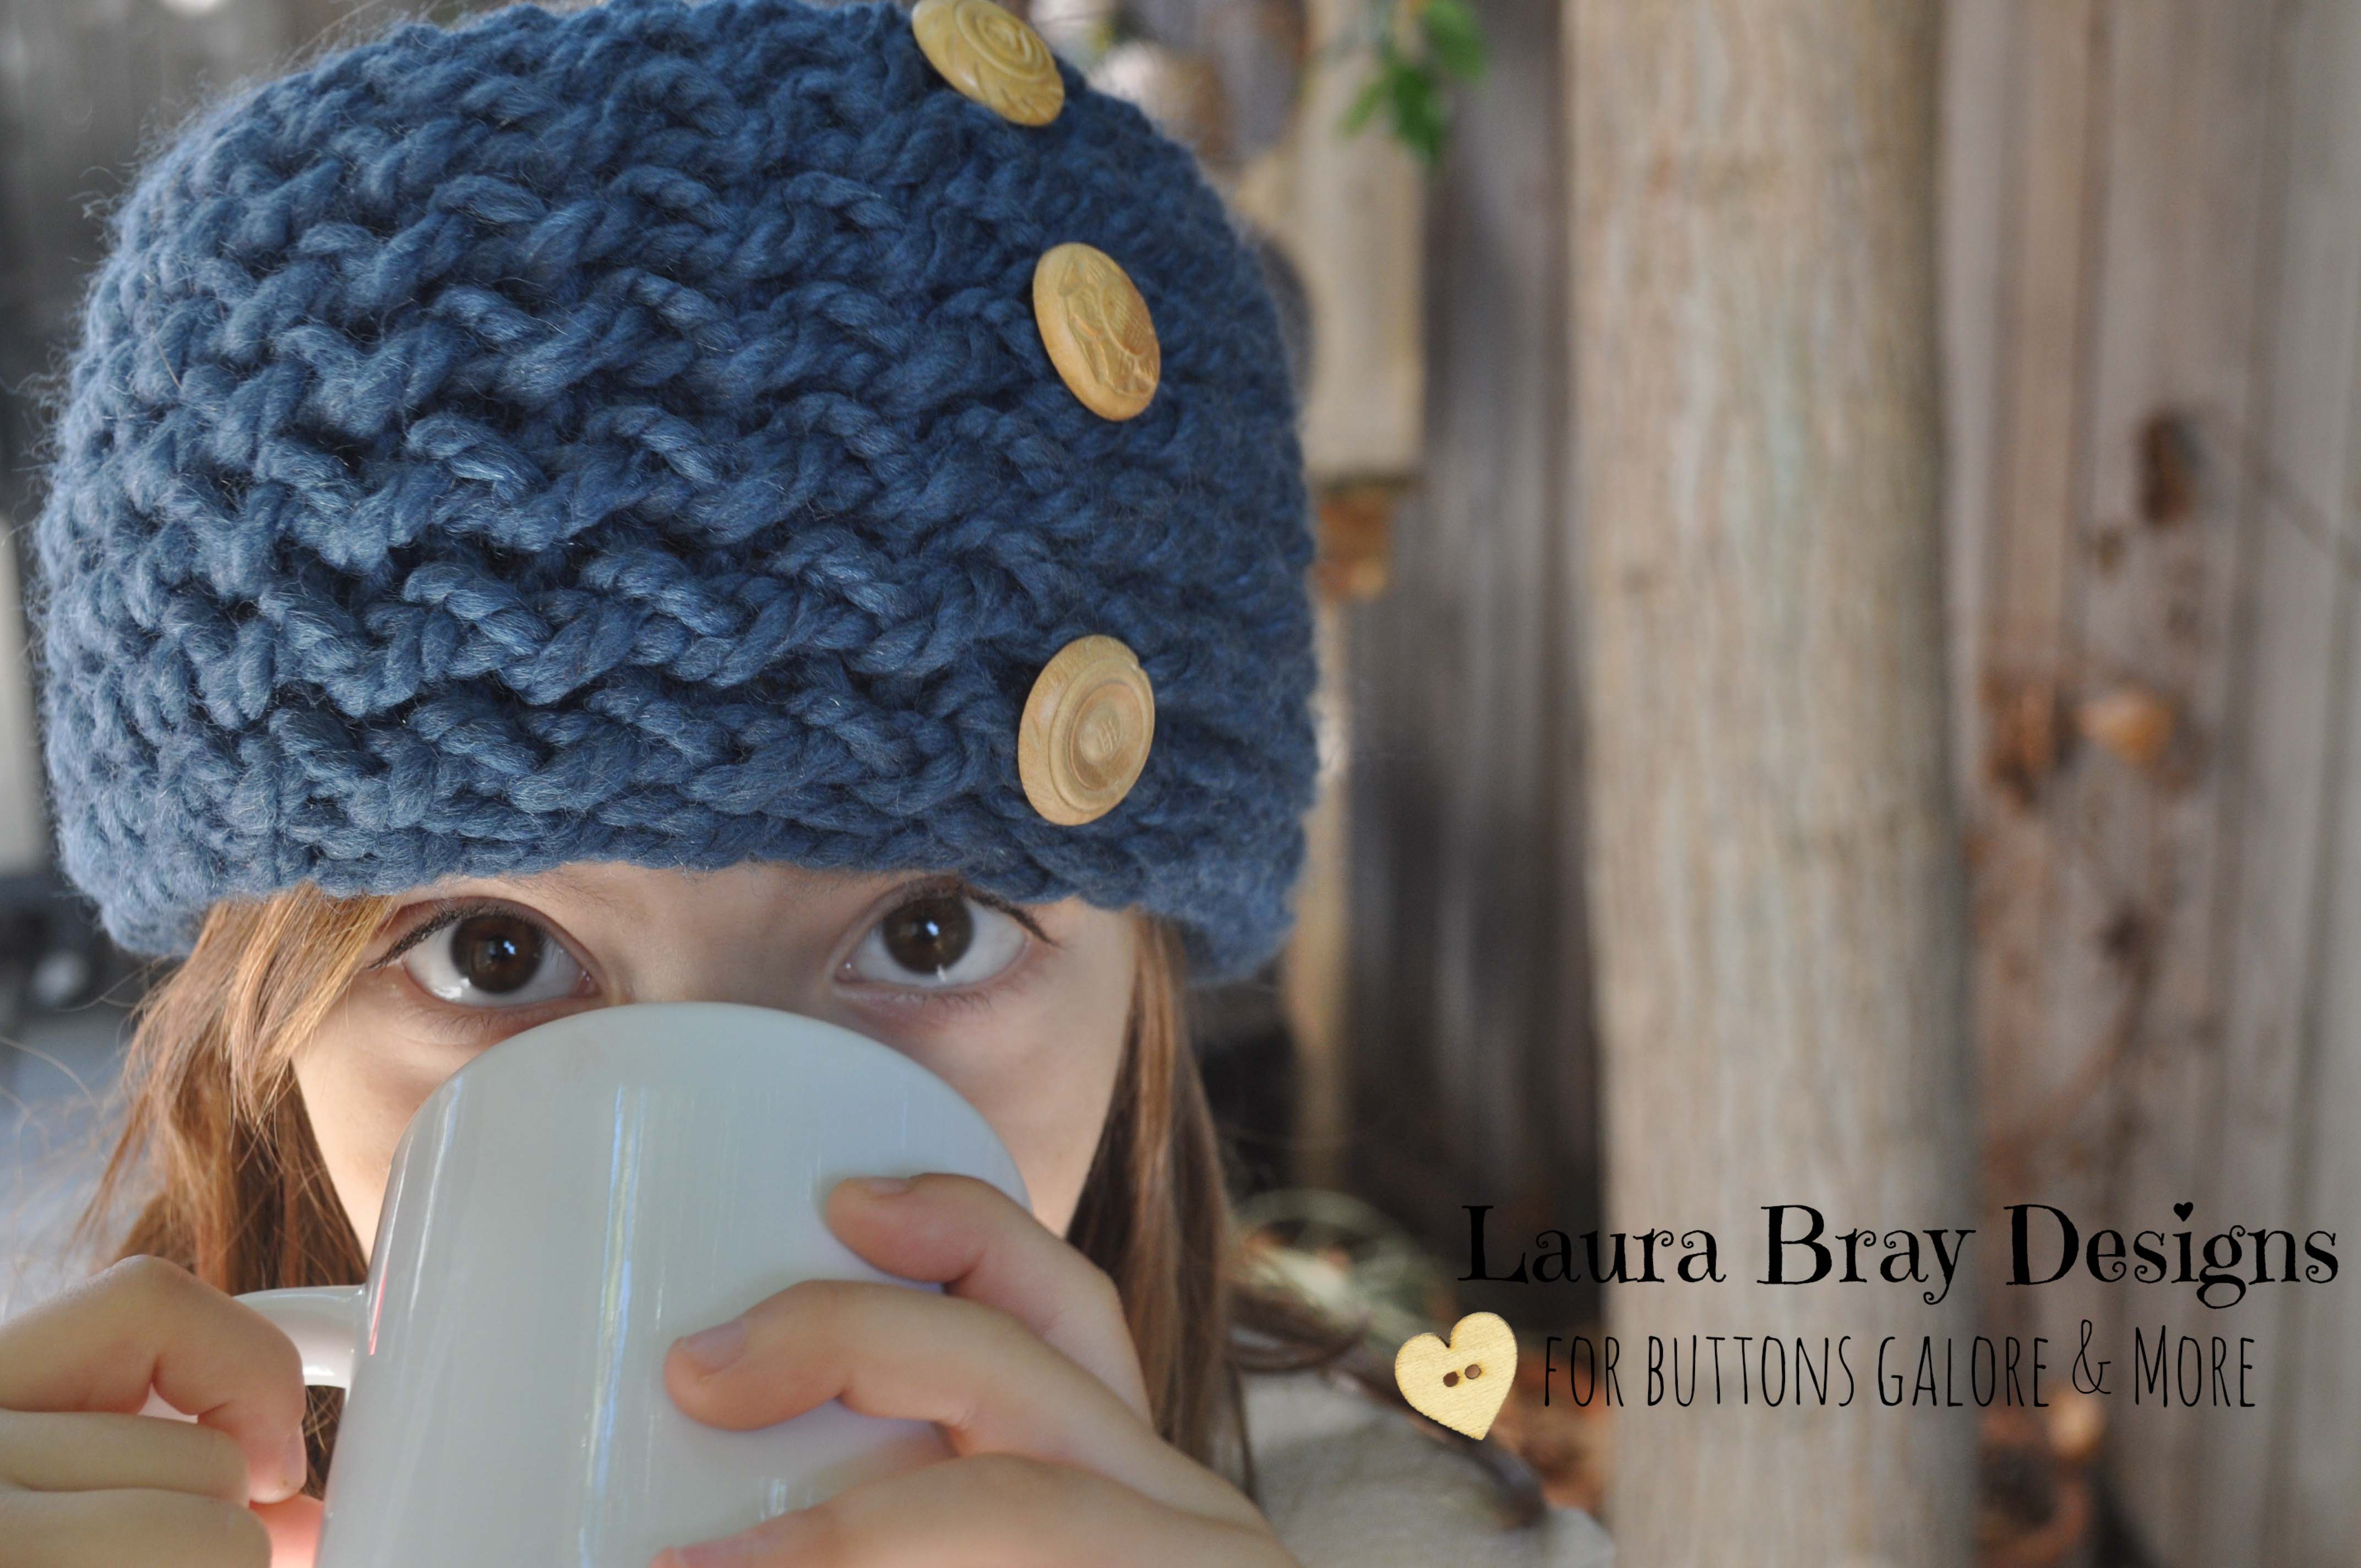
If you are interested in knitting on a loom, just go to YouTube and search loom knitting and you’ll get tons of tutorials. Here’s a general idea of how I made mine. Did I mention I’m not a knitter? Don’t expect to see anything that resembles a knitting pattern below. This is a seat-of-my-pants tutorial. If you don’t knit, I’m sure you’ll appreciate it.

Here’s a helpful tip. If you are like me, you might think that using the round, hat loom would work for this project, but it won’t. Casting off leaves you with a wonky side edge. Trust me when I tell you to the scarf loom is best for this project.
If you are even more resistant than I am to knitting, you can also sneak off to the store, buy a knit headband and stitch a few wood buttons on to it. That counts as handmade too. At least in my world it does!
Want to see other projects I’ve knitted with my loom (and yes some have wood buttons)? Visit my Pinterest Board.
![]()
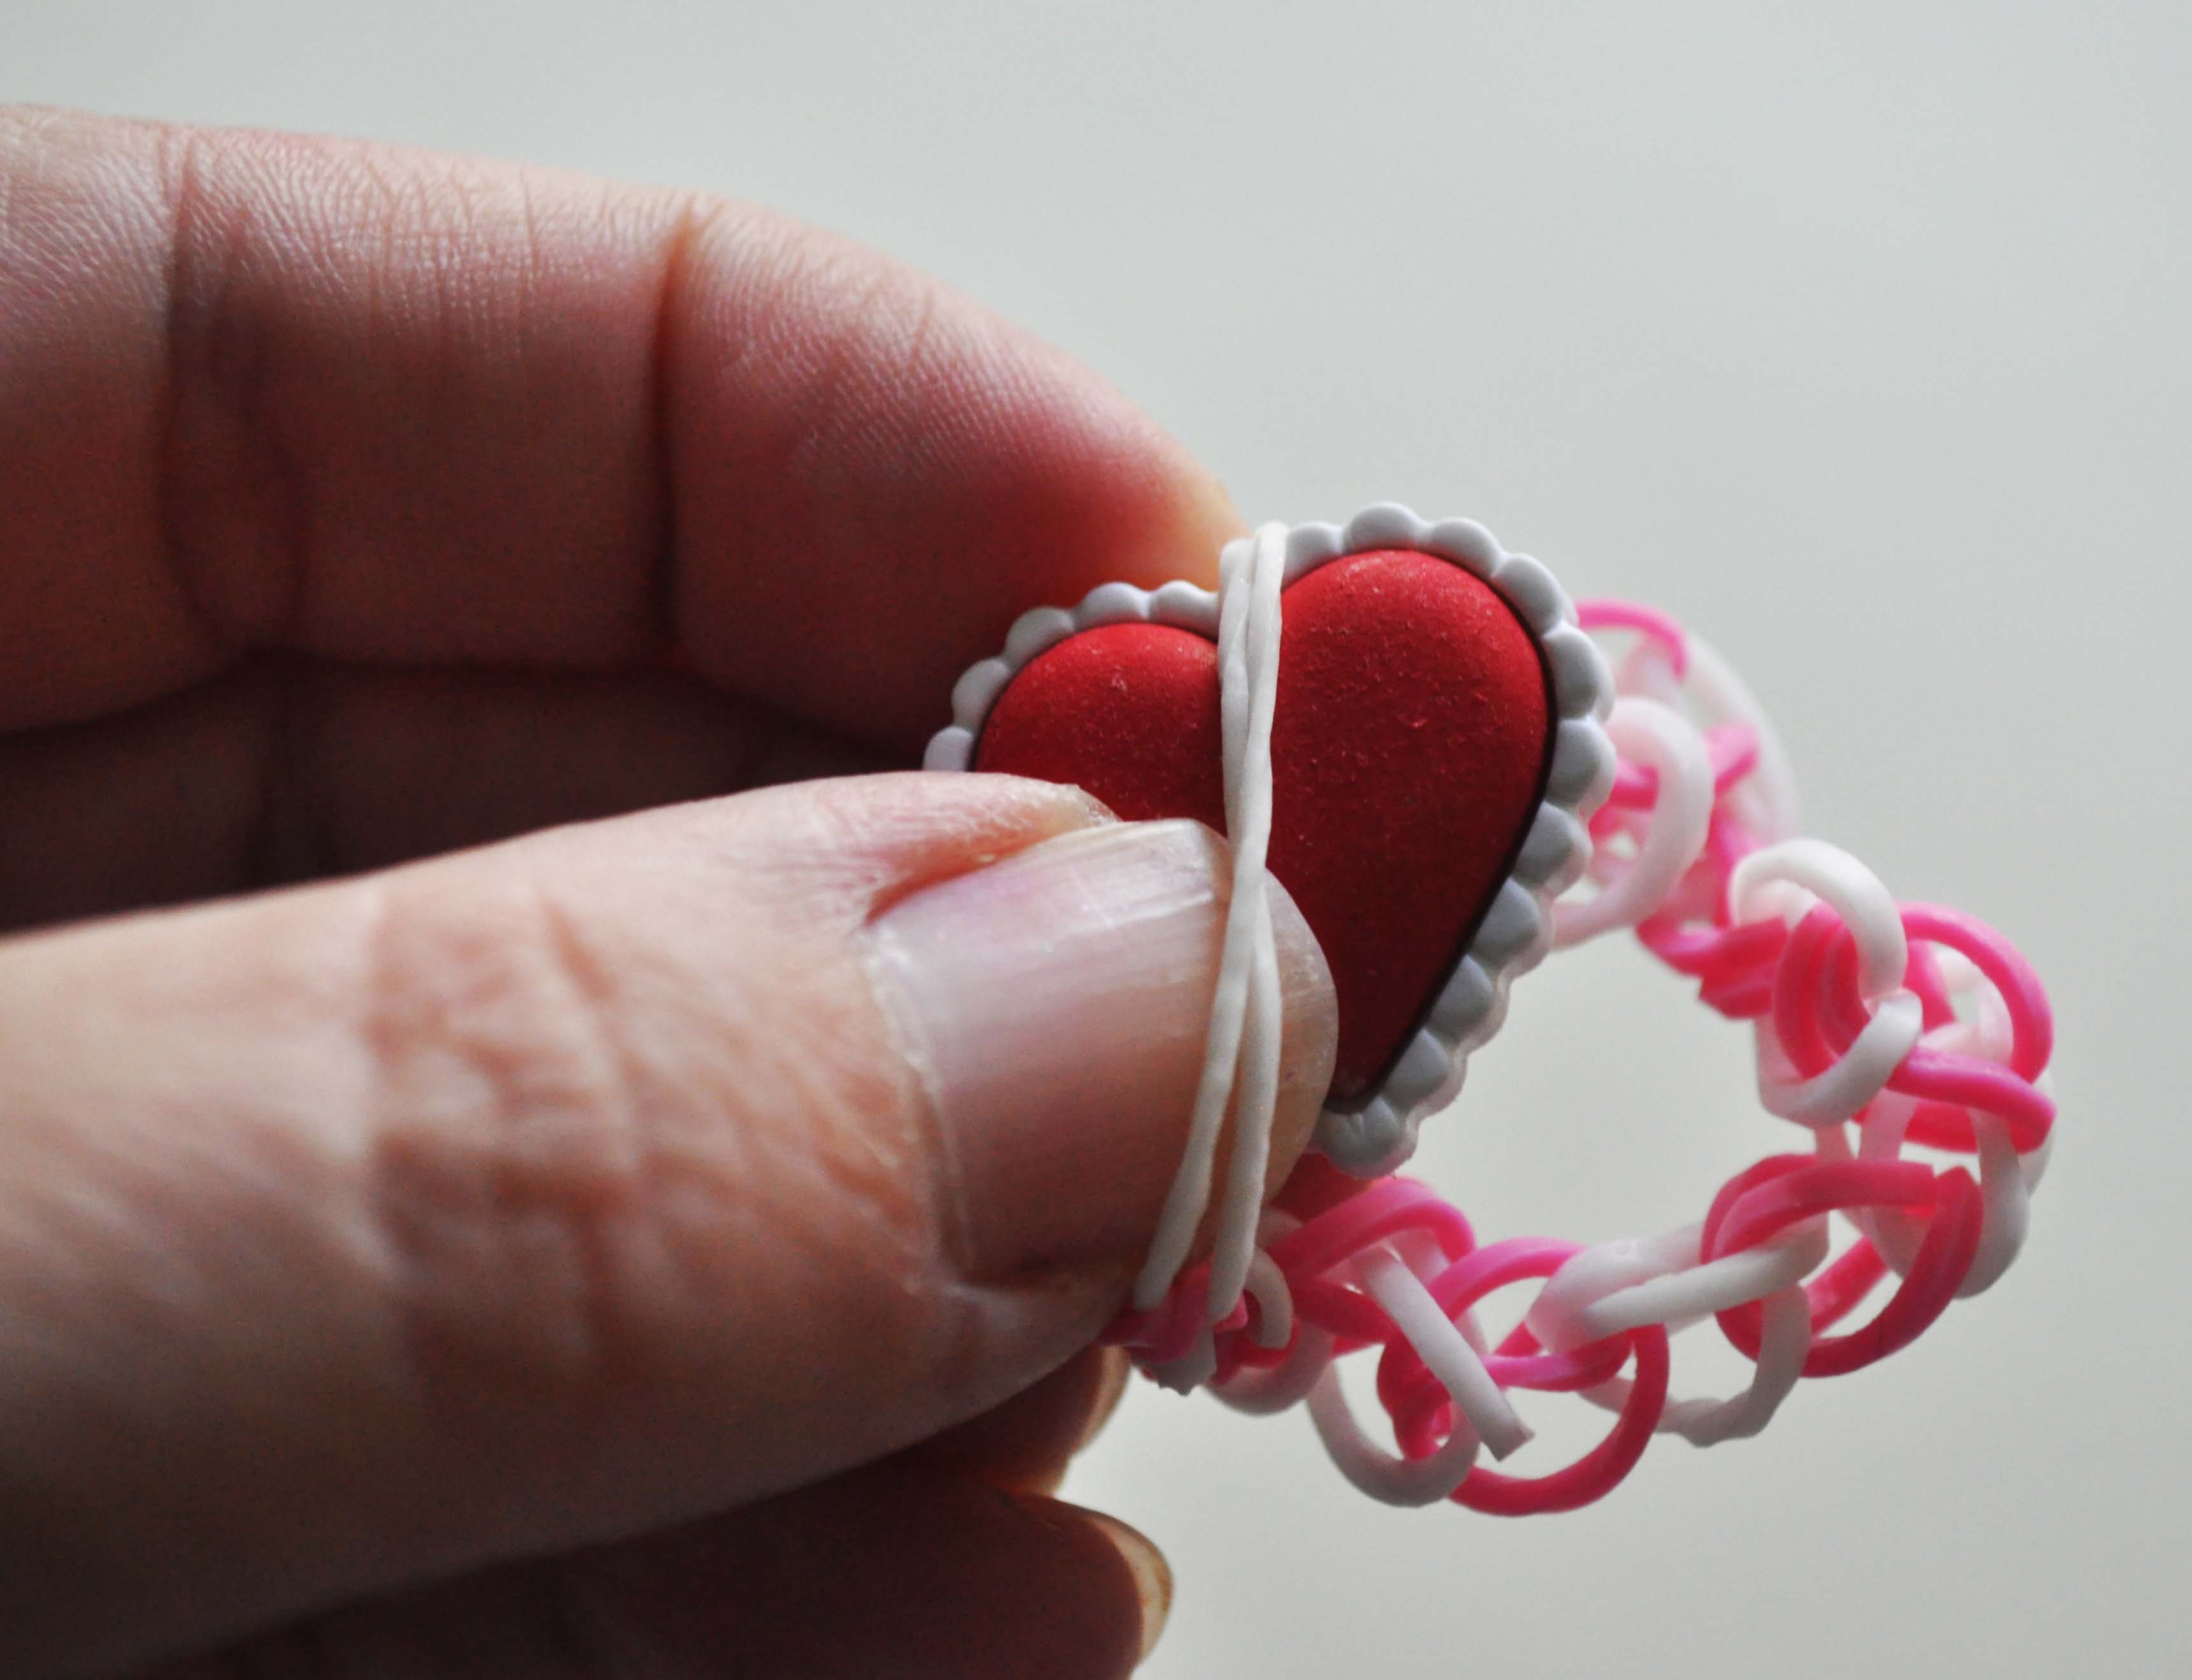
Rubber band bracelets are all the rage with kids these days. Some crafters use a special loom to create the bracelets, but you can also use your fingers and some super cute novelty buttons to create a closure for your bracelet. This is definitely a kid-approved project as my daughter was wildly impressed that she could now make rubber band bracelets that stood out from the crowd.


1. With your fingers, squeeze one of the bands in half and thread it through the shank of your button.
2. Squeeze another band in half and weave it through the loops of the band that you pushed through your button.

3. Continue weaving your bands together until you get the length you want. Don’t forget the bands stretch!
4. When you get to the end of your band, take the two last two loops and wrap it over the button.
Thanks for crafting with me today! For more crafts, lifestyle tips, and button projects, visit me on my blog at Laura Bray Designs.
![]()
Allie Gower has created a fun Jumbo Baseball Bottle Cap using the Baseball Button Assortment, an Archiver’s Exclusive.

Buttons Galore is heading to Archivers Mall of America for ScrapFest 2013.
Join us for fun make and takes each day of ScrapFest.
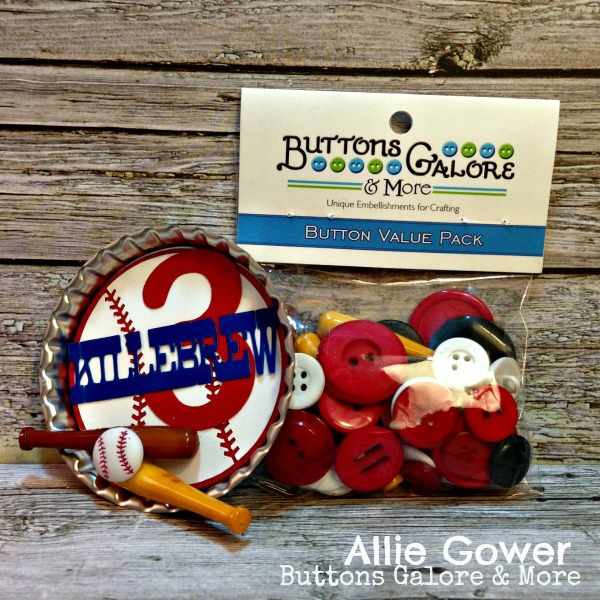
Project note – Add a pin back so you can wear this, or add a magnet to the back and honor your favorite player on the fridge!
Please note that all of these supplies used to make the ScrapFest projects are readily available in your local Archivers, and many of them are available in the Archiver’s Annex Online. Projects will be on display in the Archiver’s at the Mall of America.
See more of Allie’s work at her blog, My Card Party.
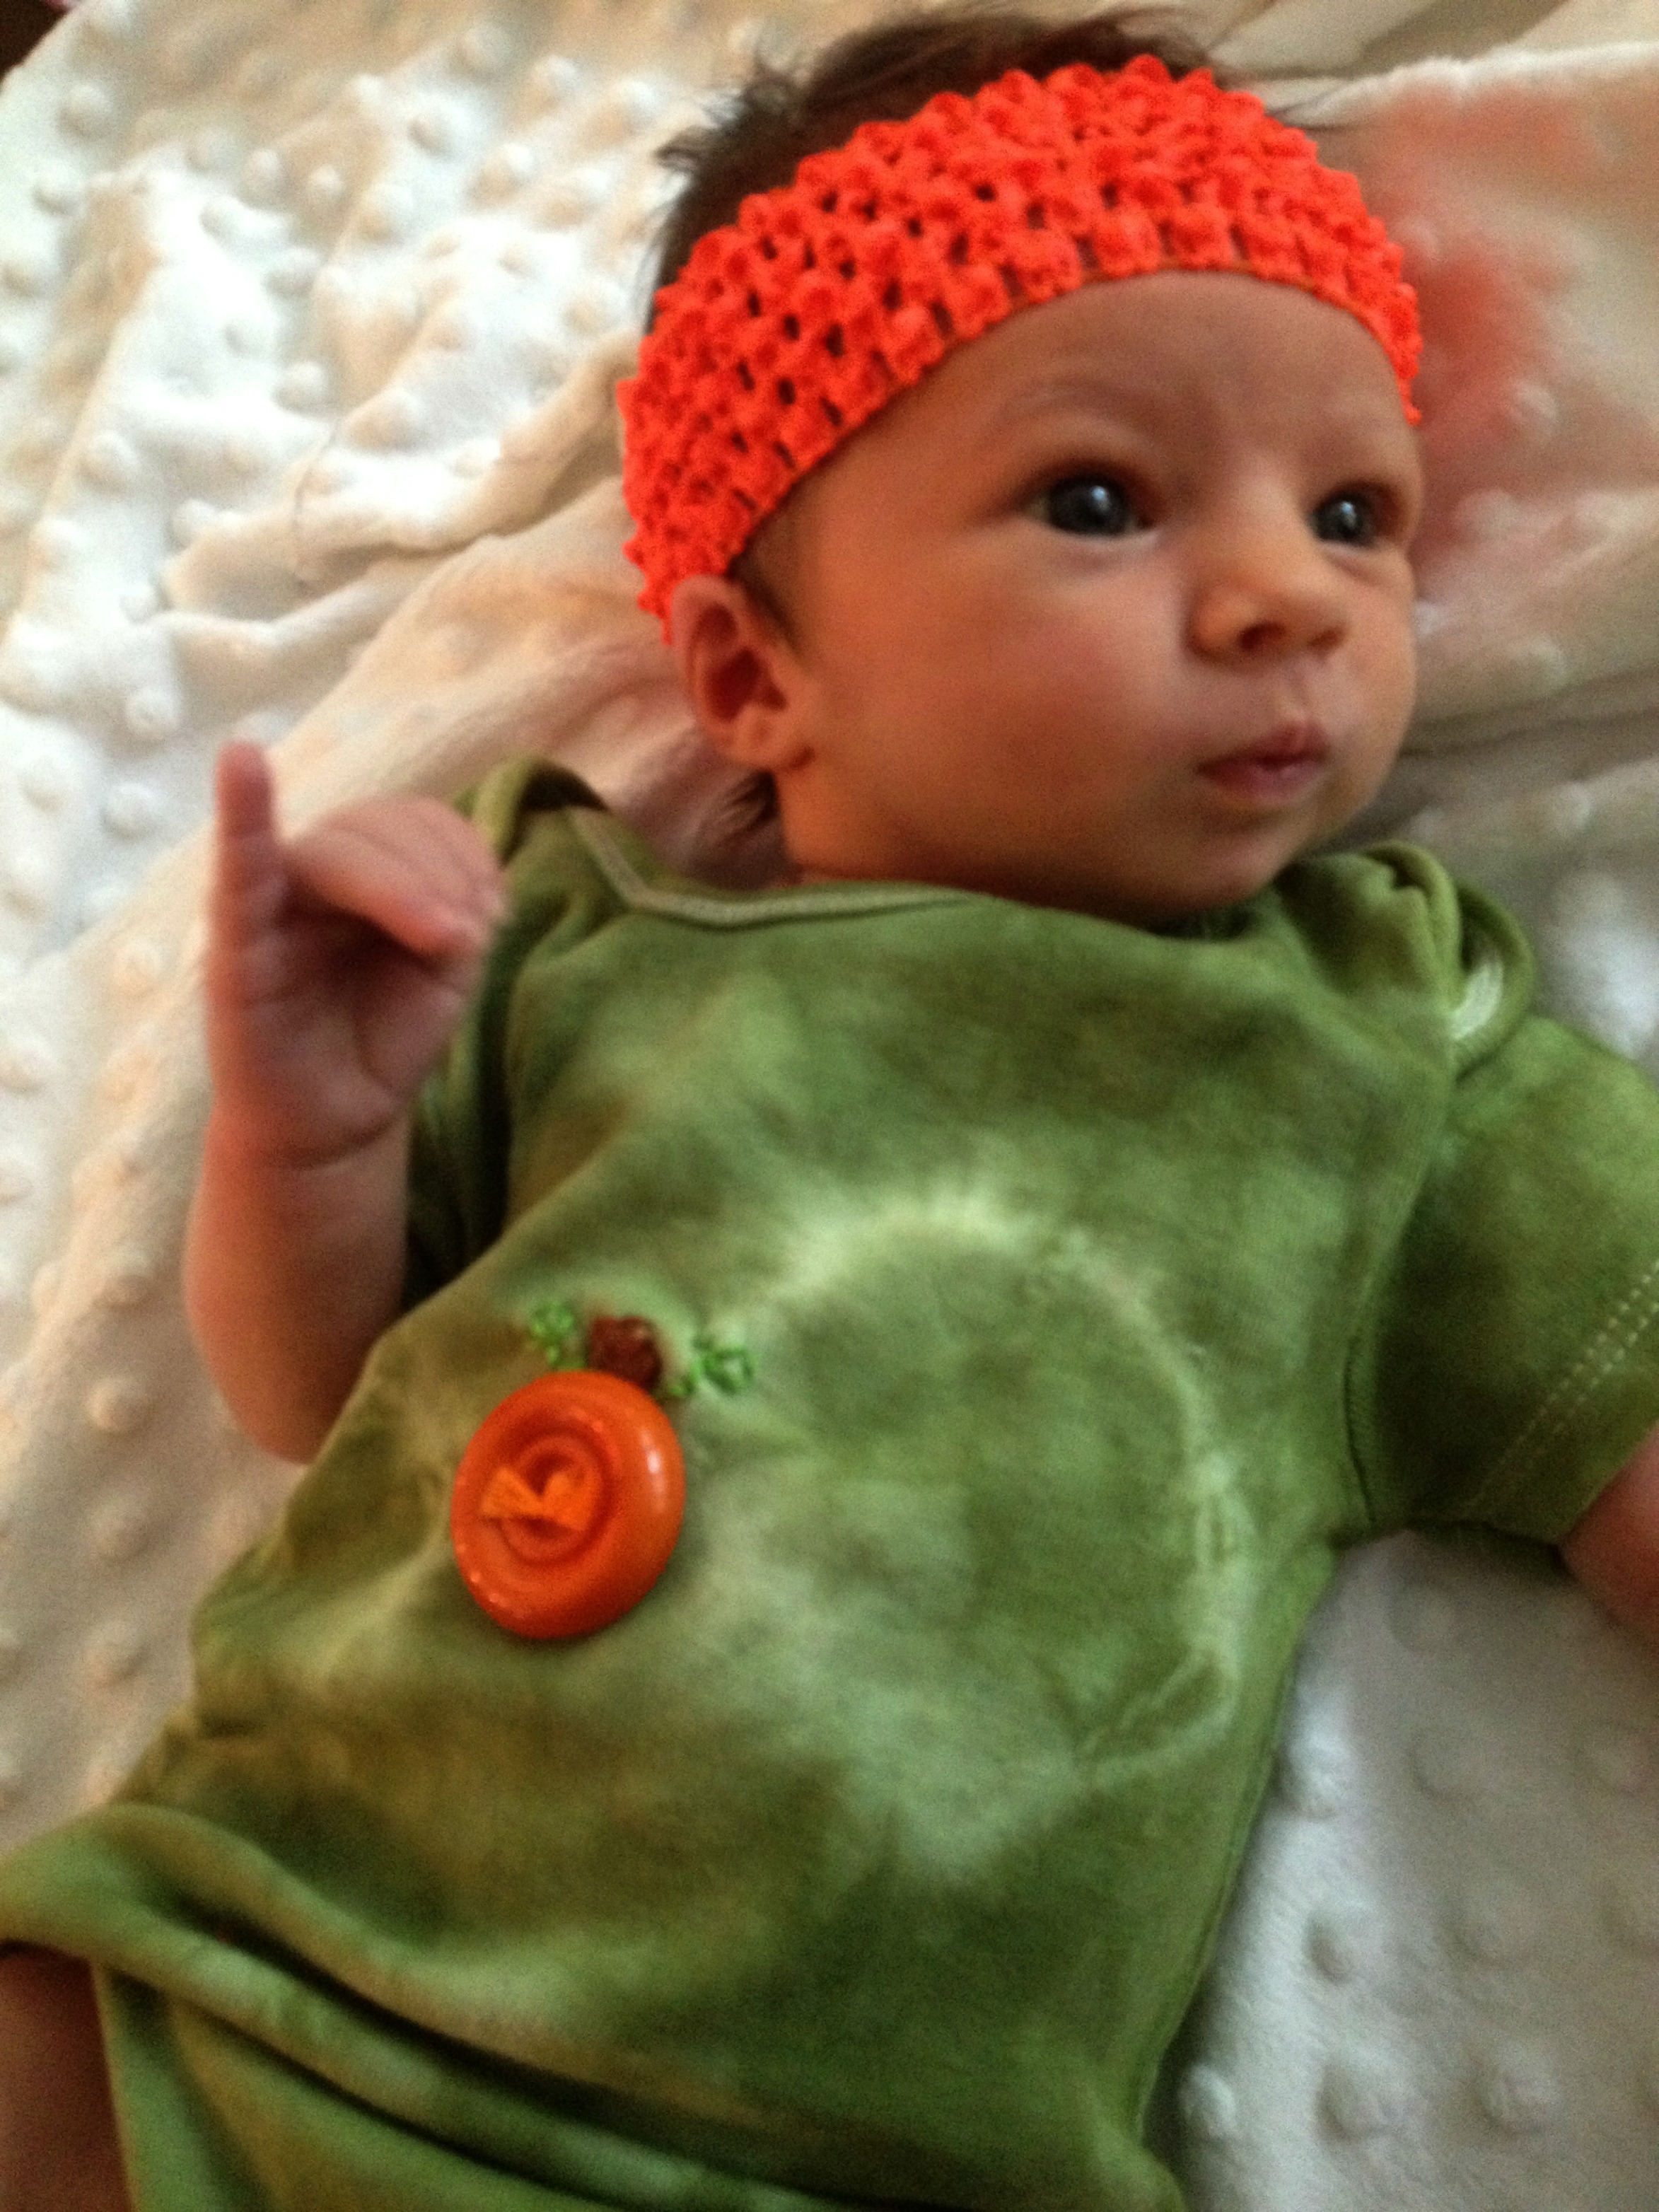
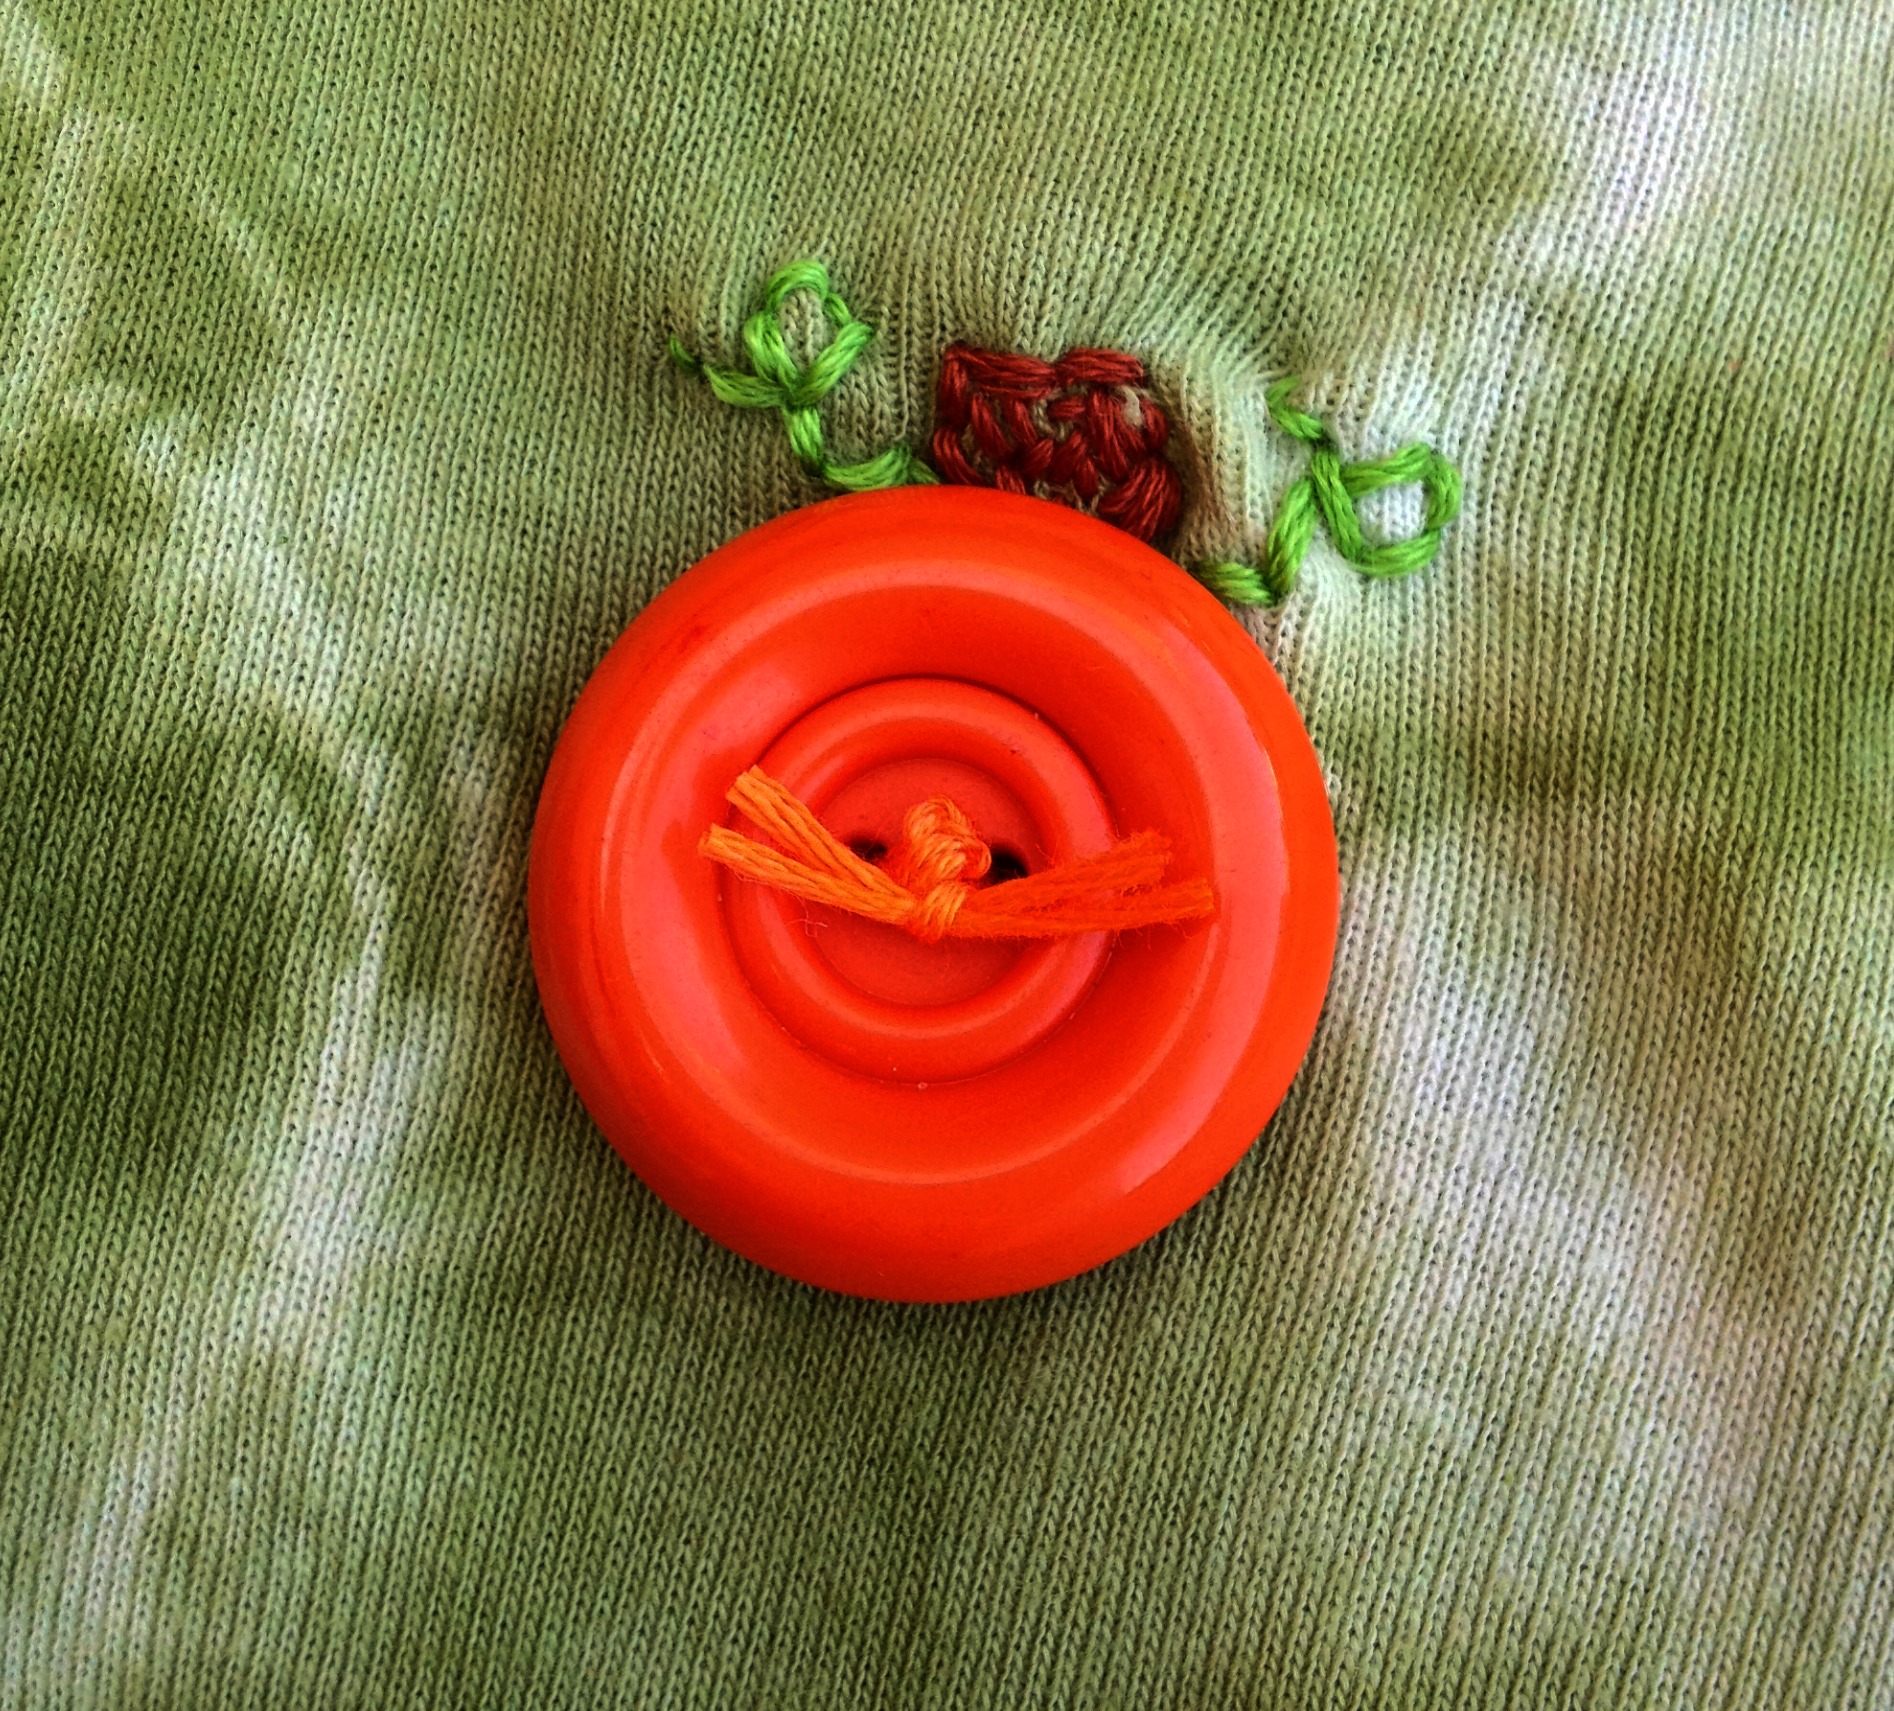
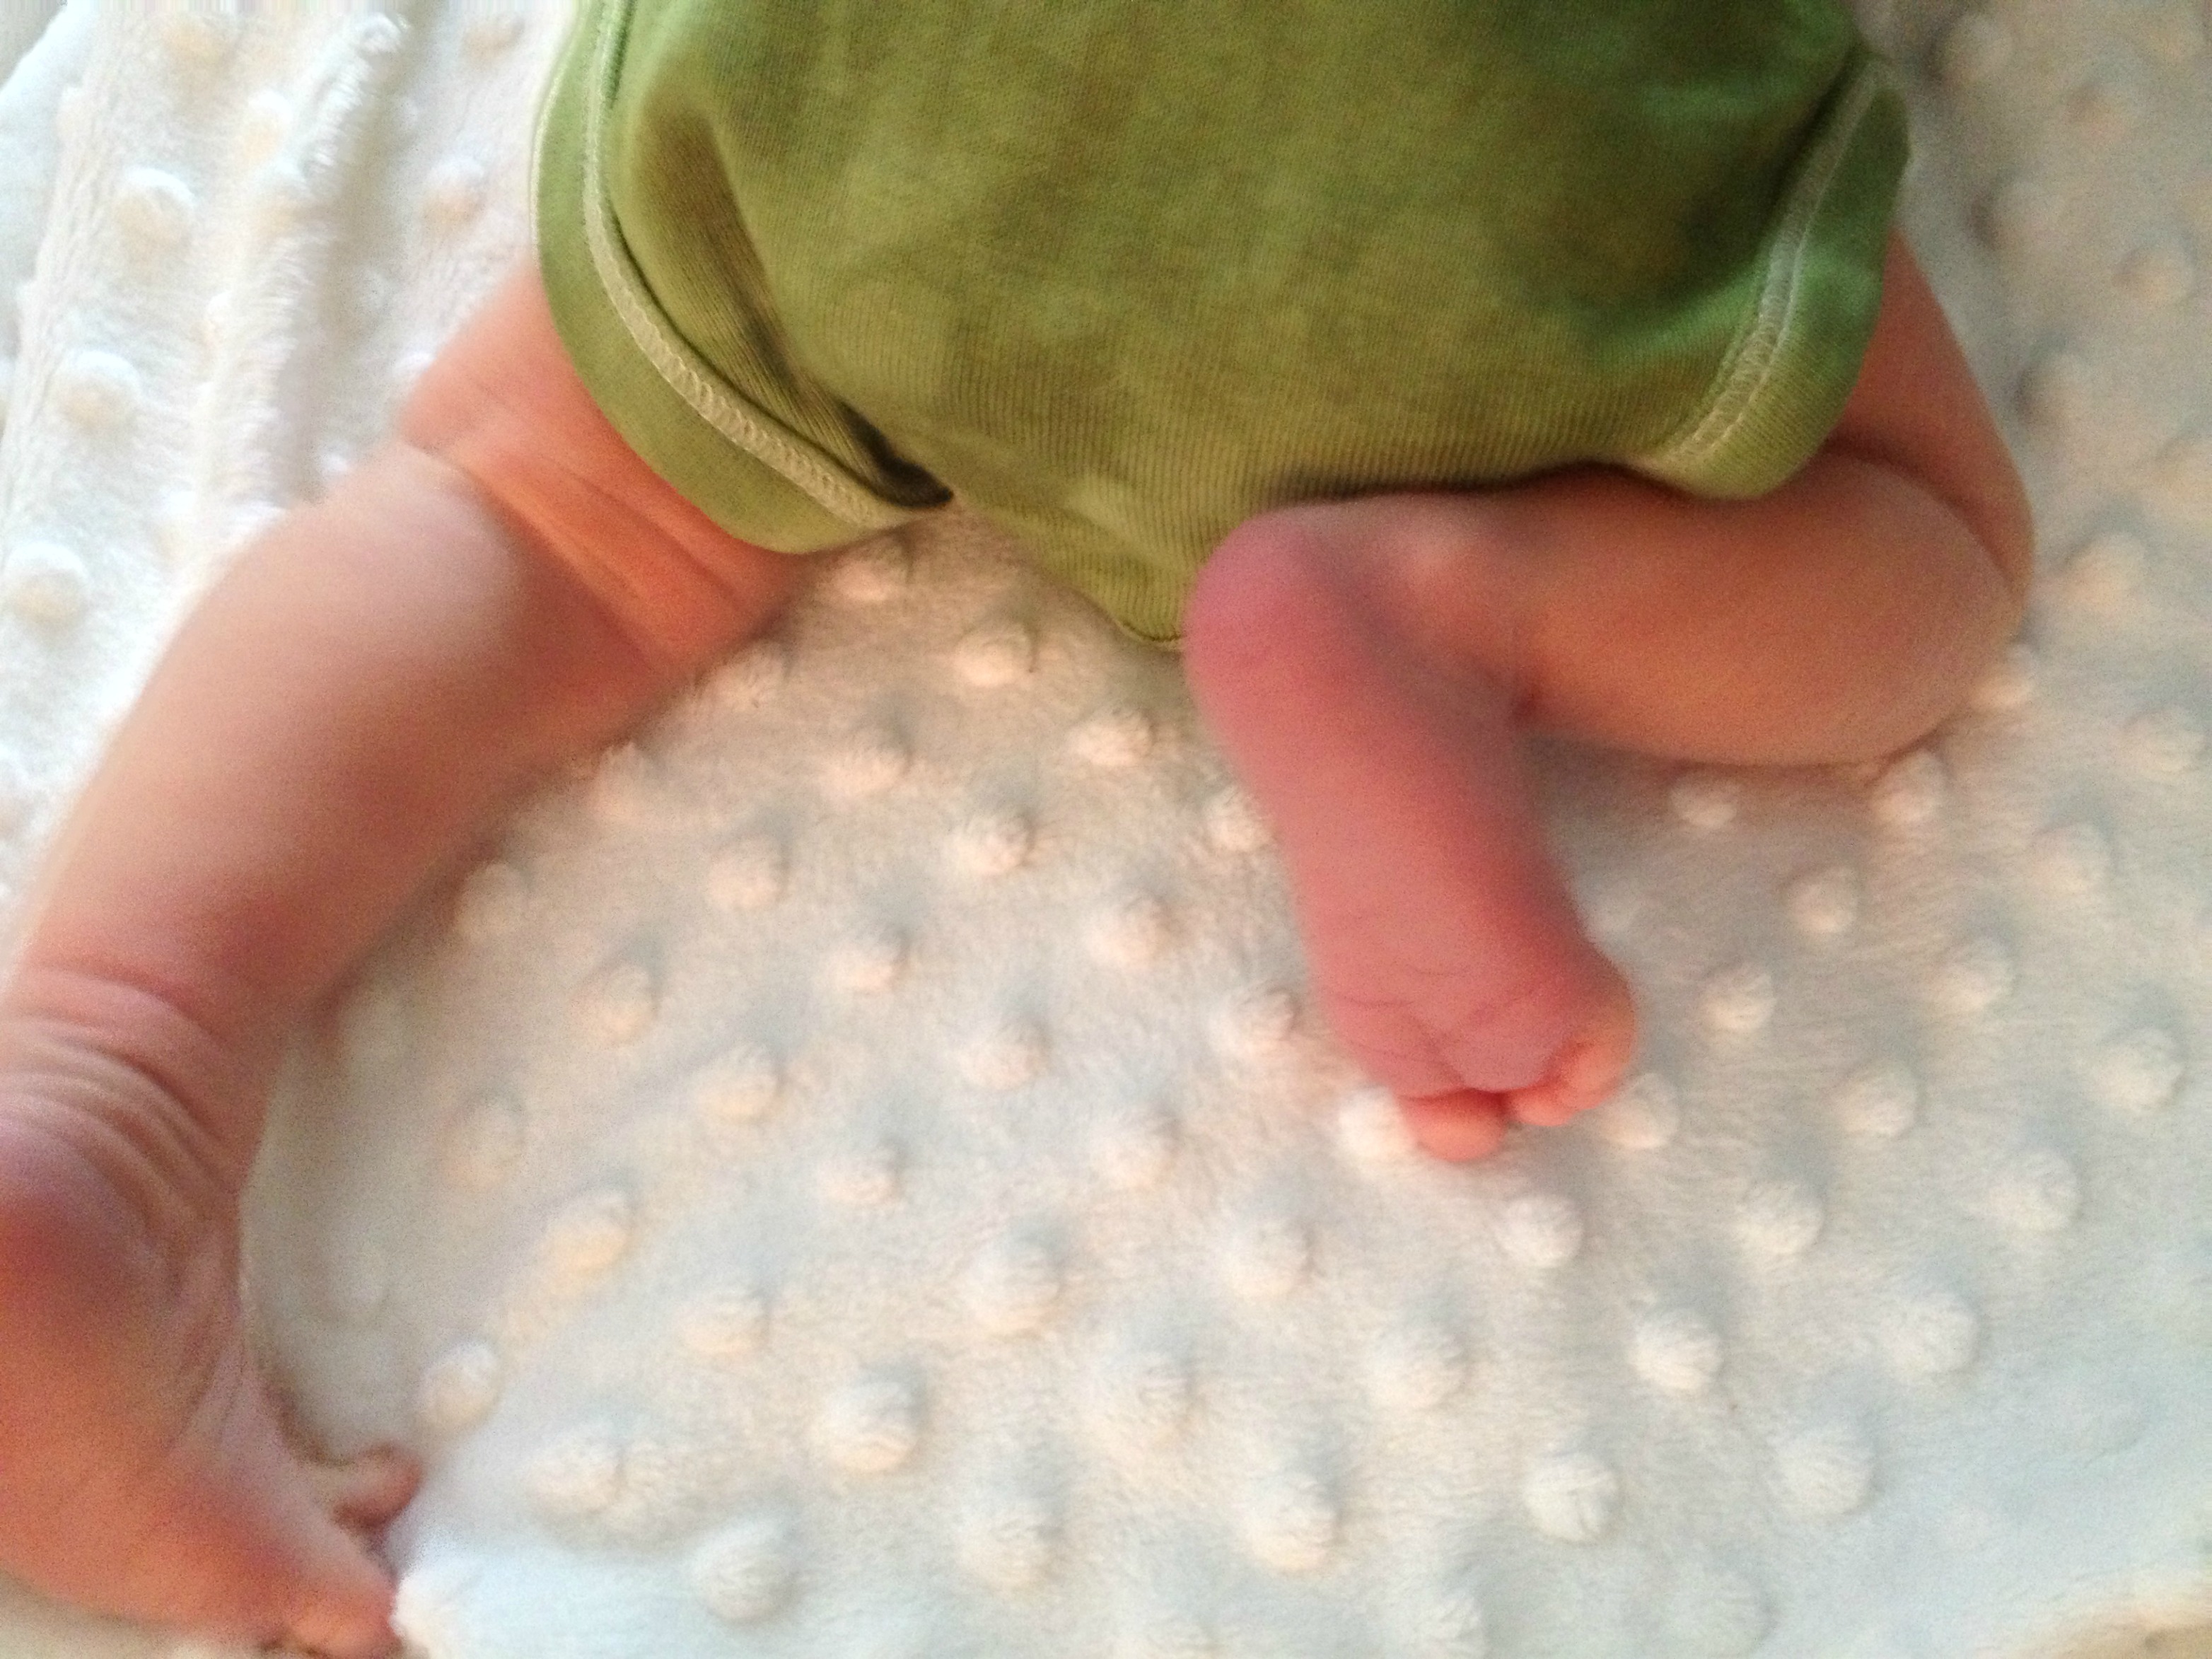
Babies are so adorable when they are dressed to celebrate the holidays. This pumpkin onesie creation for Halloween is super cute as well as quick and easy.

All you need is a onesie, embroidery floss and a large Outrageous Orange button . If you want to put your pumpkin on a green onesie and you can’t find one, you can dye one. That is what I did first. I used Rit Dye’s Apple Green and tie dyed it in a mason jar.

It is best to embroider the stem and vines first and then add your button. My favorite floss is embroidery floss by Coats and Clark! I think the little pumpkin is just simply so adorable. So make your little pumpkin a onesie today.
Happy Pumpkins, Buttons and Stitching,
Laura
Sometimes I feel like September is really new year. Back to school time calls for getting organized and cleaning out closets. As I was purging my closet, I found a pair of cute, polka dot shoes.
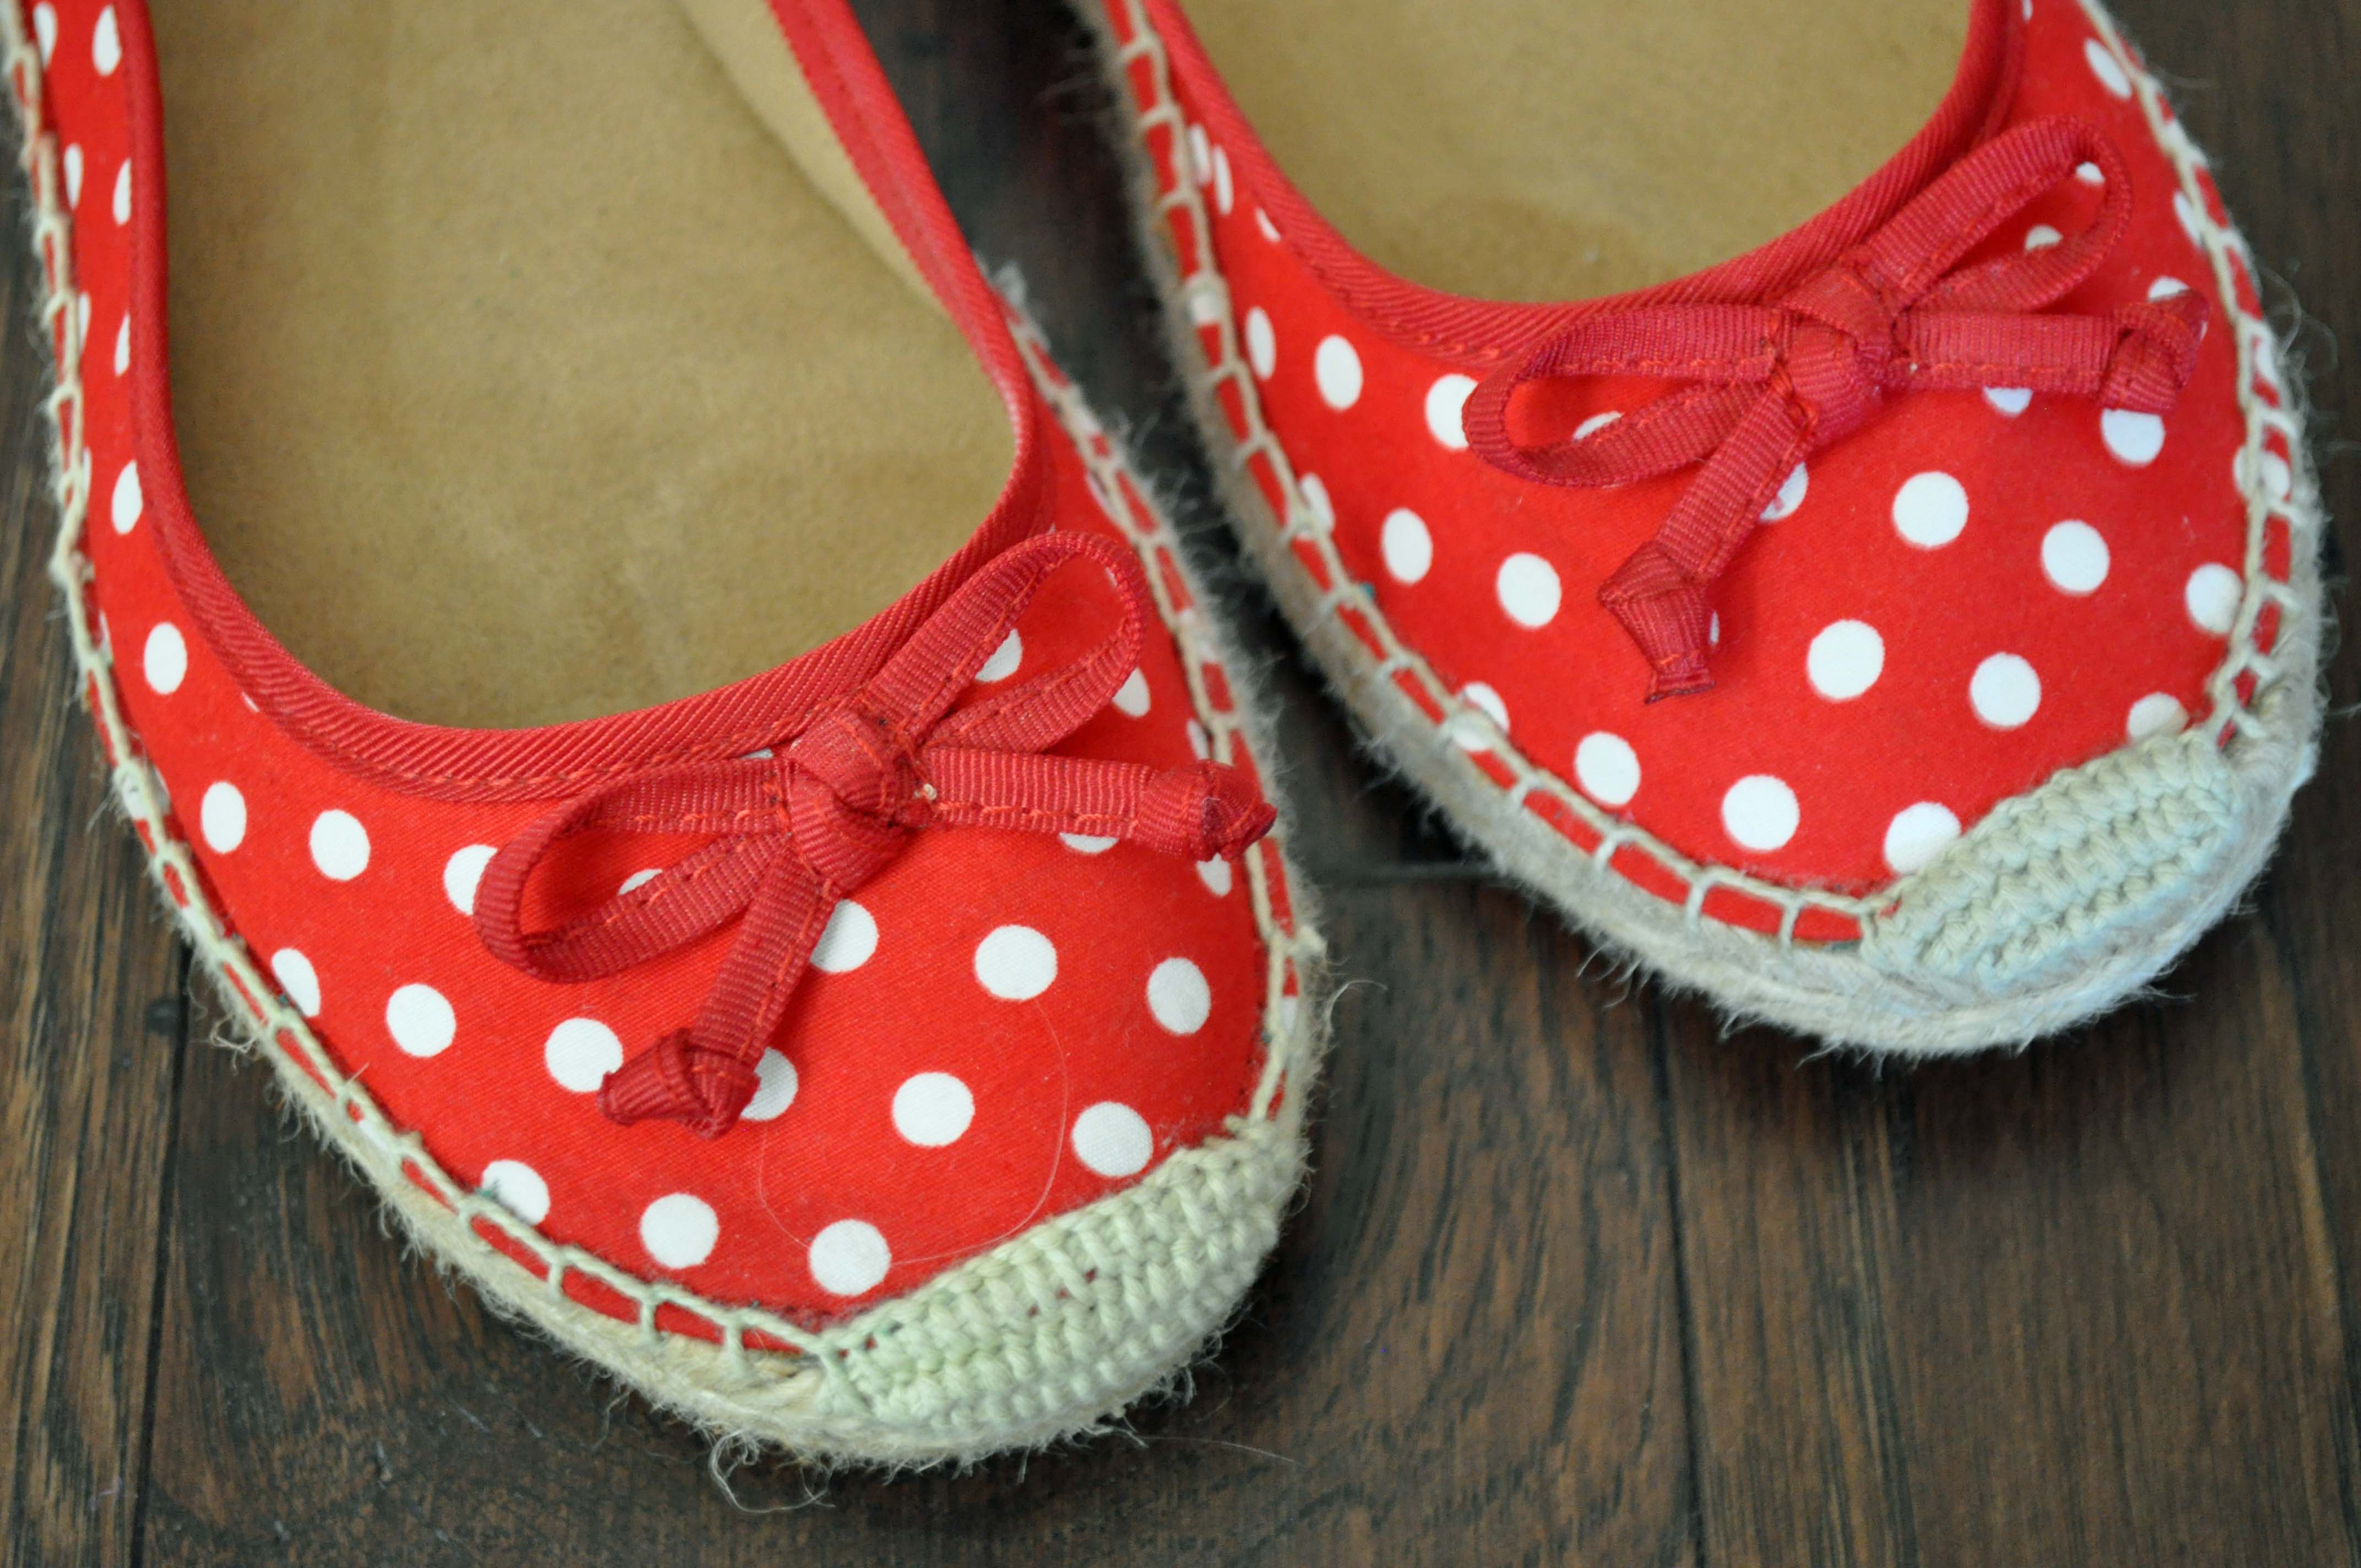
On their own they are pretty cute but, being the crafter I am, I couldn’t leave well enough alone so I was off to the studio to create some jewelry for my shoes.

You can buy shoe clips blanks at most craft stores. Buy a dozen. I promise you are going to be addicted to the craft once you find out how easy it is to do.
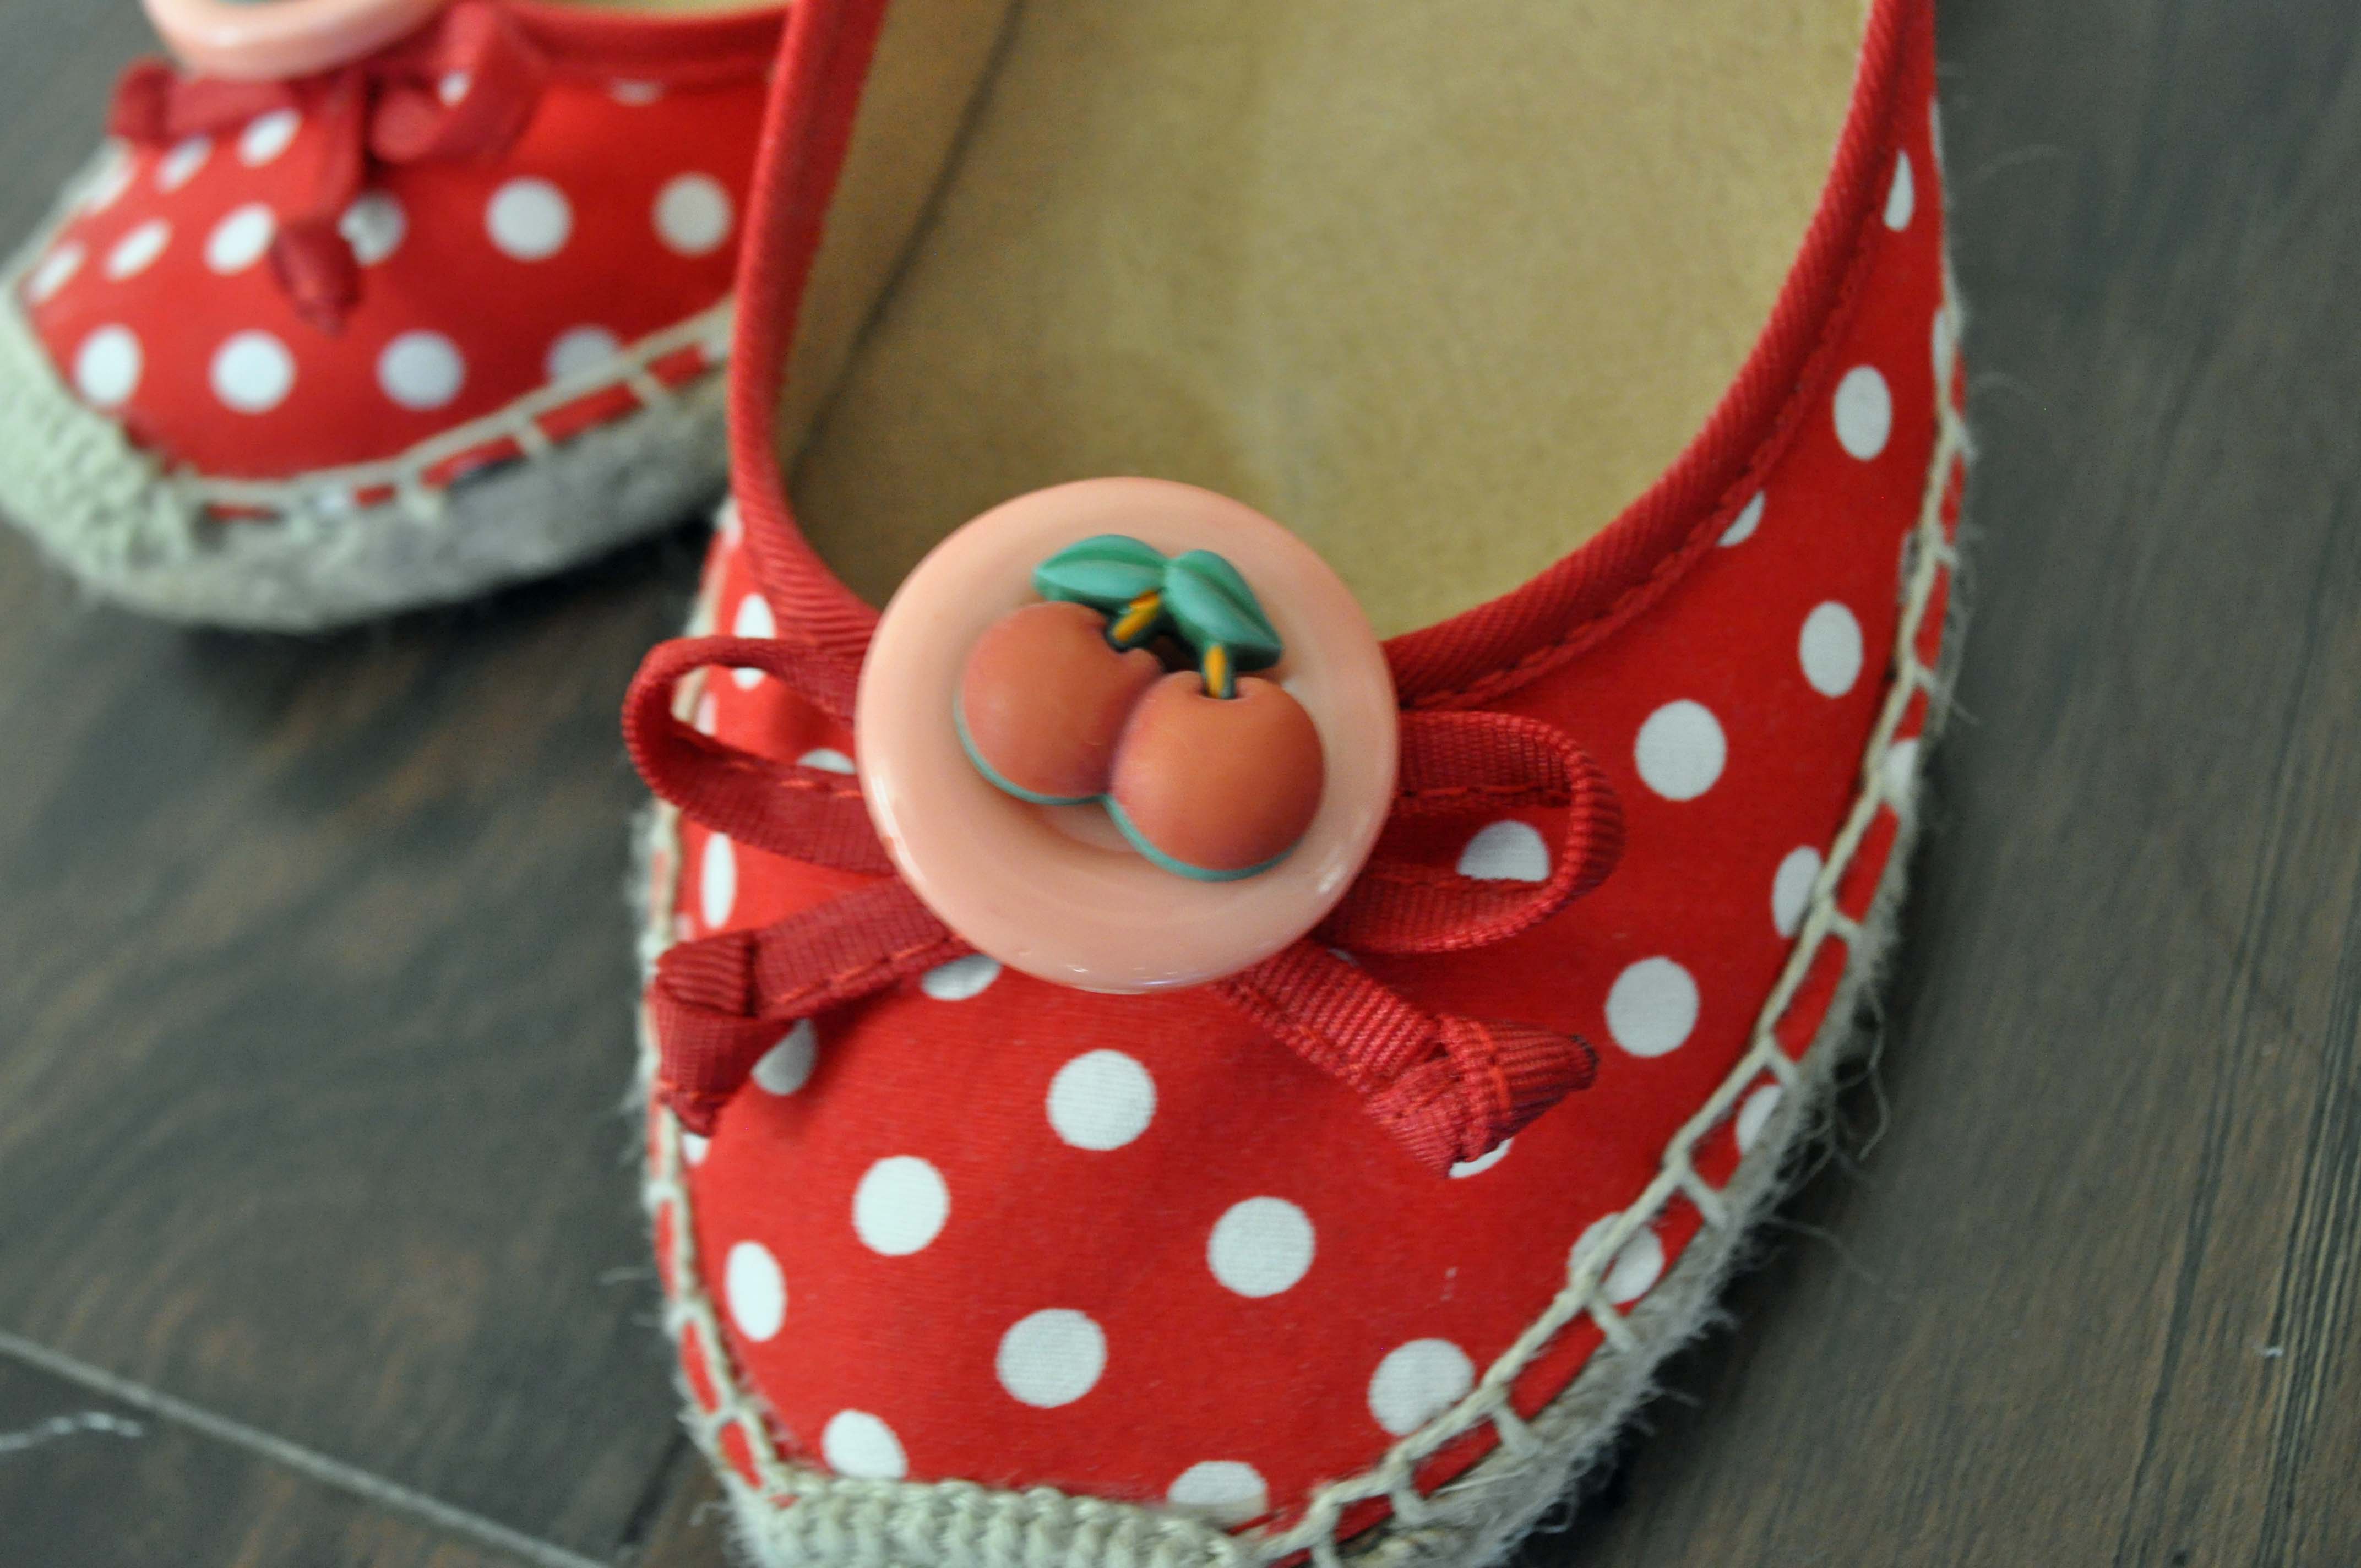
As for buttons, Buttons Galore & More’s large supply of novelty buttons means the possibilities are endless. Turn your favorite pair of shoes or pumps into cute retro shoes with cherries, decorate your child’s shoes with back to school buttons, or get a jump-start on the holidays and make some Christmas themed shoe clips. By simply adding shoe clips, you can turn one pair of shoes into endless looks.
1. Glue a novelty button onto a plain button. Set aside to dry.

2. Once buttons are securely glued together, attach your button creation to the shoe clip blank. Make sure the button is glued onto the clip so that when you clip it onto your shoe, the design is oriented in the way you want it.

TIP: Once you have glued the button onto the shoe clip blank, set it upside down onto a clean surface to dry. This will keep the buttons from sliding off the shoe clip while drying.
3. Once the clip is dry, attach it to your shoes and skip down the street.
To get more button craft tutorials, recipes, and lifestyle tips, visit my blog at www.laurabraydesigns.com.
![]()
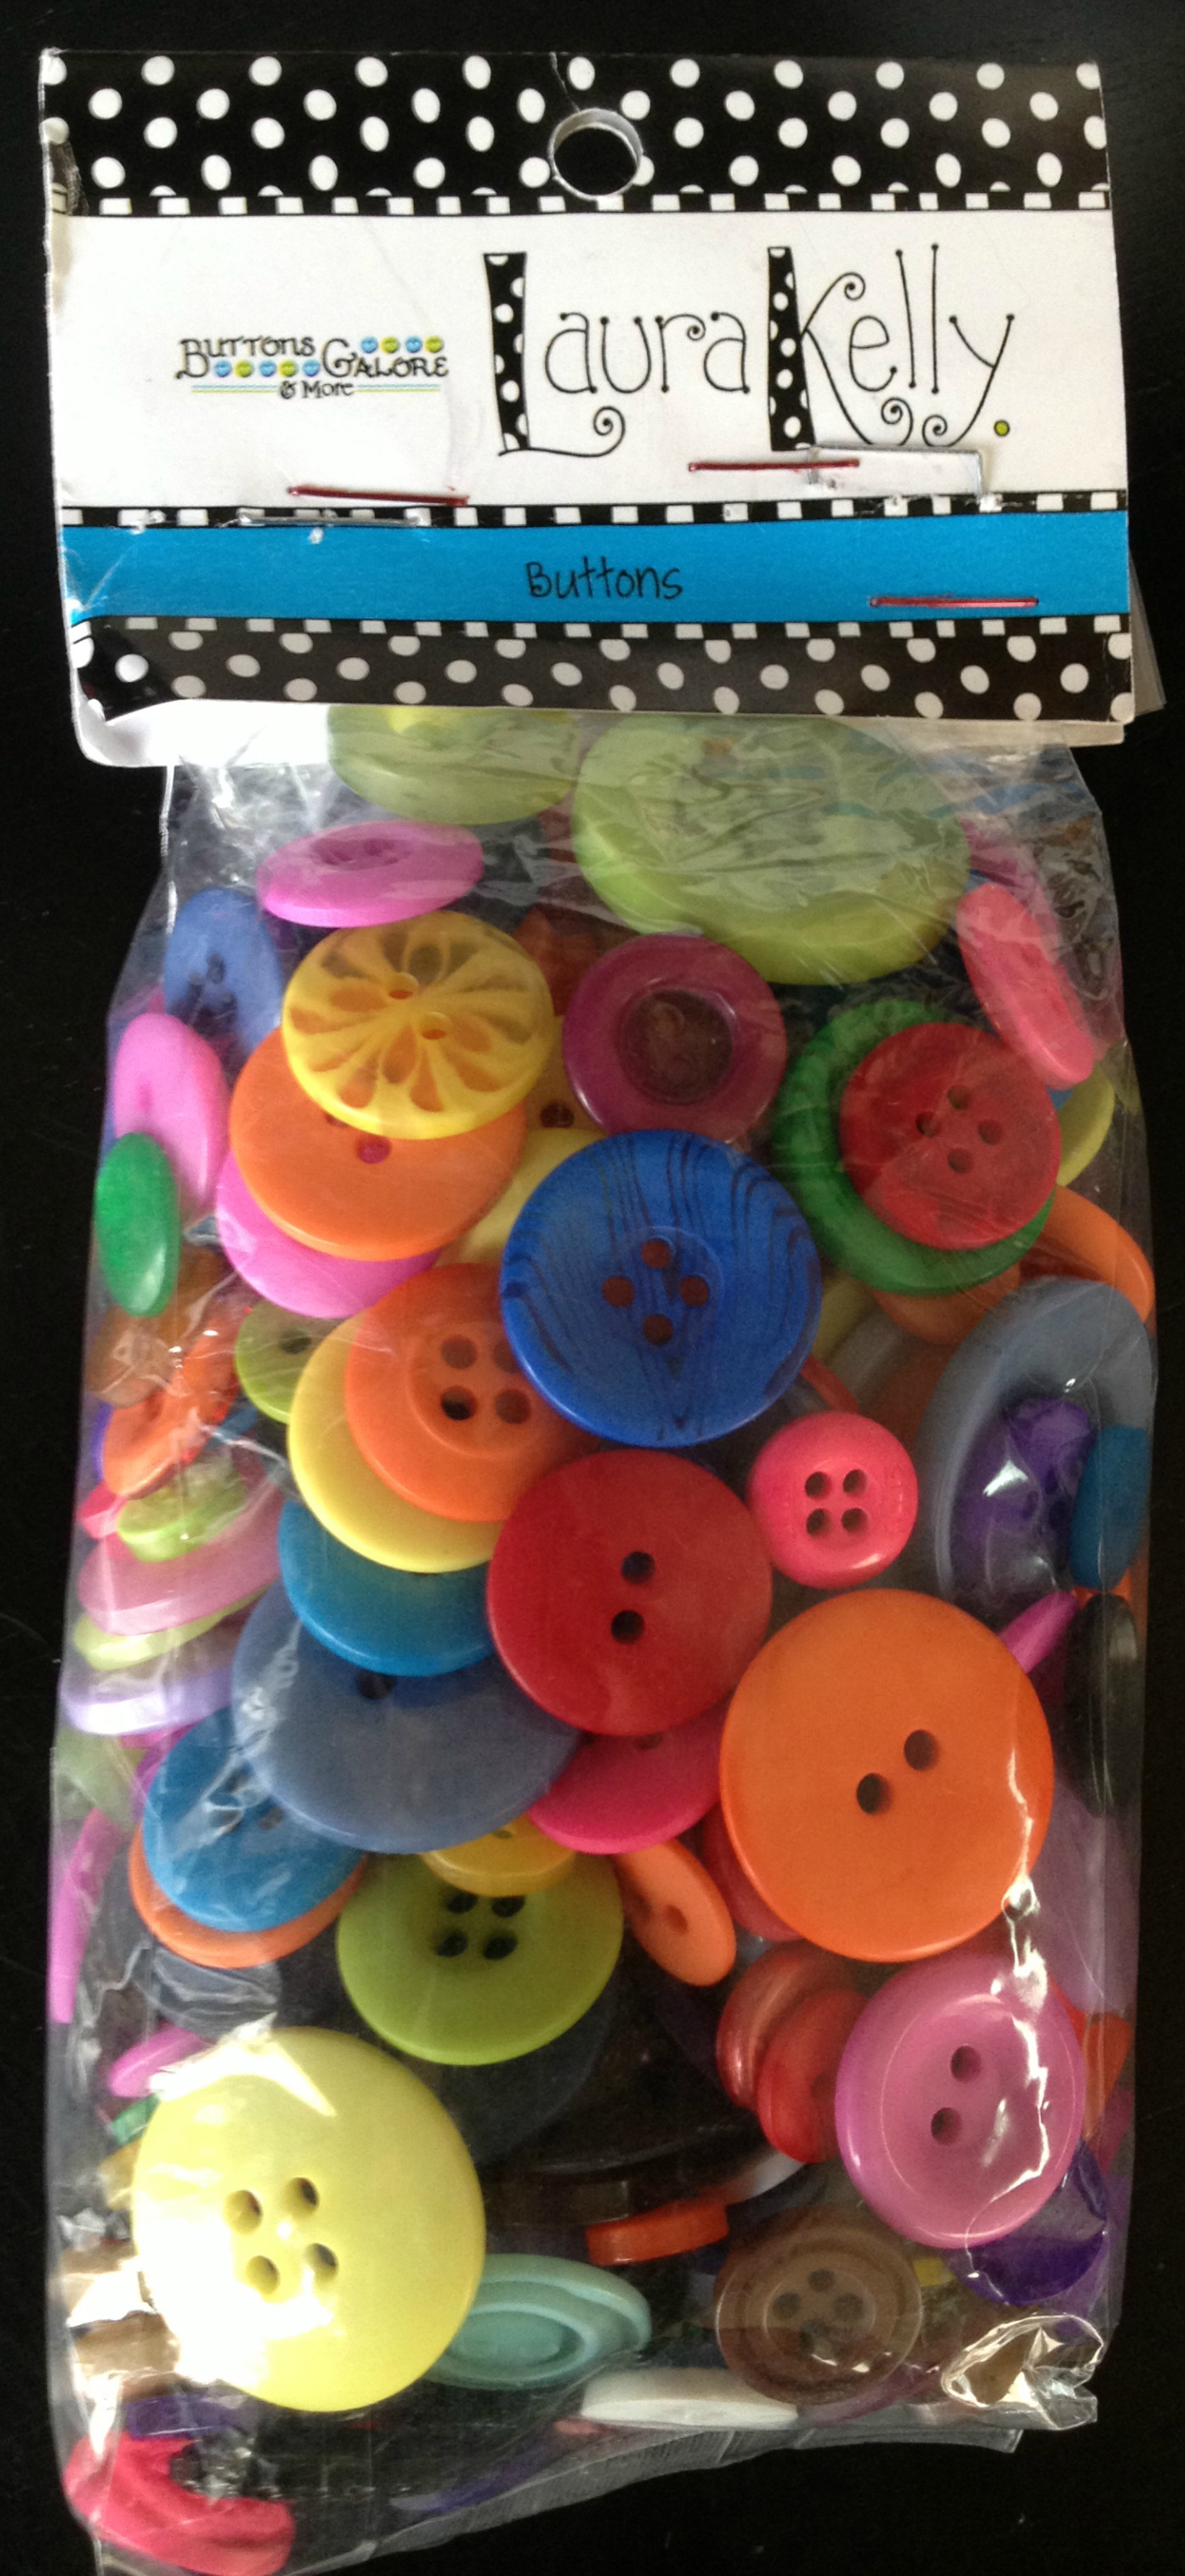
I love the mixed color collection of Laura Kelly buttons and keep finding fun ways to use them.
When socks get work and need a little bit of fancying up, here is a great way to make them fun again. The first step is to wash them and get them bright and white again. I recommend Rit’s Laundry Whitener and Brightener. If they are too far gone, you can dye them a fun new color. When they are clean and dry, sew on miscellaneous buttons to decorate them. I used embroidery floss to get a secure stitch.
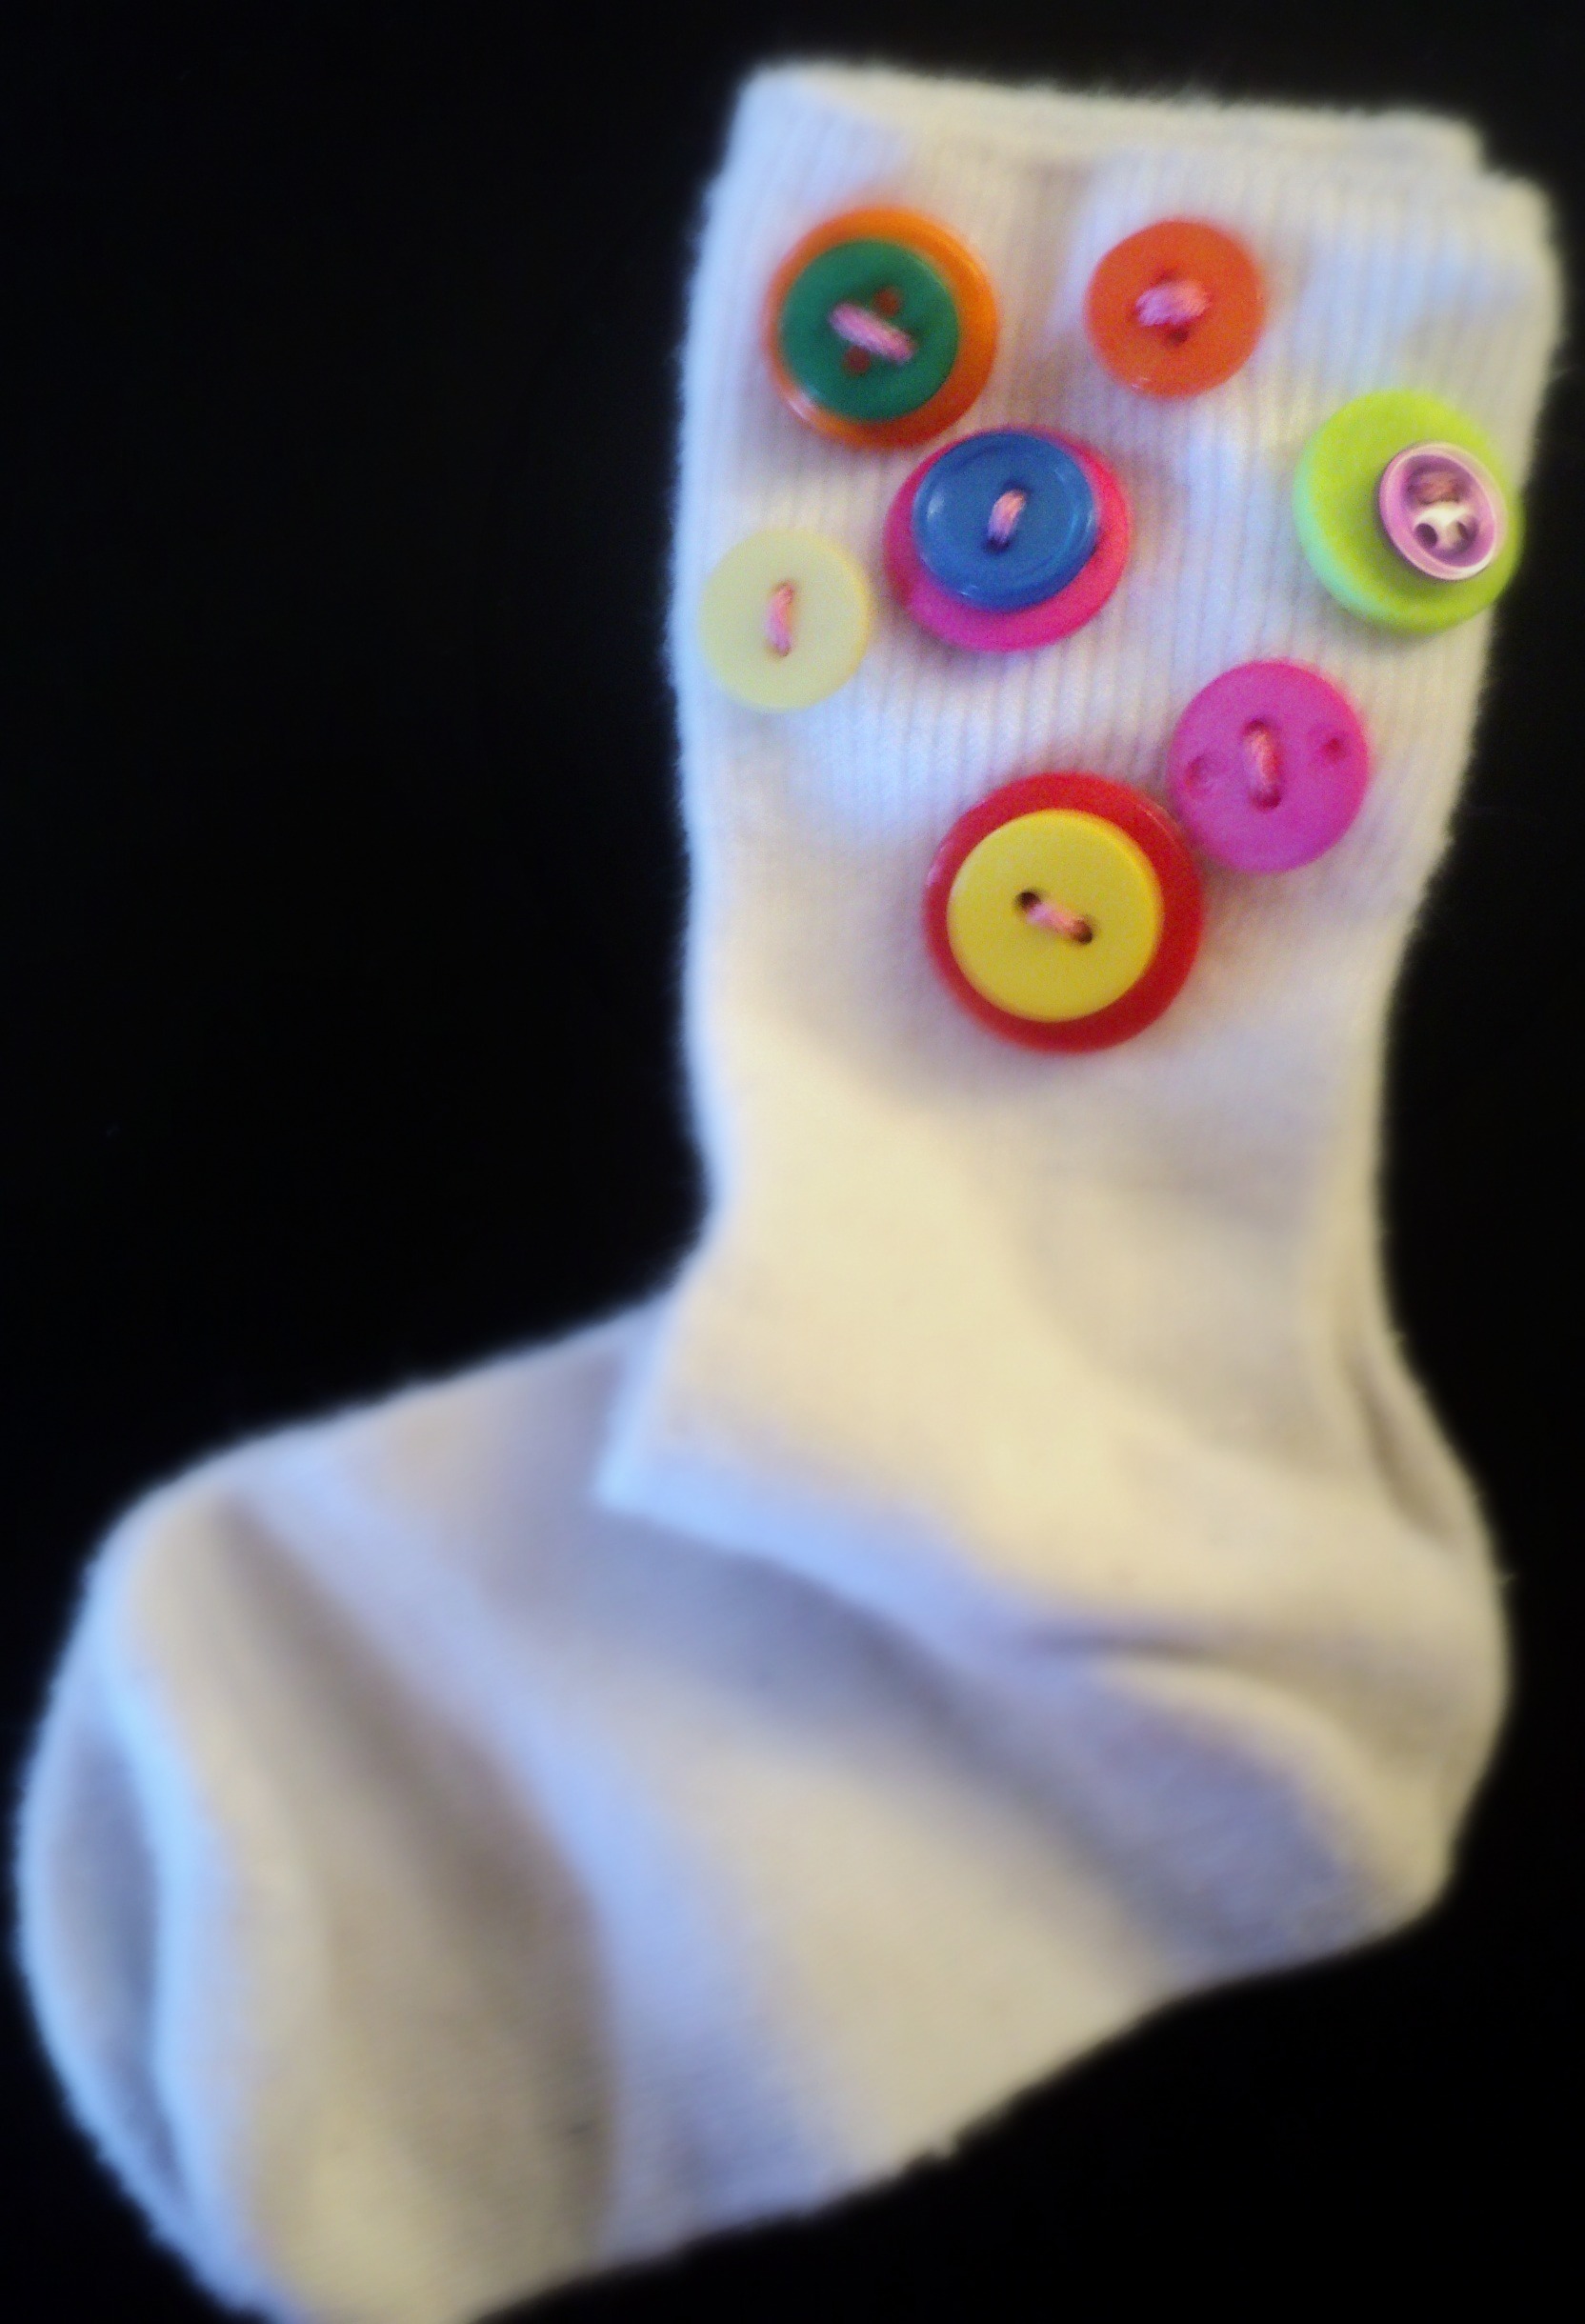
Awesome way to up cycle worn out apparel.
It would be fun to do them in school colors (or football team colors) or to match a favorite outfit. I think I might try them on a pair of knee socks next.
Happy Buttons,
Laura
This trendy wrist cuff is so simple to make and takes very little time. It is a great DIY project for girls of all ages and would be perfect for a party activity or a gift. I got the idea from Marisa Pawelko’s book, Crazy-Cool Duck Tape Projects then modified it to add…BUTTONS!

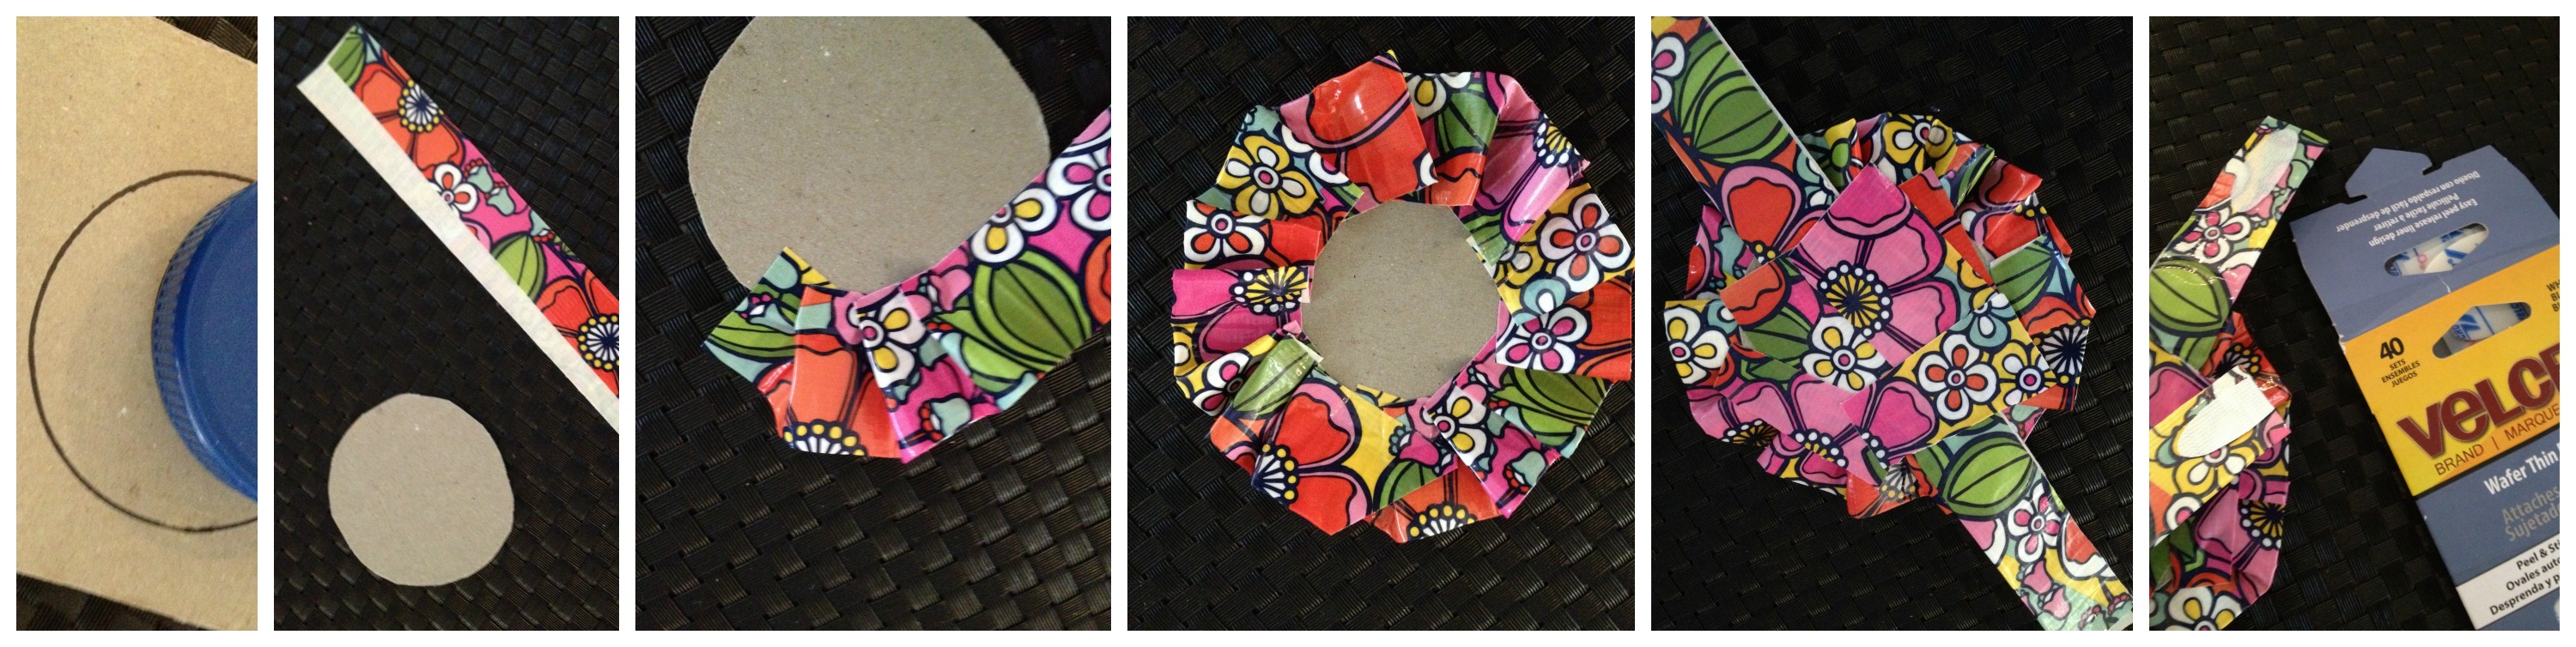
You will need Duck Tape, Buttons, Cardboard, Velcro and Ad-Tech Hot Glue. That is it!
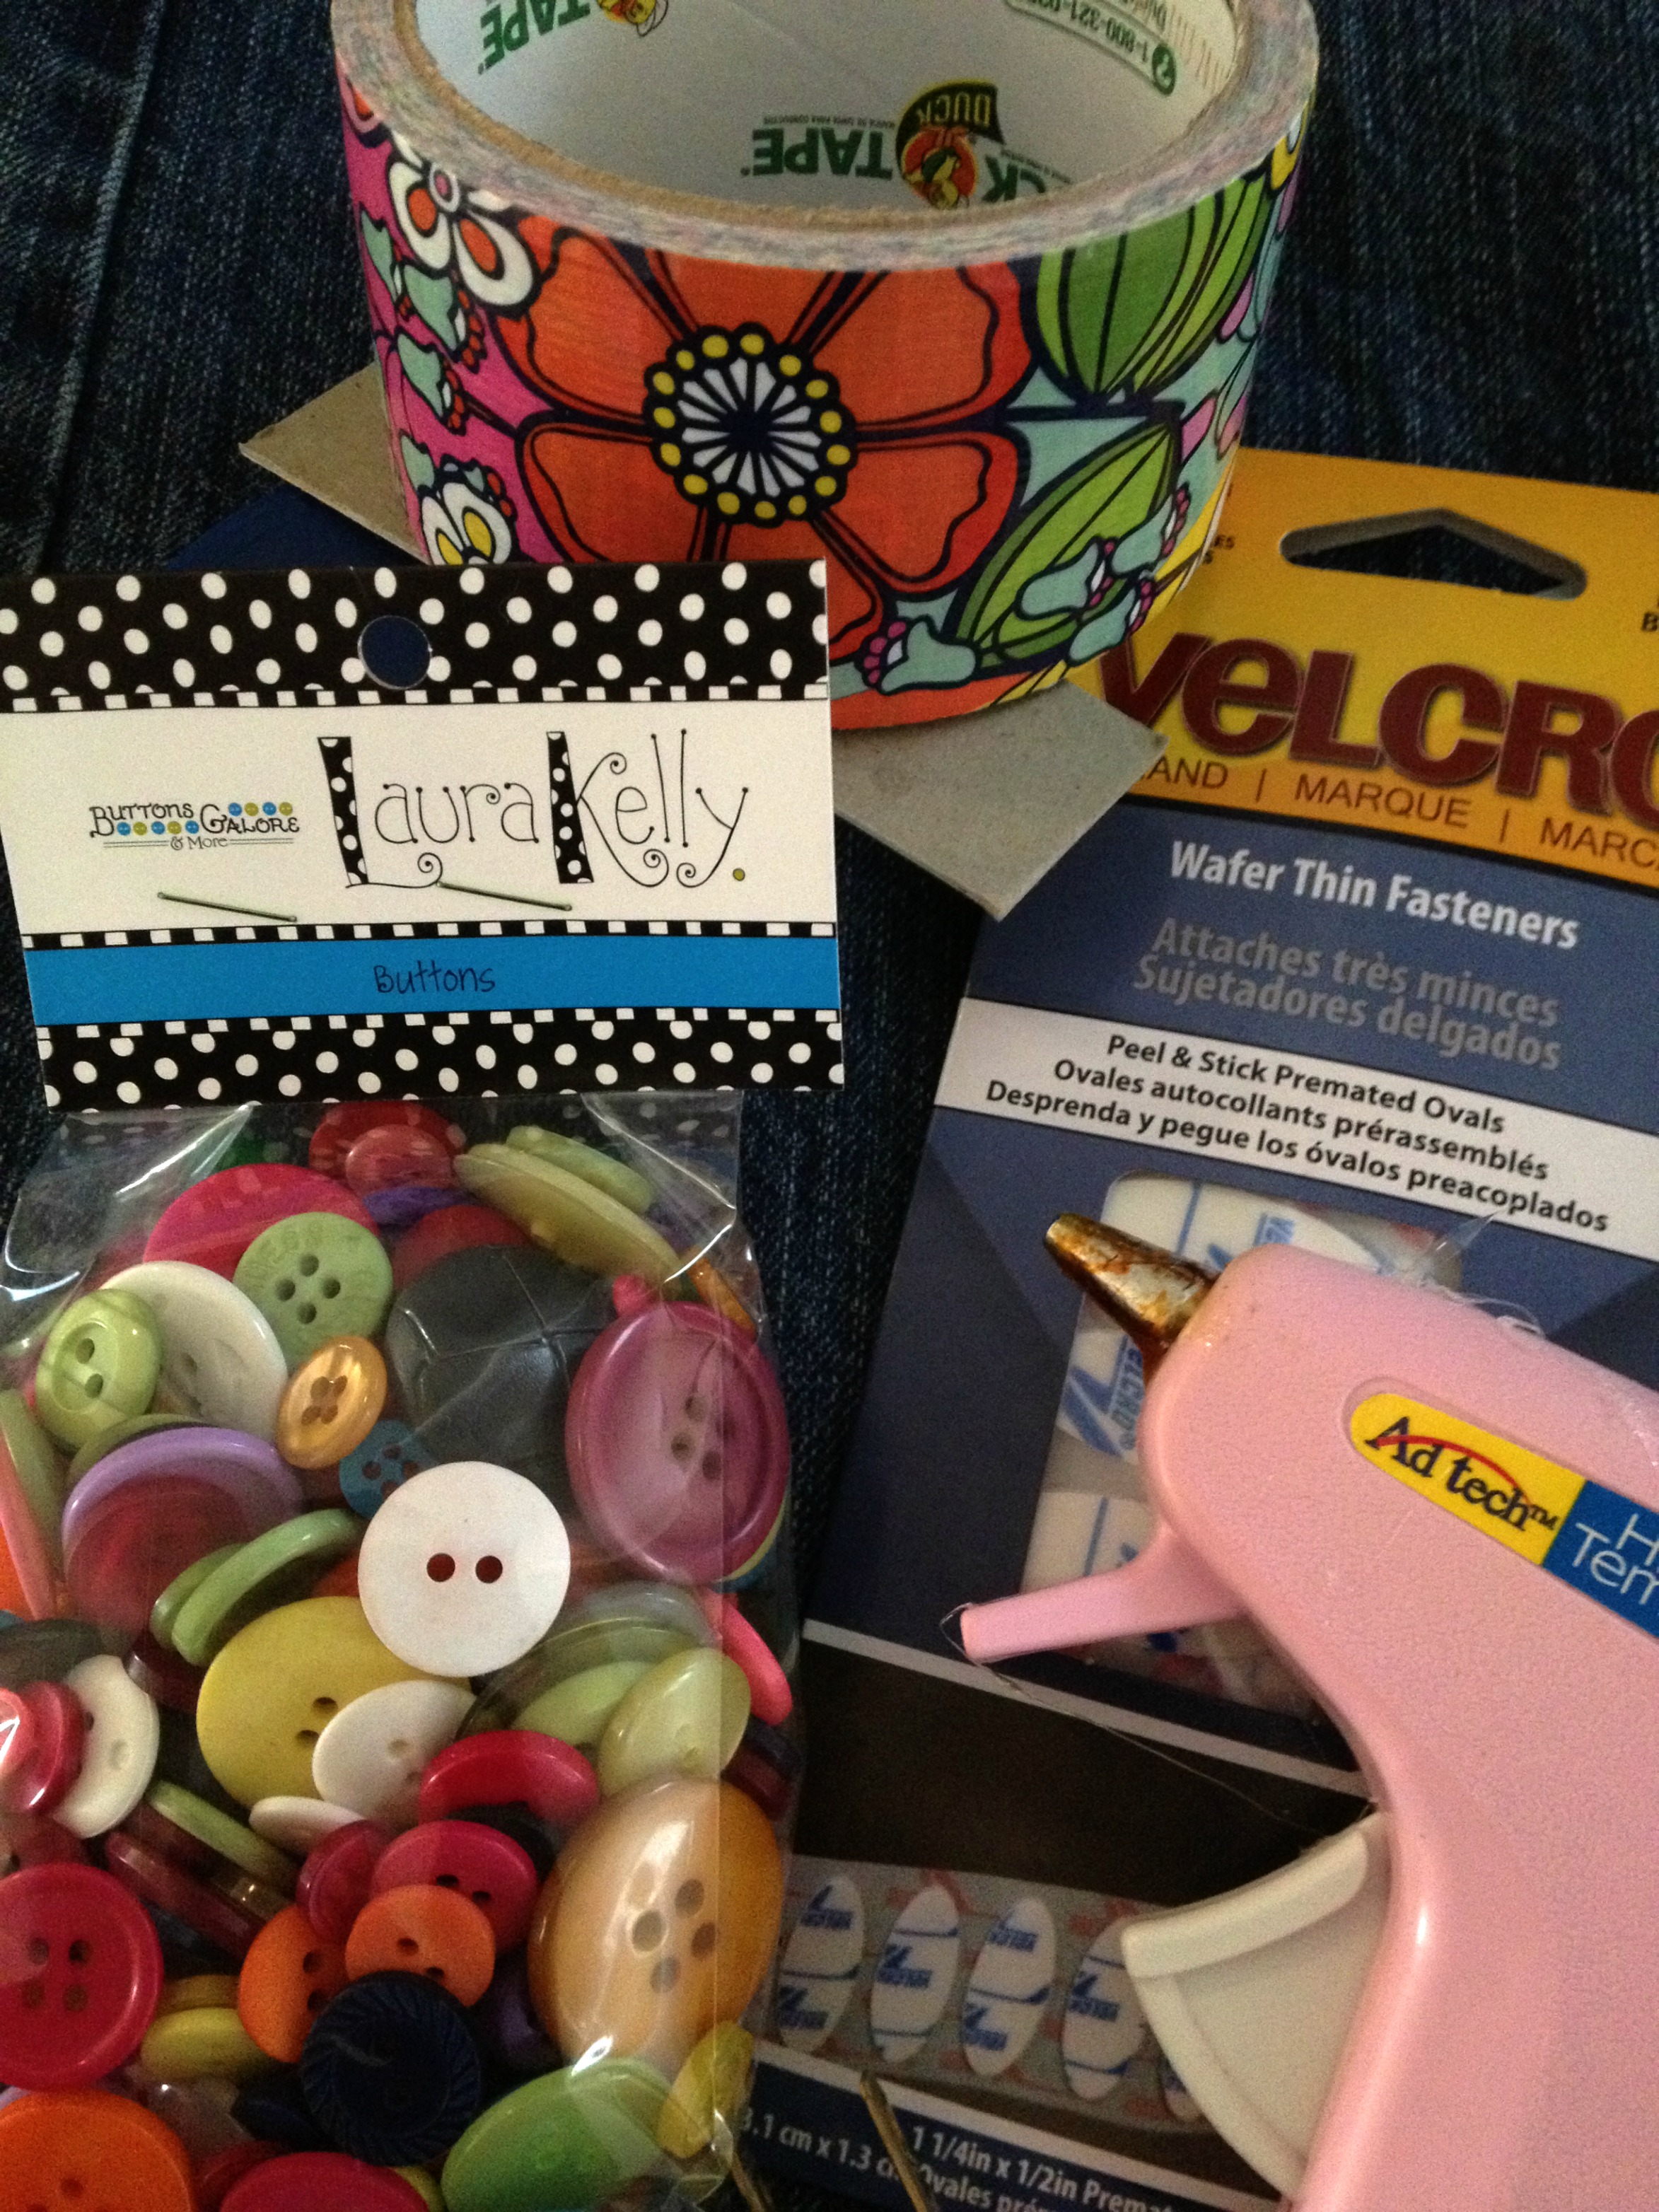
Cut a circle out of cardboard the size you want your flower to be. Then Cut a long strip of tape and fold it, leaving only a small amount to stick to the cardboard. Adhere the tape around the circle folding it each time you stick it down to create the rippled effect. When you have made it around, trim your excess, flip it over and add a long folded strip the length of your wrist, attaching it with…tape of course! Add Velcro to hold your bracelet closed.
Then flip it back over and hot glue gun your buttons to the front. I used buttons to match the tape in Apple Green, Purple Possibilities, Robbins Egg Blue and Watermelon.
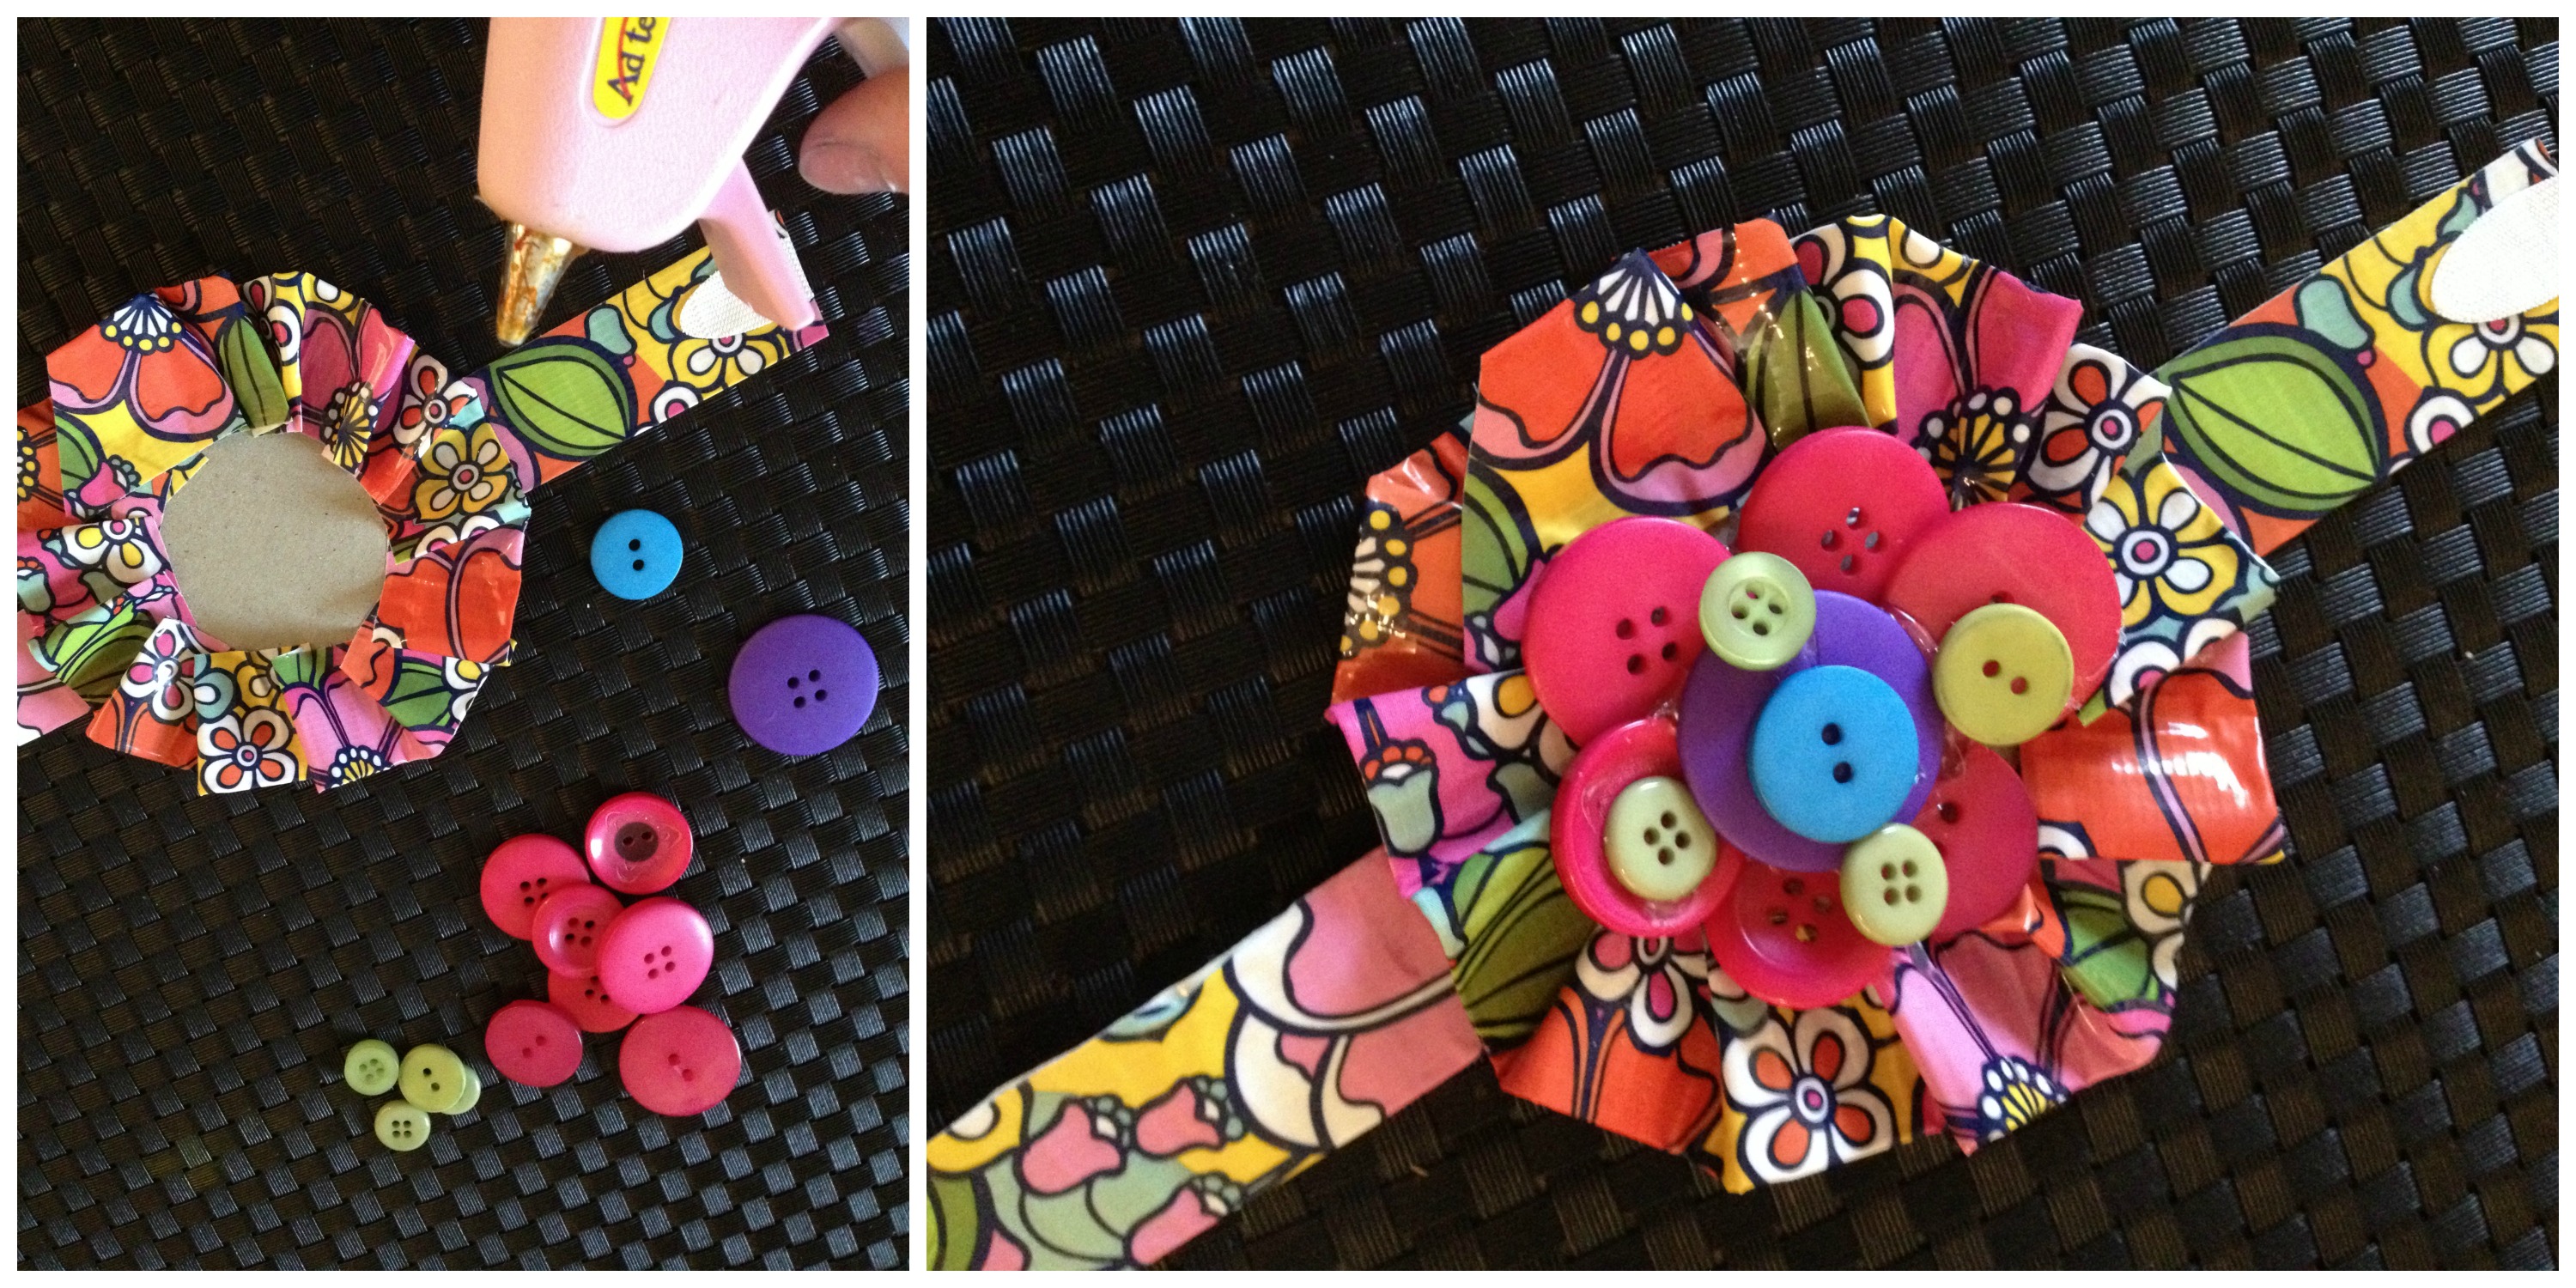
Ta Da…a designer wrist cuff in fifteen minutes or less! For more ideas with Duck Tape and Buttons, visit my blog post from earlier this week!
Happy Taping and Buttoning Up Some Fabulous Fashion,
Laura
I’ve admired bib necklaces for quite some time now. I love how whimsical they look, especially if they are covered in buttons. They can elevate a plain t-shirt and jeans outfit into something really special and it doesn’t have to cost much. Yes, you can buy very expensive “statement” necklaces, but with a little felt and a jar of buttons you can create something really beautiful.

Supplies for a button bib necklace
Instructions for a button bib necklace
1. Lay the bib necklace template onto felt, pin in place, and cut out two bib shapes.

2. Starting at the center of one of the bib shapes, begin sewing buttons onto the felt. Working your way out from the center will give your necklace a centered focal point.

3. Leave about 1″ of the felt on the ends unembellished.
4. Measure two pieces of ribbon (one for each side) to the length you want your necklace to hang. Bib necklaces usually look best hung at your collar bone. Don’t forget to allow some length so you can tie the necklace around your neck!
5. Lay the unembellished piece of felt down on your work surface. Place the front piece over it. Make sure it lines up nicely. Gently lift the ends and slide your ribbon ties in places. Pin and either hand or machine sew the ribbon between the two pieces.

6. To attach the front and back of the bib, use a strong fabric glue or whip stitch them together.

Thanks for getting crafty with me today! For more button crafts, stitching and lifestyle ideas visit me on my blog at www.laurabraydesigns.com.
![]()

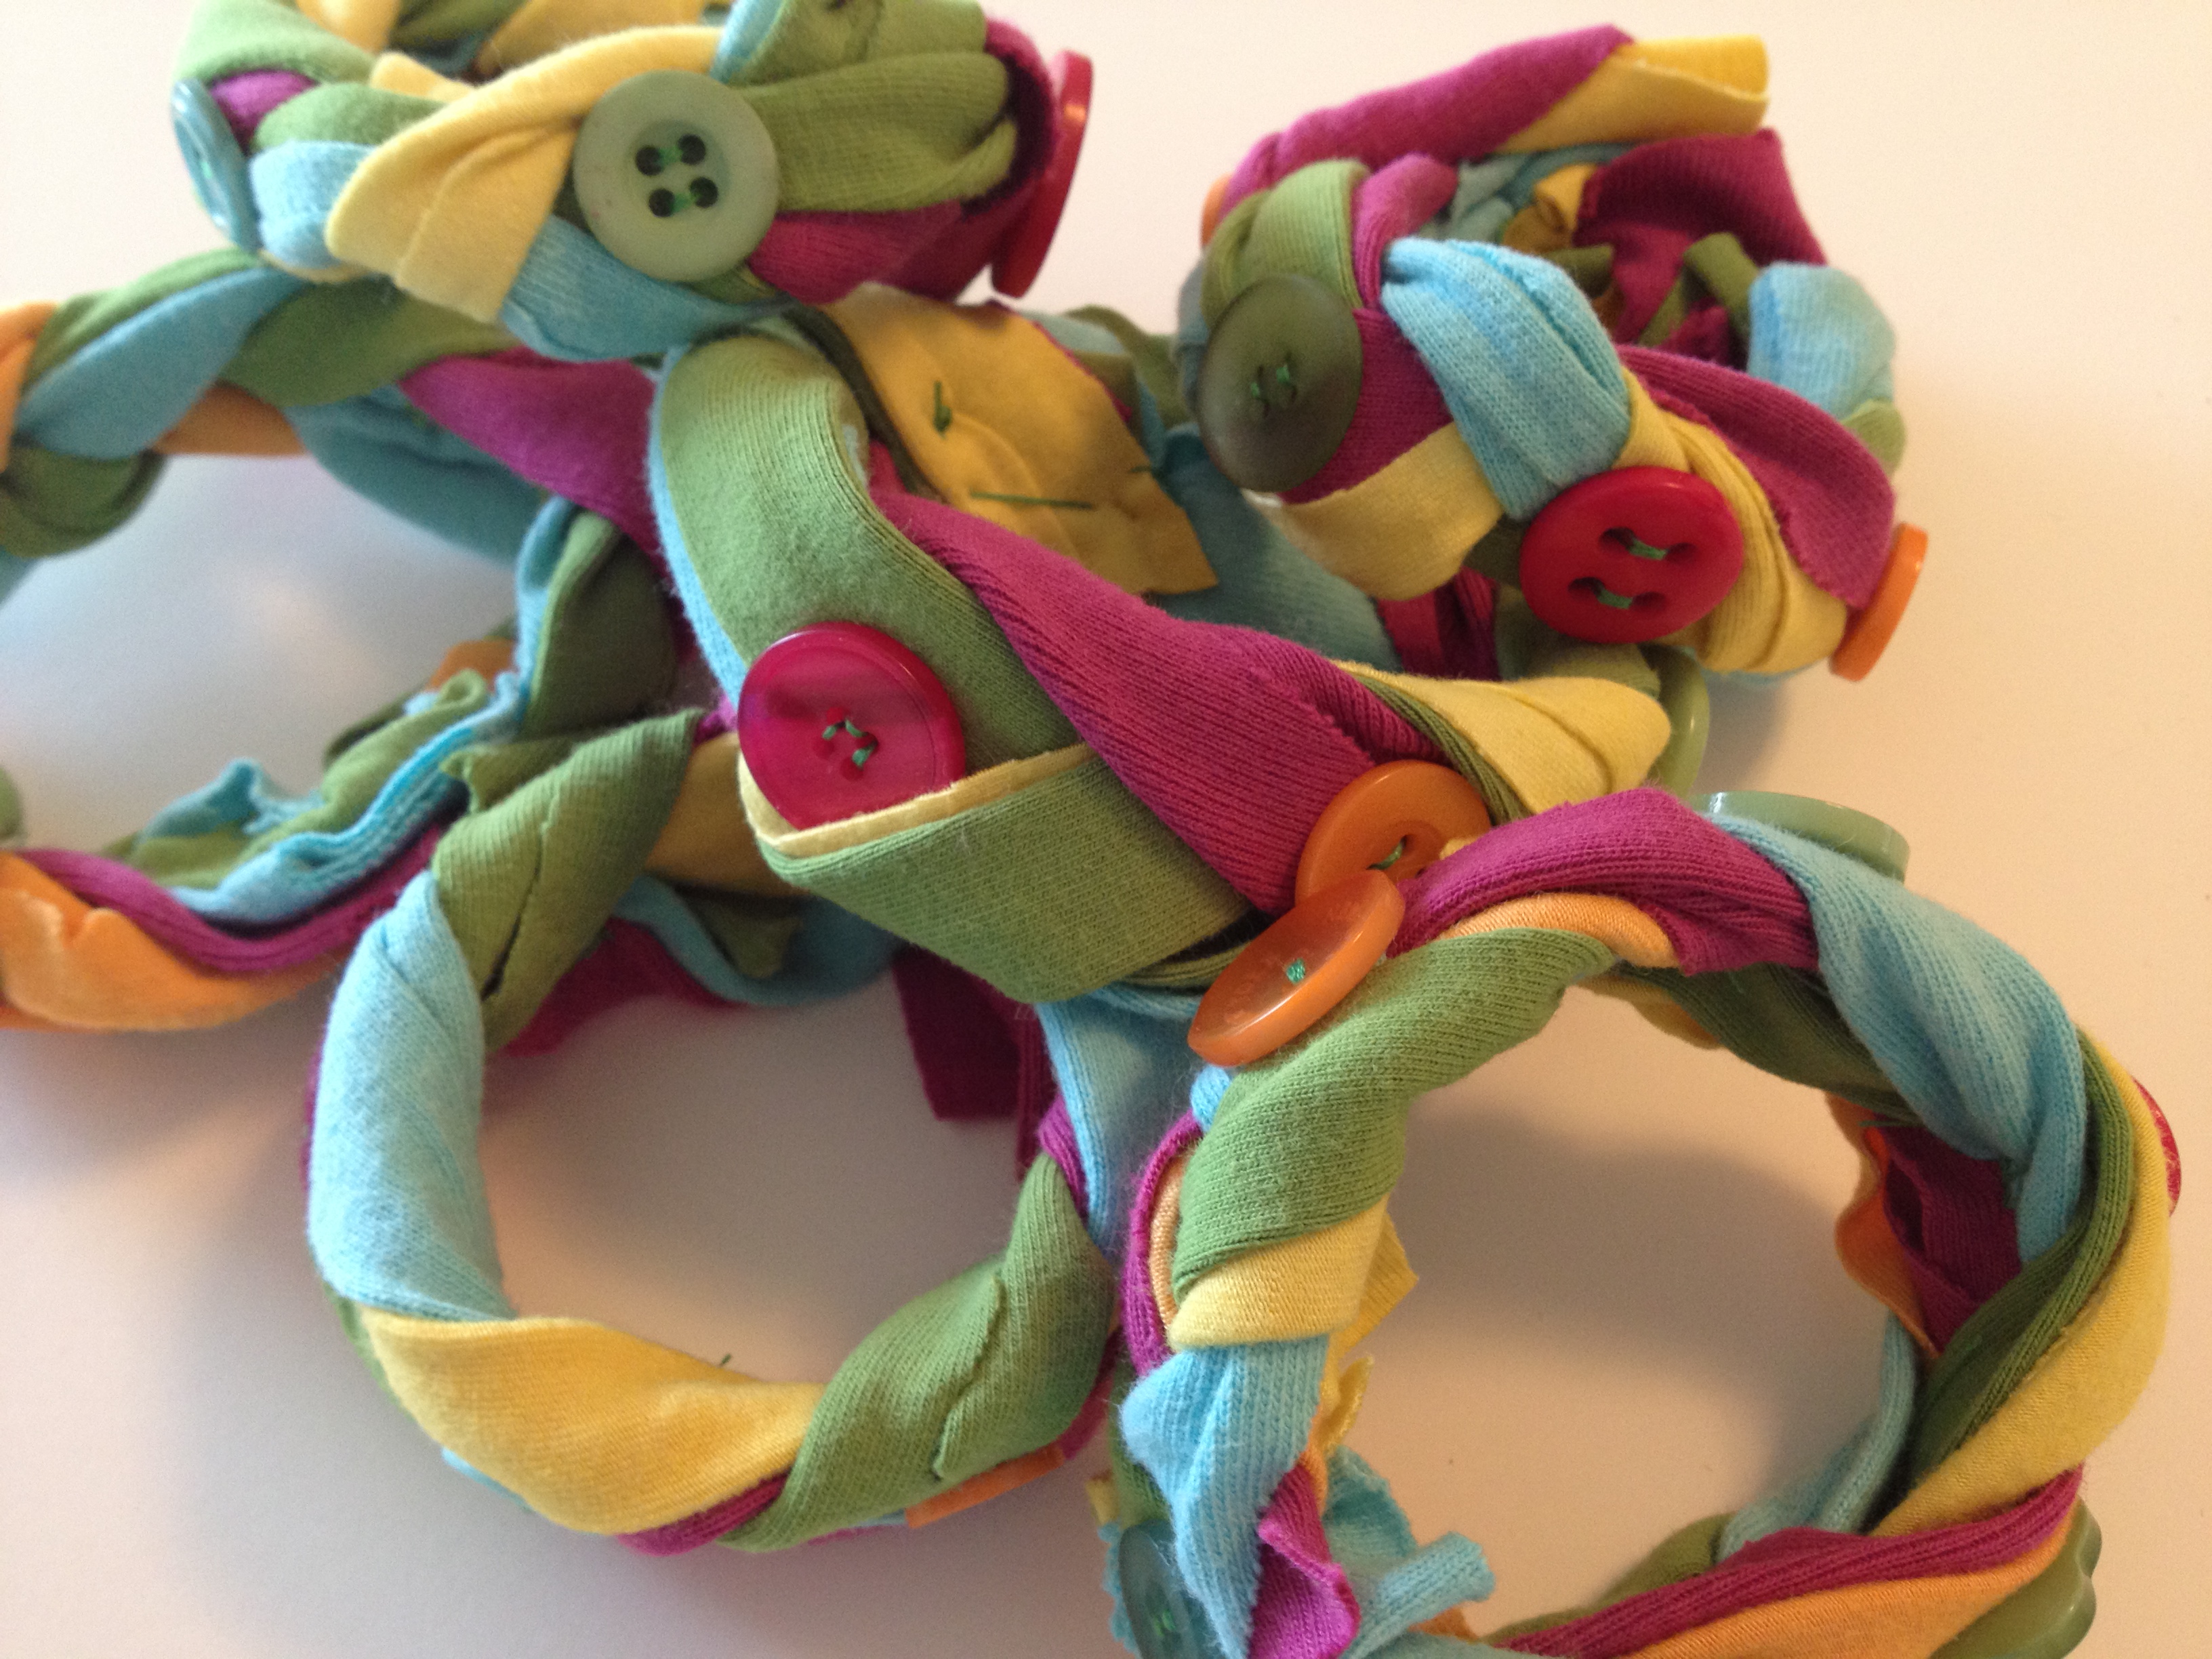
Braided T-Shirt Bracelets, we are seeing this unique idea for repurposing old t-shirts everywhere! After having experimented many times making several in different colors and styles, I think this is my best version. The secret? The buttons. I first made a batch of these to wear to my Zumba classes. No matter how sturdy the construction seemed to be, after a few sweat sessions, they kept falling apart. So finally I decided to give it another try but added buttons to the mix this go-round.

First you will need to cut strips of some old t-shirts. I cut mine into a strips measuring approximately 2″ x 10.” I used about five but you can use 2 or 3 more or less depending on how large you want the end result to be.
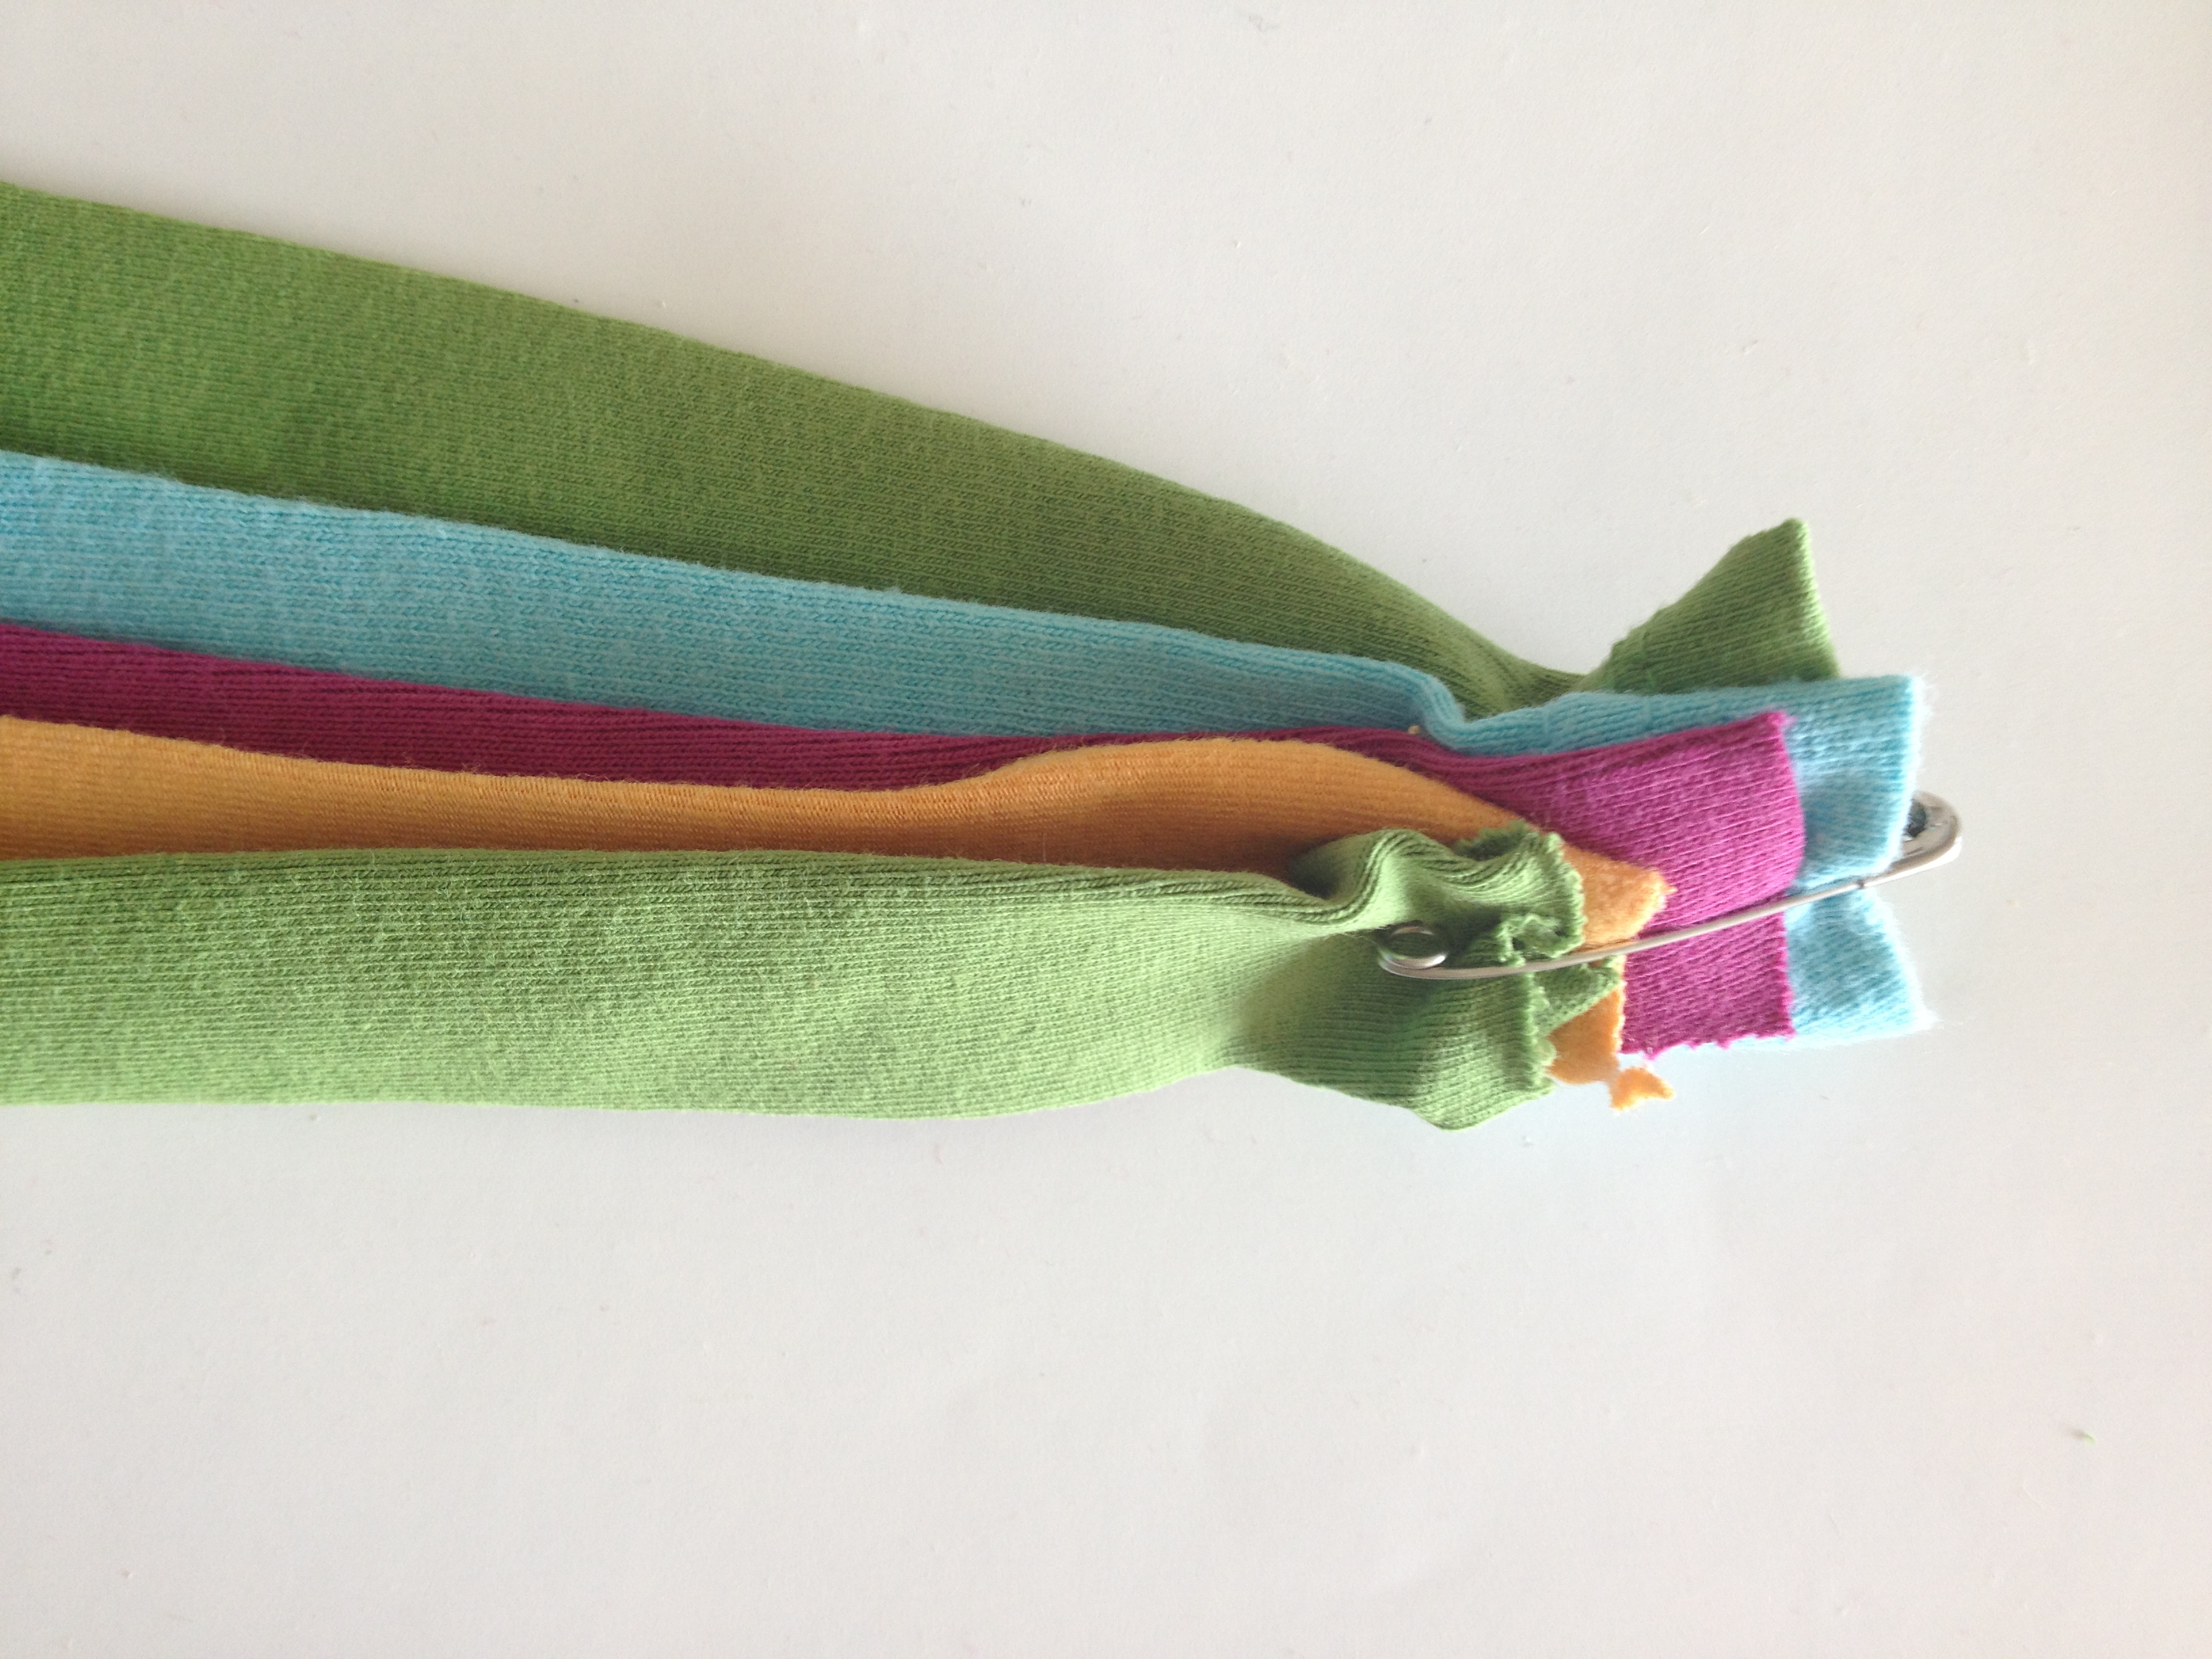 To keep your strips in place while braiding them, secure the ends with a safety pin.
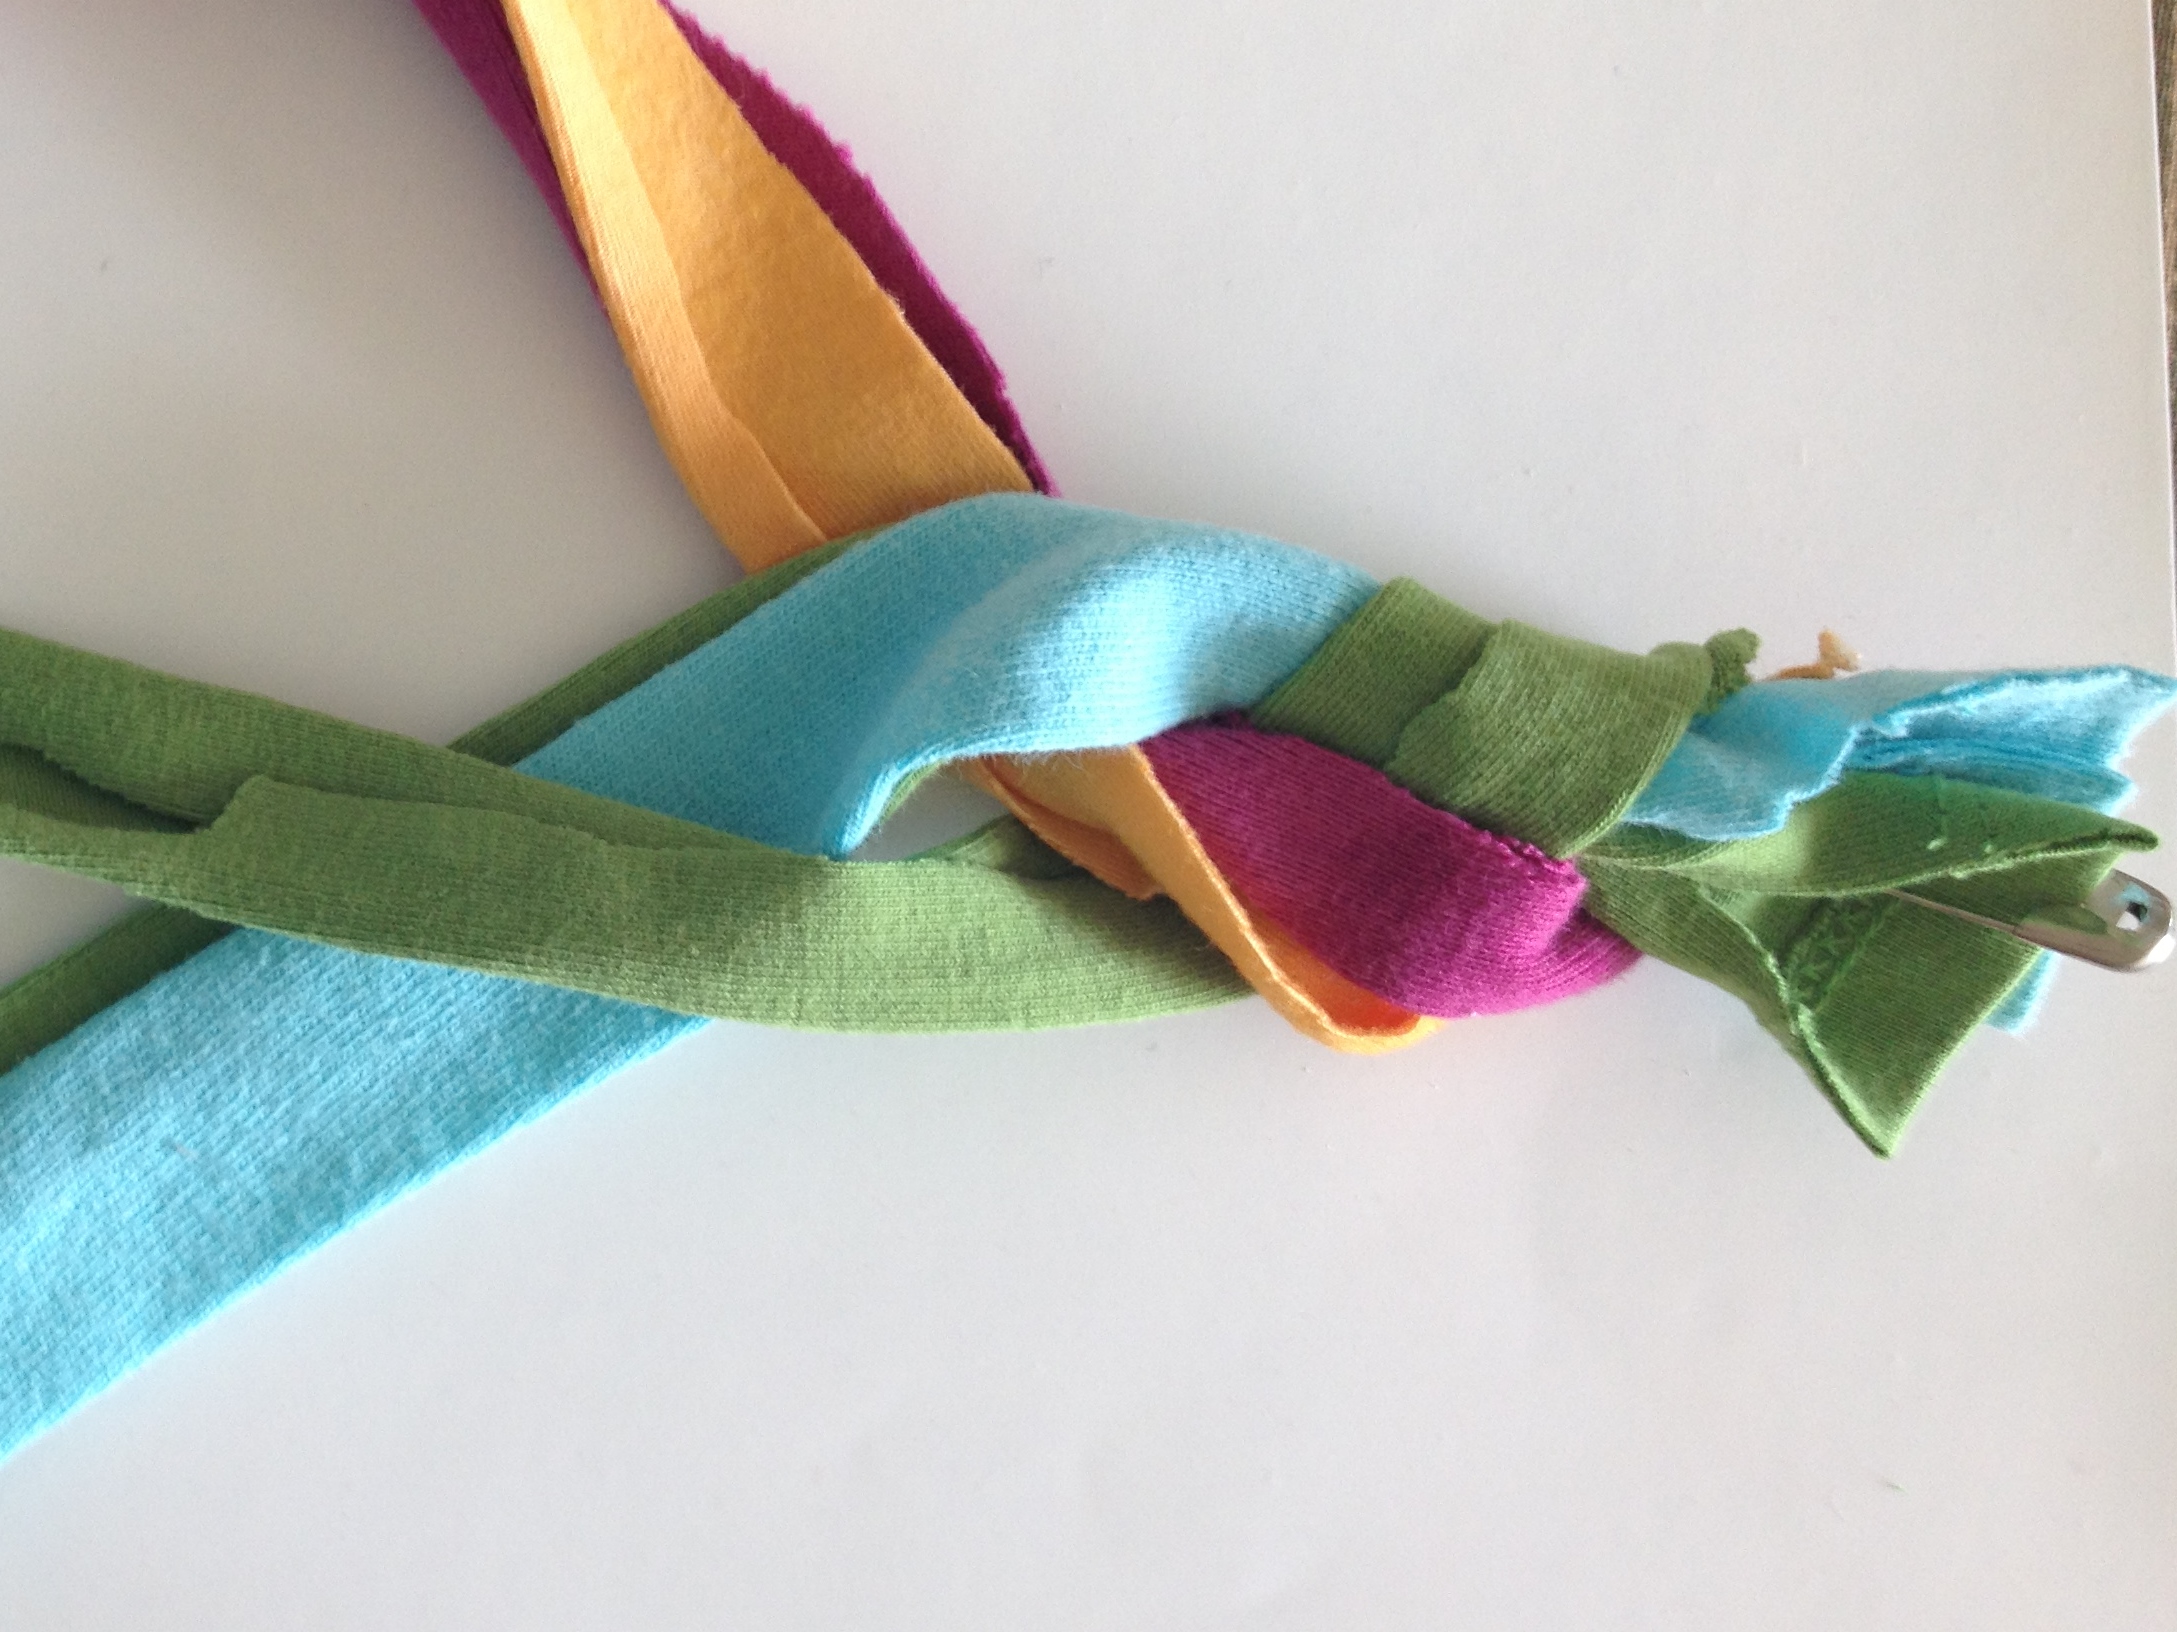 Start to braid the strips working in bundles of two or three strips at a time.
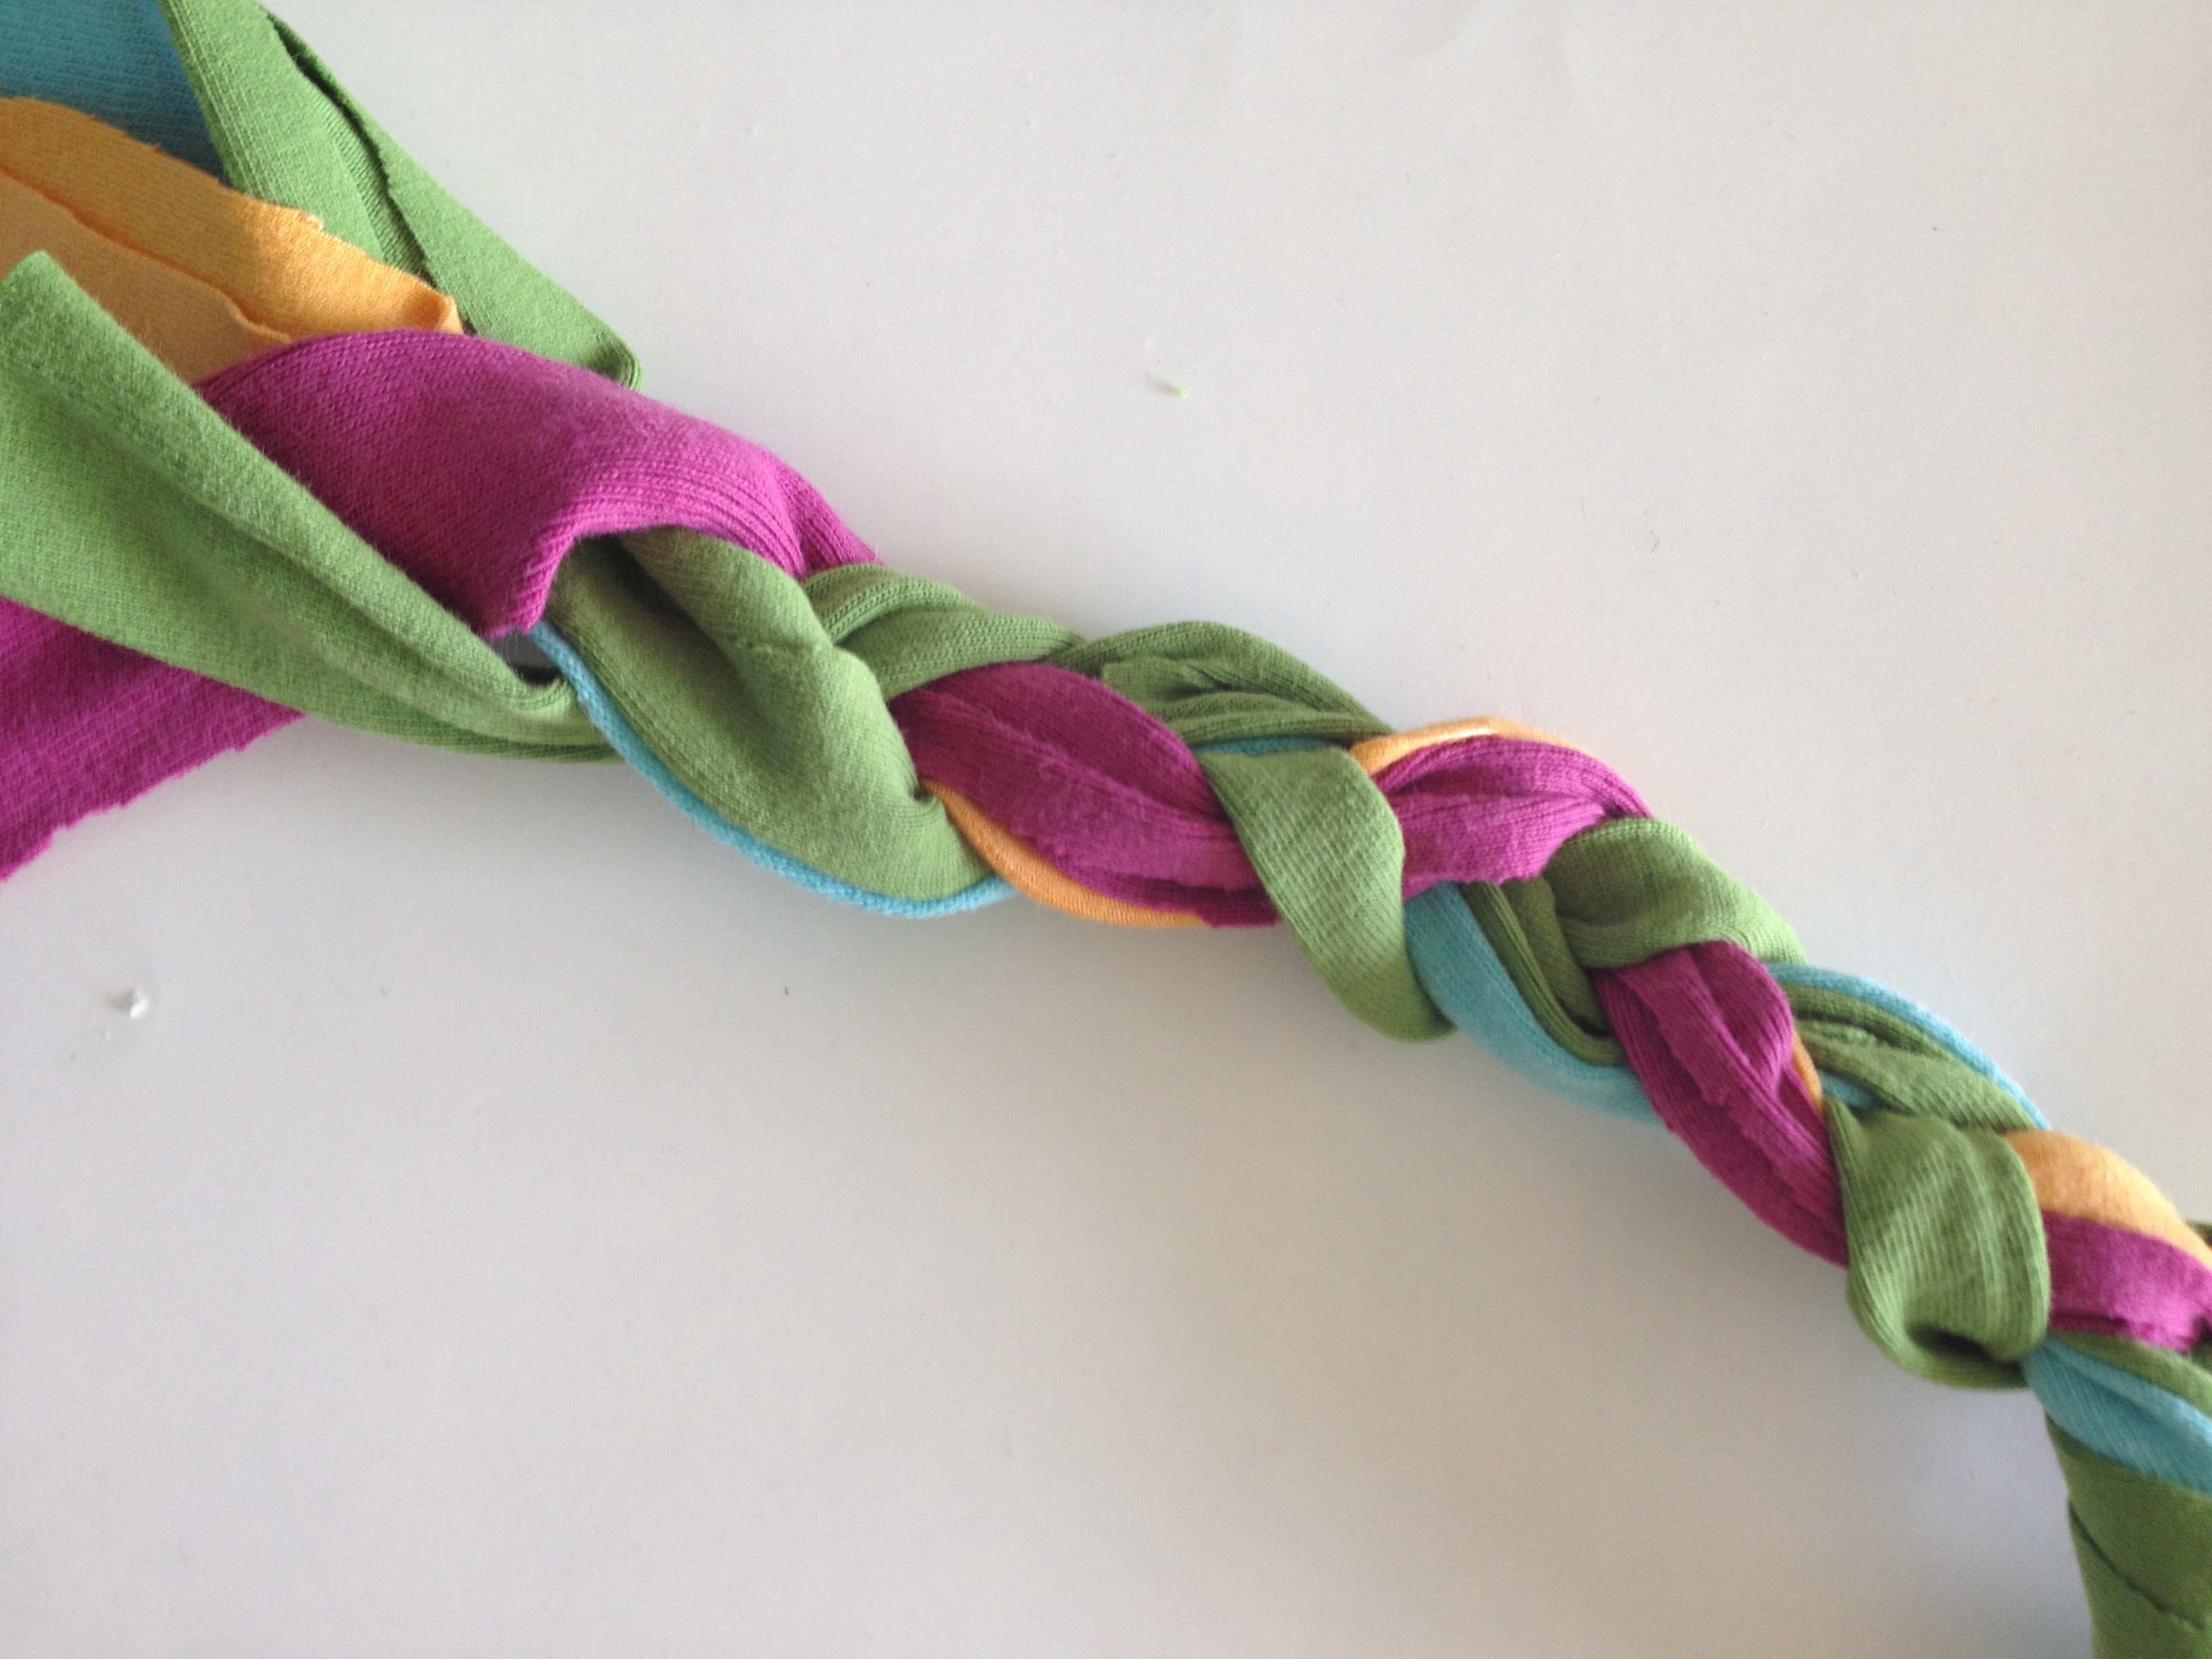 Continue to braid to the end, tightening the braid as you go along.
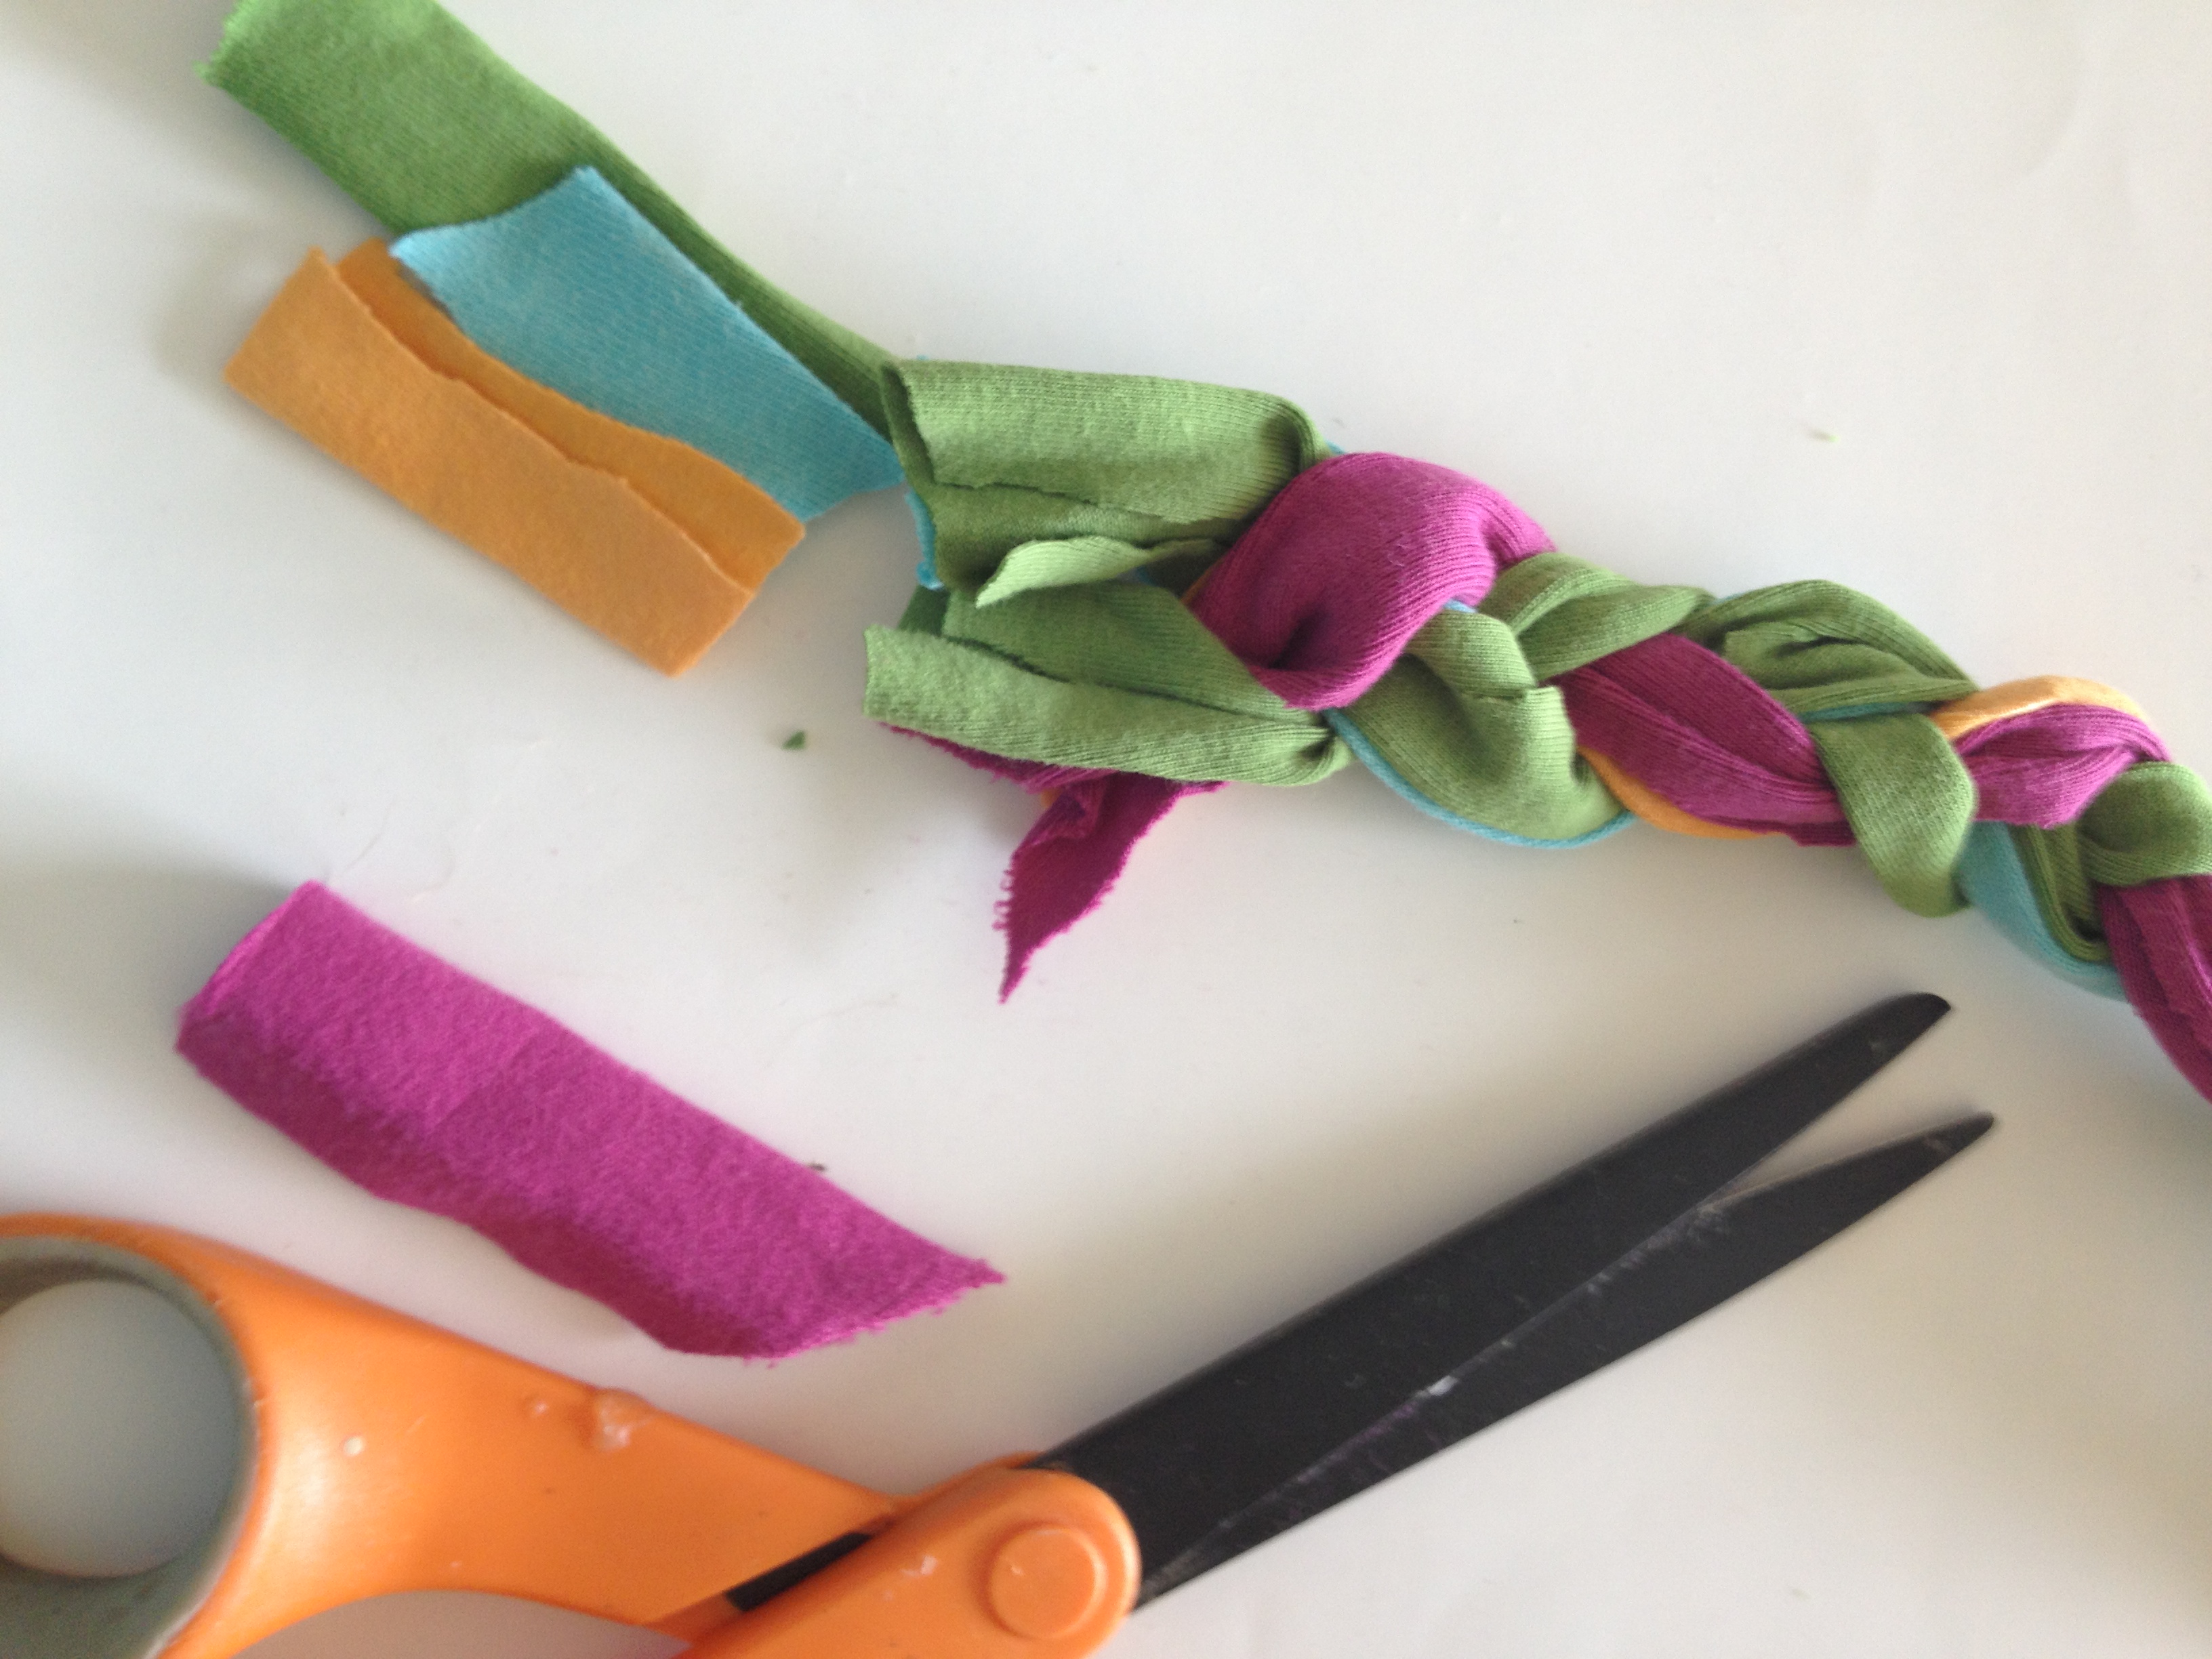
Decide how big your bracelet needs to be to fit your wrist and cut off the excess end if needed.
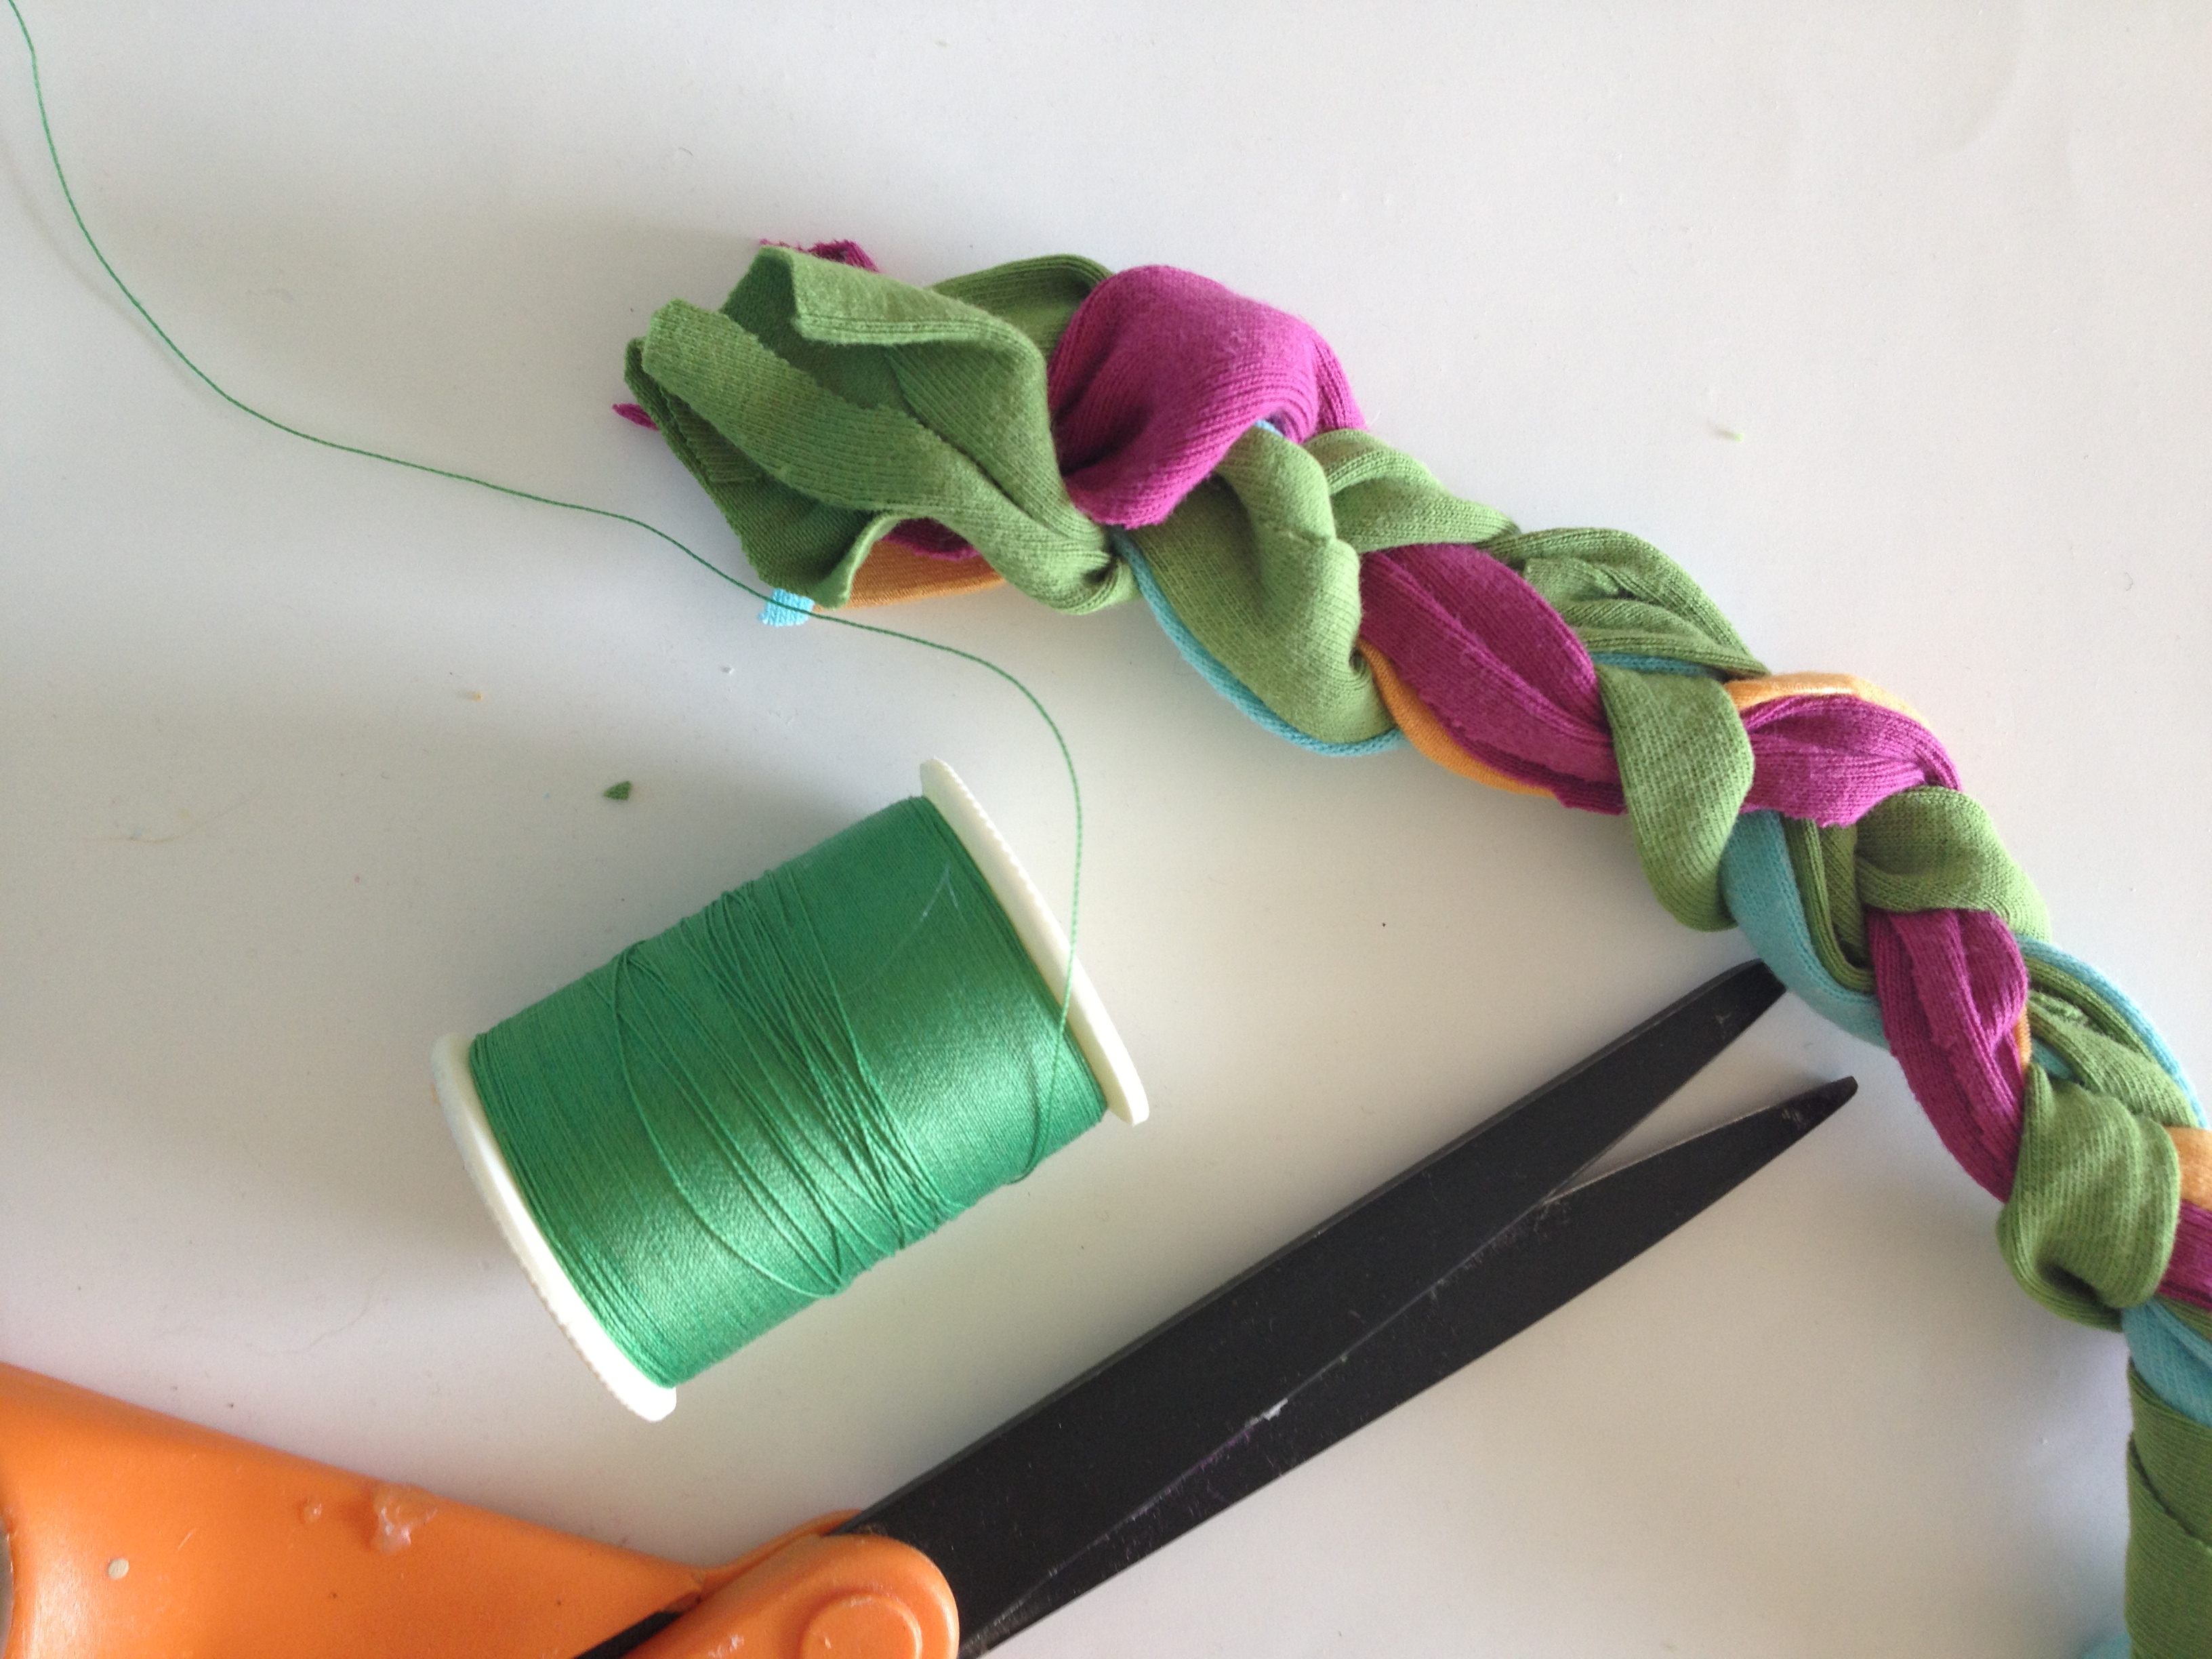 Secure the end of the bracelet with a hand sewing needle and thread.
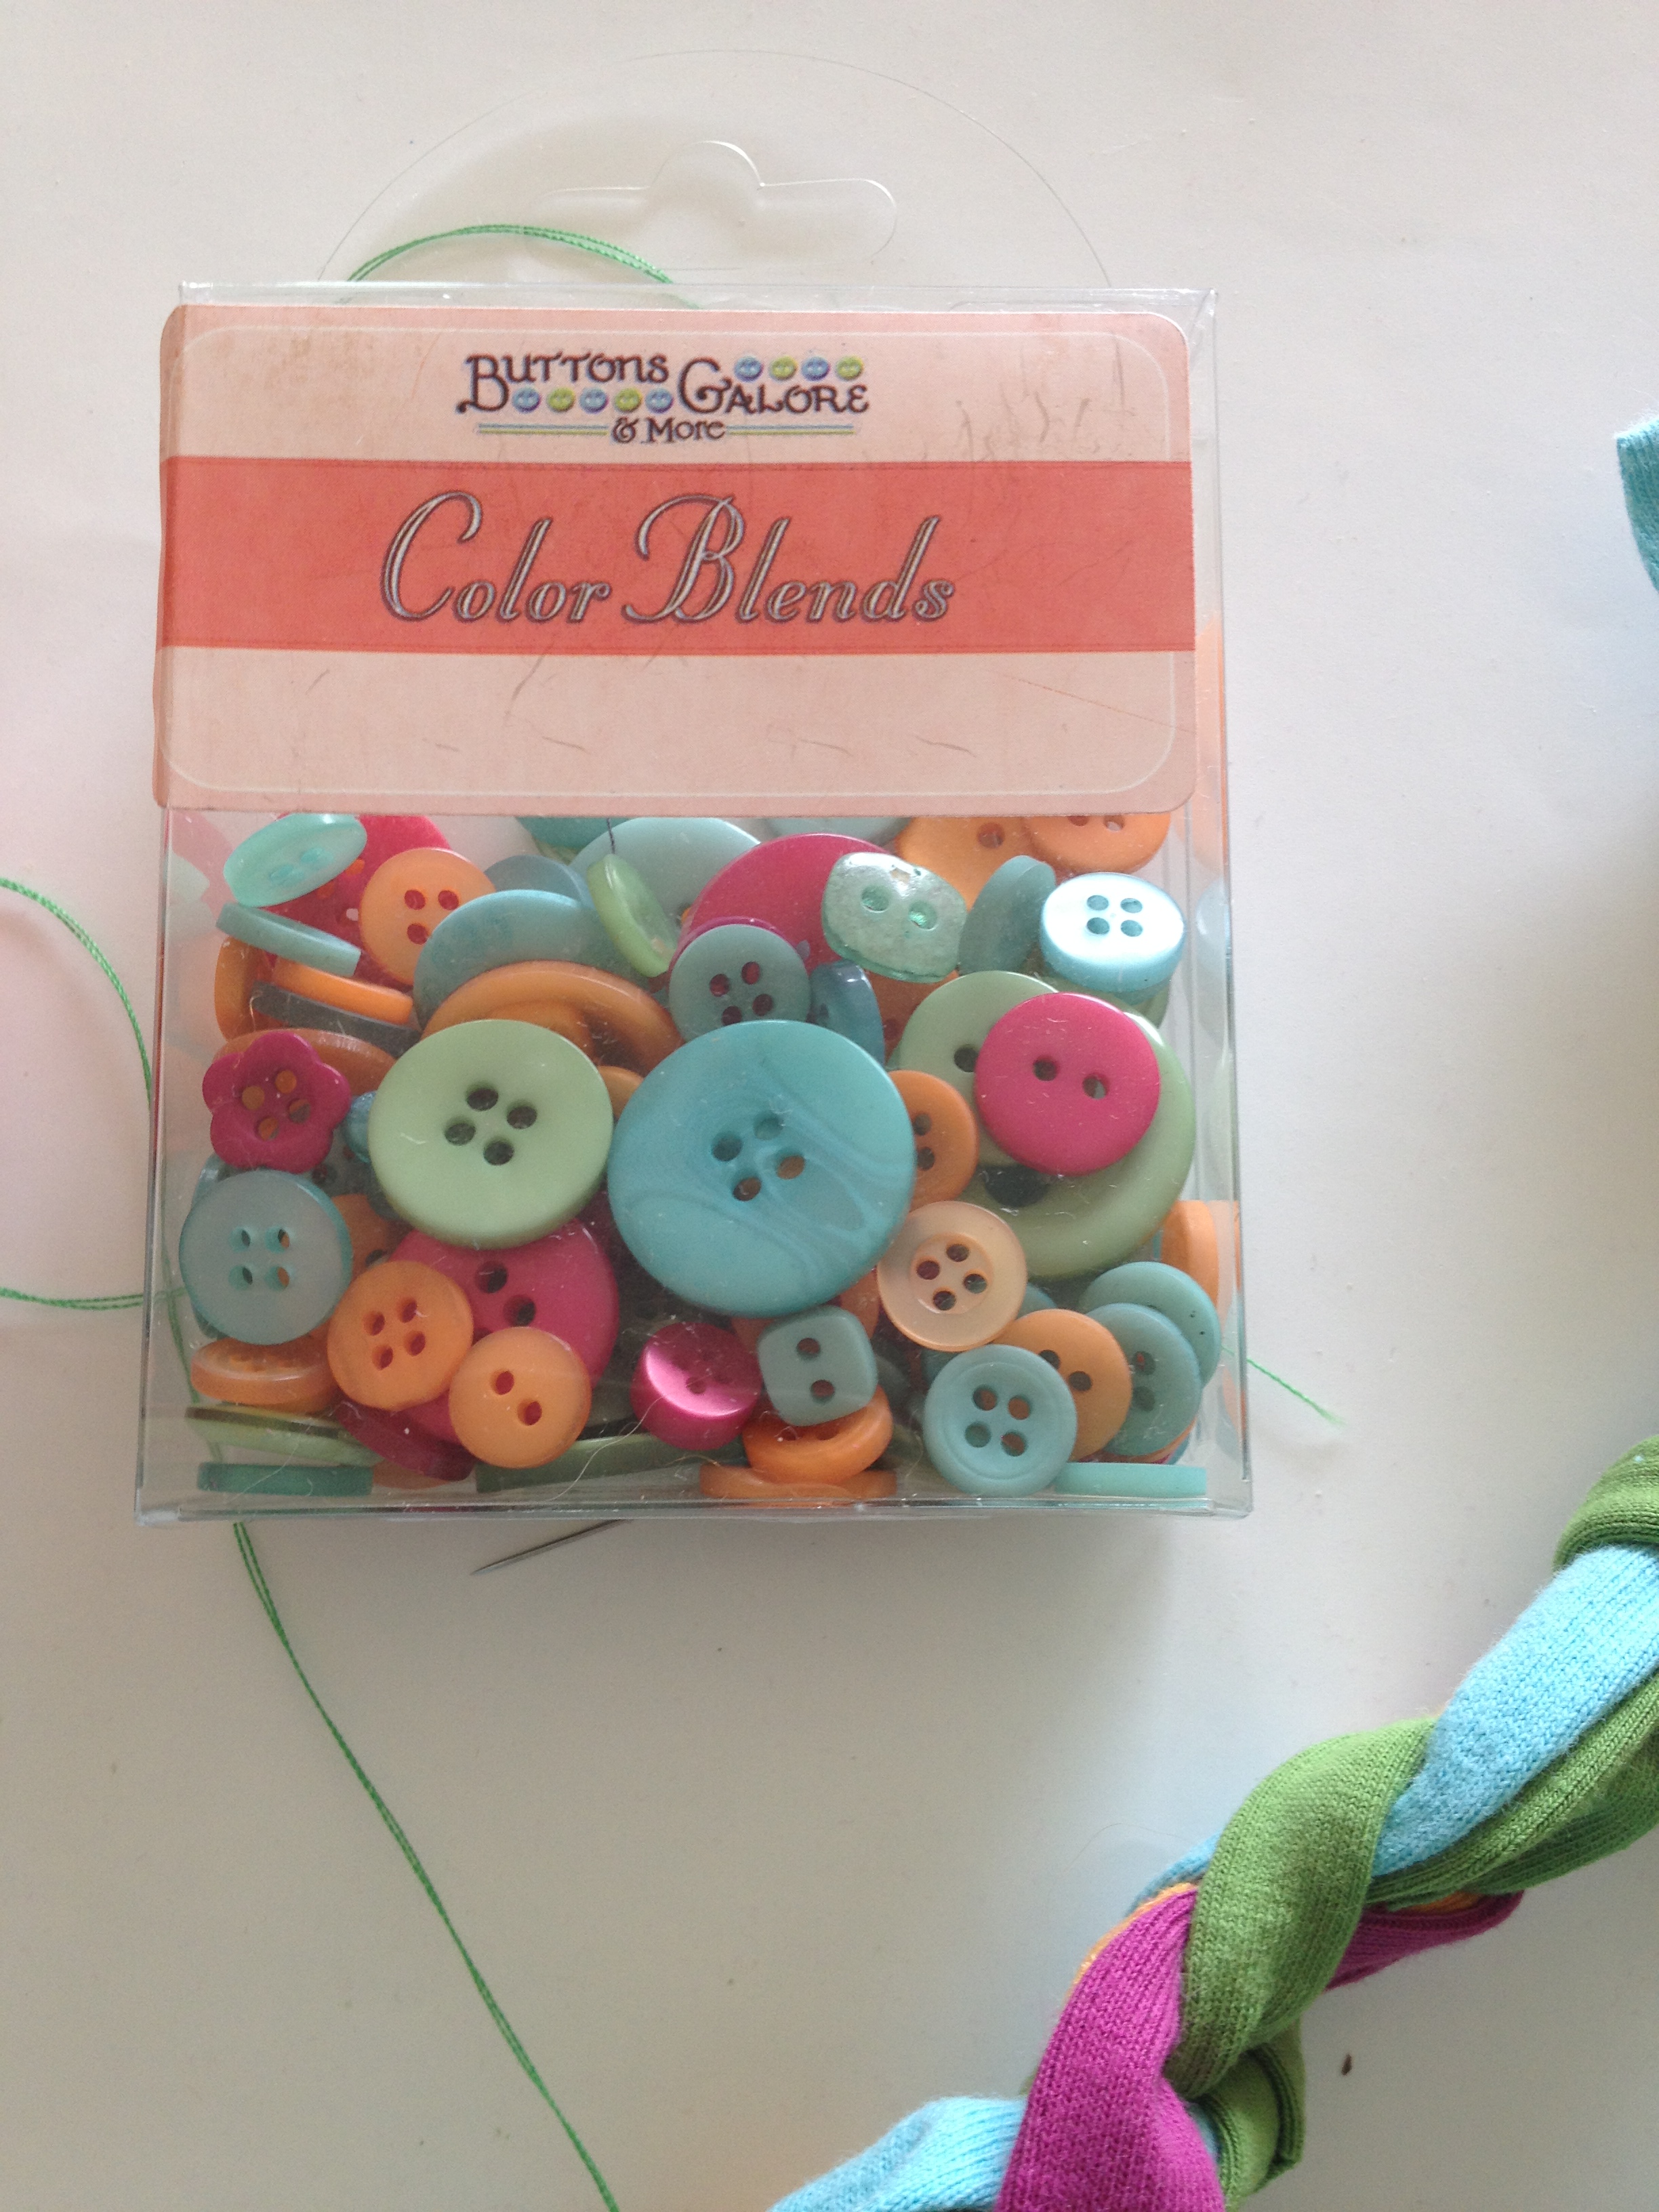
To secure the braided bracelet, I chose these Color Blend Buttons by Buttons Galore and More.
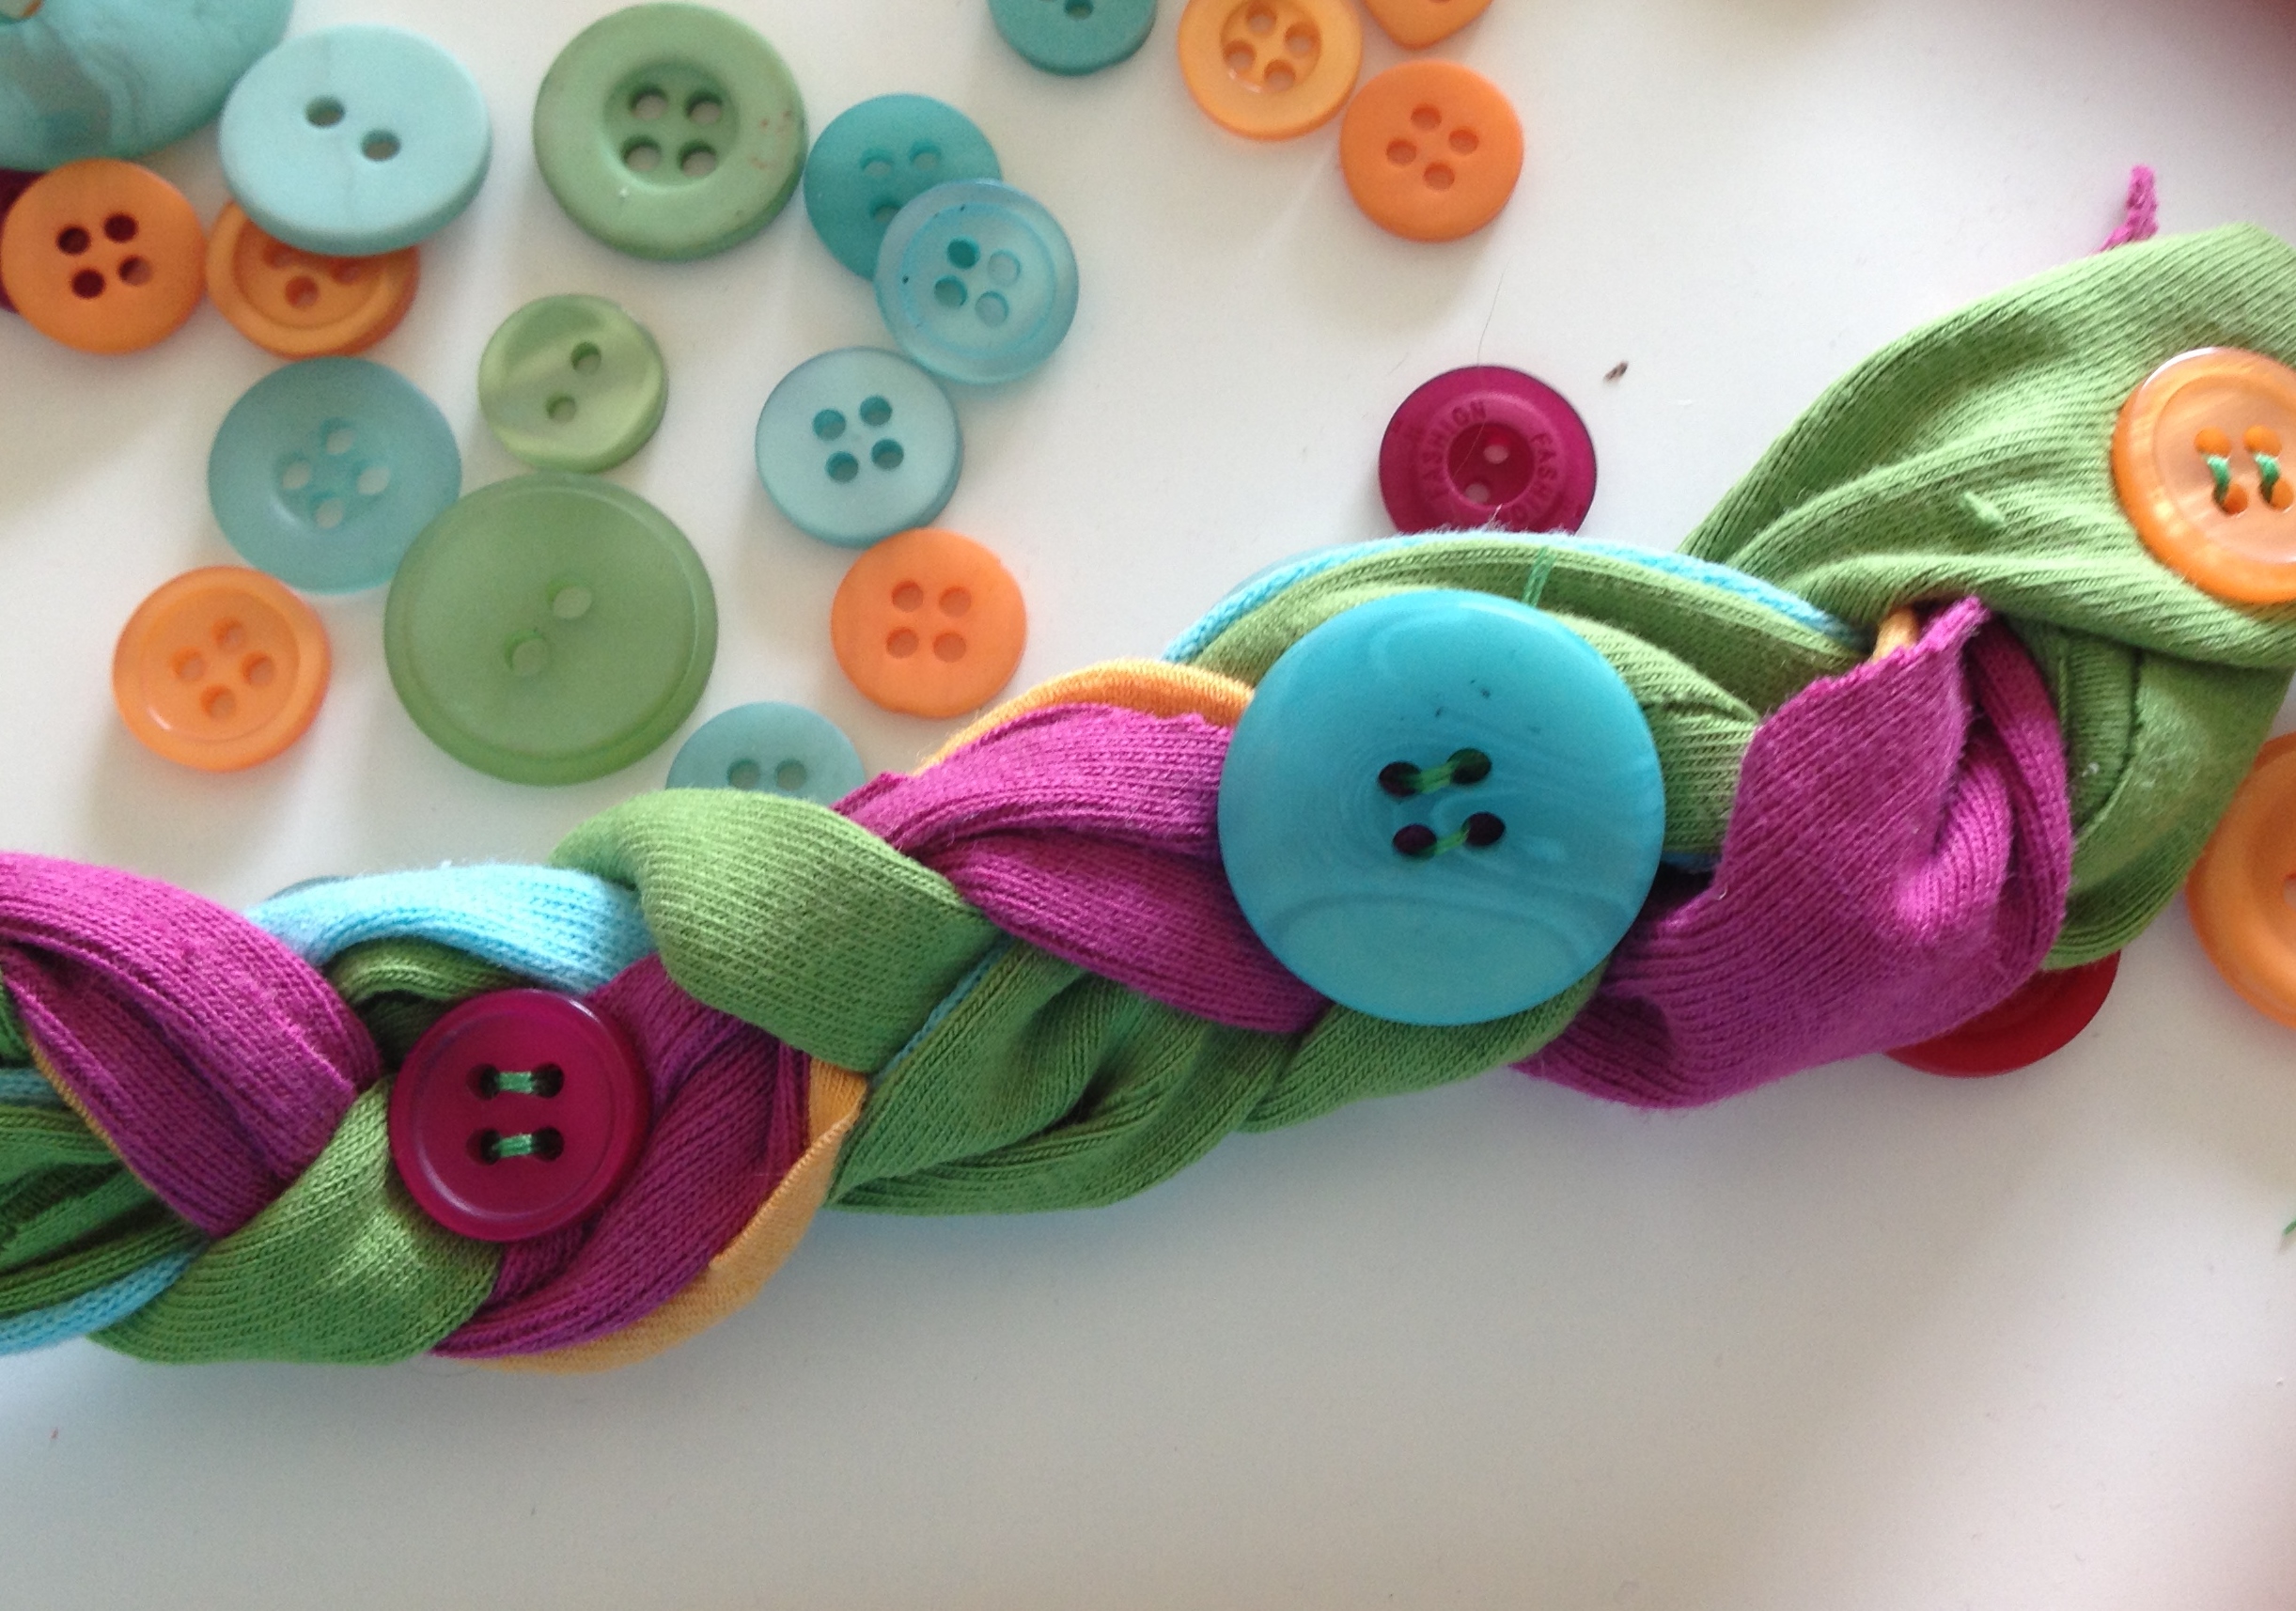 I spaced them somewhat evenly on the braided bracelet and sewed them down with the hand sewing needle and thread. This is what will keep your bracelet in tact during heavy periods of wear and tear and sweat, like dance class!
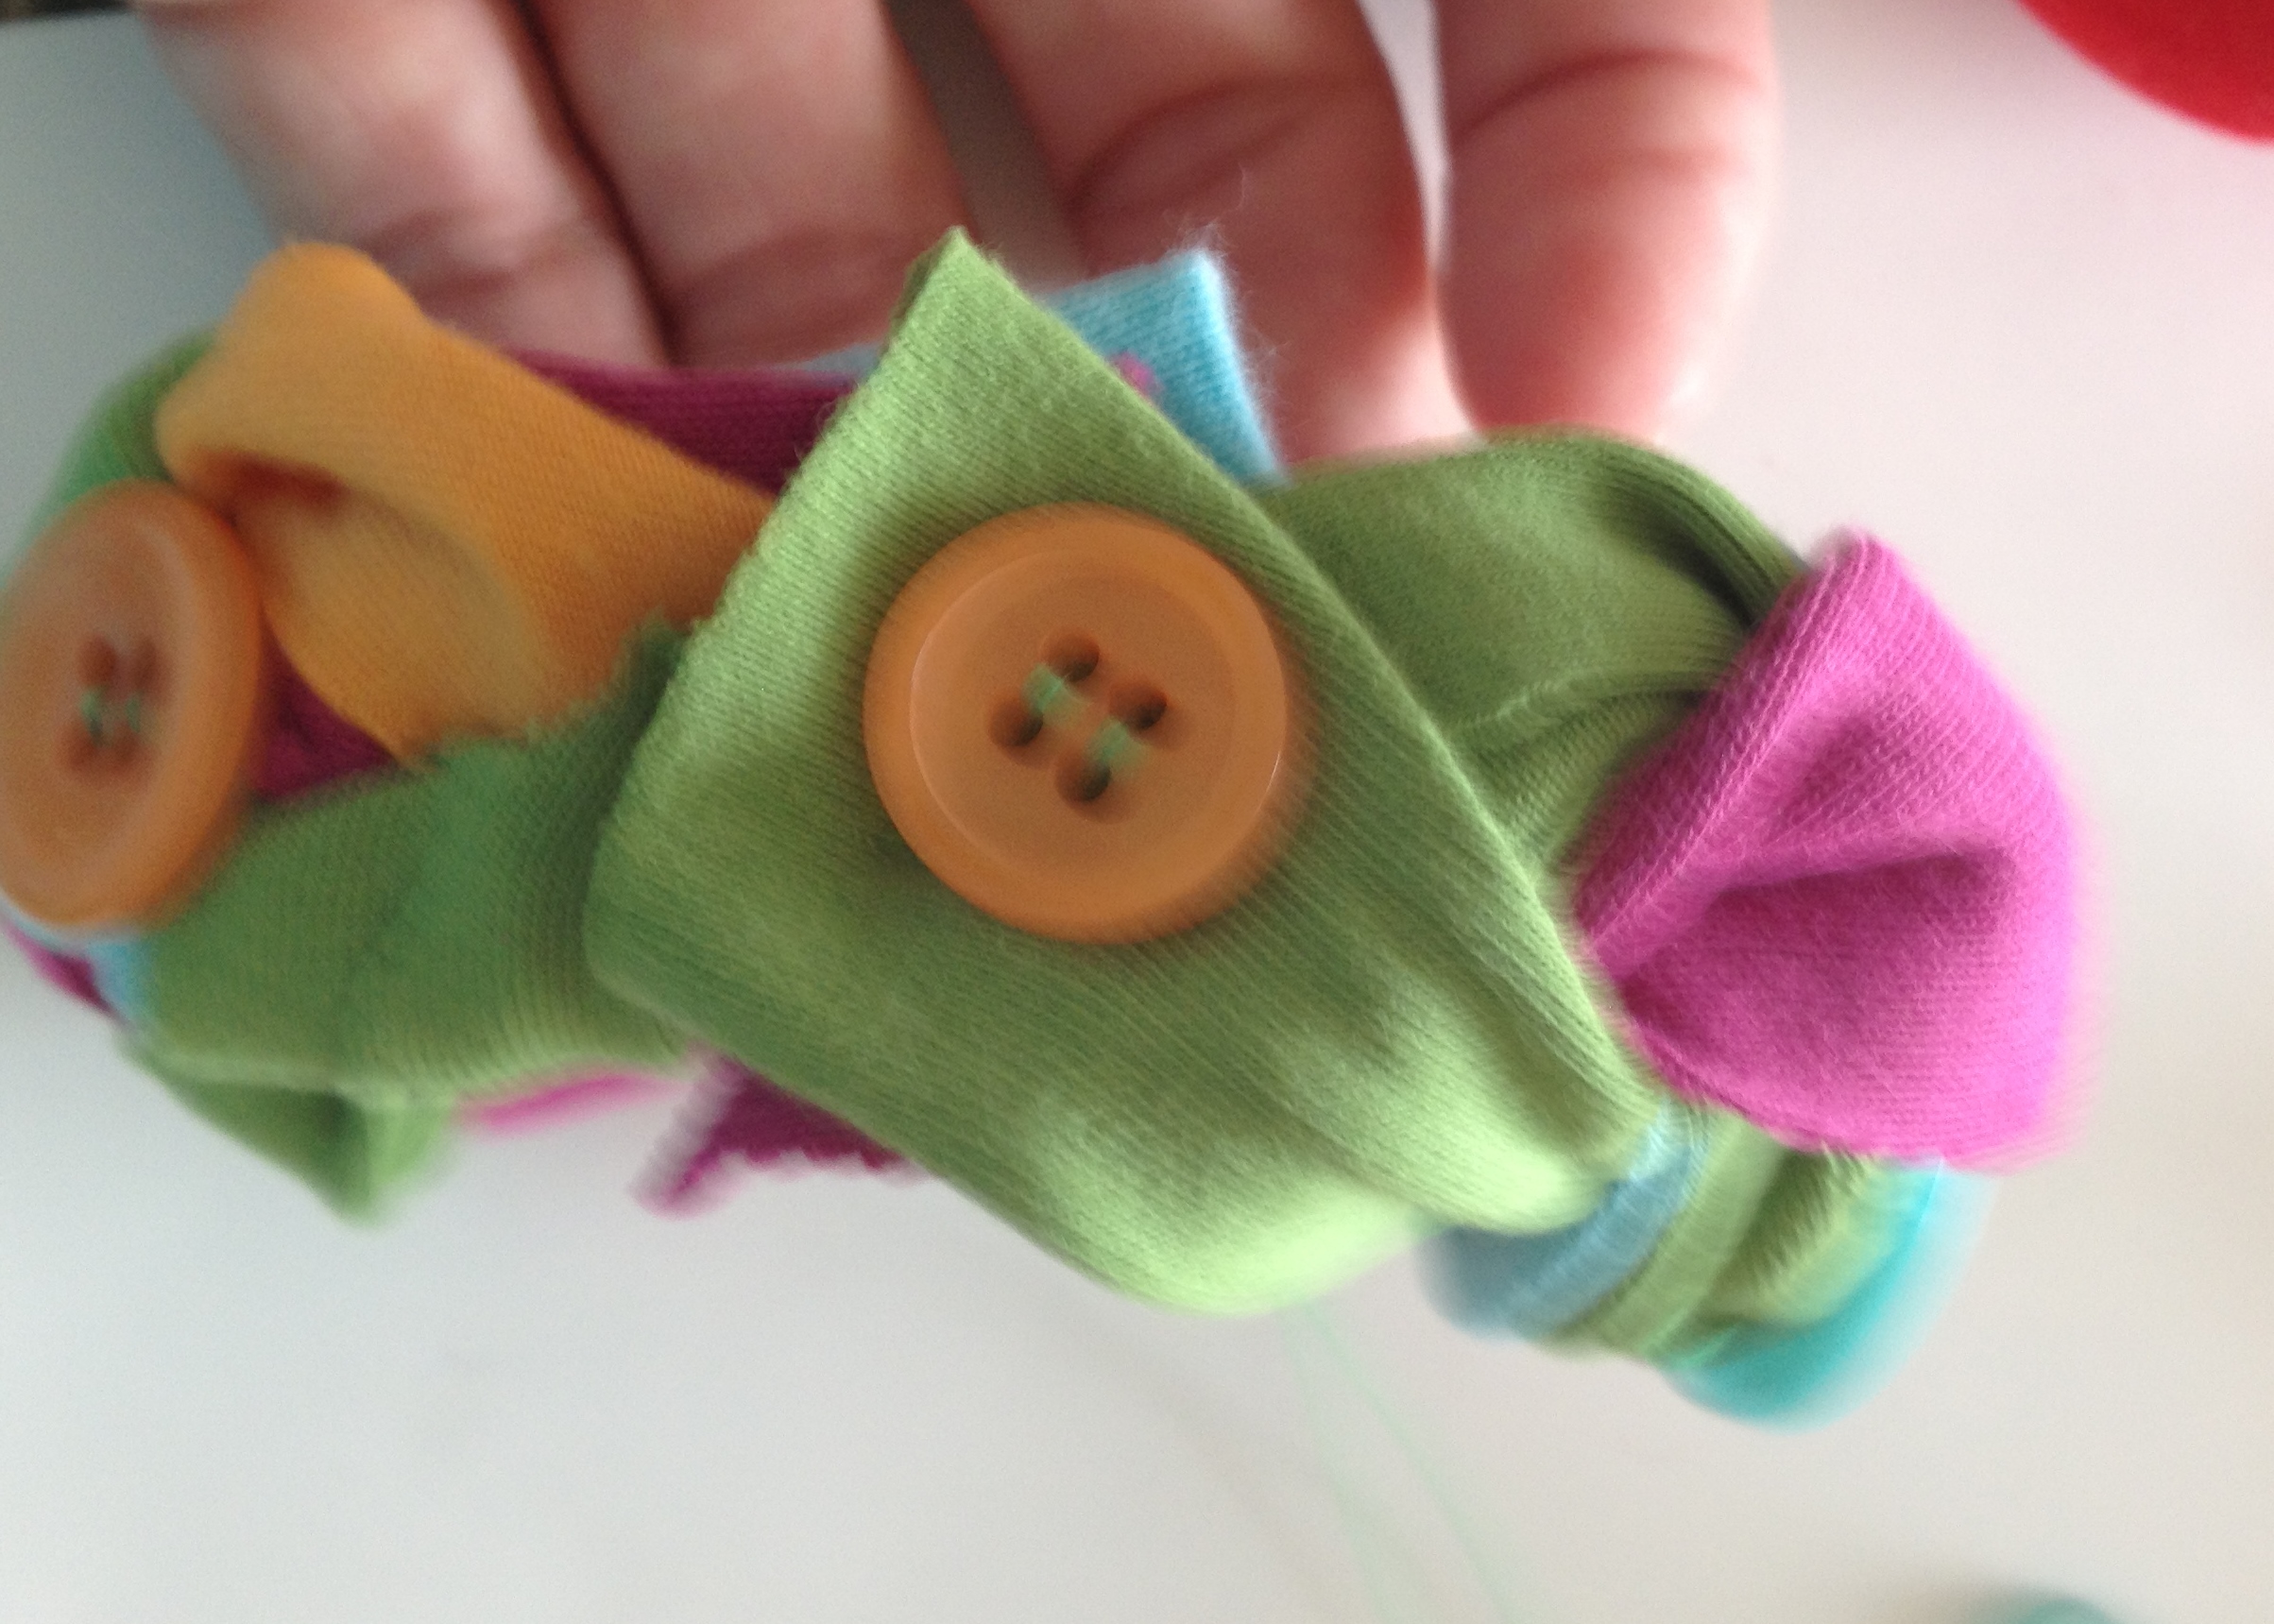
Finish your bracelet with a button, sewing the ends together.
 Live Life Creatively,
Melony
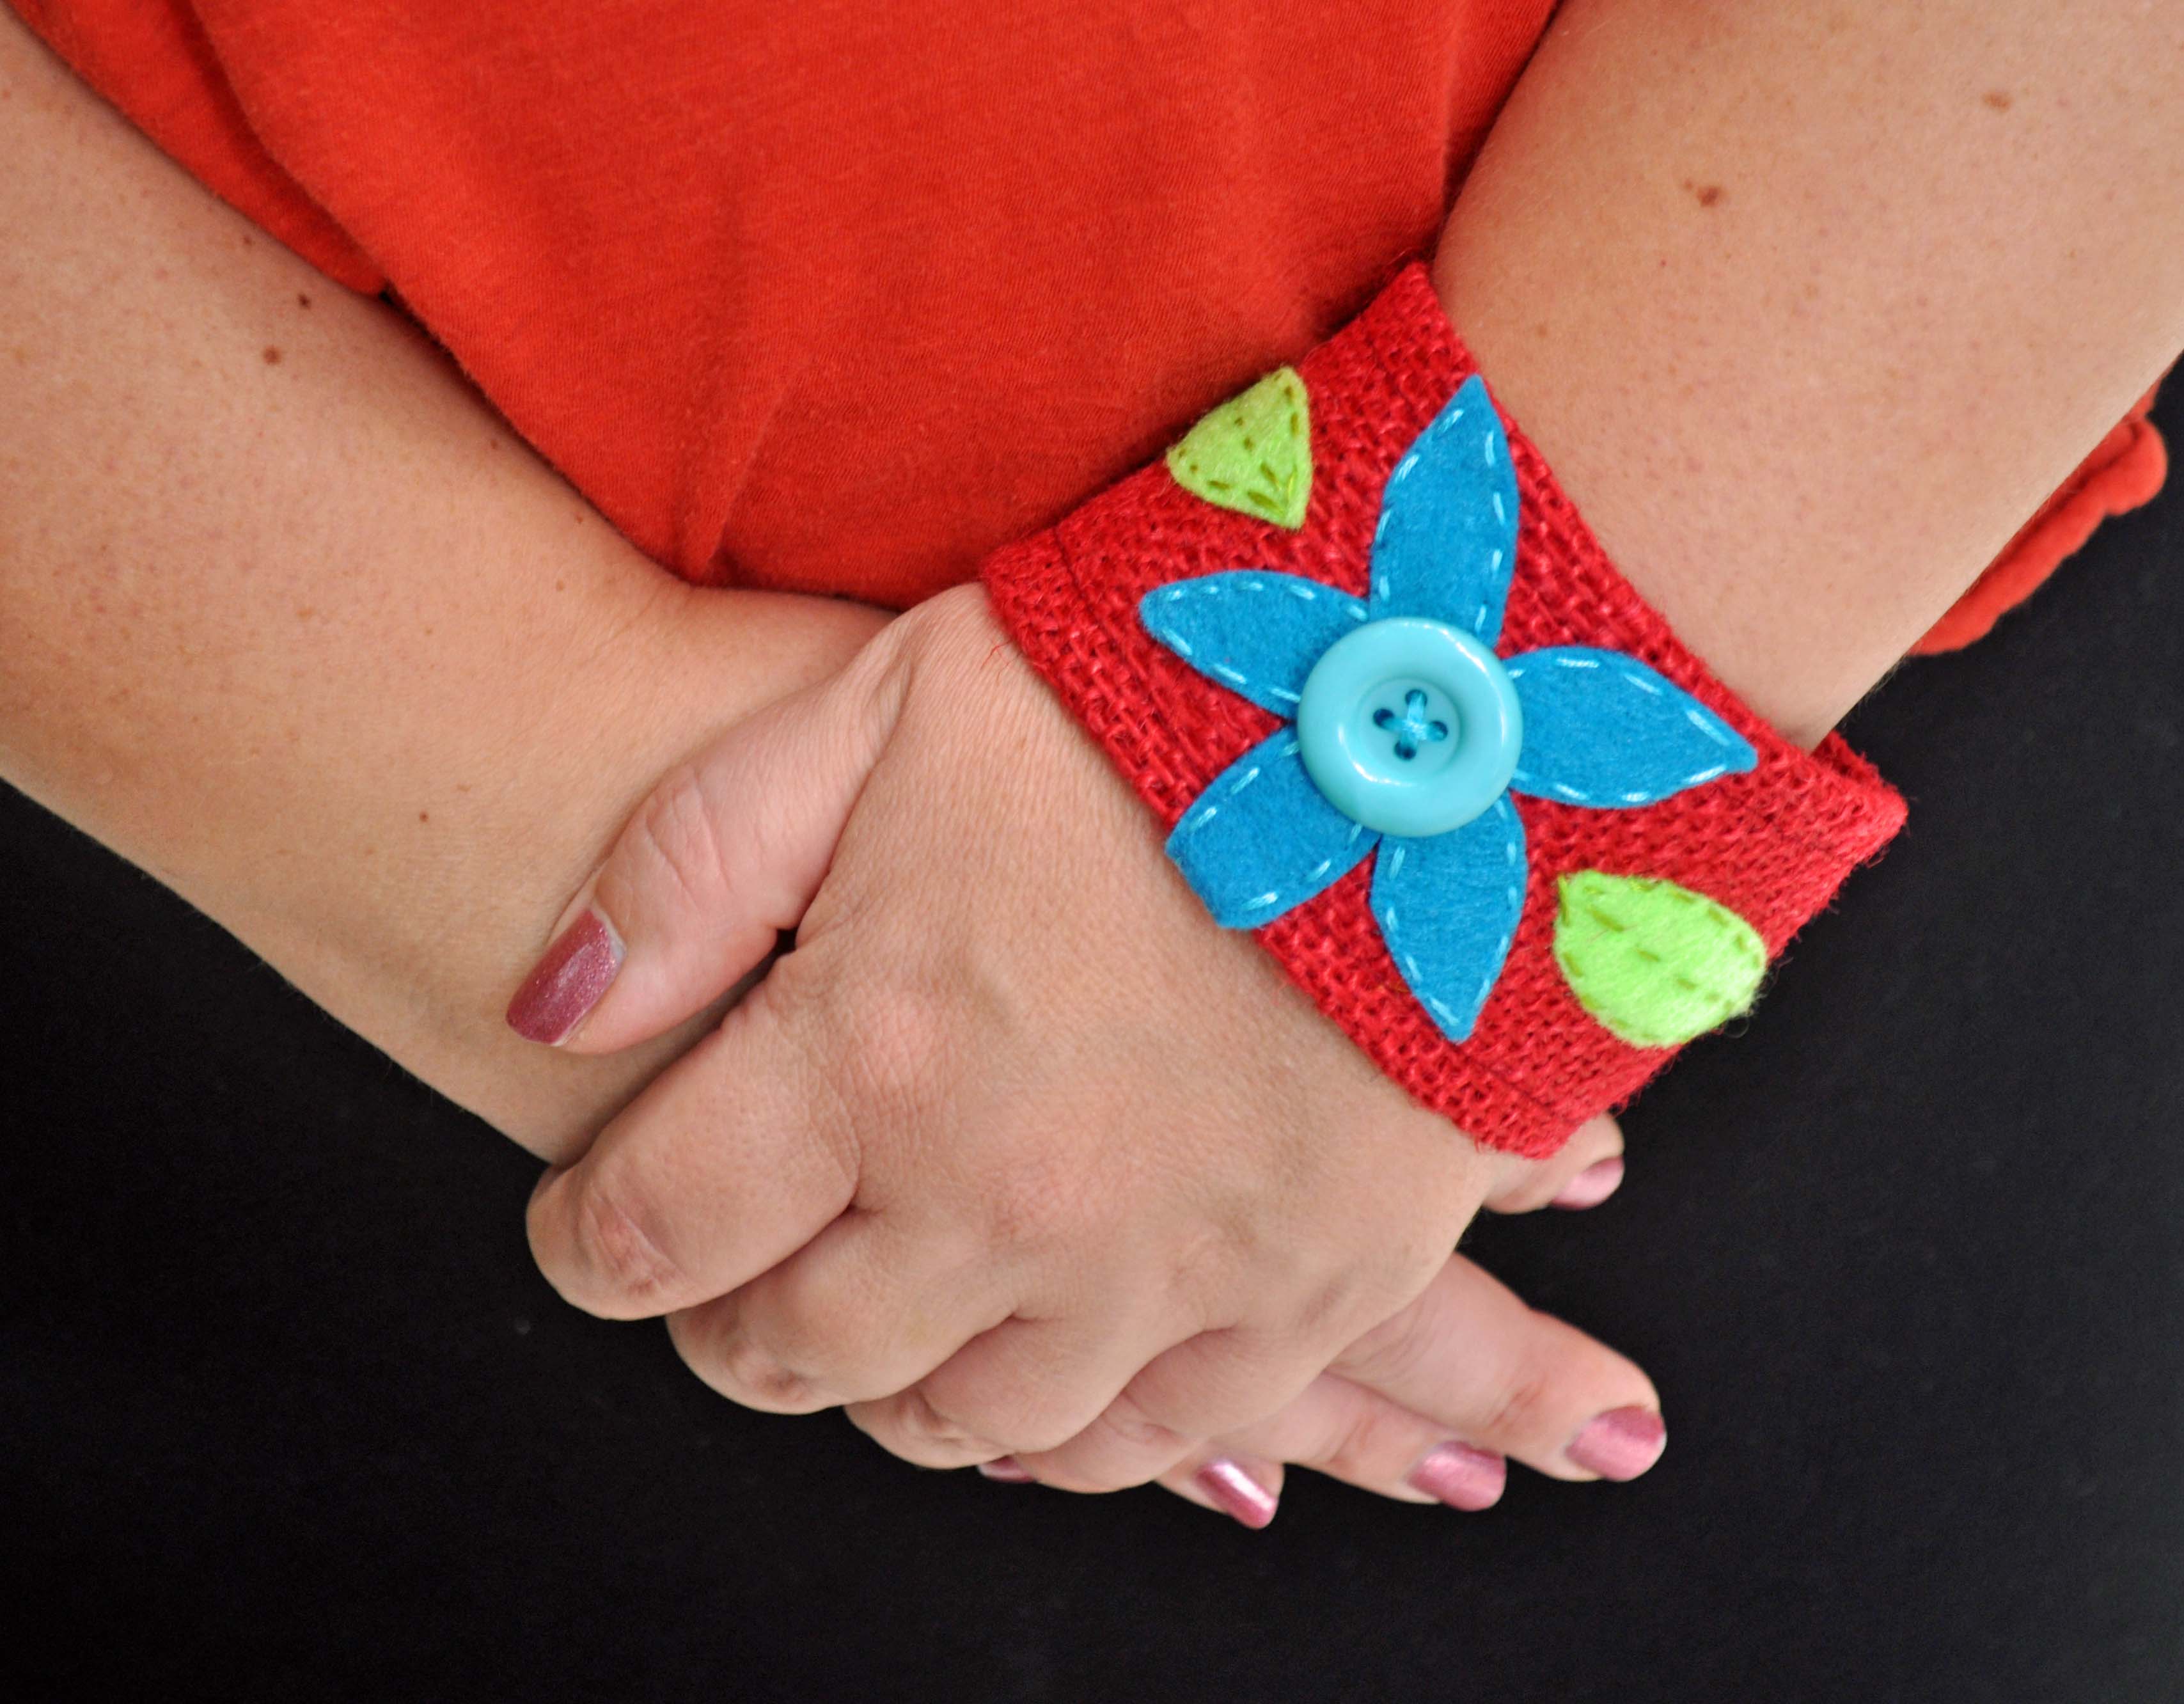
Short-sleeved, summer tops demand a good burlap and buttons cuff, don’t you think? Create this simple and rustic burlap cuff for your next walk on the beach. It’s hip and cool and so easy to make!
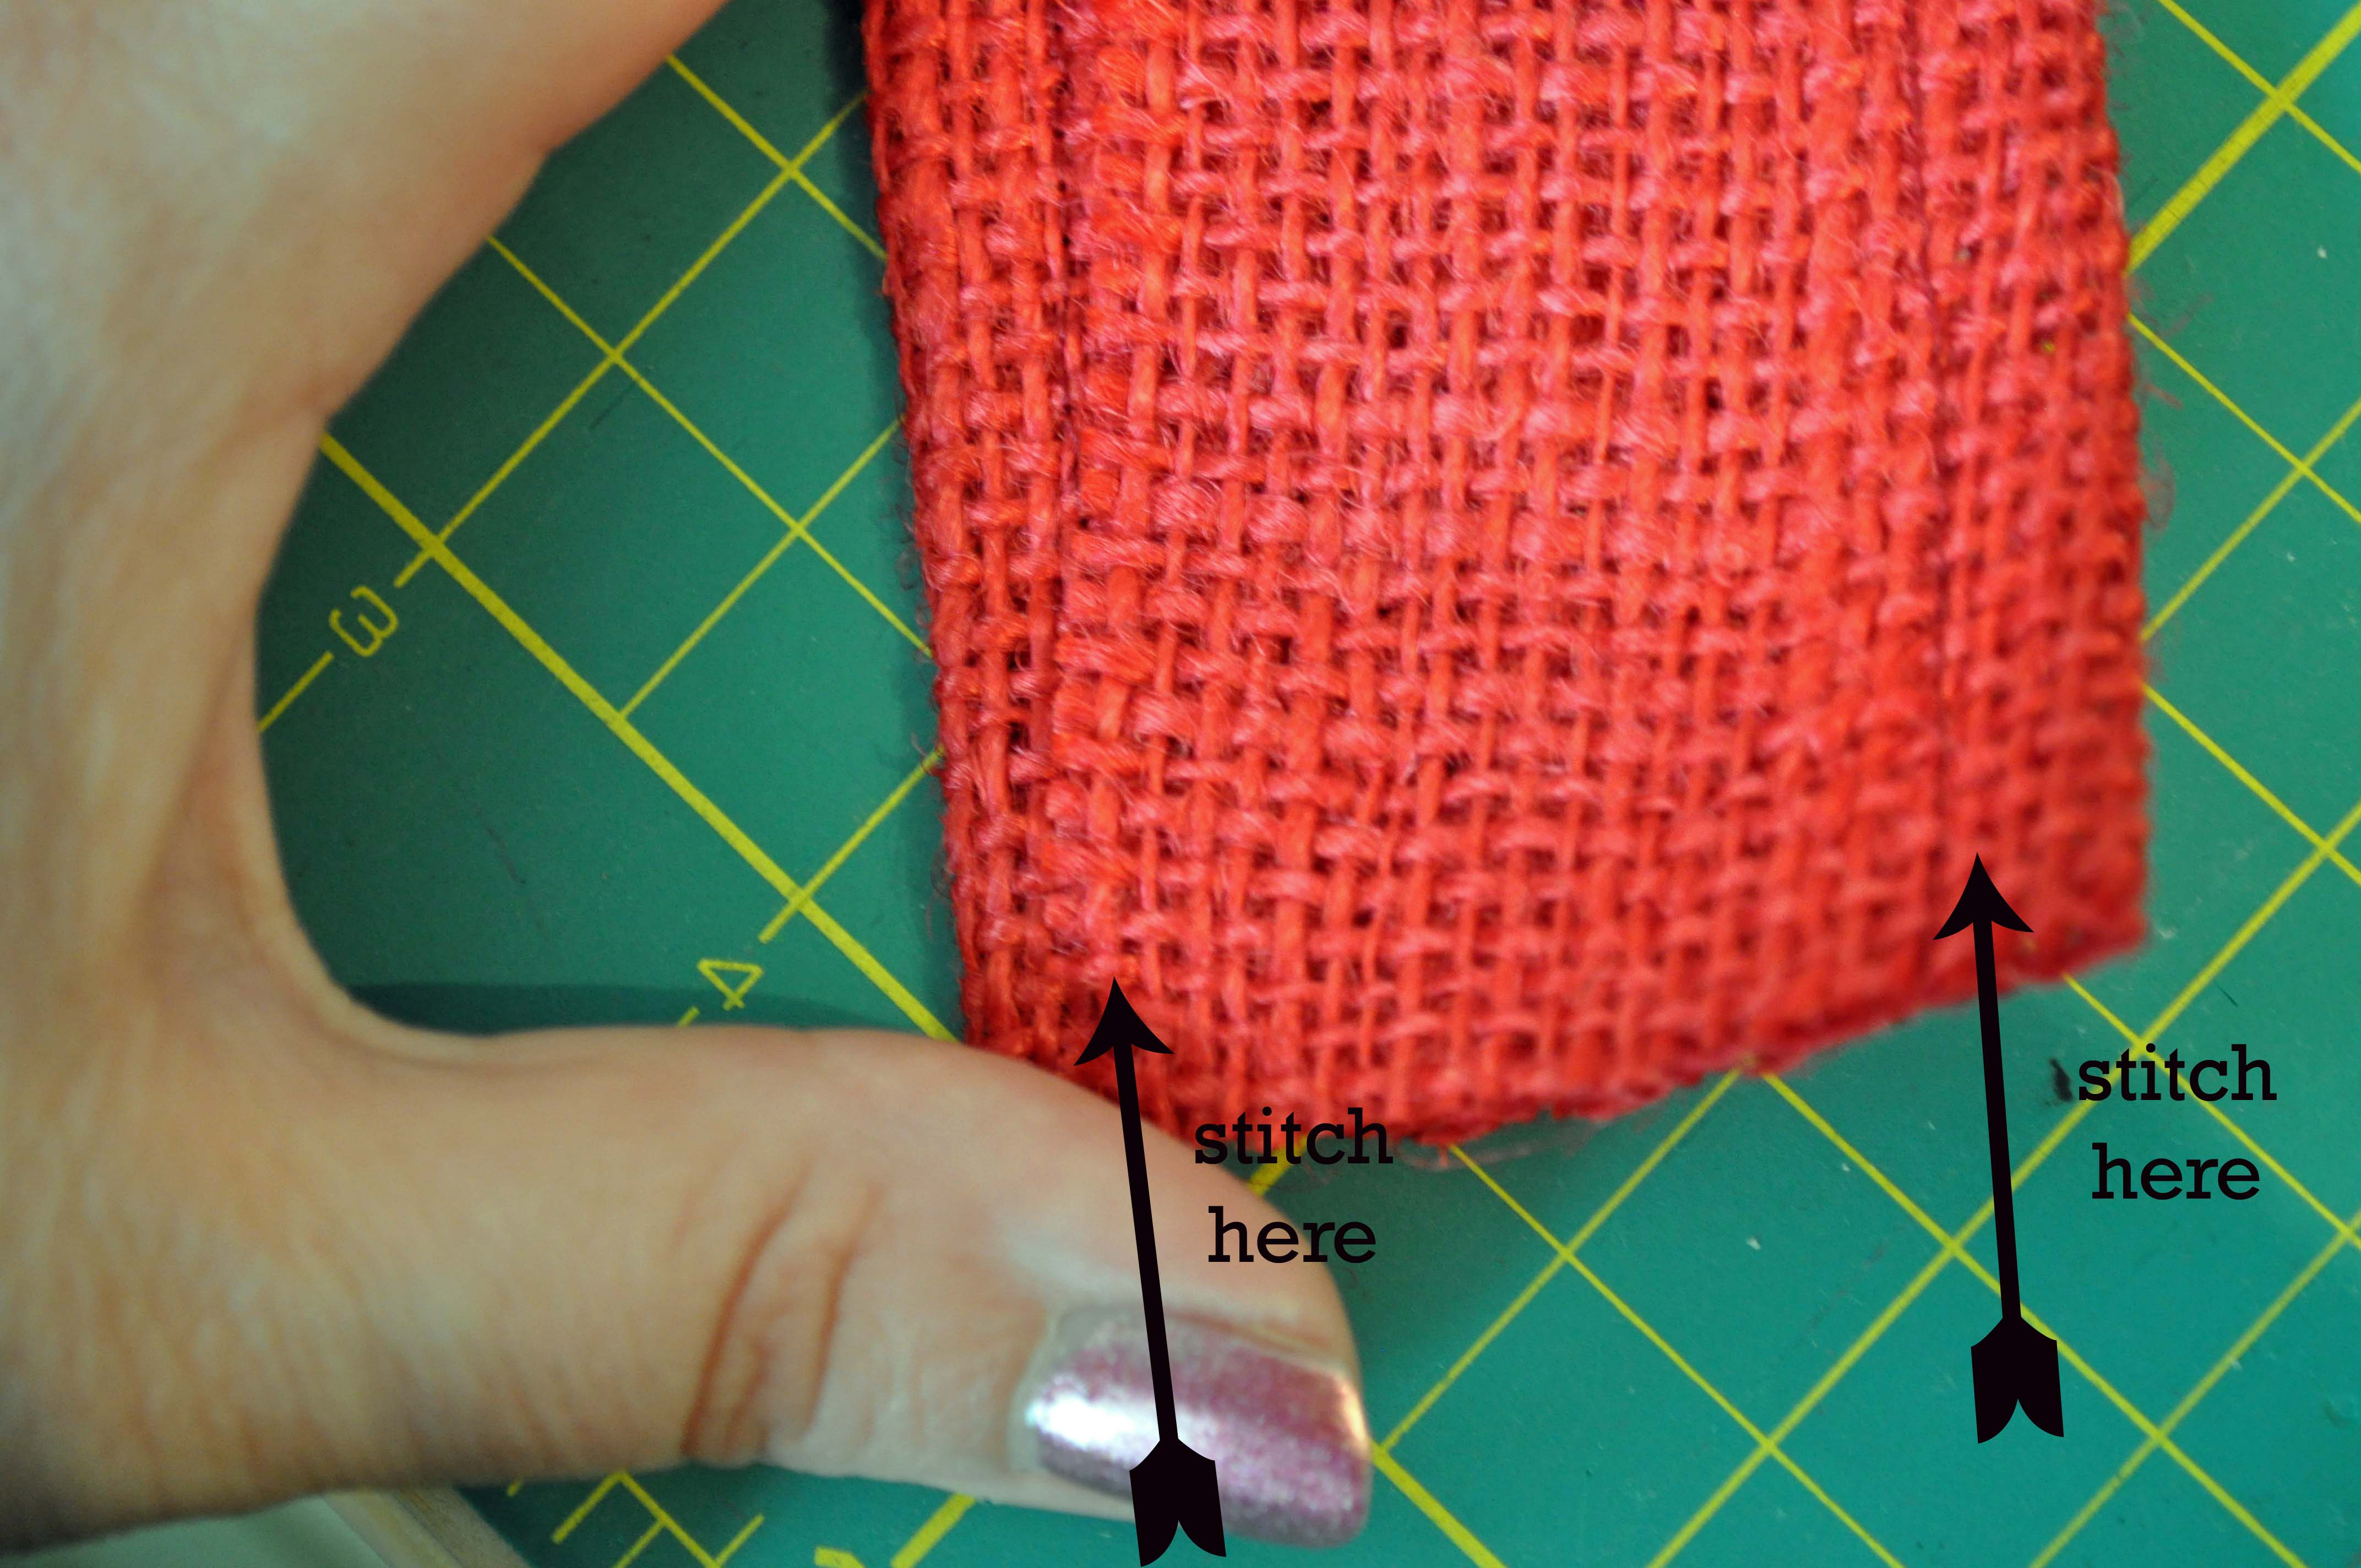
1. Fold the burlap into thirds to create a long strip measuring 10″ x 2″. Pin in place and stitch along the edges.
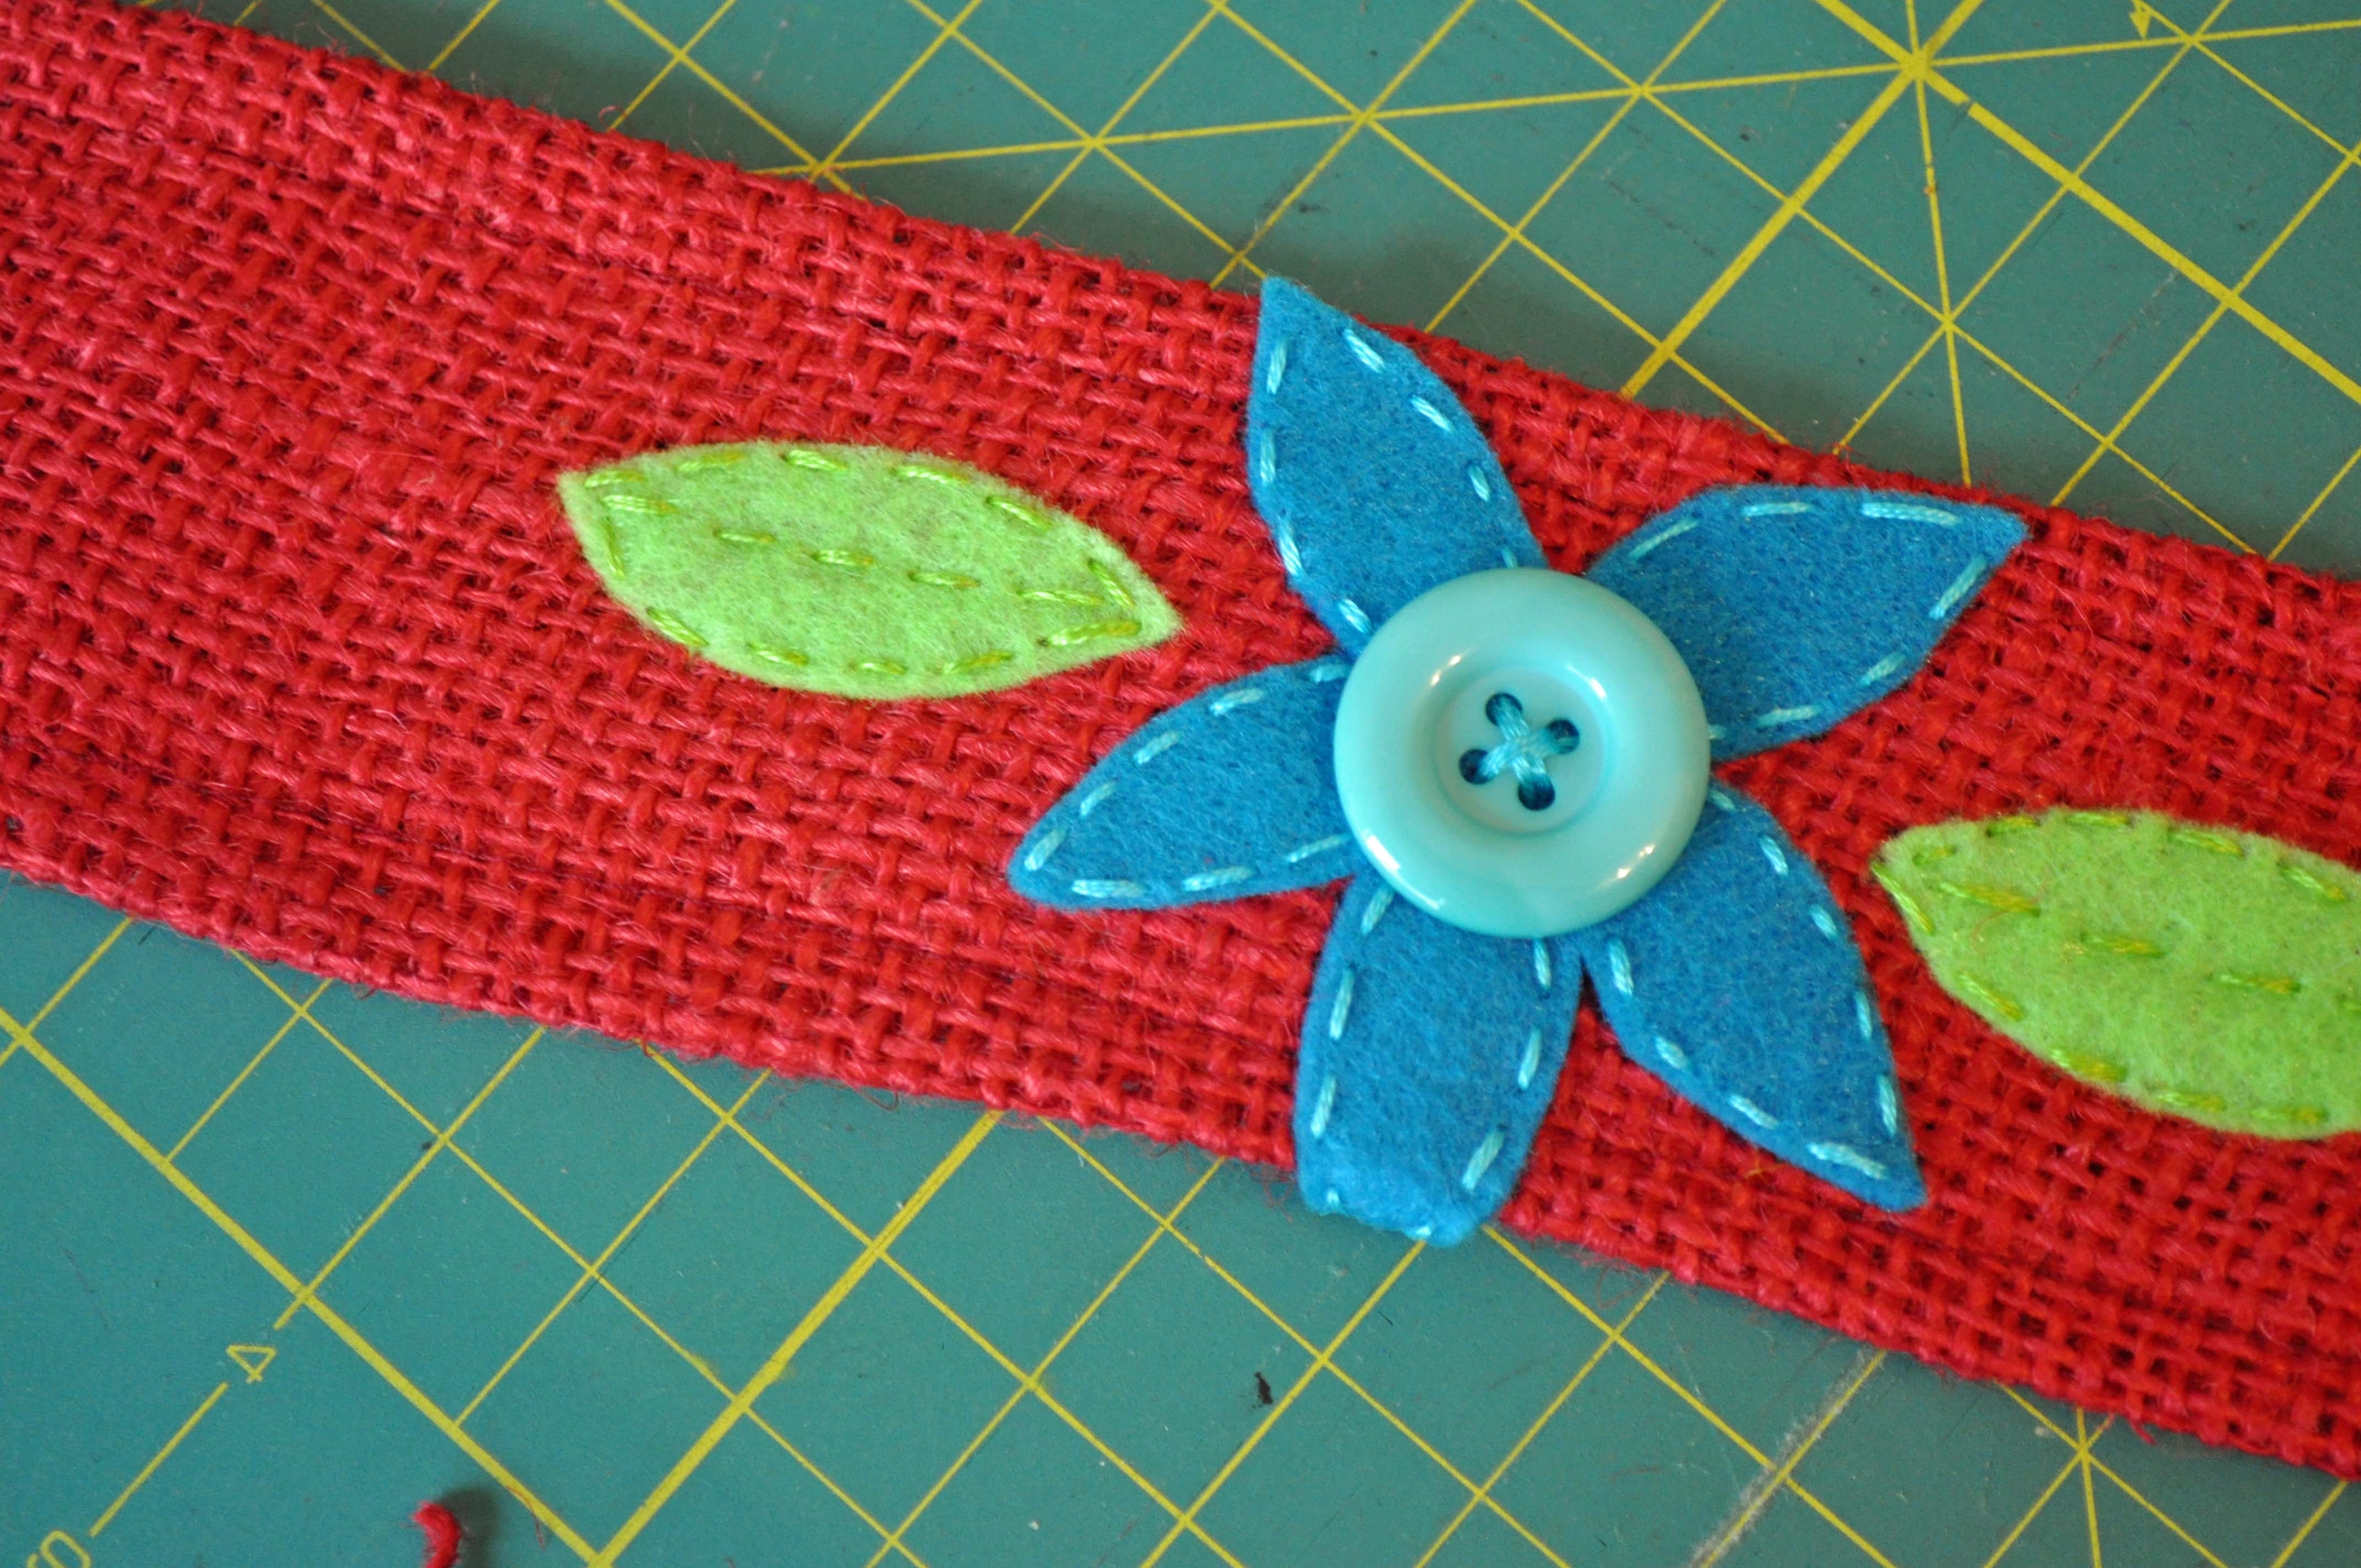
2. Using felt scraps, cut out petals and leaves to form a flower. Arrange in the center of the burlap rectangle and using embroidery thread, stitch them into place.
3. Stitch buttons into place. Use them for the center of the flower. You can really go crazy and add more into the design. (I strongly believe you can never have too many buttons on a project!)
4. Once the design is stitched in place, use embroidery thread to attach the two short ends of the cuff together.
Note: I measured my wrist at the beginning of the project and made sure that I could slip the cuff on and off. If you prefer a tighter fitting cuff, measure your wrist size and then use a hook & loop, snap, or BUTTON closure to secure the cuff on your wrist.
Thanks for getting crafty with me today! For more button crafts, stitching and lifestyle ideas visit me on my blog at www.laurabraydesigns.com.
![]()
Sew a button and burlap pencil case for the guy in your life. It’s just right for the high school graduate who is heading off to college in the Fall or it would also be a great Father’s Day gift.
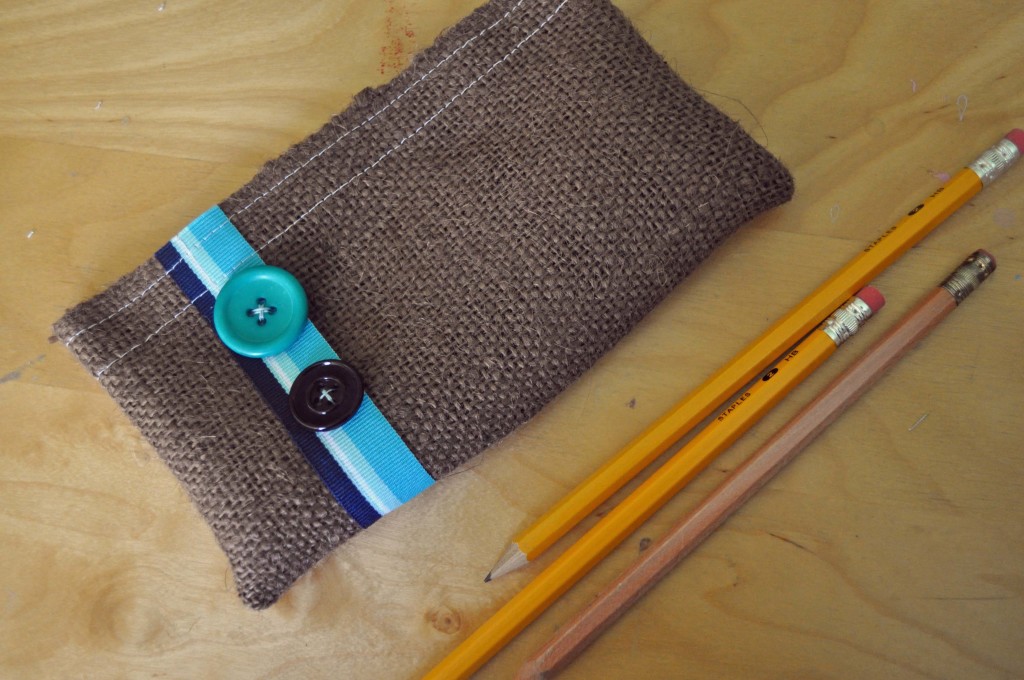
I know I’m always trying to keep my husband organized and he’s always looking for pens and pencils. Do you think there’s any chance a button and burlap pencil case is going to help? Naw, I don’t think so either, but it’s fun to make!
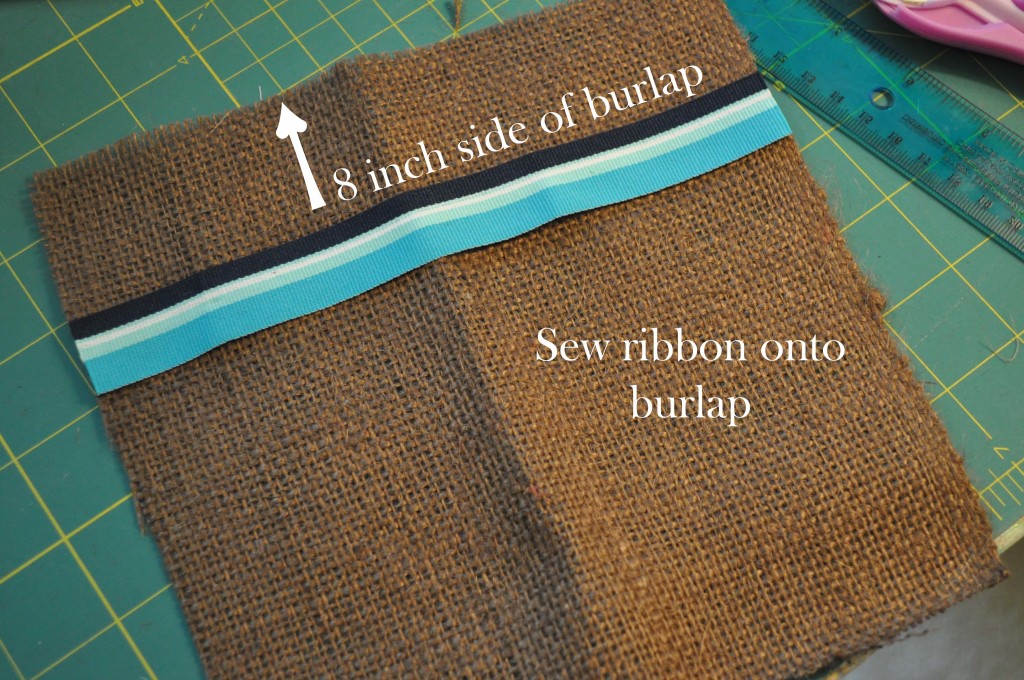
1. Sew ribbon onto burlap parallel to the side that measures 8″. Place it approximately 1.25″ from the edge of the burlap.
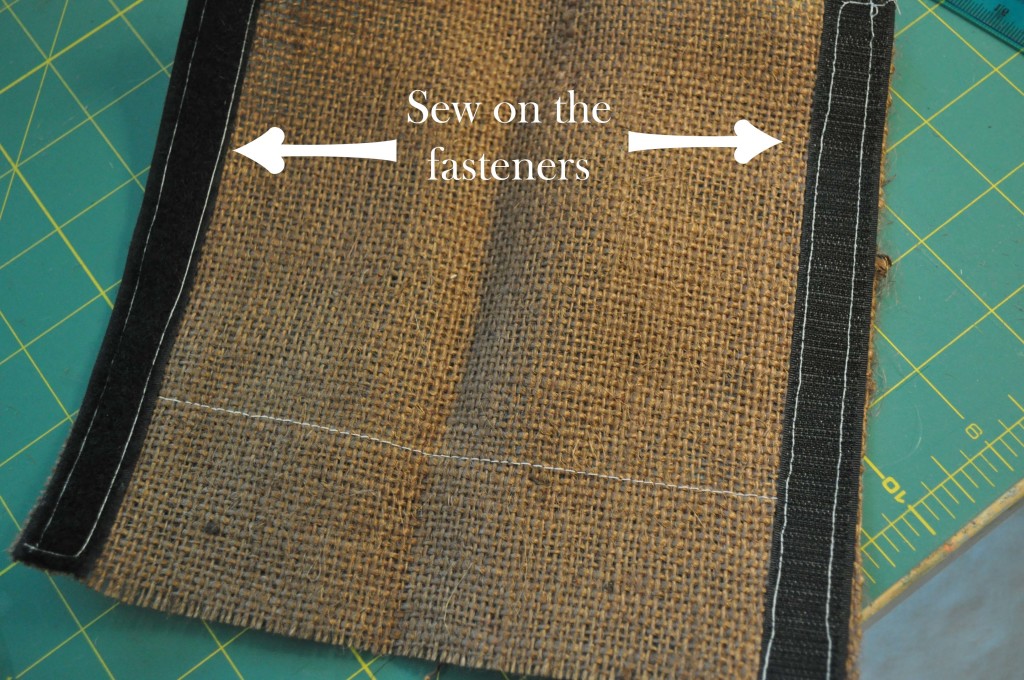
2. Sew the Velcro (R) Brand fasteners onto the 7.5″ inch sides. (These will be perpendicular to the ribbon.) I like to leave the top of the case without finishing it. The rough edge gives it a more masculine touch!
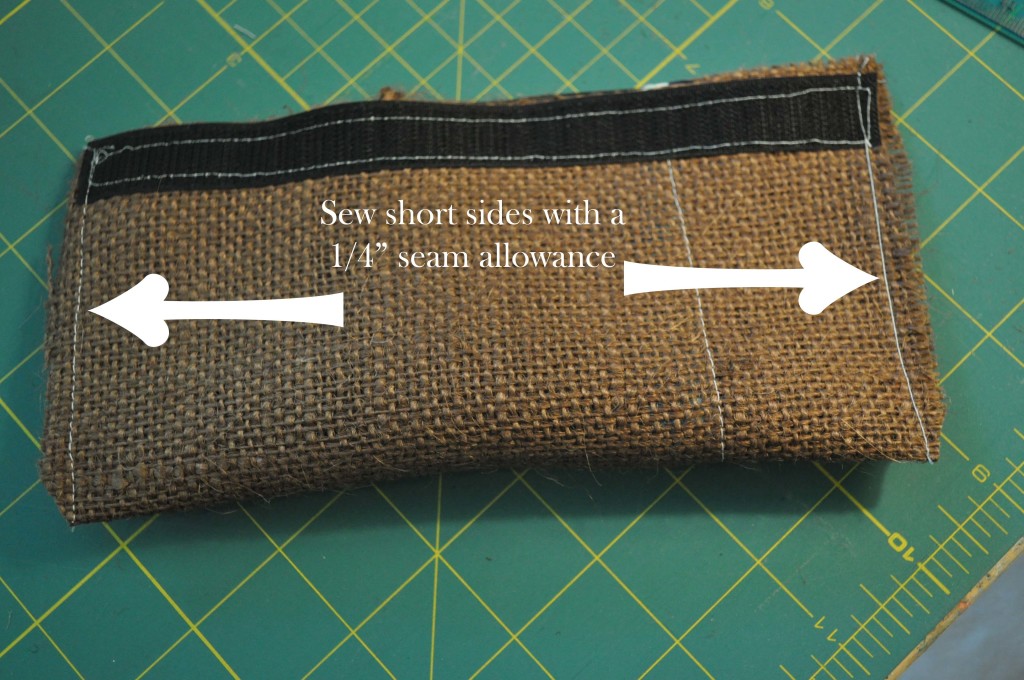
3. Fold in half, right sides facing (the side that you sewed the ribbon onto is the “right” side). The 7.5″ edges should be even. Press with an iron.
4. Sew the short sides closed.
5. Clip the corners and turn the bag right side out.

6. Sew buttons onto ribbon. I know it’s a bit harder to sew them on when the case is sewn, but it’s best to leave this step for last, so you can see the best placement for them.
![]()
It is that time of year, the red…white…and blue time that is! Here is a quick and easy way to up-cycle an old t-shirt into a festive masterpiece fit for the grandest of parades. It is shown in patriotic style but could be done in any color theme for any occasion.
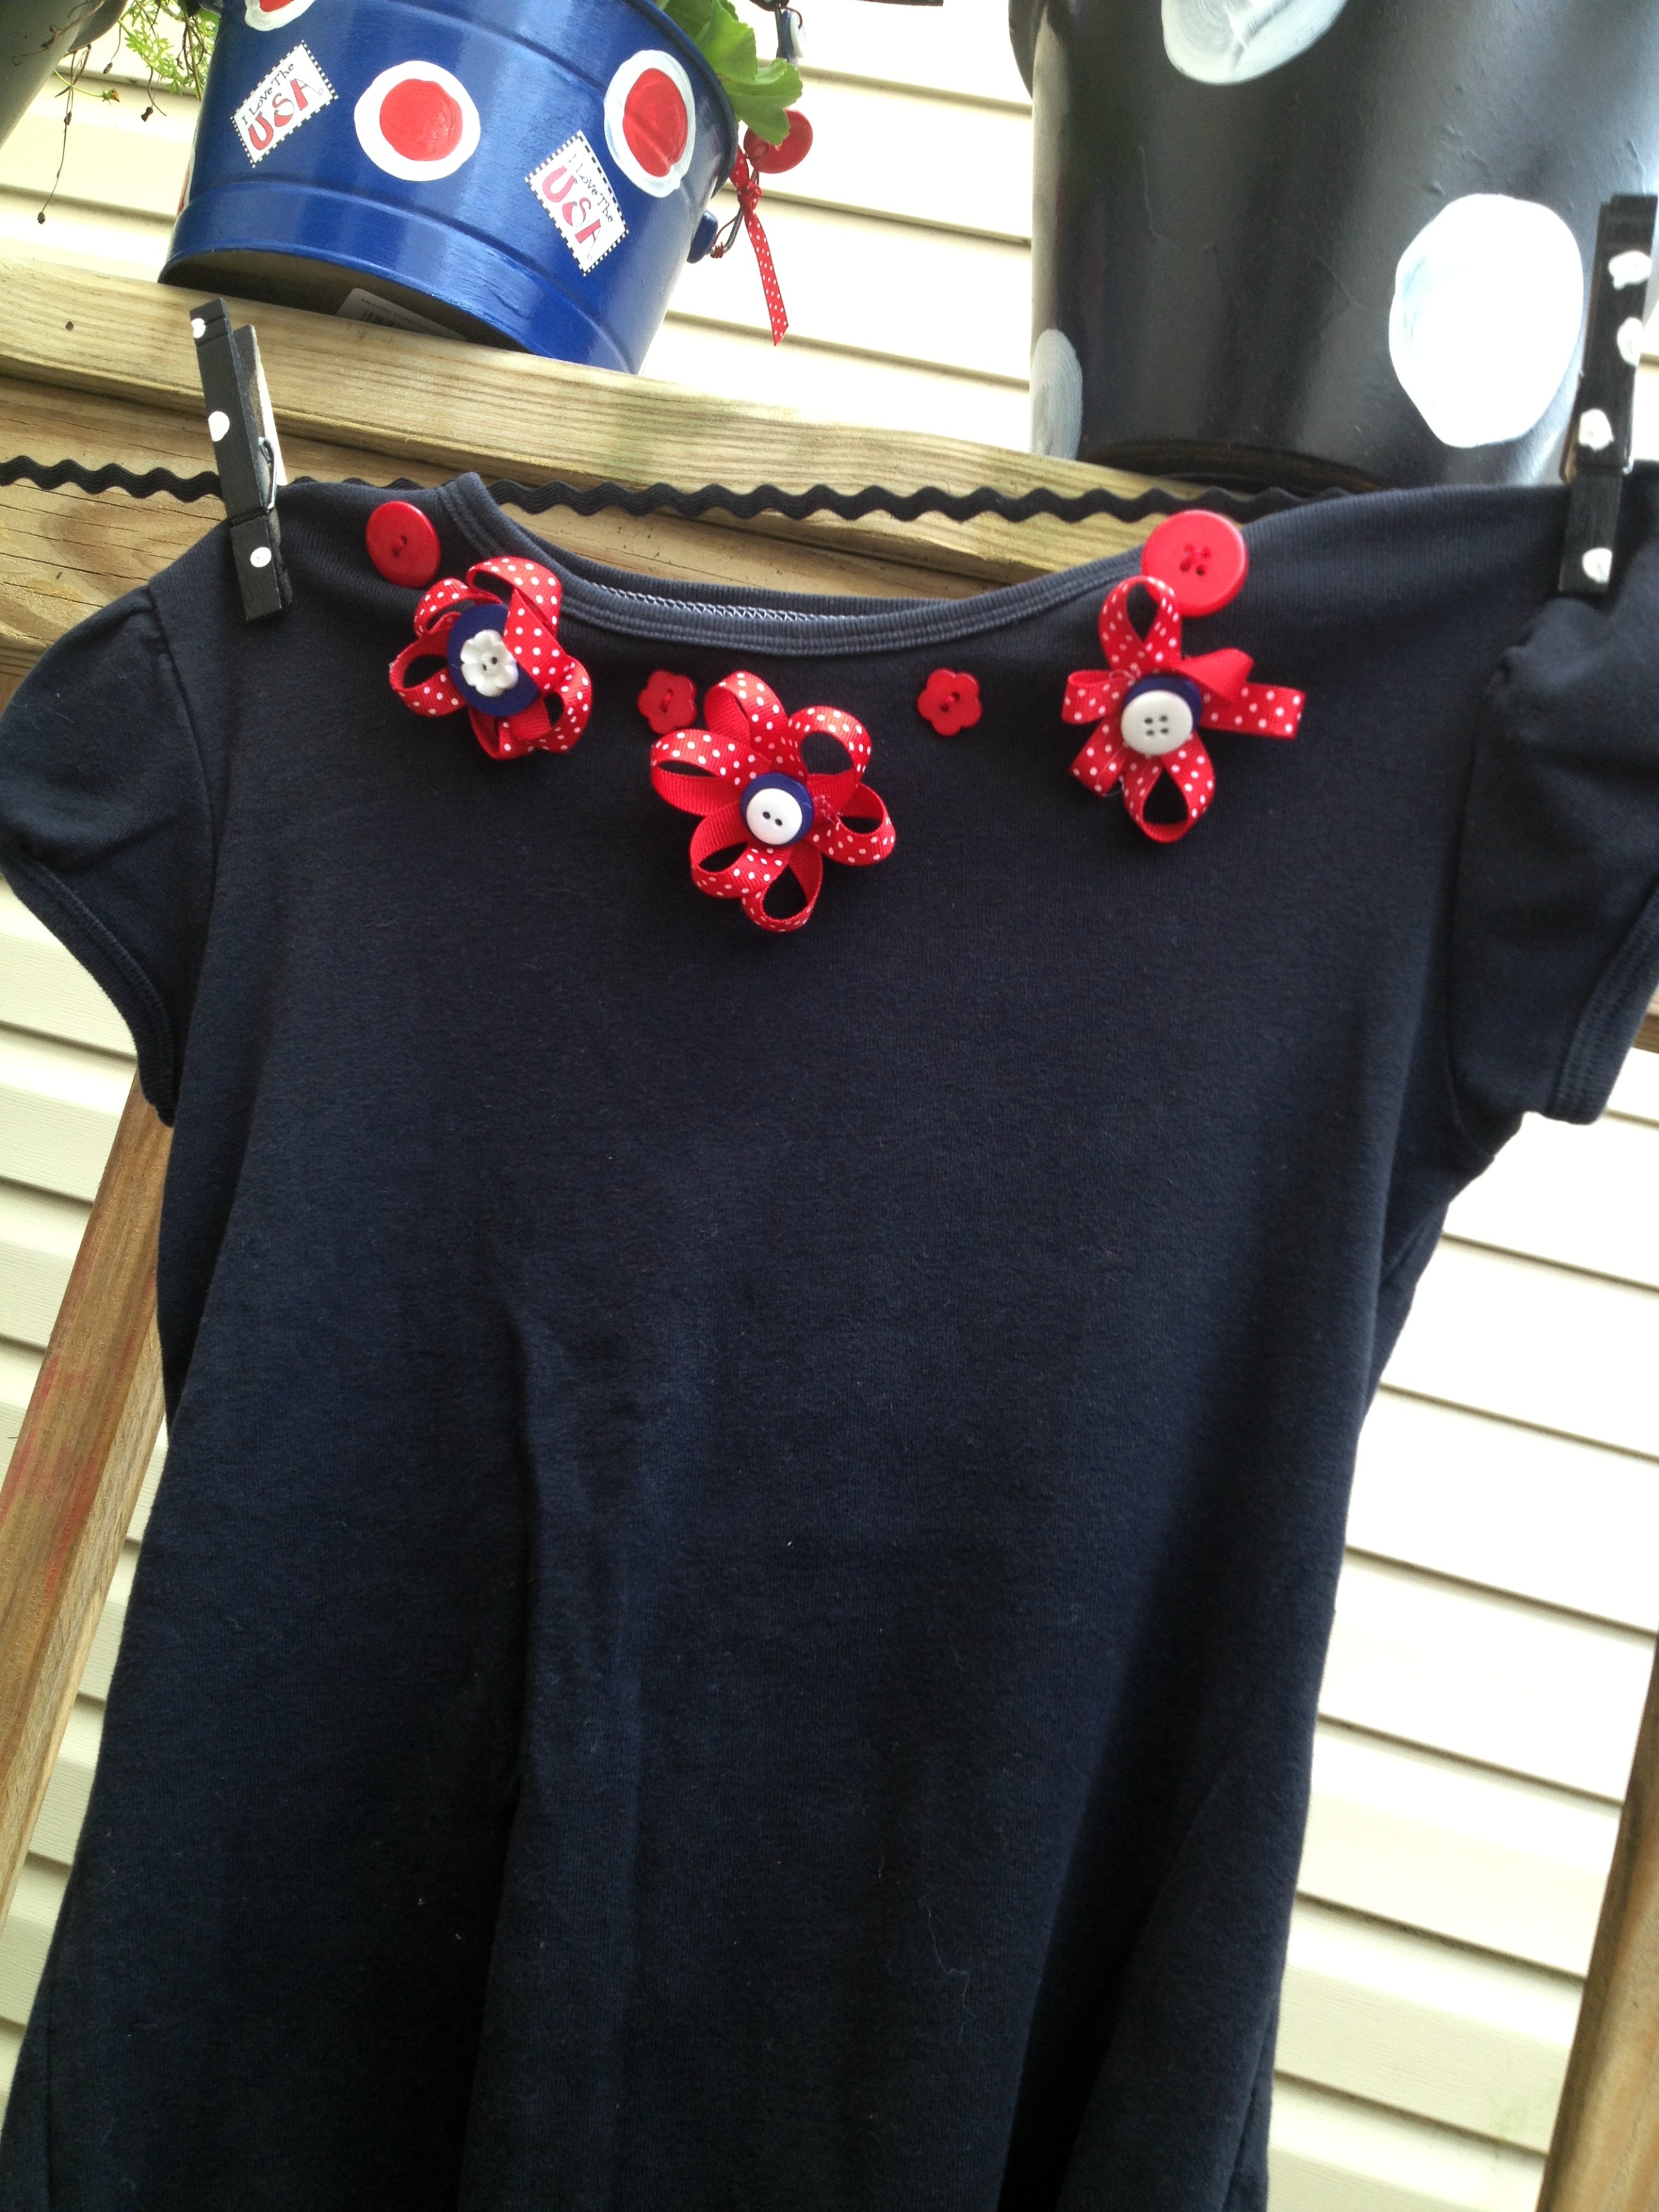
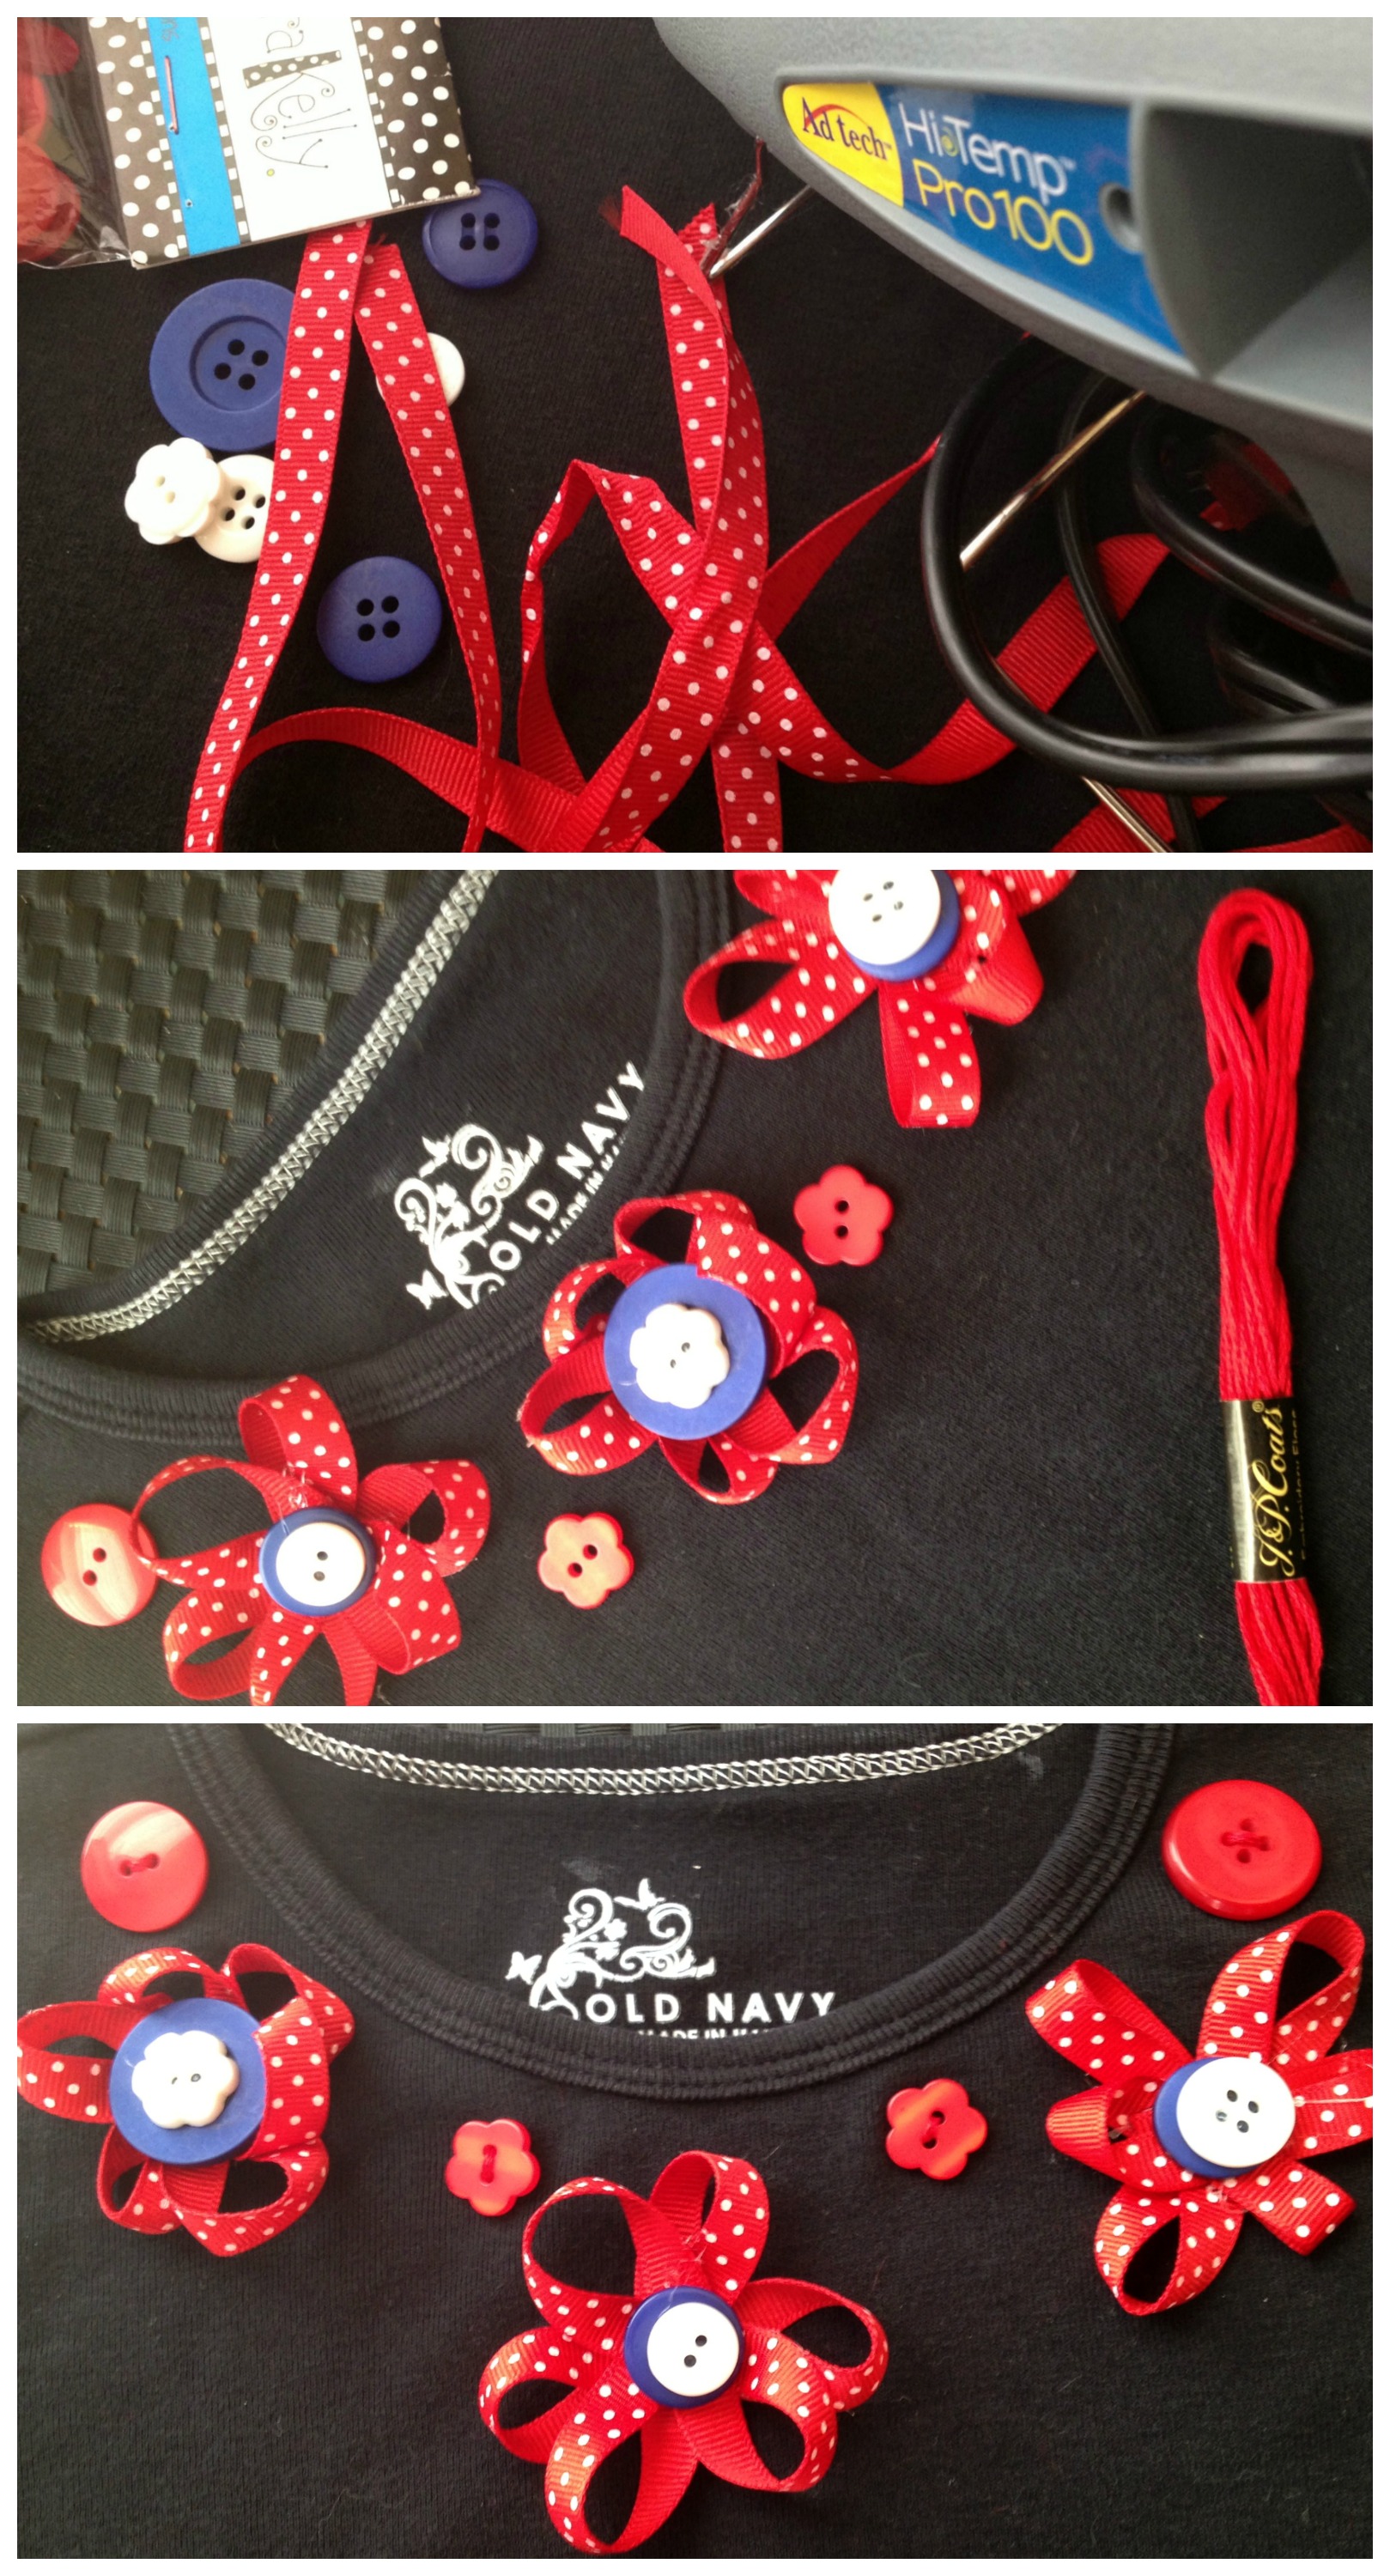
You only need a few things…buttons (Laura Kelly’s patriotic mix is best), embroidery floss (Coats and Clark is my favorite), HOT glue (Ad-tech of course) and ribbon.

Make the ribbon flowers with button centers using your HOT glue. It works best to do the ribbon part first and then add the buttons at the end. Then sew them and additional buttons around the neck of the shirt. If you want to go button crazy, you can sew red, white and blue buttons all of the shirt to look like polka dots.

If you like the shirt and you want an additional patriotic button craft idea to upcycle these denim shorts, visit Laura on her blog for directions.
If you want to win this prize, (buttons in an awesome Viewtainer, Beacon Zip Dry, and a Laura Kelly notepad with a Sharpie, go like Laura on her Facebook page or post a comment on this blog and you will be entered!

Happy Creating using BUTTONS, imagination and LOVE.
Cheers,
Laura
Having a BBQ on the 4th of July is as American as apple pie. But who wants to get their cute summer clothes stained with BBQ sauce? Here’s how to make a BBQ apron. It’s perfect for either a guy or gal, depending on who is the BBQ master in your house.

Supplies:
Directions:
1. Cut a piece of fabric into a 6 1/2″ x 5 1/2″ rectangle. This will be the body of your flag.

2. Place the fabric on your apron. Pin it and sew it down. I left my edges raw for more of a folk art look. Laura Kelly’s 4th of July Fabric already has stripes. You can slice up the stripes and sew them down individually or just sew down the entire rectangle and then go back and quilt along the stripes.
3. Cut a 3″ x 2 3/4 inch rectangle from the felt. Pin in place in the top left corner of your flag and stitch down.
4. Arrange white buttons in the felt rectangle to represent stars and sew them on.

5. Add red & white buttons by the top ties of the apron.
Wishing all my fellow Americans a Happy Fourth of July!
![]()
A Party without buttons and bright colors, well that’s hardly a party to me!
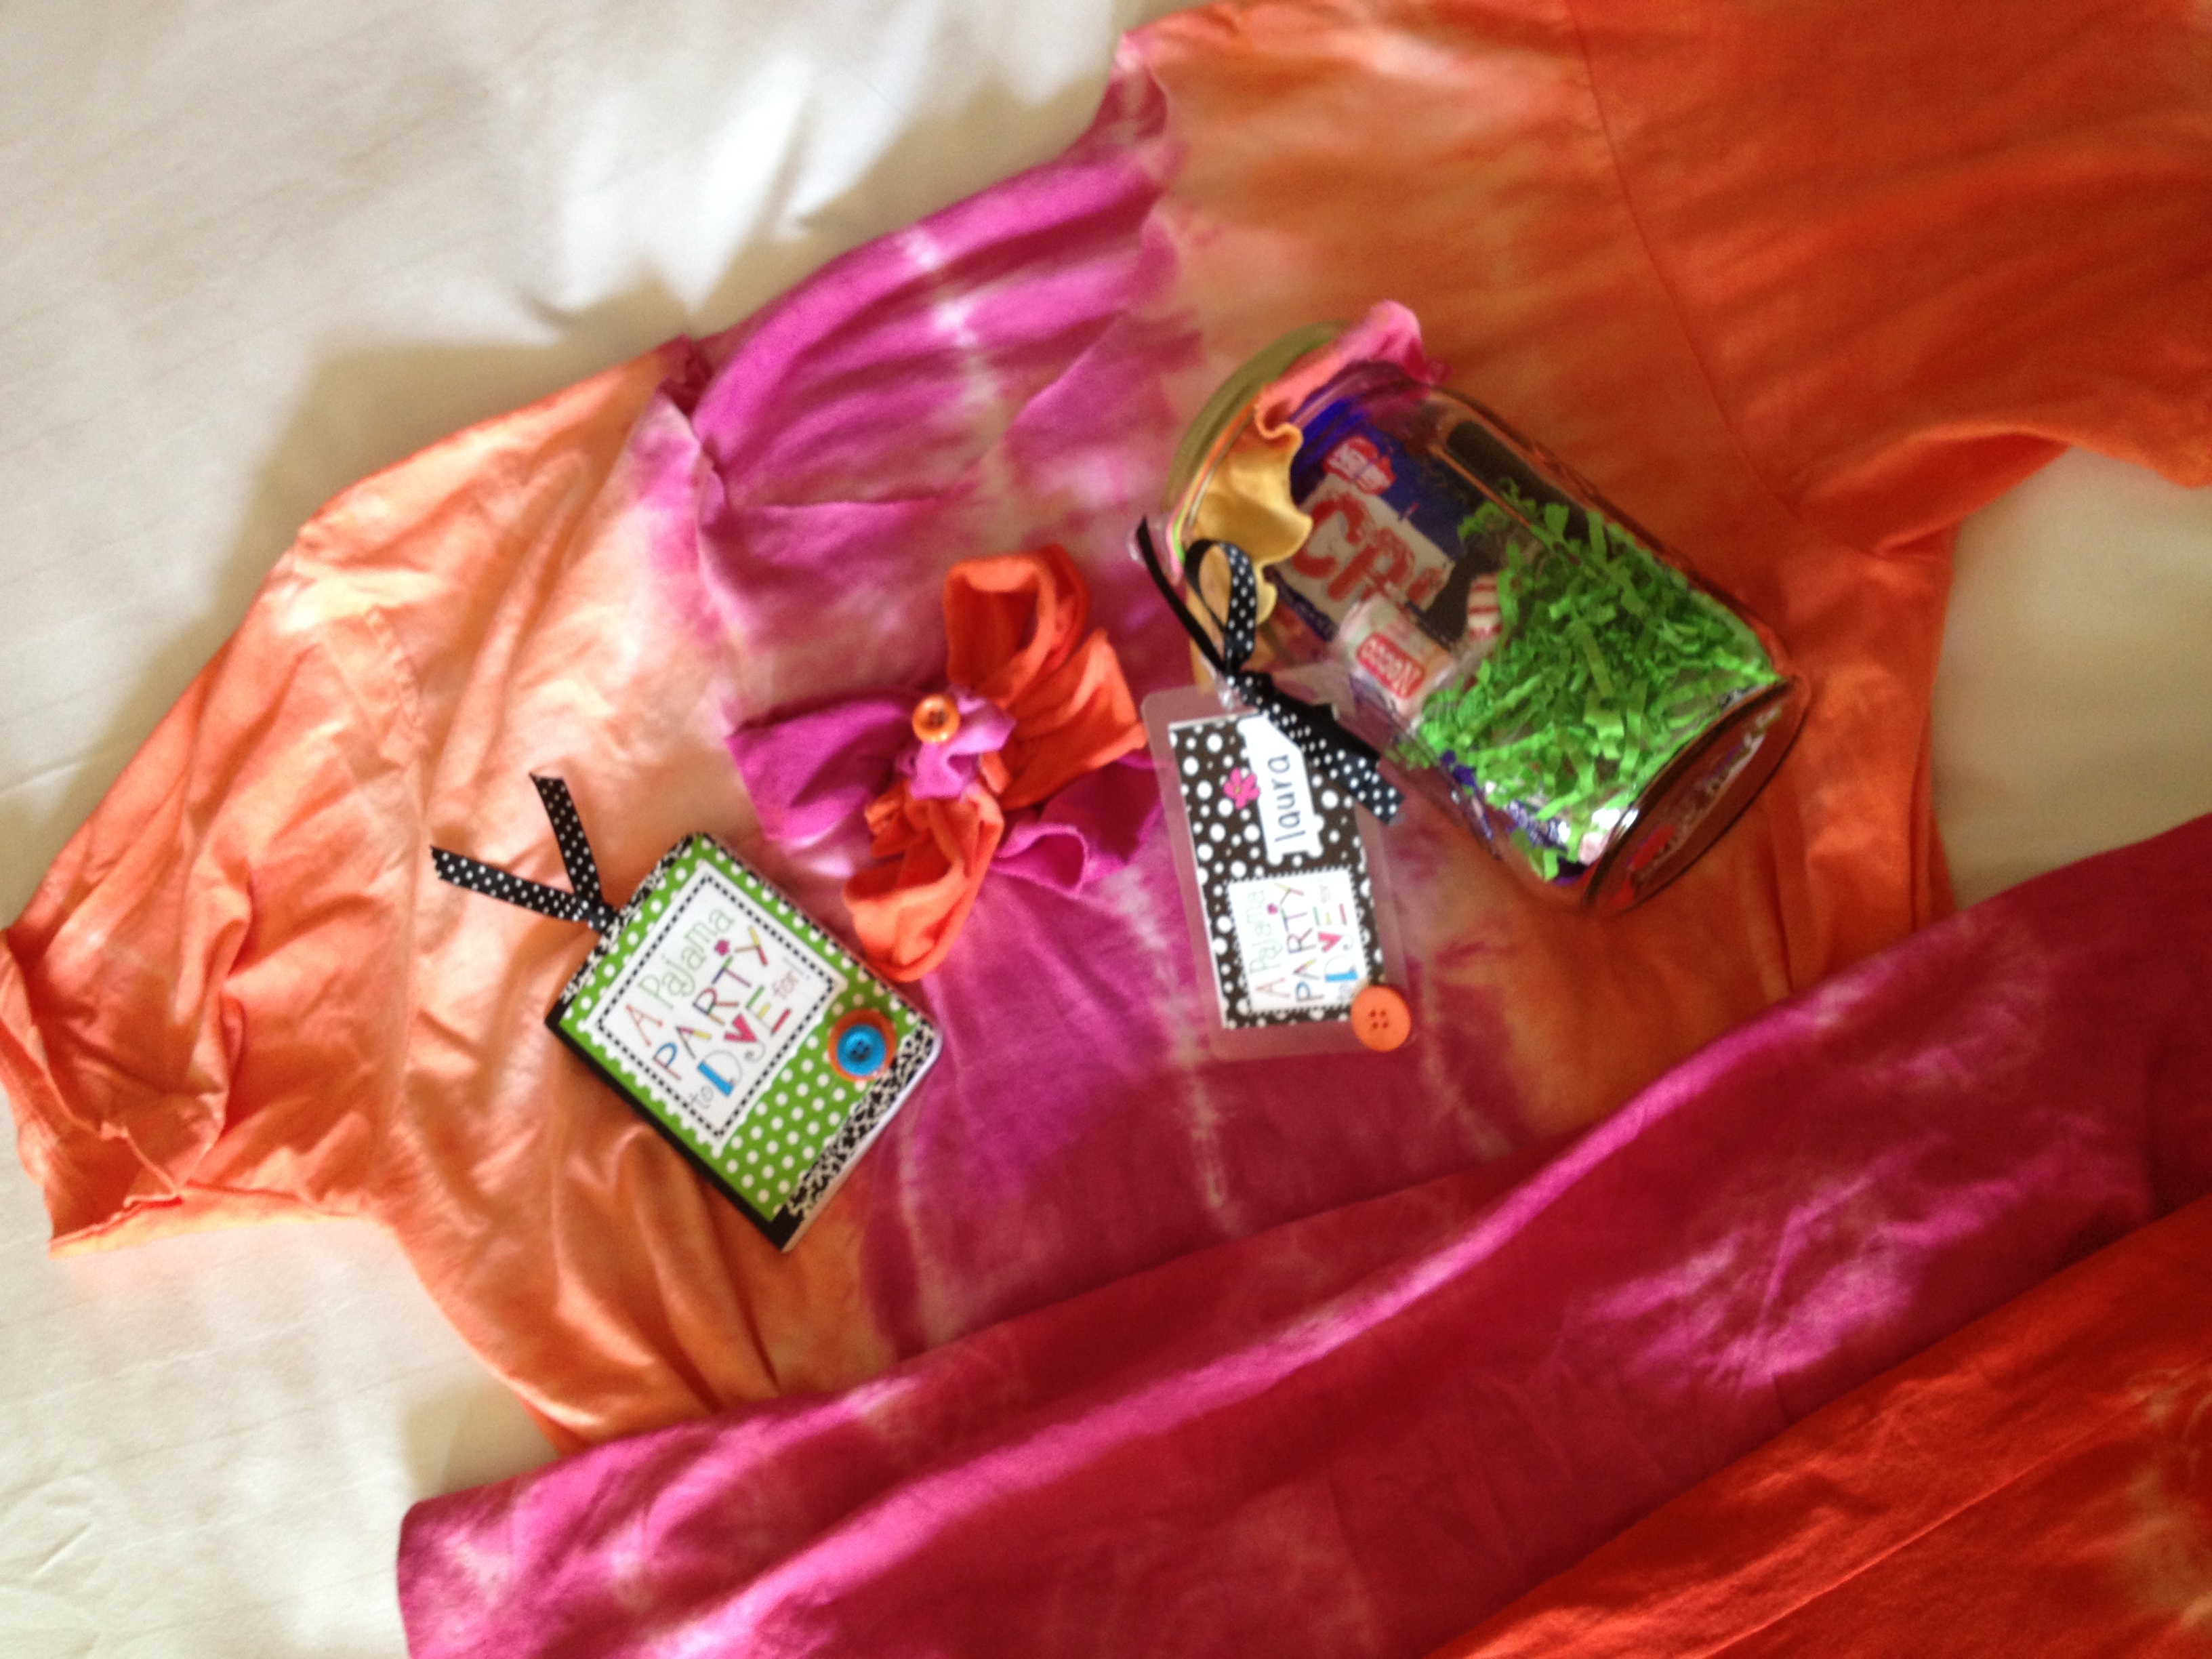
Several of the Buttons Galore Design Team members and myself participated in a “Pajama Party to DYE For” this week with some fantastic creative new friends from Rit Studio. I created and brought the goody bags and, of course, added bright Laura Kelly Buttons to the elements in them. They ended up being a part of the party! Here are a few pictures from the creations being made.
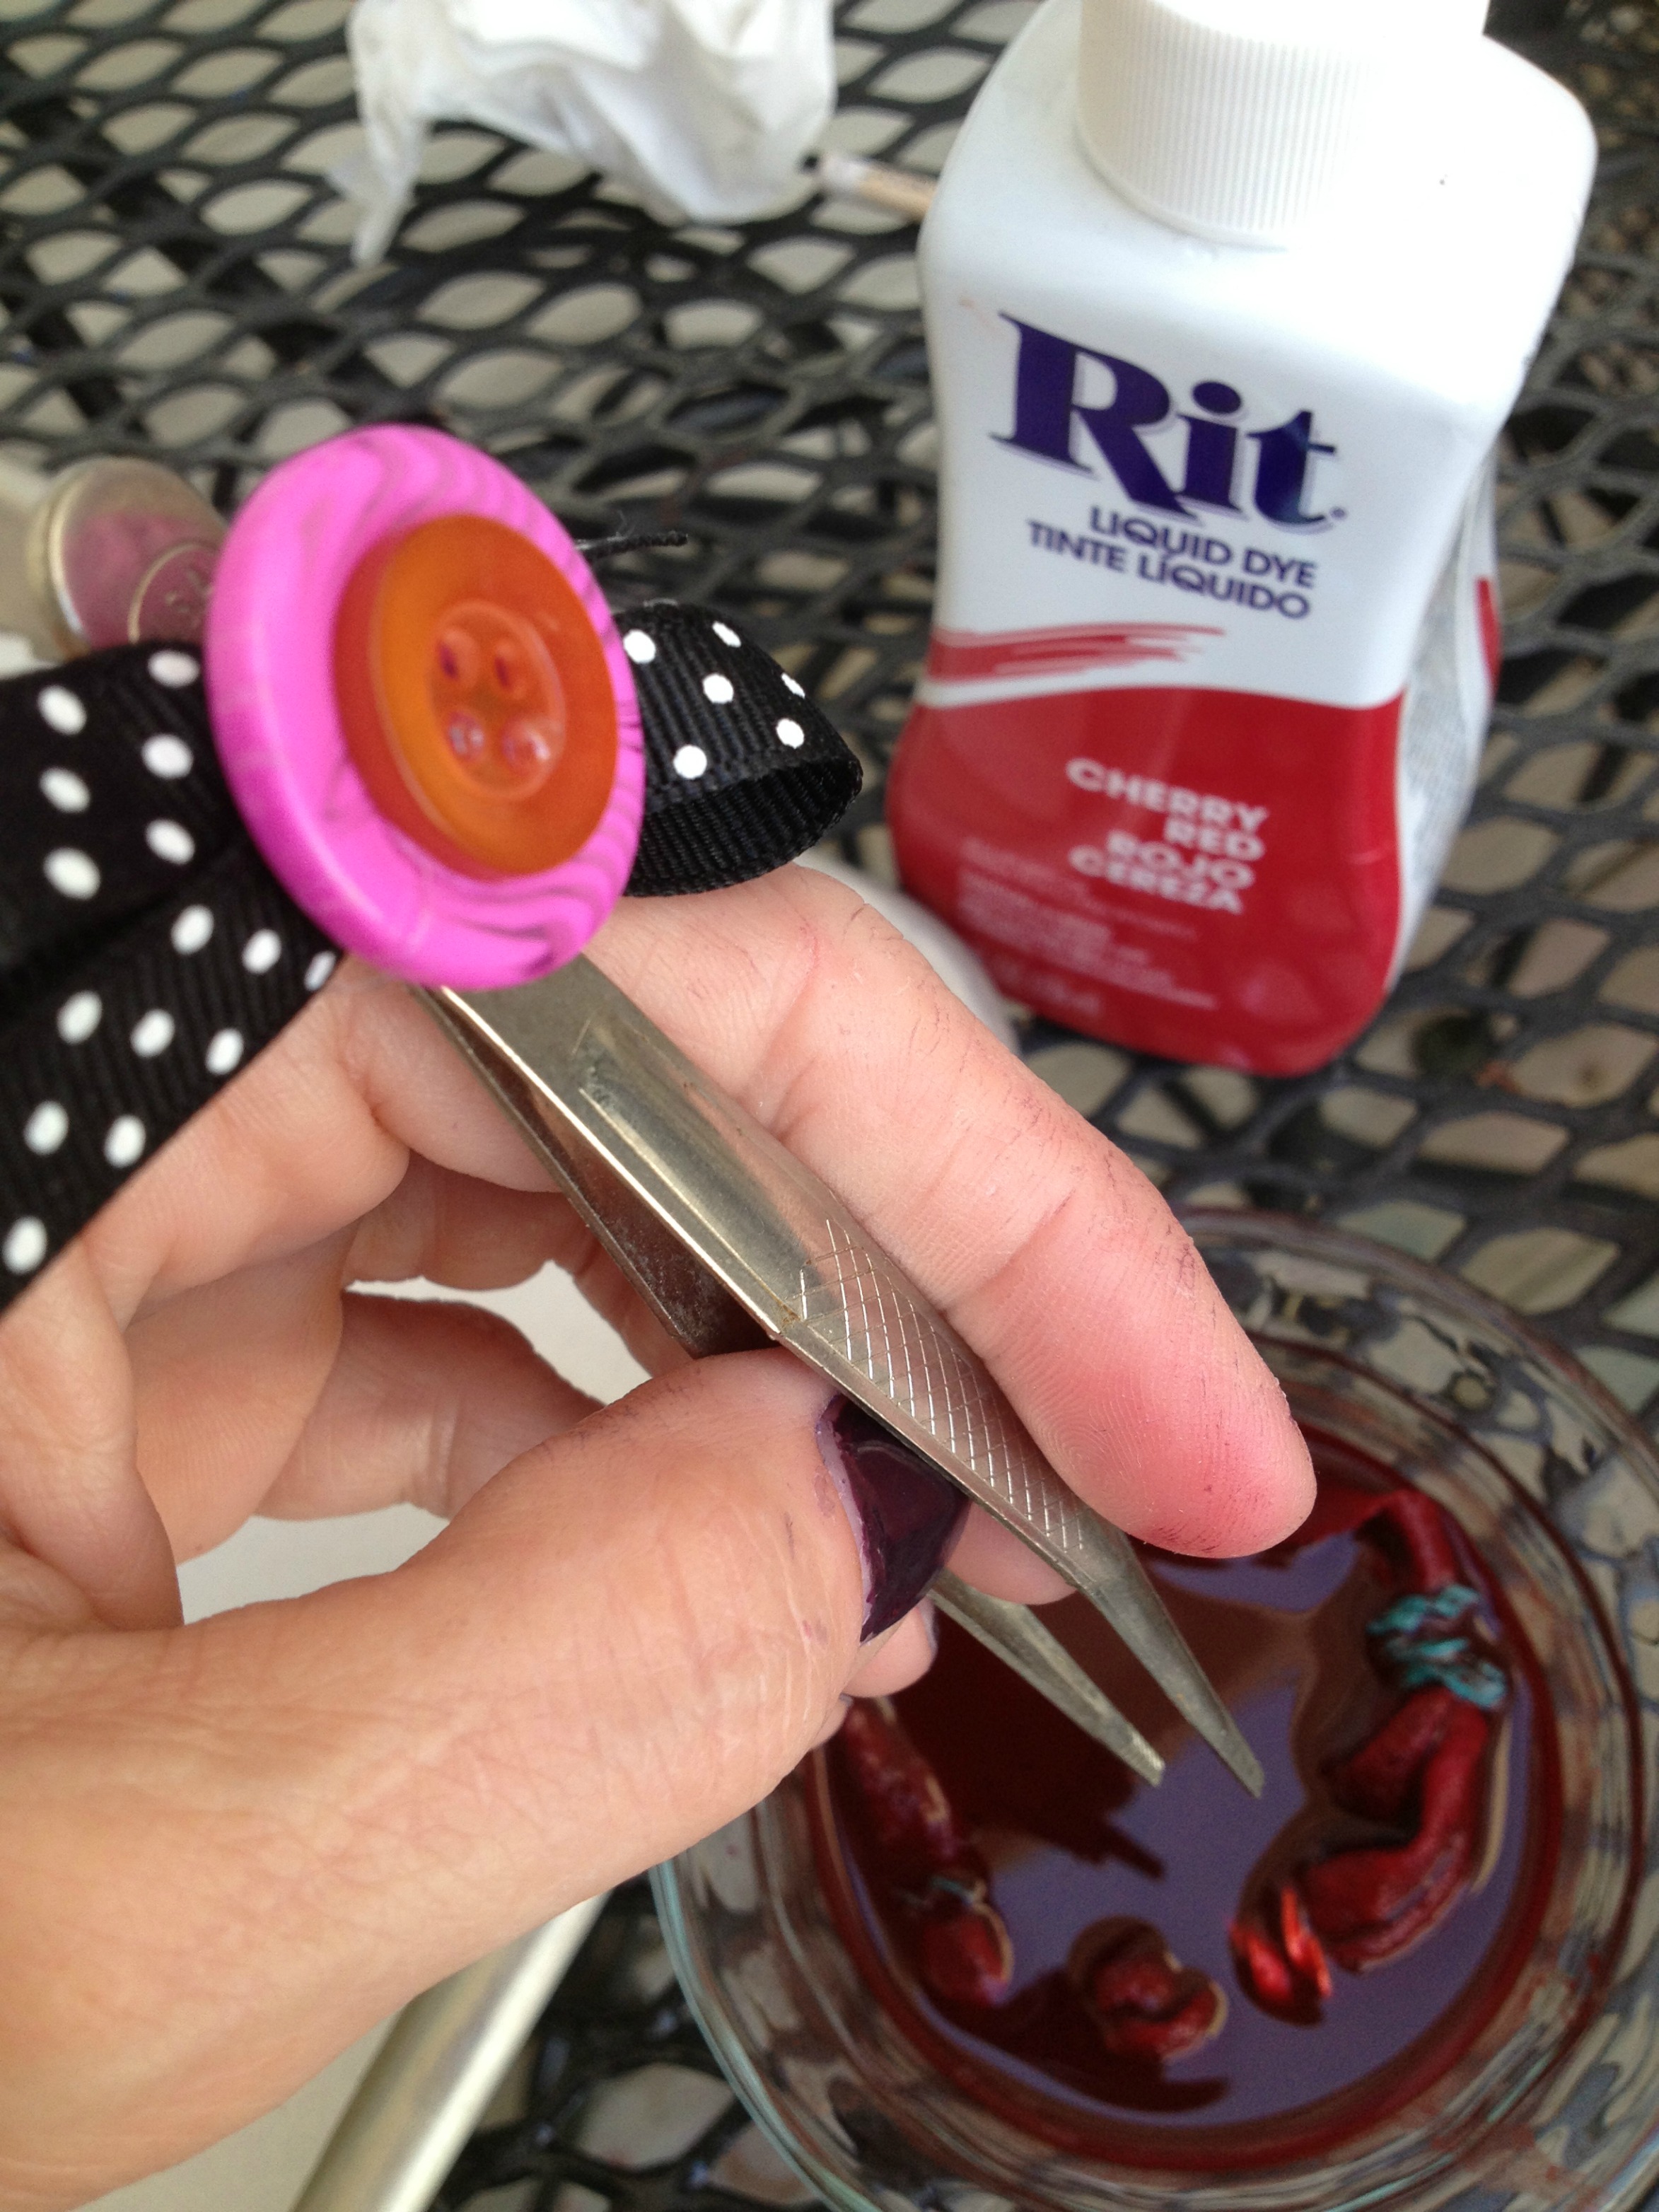
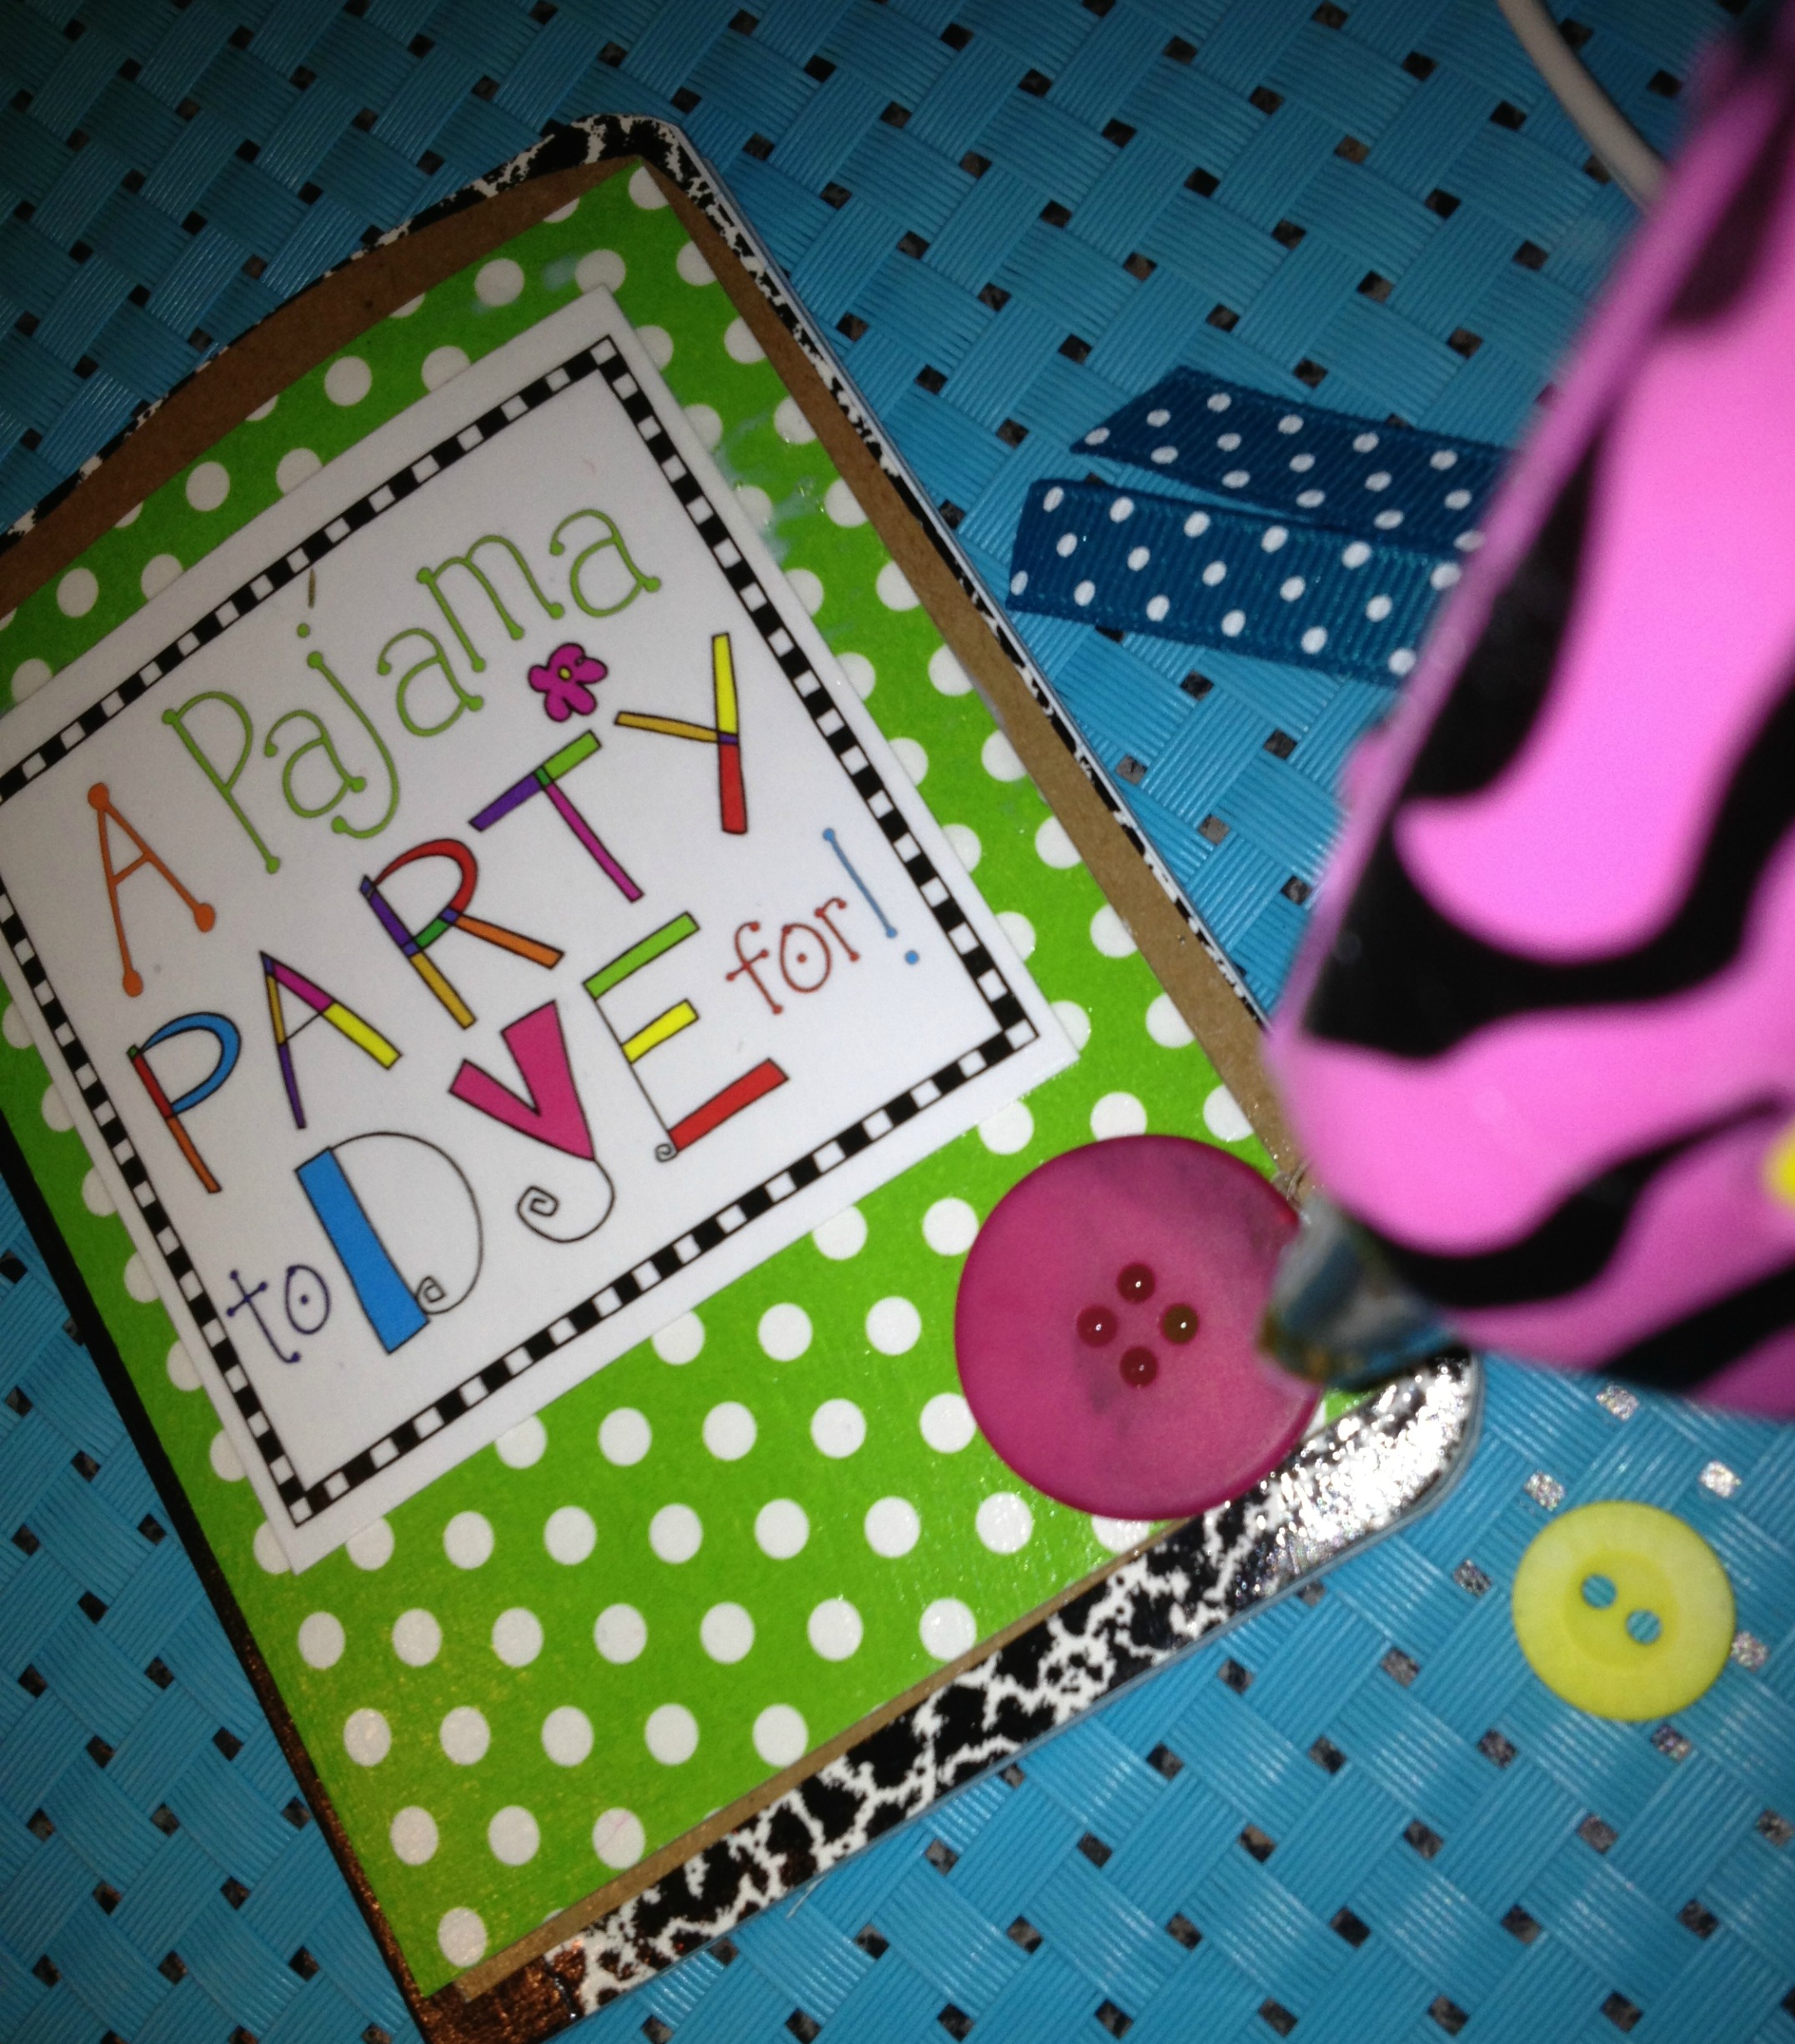
Yes, those are buttons on my tweezers and buttons on the mini journals.
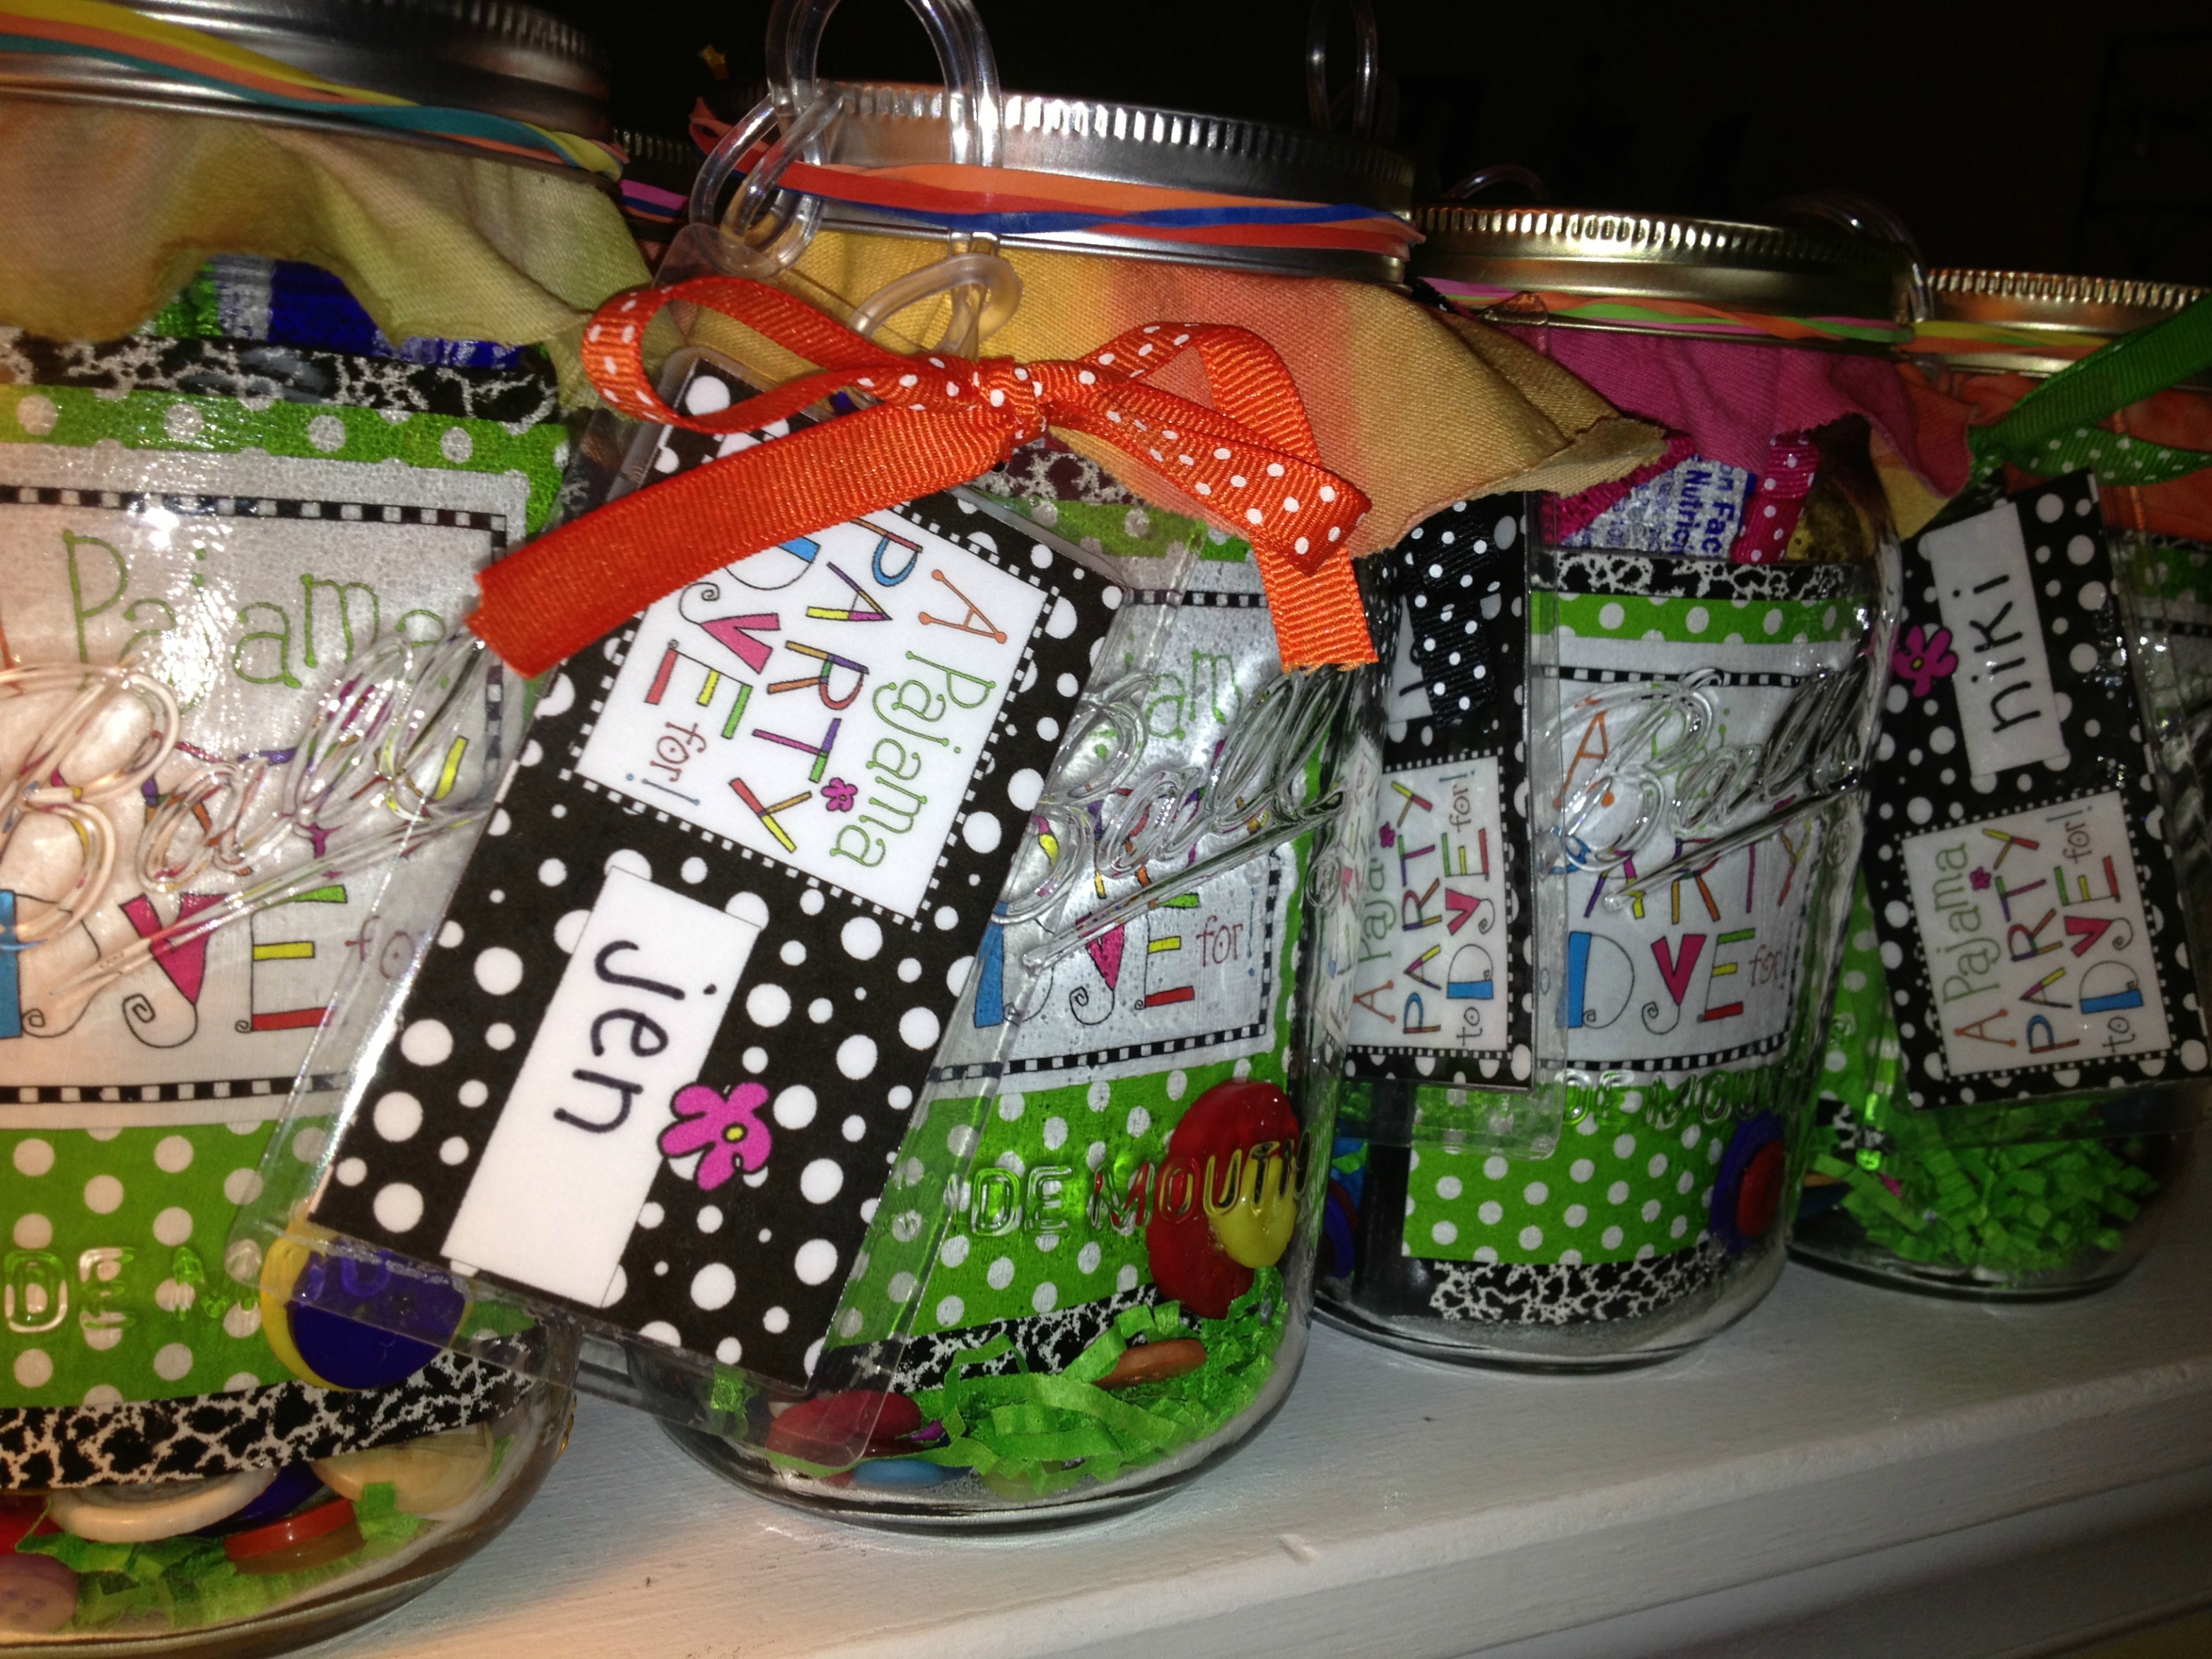
I added buttons into jars too, just in case we wanted to use them at the party.
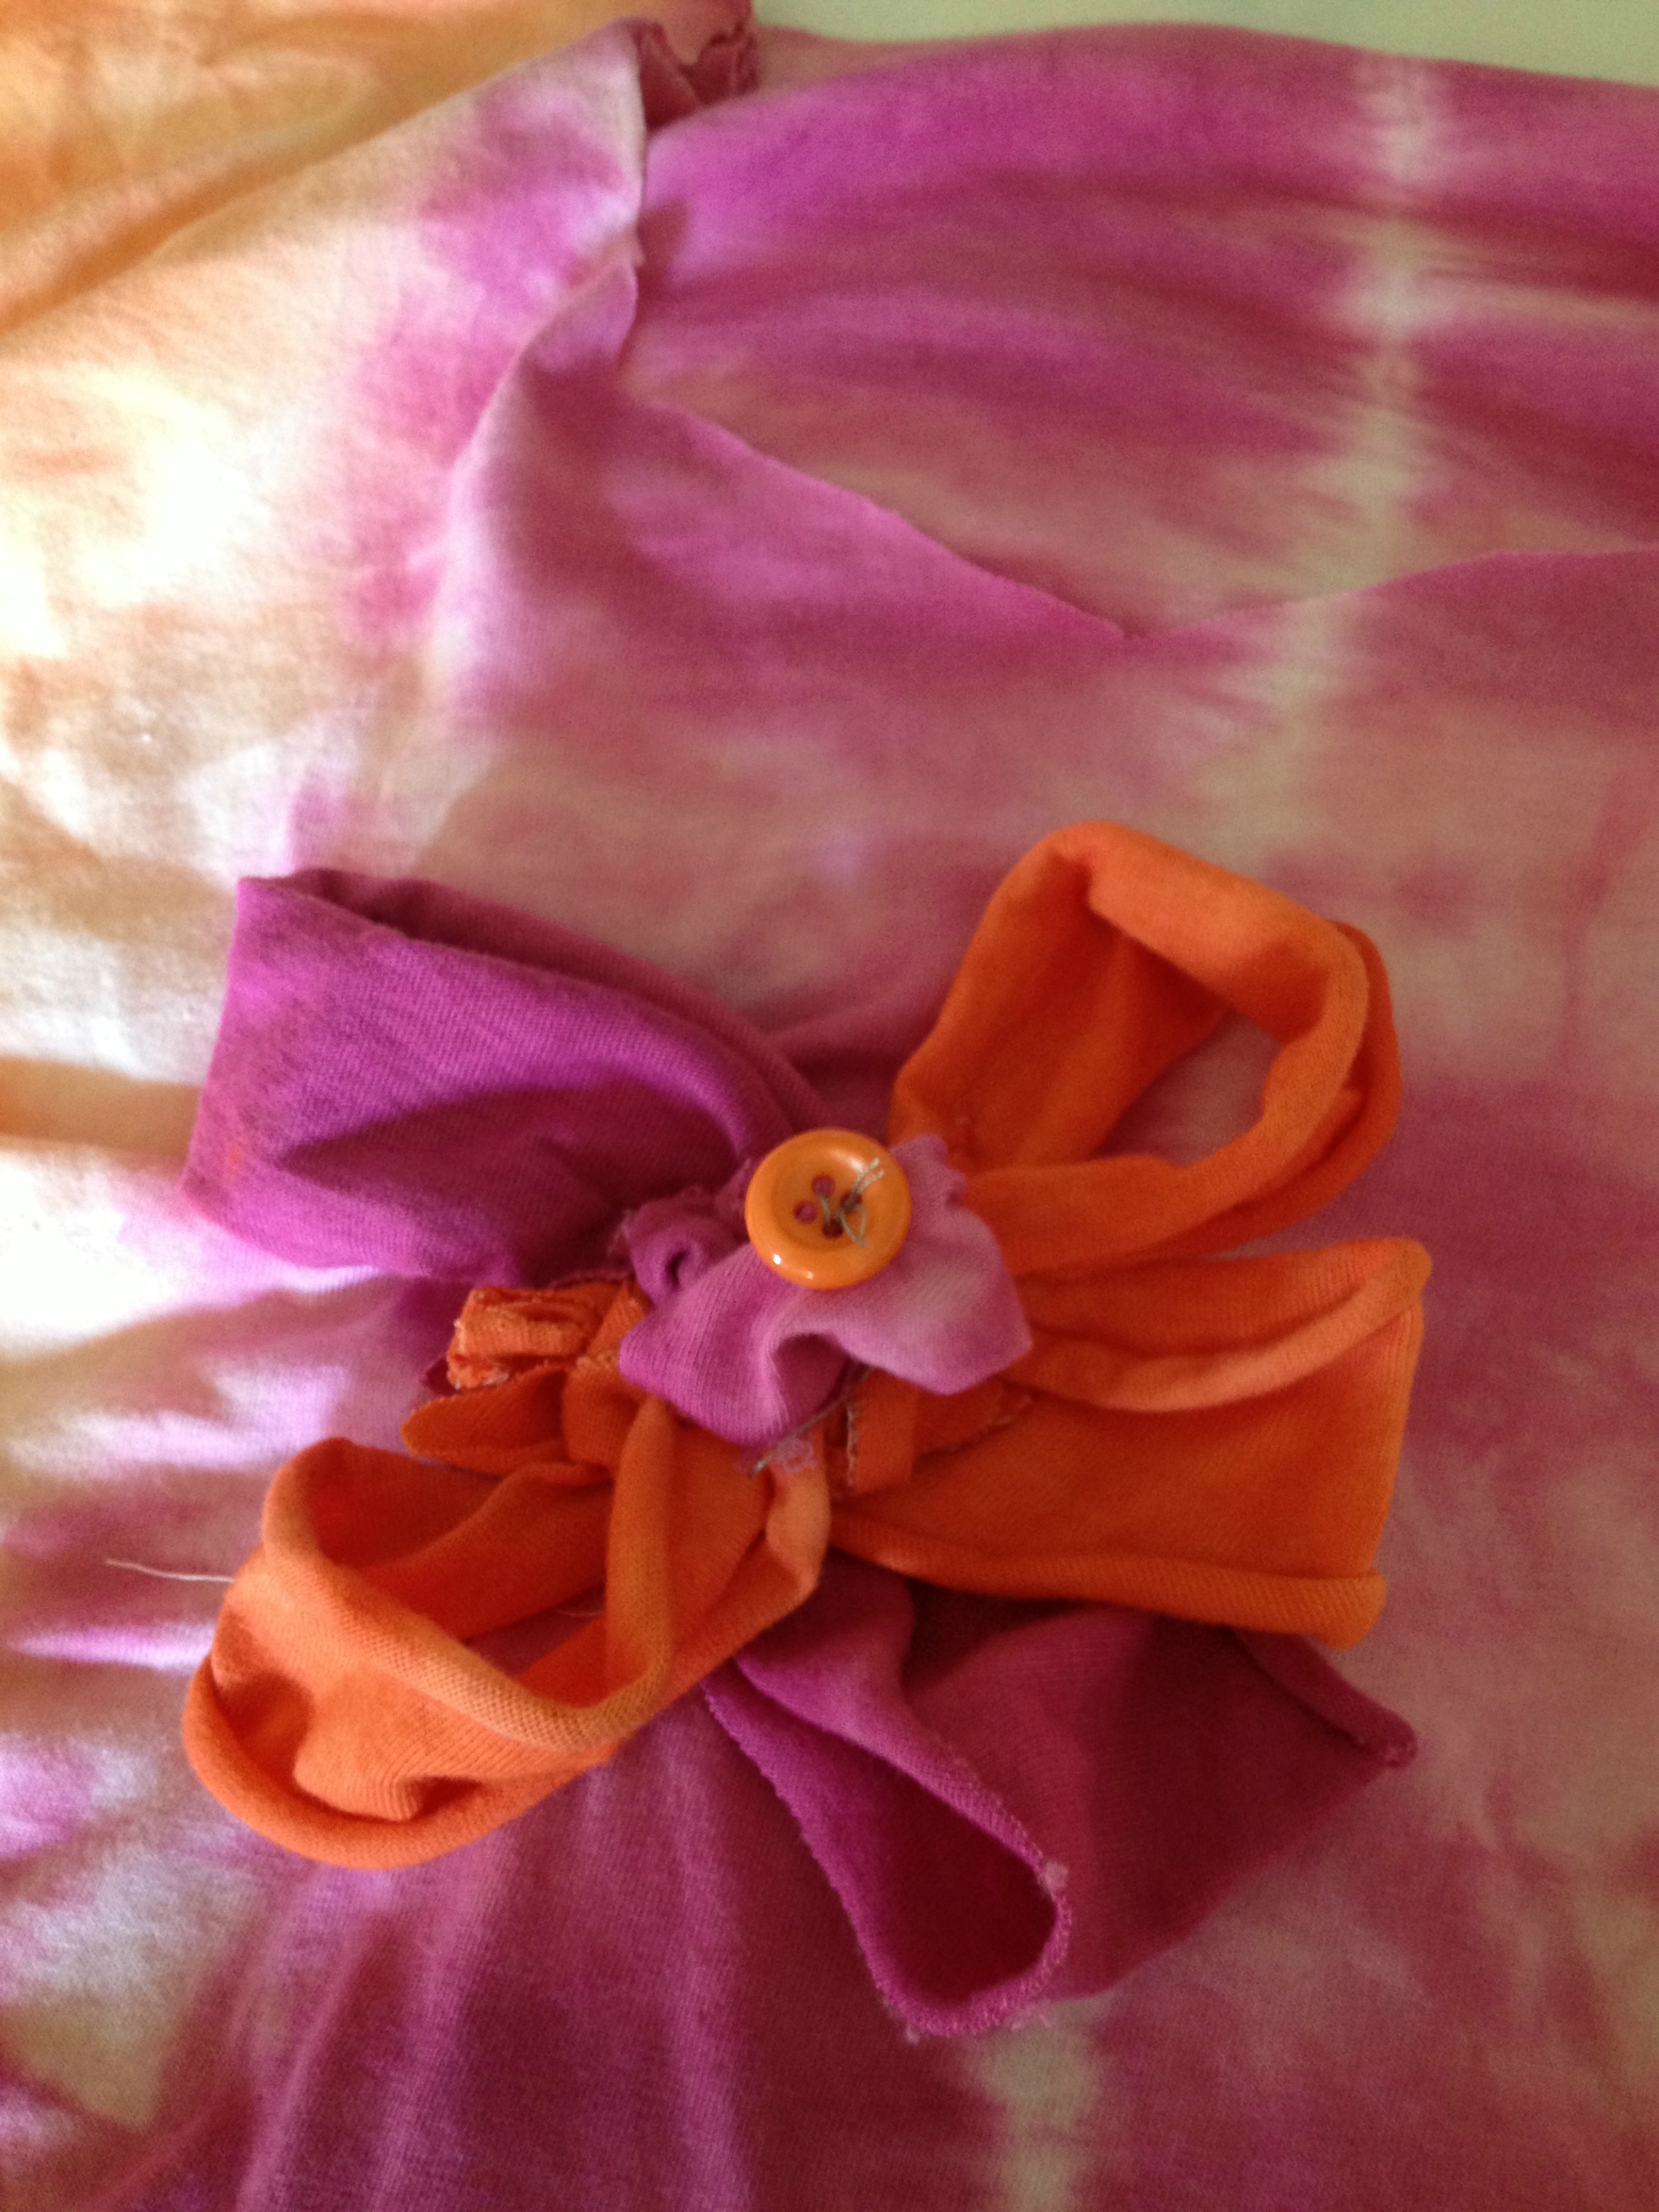
Which we did. I sewed a scrap flower from my dyed PJ remnants and added a button center. The tearing of the fabric, sewing of the ribbon and adding the button took me about fifteen minutes! I think it came our really cute and can’t wait to wear them! It just goes to show, a party just isn’t complete with dye and buttons! It was a BLAST and then more fun on top of that.
To learn more about our celebration of creativity and color, search the hashtag #pjrit around the web and see what you can find.
Happy Adding Buttons To Your Parties!
It’s so easy to make hair accessories with buttons. My daughter has long hair and the start of summer means lots of ponytails! I stitched up a couple of super cute ponytail holders for her using buttons and hair elastic. It’s a great project to do together. I just pulled out my button jar and let my daughter pick the ones she loved and then I quickly stitched them up for her. I have to admit, the wood button hair accessories are for me! I couldn’t resist the look of them.

Supplies:

Directions:
1. Hand stitch the button onto the elastic.
That’s it! You can make dozens in a an hour. They would be great to make for little girl party favors.

To make these ponytail holders, it’s better to use buttons without shanks. Of course, my daughter chose some with shanks. (I mean, who can resist butterfly buttons?) So I made a couple of additional ponytail holders using Jen Goode’s brilliant tutorial.

![]()
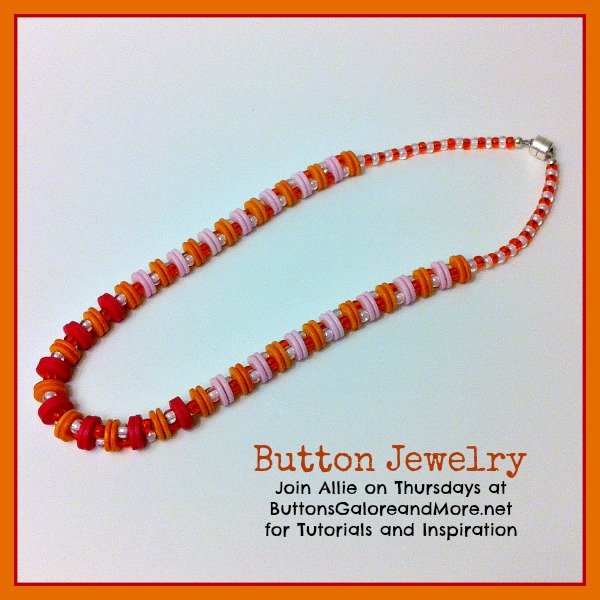
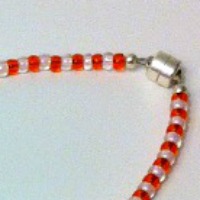
Hi, it’s Allie! It’s Thursday, time for some button jewelry, and I’m sharing a Buttons & Beads Necklace with you today.
If you have a basic understanding of stringing, this necklace is super simple!
I went with a rainbow sherbet color scheme – pink lemonade, raspberry, orange – yummy, right? I used satin finish buttons – picking out all the same size, just because … The pinks (dark and light) are from the Victorian Collection. The orange ones are from the Tutti Fruity Collection.
I used single seed beads on both ends and I strung the wire through both holes in the buttons, using a seed bead on the wire coming out of each hole. I went about 2/3 of the way around the necklace in this manner, and then brought both strands together with seed beads. I reversed the order of the seed beads after each set of matched buttons – just to add a little interest.
Simple Repetition
I finished it off this necklace with a simple magnetic closure and some crimping beads. I particularly like magnetic closures for kids – if they accidentally got caught on something, it would open. The magnet is strong enough to stay closed during normal wear.
Magnetic Closure for Safety
This would be so fun to do with the kids for summer! Are you ready for summer?
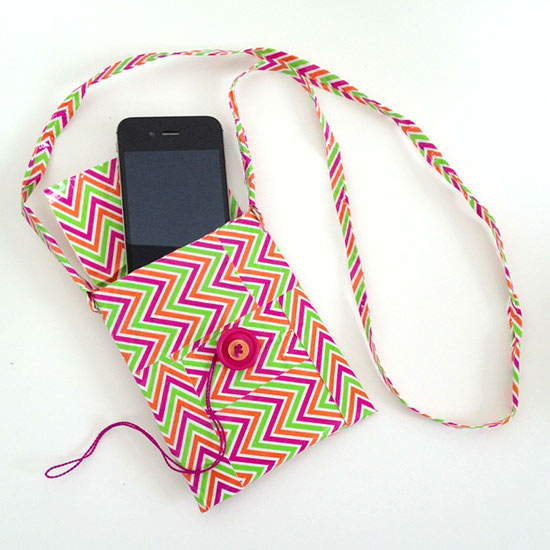
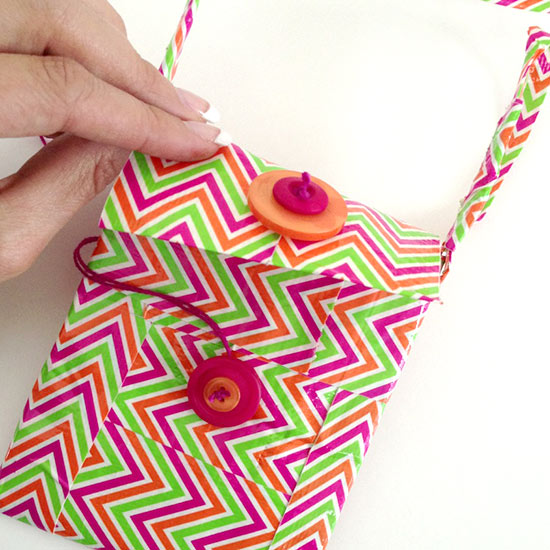
Make a Duck Tape iphone purse with buttons galore and more buttons. I was struggling with ideas to make for my projects this month featuring buttons. While I was sitting around brainstorming, I started playing with the fancy roll of Duck Tape I had and next thing ya know, I had made a mini purse. Now, I don’t have photos to share showing how I made the purse exactly. That’s what happens when a girl get crafty at 11pm with no plan. However, I’ll tell you how I did it.
I used buttons to create the closing feature on this purse. I hand stitched these buttons in place so they would be more sturdy than a simple adhesive attachment. I think it would be fun to sew extra embellishments and designs on the purse too.

Duck Tape cell phone purse
Make your own iPhone purse
Materials I used:
– no kidding, that’s it!
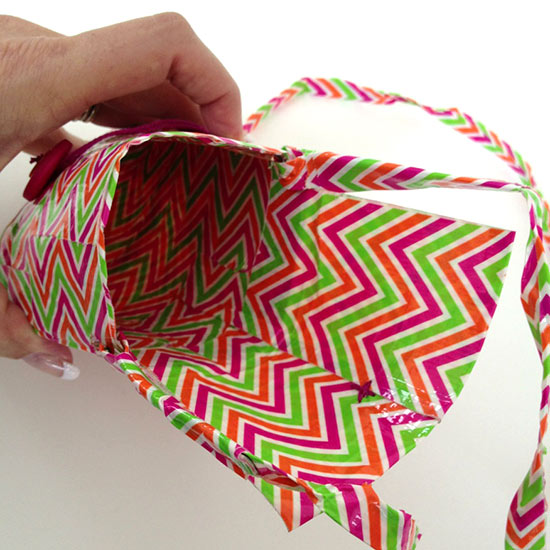
iPhone purse pocket
iPhone purse flap
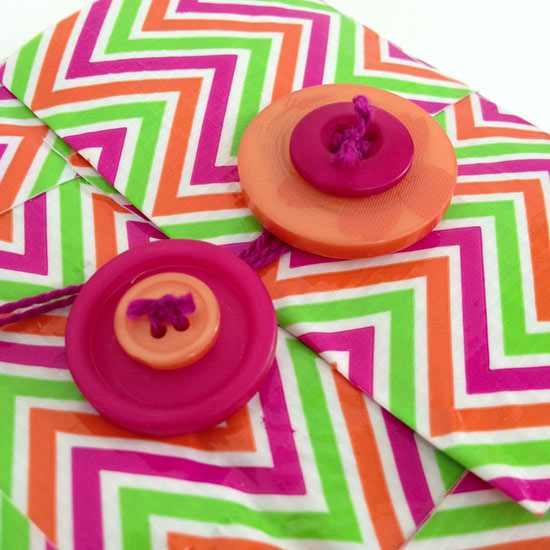
iPhone purse button closeup
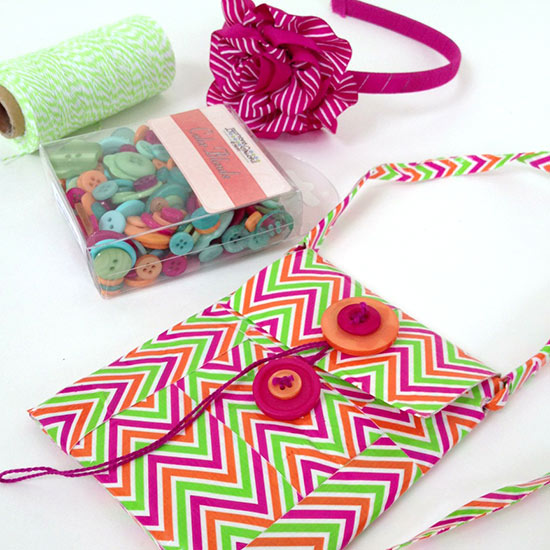
Fun colors to make your own iPhone purse
I always carry a super small purse, so you could use this as your wallet or add more pockets to carry more little treasures. I think it would be neat to add a few different Duck Tape patterns too. Get creative with the Duck Tape to make your own fun purse. I’d love to hear what you come up with!
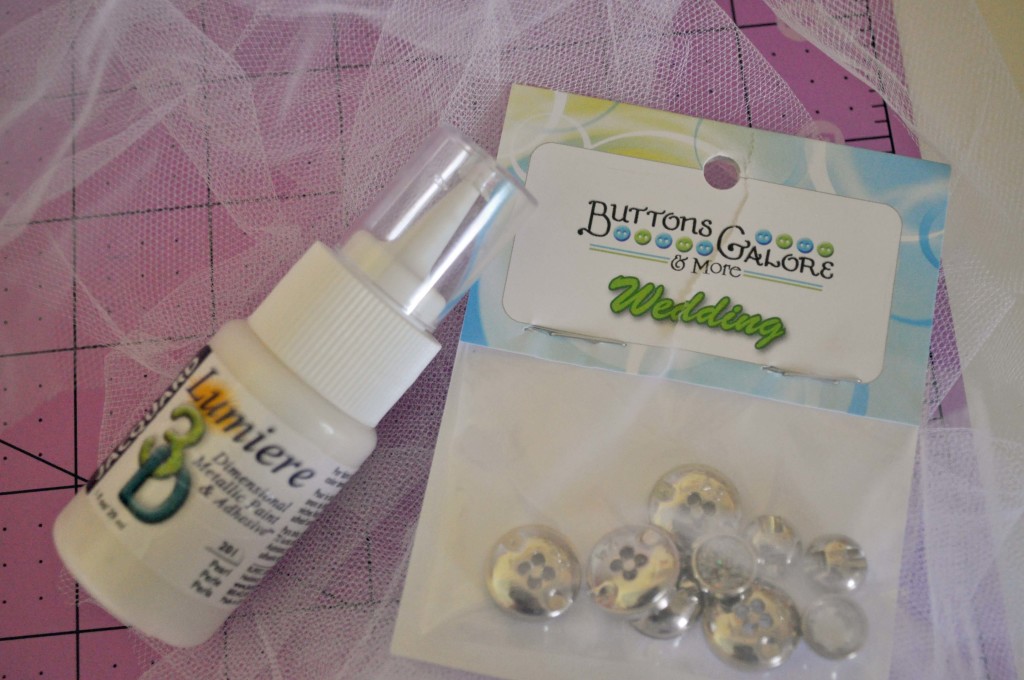
Something borrowed, something blue. This cute, DIY bridesmaid headband is perfect for your wedding. I love the “Tiffany” blue of the ribbon and the Buttons Galore & More Wedding Glitz buttons give it lots of sparkle. This headband is a great wedding project. It would look great on your bridesmaids, flower girls, or even as a alternative to a veil for a bride.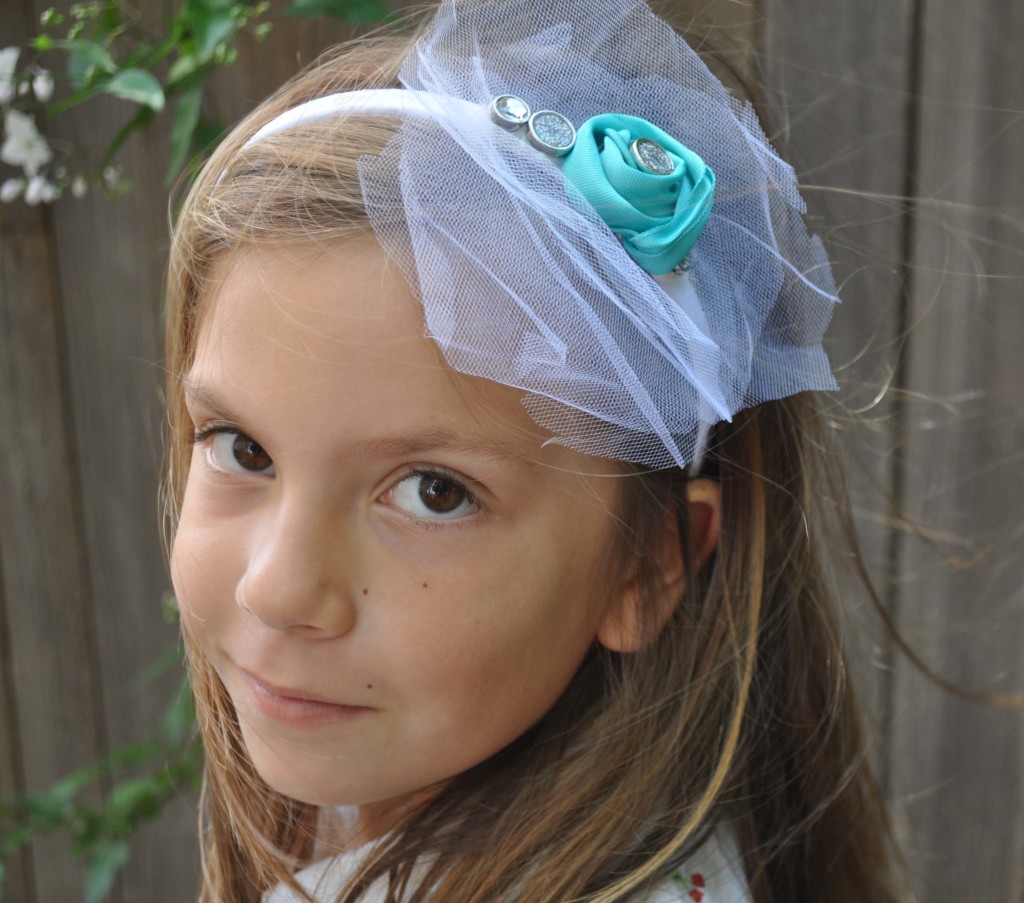
1. Using scissors, cut 3 circles, measuring approximately 6 inches in diameter, from the tulle. This doesn’t have to be perfect! Cut them freehand and let the edges be a little ragged. This will give the headband a soft, romantic look.
2. Cut 12 inches of ribbon. Twist and roll it into a flower shape.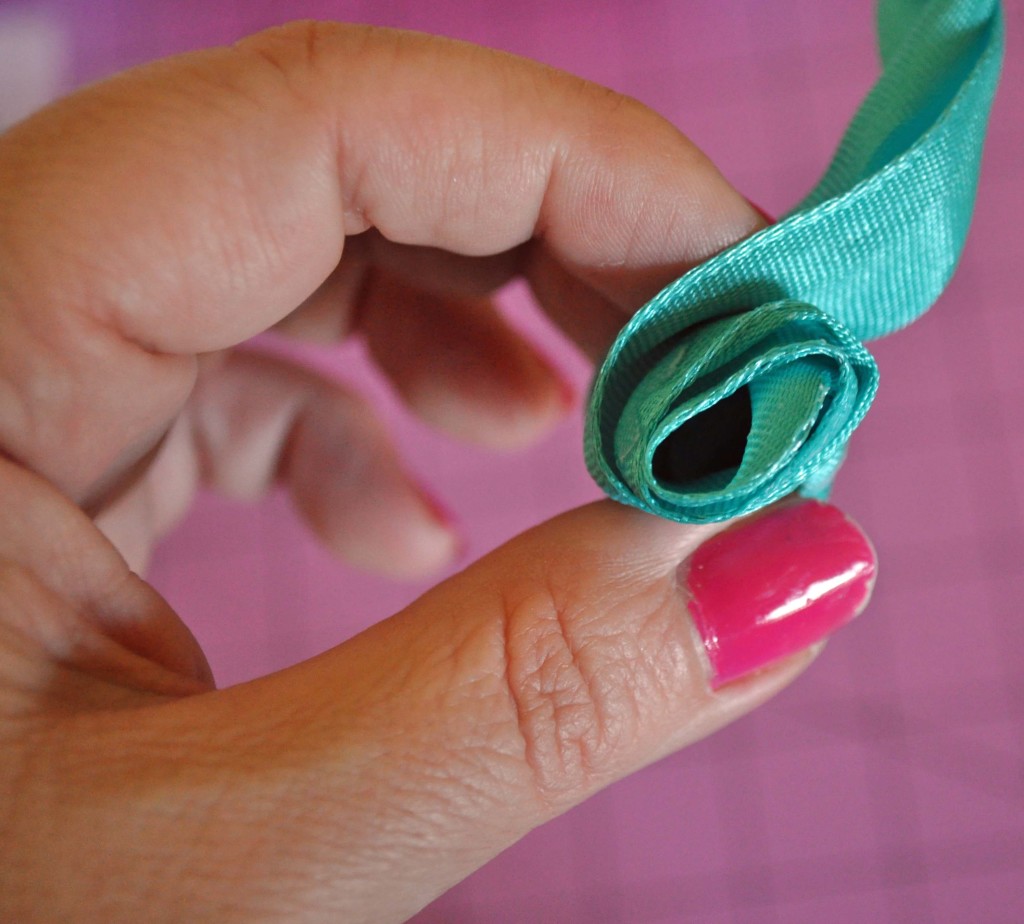
3. Using the Lumiere paint, apply a dab of glue to the side of the headband and attach the tulle circles to the headband. It should be placed 1-2 inches from the top, center of the headband.
4. Again using the Lumiere paint, attach the the ribbon flower and some additional Wedding buttons to the headband over the tulle. Add as much or as little bling as you like!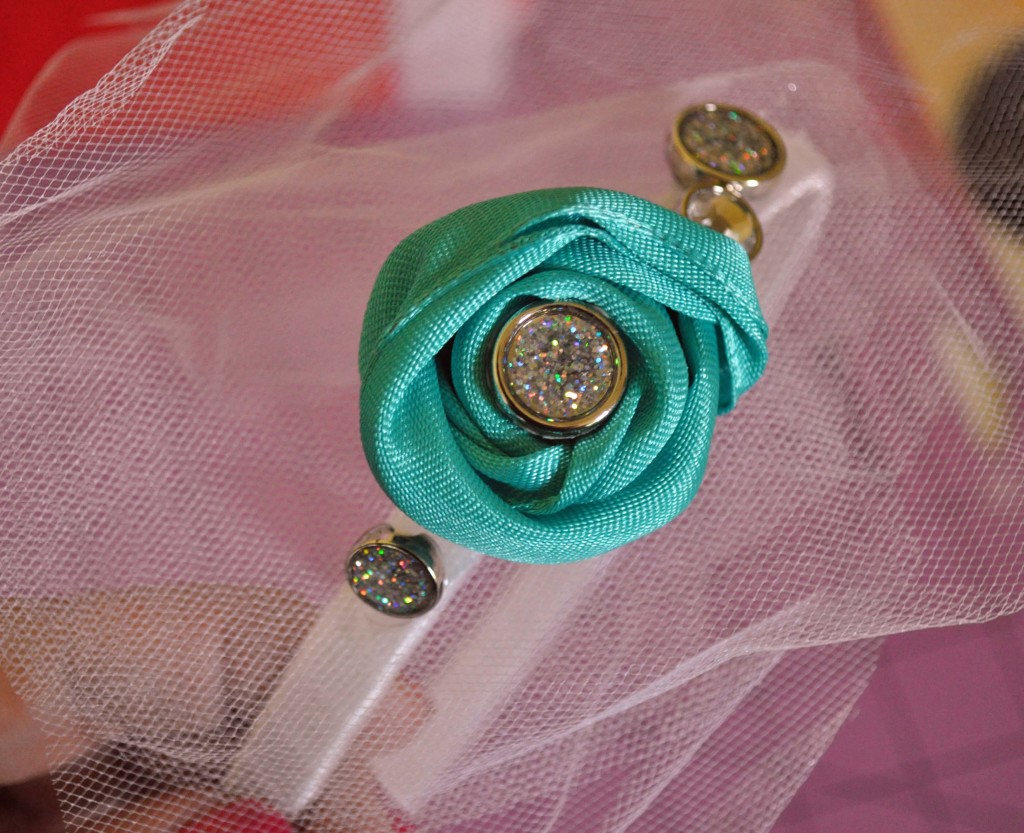
Tip: Lumiere 3D Dimensional Paint works great for this project as it works as both a glue and design element. When the paint dries it gives you a 3D pearl effect-perfect for a wedding.
![]()
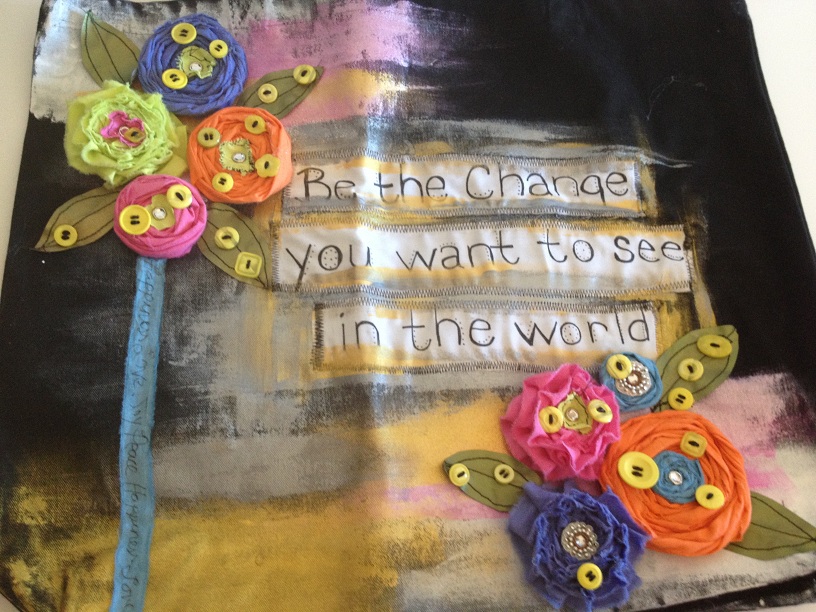
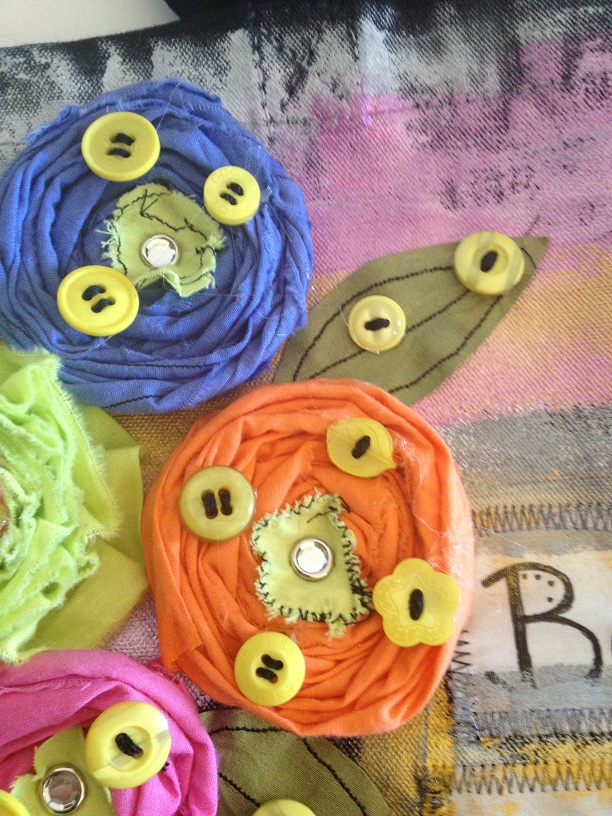
Hand journaling is becoming more and more popular in mixed media crafts these days. This tote is a basic pre-made black tote I ordered online and embellished with hand journaled muslin, Jacquard Products paints and dyes (for the hand dyed fabric) and finally, fun buttons!
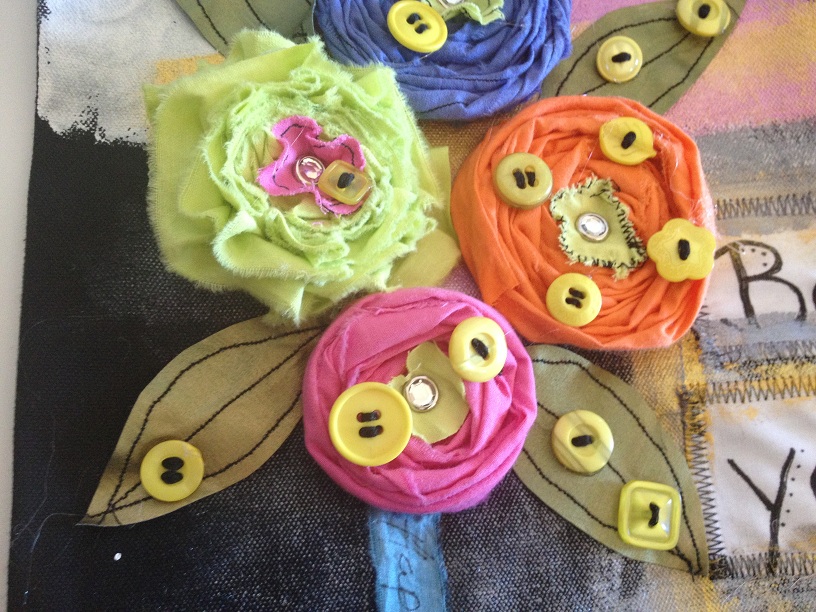
Jacquard products makes a wonderful product called IDye. It comes in both liquid form and powered packets. I used the powdered packets to machine dye white cotton muslin. Once the muslin was dry, I created happy bright colored fabric flowers using various techniques. Instructions for making flowers by hand from fabric can be found in abundance these days. Search for a myriad of techniques on sites like Pinterest. You can find other ideas for an embellished tote there, too.
I started with creating a dry brushed background using Jacquard’s Neopaque and Lumiere paints. Starting with one color, I waited for the colors to dry in between coats before adding the next to create an interesting canvas.
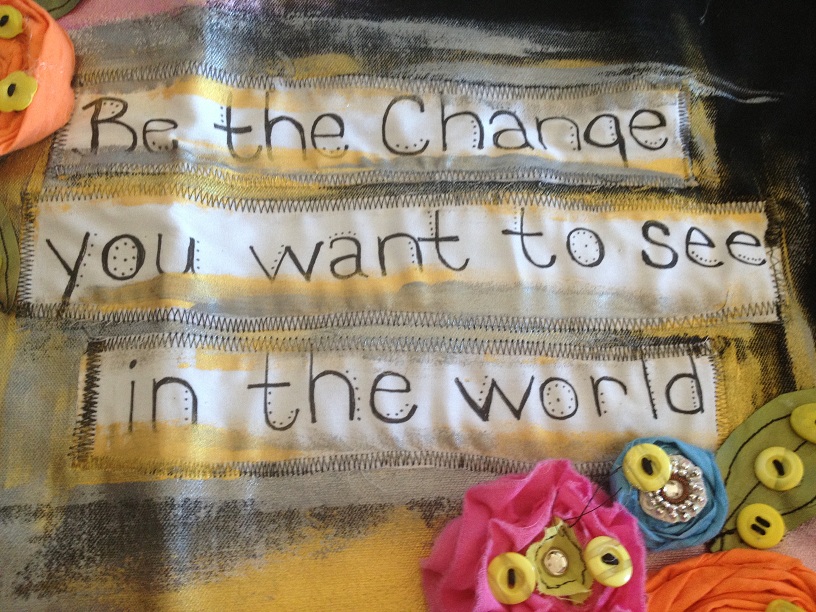
Believing that I have the absolute worst hand writing on earth, I was very timid about hand journaling on these muslin strips. I took on the challenge anyway and pinned and sewed them to the front of the bag. Swiping a coat or two of the paints allows them to blend in nicely with the background while standing out at the same time.
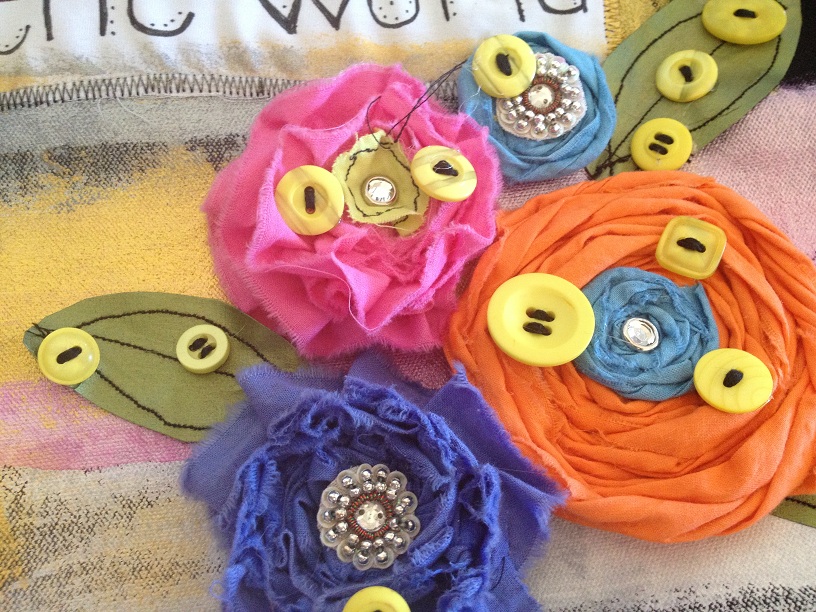
Bright, fun, hand dyed buttons add the final touch to the flowers. They are perfect for this project since the fabric is hand dyed as well. I used three strands of six ply embroidery floss to sew through the holes of each button. I wanted to create the impression that the buttons were sewn to the bright flowers but in reality, I knotted off the threads in the back and glued them on with Beacon Adhesives Fabri-Tac.

The message of the sentiment speaks well to me. Instead of constantly complaining about how things should be, or how they are not what we envision as “right,” we should lead by example. Show the world what a better place it could be by being just that – better.
Live Life Creatively,
Melony
Buttons are the perfect addition to most any craft, they come in every color, size and shape you can imagine. I have been making things for my granddaughter and decided to decorate some socks.
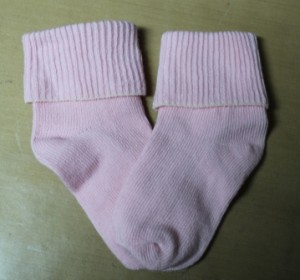
I started out with a plain pink pair of socks which I pre-washed and dried without fabric softener.
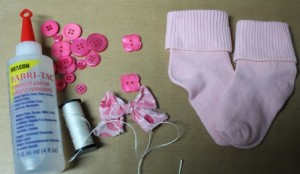
I got out some of my pink buttons from my BB84 Brilliant Pink Buttons package, Fabri-Tac, Kreinik Thread and some scrap pink fabric which I tore and tied into 2″ bows.
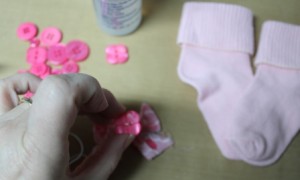
I threaded some Kreinik Thread through the button holes and glued them on top of the bows.
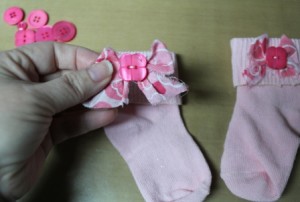
Then glue the bows onto the sock being sure to glue them on opposite sides of the socks.
Let dry….
Make these cute little socks in every color for a special little girl!
 Zippered bag measurements 10×10 bag

1/4” foot, zipper foot, multi-purpose foot, scissors, sewing machine, iron
All seam allowances are 1/4”.
From each FQ, cut (1) 2 1/2” x 10” strip (front of bag)
From one FQ, cut (1) 10” square (back)
From one FQ, cut (2) 10” squares (lining)
From cotton batting, cut (2) 10” squares

All seam allowances are 1/4”.
1. With 1/4” foot, sew each 10” strip RST, along 10” side, Press

2. Layer backing (face down), batting, lining (face up) Spray Temporary Spray Adhesive between layers. Repeat with front and lining.

3. With darning foot and feed dogs lowered, quilt bag using loopy design. Repeat with backing layers. Use matching lining thread in bobbin.

5. Position various buttons to front bag, in random places. Sew with machine or by hand. I used my machine and the variegated thread, it changed with the color of each button! Apply Fray Check to back of each button to secure.

6. With Zipper foot, sew zipper RST onto front of bag along top raw edge.
7. Sew zipper RST to back of back. Use pins if necessary.
8. With the Multi-purpose foot, zig-zag along zipper edge.
9. Turn bag over to Right side and topstitch along zipper edge.

10. Upzip zipper! (for turning right side out) With 1/4” foot, and RST, sew bag along all three sides. Backstitch at each end. Zig-zag along seam allowances.

11. At corners of bag, match up side seam with bag bottom seam, pin on either side of seam. Check inside of bag to make sure they line up. Sew a seam, approximately 1 1/4”, from tip of corner . Backstitch at each end. Zig-zag and trim. Turn bag RSO.

12. Thread cord through zipper pull and tie a knot. Thread cord through three different buttons and tie a knot. Trim cording even. Apply Fray Check to ends. Enjoy!

Denise Clason has been an artist/designer for over 35 years, selling her creative and beautiful designs to friends and teachers at an early age. She continues to design and has been published and licensed in the craft, decorative painting, sewing and quilting industries. Along the way she has designed product for several manufacturers. Denise is the author of 9 books. Her latest book, “Sewing Vintage Aprons” was published by All American Crafts”, released June 2011. Another two books were published by Krause Publication’s, “New Country Quilting,” released Spring 2005 and “Quilted Bags & Totes,” released Fall 2006. Denise is a Designer Member of The Craft & Hobby Association (CHA). Please contact her at denise@deniseclason.com or visit her website & blog: www.DeniseClason.com. She would love to hear from you!
Good Morning! Today I have a stepped up version of a no sew tutu tutorial from a great DIY blog called – Skip To My Lou. I followed all of her steps but where she stops is where I picked up to make this fun and oh so seasonally perfect button embellished tutu! Here’s how I just kicked her’s up a notch – Enjoy!

Find an adorable little girl who you can transform into an Autumn Forest Nymph!!

Follow tutorial found on Skip To My Lou’s Blog (http://www.skiptomylou.org/2011/11/01/no-sew-tutu-tutorial/) but cut away the excess elastic.

Add a bit of superglue to the knot to be sure it is held securely.

Wrap the ribbon around your finger to measure out how much ribbon will be needed to fit round the knot and still have plenty of room to pass the other length of ribbon through.

Wrap the ribbon around the knot and hot glue in place.

Be sure to keep edges of ribbon even and hold end of ribbon in glue until glue cools.

Pass the ribbon through the loop and tie into a perky little bow.

Embellish the center of the bow with a large button that has a bow of hemp tied through the center.

Gather a few different colors of Autumn colored felts.

Cut felt into approximately 2″ x 3″ rectangles.

Fold rectangle in half and cut a half leaf shape on fold.

Open to reveal leaf shape.

Repeat with additional colors of felt until you have a good assortment of felt leaves.

Place leaves all over tutu before gluing into place to be sure you have a good mix of colors and spacing.

CAREFULLY adhere using hot glue. Be careful as the glue will go right through the tulle if you aren’t careful!

Using either heavy duty scissors or a button shank remover tool, remove the button shanks from as many buttons as you glued leaves.

Carefully adhere a button to the top of each leaf on the tutu.

Finish gluing a button to each leaf to finish embellishing the entire tutu.
Find an adorable little girl who you can transform into an Autumn Forest Nymph!!
I hope you have enjoyed this no sew tutu tutorial /Autumn Forest Nymph Tutu. It was fun and easy to make and my daughters love it.

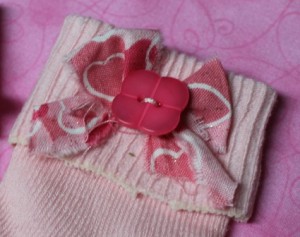
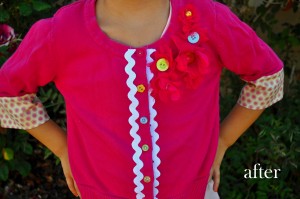
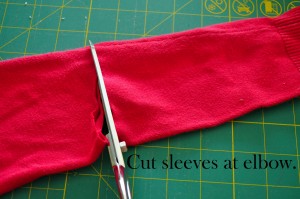
My daughter and I have champagne taste and apple juice budget so I decided to make an upcycled sweater to get a boutique style look at a fraction of the cost. I’ve been busy doing our annual back to school shopping. We saw a ton of button embellishments on the clothes in all the children’s boutique clothing stores this year, so when we got home, I got out my buttons and an old sweater and got to work. The sweater was cute last year, but the sleeves are too short for my growing daughter and the flowers on the shoulder were looking a little tired. The end of the sleeves were also stained. (Why oh why can’t my daughter pull up her sleeves before eating or crafting?) It hardly cost me anything to make as I already has some ric rac and I used fabric scraps for the sleeves.
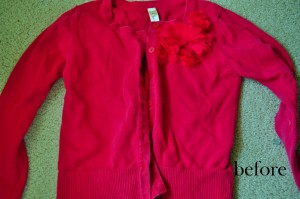
Did I inspire you? Here’s how you can upcycle a sweater!
Directions:
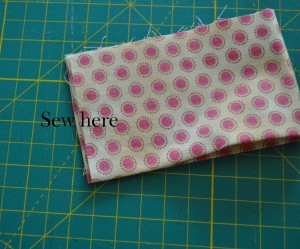
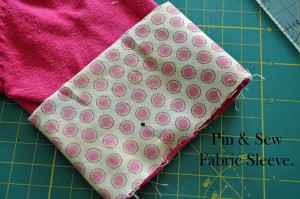
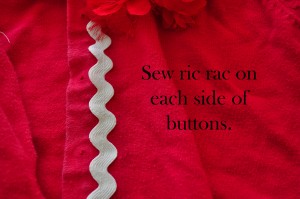
That’s it! Easy. It took me less than an hour to do this upcycled sweater project. If you aren’t feeling adventurous, simply changing out the buttons on an old sweater will give it a new look. Or if you are feeling extra adventurous, you could add some fabric to the bottom edge of the sweater. (Which also lengthens it if the sweater is too short for your child!)
![]()
Here at Buttons Galore we like crafts of all types and of all skill sets. We especially like seeing buttons incorporated into projects that have a “green” flair to them. The trendy word now is called UPCYCLED. We like upcycled, recycled, repurposed, eco friendly or green crafts. We find inspiration on Pinterest via readers sending us links. If you have a project you want to share please email us or leave a message on one of our posts. While surfing the net we found this blogger, A Splendid Assembledge, has a great project that would work great with our Big ol’ buttons. Heck, it would work great with almost any of our buttons. For a tutorial check out her blog. While you are there you should check out all her tutorials. She has some really fantastic ones.

![]() It’s the end of the school year and time to give your favorite teacher a token of your appreciation. This easy burlap gift bag can hold a small gift and has a darling felt & button badge pin. After the gift is opened, the badge can be worn as a pin on a favorite sweater or tote bag and the burlap bag can be reused for future gifting.
It’s the end of the school year and time to give your favorite teacher a token of your appreciation. This easy burlap gift bag can hold a small gift and has a darling felt & button badge pin. After the gift is opened, the badge can be worn as a pin on a favorite sweater or tote bag and the burlap bag can be reused for future gifting.
Supplies:
Instructions:
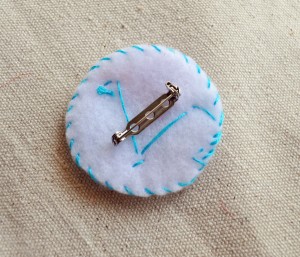
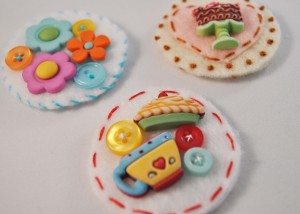
Felt & Button Badges by Laura Bray
Hi there and welcome back!!! Today I have alot of info to share so get comfy! :) First I wanted to tell you about our June theme, then I have a really cute tutorial for you on how to make these delightful burlap & button rosette hair bows.
 Our theme this month if you didn’t guess by my intro project is Buttons & Burlap!

Keep any eye out for our Buttons & Burlap Challenge Contest coming later in the month...if you don't have any burlap or buttons you may just want to go get some...just thinking out loud here. ;)
So this month we were given a theme where we as designers have been challenged to work with Buttons & Burlap. I think you will really enjoy what the design team has cookin’ for you! And today, I have the first project and it comes with a FULL STEP BY STEP PHOTO TUTORIAL!!! Yay!!! Who doesn’t love a good tutorial? So let’s get started. The supplies I have used are:
Buttons – I think my two came from various Button Jar assortments.
Burlap – you can find this at most big box craft stores and it’s CHEAP!
Westcott Brand Rotary Trimmer, Cutting Mat, Steel Ruler & Tiny Thread Snips
Large Needle
Twine or Yarn
Sharpie Oil Based Paint Pens
Ribbons & Trims
Hot Glue Gun & Hot Melt Glue

Begin by cutting a 1.5" strip of burlap in your choice of color...length is not all that important but these were approximately 12" long.

Use a large needle threaded with twine or yard and sew a large basting stitch about .25" from one edge.

Pull on the ends of the twine used to create a gather. Tie a knot to the back of the rosette and spread the ruffles so that they are evenly spaced along the tied circle of twine.

Remove outer few bands of burlap to create distressed edges

Use hot glue to attach hair clip to back side of rosette

Create polka dots on surface of button using Sharpie paint pen

Tie a length of green twine through the buttons and tie in a knot on the under side trim ends with sharp snips

Liberally cover entire knot with hot glue

Press onto front center of rosette to finish hair bow

Alternate button idea - try out all the various color/pattern themes you can think of! Get creative!!!

Just a quick shot of the two side by side.
And finally my adorable little model (my daughter :) ) who was just over the moon to be getting such “high fashion hair bows” today when Momma was done working…. :)

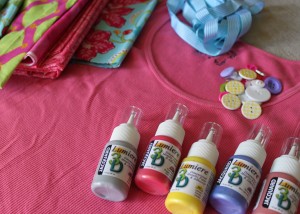
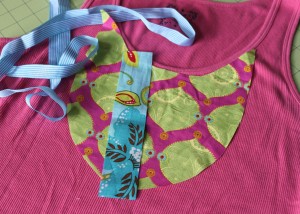
I keep seeing adorable clothes for little girls, but never for us “big girls” like me. I want cute clothes too! So… I decided to see what I could do with my sparse sewing skills. After rummaging through my tank top drawer and fabric scrap bin, I came up with a plan to work up a cute little bib tank.

Supplies:
Tank Top or T-Shirt
Fabric Scraps
Scrap Paper
Fabric Marker
Sewing Machine/Kit
Iron
Fusible Web/Stabilizer
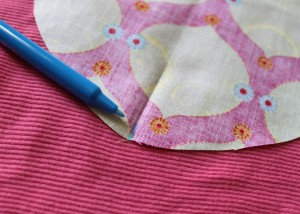
1. Take a scrap piece of paper and draw out a template that suits you and trim it out. This is your pattern. I sketched my design, folded it in half, and then cut it out to ensure it was symmetrical.
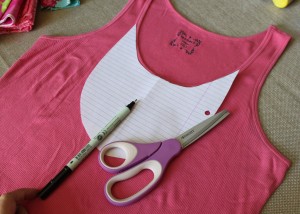
2. Once you’ve come up with a pattern that you like, cut out your pattern in a fun fabric. The fabric I chose was an old drawstring bag used to keep shoes nice when traveling.
3. To make the center strip, measure the top of your pattern to the bottom and add an extra inch to fold over later. You can create the strip as wide as you’d like, but I made mine 1.5″ wide keeping in mind that I’d be folding over 1/4″ on each long side to hide my raw edges.
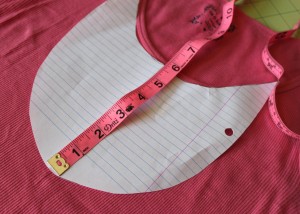
4. For the outside ruffle, measure around the bib of your pattern and double it. This is about how much fabric or ribbon you’ll end up using once you ruffle or pleat it. You can also purchase a trim that is already ruffled if you like. If you’re using ribbon, you may want to consider the materials to ensure it can be washed (won’t bleed or melt). All of your cut pieces should end up looking like this:
5. To ensure that my center piece would be mid-line, I took a washable fabric marker and drew a line to mark the center of my bib.
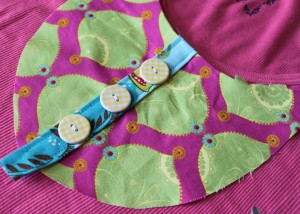
6. You’ll then want to fold and iron the top edge of your bib down about 1/4″. I snipped the fabric in a bit about every 1/2″ so there would be less bulk and puckering. Fold and press over 1/4″ on each long side of your center strip fabric and apply a strip of fusible web 1/2″ narrower than the width of your fabric strip to the back before ironing to the bib. You’re then ready to sew the strip to your bib and attach the buttons. It should look something like this…
7. Sew the ribbon on top of the bib around the bottom 1/4″ from the edge. (If the material you choose to make a ruffle or pleat is single sided, you’ll want to ensure that is facing down for this portion.)

8. Carefully iron your ruffle/pleat out flat, add fusible webbing to the back, and iron on to your tank top.
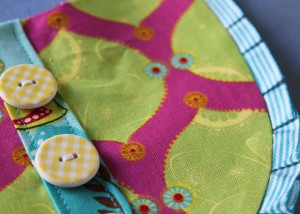
9. Sew the bib to the tank top ensuring you don’t sew all the way through to the back (like I did). Now for bling… Use the Lumiere 3D to embellish the existing pattern on your chosen fabric and sprinkle on microbeads. I pressed the beads in lightly with the back of the measuring spoon once a hefty amount was sprinkled over each dot. Once the Lumiere dries for 72 hours it’s completely washable.
10. And… that’s it! Wear it, enjoy it, and maybe even make a few more!
I hope you’re feeling inspired, and have a crafty kinda day!
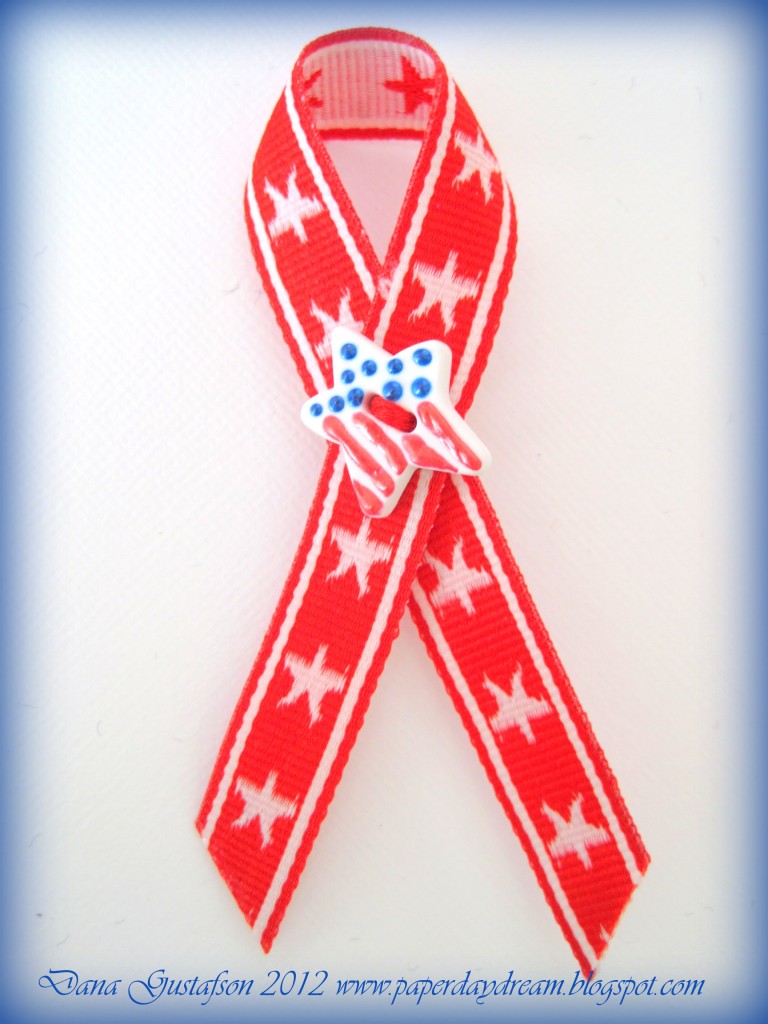
Here in the U.S. we will be celebrating Memorial Day at the end of May. We also celebrate Independance Day on the 4th of July. Today I am sharing a simple way to show pride in your country with handmade lapel pins.
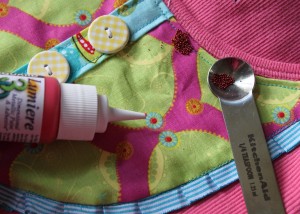
Gather a few simple supplies…
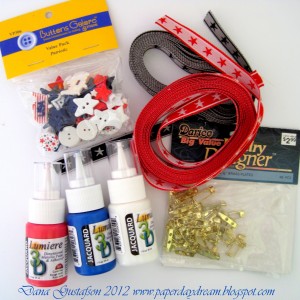
Supplies:
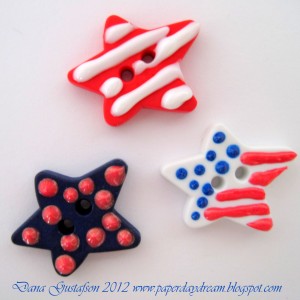
I chose to decorate the stars in the value pack using dimensional paint from Jacquard. Free handing dots and stripes is a breeze with the fine tip applicators on the bottles. Let the dimensional paint dry completely before the lapel pin assembly steps.
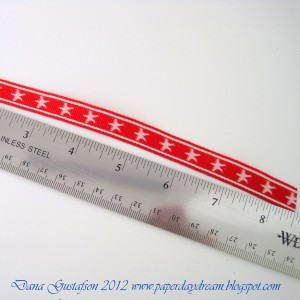
Prep your ribbons by cutting at approximately 8 inches long.

Using a contrasting color of embroidery floss, sew the lapel pin together with the looped ribbon between the pin back and the embellished button.
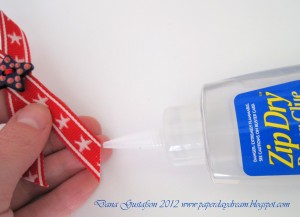
Run a fine detail glue like Zip Dry along the edges of the cut ribbon to prevent fraying.
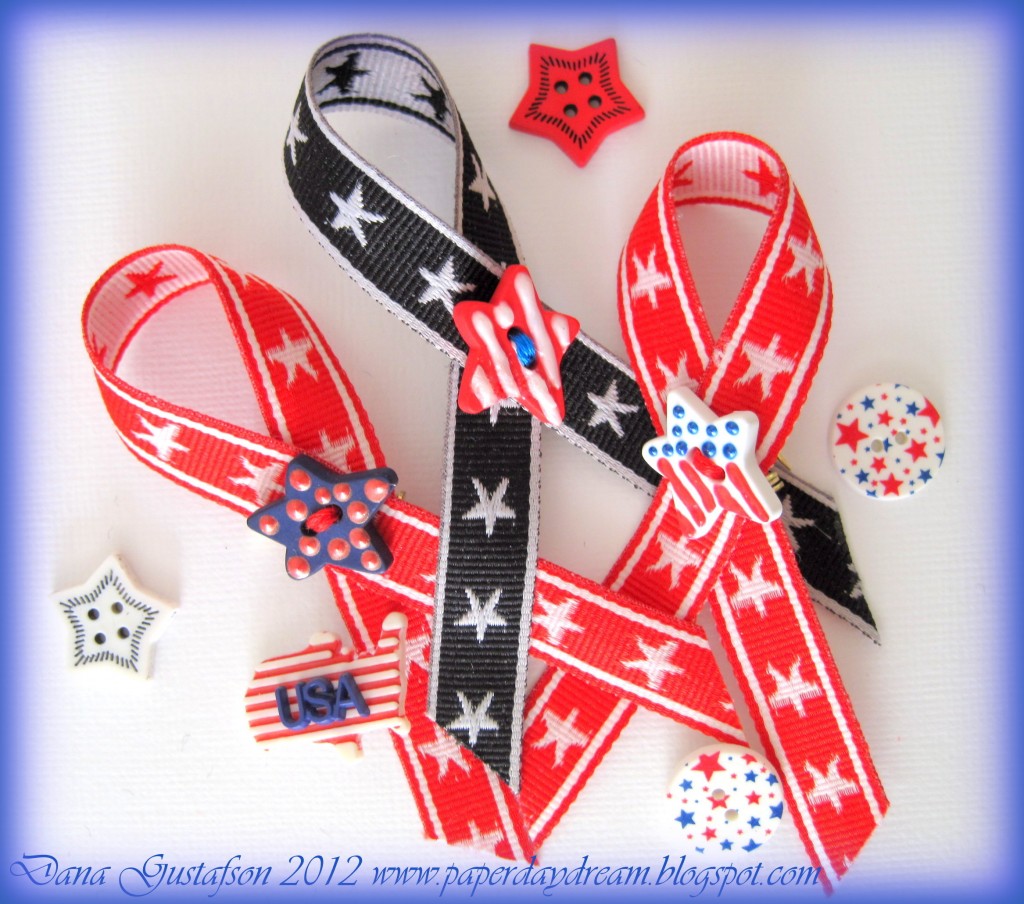
These are a snap! Make a few and share them with your friends and family. Not a lapel pin wearer? I’ve pinned these on the side of canvas tote or they would look cute on a hat too. Thanks for stopping by! Have a great one!
Hi y’all! Allie here… I got my hands on some of Button’s Galore’s Start Up craft shapes this week, the Large Circles. I had such fun making some charms with these blank circles. These blank craft shapes are blank poly plastic pieces that you can stamp on, rub on, ink, paint or embellish with anything you desire. I decided to get creative with some napkins and stamps, and some spritz.
I really love these blank craft shapes! They come in lots of shapes and sizes, from flowers to tags, to sliders and frames, and even holiday shapes. There are even start up packs, and collections including a variety of sizes. They are perfect for every project.

This picture shows the separate layers of the napkins I’m using. For my charms, I just used the very top layer.
![]()
I decided to collage with napkins. I start by separating the layers of the napkin, so I’m working with the top designer layer. I use Claudine Hellmuth’s Matte Medium from Ranger, with a flat brush. Some people like to use a wet Q-tip to “cut” through the napkin, but I prefer to tear, and sand off any excess.
I used a little round file to clean out the holes in the charms. You can use any decoupage medium, whatever you prefer. I also like to seal the top when I’m done.
![]()
I skipped a few photos, but this is what happens after the decoupage step. I stamped the Large Circles with an Itty Bitty bicycle stamp from Unity Stamp Company. I used Jet Black Stazon ink from Tsukineko. I also lightly tapped around the edges of the Large Circles with the same black Stazon Ink. Once the ink was set, I gave the Large Circles a light spritz with Mr. Huey’s Gold spray from Studio Calico.
Use your favorite spritz, or you could even make your own.
You can add anything you like to these little charms. I put a jump ring on each of them, and added little trinkets and bling. The metal pieces and the little pearls are from Ideaology, and are designed by Tim Holtz. I added bling to the sprocket, on the second row, the charm on the left. I love a little sparkle, don’t you?
Add some bling, little trinkets or baubles.
You could attach these charms to a chain, a hoodie, or anything you like. You can even keep it simple, and just thread it onto some crepe ribbon, as shown below. This ribbon is from Creative Impressions.
![]()
SUPPLIES AND MATERIALS
We have a ton of plain colored pony tale holders around the house. This is fine for me, but for my little princess, sometimes a plain ponytail just isn’t enough. Instead of buying a ton of different decorated rubber bands, make them yourself using buttons with the loophole in the back. It’s easy, quick and gives you the opportunity to customize the look of your little hair pieces. (This would even be great for grown up princesses, using some pretty shiny or elegant buttons ~ wink).

Ponytail holder made with a button

Make a ponytail holder using buttons

Pink flower button ponytail holder
The best part about these button ponytail holders is that I can change the buttons to make a whole new look at any time. There’s no glue or cutting… just pulling the rubber band through the button back and voila! You could add more than one button if you’d like, but I think you’d need a little bigger rubber band. I used a small 1.5″ diameter rubber band for this example. This would also be a fun project for kids to make!
What quick and fun projects do you like to use buttons for?
This buttoned handbag is simply beautiful. If you have a little bit of time and basic sewing skills you could create it yourself. Check out the buttons in our haberdashery line.

http://pinterest.com/pin/121949102380039596/
Well I hope you enjoyed my ring tutorial yesterday. I really enjoyed putting it together. I especially love when people try out my tutorials and then let me know how it worked for them! :)
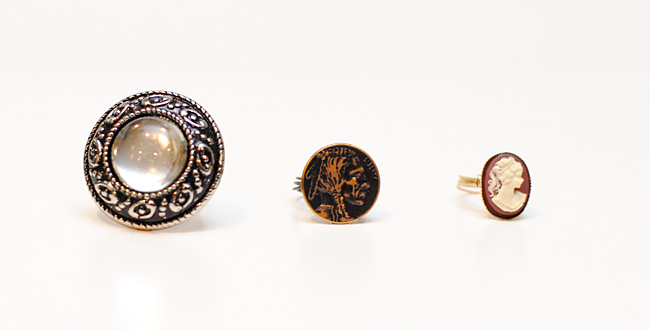
Today I just have a quick post to share with you. Here I wanted to show you a few more button rings I have made. First I will show you all three, then I will expound on them just a bit for you.
Here you can see that you can use buttons of all shapes and sizes. There’s no “right size” button for making a ring!

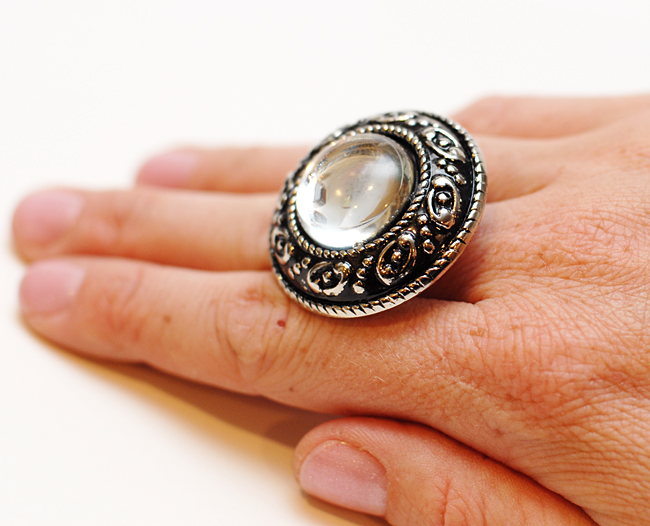
When I found the first one on the left in the Gold Bulk Button Pack I was thrilled that it wasn’t GOLD! LOL I was so excited to see it was silver because I am generally a “silver/copper/bronze” kinda gal… the only gold I typically wear is my wedding band and engagement ring. This button measures almost an inch and three quarters at the widest part!!! Suuuuch a fun “cocktail ring” size.
Here it is on my hand. Fun right??
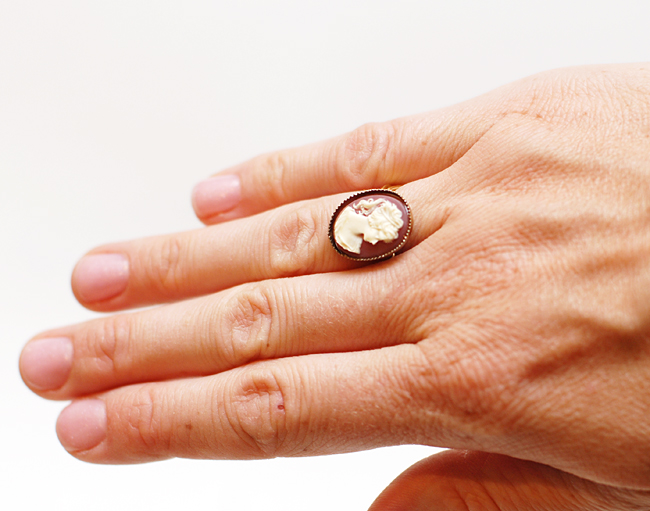
Well then I thought I would also make one from the sweet dainty little Cameo Button in the Genuine Vintage Button Tin. It’s just so little and cute compared to the ginormous one in the picture above, isn’t it?
 I have some really cute colored buttons that I plan on doing another ring soon with…I hope you will come on back to see them! Please be sure to comment with a link to your button ring creations. I would love to see what you have done either on your own or using the tutorial I created! Have a great day!
P.S. Be sure to check out our “Pin it to Win it Contest” that runs all the way through April 27th!!!

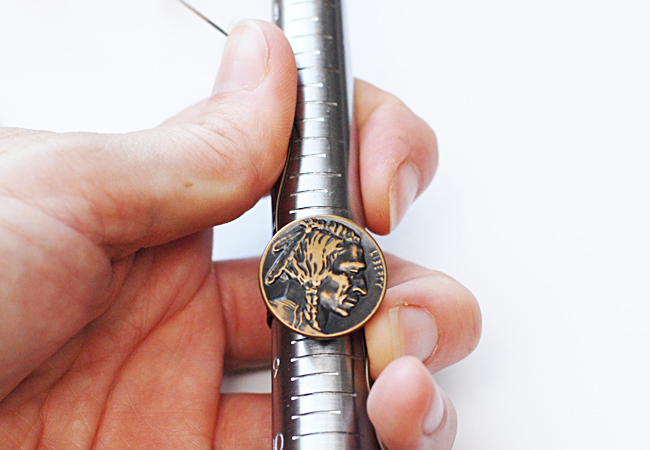
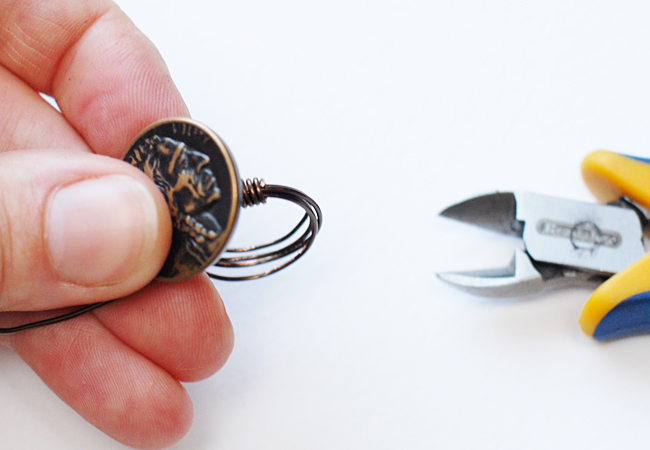
Good Morning! Today I thought it would be fun to bring you a tutorial on how to create a wire wrapped ring using a button from the Genuine Vintage Button Tin as the focal piece. In addition to the button you will also need:
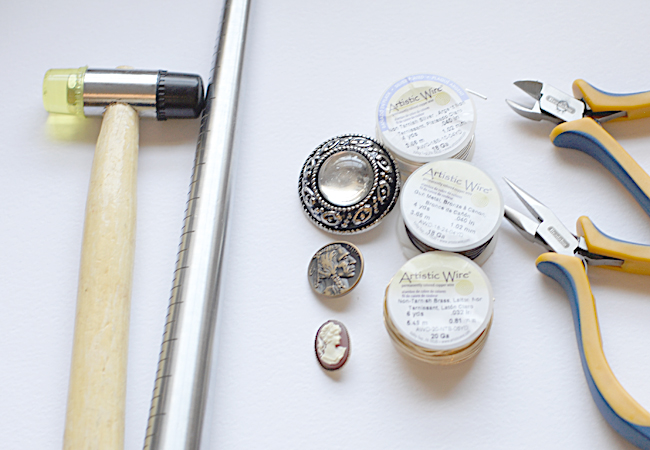
Supplies needed for an assortment of rings
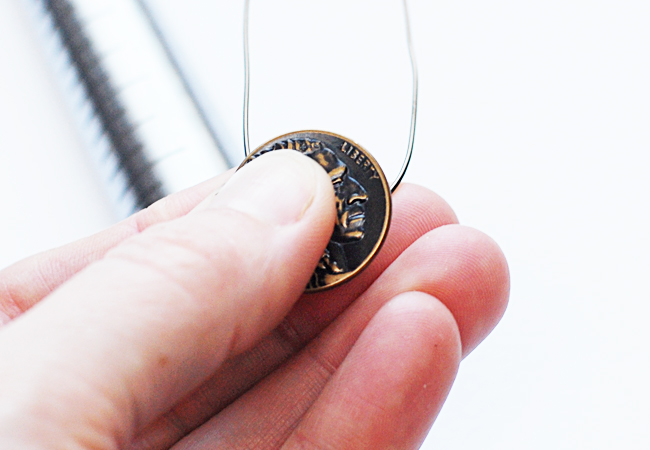
Begin by cutting a 20" length of wire. Run it through the shank on the back of the button, centering the button in the middle of the wire. Bend the wire into a gentle "U" shape.
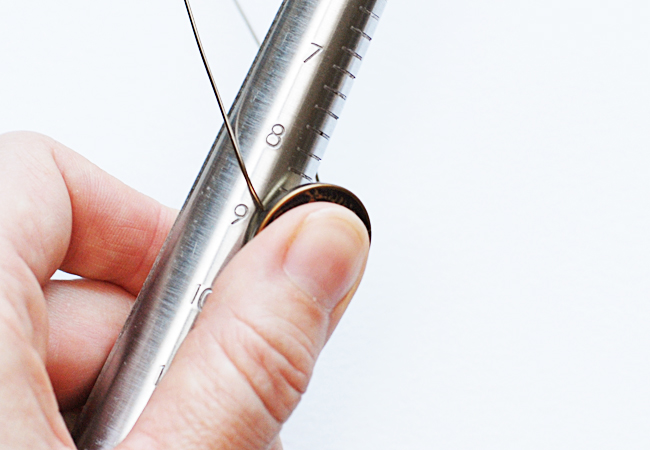
Place the center of the button onto the ring mandrel one full size larger than you need for the finished ring size. Here you can see that I need a 7 1/2 ring so I am beginngin at a size 8 1/2 on the ring mandrel.
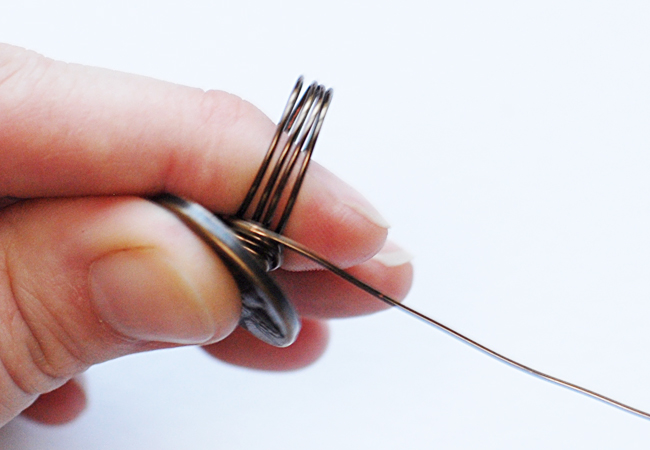
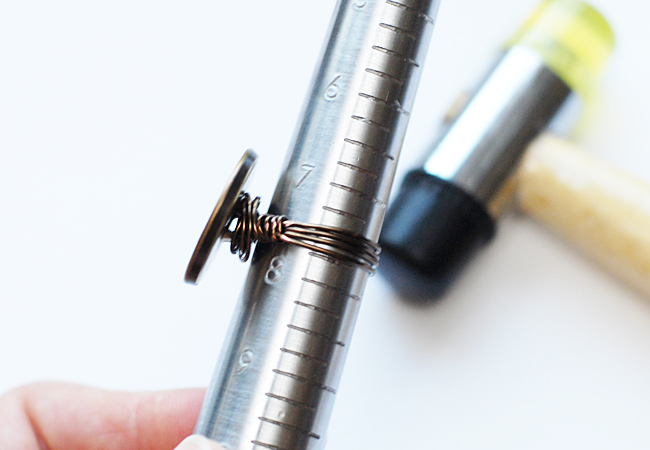
Wrap the wire around the top and bottom of the button the mandrel so that you have four wraps around the mandrel.
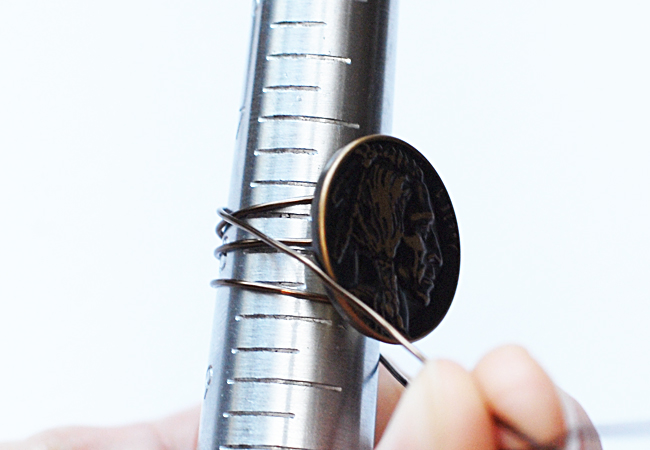
Pull the ends of the wire perpendicular to the mandrel and pull tightly to draw the wrapped sections to the center of the button.
Begin to wrap the wires clockwise around the shank of the button. Wrap until you have atleast four wraps around the bottom, keeping pressure and tension on the wires at all times.
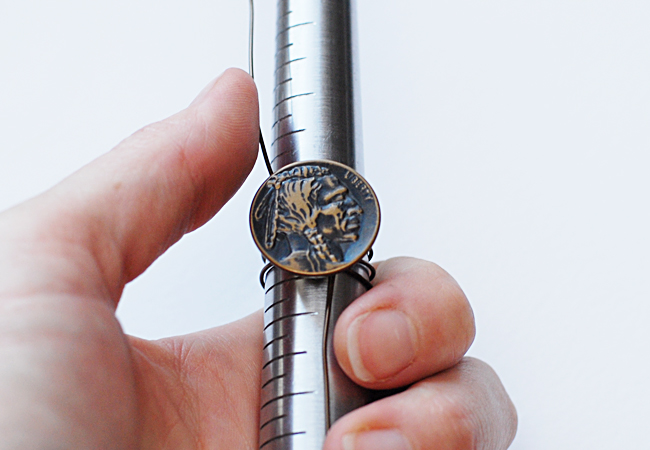
Again holding the wires perpendicular to the mandrel, remove the ring from the mandrel.
Pinch the button and the wire wraps between your nondominant thumb and forefinger.
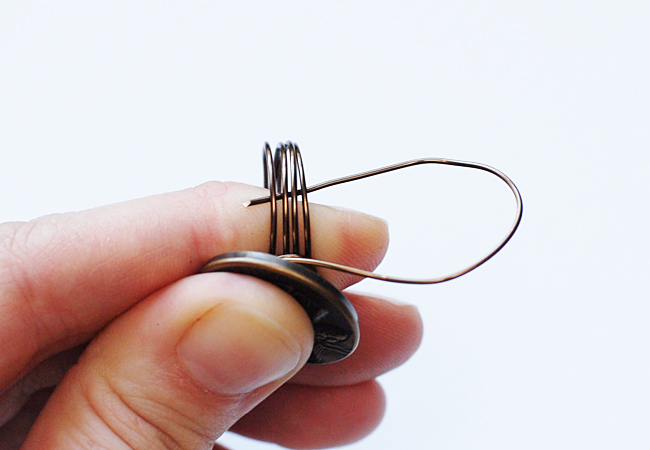
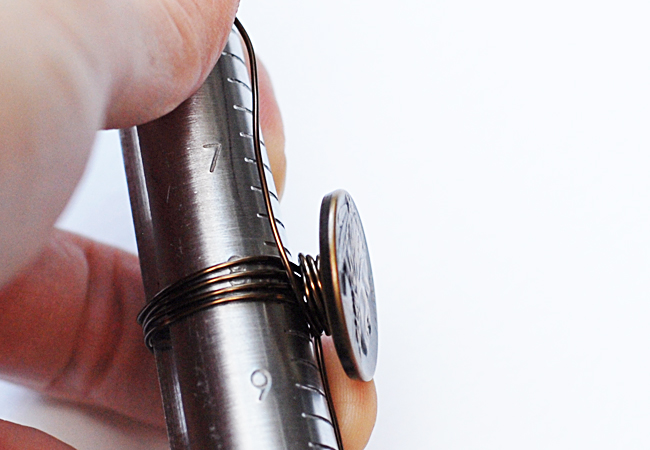
Using your dominant hand, wrap the end of the wire under the four wraps, then back up and around the wraps.
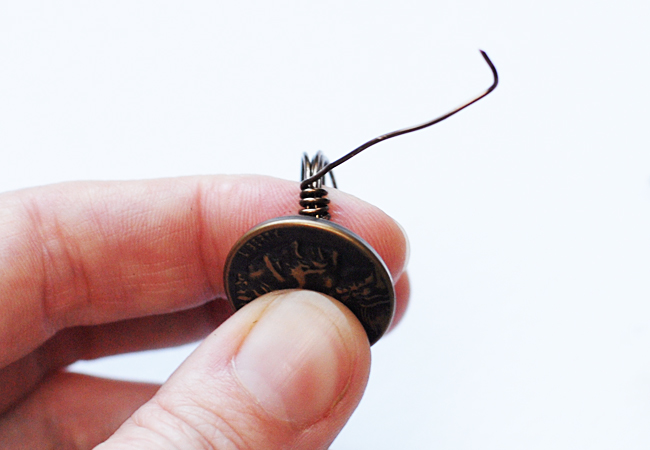
Continue to wrap three or four more times, pulling tightly each time. Make sure to keep the four wires flat against your index finger for a more comfortable fit.
Using wire snips, clip end of wire close and press clipped end down using chain nosed pliers. Repeat wrapping on other side of ring.
Place wrapped ring back on mandrel and being to hammer ring down mandrel. Remove ring, flip it and hammer it back down toward thick end of mandrel to make sure both sides are fully formed.
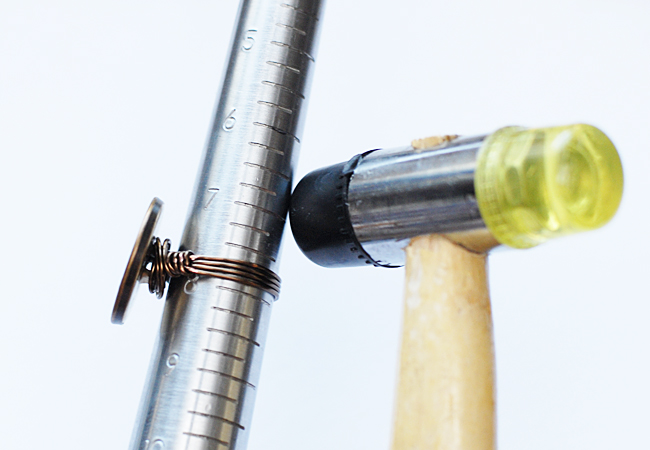
Tap around entire ring from side of button to side of button to work harden wires and make sure that the wires are going to lie flat.
Finished Vintage Button Wire Wrapped Ring
I hope you have enjoyed my first button jewelry project here on the Buttons Galore & More Blog! Be sure to add us to your reading list or subscribe so that you don’t miss out on the next one I have planned. It’s one that you will not want to miss!!! :)
K
P.S. Don’t forget to enter our PIN IT TO WIN IT CONTEST!
Buttons Galore and More is pleased to start a new segment featuring Guest Designers. Not only do we have a fantastic Creative Team working diligently behind the scenes to bring you fabulous projects, we are bringing in some extra talent too. I hope you will enjoy their creativity, crafty ideas and be as inspired by them as I am. Our first Guest Designer is Melony Bradley, her work has graced the covers of many crafting and lifestyle publications. Please enjoy her post below. If you would like to check out more of work visit her blog or her etsy shop.

Finished Bracelets
I am loving all the adorable versions of this throw back craft from my childhood I am seeing all the web these days. When I got a stash of Granny’s Button Box stitched buttons from Buttons Galore and More in the mail last week, I knew I had to give this old craft a new try and incorporate these adorable buttons.
wood sticks and buttons
The concept is rather simple. Wood can be manipulated when soaked in water since it tears down the wood fibers. So, grab some jumbo craft sticks and lets get started.
Boil Craft sticks
First, bring a pot of water to a boil. Turn off the burner, Insert the craft sticks and let them soak for about 10-15 minutes. Put a few more in the water than you will think you need. I broke a few not being patient while trying to bend them.
broken sticks
Once the sticks are soaked. Grab some appropriate sized glasses or plastic cups and patiently work them into the glass. Work slowly if you don’t want to end up with a lot of broken sticks like I did. It takes a little patience to get the hang of it
sticks and glasses
These have to set up for 24 hours to completely dry. While they are drying, go ahead and grab some acrylic paints and pattern papers to coordinate with the buttons. I used Americana Acrylics by DecoArt and some older random simple printed patterned papers.
Paint and Buttons
Here is another step you can do while waiting for the sticks to set up, On the wrong side of the patterned paper, use a pencil and a jumbo craft stick to trace it.
Make a template
cut out the template
Use a pair of scissors to cut the paper out.
cut out papers
Once the bracelets have dried, gently remove them from the glasses.
paint bracelets
Paint the bracelets in the colors of your choice.
Collage Pauge
Use a decoupage medium like collage pauge and a foam brush to apply the papers to the front of the bracelets. Allow the medium to dry and gently sand the edges of the papers even with the wood.
Now comes the fun part! Glue some rhinestones in the center of the stitched buttons using a tacky glue like Aleenes Original Tacky Glue.
Glue the buttons to the front of the bracelet and let dry.
Finished Bracelets
My bracelet’s didn’t turn out as snug as I wanted them to be, so I used some chain and jump rings to pull them a little closer in. I can still fit them over my hand without using a closure such as a lobster clasp but that still be another option. Learning from this, make sure you use a glass or cup that is slim enough if you want to skip this step!
Live Life Creatively,
Melony
St Patrick’s Day Headband
Make this Quick & Easy St Patrick’s Day Headband today and wear it this evening….using “Match Ups” makes it so easy to do!
Supplies:
• Match Ups Spring Collection #2133 (5 clovers)
• Thin White Headband
• 2 yards ¼” Green Grosgrain Ribbon
• Beacon’s 3 in 1 Glue
• 5 Rhinestones
Scissor
Instructions:
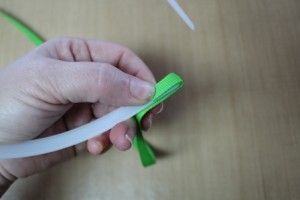
Glue small piece of ribbon onto ends of headband
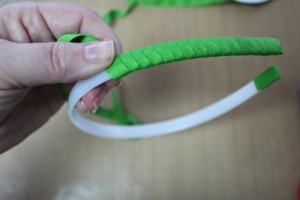
Then glue one end of ribbon at the end of headband and wrap around at an angle until headband is covered, glue end; let dry.
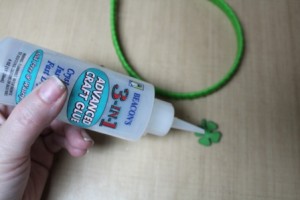
Glue rhinestones onto center of clovers.
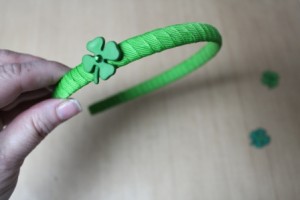
Glue clovers to headband starting on one side; you can stop with just one clover or
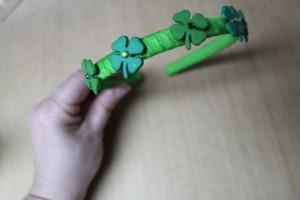
Glue the rest of the clovers onto headband as shown.

Handmade Button Boutonniere
Hello! It’s my distinct honor to be writing up my first post here at Buttons Galore and More! I am also so excited about sharing a creative way to make a one of a kind boutonniere that will definitely stand up to the activity of the wedding day…all the way from getting ready in the morning to the ceremony to the dancing and celebrating into the night and beyond! A button boutonniere can be made as unique as the person who will wear it!
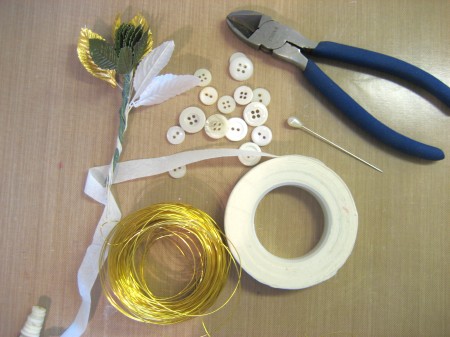
Supplies:
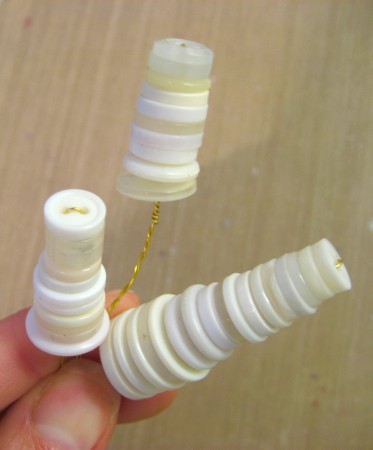
Begin by threading a stack of buttons of increasing size onto the craft wire(cut to 10-12 inches in length), smallest buttons first down to the largest in your selection. Twist the wire at the bottom of the stack tightly to secure the stack. I used different amounts and heights of buttons to make each stack a slightly different height when finished.
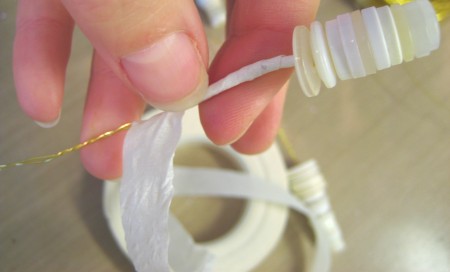
Twist wrap the florists tape around the wire stem approximately half way down the wire.
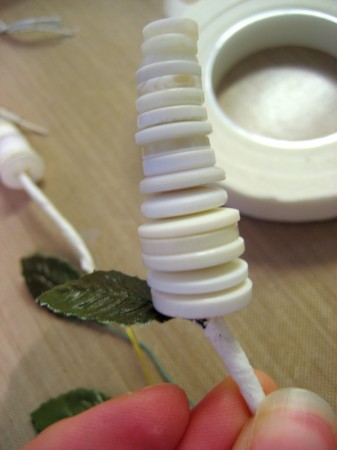
Add floral leaf picks or other decorative items the same way by wrapping the bundle with florist tape to approximately the mid-point.
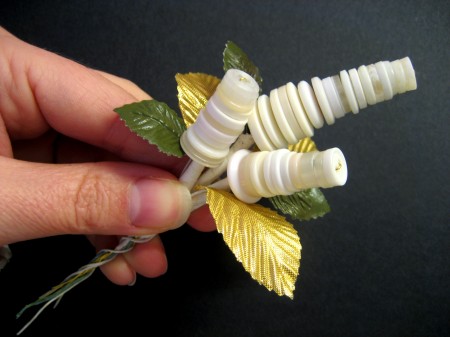
Once you have all three button flowers and leaf stems individually wrapped, group them in a pleasing way as one bouquet and twist the wire stems together. Wrap the whole stem from base of the bouquet to the tip of the wire with white florist’s tape.
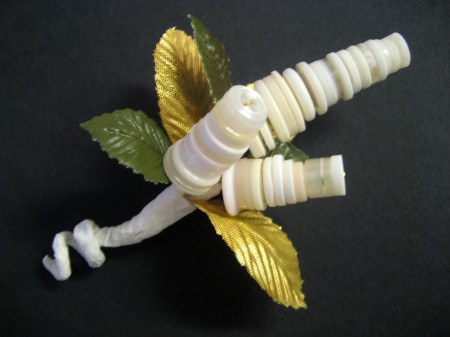
Once the wrap is in place, use your fingers to corkscrew the bottom tail of the boutonniere. You can also arrange and shape the leaves and button flowers since they are wired which makes this boutonniere extra friendly to design!
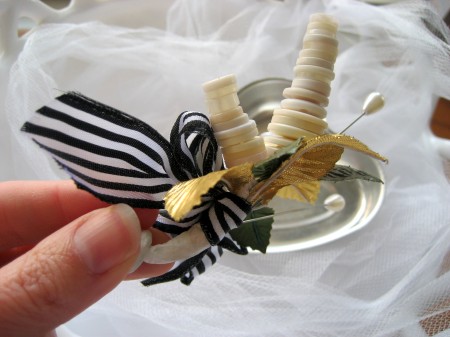
Add a bit of ribbon and corsage pins so this boutonniere is ready for the big day!
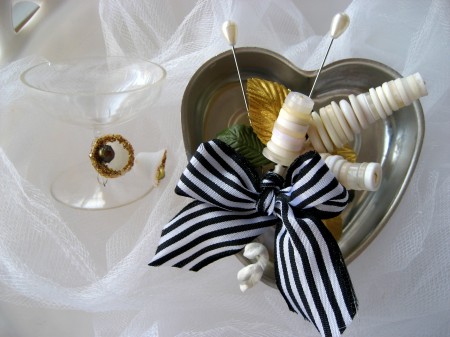
Ta da! That’s it! The great thing about button floral designs are that they can be done way in advance and will still look perfect on the big day. Not to mention, the cost on these per boutonniere are pennies compared to their fresh flower counterparts. These can also be easily translated into other holidays or get-togethers and customized with pretty vibrant colored buttons, ribbons and other trims. Add an elastic wrist strap to the back and this is a wrist corsage too. Got creative teenagers in your life? Gather the kids for a button corsage/boutonniere making day and they’ll be the newest smash hit since duct tape prom dresses! The sky is the limit and Buttons Galore and More has you covered with beautiful buttons and trims to make your day extra special!
Thanks so much for stopping by!
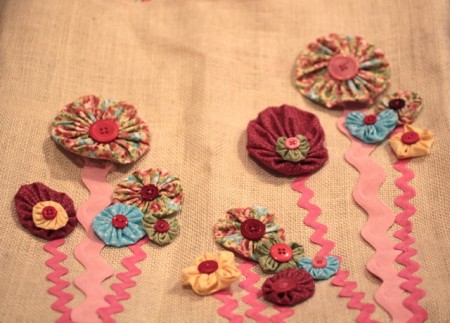
Yo-yos on Girly Messenger bag by Niki Meiners
This feminine messenger style tote is perfect for a Valentine’s Day gift. It is soft and girly and it can be carried long after. Plus the flowers on this bag will last a lot longer than a dozen roses.
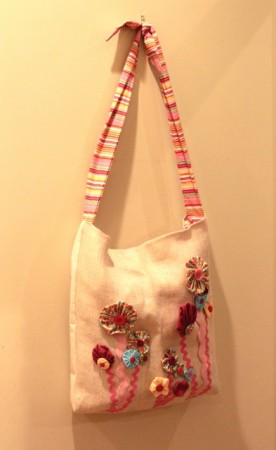
Gusseted Messenger Style Tote
Tools:
Scissors, Cutting matt, needle, thread, pins, Clover Yo Yo Maker in extra small, small, medium, large, extra large circle, small and medium heart and the small and medium flower.
Materials:
Confection Button Collection and FabriTacCream canvas, cream burlap small dark pink rick rack, large light pink rick rack, various scraps of coordinating fabric. Two strips of 6×24”, burlap, Velcro ®
Directions:
1. Cut burlap to 36″ by 22″ to make a bag about the same size as a grocery bag. So if you buy 44″ wide fabric, you can make two bags with a yard. Cut in half. to measure &&& Cut canvas to $x#. Sew the burlap to the canvas. Fold the top edge down 1/2 inch. Then stitch ¼” from edge. Place wrong sides together and sew on the three remaining sides.
2. To make a gusset, flatten the bag with the bottom seam on top. (It looks like an odd triangular shape, but makes more sense when you actually do it). Then sew across the triangle so that your seam is about 3-4″ long (mark it by sliding a ruler down until it reads 3″). When you turn the bag right-side-out, it will stand up like a paper grocery bag just not as deep.
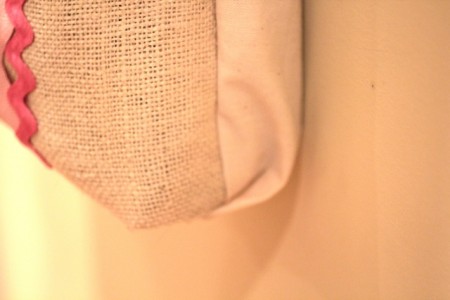
Gusset on Messenger Style Tote
3. Cut striped fabric for handles to 6×24. Fold in one inch on each side finger press. Then stitch ¼” from edge. Fold ends of each tip to form a diagonal and sew along edges. Sew the other end inside the bag. Straps can be made of self-fabric, very sturdy ribbon, matching fabric remnants, nylon webbing, or whatever else seems you have handy. I tied the fabric strips into a knot for a decorative effect.
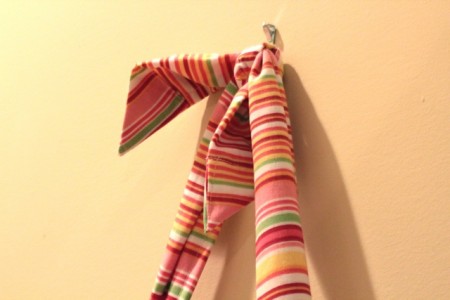
Knot at the top of the straps
4. To embellish the tote use Fabri-tac to adhere various lengths of rick rack. The rick rack mimics flower stems. Mine vary from 4-10″.
5. Follow manufacturers directions to make the yo-yos. I used a variety of the sizes listed above. Hand sew buttons in the center of each yo-yo. You can either adhere the yo-yos with a quick stitch or you can use the Fabri-Tac.

Yo-yos flowers with button center
I love doodling on all types of objects, so when I was sent some of the Start Ups buttons, I was excited to see what I could come up with. I decided to use my Marvy Uchida alcohol based markers to color the flower Start Ups and make a headband for my daughter. The Start Ups are great for adding your own personal touch to a fun button project!
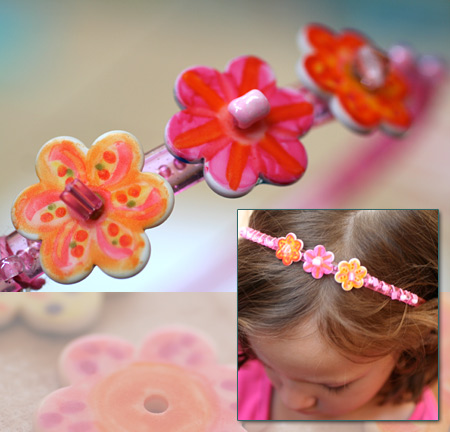
Button and bead embellished headband by Jen Goode
Materials you’ll need:
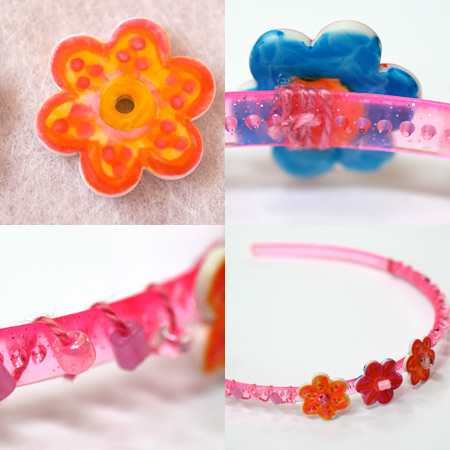
Button and bead embellished headbad steps to make
Here’s how to make a button and bead embellished headband:

Add colored glitter glue to clear buttons for an embellishment that sparkles!
Making your own Glitter Buttons is an easy DIY project that you can complete with the kids in a weekend.

I found this adorable table runner while cleaning up my Mother In Law’s house a couple of weekends ago. For some reason she had only worked half of it and then put it away to never be worked on again.
I felt bad cutting it up but it didn’t quite fit on the front of this messenger bag. So I cut it to fit and then cut the lace from the edge and sewed it back on. Same thing…only smaller.

I sewed a small heart shaped doily to the lower corner and embellished it with buttons from a Button Bonanza bag in Bubblegum. Finally, I stitched again around the outside edge of the heart with pink embroidery floss and put embroidery floss through a couple of the buttons.
I haven’t decided if it’s finished or not. I’ll have to sit with it for a day or two and decided if I need to add anything more.
What do you think? Is it finished? If not what would you add?

Button embellished cowgirl shirt
Whether it’s time for some ropin’ and ridin’, or just a fancy night out on the town… There’s not much fashion that doesn’t look better with BUTTONS!
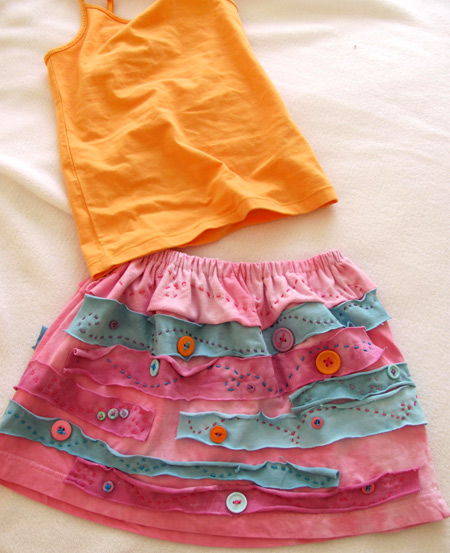
DIY recycled t-shirt button skirt by Jen Goode
Between all my kids, the house is always filled with someone’s clothes that don’t fit anymore. With hand-me-downs, the boys have had a great selection of new clothes in every size, but my daughter isn’t about to get excited over monster truck t-shirts unless that have bling in sparkly pink and purple. However, with a little creativity, we can turn any rough, tough boy-wear to fabulous girly in no time!

Cute button dress
Isn’t this little party dress adorable? I love the way the colors of the buttons echo the polka dots in the bottom.
Oh! And those cheeks! How could a mommy not spend all day kissing those cheeks!
Please visit Craftiness Is Not Optional to read more about this project.
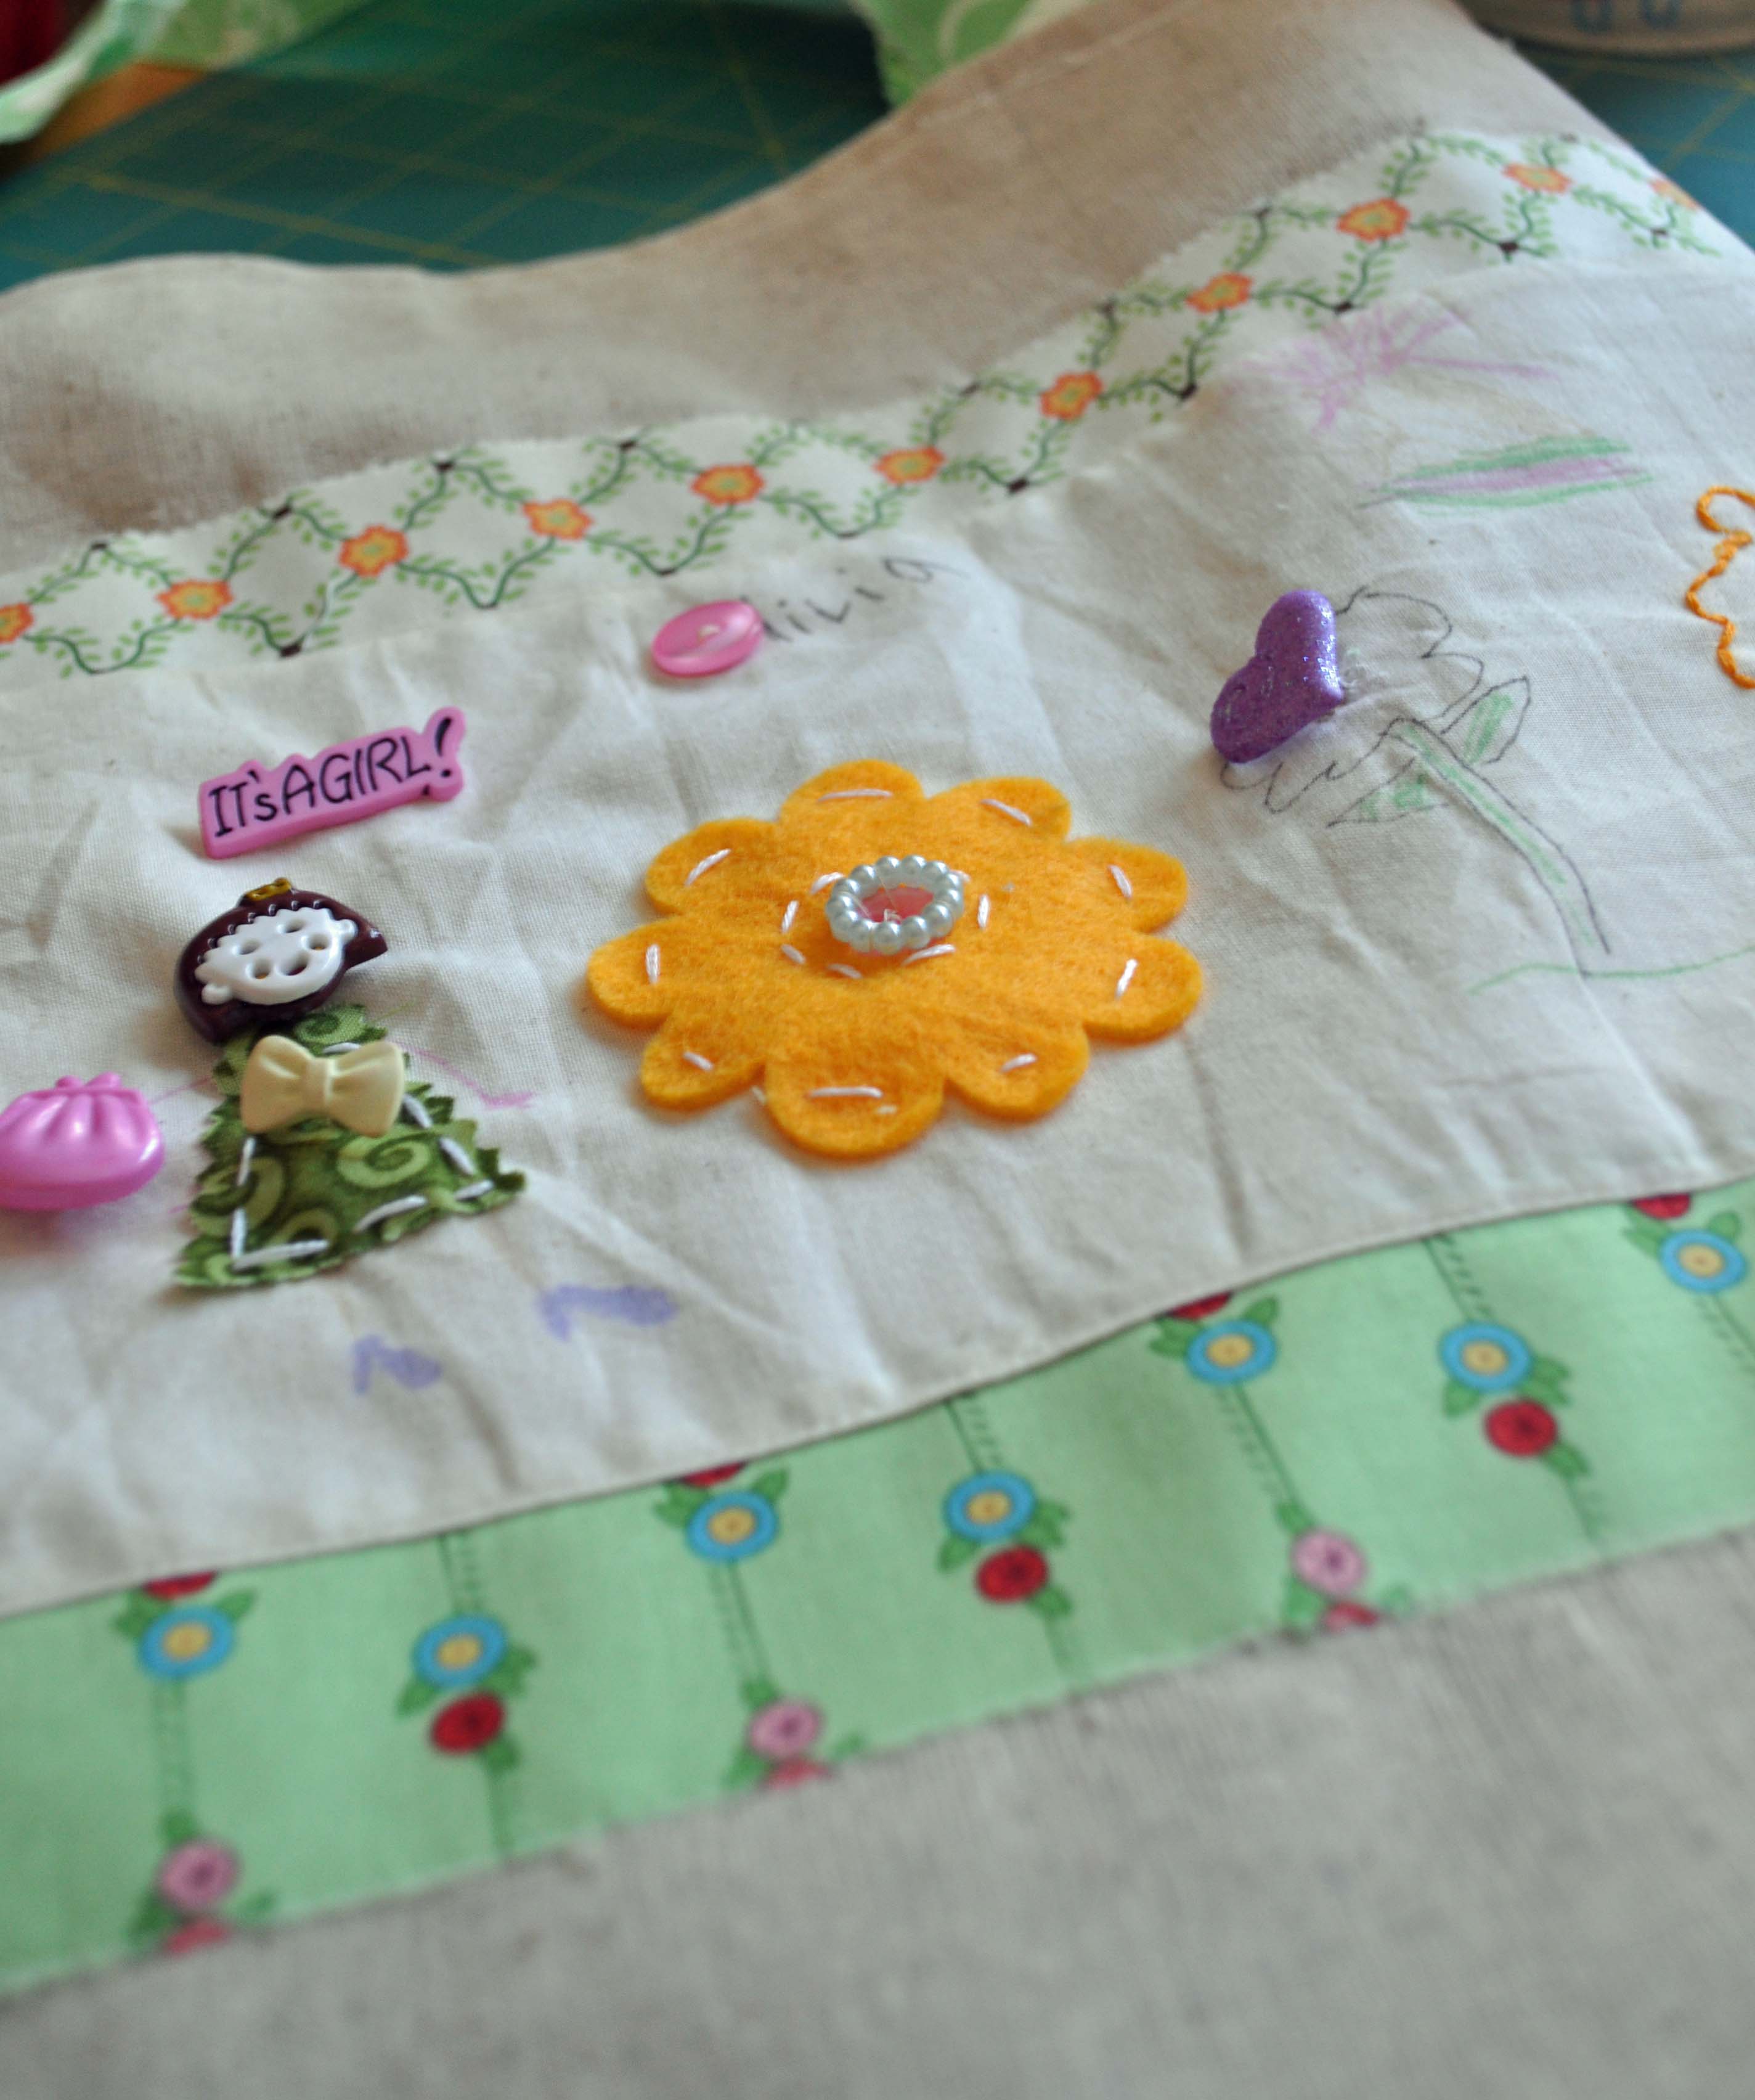
Do you remember how much you loved to sift through your mom, aunt, or grandmother’s button boxes? I still play with my buttons all the time, and I know I can always keep my five year old daughter busy with buttons. I recently came up with a project that takes button play beyond just looking at buttons, but also uses them as a creative tool. The end result is a darling little sampler of all my daughter’s favorite buttons and artwork. It’s truly an heirloom piece that will be cherished for years to come. Here’s how to make a button embroidery sampler with your child.
Yo Yos and buttons seem to be made for one another. I recently made a few projects with yo yos using the Clover Yo Yo makers and our beautiful buttons.

Yo Yo button headband
I do have a little confession to make… I had never made a yo yo before. True story. But the yo yo maker was soooo easy and if I had a yo yo that didn’t look “just right” adding a button to it made it look fine. My good yo yos looked even better with a button.
I covered the headband above with fabric and then covered the seam with some grosgrain ribbon. Finally I attached a yo yo made with coordinating fabric and topped it off with a button. Super cute hair accessory in about 20 minutes. Seriously.
Look how cute the minis look on a barrette!!
I love this mini tote with a doily, yo yo and button. Wouldn’t it make a great gift bag?
Yo Yos and Buttons go together like peanut butter and jelly. Don’t you think?

Button Embellished Messager Bag
This is an easy way to dress up a plain cotton messenger bag!
I used Fabri-Tac to glue the buttons on but you could definately sew them on.
I like the monochromatic look of the Natural Buttons but you could easily make this in soooo many colors. And because the bag is cotton it could be dyed to match any of our buttons.
What color would you make?