Header

Author Archive | Elise Durenberger

Make Halloween Spider Decorations: Button-bodied spiders

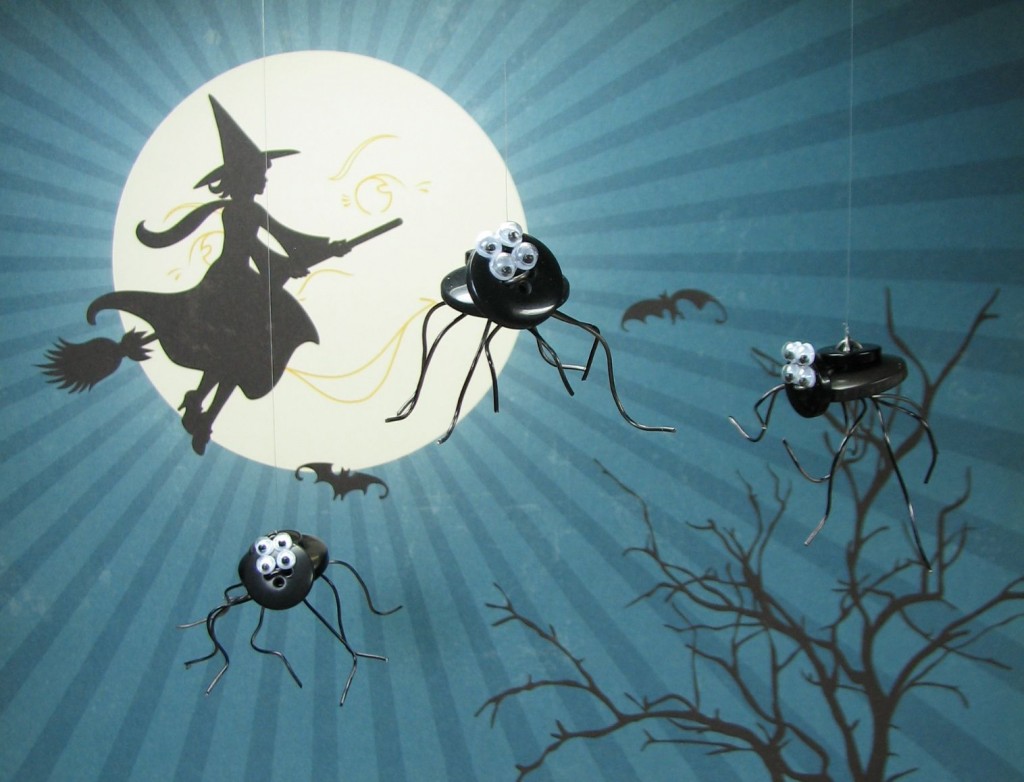
Put down the mop and dusting cloth!  Button-bodied Halloween SPIDERS are fun to make and should become a welcome addition to your Halloween arsenal of ghoulish home decor!

I just ADORE creating “life” with buttons!

It doesn’t TAKE much…. to make your EYES bulge with joy seeing these Halloween Spiders!

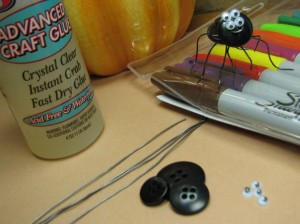
Button-bodied  Halloween Spider Recipe:

Buttons Galore & More Buttons (3 per spider, small, medium & large)

Craft Wire

Google Eyes

Beacon Adhesive

Sharpie Markers

Wire cutters

Clear thread  – if you want to hang them!


Button-bodied  Halloween Spider Directions:

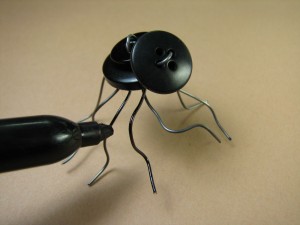
1) Cut craft wire into 4 pieces of 4 – 5″ lengths.

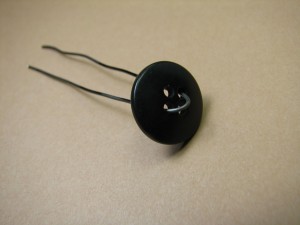
2) Take one, fold in half and thread through medium sized button.

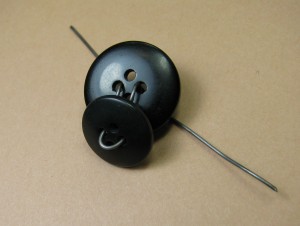
3) Thread ends (with medium button attached), through large button, adjusting smaller button to sit on the edge of the large button, so that there is approximately 1/4″ slack between medium button and where the wires thread through the holes of the large buttons.

4) Twist the legs or “ends” of the wire, to lock it into position.

5) Repeat step #2 with the smallest button and second piece of wire.

6) Thread the wire ends from the smallest button into the holes of the largest button, so that it covers the “slack” of the wire.

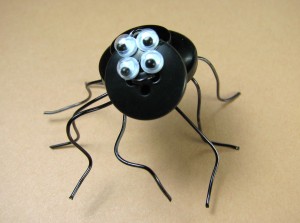
7) Fold in half and add the remaining wires, criss-crossing through the button holes, so that the spider now has 8 legs.

8) Arrange legs to your liking, cutting off excess as needed.

9) Color wire legs with Sharpie markers.

10) Adhere eyes with Beacon 3 in 1 adhesive.

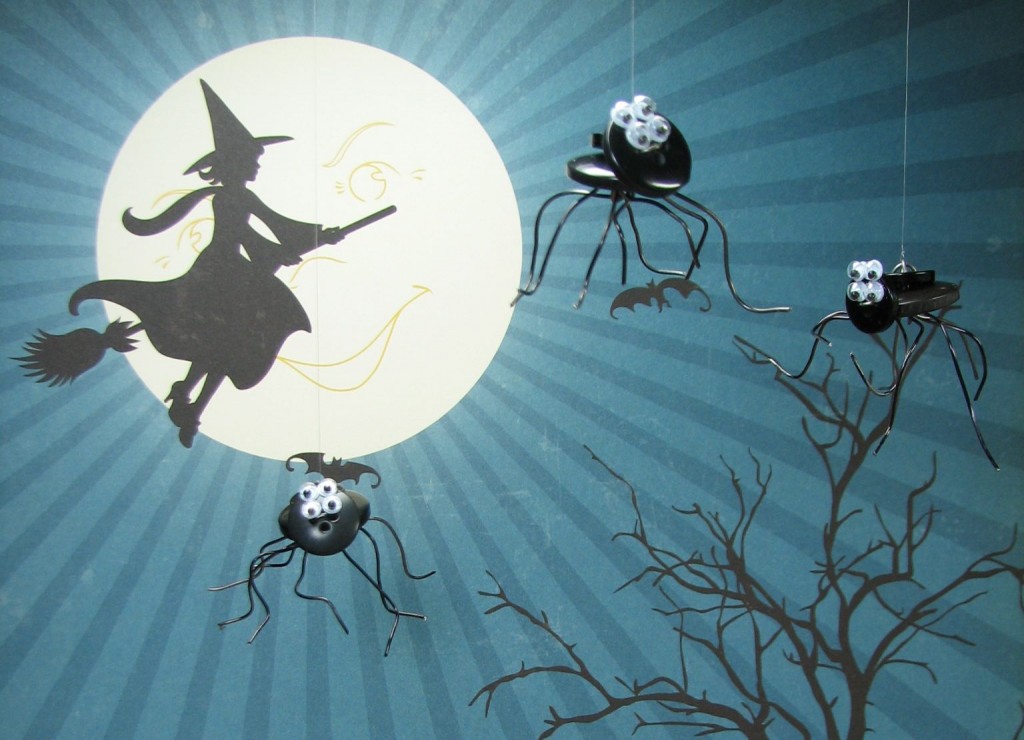
11) Using clear thread, tie through the central wire in the “body” of spider to create spider web string.

Embellish Halloween scenery and your home as needed!

Ya see!  There are SO many ways to use Buttons Galore & More buttons, it’s SCARY!

Happy HAUNTING!


0

halloween wall art with buttons idea -DIY

Halloween wall art?  Buttons Galore & More buttons and supplies make Halloween SO much fun, it’s spooky!

make halloween wall art with buttons

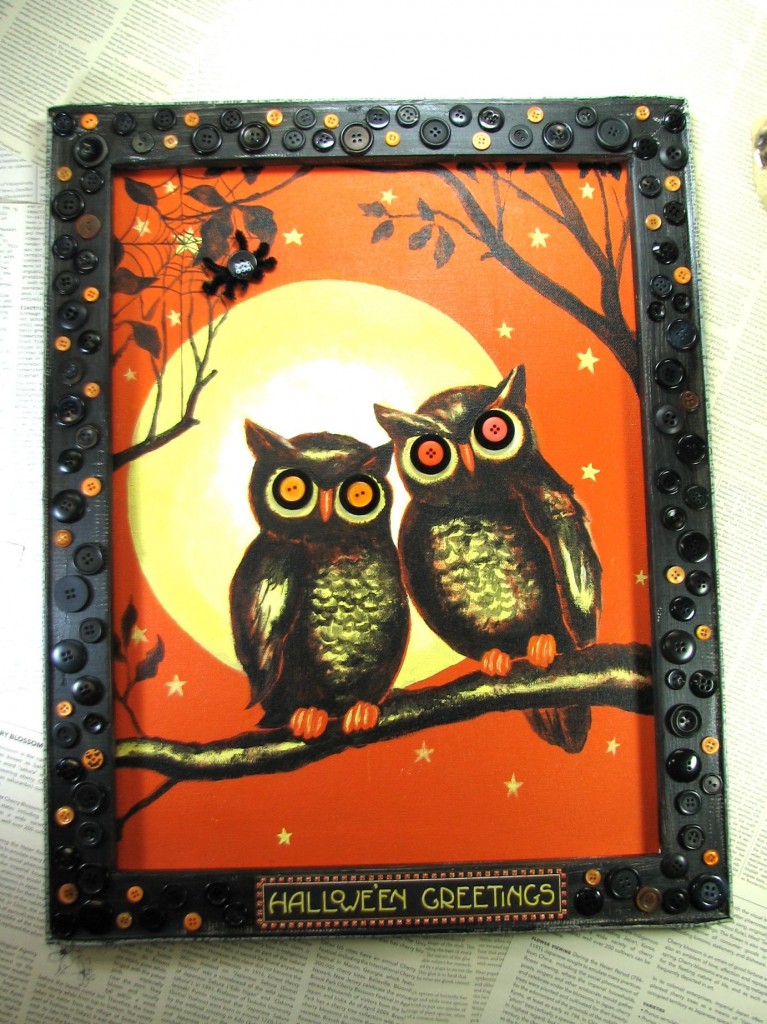
Autumn is the PERFECT time to get crafty, and I couldn’t help but be influenced by the most wonderful inventory of buttons from BG & M and the subtle changing of light and shadow as the days are becoming shorter…   So HERE I go, sharing with you a technique rich, button festooned project, to get your inner hoot owl, hooting!  Let’s make halloween wall art with buttons.

halloween wall art embellished with buttons from Buttons Galore & More:

Suggested supply list –

1. Artist (value) canvas

2. Inspirational graphics of your choosing (i.e. scrapbook paper, free digital images, old print ads, etc.)

3. Acrylic paint/ Gesso/ Artist Paste

4. Seasonally colored buttons from Buttons Galore & More

5. Beacon adhesive

6. Decorative tissue tape

7. Pipe cleaners

8. Google eyes

9. Jacquard Lumiere 3D acrylic paint

10. Sharpie Markers

halloween wall art directions:

This project is shared for YOUR inspiration – I hope you’ll create something specific to your needs for fun and holiday decor!  What follows is a guideline to assist you in  your creative travels.  Enjoy make halloween wall art with buttons.

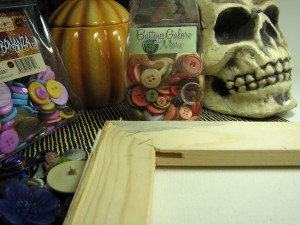
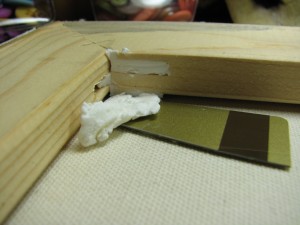
Remove packaging materials from value canvas, flip to the backside.  Fill support gaps in stretcher bars with Artist 3D medium (spackle!) using tool of your choosing.

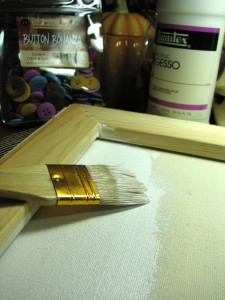
Prepare the raw canvas with gesso, so that acrylic paint can be applied.  Let dry.  Paint the wooden frame in a complimentary color for your project.  Finish the OUTSIDE edge of the frame with decorative tape.

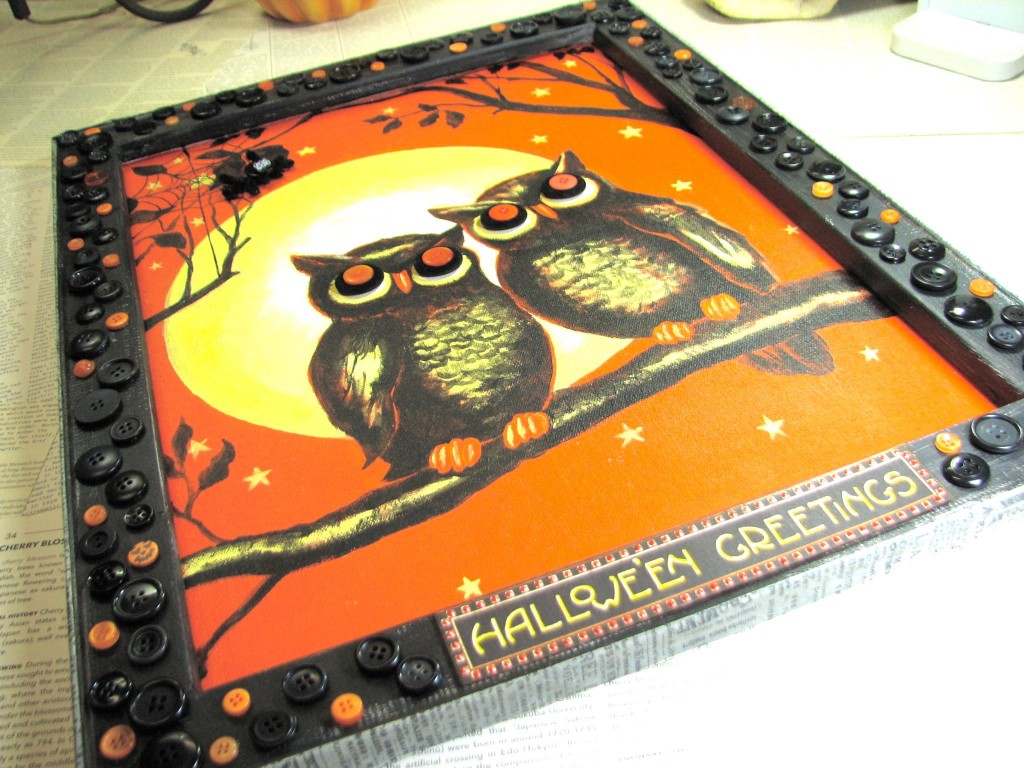
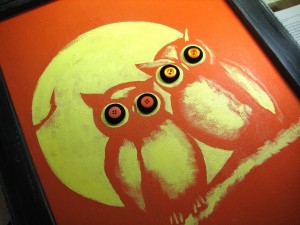
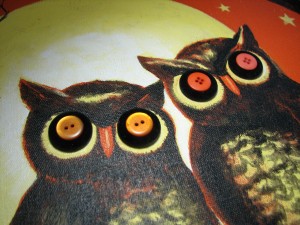
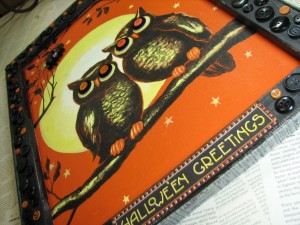
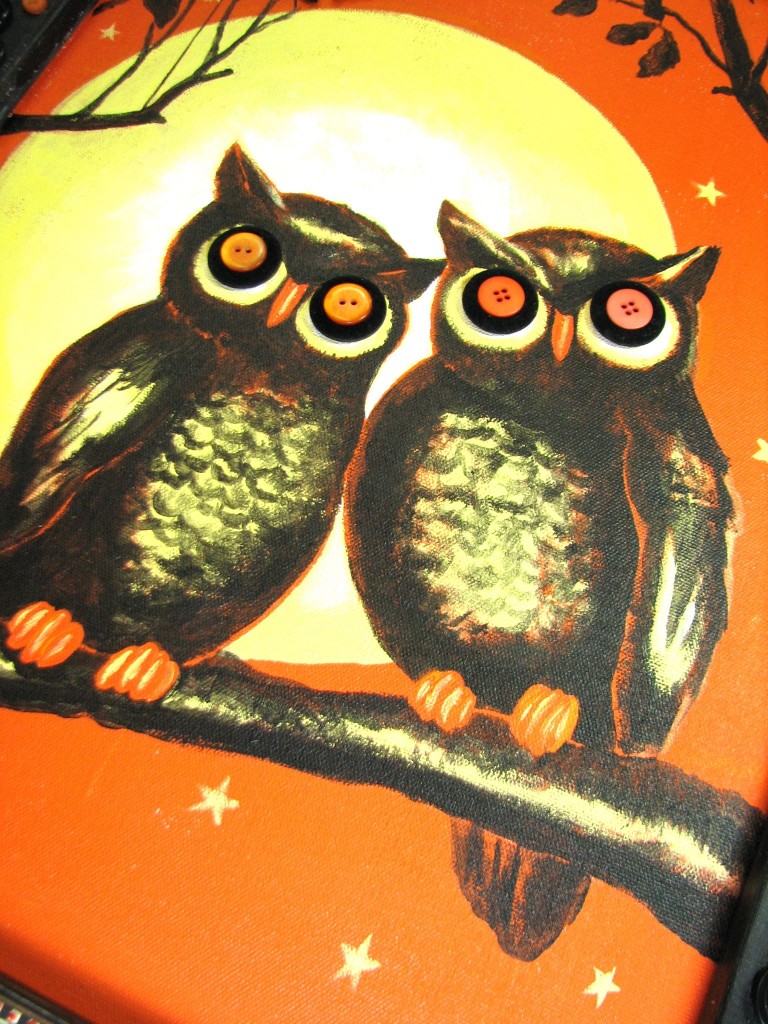
Since buttons were the inspiration for MY project, I sought a design that could feature buttons as eyeballs!  A pair of spooky, Halloween owls were the next logical choice for my decorative canvas.  By placing the buttons on the canvas, I sketched out owls at a scale that would really make the buttons stand out!  If you are not comfortable with sketching freehand, you can get beautiful results by blowing up a printed image and then using graphite transfer paper BEHIND the artwork, trace the image from the front and then have our lines appear, similar to this drawing.

By painting in the highlights, first, I could confirm the scale, but mistakes could be easily covered with leftover background paint.  Using a limited palette makes this SO easy!  (And SUPER spooky!)

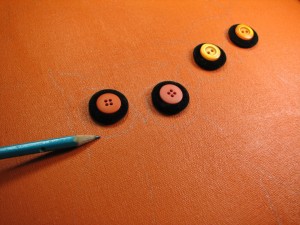
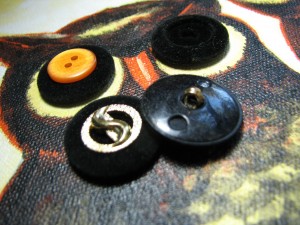
For this project, I immersed myself with buttons!  While Buttons Galore & More is a wealth of seasonal themed, as well as EVERY color and shape of buttons imaginable, I was searching for classic buttons, to create a spooky, vintage look.  In a FAT bag of miscellaneous goodies from a BG & M grab bag, I found a wealth of these snazzy, faux velvet and gold buttons.  It was easy to snap the shank off the back, remove the gold, and then fit a SCRUMPTIOUS orange button into the recess.

I LOVE the character that was created with these stunning buttons!  Beacon 3 in 1 craft glue makes for easy and secure button festooning… (Plus, it’s FUN!)

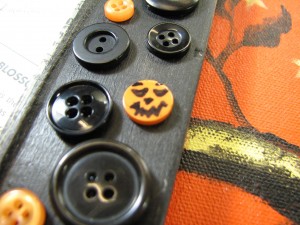
A button WITHOUT holes was a perfect, pumpkiny surprise for this craft-addicted girl…  Add SHARPIE marker = PUMPKIN FACE!  Trick OR Treat, babies! It’s ON!

Did I mention, I LOVE HALLOWEEN CRAFTS!?!

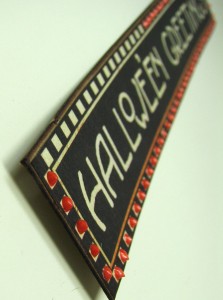
…   And GREAT materials!  Look how this gorgeous Lumiere 3D paint from Jacquard and some Sharpie marker brought this sentiment up a few zillion watts!

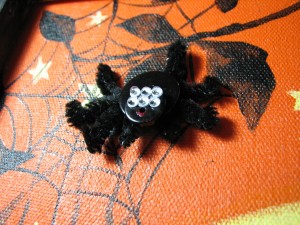
Oh, gawsh…  And did I forget to mention, SPIDERS?

No need to shriek…  This one’s perfectly tame!  Pipe cleaners, buttons and GOOGLY eyes…!   Give the exterminator the day off, buttons BUGS are fun to make!

Thanks for taking this eerily creative and crafty journey with me!  I hope you’ll be inspired to make halloween wall art with buttons and supplies from Buttons Galore & More!  Have FUN!


1

Make Faux Pierced Earrings : Button Fashion Craft with Cozy Brads

Don’t have pierced ears?  I have the solution.  Make faux pierced earrings.  This is a great back to school project for your tween who wants to have pierced ears.  If you’re not already buried in the reality of “back to school,” brace yourself…  {It’s COMIN’!}

Here’s a quick and easy way to do a fun bit of fashion craft with a sweet lil’ student, BEFORE things get ALL about the backpacks and hand sanitizer…  Cozy Brads “faux” pierced earrings, for back to school!

Materials for faux pierced earrings:

Blueberry Pie, Color Blends Pillow Pack

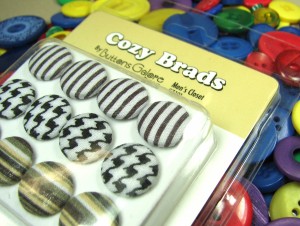
Cozy Brads – Men’s Closet

Quick Grip, Beacon Adhesive

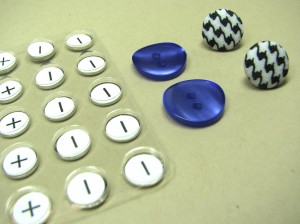
Ultra Thin, Paper Crafting Magnets


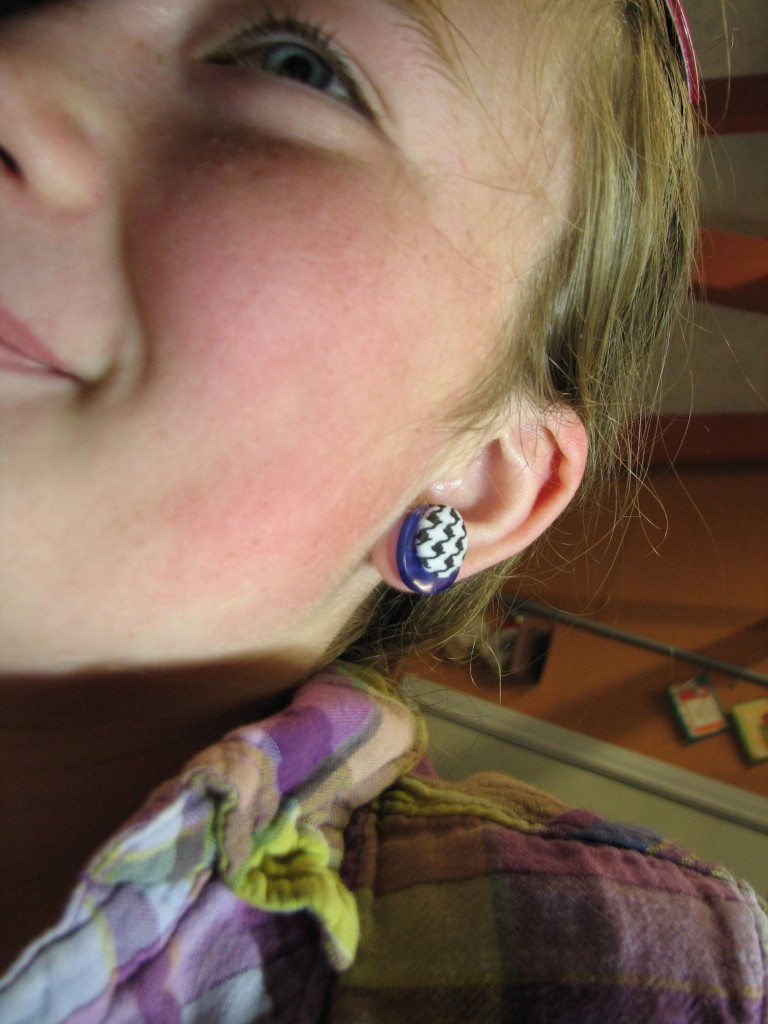
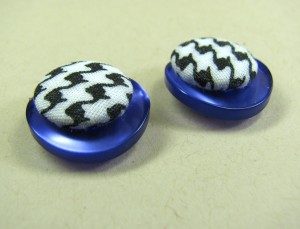
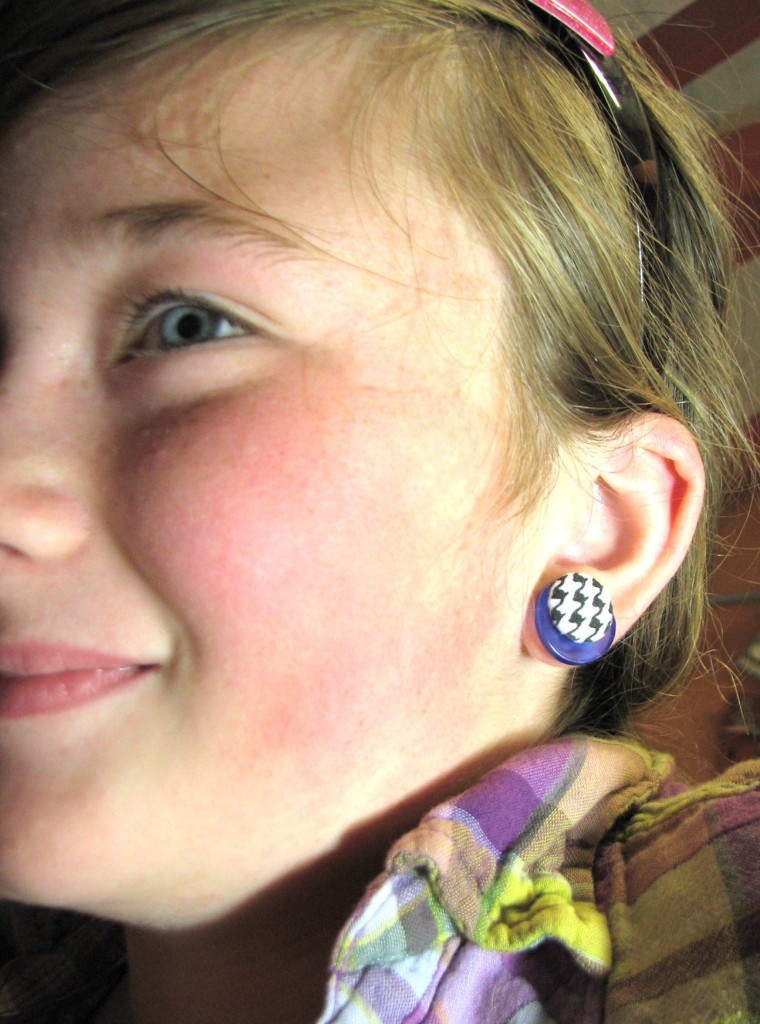
This adorable little fashion model is eagerly awaiting the opportunity to showcase PIERCED earrings, but since she’s not quite ready for the real thing, we made some, less invasive, faux earrings with gorgeous buttons and super, trend-setting HOUNDS TOOTH brads from Buttons Galore & More!

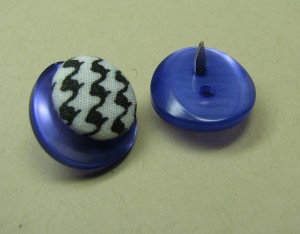
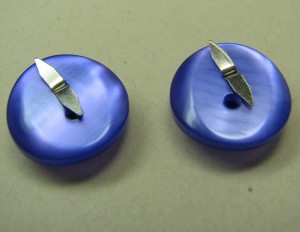
You’ll never look at buttons, brads and magnets the same!  Thread the “legs” of one of the brads through one, of a two-holed button, of your color choice.

Flatten the brad legs, just as you would through a piece of paper, then apply a dab of Quick Grip adhesive.

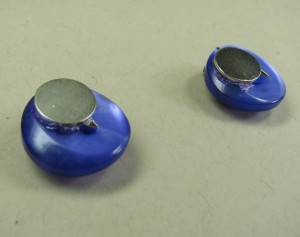
Set magnets in the glue, adjusting the placement against the brad’s legs.  Having the natural attraction of the magnet AND the adhesive creates an excellent bond.  Allow time to dry and then rub off  excess.

Working from two-holed buttons will allow for a stunning, off-set accent, to the excitement of the hounds tooth pattern.

The “fashion model” seems satisfied with the results of her faux pierced earrings!

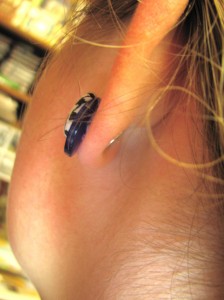
You can barely see the opposing magnet on the back of the ear lobe.  With these ultra thin magnets, there is just enough strength in the bond to keep the earring secure, but not enough to make it uncomfortable!  The model wore her faux pierced earrings for the day, comfortably!  These will DEFINITELY be a part of the first day of school wardrobe for THIS girl!

Just THINK about how YOU can customize some “faux pierced earrings” of your own!  HUGE possibilities!  Have FUN!


2

Button-embellished ~ GLAMOUR~ Keepsake Frame

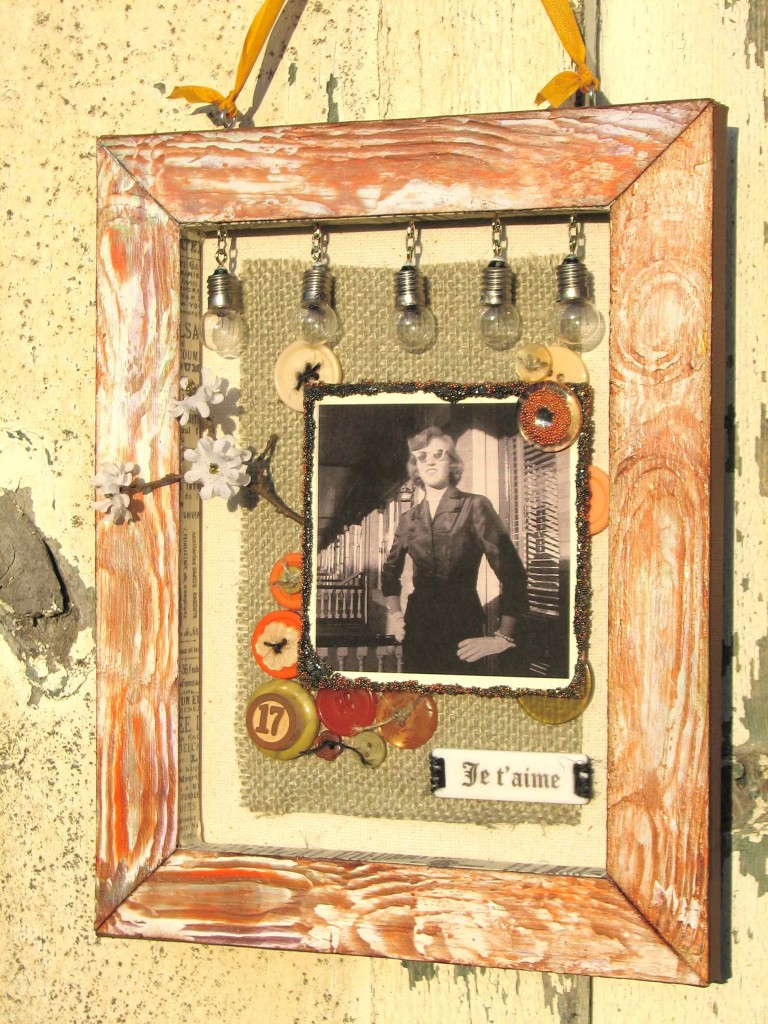
Taking a little break from our “Christmas in July” theme we have a delightful project of Mixed Media Art in this great Keepsake Frame by Elise! :)

Glamor, art and intrigue – a perfect recipe to play with buttons!

Teaming up with some HEAVENLY materials, including burlap, Lumiere Dimensional Paint by Jacquard, Glitter, Ink and Smooch Accent ink by Clearsnap, MICRO PEARLS {Yes!  Micro pearls!} and a whole lot of GORGEOUS buttons form Buttons Galore and More, I was COMPLETELY inspired to alter this simple “value” artist canvas to become “priceless” in no time!

Supplies:

Button Tote Bag Assortment – Cornucopia

Mixed Rectangular Sliders

Lumiere 3D Metallic Paint and Adhesive

Glitter, Smooch and Ink – Clearsnap

Trimmer, Knife, Ruler & Mat – Westcott

Adhesive – Beacon via Buttons Galore and More

Acrylic Paint – Eco Green Crafts

Burlap

Micro pearls

Tissue Tape

Faux Wood Grain tool (Local Hardware supply)

Other – Vintage light bulbs, twigs and fabric flowers (Misc. stash)


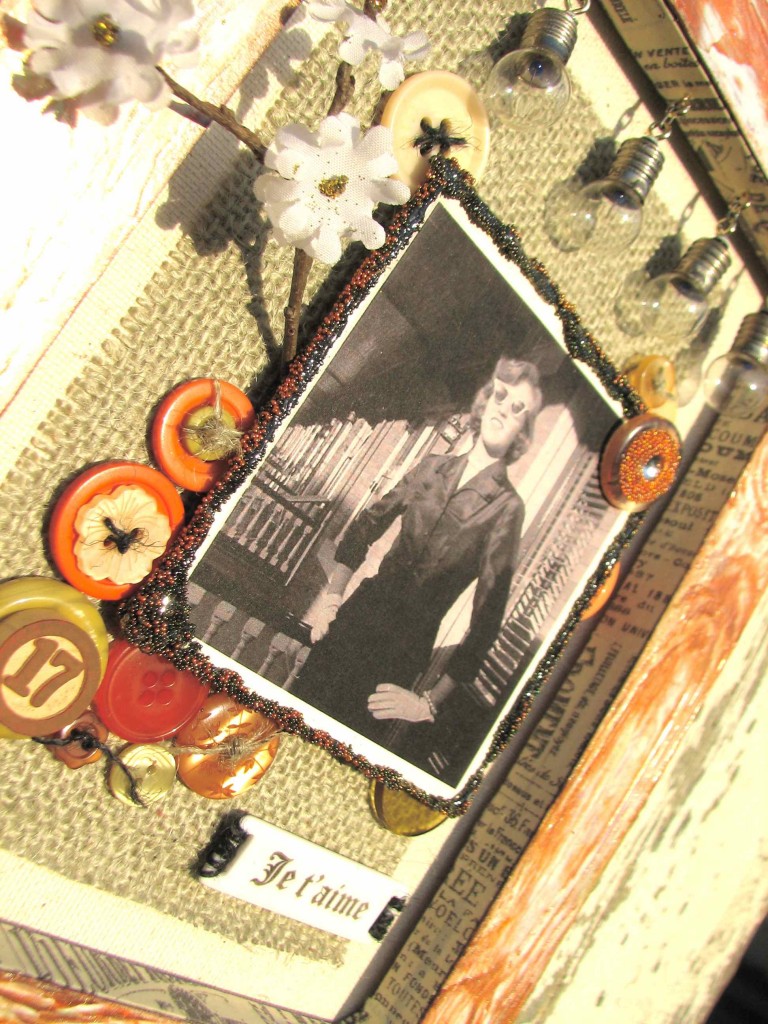
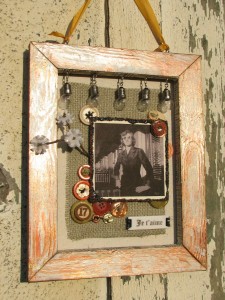
To begin, select a glamor shot of your choosing, to feature in finished frame. {I chose a cool, black and white shot of my sweet Mama at the wee-age of 17!  Wasn’t SHE a dish!}

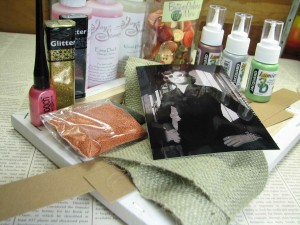
By accessing the back side of a traditional canvas, there is a whole wealth of crafty potential to play with.  To customize the “frame” of this look, I created faux wood grain with a simple wood grain tool (available at most hardware stores!), Lumiere 3D paint, as well as regular acrylic paint and some strips of chipboard, cut and sized to metier together to match the stretcher bar framework of the canvas.  Start by applying an acrylic base to the chipboard.

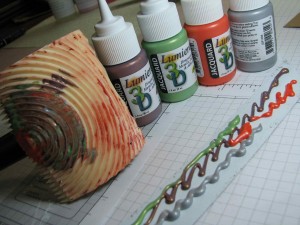
For rich wood grain effect, the MORE color, the better…  I used FOUR different Lumiere colors for this look!  In case you’ve never dabbled in faux wood grain – it’s TOTALLY easy and addicting…  Apply Lumiere on top of dried, painted (with regular acrylic paint) chipboard strips, then pull and rock the tool to create the MOST amazing effects!  If you don’t like how it looks, keep working!  The 3D quality of the Lumiere gives you some decent working time – you’ll see!  (G’head – TRY it!)  Once you get all four strips done, set to the side to dry.

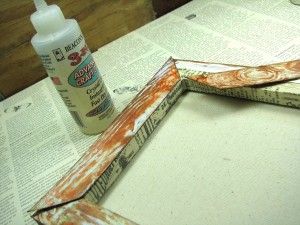
Paint the outside edge of canvas with color of your choosing.

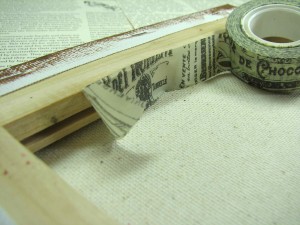
Line the INSIDE of the frame edge with printed tissue tape.

Glue faux wood grain strips to frame.  I love, love, LOVE how beautifully Beacon 3 in 1 works for an assignment like this!

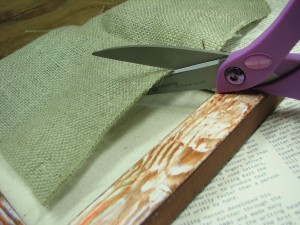
Westcott fabric scissors cut burlap, flawlessly!  Cut burlap to size of your choosing.  I decided to let some canvas frame the edge of the burlap, just because it looked YUMMY!  So many textures!  What’s a girl to DO!?!

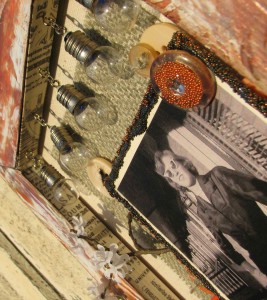
Arrange picture and embellishments to your liking.  For this project, I mounted the photograph on chipboard, mixed micropearls and glitter and then adhered with Beacon 3 in 1 adhesive for a luscious, tactile effect.  Having TOO much fun to stop there, I added micro pearls to button centers, as well…  OMG!  {My middle name is DANGER!}

If you’ve never ventured, I can’t recommend HOARDING, uh, I mean, collecting some of our Blank Craft Shapes, in every size!  Love the mood that can be created with theses!  Easy to stamp and beautiful to behold – Je t’aime!  {See what I’m sayin’!}

YOU can get your glamor on, too!  Just pick up a selection (or TWO/FIFTEEN!) of some lovely button assortments from Buttons Galore and More, toss in some HEAVENLY crafty supplies, a canvas and old picture or two…  I guarantee you’ll beat the heat if you spend a few hours crafting away on a cool keepsake, like this!  I hope so!

Thanks for visiting!  Here’s to a glorious, button-craft filled day!  Keep CALM and BUTTON onnnnnnn!


1

Button Embellished hand painted Bunny Characters

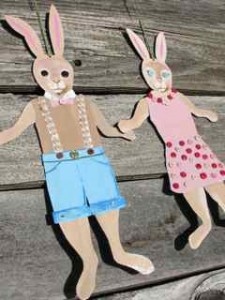
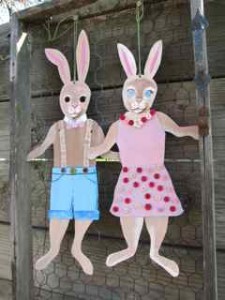
Depending on what part of the world you’re living in, it may or may not seem like Easter is right around the corner.  Where I live, Mother Nature has been up to her old tricks: there have been days where I’m not sure if it’s time for Christmas OR Easter, but I’ve had it on the brain, so Easter Craft is WHAT I’m sharing with you today, these adorable hand painted bunny characters.

Beautiful buttons from Buttons Galore & More, Rose Garden, button tote collection, was such a splendid influence, so with a little help from some seasonal friends, and some re-purposed tin scraps, I met the Easter Bunny and his gal pal, halfway down the bunny trial: CHECK IT OUT!

The thought of our standard Easter display feels a little out of date, these days.  Since I’m crafting with SUCH extraordinary buttons from Buttons Galore & More,  I decided to conjure some images of Peter Cotton Tail, to make something “keepsake” and classic feeling, created with my own two hands.  It all started with some sketching…

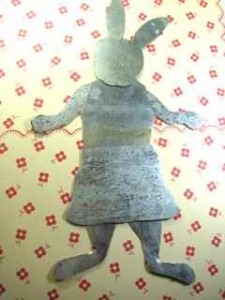
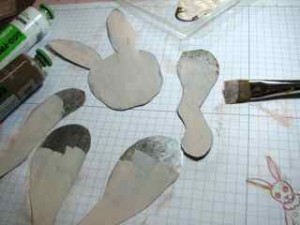
And then CUTTING!  Scissors indicated for metal, cut this material easily.  Using a standard, crafting felt pen, I made my marks, that could easily be removed by rubbing.  From 5 individual squares of 4 x 6″ galvi/tin, I cut bunny body parts…  To be ENJOYED, not harmed! {!}

These individual pieces will be joined with simple brads, with long shanks, once painted and embellished.  Careful planning in the early stages is the best way to ensure a great results to your seasonal {and ANY!} craft decor project.

Mixing a desired shade of “bunny” creamy brown, I gave each piece two coats of paint.  Bunny “details” were added, as desired. Once dried, they were then painted with clear, crystal adhesive, then dried completely.  When dried, the edges were sanded.  More adhesive added where desired.

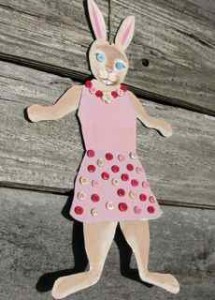
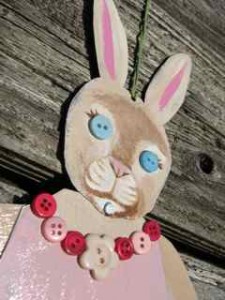
Once pieces were dried, they were assembled using a “metal friendly” punch, and then fitted with a brad.  Once in place, the brad was lightly smashed with a craft hammer to give a more vintage feel.  I’m hoping these guys will grow old with my family, so I need them to stay sound.   With the character’s parts, functioning, buttons were added to embellish and complete a classic flavor to these Easter Characters.  Adhered with Beacon’s 3 in One Craft Glue, with careful storage, these fabulous details should last for years!

I’m rather smitten with lil’ Easter Girl!

But SHE appears smitten with Peter Cotton Tail!

Aren’t they the cutest pair!

I hope they have inspired YOU to look at your personal inventory of “leftovers”, toss in some incredible buttons from Buttons Galore & More, and make a seasonal treasure for you and YOUR family to enjoy for years to come!   It was a pleasure to share this fun button embellished spring project with you!   Have a splendid day!

Buttons Galore & More Products Used:

Rose Garden Button Tote – HB104

Class Button Tote – HB108

3 in 1 Craft Glue

Cross Promotional Items –

Loden Colored Twine


0

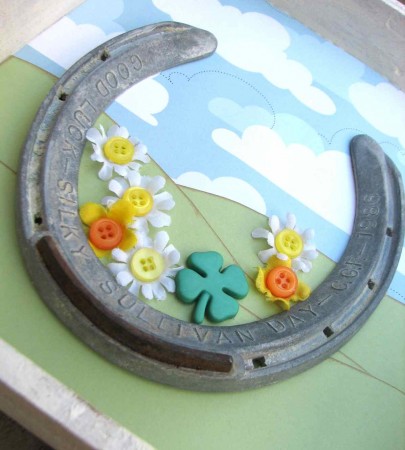
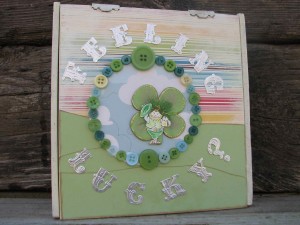
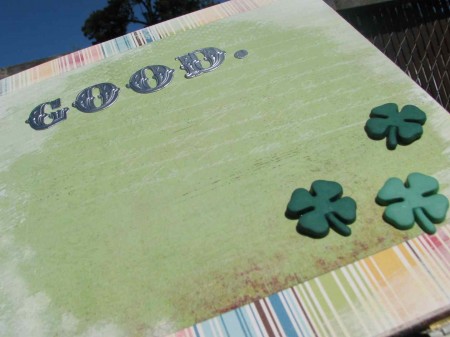
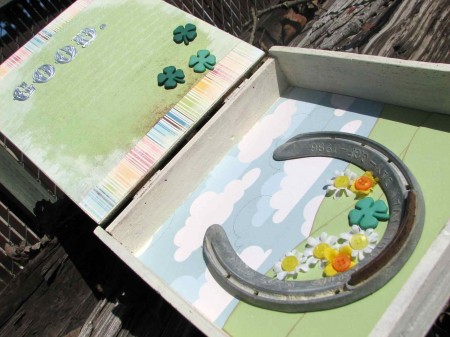
St. Patrick’s Day Keepsake Box

Button embellished St. Patrick's Day Keepsake box


Is the luck of the Irish with you?


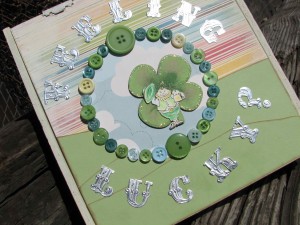
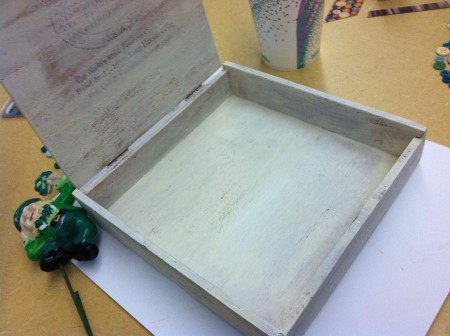
It was WITH ME, when I re-purposed this old cigar box, to become a sparkling keepsake, with a St. Patty’s Day twist…


A delightful assortment of Buttons Galore & More buttons and just the right amount of good old Irish magic…

Buttons Used:

Luck Button Tote

Shamrock


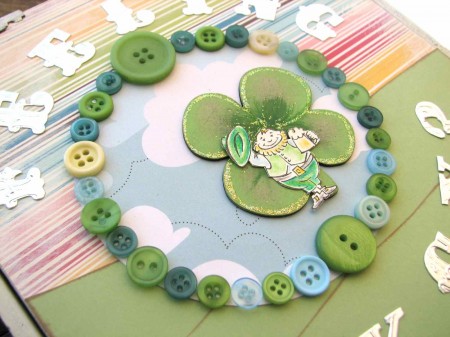
The spirits moved me to create this festive, button embellished medallion, to house a wee-leprechaun and invite contemplation of one’s sense of optimism…


And being, ever the optimist, myself – I confirmed what EVERYONE should feel….


L-U-C-K-Y!


And HOPEFULLY, inspired as well!

I hope you do a little jig and get your BUTTONS on – it’s a great time for crafting with Buttons Galore & More!

Thanks for visiting!


2

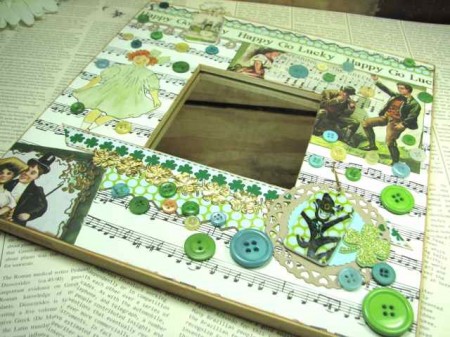
St. Patrick’s Day Wall Art with Start Ups and Packing Tape Transfers

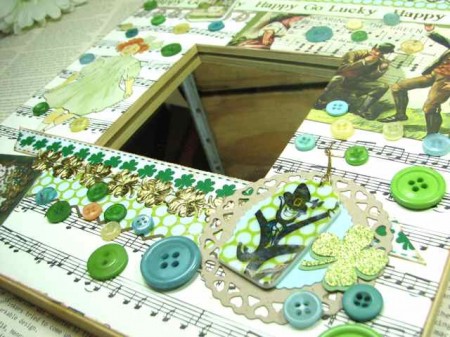
St. Patrick's Day button wall decor

St. Patrick's Day button wall decor

Hello, and happy thoughts of Spring, Shamrocks and Button Crafts!

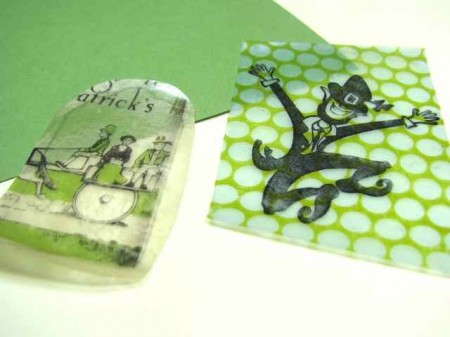
I have a well buttoned, St. Patty’s Day themed project, and some cool instructions for creating packing tape transfer to use with Button’s Galore & More, wonderful Start Up’s line.  Get ready to do a jig, sip a pint and get crafty!


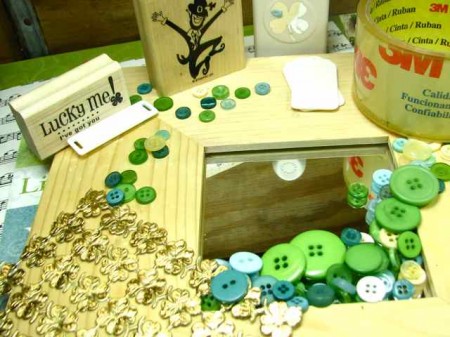
Armed with a fine, spring-like bounty of buttons, start up shapes, printed designer paper and good old packing tape, this simple wooden mirror can easily become the canvas for some festive button craft that will have your friends and family green with delight!


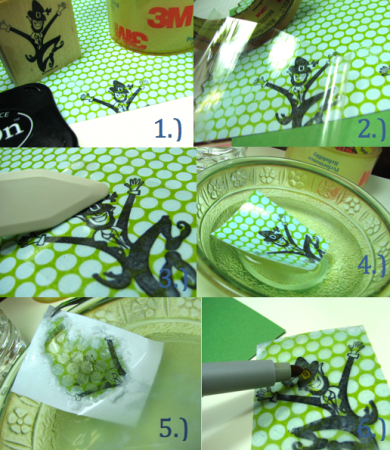
In order to complete a simple packing tape transfer, suitable for enticing even the shyest of Leprechauns, you will only need to follow these simple steps:

1.) Select some printed paper (ink jet prints will not work) with designs appealing to your project and tag, or in this case, designer paper plus stamped image.

2.) Cover desired image with packing tape.

3.) Burnish the image.

4.) Cut out the selection and soak in a bowl of warm water. Soak for several minutes, or until paper becomes soft.

5.) Gently roll off the paper, by rubbing with your fingers, exposing the tape with the image embedded in the transfer material.

6.) Let dry, and then add color, if desired, with a permanent marker.


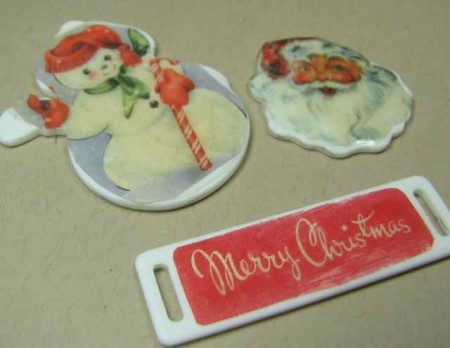
Here’s a shot comparing the printed paper, plus the Leprechaun that I stamped in solvent based ink and let dry, prior to adding the tape for the transfer.  To the left is a transfer I made using just printed designer paper.  I just love the magic of the transparency created by this simple technique.   Below is a photo from a Christmas project I made, here, where I used images from designer paper to match up with some of our wonderful Christmas designs in the Start Ups line:


There’s SO much possibility in these fabulous shaped platforms for custom created embellishments.  I could have a truck load and never run out of ways to use them!


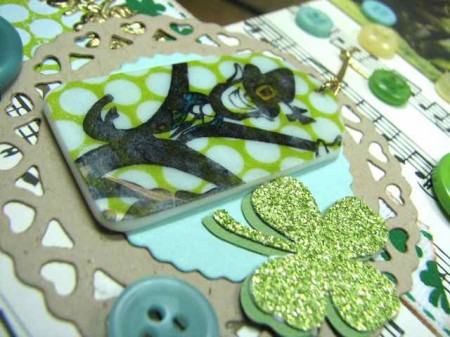
Meanwhile, back at the jumpin’ shamrock, here’s my stamped, transferred, glued and completed Start Up piece, in it’s sparkly home – kinda makes ME want to do a jig…


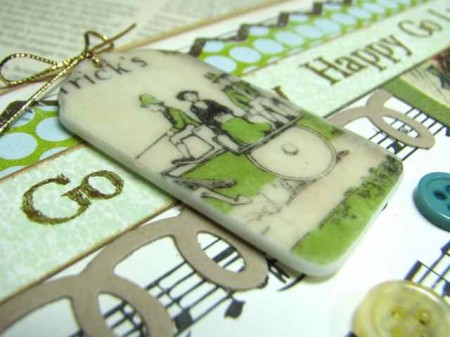
Also, here’s a shot of the way-simple, fun and darling Start Up tag I made directly from a scrap of paper!  I sanded the edges a bit, after it was glued with clear adhesive, to give this gem a true vintage treasure feel.  This is NO blarney – Start Ups are bushels of fun!


I know I’ll be grinnin’ mighty wide when I look upon this button-embellished frame – I’ll certainly be feelin’ the luck of the Irish!  But don’t you be green with envy – you can make one TOO!  Here’s hopin’ that you do, and that the wind is always at your back!  Happy buttoning!


3

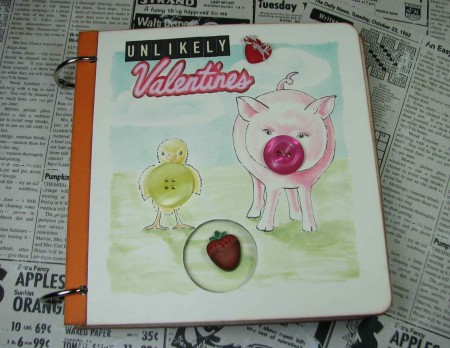
Valentine Theme Keepsake Book


Supplies from Buttons Galore & More:

Oh, the wonderful things we can do with buttons!  This blog is choc FULL of ideas!  And thanks to the bountiful assortment from Buttons Galore and More – we keep comin’ up with NEW ways, to make amazing crafts with buttons…

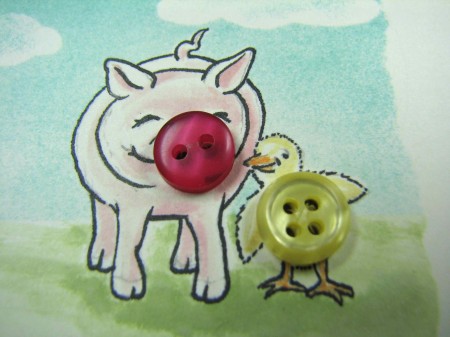
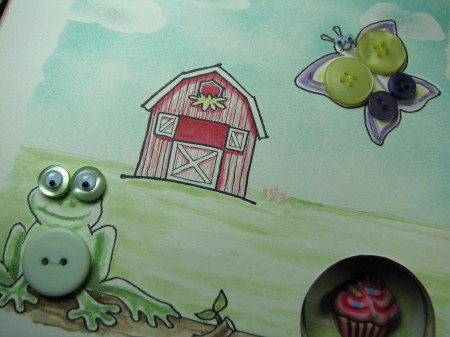
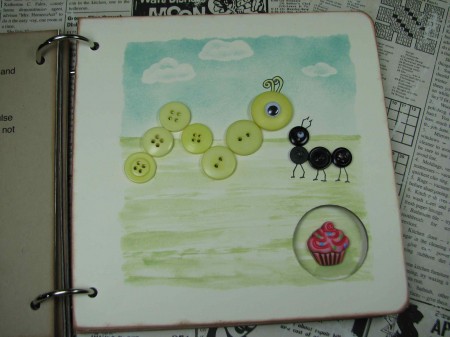
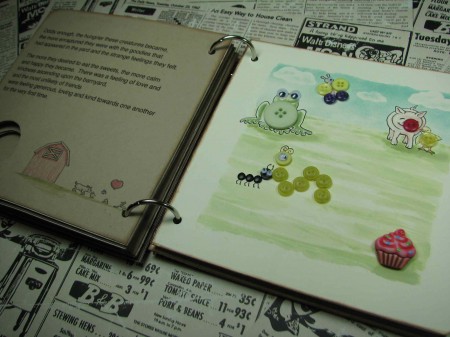
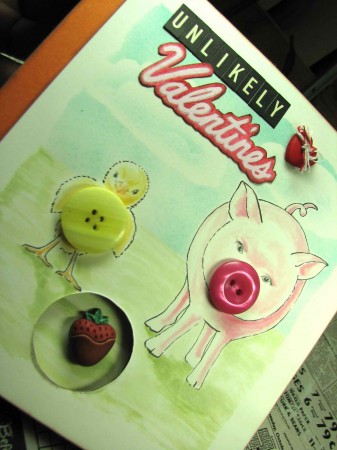
Recently, while doodling on my desk blotter, I created some fun characters by sketching around some colorful buttons.  Like seeing circus animals in the clouds, and messages in coffee froth – THIS little book idea, and the characters within, were born.


I was so taken with the characters, I decided to showcase them by creating a keepsake story, from a re-purposed children’s book.  For YOUR creative consideration, I’m sharing some ideas on how to take your doodles and buttons from desktop to KEEPSAKE – it’s a fun and crafty ride, so I hope you enjoy!

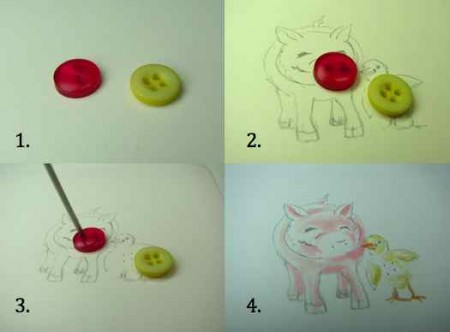
Steps 1 – 4

1.)  Select buttons that inspire you.

2.)  Doodle or sketch as desired.  When satisfied, re-create artwork onto good quality card stock.

3.)  Plan for button holes with a paper piercer, poked through holes and into cards stock.

4.)  Color and ink drawing as desired.


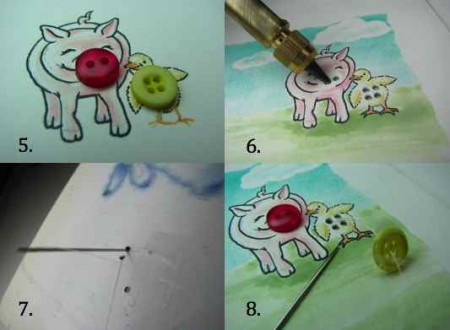
Steps 5 – 8

5.) Check button placement, then color the rest of the drawing or scene to your liking.  Secure artwork to card board page with adhesive.

6.) Drill holes to correspond with pierced marks, through cardstock and cardboard.

7.) From opposite side, using clear thread and needle with a small knot, and secured with tape, push threaded needle to the front side of the artwork.

8.) Thread button and pull tight to secure the button into place.  Tie off and tape down excess thread on the back side of the card board.


Take a MOMENT to enjoy the adorableness of your creations and then CARRY on!


The opposite side of the board, where thread is secured, can be covered with more cardstock and the copy for the story telling, if desired.  This could also be made into a darling scrapbook or memorabilia holder – let your imagination and button characters take you on an adventure and then write about it!


That’s how these creatures came to be!


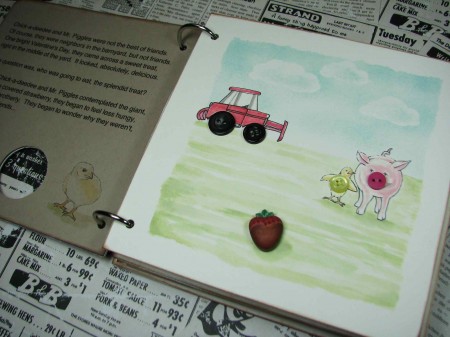
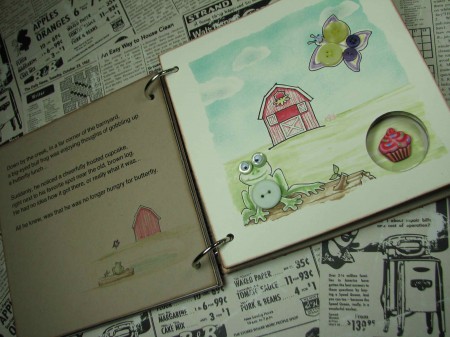
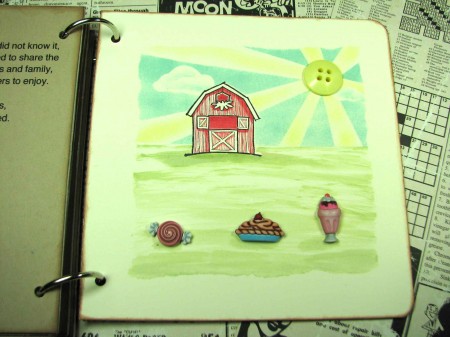
The scene: the BARNYARD.


The characters: unlikely friends who are moved to acts of generosity and sharing as a magical mood is created, by mysterious sweet treats…


The most unlikely of friends become the most UNLIKELY VALENTINES, as they share and bond on Valentine’s day.


And a darling, button filled lesson that life can be so much sweeter, when you share!


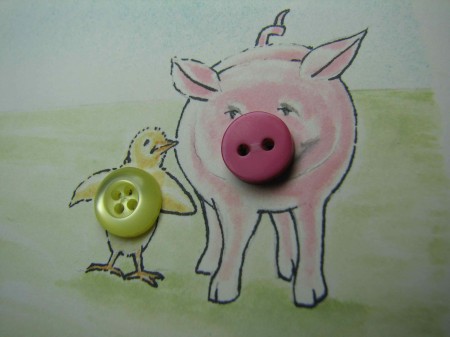
Just ask Mr. Piggles and Chick-a-deedee!


The MOST unlikely of Valentines!

Super fun!  Super BUTTONS!  The very best store: Buttons Galore and More!


8

A Valentine's Day Gift for Teacher


In case you didn’t get enough wrapping, tags and holiday goodness, last month… It’s onward and FORWARD: Valentine’s Day is just around the corner!


Good thing Buttons Galore & More has SUCH a wide assortment of buttons and lovely bits to get the imagination and crafty thoughts flowing.


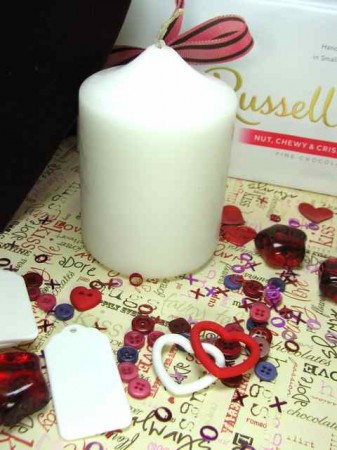
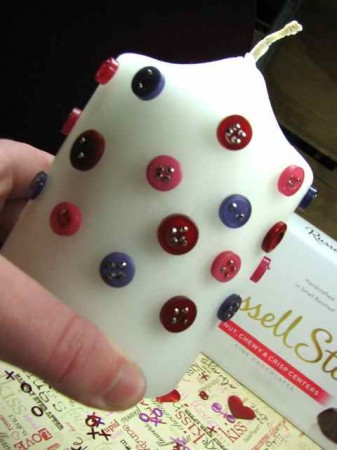
With some simple supplies and a splash of colorful fun, a button embellished Valentine’s candle seems is the perfect project for a little post-Christmas togetherness time.  Gather a willing, crafty kid, and LOVELY buttons from Buttons Galore & More. The wee-child in your life might just be heading back to school with some Valentine’s teacher gifts “in the can”, as it were.  Move to the head of the class… AND have fun!


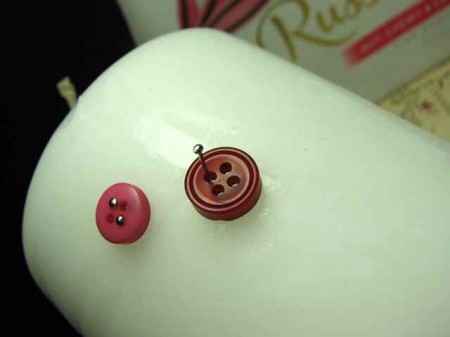
With satisfying crafty abandon, have the child pin buttons to the outside of a pillar candle, using half inch stick pins.


We had A LOT of fun with the pins!  Use as many or as few as desired – you MAY want to remove them when decorating is complete.


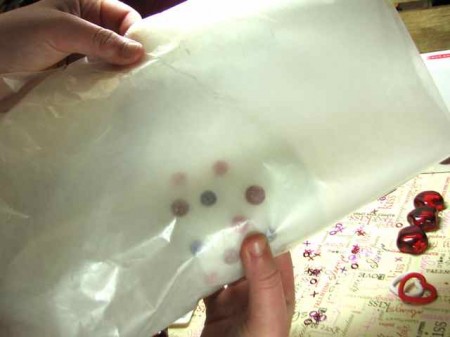
Once button layout is complete, prepare 3 – 4 feet of wax paper, folded in half.  Fold in half, again, and insert candle.


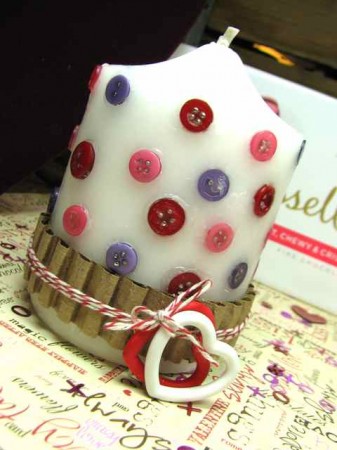
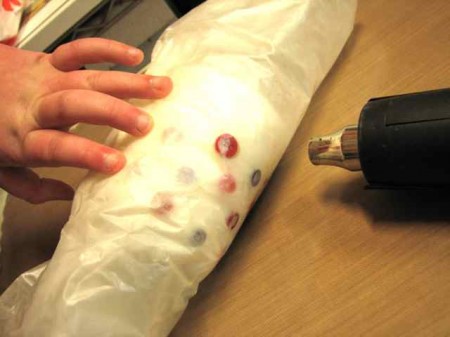
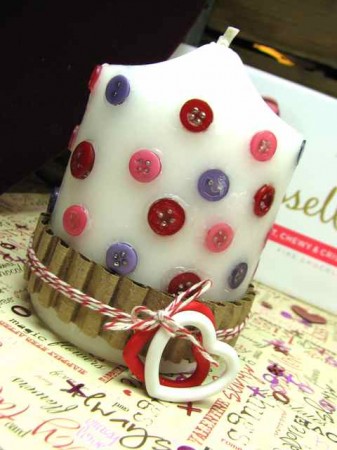
On a hard surface, with a heat resistant mat, heat the candle with heat gun, through the wax paper, until very hot.  {This is where “parent” supervision kicks into high gear – I recommend a good heat glove for the first go-round} Going “horizontal” sections at a time, heat until the wax is visibly melting beneath the sheet of wax paper.  Firmly roll and press the candle so that the warmest, meltiest section is then pressed, firmly, onto the hard surface.  Repeat this step until entire candle has been well heated/melted and then remove wax paper.  Buttons should appear sunken, and possibly covered with wax. When satisfied, pins can be removed, if desired.


Embellish base with cardboard, baker’s twine and wonderful button/accessory goodness from Buttons Galore & More.


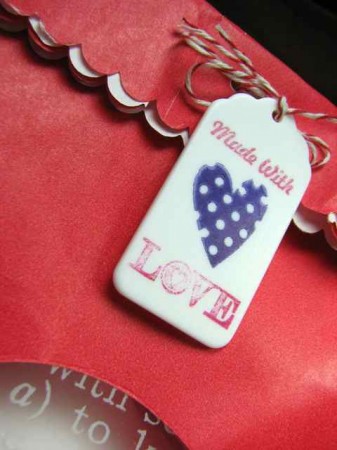
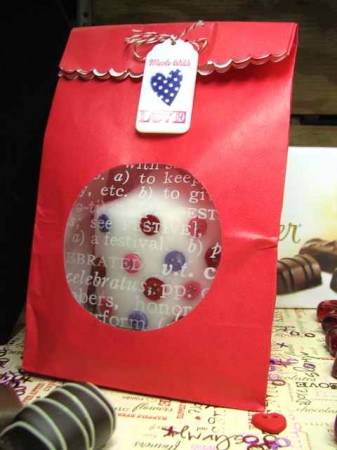
Prepare a paper bag for presenting teacher Valentine’s gift, and finish with stamped Start Up tag, using solvent based permanent ink.


Save the chocolate {for YOURSELF!} and help YOUR child gift teacher, with a Valentine’s keepsake that will surely LIGHT up the heart!  Enjoy!


9

Opulent St. Nick Christmas Ornament


It has long been established that nobody likes a skinny Santa, so make him regal and utterly unforgettable with some festive button embellishing!

Suitable for framing – I’m so excited to share with you a super craftilicious project, beckoning for buttons and a place of importance in your seasonal decor!
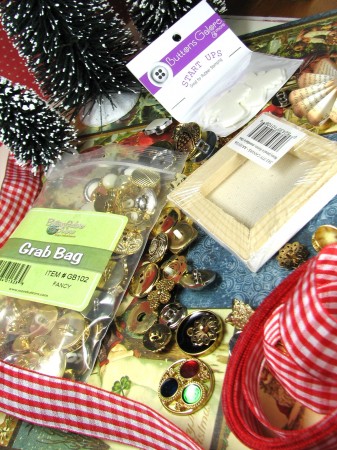
Armed with  some of my favorite Buttons Galore & More products, and a smattering of extras, then this project is READY for fun…
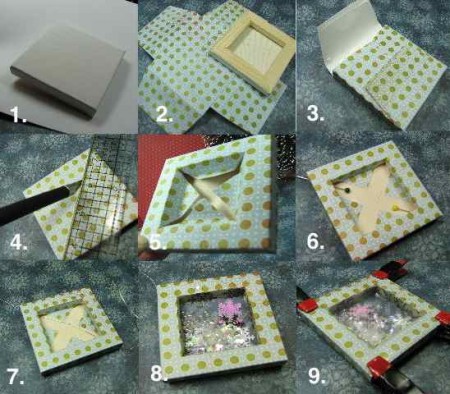
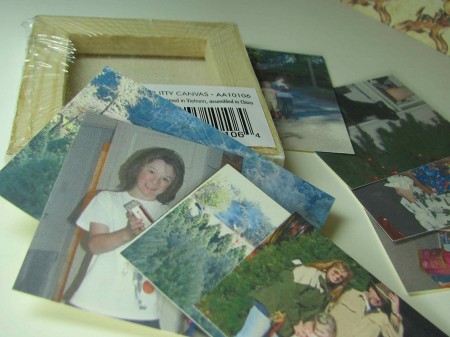
In case you’ve never par taken in the mini canvas WRAP – {OMG!  So FUN!} Here’s a quick breakdown of how to do, exactly that:

1.) Prepare to wrap a mini canvas by facing the “opening” or backside of the canvas, to the blank, or backside, of desired decorative paper.

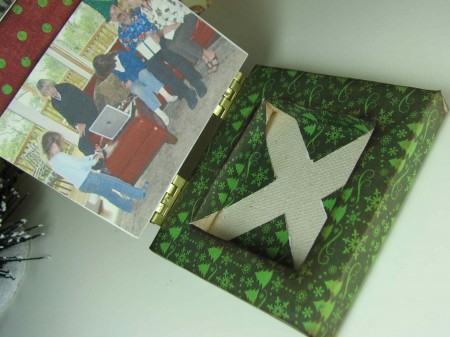
2.) Score fold lines around the edge of canvas and cut flaps, so that the ends can be glued onto the “traditional” front surface of the canvas.

3.) Glue flaps down so that paper fits snug and clean around the edges. (The desired printed side should be exposed)

4.) Using a ruler guide, make a small “x” opening across the solid paper, exposing the recession from the original back of canvas.

5.) Crease and work edges so that paper will wrap snugly.  Glue flaps to exposed wood and canvas.

6.) Using two sewing pins at opposing points, push from the inside of opening, so that the pin tip comes through at the two opposing corners.

7.) Cut 1.5′ length of embellishing wire and thread through, following the pin holes, from the inside of canvas “box”, out.  This will be the spine of the ornament.

8.) Cut a small square of coordinating paper to fit inside opening and glue.  Finish the inside lip of the box with decorative tape or paper.  Fill with snowflakes, etc.

9.) Cut a matching acrylic square to fit on top of the entire front of the ornament.  Using clear glue, adhere.  Use clamps, if desired, to make a secure seal.
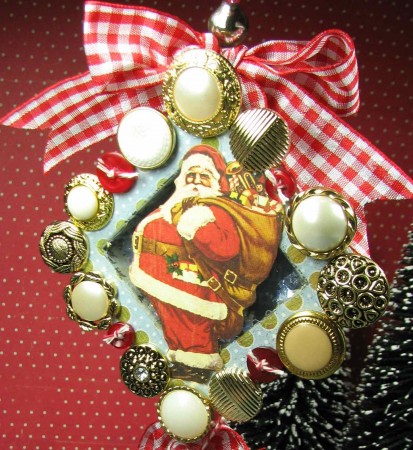
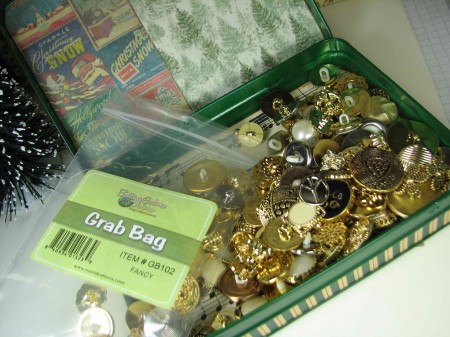
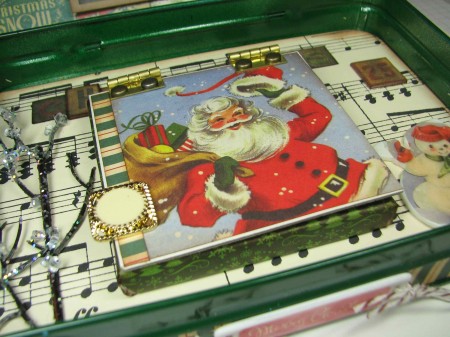
Glue Santa image to the top of the acrylic and embellish edges with buttons, shanks removed, from Buttons Galore & More,  Gold and Silver Grab Bag.
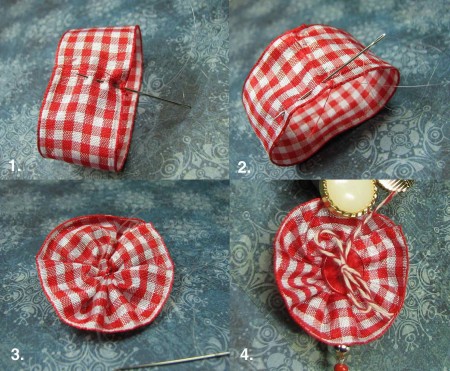
Create a ribbon flower to embellish ornament:

1.) Cut a length of red and white gingham ribbon, sew the ends together to create a cuff.

2.) Sew a running stitch around one end of the cuff.  Tie off and cut excess.

3.) Tighten ribbon to create bloom.  Tie not and cut excess.

4.) Embellish with transparent button and bakers twine.

Enjoy! {But WAIT – there’s more!}
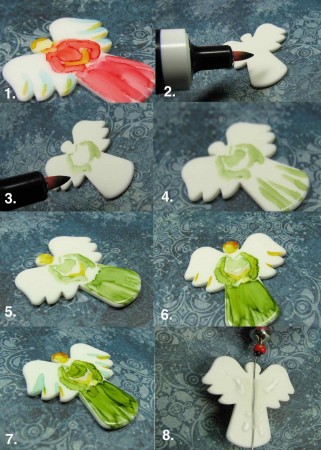
1.) Make a pretty angel “dangly” for ornament using two Start Up – Angels.

2.) Add color using alcohol ink and a blank alcohol ink pen, to add color directly to Start Up material. {No sanding required!}

3.) Sketch out angel robe in color of choosing.

4.) Add accent values, but allow ink to “do it’s thing”, making sure each color is dry before adding more ink.

5.) Change color by merely wiping pen onto scratch paper, until color doesn’t transfer, then change color.

6.) Build face, hair and suggestion of song book and wing definition.  If results don’t please you, simply wipe surface with alcohol blending solution and let dry.

7.) Don’t overwork – just let the angle appear!

8.) Repeat steps for second angel and sandwich over wire with glue and glue dots, so that painted angels will be visible from both sides of ornament.
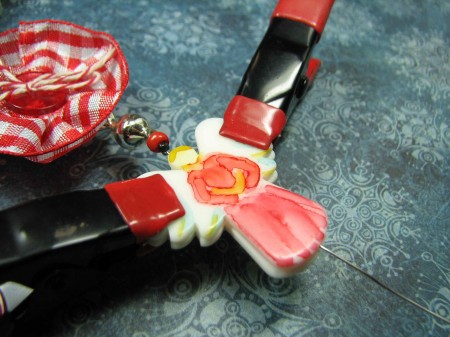
Embellish wire with beads of your choosing.  Tie a festive ribbon from Buttons Galore & More Red and White Gingham Ribbon and thread through wire, so that it sits on top of the ornament.  Add more beads or desired accents to the top of the ornament.
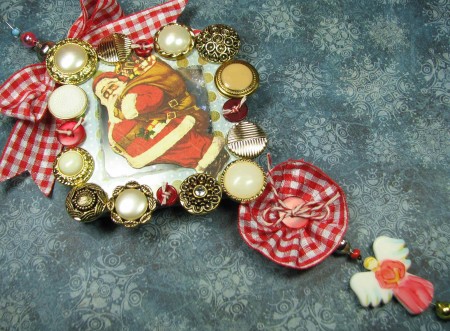
When complete, add ornament to your tree or use in window display to let the big man you’ve been VERY good this year!

Happy Holidays!


Buttons Galore & More products used:

Gold and Silver Buttons – Grab bag

Red and White Gingham Ribbon – 1″

Start Ups – Angels

MU – Clear Round Celebration Buttons

Mini Glue Dots

3 in 1 Craft Glue
7

Outside of the Box – Mixed Media Keepsake Box for the Holidays


The buttons are OUTSIDE of the box, friends!  {And… inside, too!}  For your creative consideration, I’ve mixed things up with a crafty menagerie of buttons, Start Ups, Ribbon and more!


Buttons Galore & More products used:


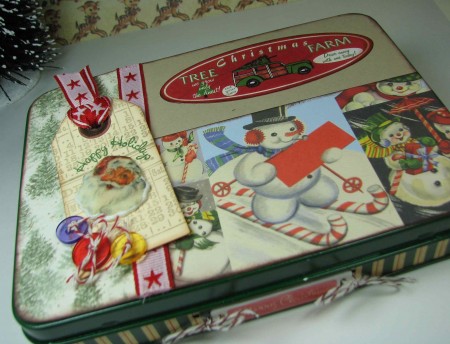
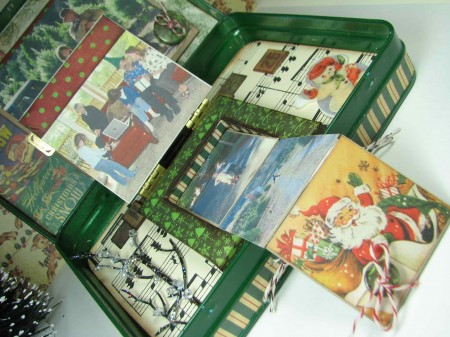
Just to help set the Christmas mood, I created a “beyond the box” scrapbook project, within…  {wait for it…!} a darling altered box!  The PERFECT assignment, to help stimulate crafty projects to give this season… {or KEEP for yourself!} Armed with assorted materials from Buttons Galore & More, and miscellaneous extras, just kicking around the craft room…  I made this fun, interactive memorabilia box to share with all of you!


Spray paint and embellish metal box with color and papers of choice.  Contemplate BUTTONS!


Reduce and print photos on a small scale to create accordion album to fit into mini canvas.  Choose several photos to highlight your subject and print at normal scale.


Wrap mini canvas so that the backside is covered completely by the paper. Glue flaps to the front of the canvas, as tightly as possible.  Using a sharp blade, score an “x” across the covered backside of the canvas, exposing the inside.  Fold triangular flaps down and secure with glue to create an open box type of frame.  Cut a piece of chipboard to cover the entire frame and screw two sets of hinges to the front of the chipboard, after it’s been decorated, to create a “lid”.


Embellish cover of canvas box with a stunning button of your choosing!


Acclimate small scale pictures to work in an accordion motion.  Secure with glue and tape.  For opening, pull attachment, add button, glued and sewn with clear thread, for strength.


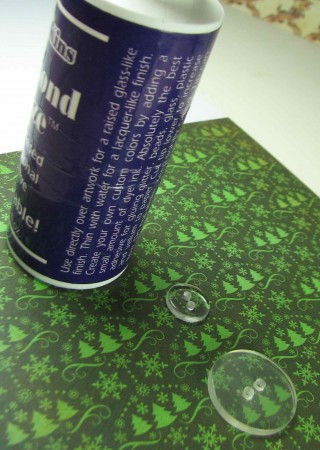
Customize clear buttons with clear, dimensional glue and decorative paper.  Cover underside of button with glue, place on desired pattern from paper and gently push the excess glue out from under the button, then let dry.  Once dry, cut the excess paper away from the button, re-poke the holes and embellish with baker’s twine.


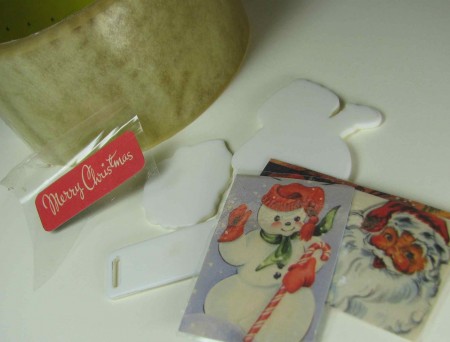
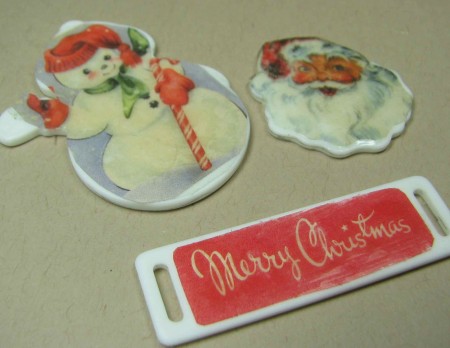
Create packing tape transfers with desired printed images to fit onto Start Up shapes.  Apply directly to Start Ups with clear glue and let dry.


Embellish box, as desired.


Yes, indeed!  I’ll say the Holidays are off to a mighty happy start!  Let the CRAFTING begin!


Thanks for letting me share this joyfully button festooned project with you!


5

Halloween Crafts – Beautiful buttons make BOO-tiful bits!

Hold on to your buttons – this might scare ya!

It’s just a given – holidays are more fun, with buttons!

And we’re looking right down the barrel of one of the BEST holidays to get your buttons into the spirit – HALLOWEEEEEEEN!  Don’t be afraid, to let inspiration take hold of you!

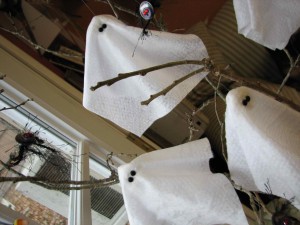
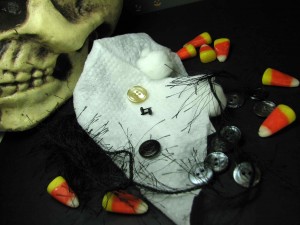
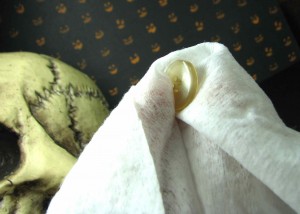
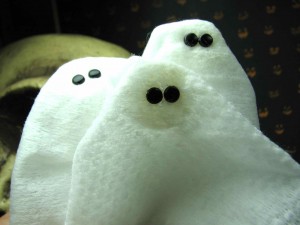
The spirits told me to grab a dried baby wipe {for CRAFTING! Doh!} and let it drape over a shimmery pearl button from the Wedding collection…  for a VERY haunting exploration….

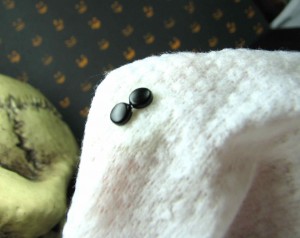
Festooned with small black brads, poke through the front of wipe, and THROUGH the button holes…

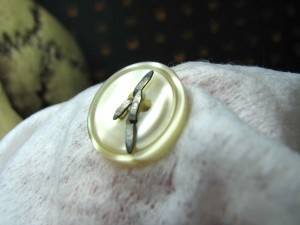
…then secured from the back, but under the drape of the baby wipe.

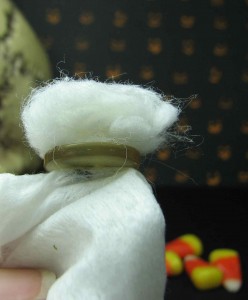
Glue half of a firm cotton ball over the bent ends of the brads with Fabri Tac and let dry.
Spooky!  Right?

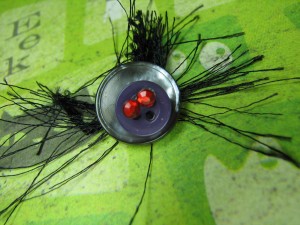
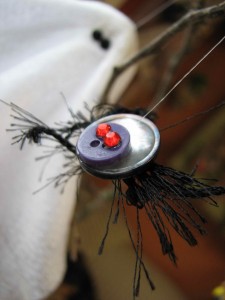
Ohhhhh, noooooo!  Spooky button ghosts don’t like to haunt alone…  So I made some FRIGHTENING button spiders to go with!

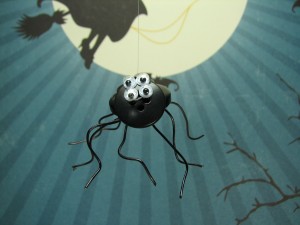
Sew three, 1.5 inch sections of your favorite “spider leg” twine to the middle holes of a button.  Attach bling eyeballs to smaller button, so that one hole shows below the eyes for a ghoulish expression…  Glue it to the larger button, near the edge.  Can you hear it?  “Ooooooooooowwww!” {Muwah ha ha!}
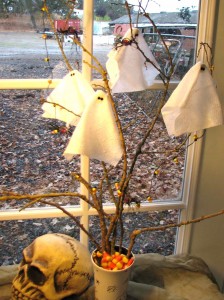
Thread all creatures with clear thread and dangle from a well balanced, dried branch.  Place in a weighted cup or pot.  The perfect cup-o-thrills and ghoulish delight, to adorn your favorite window sill or table top!  Happy CRAFTIN’!

0

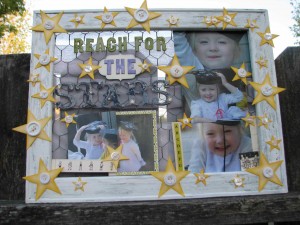
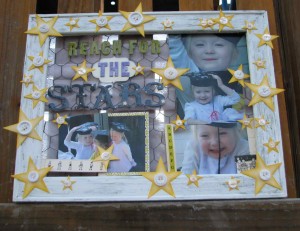
Reach for the buttons!

And you’ll land amongst the stars!

This time of year, many fine folks are spreading their wings and moving up in the world. This project goes out to all of the graduates out there, large and SMALL!

Here’s a hybrid home dec/scrapbook memorabilia collection to get your buttons sparkling for attention – check out my quickie forgotten fine art canvas makeover!

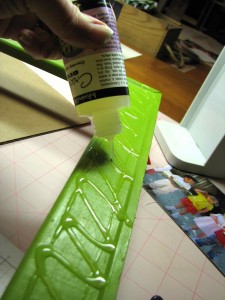
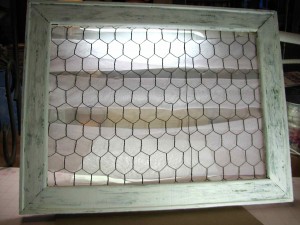
Old canvas was stripped from this frame.  The frame was then painted with acrylic paint.

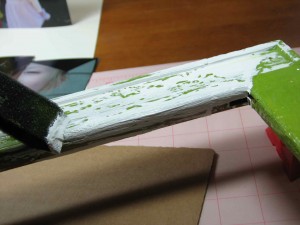
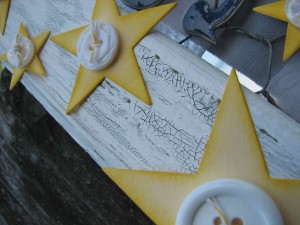
Once dry, crackle medium was applied and spread, generously.  Let dry, at least until tacky.

Spread 2nd color over crackle medium.   (The 2nd coat doesn’t have to be perfect.) Let dry for several hours.

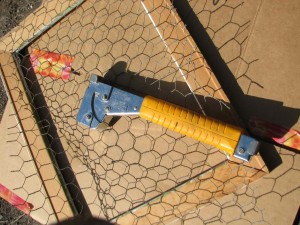
Once dry, attach chicken wire to the backside with strong staple gun.

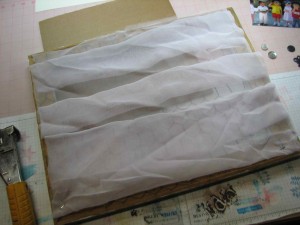
Drape fabric onto the back of chicken wire and attach.

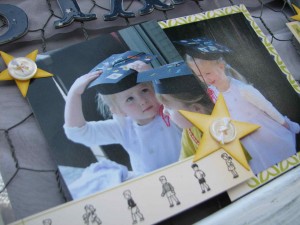
Cut stars from card stock and embellish with baker’s twine embellished buttons from Buttons Galore & More.

Lay out pictures and embellishments, memorabilia, etc.

Secure with glue, tape or clips, as desired.

Give the grad in your world a big hug and blessings to REACH FOR THE STARS!

3

Powered by WordPress. Designed by WooThemes