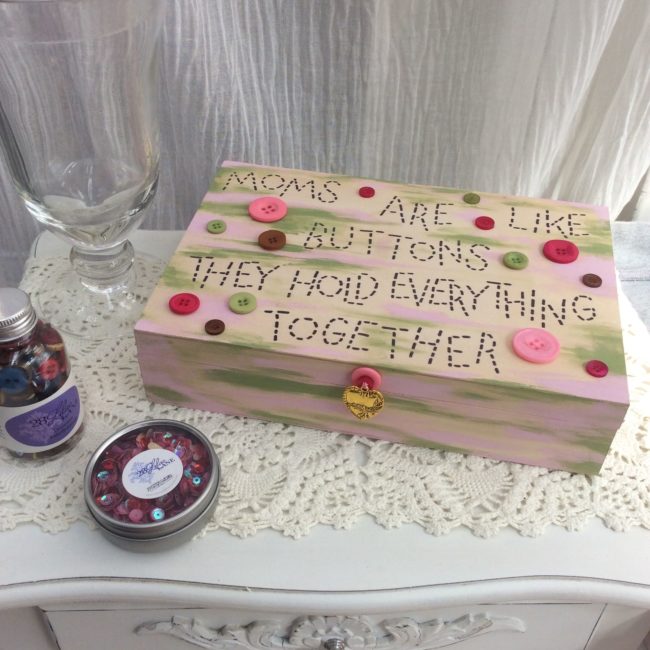
Here is an idea to keep Mom’s craft supplies organized. It’s both thoughtful and practical.

Here is an idea to keep Mom’s craft supplies organized. It’s both thoughtful and practical.
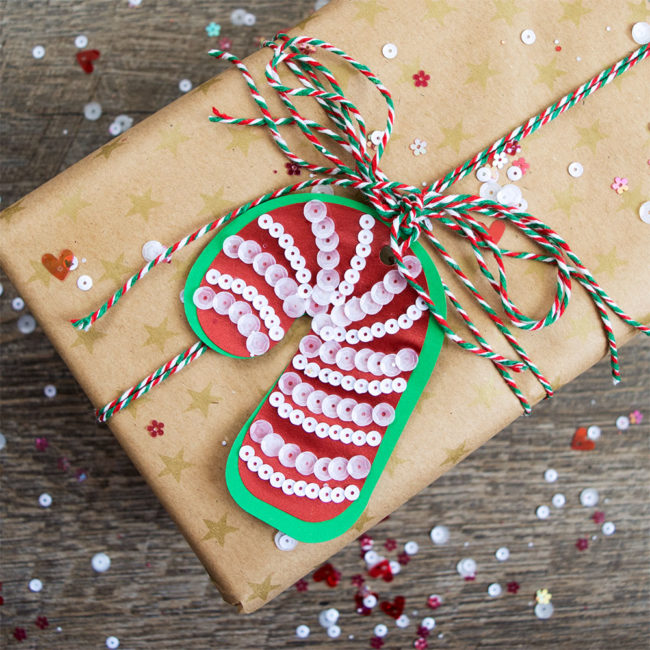
One of my favorite things during the holiday season are handmade gifts. But even more fun than making just the gifts, I love to make the tags and even the wrapping paper to wrap the handmade gifts in. I start making my holiday gift wrap and tags super early in the year and I put them on everything! These fun 28 Lilac Lane Candy Cane Sequins were perfect to make candy cane Christmas gift tags! It’s such a lovely mix of red and white sequins for the holiday season. The candy cane gift tags turned out so festive and cute. It’s the perfect little tag for a cute little package! Continue Reading →
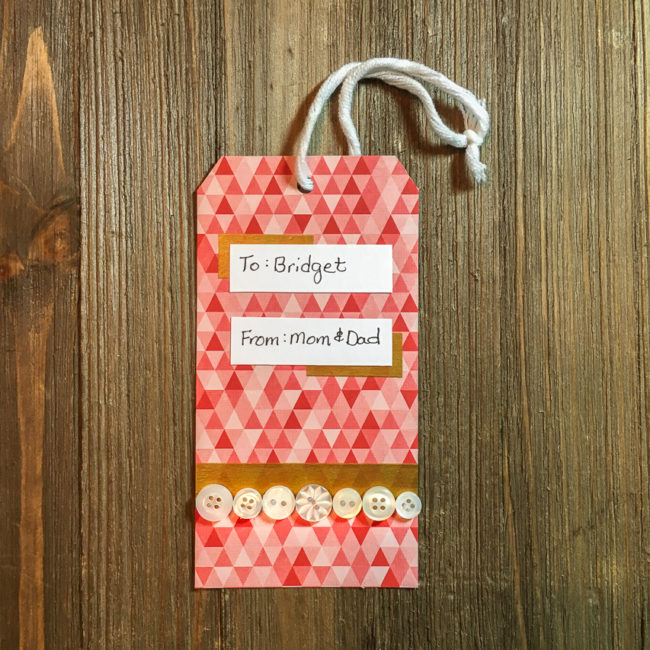
Think buttons aren’t a match for modern style? Our 28 Lilac Lane “Winter Wonderland” embellishment bottle, paired with washi tape, makes a quick and easy modern Christmas gift tag that will add sparkle and style to your special gift this Christmas!
Supplies:
To create the tag base, cut the 6×6 pad in half to create a 3×6 piece. Snip off two corners to create the top of the tag, and then use a hold punch to create the hole.
Lay a strip of the gold washi tape across across the tag about 2/3 of the way down from the top. Cut two more small strips and position them one to each side closer to the top.
Select buttons to create a row across the tag along the bottom of the washi tape. Adhere the buttons using white glue or a hot glue gun.
From the white cardstock, cut a 5/8″ strip. Write the to/from information for your gift on it, and then snip the pieces off of the strip. Adhere them using paper adhesive.
Cut a length of yarn. Loop it through the tag’s hole and tie it off to attach your gift.
This modern Christmas gift tag only takes a few minutes to make, but will definitely brighten up your Christmas wrapping for someone special!
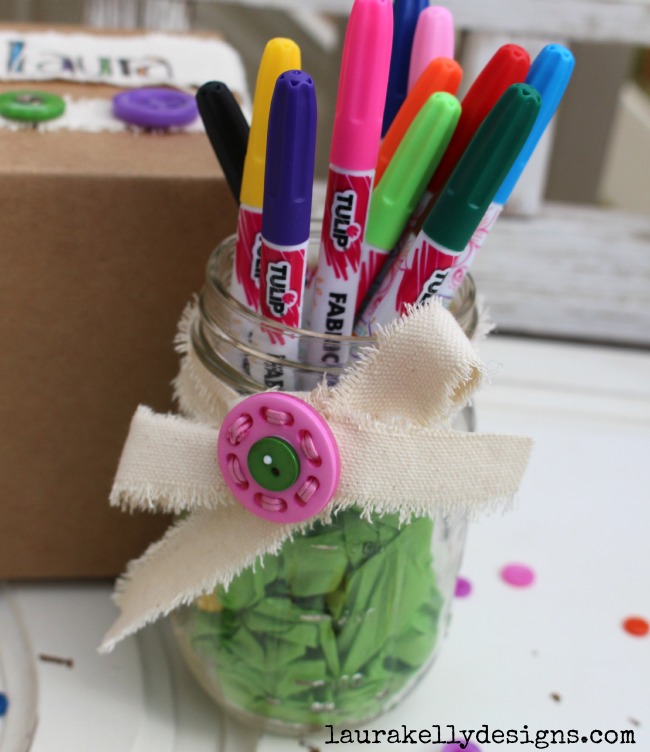
Here is a fantastic way to create custom DIY gift wrapping in fifteen minutes (or less) using buttons, fabric markers and glue. Check it out! Yay, it’s Fifteen MINUTE Friday!!!
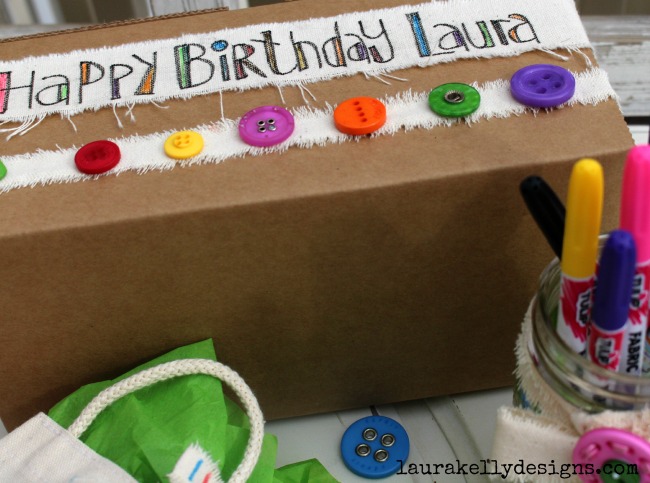
A tip for buttons and fabric if you are not up for sewing…super tacky adhesives work best! I love the Fast Grab Tacky from Aleene’s because it holds the buttons right away and keeps them in place until totally dried. You can see in the next picture that the buttons are in place and the glue is still wet. I love that!
You can get more ideas and the full tutorial over on my blog HERE.
 .
.
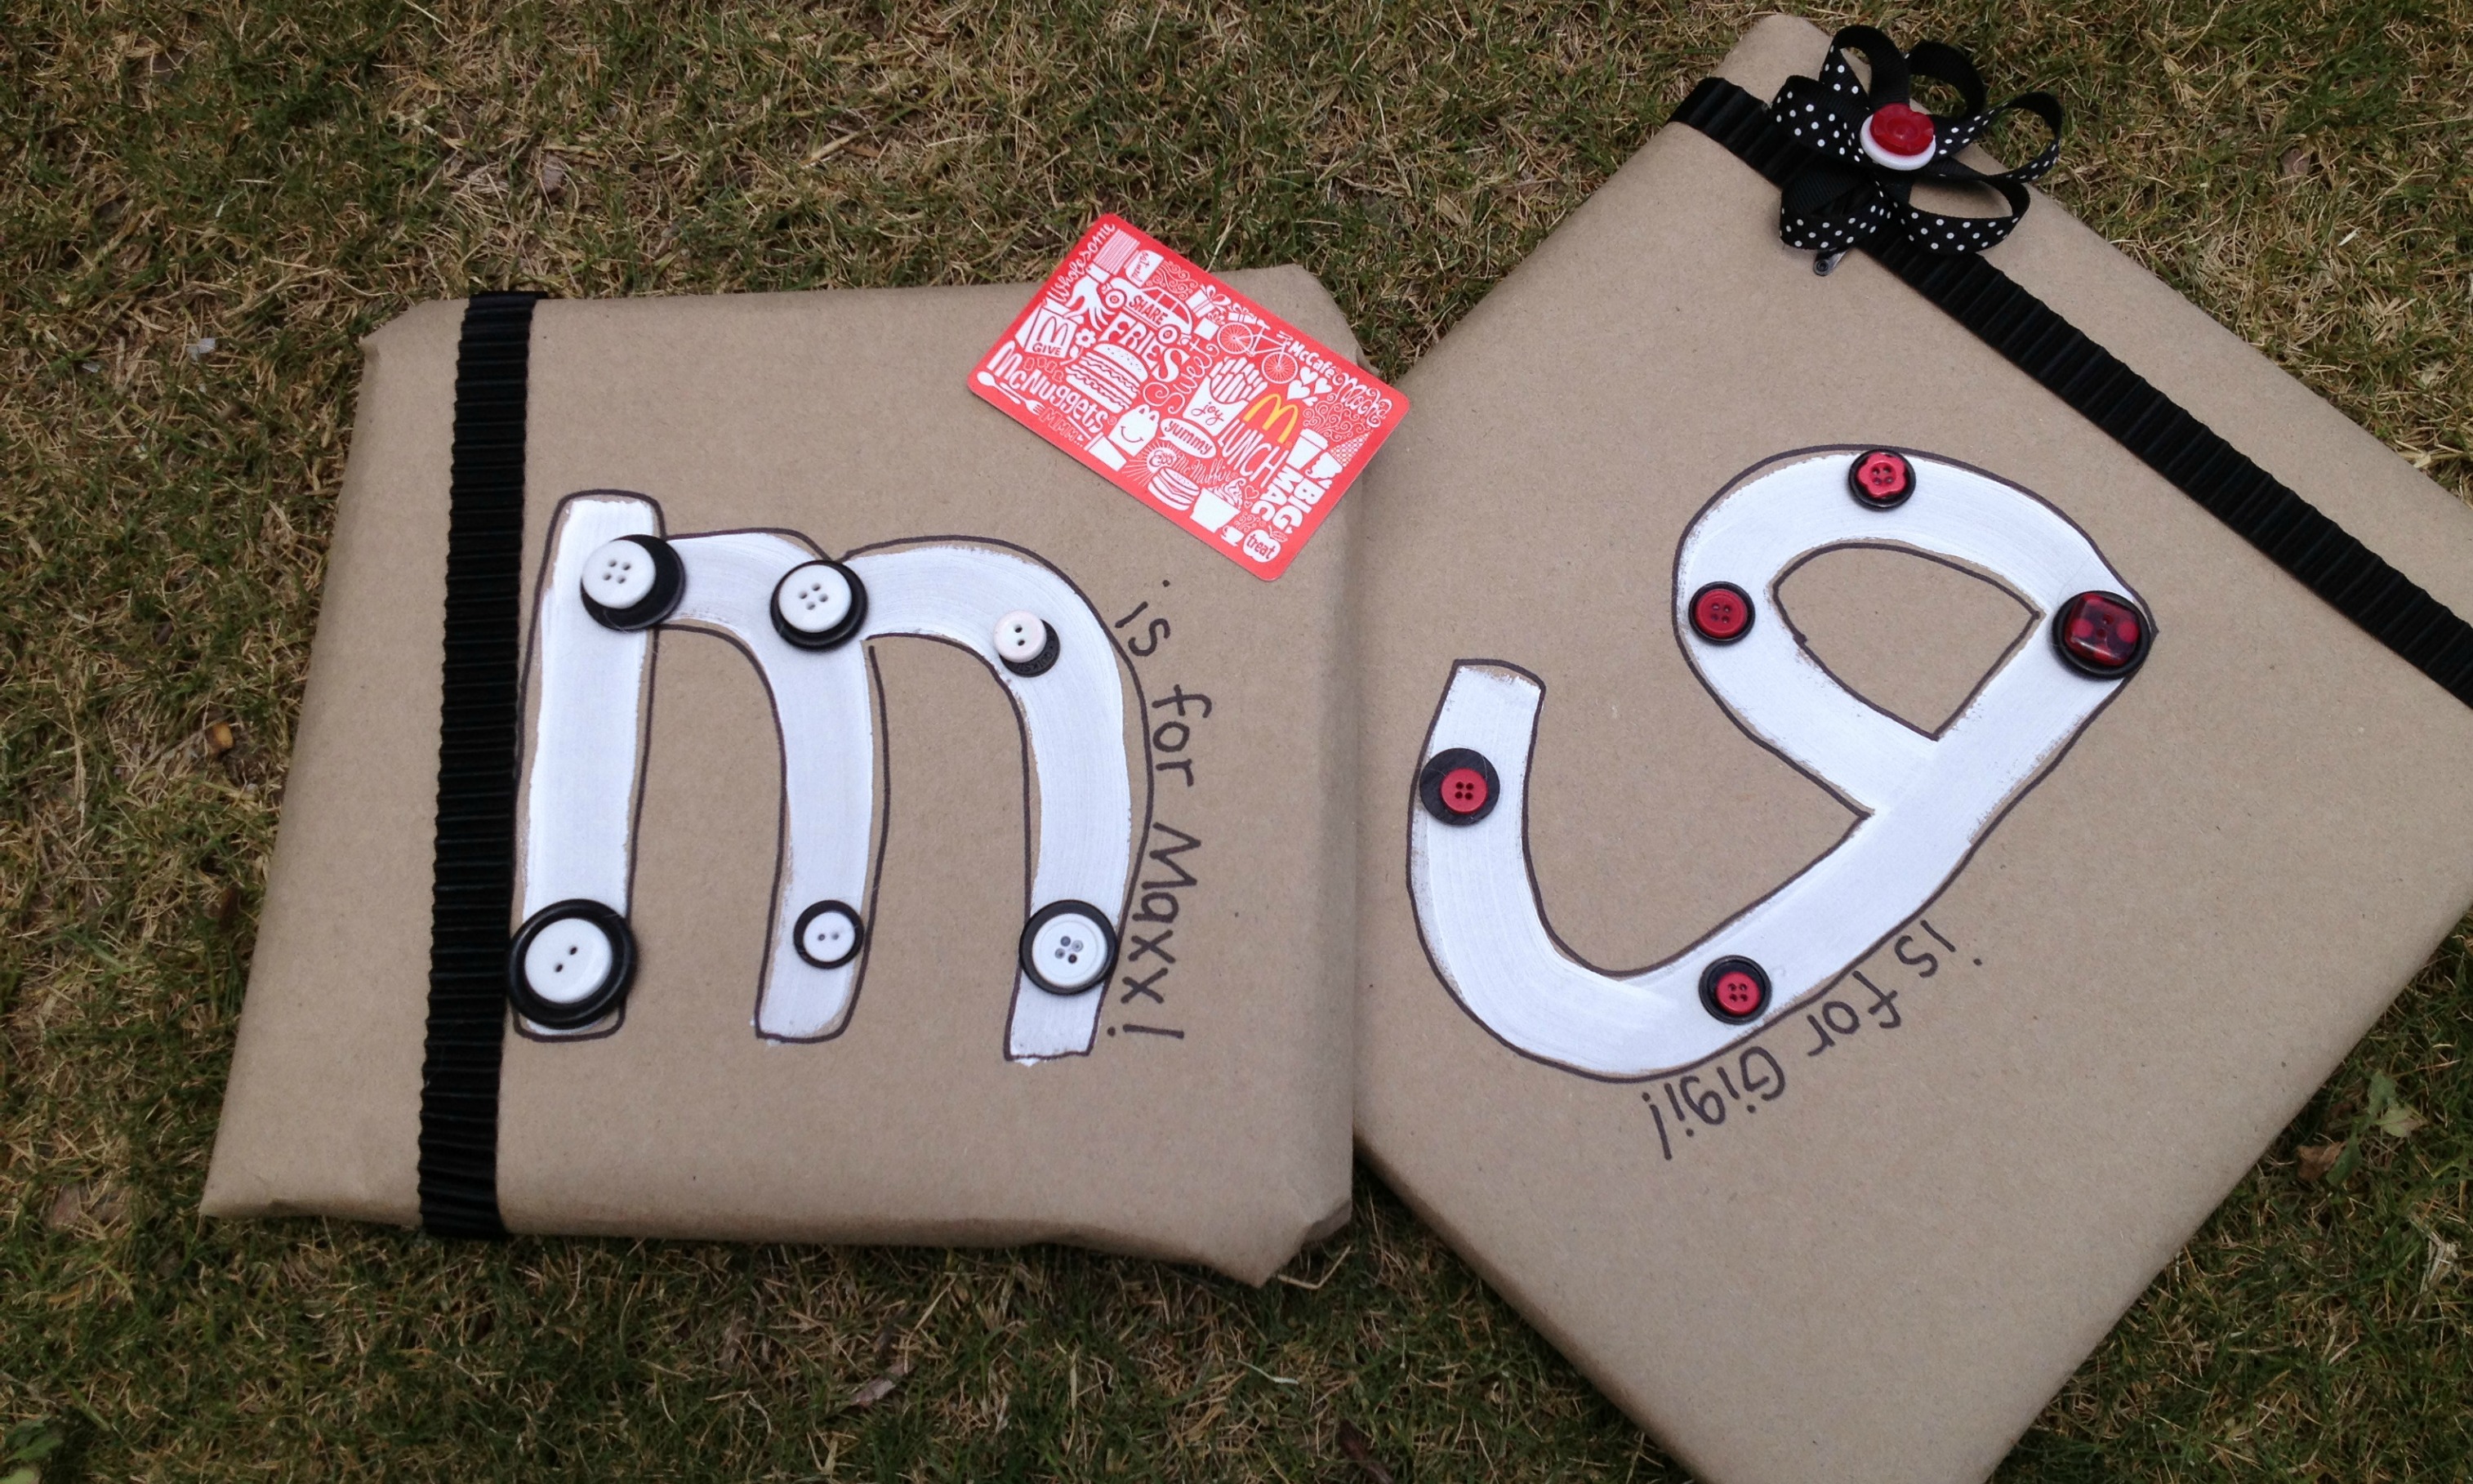
Nothing beats birthdays and presents…especially giving things to people we love. Sometimes the wrapping makes all the difference. Here is a wrapping idea that is simple and fun. The mom of these spectacular kids kept the wrapping to frame. How touching!
This would be a great way to wrap graduation gifts, Father’s Day gifts and wedding gifts too.
I painted the initial on the paper then outlined with Sharpie and added words. I hot glued buttons and ribbon to decorate and wa-lah…the gifts were ready to give.
To read more about this project, visit Laura Kelly’s blog.
Happy Creating!
Some times it is so much fun to create ways to use scrap paper and miscellaneous bright buttons. This project is one that is worth “picking”, kind of like a pretty flower.

You will need scrap paper , Mod Podge (I used the washable kind for kids), a brush, black Sharpie marker, Laura Kelly buttons and ad-tech hot glue to create the flower. You can buy a tag already to go or make one yourself.
Cut your paper into petals of any size and shape, whatever works for the tag size you are making. Mine are about 2 inches long. Cut another piece into a circle about an inch in diameter. Using Mod Podge, brush a heavy coat on the circle then add the petals, brushing new layers of Mod Podge liberally between each petal. Apply a final coat over the entire flower. Set it aside to dry. Cut a stem and leaves from your scraps and use the Mod Podge to apply them to your tag using the same technique. Add the flower with Mod Podge and let it all dry. To finish your project, use your ad-tech hot glue to apply several buttons in a stack in the center of the petals. If you want to add the black decorations around the outside, you can’t beat the black Sharpie permanent marker.

There are lots and lots of ways to use these paper flowers to create masterpieces. You can visit Laura’s blog to find more ideas if you have more than fifteen minutes to create!