Header

Archive | Purses & Totes

Get Festive with a Shaker Card Inspired Bag!

Hello Everyone! This is Katie from the Buttons Galore & More Design Team and today I have a unique but simple project for you guys to make this summer!
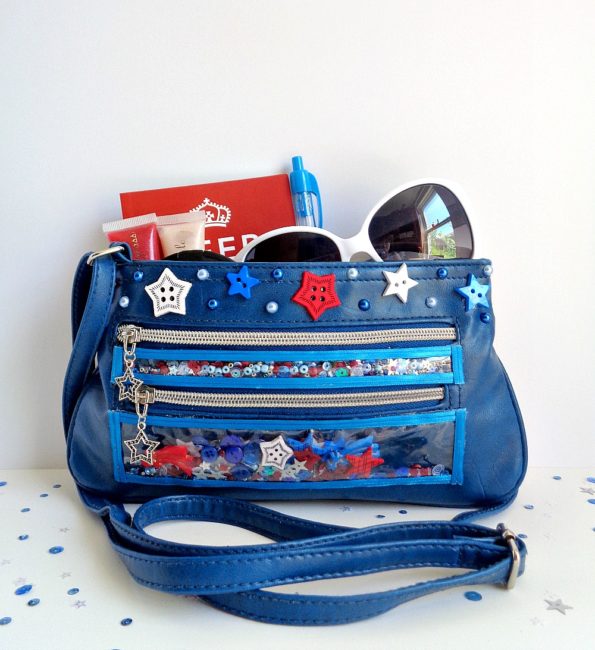
Today I will be showing you how to update an old crossbody bag by adding shaker elements onto the bag! What does that mean you ask? Well, if a shaker card and a crossbody bag got together, my project would be the final result. In today’s project, I will be showing you how to incorporate those shaker card elements into a bag. I will also be showing you how you can update a bag with items from the 28 Lilac Lane Embellishment Kit in Stardust.

In addition, I decided to go with a red, white, and blue theme for my crossbody bag. However, you can choose any type of theme and choose any type of bag style for this project. Just make sure that the bag doesn’t have any big embellishments on the outside and that the bag is cleaned (both inside and out) before you begin the project.

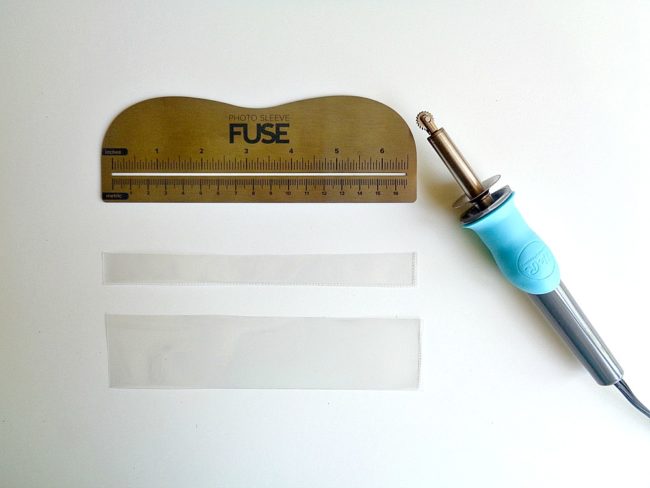
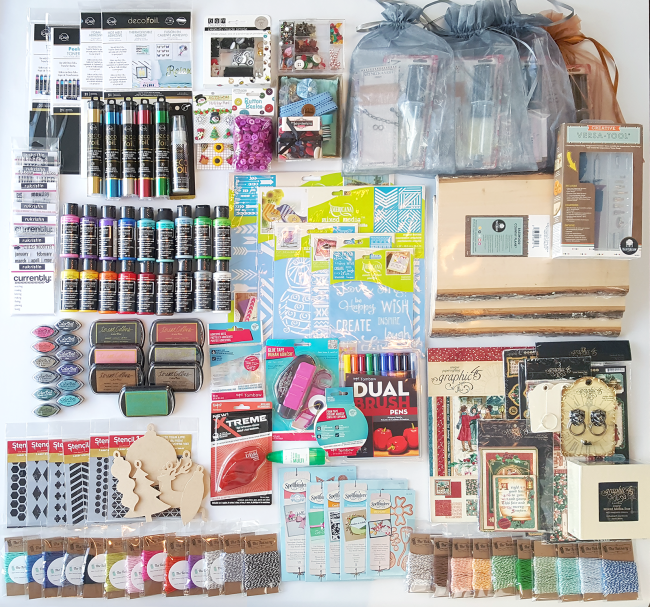
With all that in mind, below is the supplies that you will need to make this project!

Supplies Needed: 

Step 1: Determine where you want the shaker elements to be on your bag. When doing this you will want to look for a ”small area” which is flat and that doesn’t interfere which any other components of the bag.

Once you have determined where you want the shaker elements to be, it is time to measure. Measure one area of the bag and then cut out 2 pieces of page protector which fit in that area. Then take your We R Memory Keepers Fuse Tool and fuse the sides and bottom of the 2-page protector pieces together. With that being said, make sure you leave the top of the page protector open.  When you’re done, you should have created a little shaker pouch.

Repeat this step if you are creating more than one shaker element for your bag.
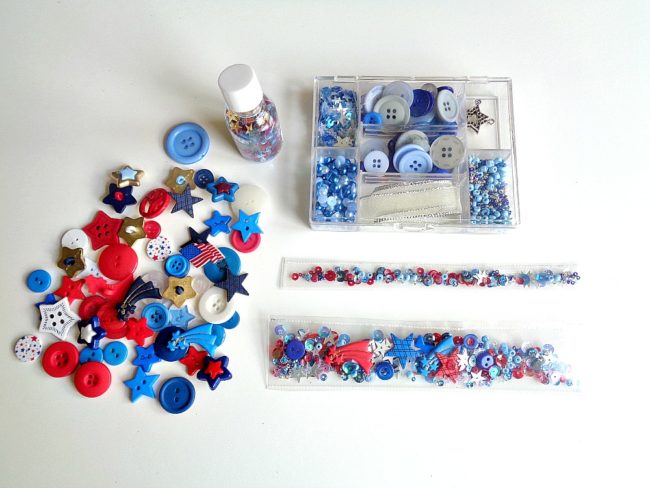
Step 2:  Fill up the shaker pouch that you created in step 1 with buttons, sequins, and seed beads. For my two shaker pouches, I filled them up with buttons, sequins and seed beads from the 28 Lilac Lane Embellishment Kit in Stardust. I also used buttons from the Patriotic Value Pack and sequins/seed beads from the 28 Lilac Lane Sequin & Seed Bead Mixes in Stars & Stripes.

Once you have filled up your shaker pouches, fuse the top together so all your buttons, sequins, and seed beads are sealed in.
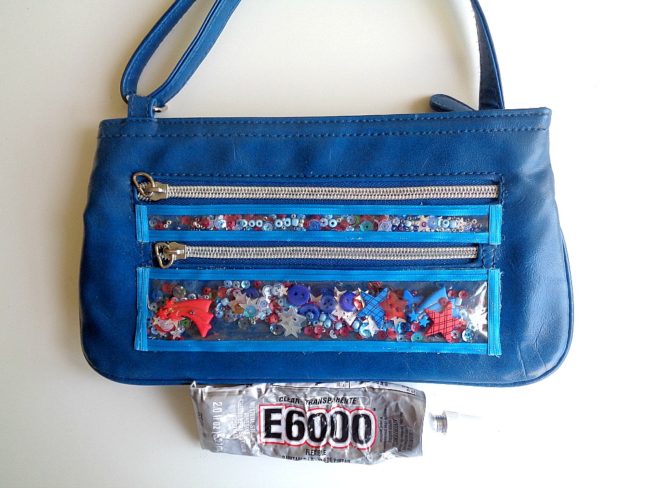
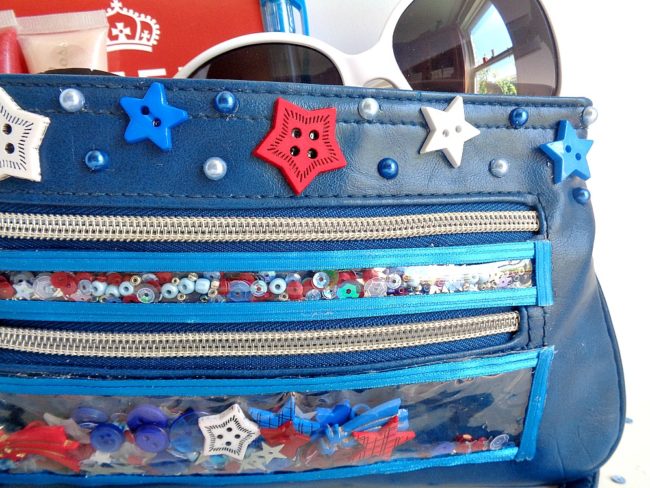
Step 3: Using some E6000, apply some glue onto the back of your shaker pouches and then adhere them to your bag. Then to cover up the edges of the shaker pouches, glue some ribbon around the edges of the pouch.

Once you are happy with the placement/look of your shaker pouches, set your bag aside to dry.
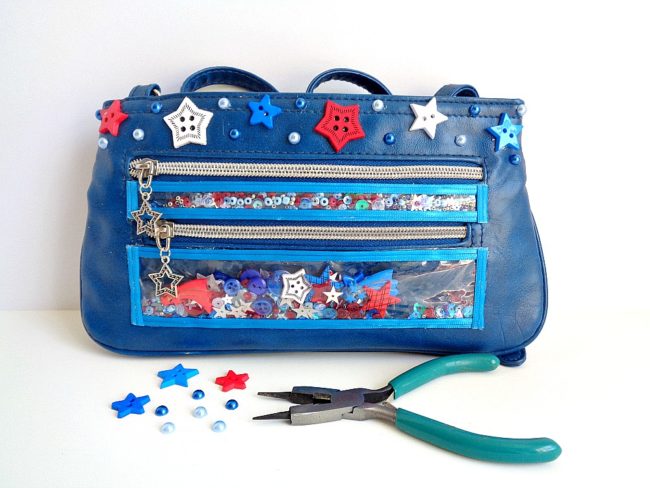
Step 4: Now it is time to decorate the rest of your bag! Grab all your different embellishments and begin playing around with how you want them to look on your bag. For example, I replaced the handles on my zippers with the star charms from the 28 Lilac Lane Embellishment Kit in Stardust. I also used the pearls from that kit to decorate the top of my bag along with some star buttons from the Patriotic Value Pack.

No matter how you decorate your bag, make sure you glue down your buttons with some E6000 and to set the bag aside to dry.

Once the glue on your bag has completely dried, you are now ready to wear it!
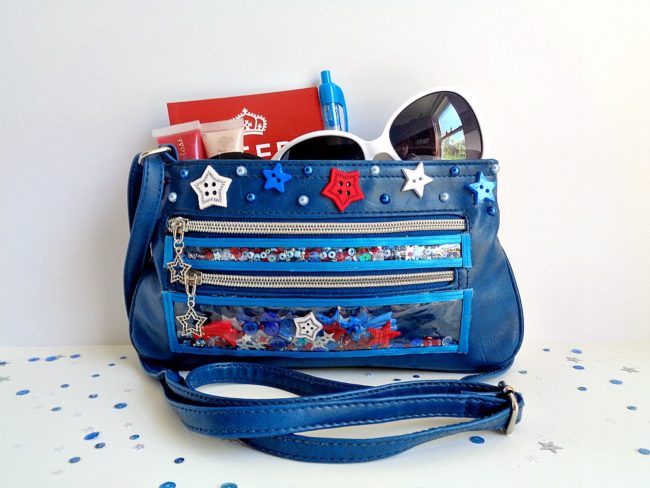
I loved how this bag turned out and think it would be so cute to wear to a barbecue! With that being said, I would recommend that you wear your shaker bag to functions which are more laid back. For example, a barbecue, going to the thrift store, and so forth.

If you made this shaker bag, what 28 Lilac Lane items would you use?

0

Make a Spring Zip Pouch for Mom!

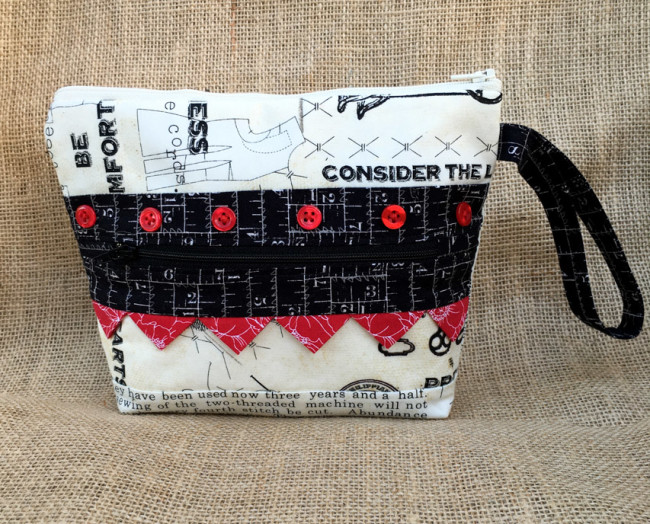
Regular readers of the site may remember this delightful zip pouch that I made last fall during the Handmade Holidays blog hop. It is from a pattern called Everyday Zips by Joanna Figueroa of Fig Tree & Company, available online or at local quilt stores.

Zippered Notions Bag

Making the pouch was so simple and fun that I decided to make another one for the trade show booths in January…this time in a spring color scheme, and with a few modifications. Because you can never have too many zip pouches, right?
Spring Zip Pouch

Supplies:

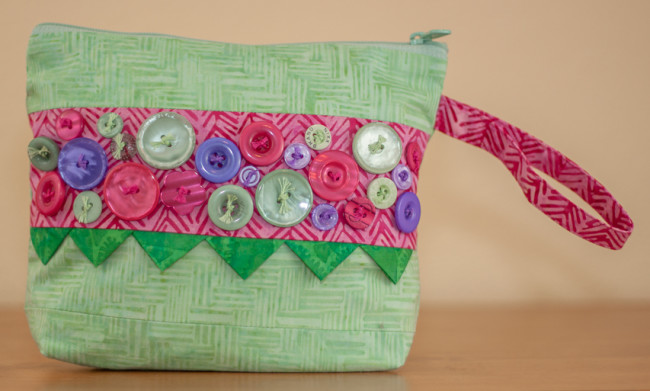
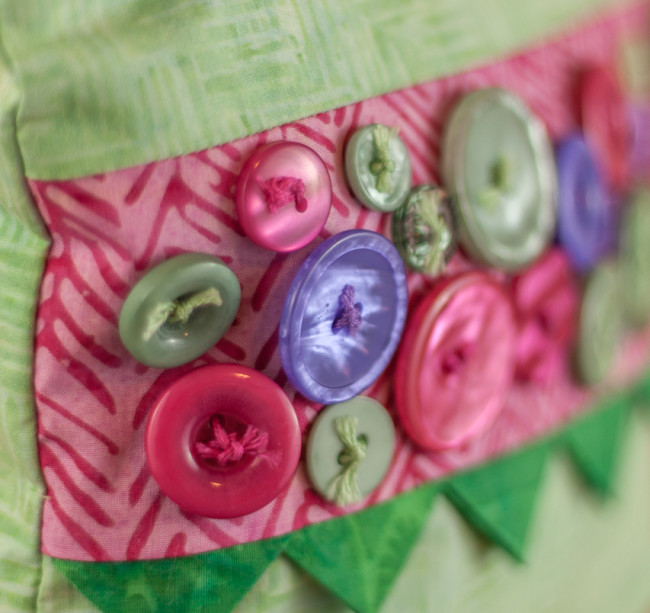
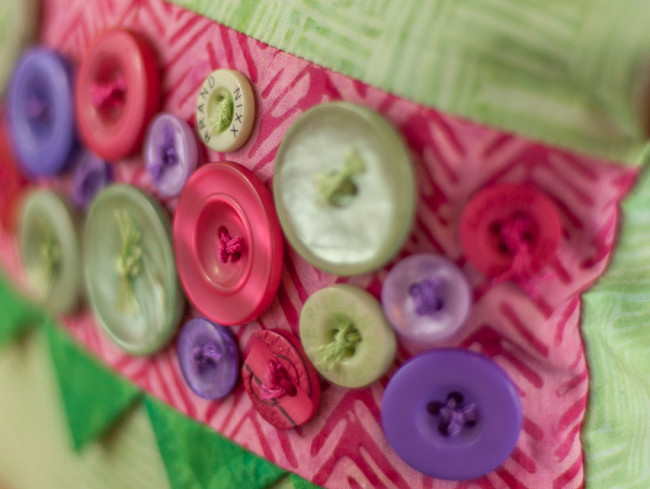
For this version, I created a totally different look. Instead of vintage style neutrals, the new design used batik print quilt fabric in spring colors. The light green fabric was used for both the exterior body and for the lining. The bright pink contrast panel and the green prairie points create an impression of leaves surrounding flowers.

Instead of just a few button accents, the spring zip pouch has a whole collage of buttons decorating its front panel!

Spring Zip Pouch close up

As well as adding buttons, I also took something away from the front of the pouch. You might have already noticed that the zipper pocket isn’t on the front of the new design of the pouch. Removing it simplified the sewing of the pouch and made room for the large decorative button collage.

Spring Zip Pouch close up 2

Making the change to remove the zipper from the panel was easy. I measured what each of the three pattern pieces for this panel would be in height after the seam allowances were removed. Then I added those three numbers together, added the seam allowance to the top and bottom of it.  That gave me the new height I needed to cut my panel to. (The width is provided by the pieces for above and below the zipper.) Using those dimensions, I created the new pattern piece. The piece I ended up cutting was 3″ by 9.5″. I then simply skipped the steps in the pattern dealing with installing the pocket zipper and the pocket lining.

Zip pouches make great gifts for Mother’s Day, birthdays, and teacher appreciation! What occasion do you have coming up that a fun zip pouch gift would be perfect for?

0

Handmade Holidays | Beautiful Tote Bag

Welcome to the Handmade Holidays on Buttons Galore! We’re joining in by sharing ideas for handmade Christmas gifts using – of course – buttons!

HANDMADE HOLIDAYS hop - HORIZONTAL

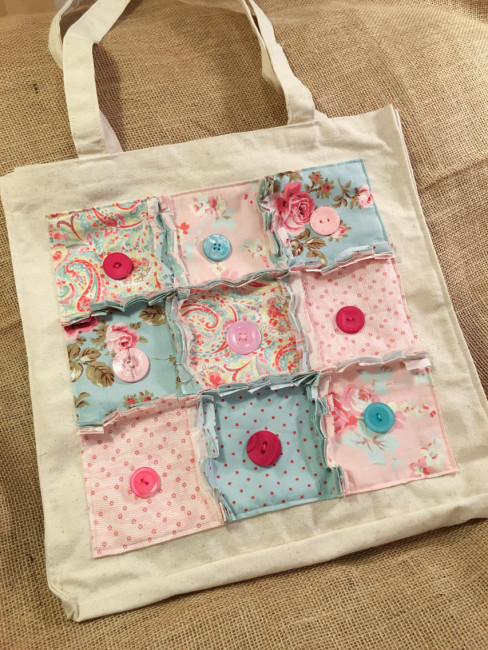
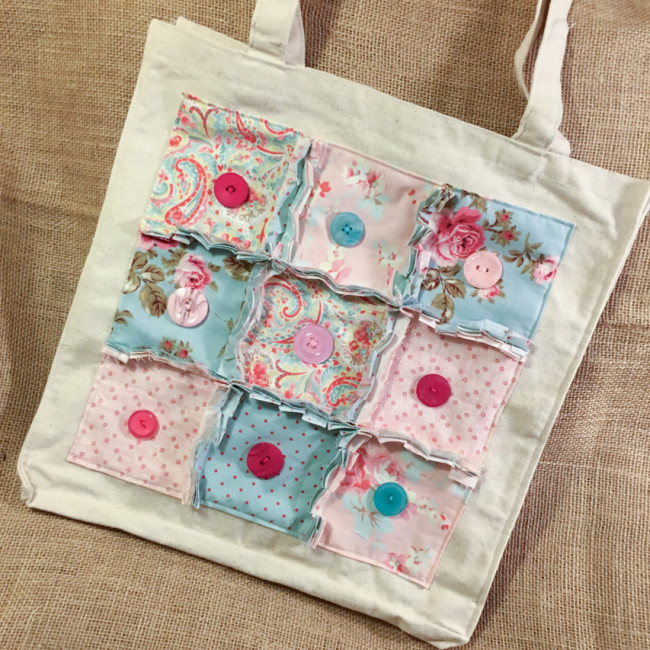
Today’s gift is both practical and pretty! You can never have enough tote bags, and today our gift is a nice sized one that is made gorgeous using an easy rag quilting method.

Rag Quilted Tote

Supplies:

  • 15″ x 15″ tote bag
  • 18 – 5″ charm squares
  •  Buttons Galore Button Bonanza in Bubblegum & Ocean Blue

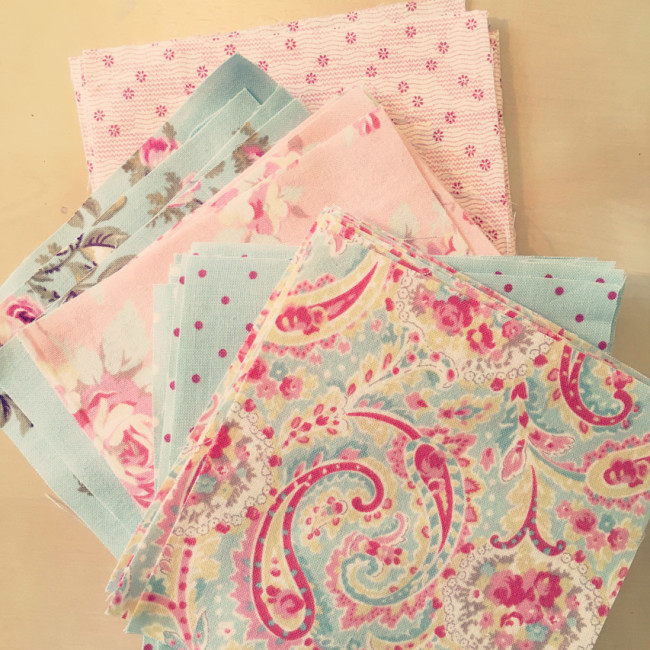
This bag is quilted using convenient 5″ charm squares. I originally cut these to use on another project but when I switched fabrics for that project, these charm squares went unused. It took 18 of them to quilt this tote: 9 for the front of the squares, and 9 for the backside of them (to help create the bulk in the visible seams).

Charm Pack

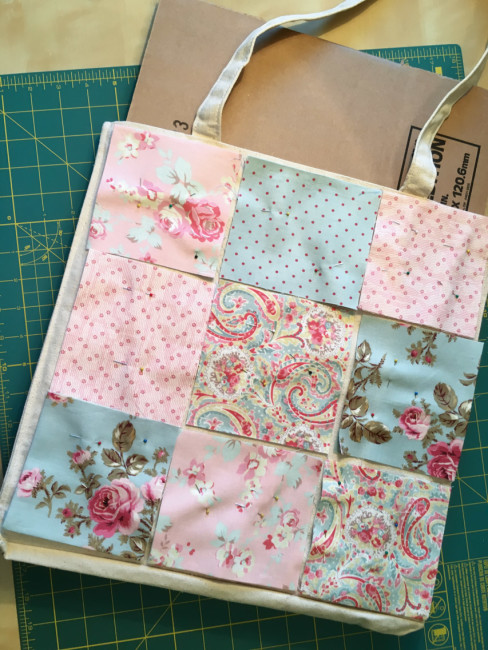
Laying out the pattern is the first challenge. I inserted a piece of cardboard in the tote to help make it nice and flat while I worked on the layout.

Tote in progress

Once your layout is arranged, the next step is to prepare the edges that won’t be quilted of the squares.

On the backing squares, each edge that won’t be part of a rag quilted seam should be trimmed by 5/8″.

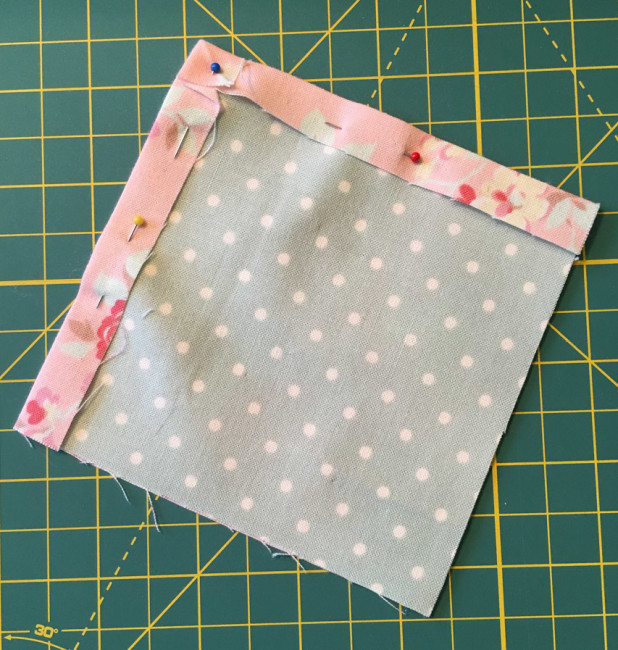
On the front (visible in the finished product) squares, press under a 1/2″ seam on each edge that won’t be part of a rag quilted seam. Miter corners where pressed edges meet for best results.

Stack the backing squares on the front squares, folding the pressed edges over the backing squares. Make sure that the raw edges for the rag quilted seams are aligned. Pin together.

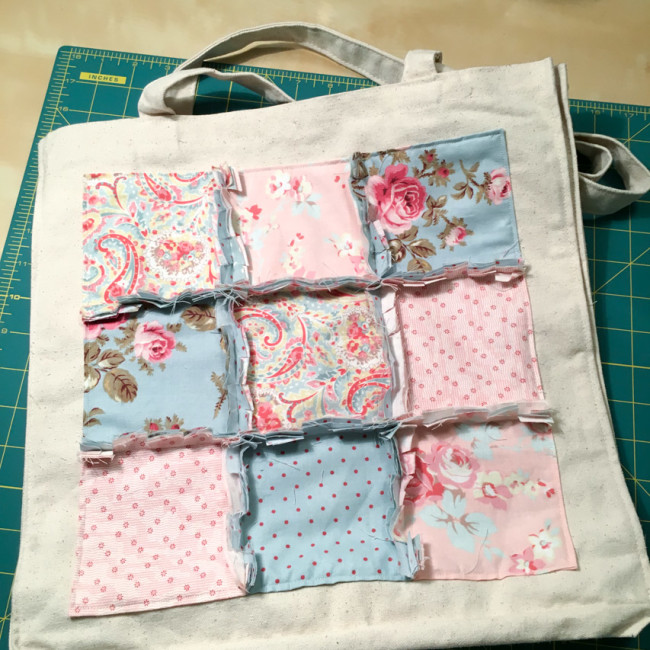
Rag Quilted Tote SquareAssemble the 9 blocks into a square by using rag quilted seams. (For easy instructions on assembling rag quilt blocks, see this wonderful article by Deby at So Sew Easy.)

Once the squares are all attached together, the block must be attached to the bag by sewing around the outside edge. This seam must be sewn one block at a time, without passing over the rag quilted seams. So it requires a lot of stopping and starting of your machine. Careful pinning is the key to success in this step.

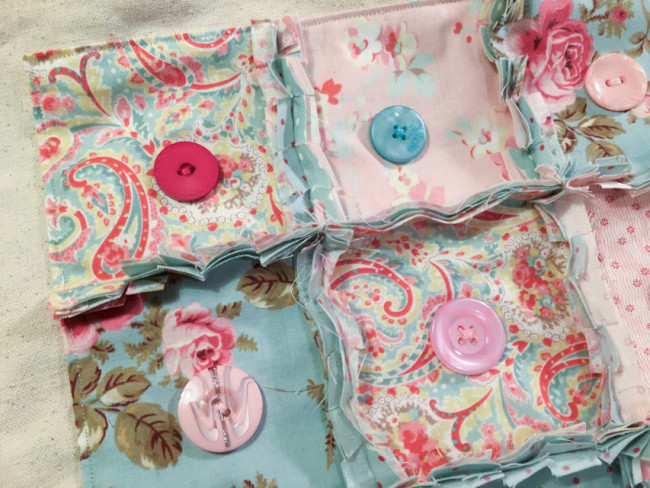
Rag Quilting ToteThe final step is to adhere buttons in each square. This project is a great way to use all of those really large buttons in your Button Bonanza bags! The buttons aren’t just decorative – they also serve a purpose as well, by helping to anchor the squares to the bag.

Tote close-upAnd that is it! Your tote is ready to hit the street – or be wrapped for under the tree! The rag quilted seams will soften and fray as they are used and washed into an even more beautiful fuzzy fringe.

Rag Quilted Button ToteNow, did I mention there are fabulous prizes?

Handmade-Holidays-2015-Prize-Pack-1600-wide

We are having a giveaway of over $600 in craft supplies to help you make this holiday handmade! Enter to win using the widget below:

a Rafflecopter giveaway

Many thanks to all of the sponsors of the hop and giveaway!


HANDMADE HOLIDAYS SPONSORSThanks for stopping by, and make sure to use the widget below to visit the other hop participants!

horizontal-line

Thanks for joining us for the three days of the Handmade Holidays blog hop! Make sure you don’t miss day one and day two of the hop, too!

10

Handmade Holidays | Zip Pouch

Welcome to the Handmade Holidays on Buttons Galore! For the next 3 days, we’ll be joining in by sharing ideas for handmade Christmas gifts using – of course – buttons!

HANDMADE HOLIDAYS hop - HORIZONTALOur handmade gift project today is a handy little zippered notions bag that is perfect for the sewing enthusiast or frequent traveler in your life! It’s made from a pattern called Everyday Zips by Joanna Figueroa of Fig Tree & Company that is available online or at a local quilt store (which is where I got mine).

Zippered Notions Bag

Supplies:

One of the most underestimated tasks in the success of a sewing project may be the selection of fabric. Just choose colors you like, right? Not exactly. Color, pattern, and other choices can make the difference between a project you are happy with and one that just isn’t satisfying.

Notions tote under construction

On this project, the pattern called for the body of the bag to be a neutral colored lightweight canvas. But I had found this neutral background vintage sewing themed quilt fabric that I was in love with at my local quilt store. This project seemed like a great excuse to use it! Plus, since this is a “notions tote”, the fabric would reinforce the theme.

I also chose a light color for the interior (not seen here) – an ivory tone on tone chevron design.

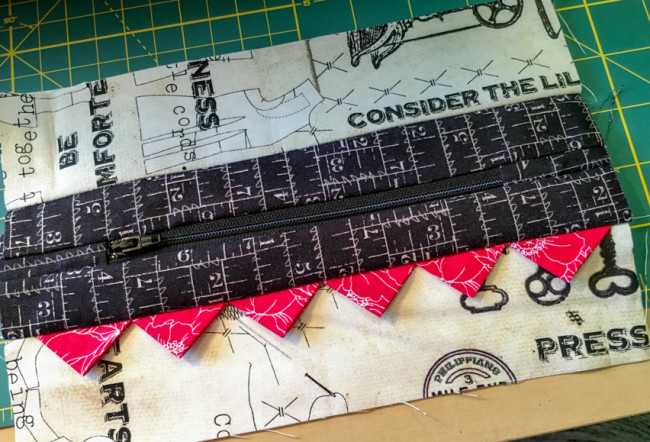
For the contrast panel, I chose the black rulers to pull the black out of the background and reinforce the sewing notions theme. That left me the prairie points to decide on. Red, white and black is a classic vintage color scheme, and so it seemed the natural answer here.

But as you can see above during construction, the red is incredibly stark against all that neutral. To me, it made the design look off balance. That’s where the buttons come in! By putting a row of red buttons above the zipper, it balances out the red prairie points and mutes their visual aggressiveness somewhat. And, as a bonus, the buttons add to the sewing theme!

Sometimes color choices make practical sense too. The pattern called for the strap to be the same color as the prairie points but I thought that would be too bold. The best alternative was to use the black ruler fabric, as it is the least likely of the fabrics that I was using to show dirt from while I was handling it.

Even the zipper color choices can make a night and day difference. I really could have used black or natural for either of the zippers. I could have positioned them so the zipper contrasted with the surrounding background, or so that the zipper blended with the background. But I’m well aware that sewing zippers isn’t my most proficient sewing skill. By choosing zipper colors that blend with the fabric around the zipper, I provided a bit of camouflage for any wonky sewing of the zippers. Choosing a contrasting color for the zippers would have the opposite effect: highlighting any errors on the zipper.

One thing that I made sure to avoid on a project like this that had tons of straight seams? Fabric that had stripes or other straight lines in the pattern (such as dots arranged in neat lines) was a no-no. Straight lines in the fabric would only highlight any errors in getting my pieces cut square or sewn straight. The ruler fabric does have straight lines but they are somewhat rough and not continuous so the pattern was workable.

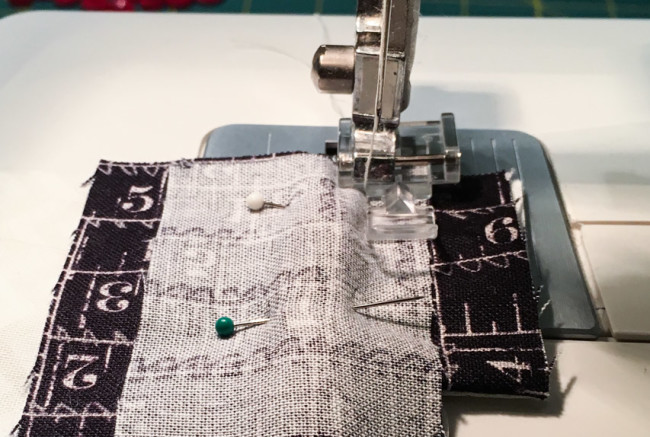
Since the project is mostly just straight seams, sewing the zippers are the most challenging parts of making this tote. While I admit that zippers aren’t my best talent, I do have one secret weapon:

Zipper Foot

This is the zipper foot on my sewing machine. While it is possible to sew zippers without them, the zipper foot makes it infinitely easier. Having the right tools is often half the battle in producing a quality result. If you are going to sew a zipper, I highly recommend that you invest a few dollars in a zipper foot for your machine. You won’t regret it!

Now, to the blog hop…

Did I mention there are fabulous prizes?

Handmade-Holidays-2015-Prize-Pack-1600-wide

We are having a giveaway of over $600 in craft supplies to help you make this holiday handmade! Enter to win using the widget below:

a Rafflecopter giveaway

Many thanks to all of the sponsors of the hop and giveaway!


HANDMADE HOLIDAYS SPONSORSThanks for stopping by, and make sure to use the widget below to visit the other hop participants!

horizontal-line

46

Upcyled Denim Pocket Purse

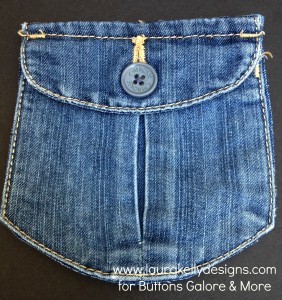
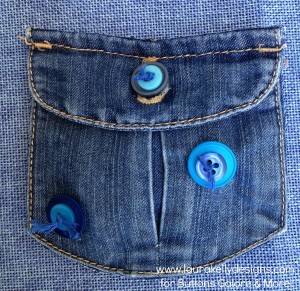
Buttons Galore was invited to join the Rainbow Blog Hop 2014 (aka RainbowHop14) with the color indigo.  To become a piece of the colorful rainbow party, I took an old pocked from a pair of kid jeans and turned it into a mini purse, Welcome to the party!

RainbowHop_Button

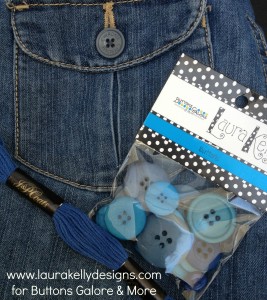
Here are the supplies I started with.

Supplies

I cut the pocket out first.

Pocket

Then I stitched on some buttons in the colors from my Laura Kelly collection that worked best (Robin Egg Blue and

PocketFinalClosed

It is perfect to hold important things in a bigger bag (ie:  gym bag, backpack, pocketbook, etc.)!

Check out the projects in all of the colors of the rainbow.  Lots of them use buttons!

And you can enter to win a prize too!

a Rafflecopter giveaway

Happy St. Patrick’s Day and Rainbows of Creative Love,

Laura

5

Sew a Button and Burlap Pencil Case

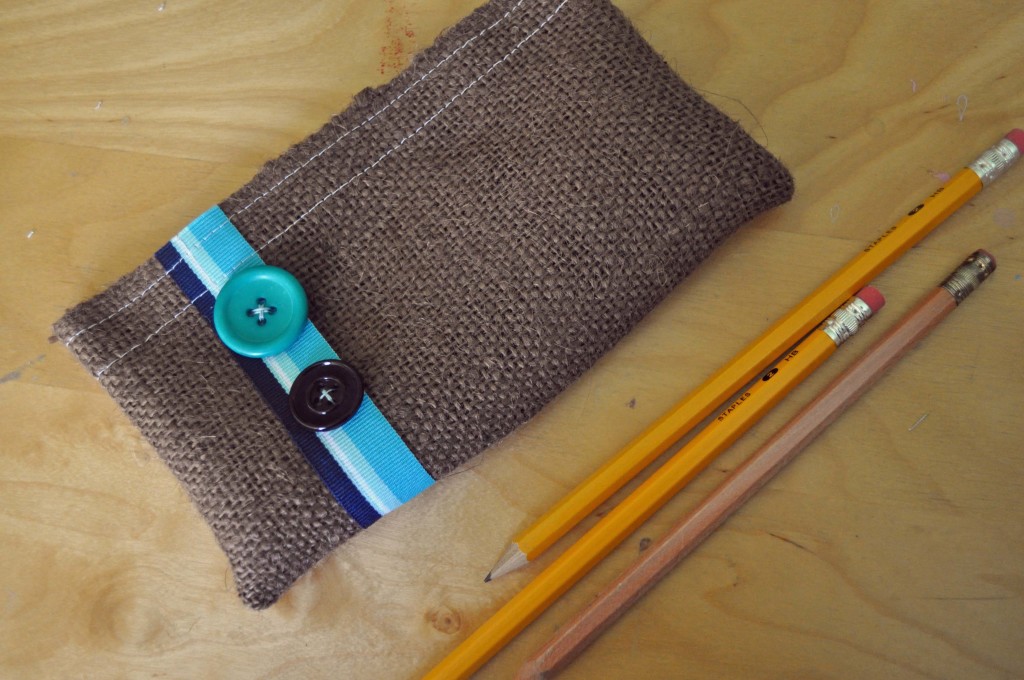
Sew a button and burlap pencil case for the guy in your life. It’s just right for the high school graduate who is heading off to college in the Fall or it would also be a great Father’s Day gift.

button and burlap Button & Burlap Pencil Case II

I know I’m always trying to keep my husband organized and he’s always looking for pens and pencils. Do you think there’s any chance a button and burlap pencil case is going to help?  Naw, I don’t think so either, but it’s fun to make!

Supplies needed for a button and burlap pencil case

  • Burlap cut to 7.5″  x 8″
  • Velcro (R) Brand Sew-On Fasteners cut to 7″ long
  • Ribbon cut to a length of 8″
  • Buttons – the Haberdashery line has some great masculine colors!
  • Basic sewing supplies

Instructions for sewing a button and burlap pencil case

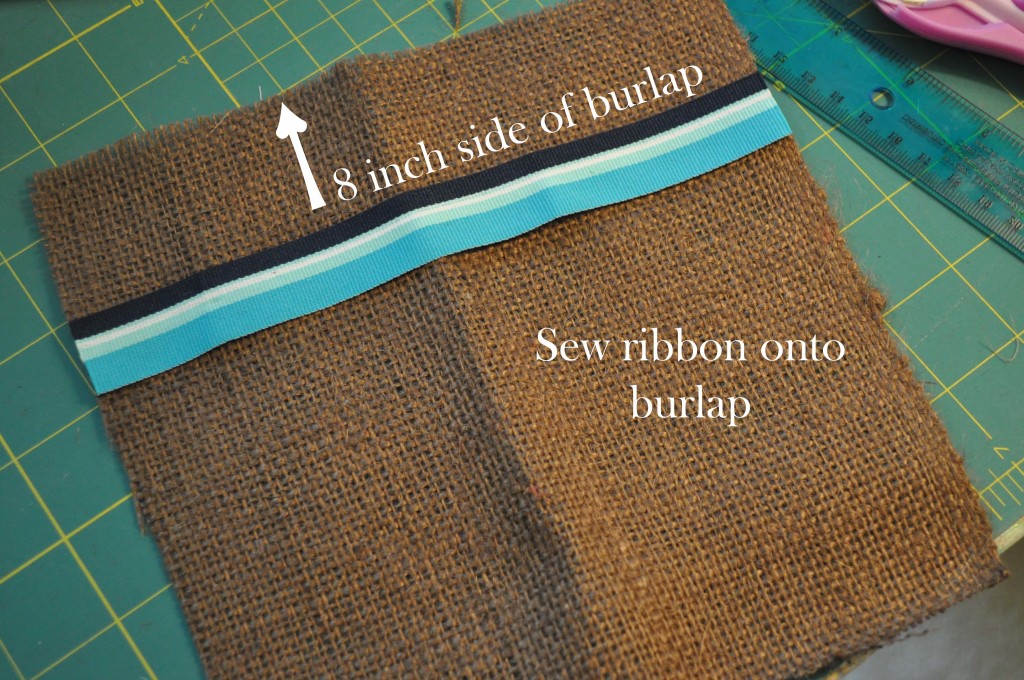
1. Sew ribbon onto burlap parallel to the side that measures 8″. Place it approximately 1.25″ from the edge of the burlap.

Ribbon Onto Burlap

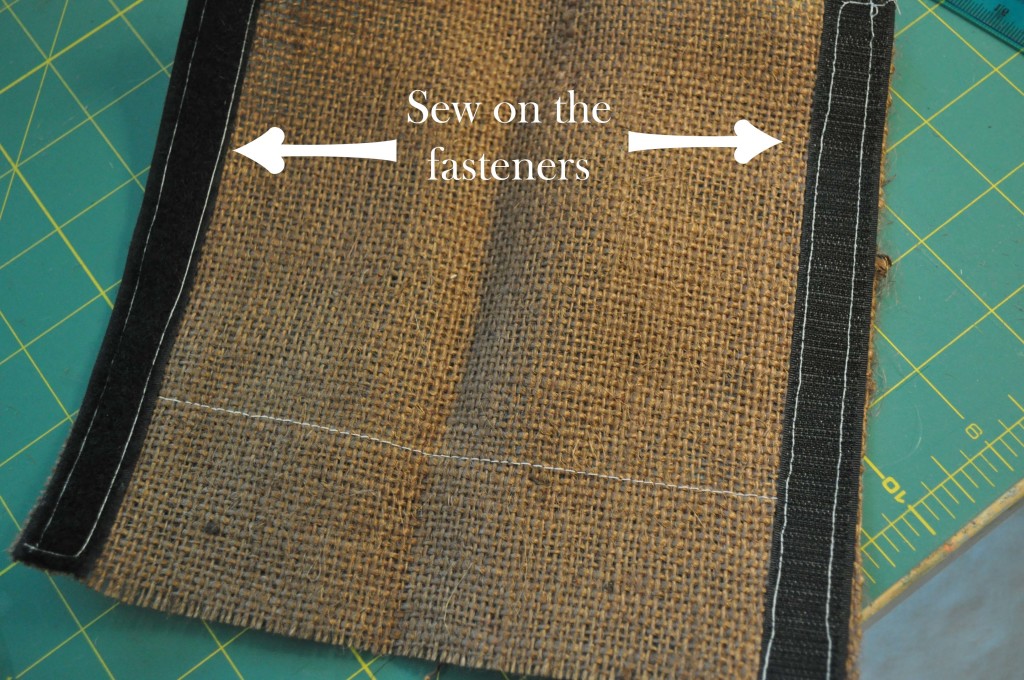
2. Sew the Velcro (R) Brand fasteners onto the 7.5″ inch sides. (These will be perpendicular to the ribbon.) I like to leave the top of the case without finishing it. The rough edge gives it a more masculine touch!

Sew on Fasteners

3. Fold in half, right sides facing (the side that you sewed the ribbon onto is the “right” side). The 7.5″ edges should be even. Press with an iron.

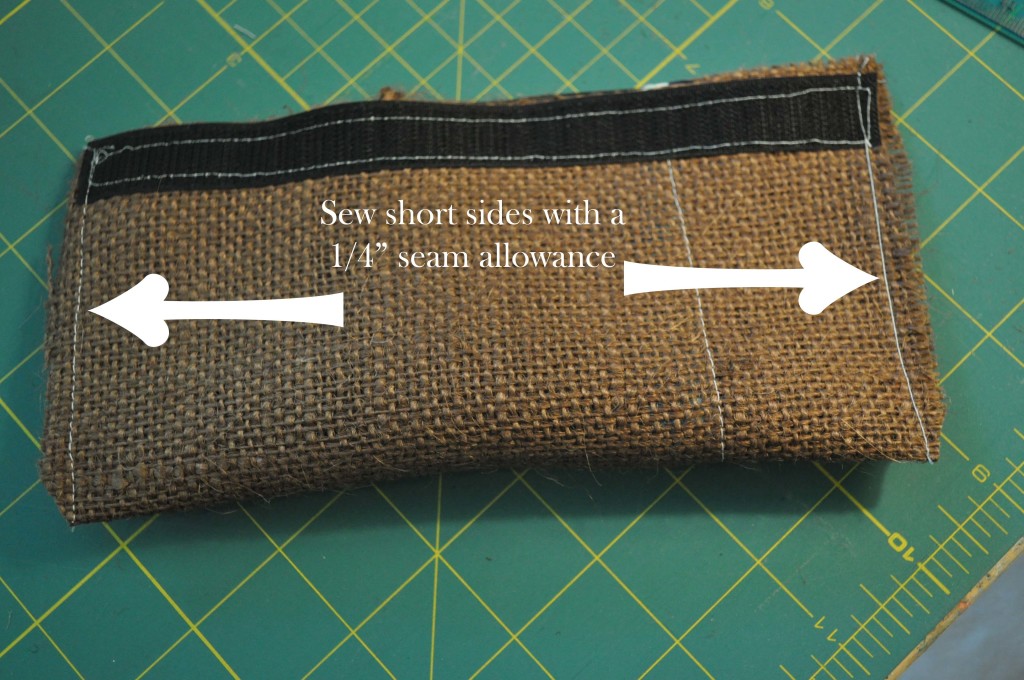
4.  Sew the short sides closed.

Sew Closed

5. Clip the corners and turn the bag right side out.

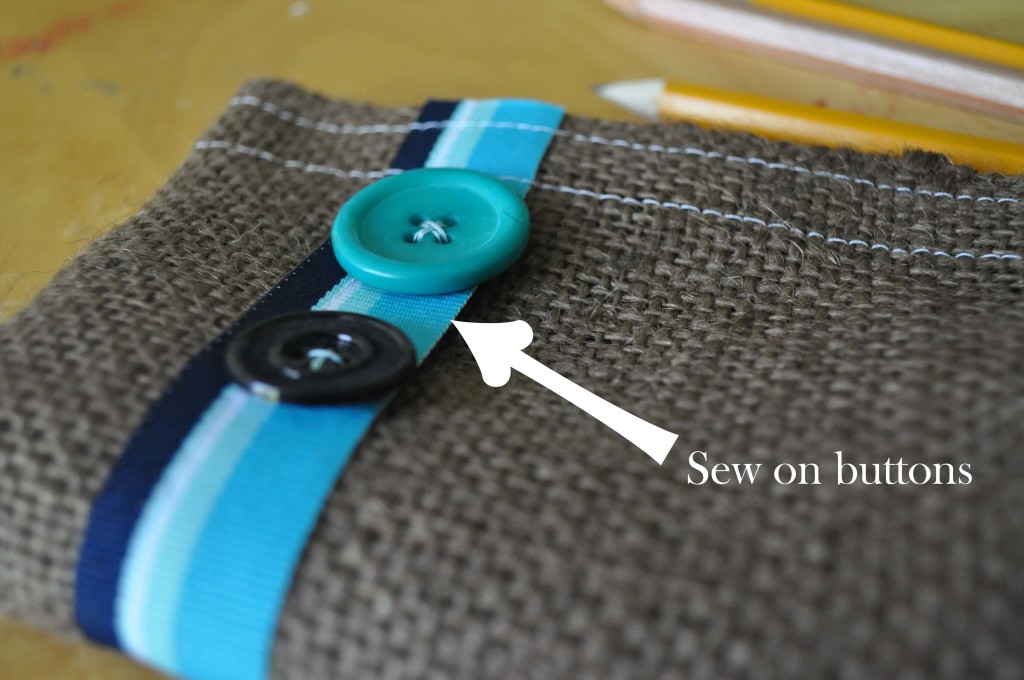
Sew On Button

6. Sew buttons onto ribbon. I know it’s a bit harder to sew them on when the case is sewn, but it’s best to leave this step for last, so you can see the best placement for them.

www.laurabraydesigns.com

1

Make an iPhone Purse with Duck Tape and Buttons

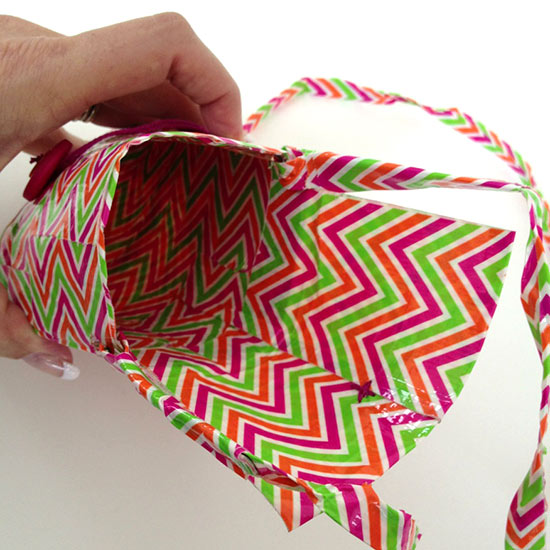
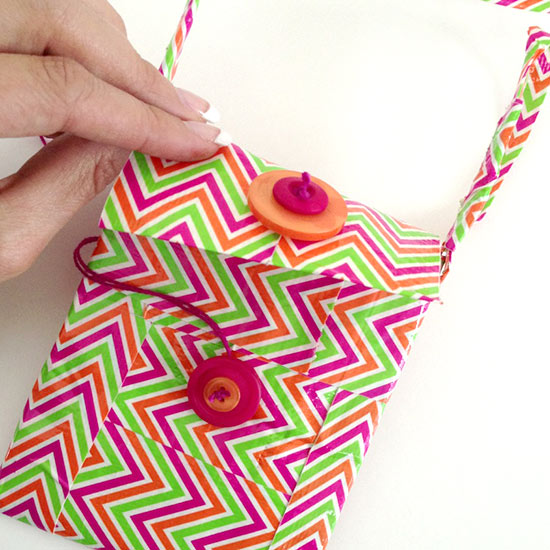
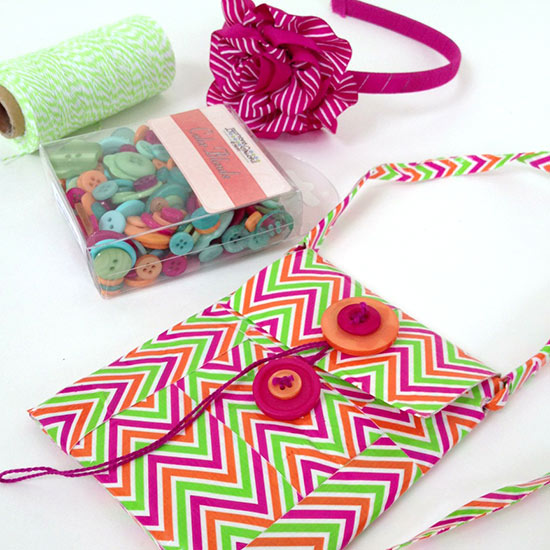
Make a Duck Tape  iphone purse with buttons galore and more buttons.  I was struggling with ideas to make for my projects this month featuring buttons. While I was sitting around brainstorming, I started playing with the fancy roll of Duck Tape I had and next thing ya know, I had made a mini purse. Now, I don’t have photos to share showing how I made the purse exactly. That’s what happens when a girl get crafty at 11pm with no plan. However, I’ll tell you how I did it.

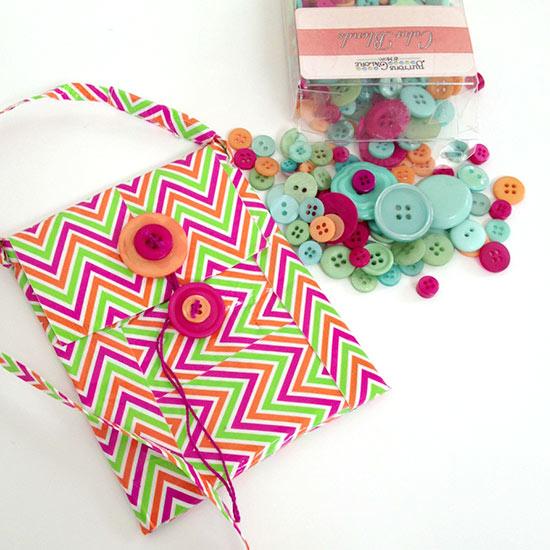
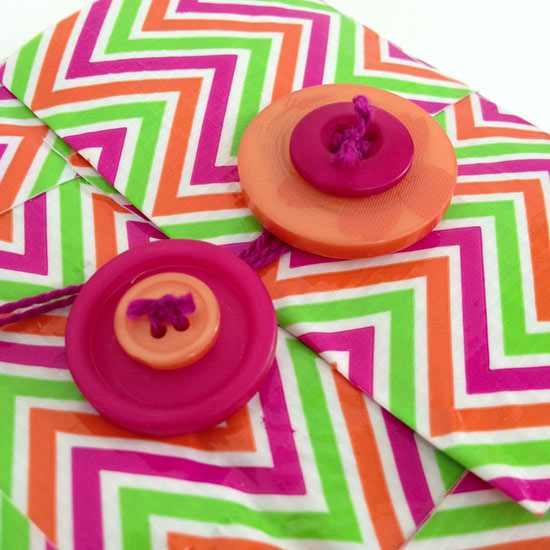
I used buttons to create the closing feature on this purse. I hand stitched these buttons in place so they would be more sturdy than a simple adhesive attachment. I think it would be fun to sew extra embellishments and designs on the purse too.


Make a Duck Tape cell phone purse with buttons galore and more buttons

Duck Tape cell phone purse


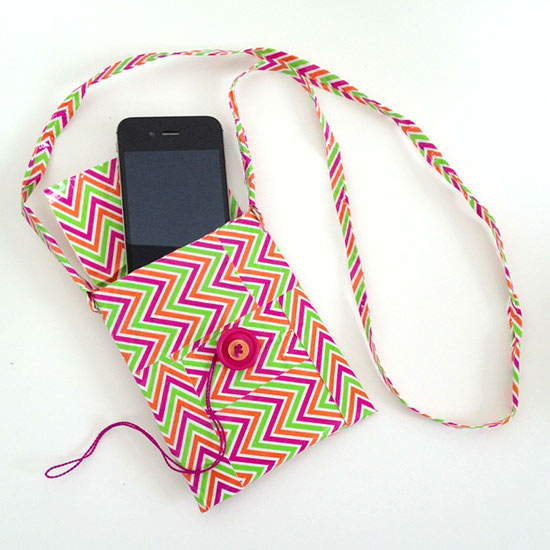
Make your own iPhone purse

Make your own iPhone purse

Materials I used:

  • Duck Tape
  • Vacation – Coordinating buttons
  • Embroidery thread and needle

– no kidding, that’s it!

How to make your own iPhone purse with Duck Tape and Buttons:

  1. Create a sheet of double sided Duck Tape that is 3 tape strips wide and 11″ long. To make the sheet, tear off 3 pieces of tape that are about 11″ long,  lay them next to each other, overlapping on the side by about 1/4″. Repeate this step and then stick the two large pieces on top of each other.
  2. Fold the bottom up about 4″ and tape the sides. Now you should have a pocket with a flap.
  3. Cut a small hole on each side of the pocket opening.
  4. Using a long strip of duck tape, make a strap for your purse. Roll or fold the strip of tape until it is more like a cord with no sticky side showing. RUn the cord through each hole on the purse pocket. Place tape around the edges of the cord so that it stays in place.
  5. Add your buttons
    1. Sew buttons in place however you’d like.
    2. Wrap thread around the bottom button and leave a piece hanging so you can use it to wrap around the flap button to keep your purse closed.
iPhone purse pocket

iPhone purse pocket


iPhone purse flap

iPhone purse flap


iPhone purse button closeup

iPhone purse button closeup


Fun colors to make your own iPhone purse

Fun colors to make your own iPhone purse


I always carry a super small purse, so you could use this as your wallet or add more pockets to carry more little treasures. I think it would be neat to add a few different Duck Tape patterns too. Get creative with the Duck Tape to make your own fun purse. I’d love to hear what you come up with!

2

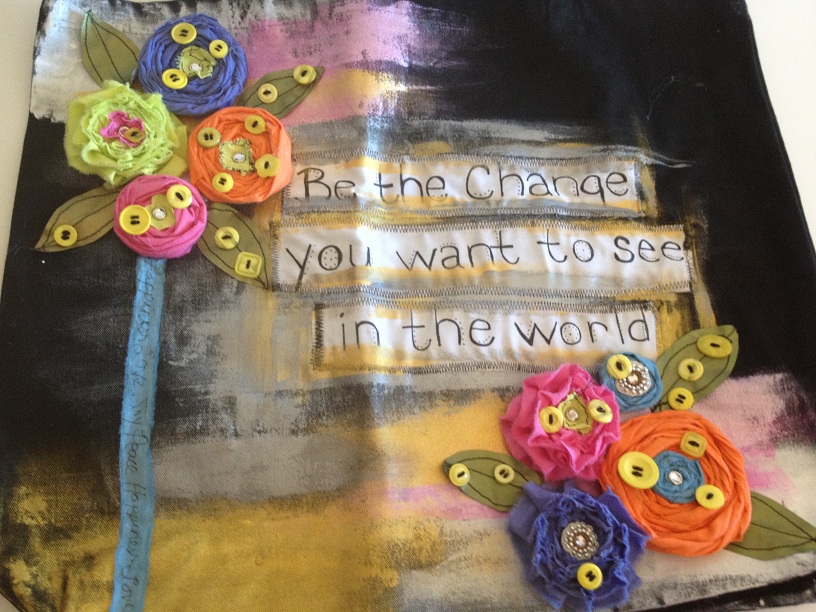
Make an embellished tote with Hand Dyed Buttons

embellished tote

An embellished tote

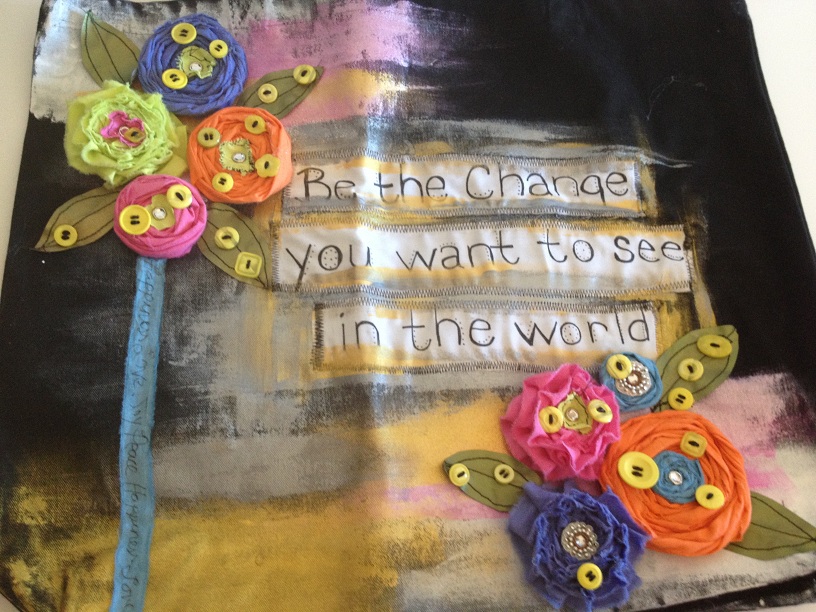
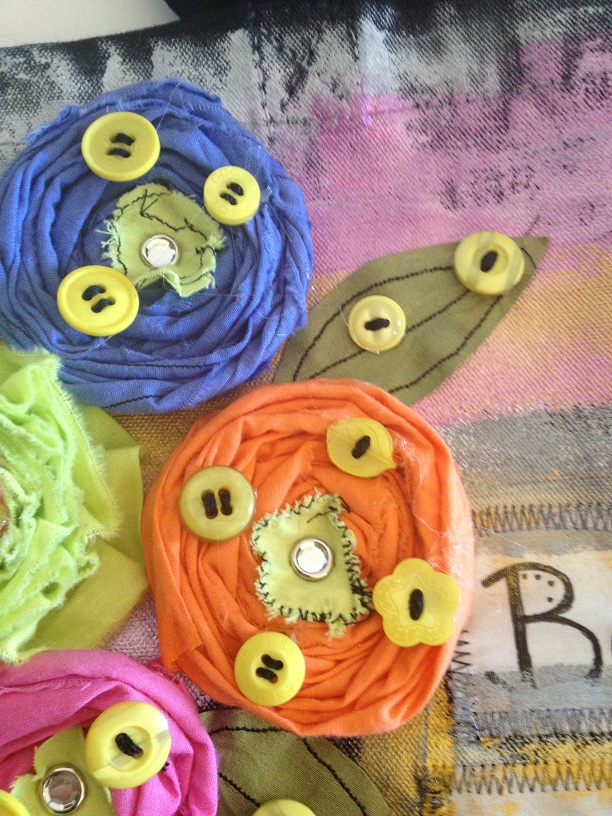
Hand journaling is becoming more and more popular in mixed media crafts these days. This tote is a basic pre-made black tote I ordered online and embellished with hand journaled muslin, Jacquard Products paints and dyes (for the hand dyed fabric) and finally, fun buttons!

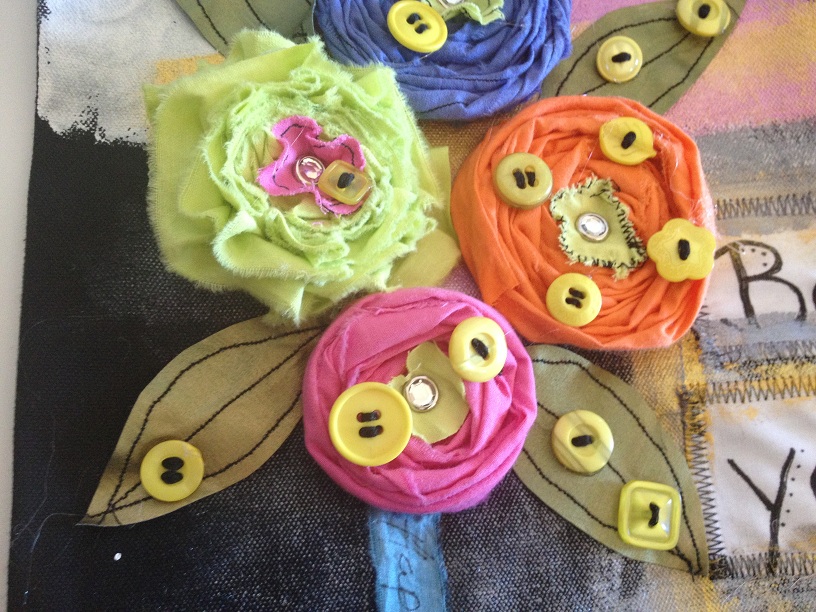
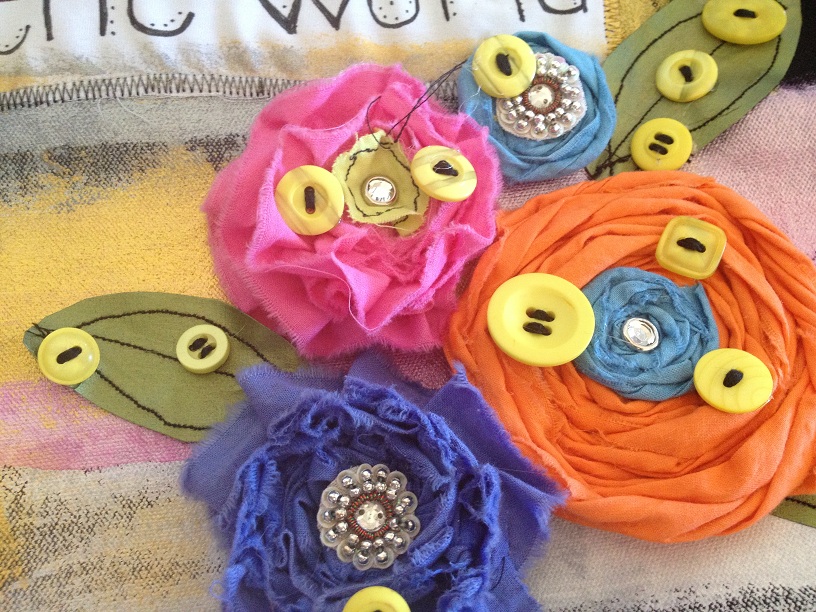
Jacquard products makes a wonderful product called IDye. It comes in both liquid form and powered packets. I used the powdered packets to machine dye white cotton muslin. Once the muslin was dry, I created happy bright colored fabric flowers using various techniques. Instructions for making flowers by hand from fabric can be found in abundance these days. Search for a myriad of techniques on sites like Pinterest.  You can find other ideas for an embellished tote there, too.

How to make an Embellished Tote:

I started with creating a dry brushed background using Jacquard’s Neopaque and Lumiere paints. Starting with one color, I waited for the colors to dry in between coats before adding the next to create an interesting canvas.

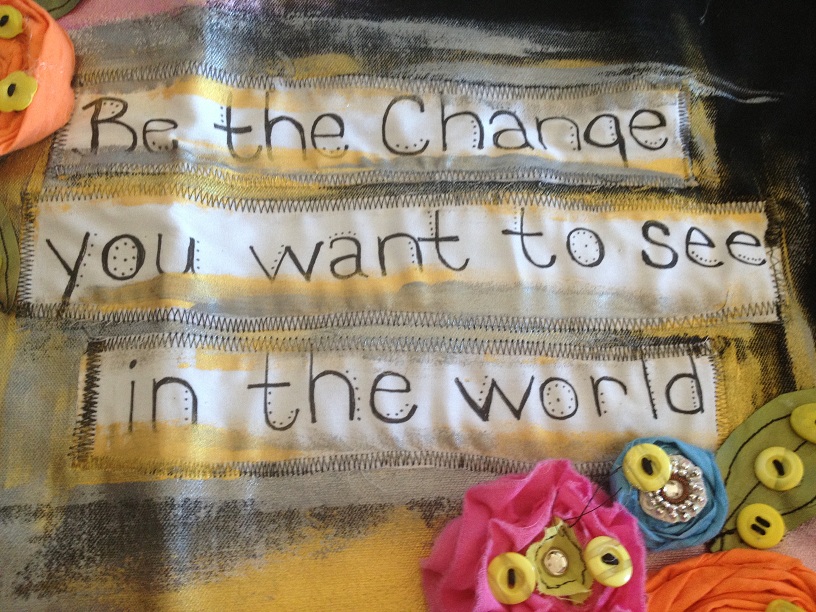
Believing that I have the absolute worst hand writing on earth, I was very timid about hand journaling on these muslin strips. I took on the challenge anyway and pinned and sewed them to the front of the bag. Swiping a coat or two of the paints allows them to blend in nicely with the background while standing out at the same time.

An Embellished Tote bag with hand dyed buttons and fabric

Bright, fun, hand dyed buttons  add the final touch to the flowers. They are perfect for this project since the fabric is hand dyed as well. I used three strands of six ply embroidery floss to sew through the holes of each button. I wanted to create the impression that the buttons were sewn to the bright flowers but in reality, I knotted off the threads in the back and glued them on with Beacon Adhesives Fabri-Tac.

The message of the sentiment speaks well to me. Instead of constantly complaining about how things should be, or how they are not what we envision as “right,” we should lead by example. Show the world what a better place it could be by being just that – better.

Live Life Creatively,

Melony

0

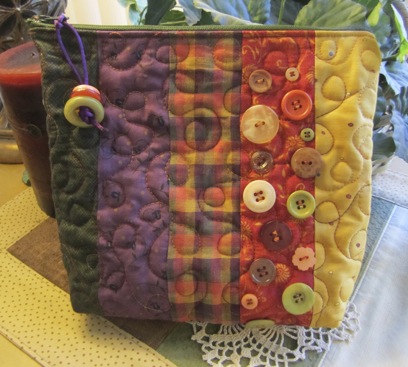
Zippered Bag with Buttons by Denise Clason

 Make a Zippered Bag with Buttons

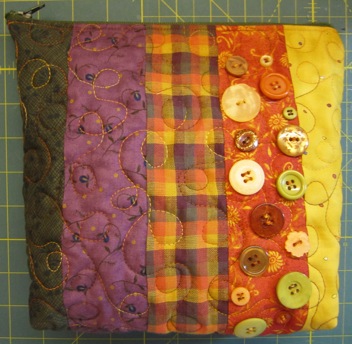
Fall Zippered Bag with Buttons by Denise ClasonZippered bag measurements 10×10 bag
Fall Zippered Bag with Buttons by Denise Clason


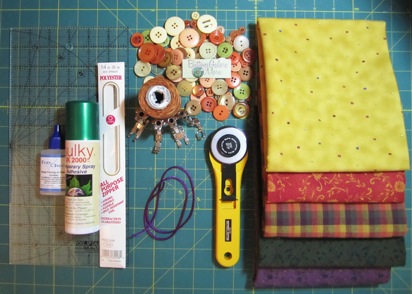
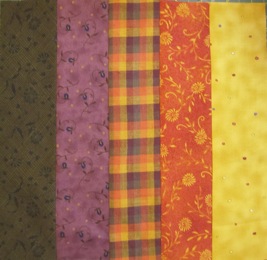
  • *(5) Coordinating Fat Quarter (FQ) Prints or use scraps, minimum 10” x 10”
  • *1 bag “Button Tote Bag Assortment” by Buttons and More, #1138473
  • *(2) 10” x 10” scraps of cotton batting, Warm & Company
  • *Star Multi-Color Machine Quilting Thread, to match fabrics, Coats & Clark
  • *10” Polyester Zipper, Coats & Clark
  • *Rotary Cutting Tools, Olfa
  • *Temporary Spray Adhesive, Sulky (green cap)
  • *Fray Check, Dritz
  • *1/8” wide12” strand cording to match fabric

Supplies for zippered bag:

1/4” foot, zipper foot, multi-purpose foot, scissors, sewing machine, iron

All seam allowances are 1/4”.

Cutting Instructions for Zippered Bag:

From each FQ, cut (1) 2 1/2” x 10” strip (front of bag)

From one FQ, cut (1) 10” square (back)

From one FQ, cut (2) 10” squares (lining)

From cotton batting, cut (2) 10” squares

Fall Zippered Bag with Buttons by Denise Clason

All seam allowances are 1/4”.

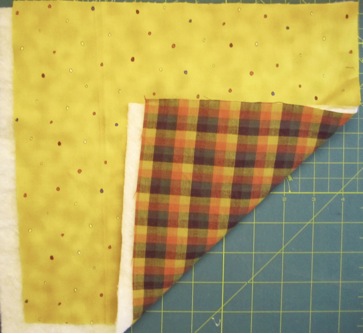
1.  With 1/4” foot, sew each 10” strip RST, along 10” side, Press

zippered bag

2. Layer backing (face down), batting, lining (face up) Spray Temporary Spray Adhesive between layers. Repeat with front and lining.


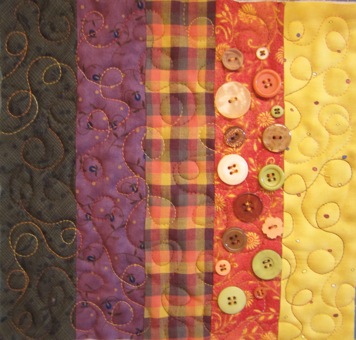
3. With darning foot and feed dogs lowered, quilt bag using loopy design. Repeat with backing layers. Use matching lining thread in bobbin.

  1. Trim Front bag approximately 10” x 10” and then trim Back bag the same size.


Fall Zippered Bag with Buttons by Denise Clason

5. Position various buttons to front bag, in random places. Sew with machine or by hand. I used my machine and the variegated thread, it changed with the color of each button! Apply Fray Check to back of each button to secure.

Fall Zippered Bag with Buttons by Denise Clason

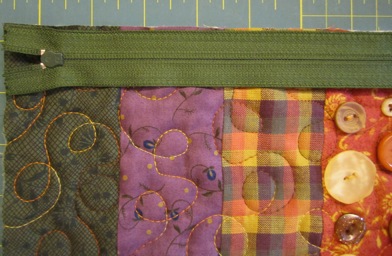
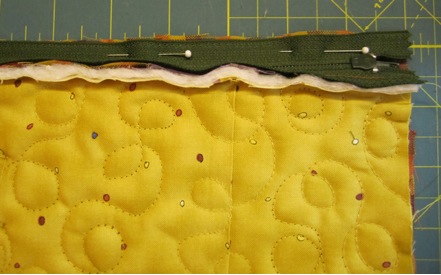
6. With Zipper foot, sew zipper RST onto front of bag along top raw edge.

7. Sew zipper RST to back of back. Use pins if necessary.

8. With the Multi-purpose foot, zig-zag along zipper edge.

9. Turn bag over to Right side and topstitch along zipper edge.

Fall Zippered Bag with Buttons by Denise Clason

10. Upzip zipper! (for turning right side out) With 1/4” foot, and RST, sew bag along all three sides. Backstitch at each end. Zig-zag along seam allowances.

Fall Zippered Bag with Buttons by Denise Clason

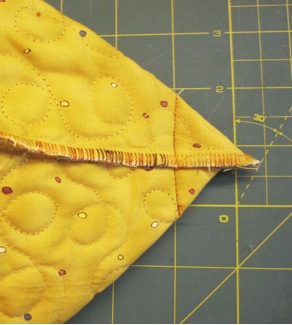
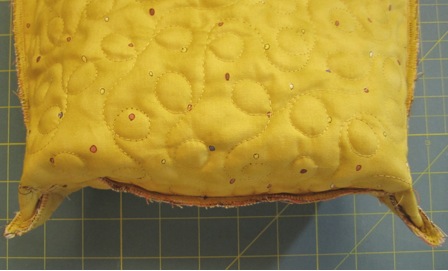
11. At corners of bag, match up side seam with bag bottom seam, pin on either side of seam. Check inside of bag to make sure they line up. Sew a seam, approximately 1 1/4”, from tip of corner . Backstitch at each end. Zig-zag and trim. Turn bag RSO.

Fall Zippered Bag with Buttons by Denise Clason

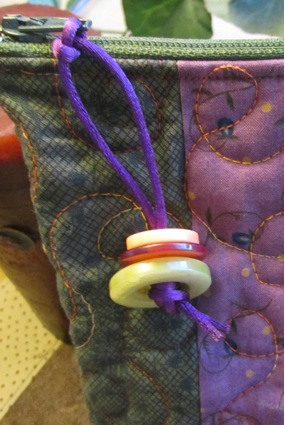
12. Thread cord through zipper pull and tie a knot. Thread cord through three different buttons and tie a knot. Trim cording even. Apply Fray Check to ends. Enjoy!

Fall Zippered Bag with Buttons by Denise Clason

Denise Clason has been an artist/designer for over 35 years, selling her creative and beautiful designs to friends and teachers at an early age.  She continues to design and has  been published and licensed in the craft, decorative painting, sewing and quilting industries.  Along the way she has designed product for several manufacturers.  Denise is the author of 9 books. Her latest book, “Sewing Vintage Aprons” was published by All American Crafts”, released June 2011. Another two books were published by Krause Publication’s, “New Country Quilting,” released Spring 2005 and “Quilted Bags & Totes,” released Fall 2006. Denise is a Designer Member of The Craft & Hobby Association (CHA).  Please contact her at denise@deniseclason.com or visit her website & blog: www.DeniseClason.com. She would love to hear from you!

2

Messenger Bag with Embroidered Table Runner

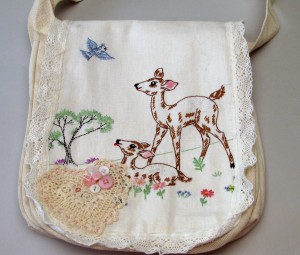
Thrifting Thursday - Messenger Bag with Embroidered Table Runner

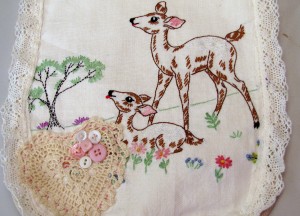
I found this adorable table runner while cleaning up my Mother In Law’s house a couple of weekends ago. For some reason she had only worked half of it and then put it away to never be worked on again.

I felt bad cutting it up but it didn’t quite fit on the front of this messenger bag. So I cut it to fit and then cut the lace from the edge and sewed it back on. Same thing…only smaller.

http://www.vickiodell.com/wp-content/uploads/2011/04/goddess-transparent1.jpg

I sewed a small heart shaped doily to the lower corner and embellished it with buttons from a Button Bonanza bag in Bubblegum. Finally, I stitched again around the outside edge of the heart with pink embroidery floss and put embroidery floss through a couple of the buttons.

I haven’t decided if it’s finished or not. I’ll have to sit with it for a day or two and decided if I need to add anything more.

What do you think? Is it finished? If not what would you add?

1

Child’s Button Embroidery Sampler

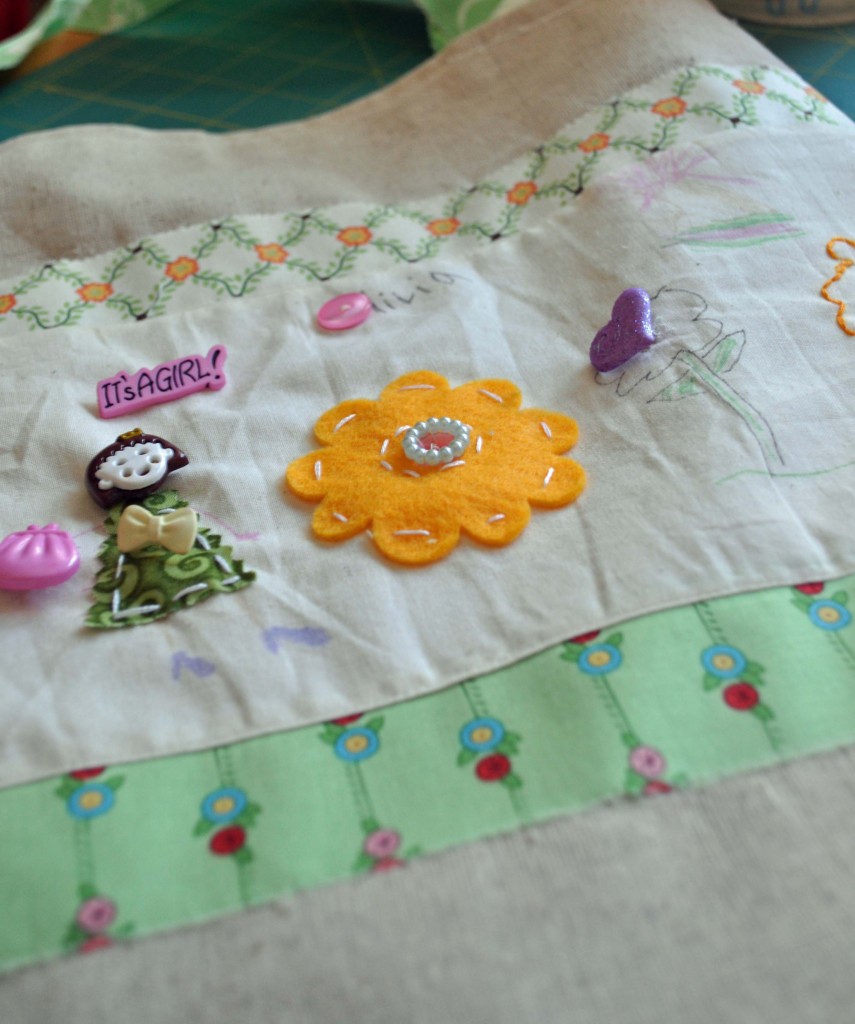
Do you remember how much you loved to sift through your mom, aunt, or grandmother’s button boxes? I still play with my buttons all the time, and I know I can always keep my five year old daughter busy with buttons. I recently came up with a project that takes button play beyond just looking at buttons, but also uses them as a creative tool. The end result is a darling little sampler of all my daughter’s favorite buttons and artwork. It’s truly an heirloom piece that will be cherished for years to come. Here’s how to make a button embroidery sampler with your child.

Continue Reading →

1

Powered by WordPress. Designed by WooThemes