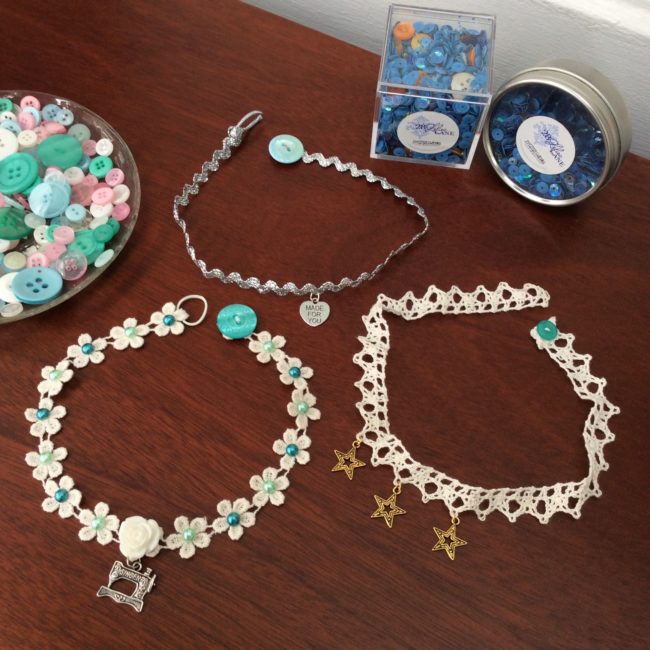
Make fun necklaces with the lace trim found in our 28 Lilac Lane Kits. It is easy to embellish the trim with the pearl flat backs, charms and resin flowers that can be found in each of our Embellishment Kits.

Make fun necklaces with the lace trim found in our 28 Lilac Lane Kits. It is easy to embellish the trim with the pearl flat backs, charms and resin flowers that can be found in each of our Embellishment Kits.
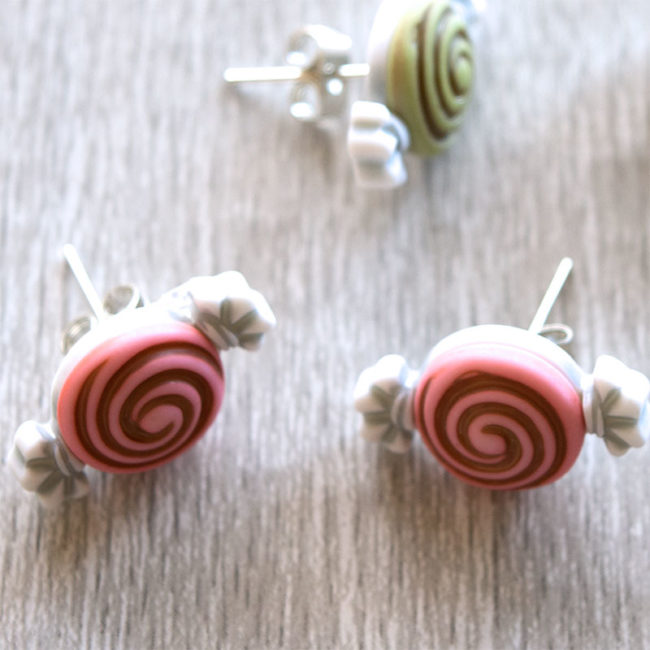
I love wearing fun holiday jewelry, but sometimes it can be expensive or difficult to find! Especially considering the limited amount of time you can wear cute holiday jewelry! Buttons make really great jewelry options, and it’s so easy and inexpensive to make your own earrings using your favorite holiday buttons. I turned these sweet “Candy Treats” 3D Buttons into some simple, but adorable DIY candy earrings in just a few minutes! With all of the cute Buttons Galore 3D holiday buttons, there are so many adorable options for your own holiday style! Continue Reading →
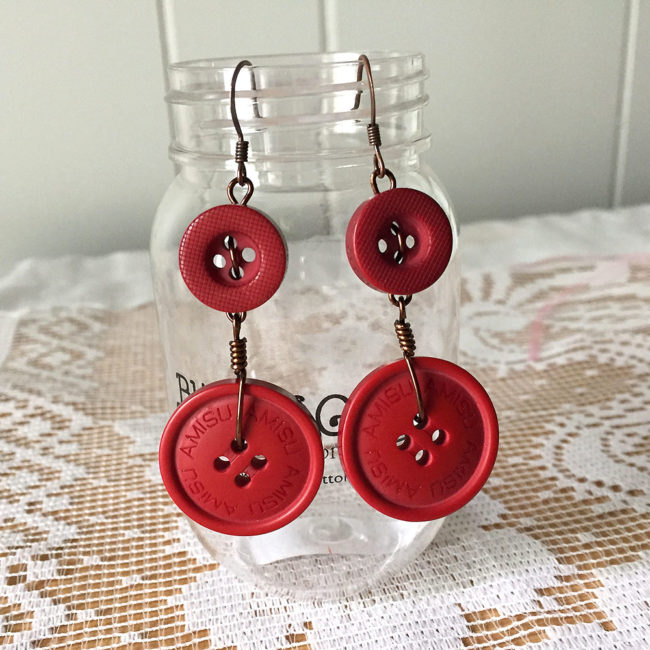
Hi! It’s Anaya from the Buttons Galore & More Design Team. With the holidays fast approaching, you’ll surely want to dress to impress for all of the upcoming parties and celebrations. If you’re like me, you get tired of showing up in the same old boring earrings. Well, today I’ve got the perfect project for you – DIY Dangle Earrings! Continue Reading →
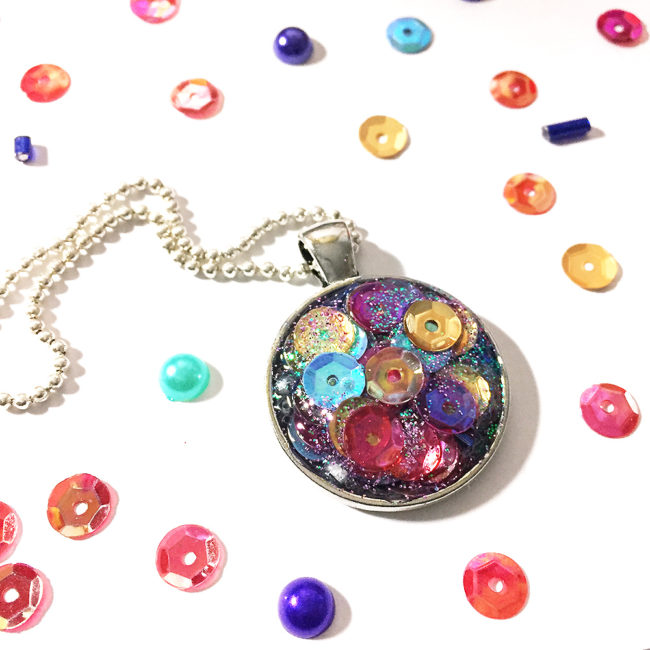
Who doesn’t love an invite to good party? I know I do! When you walk through the door (fashionably late, of course) you can be the center of attention in this quick, easy to make sequin pendant necklace! Continue Reading →
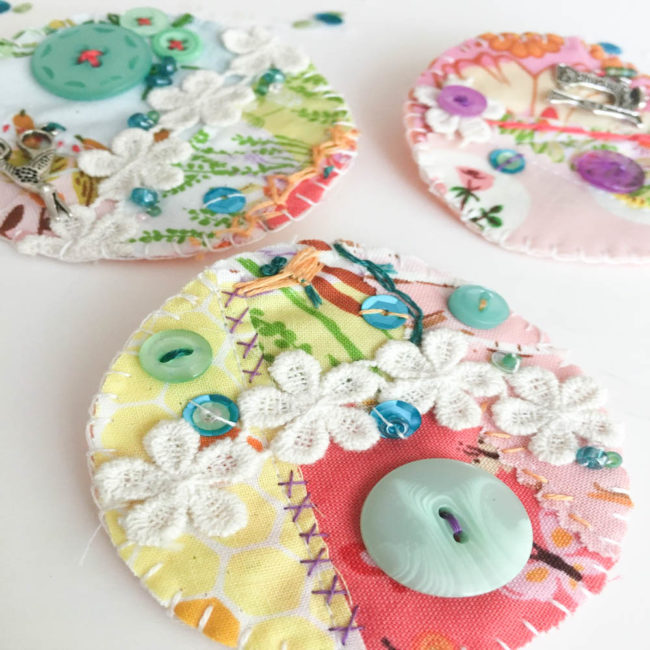
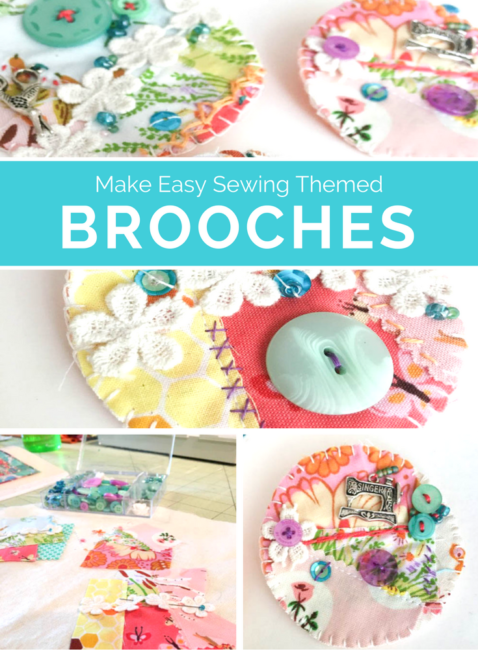
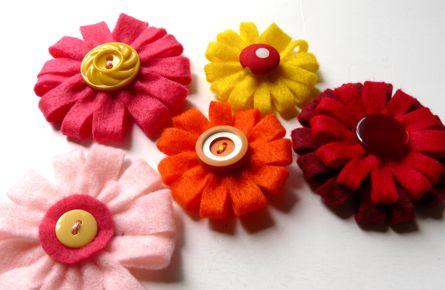
Hello button lovers! This is Katie from the Buttons Galore & More Design Team, and today I have a fun DIY flower button brooches project if you are someone who is just not ready to make that transition into the fall season!
Now, as a fall season girl at heart, I know making flower button brooches sounds a bit weird in September. However, there are those folks who just love spring and summer. If this is you, then these flower button brooches should make the fall season a bit more bearable and make those warm cardigans a bit cuter! Continue Reading →
My project today is a sweet little pendant necklace that comes together pretty quickly and makes a great gift.

Don’t be daunted by the idea of sewing on the beads! It’s true that sewing beads can be a little fiddly because of their tiny size, but once you get the hang of it, it’s a great beginner project for jewelry making.
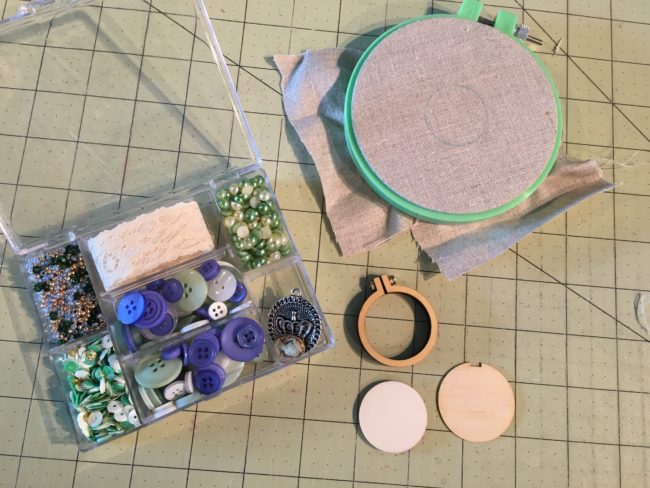
Here’s what you need to make this little beaded pendant necklace:
Put your scrap of fabric inside your embroidery hoop for sewing and outline the inside circle of the mini embroidery hoop with a pencil onto your fabric. Using the little cameo from the 28 Lilac Lane set, use craft glue to glue this to the center of the circle you just outlined. Let dry completely before moving on.
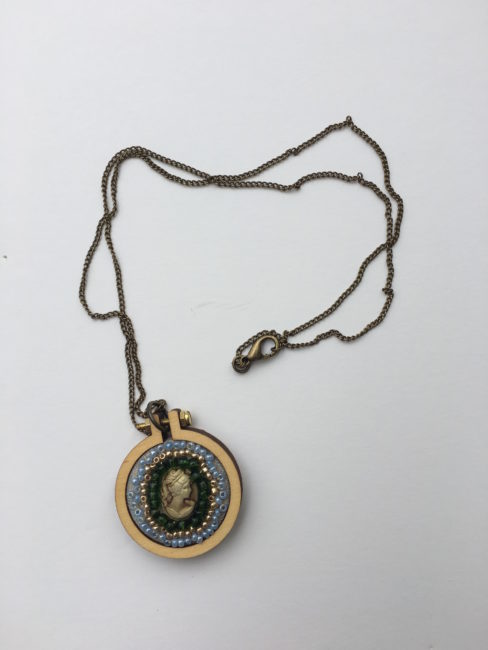
After your cameo is completely dry and securely attached to your beaded pendant, take a small plate (or use the lid of the Tea Time set) to pull out the beads. From your divisible embroidery floss, pull out one thread strand and thread your needle, making sure to leave a knot in the end. Sew a row of the larger green beads around the edge of the little cameo. Then repeat with the gold beads and then the blue beads.

To finish your beaded pendant, position the mini hoop on your design and draw a cutting line approximately 1/2 inch around the hoop. Cut it out. Place the cut design on the center plate. Then place the mini hoop on top and push it down to secure it. Flip it over and using a hot glue gun, place the glue around the inner edge. Push the fabric down in a circular motion. Add glue to the backing piece on the inner edge. Position it on the back of the hoop with the notch top and center.
You can either add a jump ring to your beaded pendant for your necklace chain to go through or thread the chain through the bolt in the center of the hoop.
Voila! You have a sweet little beaded pendant necklace ready to wear on a fun night out or to gift to a friend!
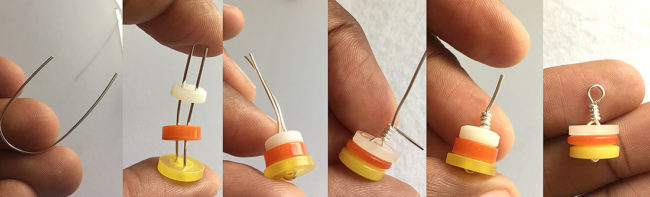
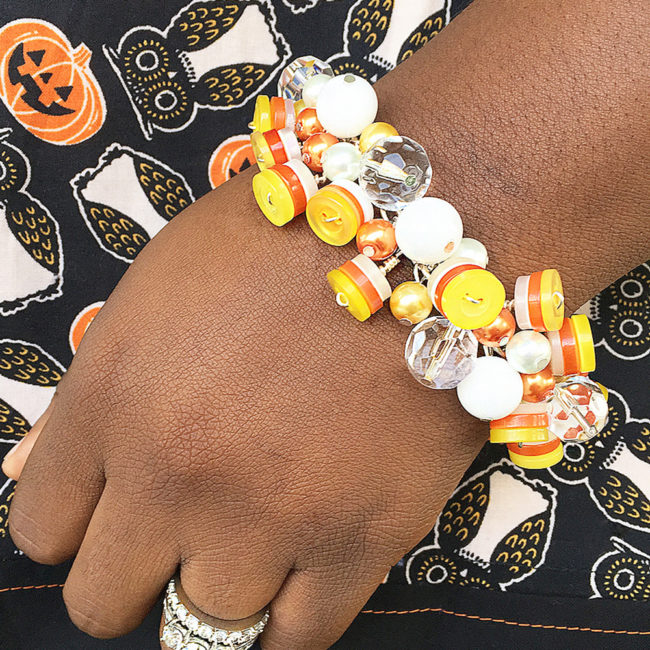
Hi everybody! It’s Anaya from the Buttons Galore & More Design Team. Halloween is fast approaching and I must confess, I’m excited. No, I’m not into the creepy scary stuff – I’m just looking forward to the candy! If you love Halloween candy like I do, I know you’ll enjoy making this super sweet candy corn bracelet.
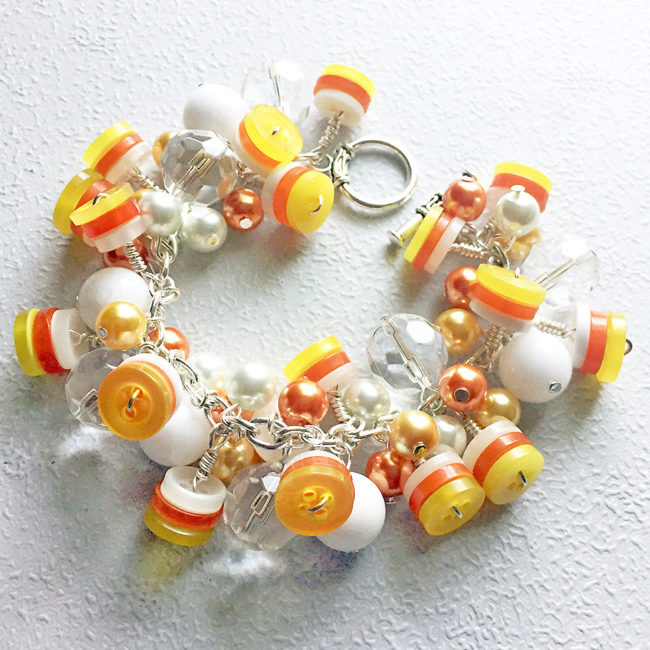
Start your candy corn bracelet by separating the buttons by color and size. You will need to select buttons of a similar size to stack and create little button candy corn charms for your bracelet. Cut a 3-4″ length of wire and gently fold into a ‘U’ shape. Stack buttons with yellow on the bottom, orange in the middle, and white on top. Push the buttons together and twist one end of wire tightly around the other. Trim the excess wire and create a loop using round nose pliers.
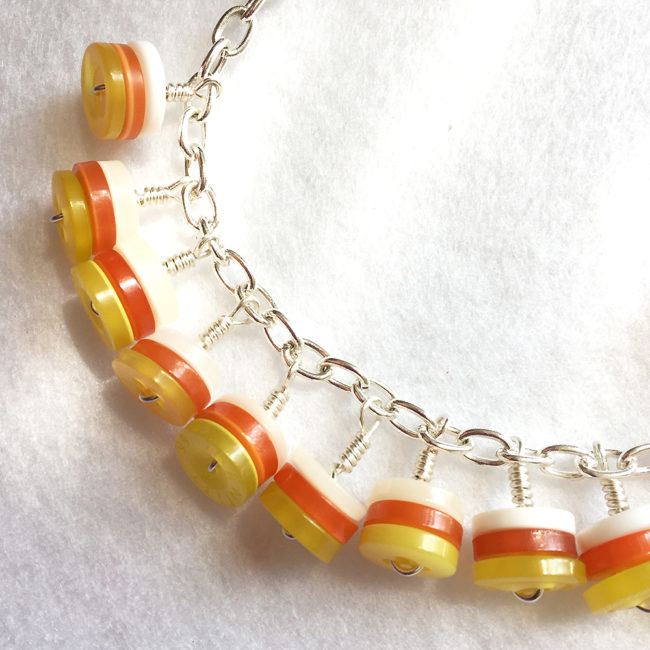
Repeat this step a until you have enough to fill your your chain. My bracelet is 7″ and I have attached a button charm to every other link.
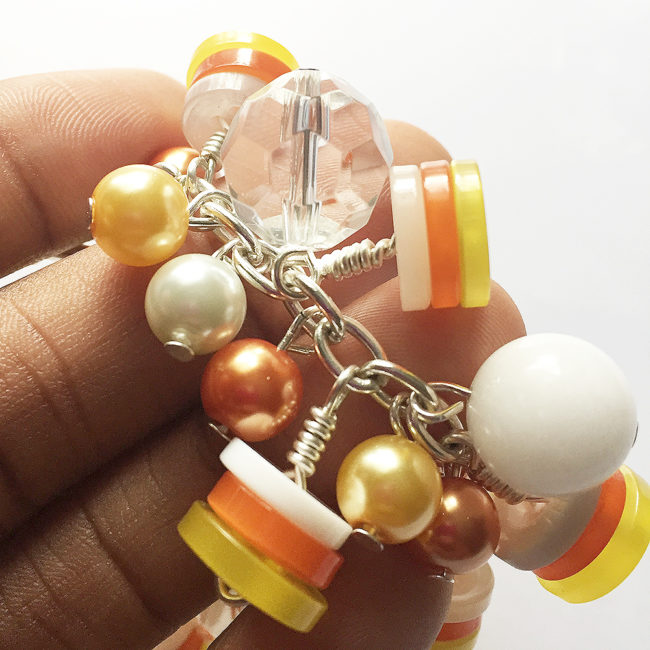
After filling the candy corn bracelet with button charms, gather your selection of beads. I am using 10mm yellow, orange, and white glass pearls along with larger clear and white glass beads. Using headpins, add 2-3 beads to each of the remaining empty links in the chain.
Once the bracelet is as full as you’d like, place a jump ring on each end of the chain. Attach the toggle clasps to the jump rings and your candy corn bracelet is complete!
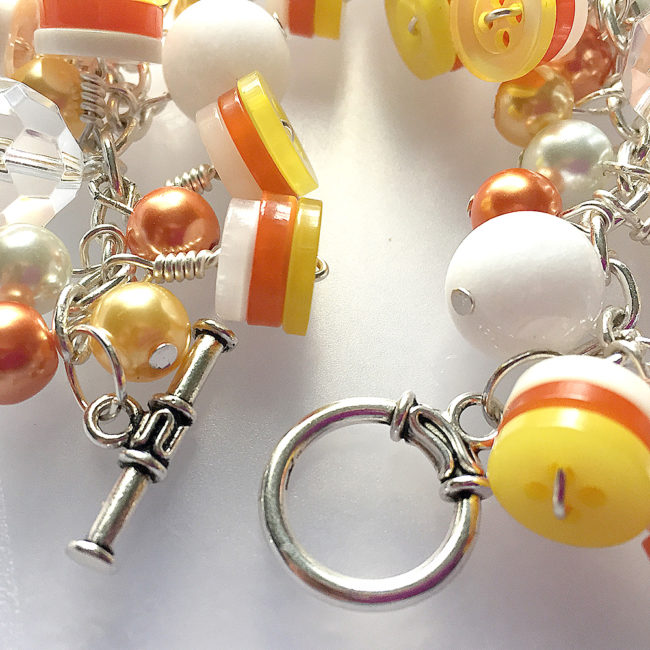
I hope you’ll give this candy corn bracelet a try! It’s so cute that it’s definitely worth the time and effort to make. You can even modify the steps a bit to create a matching Halloween necklace and earrings. With this kind of arm candy, you’ll be sure to get all the sweet treats you desire this Halloween candy grabbin’ season!
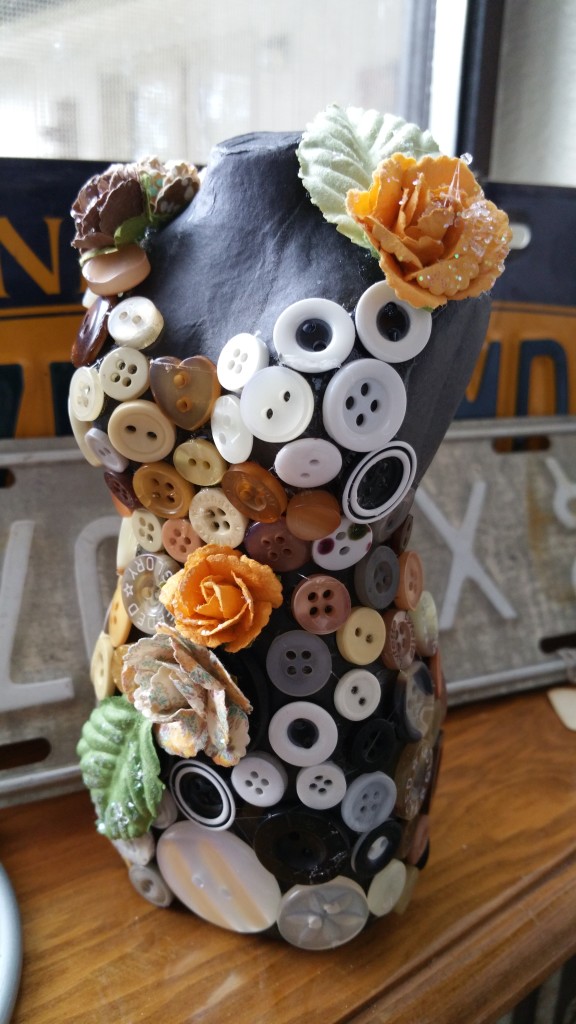
Hi, Connie here with Buttons Galore & More design team! Today I will be sharing an idea using the Toasted Graham Embellishment Bottle by 28 Lilac Lane. The contents of the bottle remind me of graham crackers, buttons in rich brown tones along with seed bead and sequins. Taking beautiful embellishments and adding them to clothing to accessorize is a favorite project of mine. Making a DIY button brooch, to add to a denim shirt or straw hat, is where I started!

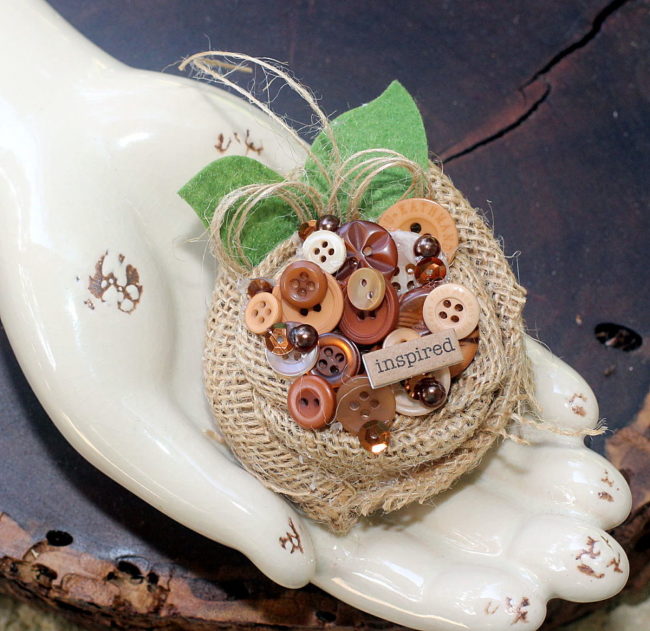
Take a small piece of burlap and twist it, to make an easy to create rose flower to serve as the base of the brooch. Coat the ends with a strong glue to keep them from fraying, and mount the burlap flower on a circle of felt, so the flower will not unravel.
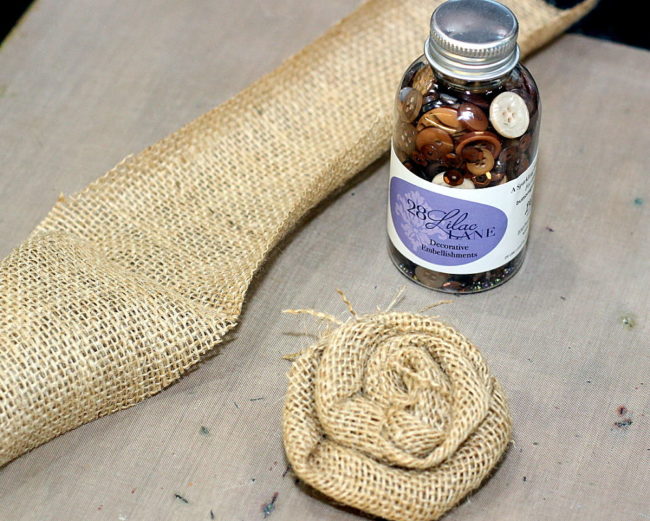
Now comes the fun part! Pour the contents of the Toasted Graham embellishment bottle on a dish (so you can see all of the pretties that are in it), and start selecting the buttons for the center of the DIY button brooch.
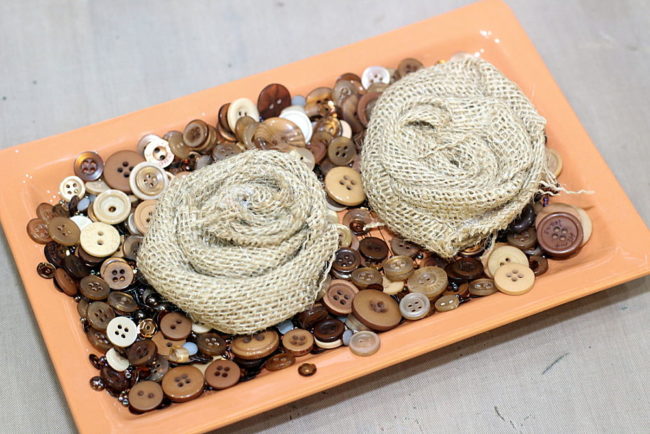
Using a strong glue, start gluing down buttons, sequins, pearls and beads onto the brooch. Overlapping the buttons and tucking in the sequins under the buttons will make a beautiful looking brooch. Add felt leaves and twine to finish off the brooch. Glue a pin onto the back of the brooch, making it easy to attach to a shirt or hat.
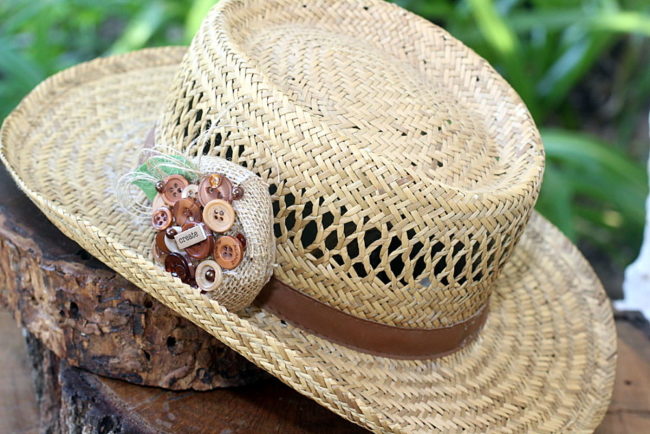 I love how the “create” brooch looks on this straw hat. It’s such a fabulous look for the fall season! Just attach it to the hat, using the pin that was glued to the back of the brooch.
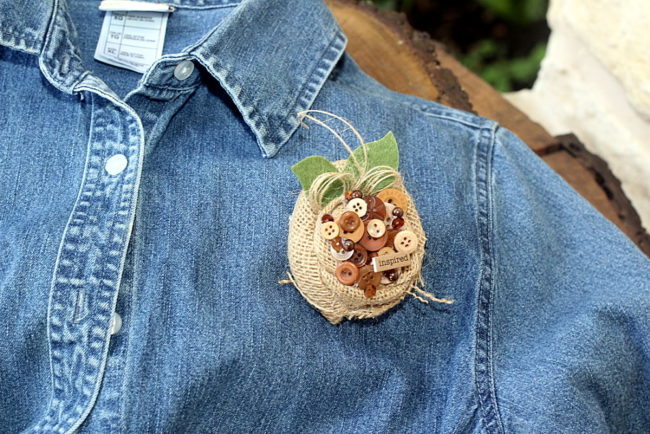
Here is the”inspire” brooch on the denim shirt. I love this look!
I hope you will give the 28 Lilac Lane embellishment bottles a try and create something to add to those hats, sweaters and shirts like I did!
Supplies Used:
28 Lilac Lane “Toasted Graham” Embellishment Bottle
Felt (leaves and back of brooch)
burlap
strong glue
word sticker
twine
Thanks for stopping by~
Connie Mercer/DT Member
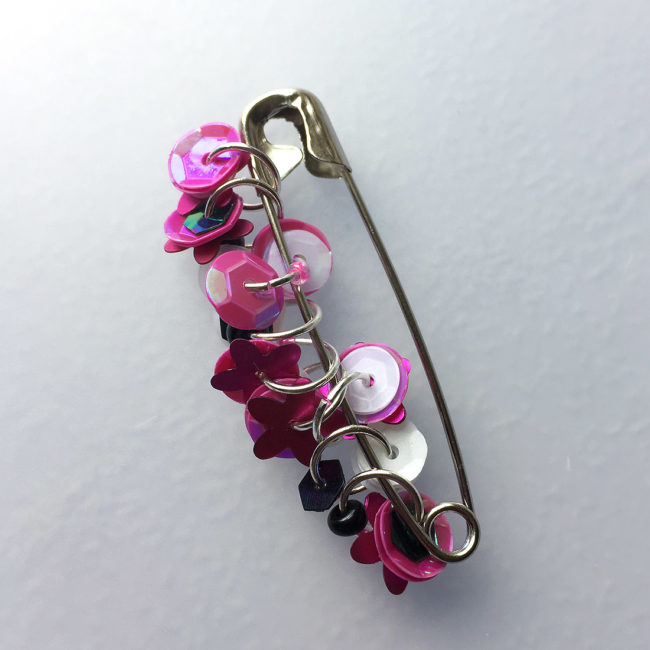
I’m constantly on the look out for fun accessories. But what I love more than looking for cool things is making my own. If you feel the same way, I have a beginner project to help you accessorize. In just a few easy steps, you can make sequin safety pin jewelry!
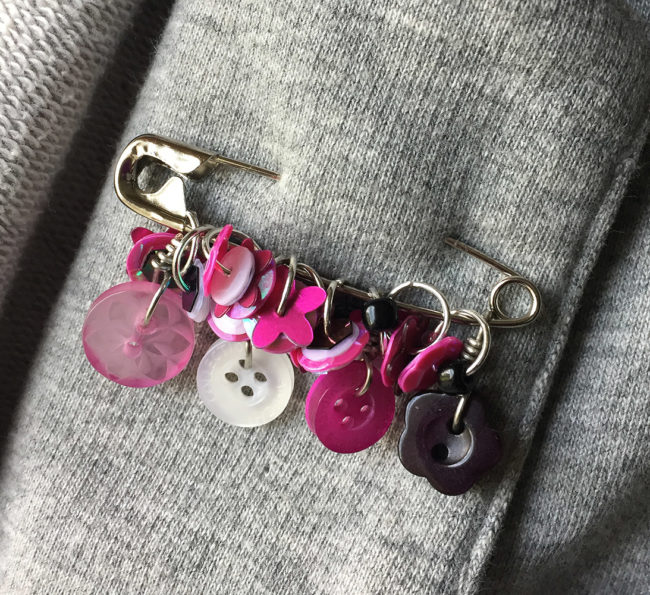
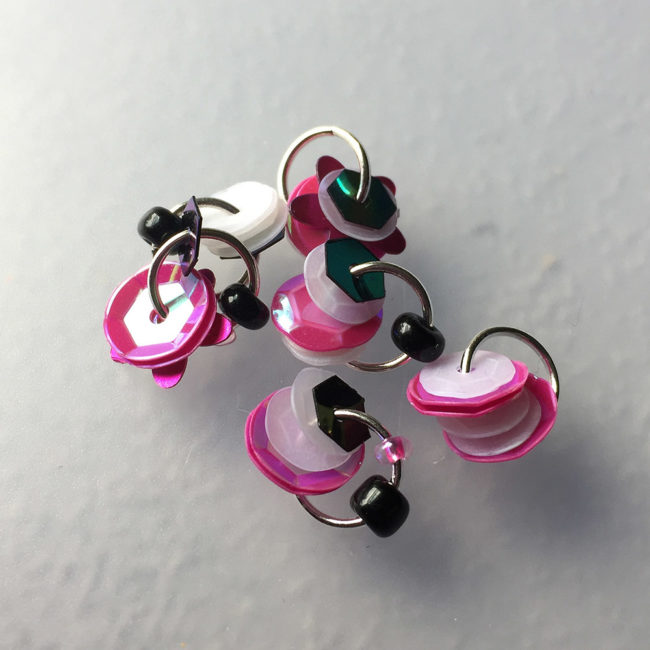
To start making your sequin safety pin jewelry, open the 8mm jump rings with jewelry pliers and add about 4-6 sequins to each ring along with a bead or two if you’d like. The rings will move around a lot if you start adding them to the pin as you go, so you may find it easier to just make a pile of completed jump rings.
Once you have about 10-12 rings finished, add them to the safety pin. The jump rings should be added to the immovable side of the pin. At this point the pin will look pretty awesome as is, but I just love to add buttons to everything! I find the buttons not only give the pin a unique look, but they will also help keep the jump rings from floating around the loop at the end of the pin.
Cut a 5 inch length of wire. Place wire through one of the buttons holes. Bend one end of wire toward the back of the button. Twist that wire around 3-5 times and trim it. Cut the other piece short, but leave enough wire to create a loop.
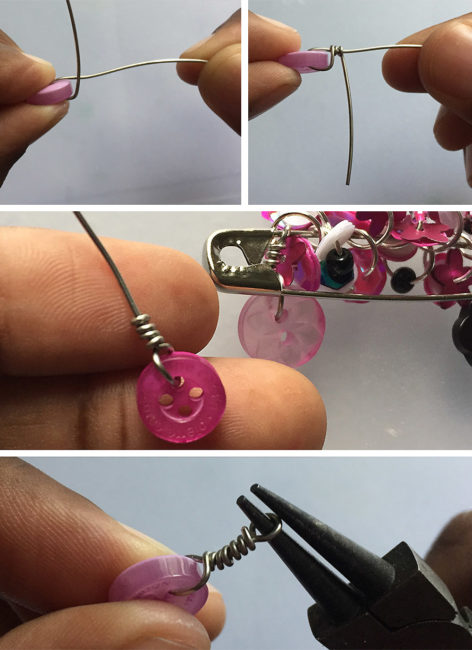
Be sure to add a button before the first jump ring and behind the last ring on the pin. This will keep the jump rings from sneaking past the loop and getting away.
And your sequin safety pin jewelry is done!
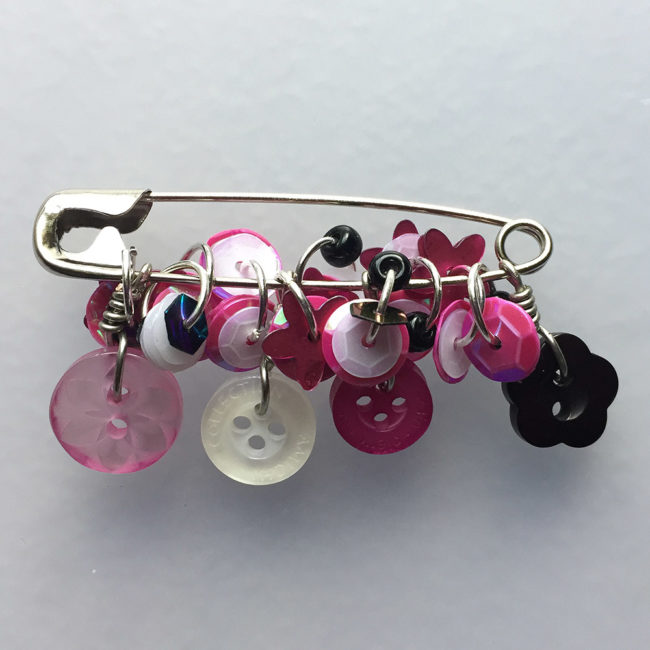
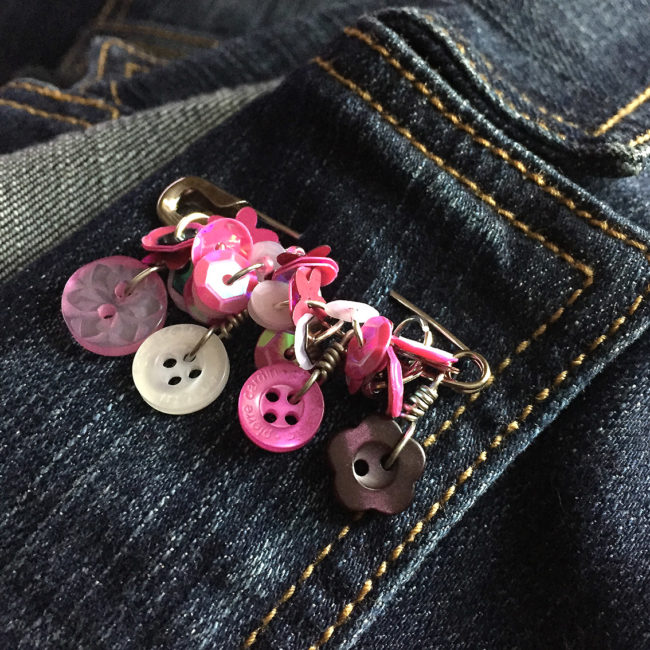
There are so many options and color combinations available that I have already made myself a nice variety of sequin safety pins! I hope you find this to be a fun and easy way to bring a unique jewelry touch to an old shirt, jacket, or backpack.
These little crafty brooches make a great quick and easy gift for the lady in your life who loves to sew and create. Use up some scraps of fabric, spread your creative wings and add some bling with a sweet 28 Lilac Lane embellishment kit.

Here’s the supplies you will need:
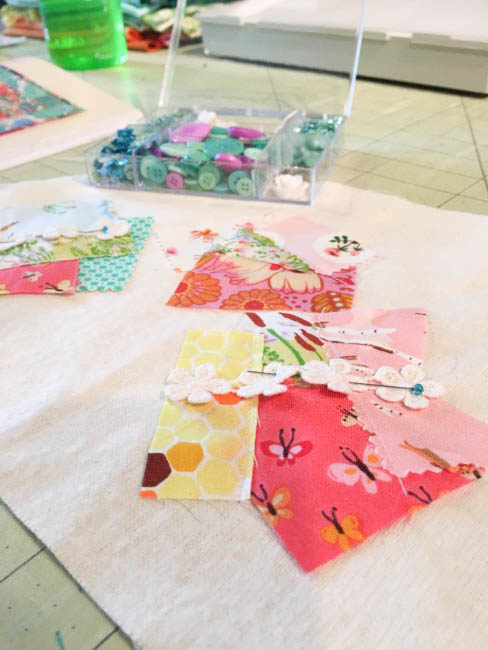
First, I laid out my backing fabric (I used a thicker cotton muslin that I had in my stash, but just a general cotton or even felt would work fine too). With a jar lid I had, I traced an outline of my circles onto the top of the fabric. Then I gathered up some various scraps of fabric and laid them out within the outlined circle. I used my sewing machine to sew down a few of the seams, but this could easily be done by hand with just a back stitch using a single strand of embroidery floss.
Next up, I laid out different elements from the 28 Lilac Lane “Sew Crafty” embellishment kit. The kit includes some trim, sequins, beads, buttons and a few charms. The trim lends itself greatly to being used as a typical trim or even cutting off each flower individually. This is where you can be creative and every brooch you make will be different!
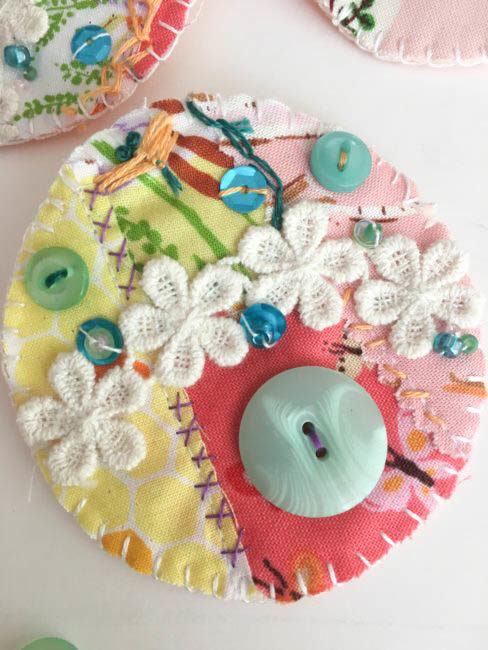
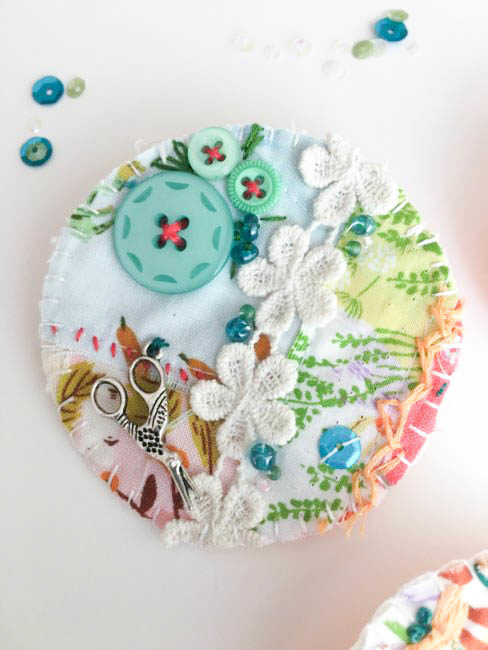
On a few of the seams I chose to add some simple embroidery stitches. I used two strands of divisible embroidery floss for all of my stitching. I made simple X’s, seed stitches, and a chainstitch. I sewed down the trim with a single strand of white embroidery thread and just stitched down on the flowers where the stitches won’t be seen.
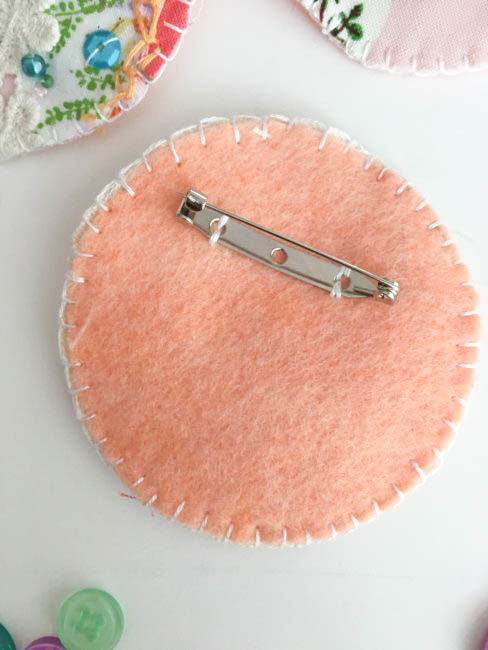
To finish out my crafty brooches, I took some felt and using the same jar lid cut out the felt and the brooch circles. The pin backs I used can be either sewn or glued down. I sewed down the pin back onto the felt.
Finally, I matched the top and backs of the brooches with wrong sides together. The brooches were sewn together using a buttonhole stitch to stitch the two layers together around the edge. There you have it!! Sweet little crafty brooches ready to wear!
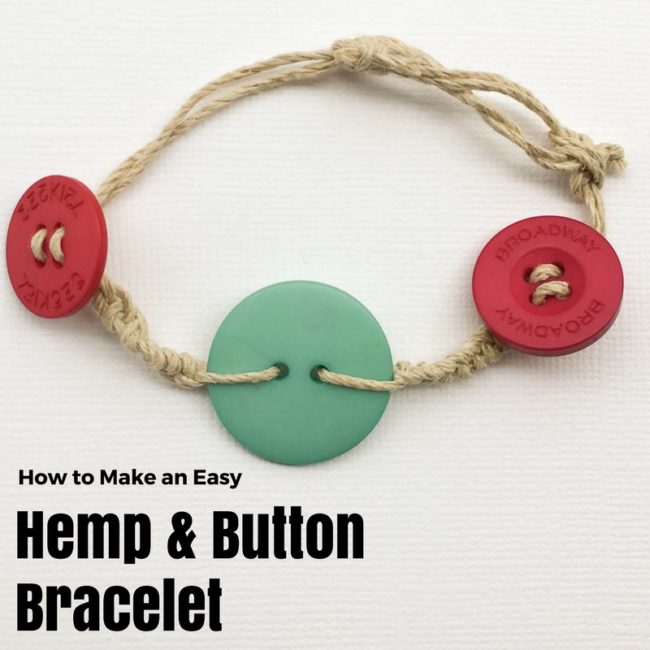
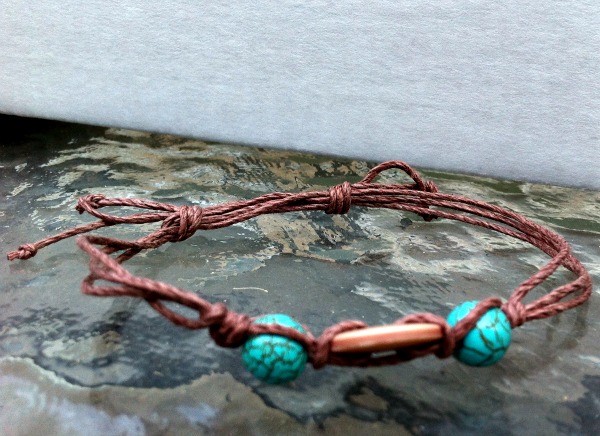
It’s spring break time in a lot of places and that means time to head for the beach! Let’s make some fun vacation jewelry just for the beach – a fun hemp & button bracelet!
Supplies:
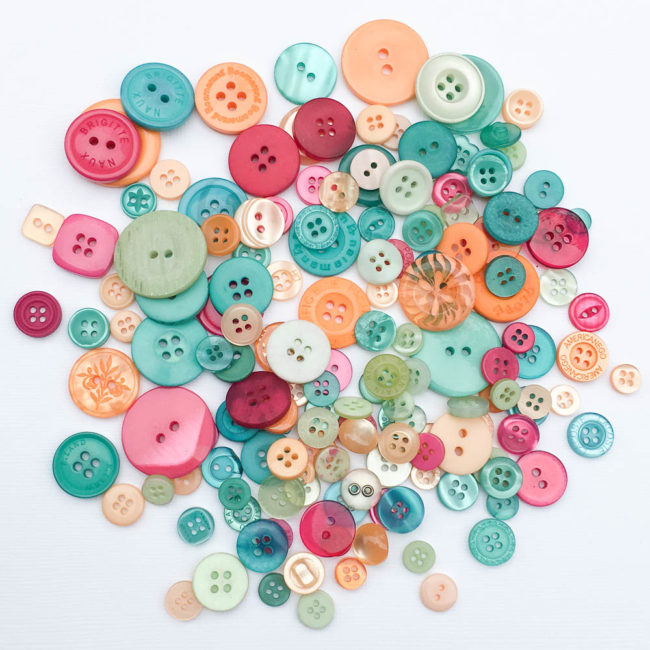
This hemp & button bracelet uses one of our Buttons Galore Button Totes that is called (appropriately) Vacation. It’s a fun mix of fuschia, turquoise, light orange, and light green.
Making this button bracelet is super fast and easy!
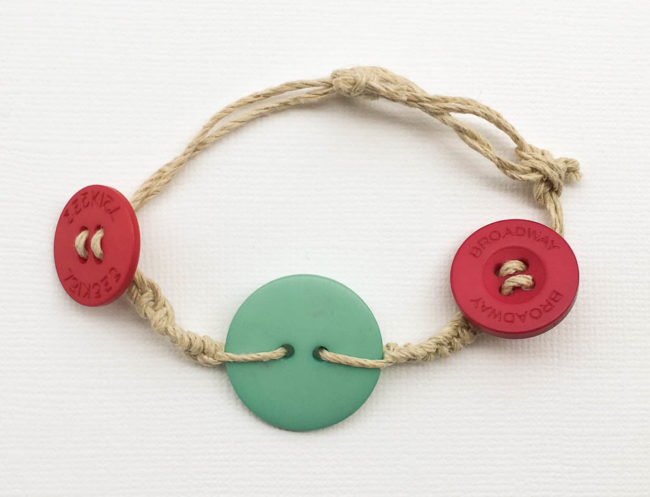
To start, choose a large button for the center of your bracelet. Select two coordinating medium sized buttons with four holes for the sides of your bracelet, and set them aside.
Cut two long lengths of hemp. Thread one length of hemp through one of the holes in the large button, and pull it through until the ends are even. Pull one end of the hemp tight, and start tying half knots around that strand with the other strand. Stop at ten knots, or adjust for your desired bracelet length. Repeat this process for the other side of your bracelet.
Place the smaller buttons onto the bracelet by threading each of the threads on each side through two of the holes in a button. Pull the button tight against the knotted section.
Finish your hemp & button bracelet by creating slipknots to create an adjustable and removable bracelet band, or just tie your bracelet on permanently until vacation is done!
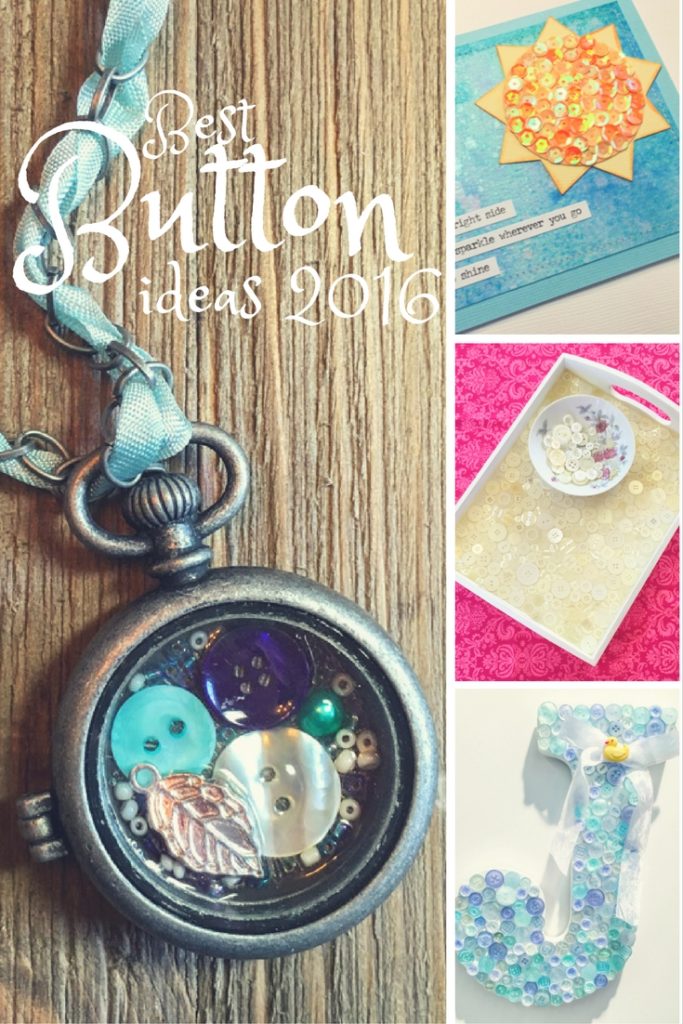
2016 is coming to an end, and it’s time to take a look back at the best of our button (and sequin) projects for the year. We hope you enjoy taking a look at the year’s highlights, and find some things you missed – or forgot how much you loved the first time!
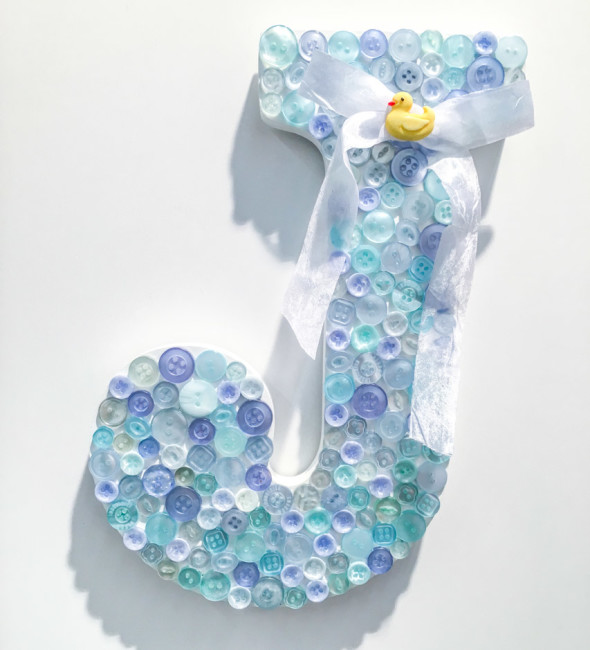
A monogram is just the thing for baby’s room, and buttons add just an extra touch of cute to one. Use traditional pink or blue, or choose a color to coordinate with baby’s nursery for home decor style.
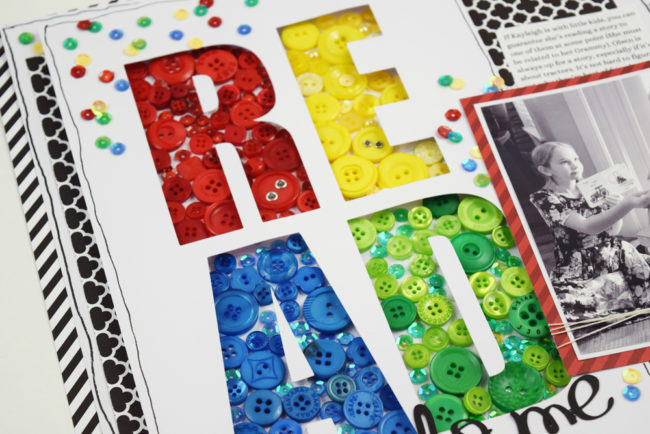
Guest artist Becki Adams used primary colors to create a giant title out of buttons and sequins on an adorable layout about her children reading. Paired with a bold black and white color scheme, the colors really pop!
Guest artist Candy Rosenberg used buttons to dress up her signature design icon – a dress form. Using a palette of neutrals along with pale green and peach, Candy created an eye popping “dress” that is at once vintage and modern. This beautiful lady will be at home in your home decor or decorating an art studio!
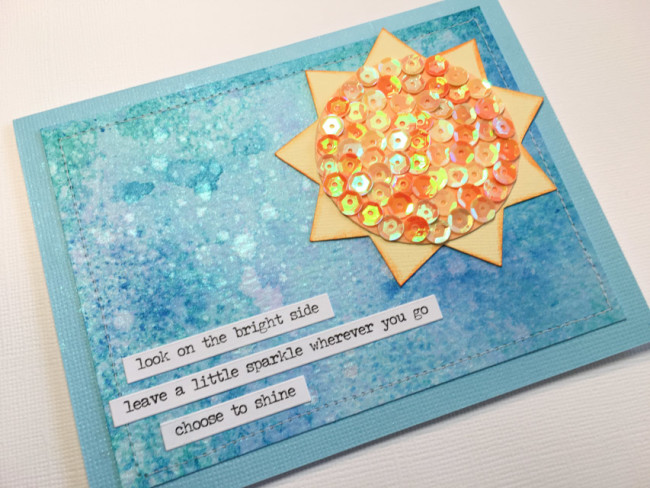
A little sparkly sunshine is always seasonal! This simple sequin collage card using our 28 Lilac Lane sequins will have someone special looking on the bright side of life, and let them know you are thinking of them.
Buttons make a big impact in a big collage. Encase them in resin, and you’ve got a surface that is both practical and pretty. Creating a collage of ivory and pearl buttons gives a gorgeous vintage look to this wooden tray, creating a project that will decorate your party or wedding.

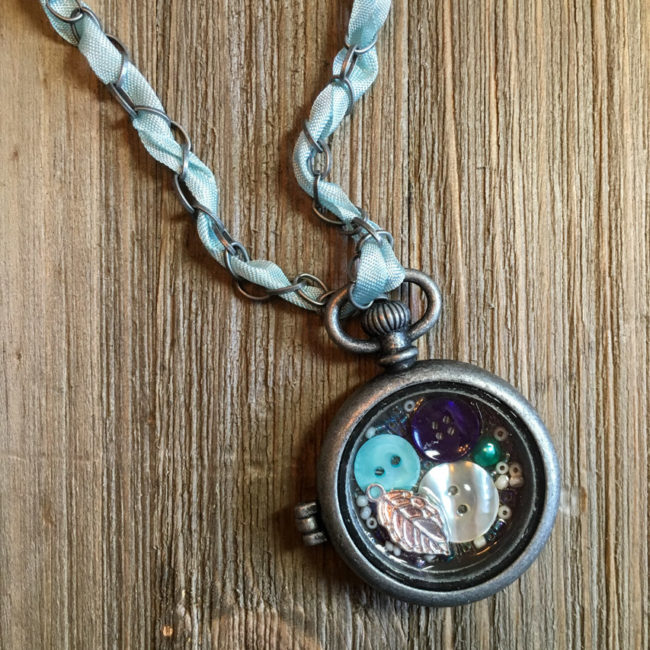
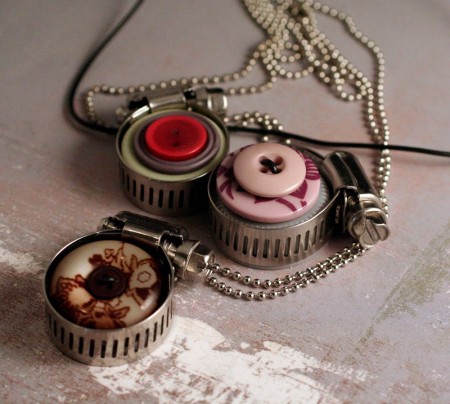
Our 28 Lilac Lane embellishments are so pretty, you’ll want to wear them – and you can, in this mixed media locket project! Layer charms, buttons and beads to create a one of a kind piece of jewelry. The options are as endless as our 28 Lilac Lane color palette!
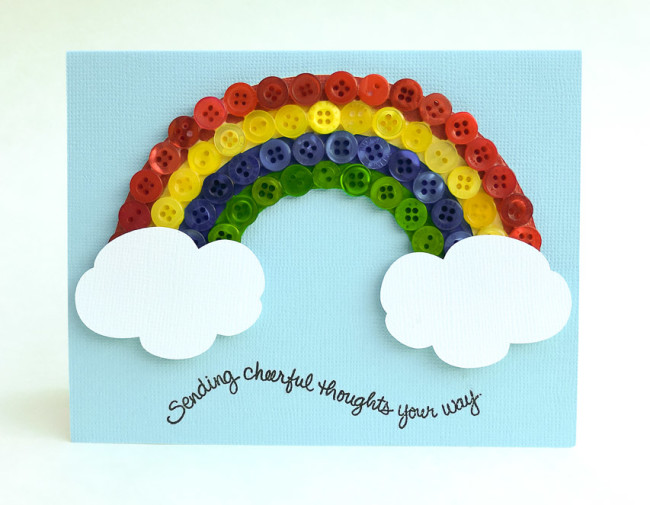
What is cheerier than a rainbow? Creating this bright button rainbow card to bring some cheer to someone you care about is surprisingly easy. Learn how we did it!
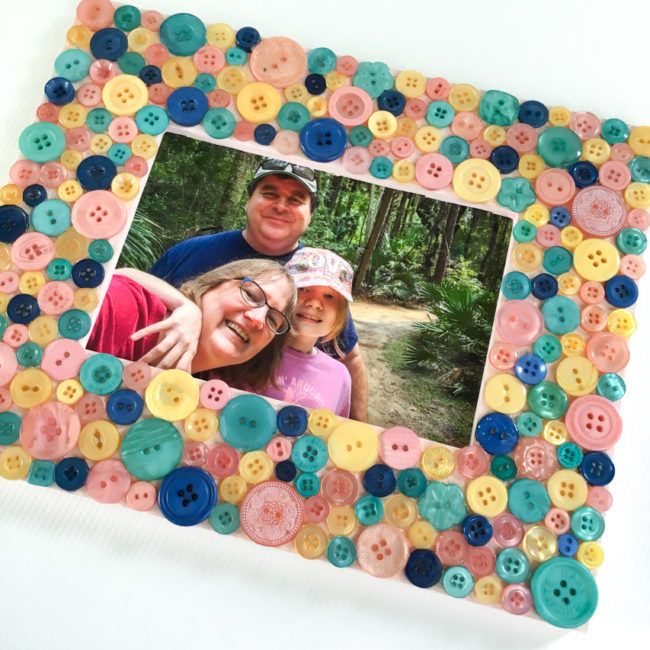
With our huge selection of colors, a button collage can be customized to any decor. This project utilized our trendy new Glam Girl Button Bonanza to make a button collage frame that is perfect for a kid’s room – or a grown-up room, too.
We hope you enjoyed our walk down memory lane of the best of button projects of 2016! We can’t wait to share more beautiful things – and products – with you in 2017!
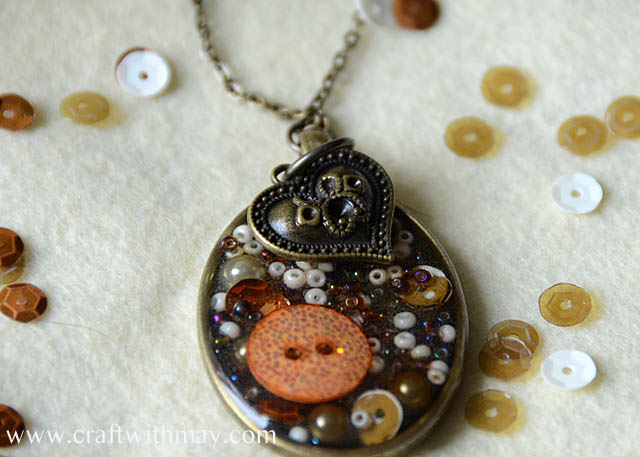
Christmas shopping time has arrived…and so has Christmas gift crafting time! A custom piece of jewelry is the perfect DIY holiday gift for a friend or family member…and with 28 Lilac Lane embellishments, a surprisingly easy one!

Supplies:
This locket is built using a very simple process. Fill the bottom of the locket with a single layer embellishments. Start with the large items (the buttons) and then fill in around them with the small items like the beads and pearls. Vary the color and placement of the items. Select a charm but don’t place it in the locket just yet!
Once you are satisfied with the placement of your bottom layer of embellishments, get out your Ice Resin. Following the directions on the package, use the Ice Resin to fill in a layer of epoxy on top of the layer of embellishments. Stop filling when the layer is just slightly covered. Before the resin dries, press the charm that you saved earlier into the top of the epoxy. It should just be slightly embedded, protruding out the top of the epoxy layer.
To create the ribbon embellished chain, thread a large needle (or a knitting darning needle) with the ribbon. Then weave it in and out of every other link the chain so that it is threaded into it. Tie the ribbon off to the chain at each end.
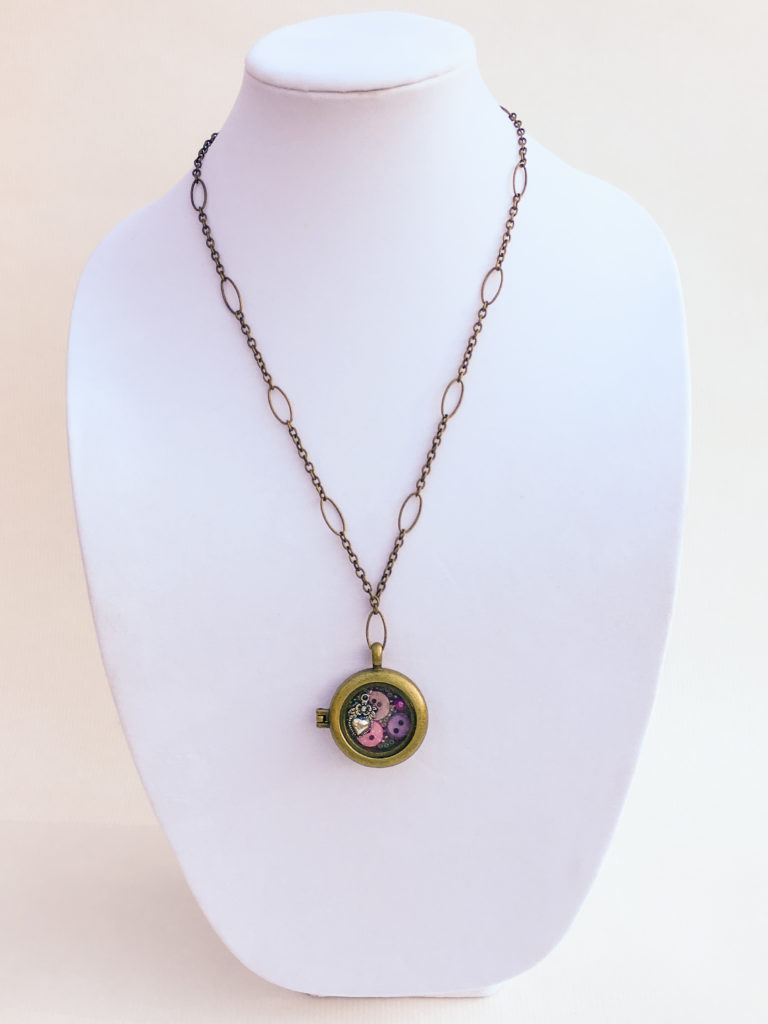
The fun thing about these DIY holiday gift lockets is that they can be created for any theme or color scheme, to perfectly match the recipient it is intended for! To see a different interpretation of this project in a pink color scheme, check out our previous mixed media locket article.
Think our 28 Lilac Lane buttons are too beautiful to hide at home in your craft room? We do too! That’s why I made this this beautiful locket that showcases some of my favorite elements from the collection. This mixed media locket is a fun and eclectic piece of button jewelry that will let me show off my love of crafts in a fashionable way.
Supplies needed:
This mixed media locket is created by encasing 28 Lilac Lane embellishments in Ice Resin, a clear drying epoxy that is available in single use syringe dispensers. It’s a fast and easy project that can easily be completed in an hour or so, except for allowing dry time for the epoxy.
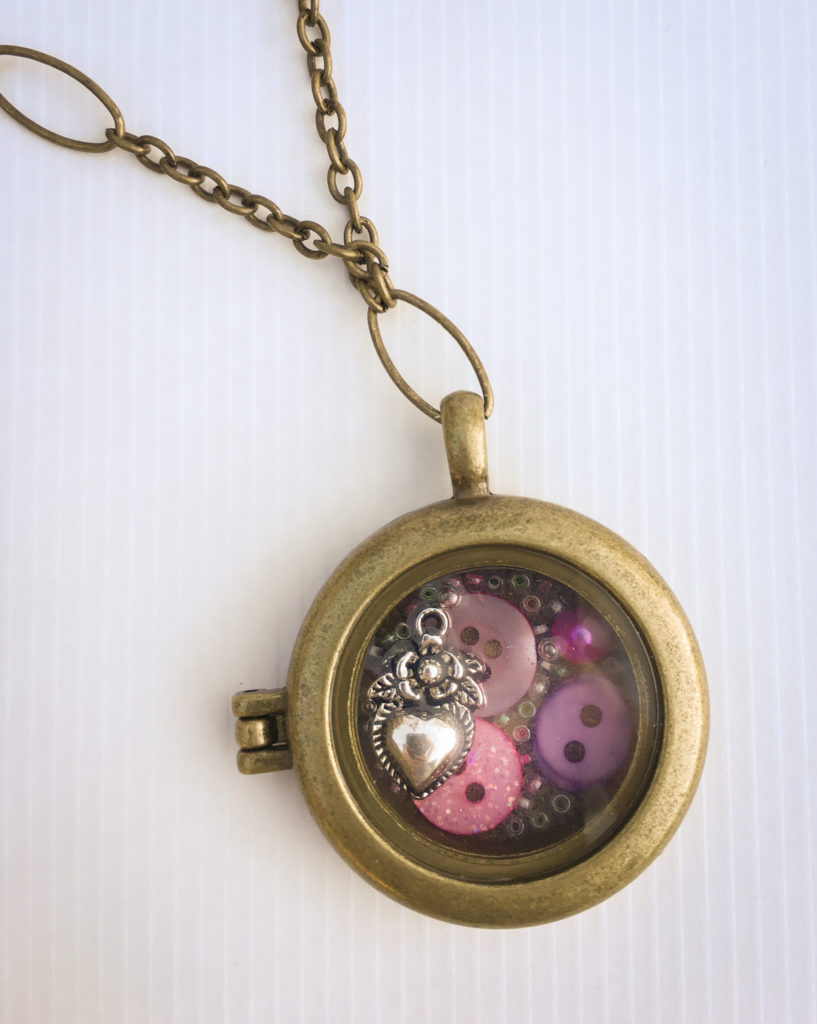
To make my design, I started by arranging the large colored items – the buttons and the flat back pearl – inside the locket. Once I was happy with how they looked, I gently filled in around them with the seed beads. This part of the process requires patience, as sometimes it means placing the beads one at a time.
Once the bottom layer of embellishments is placed, I selected a charm to place on top and set it aside.
Working with the epoxy was something I’d wanted to do for awhile but I was, I admit, a bit intimidated to try it. It turned out to be very easy – just push the plunger down to get the amount that you want, and stir! Once the epoxy was mixed well, I poured it over the bottom layer of embellishments to cover and hold them in place in the locket. Then I quickly pressed the charm down on top of the epoxy, so that it was just barely embedded and stuck out from the top. (Be very careful to not get your fingers in the epoxy! I suggest dropping the charm in and then using a toothpick or other tool to nudge it into place.)
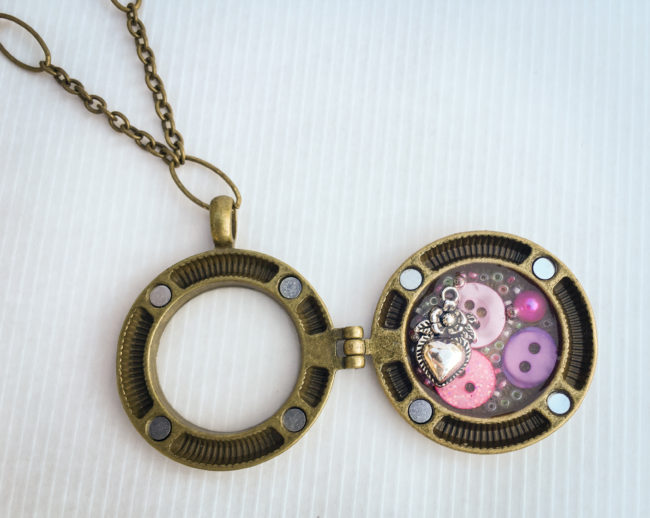
Once the resin is dry, you can add a chain to your locket. Then you can wear and enjoy your mixed media locket masterpiece to share your love of crafts – and 28 Lilac Lane – through fashion!
This gold button charm bracelet project is easy to make with only a few supplies, and makes a perfect gift for the special stylish woman in your life!
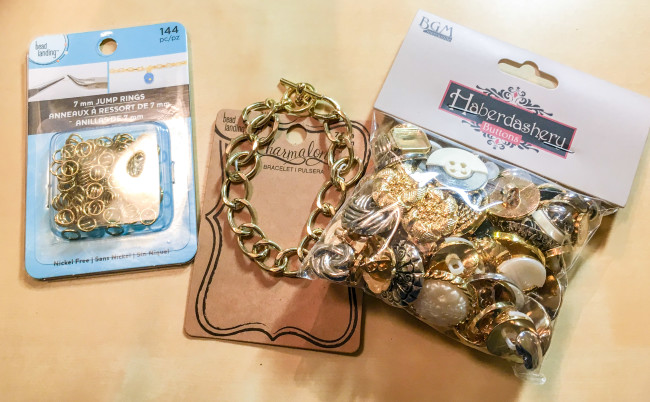
Supplies:
I also recommend having on hand a pair of jewelry pliers (long nose or bent nose) to open and close the jump rings to complete this project more easily.
Once the supplies are assembled, select a random assortment of stem buttons from the button bag. You’ll need enough to put one button on each link of the bracelet chain.
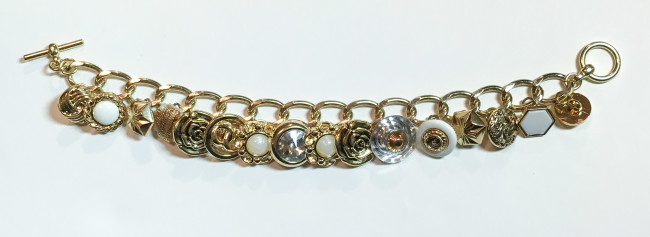
Use the jump rings to attach the stem buttons to the bracelet chain. Attach one button per link in the chain, keeping all of the buttons on the same side of the links.
Vary the size and design of the buttons that you use as you go to get a good random appearance. If you look closely above, you can see that I put larger buttons in the center of the bracelet, and smaller ones at the ends, to create a taper effect and make the bracelet more comfortable to wear.
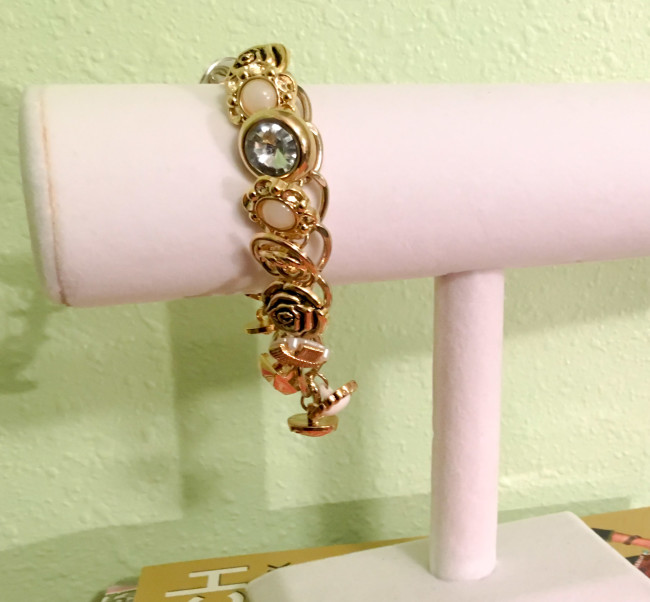
That’s all there is to it! This fun gold button charm bracelet gift is so easy to make, but the results are stylish!
For a different look, try making this button charm bracelet project with our Fancy Silver Haberdashery buttons, and a silver bracelet and silver jump rings.
I am new to the world of resin, but I’m really excited to test out possibilities and combine it with my new 28 Lilac Lane kits! Creating a dimensional piece for my daughter to wear in honor of our dogs seemed like a really fun place to start, and I hope that you enjoy this video tutorial. There are so many fun ways to utilize the Paws & Pets kit, and all of the kits in this line!
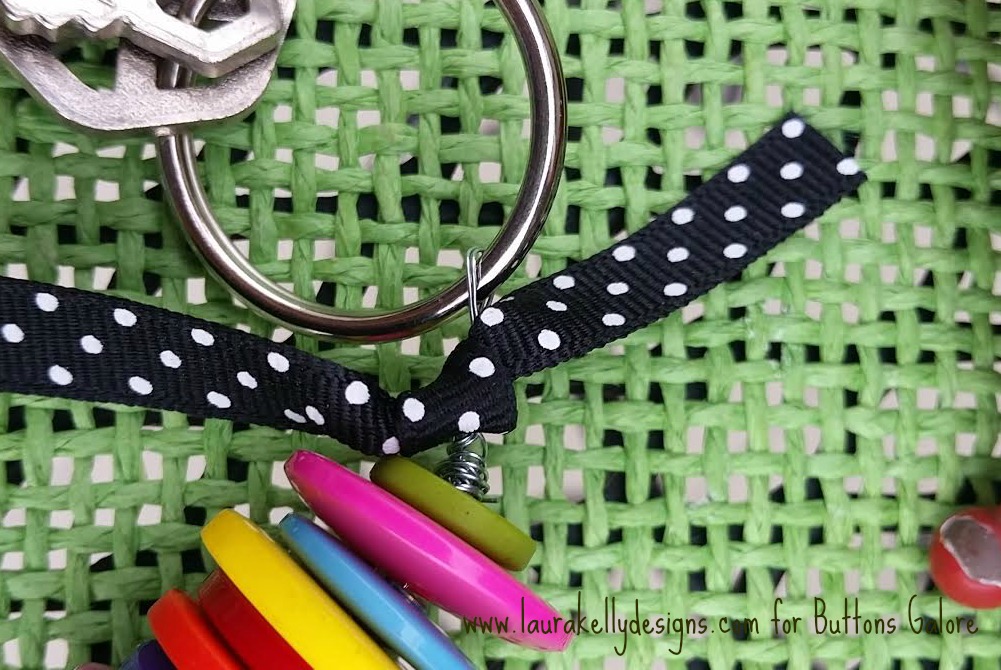
I am always losing my keys so they need to be on a chunky key ring! This button stack key ring is bright, fun and so easy to make. YAY, it’s Fifteen MINUTE Friday!!!
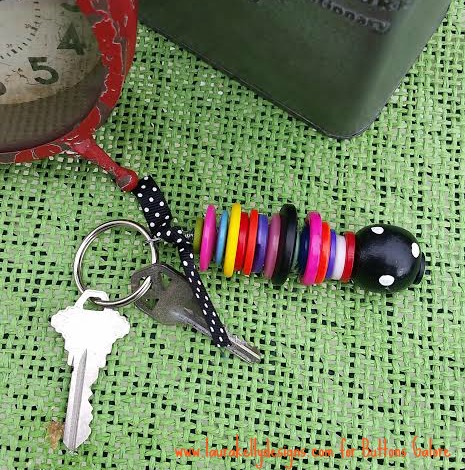
You will need buttons, wire, a big bead (optional) and a key ring. I used buttons from the Laura Kelly BRIGHTS mix because they are my favorite colors!

Here’s what to do…
TaDa!
Have a great weekend,
Laura
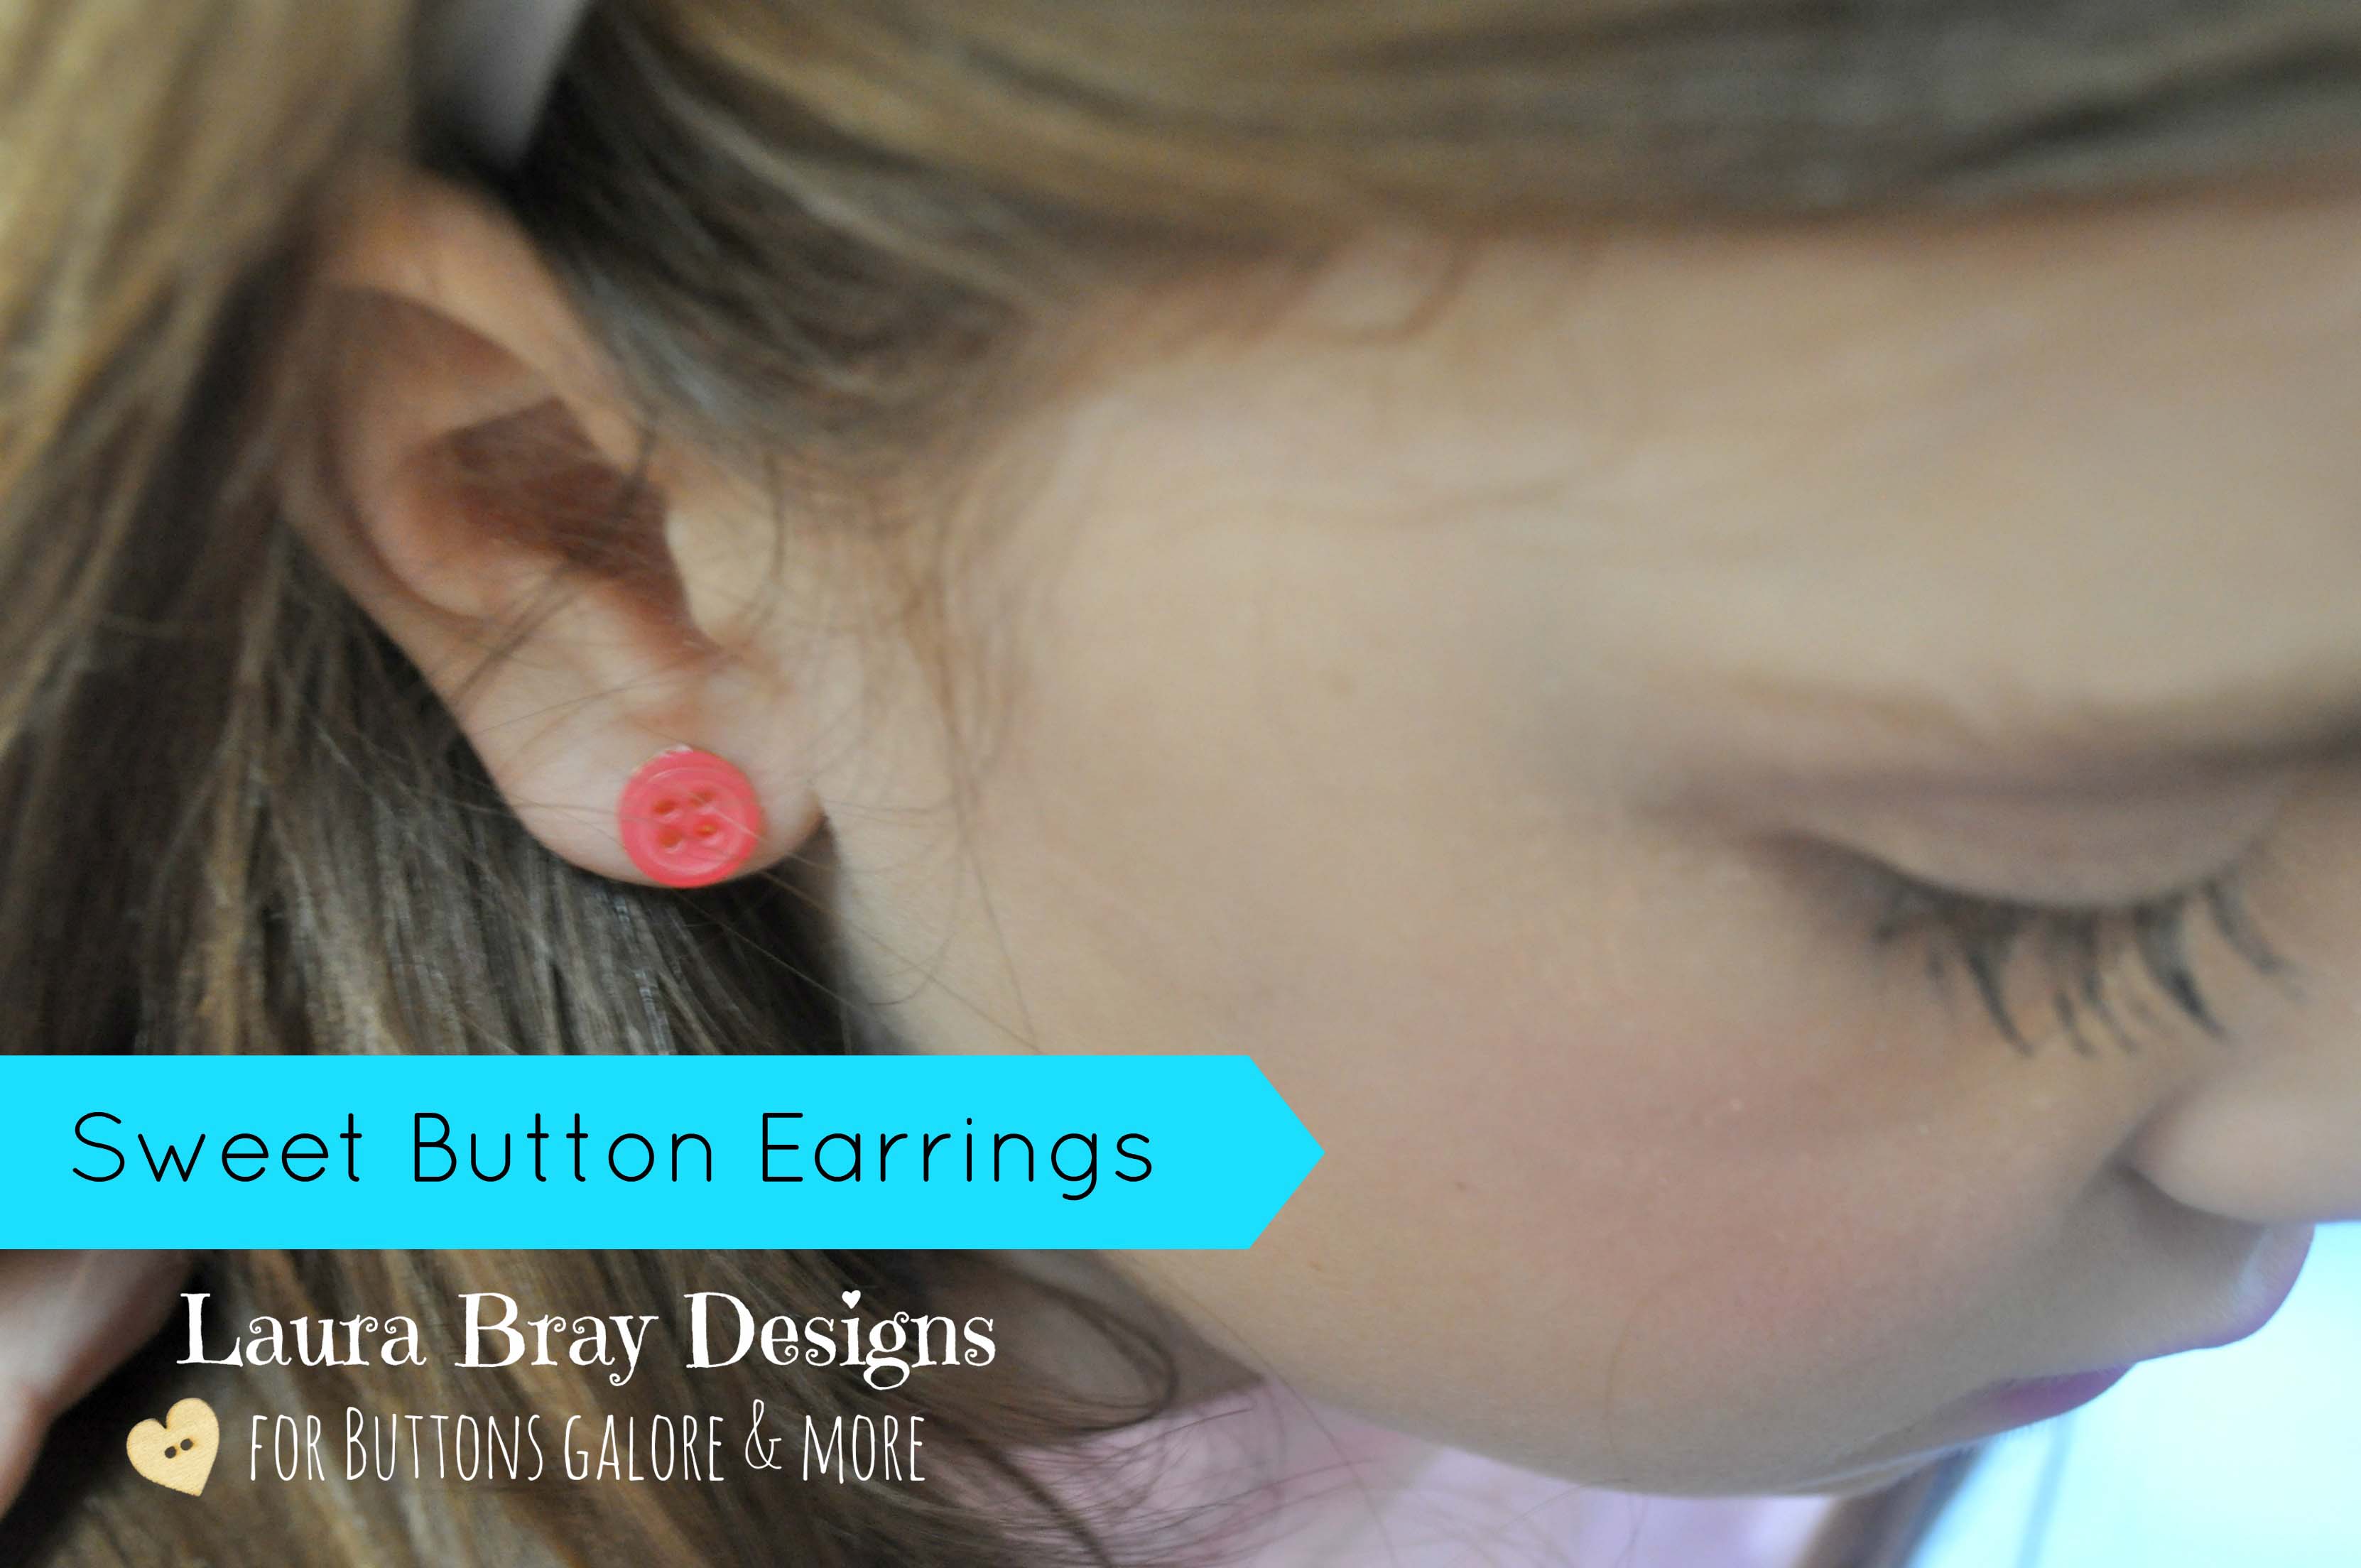
Need to make a set of super quick earrings? It doesn’t get any faster or easier than these.
Supplies:
Instructions:
This project is easy enough for children to do it. It would be a fun party activity for your little girl’s next party. Teachers-this would make a nice Mother’s Day craft project too!
Added bonus: Go to my blog, Laura Bray Designs to download some free, printable Mother’s Day cards that you can put your button earrings on!
Need some fun craft ideas for handmade jewelry? Button Jewelry – Perfect Gifts!
We’ve gathered up some of our favorite fast and easy pieces.
Make Easy Accessories Straight from the Button Jar
Upcycle Jewelry with Buttons and Hardware
Antique Button Earrings in a FLASH
Get all your buttons for your button jewelry at Buttons Galore and More. We have a large variety of buttons for sewing and crafting, as well as adhesives, trims and tools.
To help you with your holiday crafts, here is a list of our current specials:
Visit our “SPECIAL BUYS” section for savings:
Expires: 12/9/13 Code: HBH20
Expires 12-20-13 Code: CBTP1213
Expires 12-20-13 Code: 20HFUN
*Please note that offers may not be combined.
Free Shipping to the U.S. on orders over $30.
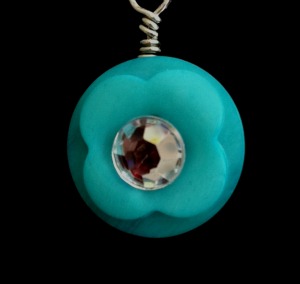
Last month I dyed some buttons using Rit Dye, and I had some left over so I’ve made this Dyed Button Necklace.
I used one large Coconut button and embellished it. I love that these buttons have an earthy, natural feel, and come in their own little tin with a clear top. This tin is great for storage, and great for using later for creating more fun!

Rustic Coconut Shell
Rit Dye (Aquamarine), Imagine® Crafts/Tsukineko VersaMark ink and Gold Embossing Powder, and StāzOn™ Inks (in Olive, Forest Green, Rusty Brown, and Pumpkin for coloring charm – applied with Fantastix™ Applicators), 3-in-1 Glue, charm
Also: Jump ring, chain, pliers, heat tool (for melting embossing powder)
See Rit Dye for their Wood & Wicker Dyeing instructions. I had prepared dye in mason jars, and simply reheated it and added it to the button.
Make sure your button is dry before you try embossing. Sponge on ink and dip in embossing powder. Carefully heat set to melt. I did different areas separately, and used some tongs to hold the button.
I colored a charm with StāzOn™ Inks using Fantastix™ applicators and added a jump ring and chain, then adhered the charm to the button with 3-in-1 Glue.
I love the colors and how they all came together. Doesn’t fall have a beautiful assortment of colors to choose from? Fall is my favorite, no wait – I love snow, oh but spring flowers … Every season is lovely.
Thanks for joining me today for another project featuring button jewelry. Are you wearing your buttons? I’d love to see!
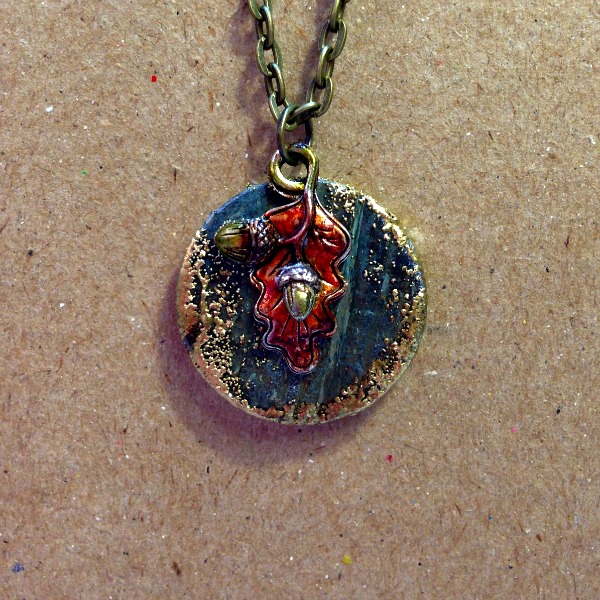
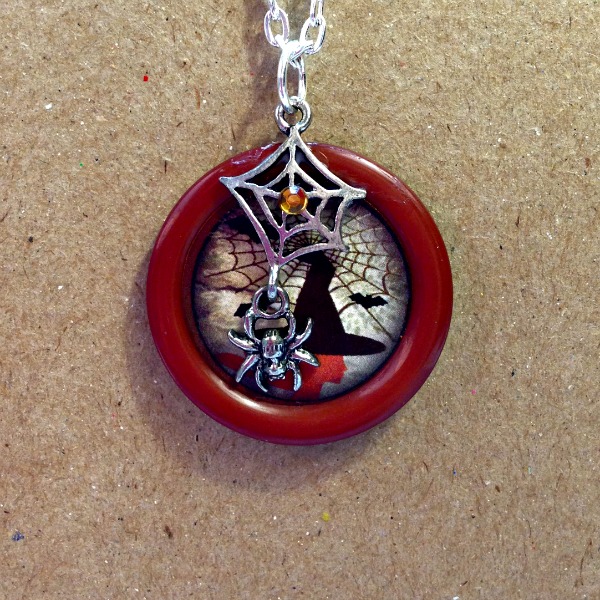
I’m creating a Button Charm today using a button as a frame for some seasonal artwork.
No, this is not hard. You can do this so easily.
As you can see, I’ve just used a single large button for my piece today.
I punched out some art work from a sheet of Halloween images from Bottle Cap Inc. and adhered it to the center of a large button. I used Tacky Glue to attach a spider and web charm to the top of the button.
I love the way that the button acts as a frame for the image, the color really has a fun splash of Autumn color.

Cappucino Grab Bag
Besides that big button and a focus image , you will want a charm. I purchase my charms at local bead shops, they have such fun, unique stuff. In addition, you’ll need some chain, jump rings, and pliers.
You will also need a good craft glue, I chose Tacky Glue. Let this set up overnight, at least 24 hours, before you wear it … this will make sure your charm stays put!
To finish off the piece, I added a little bit of bling from Want2Scrap, because I just like a little sparkle in … well, just about everything.
There is nothing simpler than stringing buttons, so why not make a Seasonal Button Necklace?
This is is a simple statement piece, and one you can change out year round.
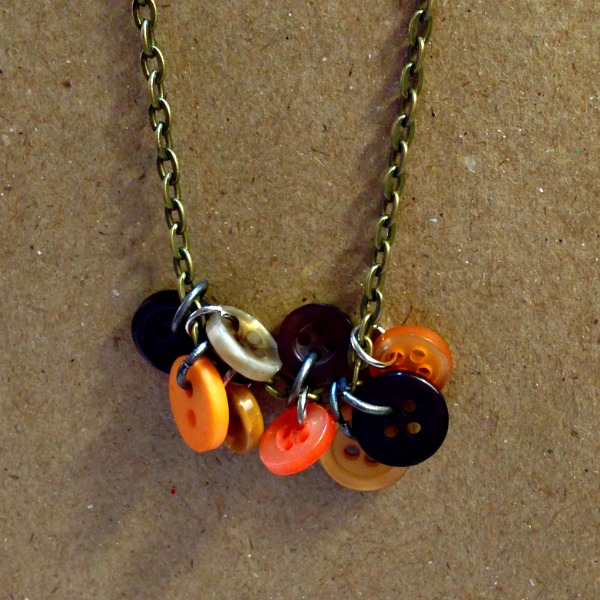
Some people hear craft, or DIY, and cringe. Pretty pieces do not have to be complicated, or expensive. This month I’m making several pieces that are very inexpensive, and assembled with just some basic pliers and or glue.
Grab a friend, get some buttons, and let’s make some fun things to wear. At the end of the season, repurpose them! Easy peasy.
I’m using some really fun assortments that just say pumpkins and spice and everything nice!

Black Beauty
Cappucino Grab Bag

Sunrise Assortment
You’ll need some chain, jump rings, and pliers.
Use buttons to accent this fun Spider Pendant.
Along came a spider …
Let’s jazz up your Halloween Jewelry!
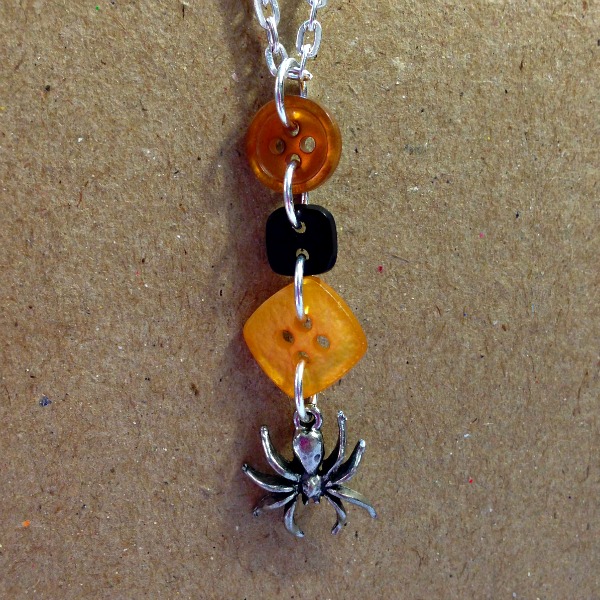
I’m using buttons from a few collections today. This idea could easily work for any occasion with a quick change of charms and button selections. Buttons Galore has buttons for just about EVERY occasion, from bats to baseballs, and everything in between.
This month, we’re all about Halloween and Fall.
Black Beauty
Cappucino Grab Bag
Sunrise Assortment
You’ll need some chain, jump rings, and pliers.
Some buttons are just too cute to pass up. Enjoy your favorites by wearing them. Simply make a Flower Button Pendant … or whatever shape your favorite button is!
Some of the Bulk Buttons have a really fun assortment, and I found this pretty flower shaped button and thought it would make such a cute pendant.
I looped wire through the button holes and then wrapped to create a loop at the top. I adhered a rhinestone using Beacon’s 3-in-1 Adhesive.
These would be so fun to make with girls, and inexpensive, too!
Thanks for joining me today.
See more of my creations at My Card Party.
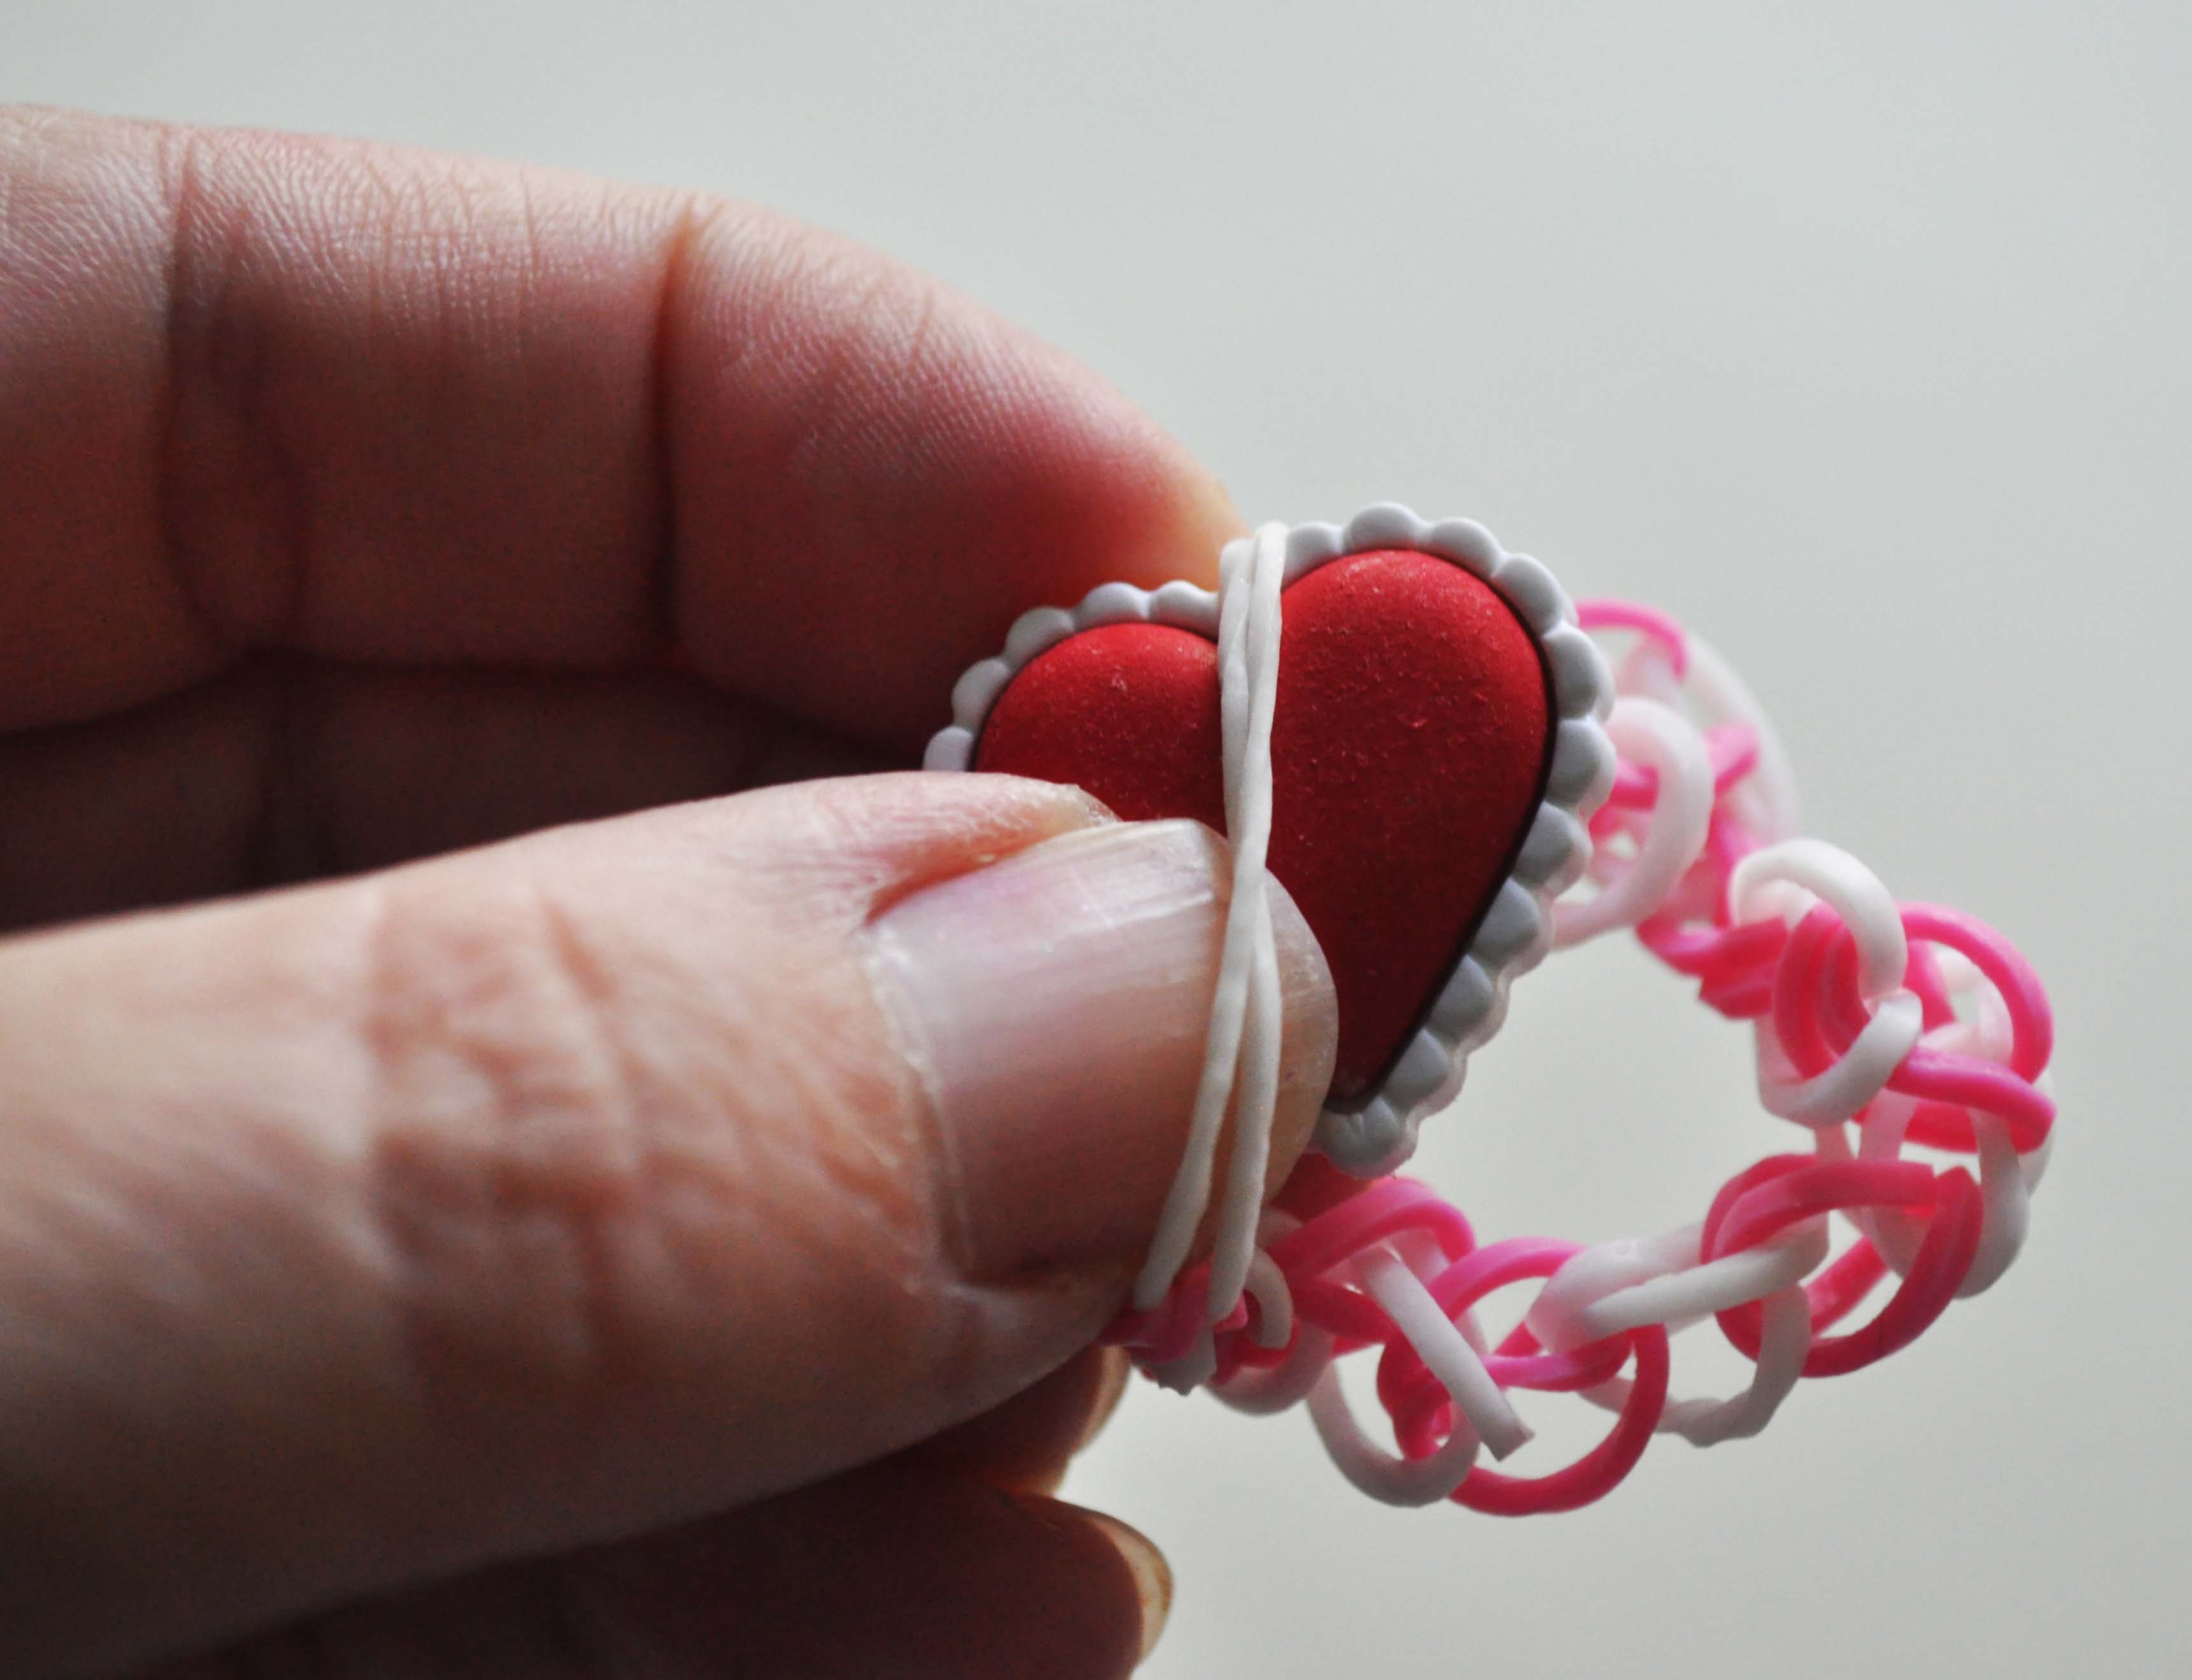
Rubber band bracelets are all the rage with kids these days. Some crafters use a special loom to create the bracelets, but you can also use your fingers and some super cute novelty buttons to create a closure for your bracelet. This is definitely a kid-approved project as my daughter was wildly impressed that she could now make rubber band bracelets that stood out from the crowd.


1. With your fingers, squeeze one of the bands in half and thread it through the shank of your button.
2. Squeeze another band in half and weave it through the loops of the band that you pushed through your button.

3. Continue weaving your bands together until you get the length you want. Don’t forget the bands stretch!
4. When you get to the end of your band, take the two last two loops and wrap it over the button.
Thanks for crafting with me today! For more crafts, lifestyle tips, and button projects, visit me on my blog at Laura Bray Designs.
![]()
A quick and simple Reversible Button Bracelet.
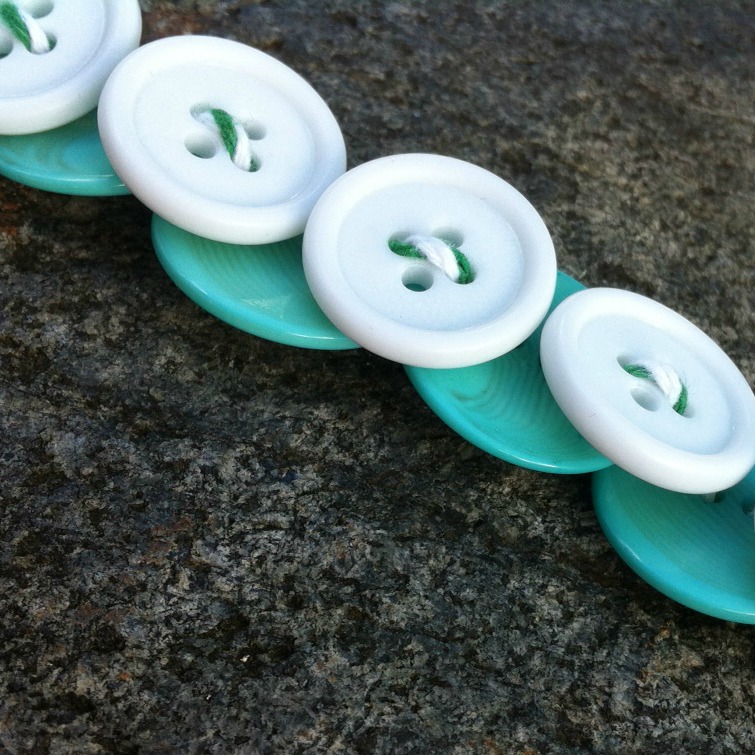
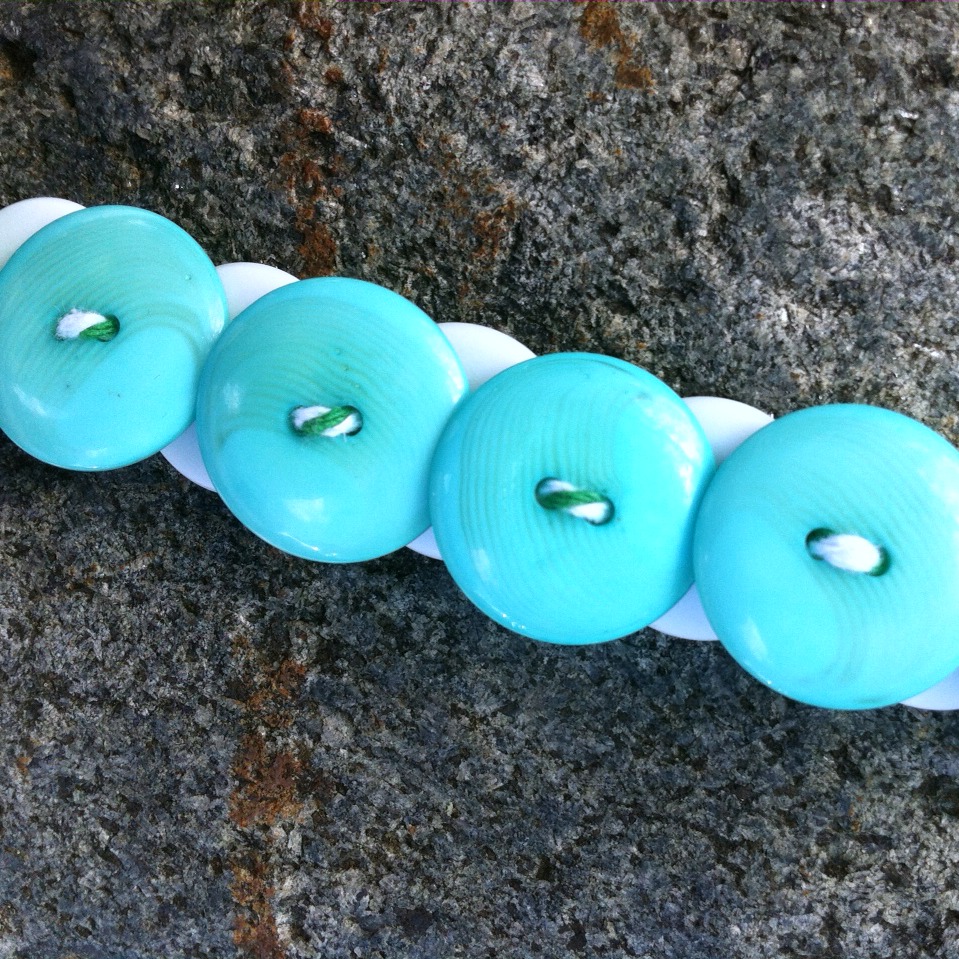
Thread twine down then up in the lower row, and up then down in the top row. The lower button will overlap, but when you get to the end, it all lines up just right.
Be sure to get each set of buttons pretty snug before moving on so that your bracelet lays nicely. Leave room at the ends to tie off. I like to put small knots at each end so the buttons can’t move anywhere, then just tie a little bow to keep it on my wrist.
Another note: when measuring your wrist, remember that larger buttons need more room to go around your wrist. I found it best to check sizing as I went along, rather than the actual length of the bracelet. The average woman’s wrist is 7.5″ and while my wrist is actually a bit smaller, my bracelet is 8 inches and fits snugly.
Thanks for joining me today.
See more of my creations at My Card Party.
I’ve admired bib necklaces for quite some time now. I love how whimsical they look, especially if they are covered in buttons. They can elevate a plain t-shirt and jeans outfit into something really special and it doesn’t have to cost much. Yes, you can buy very expensive “statement” necklaces, but with a little felt and a jar of buttons you can create something really beautiful.

Supplies for a button bib necklace
Instructions for a button bib necklace
1. Lay the bib necklace template onto felt, pin in place, and cut out two bib shapes.

2. Starting at the center of one of the bib shapes, begin sewing buttons onto the felt. Working your way out from the center will give your necklace a centered focal point.

3. Leave about 1″ of the felt on the ends unembellished.
4. Measure two pieces of ribbon (one for each side) to the length you want your necklace to hang. Bib necklaces usually look best hung at your collar bone. Don’t forget to allow some length so you can tie the necklace around your neck!
5. Lay the unembellished piece of felt down on your work surface. Place the front piece over it. Make sure it lines up nicely. Gently lift the ends and slide your ribbon ties in places. Pin and either hand or machine sew the ribbon between the two pieces.

6. To attach the front and back of the bib, use a strong fabric glue or whip stitch them together.

Thanks for getting crafty with me today! For more button crafts, stitching and lifestyle ideas visit me on my blog at www.laurabraydesigns.com.
![]()
Buttons and Boho Bracelets … Say that three times fast.
This Dyed Boho Bracelet DIY is extra fun and special. Why BUY when you can DIY? Right?
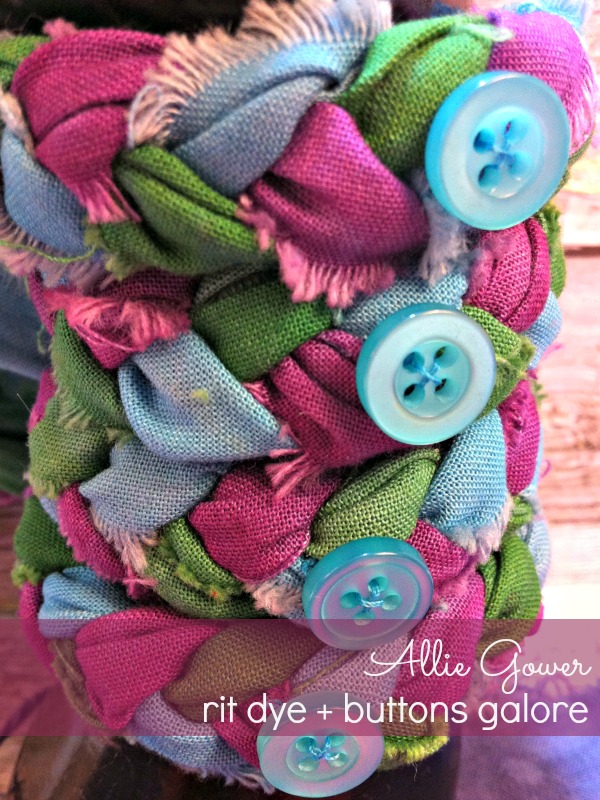
We’ve all been having a lot of fun with the Rit Dye, and I had a lot of Moda Jelly Roll Strips left, so I was playing around with braiding and made this Boho style bracelet. It’s actually braided, but it has that vibrant, Boho feel.
It’s funny, I work with buttons a lot, obviously … but it had been a while since I’d sewed. My fingertips would highly recommend you use a thimble!
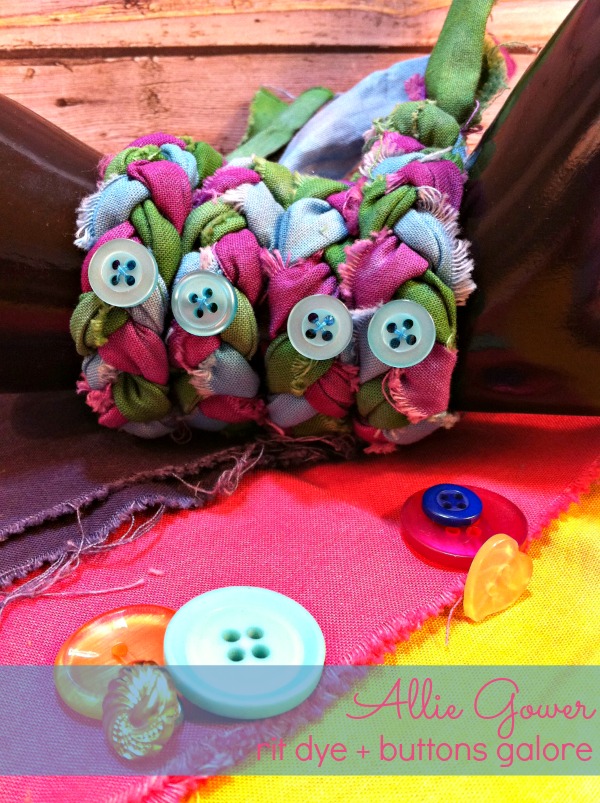
Take three dyed Moda Jelly Roll strips and braid them. Determine placement for the buttons on your wrist and add the buttons. For specifics on how I dyed my fabric, please see my Rit Dye Blog Hop Post. It was really very easy! The strips naturally fray a bit and will fold and show different bits, it really adds to the look of the braid.
Knot your braids at each end. Tip – use a clip board to hold your strips and leave plenty of extra length at each end so that you can knot the ends and also tie it on your wrist.
You will also need needles, and as suggested by my fingertips, a thimble! I hope you enjoyed this Dyed Boho Bracelet DIY.
Have you hopped with us? There are so many fun projects with buttons and dye that you won’t want to miss.
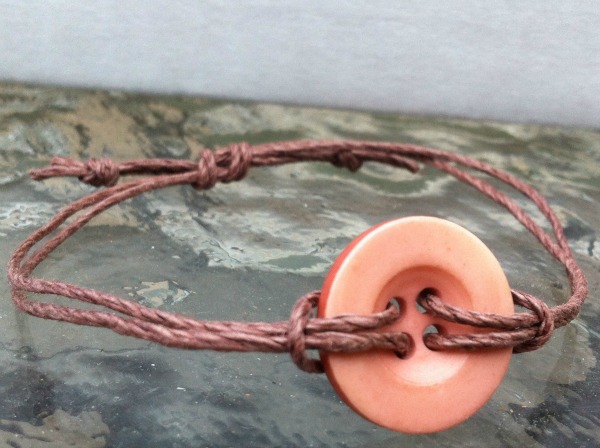
How about a bracelet with just two items?
Just hemp and a button. If you wanted, you could add some beads…
These really don’t get much simpler. The knots are easy to pull out if you want to swap out your button.
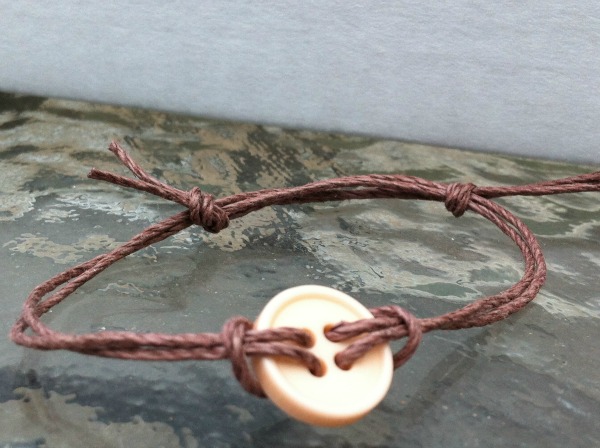
Two strands of hemp, and a Latte Button with four holes will work best. Bring the ends up through the bottom of the button. This creates a loop underneath.
Put the ends through that loop and your button is secured. Repeat on the opposite side.
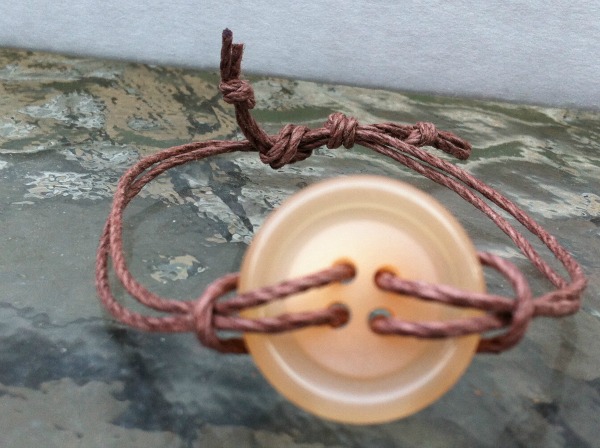
To make the bracelet adjustable, you’ll wrap one set of ends around the other and create a loop, pulling that same set of ends back through to make a knot. I like to put little knots in each end to prevent accidentally pulling them all the way through when taking your bracelet off. Flip the bracelet over and repeat the same looped knot.
Now, when you tug on the ends, the bracelet tightens. To loosen, gently push on the knots.
To add beads, I took a third piece of hemp and ran it through the loops I created to secure the button, then through the beads. I took the ends of the pieces securing the button and went around the beads, holding them in place, then making knots.
Make your other knots the same way as above – they’ll just be a bit larger.
Simple, easy, great fun to make with kids.
Latte Buttons, Handmade Dyed Hemp, optional – wide mouth beads
Thanks for joining me today.
Hi all, Allie here with a quick Button Jewelry project. C’mon and get your Shine on!
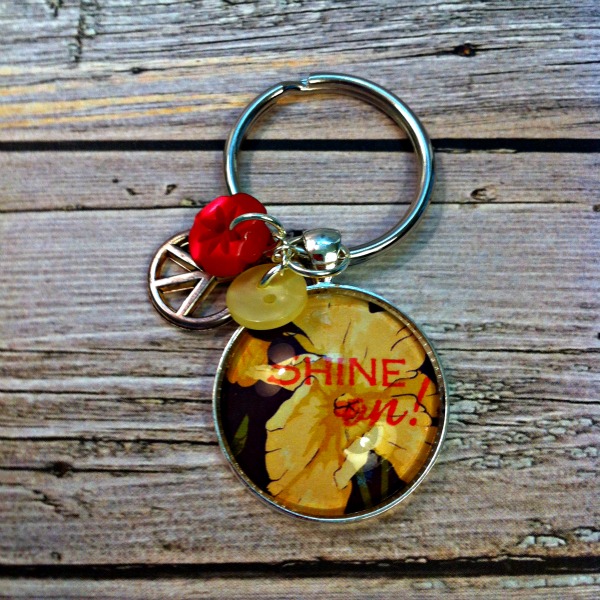
I created a fun key chain using a Charmed Key Chain Kit and some buttons from the Laura Kelly Designer Mix. To finish it off, I added a peace charm that was left over from another button jewelry project.
Tools Needed:
Thanks for joining me today. To see more ideas and jewelry, please join me at My Card Party.

Braided T-Shirt Bracelets, we are seeing this unique idea for repurposing old t-shirts everywhere! After having experimented many times making several in different colors and styles, I think this is my best version. The secret? The buttons. I first made a batch of these to wear to my Zumba classes. No matter how sturdy the construction seemed to be, after a few sweat sessions, they kept falling apart. So finally I decided to give it another try but added buttons to the mix this go-round.

First you will need to cut strips of some old t-shirts. I cut mine into a strips measuring approximately 2″ x 10.” I used about five but you can use 2 or 3 more or less depending on how large you want the end result to be.
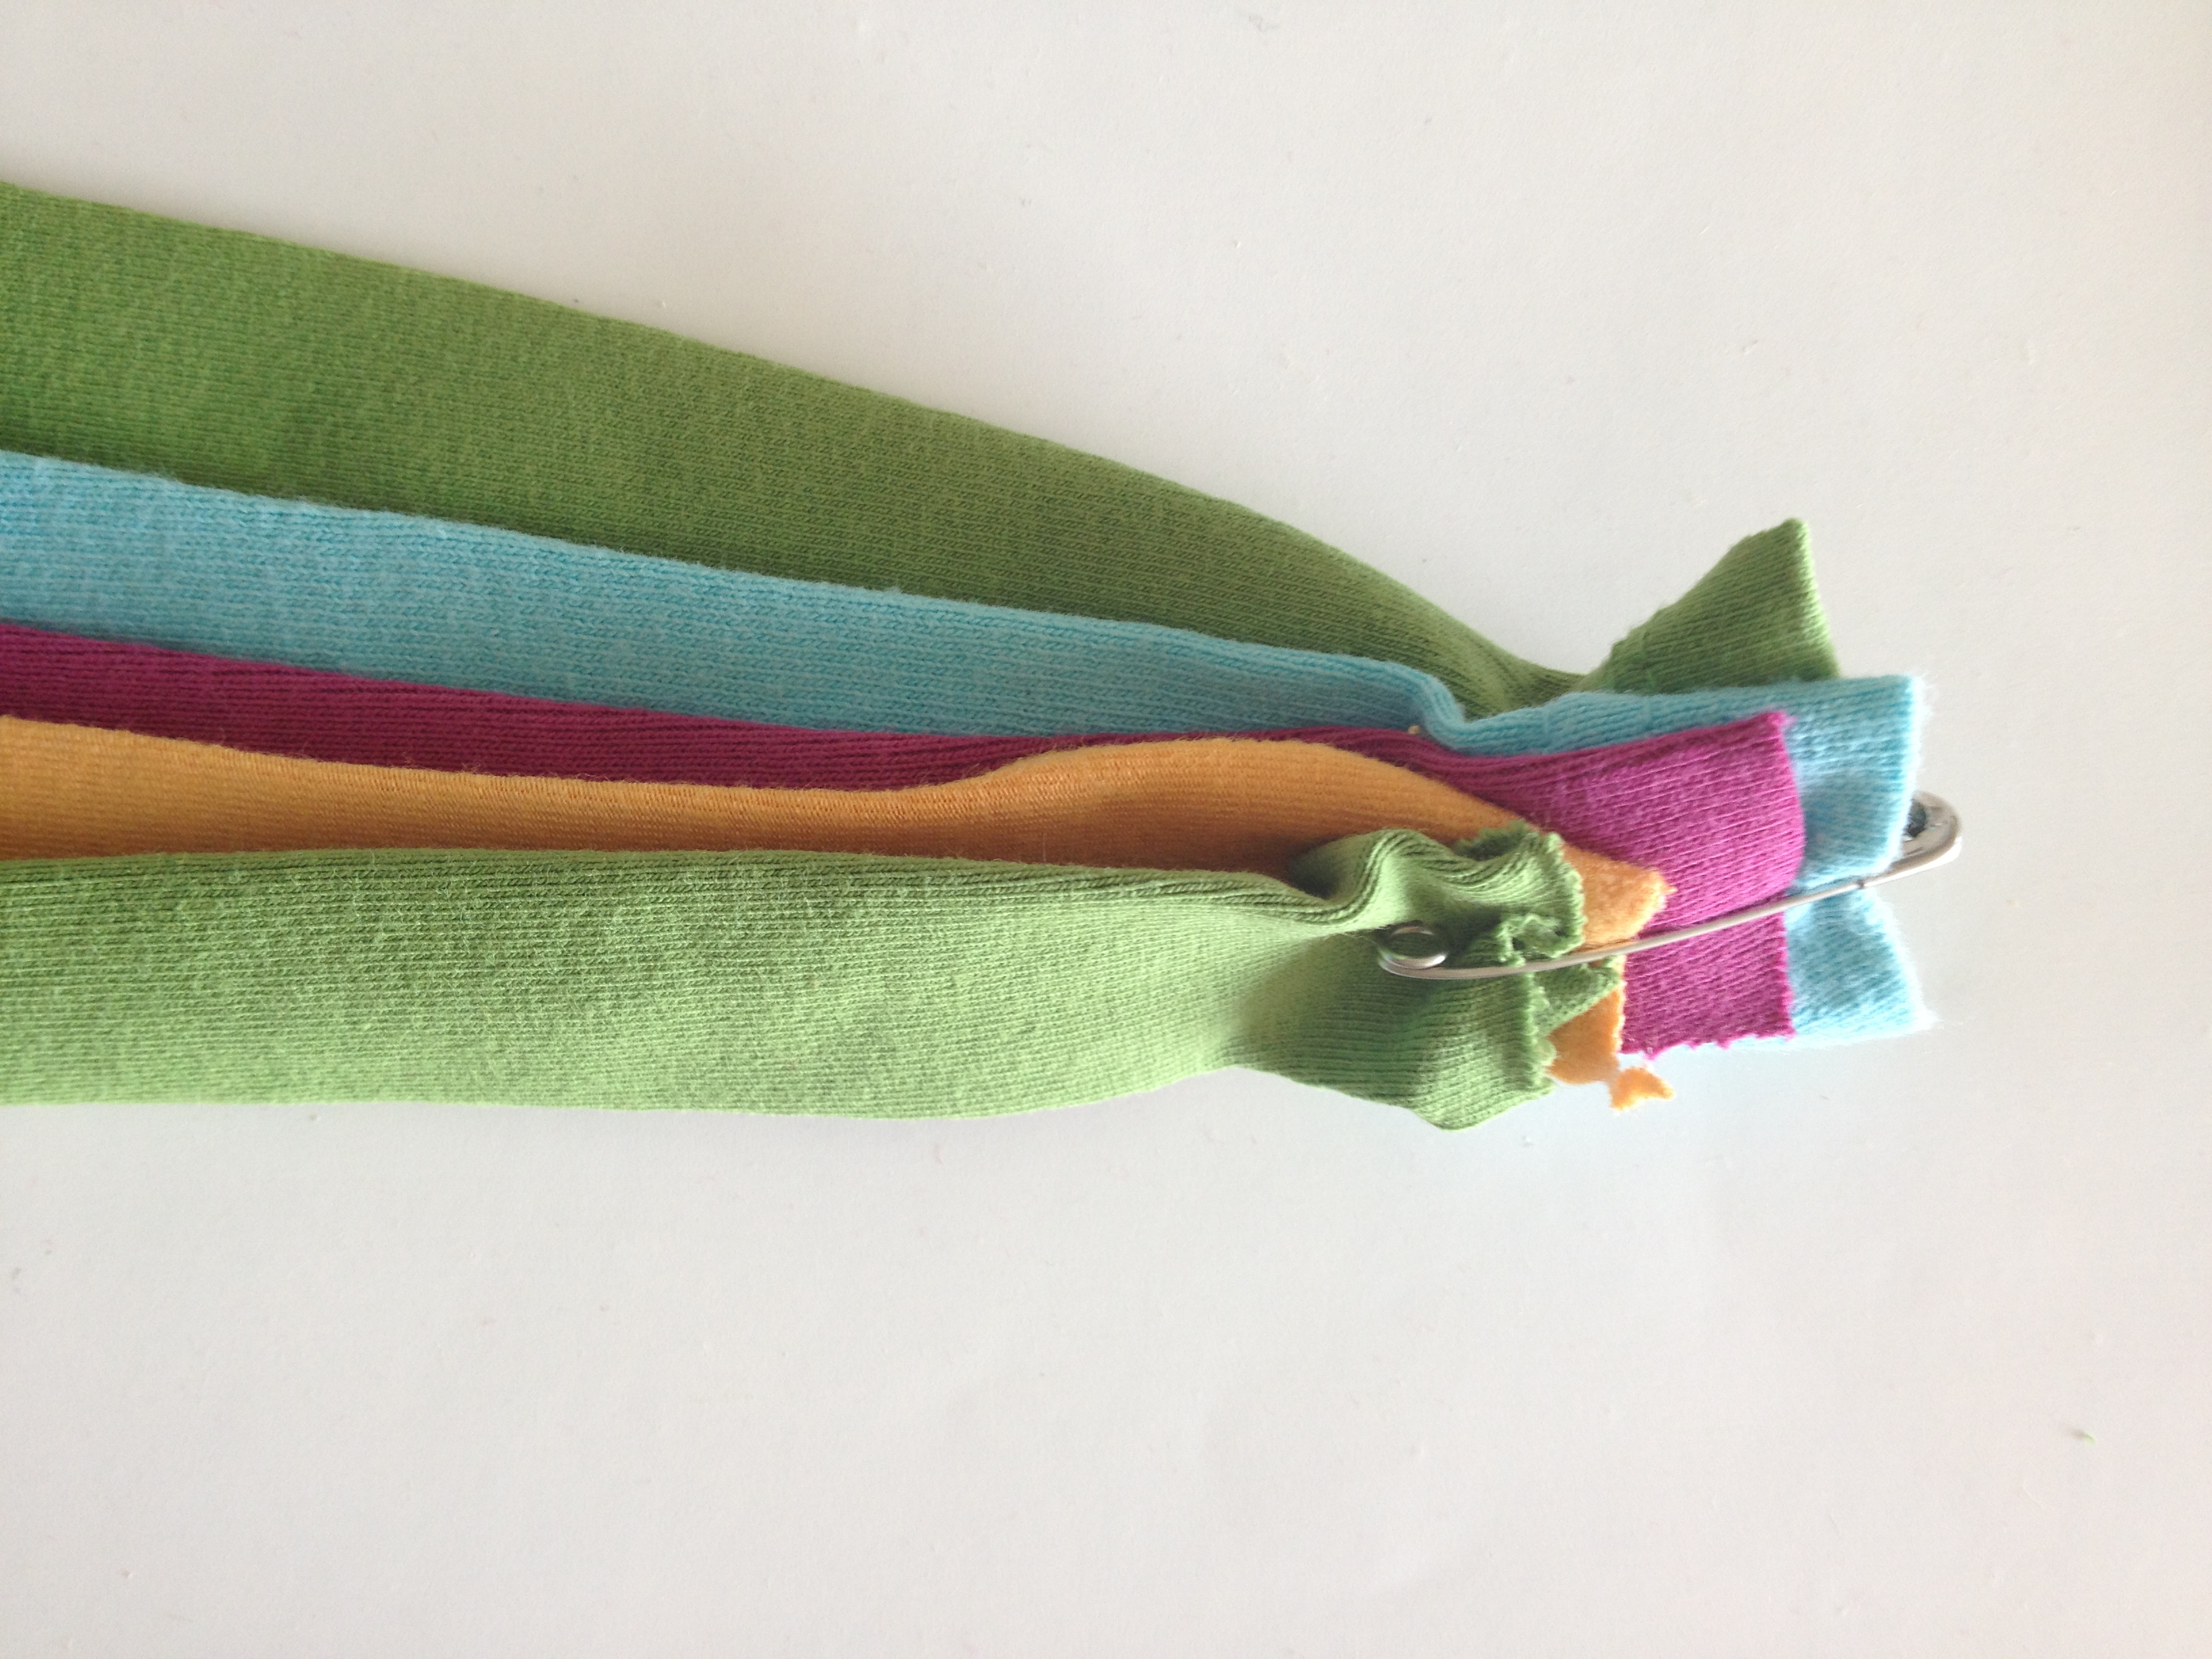 To keep your strips in place while braiding them, secure the ends with a safety pin.
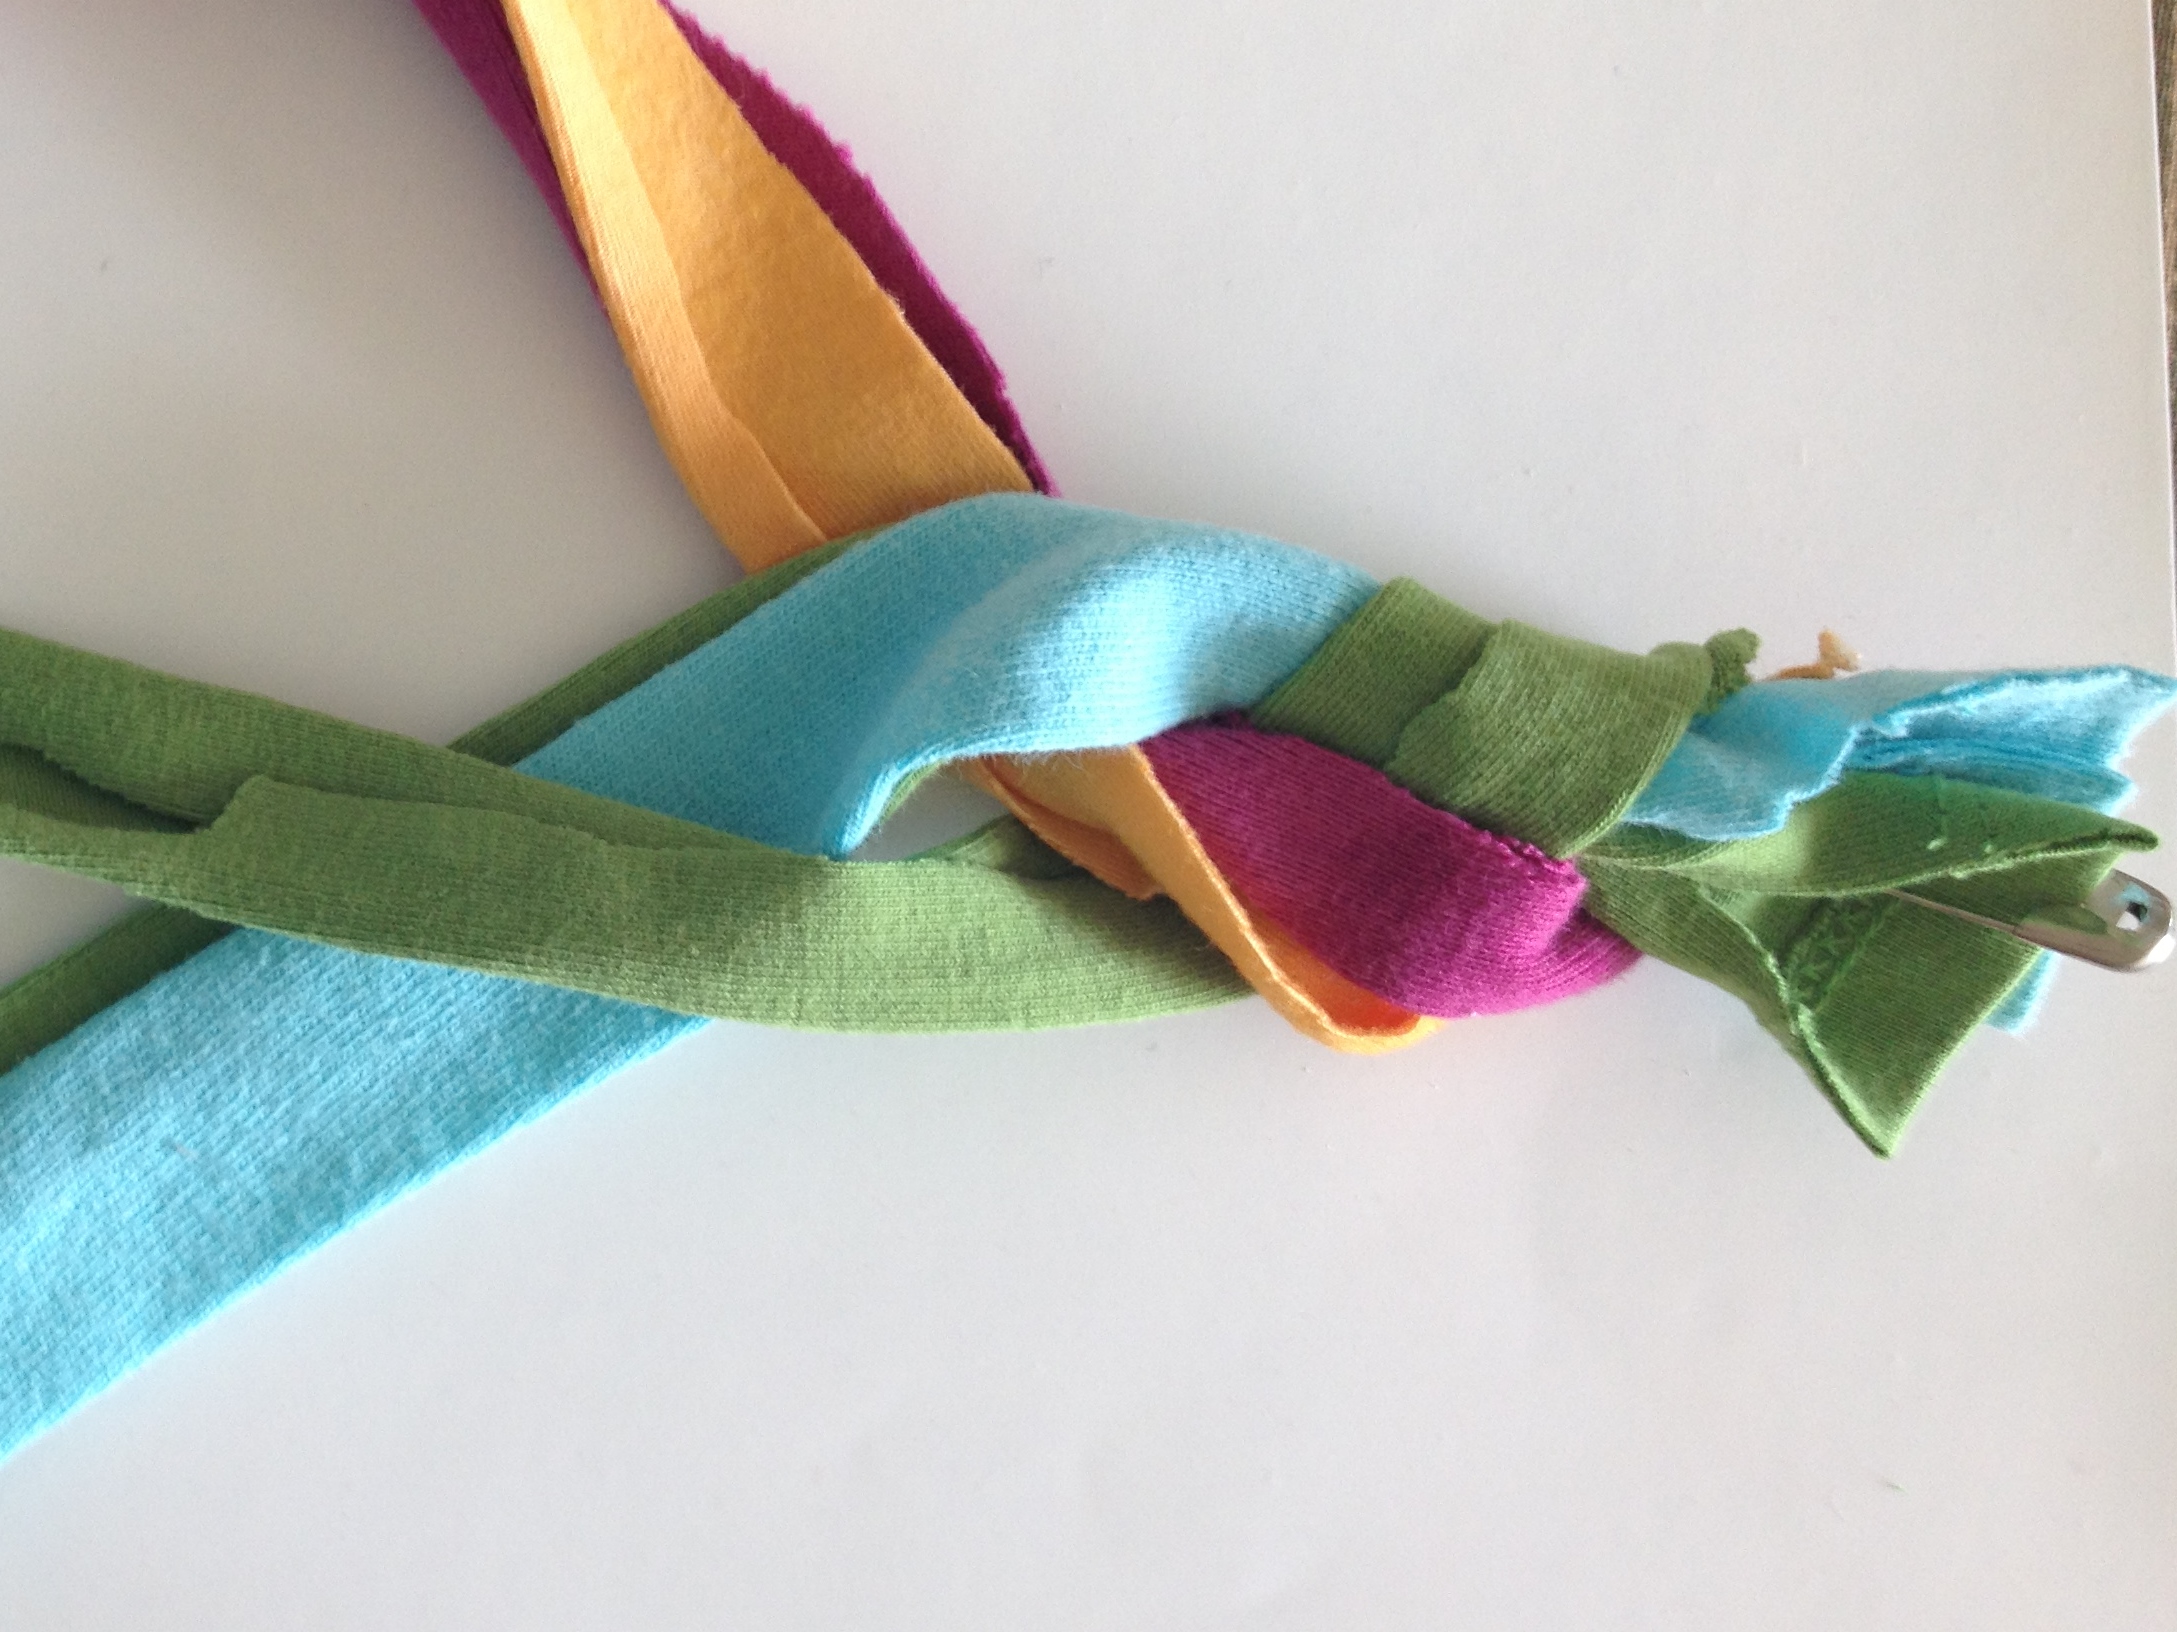 Start to braid the strips working in bundles of two or three strips at a time.
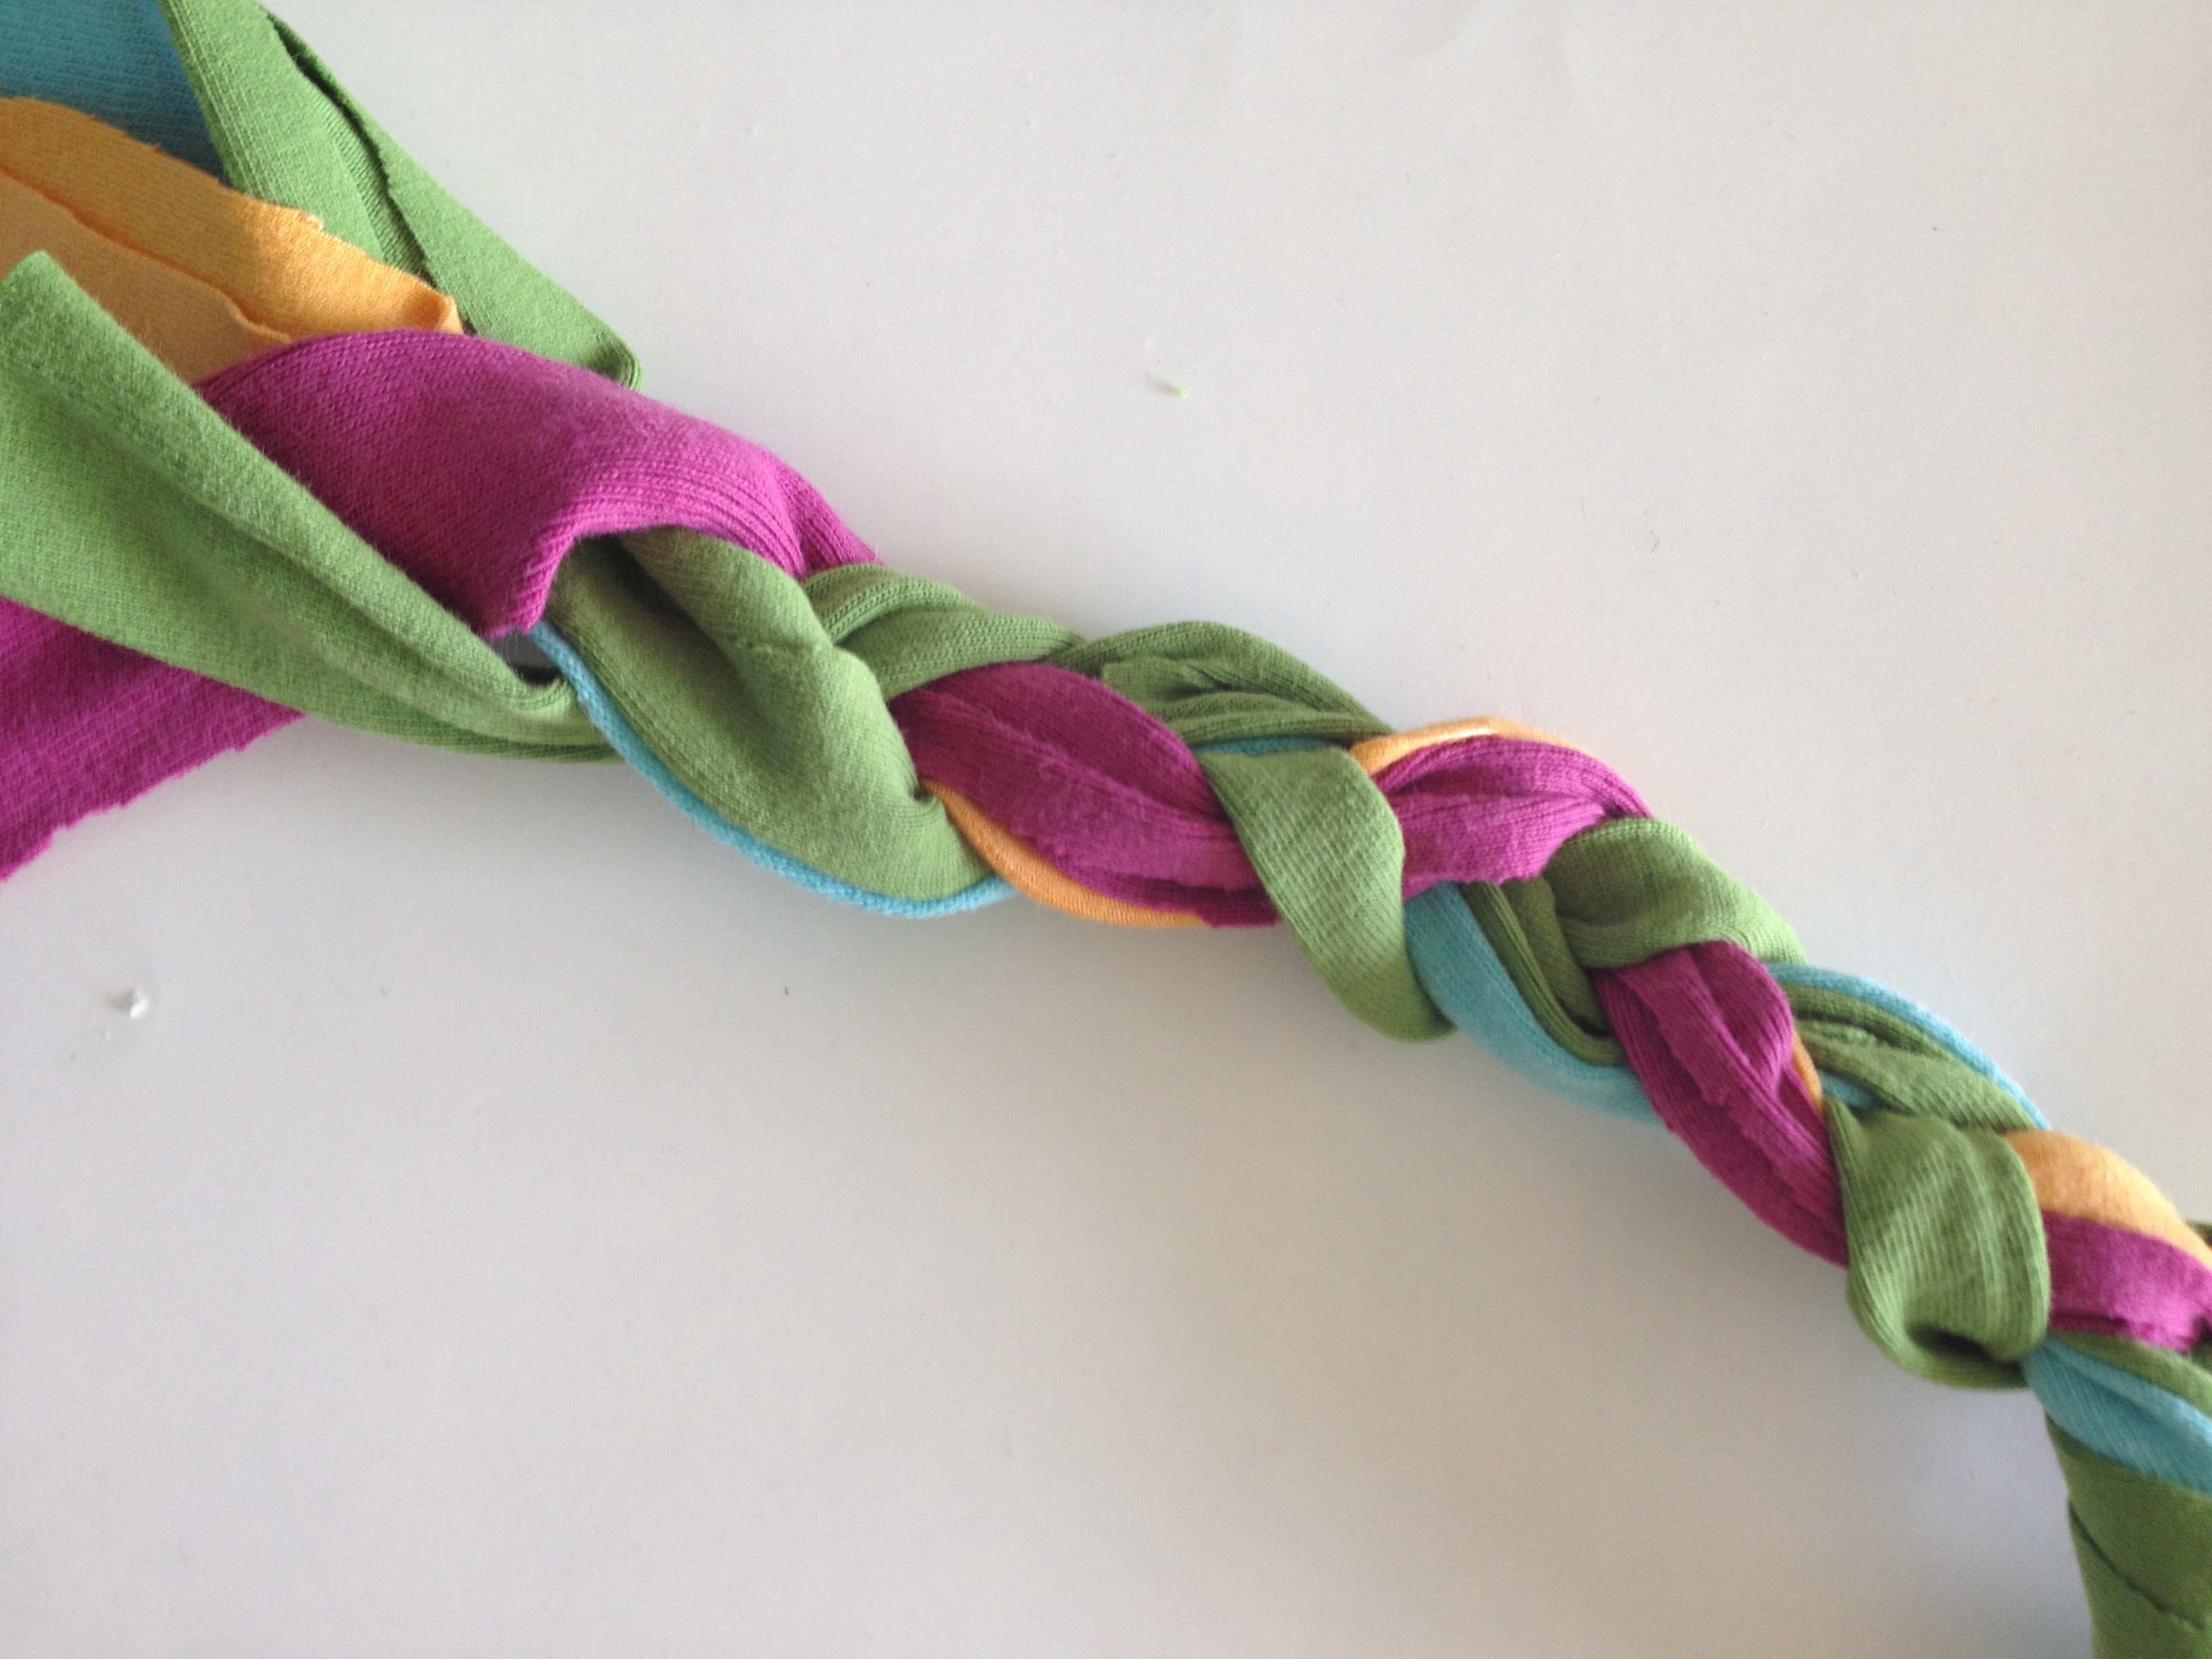 Continue to braid to the end, tightening the braid as you go along.
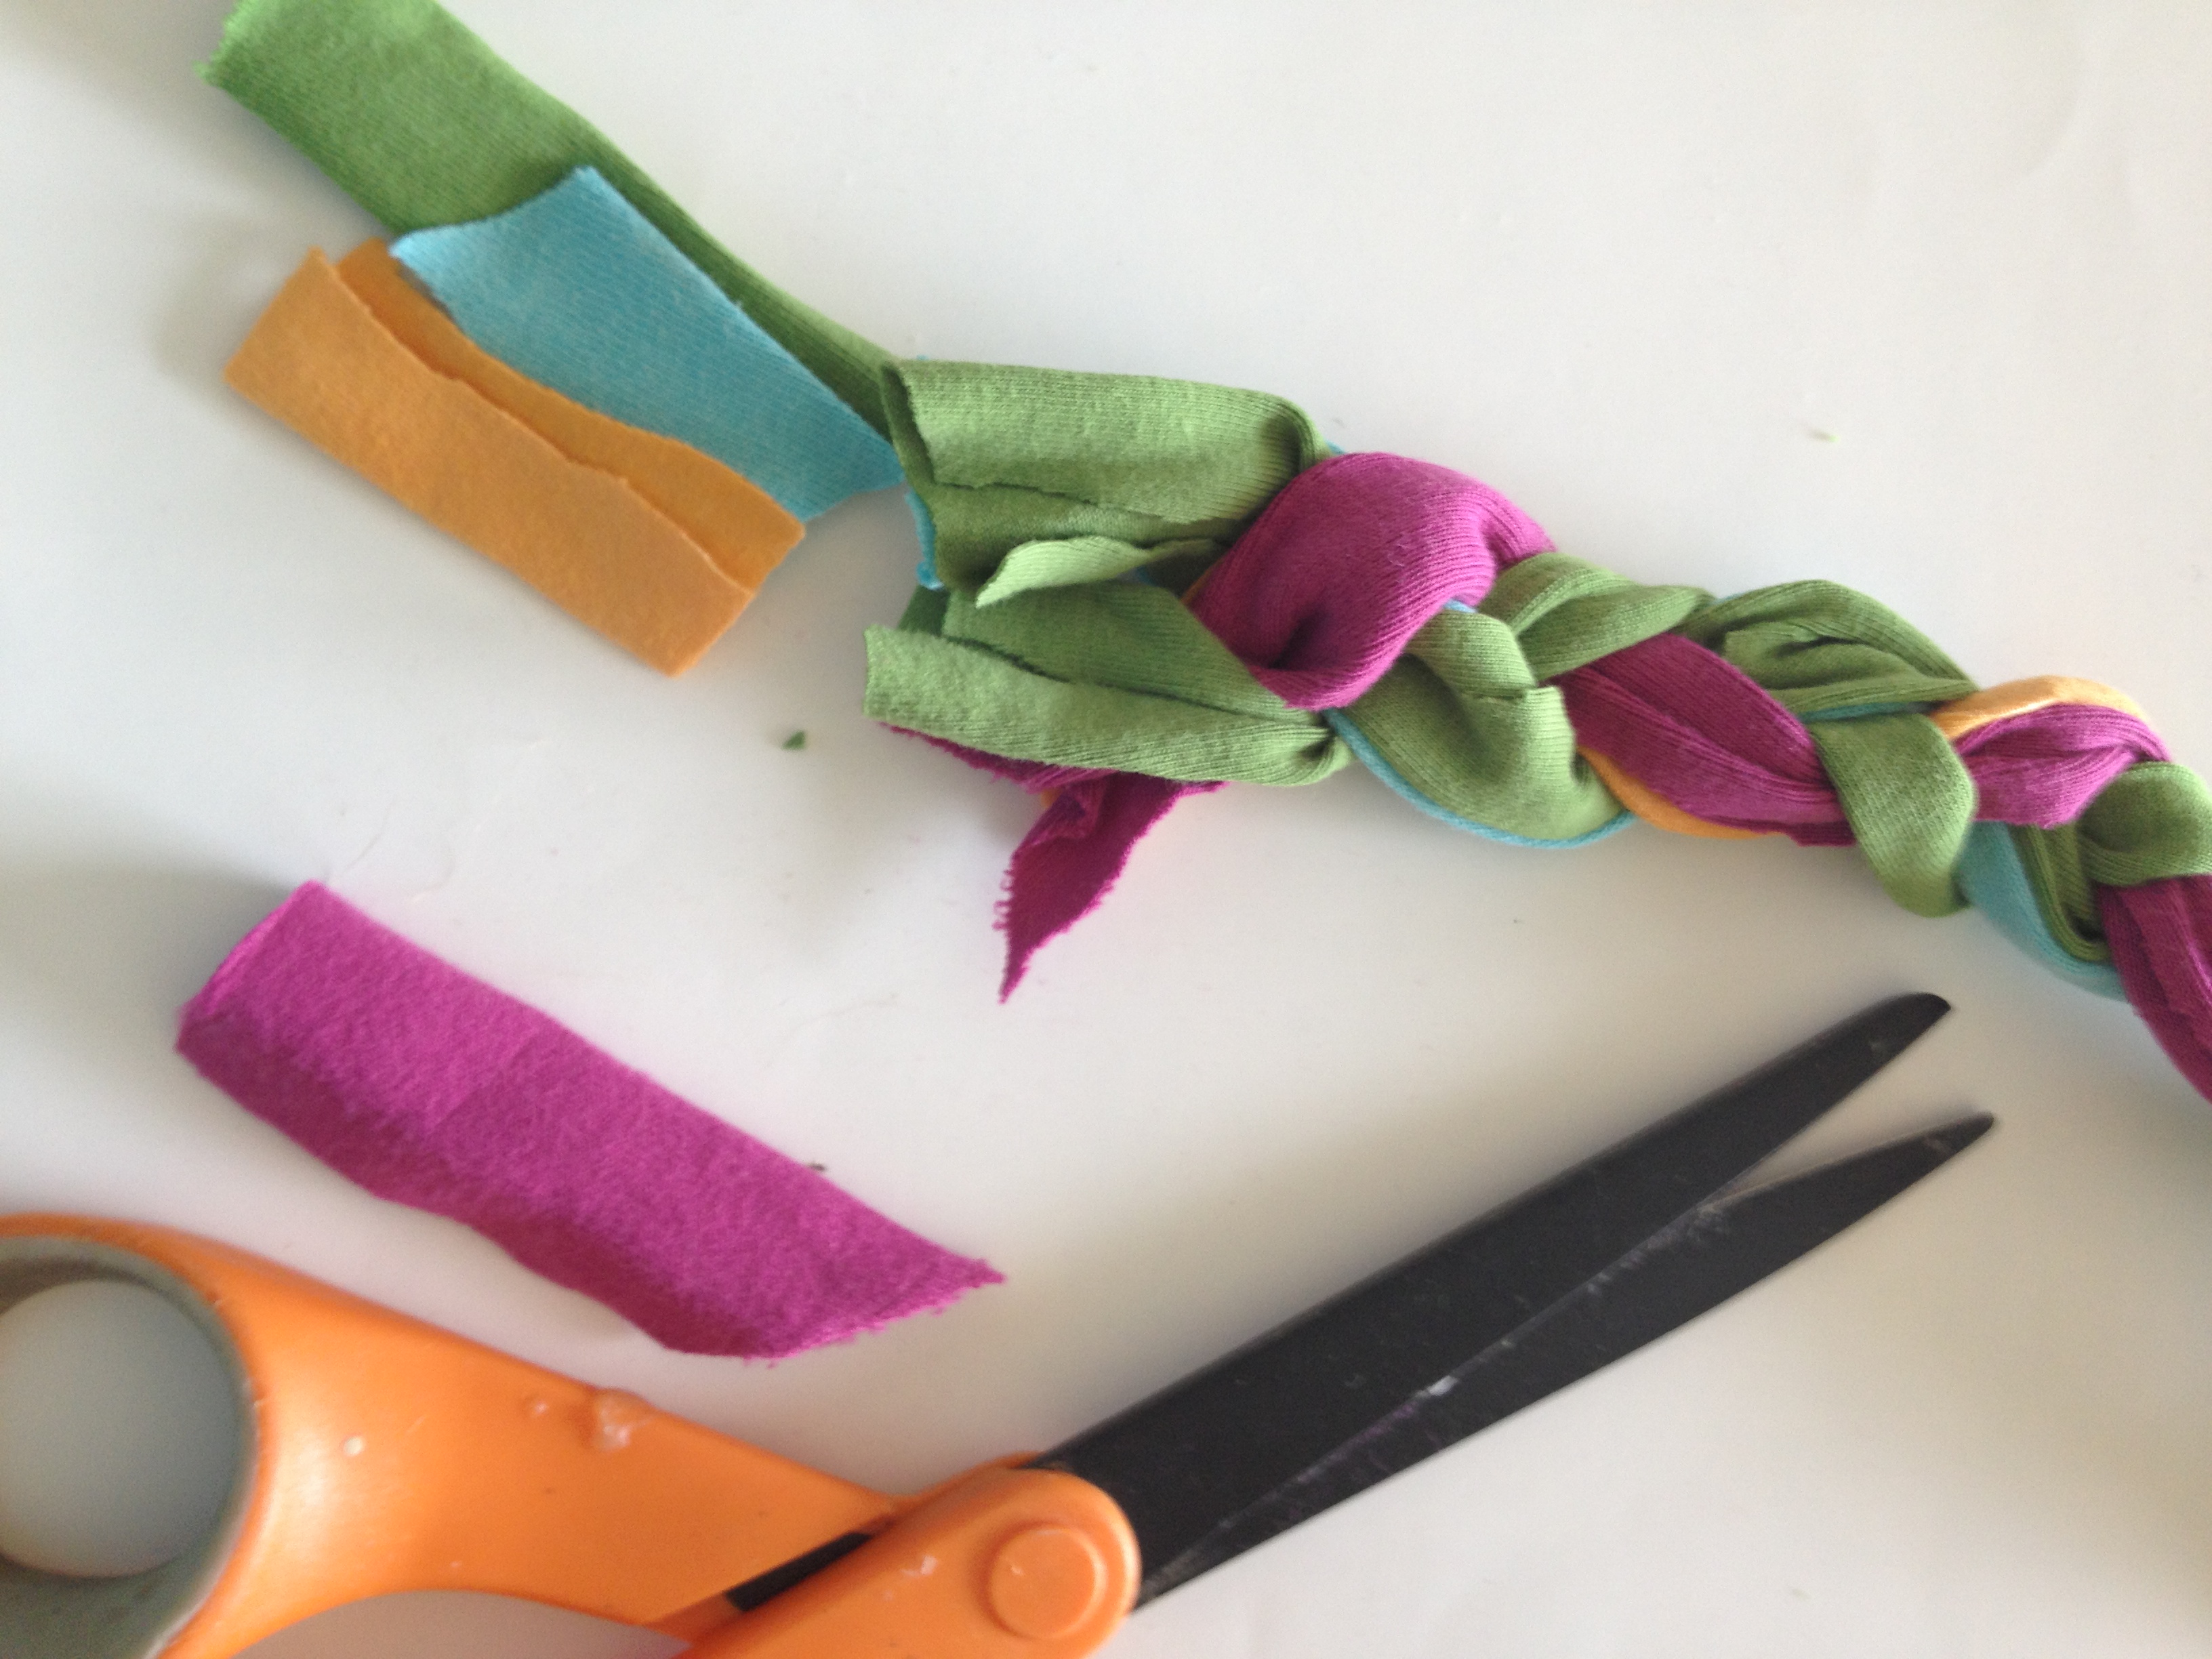
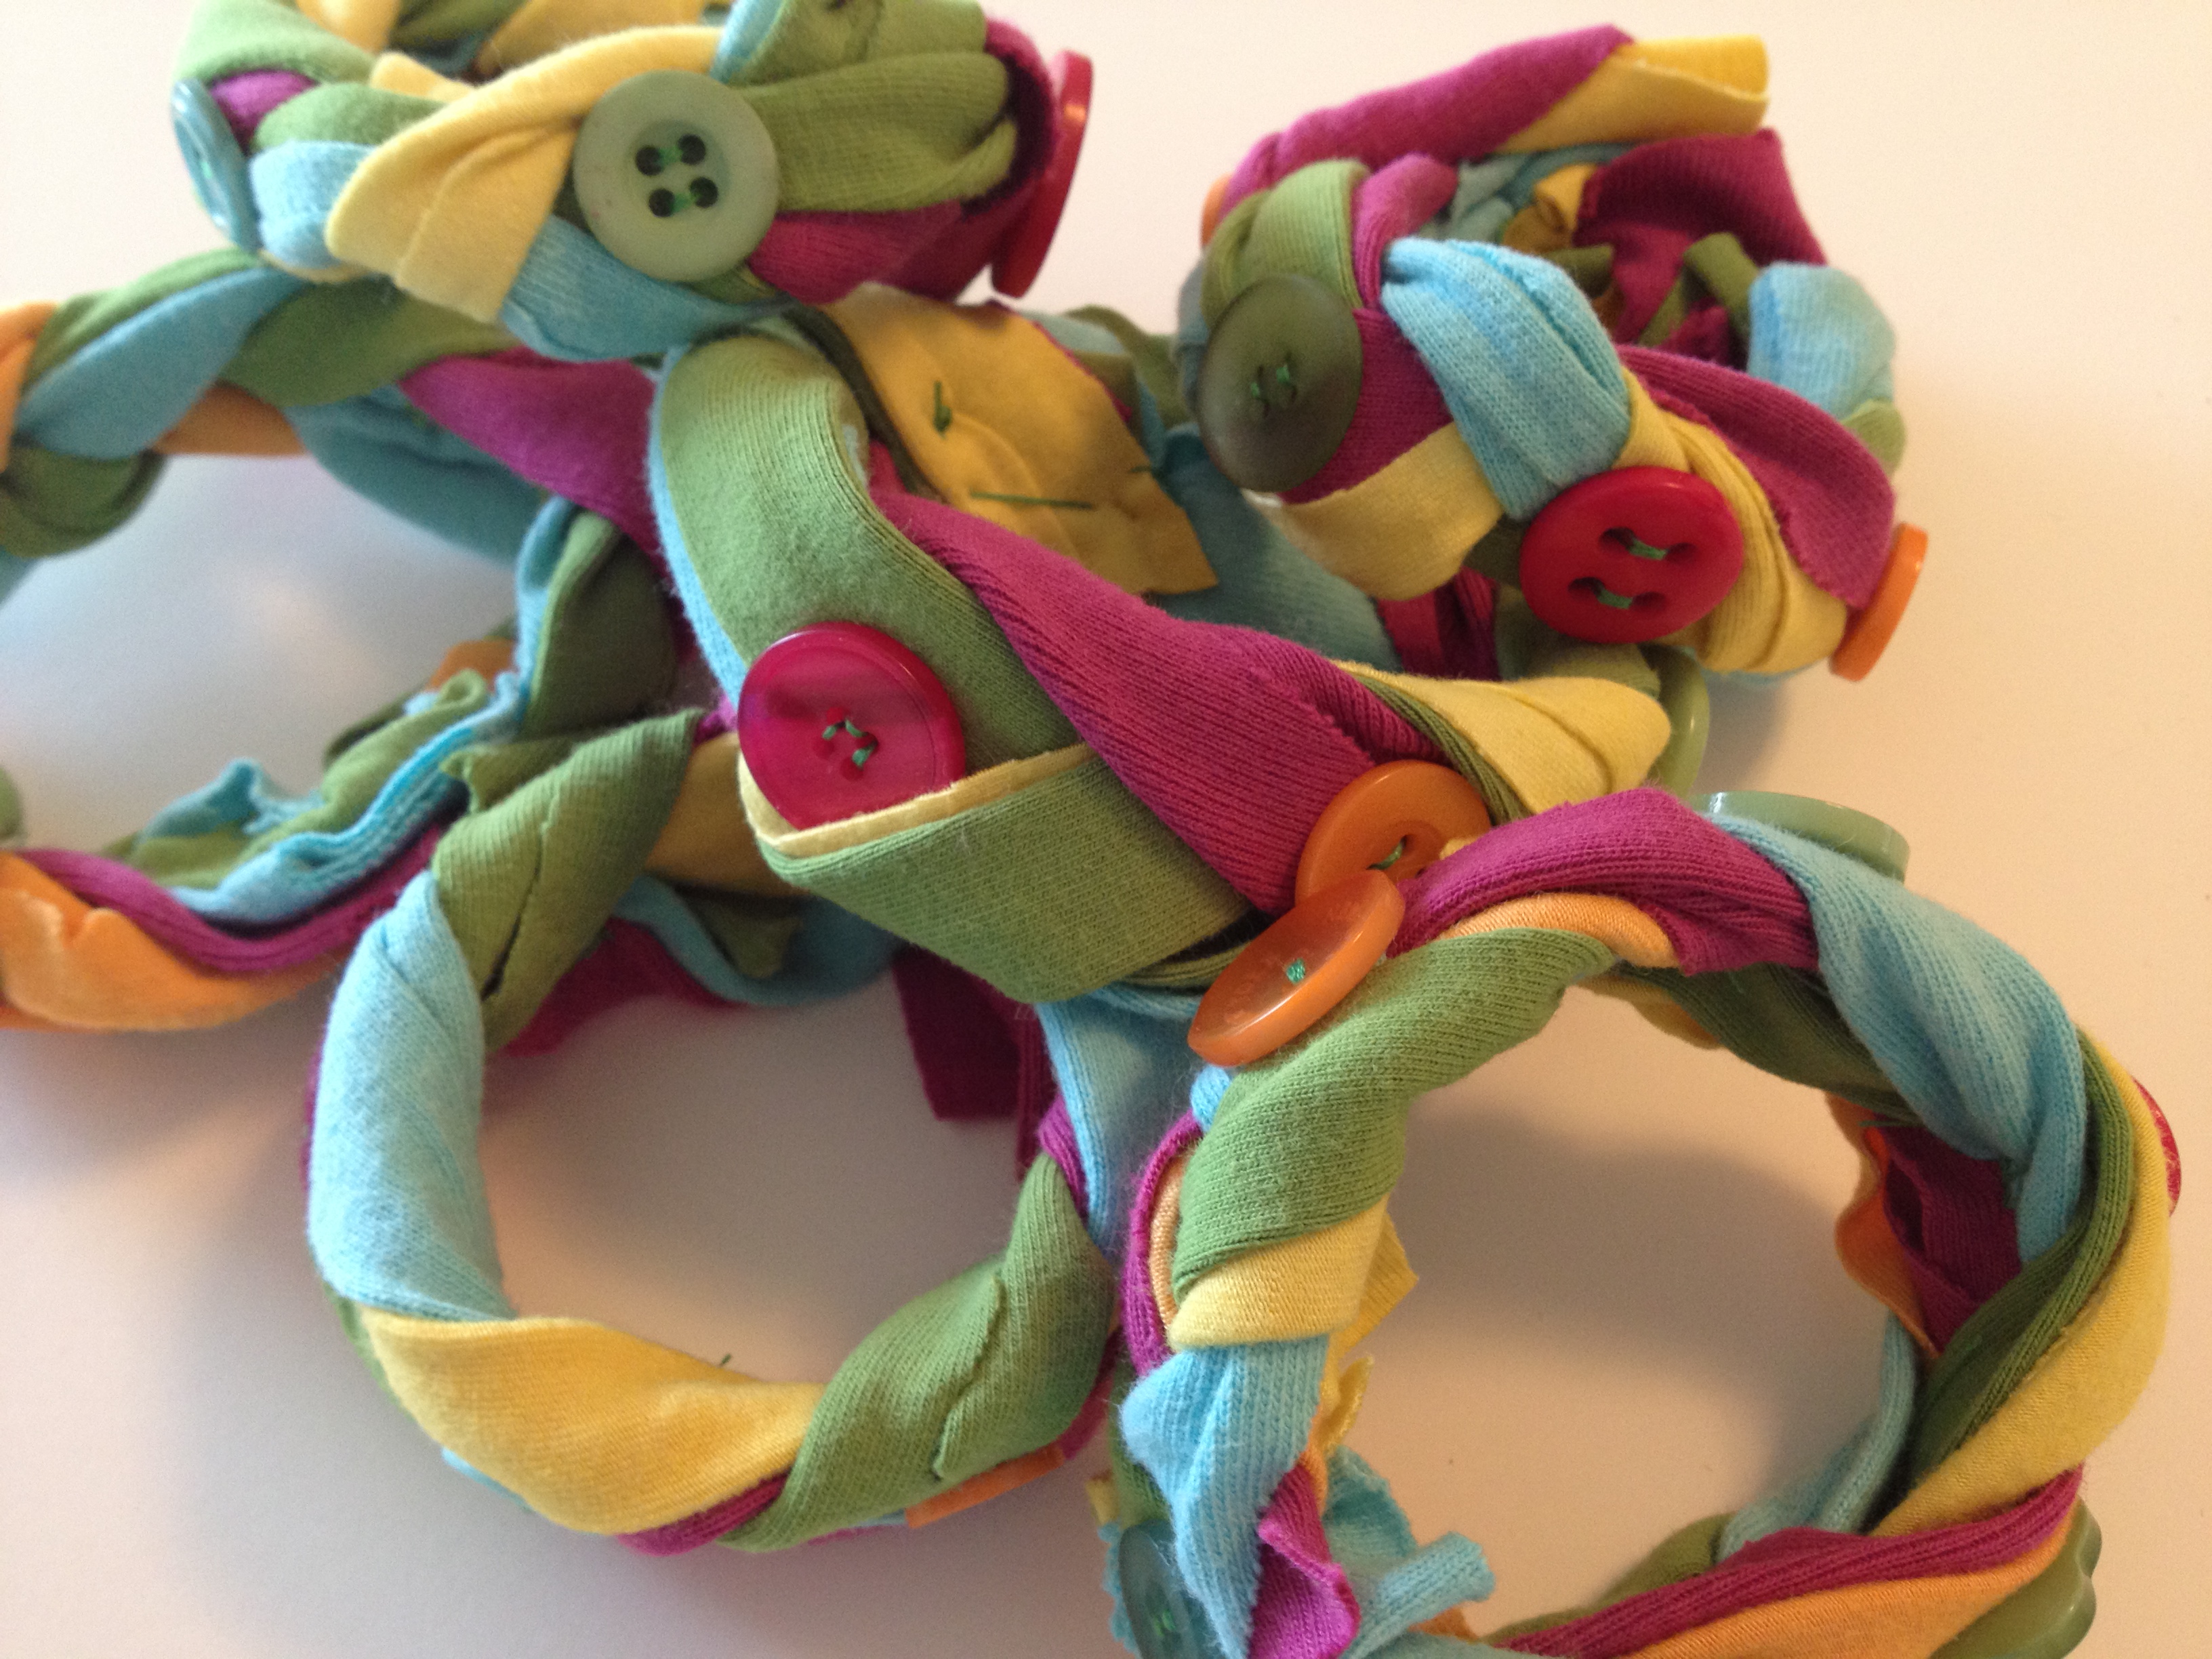
Decide how big your bracelet needs to be to fit your wrist and cut off the excess end if needed.
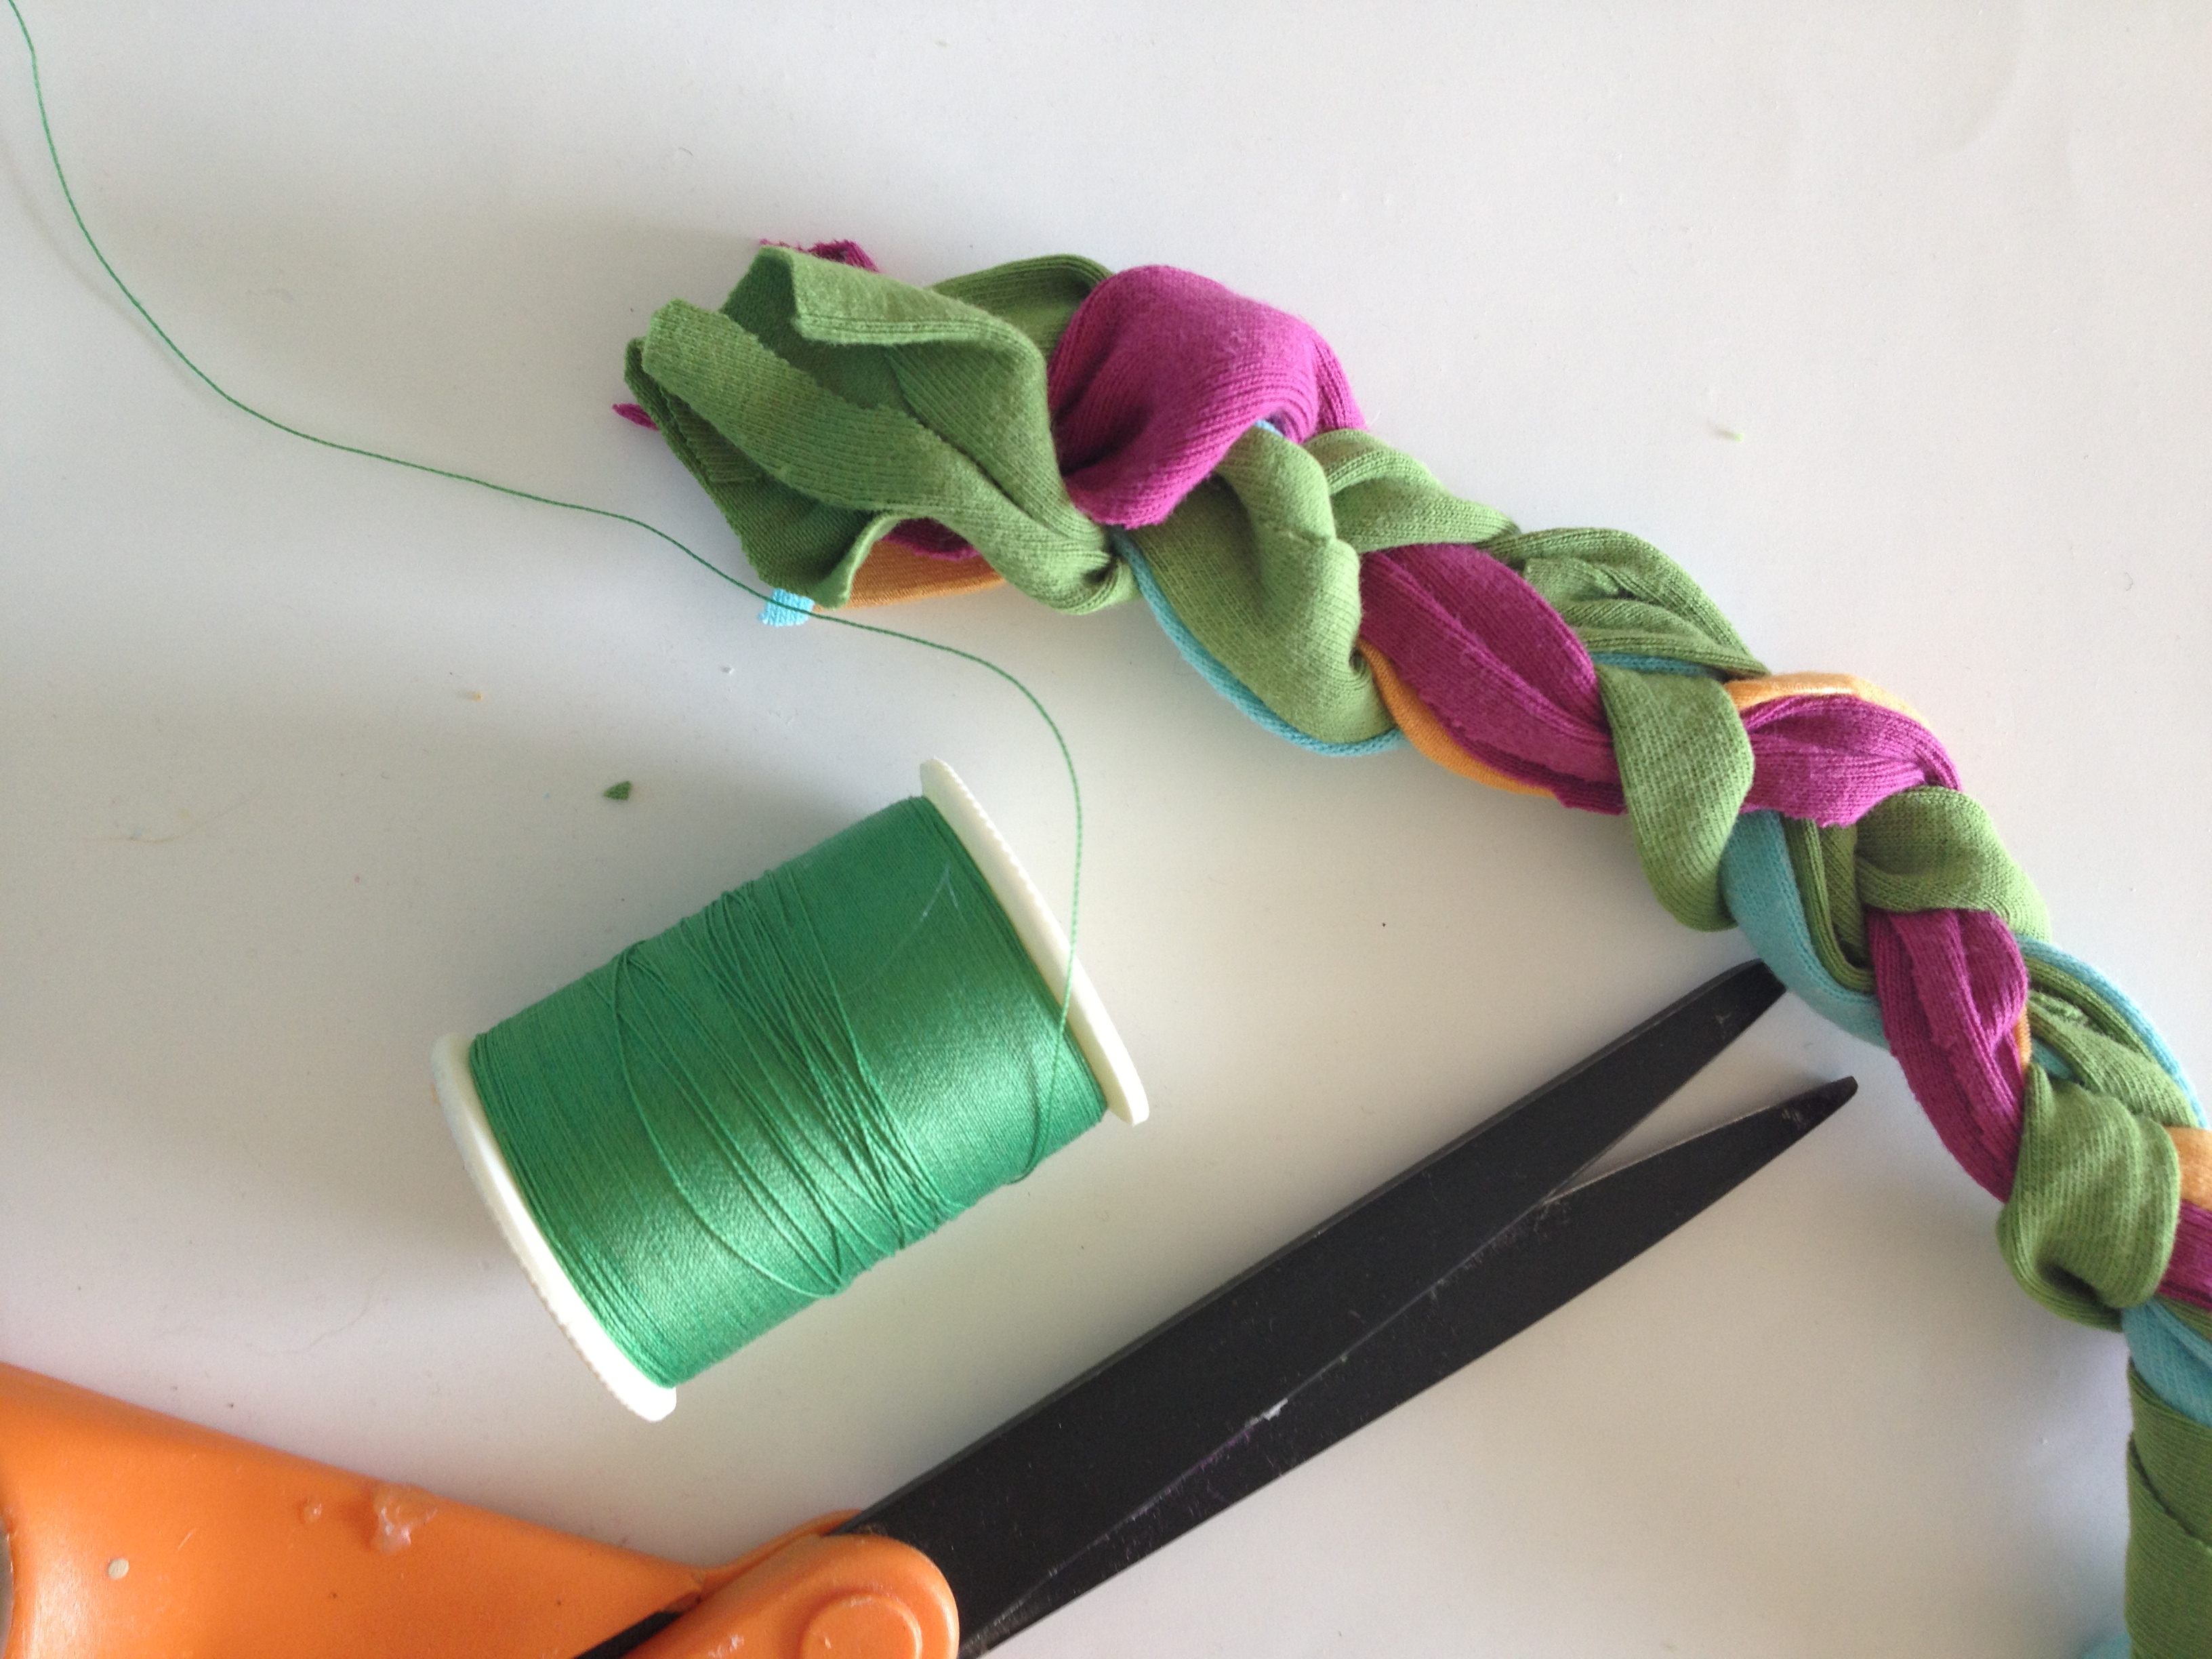 Secure the end of the bracelet with a hand sewing needle and thread.
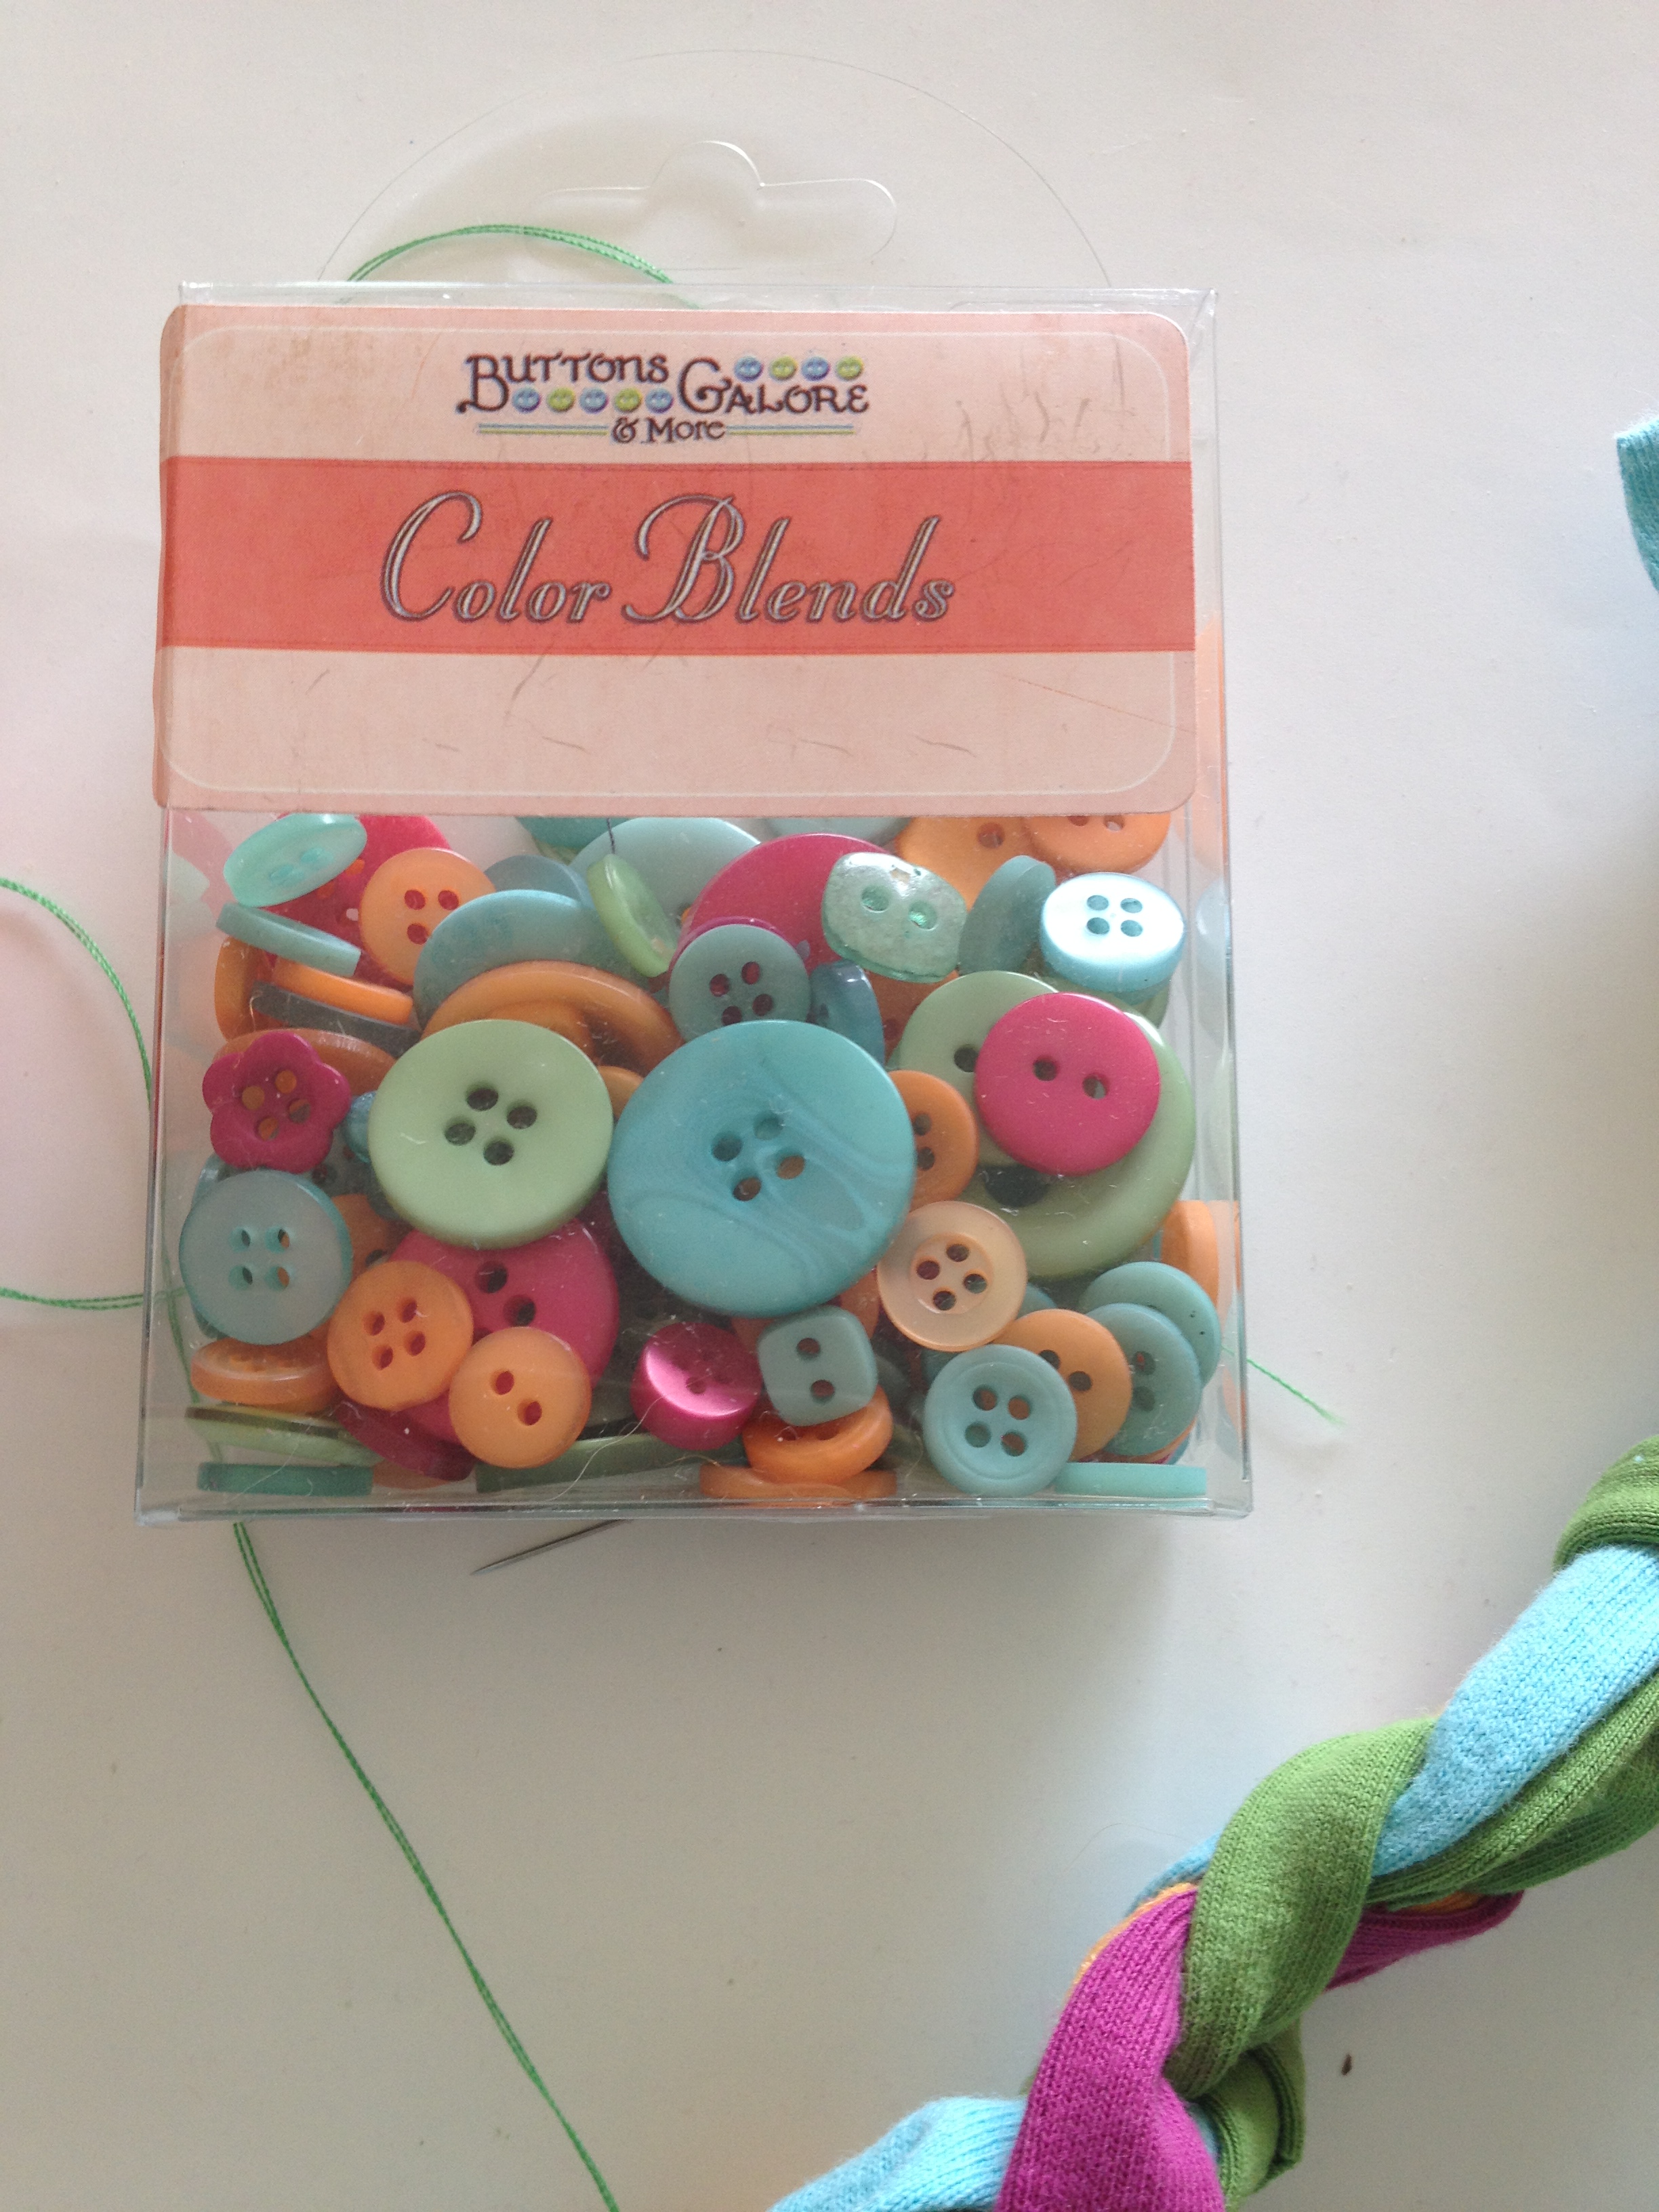
To secure the braided bracelet, I chose these Color Blend Buttons by Buttons Galore and More.
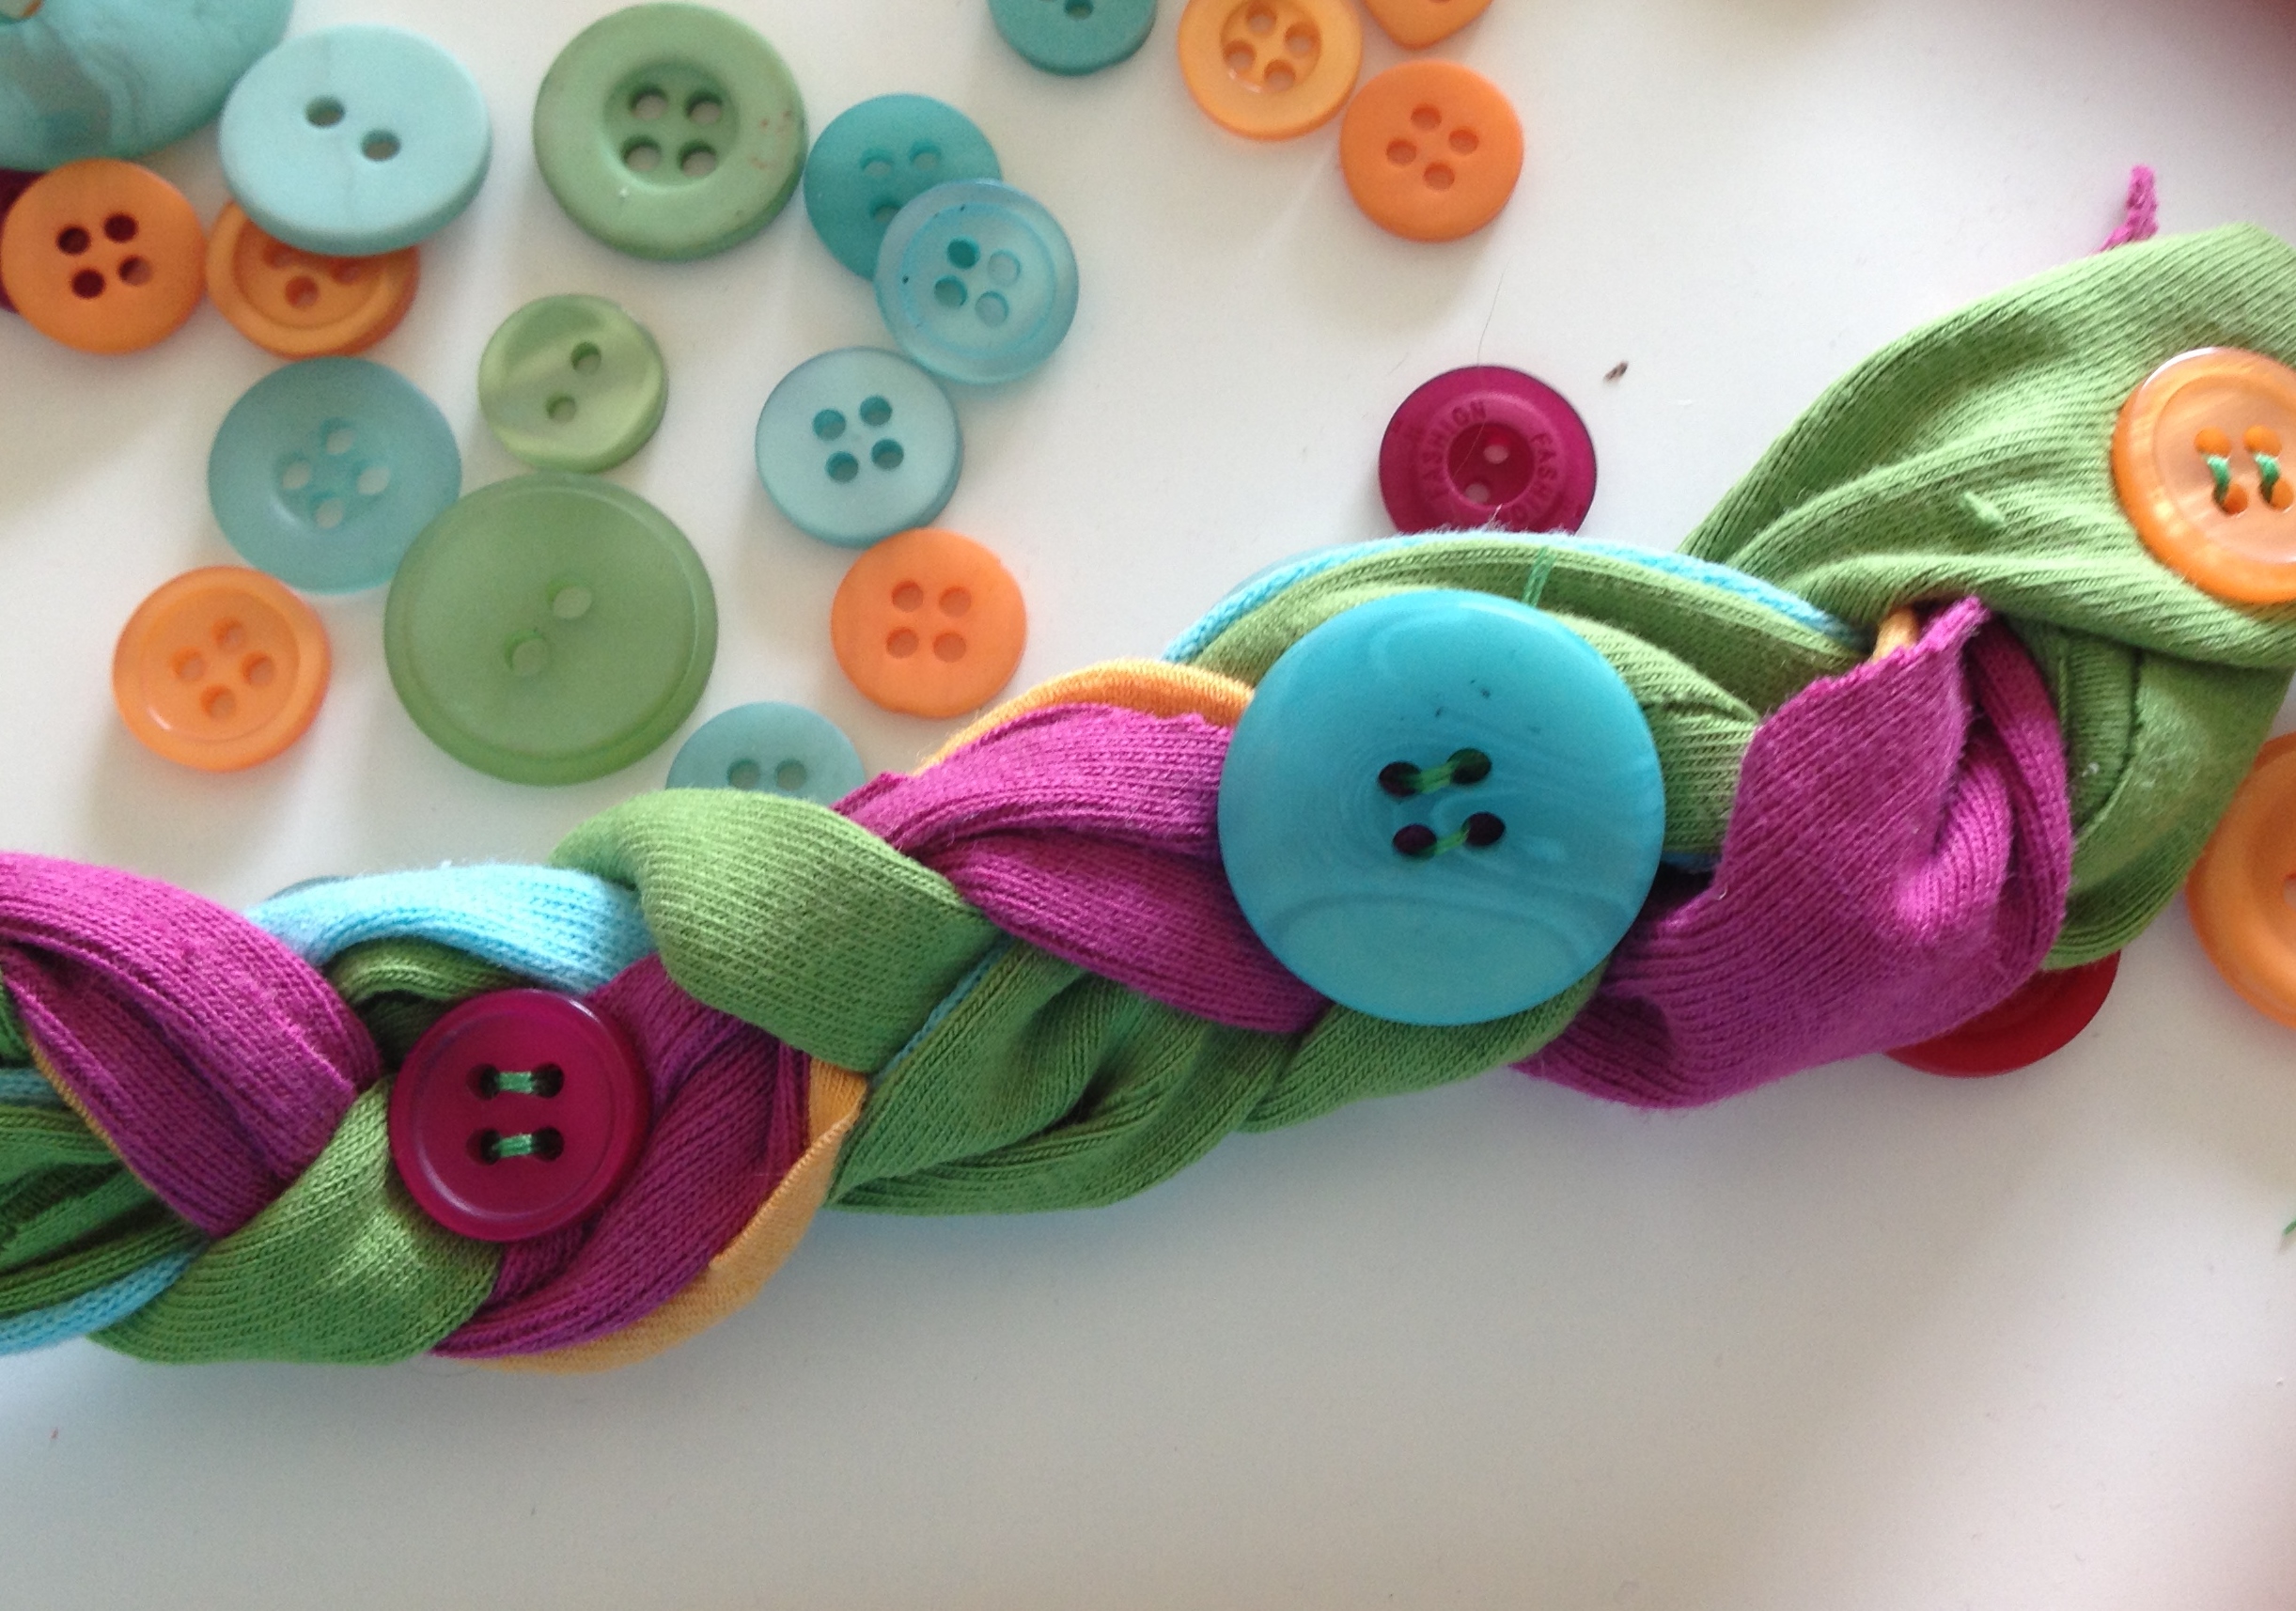 I spaced them somewhat evenly on the braided bracelet and sewed them down with the hand sewing needle and thread. This is what will keep your bracelet in tact during heavy periods of wear and tear and sweat, like dance class!
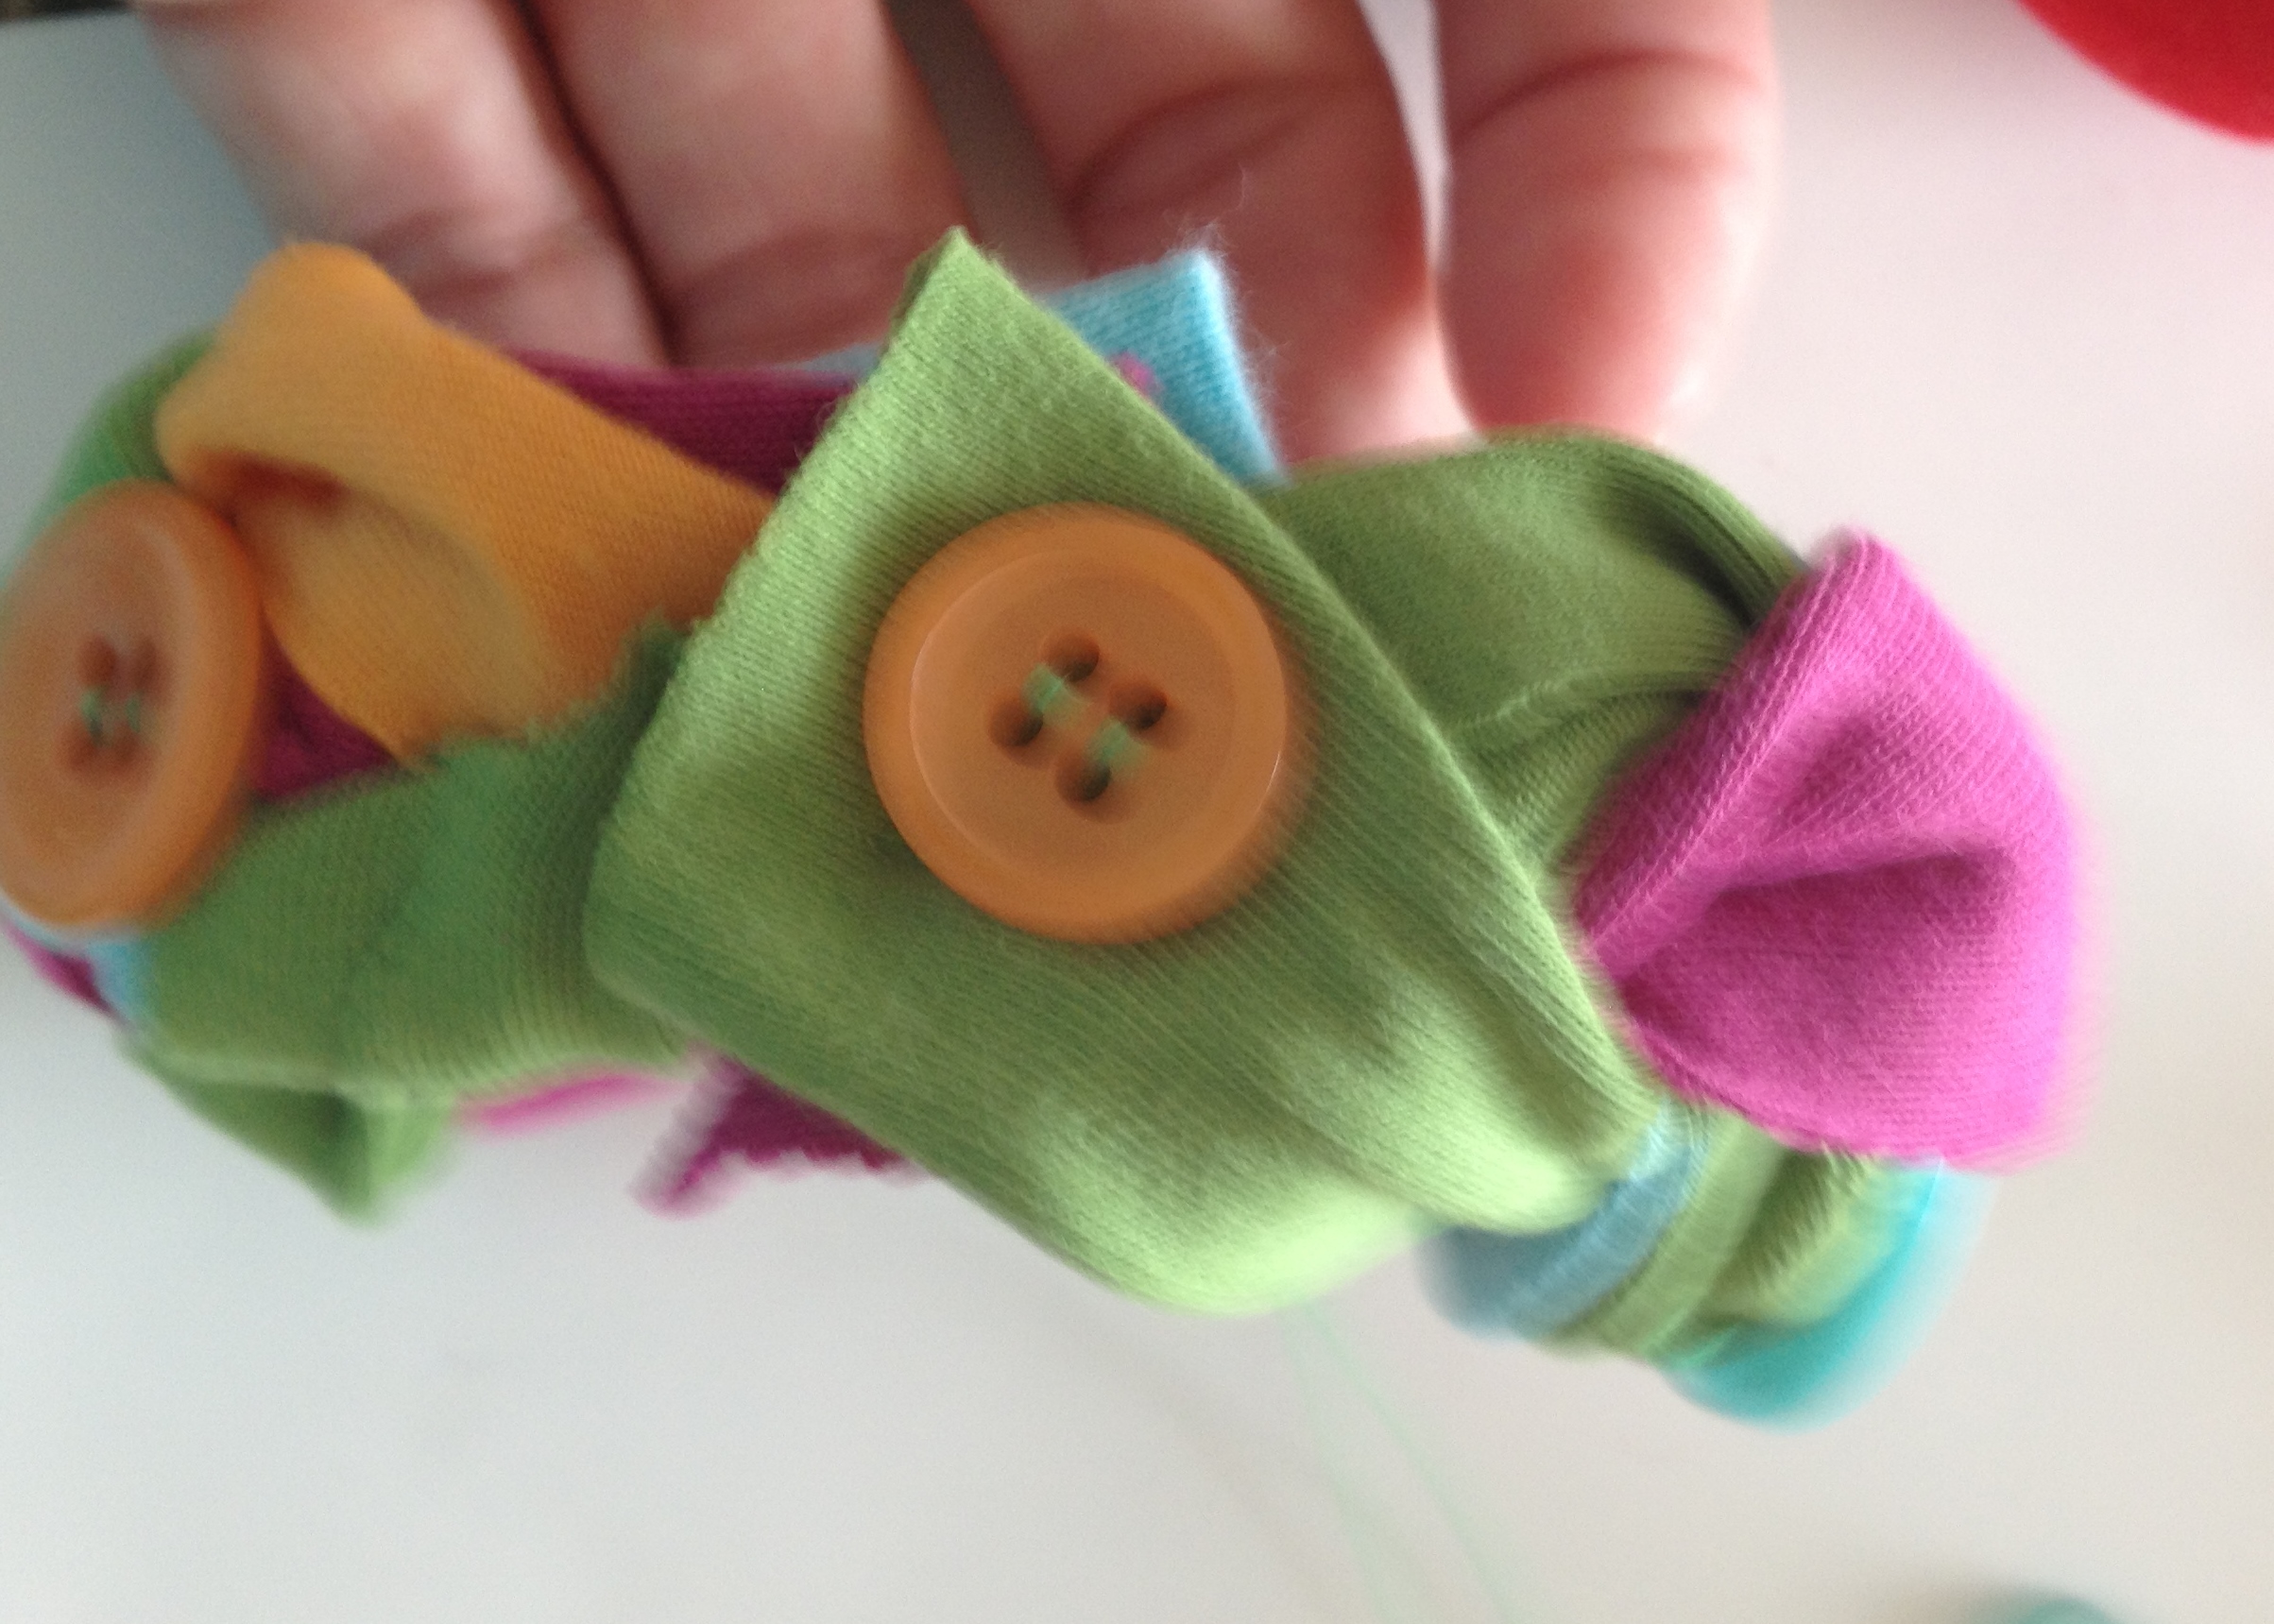
Finish your bracelet with a button, sewing the ends together.
 Live Life Creatively,
Melony
I thought a “CHA CHA” bracelet was appropriate, since Buttons Galore and More is at C.H.A. this week, the Craft and Hobby Association event in Las Vegas, Nevada.
It seems that everybody enjoys making their own custom, artisan jewelry these days, and I love making jewelry with BUTTONS!
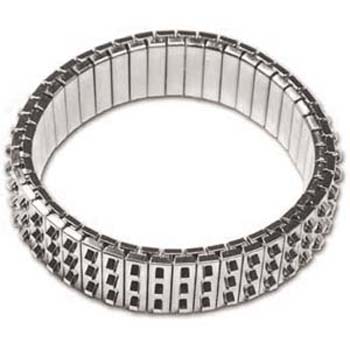
Cha Cha Bracelets are a lot of fun. The slip right on and one size generally fits all. It is basically an expansion bracelet, like a watch band, with loops for attaching beads, or in our case today … BUTTONS!
Buttons are lightweight AND affordable, and can be swapped out making this an inexpensive project.
Buttons – Fancy Gold Grab Bag (shown below)
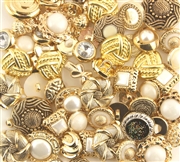
Beading Pliers, Jump Rings, Cha Cha bracelet base (shown below)
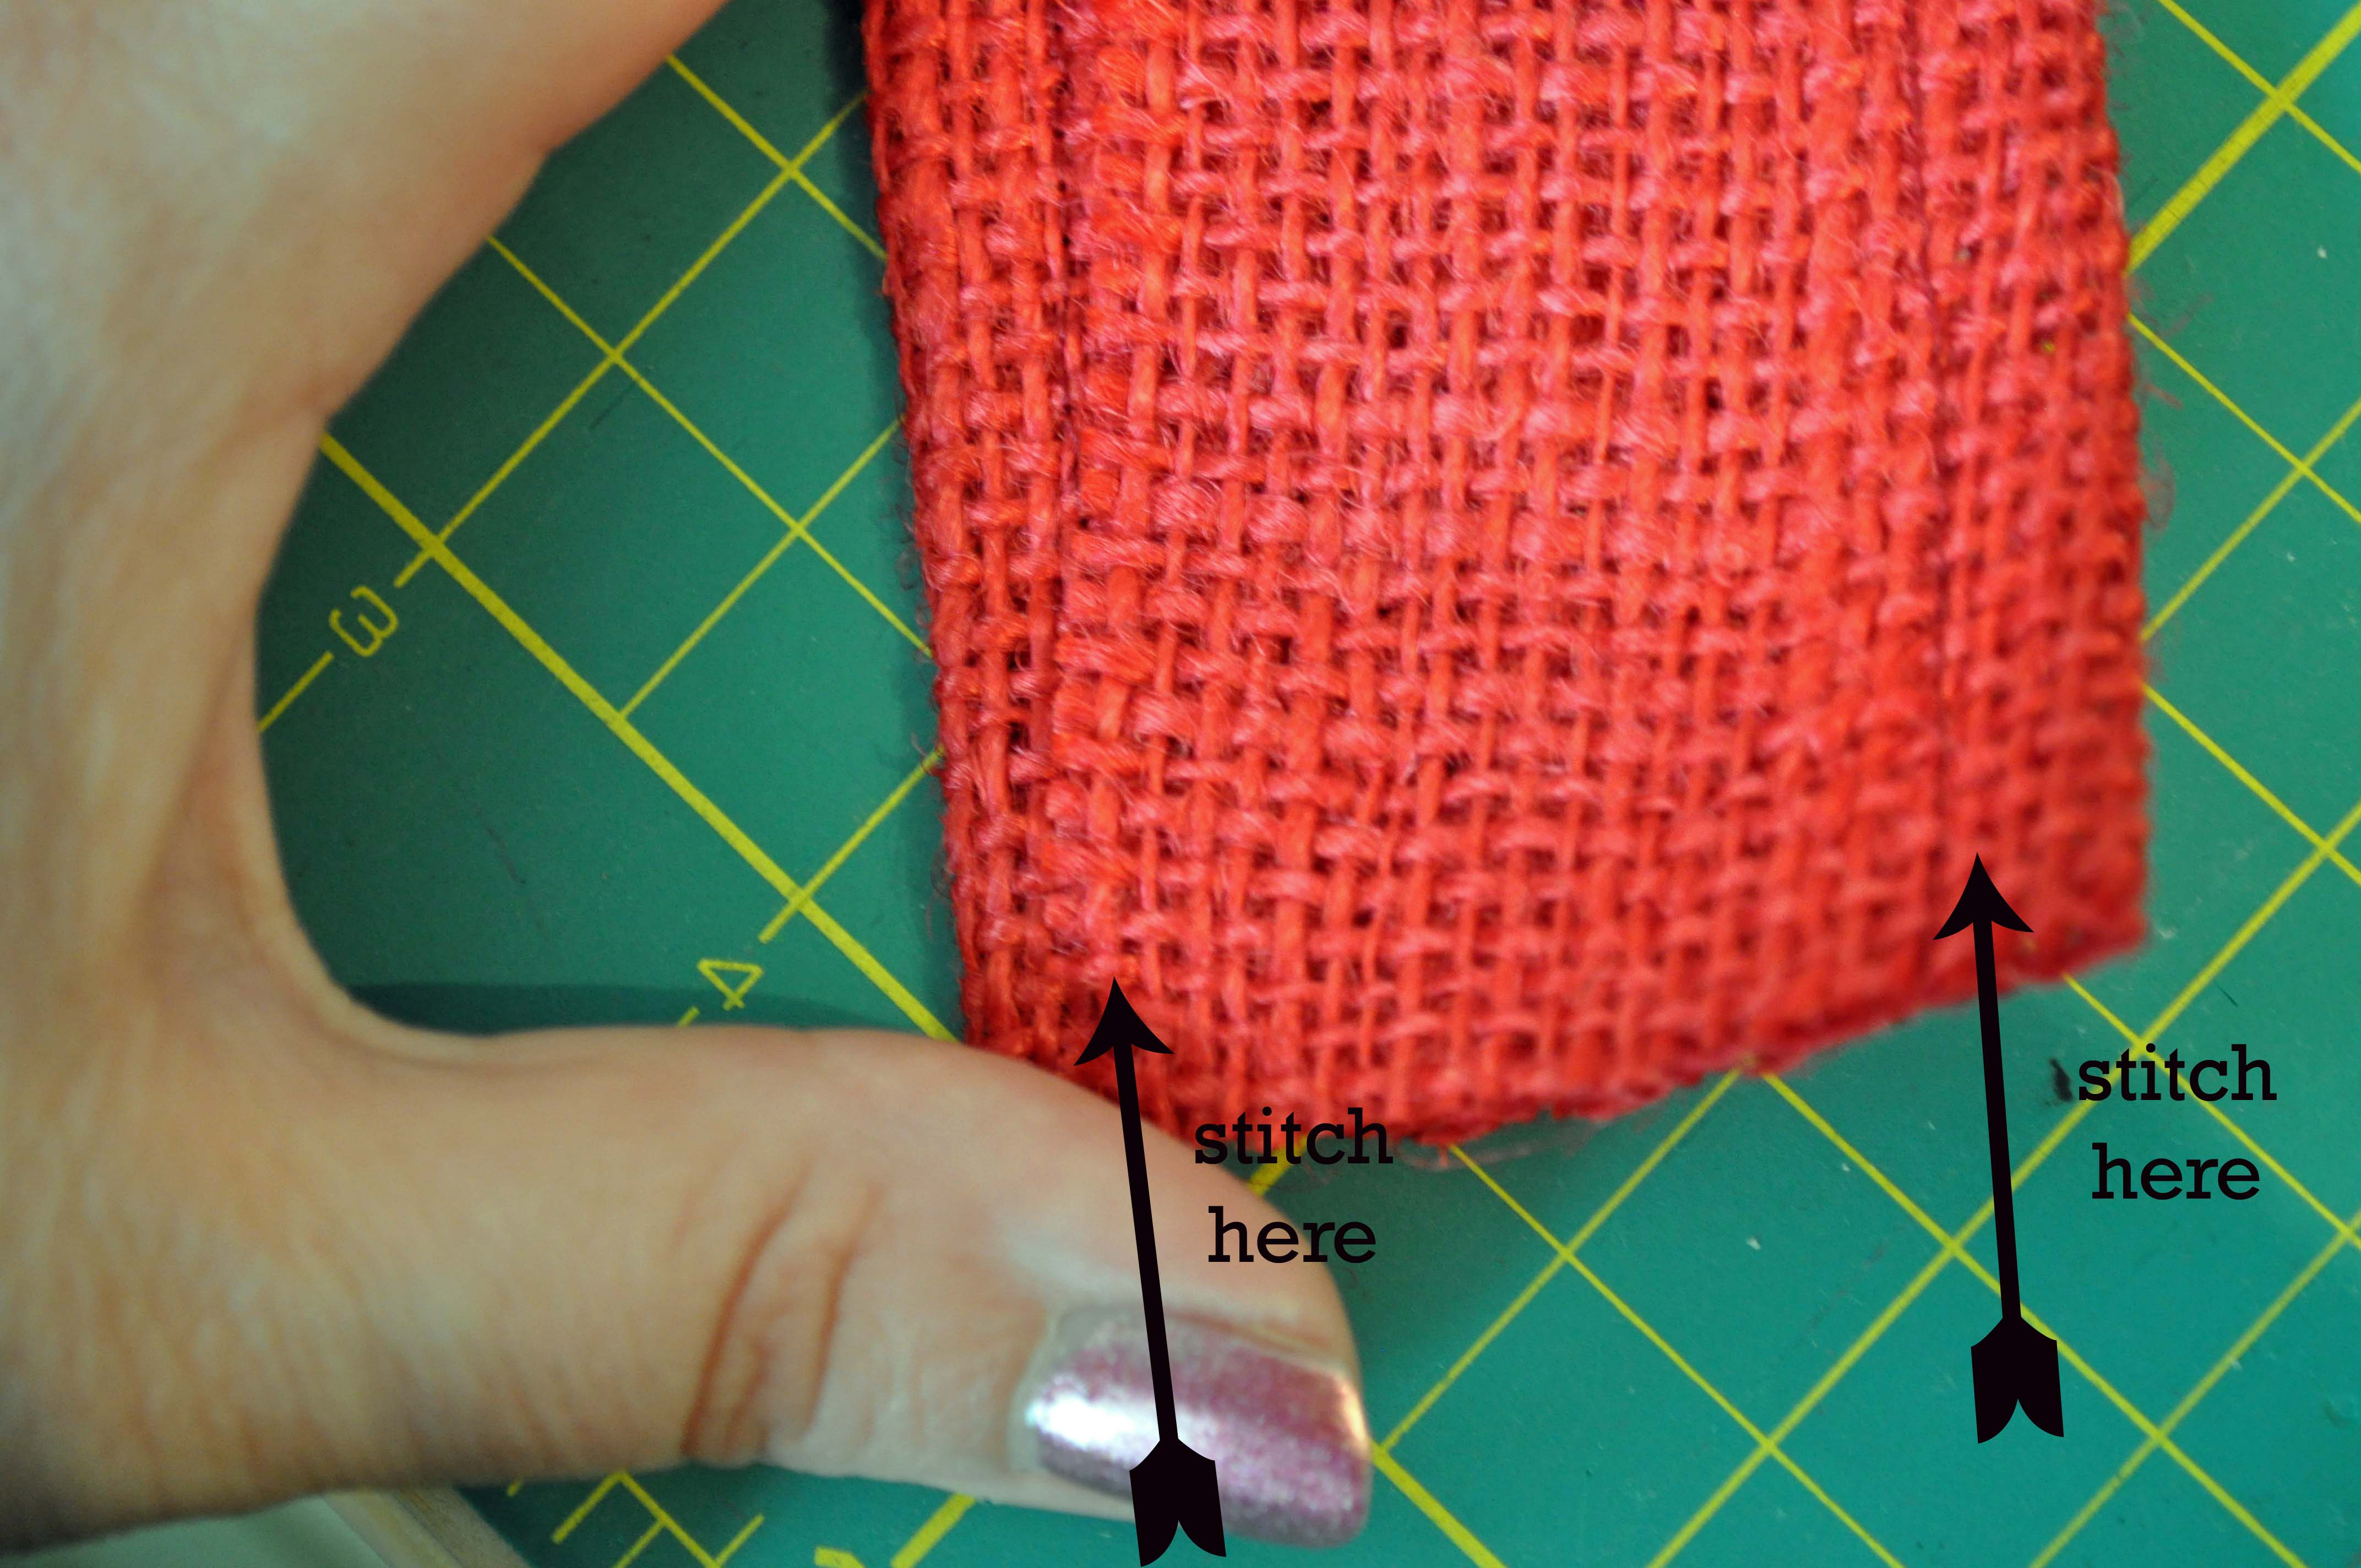
Short-sleeved, summer tops demand a good burlap and buttons cuff, don’t you think? Create this simple and rustic burlap cuff for your next walk on the beach. It’s hip and cool and so easy to make!
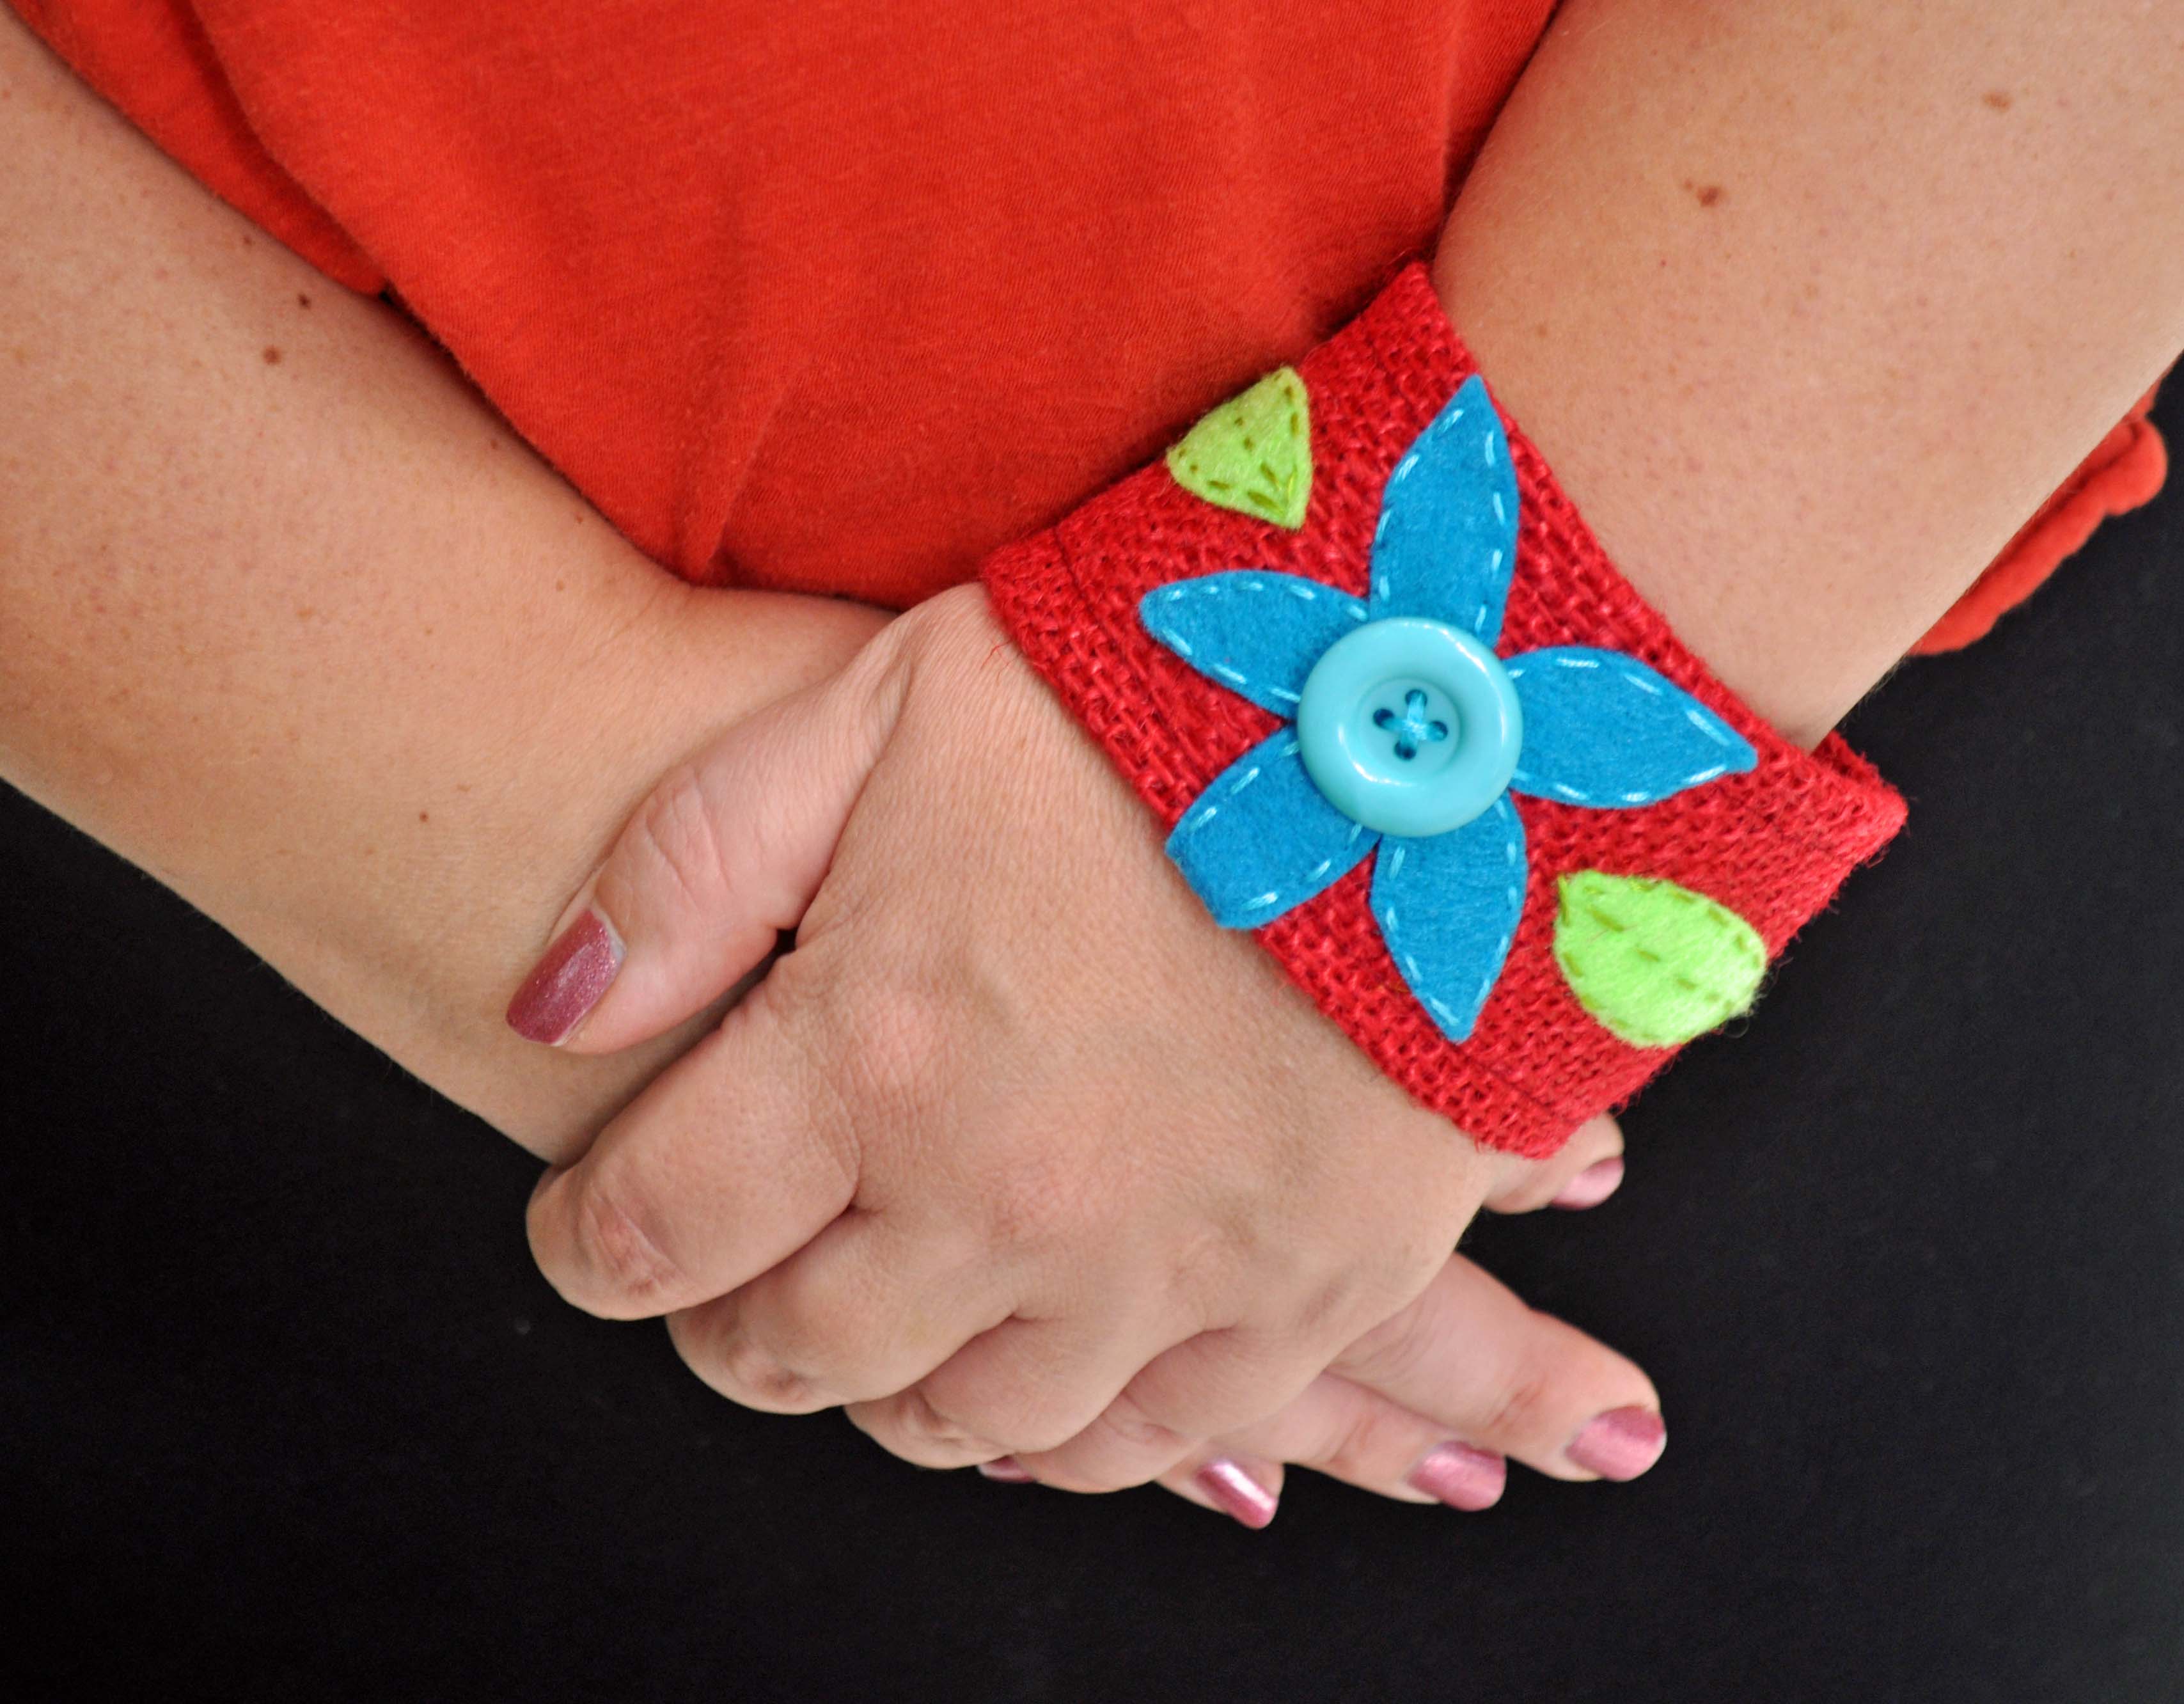
1. Fold the burlap into thirds to create a long strip measuring 10″ x 2″. Pin in place and stitch along the edges.
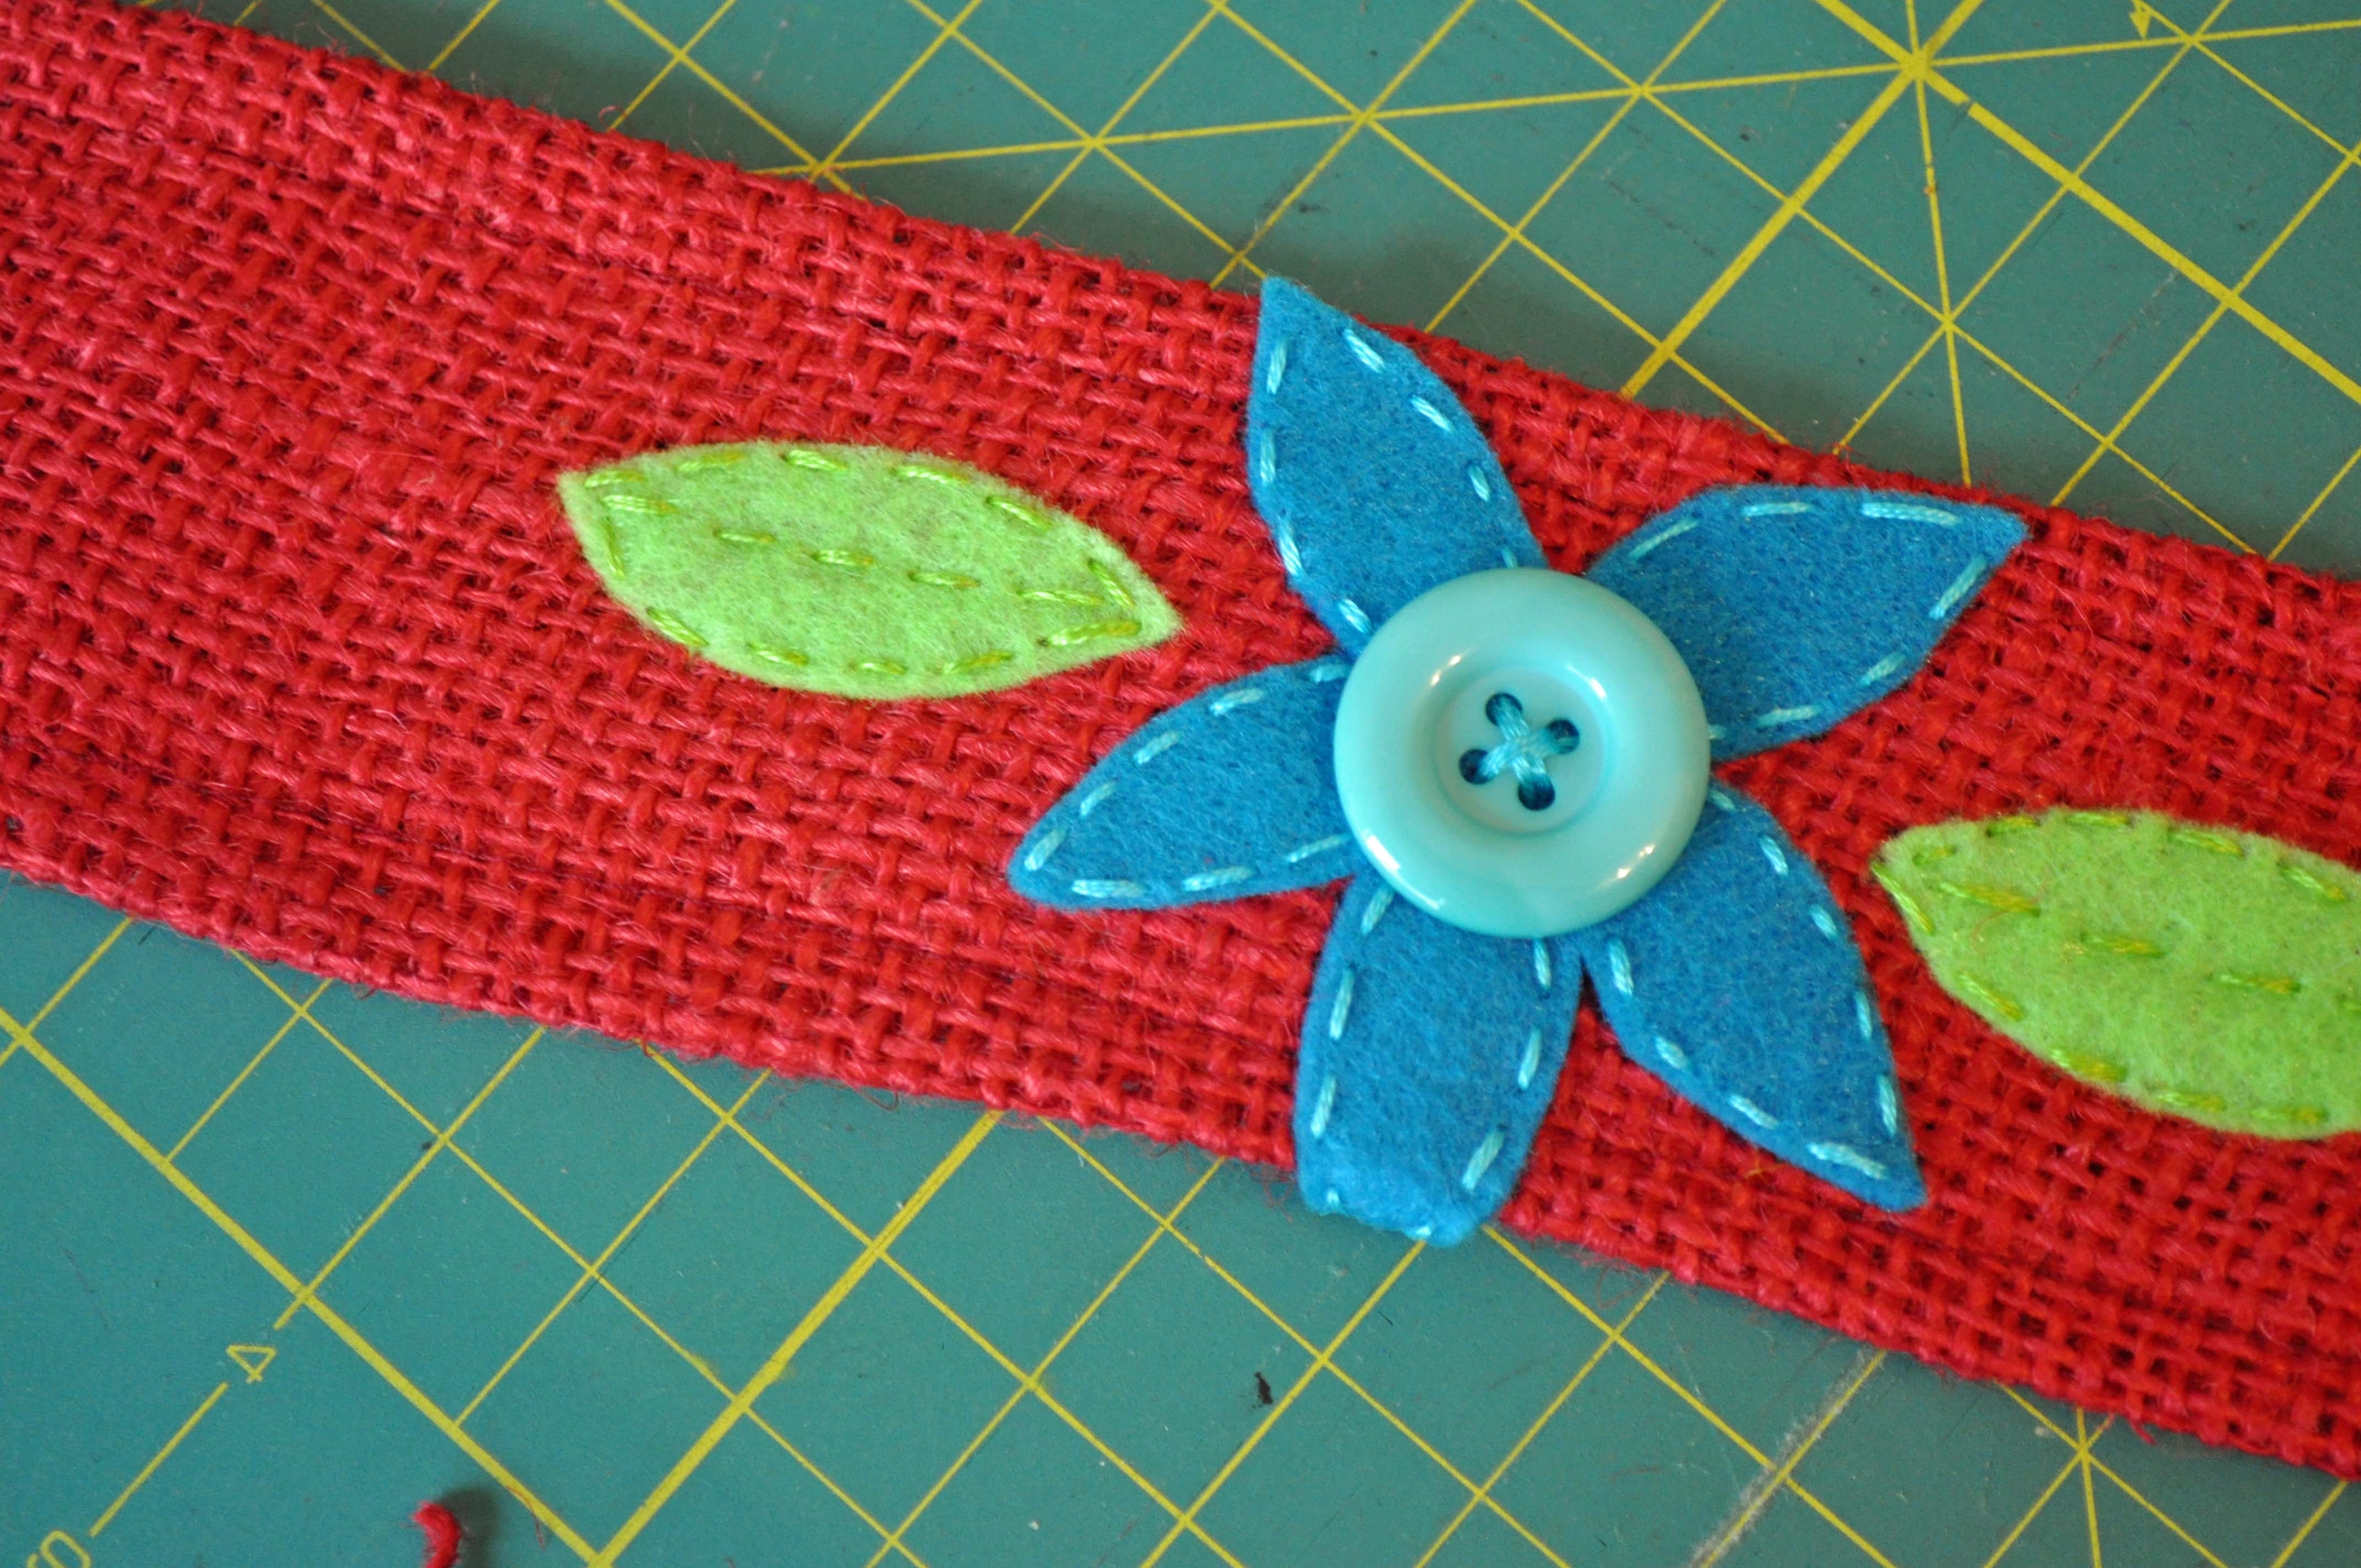
2. Using felt scraps, cut out petals and leaves to form a flower. Arrange in the center of the burlap rectangle and using embroidery thread, stitch them into place.
3. Stitch buttons into place. Use them for the center of the flower. You can really go crazy and add more into the design. (I strongly believe you can never have too many buttons on a project!)
4. Once the design is stitched in place, use embroidery thread to attach the two short ends of the cuff together.
Note: I measured my wrist at the beginning of the project and made sure that I could slip the cuff on and off. If you prefer a tighter fitting cuff, measure your wrist size and then use a hook & loop, snap, or BUTTON closure to secure the cuff on your wrist.
Thanks for getting crafty with me today! For more button crafts, stitching and lifestyle ideas visit me on my blog at www.laurabraydesigns.com.
![]()
For a fun button necklace, all you need is a thick chain, buttons and lots of jump rings. Don’t forget your pliers!
This button says sunshine to me!
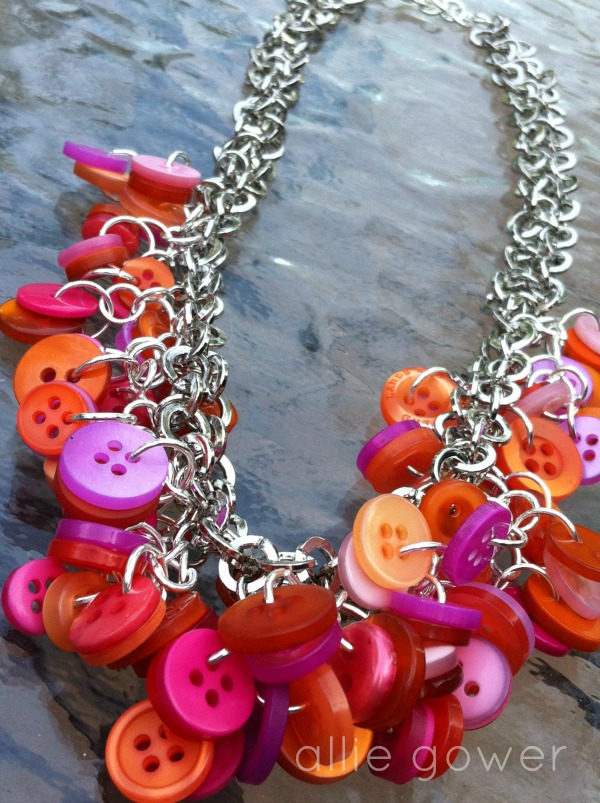
I gathered up a hodge podge of orange and hot pink buttons.

Pumpkin Orange

Sweet Blush
To change things up, mix different colors or add crystals, beads, or charms!
Give it a try. It’s inexpensive and FUN!

Thanks for stopping by. This week I’m linking it up with Real Family Fun!

To see more projects, tips, recipes and more, stop by My Card Party.
Visit us on Facebook for a chance to win some Laura Kelly buttons and a Me & My Peeps Decal!
First off, I love to alter things – so to alter a wood button was not outside my comfort range. At first, I was nervous but it just adds such a nice touch, and really accented the beads perfectly.
Do you really need to ask the question, to ink or not to ink? I mean really, don’t you just want everything to have your personal touch, a little added color? Buttons Galore has a variety of Carved Wooden Buttons and they are just little canvasses, waiting for you to create.
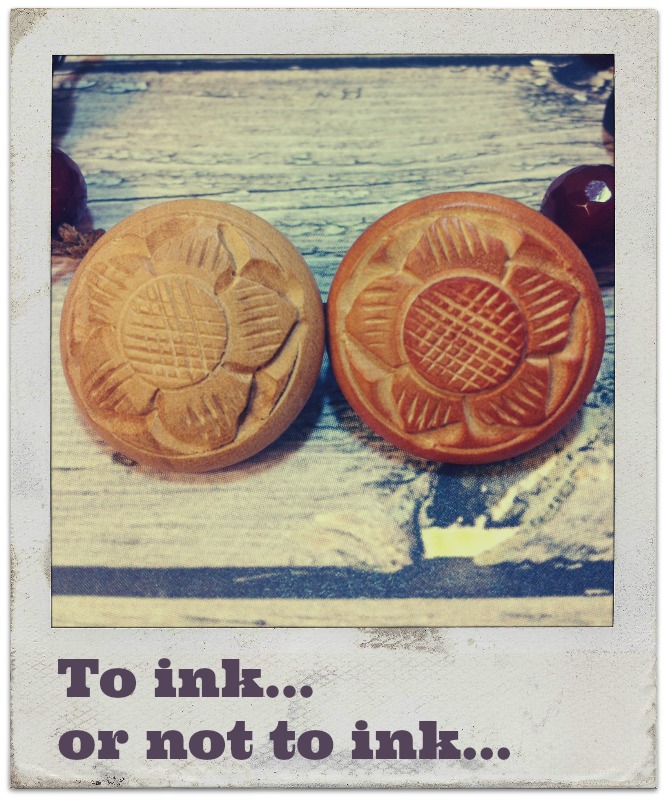
You will need a Carved Wooden Button and some Rustic Coconut Shell Buttons.
Additional supplies include hemp and beads, as well as ink, glaze, and applicator (Tsukineko/Imagine Crafts). The beads I used are faceted Carnelian beads.
Altering the Wooden Button

Creating the Ankle Bracelet
I hope you enjoyed this tutorial. With some different beads and buttons, you could really create so many different styles. With a little ink and glaze, you can really create a perfect match for any outfit.
See more of my creations on my own blog, My Card Party.
Thanks for joining me today. Since today is Independence Day, I want to wish all my American friends a safe and happy fourth. There is nothing quite like celebrating your freedom with the ones you love.
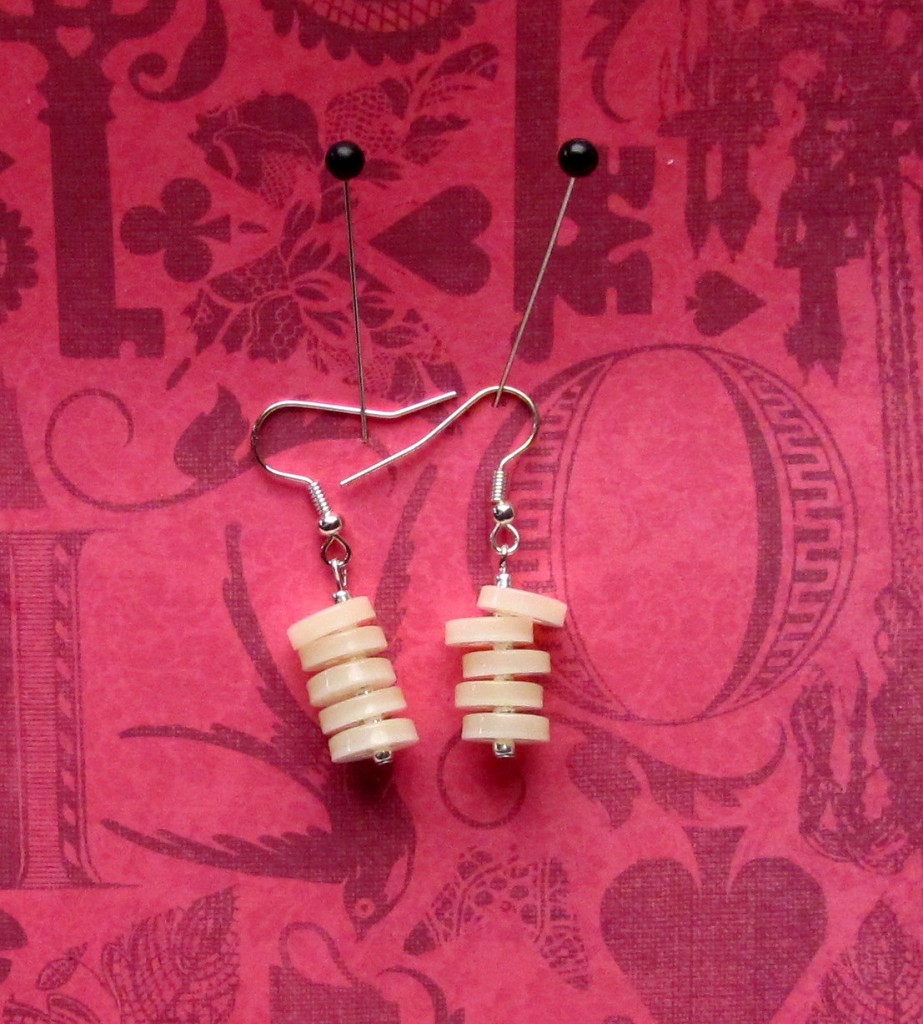
These Button Earrings are super quick and fast. You can even swap out buttons to match your outfit.
Why buy when you can DIY? I chose these Teal Ice buttons to match a new shirt I got. It took me MINUTES to create these earrings. Jump rings are pretty hardy, so you could easily swap out buttons. However, they are so inexpensive and fun, you’ll want to whip up a bunch for yourself and your friends! I like to have friends over to make things. This is perfect!

This could not be simpler.
If you’ve never opened jump rings, I’ll share a little tip – don’t pull them apart, twist them… One side away from you and one side toward you. Then, when you are ready to close them, you want to go back and forth a little, this actually strengthens your ring. If you were working with something tinier than a button, like say a wrapped bead, you could even put a little adhesive like Gem Tac.
I’m linking it up with Create.Craft.Love this week. Join the party. #linkparty
Wear and enjoy! Thanks for dropping by today!
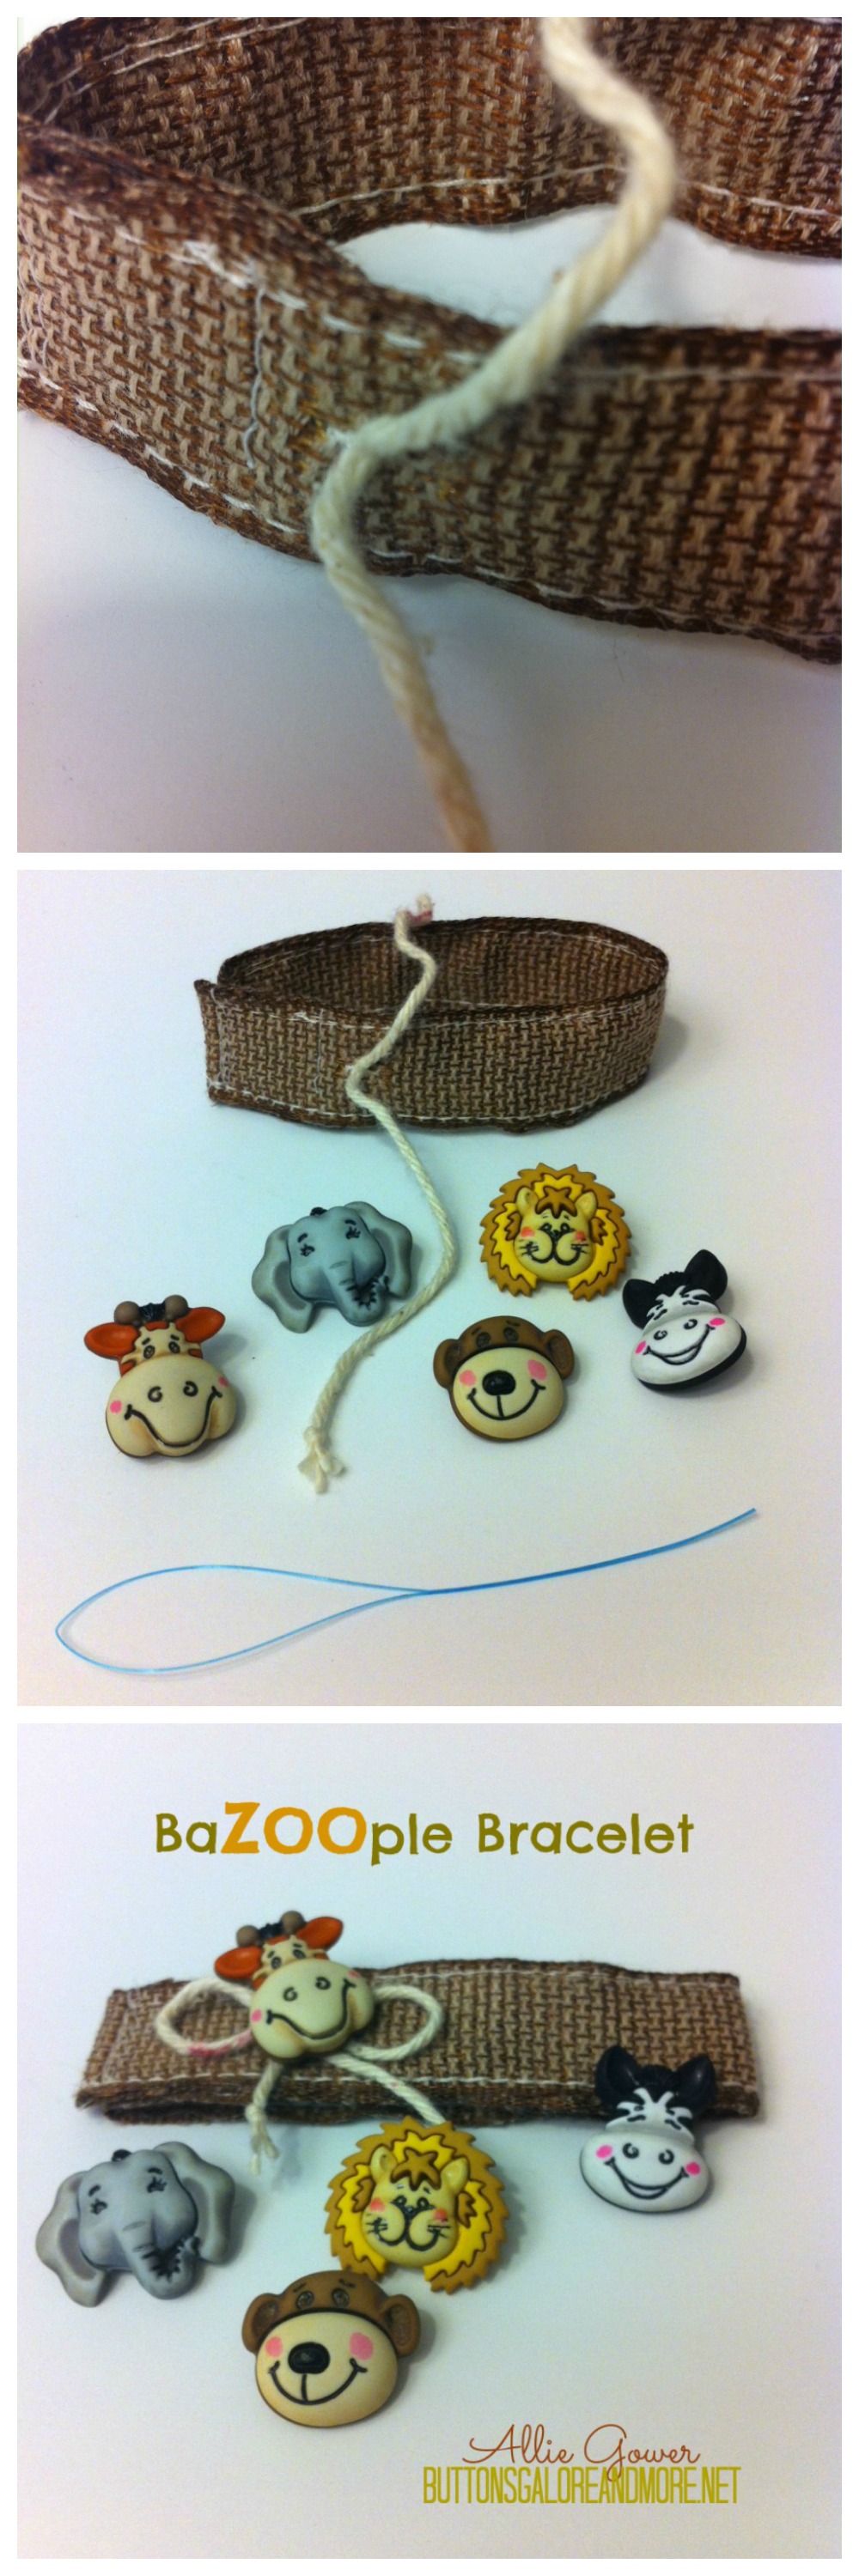
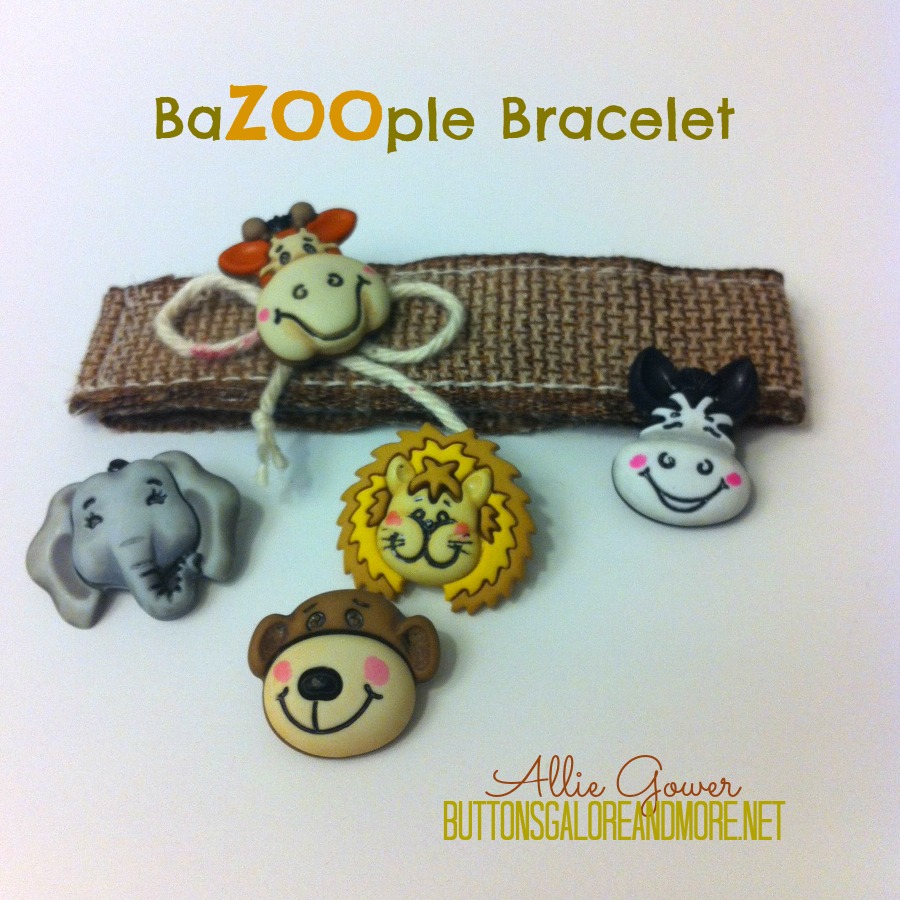
I’ve got a BaZOOple bracelet for you today. The buttons can be changed out.
We go to the Zoo a lot during the spring and summer, and I think this will be lots of fun to make and wear with the kids.

Supplies
I like to include a floss threader in my little bracelet kit. These can be found in the dental area of your pharmacy – they’re very inexpensive and they really make my life easier!
How to Create the BaZOOple Bracelet
It’s really that easy!
Thanks for joining me today.
See more of my creations at MyCardParty.
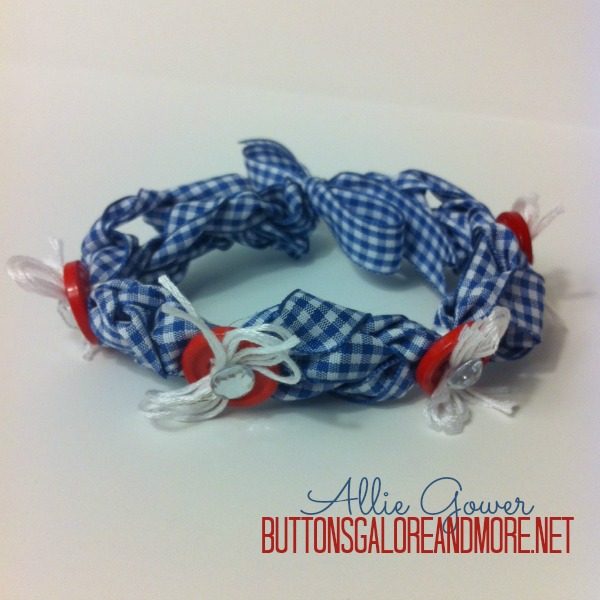
Create a Patriotic Bracelet with Buttons and Ribbon. This could easily be done with the kids in a variety of colors with lots of different buttons.
I’ve knit my ribbon by wrapping it around my fingers. As a child I would sit for hours and make yarn chains and pull them out. I guess I was bored during the summer! If you aren’t familiar with this technique, you could easily braid some ribbons.
It’s fun to find inexpensive craft ideas for the kids during the summer.
Thanks for joining me today.
See more of my creations at MyCardParty.
It’s so easy to make hair accessories with buttons. My daughter has long hair and the start of summer means lots of ponytails! I stitched up a couple of super cute ponytail holders for her using buttons and hair elastic. It’s a great project to do together. I just pulled out my button jar and let my daughter pick the ones she loved and then I quickly stitched them up for her. I have to admit, the wood button hair accessories are for me! I couldn’t resist the look of them.

Supplies:

Directions:
1. Hand stitch the button onto the elastic.
That’s it! You can make dozens in a an hour. They would be great to make for little girl party favors.

To make these ponytail holders, it’s better to use buttons without shanks. Of course, my daughter chose some with shanks. (I mean, who can resist butterfly buttons?) So I made a couple of additional ponytail holders using Jen Goode’s brilliant tutorial.

![]()
I created a mixed media necklace to share with you today. Mixed media to me means having fun. It’s more about the journey, and not so much about the results.
I like to incorporate elements that have meaning to me, or to the person I’m creating for. I love butterflies. They are all about change.

Note – this is what I used – use what YOU love. But of course, include some fun buttons! You don’t need everything on this list – you could play with paint, beads, remake an old necklace… The sky is the limit. Enjoy the journey!
Here’s a fun little video showing some close ups and tips.
Thanks for joining me today. Please share something you make with buttons, I’d LOVE to see it.
You can find me at My Card Party.
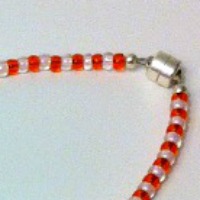
Hi, it’s Allie! It’s Thursday, time for some button jewelry, and I’m sharing a Buttons & Beads Necklace with you today.
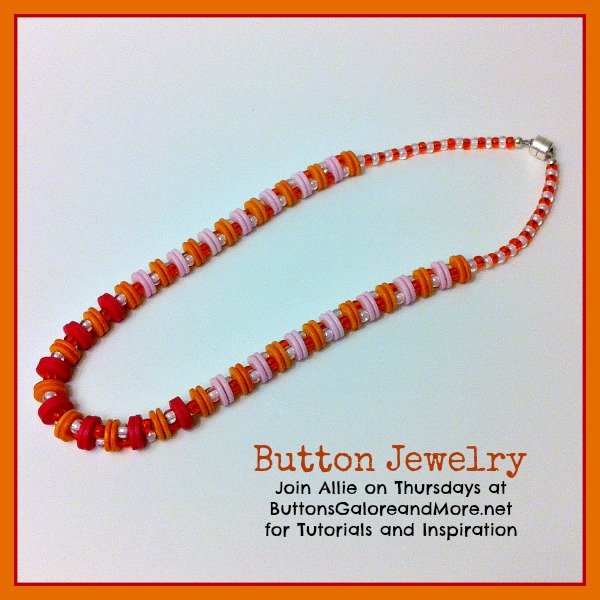
If you have a basic understanding of stringing, this necklace is super simple!
I went with a rainbow sherbet color scheme – pink lemonade, raspberry, orange – yummy, right? I used satin finish buttons – picking out all the same size, just because … The pinks (dark and light) are from the Victorian Collection. The orange ones are from the Tutti Fruity Collection.
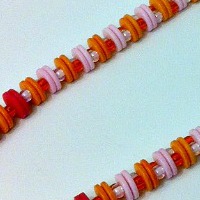
I used single seed beads on both ends and I strung the wire through both holes in the buttons, using a seed bead on the wire coming out of each hole. I went about 2/3 of the way around the necklace in this manner, and then brought both strands together with seed beads. I reversed the order of the seed beads after each set of matched buttons – just to add a little interest.
Simple Repetition
I finished it off this necklace with a simple magnetic closure and some crimping beads. I particularly like magnetic closures for kids – if they accidentally got caught on something, it would open. The magnet is strong enough to stay closed during normal wear.
Magnetic Closure for Safety
This would be so fun to do with the kids for summer! Are you ready for summer?
As a kid, I remember the first time I saw the Wizard of OZ, and I tried to capture all my memories in this Wizard of OZ Charm Bracelet. This month I’m sharing some easy Button Jewelry ideas. I hope you like them, and that you’ll come back every Thursday to see a new project.
I like to figure out how long I need to make a bracelet and then count the links, so I have a nice even variety of buttons and charms. My wrist is on the slim side – an average bracelet is about 7.5″. One thing to remember to take into account is how bulky your bracelet is – if it’s super chunky, you might need to go a little longer.
I’ll briefly go over what I used – the construction is pretty simple. Decide where you want things and add them with a jump ring. I used the satin finish buttons from the Teal Ice package. These are my favorite colors, so it was just a matter of what I liked! In addition to that I have some Want2Scrap charms – I used crowns, a key, a little girl, a music note, and a star – for the Wizard of course. In addition to the charms, I used an Epiphany Crafts punch to punch out OZ (from Graphic 45 papers) and Epiphany blanks and acrylic shapes (Circle 14) to make my OZ charms. The paper is actually blue, so the buttons went together nicely.
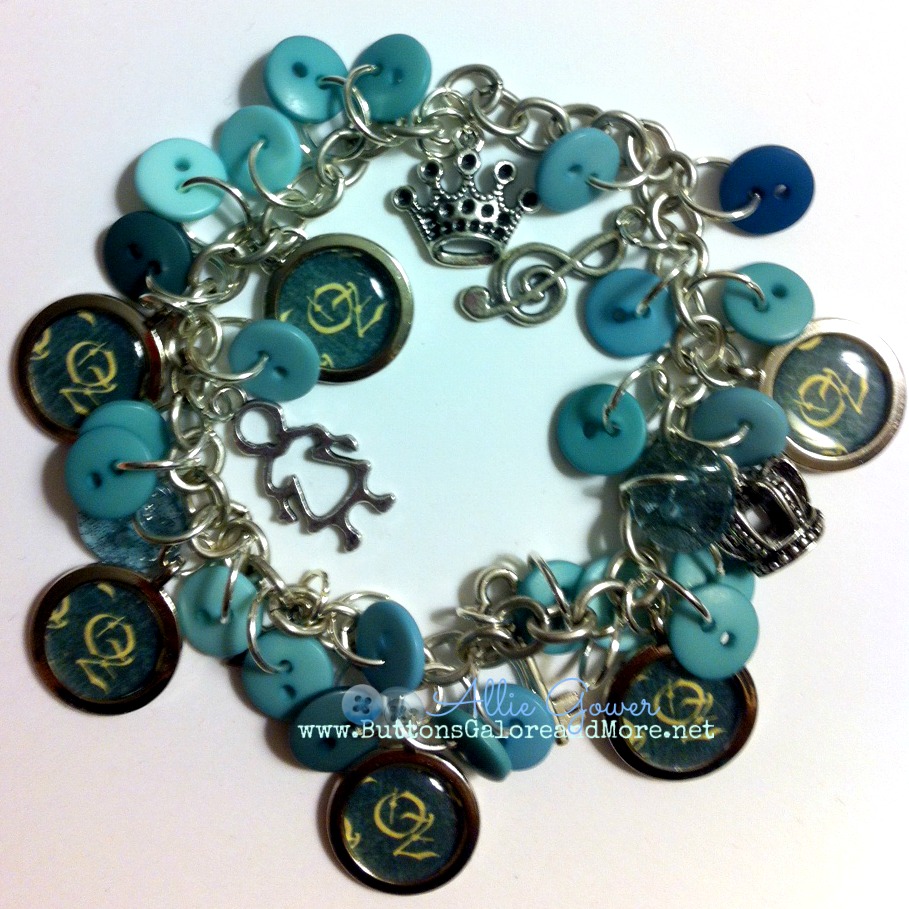
I hope you’re inspired to grab some buttons and charms and create a Charm Bracelet. I’ll be back next Thursday with some more Button Jewelry.
**Note – you will need pliers to open and shut the jump rings.
Today, I’ve got this shaker charm. These are easy to make and can be a wearable memento. I think of my Dad a lot in the Spring, and I think of a strong man. My dad was quiet, but in his silence, he always had so much to say. He left us in April 1997 after a brave fight with cancer, but he’ll be in my heart, forevermore. My dad let me share his work space to experiment with different crafts. I think he’d really enjoy seeing some of the things I make now. I’d like to share some Button Jewelry ideas with you this month. So, if you like jewelry, you will want to come back each Thursday for a new project.

These are very easy to make. This charm is 3×1″. I’m using a Memory Frame, Slide Glass and Capsules from Ranger Ink.
There are lots of different items you can place inside the capsule, and equally as many ways to decorate the slides and make this shaker charm a personalized memento. I left the back blank with card stock, but you could easily add a photo. When I’m not wearing charms, I like to hang them around the house – on knobs, lights, etc. My kids even wear them on their hoodies as zipper pulls.
I hope you’re inspired to grab some buttons and create a memory. I’ll be back next Thursday with some more Button Jewelry.
**Note – you will need pliers to open and shut the jump ring.
Buttons and Birdhouse Challenge Winners – we have a Winner Winner Chicken Dinner!
Thank you to everyone for viewing all the projects with buttons. We had our best participation ever and I cannot tell you how excited that makes me. Our designers place a lot of time, energy and love into each one of their projects in the hopes of inspiring you, our wonderful fellow crafters and showing you how to make really cool crafts. Enough of my mushiness and on to the important stuff.
Author: nancy (ntorresdir@xxxxx.com)
Website:https://www.facebook.com
Comment: permalink
my vote is for Mai Larsen, espectacular
Nancy, Please contact us with your shipping address. nikimeiners@ yahoo . com She will take care of it for you.
The viewers favorite was Mai Larsen. We are very lucky to have Mai as she is bi-lingual and has brought a whole new group of fans to our blog. Muchas gracias Mai. Speaking of Mai – she also had the most votes too. ¡Felicidades! Mai.

Stay tuned to the blog for some great button jewelry ideas. Thursdays this month will feature unique DIY jewelry ideas with buttons for everyone. Tutorials and instructions will be provide for some of the pieces and materials lists for the rest.
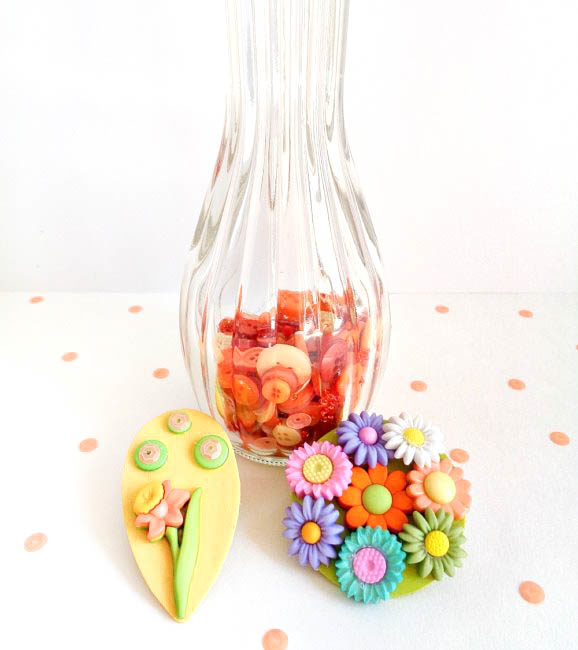
When I lived in Ohio, I remember all too well covering up my beautiful Easter outfit with a heavy winter coat. The way the weather has been going lately, I’m thinking this Easter might be the same so I created a piece of unique Easter Jewelry to pin to your coat.

If the weather clears up (let’s hope it does) you can pin it onto an Easter basket or tote bag, or you can even hang it on the wall.

1. Using the Quick Grip glue, attach buttons to the wood rectangle. I visually split the wood in half and filled the top in with the blue, Mint Cooler buttons and the bottom with the green, Candy Apple buttons to represent the sky and grass.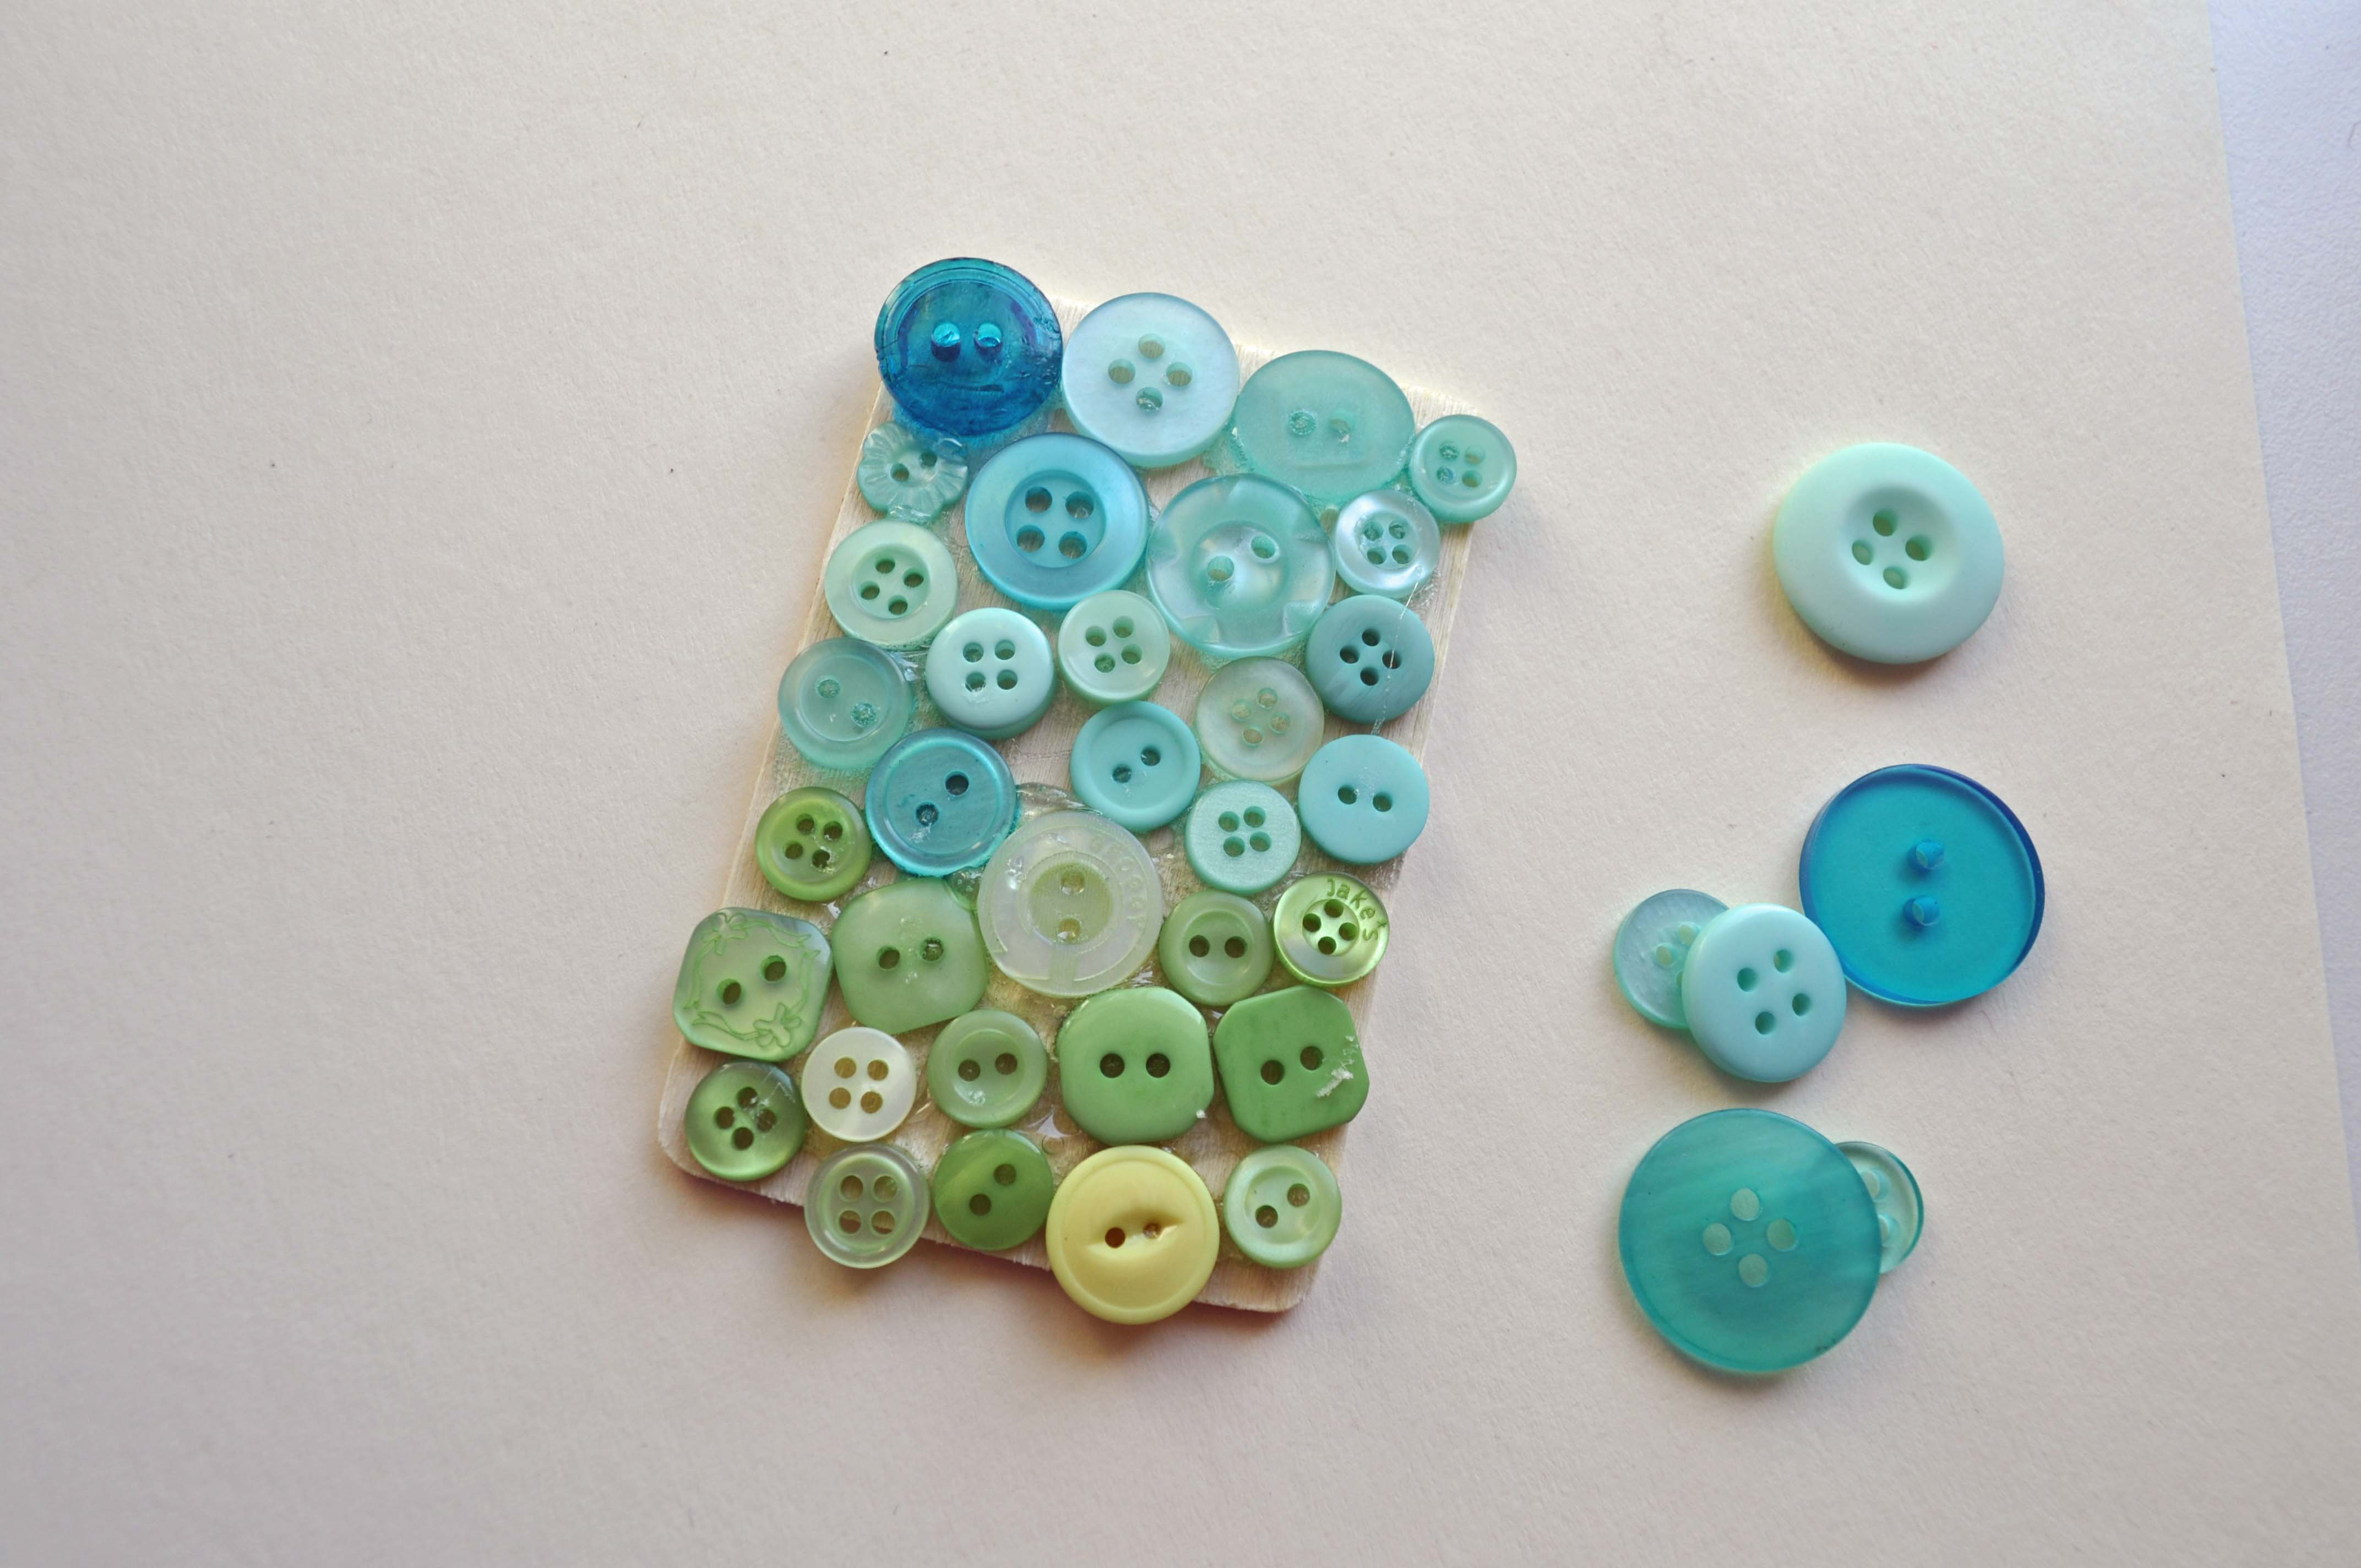
2. Glue the lamb onto the center of the piece, on top of the buttons.
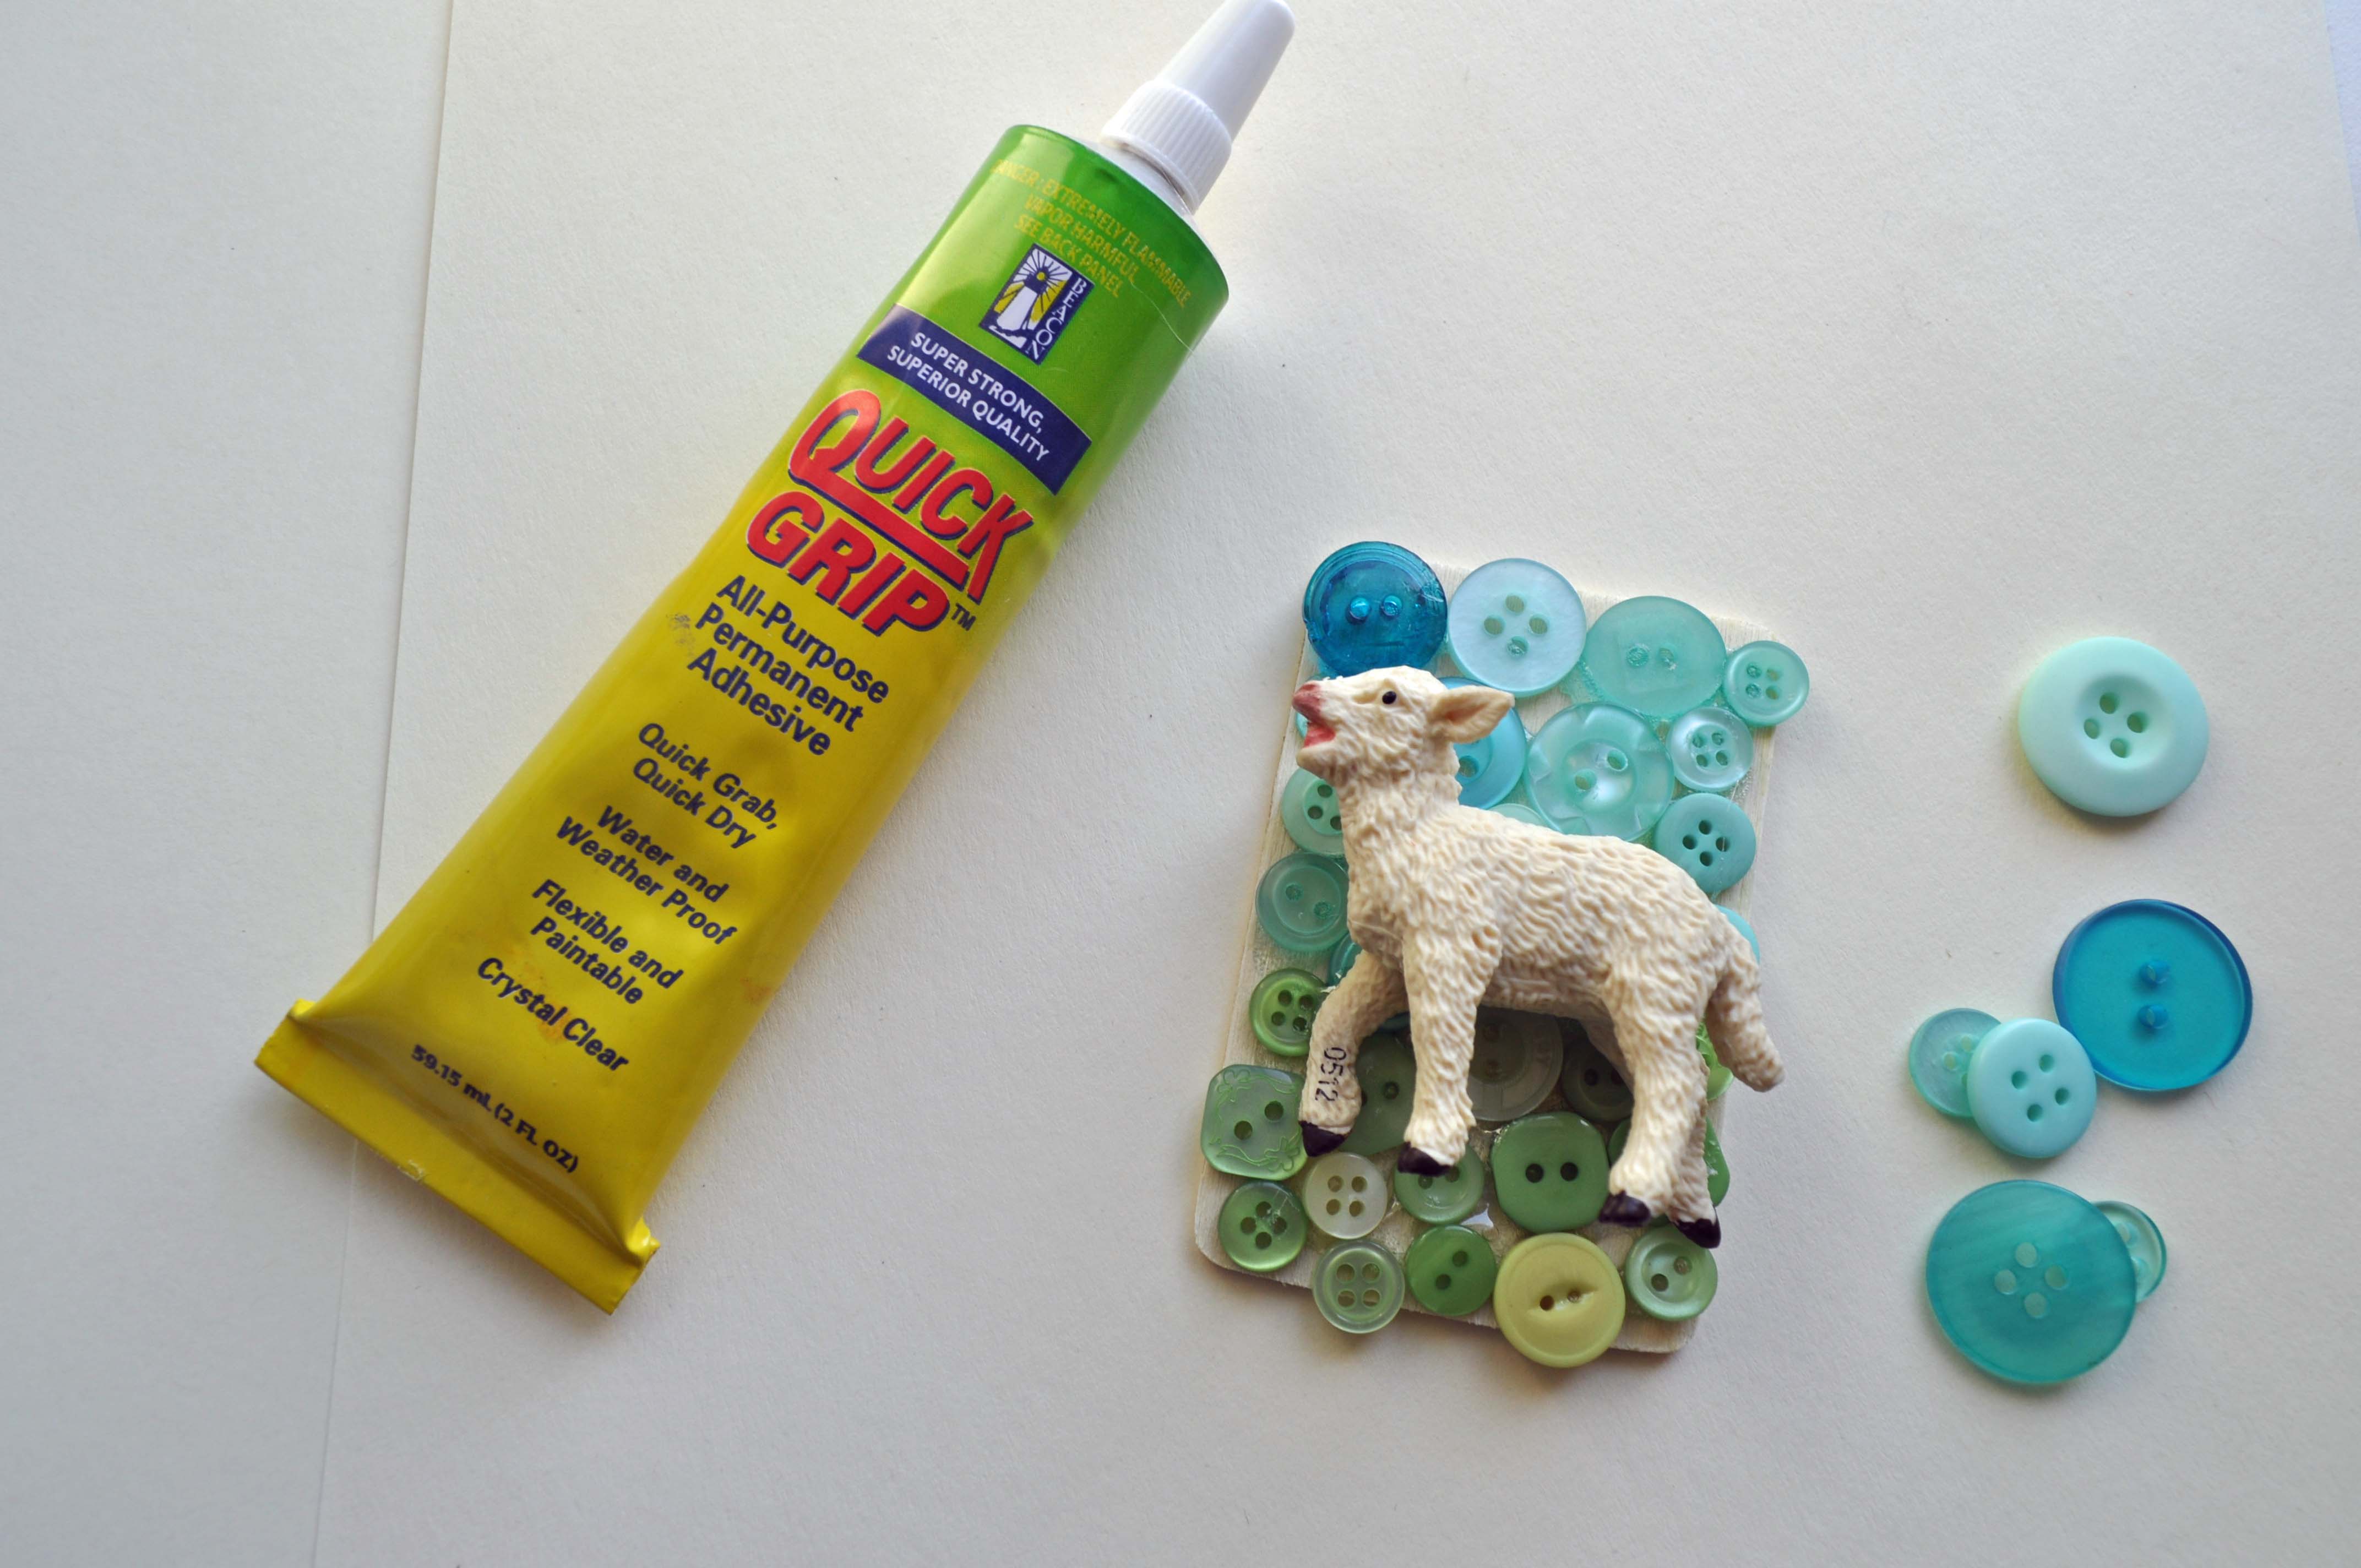
3. To add some dimension, glue more buttons on top of your original button layer. Don’t completely fill it in this time. You want to have different levels of buttons in the background.
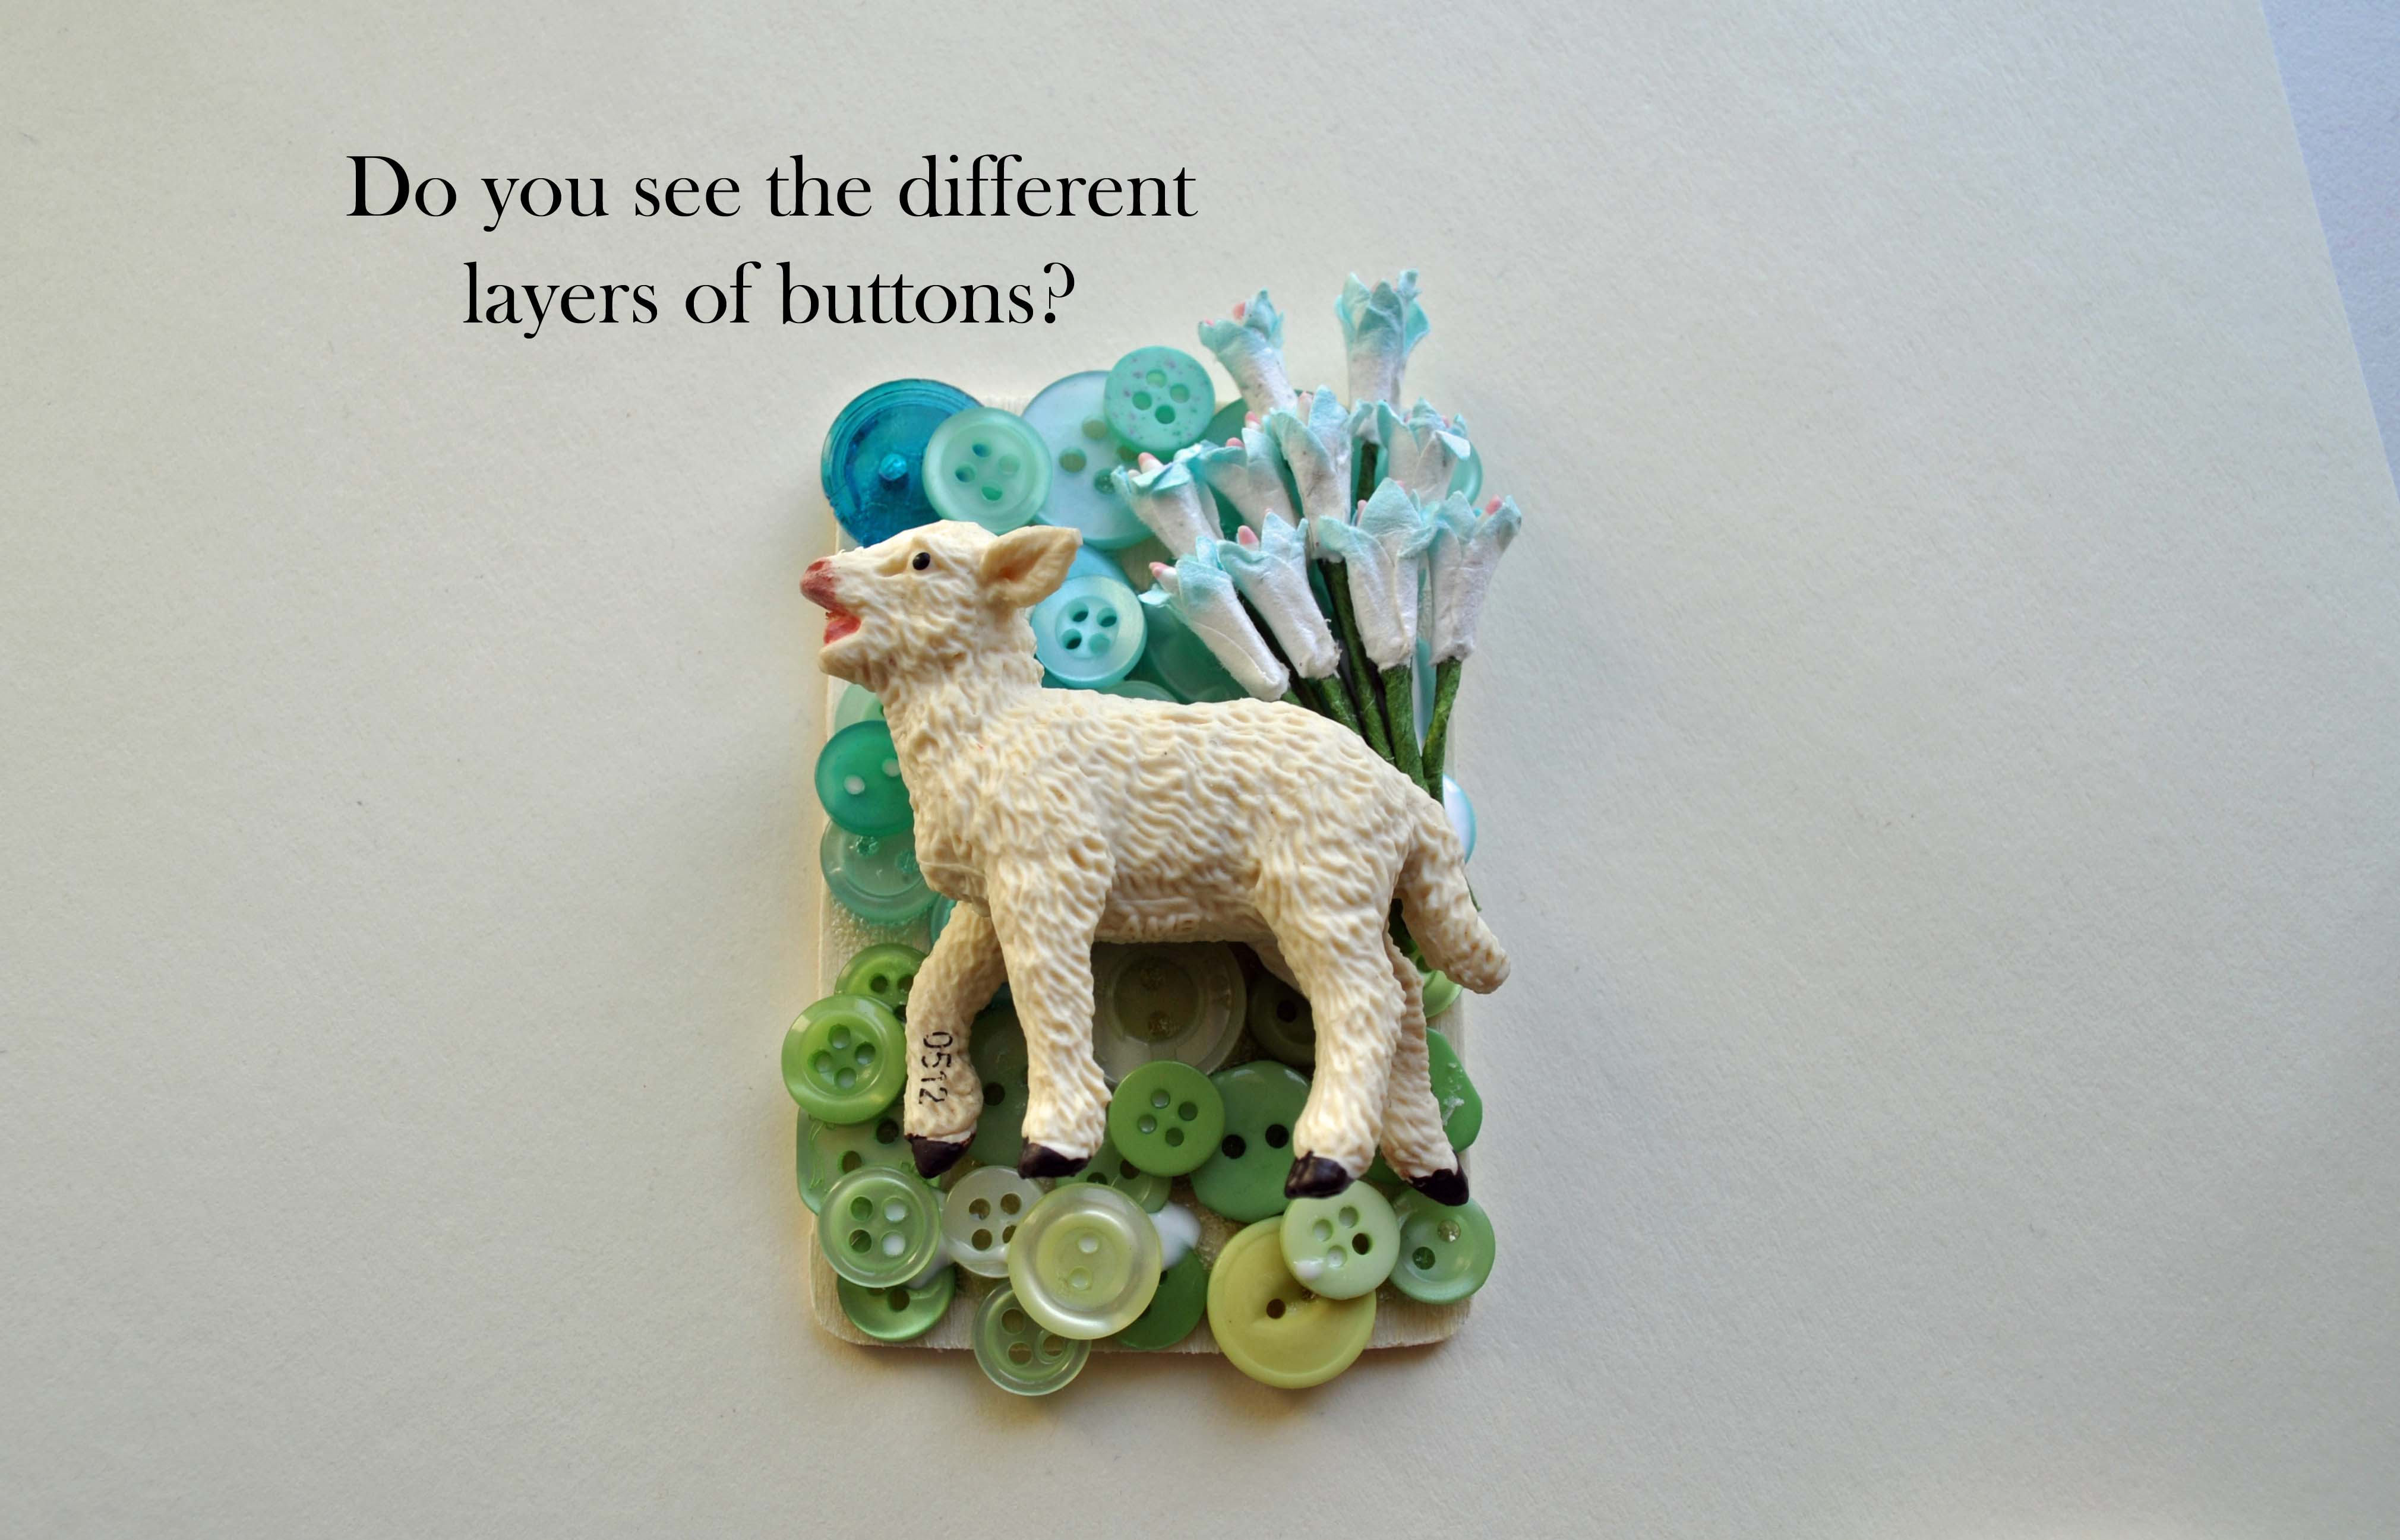
4. Glue the flower embellishments on to the piece.

5. Turn the piece over and glue the pin back on.
It’s actually a very easy project, that gives you really impressive results. I hope you’ll wear your pin proudly on Easter Sunday-no matter what the weather may bring!

![]()

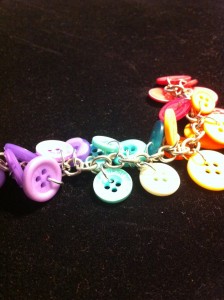
Easy Button Bracelet by Allie Gower
Ready for a fun and easy Button Bracelet DIY project? This bracelet is put together very easily. I used a variety of buttons, some fun Turquoise Bulk Buttons, along with Orange, Pink and Purple buttons from a bag of Color Bulk Buttons in fun sizes and shapes, and used Tiny, two holed White Buttons for a little more jiggle and dimension. On the colored buttons, I had to just sample and try to see which ones fit the jump rings I had on hand. It’s so nice to have a variety to choose from.
Directions for the Button Bracelet DIY
I attached colored buttons by jump rings to a chain segment, one per link. I attached a white button via a second jump ring to each of the colored buttons. Toggles are added to each end.
Note: be sure to take into account the size of your closure in the measurement of your bracelet, and add a little room for bulkier bracelets
Buttons Galore Products Used:
Additional Supplies needed:
You’ll need two sets of pliers, I use Half Round Flat Nose – these are lined with nylon so they don’t scratch up some of the softer metal jump rings. Chain nose pliers would be fine too. If you’ve never worked with jump rings before, Fire Mountain Gems has some great tutorials. This article “All About Jump Rings” is a great start.
I hope you enjoyed this easy Button Bracelet DIY – give some jewelry a try!
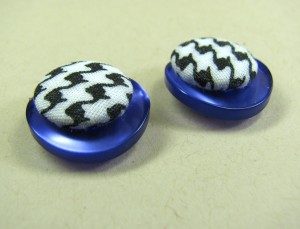
Don’t have pierced ears? I have the solution. Make faux pierced earrings. This is a great back to school project for your tween who wants to have pierced ears. If you’re not already buried in the reality of “back to school,” brace yourself… {It’s COMIN’!}
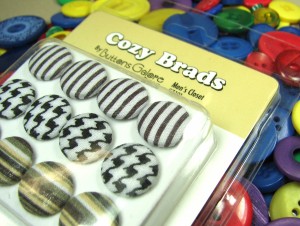
Here’s a quick and easy way to do a fun bit of fashion craft with a sweet lil’ student, BEFORE things get ALL about the backpacks and hand sanitizer… Cozy Brads “faux” pierced earrings, for back to school!
Blueberry Pie, Color Blends Pillow Pack
Ultra Thin, Paper Crafting Magnets
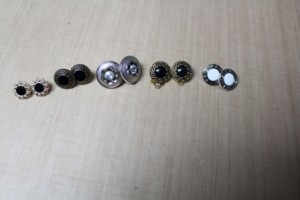
This adorable little fashion model is eagerly awaiting the opportunity to showcase PIERCED earrings, but since she’s not quite ready for the real thing, we made some, less invasive, faux earrings with gorgeous buttons and super, trend-setting HOUNDS TOOTH brads from Buttons Galore & More!
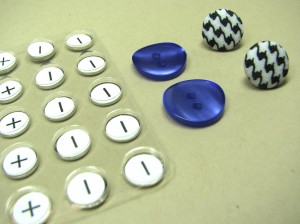
You’ll never look at buttons, brads and magnets the same! Thread the “legs” of one of the brads through one, of a two-holed button, of your color choice.
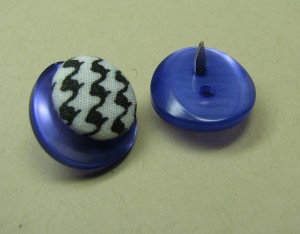
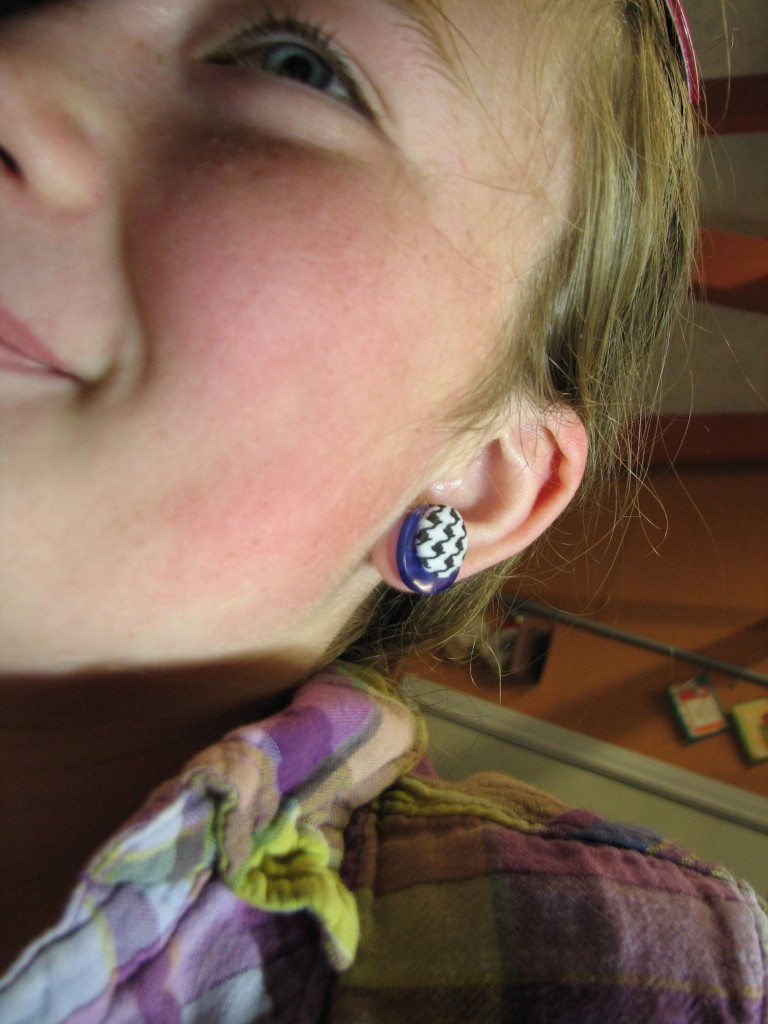
Flatten the brad legs, just as you would through a piece of paper, then apply a dab of Quick Grip adhesive.
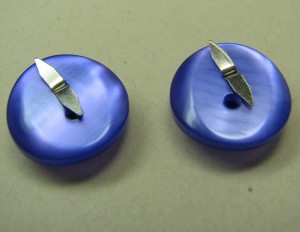
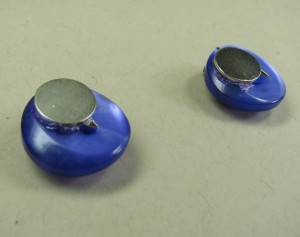
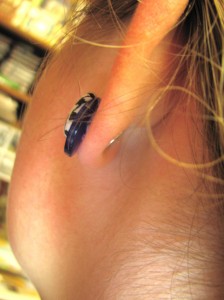
Set magnets in the glue, adjusting the placement against the brad’s legs. Having the natural attraction of the magnet AND the adhesive creates an excellent bond. Allow time to dry and then rub off excess.
Working from two-holed buttons will allow for a stunning, off-set accent, to the excitement of the hounds tooth pattern.
The “fashion model” seems satisfied with the results of her faux pierced earrings!
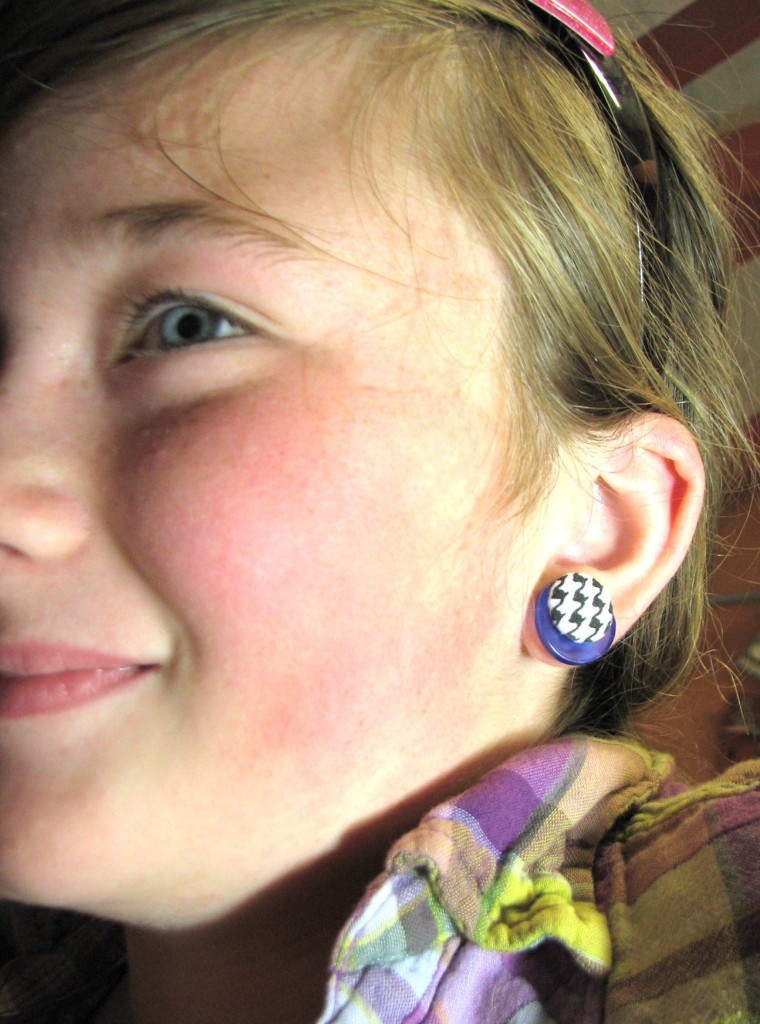
You can barely see the opposing magnet on the back of the ear lobe. With these ultra thin magnets, there is just enough strength in the bond to keep the earring secure, but not enough to make it uncomfortable! The model wore her faux pierced earrings for the day, comfortably! These will DEFINITELY be a part of the first day of school wardrobe for THIS girl!
Just THINK about how YOU can customize some “faux pierced earrings” of your own! HUGE possibilities! Have FUN!
Here at Buttons Galore we like crafts of all types and of all skill sets. We especially like seeing buttons incorporated into projects that have a “green” flair to them. The trendy word now is called UPCYCLED. We like upcycled, recycled, repurposed, eco friendly or green crafts. We find inspiration on Pinterest via readers sending us links. If you have a project you want to share please email us or leave a message on one of our posts. While surfing the net we found this blogger, A Splendid Assembledge, has a great project that would work great with our Big ol’ buttons. Heck, it would work great with almost any of our buttons. For a tutorial check out her blog. While you are there you should check out all her tutorials. She has some really fantastic ones.

Today’s guest Designer is Carlene, who is also know as the Pink Scrapper. 
This is a sample of her paper crafts and they can be viewed on her blog. But today she created something special – a video showing how to make a button bracelet. BUTTON BRACELET VIDEO TUTORIAL
Carlene’s Bio:
I have been paper crafting for over 20 years. I’ve gravitated from card-making, to scrapbooks, and now mixed-media and mini albums. I’m self taught and my favorite quote is “there’s no rules in crafting”. I love to create freely without any limitations. I also love to recycle, so you will often hear that I have been thrift store shopping because I find the best treasures there! I have been teaching locally for about 5 years, and own/operate my own online store. I love teaching and seeing students take a concept and add their own style and flair to it. That’s the best reward for me. I am a free-lanced mixed media artist for Prime Publishing, and have recently been published in Somerset Studio’s Gallery Summer 2012 edition. You can find my classes at ScrapbookNewsAndReview.com and more of my projects on my blog at PinkScrapper99.blogspot.com.
Hi there and welcome back!!! Today I have alot of info to share so get comfy! :) First I wanted to tell you about our June theme, then I have a really cute tutorial for you on how to make these delightful burlap & button rosette hair bows.
 Our theme this month if you didn’t guess by my intro project is Buttons & Burlap!

Keep any eye out for our Buttons & Burlap Challenge Contest coming later in the month...if you don't have any burlap or buttons you may just want to go get some...just thinking out loud here. ;)
So this month we were given a theme where we as designers have been challenged to work with Buttons & Burlap. I think you will really enjoy what the design team has cookin’ for you! And today, I have the first project and it comes with a FULL STEP BY STEP PHOTO TUTORIAL!!! Yay!!! Who doesn’t love a good tutorial? So let’s get started. The supplies I have used are:
Buttons – I think my two came from various Button Jar assortments.
Burlap – you can find this at most big box craft stores and it’s CHEAP!
Westcott Brand Rotary Trimmer, Cutting Mat, Steel Ruler & Tiny Thread Snips
Large Needle
Twine or Yarn
Sharpie Oil Based Paint Pens
Ribbons & Trims
Hot Glue Gun & Hot Melt Glue

Begin by cutting a 1.5" strip of burlap in your choice of color...length is not all that important but these were approximately 12" long.

Use a large needle threaded with twine or yard and sew a large basting stitch about .25" from one edge.

Pull on the ends of the twine used to create a gather. Tie a knot to the back of the rosette and spread the ruffles so that they are evenly spaced along the tied circle of twine.

Remove outer few bands of burlap to create distressed edges

Use hot glue to attach hair clip to back side of rosette

Create polka dots on surface of button using Sharpie paint pen

Tie a length of green twine through the buttons and tie in a knot on the under side trim ends with sharp snips

Liberally cover entire knot with hot glue

Press onto front center of rosette to finish hair bow

Alternate button idea - try out all the various color/pattern themes you can think of! Get creative!!!

Just a quick shot of the two side by side.
And finally my adorable little model (my daughter :) ) who was just over the moon to be getting such “high fashion hair bows” today when Momma was done working…. :)

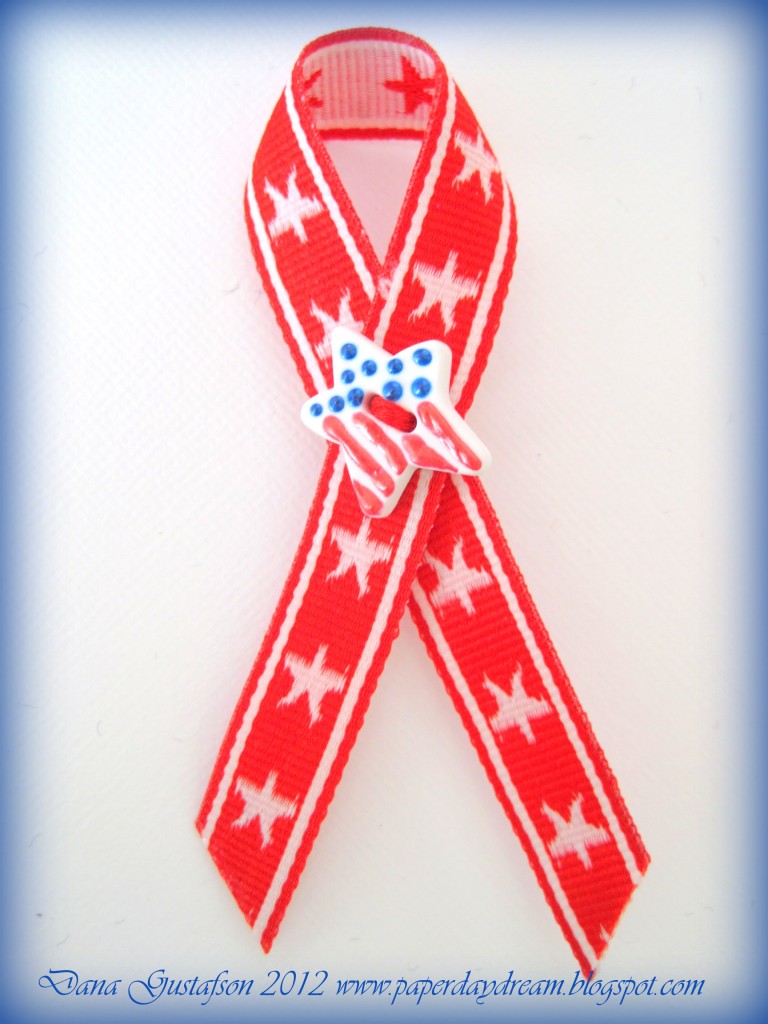
Here in the U.S. we will be celebrating Memorial Day at the end of May. We also celebrate Independance Day on the 4th of July. Today I am sharing a simple way to show pride in your country with handmade lapel pins.
Gather a few simple supplies…
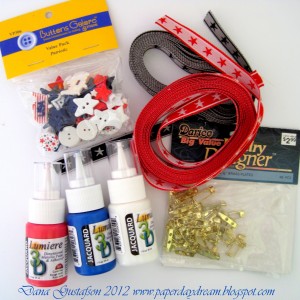
Supplies:
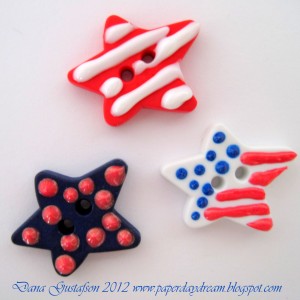
I chose to decorate the stars in the value pack using dimensional paint from Jacquard. Free handing dots and stripes is a breeze with the fine tip applicators on the bottles. Let the dimensional paint dry completely before the lapel pin assembly steps.
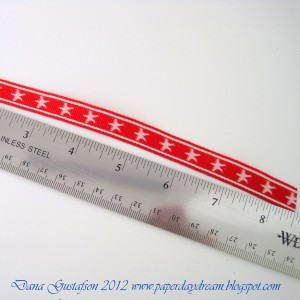
Prep your ribbons by cutting at approximately 8 inches long.

Using a contrasting color of embroidery floss, sew the lapel pin together with the looped ribbon between the pin back and the embellished button.
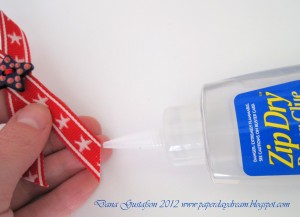
Run a fine detail glue like Zip Dry along the edges of the cut ribbon to prevent fraying.
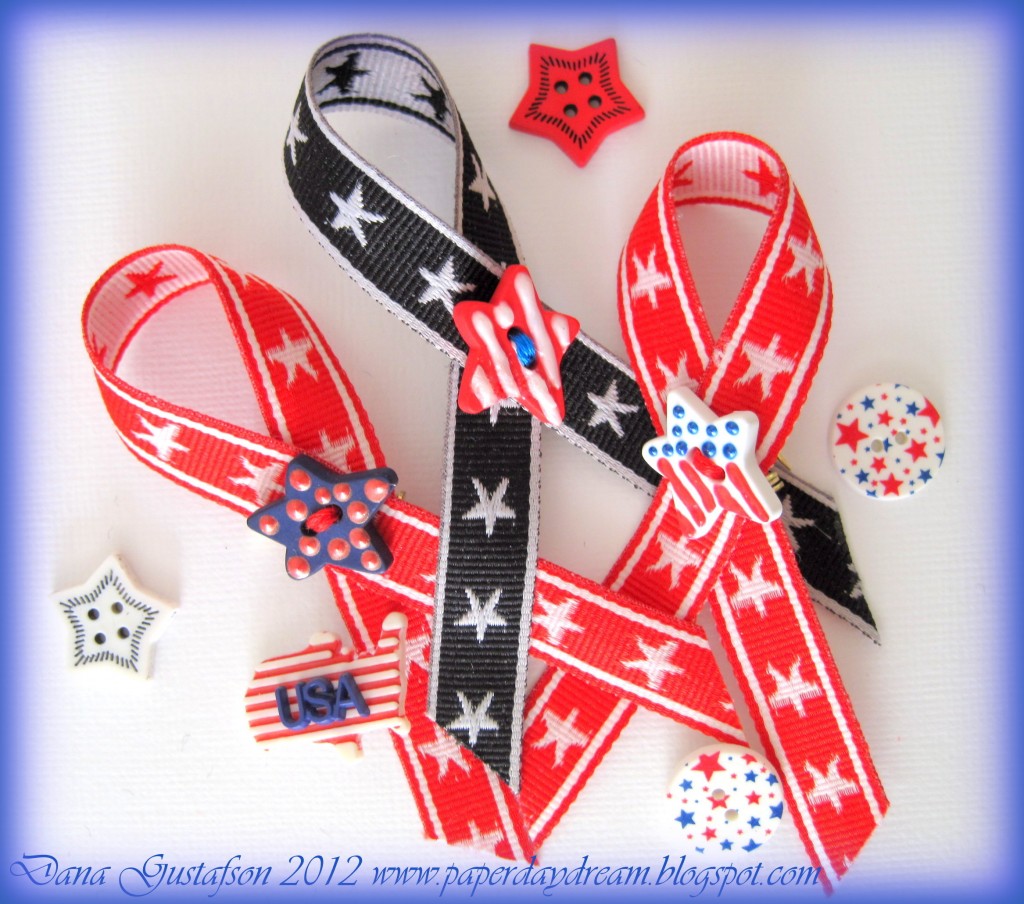
These are a snap! Make a few and share them with your friends and family. Not a lapel pin wearer? I’ve pinned these on the side of canvas tote or they would look cute on a hat too. Thanks for stopping by! Have a great one!
We have a ton of plain colored pony tale holders around the house. This is fine for me, but for my little princess, sometimes a plain ponytail just isn’t enough. Instead of buying a ton of different decorated rubber bands, make them yourself using buttons with the loophole in the back. It’s easy, quick and gives you the opportunity to customize the look of your little hair pieces. (This would even be great for grown up princesses, using some pretty shiny or elegant buttons ~ wink).

Ponytail holder made with a button

Make a ponytail holder using buttons

Pink flower button ponytail holder
The best part about these button ponytail holders is that I can change the buttons to make a whole new look at any time. There’s no glue or cutting… just pulling the rubber band through the button back and voila! You could add more than one button if you’d like, but I think you’d need a little bigger rubber band. I used a small 1.5″ diameter rubber band for this example. This would also be a fun project for kids to make!
What quick and fun projects do you like to use buttons for?
Well I hope you enjoyed my ring tutorial yesterday. I really enjoyed putting it together. I especially love when people try out my tutorials and then let me know how it worked for them! :)
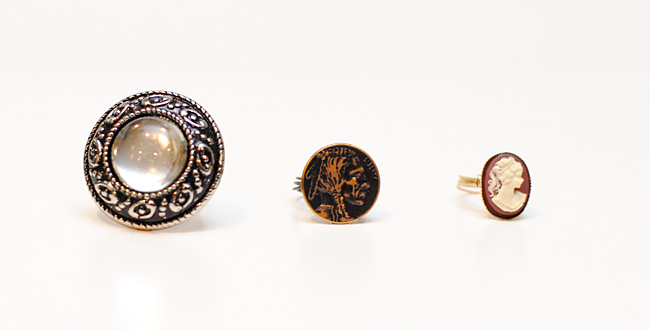
Today I just have a quick post to share with you. Here I wanted to show you a few more button rings I have made. First I will show you all three, then I will expound on them just a bit for you.
Here you can see that you can use buttons of all shapes and sizes. There’s no “right size” button for making a ring!

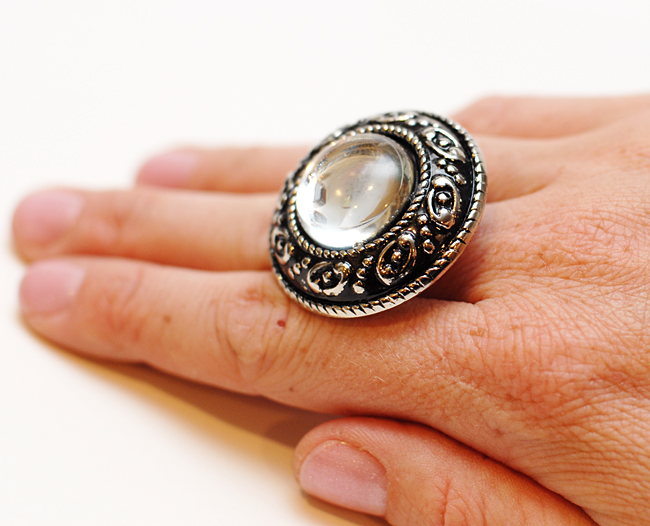
When I found the first one on the left in the Gold Bulk Button Pack I was thrilled that it wasn’t GOLD! LOL I was so excited to see it was silver because I am generally a “silver/copper/bronze” kinda gal… the only gold I typically wear is my wedding band and engagement ring. This button measures almost an inch and three quarters at the widest part!!! Suuuuch a fun “cocktail ring” size.
Here it is on my hand. Fun right??
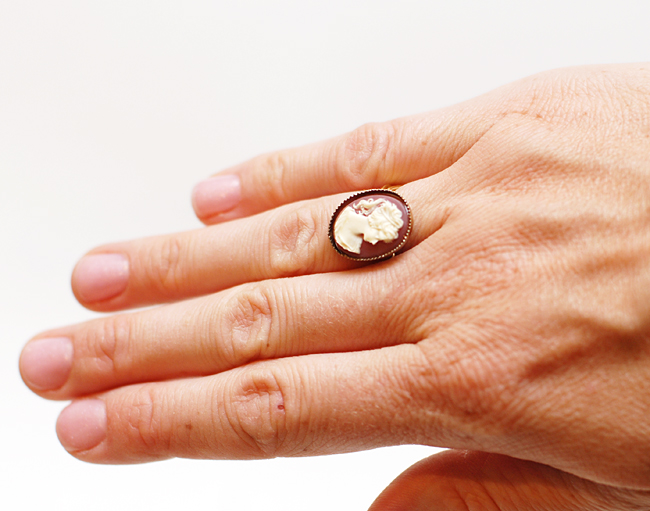
Well then I thought I would also make one from the sweet dainty little Cameo Button in the Genuine Vintage Button Tin. It’s just so little and cute compared to the ginormous one in the picture above, isn’t it?
 I have some really cute colored buttons that I plan on doing another ring soon with…I hope you will come on back to see them! Please be sure to comment with a link to your button ring creations. I would love to see what you have done either on your own or using the tutorial I created! Have a great day!
P.S. Be sure to check out our “Pin it to Win it Contest” that runs all the way through April 27th!!!

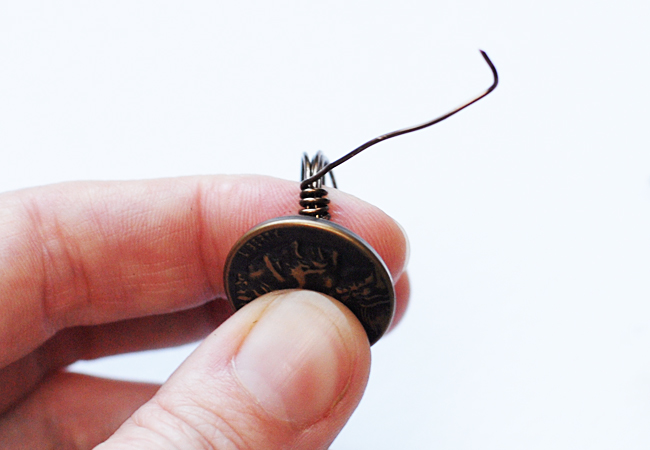
Good Morning! Today I thought it would be fun to bring you a tutorial on how to create a wire wrapped ring using a button from the Genuine Vintage Button Tin as the focal piece. In addition to the button you will also need:
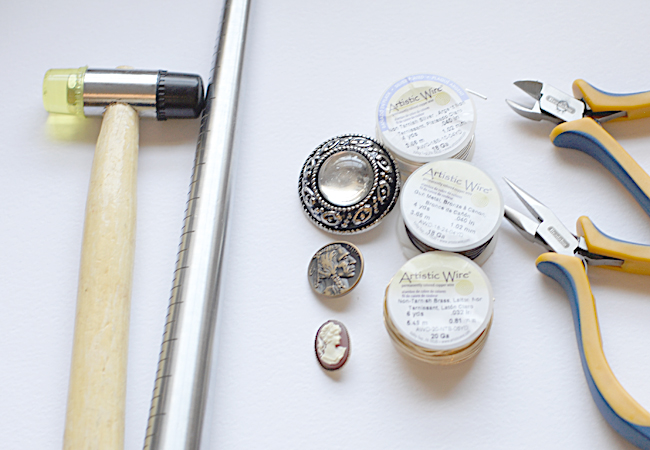
Supplies needed for an assortment of rings
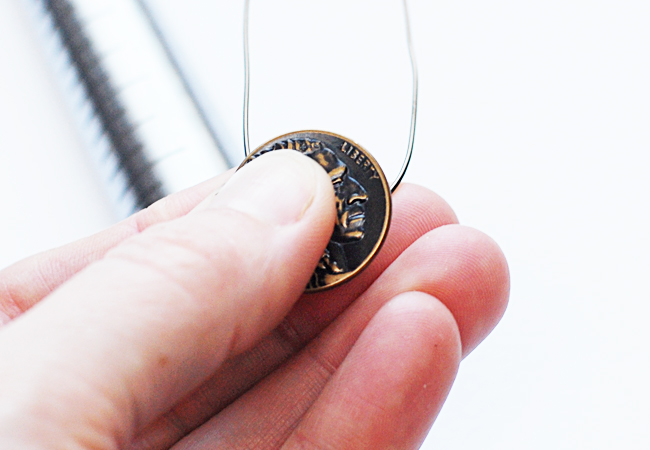
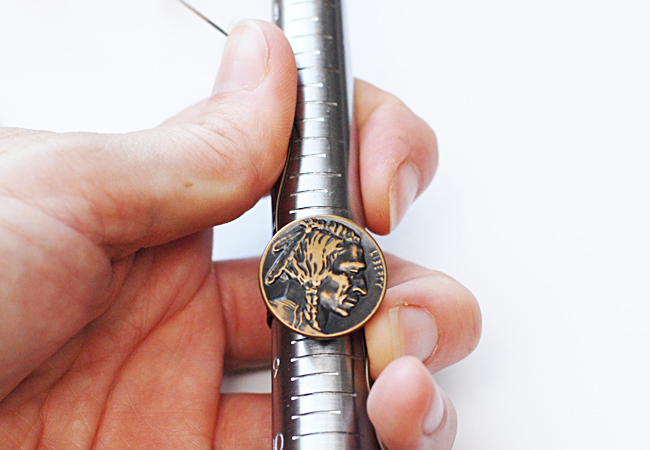
Begin by cutting a 20" length of wire. Run it through the shank on the back of the button, centering the button in the middle of the wire. Bend the wire into a gentle "U" shape.
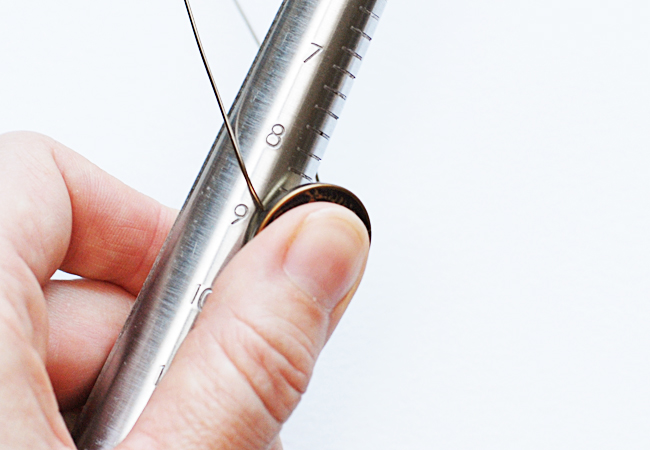
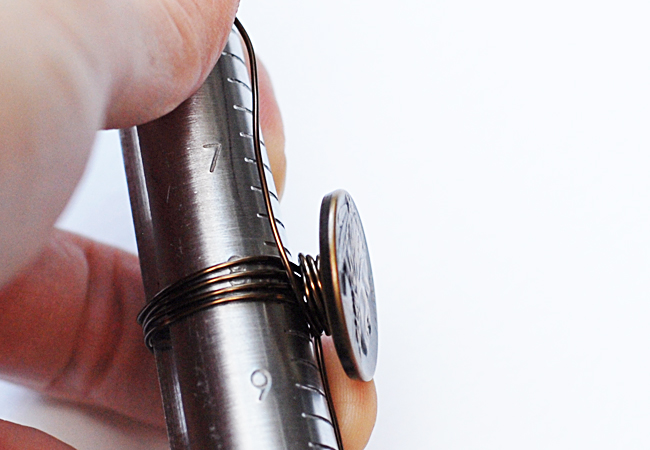
Place the center of the button onto the ring mandrel one full size larger than you need for the finished ring size. Here you can see that I need a 7 1/2 ring so I am beginngin at a size 8 1/2 on the ring mandrel.
Wrap the wire around the top and bottom of the button the mandrel so that you have four wraps around the mandrel.
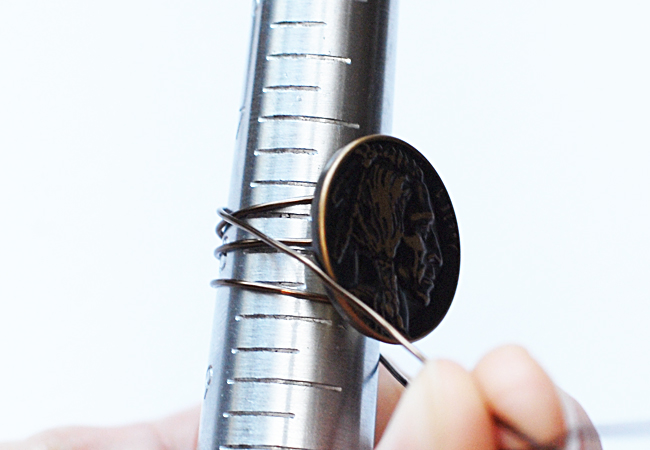
Pull the ends of the wire perpendicular to the mandrel and pull tightly to draw the wrapped sections to the center of the button.
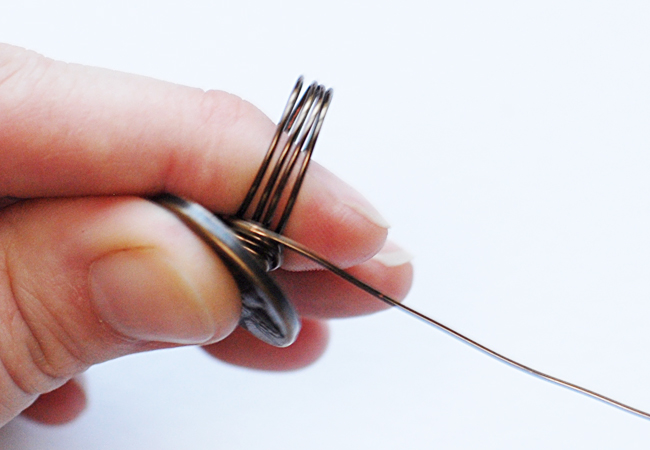
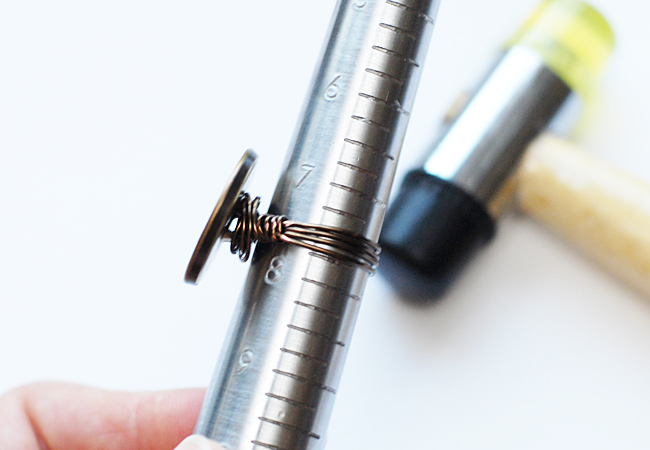
Begin to wrap the wires clockwise around the shank of the button. Wrap until you have atleast four wraps around the bottom, keeping pressure and tension on the wires at all times.
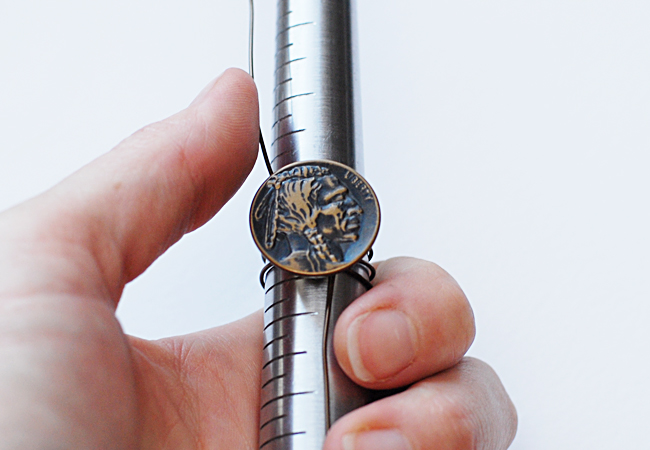
Again holding the wires perpendicular to the mandrel, remove the ring from the mandrel.
Pinch the button and the wire wraps between your nondominant thumb and forefinger.
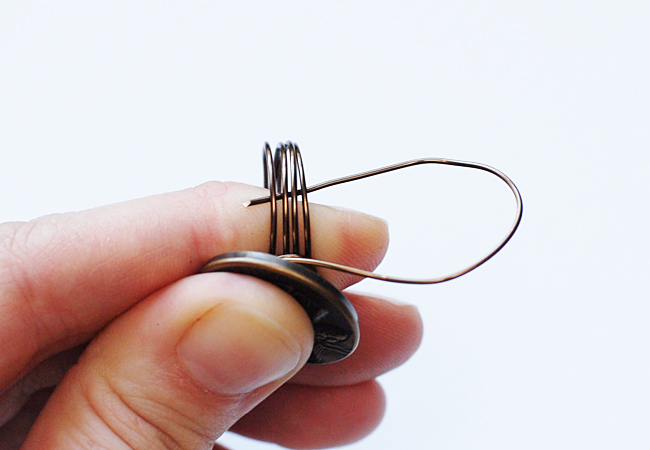
Using your dominant hand, wrap the end of the wire under the four wraps, then back up and around the wraps.
Continue to wrap three or four more times, pulling tightly each time. Make sure to keep the four wires flat against your index finger for a more comfortable fit.
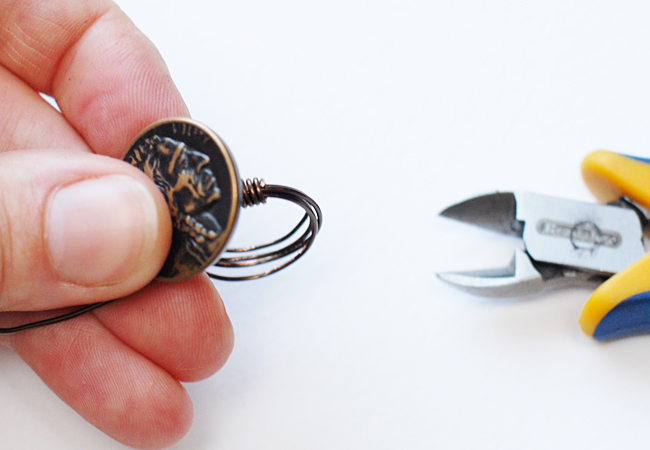
Using wire snips, clip end of wire close and press clipped end down using chain nosed pliers. Repeat wrapping on other side of ring.
Place wrapped ring back on mandrel and being to hammer ring down mandrel. Remove ring, flip it and hammer it back down toward thick end of mandrel to make sure both sides are fully formed.
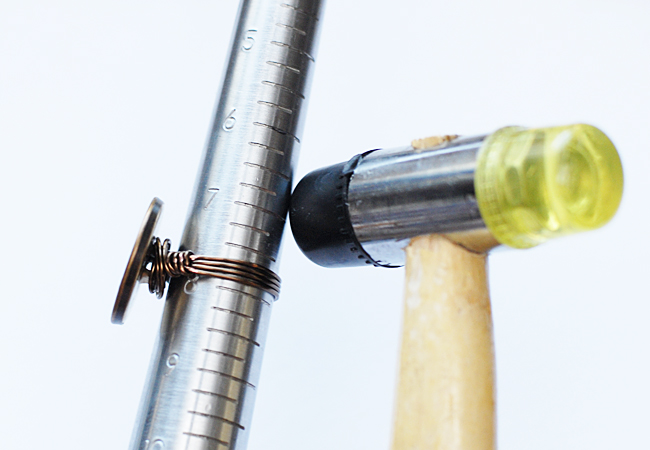
Tap around entire ring from side of button to side of button to work harden wires and make sure that the wires are going to lie flat.
Finished Vintage Button Wire Wrapped Ring
I hope you have enjoyed my first button jewelry project here on the Buttons Galore & More Blog! Be sure to add us to your reading list or subscribe so that you don’t miss out on the next one I have planned. It’s one that you will not want to miss!!! :)
K
P.S. Don’t forget to enter our PIN IT TO WIN IT CONTEST!
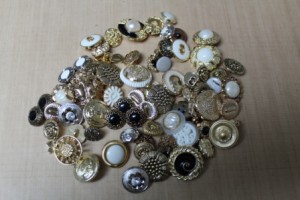
When this package of antique buttons arrived. I immediately knew what they were going to be. Button Earrings! The antique buttons are elegant and sophisticate. You will be surprised at how quick and easy it is to make button earrings.
Supplies:
Earring Post (Clips optional)
Instructions:
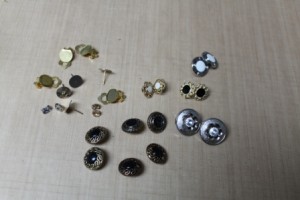
Match up buttons into earring pairs; there are so many great options.
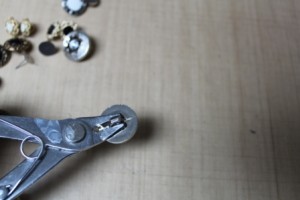
Remove shanks off backs of buttons.
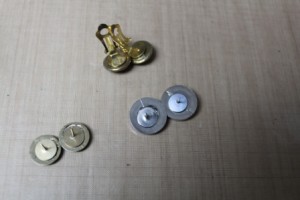
Glue earring backs (or clips) onto back of buttons; let dry.
Done….finished in a flash….quick and easy earrings made in a FLASH! Make them today and wear them tonight! Enjoy this super easy project!
Upcycled Jewelry with Buttons and Hardware
While cruising around Pinterest this week I found this adorable jewelry project that I just had to share! I love the mix of buttons and the hardware, don’t you?
You can find the complete tutorial over on Olives Bites.

Button Embellished Lariat Style T-Shirt Necklace
Here is my second version of the T-Shirt necklace made with buttons. My first T-Shirt necklace was the Button Embellished T-Shirt Necklace and you can read more about it by clicking on the title.
To find out how to make the t-shirt portion of the necklace visit Whole Living or there are a few companies such as consumercrafts.com who sell the strips of colorful cotton all cut up and ready to go. And BTW one package of the Accessory Loops made BOTH necklaces. ;)
Why yes, I DID take the easy way out! AGAIN!

To make this style of necklace I cut all of the t-shirt strips (just one snip on each strip to make a long T-Shirt strand) and threaded the buttons on.
Getting the fabric through the shank of the button is a little tricky and I used a wooden skewer to push the fabric through the hole. It’s a tight enough fit that you don’t have to tie knots to hold the buttons in place.
To finish it off – tie a knot in the ends of the t-shirt strands.
To wear this style necklace fold the strands in half and lay it around your neck. Feed the ends through the fold and adjust to your liking.
The buttons I used are from the Gold and Silver Grab Bag.

Button Embellished T-shirt Necklace
T-shirt necklaces are super popular right now. I really like them… but then again, I like my jewelry to be kind of big and chunky!
To find out how to make the t-shirt portion of the necklace visit Whole Living or there are a few companies such as consumercrafts.com who sell the strips of colorful cotton all cut up and ready to go.
Why yes, I DID take the easy way out! :)
To add the buttons I simply cut one of the black t-shirt strips and threaded the buttons on and then tied the ends together again. The buttons I used are from the Gold and Silver Grab Bag.

On some of the smaller buttons it can be kind of tricky to get the fabric through the shank of the button. I pushed it through with an awl just until I got enough fabric through to grab hold of and then I pulled it through with a pair of pliers. This technique tends to stretch the cotton out so you’ll have to cut a little off the length when you tie the ends together again.
Twist the t-shirt strands together and adjust the placement of the buttons to your liking. You can put the whole necklace over your head in a single loop or double it like I have here and use a clasp ring that opens (like the ones you find in the office supply store) and closes to secure the ends.
Super easy, super trendy and a great way to wear your favorite buttons!
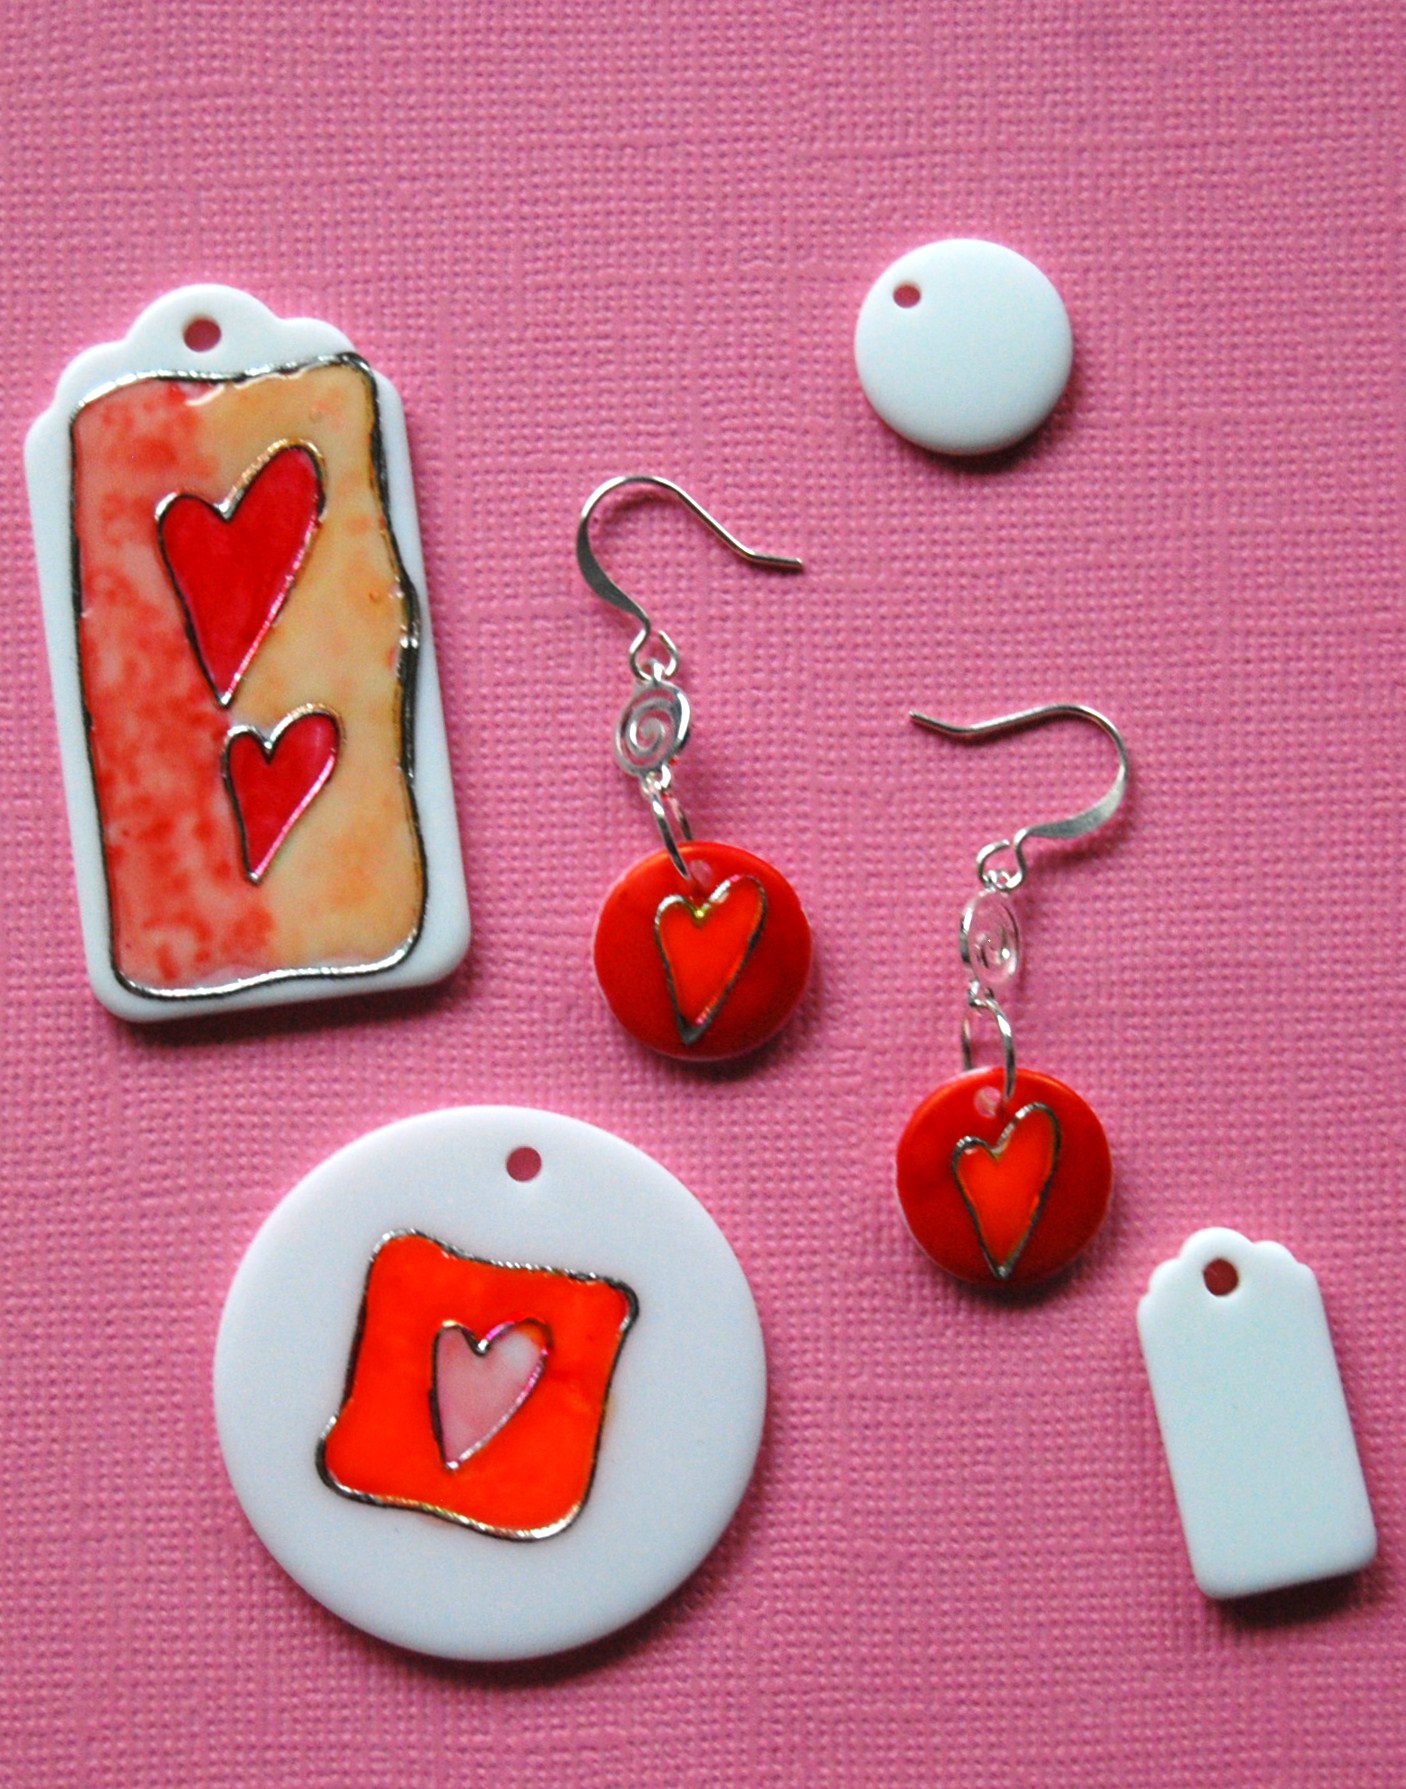
These Start-Ups from Buttons Galore & More are the perfect itty bitty blank canvas for making a great big statement. Whether an accent for a larger project or a stand-alone piece, these nifty little shapes are great for embellishing.
For my Start-Ups Challenge project, I chose the Large Tags because I thought they would make a fantastic pendant. The holes are pre-drilled so attaching a chain or ribbon is simple.

What I really like about the Start-Ups is that they can be made either complex or streamlined, depending on the project. I chose a lettuce green alcohol ink to color the tag shape, applied with a small scrap of felt.

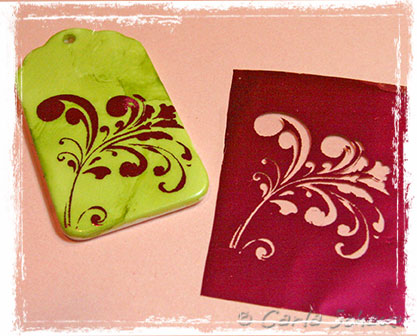
I then cut a swirl shape from a set of double-sided adhesive designs (Design Adhesives by Clearsnap) and applied one side to the bottom corner of the tag.
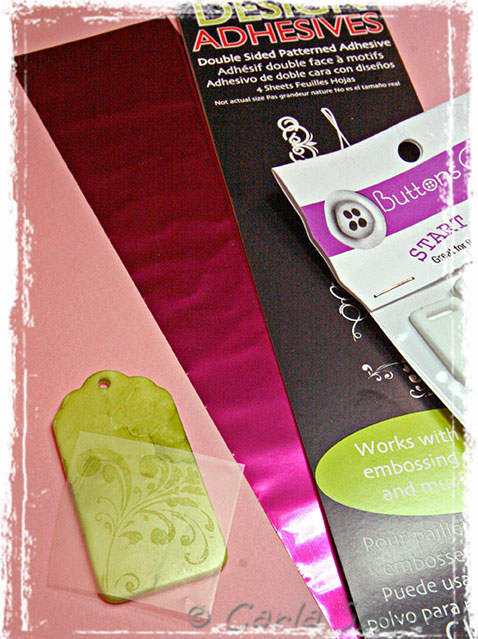
A small piece of thin pink foil (also by Clearsnap) was pressed into the adhesive design and 3 turquoise crystals were glued to the upper right corner. If desired, a clear varnish can be applied before gluing the crystals in place.
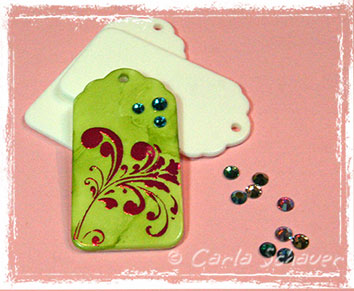
I added a 9mm silver jump ring through the pre-drilled hole, and attached my pendant to a chain I had in my stash. I love that I can have custom jewelry in less than an hour!
Thanks for stopping by!
Carla Schauer

Stamping with Start-ups
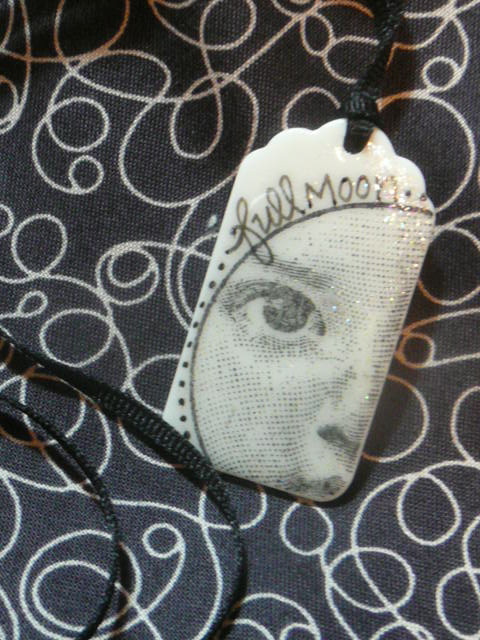
There was a full moon last night and I was crafting all night with my daughter. A perfect time to do some Start Ups samples. This was my first time playing with the new Start Ups surfaces. After a few mishaps… I fell in love with them and have to have more, NOW!
Basically all you need is your favorite stamp (this one is my moon face from Inkadinkadoo – and ladies, it’s old!), fine sand paper and Staz On ink. I added in a Faber Castel PITT pen, because I can resist lettering a bit. Just sand the surface down a bit, just to rough it up and take the shinny coating off , dust it off and stamp. I stamped this off center and I loved the way it came out. I added the text and a few dots and let it dry a bit. To make sure it’s coated well, I added a layer of DG3 from Judikins. It needs to dry overnight… so don’t touch it, let it dry. I sprinkled in a bit of Ultra Fine Prisma Glitter for the moons sparkle and went to bed. The DG3 will go right up to the edge of the start up but won’t drip over the edges. If it did, you could lightly sand it again when you were done. If you do coat with the DG3, use a silicon mat ( or splat mat ) – it won’t stick and will peel right off.
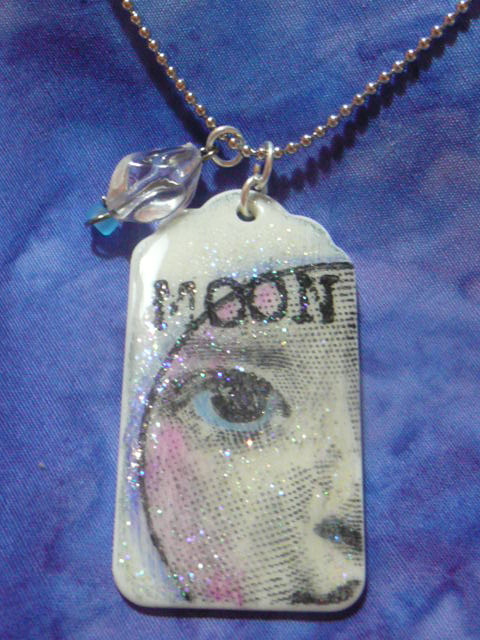
This one was basically the same technique but I waited for the Staz On to dry for about 15 minutes and then used colored pencil to add a little hint of color. I then stamped the word MOON over the moon face, coated with the DG3, sprinkled with glitter and let it dry again overnight. I finished it off with a crystal bead and a ball chain. I love the way these came out and I can’t wait to try more shapes.

Start Ups Mixed Media Charms
I loved playing with the Start Ups that I received recently. I started with the Large Tags because I thought they were the perfect size for a necklace pendant. I haven’t used my Alcohol Inks in a while, so I pulled those out and decided on Greens, Blues and Purples.
The first background I created was a tie dye effect – the alcohol ink has a fluid movement on the Start Ups surface and I almost couldn’t stop layering the colors and watching them blend together!

Tie Dye Butterfly Necklace
I added a chipboard butterfly from K & Company and Making Memories letter stickers to spell the word FLY.

Stamped Mixed Media Charm
For the next background, I dropped Alcohol Ink on the surface of the Start Ups, then blotted off with a paper towel to create a watercolor effect. I stamped over the background with StazOn Jet Black Ink and set the ink with my Heat Tool. I added a touch of Starlight Stickles on the dragonfly, the word sticker COURAGE, a flower with gem and a black gingham ribbon compete this mixed media necklace.

Glossy Monogram Charm
The third background was similar to the second, but I sanded the dry alcohol ink to distress the finish. I then stamped with musical notes and finished with a large monogram M that was painted black and topped with a thick coat of Glossy Accents.
I inked around the edge of each of my Start Ups mixed media charms with black StazOn ink and then set it with my Heat Tool.
Add a jump ring and some ball chain and you are ready to wear your mixed media necklaces – or give them as gifts!
Thanks for stopping by! -Beth Watson

Free Form Bead Weaving with Button Closure
Every once in a while one of our Design Team members creates a project that’s either published or promoted in another way and we like to share them here.
It feels a little different this time because I’m usually the one promoting one of my DT members but this time it was ME who got a little publicity that I wanted to share!
Why? Because I want to encourage my fellow crafters to think of using buttons in lots of different ways… even high end jewelry.

The Emmy Necklace: Free Form Bead Weaving
This is the necklace I created for the Emmys and the photo above shows the button closure.
Here are some related articles:
DIY-ing the Emmys: The Gown, Shoes and Accessories
The Emmy Necklace – Free Form Bead Weaving: Tips for Choosing Beads
Start Ups from Buttons Galore and More might just be my favorite product from the site! I love their smooth, white surface….. like a canvas just begging to be painted upon. I rifled through my sticker stash in order to come up with this easy-peasy faux cloisonne technique.

Faux Cloisonne
To make these, I simply peeled a sticker off of the sheet and applied it to the Start-Ups, burnishing it down a bit with a fingernail. Then I colored in the lines using my alcohol based markers.
When the ink was dry I added a coat of Mod Podge Dimensional Magic over the whole thing to pull off the Cloisonne effect. Or, like in this example, you can choose to do only one area to add “pop” to your piece.
Once the Mod Podge Dimensional Magic is all dry, add jump rings and earring findings and you are ready to roll. (If you leave some areas without the Dimensional Magic, I’d suggest spraying the pieces with a coat or two of Krylon Triple Thick in order to keep the ink from scratching off in the future.
No one needs to know you raided your paper crafting stash to make your jewelry!

Button and Fabric Circle Brooch
How on earth can something so easy be so darn cute? A little felt, fabric, thread and of course, a button.
Be sure to visit the Cluck Cluck Sew blog for full instructions.

Orange and Blue Button Necklace
I love the color combo used to make this necklace!
While it’s not a complete tutorial you can find the basic rundown of how this necklace was made over on Craftster. If you have any experience making jewelry a quick run down is all you need.
I think that our Button Bonanza: Summer Time would be a perfect choice for this.
Or what about the Button Tote: Cornucopia for more of a Fall look? Maybe with an antique gold or brass chain? Oh yeah. I like that idea…. might make one myself! :)

Pink and red button necklace
Here is the product of a recent experiment. I think it turned out rather well, don’t you?
I haven’t turned this into a tutorial yet but I will… maybe it’ll even be a video! But until then I can tell you that it’s one single length of strong quilting thread with the buttons threaded on.
Zinnia Style Button Brooch
I was tooling around the web recently, minding my own business when I happened upon this tutorial by Diane Gilleland of Crafty Pod over on Craft Leftovers.
I’m madly in love with these little zinnias with button centers. Check out the tutorial here to see how quick and easy they are to make.
If you ask me this is the PERFECT time of year to make a batch of them to wear… or to give!
I’ll take one in red please! :)
Try these bright and cheerful buttons for YOUR zinnia brooch

“Tulip” button jar

“Citrus” button jar

Buttons Galore and more on TV with Vicki O'Dell
Our very own Design Team member (ME!) appeared on a local Cleveland TV show in June to show viewers how easy it is to make a one of a kind button bracelet.
While there is a can of old collected buttons in a tin can shown – and they are fine to use – you may not find enough buttons in the colors you need or you may not want to use Grandmas buttons on a piece you will give away.
Our Button Bonanza packages hold enough buttons to make 2-3 bracelets and they come in lots of colors!
While some people look at jewelry as investment pieces, keeping them to wear long-term over the years, I love bright funky jewelry that I can wear as my mood or the trends change.
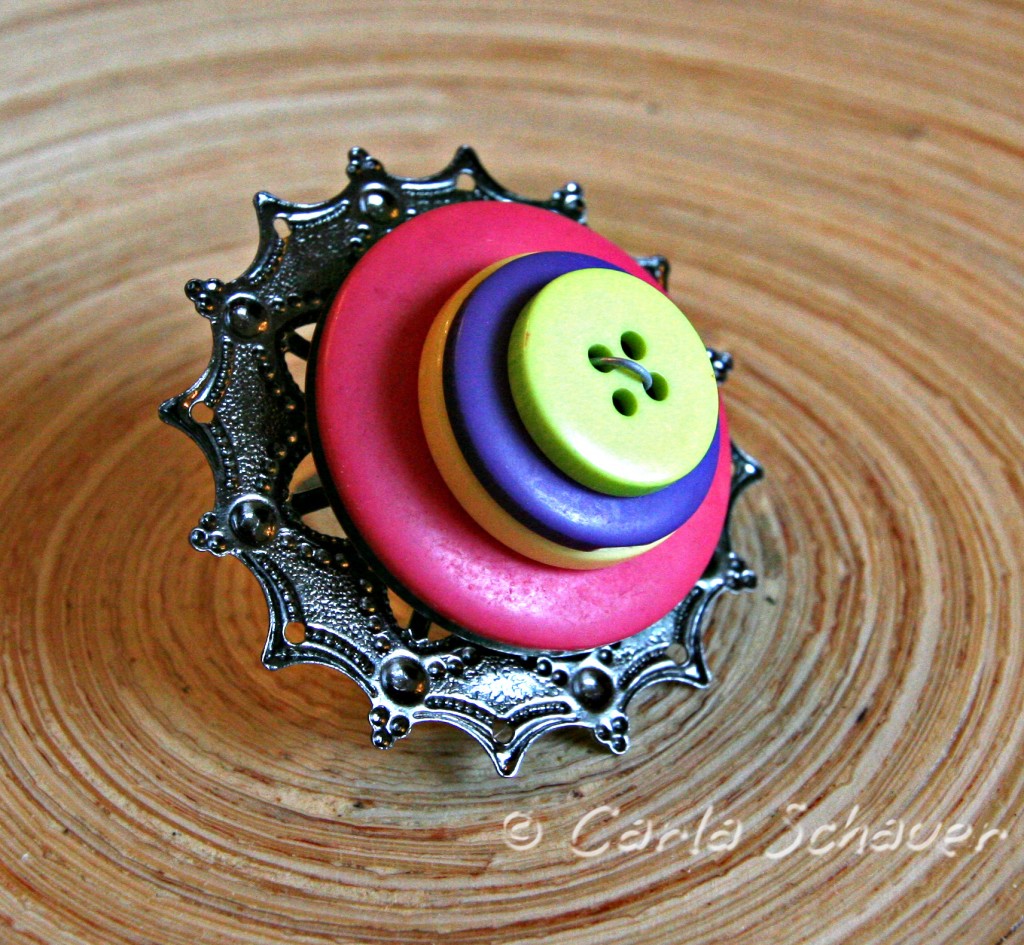
Button web ring
This particular piece I made in under 10 minutes, using supplies I had on hand, buttons from the Mixed-Color Grab Bag from Buttons Galore & More, a large metal jewelry finding, a ring blank, and a 6 inch piece of wire.
I started by choosing buttons of different colors and sizes. The Grab Bags are fun to use because the colors and sizes are all mixed together and it’s easy to just pluck several different buttons from the same package. The Button Bonanzas and Button Totes would also work well to get the same look.
After choosing my buttons, I strung the wire up from the bottom button through one hole of each, then bent the wire and strung it back down through one different hole of each button. I wanted the funky look, so for my piece it didn’t matter which hole I used or whether the button had 2 or 4 holes, I was going for the wacky stacked look. After the buttons were strung, I fed both ends of the wire through the jewelry finding and twisted the ends of the wire together to secure, clipped the extra wire off, and pressed the twisted ends as flat against the jewelry finding as possible.
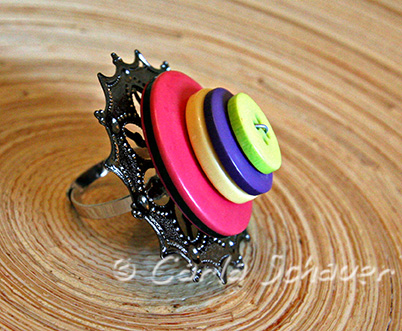
I decided to use the piece as a ring, so I glued it to a ring blank using a heavy duty, multipurpose glue. I could have also used it as a pin, a pendant, or a hair accessory. The sky is the limit when making button accessories. Have fun!
Button Earrings
Here is a pair of earrings I made as a last minute, I’m walking out the door right now, kind of thing.

Monochromatic Button Pin and Button Gift Box
Working with monochromatic color schemes is a quick and easy way to design a project. You don’t have to worry about the colors not coordinating.
This pin is going to be for Mother’s Day. My mom sent me a link to the dress she is wearing and I thought the pin would be a great surprise. If I know my mom well and I think I do, she will also save the box and re-use it. If she does that will make me happy.

Beachy Button Bracelet Set
These blue buttons caught my eye right away. I love the beach and these buttons have the color and shimmer of the ocean on a summer day. They are aptly named “Sea Glass”. I have a big container of natural beads left over from some beachy home décor projects I made last year, and they seemed a perfect complement to the “Sea Glass” buttons. With the addition of some copper findings and chain, I had the supplies for my bracelet.

Button bracelet
Here is a video I made a little while back showing how to use buttons to make an adorable charm bracelet. I hope you like it!