Header

Author Archive | Keri Lee Sereika

Quick and Easy Gifts – Make a handmade note card set

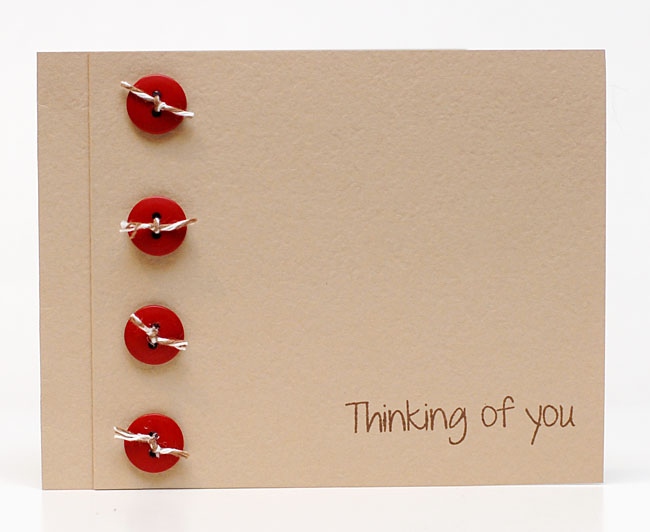
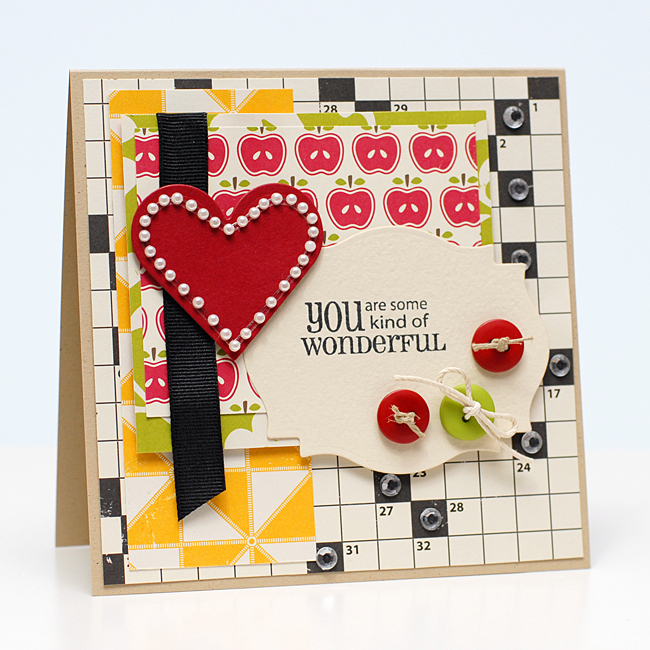
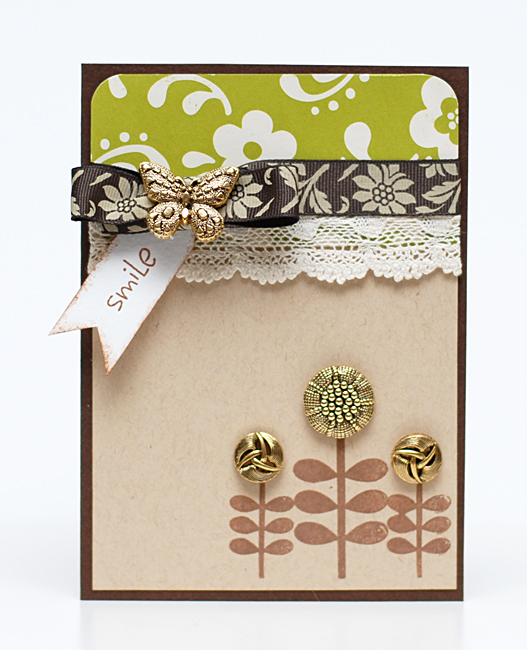
It’s that time of year where we all start looking for quick and easy gifts. Being able to make them homemade is a bonus!!! Why not make a handmade note card set? Mine is not Christmas themed, or Fall themed…I like generic…it works well when I am in a pinch! I can just grab & go! BUT I do like to make my gifts in good seasonal colors. So for this set I thought I would show you my “thought process” on how to make a set of cards in a quick and easy assembly fashion. :) Just add in your papers, matching buttons, ribbon and bling of your choice and you are all set and ready to get creating your very own quick and easy gifts!


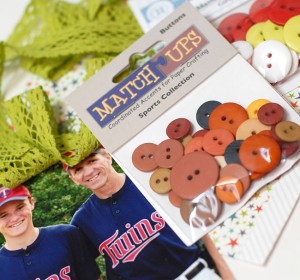
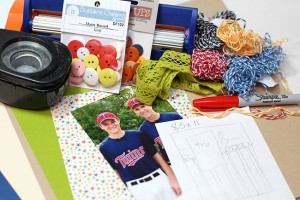
Gather up supplies. I generally like to pick my papers first, then cardstock, ribbon and embellishments. As you can see, I have chosen three different colors of Button Bonanza Bags just to be sure I have the perfect color when the time comes for embellishing. You can also see I have printed out my sentiments panels using Duetica Lettering Arts Studio’s Mandolyn Font in the Outline feature then colored it in using my Copic markers. Another neat trick to PERFECTLY matched sentiments that say JUST what you want in just the perfect size for your project. :) Once I was done coloring them in I die cut each sentiment panel using Spellbinders Nestabilities and I was all set!

Using a Bow Easy Ribbon Tool REALLY helps make the set look polished, all of my bows look exactly alike!

Add an extra touch by outlining the first letter using a glue pen then shake on a bit of coordinating glitter.

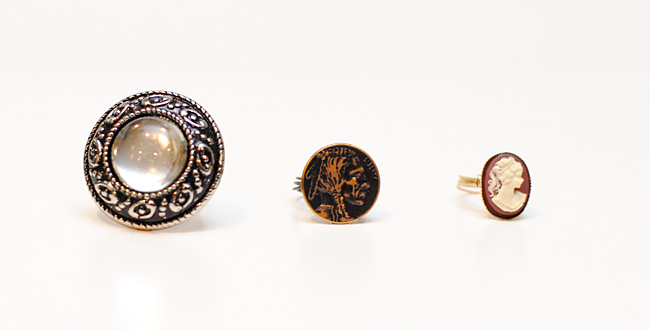
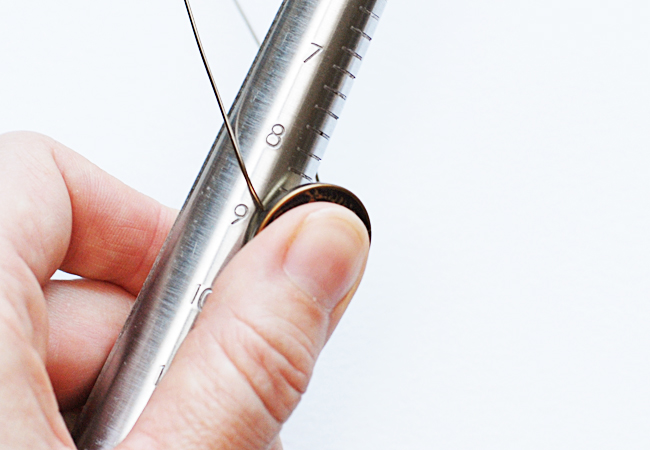
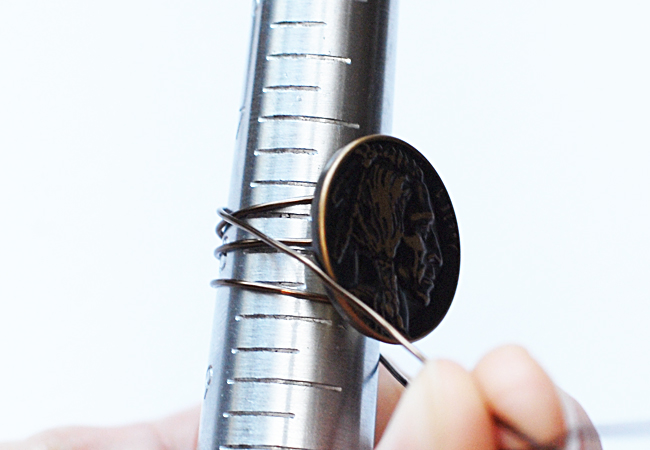
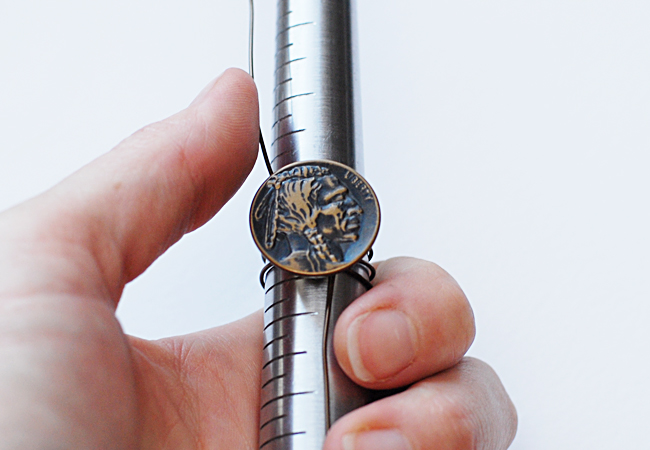
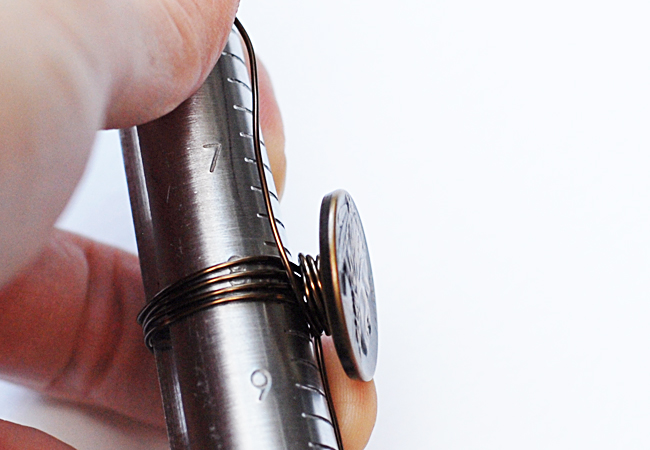
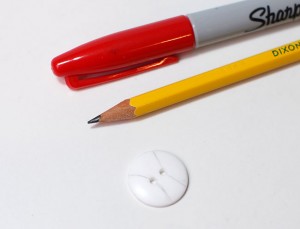
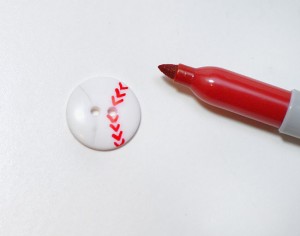
Another great touch that really doesn’t take too long is to embellish the embellishments! I love to add a bit of bling to the center of my buttons.


And here you have it! A cute set that took less than an hour start to finish! Not bad….


0

A DIY on How to Make a No Sew Tutu Tutorial Embellished With Felt Leaves & Buttons

 no sew tutu tutorial

Good Morning! Today I have a stepped up version of a no sew tutu tutorial from a great DIY blog called – Skip To My Lou. I followed all of her steps but where she stops is where I picked up to make this fun and oh so seasonally perfect button embellished tutu! Here’s how I just kicked her’s up a notch – Enjoy!

 no sew tutu tutorial Autumn Forest Nymph Tutu

Find an adorable little girl who you can transform into an Autumn Forest Nymph!!


Direction to make a  no sew tutu tutorial/ Autumn Forest Nymph Tutu


Follow tutorial found on Skip To My Lou’s Blog (http://www.skiptomylou.org/2011/11/01/no-sew-tutu-tutorial/) but cut away the excess elastic.


Add a bit of superglue to the knot to be sure it is held securely.


Wrap the ribbon around your finger to measure out how much ribbon will be needed to fit round the knot and still have plenty of room to pass the other length of ribbon through.


Wrap the ribbon around the knot and hot glue in place.


Be sure to keep edges of ribbon even and hold end of ribbon in glue until glue cools.


Pass the ribbon through the loop and tie into a perky little bow.


Embellish the center of the bow with a large button that has a bow of hemp tied through the center.


Gather a few different colors of Autumn colored felts.


Cut felt into approximately 2″ x 3″ rectangles.


Fold rectangle in half and cut a half leaf shape on fold.


Open to reveal leaf shape.


Repeat with additional colors of felt until you have a good assortment of felt leaves.


Place leaves all over tutu before gluing into place to be sure you have a good mix of colors and spacing.


CAREFULLY adhere using hot glue. Be careful as the glue will go right through the tulle if you aren’t careful!


Using either heavy duty scissors or a button shank remover tool, remove the button shanks from as many buttons as you glued leaves.


Carefully adhere a button to the top of each leaf on the tutu.


Finish gluing a button to each leaf to finish embellishing the entire tutu.


Find an adorable little girl who you can transform into an Autumn Forest Nymph!!


I hope you have enjoyed this  no sew tutu tutorial /Autumn Forest Nymph Tutu.  It was fun and easy to make and my daughters love it.

4

altered buttons make great embellishments!

Today I thought I would bring you an Autumn themed card and share a few tips on how to alter buttons for embellishments. I know it is hard to  believe Summer is passing and we are moving into the Autumn season?  Creating distressed or altered buttons is not a new concept, that I know. But sometimes being reminded that creating handmade embellishments isn’t feasible and that altering embellishments is the next best thing! Here I will share with you one way I like to alter my button embellishments that takes just a few quick strokes of sandpaper in two different grits and you have an entirely new and interesting look to your buttons! I started with two buttons of the same size and color from the Gingerbread Assortment and then went to town!


 The buttons I chose to use from the Gingerbread Assortment matched perfectly with my color palette however,

I thought they’d look good with a little “character”.


 Starting with a rough grit side of the sanding block, sand the edges.


 Next using a less rough grit, sand the surface of the face of the button to lightly distress it.


 Notice the difference? It’s just a few simple steps to really personalize your button embellishments.


And the finished result!

0

Cozy Brads + 15 minutes = cute handmade card!

Good Morning! It’s a great day to encourage someone to reach up and go for their dreams….what better way to do that than with a handmade card??? And this one can be created in less than 15 minutes! I know for a fact because…..
Confession time: I should have had it done and up on the Card Positioning Systems blog, ready to run first thing on Tuesday morning, but totally spaced it and didn’t create it or load it!!! So I had to whip it up first thing and it took less than 15 mins start to finish. I just used the weekly sketch, threw in a mix of fun patterned papers, some ribbon and two fabulous Cozy Brads and BAM!!! Done! Enjoy!!


Supplies:

Stamps: Hero Arts – Anytime Messages
Ink: Tsukineko Memento Dye Ink – Tuxedo Black
Patterned Paper: Fancy Pants Designs – Childish 6×6 Paper Pad
Cardstock: Bazzill Basics
Brads: Buttons Galore & More – Cozy Brads: All Boy
Dies: Spellbinders Paper Arts
Ribbon: Generic Grosgrain
Punch: Fiskars Scalloped Punch

0

Create Personalized Monogram Home Decor using Buttons, Brads & Beads

It’s time to get busy making something to freshen up the house! We have been busy all summer and as the Autumn season fast approaches having a few handy tutorials on how to make personalized gifts and hand made home decor just seems fitting. So today I have a Personalized Monogram Home Dec project to share with you. Enjoy!

Supplies Needed: Buttons, Brads, Micro Beads, Gem Tac (R), Scrapbook Paper, Hot Glue Gun, Scissors, Frame


Print letter of your choice as large as you would like finished monogram to be. Place beneath paper and put against a well lit window to serve as a light box. Then trace onto scrapbook paper.


Outline one third of the traced letter with Gem Tac.

Fill in the area fully with Gem Tac.


Place as many buttons as fit onto the glue covered area.


Quickly cover the entire surface with micro beads.


Remove excess beads before moving onto next step.


Continue covering the entire traced area a bit at a time following the steps above.


Cut the prongs off of the brads using strong sharp scissors.


See how much flatter brads lie once the prongs have been removed?


Hot glue the altered brads to the surface of the monogram randomly. Here I chose to hide "barren spots" with the brads. :)

Once your piece has fully dried, place in a frame and you are ready to enjoy your brand new PERSONALIZED home decor!!!


I would love to see what you make! Please leave a comment with a link to your personalized home decor projects! :) I will be sure to pop over and leave you some love on your project!! :)


1

Creating Easy Home Decor Using Buttons and STYROFOAM

Howdy all! I am so sorry to keep you waiting all month for my home decor project! I have had a SUPER busy summer and this month just was the busiest of them all. But tonight, JUST BEFORE JULY IS OVER I have a fun home decor idea for you that is quick, easy and can be easily customized to fit your home’s Christmas decor! So let’s get busy!!! And hey, now’s a great time to start working on holiday decor because it’s best to be prepared now and now hurried later, right? So HAPPY CHRISTMAS IN JULY Y’ALL!!!!
Supplies Needed: STYROFOAM Cone, Two Tones of Butt ons, Acrylic Paint and Paint Brush, Glitter, Hot Glue, wood circle for trunk or other trunk material.


Begin by placing a pool of paint onto a piece of scrap paper as a palette for easy clean up.


Apply a full coverage layer of paint to entire surface of cone.


While the paint is still wet, liberally cover surface with glitter.


Find a button the same size as the top of the cone.


Build a stack of buttons in graduating size and hot glue together to be a "tree topper".


Once the paint has fully dried, hot glue the topper to the top of the cone.


Randomly glue buttons all along the outside of the cone in various sizes and shades of green.


Glue a line of large Ivory buttons along the bottom edge.


Hot glue the piece of cut tree limb to bottom as a tree trunk.


Ahhh your brand new hip and happening home decor project ready for the mantle, table top or anywhere else in your home!


I would LOVE to see your home decor pieces! Please share a link here so I can come to your blog and see how you decorate for the holidays!!! And hey if you happen to have a great button project that is just a HUGE BONUS! :) Enjoy!

2

Buttons & Burlap Summer Scrapbook Page Idea

Summer, when you hear that word what images does it conjure up in your mind? For me I think of the heat, the BRIGHT colors and RELAXING! I love Summer. I know a ton of people who just hate the heat, but being a gal who’s always got cold fingers and toes, I love that during the summer month’s my body feels WARM all over, all day long! Bright colors, well I love those too! Wearing them, creating with them, you name it, I love it! And relaxing…well let’s just say there’s a well loved, well worn hammock in my backyard that my kids and I all enjoy piling into and having a good snuggle time in. I can relax with the best of them, and in STYLE to boot! LOL

For my project today you can see each of these elements we are talking about have been captured perfectly! From the bright sunshine, the bright colors of the porch chair and the slouchy posture of my sweet Elliott, this scrapbook layout just screams SUMMER. Pairing up bright buttons & bright papers with a nice wide swath of burlap helps to give this layout rest amongst the busyness. Now, while I was creating I got to the point where everything was on the layout EXCEPT the title. And I was STUCK…I mean the page was cute, but needed something…but what….that was when I emailed a photo of the layout and then called our DT Lead Niki Meiners and said “What’s wrong with this page..I am stuck” As if on cue she replied “Oh just add a title to the page – SUMMER” “Where??? Where would I even put a title??” I replied. “Ummm right there under the photo overlapping the patterned paper, burlap and above the cluster of red big buttons…” And you know, she hit the nail on the head!!! It was JUST what this layout needed. Talk about a friend being a help just when you need it!!!  So now you tell me…who do you call if you get stuck or just can’t seem to “make it all workout” in your creative process??

0

Fifteen Minute Fashion: How to create these adorable Button & Burlap Rosette Hair Bows

Hi there and welcome back!!! Today I have alot of info to share so get comfy! :) First I wanted to tell you about our June theme, then I have a really cute tutorial for you on how to make these delightful burlap & button rosette hair bows.

Our theme this month if you didn’t guess by my intro project is Buttons & Burlap!


Keep any eye out for our Buttons & Burlap Challenge Contest coming later in the month...if you don't have any burlap or buttons you may just want to go get some...just thinking out loud here. ;)


So this month we were given  a theme where we as designers have been challenged to work with Buttons & Burlap. I think you will really enjoy what the  design team has cookin’ for you! And today, I have the first project and it comes with a FULL STEP BY STEP PHOTO TUTORIAL!!! Yay!!! Who doesn’t love a good tutorial? So let’s get started. The supplies I have used are:

Buttons – I think my two came from various Button Jar assortments.
Burlap – you can find this at most big box craft stores and it’s CHEAP!
Westcott Brand Rotary Trimmer, Cutting Mat, Steel Ruler & Tiny Thread Snips
Large Needle
Twine or Yarn
Sharpie Oil Based Paint Pens
Ribbons & Trims
Hot Glue Gun & Hot Melt Glue


Begin by cutting a 1.5" strip of burlap in your choice of color...length is not all that important but these were approximately 12" long.


Use a large needle threaded with twine or yard and sew a large basting stitch about .25" from one edge.

Pull on the ends of the twine used to create a gather. Tie a knot to the back of the rosette and spread the ruffles so that they are evenly spaced along the tied circle of twine.


Remove outer few bands of burlap to create distressed edges


Use hot glue to attach hair clip to back side of rosette


Create polka dots on surface of button using Sharpie paint pen


Tie a length of green twine through the buttons and tie in a knot on the under side trim ends with sharp snips


Liberally cover entire knot with hot glue


Press onto front center of rosette to finish hair bow


Alternate button idea - try out all the various color/pattern themes you can think of! Get creative!!!


Just a quick shot of the two side by side.

And finally my adorable little model (my daughter :) ) who was just over the moon to be getting such “high fashion hair bows” today when Momma was done working…. :)


2

How to Watercolor using Lumiere 3-D, a shimmery way to paint!

Today I thought I would share a quick tutorial on how to use Lumiere 3-D one more way! :) I had used this technique on my “Mother” scrapbook layout earlier this month but didn’t really showcase it so I figured it would be a great way to end the month here… :) I hope you enjoy!

Supplies Needed: Cardstock, Stamps, Ink, Lumiere 3-D in Pink & Pearl, ButtonsPretty Girl Cozy Brads, Ribbon, Watercolor Brush, Small Container of Water, Palette for mixing on


Dip tip of watercolor brush into water then into Lumiere 3-D to thin.


Apply water thinned Rose Lumiere 3-D to each petal individually


Repeat steps one & two with Pearl colored Lumiere 3-D, Only this time just paint the entire surface of the flower image.


Before the painted surface has time to dry, apply a light dusting of ultrafine glitter to the surface of the Pearl painted flowers if desired.


Remove the excess glitter from the surface of the paper and then finish the card using your watercolored panel.


Here’s the finished card once assembled. The gentle shimmer is so subtle yet so pretty, I only wish I could have caught it in the photo as it really appears in real life.
2

Happy Father’s Day Card

Taking time to recognize all the wonderful fathers out there is important & not just once a year, but the entire year through!

For this card I simply wanted to design something that my husband would love. I happen to love the colors kraft, red & blue together, no matter what the shades.

For the sentiment I had the notion to use a chipboard letter from Want2Scrap in place of the printed “F” but still use the fun swirls that come with that uppercase letter. To achieve this I opened a file in Photoshop, created a total of three layers, one for each word I was planning on using. I made the word “Father’s” larger than both of the other words. I then made sure that the “F” was even larger than the rest of the word. Finally, I created another layer. Then using the rectangular selector tool I created a selection over top of the “F” and filled it with white but kept the swirls that were coming off. My last step was to arrange the layers so that the sentiment was placed together so that there would be room to add the chipboard “F” as I had planned. I then printed the sentiment and die cut around it using Spellbinders Labels Four. To finish off my sentiment panel I simply inked the chipboard “F”, applied glue to the entire surface and applied red glitter to really give it “POP!”.

After that it was simply a matter of putting the card all together as you see here. I again used the Lumiere 3-D to adhere the buttons and fill the “naked” button holes, just like I did on my scrapbook layout earlier this month.

What a fun texture the strips of buttons add beneath the main focal image, don’t you think? Enjoy!


Supplies:
Sentiment: Duetica – Woodwynds Font
Cardstock: Bazzill: Red, White & Light Teal
Stamps: Gina K Designs – Vintage Backgrounds
Ink: Clearsnap Fluid Chalk Ink – Creamy Brown, Lipstick Red
Glitter: Clearsnap – Ruby Slippers
Ribbon: Really Reasonable Ribbon – White Seam Binding
Buttons: Buttons Galore & More – Button Tin in Sea Glass, red
Chipboard Letter & Gems: Want2Scrap
Other: Jacquard Lumiere 3D (To adhere buttons and fill button holes)

0

How to use Lumiere 3D with buttons in a new and different way


I love my mom. She’s a wonderfully fun person who everyone loves! She has a joyful spirit that just oozes to all those around her. This week I decided it would be fun to scrap a layout with her as the subject! :) If any of you have followed my work you know I love stamping, I love paper, I love ink, I love all things “crafty”…and here on this project I went all out and decided to not use any patterned paper but instead to get creative and make my own backgrounds.

I really wanted there to be attention to all the fine details on this layout  so as you can see I used buttons as a border. Nifty Tip: Jacquard Lumiere 3D can be used to adhere buttons to your project AAAAAND it doesn’t leave you with “naked” button holes (personal preference of mine is to NOT have naked buttons!!!). The Lumiere 3D fills in the holes as well as adheres the buttons right where you want them to stay! The Lumiere 3D Turquoise is a dead match for the buttons in our Sea Glass Tin.

I also found that the Pearl Lumiere 3D was just right for holding my little white mother of pearl buttons from the Genuine Vintage Tin right where I needed them for the “buds” on my tree branch as well as for creating perfect domed centers for all my flowers.


As you can see here I have printed repetitive words using the Duetica Mandolyn 1 Font. I love how crisp and clean this font is but still has a flowing feminine feel at the same time. I decided it would be cute to make a list of all the names my mom has answered to in her life time….Marilyn, Mon, Mom, Kiddo, Momma, Mommy, Mother, Mimi etc…I then just repeated the list over and over and printed in a light gray on Kraft cardstock to make the background strip beneath the photo.


Then for my title I again used the Duetica Mandolyn1 Font in a larger point size and a cool teal color. One of the best things I am finding when working with the Duetica fonts is that I can customize EVERYTHING about them, the way they type out, the colors I print in, the size, the layout…you name it, you do it! :) Since we just celebrated Mother’s Day now is a great time to get out that photo of your mother and treasure that memory as you create a keepsake scrapbook layout…

Supplies:

Buttons: Buttons Galore & More – Sea Glass, Genuine Vintage
Jacquard – Lumiere 3D: Pearl & Turquoise
Duetica Font: Mandolyn 1 & Adobe Photoshop
Cardstock: Prismatics & Coredinations
Cricut Electronic Cutting Machine, Serenade & Winter Wonderland Cartridges
Stamp: Layers of Color – Fairy Wishes
Ink: Clearsnap Colorbox Pigment Ink – Glacier Ice
Glitter: Ultrafine Iridescent
Rhinestones: Want2Scrap
Flowers: Prima “e!” line
Die: Spellbinders Labels Four Nestabilities

4

Taking inspiration and making something totally different

A few weeks back I was perusing Pinterest and I saw this totally cute pin idea and instantly thought  “I could make a really cool clean and simple card with this as inspiration”. So I repinned the blog post over at Imparting Grace where she had seen a Pottery Barn Pillow using buttons and was inspired to make it herself.


Image courtesy of Pottery Barn

I in turn was inspired by her post to make the general idea into a card!! Here’s my take on the simple but oh so button savvy design! I started with a 4 1/4 ” x 11 1/2″ strip of cardstock. I scored 5 1/2″ from the end and folded along the score line to make the spine of my card.  I then made and additional two score lines using my Scor-Pal Scoring Tool 1″ from the spine of the card and 1 1/2″  from the spine of the card.  I then folded at the score lines to create the “pleat” that you see on the left side of the card lining up the ends of the cardstock strip.  A little line of 1/4″ Scor-Tape to hold the folds and the base of the card was done. I then used four red buttons from the Girly Button Pack and tied a bit of twine through each before adhering them to the card front just past the “pleat”, stamped the simple sentiment and BAM! Done! :)

Have you ever been inspired by something and gone in a totally different direction with it? For example this was a pillow design and I translated it into a clean and simple card. Share a link! We’d love to see what inspires you and how you translate it into making it your own!

0

How to make a statement by using a grouping

A few weeks ago I was stuck. I had to make my weekly card for Card Positioning Systems and I had everything but the finishing touch just wasn’t working. The sentiment I wanted to use was too small for the label die cut I was working with and I really wanted to use THIS SENTIMENT. You know how you can just get stuck with the image in your mind and nothing else works?? Yeah I was there…so I decided to embellish my main image…and not just with one, not two, but THREE fun buttons. Here you can see I chose some buttons from the Girly Button Pack. They were JUST THE RIGHT COLORS to go with my chosen patterned papers. So I kinda played around with the color balance and felt the two reds and one green was just what I needed. To spice things up I decided to use natural colored hemp in the red buttons, tied in a knot and snipped short. For the green button to add balance and interest I tied white twine, tied a big loopy bow and snipped the tails a bit longer. I felt it gave the card fun whimsy! If you’d like more info feel free to pop over to my blog Pink Lemonade. Enjoy!!

0

How to Alter Shanked Buttons to Create a Sweet Papercrafted Garden

Have you ever been in the middle of a project and felt you needed just the “right touch” but couldn’t really put your fingers on what that “right touch” was?  Well I thought I would share my card that shows just such a moment.

I had this cute little stamp that was the flowers’ “stems & leaves” and I wanted to go 3-D with the flowers themselves…so I put my thinking cap on~ I sorted through my fun Gold Buttons and found three that were JUST THE RIGHT THING!!! So I snipped the shank off the back using some Hefty Duty Scissors….the shanks are plastic so you will not need wire snips or anything but I certainly recommend that you use a good strong pair of scissors!!! (And eye protection is a good idea too because the shanks can kinda take off on you! LOL)

Anyway, here’s my card…can you spot my BONUS HAPPY FIND? Yep! That is right, the butterfly on the knot of the ribbon is ALSO one of the buttons I found while pecking through my Gold Buttons! If you’d like more details about this card just pop over to my blog Pink Lemonade…enjoy your day!

vintage flower garden card

0

More Handmade Button Rings…”variety is the spice of life”, right?

Well I hope you enjoyed my ring tutorial yesterday. I really enjoyed putting it together. I especially love when people try out my tutorials and then let me know how it worked for them! :)

Today I just have a quick post to share with you. Here I wanted to show you a few more button rings I have made. First I will show you all three, then I will expound on them just a bit for you.


Here you can see that you can use buttons of all shapes and sizes. There’s no “right size” button for making a ring!

When I found the first one on the left in the Gold Bulk Button Pack I was thrilled that it wasn’t GOLD! LOL I was so excited to see it was silver because I am generally a “silver/copper/bronze” kinda gal… the only gold I typically wear is my wedding band and engagement ring. This button measures almost an inch and three quarters at the widest part!!! Suuuuch a fun “cocktail ring” size.

Here it is on my hand. Fun right??

Well then I thought I would also make one from the sweet dainty little Cameo Button in the Genuine Vintage Button Tin. It’s just so little and cute compared to the ginormous one in the picture above, isn’t it?
I have some really cute colored buttons that I plan on doing another ring soon with…I hope you will come on back to see them! Please be sure to comment with a link to your button ring creations. I would love to see what you have done either on your own or using the tutorial I created! Have a great day!

P.S.  Be sure to check out our “Pin it to Win it Contest” that runs all the way through April 27th!!!

0

Handmade Vintage Button Ring Tutorial with Step by Step Photos

Good Morning! Today I thought it would be fun to bring you a tutorial on how to create a wire wrapped ring using a button from the Genuine Vintage Button Tin as the focal piece. In addition to the button you will also need:

  • Ring Mandrel
  • Nylon Hammer (or rawhide – non marring hammer)
  • Wire Snips
  • Chain Nose Pliers
  • 18 Gauge Artistic Wire® By Beadalon in Gun Metal Bronze

Supplies needed for an assortment of rings

Begin by cutting a 20" length of wire. Run it through the shank on the back of the button, centering the button in the middle of the wire. Bend the wire into a gentle "U" shape.

Place the center of the button onto the ring mandrel one full size larger than you need for the finished ring size. Here you can see that I need a 7 1/2 ring so I am beginngin at a size 8 1/2 on the ring mandrel.

Wrap the wire around the top and bottom of the button the mandrel so that you have four wraps around the mandrel.

Pull the ends of the wire perpendicular to the mandrel and pull tightly to draw the wrapped sections to the center of the button.

Begin to wrap the wires clockwise around the shank of the button. Wrap until you have atleast four wraps around the bottom, keeping pressure and tension on the wires at all times.

Again holding the wires perpendicular to the mandrel, remove the ring from the mandrel.

Pinch the button and the wire wraps between your nondominant thumb and forefinger.

Using your dominant hand, wrap the end of the wire under the four wraps, then back up and around the wraps.

Continue to wrap three or four more times, pulling tightly each time. Make sure to keep the four wires flat against your index finger for a more comfortable fit.

Using wire snips, clip end of wire close and press clipped end down using chain nosed pliers. Repeat wrapping on other side of ring.

Place wrapped ring back on mandrel and being to hammer ring down mandrel. Remove ring, flip it and hammer it back down toward thick end of mandrel to make sure both sides are fully formed.

Tap around entire ring from side of button to side of button to work harden wires and make sure that the wires are going to lie flat.

Finished Vintage Button Wire Wrapped Ring

I hope you have enjoyed my first button jewelry project here on the Buttons Galore & More Blog! Be sure to add us to your reading list or subscribe so that you don’t miss out on the next one I have planned. It’s one that you will not want to miss!!! :)

K

P.S. Don’t forget to enter our PIN IT TO WIN IT CONTEST! 


8

How I “get set up” to create a scrapbook page

Hi there! As I was trying to think of a good subject to blog about today I realized that people are always asking me “How do you get started? I find it’s hard to just get started!!!” So today I thought I would take a few minutes to share my process in getting started with creating a layout. I also have a super quick tutorial on how to make a button JUST WHAT YOU NEED at the moment. So let’s get started, shall we?

Here’s my completed layout. It is a simple layout, for two reasons. One, I generally am a pretty simple layout maker and two, I find for “teen boys” they would much rather be featured on a “not too over the top” layout! LOL

Baseball buttons and card Layout by Keri Lee Sereika

Baseball buttons and card Layout by Keri Lee Sereika

Supplies needed for this project are:

Photo: of your choice! :)
Buttons: Buttons Galore & More Girly Assortment
Patterned Paper: My Minds Eye: Lime Twist – Out of the Blue
Cardstock: Blue, Cream, Kraft, Red
Trim: Pale Olive Green Crochet Trim
Twine: Red & White
Tools: Paper Cutter, Scissors, Circle Punch, Red Sharpie, Pencil
Adhesives: Tape Runner & 3-D Foam Squares

To get all set up to start creating I like to pic my photo first and work from there. Generally I choose my photo and a coordinating patterned paper or papers that I will base all of the other colors I work with from. :) Takes the guess work out of if colors actually go together…I mean hey if they are on a patterned paper then they MUST go together, RIGHT?


Once I have chosen my paper I selected my buttons & embellishments. I don’t always go in this order but since I really wanted to make the buttons a focal of the project I started there. Here you can see I have the MU Matte Round Sports Collection & the Girly Assortment. I wasn’t sure if I was going to need the golden & black buttons from the Sports Collection or not so I threw em into the pile just in case!


Once I had my “Focal Parts & Pieces” I decided it was time to draw up a sketch…once I have a sketch I usually have a good idea of what tools I will need to create the sketched project.

Once I had the sketch I done I hopped around the studio picking out anything I thought I might use…it saves me time later not having to go looking for stuff…KWIM? And since I was looking at my sketch and had all my stuff out I saw the big white button from the Girly assortment and I just KNEW I had to make it a BASEBALL BUTTON!!! (hence the red Sharpie!)


To make the Baseball Button, simply draw two opposing arcs onto the face of the white button…be sure your pencil has an eraser…it may take a few tries to get the arcs just the way you want them.


Once you are pleased with your arcs, it is time to add the stitching using the red  Sharpie to draw tiny little “v” shapes onto the arcs. Again, you may want to have some rubbing alcohol handy as this took me a few tries to get them just so…Rubbing alcohol will take the majority of the Sharpie off the button and allow you to “fix your mistakes” without having to start with a whole new button.


Simply repeat the “v” shape on the second arc and you are all set to pull it all together to create your layout! I hope you enjoyed a “behind the scenes peek” at how I get set up  and ready to create!

Keri Lee

1

Powered by WordPress. Designed by WooThemes