
Hi there! As I was trying to think of a good subject to blog about today I realized that people are always asking me “How do you get started? I find it’s hard to just get started!!!” So today I thought I would take a few minutes to share my process in getting started with creating a layout. I also have a super quick tutorial on how to make a button JUST WHAT YOU NEED at the moment. So let’s get started, shall we?
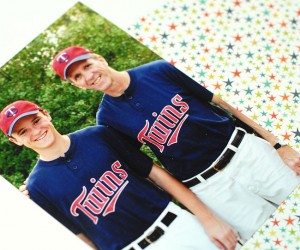
Here’s my completed layout. It is a simple layout, for two reasons. One, I generally am a pretty simple layout maker and two, I find for “teen boys” they would much rather be featured on a “not too over the top” layout! LOL

Baseball buttons and card Layout by Keri Lee Sereika
Supplies needed for this project are:
Photo: of your choice! :)
Buttons: Buttons Galore & More Girly Assortment
Patterned Paper: My Minds Eye: Lime Twist – Out of the Blue
Cardstock: Blue, Cream, Kraft, Red
Trim: Pale Olive Green Crochet Trim
Twine: Red & White
Tools: Paper Cutter, Scissors, Circle Punch, Red Sharpie, Pencil
Adhesives: Tape Runner & 3-D Foam Squares
To get all set up to start creating I like to pic my photo first and work from there. Generally I choose my photo and a coordinating patterned paper or papers that I will base all of the other colors I work with from. :) Takes the guess work out of if colors actually go together…I mean hey if they are on a patterned paper then they MUST go together, RIGHT?
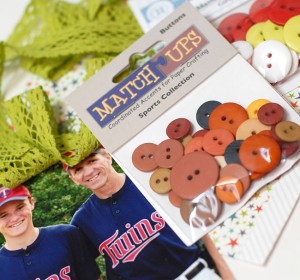
Once I have chosen my paper I selected my buttons & embellishments. I don’t always go in this order but since I really wanted to make the buttons a focal of the project I started there. Here you can see I have the MU Matte Round Sports Collection & the Girly Assortment. I wasn’t sure if I was going to need the golden & black buttons from the Sports Collection or not so I threw em into the pile just in case!
Once I had my “Focal Parts & Pieces” I decided it was time to draw up a sketch…once I have a sketch I usually have a good idea of what tools I will need to create the sketched project.
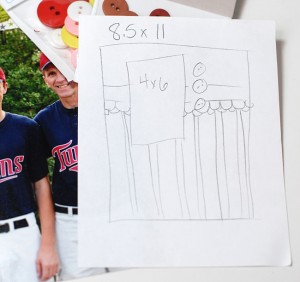
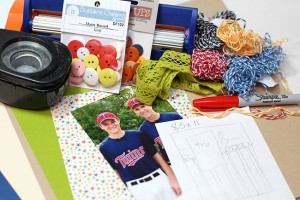
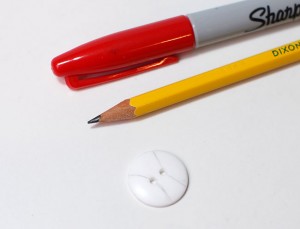
Once I had the sketch I done I hopped around the studio picking out anything I thought I might use…it saves me time later not having to go looking for stuff…KWIM? And since I was looking at my sketch and had all my stuff out I saw the big white button from the Girly assortment and I just KNEW I had to make it a BASEBALL BUTTON!!! (hence the red Sharpie!)
To make the Baseball Button, simply draw two opposing arcs onto the face of the white button…be sure your pencil has an eraser…it may take a few tries to get the arcs just the way you want them.
Once you are pleased with your arcs, it is time to add the stitching using the red Sharpie to draw tiny little “v” shapes onto the arcs. Again, you may want to have some rubbing alcohol handy as this took me a few tries to get them just so…Rubbing alcohol will take the majority of the Sharpie off the button and allow you to “fix your mistakes” without having to start with a whole new button.
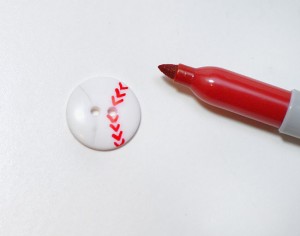
Simply repeat the “v” shape on the second arc and you are all set to pull it all together to create your layout! I hope you enjoyed a “behind the scenes peek” at how I get set up and ready to create!
Keri Lee
Latest posts by Keri Lee Sereika (see all)
- Quick and Easy Gifts – Make a handmade note card set - November 2, 2012
- A DIY on How to Make a No Sew Tutu Tutorial Embellished With Felt Leaves & Buttons - October 1, 2012
- altered buttons make great embellishments! - September 3, 2012
Nice explanation of your process