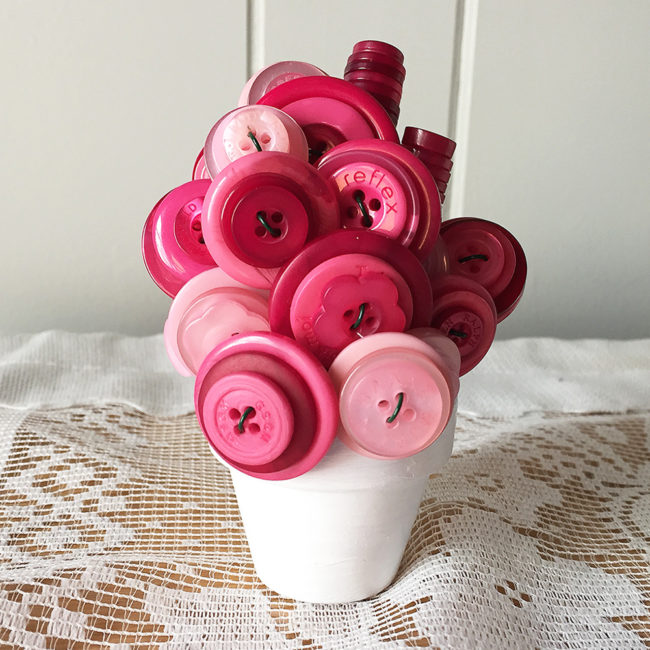
Flowers are pretty, but they are also expensive and don’t last very long. A button bouquet is affordable and simple to make and will add some vintage charm to your home, wedding, or shower – and never needs watering! Continue Reading →

Flowers are pretty, but they are also expensive and don’t last very long. A button bouquet is affordable and simple to make and will add some vintage charm to your home, wedding, or shower – and never needs watering! Continue Reading →
Hello Everyone! This is Katie from the Buttons Galore & More Design Team and today I have a fun wedding decor idea!
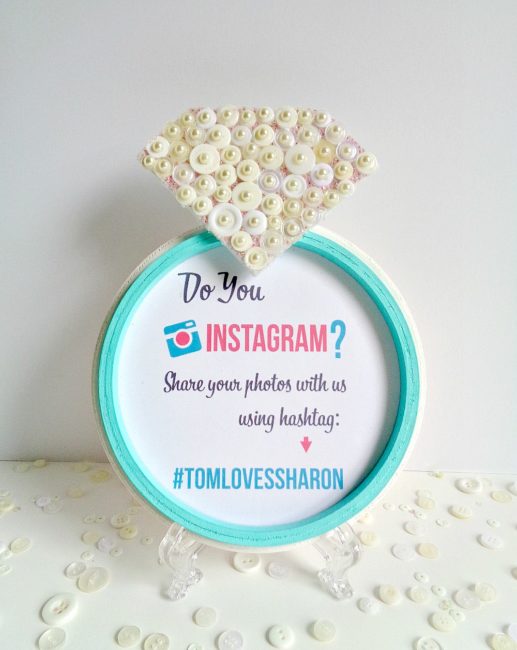
When I was given the task to make a wedding decor project, I wanted to create something that was cute, useful, and that could be saved in the long-run. With that in mind, I decided to create a diamond ring frame that could be customized to fit your wedding decor, be useful (since it’s a frame), and be saved by the bride. In addition, this project is super inexpensive to make because it’s made from a wooden plaque, an embroidery hoop, and a piece of foam board!
To decorate the diamond part of the ring, I decided to use the 28 Lilac Lane Embellishment Bottle in Winter Wonderland. Even though “winter wonderland” sounds wintry, this embellishment bottle could easily be used for wedding décor as well because the embellishment bottle contains several shades of white/cream colored buttons, along with seed beads and flat back half pearls. The flat back half pearls (in my opinion) really make this embellishment bottle perfect for wedding projects!
So, to find out how to make your own Diamond Ring Frame, keep reading below!
Supplies needed:
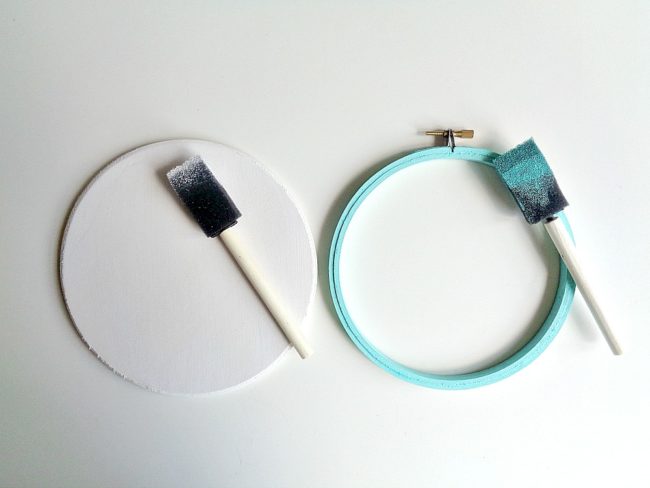
Step 1: Paint your wooden plaque white and your embroidery hoop mint. Then set both items aside to dry.
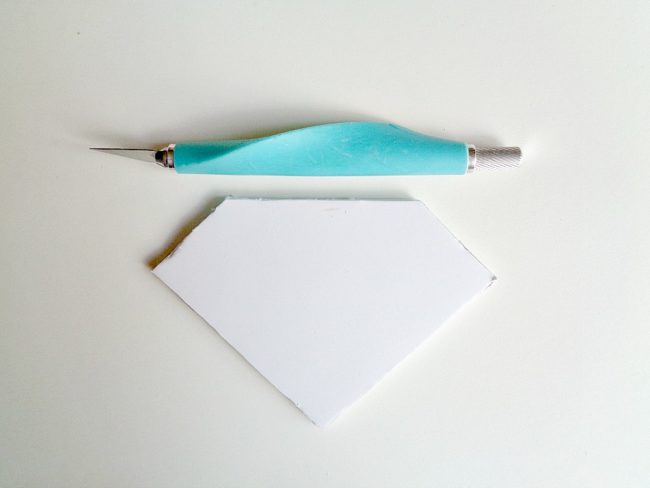
Step 2: Grab your foam board and cut out a diamond shape. The diamond I cut out for my 6-inch embroidery hoop was 5 inches by 3 ½ inches.
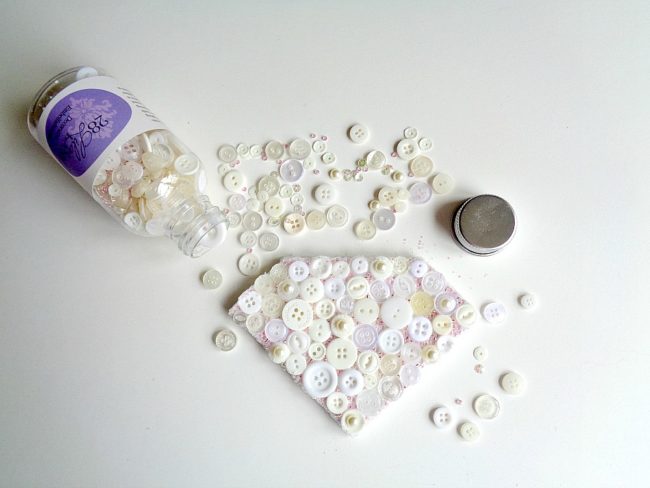
Step 3: Grab your 28 Lilac Lane Embellishment Bottle in Winter Wonderland and start decorating your diamond cut out. To do this, simply brush on a layer of decoupage glue onto your diamond cut out and begin arranging your buttons. While doing this, I also sprinkled on seed beads to fill in the gaps between the buttons. Finally, as an extra touch, I glued on a flat back half pearl to each of the buttons.
Once your diamond has been decorated, set the whole thing aside to dry.
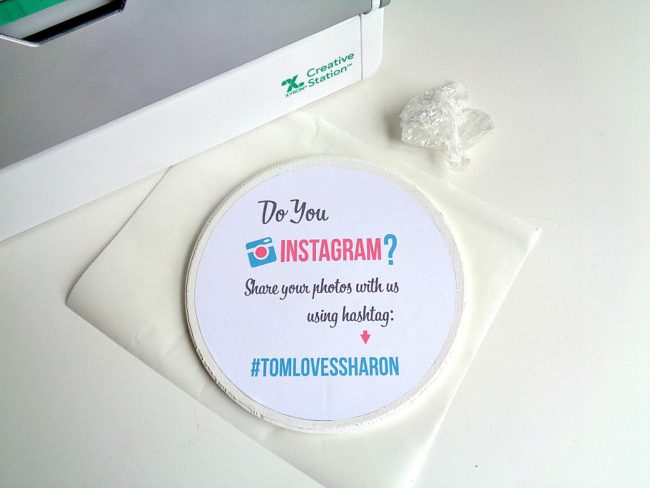
Step 4: Take your picture, sign, or image that you want to use for your frame and cut it down to size to fit on the inside of your embroidery hoop. Then take that image and run it through your Xyron 9” Creative Station. Once you have run your image through the Xyron Creative Station, rub the top of the sticker paper. Finally, peel the image off the sticker paper and adhere it to your wooden plaque.

Step 5: Using a hot glue gun, glue on your embroidery hoop to your main wooden plaque and then glue your diamond on top of the embroidery hoop.
Once all your pieces have been glued on, you’re ready to display your new Diamond Ring Frame!
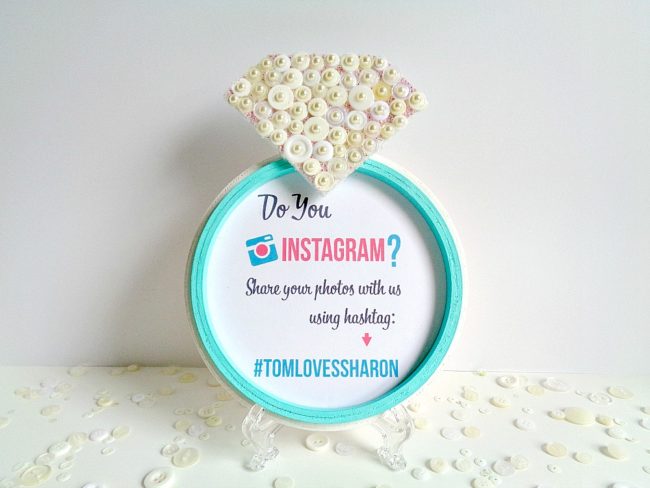

As you can see, I used my Diamond Ring Frame to hold a sign about taking Instagram photos during the wedding. However, this frame could be made to hold a variety of things. For example, the frame could hold photos, it could direct the guests to do something (like signing a guest book), or simply be used to display a favorite quote. Along those same lines, this Diamond Ring Frame does not have to be used at the wedding. It could also be used as a decoration for the bridal shower or bachelorette party instead!
What 28 Lilac Lane items would you use for your wedding or shower decor?
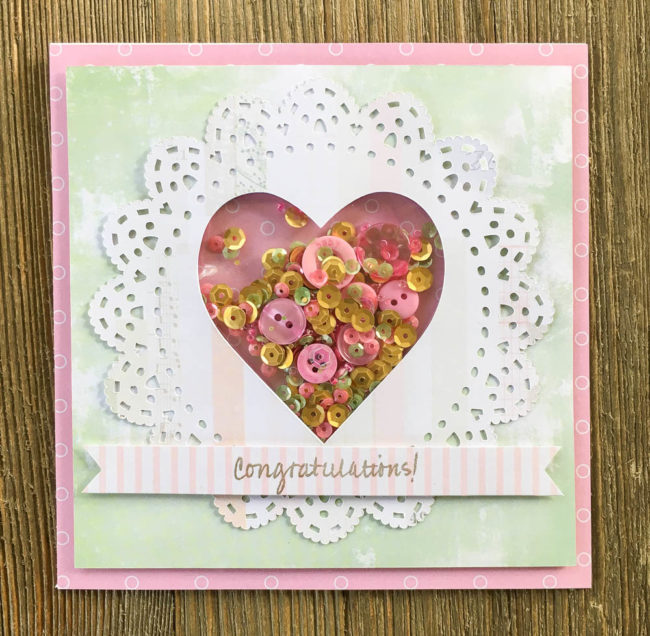
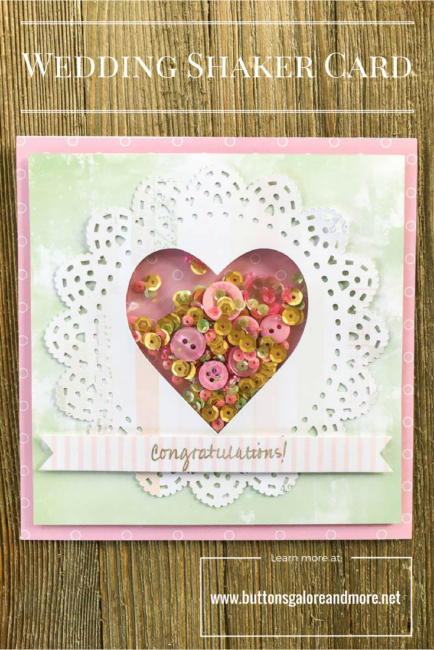
Shaker cards aren’t just a way to celebrate birthdays…they can also be a beautiful way to celebrate a more formal occasion like a wedding! This wedding shaker card pairs a sparkly shaker mix with a doily and die cut heart to celebrate the love of a special couple.
Supplies Needed:
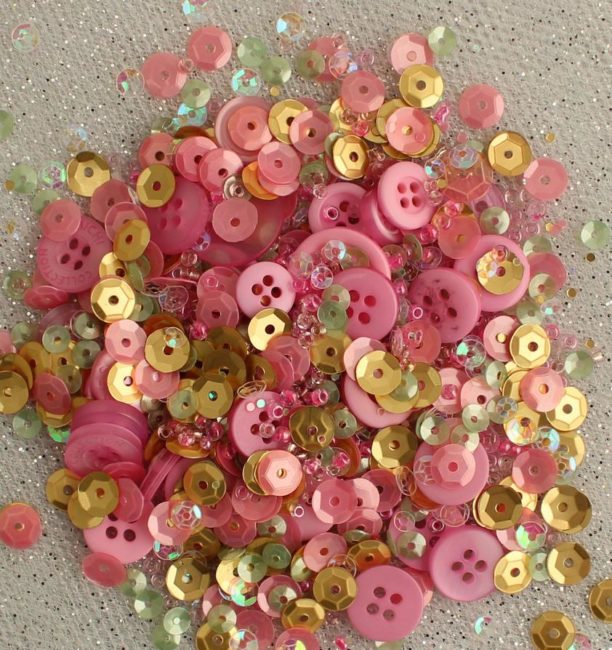
This shaker card features our versatile 28 Lilac Lane “Rose Garden” Shaker Mix that is a mix of gold, clear, pink, and green sequins, pink beads, and pink buttons to create the perfect shaker mix! Use this mix for occasions like weddings, to welcome a baby girl, or for a special birthday message.
Making this wedding shaker card is simple. Just die cut the doily for the card front, and then die cut the same heart shape out of both the doily and green layer of the card so they can be layered to create the card front with the shaker window. Glue the two pieces together and flip them over.
Using either a scrap of page protector or a Fuseable Pouch and Fuse tool, create a pouch that is slightly larger than the shaker window opening. Fill it about 1/2 full with the 28 Lilac Lane “Rose Garden” Shaker Mix, and then seal it with red liner tape or a Fuse Tool. Then use red liner tape to attach it to the back of the card front so that it shows through the shaker window.

To finish the wedding shaker card, attach the pink paper to the card base. Then use foam tape to attach the shaker card layer on top of the pink layer. Finally, cut a 1/2″ strip of paper and stamp the sentiment on it. Snip the ends into a banner and attach it with foam tape for dimension.
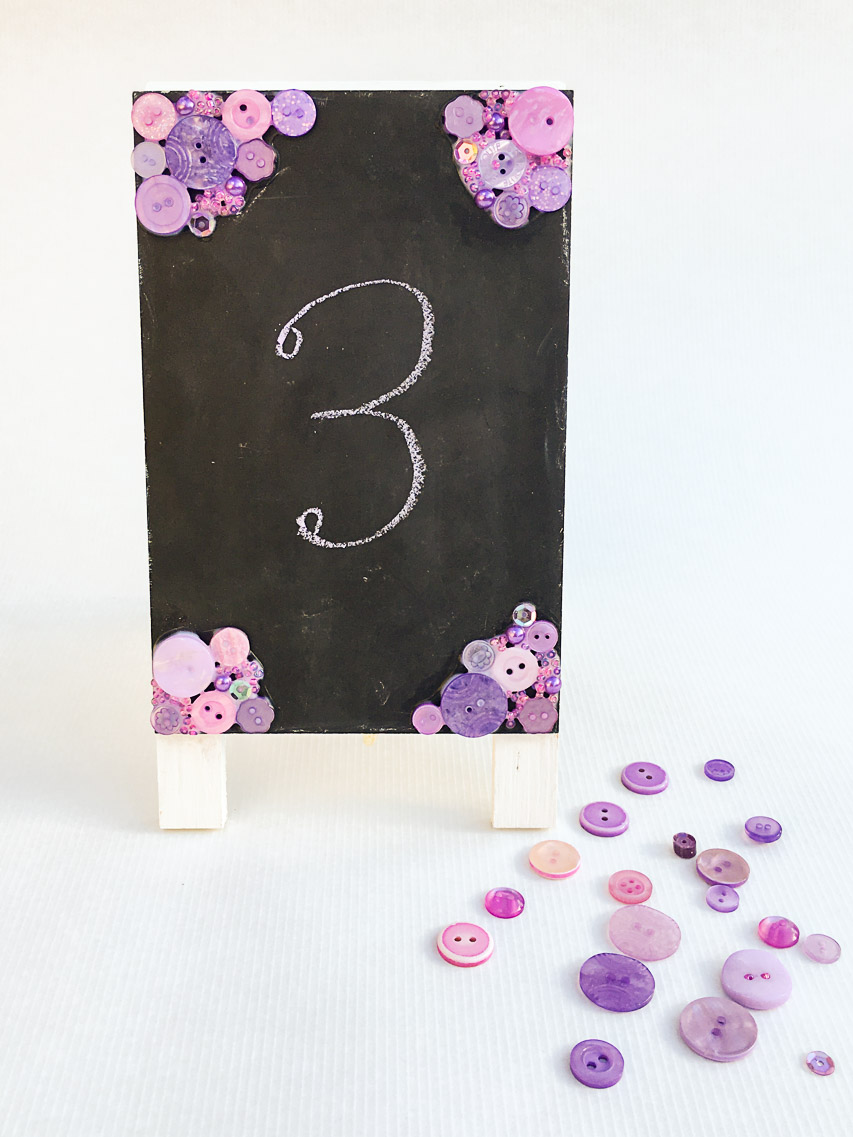
Summer is wedding season for a lot of families, and a DIY wedding is a great way to save money on the cost of getting married. As our DIY Wedding Chalkboard Table Number shows, DIY can also be beautiful – and a great way to personalize your wedding.
Supplies:
This table number is very simple but oh so pretty! Small chalkboard easels like this are available at most craft stores. They make great table numbers, or menu display boards for weddings and showers. And at the end of the night, they can go home with guests as party favors!
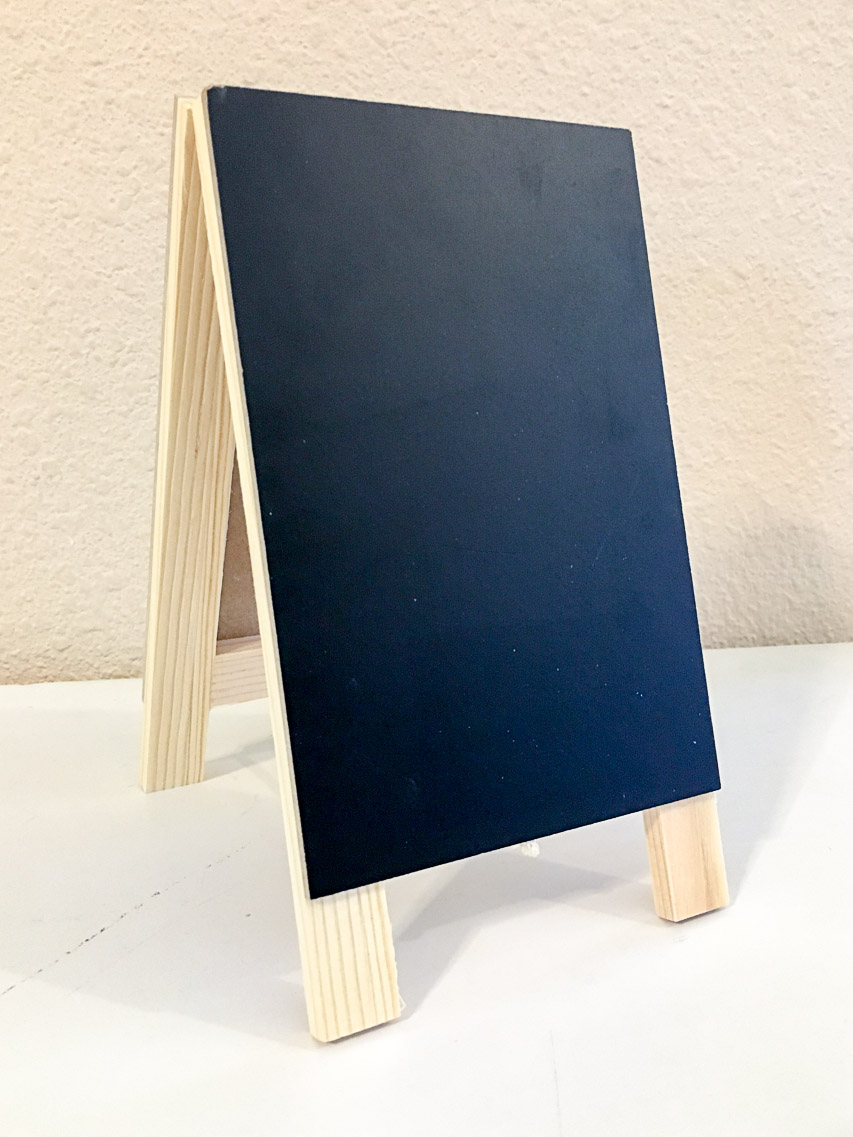
To start the project, paint the bare wood with white chalk paint. Use a small brush along the sides of the chalkboard. If you get some paint on the chalkboard surface, use a damp cloth to wipe it away while it is still wet. If you aren’t able to get it all off and a trace of it remains, don’t worry. It will just look like smudges of chalk when the project is complete.
Lay the easel flat and spread some of the glue in one of the corners of the chalkboard. Fill in some buttons, varying colors and sizes and leaving small spaces in a couple of places. Fill the small spaces in with small items from the embellishment bottle such as seed beads, sequins, and flat back pearls. Repeat for each corner of the blackboard. Allow to dry.
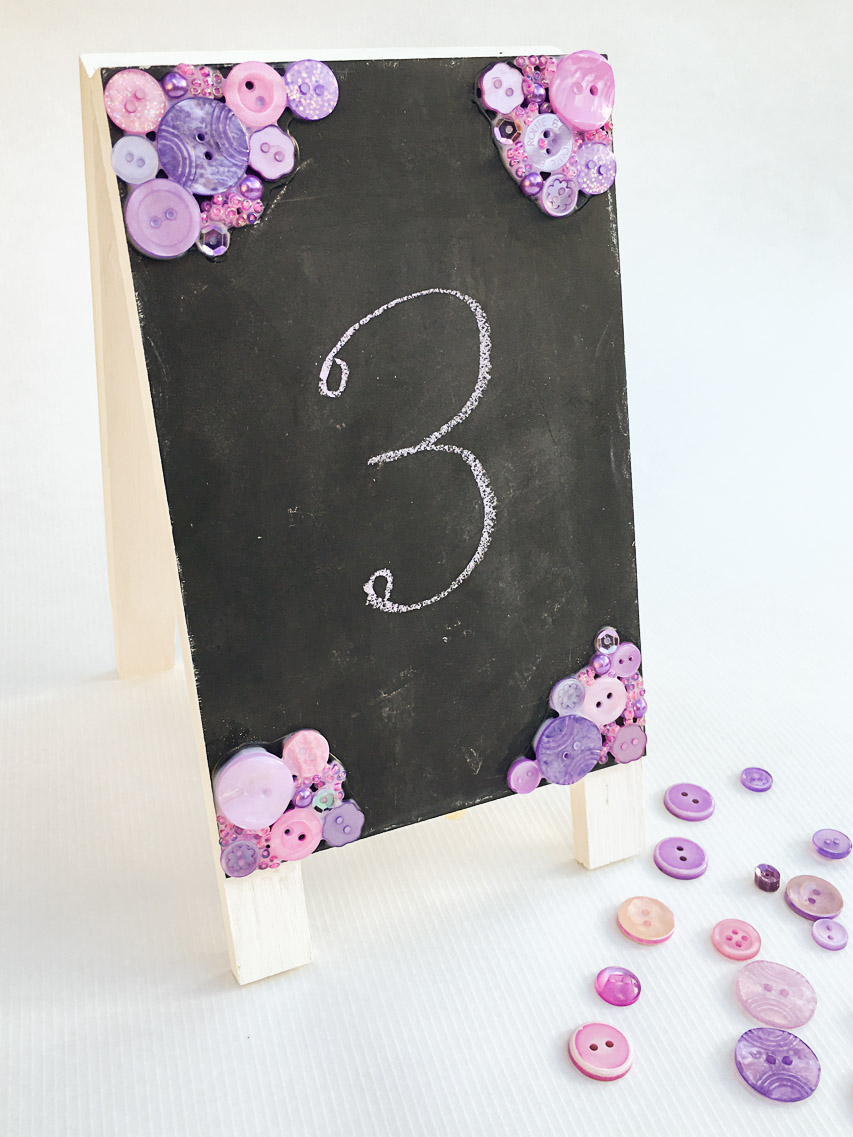
I chose to work with the “On Lilac Lane” embellishment bottle for this DIY Wedding Chalkboard Table Number, but this project could be adapted to any wedding color theme by selecting another of the embellishment bottles (or even one of our Button Bonanza bags). Our embellishment bottles include popular wedding colors like Mint, Yellow, and Pink.
The last step before using your DIY Wedding Chalkboard Table Number is to use a piece of chalk to prime the board. Place the side of it on the chalkboard and rub all it all to cover the board. Erase the chalk and the board is ready to use!
What other uses can you think of for this decorative chalkboard easel?
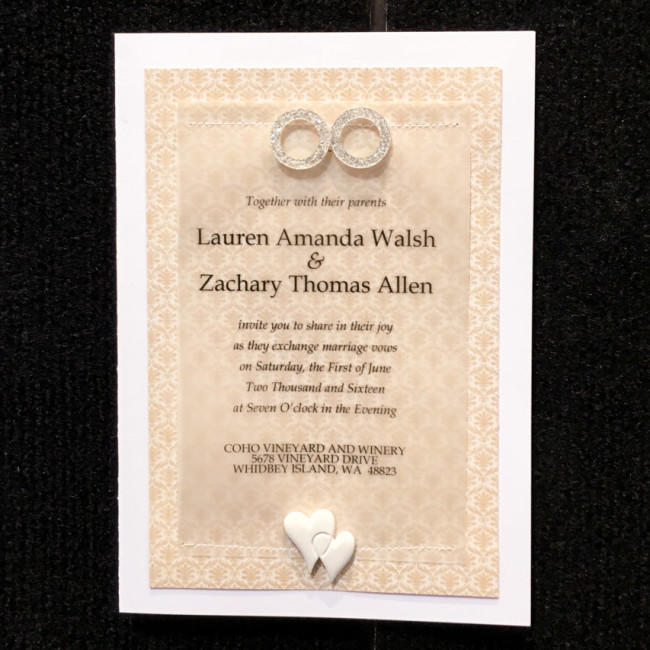
Are you hearing bells in your future – wedding bells, that is? If you are having a DIY wedding, our 3D wedding buttons can help you create a DIY wedding invitation and other beautiful items for your special day!
Supplies:
Making this invitation is easy!
Cut and fold the smooth cardstock to make a 5″ x 7″ sized card base.
Use a word processing program to create the invitation text. Print the text onto inkjet printable vellum.
Cut the patterned paper to size. Using your sewing machine, stitch the vellum onto the patterned paper.
Adhere the patterned paper & vellum combination to the card front. Adhere the buttons on top of the vellum.
Buttons Galore’s 3D buttons are available for bulk purchase. If you require a specific item in bulk to create large quantities of an item like this DIY wedding invitation, please contact our customer service department through our website for assistance.
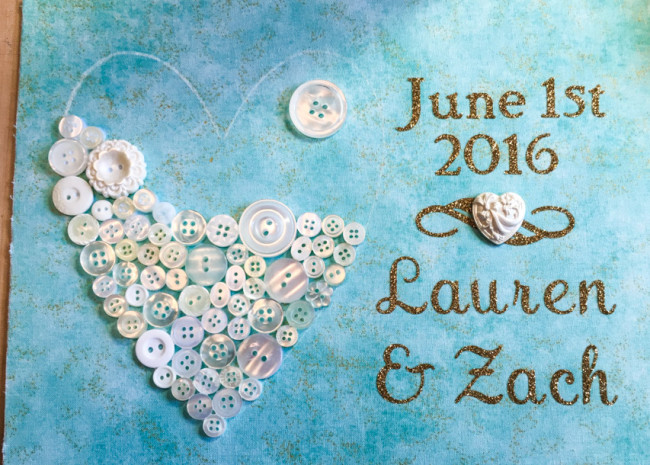
Yesterday was Valentine’s Day, and that means love, romance…and proposals! So, for everyone who woke up this morning with a wedding in their future (or their family’s future), we’ve got a fun and easy project for you – a DIY wedding frame!
This wedding frame is multi-purpose – it can serve as a wedding or shower decoration, and then transition to home decor as a treasured memory after the big day is over.
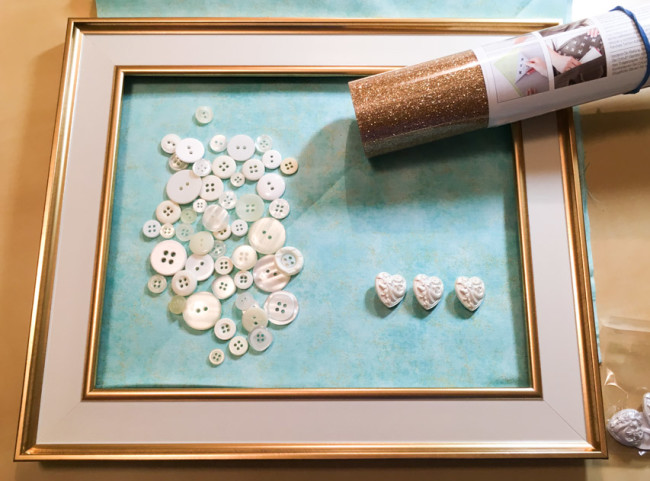 The first step in this project is to select a color scheme. This project is built around a fabric background, which can really be any color. I’ve chosen a beautiful aqua, but the wedding’s theme color or a color from the bride’s home decor might both be excellent choices.
The gold iron-on material matches both the frame and a fleck that is in the fabric. Our Haberdashery button pack is variegated between cream and white, so no matter what color of wedding dress the bride chooses, the collage will work.
Use a fabric pencil to sketch out the area for the heart.
Measure the remaining area and create the text and other elements on your die cut machine. Cut from glitter iron-on material, and iron on to fabric following manufacturer’s instructions.
For the fabric to stand up to holding the collage of buttons in the frame, it needs to be stiffened. I used Krylon Spray Adhesive to laminate the fabric to a sheet of white chipboard as a backing.
Using white glue (I used PPA Matte by ArtQuest), adhere white buttons from the Button Basics and Haberdashery packages. Continue until the entire heart is filled. I ensured that the largest ones were spread around in a balanced fashion by laying them down first and then building around them.
Finish by removing the stem from a heart button, and gluing the heart on top of the glitter flourish.
Remove the glass from the frame, and place the cardboard sheet in place!
And now your beautiful memory of a special day is ready to enjoy!

Supplies:
Congratulations to all the newly engaged couples out there, and we look forward to seeing you make our DIY wedding frame!
Make a lovely wedding card. Wedding season is upon us!
I love to use the colors chosen by the wedding party. By stamping and adding matching buttons, any card can become extra special to the bride and groom.
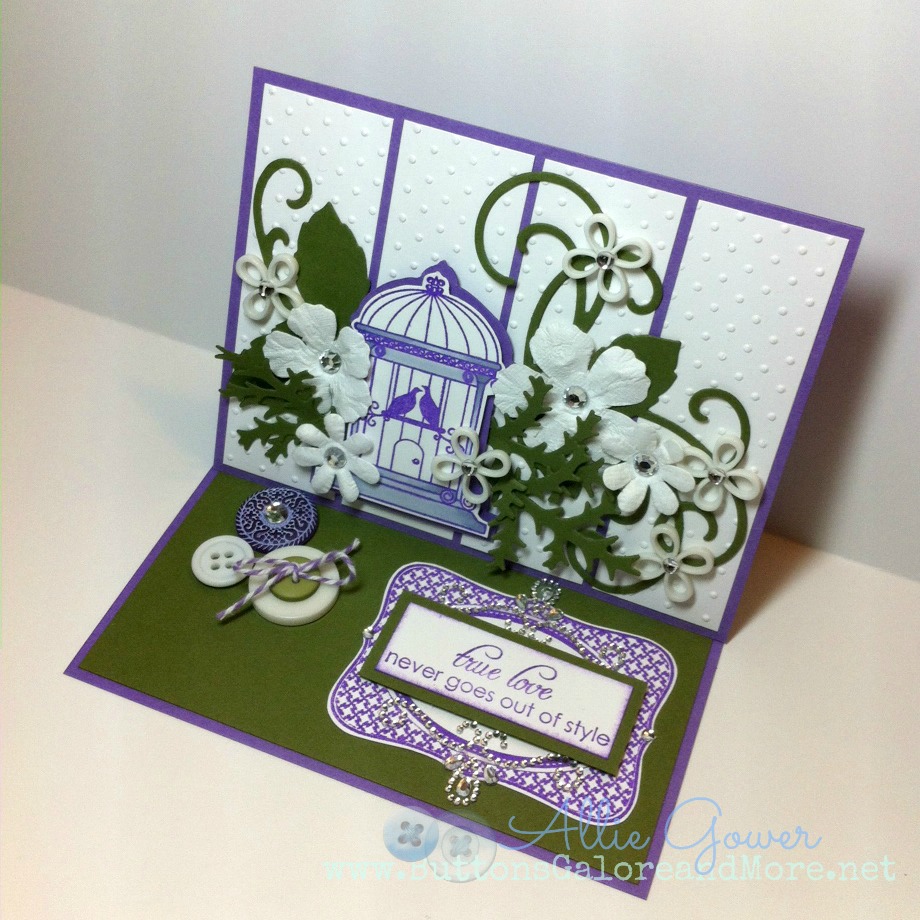
This is a simple easel card with a little bit of stamping with die cuts. It’s not difficult. The background is embossed panels – the folder is Swiss Dots. The swirls are die cut from the Belle Rose set from Heartfelt Creations. The sprigs are from a Spellbinders set called Foliage. When some were too big, I just cut them down. Make your dies work.

I stamped my bird cage and fussy cut it. I also cut a mat for it, so it would stand out in the business of the flowers. The buttons help the card stay open. To one I added a bling center, and then I took two buttons and tied them together with twine. The larger white button is actually upside down, so that the twine doesn’t touch the card.
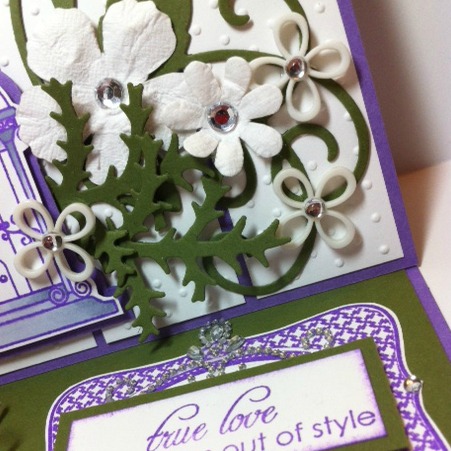
I stamped and cut out the label. My sentiment was a tad too big, so I just matted it and accented it with some fancy bling.
The buttons are from the Valentino Collection, the flower buttons are blank Flower Shapes, and I added some bling to the centers. The flowers came with bling already attached.
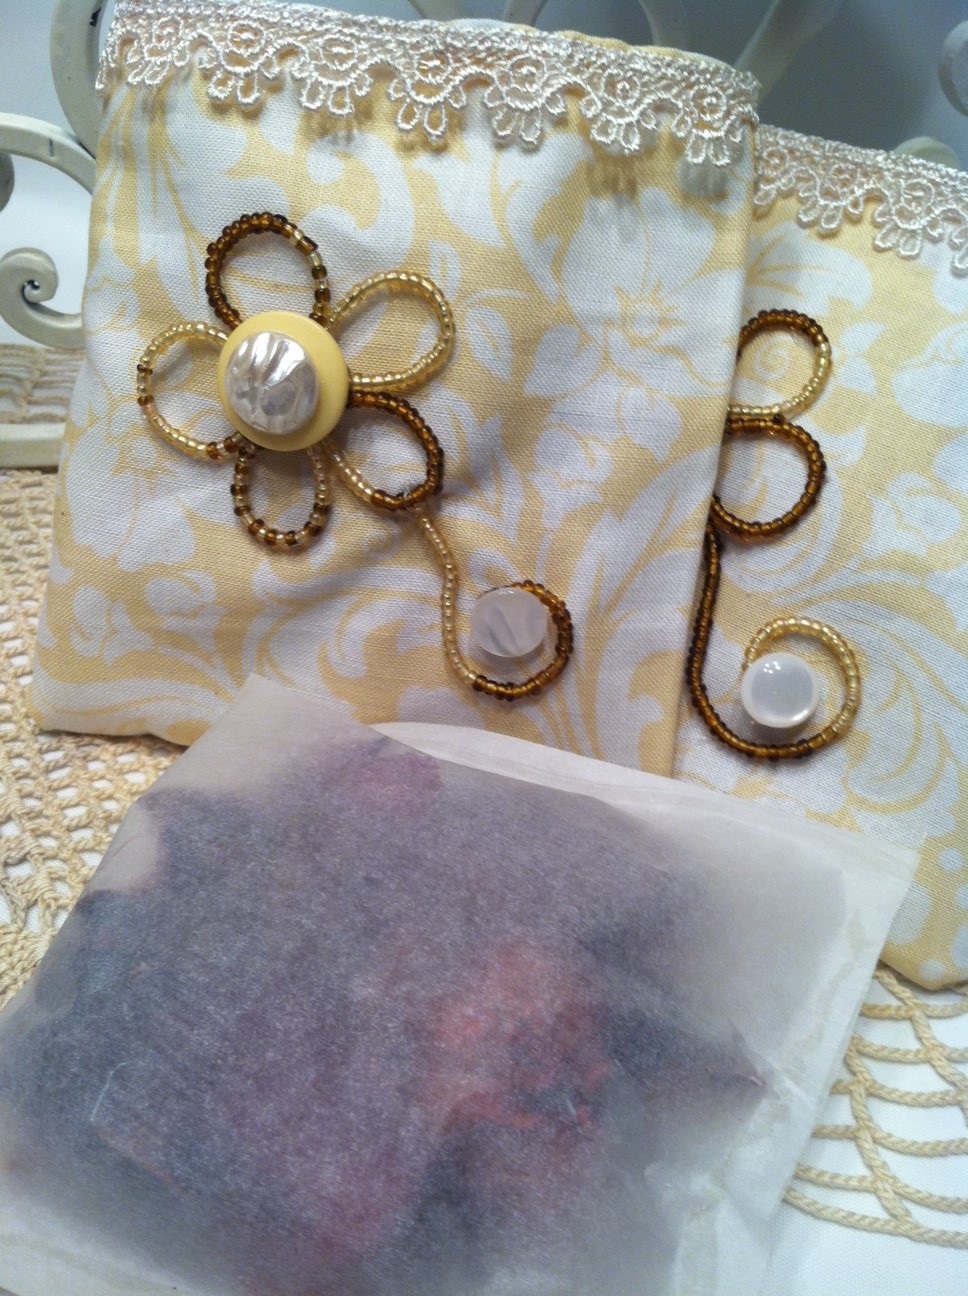
With Spring just around the corner, many young couples are planning their weddings. What better gift than a Ivory Pearl Haberdashery Wedding Favor Sachet Set. Buttons Galore & More offer more than just buttons they offer young couples the ability to create lovely wedding invitations and favors with their lovely line of buttons.
For my project today I used one that I have totally fallen in love with. The Ivory Pearl Haberdashery. The ivory pearl finished buttons come in a variety of sizes and its truly something that can be used over and over again regardless of what the occasion is.
Now who wouldn’t want a scented wedding favor? Especially one with lovely buttons such as the Ivory Pearl Haberdashery? These favors can be used to provide scent to any room in your home after the wedding is over.


These Ivory Pearl Haberdashery Wedding Favor Set can be created for any occasion it doesn’t necessary have to be done for weddings, but I think that anyone attending a wedding would truly love receiving such a lovely favor.
BUTTONS GALORE & MORE:
Now I know it may seem like a lot of materials. Trust me it makes a lovely Wedding Favor Sachet. I started out by cutting my fabric that I picked up at my local fabric store. I cut the fabric 4 1/2″ x 5″ and sewing the edges leaving an opening. Now, I’m not that great at sewing. So I glued my ivory trim with Beacon adhesive Fabri-Tac. Wow this glue is amazing. I was really amazed on how quick it dried up and how well it glued the trim to the fabric. Once you have this all done you can begin beading the flowers by using a floral wire. I twisted the wire once all the glass beads were on the fabric wire to create a flower. To make the swirls on the side of the flower I did the same thing.
I applied the flowers to the fabric using Beach Adhesive Fabric-Tac. It was just that easy to adhere to the sachet bags. Next I applied my buttons from Ivory Pearl Haberdashery collection and Sunny. They are on Buttons Galore & More website. I placed a piece of Velcro Press and Close Fastener to the inside of the sachet bags. This will allow you to refresh or replace your potpourri bags anytime you want.
The potpourri is something I picked up at my local Walmart. I used Canson Tracing Paper to hold my potpourri. I cut about 3 3/4″ x 4″ tracing paper. I hot glued the edges leaving an opening and then placed my potpourri inside and sealed the top with more hot glue. I placed it inside of my Wedding Favor Sachet and sealed with the Velcro Press & Close Fasteners.
I couldn’t stop just here I had to make a card to accommodate this lovely Wedding Favor Sachet Bags. The card is 5 x 5 1/2″ and I used the same technique to create the flower. I added the Ivory Pearl Haberdashery buttons to the flower petals which I glued using hot glue. I also saved a piece of the fabric that I used for the bags and applied it my card and to top this card off I used Teresa Collins Vintage Find Acrylic Stamp, Staz On and Buttons Galore & More Sm. Rectangle Sliders . I stamped the word “LOVE” using Black Staz On Ink and stamped it directly to the Sm. Rectangle Sliders. I used Glue Dots to attach my seam binding ribbon to the card and finished my card up.
I hope this inspires you to create something lovely and amazing for your Wedding using Buttons Galore & More buttons for your wedding favors.
Your Wedding Day is coming up. Now, it’s time to throw a thank you Bridal Luncheon for the gals who’ve been helping you make your big day special.
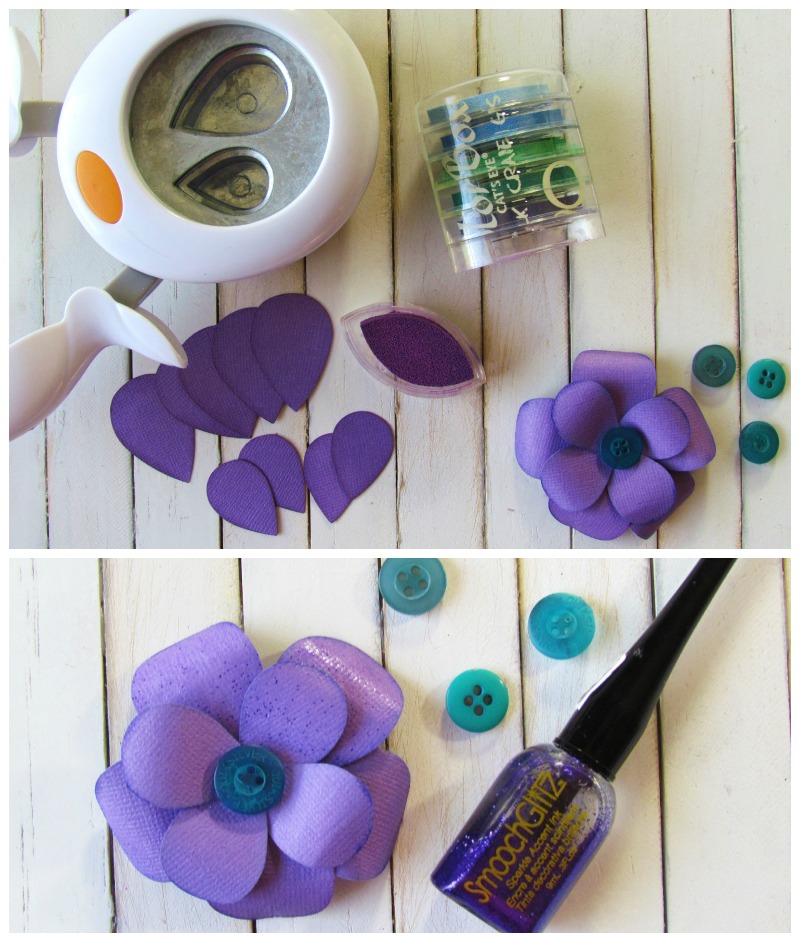
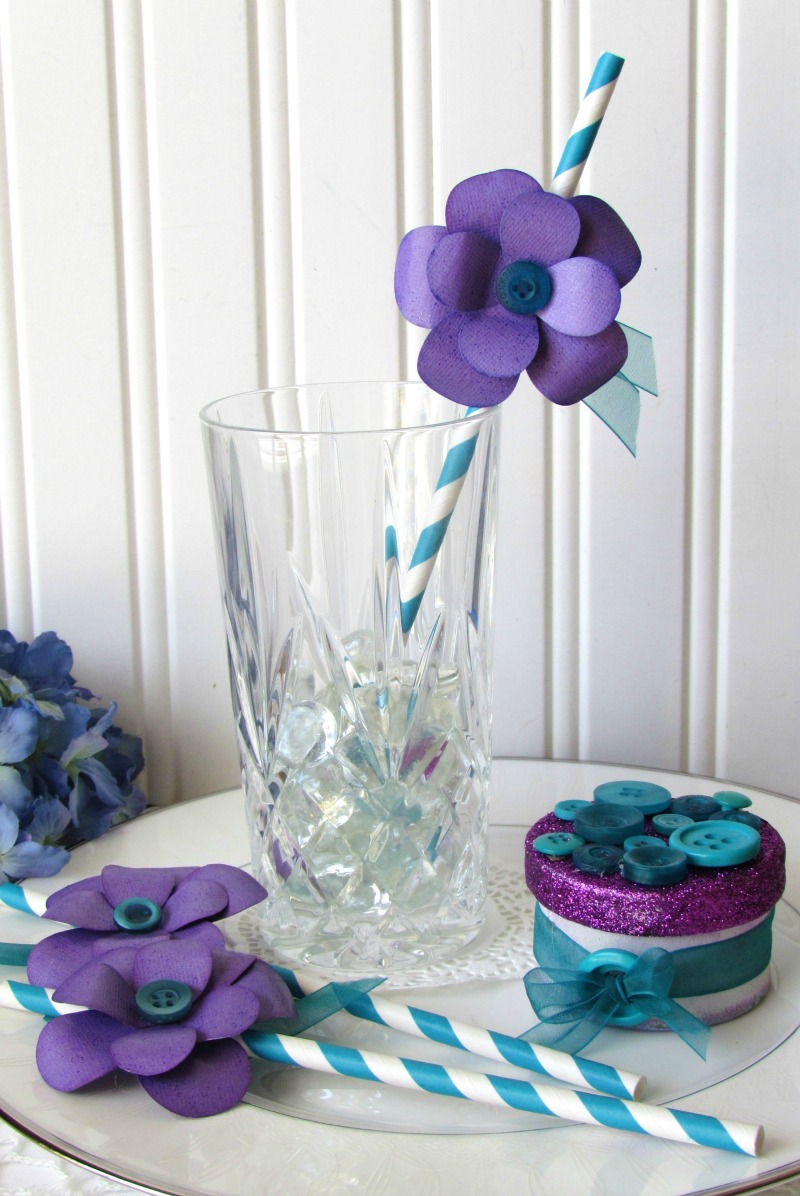
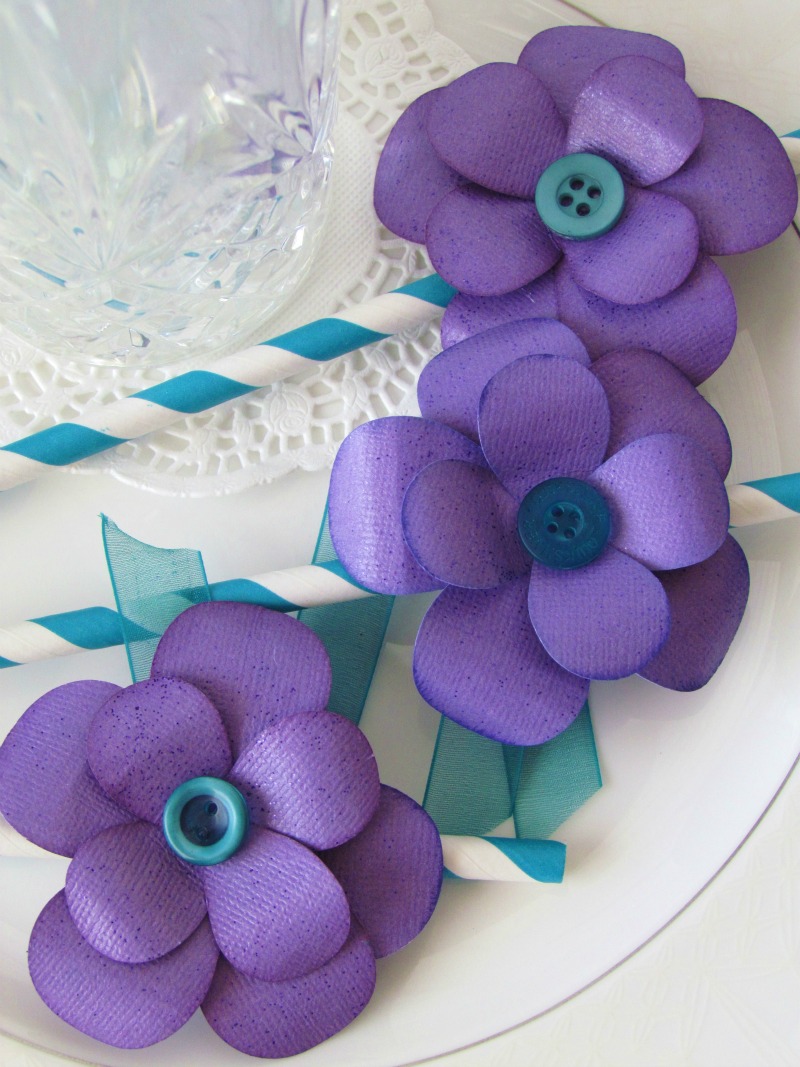
Previously this month, I posted a tutorial on the Buttons Galore & More blog on how to make a Bridesmaid Gift Box. So, to continue with my bridesmaid theme, I’m sharing coordinating Button Flower table decor that can be an easy way decorate your Bridal Luncheon table.

To coordinate with the Bridesmaid gift box, I made some button flower table decor using a Fiskars punch and adhered them on to C.U.T.E drinking straws. I love how these straws come in a variety of colors. There so cute that it’s almost hard to put them in to a drink.

Like Me on Facebook!
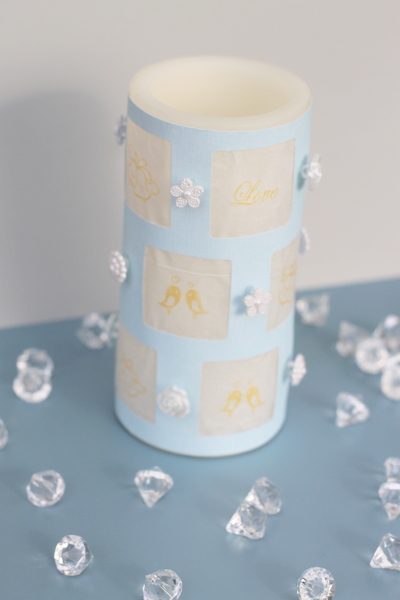
Looking for DIY wedding decorations for your wedding? These candle wraps with buttons are perfect for your ceremony. Plus there are two different looks to choose from. These wedding decorations can be modified to work with any style.
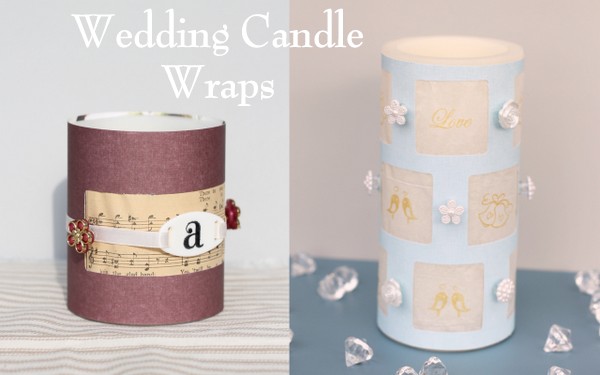
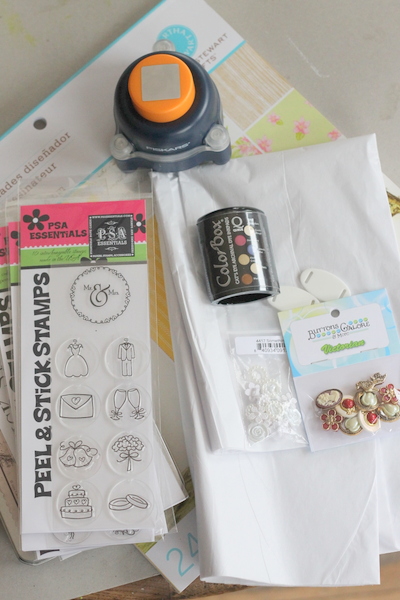
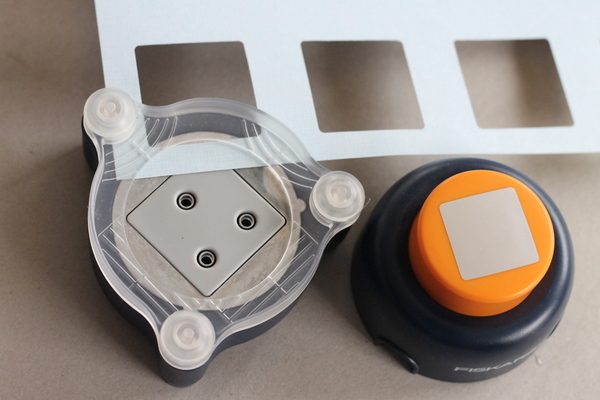
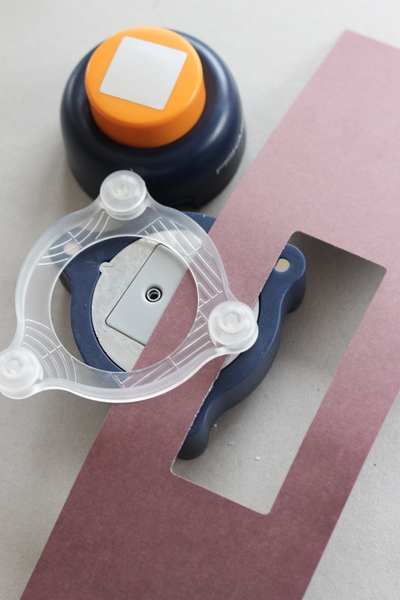
For the blue candle wrap, cut a sheet of paper so that it fits your candle. Punch out a pattern of windows in your scrapbook paper with the Fiskars Everywhere Punch.
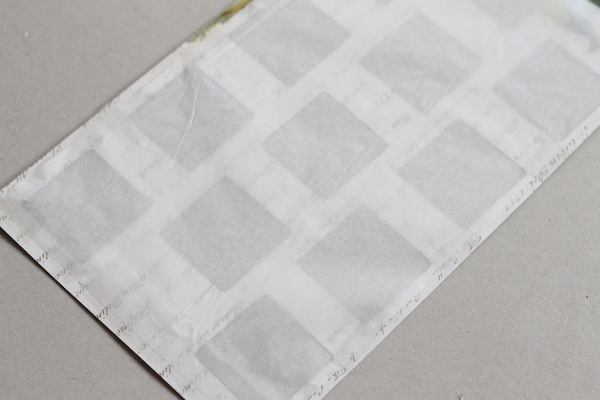
Cut a sheet of tissue paper slightly smaller than your paper and tape to the back.
Use various stamps to decorate each window of your candle wrap.

Wrap the candle and secure with tape in the back. The candles I am using are wax sleeves that accept battery power tea lights. There is no threat of fire when using these types of candles. Add random buttons from the Something New button pack around your candle wrap. Use hot glue to secure your buttons.
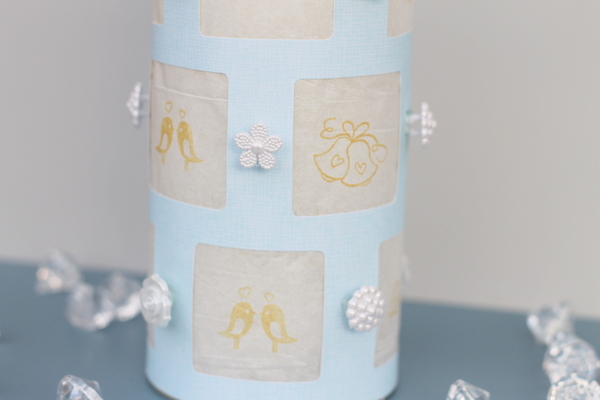
Add this one to the center of your wedding table for a beautiful centerpiece. A collection of these would look great at your wedding reception.
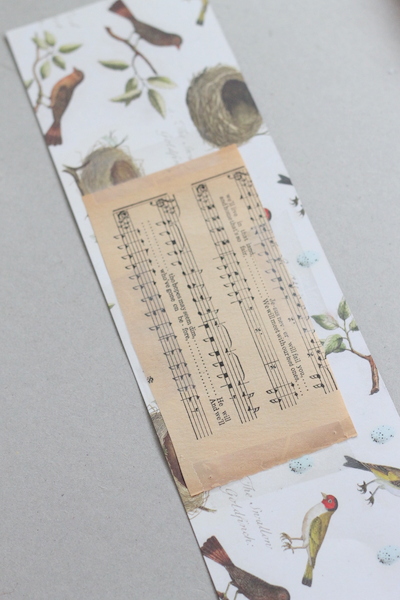
Now for the second version just to show that these can be customized to any wedding theme. For this version, again I cut the paper to size. This time I used my Fiskars Everywhere Punch to make an elongated hole.
I cut some sheet music to size and taped it to the back of the paper over the window.
Stamp the blank shape with the monogram of your choice. Then thread through some ribbon. Glue the shape and the buttons to the ribbon ONLY. Do not adhere to your wrap in this step.
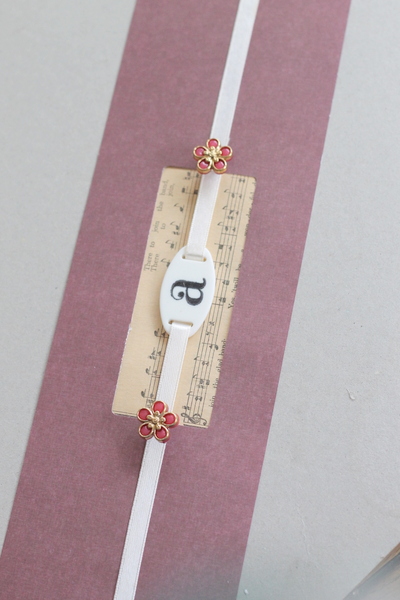
Wrap the paper only around your candle first and secure with tape. Then add your ribbon and secure with hot glue.
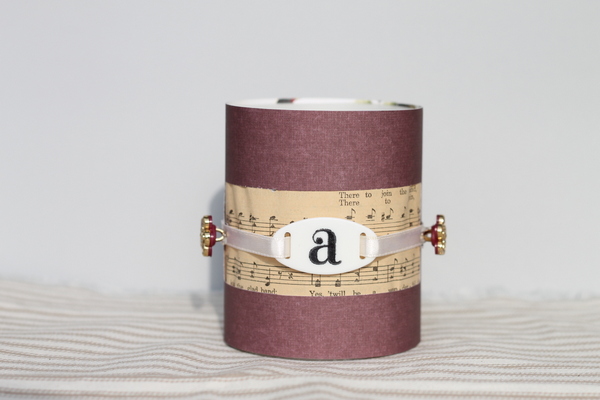
You can change up the paper and buttons on your candle wraps to match your wedding theme. These are a quick and easy addition to any wedding decor. Not getting married anytime soon? These could also be customized for any season or home decor. Grab your buttons and get started on your wedding decorations today.
I am in love with doilies. Seriously, I think everything looks better with a doily. And, as Spring and Summer approach, I’ve also got pinwheels on my mind. So, when I was brainstorming some wedding ideas to share with you, I decided to combine my two loves. Of course I threw in a button for good measure too! These doily pinwheels would be great wedding favors or, if you want to give your wedding a whimsical touch, why not line the ceremony aisle with them? I can’t imagine a better way to walk into life as a newlywed than between pinwheels. After all, doesn’t your groom make your heart spin?
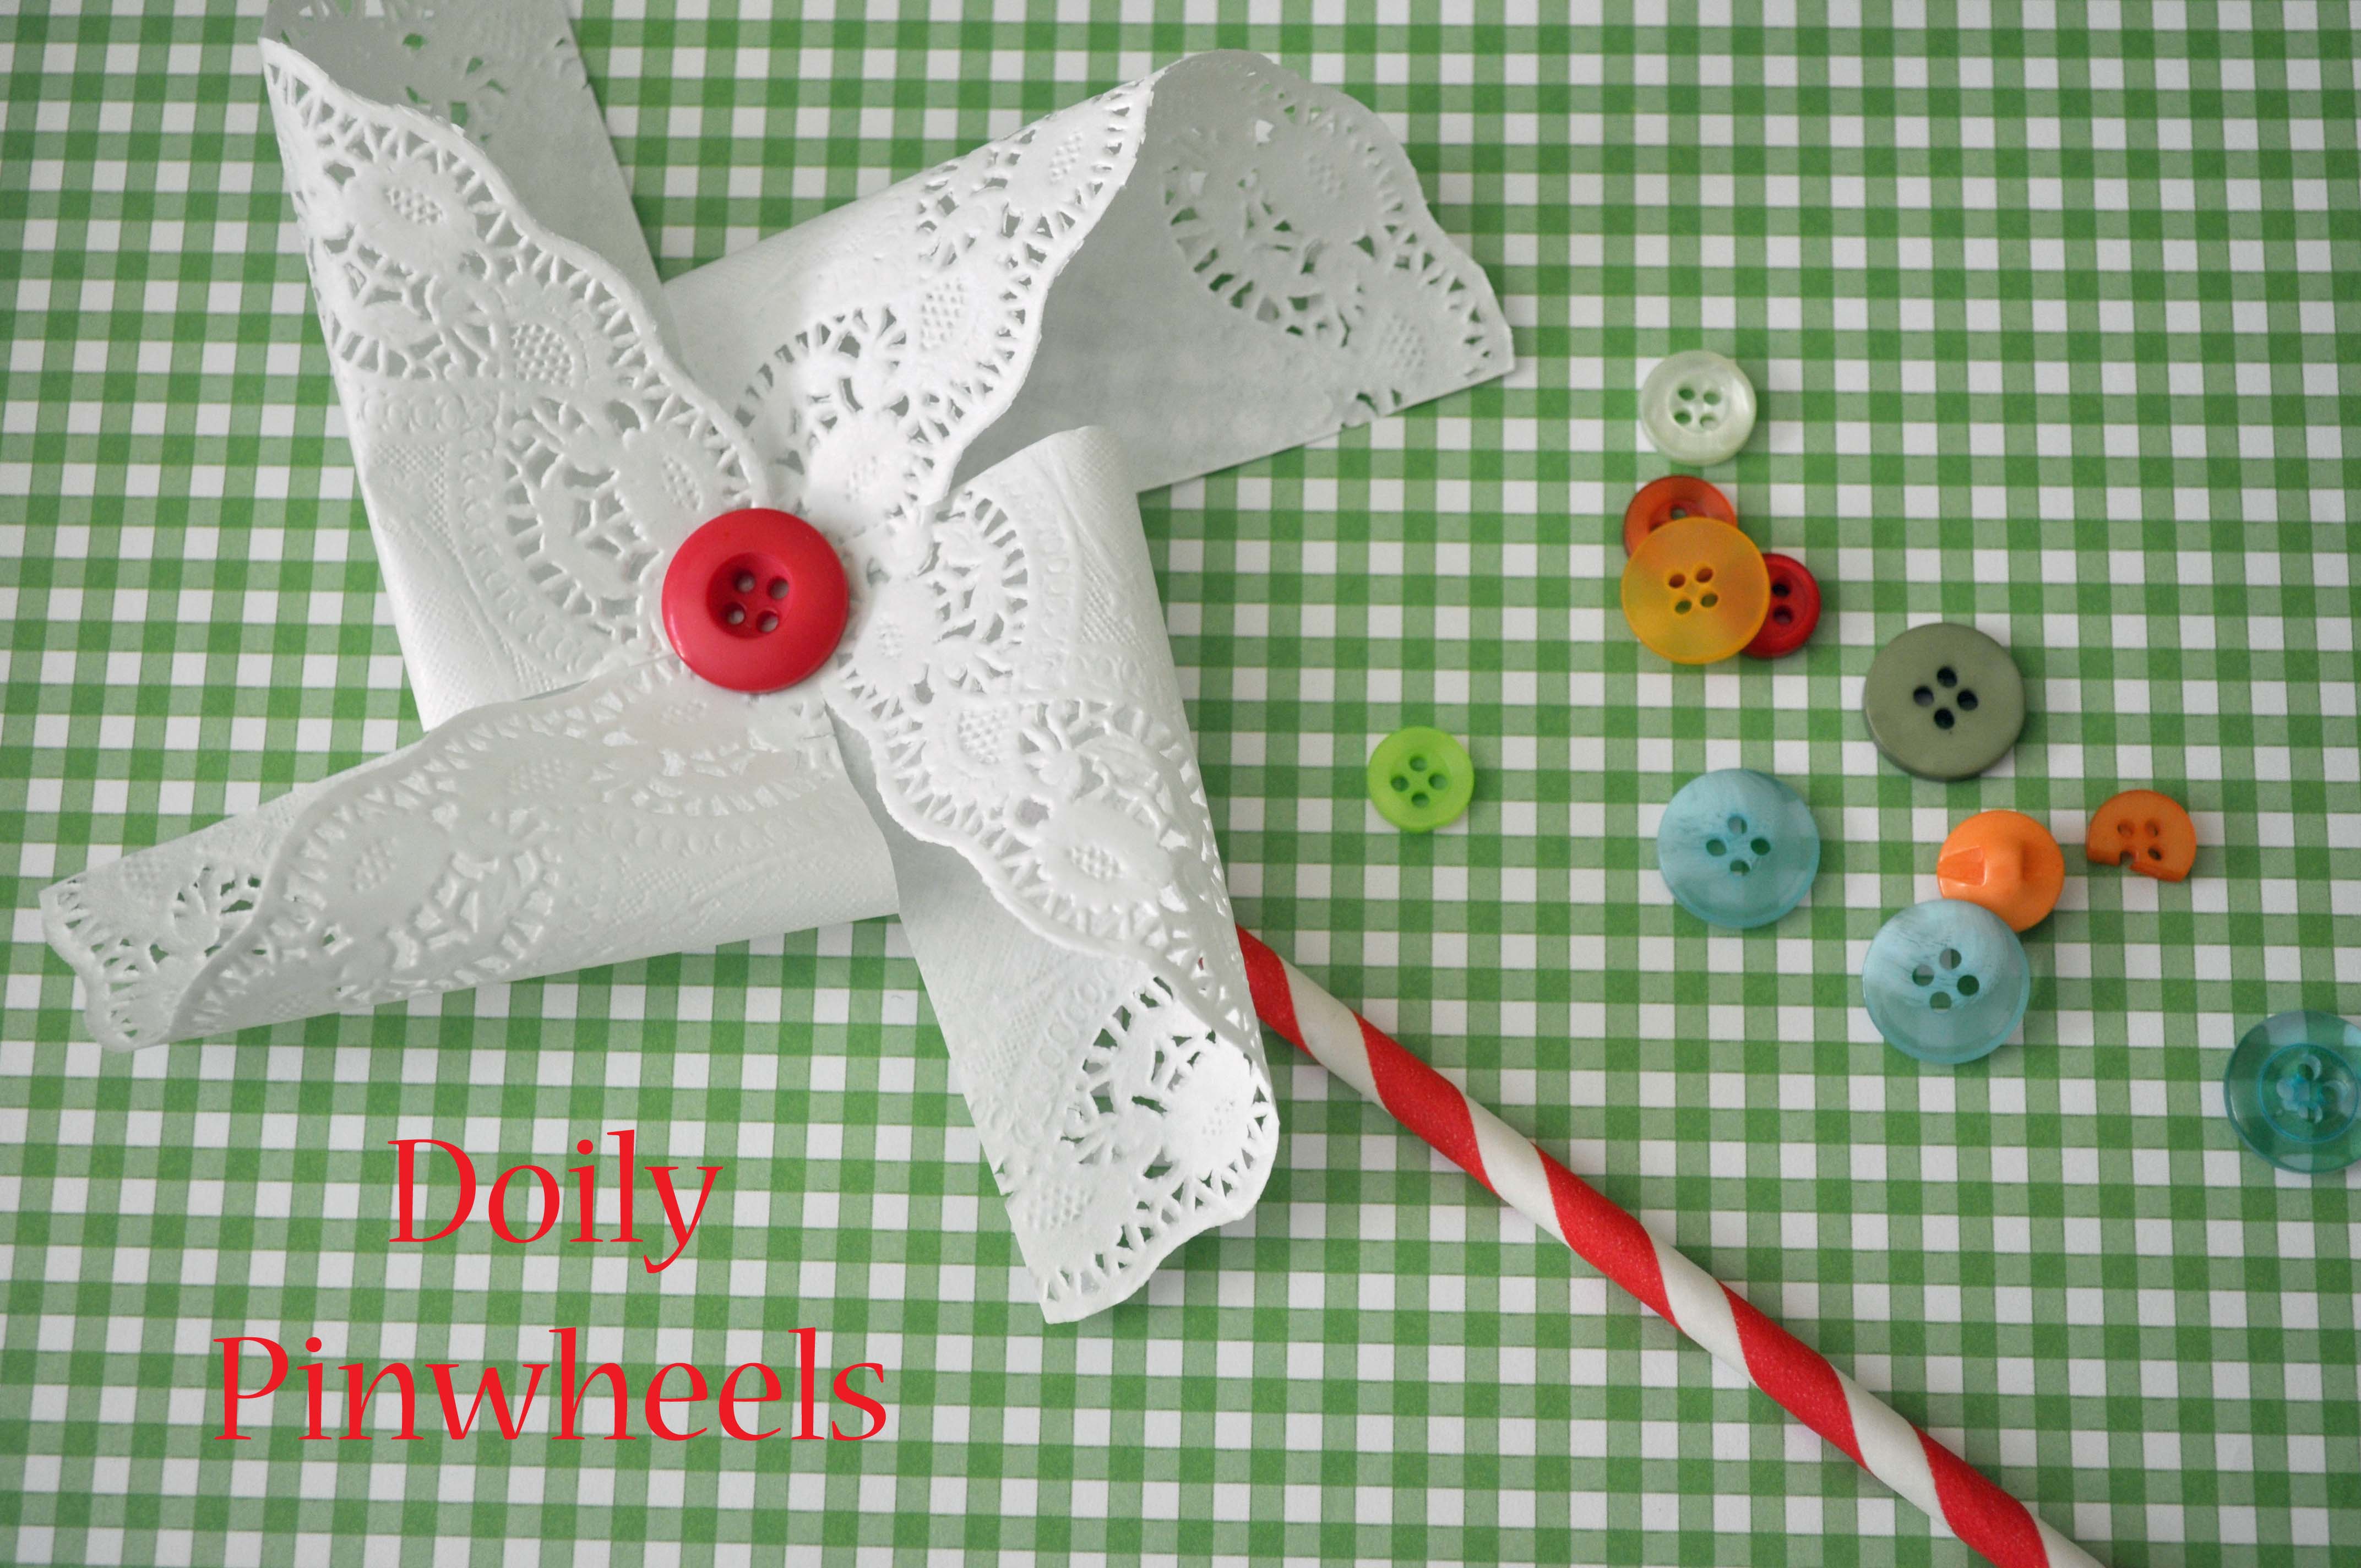

Tip: Match the button and the stripes of the straw to your wedding colors. If you can’t find straws to match, use wood sticks and paint them to match!
![]()
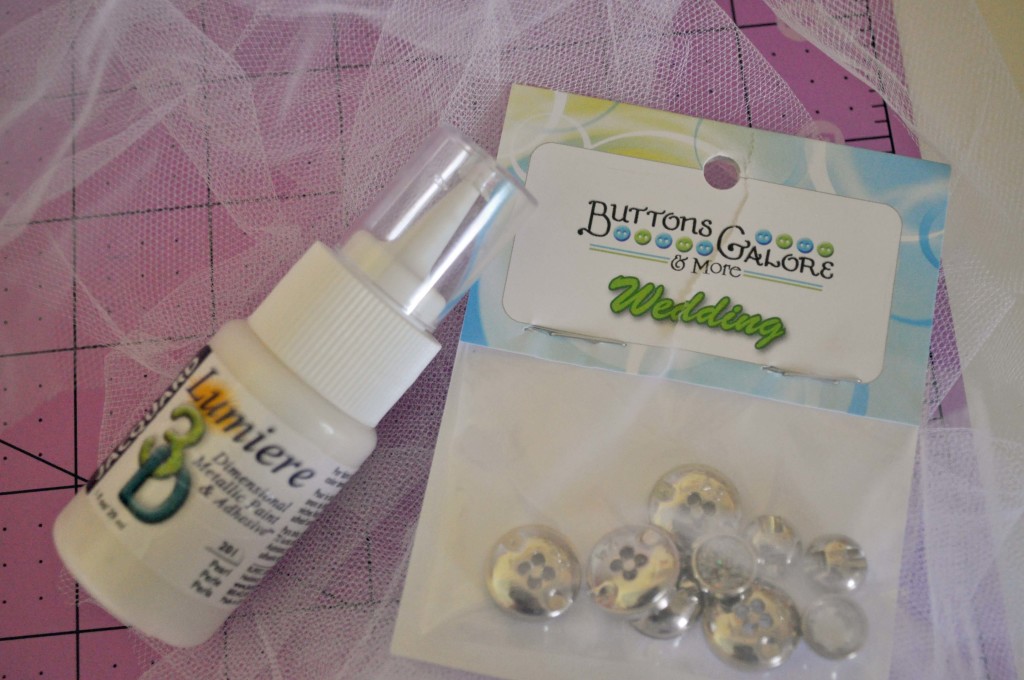
Something borrowed, something blue. This cute, DIY bridesmaid headband is perfect for your wedding. I love the “Tiffany” blue of the ribbon and the Buttons Galore & More Wedding Glitz buttons give it lots of sparkle. This headband is a great wedding project. It would look great on your bridesmaids, flower girls, or even as a alternative to a veil for a bride.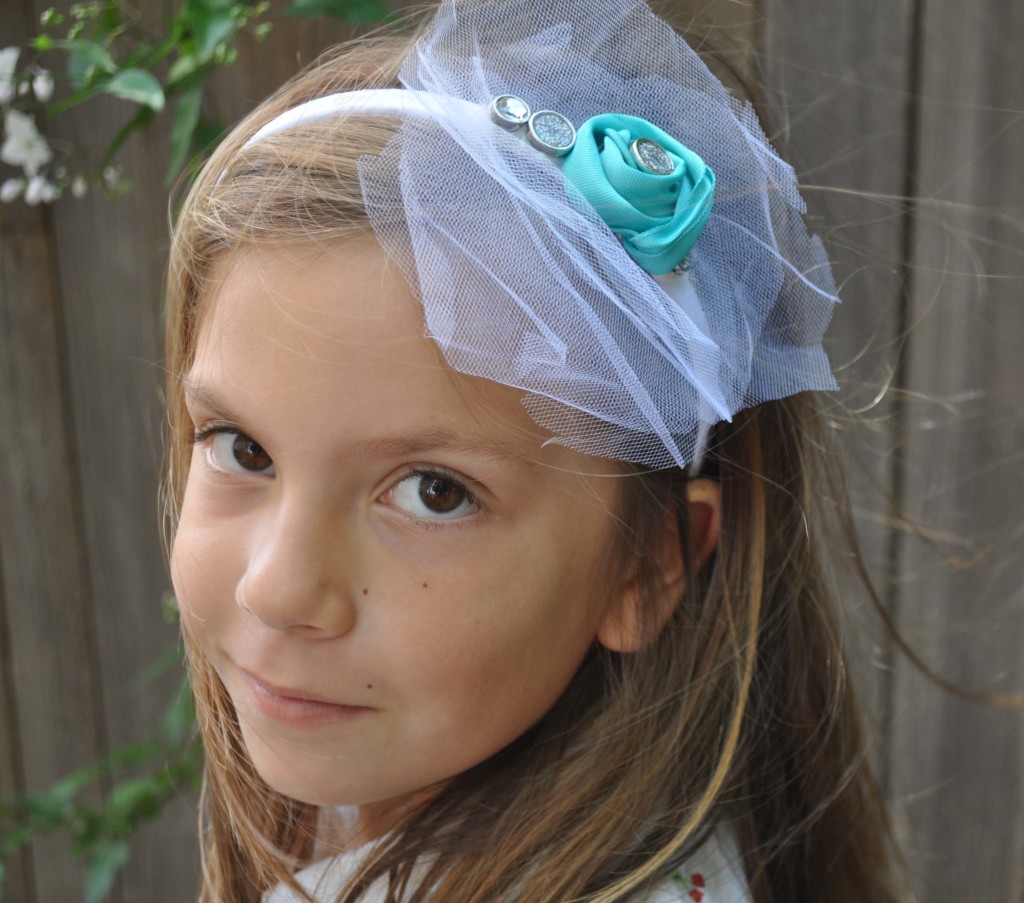
1. Using scissors, cut 3 circles, measuring approximately 6 inches in diameter, from the tulle. This doesn’t have to be perfect! Cut them freehand and let the edges be a little ragged. This will give the headband a soft, romantic look.
2. Cut 12 inches of ribbon. Twist and roll it into a flower shape.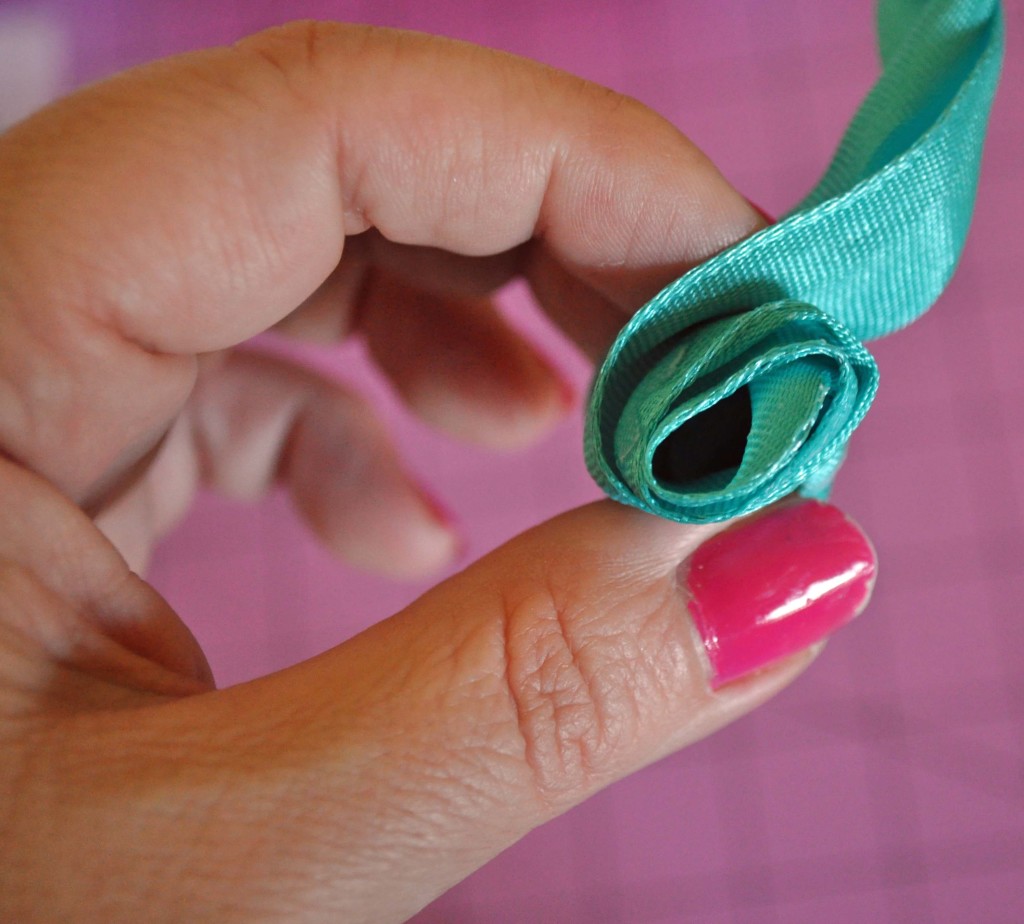
3. Using the Lumiere paint, apply a dab of glue to the side of the headband and attach the tulle circles to the headband. It should be placed 1-2 inches from the top, center of the headband.
4. Again using the Lumiere paint, attach the the ribbon flower and some additional Wedding buttons to the headband over the tulle. Add as much or as little bling as you like!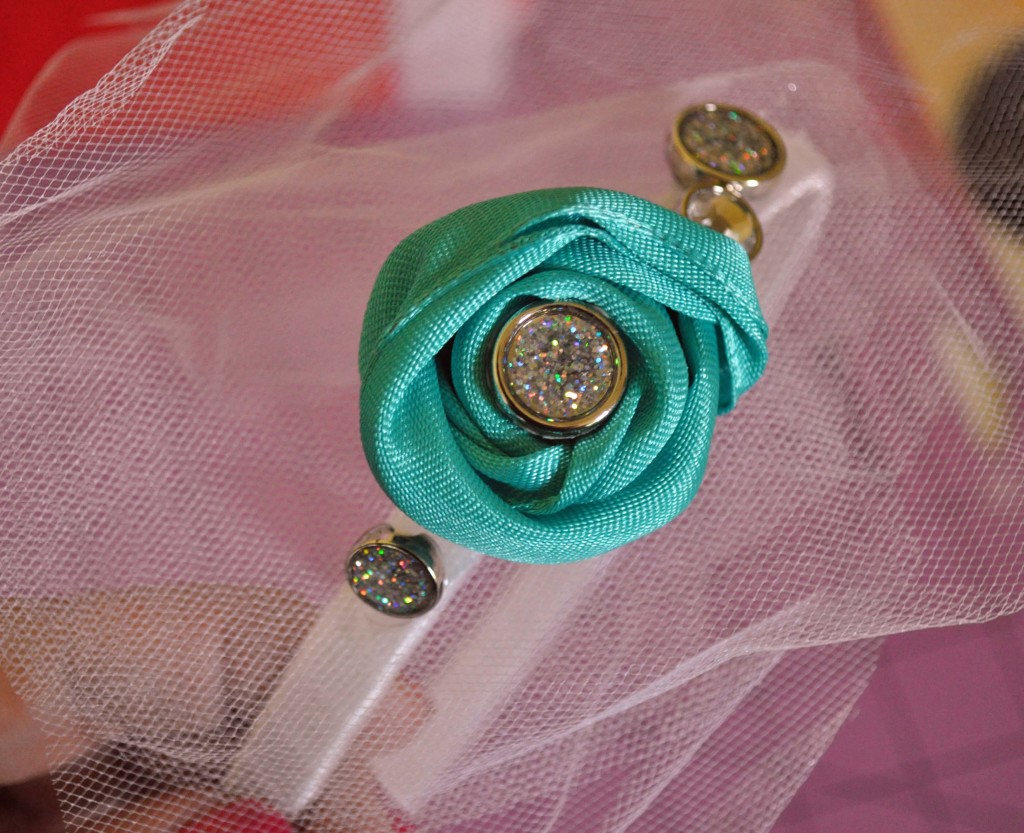
Tip: Lumiere 3D Dimensional Paint works great for this project as it works as both a glue and design element. When the paint dries it gives you a 3D pearl effect-perfect for a wedding.
![]()
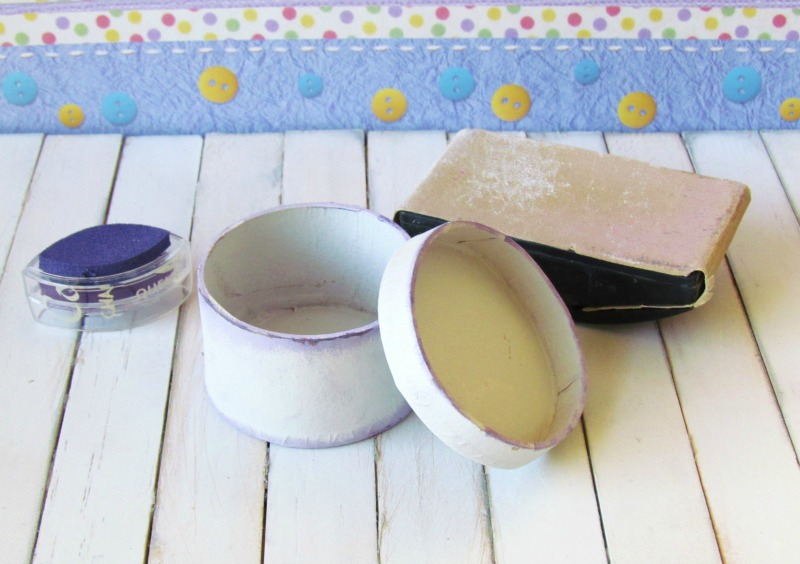
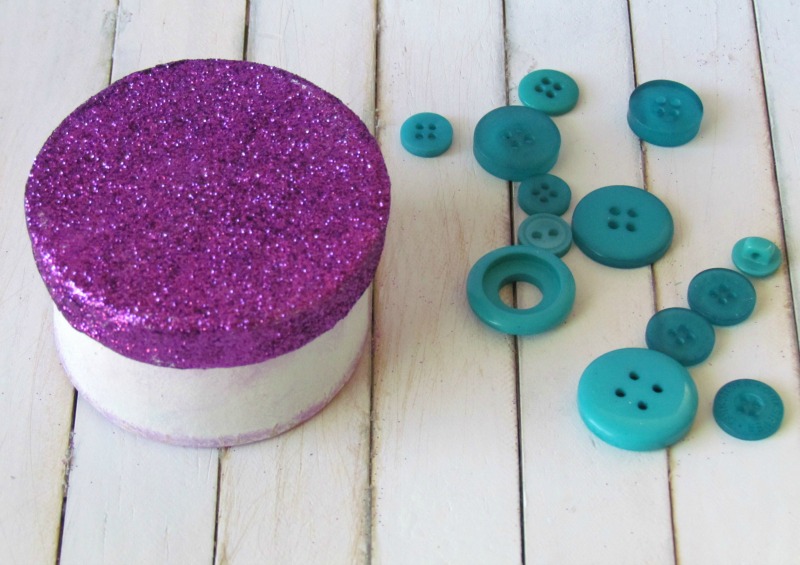
A Bridesmaid Gift Box idea – So your big day is coming up and you want to give your Bridesmaids a handmade gift from the heart since they’ve been puttin’ up with your Bridezilla attitude.
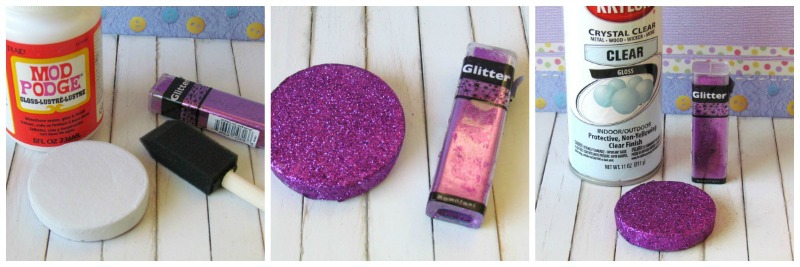
How about making them an elegant Bridesmaid gift box using buttons and glitter? You could even personalize the Bridesmaid gift box more by using your wedding colors or even their favorite colors.

Simple and elegant Bridesmaid Gift Box made by using buttons and glitter.

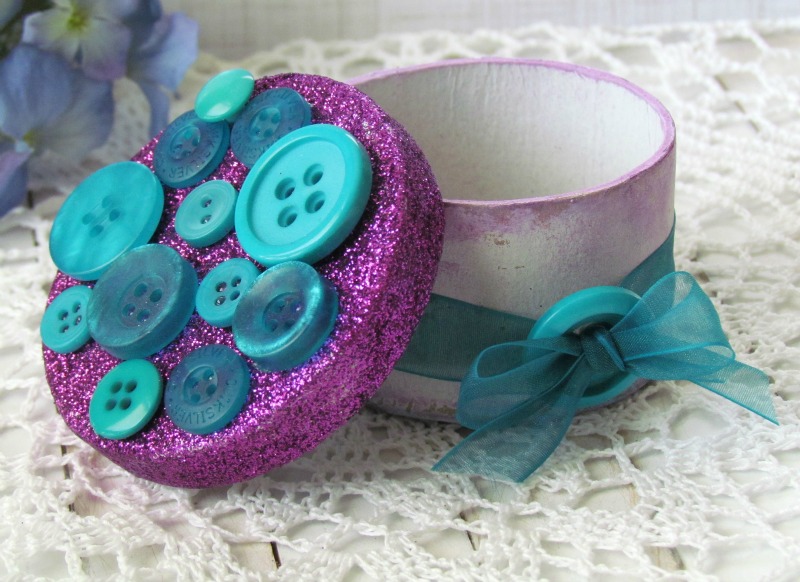
Now that your elegant Bridesmaid gift box is made, it’s time to add something sentimental inside for them to remember your special day and how they helped you to get there. Maybe a piece of jewelry, a gift card to their favorite eatery or even an IOU for a night out on the town after your big day.

 Sharpie markers make creating with buttons so much fun. Our talented designers were sent a variety of Sharpies and asked to create a project around the theme of Weddings, Showers and parties in general. One of our own designers, Laura Kelly, is getting married next month. so in honor of her event we thought we would give you some inspiration for the upcoming wedding season.
Each of the designers has posted their project on their personal blog. We love comments and compliments… honestly, who does not? So to encourage the love we are giving a prize. Leave a comment on this blog about a project. It could be your favorite, a delightful color combination or an inspirational use of the buttons and Sharpies.
The list of designers:
Ann Butler http://www.creativitystirsthesoul.com/2012/06/buttons-plus-sharpies-equals-cute.html
Allie Gower http://welltrainedpaper.blogspot.com/2012/06/sharpies-blog-hop.html
Keri Lee Sereika http://pinklemonade.typepad.com/my_weblog/2012/06/buttons-galore-more-sharpie-marker-blog-hop.html
Ryann Salamon http://ryannmarin.wordpress.com/2012/06/19/buttons-galore-more-weddingbridalshower-blog-hop/
Carla http://carlaschauer.com/sharpies-and-buttons-tag-tuesday/
Dana http://www.paperdaydream.blogspot.com/2012/06/buttons-galore-teams-up-with-sharpies.html
Laura Bray http://www.katydiddys.blogspot.com/2012/06/wedding-blog-hop-buttons-sharpie.html