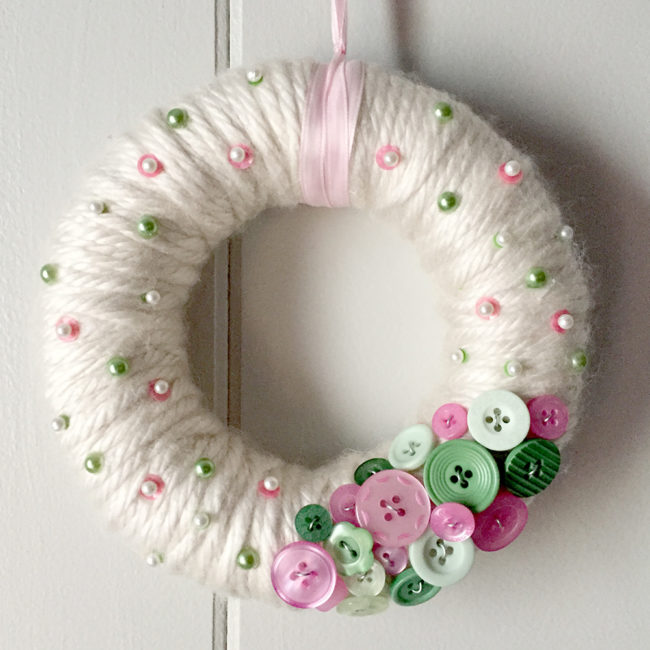
A beautiful wreath is an essential part of complete holiday decor. This yarn wrapped button wreath helps welcome guests to your home and allows you to express your creativity as well! Continue Reading →

A beautiful wreath is an essential part of complete holiday decor. This yarn wrapped button wreath helps welcome guests to your home and allows you to express your creativity as well! Continue Reading →
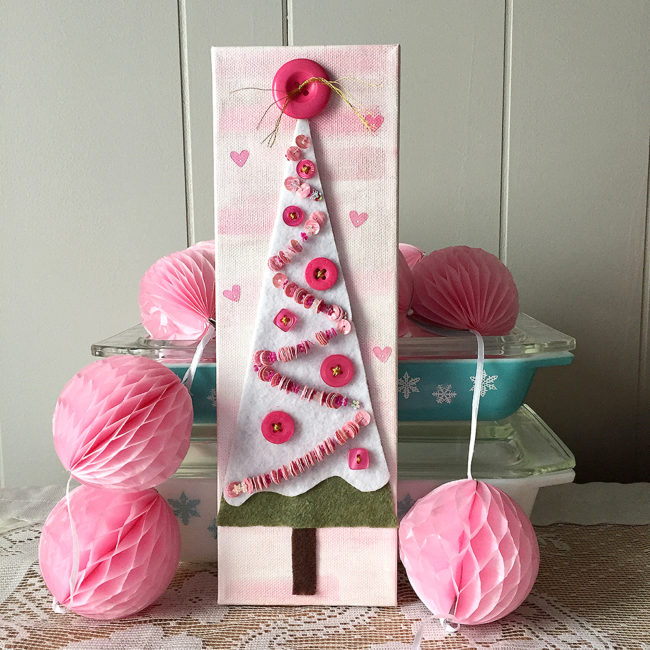
Do you love crafting for the holidays but just can’t stand making everything red and green? Good news – pink is trending this Christmas! Add this pretty pink Christmas tree decor to your decor to change things up a bit this holiday season! Continue Reading →
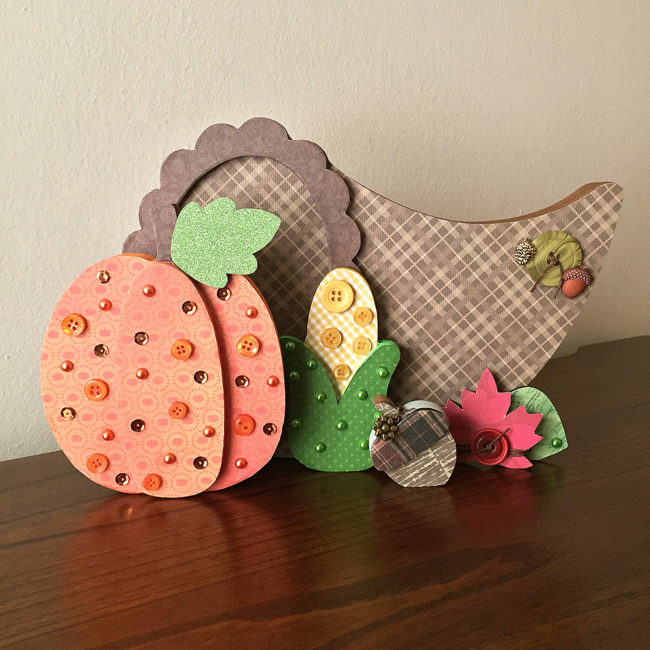
Thanksgiving will be here soon and the house will be full of relatives and friends. Why not create something to show off before dinner with this DIY thanksgiving cornucopia home decor set? Continue Reading →
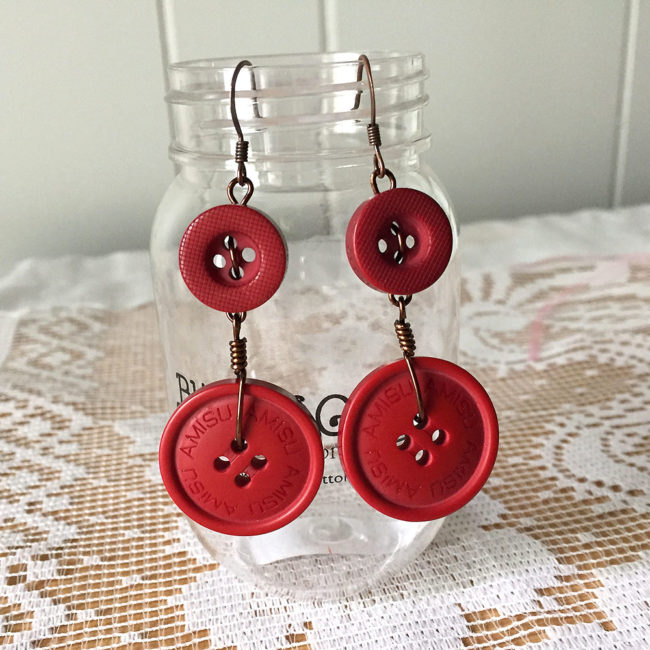
Hi! It’s Anaya from the Buttons Galore & More Design Team. With the holidays fast approaching, you’ll surely want to dress to impress for all of the upcoming parties and celebrations. If you’re like me, you get tired of showing up in the same old boring earrings. Well, today I’ve got the perfect project for you – DIY Dangle Earrings! Continue Reading →
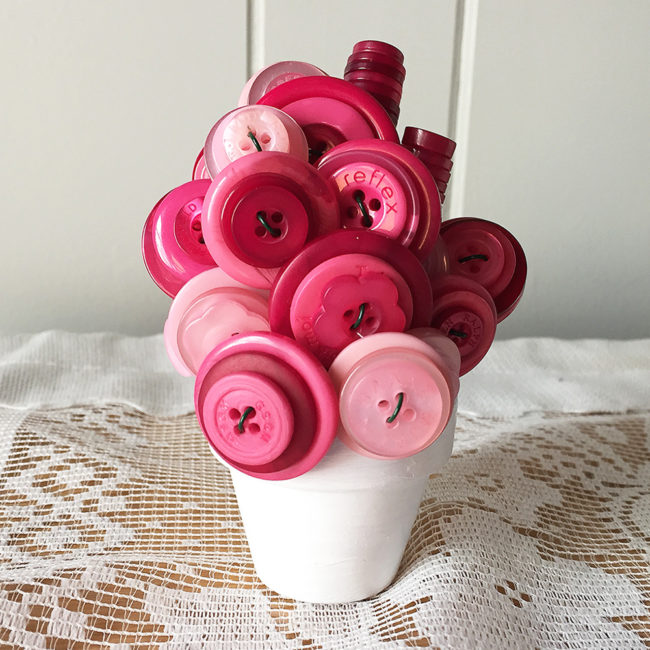
Flowers are pretty, but they are also expensive and don’t last very long. A button bouquet is affordable and simple to make and will add some vintage charm to your home, wedding, or shower – and never needs watering! Continue Reading →
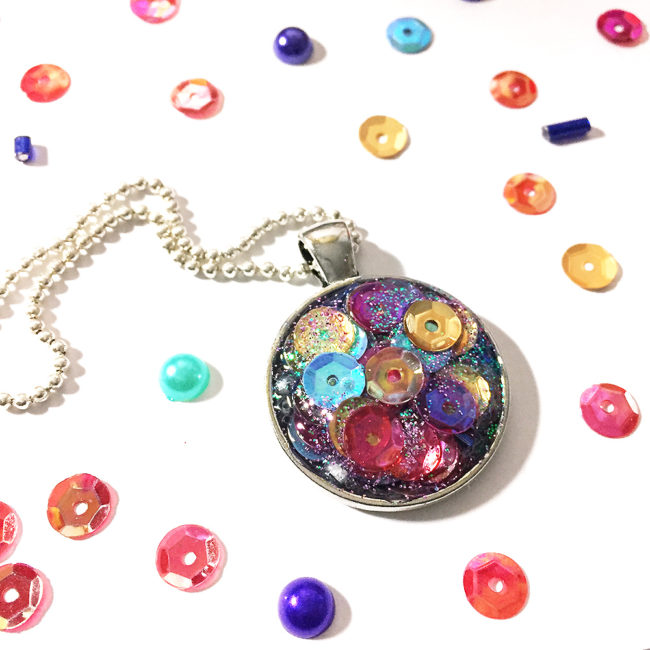
Who doesn’t love an invite to good party? I know I do! When you walk through the door (fashionably late, of course) you can be the center of attention in this quick, easy to make sequin pendant necklace! Continue Reading →
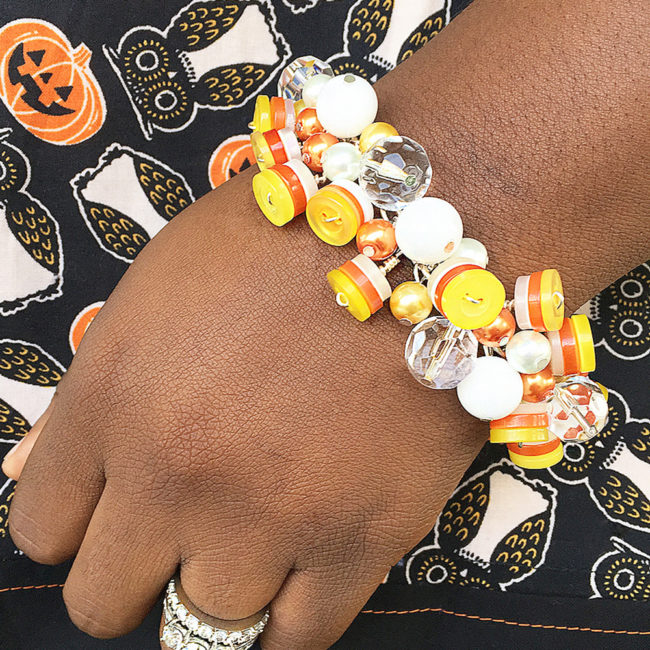
Hi everybody! It’s Anaya from the Buttons Galore & More Design Team. Halloween is fast approaching and I must confess, I’m excited. No, I’m not into the creepy scary stuff – I’m just looking forward to the candy! If you love Halloween candy like I do, I know you’ll enjoy making this super sweet candy corn bracelet.
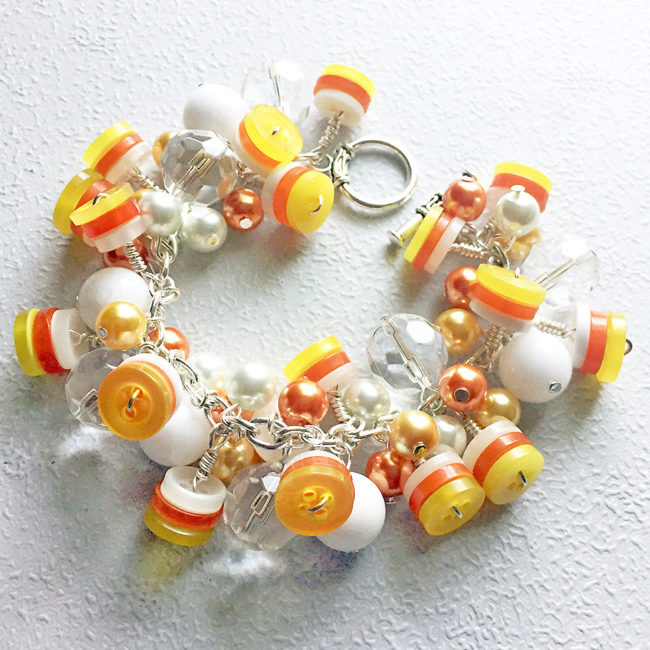
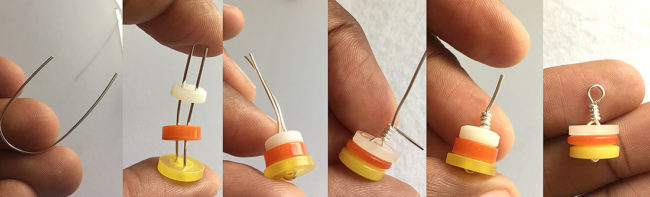
Start your candy corn bracelet by separating the buttons by color and size. You will need to select buttons of a similar size to stack and create little button candy corn charms for your bracelet. Cut a 3-4″ length of wire and gently fold into a ‘U’ shape. Stack buttons with yellow on the bottom, orange in the middle, and white on top. Push the buttons together and twist one end of wire tightly around the other. Trim the excess wire and create a loop using round nose pliers.
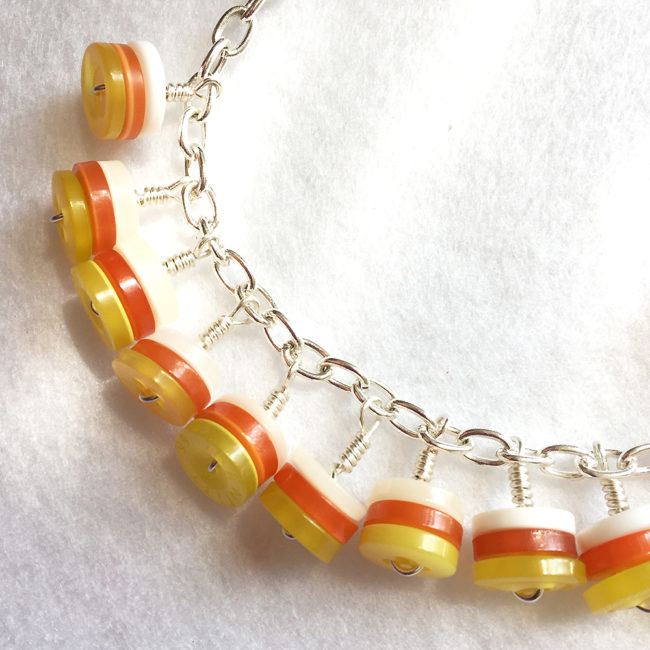
Repeat this step a until you have enough to fill your your chain. My bracelet is 7″ and I have attached a button charm to every other link.
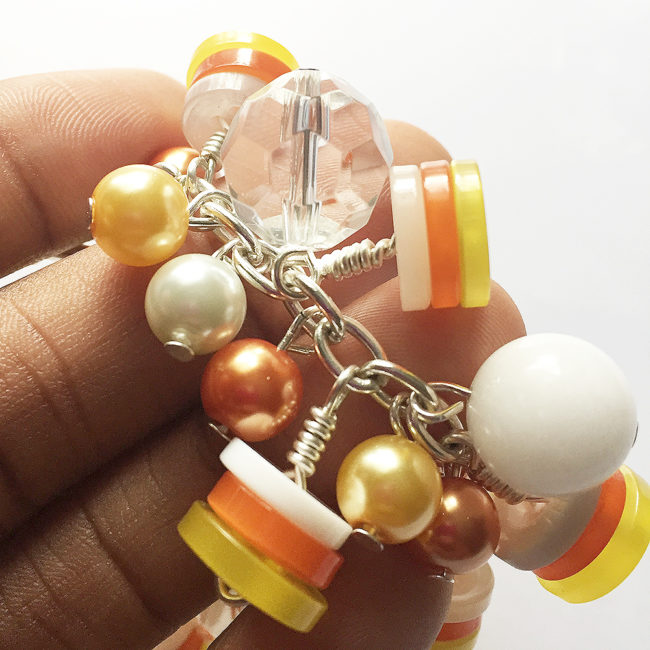
After filling the candy corn bracelet with button charms, gather your selection of beads. I am using 10mm yellow, orange, and white glass pearls along with larger clear and white glass beads. Using headpins, add 2-3 beads to each of the remaining empty links in the chain.
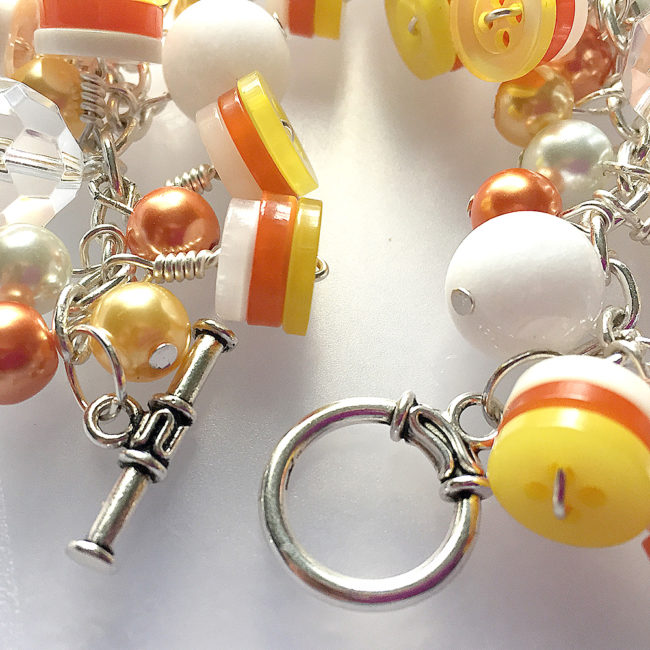
Once the bracelet is as full as you’d like, place a jump ring on each end of the chain. Attach the toggle clasps to the jump rings and your candy corn bracelet is complete!
I hope you’ll give this candy corn bracelet a try! It’s so cute that it’s definitely worth the time and effort to make. You can even modify the steps a bit to create a matching Halloween necklace and earrings. With this kind of arm candy, you’ll be sure to get all the sweet treats you desire this Halloween candy grabbin’ season!
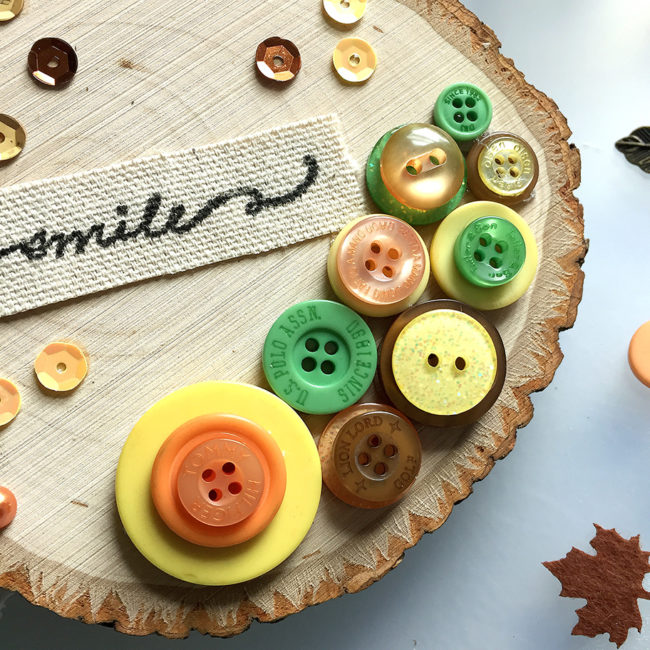
If you’re like me, you just can’t wait for the temperatures to drop. Now is the perfect time to get started on some fun and simple projects for fall. Today, I’m going to show you how to use the Autumn Afternoon embellishment kit by 28 Lilac Lane to create an awesome fall wood coaster wall decor piece for your home.
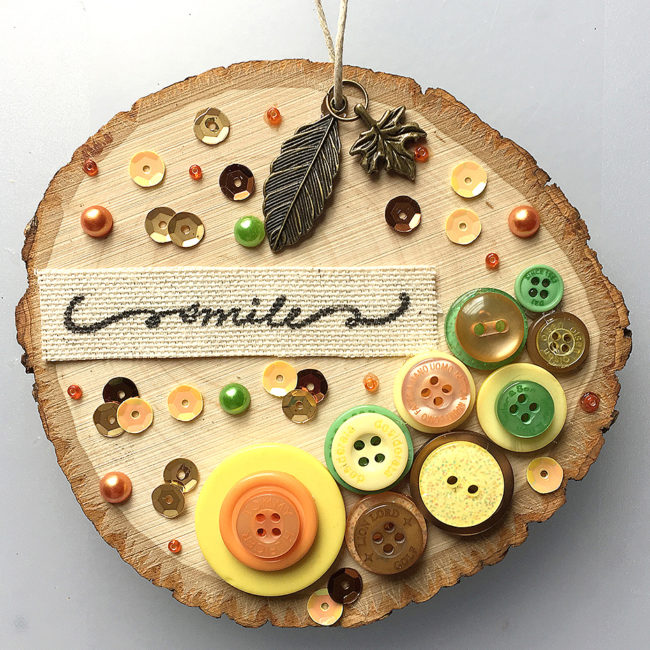
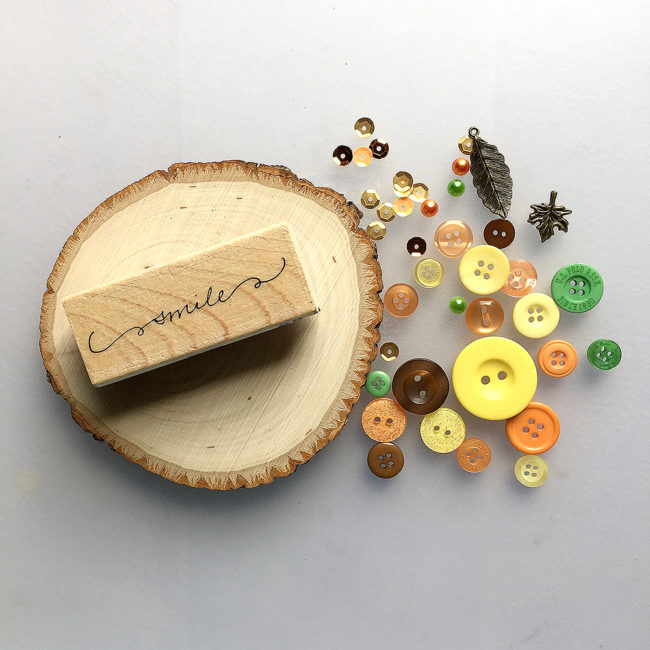
The first thing you need for this project is a wood surface. I’m using a 4 1/2″ round wood coaster that is about 1/2″ thick. Next, you will need to find a stamp with a word or phrase that expresses the perfect sentiment. I have selected a “smile” stamp. Smiles are always in season! You can of course go with something specifically related to fall. Most importantly, ensure that anything you choose will fit nicely onto your coaster.
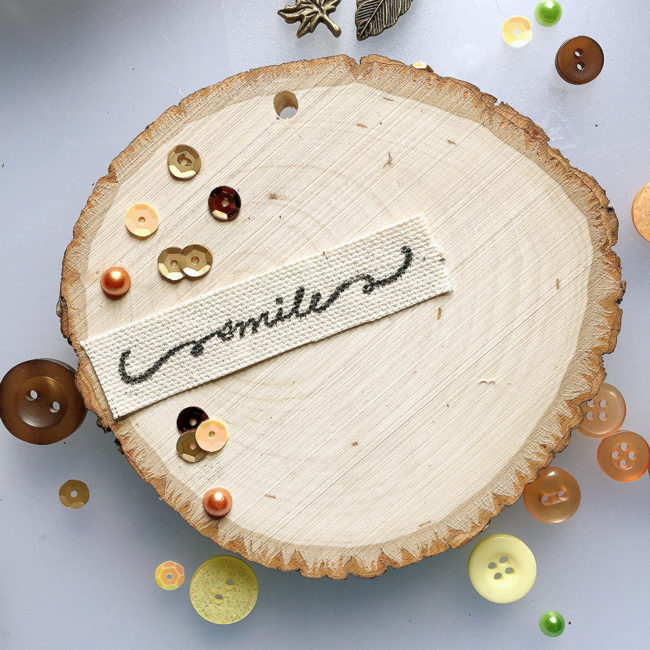
I have drilled a hole in the top in order to attach a string, but you may be able to find one that is pre-drilled for crafting. On a scrap piece of duck cloth I have stamped the word “smile” in black ink and then glued the fabric to the coaster’s surface. Then I used a clear-drying glue to begin adding pearls and sequins.
Don’t forget to leave room for buttons! Using a glue gun, I arranged the buttons closely together near the bottom edge and stack a few for extra dimension.
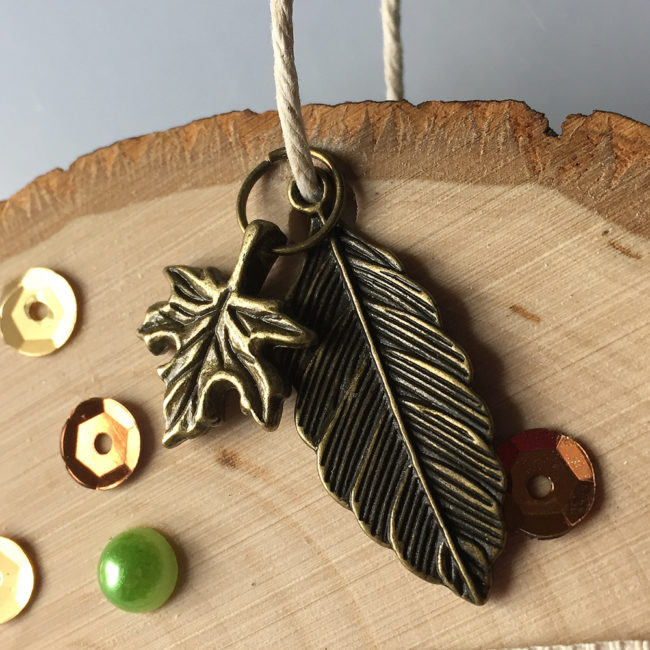
The kit includes leaf and feather pendants in bronze that look great hanging and add just the right touch for the season. I looped the cord through the wood coaster and each pendant. I used a 7″ length of hemp cord. After I attached the pendants, I just tied a knot in the cord to finish it off.
For the last step, I applied a few seed beads using the tiniest dab of glue. Using tweezers will assist in applying the beads exactly where you want them. As we all know, glue can at times get messy!
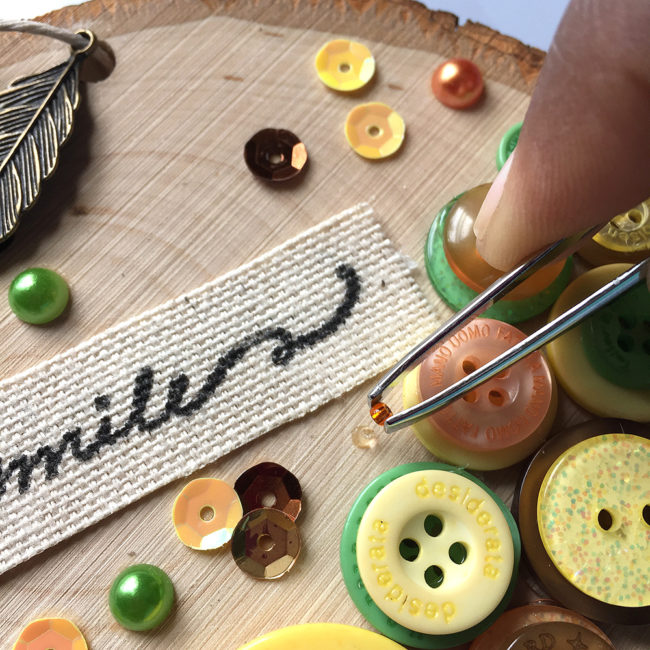
And its just that easy! Your newly embellished fall wood coaster wall decor is complete.
It’s Christmas in July! I’m thinking cool thoughts and making cool things, like this sweet snow scene in a jar!
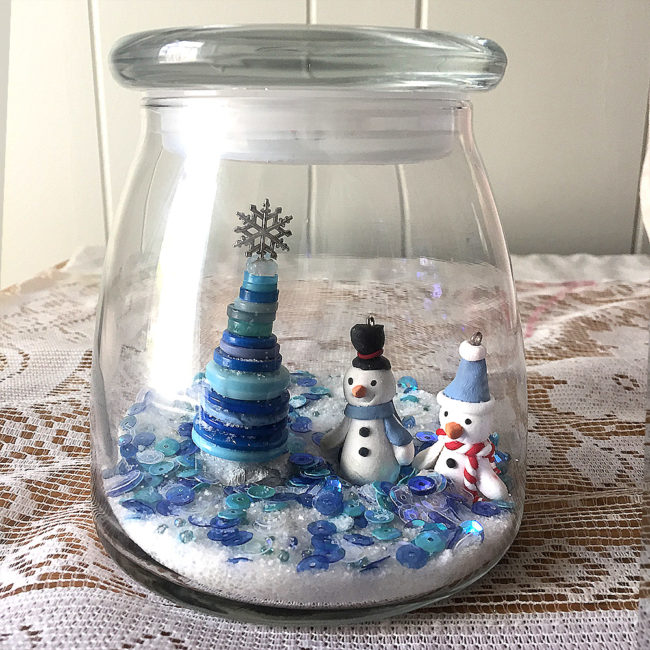
Begin by rolling up a 1″ ball of aluminum foil, and then press it down to make the ball flat on the bottom. Cover the foil with a layer of white paint and allow to dry. To make the button tree, cut 6″ to 7″ inches of wire, and fold in half. Start with one of the snowflakes in the embellishment kit to attach as the tree topper. To keep the snowflake centered, apply some glue to hold it in place. Continue adding buttons from smallest to largest until it is to the height you desire. Twist the remaining wire and trim. Leave just enough wire to place in the hole of your snow hill with a dab of glue.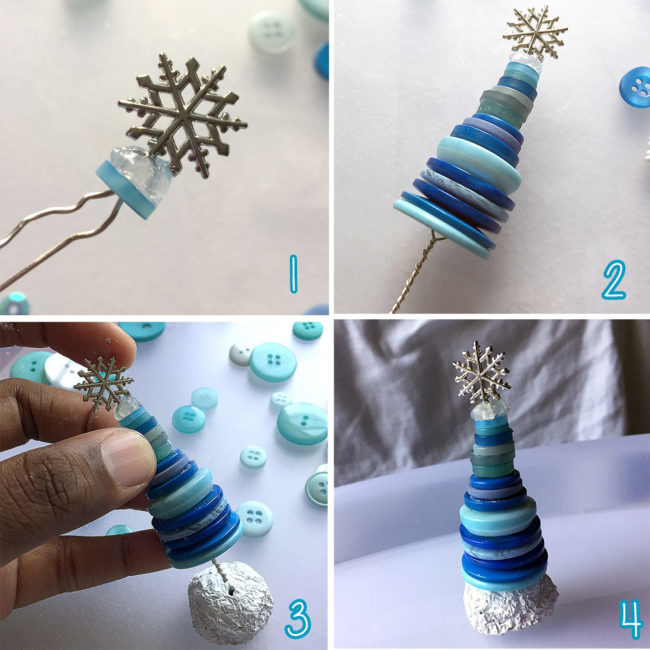
Glue the snow mound, along with any other little holiday figures you may have to the bottom of your glass jar. 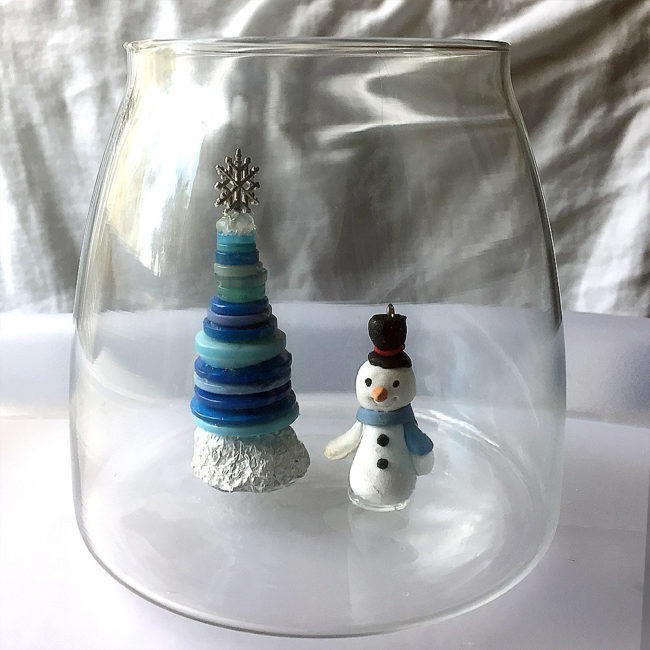
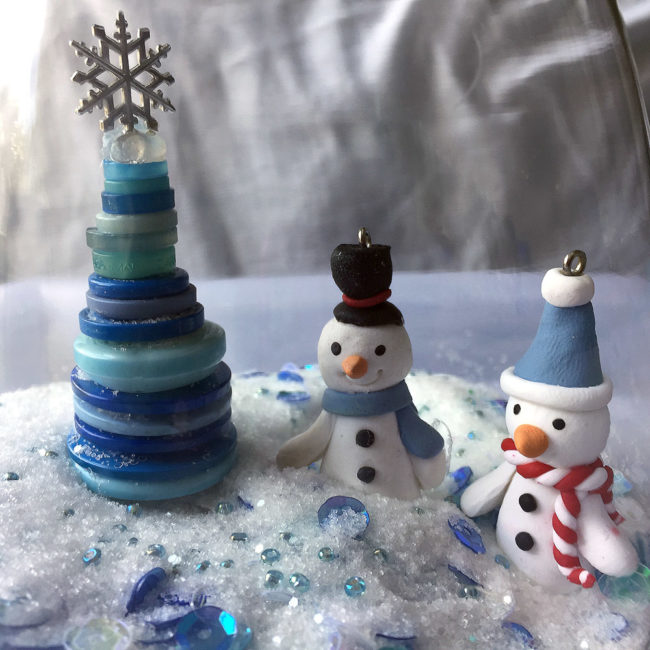
The last step is to add some sparkle and ‘snow’. Pickling salt may sound like a strange item to use in crafting, but it’s really awesome because it’s bright white and looks so much like snow! Also, the salt is heavy and will keep the sequins and beads from settling directly to the bottom of the jar. Pour in as much salt as you want until it reaches a height that makes you happy. Add sequins and beads from the kit, and then give the mixture a gentle swish from side to side to mix things up. That’s it! Your scenic snow jar is complete.
Have fun and experiment with various jar sizes and embellishments to decorate your home or give as gifts. This project takes just a little time and very basic craft skills. I hope you’ll give it a try if you’re looking for something quick and easy to craft up for the holidays.
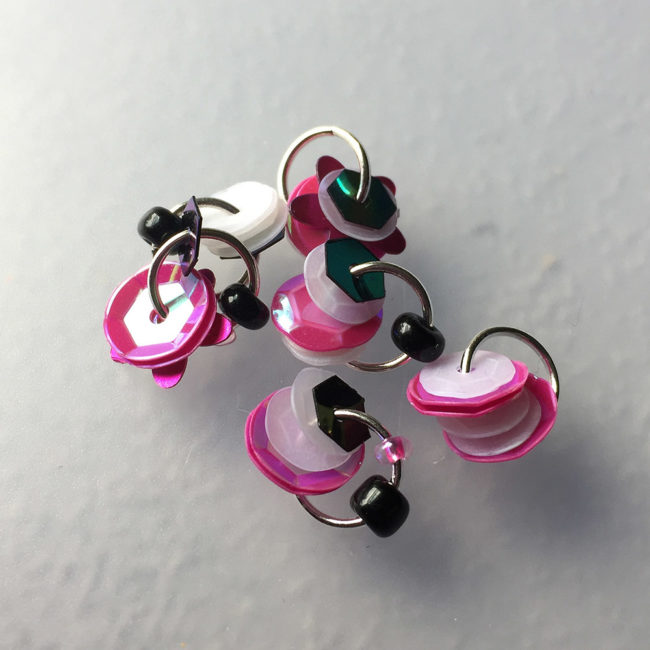
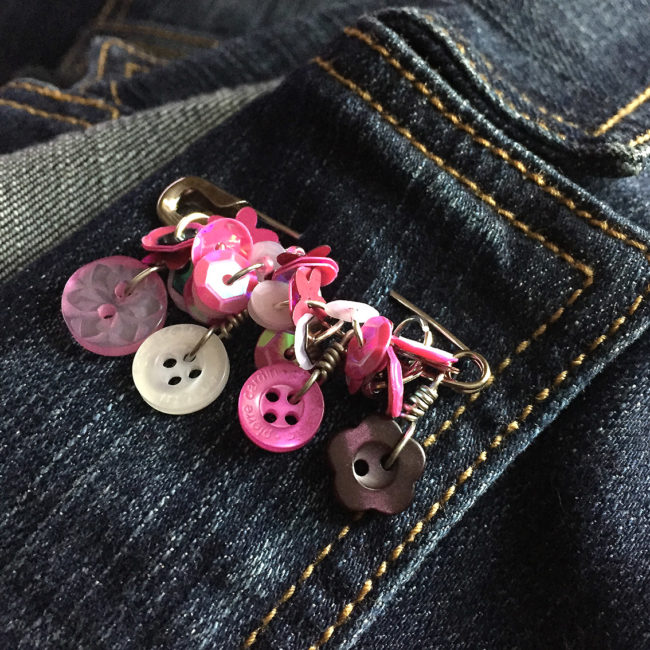
I’m constantly on the look out for fun accessories. But what I love more than looking for cool things is making my own. If you feel the same way, I have a beginner project to help you accessorize. In just a few easy steps, you can make sequin safety pin jewelry!
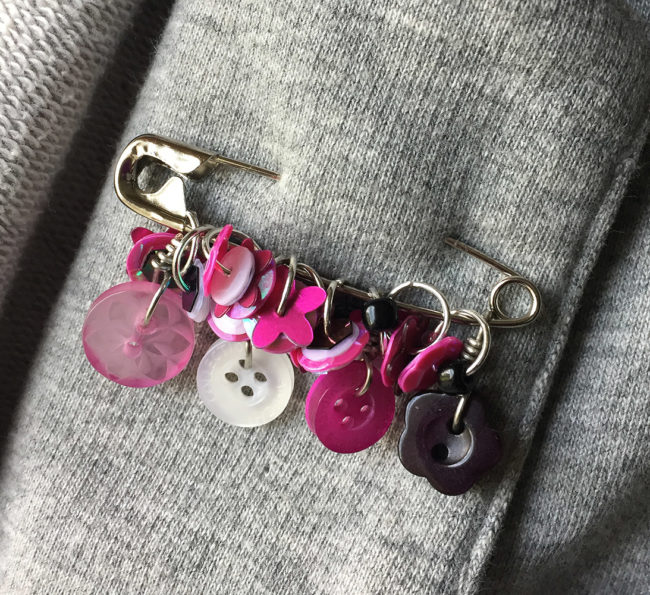
To start making your sequin safety pin jewelry, open the 8mm jump rings with jewelry pliers and add about 4-6 sequins to each ring along with a bead or two if you’d like. The rings will move around a lot if you start adding them to the pin as you go, so you may find it easier to just make a pile of completed jump rings.
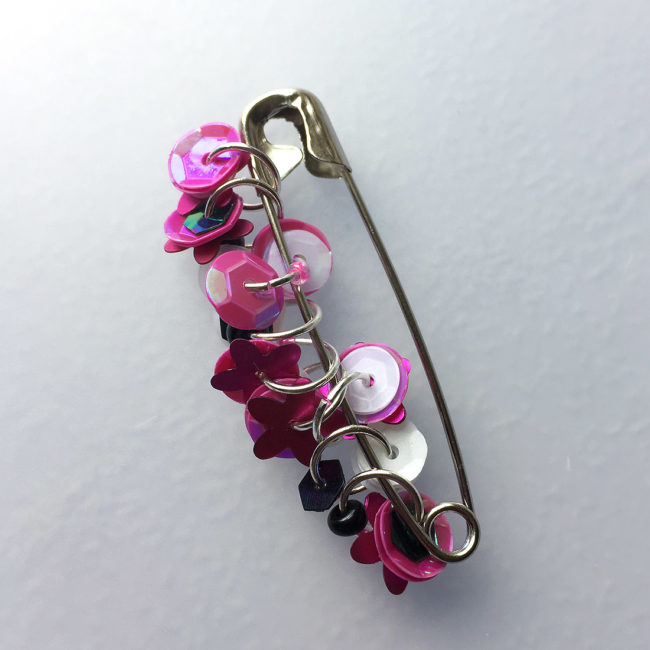
Once you have about 10-12 rings finished, add them to the safety pin. The jump rings should be added to the immovable side of the pin. At this point the pin will look pretty awesome as is, but I just love to add buttons to everything! I find the buttons not only give the pin a unique look, but they will also help keep the jump rings from floating around the loop at the end of the pin.
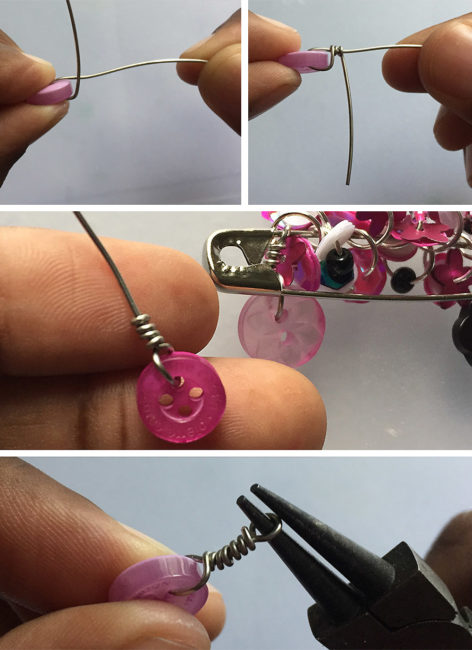
Cut a 5 inch length of wire. Place wire through one of the buttons holes. Bend one end of wire toward the back of the button. Twist that wire around 3-5 times and trim it. Cut the other piece short, but leave enough wire to create a loop.
Be sure to add a button before the first jump ring and behind the last ring on the pin. This will keep the jump rings from sneaking past the loop and getting away.
And your sequin safety pin jewelry is done!
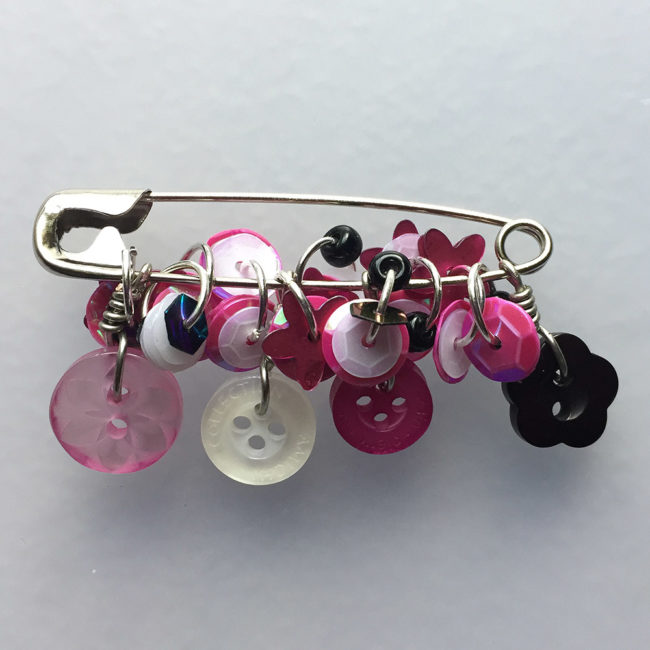
There are so many options and color combinations available that I have already made myself a nice variety of sequin safety pins! I hope you find this to be a fun and easy way to bring a unique jewelry touch to an old shirt, jacket, or backpack.
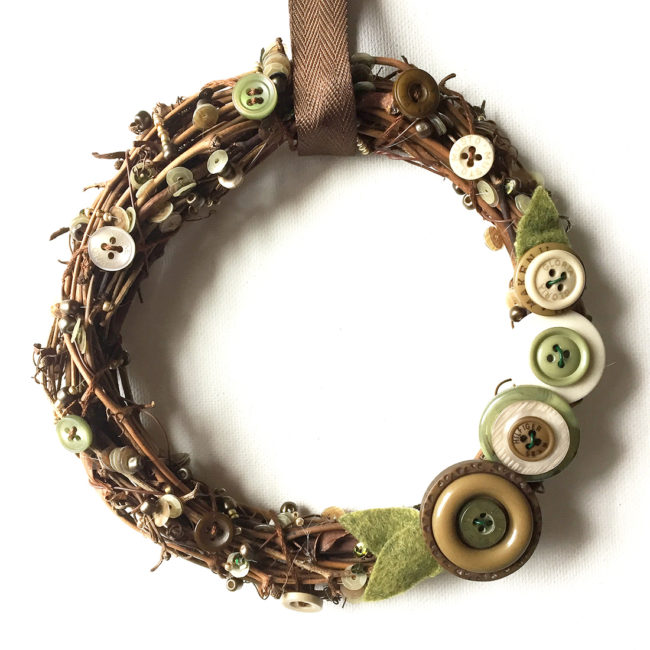
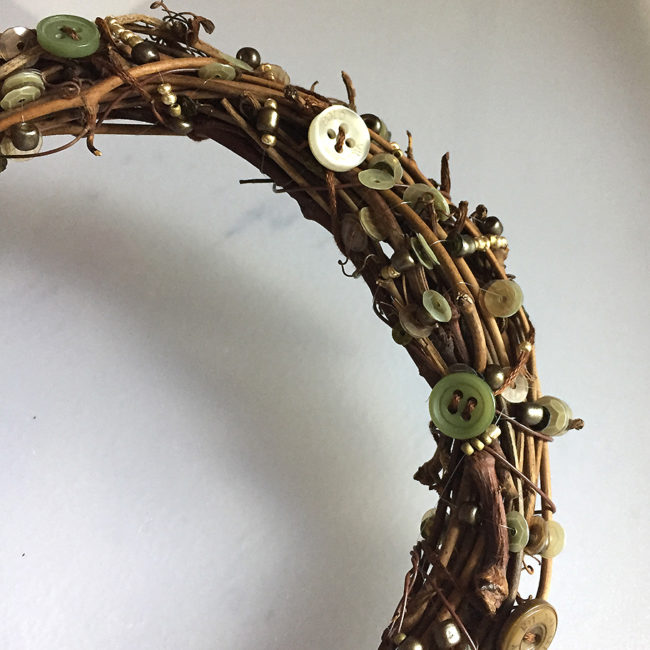
One of my favorite things to make are wreaths. There are so many ways to decorate them and endless opportunities to get creative. I put together this rustic vine wreath using the Victoria embellishment kit by 28 Lilac Lane.
Supplies needed:
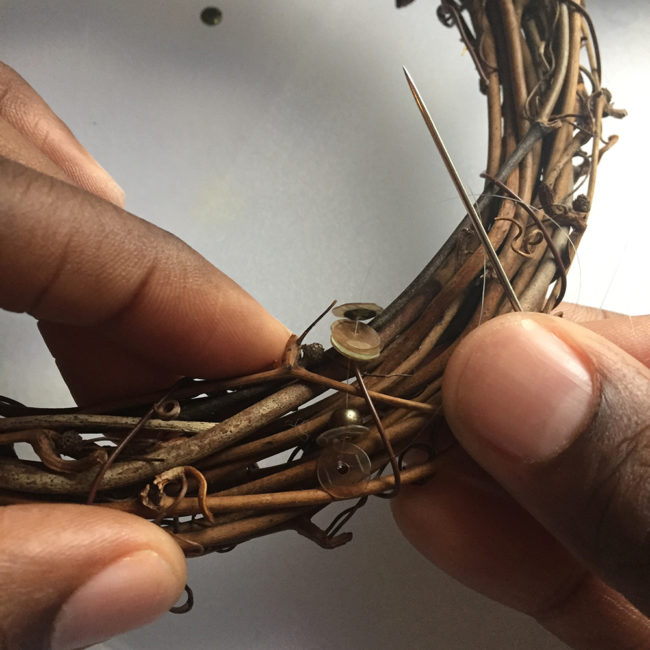
Start with the beading needle and invisible thread. Wrap the thread around the wreath and tie a knot to secure it. Stack beads and sequins onto the needle until you have about 1/2 inch or so on the needle. Wrap the thread around while keeping the majority of the beads and sequins in place on the front of the wreath.
Continue wrapping the thread around the rustic vine wreath until you get back to where you started. You’ll get the best results if you wrap the thread no more than about 1/2″ inch apart.
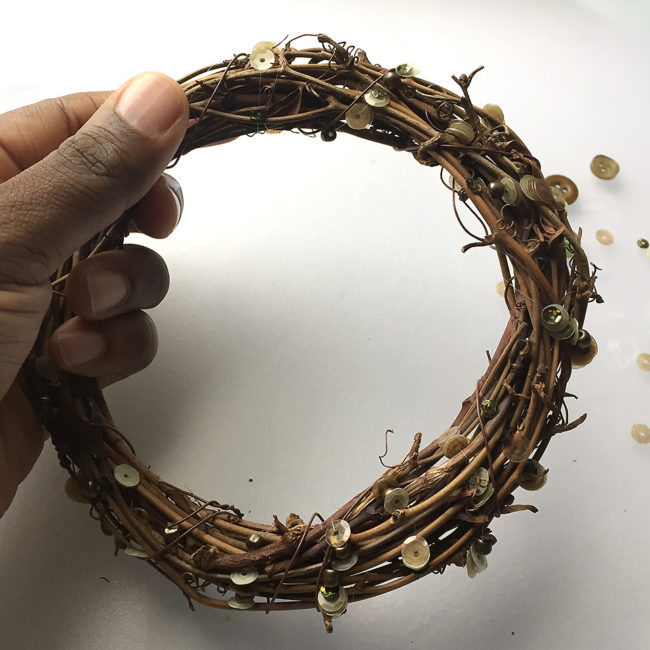
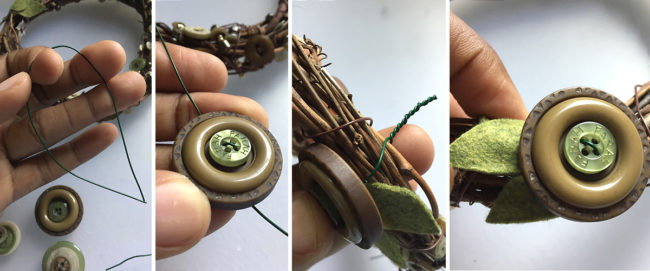
After adding the sequins and beads, I repeated the process with embroidery thread to add some little buttons.
I cut a few pieces of felt to create leaves and attached them to the wreath with a glue gun, while leaving space for some buttons. Cut a length of wire long enough to wrap around the wreath. Stack 2-3 buttons and push wire through 2 holes in each of them. Wrap the wire around the wreath, twist, and cut the ends. Tuck the excess wire into the backside of the wreath so there are no sharp ends left sticking out.
After you have added as many buttons as you’d like, the last step is to tie a ribbon to hang your finished rustic vine wreath! I used a small 6 inch wreath for this project, but of course it can be done in a larger size. I find this to be a perfect size to decorate with inside the house. I often hang small wreaths around the house on the walls alongside my photos and even hang them in my work space at the office.
Looking for a wreath project but prefer a different style? Check out all our button wreath projects!
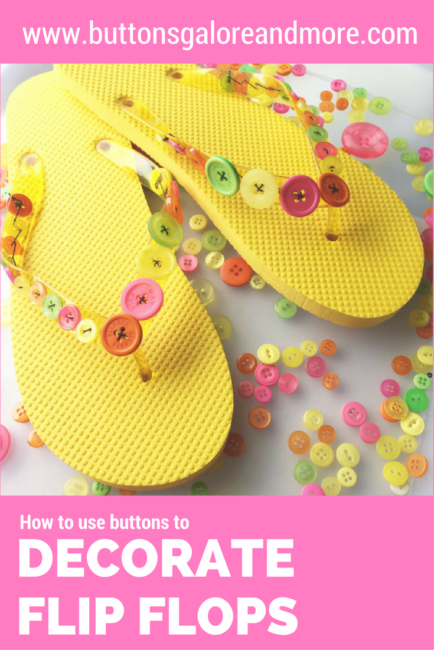
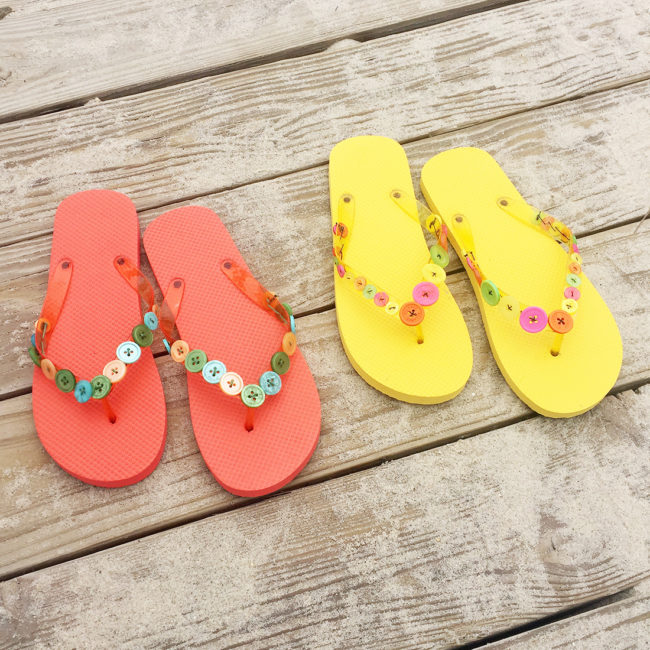
Summer is almost officially here! I’ve got a super easy project to decorate flip flops with buttons to keep you looking fashionable on the hot days ahead.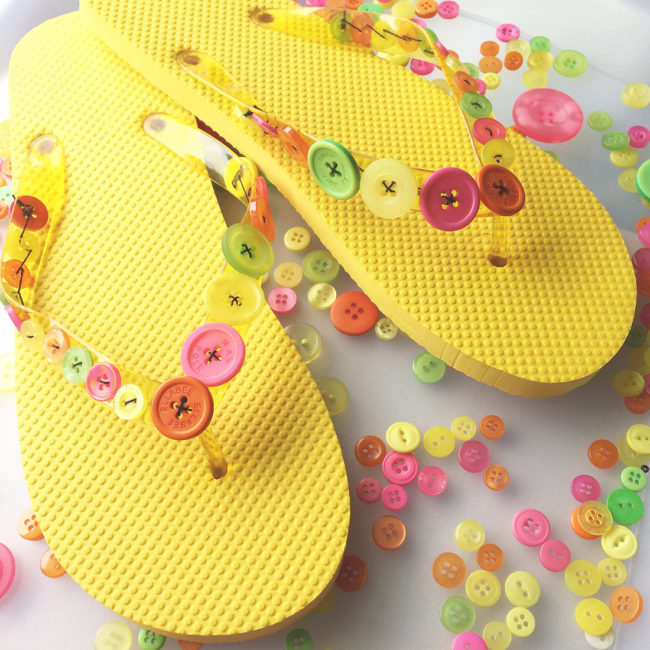
Supplies Needed:
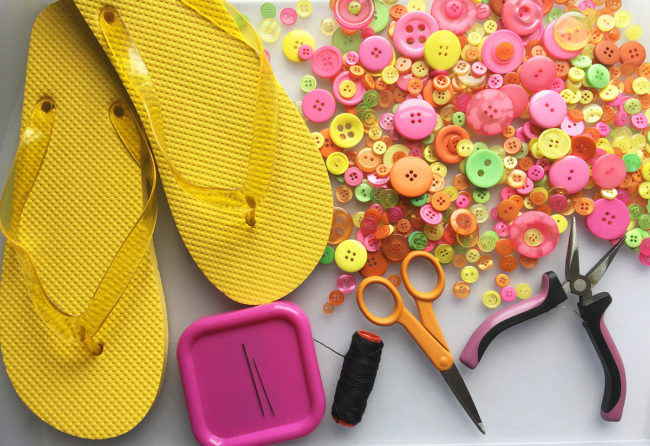
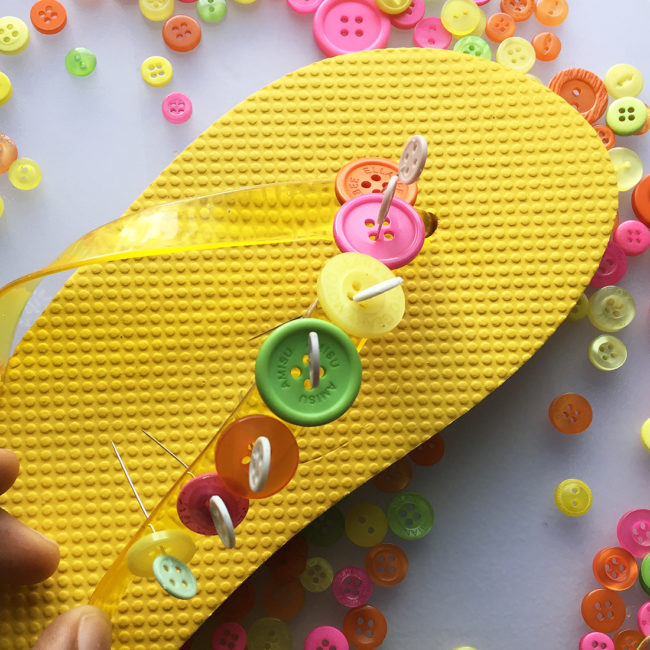
It’s surprisingly easy to decorate flip flops with buttons! Before you get started, make sure you have a thick strong thread. To begin, select buttons from the pack you want to use and line them up on the flip flop strap using pins. This step is optional, but it will provide you with a preview of way the shoe will look and give you the opportunity to work out the placement of the buttons prior to sewing them into place.
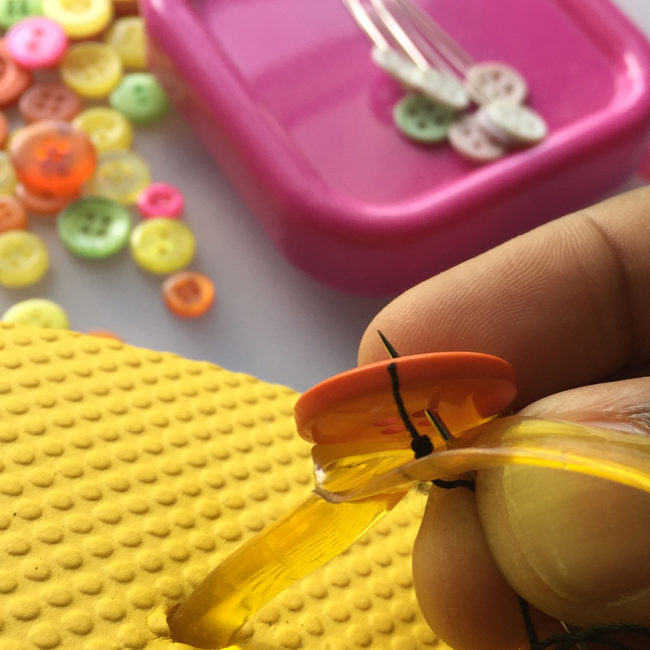
Thread the needle and start attaching the buttons starting at the center of the strap. The first stitch goes into the strap from the top. If you are using a very thick thread or clear plastic thread this will ensure the knot is not rubbing against your foot. After all, you want your shoes to be comfortable!
Be sure to tie all of your knots tightly. Don’t worry about the knot showing, as it will be hidden once you start adding your buttons. Depending on the thickness of your flip flops’ strap and the bulkiness of the thread, you may find it easier to push and pull the needle using pliers. I didn’t have any issues doing it by hand, but I would suggest you have a pair handy just in case you run into any issues.
Continue adding buttons until you get to within an inch or two of the end of the strap. After you have secured the last button, push the thread through so you can again tie the knot on the top of the strap.
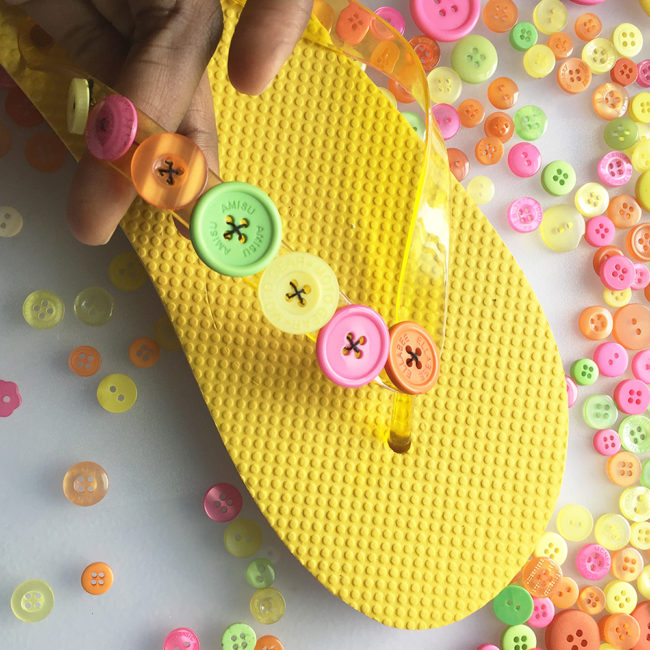
Beginning at the center again, add the next set of buttons to the other half of the strap.
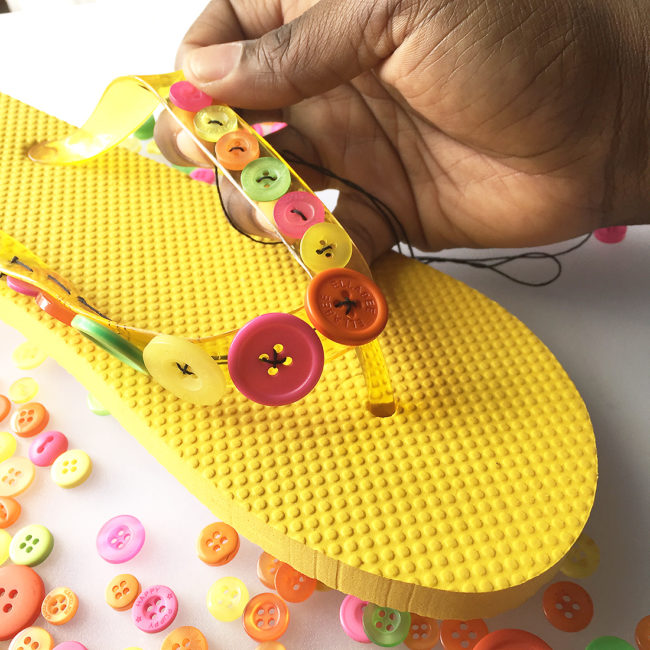
Now you just repeat the process for the other shoe and your flip flops are ready to wear! This time of year it’s easy to find inexpensive flip flops just about everywhere in every color you could need. It’s such an easy affordable project to decorate flip flops with buttons and you can make several a pairs in festive colors to coordinate with every outfit for your summer events. I had so much fun with this project I’ve already got two pairs ready for a stroll on the boardwalk!
Don’t waste any time…the beach is waiting! Grab a Button Bonanza bag and a pair of flip flops to start creating your summer wardrobe today!