Header

Author Archive | Allie Gower

BeBunni Blue Birthday Card

Hello. Allie here with a BeBunni Blue Birthday card. Some of Button Galore’s shaped buttons are just perfect for card making, and the colored ones make perfect accents too.


Bebunni Blue Birthday buttons and flowers
Bebunni Blue Birthday

Bebunni Blue Birthday front

Buttons Galore Supplies Used for Blue Birthday Card

The cute package shaped button comes from our Wedding Collection. The shiny silver buttons are from this Black and Silver set.

Additional Supplies

Patterned Paper, Cardstock, Stamps (BeBunni – Crafter’s Companion), Spectrum Noir Markers, Glitter, Adhesive

Thanks for dropping by today. See more of my cards and projects here at Buttons Galore.
0

CHRISTMAS DIY: Colorful Buttons for Doll Stockings

Here is a fun Christmas DIY for dolls that you AND the kids can create!

Anna at Doll-It-Up creates adorable Christmas Decorations using Laura Kelly’s Mixed Brights Button Collection.

buttons, Laura Kelly, DIY Crafts, Christmas DIY


christmas craft, holiday buttons, doll diy, Christmas DIY

Read the rest of Anna’s post here.

Shop Buttons Galore and More now. Here are our current specials!

Visit our “SPECIAL BUYS” section for savings:

http://www.buttonsgaloreandmore.com/SearchResults.asp?Cat=1926

20% OFF Christmas Button Theme Packs*

Expires 12-20-13

Code: CBTP1213

20% OFF Holiday Fun 3D Buttons*

Expires 12-20-13

Code: 20HFUN

*Please note that offers may not be combined. Free Shipping to the US on orders over $30.

0

DIY Doll Accessories with DOLL DIARIES

The wonderful folks at Doll Diaries love BUTTONS for making DIY Doll Accessories! Laura Kelly Buttons are the perfect craft staple for creating fun crafts for and with your dolls! From jewelry and clothing to accessories and decorations, the sizes and colors make creating easy.

DIY Christmas Tree Garland with Buttons Galore

Decorating for Christmas with the dolls has never been more festive with this DIY Christmas Tree Garland.

Doll Diaries, Laura Kelly Buttons, Christmas DIY

Doll Crafts – Button Jewelry for Dolls

Use Buttons Galore and More’s wonderful Snowflakes Value Pack or Olde Fashion Lights to make jewelry for your dolls and YOU.

#Snowflakes, DIY Button Jewelry, winter buttons

#christmas buttons, DIY Jewelry


Doll Diaries, Laura Kelly Buttons

Wishing You a Cherry Christmas

Holiday Bazooples make perfect accents!

#christmas, holiday buttons, bazooples

Santa & Friends

#christmas, buttons, bazooples

Here Comes Santa

#christmas, holiday buttons, bazooples

Reindeer Games

Doll Diaries, Rit Dye, Buttons Galore

Camp Doll Diaries: Make Button Yo-Yos

Two buttons and string? How many things can you create. #1 … Yo-Yos!

Doll Diaries, Laura Kelly Buttons

Doll Sized Bake Sale with Button Cookies

With a little creativity, buttons can become lots of wonderful things, including cookies!

Doll Diaries, Laura Kelly Buttons

Doll Sized Napkin Rings

Why should the kids’ table or the dolls’ table look any less festive.  Learn how to make these adorable napkin rings. Make some for your table too!

Doll Diaries, Laura Kelly Buttons

 Special thanks to the ladies at Doll Diaries for sharing their creativity with us.

Our Laura Kelly Buttons Selection is growing. Which collection is your favorite?


To help you with your holiday crafts, here is a list of our current specials:

Visit our “SPECIAL BUYS” section for savings:

20% off EVERYTHING*

Expires: 12/9/13     Code: HBH20

20% OFF Christmas Button Theme Packs*

Expires 12-20-13     Code: CBTP1213

20% OFF Holiday Fun 3D Buttons*

Expires 12-20-13     Code: 20HFUN

*Please note that offers may not be combined.

Free Shipping to the U.S. on orders over $30.

0

Button Jewelry – Perfect Gifts

Need some fun craft ideas for handmade jewelry? Button Jewelry – Perfect Gifts!

We’ve gathered up some of our favorite fast and easy pieces.

quick button earrings

Quick Button Earrings

make easy accessories straight from the button jar

Make Easy Accessories Straight from the Button Jar

Zinnia Style Brooch

Zinnia Style Button Brooch

Upcycle Jewelry with Buttons and Hardware

Upcycle Jewelry with Buttons and Hardware

Antique Button Earrings in a Flash

Antique Button Earrings in a FLASH

Get all your buttons for your button jewelry at Buttons Galore and More. We have a large variety of buttons for sewing and crafting, as well as adhesives, trims and tools.

To help you with your holiday crafts, here is a list of our current specials:

Visit our “SPECIAL BUYS” section for savings:

20% off EVERYTHING*

Expires: 12/9/13     Code: HBH20


20% OFF Christmas Button Theme Packs*

Expires 12-20-13     Code: CBTP1213


20% OFF Holiday Fun 3D Buttons*

Expires 12-20-13     Code: 20HFUN


*Please note that offers may not be combined.

Free Shipping to the U.S. on orders over $30.

0

Homemade Christmas Gifts

Welcome to our Homemade Christmas Gifts Holiday Blog Hop.

Holiday Blog Hop

Handmade Christmas gifts with buttons

We have some great holiday ideas using Buttons Galore and More Buttons and May Arts Ribbon. Hop with us to see homemade Christmas gifts such as, ornaments, decorating ideas and more!

If you are here for the regularly scheduled project from Laura Kelly, do not fear her project is still featured here.

From Laura:
How adorable is this rock? It is not any ordinary rock. It is a special holiday hand-painted and button embellished rock that we use to hold the door open.  It is a rock with a message and a purpose.

RockPainting homemade Christmas gifts RockFinal

I hand painted the tree on the big heavy rock with Americana paints by Deco-Art.  I love these paints because they are thick enough that when I paint on a rough surface with a slant they don’t run.  When it was dry, I used Glue Dots to add the buttons (Radical Red from my Laura Kelly collection with Buttons Galore).  Then I used a Sharpie marker and added a message to the back.

These rocks would be adorable in all sizes and shapes as door holders and spreaders of Christmas spirit.  I plan to paint a bunch of little ones with messages to hand out over the next few weeks at the Starbucks drive through and the bank and to people I meet while out on my daily adventures.  These are the messages I plan to use: Spread Cheer, Joy to the World, Follow the Star, Christmas is Love.

To help you make homemade Christmas gifts we have a discount code –  HBH20 20% off entire order. This discount can not be combined with other offers. Retail customers only. The code can be used Dec. 6-9 2013 and if you spend $30 or more you get free shipping in the US.

Now on to the Homemade Christmas Gifts Holiday Blog hop.

Holiday Hop Prize Package Photo

Visit our Designers’ blogs listed below and leave them some love for a chance to win the wonderful craft prize package pictured above.  Who knows there might be more than one prize so make sure you visit everyone.

Special thanks to May Arts for providing the Button Bevy with a wonderful assortment of ribbons

DON’T FORGET OUR SALE:

Save 20% off at Buttons Galore this weekend.
*enter the code “HBH20” – offers may not be combined*
Sale starts Friday and ends Monday.

11

Buttoned Up Gift Box

Create a Buttoned Up Gift Box with paper, ribbon and buttons. A gift is much more special when presented in a handmade Gift Box.
Buttoned Up Gift Bag


Supplies for Buttoned Up Gift Box:

  • Buttons – Teal Ice
  • Cardstock – Discount Cardstock
  • Template – Lori Whitlock
  • Ribbon – American Crafts
  • Snowflakes – Silhouette
  • Glitz Gel – Close To My Heart
  • Twine – Doodlebug Design

Instructions for gift box:

  1. Cut pieces and assemble box.
  2. Accent box with Glitz Gel.
  3. Cut several snowflakes and fold in half. Use three snowflakes for each embellishment and adhere the halves together to create dimension. Accent with Glitz Gel.
  4. Create a small bow and attach button with twine. Adhere to box.
0

Winter Card Boy

This is a fun Winter Card for a Boy.

Little girls are easy to make cards for, as anything goes – pink, flowers, sparkles … but boys are a little more picky. Spray and an inky grunge stamp add to the details that make this card perfect for a boy.

Winter Card for a Boy


Decorative papers with gears, camouflage and other gender neutral shapes also help make this card for boys.


Supplies for Winter Card Boy

  • Buttons Galore – Cookies & Cream
  • Cardstock
  • Ink
  • Spray
  • Twine
  • Punch
  • Mitton Die Cuts

Directions

  1. Spritz cardstock.
  2. Stamp splotches in a complementary ink.
  3. Ink edges of cardstock.
  4. Punch pennants and adhere to mat.
  5. Wrap twine and tie button.
  6. Cut mittens, apply ink and add to card.
  7. Attach mat to orange card base.
0

thankful Cards

Wishing you a day stuffed with reasons to be Thankful … with this set of Thankful Cards.  Create clean and simple Thank you cards with a stamped sentiment, two colors of card stock and the lovely leaf buttons from the Autumn Value pack. Adhere everything together with Mini Glued dots and you have a wonderful set of thankful cards to use this holiday season.

thanksgiving paper crafts, thankful cards, cards with buttons, a jillian vance design

Supplies for Thankful Cards:

autumn buttons

Autumn Value Pack

  • Buttons – Autumn Collection
  • Adhesive –  Mini Glue Dots
  • Ink – Rich Cocoa – Tsukineko
  • Cardstock – DiscountCardstock.com
  • Stamp – Jillian Vance Design


1

Thanks a Bunch Card

Tis the season to say Thanks a Bunch … so glad you’re here today.

handmade card, fall thank you card, thanks a bunch card

Supplies for Thanks a Bunch Card:

autumn buttons

Autumn Value Pack

Create simple and elegant cards with card stock and button embellishments.  Buttons Galore and more carries novelty buttons in almost any theme imaginable.  Many buttons are available in both small variety packs and in large bulk packaging.  Adhesives are also carried in the store.

1

Acorn Place Cards

Wishing you a day stuffed with reasons to be Thankful … with this set of Thankful Cards.

Acorn Place Markers, Fall Paper Crafts

Supplies for Acorn Place Cards:

autumn buttons

Autumn Value Pack

  • Buttons – Autumn Collection
  • Adhesive –  Mini Glue Dots
  • Ink – Peanut Brittle – Tsukineko
  • Cardstock – DiscountCardstock.com
  • Ribbon – May Arts
  • Stamps – A Jillian Vance Design
  • Tag Die – Lifestyle Crafts, Acorn – Silhouette – Allie Gower “Acorn Set”


0

Paris Wall Art

STYROFOAM™ and Buttons – Paris Wall Art.

Paris Wall Art

I could never get tired of Paris. Let’s make some Paris Wall Art!  I was surprised at how easily this came together.

Paris Wall Art Supplies:

  • Buttons – Sweet Delights
  • Adhesive – Beacon’s 3-in-1Mini Glue Dots, Fabri Tac
  • Heart Shape – Styrofoam Crafts
  • Ribbon, Charm and Bling – Want2Scrap
  • Paris Die – My Favorite Things
  • Patterned Paper – Bo Bunny
  • Cardstock – DiscountCardstock.com
  • Flowers – Wild Orchid
  • Other – Dymo Labeler and Label Tape, Jump Rings, White Versacraft Ink, Red Copic Marker

Instructions:

  1. Trace heart and cut out of patterned paper. Adhere with Beacon’s 3-in-1.
  2. Line outer edges with rose ribbon using Fabri Tac.
  3. Create Dymo Label. Pink edges and adhere to heart.
  4. Die cut Eiffel Tower and distress with White Versacraft Ink. Adhere with Mini Glue Dots.
  5. Embellish with rhinestones, flowers and additional ribbons.
  6. Accent charm with Copic Marker. Add charm to black bow using jump rings.

Thanks for joining me today.

See more of my creations at My Card Party.

0

Dyed Button Necklace

Last month I dyed some buttons using Rit Dye, and I had some left over so I’ve made this Dyed Button Necklace.

fall buttons, fall leaves, button jewelry

 Supplies for Dyed Button Necklace

I used one large Coconut button and embellished it. I love that these buttons have an earthy, natural feel, and come in their own little tin with a clear top. This tin is great for storage, and great for using later for creating more fun!

coconut shell, natural buttons

Rustic Coconut Shell

Additional Supplies:

Rit Dye (Aquamarine), Imagine® Crafts/Tsukineko VersaMark ink and Gold Embossing Powder, and StāzOn™ Inks (in Olive, Forest Green, Rusty Brown, and Pumpkin for coloring charm – applied with Fantastix™ Applicators), 3-in-1 Glue, charm

Also: Jump ring, chain, pliers, heat tool (for melting embossing powder)

Instructions:

See Rit Dye for their Wood & Wicker Dyeing instructions. I had prepared dye in mason jars, and simply reheated it and added it to the button.

Make sure your button is dry before you try embossing. Sponge on ink and dip in embossing powder. Carefully heat set to melt. I did different areas separately, and used some tongs to hold the button.

I colored a charm with StāzOn™ Inks using Fantastix™ applicators  and added a jump ring and chain, then adhered the charm to the button with 3-in-1 Glue.

I love the colors and how they all came together. Doesn’t fall have a beautiful assortment of colors to choose from? Fall is my favorite, no wait – I love snow, oh but spring flowers … Every season is lovely.

Thanks for joining me today for another project featuring button jewelry. Are you wearing your buttons? I’d love to see!

2

Spooky Halloween Card

I like Halloween, but I’m not super into the really frightful stuff, I’m more into delightful – so this is about as creepy as I get with this Spooky Halloween Card!

I’ve stamped my batty background and the Happy Halloween sentiment using Happy {OWL}oween Stamps from A Jillian Vance Design. I inked my stamp with a Tombow Marker in sort of an Olive Green, which went well with the Kraft Cardstock. I colored each bat with a few shades of Copic Gray Markers – T1, T4 and W3.

I cut my Ghost and lightly sponged Toffee Crunch Memento ink around the edges, leaving the parts that overlap plain.

The focal word on my Spooky Halloween Card was created using Lavanderia Script from from LOST TYPE. I have a tutorial on my blog if you have a Silhouette and haven’t made fun focal words like this. “Make Pretty Words on the Silhouette” – it’s easier than you think! Once the word was cut out, I lightly inked it with Cloud White VersaMagic Ink.

To bring a little attention to the gorgeous Tangerine Button, I tied some waxed linen thread through it. This thread is thick but not super bulky, and it holds its shape perfectly!

halloween card, card making, fall crafts

Tangerine Tango Buttons are perfect for Halloween. You get about 125 buttons in a reusable Pillow Box, and it’s such a fun assortment. They stay down well with Ultra Thin Glue Dots, also available from Buttons Galore & More.

tangerine button, waxed linen, card making

I save a lot of money using Craft Glue to adhere all my paper. I find for the detailed titles, that painting the adhesive with a foam brush or a foam applicator works really well. It dries clear, without leaving a shiny finish, just in case I get a little sloppy.

Supplies for Spooky Halloween Card

  • ButtonTangerine Tango Assortment – Buttons Galore and More
  • Cardstock – DiscountCardstock.com
  • Stamps – A Jillian Vance Design
  • Ink – Tombow Markers; Cloud White VersaMagic Ink, Toffee Crunch Memento (Imagine Crafts)
  • Spooky – created using the Lavanderia Script font ( for a tutorial on creating your own cuttable words – please see my tutorial “Make Pretty Words on the Silhouette
  • Ghost – Silhouette Online Store
  • OtherSilhouette Cameo, Silhouette Designer Software, Waxed Linen – Beadniks


0

Button Charm

I’m creating a Button Charm today using a button as a frame for some seasonal artwork.

No, this is not hard. You can do this so easily.

halloween, halloween jewelry, button jewelry, spiderweb necklace

As you can see, I’ve just used a single large button for my piece today.

I punched out some art work from a sheet of Halloween images from Bottle Cap Inc. and adhered it to the center of a large button. I used Tacky Glue to attach a spider and web charm to the top of the button.

I love the way that the button acts as a frame for the image, the color really has a fun splash of Autumn color.

Great Buttons for your  Seasonal Button Necklace:

brown buttons

Cappucino Grab Bag

Additional supplies:

Besides that big button and a focus image , you will want a charm. I purchase my charms at local bead shops, they have such fun, unique stuff. In addition, you’ll need some chain, jump rings, and pliers.


You will also need a good craft glue, I chose Tacky Glue. Let this set up overnight, at least 24 hours, before you wear it … this will make sure your charm stays put!

To finish off the piece, I added a little bit of bling from Want2Scrap, because I just like a little sparkle in … well, just about everything.


1

Fall Thank You Card

I have had a lot of fun playing with my Silhouette, and I came up with this fun design for a Fall Thank You Card.

Fall Thank You Card #buttonsgalore #silhouette


Fall is a wonderful time of the year to remember to say thank you.  I’m surprised at the number of people I know that enjoy making cards, but don’t send them to anyone. I challenge you to send a thank you card to someone this week. It feels good to be appreciated. Thank a mail man, a coach, the girl that bags your groceries, someone at church, anyone!

Don’t let me forget to thank you, for stopping by, and for being a part of my journey.

thank you words

“Hem your blessings with thankfulness, so they don’t unravel.”

Unknown

Supplies to create Fall Thank You Card

rustic coconut shell buttons, buttons galore and more

Rustic Coconut Shell Buttons

One large Rustic Coconut Shell Button
Baby Bling – Want2Scrap
Patterned Paper – Doodlebug Design; Cardstock – DiscountCardstock.com
Twine – My Mind’s Eye
Adhesive – Tacky Glue, Ultra Thin Glue Dot

Other – Silhouette Cameo, Design Studio Software, Font – PtSans

If you would like the file to cut your own card, please contact me through the contact form on my blog at My Card Party. Sorry, but this file is ONLY for the Silhouette.

Thanks again for joining me today,

Allie

1

Seasonal Button Necklace

There is nothing simpler than stringing buttons, so why not make a Seasonal Button Necklace?

This is is a simple statement piece, and one you can change out year round.

button jewelry, button charms, fall necklace, seasonal button necklace

 Some people hear craft, or DIY, and cringe. Pretty pieces do not have to be complicated, or expensive. This month I’m making several pieces that are very inexpensive, and assembled with just some basic pliers and or glue.

Grab a friend, get some buttons, and let’s make some fun things to wear. At the end of the season, repurpose them! Easy peasy.

I’m using some really fun assortments that just say pumpkins and spice and everything nice!

Great Buttons for your  Seasonal Button Necklace:

black buttons

Black Beauty

brown buttons

Cappucino Grab Bag

Orange Buttons

Sunrise Assortment

Additional supplies:

You’ll need some chain, jump rings, and pliers.


1

Missing You Card

Summer is full of friends and fun, and I already miss mine, so I made a clean and simple Missing You Card. I can’t believe that Fall is here, and I’m missing Summer well … like crazy!

Missing You Card


Supplies for Missing You Card:

Instructions:

  1. Cut a 4.25 x 11″ piece from Colonial White Cardstock and fold from top to bottom. Round bottom corners with Corner Rounder
  2. Stamp desired sentiment using Coffee House ink.
  3. Cut Leaning Sunflowers pieces in appropriate colors and assemble using Premium Craft Glue. Adhere to card base.
  4. Add buttons to the centers of each sunflower using Glue Dots.


0

Halloween Jewelry – Spider Pendant

Use buttons to accent this fun Spider Pendant.

Along came a spider …

Let’s jazz up your Halloween Jewelry!

spider necklace, button jewelry, halloween jewelry, spider pendant

I’m using buttons from a few collections today. This idea could easily work for any occasion with a quick change of charms and button selections. Buttons Galore has buttons for just about EVERY occasion, from bats to baseballs, and everything in between.

This month, we’re all about Halloween and Fall.

Great Buttons for your  Spider Pendant:

black buttons

Black Beauty

brown buttons

Cappucino Grab Bag

Orange Buttons

Sunrise Assortment

Additional supplies:

You’ll need some chain, jump rings, and pliers.


1

Button Pumpkin

How about a Button Pumpkin for your door? This will be fun to do with the kids.

I used Hot Glue, but the kids could easily use a Craft Glue or Glue Dots.

Button Pumpkin

Supplies for Making Button Pumpkin:

Instructions:

  1. Cut paper pieces for pumpkin. Lightly trace center of pumpkin as a guideline. 
  2. Place buttons on bottom half – the outer edges, and glue into place. Add small buttons on top of other buttons for added interest and to hide some of the paper.
  3. Create the center panel. Adhere buttons. Attach to pumpkin using dimensional foam tape – you may need a few layers.
  4. Add stem and leaf. Draw “veins” on leaf and shade to add interest.

Project Note:

If you do use hot glue and you have a lot of strands of glue and messy areas, just hit them with a hair dryer or heat embossing tool – they’ll melt away – easy peasy. If you do not have an electronic cutter, print one offline onto cardstock or trace, or be brave and draw one by hand.

Enjoy. Happy Fall Y’all!

1

Flower Button Pendant

Quick and Simple Flower Button Pendant

Some buttons are just too cute to pass up. Enjoy your favorites by wearing them. Simply make a Flower Button Pendant … or whatever shape your favorite button is!

flower button pendant

Some of the Bulk Buttons have a really fun assortment, and I found this pretty flower shaped button and thought it would make such a cute pendant.

I looped wire through the button holes and then wrapped to create a loop at the top. I adhered a rhinestone using Beacon’s 3-in-1 Adhesive.

These would be so fun to make with girls, and inexpensive, too!

Supplies for Flower Button Pendant


Thanks for joining me today.

See more of my creations at My Card Party.

1

Walnut Hollow Wall Art

Walnut Hollow Wall Art

Allie here today making some Walnut Hollow Wall Art. This is really not hard, so colorful, and a lot of fun.

Walnut Hollow Wall Art

Supplies for my Walnut Hollow Wall Art:

  • Sweet Blush Buttons
  • Garden Bug Buttons
  • Board – Walnut Hollow
  • Bulk Bling – Want2Scrap
  • Fucschia Dye – Rit Dye
  • Crossword Puzzle Paper, Stickers and Vintage Cards – October Afternoon
  • Flowers – some are handmade using Spellbinders, additional flowers from Wild Orchid
  • Adhesives – Glue Dots, Adtech Hot Glue Gun and Glue Sticks, Plaid (Mod Podge)
  • Dies – Spellbinders, My Favorite Things, and Heartfelt Creations, Silhouette
  • Other – decorative napkin, coffee filters (for handmade flowers)

Instructions

  1. Decoupage a napkin onto the board and seal with Mod Podge.
  2. Cut main mat (Silhouette), flourish (Heartfelt Creations – Belle Rose Collection), tabs (My Favorite Things) and flowers (Spellbinders).
  3. Assemble large flower and add Sweet Blush Button center and Garden Bug accent. Assemble smaller flower (this flower was dyed with Rit Dye in Fuschia) and add Silver/Clear Bulk Bling Rhinestone.
  4. Add vintage cards and other paper embellishments. (Note – I doodled along the edges of some of these pieces.)
  5. Decorate edges with Bling.
  6. Add a sentiment using stickers. I chose a line from an Emily Dickinson poem. Note, stickers don’t stick well to the mod podge surface, so you may want to reinforce with adhesive.

Note – I lined the back of board with matching paper so that the crossword pattern would show through where the bird cutout is.

Thanks for joining me today.

See more of my creations at My Card Party.

2

Fall Bear Card

I have had such fun looking at Fall papers and designs, and fell in love with this Fall Bear and decided to paper piece with buttons to make a Fall Bear Card.

Fall Bear Card


Supplies for making Fall Bear card:

 Instructions:

  1. Prepare a card base – 4.25×5.5 from Green Cardstock.
  2. Create a panel with patterned paper from Doodlebug Design. Wrap Bo Bunny dotted ribbon around this panel and attach panel to card base.
  3. Cut and prepare pieces. Assemble and adhere to card.
  4. Add Apple from “Off to School” assortment, “Micro Buttons” for the Eyes and tie some twine through the  “Heart of Color” button for the Bow.


2

Peeps Halloween Countdown

Kids LOVE to know when they’re getting there, when their birthday is, how many days til their favorite holiday. Let them help you make a Peeps Halloween Countdown!

Me and My Peeps Halloween Countdown


Supplies for Peeps Halloween Countdown:

Instructions:

  1. Paint wood plank with orange paint. Let dry.
  2. Create a frame using Washi Tape. Miter the edges for a clean, neat look.
  3. Apply Peeps sticker and use a Sharpie Marker to doodle your title.
  4. Glue clip to board. Decorate tags with ribbon and buttons. Use a Sharpie to doodle the number of days on your tags to mark down the days til Halloween.
  5. Add ribbon to Blank Craft Shape and decorate with Laura Kelly Buttons.
2

Halloween Wreath for ScrapFest 2013

Allie Gower shows you how easy it is to Create a Halloween Wreath using the Halloween Button Assortment, an Archiver’s Exclusive.

ScrapFest – Halloween Wreath

Buttons Galore is heading to Archivers Mall of America for ScrapFest 2013.

Join us for fun make and takes each day of ScrapFest.

 Create a Halloween Wreath using Halloween Buttons.


 Supplies for ScrapFest – Halloween Wreath

Directions for Creating Halloween Wreath

  1. Paint wreath and allow to dry.
  2. Glue on ribbon and assorted buttons.
  3. Add accents with white ink.
  4. Gently apply heat to ribbon to make it “melt” for a brief period of time using a Heat Embossing Tool.

Please note that many of these supplies used to make the ScrapFest projects are readily available in your local Archivers, and many of them are available in the Archiver’s Annex Online.

Projects will be on display in the Archiver’s at the Mall of America.

See more of Allie’s work at her blog, My Card Party.

2

ScrapFest – Welcome Baby Girl Purse Card

Allie Gower has created a Welcome Baby Girl Purse Card using the It’s a Girl Button Assortment, an Archiver’s Exclusive.

ScrapFest – Welcome Baby Girl Purse Card

Archivers Logo

Buttons Galore is heading to Archivers Mall of America for ScrapFest 2013.

Join us for fun make and takes each day of ScrapFest.

Use It's a Girl Buttons to create a Welcome Baby Girl Purse Card.

Supplies for  Welcome Baby Girl Purse Card

  • It’s a Girl Buttons, Archiver’s Exclusive
  • Fl0wer – K & Company
  • Cardstock – Bazzill
  • Patterned Paper – Doodlebug Design
  • Lori Whitlock’s Purse Card – Silhouette Online Store
  • Adhesive – Scott Craft Glue, Glue Dots

Instructions

  1. Die cut card parts from cardstock and Doodlebug Design Paper (Sugar & Spice) and assemble using Scott Craft Glue.
  2. Add K & Company Flower.
  3. Adhere It’s a Girl Buttons with Glue Dots.

Please note that all of these supplies used to make the ScrapFest projects are readily available in your local Archivers, and many of them are available in the Archiver’s Annex Online. Projects will be on display in the Archiver’s at the Mall of America.

See more of Allie’s work at her blog, My Card Party.

0

ScrapFest Samples – Boy Button Magnets

Allie Gower has created quick and easy Boy Button Magnets using the Boy Button Assortment, an Archiver’s Exclusive.

ScrapFest – Boy Button Magnets

Archivers Logo

Buttons Galore is heading to Archivers Mall of America for ScrapFest 2013.

Join us for fun make and takes each day of ScrapFest.

Create Boy Button Magnets using the Buttons Galore and More BOYS assortment, an Archiver's Exclusive!

Supplies for Boy Button Magnets

  • Boy Buttons, an Archiver Exclusive
  • Magnets (local craft and hobby supply)
  • AdTech Hot Glue

Instructions

This couldn’t be easier, simply cut the shanks off the backs of the buttons and glue to a magnet. Kids will love these on the fridge, or use on a metal tin for playing games, or even on chore charts.

(magnets shown on a Maya Road Jumbo Bottle Cap)

Please note that all of these supplies used to make the ScrapFest projects are readily available in your local Archivers, and many of them are available in the Archiver’s Annex Online. Projects will be on display in the Archiver’s at the Mall of America.

See more of Allie’s work at her blog, My Card Party.

1

ScrapFest Samples – Creating a fun Birthday Card

Allie Gower has created a fun and happy Birthday Card using the Birthday Button Assortment, an Archiver’s Exclusive.

ScrapFest – Birthday Card Sample

Archivers Logo

Buttons Galore is heading to Archivers Mall of America for ScrapFest 2013.

Join us for fun make and takes each day of ScrapFest.

Create a Birthday Card using the Birthday Button Assortment.

 Supplies for ScrapFest – Birthday Card

  • Birthday Assortment – an Archiver’s Exclusive
  • Cardstock – Bazzill
  • Embossing Folder – Cuttlebug
  • Embroidery Thread – We R Memory Keepers
  • Sketch SentimentsHippo – Silhouette Online Store
  • Tim Holtz Tumbled Glass Distress ink
  • Inkessentials Blending Foam Tool
  • Adhesive – iCraft Adhesive Tape, Scotch Dimensional Foam Adhesive, Scotch Craft Glue, Glue Dots

Directions for Creating Card

  1. Create a card base, 4.25×5.5.
  2. Cut a mat 4×5.25″ from light blue cardstock. Emboss using Cuttlebug Folder. Ink lightly using Tim Holtz Tumbled Glass Distress ink and an Inkessentials Blending Foam Tool. Adhere to card.
  3. Create Happy Birthday using Lori Whitlock 3D Sketch Sentiments. Simple replace your blade with a Blue Silhouette Pen. Adhere to card. Cut pennant and nested pennant. Ink nested pennant with Tim Holtz Tumbled Glass Distress ink. Adhere nested pennant to card with iCraft Adhesive Tape. Attach sentiment pennant with Scotch Dimensional Foam Tape.
  4. Cut Hippo. Assemble using Scotch Craft Glue and adhere to card.
  5. Create a slip knot using embroidery thread and attach to each of the balloons. Gather together with additional thread and tie a bow. To adhere to card, place a Glue Dot behind each balloon and the bow.

(Project Note – if you are using Glitter Pens, allow time for Sentiment to dry, as some smearing may occur if the ink is not dry.)

Please note that many of these supplies used to make the ScrapFest projects are readily available in your local Archivers, and many of them are available in the Archiver’s Annex Online.

Projects will be on display in the Archiver’s at the Mall of America.

See more of Allie’s work at her blog, My Card Party.

2

ScrapFest – Jumbo Baseball Bottle Cap

Allie Gower has created a fun Jumbo Baseball Bottle Cap using the Baseball Button Assortment, an Archiver’s Exclusive.

ScrapFest – Jumbo Baseball Bottle Cap

Archivers Logo

Buttons Galore is heading to Archivers Mall of America for ScrapFest 2013.

Join us for fun make and takes each day of ScrapFest.

Create a fun Baseball themed embellishment with Baseball Buttons.

 Supplies for Jumbo Baseball Bottle Cap:

  • Baseball Buttons, an Archiver’s Exclusive
  • Bottle Cap – Maya Road
  • Baseball, Number and Killebrew created using the Silhouette Design Software
  • Adhesive – Scotch Quick Dry Adhesive, Glue Dots

Instructions

  1. Die cut pieces. Assemble using Craft Glue. Adhere baseball to bottle cap and add number and “Killebrew” on top. Let adhesive set up.
  2. Add baseball and bat buttons using Hot Glue or Glue Dots.

Project note – Add a pin back so you can wear this, or add a magnet to the back and honor your favorite player on the fridge!

Please note that all of these supplies used to make the ScrapFest projects are readily available in your local Archivers, and many of them are available in the Archiver’s Annex Online. Projects will be on display in the Archiver’s at the Mall of America.

See more of Allie’s work at her blog, My Card Party.

2

ScrapFest – Boy Candy Bar Congratulations

Allie Gower has created a Boy Candy Bar Congratulations using the It’s a Boy Button Assortment, an Archiver’s Exclusive.

ScrapFest – Boy Candy Bar Congratulations Sample

Buttons Galore is heading to Archivers Mall of America for ScrapFest 2013.

Join us for fun make and takes each day of ScrapFest.

Candy Bar Wrapper, Paper Crafts, Baby Boy Congratulations

Supplies for Boy Candy Bar Congratulations

  • It’s a Boy Buttons, Archivers Exclusive
  • Paper – Doodlebug Design
  • 3 Sketch Sentiments – Pens, Lori Whitlock Sketch Font and Banners
  • Copic Markers
  • Adhesive – AdTech Hot Glue and Thermoweb iCraft Tape, Dimensional Foam Tape
  • Other – candy bar (candy bar used was a Heath Bar)

Instructions

  1. Cut patterned paper to fit around candy bar. Wrap candy bar in chosen Doodlebug Design patterned paper. Adhere with iCraft Tape.
  2. Die cut pennants and assemble, placing top layer on nested pennant with dimensional foam tape.
  3. Hot glue It’s a Boy Buttons.

Project Note – 3 Sketch Sentiments was edited to read CONGRATS. Bottom pennant was hand colored to match using Copic Markers.

Please note that all of these supplies used to make the ScrapFest projects are readily available in your local Archivers, and many of them are available in the Archiver’s Annex Online. Projects will be on display in the Archiver’s at the Mall of America.

See more of Allie’s work at her blog, My Card Party.

0

ScrapFest Samples – Create a Disney Style Embellishment

Allie Gower has created a fun and happy Disney Style Embellishment using the Vacation Button Assortment, an Archiver’s Exclusive.

ScrapFest – Disney Style Embellishment Sample

Archivers Logo

Buttons Galore is heading to Archivers Mall of America for ScrapFest 2013.

Join us for fun make and takes each day of ScrapFest.

Create a Disney Style Embellishment for your Scrapbook page with Vacation Buttons.

Supplies for ScrapFest – Disney Style Embellishment

  • Vacation Assortment – Archiver’s Exclusive
  • Cardstock  – Archiver’s
  • Wish Ticket – Silhouette Online Store – adapted to include a mat and mouse ears
  • Adhesive – Scotch Quick Dry Adhesive

Directions for Creating Card

  1. Modify Wish Ticket and cut all appropriate pieces. Assemble.
  2. Add Vacation Assortment buttons.

Please note that all of these supplies used to make the ScrapFest projects are readily available in your local Archivers, and many of them are available in the Archiver’s Annex Online. Projects will be on display in the Archiver’s at the Mall of America.

See more of Allie’s work at her blog, My Card Party.

0

Pumpkin Spice Latte Card

I wanted a cute Pumpkin Spice Latte Card to go with a batch of syrup I was making for a friend. I’ve included links to the recipes for a Latte that tastes just like Starbuck’s, and a recipe on making the syrup yourself.

pumpkin spice latte

Here’s a close up on the details.

Pumpkin Spice Latte details

Recipe to Make the Latte. Recipe to Make the Syrup.

Supplies for Pumpkin Spice Latte Card

  • Buttons – Latte Mix, of course!
  • Cardstock – Close To My Heart
  • Inks – Peanut Brittle Memento and Copic Markers (for shading on cup, pumpkins and foliage)
  • Twine – the Twinery
  • Stamp and matching Charming Circle Die – A Jillian Vance Design
  • Adhesive – Mini Glue Dots
  • Other – Pumpkins and Coffee Cup are svgs from the Silhouette Online Store – both files were modified to create the card using Silhouette Designer Software


Thanks for dropping by. Happy Fall, Y’all. See more of my projects at My Card Party.

1

Reversible Button Bracelet

A quick and simple Reversible Button Bracelet.

Reversible Button Bracelet Reversible Button Bracelet

Thread twine down then up in the lower row, and up then down in the top row. The lower button will overlap, but when you get to the end, it all lines up just right.

Be sure to get each set of buttons pretty snug before moving on so that your bracelet lays nicely. Leave room at the ends to tie off. I like to put small knots at each end so the buttons can’t move anywhere, then just tie a little bow to keep it on my wrist.

Another note: when measuring your wrist, remember that larger buttons need more room to go around your wrist. I found it best to check sizing as I went along, rather than the actual length of the bracelet. The average woman’s wrist is 7.5″ and while my wrist is actually a bit smaller, my bracelet is 8 inches and fits snugly.

Supplies for Reversible Bracelet

Thanks for joining me today.

See more of my creations at My Card Party.

2

Follow Your Heart

If you are lost, you must quiet your mind, and follow your heart.


Follow Your Heart


Follow Your Heart

This card style is called a Stretch Card. I added a decorative band, because I plan on placing a gift card inside and I want it to stay hidden until the right time.

I used Lori Whitlock’s Reflections Papers from Echo Park, and some Kraft Paper from Close To My Heart.

Supplies for Follow Your Heart Card:

  • buttons: Nautical Value Pack 
  • paper: Lori Whitlock’s Reflections (Echo Park), Kraft (Close To My Heart)
  • stamps – Unity
  • ink – Versamark Gold Dazzle, Rhubarb Stalk Memento and Tuxedo Black Memento (Tsukineko), clear embossing powder
  • embellishments: ribbon (Bo Bunny), bling (Want2Scrap), twine (My Mind’s Eye), corrugated tag (Close To My Heart)
  • adhesive: Scor-Tape, Adtech Hot Glue Gun and Glue Sticks, Dimensional Foam Tape, Glue Dots
  • other: Heat Embossing Tool, Corner Rounder, Silhouette Cameo, Scissors (Westcott)

Instructions:

  1. Cut basic card pieces and layered pieces and assemble. Lori Whitlock has a great video here: http://youtu.be/KaDIpjGL4zk
  2. Create a sleeve – 1.5×10″ and secure at the back of the card.
  3. Stamp heart on Kraft paper with Versamark Gold Dazzle Ink and sprinkle with clear embossing powder – heat to melt. Dab Rhubarb Stalk Memento Ink on heart and cut out. Add a rhinestone to the center with a Glue Dot.
  4. Stamp sentiment with Tuxedo Black Memento. Round Corners.
  5. Tie ribbon to Corrugated Tag. Tie twine through a button. Hot glue Nautical Buttons to the tag. Adhere tag to band with Dimensional Foam Tape.
  6. Add heart and sentiment to band with Scor-Tape.
  7. Slide band onto card.


0

Organizing with Nautical Buttons

Try organizing with nautical buttons.

Keep your supplies stored in style this year!

Create a fun storage tray for pencils.

Supplies for Organizing with Nautical Buttons

Additional Supplies

  • Patterned Paper – Tommy Collection, Cardstock (Honey, Cranberry, Outdoor Denim), Burlap Ribbon, Chipboard Arrow – all from Close To My Heart
  • Bling – Want2Scrap Sleek Strips Silver Rhinestones
  • Twine – Doodlebug Design Doodle Twine
  • Ink – Copic R46, R29, C3, C4, Blender (0) and SP05 Multiliner, Cantaloupe and Bahama Blue Memento Dye Ink (Tsukineko)
  • Adhesive – Scor-Tape (Scor-Pal Company) and AdTech Adhesive Hot Glue
  • 3d Pencil Box with Wrap SVG – Designed by Jamie Cripps (Silhouette Online Store)

Create a fun storage tray for pencils.Create a fun storage tray for pencils.Create a fun storage tray for pencils.

Directions:

  1. Cut two outer panels, one of the Tommy themed paper – one of Outdoor Denim (both from Close to My Heart). Adhere together with Scor-Tape. Save leftover patterned paper – on the back there is a word strip that is used in the embellishments. Note – the Outdoor Denim liner is a special addition – it gives the box a little bit of added sturdiness.
  2. Color numbers of choice using Copic Marker R29 and R46. Add shadows with C3 and C4. Add accents with Blender pen and Copic Multiliner.
  3. Cut insert from Honey Cardstock. Assemble and attach to the outer portion of the box.
  4. Cut band from Cranberry Cardstock.
  5. Loop twine through Anchor button and tie through red button. Adhere red button to Ship’s Wheel button using AdTech Adhesives hot glue.
  6. Adhere burlap ribbon and buttons with AdTech Adhesives hot glue.
  7. Ink Chipboard Arrow (From Lucky Level 2 Assortment – Close To My Heart) with Cantaloupe Ink and edge with Bahama Blue Ink (Tsukineko – Memento Dew Drop). Adhere with AdTech Adhesives hot glue.
  8. Choose sentiments from leftover Tommy paper and “pink” edges. Attach to burlap using AdTech Adhesives hot glue.
  9. Outline numbers with Sleek Strips Silver Rhinestones.

Create a fun storage tray for pencils. 

Note – for additional assistance assembling the box, Jamie has a wonderful tutorial on her blog.

http://www.jamielanedesigns.blogspot.com/2013/07/pencil-box-with-wrap.html

 Thanks for joining me today. Hope you have fun getting organized in style.


* * * * * * * * * * * * * * *

Linking up with Transformation Thursday


TT logo

1

Simple Thank You Card

I ran out of thank you cards. I needed to replenish my stash! So … time for a quick …

SIMPLE THANK YOU CARD


A Simple Thank You Card


Top of the card – I used a Scor-Board to make lines on my cardstock, and then I sanded it.

Middle of the card – the strip is a cut from the Silhouette Online store that I sized to fit a standard A2 Card. The sentiment is stamped and colored, and I rounded just two of the corners. I added an adhesive backed pearl and some rhinestones.

Bottom of the card – just some simple card stock that I sanded the edges of, and added a Heart Button tied with some Twine and embroidery thread.

It’s kind of a running joke when it comes time to request more buttons for projects, that I ask for Heart Buttons! I love to accent my cards and projects with HEART BUTTONS.

This is my stash. It makes me happy. I am out of the large RED buttons that I used. Guess what I’ll be asking for …


Hearts Hearts and more Hearts


Supplies for a Simple Thank You Card


1

Buttons and Back Packs

Instead of jewelry this week, I’m playing with paper and buttons. I must say, buttons and back packs go together pretty well!

Buttons and Back Packs

Buttons and Back Packs

Buttons and Back Packs

I created the backpack and inked the edges with Tea Bag ink. I dyed a wooden button and cut the shank off. The bag was then decorated with patterned papers and fun embellishments. To lift the bag up a little, I created little feet by gluing Coffee and Rustic Coconut Shell buttons together.

Now, it’s time to fill it with goodies for the teacher!

Buttons for Back Pack

HAB701-2

Hand Carved Wood Buttons

Additional Supplies

Canvas Shapes, Wood Shapes and Cork Tags (Little Yellow Bicycle), Champagne Cardstock, Tea Bag Ink, Patterned Paper (Close To My Heart), Brads (Creative Impressions), Twine – My Mind’s Eye), Letters (EK Success), Flower (Petaloo), Back Pack Template (SVGCUTS.COM)

Adhesive – Scor-Tape and AdTech Hot Glue Gun and Glue Sticks

3

Prima Doll Tag

I wanted to try something different. So … I hope you like this

PRIMA DOLL TAG

My daughter and I saw the Script in concert recently, and one of the songs has the line “The Good Old Days” over and over and it was just stuck in my head.

I love these Prima Dolls from Julie Nutting, and this particular one reminds me of my daughter!

The Vacation mix of buttons is really fun and had this enormous green button, along with some flower buttons.


Prima Doll Tag featuring Vacation Buttons.


I don’t do much of the Mixed Media, but I really had fun with this. I stitched together some pennant strips. I decorated the Prima Doll with Washi Tape. I colored the rest of her with Copic Markers.

The background is just some torn papers that are layered together.


Prima Doll Tag featuring Vacation Buttons.


I highlighted the letters and outlined the Good Old Days.

Prima Doll Tag featuring Vacation Buttons.


I tied a twine bow through the smaller flower button, and tied it to the large green button from the Vacation mix.

Supplies for Prima Doll Tag:

  • Buttons – Vacation mix
  • Patterned Papers, Burlap Ribbon – Close To My Heart
  • Stamps – Prima
  • Adhesive – Thermoweb iCraft Adhesive 3mm, Mini Glue Dots
  • SVG – The Good Old Days (this is just words welded)
  • Washi Tape – DowntownTape.com
  • Twine
  • Other – ink (Tsukineko / Imagine Crafts) and Copic Markers


Thanks for joining me today. To see more creative ideas, I’d love for you to join me at My Card Party!

1

Dyed Boho Bracelet DIY

Buttons and Boho Bracelets … Say that three times fast.

This Dyed Boho Bracelet DIY is extra fun and special. Why BUY when you can DIY? Right?

We’ve all been having a lot of fun with the Rit Dye, and I had a lot of Moda Jelly Roll Strips left, so I was playing around with braiding and made this Boho style bracelet. It’s actually braided, but it has that vibrant, Boho feel.

Boho Bracelet


It’s funny, I work with buttons a lot, obviously … but it had been a while since I’d sewed. My fingertips would highly recommend you use a thimble!


Boho Bracelet


Dyed Boho Bracelet DIY Instructions:

Take three dyed Moda Jelly Roll strips and braid them. Determine placement for the buttons on your wrist and add the buttons. For specifics on how I dyed my fabric, please see my Rit Dye Blog Hop Post. It was really very easy! The strips naturally fray a bit and will fold and show different bits, it really adds to the look of the braid.

Knot your braids at each end. Tip – use a clip board to hold your strips and leave plenty of extra length at each end so that you can knot the ends and also tie it on your wrist.

Supplies for creating bracelet:

  • Rit Dye – Aquamarine, Kelly Green, and Fucshia
  • Buttons – Vacation
  • Thread – Coats & Clark


You will also need needles, and as suggested by my fingertips, a thimble! I hope you enjoyed this Dyed Boho Bracelet DIY.

Have you hopped with us? There are so many fun projects with buttons and dye that you won’t want to miss.


Don’t forget to enter our Rit Dye and Buttons Galore and More Giveaway

Rafflecopter giveaway

1

Encouraging Card

Sometimes, a friend needs to hear they are fabulous, thus the need for an …

ENCOURAGING CARD

An Encouraging Card featuring buttons, Close To My Heart embellishments and papers, along with Close To My Heart bling.

I cut the card base and flowers using the Silhouette. I cut an extra set in green to add some more leaves. Laura Kelly’s Sweet Blush Buttons dot the centers of the flowers, and these are accented with pink rhinestones. I punched some Martha Stewart butterflies from matching card stock to give a little more dimension to the butterflies on the card, and those are accented with rhinestones as well.

An Encouraging Card featuring buttons, Close To My Heart embellishments and papers, along with Close To My Heart bling.

Buttons are always a fun and inexpensive embellishment!

Supplies for an Encouraging Card:

Thanks for stopping by today. To see more cards and creative ideas, please visit me at My Card Party.


5

Simple Bracelet

How about a bracelet with just two items?

A Simple Bracelet!

Just hemp and a button. If you wanted, you could add some beads…


Simple Bracelets with Hemp and Button


These really don’t get much simpler. The knots are easy to pull out if you want to swap out your button.

Simple Bracelets with Hemp and Button


Two strands of hemp, and a Latte Button with four holes will work best. Bring the ends up through the bottom of the button. This creates a loop underneath.

Put the ends through that loop and your button is secured. Repeat on the opposite side.

Simple Bracelets with Hemp and Button


To make the bracelet adjustable, you’ll wrap one set of ends around the other and create a loop, pulling that same set of ends back through to make a knot. I like to put little knots in each end to prevent accidentally pulling them all the way through when taking your bracelet off. Flip the bracelet over and repeat the same looped knot.

Now, when you tug on the ends, the bracelet tightens. To loosen, gently push on the knots.

Simple Bracelets with Hemp and Button


To add beads, I took a third piece of hemp and ran it through the loops I created to secure the button, then through the beads. I took the ends of the pieces securing the button and went around the beads, holding them in place, then making knots.

Make your other knots the same way as above – they’ll just be a bit larger.

Simple, easy, great fun to make with kids.

Supplies to make a Simple Bracelet:

Latte Buttons, Handmade Dyed Hemp, optional – wide mouth beads


Thanks for joining me today.

2

Button Key Ring

Hi all, Allie here with a quick Button Jewelry project. C’mon and get your Shine on!

a Button Key Ring

Shine On Keychain for Buttons Galore


I created a fun key chain using a Charmed Key Chain Kit and some buttons from the Laura Kelly Designer Mix. To finish it off, I added a peace charm that was left over from another button jewelry project.

Directions:

  1. Stamp Shine On! sentiment on Watercolor Garden Paper. Adhere Jeweler’s Blank to paper using Glitter it Glue. Remove excess with a Q-Tip and cut out with non-stick scissors. (Note – any residue can be removed from scissors with hot water.)
  2. Adhere Jeweler’s Blank in Pendant Tray with Adhesive Tape.
  3. Place Pendant Tray onto Key Chain.
  4. Place buttons 9 mm jump rings. Place charm on a 7 mm jump ring. Attach a 9 mm jump ring to the loop on the Pendant Tray. Attach each charm using a 6 mm jump ring.

Supplies for Button Key Ring:

Tools Needed:

  • One pair of beading pliers, optional – split ring tool
  • Westcott Scissors
  • Q-tip

Thanks for joining me today. To see more ideas and jewelry, please join me at My Card Party.

1

CHA CHA Button Bracelet

Create a fun Cha Cha Button Bracelet with your favorite buttons.

I thought a “CHA CHA” bracelet was appropriate, since Buttons Galore and More is at C.H.A. this week, the Craft and Hobby Association event in Las Vegas, Nevada.

It seems that everybody enjoys making their own custom, artisan jewelry these days, and I love making jewelry with BUTTONS!

Create a bangle with your favorite buttons and a 3 row cha cha bracelet.


Cha Cha Bracelets are a lot of fun. The slip right on and one size generally fits all. It is basically an expansion bracelet, like a watch band, with loops for attaching beads, or in our case today … BUTTONS!

Buttons are lightweight AND affordable, and can be swapped out making this an inexpensive project.


Buttons Galore and More Supplies

Buttons – Fancy Gold Grab Bag (shown below)

Fancy Gold Grab Bag Buttons Fancy Gold Grab Bag Buttons


Additional Supplies and Tools

Beading Pliers, Jump Rings, Cha Cha bracelet base (shown below)

Create a bangle with your favorite buttons and a 3 row cha cha bracelet.


Instructions

  1. Attach a button to Cha Cha bracelet base using jump rings. I found it easiest to place the button on the jump ring and then thread the jump ring through the link on the bracelet base.
  2. Alternate sizes and styles and continue adding buttons to bracelet base. Leave open spots where desired.
0

Chunky Button Necklace

Create a chunky button necklace.

For a fun button necklace, all you need is a thick chain, buttons and lots of jump rings. Don’t forget your pliers!

This button says sunshine to me!

Chunky Button Necklace by Allie Gower for Buttons Galore and More

I gathered up a hodge podge of orange and hot pink buttons.

Pumpkin Orange

Sweet Blush


Supplies:

  • Laura Kelly buttons
  • Jump Rings – 7mm, 10mm – Bead Landing (Michael’s)
  • Chain – Bead Landing (Michael’s)
  • Optional – lobster, split ring – Bead Landing (Michael’s)

Directions:

  1. Gather your buttons. Put an orange button AND a pink button onto a 10 mm jump ring.
  2. Attach each of these rings to a the necklace with 7mm jump rings.
  3. Add your closure. I used a lobster clasp with a split ring.

To change things up, mix different colors or add crystals, beads, or charms!

Give it a try. It’s inexpensive and FUN!

Allie Gower

Thanks for stopping by. This week I’m linking it up with Real Family Fun!

To see more projects, tips, recipes and more, stop by My Card Party.

Visit us on Facebook for a chance to win some Laura Kelly buttons and a Me & My Peeps Decal!

4

Inspirational Card

When your friend needs a pick me up, it’s time for an Inspirational Card.

Make some quick and easy cards. I like to make a bunch and leave the insides blank, so I have them ready when a friend needs a quick pick me up.

Inspirational Card

I love finding new ways to use buttons in my card making, and it was fun to make a border with the buttons. This was really easy to do, and would look fun with different kinds of buttons. I’m not great with bows, but this … I can do!

Supplies for making an Inspirational Card

  • Buttons – White Buttons by the Pound
  • Twine
  • Stamps – Gina K Designs
  • Cardstock – Discount Cardstock
  • Patterned Paper – Authentique
  • Ink – Tsukineko, Copic Markers
  • Bling – Want2Scrap
  • Adhesive – Scor-Tape and Dimensional Foam

Directions

  1. Cut and score cardstock to create a standard A2 Card (4.25 x 5.5″)
  2. Cut a 3.5 x 5″ black mat.
  3. Add a 3.25″ square of patterned paper mat and a white strip (1 x 3.25″) at the bottom.
  4. Cut a 2.5″ square black mat. Cut a 2.25″ square white mat.
  5. Stamp and color image, mat and adhere with dimensional foam. Stamp sentiment on white strip (1 x 3.25″) at the bottom.
  6. Cut a piece of twin four times the width of your card. Wrap around the back of the patterned paper. String buttons on both ends of the twine and tie a bow. Trim excess.
  7. Embellish butterfly and sentiment with bling.
0

Alter a Wood Button

Step One – Alter a Wood Button

Step Two – Create an Anklet with the Altered Wood Button.

First off, I love to alter things – so to alter a wood button was not outside my comfort range. At first, I was nervous but it just adds such a nice touch, and really accented the beads perfectly.

Do you really need to ask the question, to ink or not to ink? I mean really, don’t you just want everything to have your personal touch, a little added color?  Buttons Galore has a variety of Carved Wooden Buttons and they are just little canvasses, waiting for you to create.

Before and After Photos of Wooden Buttons


Supplies for Altered Wooden Button Anklet

You will need a Carved Wooden Button  and some Rustic Coconut Shell Buttons.

Additional supplies include hemp and beads, as well as ink, glaze, and applicator (Tsukineko/Imagine Crafts). The beads I used are faceted Carnelian beads.

Directions

Altering the Wooden Button

  1. Dab Stazon Ink on button with an Ink Blusher. You really need to use a permanent ink that will not run or bleed. I like to buff off any excess with a paper towel.
  2. Seal the button with a finishing glaze. I used Creative Medium. This doesn’t get tacky – it’s perfect.

Altered Wooden Button on an Anklet

Creating the Ankle Bracelet

  1. Measure your ankle so that you can determine how large you want your anklet. Triple this measurement.
  2. Double your hemp and place the folded end through your Carved Wooden Button shank slightly. Pull the loose ends through this loop. Give yourself about 1/4″ of space and make a knot.
  3. Add a bead. Knot.
  4. Add a Coconut Shell Button. I take one of the strands and go up from underneath the button, then I take the other strand and go down through the top. This secures the button and prevents it from twirling around.
  5. Repeat until you have reached your desired length.
  6. Finish off with a loop. Make sure this look is large enough to accommodate the diameter of your Wooden Button.
  7. I like to wrap a segment of the bracelet with the remaining length. I loop around the bracelet and bring the end through the loop, doing this several times, then  tie a knot in the end of each strand – just to secure everything. You can also put a little nail polish on the ends of the knots.

I hope you enjoyed this tutorial. With some different beads and buttons, you could really create so many different styles. With a little ink and glaze, you can really create a perfect match for any outfit.

See more of my creations on my own blog, My Card Party.

Thanks for joining me today. Since today is Independence Day, I want to wish all my American friends a safe and happy fourth. There is nothing quite like celebrating your freedom with the ones you love.

Allie Gower


0

Bugs and Kisses

Bugs and Kisses. What’s cuter than that?

Sharing a fun and easy summer card. Do you have paper that you love, that you’ve used and used til you just have scraps, and none of the fun embellishments left to go with it? When you have buttons in every color, you don’t have to be afraid of not having anything to match! I love kitschy old retro papers. This is paper from my “retro” stash, and of course, I was able to find matching embellies, and make a few too!

Bugs and Kisses


Supplies for Bugs and Kisses Card

Buttons Galore – Satin Finish buttons from Orange, Blue and Fire Engine Red Bulk Collections

Other – Papers – Cosmo Cricket, Dies – Spellbinders Paper Arts, Ink and Glitter Glue – Ranger, Bling – Want2Scrap

Notes and Tips

  • Use Spellbinders dies to cut, emboss and stencil. Tape dies in place with repositionable tape and run through machine, repeat and emboss, then daub on ink. This is done on the butterflies and the sentiment circle.

Thanks for stopping by. See more of my creations at My Card Party.

Keep celebrating your sweet life with creativity.

Allie Blog Signature


2

Button Earrings

These Button Earrings are super quick and fast. You can even swap out buttons to match your outfit.

Why buy when you can DIY? I chose these Teal Ice buttons to match a new shirt I got. It took me MINUTES to create these earrings. Jump rings are pretty hardy, so you could easily swap out buttons. However, they are so inexpensive and fun, you’ll want to whip up a bunch for yourself and your friends! I like to have friends over to make things. This is perfect!

Why buy when you can DIY? Easy button earrings!

Supplies for creating Button Earrings

  • Findings – Earring wires, jump rings
  • Buttons – Teal Ice

Instructions

This could not be simpler.

  1. Attach three buttons to jump rings through one of the holes. I used 10 mm rings.
  2. Attach three buttons on their rings to a small jump ring, and attach that to your pre-made earring wires. I used 7 mm rings for this step.

If you’ve never opened jump rings, I’ll share a little tip – don’t pull them apart, twist them… One side away from you and one side toward you. Then, when you are ready to close them, you want to go back and forth a little, this actually strengthens your ring. If you were working with something tinier than a button, like say a wrapped bead, you could even put a little adhesive like Gem Tac.

I’m linking it up with Create.Craft.Love this week. Join the party. #linkparty


Wear and enjoy! Thanks for dropping by today!

13

Snap Happy

It’s Red, White & Blue season, the perfect colors for this Snap Happy Card. Will you be taking lots of pictures on the 4th?

Every week we share fresh card making ideas using buttons. This week we’re using my absolute favorite Heart Novelty Buttons. I made a card with a gift card inside that’s good for some prints at one of our local stores. What family doesn’t print a ton of pictures?

Snap Happy

Supplies for creating Snap Happy Card

Buttons – two Heart Novelty Buttons – Buttons Galore and More

Stamps  – Gina K Designs

Cardstock – DiscountCardstock.com

Embellishments – Turquoise Rhinestones – Want2Scrap; Twine – Doodlebug Design; Stickers – SRM

Tools: Dies (Inverted Scalloped Circles, Star, Circles – Spellbinders Paper Arts; Labels – My Favorite Things) ; Embossing – Sizzix

Adhesive: Hot Glue – Adtech; Dimensional Foam Tape – 3M; Scor-Tape – Scor-Pal

Other: Ink – Tsukineko; Markers – Copic; Flashing Tape – available at most Home Improvement Stores

Directions

  1. Create a Neenah Solar White cardstock base 4.25 x 11″. Score and fold in half.
  2. Cut your mats: Neenah Solar White mat 4 x 5.25″ – Black Licorice mat 3.5 x 3.5″ – Currant Red mat 3.25 x 3.25″ – Emboss Currant Red mat.
  3. Adhere mats to card with Scor-Tape.
  4. Die cut pieces: inverted circle from Lunar Blue Cardstock, a Black Licorice circle, and slightly smaller Neenah Solar White circle and label shape.
  5. Stamp and color image on Neenah Solar White circle. Stamp sentiment on label shape and attach to card.
  6. Embellish with Turquoise Rhinestones. Tie black and white twine through one Heart Novelty Button and glue to stamped image.
  7. Layer round pieces with Dimensional Foam Tape.
  8. Adhere Flashing Tape to scrap paper and die cut and emboss star. Adhere to card with Dimensional Foam Tape
  9. Wrap aqua and white twine around card and secure with second Heart Novelty Button.
  10. Add sticker sentiment to bottom of card.

Thanks for stopping by today. To see more of my art, please visit me at My Card Party. I’ll see you on Thursday with some new Button Jewelry.

Until then, keep creating!

2

BaZOOple Bracelet

I’ve got a BaZOOple bracelet for you today. The buttons can be changed out.

We go to the Zoo a lot during the spring and summer, and I think this will be lots of fun to make and wear with the kids.

Bazoople Bracelet.

BaZOOple Bracelet


Supplies

I like to include a floss threader in my little bracelet kit. These can be found in the dental area of your pharmacy – they’re very inexpensive and they really make my life easier!

How to Create the BaZOOple Bracelet

  1. Create a cuff using ribbon or fabric. I sewed a long piece of ribbon in half.
  2. Sew some yarn or twine to the cuff.
  3. Add your choice of buttons with shanks.

It’s really that easy!

BaZOOple Bracelet

Thanks for joining me today.

See more of my creations at MyCardParty.

0

Red White and Blue Card

Create a quick Red White and Blue card to celebrate Summer

Hi, it’s Allie here from My Card Party. I had some extra patriotic stickers from Authentique, and lots of patriotic cardstock from DiscountCardstock.com so I thought I’d make a summery card.

Red, White, and Blue

Happy Summer to you!

Red White and Blue Happy Summer to You


Shopping at Buttons Galore is always fun. There are so many categories and styles. My favorite thing to do is Shop by Color. I had so much red, white and blue going on in this card that black buttons seemed to be the way to go. There are many choices in the Black and White category.  I settled on a package of Cookies and Cream Buttons.

Supplies for creating Red White and Blue Card

  • Cookies and Cream Buttons
  • Ivory Smooth Cardstock #80 and Currant Red Cardstock (Discount Cardstock)
  • Bulk Bling (Want2Scrap)
  • Stickers (Authentique, Sentiment – SRM)
  • Twine and Baker’s Floss (Jo-Anne’s Fabrics)

Tools

  • Other – Martha Stewart Butterfly Punch, Martha Stewart Score Board
  • Hot Glue (AdTech)
  • Scissors (Westcott Brand)
  • Desert Sand Ink and Ink Sponge (Tsukineko)

Instructions

  1. Create a card base 4.25 x 11 and fold in half.
  2. Ink edges of card front with Tsukineko Desert Sand Memento Dew Drop.
  3. Tie multiple colors of floss through Cookies and Cream Button.
  4. Add twine and embellishments. Finish with sentiment and bling.

Thanks for joining me today. I’ll see you next Sunday.

See more of my creations at My Card Party.

0

Patriotic Craft – Country Chic Flag

Patriotic Craft – a Country Chic

Hi, Allie here and I’m sharing my Patriotic Craft – a Country Chic Flag. We are your LAST stop on the I Love the USA Blog Hop today. Are you hopping with us for this amazing Patriotic Craft Party? You should arrive here via Jen Hadfield’s Tator Tots & Jello Blog.

 *******If you’re just getting started – be sure to visit Laura Kelly at Laura Kelly Designs so you don’t miss a SINGLE project!  (Also, this is where you enter for the great prizes)******


The designers have worked long and hard to bring you patriotic inspiration.  We have gathered top name designers in their respective fields such as: sewing, scrapbooking, card making and many more.  We hope you can share in their pride and enthusiasm for all that America stands for and the beautiful country that she is.

Patriotic Craft - A Country Chic Flag

I Love the USA Star Pennant Flag Close Up

designed by Allie Gower for Buttons Galore

Patriotic Craft – a Country Chic Flag

Materials needed:


I’ve used lots of Patriotic Buttons along with Laura Kelly’s Beautiful America Fabric. (click the links to purchase) We really appreciate you hopping with us today.  Are you inspired to create something patriotic?

If so please share your projects with us on our Facebook page or on Pinterest or even Twitter using hashtags #ilovetheusabloghop  #craftpatriotic #laurakellyart    


Four more days left of the I LOVE THE USA BLOG HOP… so, keep hopping. Don’t forget to share your crafts too.  We really do love seeing what you all create. Comments are always welcome.  We all like a little love now and then, right?  From all of us at Buttons Galore and More, we wish you a creative, happy and safe  Flag Day and 4th of July too! Keep crafting!!!

To enter the I love the USA BLOG HOP, enter the -> a Rafflecopter giveaway 

20

Patriotic Button Card

Let’s make another easy Patriotic Button Card.

This is simply stickers and a cluster of Patriotic buttons. I used hot glue which allows me to put buttons where I want, and cluster them together. I finished off the card with some simple doodling.

Let the kids loose with buttons and stickers, and have them make some cards for friends and neighbors.

Patriotic Button Card

Supplies

  • Buttons – Patriotic
  • Stickers – Authentique
  • Cardstock – Discount Cardstock
  • Twine, Embroidery Thread
  • Adhesive – Hot Glue by Adtech
  • Copic Multiliner

How to Make a Patriotic Button Card

  1. Create a card base 4.25 x 11″ and fold in half.
  2. Apply stickers.
  3. Tie twine and embroidery thread to buttons and glue to card.
  4. Doodle edges.


Thanks for joining me today.

See more of my creations at MyCardParty.

0

A Patriotic Craft Party – the I Love the USA Blog Hop

It’s going to be a Patriotic Craft Party of epic proportions…

You’re invited to join us for the I Love the USA Blog Hop!

I Love the USA Patriotic Party Crafts - I Love the USA Blog Hop

 Cupcakes say PARTY! You’re invited to a Patriotic Craft Party!

28 Fabulous Artists – scrapbookers, cardmakers, seamstresses and more joining forces to take your patriotic crafts soaring to new heights. Join our Hostess Artist Laura Kelly Walters and Jen Goode and a parade of sponsors including Laura Kelly “America the Beautiful” General Fabric for Jo-Ann’s Craft Stores, Coats & Clark, Plaid, Fiskars, and Buttons Galore.

A Patriotic Craft Party – the I Love the USA Blog Hop

Check out this ALL STAR Line Up for the Blog Hop!

Our Hostesses

The Button Bevy

And Lots of Honored Guests


Join us!  If you want to follow along with hashtags and share your projects with us on our Facebook, Pinterest or even Twitter use hashtags #ilovetheusabloghop  #craftpatriotic #laurakellyart  


0

Patriotic Bracelet with Buttons and Ribbon

Create a Patriotic Bracelet with Buttons and Ribbon. This could easily be done with the kids in a variety of colors with lots of different buttons.

I’ve knit my ribbon by wrapping it around my fingers. As a child I would sit for hours and make yarn chains and pull them out. I guess I was bored during the summer! If you aren’t familiar with this technique, you could easily braid some ribbons.

It’s fun to find inexpensive craft ideas for the kids during the summer.
Patriotic Bracelet Ideas


Supplies

  • Buttons – Patriotic Value Pack
  • Ribbon – Michael’s
  • Embroidery Thread – Coats & Clark
  • Rhinestones – Want2Scrap Bulk Bling

How to Create a Patriotic Bracelet with Buttons and Ribbon

  1. Knit or braid ribbon, leaving a length at each end to tie on wrist.
  2. Tie a bow with buttons around the bracelet with several strands of embroidery thread.
  3. Hot glue a rhinestone on each bow to hold knots in place.

Thanks for joining me today.

See more of my creations at MyCardParty.

0

Patriotic Cards with Buttons

This month I’ll share several Patriotic Cards with Buttons. These would all be fun to do with the kids for friends and neighbors. Now that the kids are out of school, it’s fun to do crafts with them, right?

I’ve been creating several fun projects for an upcoming blog hop, the I LOVE THE USA Blog Hop. I had some embroidery thread left, and thought it would be fun to jazz up some buttons. 


Patriotic Cards with Buttons


Supplies

  • Buttons – Laura Kelly Patriotic Mix
  • Neenah White #110 Cardstock (DiscountCardstock.com)
  • SRM Stickers
  • Ribbon – Michael’s
  • Embroidery Thread – Coats & Clark, Twine – Doodlebug Design
  • Tools – Scor-Board, Floss Threader
  • Adhesive – Hot Glue from Adtech, Redliner Tape

How to Create Patriotic Cards with Buttons

  1. Cut a piece of Neenah Solar White #110 4.25×11 and score in half. On the front of the card, score some additional lines above and below where you would like your ribbon placed.
  2. Adhere ribbon on card with Redliner Tape.
  3. Add stickers.
  4. Tie several strands of embroidery thread with twine to Patriotic buttons as shown below.  Trim ends.
  5. Hot Glue buttons to ribbon on card.

Patriotic Cards with Buttons


Thanks for joining me today.

See more of my creations at MyCardParty.

1

Mixed Media Necklace

I created a mixed media necklace to share with you today. Mixed media to me means having fun. It’s more about the journey, and not so much about the results.

I like to incorporate elements that have meaning to me, or to the person I’m creating for. I love butterflies. They are all about change.

Mixed Media Necklace

Supplies for creating a mixed media necklace

Note – this is what I used – use what YOU love. But of course, include some fun buttons! You don’t need everything on this list – you could play with paint, beads, remake an old necklace… The sky is the limit. Enjoy the journey!

  • buttons – Shop by color at Buttons Galore
  • chain and jump rings (Fire Mountain Gems)
  • shrinky dinks
  • napkin
  • dies (Spellbinders)
  • craft metal (Ten Seconds Studio)
  • glitter and liquid adhesive (Art Glitter)
  • copic markers and an ABS (air brushing system)

Here’s a fun little video showing some close ups and tips.

animoto_high_res

Thanks for joining me today. Please share something you make with buttons, I’d LOVE to see it.

You can find me at My Card Party.

0

Get Well Card

Make a simple Get Well Card.

A Get Well Card is always a good card to have in your stash, because injury and illness never arrive at a convenient time.

I randomly stamped flowers and accented with Bling. At the bottom of the card, I’ve cinched some ribbon with a Teal Ice button and some orange floss.

Get Well Card from BUTTONSGALOREANDMORE

Supplies Used to make Get Well Card

  • Buttons – Teal Ice
  • Stamps and Cardstock – Gina K Designs
  • Sticker Sentiment – SRM Sticker
  • Bling – Want2Scrap
  • Trim – Berwick, We R Memory Keepers
  • Ink – Tsukineko/Imagine Crafts

Thanks for joining me today. I hope you don’t NEED a card wishing you well, but if you do, I hope you get well soon!

1

Make a Card for Dad

Let’s make a Card for Dad, shall we?

Just for Father’s Day, let’s step away from the flowers, the ribbons, the lace. Let’s go all MANLY! Blues, browns, etc. – safe color choices. I’m going for a mannish, woodsy feel here. My kids will give this to their dad with a gift card inside.

Make A Card for Dad

Instructions for a Card for Dad

  1. Score lines on cardstock.
  2. Ink mat with Donna Salazar inks from Clearsnap.
  3. Add small holes with hole punches and sand a bit to distress it.
  4. Add paper wire.
  5. Adhere mat.
  6. Place sticker on button, sand or cut off excess and attach to paper wire.
  7. Attach button, add finishing sentiments.
  8. Complete card.

Supplies to Make a Card for Dad

Thanks for joining me today. I hope the men in your life have a day they deserve.

2

Buttons & Beads Necklace

Hi, it’s Allie! It’s Thursday, time for some button jewelry, and I’m sharing a Buttons & Beads Necklace with you today.

Button Jewelry with Allie Gower

If you have a basic understanding of stringing, this necklace is super simple!

I went with a rainbow sherbet color scheme – pink lemonade, raspberry, orange – yummy, right? I used satin finish buttons – picking out all the same size, just because … The pinks (dark and light) are from the Victorian Collection. The orange ones are from the Tutti Fruity Collection.

I used single seed beads on both ends and I strung the wire through both holes in the buttons, using a seed bead on the wire coming out of each hole. I went about 2/3 of the way around the necklace in this manner, and then brought both strands together with seed beads. I reversed the order of the seed beads after each set of matched buttons – just to add a little interest.

Button Close Up

Simple Repetition

I finished it off this necklace with a simple magnetic closure and some crimping beads. I particularly like magnetic closures for kids – if they accidentally got caught on something, it would open. The magnet is strong enough to stay closed during normal wear.

closure

Magnetic Closure for Safety


This would be so fun to do with the kids for summer! Are you ready for summer?

Buttons Galore Products Used:

Additional Products Used:

  • Size 11 Seed Beads in Pink and Orange
  • Magnetic Closure
  • Beading Wire and Crimp Beads
0

Graduation Card

Here’s a simple Graduation Card inspired by Dr. Seuss.

graduation card

Congratulations!
Today is your day,
You’re off to Great Places!
You’re off and away!


I hope this simple card inspires you!

I cut my letters on the Silhouette. The font is called Apple Gothic, and came with my Mac. The size is 72 point.

I used Glue Dots to adhere these adorable Buttons.

Supplies used to make Graduation Card:

1

Wizard of OZ Charm Bracelet

As a kid, I remember the first time I saw the Wizard of OZ, and I tried to capture all my memories in this Wizard of OZ Charm Bracelet. This month I’m sharing some easy Button Jewelry ideas. I hope you like them, and that you’ll come back every Thursday to see a new project.

I like to figure out how long I need to make a bracelet and then count the links, so I have a nice even variety of buttons and charms. My wrist is on the slim side – an average bracelet is about 7.5″. One thing to remember to take into account is how bulky your bracelet is – if it’s super chunky, you might need to go a little longer.

I’ll briefly go over what I used – the construction is pretty simple. Decide where you want things and add them with a jump ring. I used the satin finish buttons from the Teal Ice package. These are my favorite colors, so it was just a matter of what I liked! In addition to that I have some Want2Scrap charms – I used crowns, a key, a little girl, a music note, and a star – for the Wizard of course. In addition to the charms, I used an Epiphany Crafts punch to punch out OZ (from Graphic 45 papers) and Epiphany blanks and acrylic shapes (Circle 14) to make my OZ charms. The paper is actually blue, so the buttons went together nicely.


OZ Charm Bracelet

Supplies used to make OZ Charm Bracelet

  • Teal Ice Buttons
  • Chain, Jump Rings** – Fire Mountain Gems
  • Blanks, Acrylic Disks, Circle 14 Punch – Epiphany Crafts
  • Charms – Want2Scrap
  • Paper – Graphic 45

I hope you’re inspired to grab some buttons and charms and create a Charm Bracelet. I’ll be back next Thursday with some more Button Jewelry.


**Note – you will need pliers to open and shut the jump rings.


3

Birthday Card Ideas -DIY a Make a Wish Birthday Card

Today, I’m sharing Birthday Card Ideas.  I’ve made an easy Make a Wish Birthday Card. It is great for almost anyone.

You just need some stickers, buttons and cardstock. Cards like this can easily be remade in a variety of colors, to bundle up and present as a gift.

I embossed some cardstock and cut it into strips. I matted the strip and added some Cupcake Buttons and some sentiment stickers. I like to make sets of birthday cards to give as gifts, so being able to create a bunch easily is a bonus.

Birthday Card Ideas Make a Wish Card


Supplies Used to Create Make a Wish Birthday Card

  • Buttons – Cupcake Buttons
  • Sticker Borders – SRM Stickers
  • Cardstock – Gina K Designs
  • Other – Cuttlebug Folder (Provo Craft)

More Birthday Card Ideas

Card bundles are a great gift, especially for the elderly. Create several cards using different combinations of card stock and buttons and include stamped envelopes. These bundles are always a great hit.

0

Wedding Card

Wedding Card

Make a lovely wedding card. Wedding season is upon us!

I love to use the colors chosen by the wedding party. By stamping and adding matching buttons, any card can become extra special to the bride and groom.

Wedding Easel Card

This is a simple easel card with a little bit of stamping with die cuts. It’s not difficult. The background is embossed panels – the folder is Swiss Dots. The swirls are die cut from the Belle Rose set from Heartfelt Creations. The sprigs are from a Spellbinders set called Foliage. When some were too big, I just cut them down. Make your dies work.

Button Embellishments

I stamped my bird cage and fussy cut it. I also cut a mat for it, so it would stand out in the business of the flowers. The buttons help the card stay open. To one I added a bling center, and then I took two buttons and tied them together with twine. The larger white button is actually upside down, so that the twine doesn’t touch the card.

Wedding Embellishments

I stamped and cut out the label. My sentiment was a tad too big, so I just matted it and accented it with some fancy bling.

The buttons are from the Valentino Collection, the flower buttons are blank Flower Shapes, and I added some bling to the centers. The flowers came with bling already attached.

Supplies Used:

Tool Used:

1

Shaker Charm with buttons

Today, I’ve got this shaker charm. These are easy to make and can be a wearable memento. I think of my Dad a lot in the Spring, and I  think of a strong man. My dad was quiet, but in his silence, he always had so much to say. He left us in April 1997 after a brave fight with cancer, but he’ll be in my heart, forevermore. My dad let me share his work space to experiment with different crafts. I think he’d really enjoy seeing some of the things I make now. I’d like to share some Button Jewelry ideas with you this month. So, if you like jewelry, you will want to come back each Thursday for a new project.


Shaker Charm


These are very easy to make. This charm is 3×1″. I’m using a Memory Frame, Slide Glass and Capsules from Ranger Ink.

How to make a Shaker Charm

  • Trace patterned paper and card stock to match the size of the glass slides and cut it out. A
  • Add some tissue tape and stickers.
  • Sandwich the decorated paper between two glass slides.
  • Place a variety of small Haberdashery Buttons in the capsule (upside down).
  • Lay the slides on the capsule and carefully slide everything into the Memory Frame.
  • Adorn with token.
  • Remove fasteners from brad and adhere to outside of capsule with a Glue Dot.

There are lots of different items you can place inside the capsule, and equally as many ways to decorate the slides and make this shaker charm a personalized memento. I left the back blank with card stock, but you could easily add a photo. When I’m not wearing charms, I like to hang them around the house – on knobs, lights, etc. My kids even wear them on their hoodies as zipper pulls.


Supplies to make a Shaker Charm

  • Haberdashery Buttons – Buttons Galore
  • Paper and Stickers – Authentique
  • Memory Frame, Glass and Capsule – Ranger
  • Tissue Tape, Token – Tim Holtz
  • Brad – Creative Impressions
  • Adhesive – Glue Dots
  • Jump Ring**, Waxed Cotton – Fire Mountain Gems


I hope you’re inspired to grab some buttons and create a memory. I’ll be back next Thursday with some more Button Jewelry.


**Note – you will need pliers to open and shut the jump ring.


2

3D Button Flowers

3D Button Flowers

It’s spring. These 3D Button Flowers would be so cute for Mom, or any Spring birthdays, or just as a pick me up.

Go 3D with flowers and buttons


These are SO simple to make.

You need the following supplies:

Buttons, Twine, Sturdy Wire, Felt,

Yes, that’s IT!

I die cut some flowers using a Spellbinders Paper Arts die called Blossoms. You could also just cut out flowers, or use ready made flowers.

I chose a large button with four holes. I thread two wires through the holes. I sandwich flowers on the “stems” and add buttons.

I put a circle of felt on the button of the button to help keep the sculpture upright. I added some twine around the edge of the button to create grass.

SUPPLIES USED:

TOOLS USED:

Thanks for stopping by today. Hope you’re inspired to make something 3D!

4

Altering Buttons

Altering Buttons

There are lots of ways of altering buttons. Today, we cut off shanks and paint.

Altering Buttons to match a Poppy Card


Altering buttons to match a butterfly card.

I’m back with more buttons from the Butterfly Kisses collection. I needed to do something to make these butterflies match the cards I was wanting to make.

Butterfly Kisses

Butterfly Kisses Collection

Here’s how to get started.

Altering Buttons - Start by removing the shank

Gesso is like paint, but different – it’s almost like a crafty primer coat.
Altering Buttons - Apply Gesso to your Button

Once your button is primed, you can try lots of products.
Here, I use Smooch in a couple of colors.

Smooch comes in a nail polish style bottle with it’s own brush. So convenient. It’s made by ClearSnap.

Altering Buttons

To finish off this card, I added some ribbons from May Arts. As a kid, I grew up watching my mom sew. When she passed away, I received her sewing basket, and inside were her orange handled Fiskars scissors. Her scissors were carefully hand labeled – for sewing, for ribbons, and for paper. I still have them all.

You can also ink your primed buttons.

Altering Buttons

No button should ever go to waste!

Alter buttons to match your next project.

Supplies Used:

  • Butterfly Kisses buttons
  • Gesso – Claudine Hellmuth
  • Ink, Spritz and Smooch – Clearsnap
  • Ribbon – May Arts
  • Images – Gina K Designs
  • Paper – Cosmo Cricket
  • Other – Copic Markers

Tools Used:

  • Fiskars scissors
  • Toe nail clippers


1

Quick and Easy Place Cards Ideas

Quick and easy place cards ideas!

Do you need place cards for your next event? Create some with just buttons and paper. Here are some quick and easy place cards ideas.

Quick and Easy Place Cards Ideas


These are easy to create.

I’ve cut my cards 3X3″ and folded them in half. The image below shows how the easy grass border is made and attached. This month we’re lucky enough to be playing with Fiskars products, so of course I used my Fiskars orange handled scissors. Thanks, Fiskars!


Quick and Easy Place Cards Ideas - Making the Grass Border


The cloud is a die cut that I inked. To finish off these quick and easy place cards, just add stickers. I love these adorable, chunky butterflies from Buttons Galore’s Butterfly Kisses Collection. I like to use Beacon’s 3-1 glue to make sure they stay put. Buttons Galore has several kinds of adhesive to offer in their Adhesives section.

Quick and Easy Place Cards Ideas Close Up Green

Quick and Easy Place Cards Ideas Close Up Orange


Supplies Used

Tools Used

  • Fiskars scissors
  • Sizzix Vagabond and cloud die

Thanks for joining me today. I hope you will find that our buttons are a great embellishment for all of your paper crafts.

1

Sunday Cardmaking: Make an Easter Magnet

Make an Easter Magnet.

Do you keep a calendar on the fridge? When my kids were little we would keep our calendar on the fridge and mark special days with a holiday magnet.

I used an Inky Antics stamp set to make my ears and face for this project, but you could EASILY cut some and draw your own face! This is a fun magnet that can be used on the fridge. You could easily swap the magnet for a pin back and have a holiday pin.

Happy Easter Magnet

How to Make an Easter Magnet:

  1. Stamp or draw and cut out ears. Stamp or draw a face and cut out with a circle punch.
  2. Sponge on pink ink on ears.
  3. Stack two Big Ol Buttons, nestling ears between them.
  4. Adhere a magnet to the back of the button bunny. I use Beacon’s Adhesive
  5. Die cut and emboss scalloped squares and classic squares.
  6. Stamp sentiment and assemble card.

I slid a small disc of metal under the top square, so that the magnet could stay in place and be removed easily. This is also how I wear the magnet.

Buttons Galore Supplies Used to make an Easter Magnet:

Cross Promotional Products Used to make an Easter Magnet:

Additional Supplies Used to make an Easter Magnet:

  • Sponge – Tsukineko/Imagine Crafts
  • Cardstock – Bazzill


0

Sunday Cardmaking: Create an Easy Ombre Easter Card

Let’s Create an EASY Ombre Easter Card. Ombre is a Spanish word that simply means graduated colors. I really wanted to make a simple, sweet Easter card, and I did not want to use traditional colors. These blues are calm and happy to me. I like the tone on tone bunnies on the blue strips, and the bunnies and button eggs add a little bit of fun. I used a paint sample as my inspiration. This simple construction allows you to make a lot of cards, without a lot of work.

Easter Card

Material used to create an EASY Ombre Easter card:

Buttons Galore Product used:

I also used:

  • Dies – Quickutz
  • Embossing Folder – Sizzix
  • Cardstock – Bazzill
  • Dimensional Adhesive

Directions for making the EASY Ombre Easter Card:

  1. Create a 5×7″ card base.
  2. Cut four pieces of graduated blue cardstock 4 3/4 x 1.5″ and emboss. Place on card, leaving room in between each strip. Adhere to card base.
  3. Die cut four bunnies from same graduated card stock. Adhere to graduated blue rectangles with dimensional adhesive.
  4. Add buttons.

I hope you enjoyed this Ombre Easter card. When I’m making a lot of cards, I love to do something simple, but different. You can get a lot of strips out of each piece of blue card stock, and cut all your bunnies out of the scraps. When my kids were little we used to have their friends over and make fun cards for friends and family.

Thanks for stopping by.

Allie

1

Sunday Cardmaking: Making an Easy Easter Card and Treat Containers

Making an EASY Easter Card and Treat Containers to match.

Easter is so much fun for the kids, but it doesn’t have to be expensive or difficult to make treats. I love to make these little treat containers for the children at Sunday School, along with friends’ children. They are EASY PEASY to make. The card couldn’t be easier. With a sticker sheet, you can quickly make 8 cards out of one sheet of 12×12″ paper and some scraps.

It’s so easy, and I’ll walk you through it!

BGM Carrot Easter Bunny 2013-02-27 11.55.51

Directions for making Easy Easter Card

  1. Cut a card base 3 x 6 and fold in half.
  2. Create a green mat 2.75″ square and adhere to card base.
  3. Add a small strip of patterned paper 2.75 x 1″ and adhere near bottom of  green mat.
  4. Tie a bow through a white button and adhere to card.
  5. Place dimensional foam on back of bunny sticker. Leaving release paper in place, dust the back of the sticker with baby powder. This deactivates the adhesive. Tap off excess. Remove release tape and adhere bunny to card.

Directions for making Treat Containers:

  1. Cut a piece of patterned paper in a square – I made small containers – they are 4 x4″.
  2. Roll patterned paper into a tube and seal edges with redline tape.
  3. Squeeze at one end – seal with tape. Fill with treats. Squeeze at the other end, being sure to squeeze the tube “perpendicular” to your other end. These will look like Minute Maid popsicles or those old fashioned tubes of sour cream.
  4. Die cut circle and doodle around edges. Die cut green inverted circle. Fold in half and adhere to tubes.
  5. Add some Laura Kelly buttons with Beacon’s Adhesive and let dry.

2013-02-27 11.55.18

Buttons Galore Materials used to create EASY Easter Card and Treat Containers:

Cross Promotional Materials used:

Additional Items Needed:

  • Paper, Sticker, Twine – Doodlebug Design
  • Ink – Copic Multiliner
  • Dimensional foam adhesive
  • Baby powder and a small brush

Thanks for joining me today. These are super simple craft ideas that would be fun to do with the kids.

0

Sunday Cardmaking: Make a St. Patrick’s Day Card

Let’s make a FUN St. Patrick’s Day Card.

As an Irish lass, I just HAVE to share another St. Patrick’s Day Card.

Sometimes I like to make easy cards. Other times, I like to pull out lots of toys and tools, and for this card, I got out sandpaper, my scor-board and all kinds of goodies.

Let’s get started!

Happy St Patricks Day

How to make this FUN St. Patrick’s Day Card.

  1. The base is a standard A2 size (4.25 x 5.5″) and opens at the bottom. The dark green mat is 4 x 5.25″ and the white mat it 3.75 x 5″. The light green strip is 1.75 x 5″.
  2. Score light green strip at every quarter inch. Turn over and sand score lines.
  3. Stamp sentiment. Assemble card.
  4. Die cut three clovers and sand around the edges. Tie twine through assorted Orange Buttons and adhere to clovers with Beacon’s.
  5. Add ribbon. I like to fold over the top edge and use Red Liner Tape to hold it down. Add bling to ribbon and dot i in St. Patrick’s.

We had a lot of fun using tools, but it wasn’t hard… Was it? Grammar Note – the plural of clover really is clovers, I researched it. It sounds wrong, doesn’t it?

Buttons Galore Supplies Used to make this FUN St. Patrick’s Day Card.

Cross Promotional Supplies Used to make this FUN St. Patrick’s Day Card.

Additional Supplies Used to make this FUN St. Patrick’s Day Card.

  • Sentiment, Twine, and Cardstock – Close To My Heart (I like to use this cardstock because it has a fun white core.)
  • Clover die cuts – Sizzix
  • Sandpaper – Bazzill Sanding tool
  • Ribbon – American Crafts
  • Bling – Want2Scrap
  • Dimensional Foam Adhesive

Thanks for stopping by today. I hope your St. Patrick’s Day is filled with luck to last you through the year.

2

Sunday Card Making: Make a St. Patrick’s Day Card

Make a St. Patrick’s Day Card with hearts. I found that I did not have many St. Patrick’s Day themed stamps and embellishments in my stash. I decided on an Irish styled saying and a clover made of stamped hearts. You can make a card any size you like. My card is 4×4″.

Buttons Galore celebrates St. Patrick's Day with Allie Gower

Material used to create St. Patrick’s Day card:

Buttons Galore Product used:

I also used:

In addition you will need:

  • Post-it Note
  • Circle punch or die
  • Finger Dauber or Sponge
  • Copic Multiliner ( for drawing stem )

Directions for making the St. Patrick’s Day Card:

  1. Create a card base by cutting a piece of cardstock 4×8″ and fold in half.
  2. Cut a mat – 3 3/4×3 3/4″ and adhered to card base.
  3. Tie ribbon around card base and attach button using twine.
  4. Die cut scalloped square and adhere to card.
  5. Die cut a classic square.
  6. Stamp sentiment on classic square. Stamp heart four times to create a shamrock, and hand draw a stem.
  7. To create the cloud around the sentiment, you can make your own stencil, as shown below. Attach a Post-it Note to some scrap paper and punch a circle out – near the sticky edge of the Post-it note. Remove sticky circle and place on card and gently sponge around it, moving as needed, to create a cloud shape.
  8. Adhere classic square to card and add bling.

create a cloud step onecreate a cloud step two create a cloud step three create a cloud

I hope you enjoyed this St. Patrick’s Day card and the quick cloud tutorial. May the wind be ever at your back!

Thanks for stopping by.

Allie

5

Sunday Card Tutorial: Make a Window Card

Window Cards are cool.  Have you ever wanted to make a window card? Have you ever had to make a BUNCH and wanted them all to be the same?

Window Card by Allie Gower


Materials to make Window card:

I have a Grand Calibur from Spellbinders, but this should work in any machine. You need repositionable tape – I use Tissue Tape – as you can see! You will also need two post it notes.

Start by making an outline of your card, so that you know where to place each card front.

Making the Perfect Cut


You also want to tape down the die. You will cut through the tape – no worries, just put tape all over it and really rub it down. Then, you are ready to die cut your panels. Use some post it notes to hold it in place. These will really stick after running through your machine, but won’t leave any residue.

Making the Perfect Cut


Rinse. Lather. Repeat. Just kidding. Keep going, just line up your panel  and secure with post – its. Before you know it, you’ll have a nice neat stack of card fronts.

Making the Perfect Cut


My card fronts were created with an arrow stencil. This is a new stencil that Donna Salazar designed for Want2Scrap. It worked great. I used my trust post its to hold it in place, and airbrushed some black ink. Afterwards, I sprayed on a little red ink, and outlined the card.

I finished the card off with ribbon, a Red Heart Button and some twine, and a rhinestone flourish.

Behind the opening is some cardstock. I raised up the card front with some dimensional adhesive. The card front is matted on black, and then adhered to the card base.

If you have to make several cards, or even just one – this easy technique will help you get it right – the first time, and every time.

Buttons Galore Supplies Used to Make the Window Card:


Additional Supplies Used to Make the Window Card:

  • Cardstock – My Favorite Things Replenishments
  • Patterned Paper – Canvas Corp.
  • Stencil and Flourish – Want2Scrap
  • Die – Classic Heart from Spellbinders
  • Ink and Airbrush System – Copic
  • Ribbon – American Crafts
  • Twine – Doodlebug Design

Would you like me to send this card to you? I will be sending it to one lucky winner.

Simply leave a comment and Pin this card!


Thanks for joining me, I’ll be back next Sunday with a fun Card Making Tutorial for you featuring, of course, fabulous BUTTONS!


Sunday Card Making: Make an OWL LOVE YOU Valentine Card

Do you like puns?  There is nothing cuter than OWL LOVE. I think this card would work well for Valentine’s Day, or any day with the simple HELLO!

This card is not difficult, but it’s got a little cutting and some die cutting and punching.

I started with Spellbinders Labels 20 and cut two green shapes and embossed them. I though these worked well for bushy foliage. I also die cut a branch from the Spellbinders BUGS set, and I also embossed it and added some ink for added contrast.

I stamped the Owl with some Crystal Blue ink from Close To My Heart – the owl is a Stamp of the Week from Unity Stamp Company. I have a love for owls, and some of my close friends call me Owlie – it’s even the name of my character on the Wii. It’s okay to laugh! I fussy cut the owl – not as hard as SOME shapes. I doodled around his feet and gave him some eyelashes with a Copic multiliner. I stencilled on his nose – I stamped a second owl and cut out the nose. I colored and outlined. An owl can be blue and sit in a tree, but a blue nose – never! I added some metal brads for his eyes.

I punched a heart using a Fiskars punch. The paper is from Canvas Corp and has all kinds of love words on it. I added a Red Heart Button. I tied a little bow with some Doodlebug Design Twine. At the bottom, I stamped “hello” from the same stamp set. I colored in the heart with a Copic Marker and added some Turquoise Rhinestones from Want2Scrap.

I did a little rounding at the bottom of the card and on the sentiment.

That’s it!

I hope you will love this card.


Hello by Allie Gower

Buttons Galore Supplies used to make the OWL LOVE YOU Card:

Additional supplies used to make the OWL LOVE YOU Card:

  • Cardstock – My Favorite Things Replenishments
  • Stamps – Unity Stamp Company (Stamp of the Week Program)
  • Dies – Spellbinders Labels 20 and Bugs
  • Punches – Scalloped Heart and Corner Punch from Fiskars
  • Twine – Doodlebug Design
  • Ink – Close To My Heart and Copic
  • Bling – Want2Scrap

Do you want this OWL to love you forever?

I will send him to a lucky winner.

Leave a comment and PIN him. I know, you were going to do that anyway. Good luck and I’ll see you all next week.

Sunday Card Making: A Valentine that Holds a Gift Card

Are you giving a Gift Card to your Valentine this year? Gift cards are great, but they rarely come in a cute package. Am I right?

This is easy peasy. You will be ready to present those gift cards in style, for every occasion.

Ready? Here we go!

Valentine for Gift Card


I’ve mad a standard card. A2 – 4.25 x 5.5 – inside though, I added a flap. Above, I’ve stamped and cut and matted, and added a row of glorious Buttons in Laura Kelly Walters fabulously bright colors. Easy peasy, right?

I like to stamp a lot of images and keep them in a baggy so when I’m bored, yes, like that ever happens. What I mean is when I have time, I can sit down and color. Then, when I need a card, I already have images ready to go. This cute set of stringing hearts is from the Unity Stamp Company’s Kit of the Month. I stamped with Tuxedo Black Memento ink from Tsukineko/Imagine Crafts and colored with a few Copic Markers.

Shall we head inside?

Below, I added the flap. I stamped and fussy cut my hot cup of steamy cocoa and the sweet sentiment sentiment. Inside the flap, I stick on my cards with a Glue Dot. If you prefer, you can tape up the sides and make a pocket.


Valentine Gift Card Flap


Buttons Galore and More Supplies Used to Make This Valentine Gift Card:

Additional Supplies Used to Make This Valentine Gift Card:

  • Cardstock – My Favorite Things Replenishments
  • Ink – Tsukineko Memento in Tuxedo Black, Copic Markers
  • Stamps – Unity Stamp Company Kit of the Month Set.


I hope you enjoyed this EASY PEASY Gift Card lesson.

This card could be for you! Leave a comment and Pin the card and a lucky winner will be chosen.

Join me again next week – hope you like OWLS!


4

Sunday Cardmaking: Making a Valentine that Hides a Sweet Surprise

Have you ever wanted to hide a sweet surprise in a Valentine card?

Sweet Surprise Card by Allie Gower

This is a standard Easel Card Valentine with a sweet surprise.

If you’ve never created an Easel Card, here is a very easy tutorial. On my Valentine, I’ve made the size a little larger – the card is 6×6.

The sweet surprise is that in the bottom half of this Valentine, I’ve wrapped a Hershey Bar.

I added a panel of black cardstock, and scored it to make a little sleeve for the candy bar. I didn’t glue it, so the card doesn’t have to be destroyed to enjoy the candy. Apparently, no one wants to rip up the card to get to the goods! Nothing stops me from getting to chocolate.

Hershey Valentine

Sometimes people ask about the buttons and other dimensional items, and if it makes the cards hard to mail, or expensive.

Once you get a certain size, you’re paying a premium anyway, so I just pop my cards in a bubble mailer or a small box, and grin and bear the cost of mailing. My only other option is to hand deliver, which I love to do! I don’t want to hold back on my creativity – so I say layer it on, and on, and on.

Buttons Galore and More Supplies Used to Create this Valentine:

Chocolate Covered Strawberries

Strawberries

Mini Glue Dots

Beacon’s 3-in-1 Glue

Additional Supplies Used to Create this Valentine:

Paper – Authentique

Stamps – Gina K Designs

Ink – Close to My Heart

Dies – Spellbinders

Bling – Want2Scrap

Thanks for checking out my Valentine.

If you have any questions, just leave me a comment below.

I’d like to send this card to someone! Leave a comment here, and PIN the photo for a chance to win.

15

Winter Card: Sunday Cardmaking


I’m back with another winter card for Sunday Cardmaking here at Buttons Galore. I had some holiday pictures to mail off, and I thought this was a fun winter card to create, to accompany those pictures.

Do you love a winter card that’s easy to make? I used all scraps!

Directions for making Winter Card

I started with an 8.5 x 11″ sheet of cardstock from  My Favorite Things and cut a piece 4 x 8″ and folded it in half. Yes, I like to make cards in all shapes and sizes.

I cut a piece of patterned Authentique paper sized 3.5″ square. I also cut a 1 x 4.5″ strip of the same paper, and flipped it over. I stamped snowflakes on this piece, and accented it with Dimensional Pearls Paint and bling and pearls from Want2Scrap. I colored the pearls with a Copic marker to get a matching shade. I stamped the sentiment on a scrap of white cardstock and trimmed it into strips. The edges were lined with a Copic marker, and then colored with a lighter shade to match the patterned papers.

The sentiment reads …

In the depths of winter, I finally learned that within me was an invincible summer.

I promise, Spring is coming. The trees will soon be singing again.

To finish off the winter card, I punched some snowflakes from the matching patterned paper and painted them with some glossy accents and sprinkled Sugar Shimmer. These are adhered with dimensional foam dots. I then chose three matching Clear Round Buttons and punched out small circles of a coordinating Authentique patterned paper. I adhered the paper to the buttons with Glossy Accents then I attached the Clear Round Buttons and two Rustic Coconut Shell Buttons using Memory Book Dot ‘n Go glue dots.

Buttons Galore Products Used 

 Promotional Products Used

Additional Products 

  • Bling – Want2Scrap
  • Glossy Accents, Dimensional Pearls Paint – Ranger Ink
  • Snowflakes – Punch
  • Ink – Copic, Memento
  • Stamp – Close To My Heart


 Thank you for joining us this Sunday. I’ll be back next Sunday with another project idea.
0

Fun Snowman Treat Bags: Sunday Cardmaking

I’m back with a Sunday Cardmaking project.  This week we’re making Snowman Treat Bags. I made a couple of quick, simple snowman thank you cards, and wanted something nice to put them in. Snowman Treat Bags are perfect!

Let me walk you through the process. It’s not hard at all!

Directions for making Snowman Treat Bags

I started with two 8.5 x 11″ sheets of cardstock from  My Favorite Things and cut a piece 6 x 11″. I scored from left to right at 1″, 6″, and 7″ and folded them, and then adhered them together. For the bottom of the bag I used a piece of cardstock that was 3 x 6″ and I scored it to create three one inch folds. I attached that at the bottom. The handle at the top is 1 x 11″ and it’s held in place with two brads and some adhesive.

I stamped my image on cardstock and colored with Copics, and stamped again on patterned Authentique paper – cutting out the scarf and part of the hat. I used a Copic Marker to highlight some of the shadows. I cut a panel out of the same patterned Authentique paper sized 5.25″ square. I colored the edges of the bag and the mat with a Copic marker to match the patterned paper. The paper edges are inked in the same color using the broad tip. I embellished the stamped image with Polar White Flower Soft and some red pearls from Want2Scrap. I painted the snowman with Smooch. He doesn’t sparkle much in the photo, but after a few coats, he was twinkling in person.

I tied a bow around the bag to hold the cards in place and cinched the bow with some Doodlebug twine and a Wild White Button topped with a Brilliant Blue Button anchored by a snowflake brad. I placed the stamped image on the bag with some dimensional foam tape. Five holes were punched at the top, and I placed five Wild White Buttons held in place by brads. You can simple spread the “legs” on the brads a little to go through the holes, then squeeze them back together to attach to the paper. I used 3 in 1 Craft Glue just to help them stay put.

Buttons Galore Products Used 

 Promotional Products Used

Additional Products 

  • Snowflake Brads and Red crepe ribbon – Creative Impressions
  • Ivory Flowers – Petaloo
  • Bling – Want2Scrap
  • Snowflakes – Punch
  • Ink – Copic, Memento
  • Stamp – unknown
  • Twine – Doodlebug Designs
  • Fluff – Polar White Flower Soft


 Thank you for joining us for Snowman Treat Bags: Sunday Cardmaking. I’ll be back next Sunday with another project for you.
2

Winter Card Ideas: Sunday Cardmaking

I’m back with more winter card ideas. I had some holiday pictures to mail off, and I thought this was a fun card to create, to accompany those pictures.

Let me walk you through the process. It’s not hard at all!

WINTER CARD IDEAS

Directions for making Winter card

I started with an 8.5 x 11″ sheet of cardstock from  My Favorite Things and cut a piece 6″ square and folded it in half. I chose this size, because inside, I added a Caribou gift card, just a little after the holidays treat! I just stuck it on with a Memory Book Dot ‘n Go glue dot.

A piece of patterned Authentique paper sized 2.75 x 5.75″ was added. I colored the edges of the card with a Copic marker to match the patterned paper. The paper edges are inked in the same color using the broad tip. I stamped the image on cardstock with Memento ink and then taped my die in place using Washi tape to hold it in place. When I removed the die and paper, I left the tape, and sponged on some Close to My Heart ink to distress it.

I placed some white chipboard on a Wacky Tape Sheet and die cut a bird and wing. The bird was then glittered with some Clearsnap Sugar Shimmer.

I bent the vine in the shape I wanted and adhered it with 3 in 1 Craft Glue. I threaded some Rustic Coconut Shell Buttons using some twine, and adhered the buttons using Memory Book Dot ‘n Go glue dots and a few foam squares for added dimension. I added the rest of the embellishments using 3 in 1 Craft Glue and Memory Book Dot ‘n Go glue dots.

Buttons Galore Products Used 

 Promotional Products Used

Additional Products 

  • Sizzix – Bird Die
  • Ivory Flowers – Petaloo
  • Vine – Prima
  • Bling – Want2Scrap
  • Snowflakes – Punch
  • Ink – Copic, Memento
  • Stamp – Close To My Heart
  • Twine – Doodlebug Designs


I am glad you joined us for Sunday Cardmaking. I hope you are enjoying the Winter Card Ideas. I’ll be back next Sunday with another project idea.
4

Shabby Chic Card: Sunday Cardmaking

Cardmaking - Winter I

I’ve got a shabby chic card for today’s Sunday Cardmaking post – and it is very easy. It’s for a friend that loves all things shabby chic.

Let me walk you through the process. It’s not hard at all!

Directions for a shabby chic card:

I started with an 8.5 x 11″ sheet of cardstock from  My Favorite Things and cut a strip 5.5 x 11″ and folded it in half. A piece of patterned Authentique paper sized 5.25″ square was added. I placed some plain cardstock on a Wacky Tape Sheet and die cut a star. The star was then glittered with some Clearsnap gold glitter. I adhered the large snowflake and glittered star and button with 3 in 1 Craft Glue.

I gathered the fibers and ribbons. I cinched them together with Wild White Buttons and Rustic Coconut Shell Buttons using some twine. I punched two small holes in the cardstock behind each button, and tied the ribbon to the card. The rest of the embellishments were adhered using 3 in 1 Craft Glue and Memory Book Dot ‘n Go glue dots.

Once everything was dry, I placed the card, along with a few small gifts, in a bubble mailer. It’s a little late for Christmas, but it’s a nice winter card, too. Don’t you think?

Buttons Galore Products Used for the shabby chic card:

 Promotional Products Used

Additional Products 

Large White Glittered Snowflake and Christmas Tree – Michael’s, Poinsettia and Gold Leaves – Prima, Assorted Fibers – Basic Grey, White Flowers – unknown


Thank you for joining us this Sunday and my shabby chic card. I’ll be back next Sunday with another winter card idea.

3

Easy Button Bracelet DIY


Easy Button Bracelet Tutorial by Allie Gower

Easy Button Bracelet by Allie Gower


Ready for a fun and easy Button Bracelet DIY project? This bracelet is put together very easily. I used a variety of buttons, some fun Turquoise Bulk Buttons, along with Orange, Pink and Purple buttons from a bag of Color Bulk Buttons in fun sizes and shapes, and used Tiny, two holed White Buttons for a little more jiggle and dimension. On the colored buttons, I had to just sample and try to see which ones fit the jump rings I had on hand. It’s so nice to have a variety to choose from.

Directions for the Button Bracelet DIY

I attached colored buttons by jump rings to a chain segment, one per link. I attached a white button via a second jump ring to each of the colored buttons. Toggles are added to each end.

Button Bracelet in Progress

Note: be sure to take into account the size of your closure in the measurement of your bracelet, and add a little room for bulkier bracelets

Buttons Galore Products Used:

Additional Supplies needed:

You’ll need two sets of pliers, I use Half Round Flat Nose – these are lined with nylon so they don’t scratch up some of the softer metal jump rings. Chain nose pliers would be fine too. If you’ve never worked with jump rings before, Fire Mountain Gems has some great tutorials. This article “All About Jump Rings” is a great start.

  • 48 jump rings
  • 48 buttons ( I used 6 each of the blue, pink, purple and orange, and 24 white)
  • chain – most wrists are 7.5″
  • closure

I hope you enjoyed this easy Button Bracelet DIY – give some jewelry a try!

3

DIY recipe book – holiday favorite Recipes

Holiday Album


Recipe books make great gifts.  They are fun to create and pass down to younger generations.  I created a fun Holiday recipe book using a Blank Board 7″ Circle Book from the Altered Arts Section at C&T Publishing.

Every year, we try new recipes or crafty tricks, or a new tradition. This year, we’ll be keeping track by making notes and taking clippings to add to this fun book. C&T Publishing was kind enough to provide us with a sample of their products, and I had a lot of fun playing.

Materials used in the DIY recipe book:

This book is covered with paper from October Afternoon, then embellished with matching journaling cards, a die cut scalloped border from My Favorite Things and a bling border from Want2Scrap. A glittered snowflake ornament was adorned with some buttons from Laura Kelly tied together with some Baker’s Twine.  When height doesn’t matter, I love to layer buttons! In the bottom right corner, there is a cluster of buttons from the Clear Button Grab Bag, a bulk package of Ivory Buttons, and Valentine Hearts. A small circle was punched from matching patterned paper and placed behind the clear button. It’s fun to match clear buttons to your project!

I found that Beacon’s 3-1 Adhesive worked best to hold on the elements. I also used some Glue Dots.

Thanks for looking, I hope your holidays are filled with lots of favorites and yummy goodness you’ll also want to cherish.  Make your own holiday recipe book


2

Napkin rings DIY for fall – Make rustic coconut shell button flowers

DIY Fall napkin rings:

Napkin rings are essential to the holidays.  Button napkin rings are even better.  I created a quick and easy holiday craft using Rustic Coconut Shell Buttons. These beautiful buttons have a wonderful natural feel and I thought they would be perfect for a Fall table.


Materials and steps to make DIY Fall napkin rings with rustic coconut shell button flowers:


Layers

 Directions to make DIY Fall napkin rings with rustic coconut shell button flowers:

This is really a simple project. I’ve shown some of my steps above. I use 3-in-1 Glue from Buttons Galore. In addition to being inexpensive and lasting a long time, 3-in-1 Glue holds well and dries relatively fast. When dry, it’s completely clear.

I will share a tip, before gluing, I laid out the buttons until I had them layered the way I wanted them, and then I adhered them to a paper circle. I just punched out some cardstock. In the photo, I’ve shown the buttons on a white circle simply so you can see it. In my completed project, I inked my circle brown so that it wouldn’t be shown.

Once my buttons were dry, I attached the piece to a ring of grungepaper that I had covered in lace [My Mind’s Eye]. I accented it with the leaves [Prima] and bits of bling [Want2Scrap].

I think napkin rings would be a great craft to do with kids. The button centerpiece would be fun on a pin or bracelet, too. Imagine the options with these rustic flower buttons.  They would not only make great napkin rings, but a broach, a hair clip, a scarf holder and so much more.  You could make giant ones for curtain tie backs.

0

Christmas button craft ideas – Easy and simple DIY

Christmas button crafts ideas!

Christmas button craft ideas have been overflowing from my mind lately.  I love so many of the buttons from the Christmas Holiday section at Buttons Galore and More that I had a difficult time deciding which to use first.

 button crafts ideas materials:

I used a Christmas Tree from this fun set and a gift button from this set.


Directions to easy Christmas button ornament:

I made a quick and cute ornament using paper scraps. I think this would be fun to hang on a Kraft bag, place on top of a box, or hang on your Christmas Tree. I simply took strips of scrapbook paper and made a simple design, adding a button from the Star of Wonder set.


Directions for an easy  button craft ideas:

Here I took some more scraps and created a bow and box, embellished with a button from the Christmas Presents set in the center. I took two additional strips and glued them to the scalloped circles to create the tiny gift box. I would love to make lots of these, attach some magnets and use them on my fridge to create an Advent Calendar – I have such fun crafting with the little ones I babysit.

My preferred adhesive is Beacon’s 3-1 Adhesive, available on the Buttons Galore & More site. It sets quickly, but gives you time to reposition, and it dries clear. Buttons Galore & More has many additional adhesives to choose from. Additional supplies used include Paper – October Afternoon, Scalloped Circle Die – Spellbinders Paper Arts, Circle Punch – Marvy Uchida

Thanks for joining me today. use up your stash and add some fun new elements.  Please use these Christmas button craft ideas.  I hope you enjoyed these simple, inexpensive ideas for the Holidays.

1

Christmas Craft with Styrofoam Brand Authentique

Vintage Style  Christmas Craft Decoration with Styrofoam cubes, Authentique papers, Red and Green Button Galore Buttons.

Christmas Craft Bristle Brush Tree

Today I bring you a Christmas Craft for your home.  The Vintage Christmas Cube has an old world Christmas feel.

I love digging through my Buttons Galore buttons. I selected several from the Color Bulk buttons. This is a tree I purchased at a hobby shop (for train landscape). I simply adhered tiny buttons with Mini Glue Dots.

Close Up

This is the full project.

I used a styrofoam cube from the Styrofoam Corporation. It’s about 3×3. I cut some papers (Authentique) 2 3/4″ square and applied them with Buttons Galore’s Beacon 3-in-1 glue. I’ve decorated some chipboard letters (Want2Scrap) with some sharpies that I received in my DT box. I then coated those with a layer of adhesive and some glitter from Donna Salazar. I finished the project off with a little bling (also Want2Scrap) and a Christmas tree that is decorated with what else … BUTTONS, using some mini dots, also from Buttons Galore. There are also some buttons held in place with a fancy pin (Maya Road).

 Supplies for  Vintage Style Christmas Craft :

  • styrofoam cube – Styrofoam Corporation

  • buttons – Color Bulk buttons

  • paper – Authentique

  • bling, chipboard – Want2Scrap

  • adhesive – Beacon’s, Glitter It, Mini Dots – all from Buttons Galore

  • glitter – Clearsnap

  • flowers – prima

  • stick pin – Maya Road

    I hope you enjoyed this Vintage Style Christmas Craft.
2

Bulk Buttons: Be Free!

I have been having fun embellishing with buttons from the Color Bulk Button collection. I decorated a fun frame that houses a favorite picture of my son going away on his first fishing trip. This was his first sleep away experience and he had such fun. While he got to get away, and be free, my daughter and I had the first of many mother daughter nights. FUN! June kind of kicks off vacation season for most families.

I started with a simple wood frame and papered it and added a few embellishments. I then set to work on the big embellishment, a jumbo bottle cap from Maya Road. I cut some burlap that I received in my monthly box from Buttons Galore. It was a gift from our DT Coordinator, Niki Meiners. I die cut the burlap and placed it in the bottle cap.

color bulk buttons be free frame close up allie gower

Also in our DT box was some Jacquard products, these wonderful bottles of 3D Lumiere – which is a glue, and a dimensional paint. I painted some Maya chipboard letters. Before they dried, I actually stuck them to some scratch paper and ripped off some of the paint, then went over them with ink and added some copper balls (also in my DT Box). I decorated with some buttons from the Color Bulk Buttons set. This is a great collection of buttons on all colors and sizes. It’s perfect for all projects!

color bulk buttons be free frame allie gower

I finally added a punched butterfly and some beaded letters, and it reads “BE FREE!” At the top it says “The end is nothing, the road is all.” from Willa Cather – this was a rub on from the paper collection – which is from my very old travel stash.

Supplies

  • Buttons – Buttons Galore
  • Bottle Cap and Chipboard Alphas – Maya Road
  • Scrapbook Paper and Die Cuts – unknown
  • Burlap – Niki Meiners
  • Ink – ClearSnap
  • Paint – Jacquard
  • Beacon Adhesive

Thanks for looking today!

0

Large Circle Start Ups: Charmed, I’m Sure

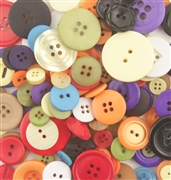
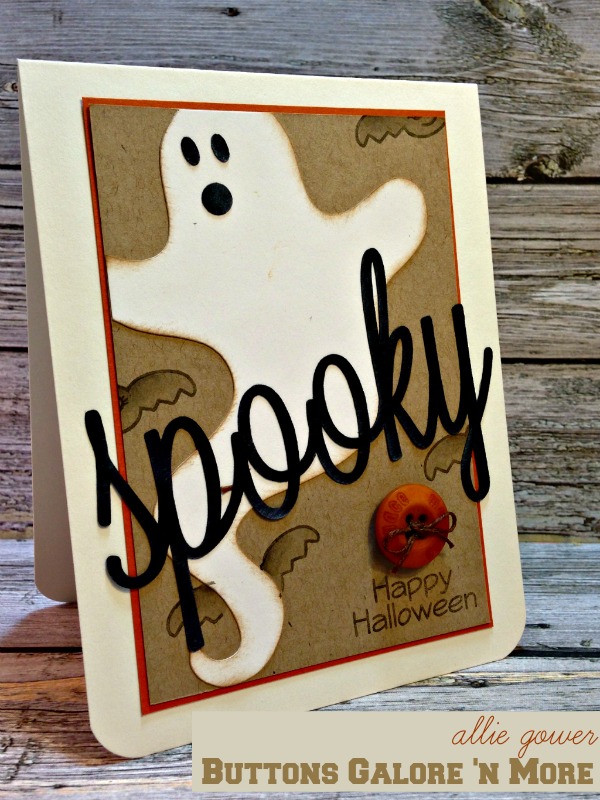
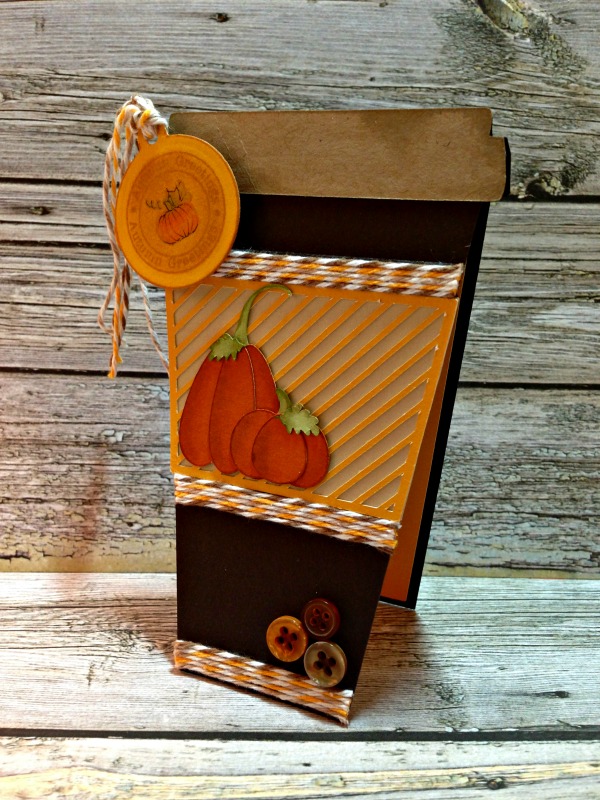
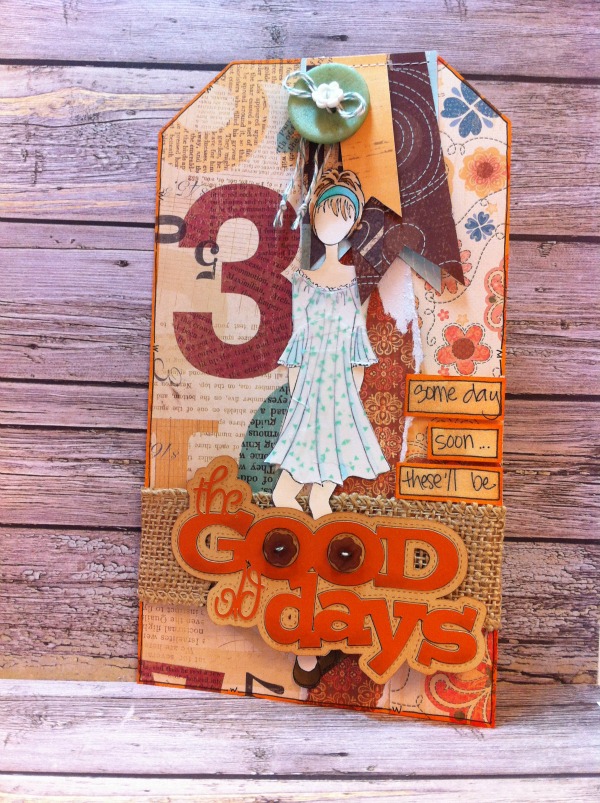
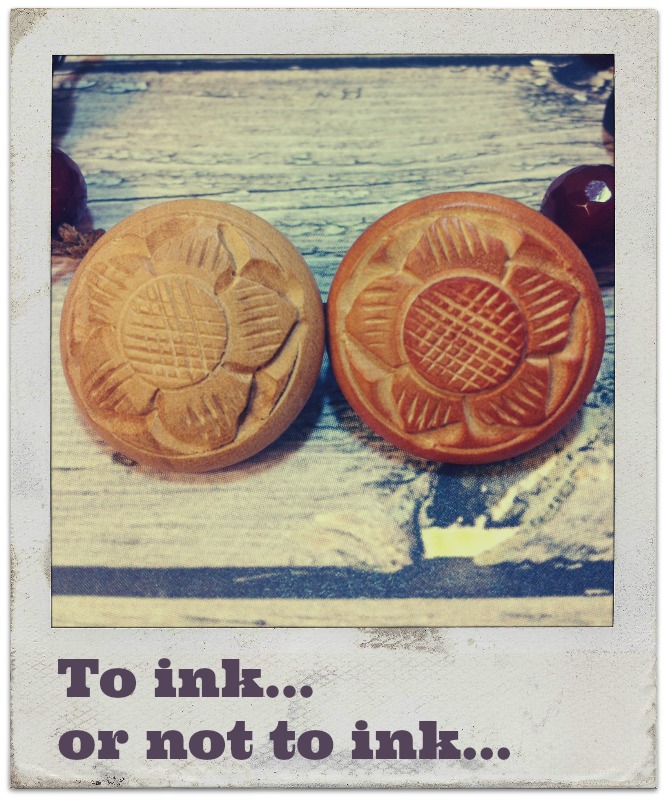
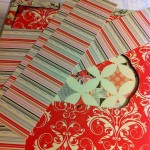
Hi y’all! Allie here… I got my hands on some of Button’s Galore’s Start Up craft shapes this week, the Large Circles. I had such fun making some charms with these blank circles. These blank craft shapes are blank poly plastic pieces that you can stamp on, rub on, ink, paint or embellish with anything you desire. I decided to get creative with some napkins and stamps, and some spritz.

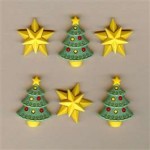
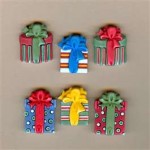
I really love these blank craft shapes! They come in lots of shapes and sizes, from flowers to tags, to sliders and frames, and even holiday shapes. There are even start up packs, and collections including a variety of sizes. They are perfect for every project.


charms-cropped-edited-300x279


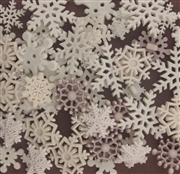
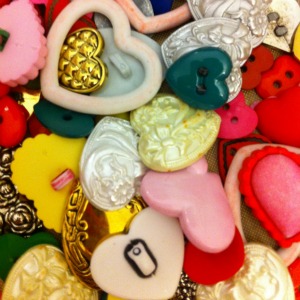
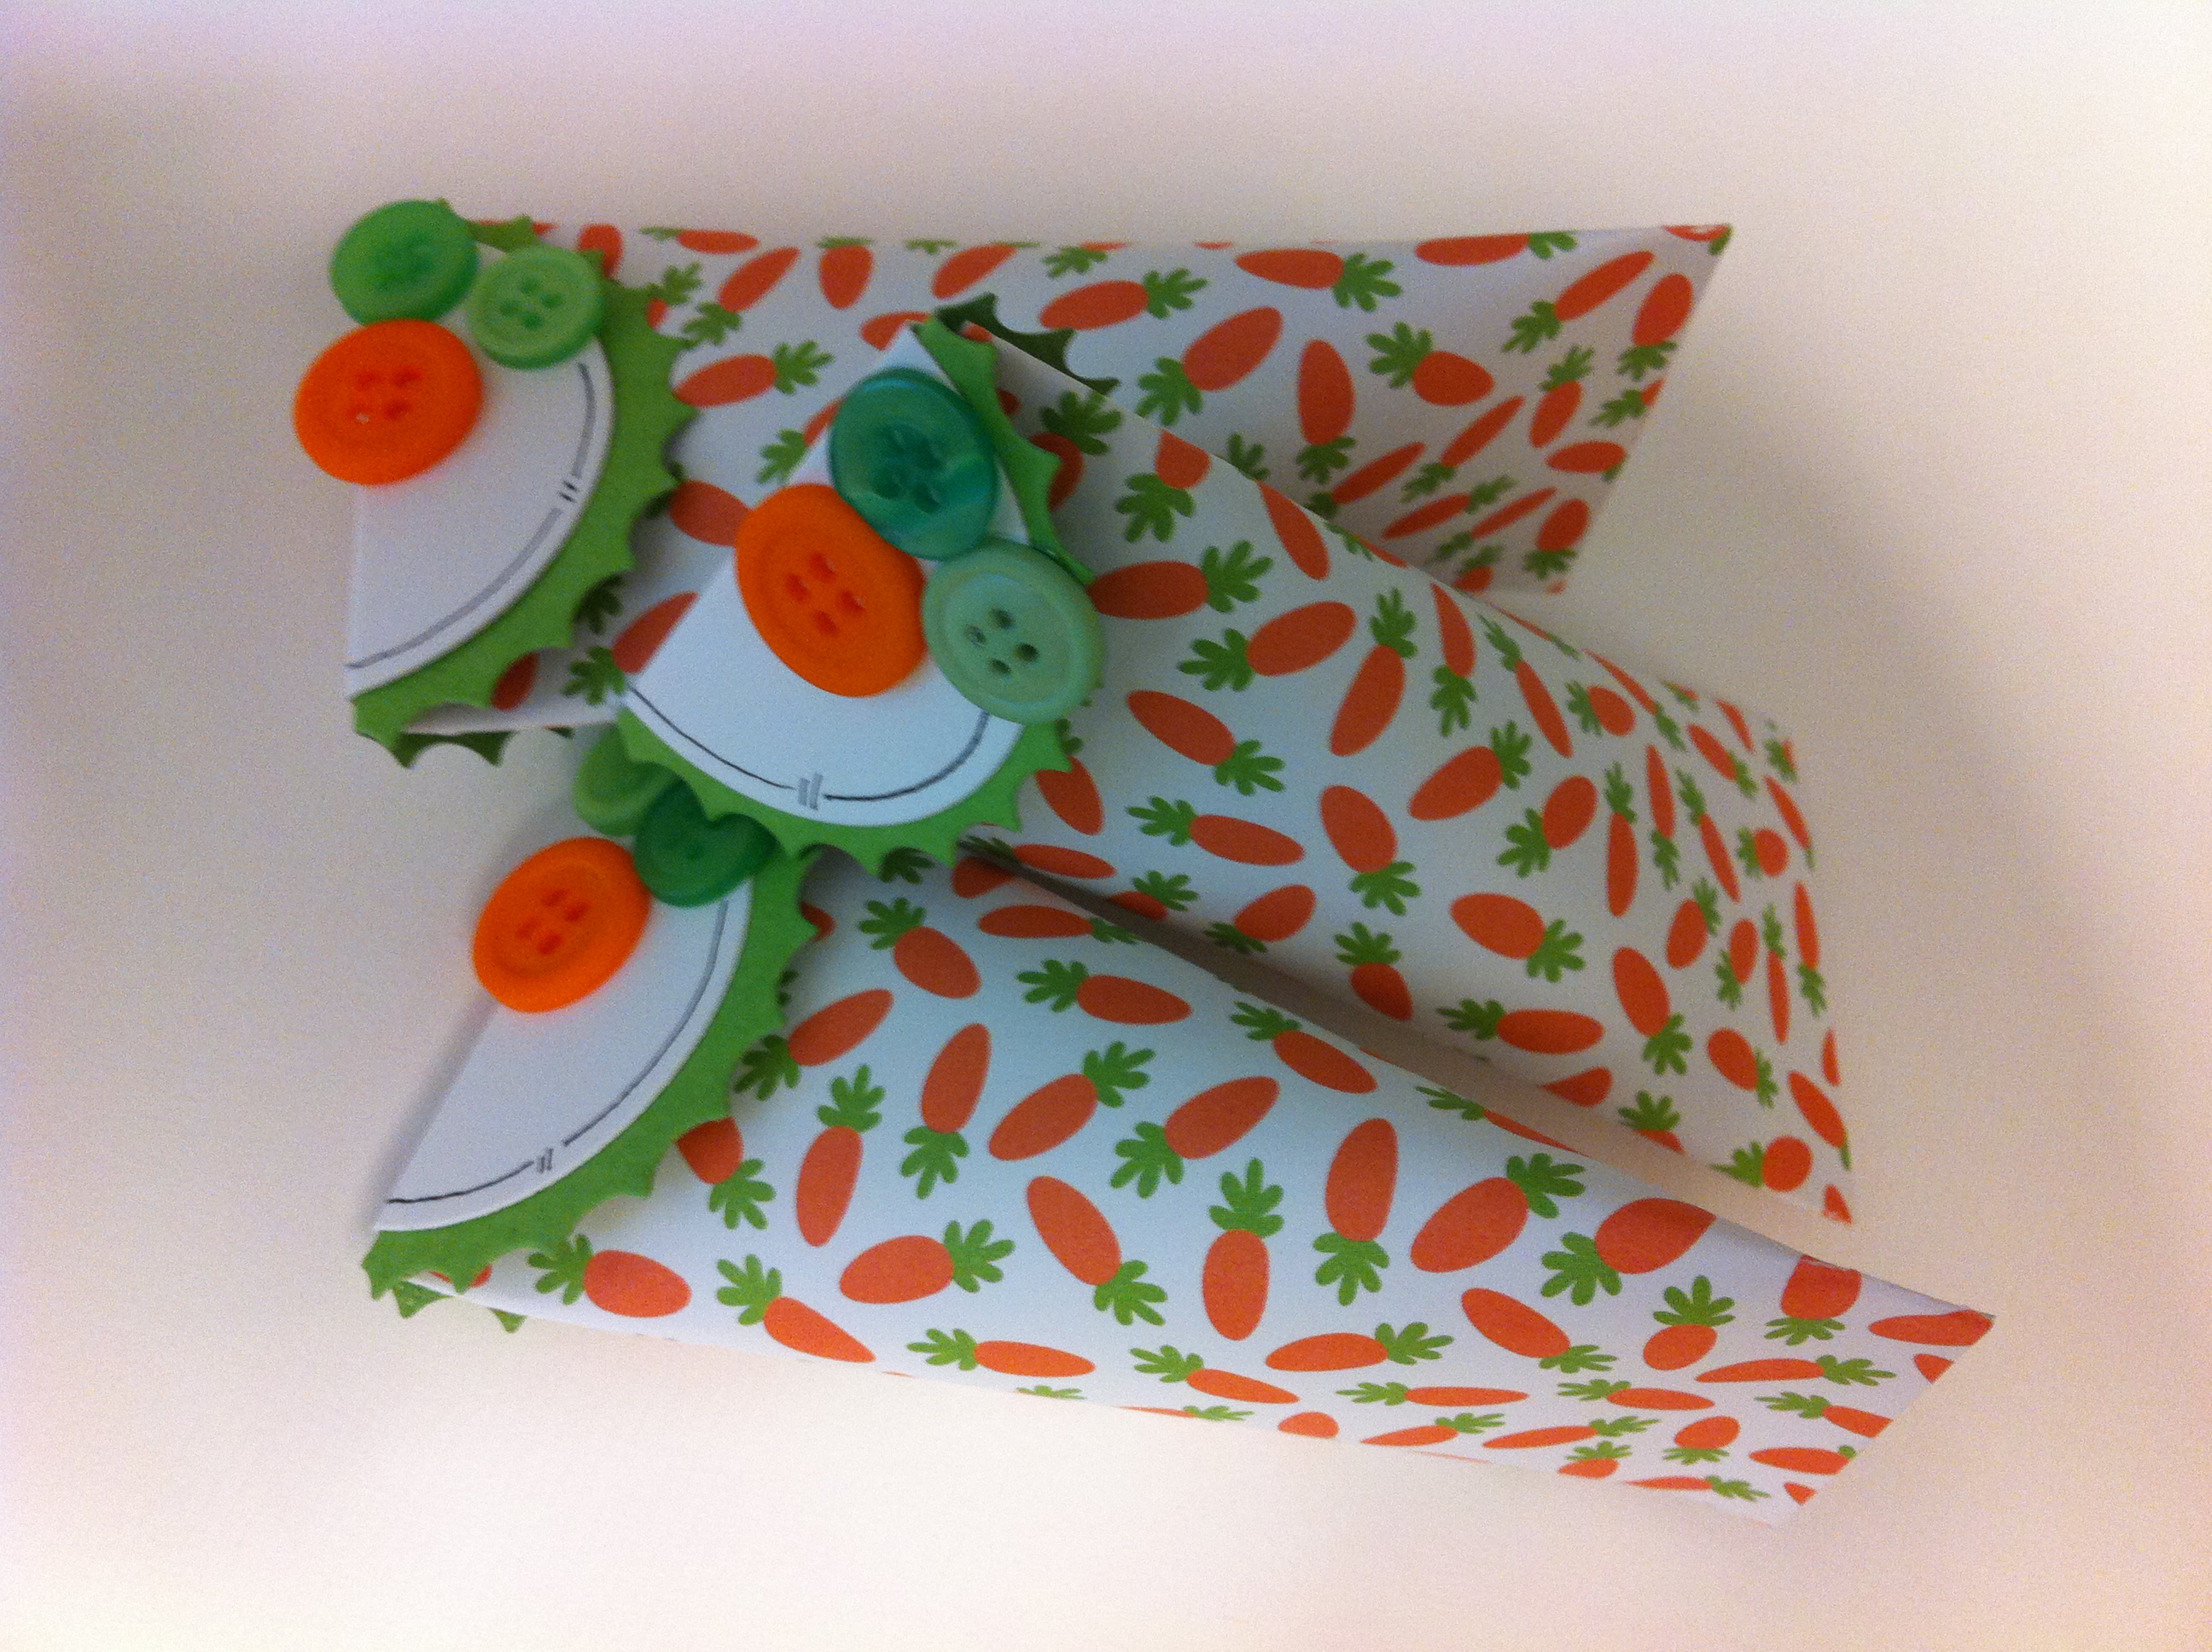
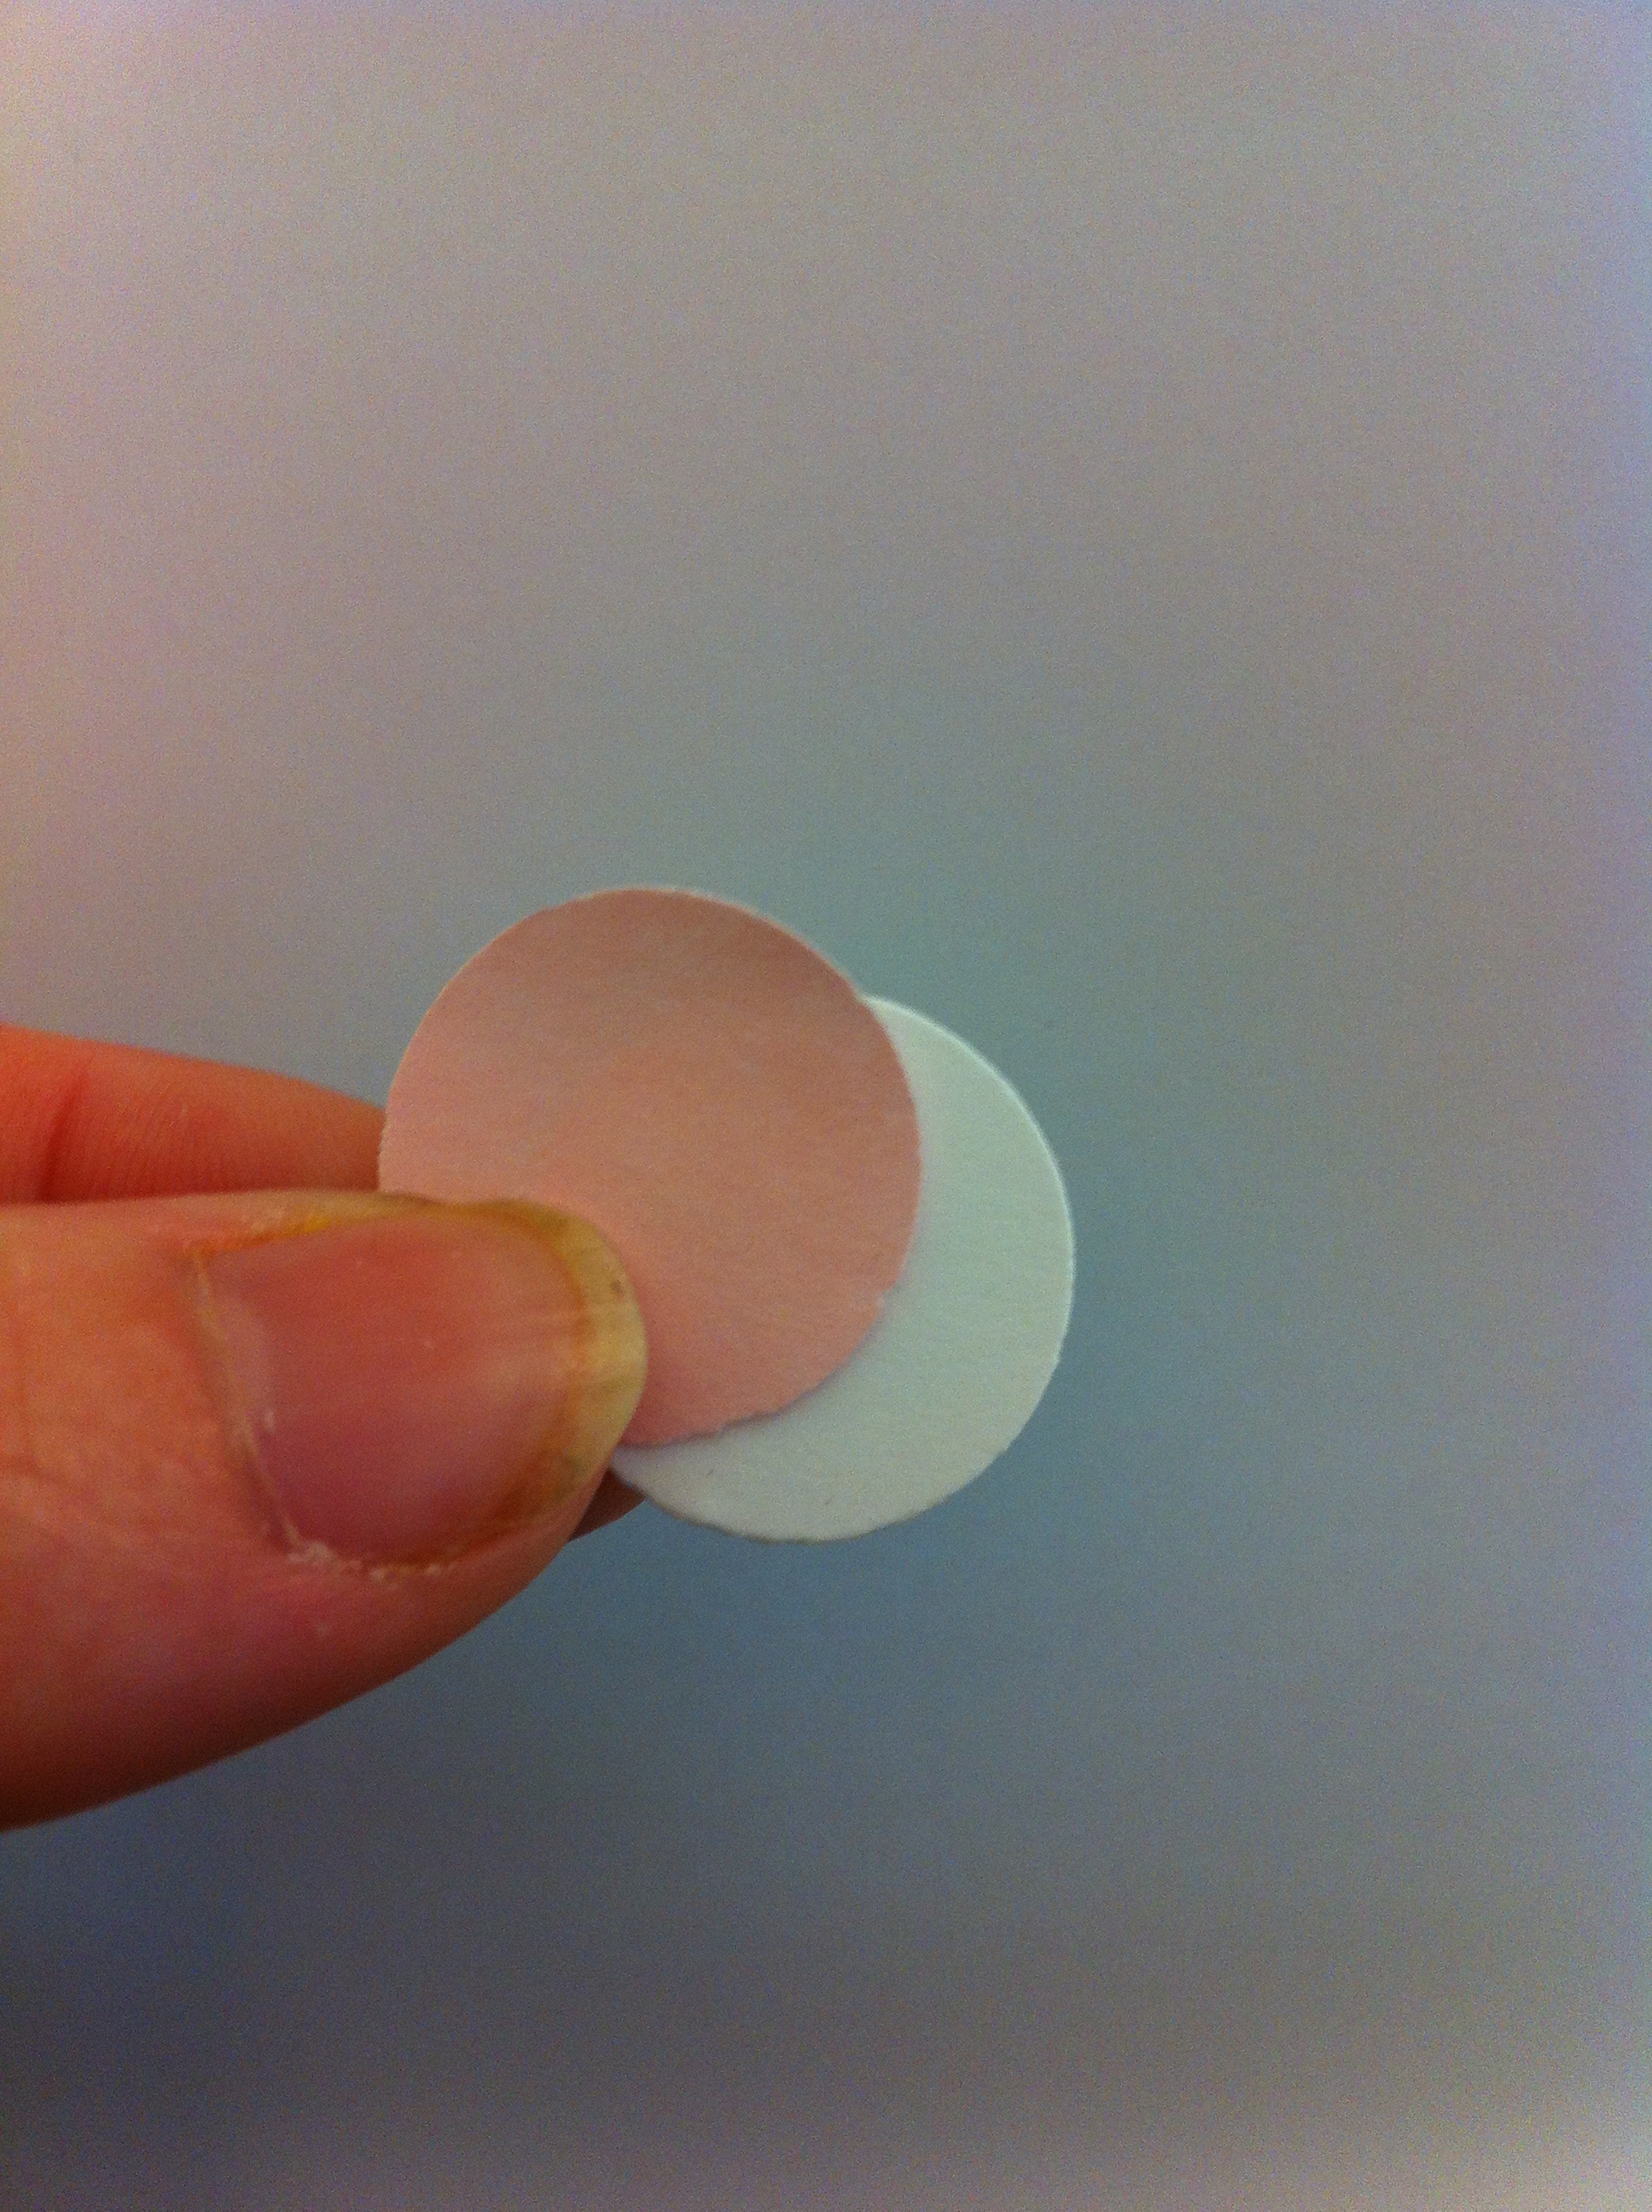
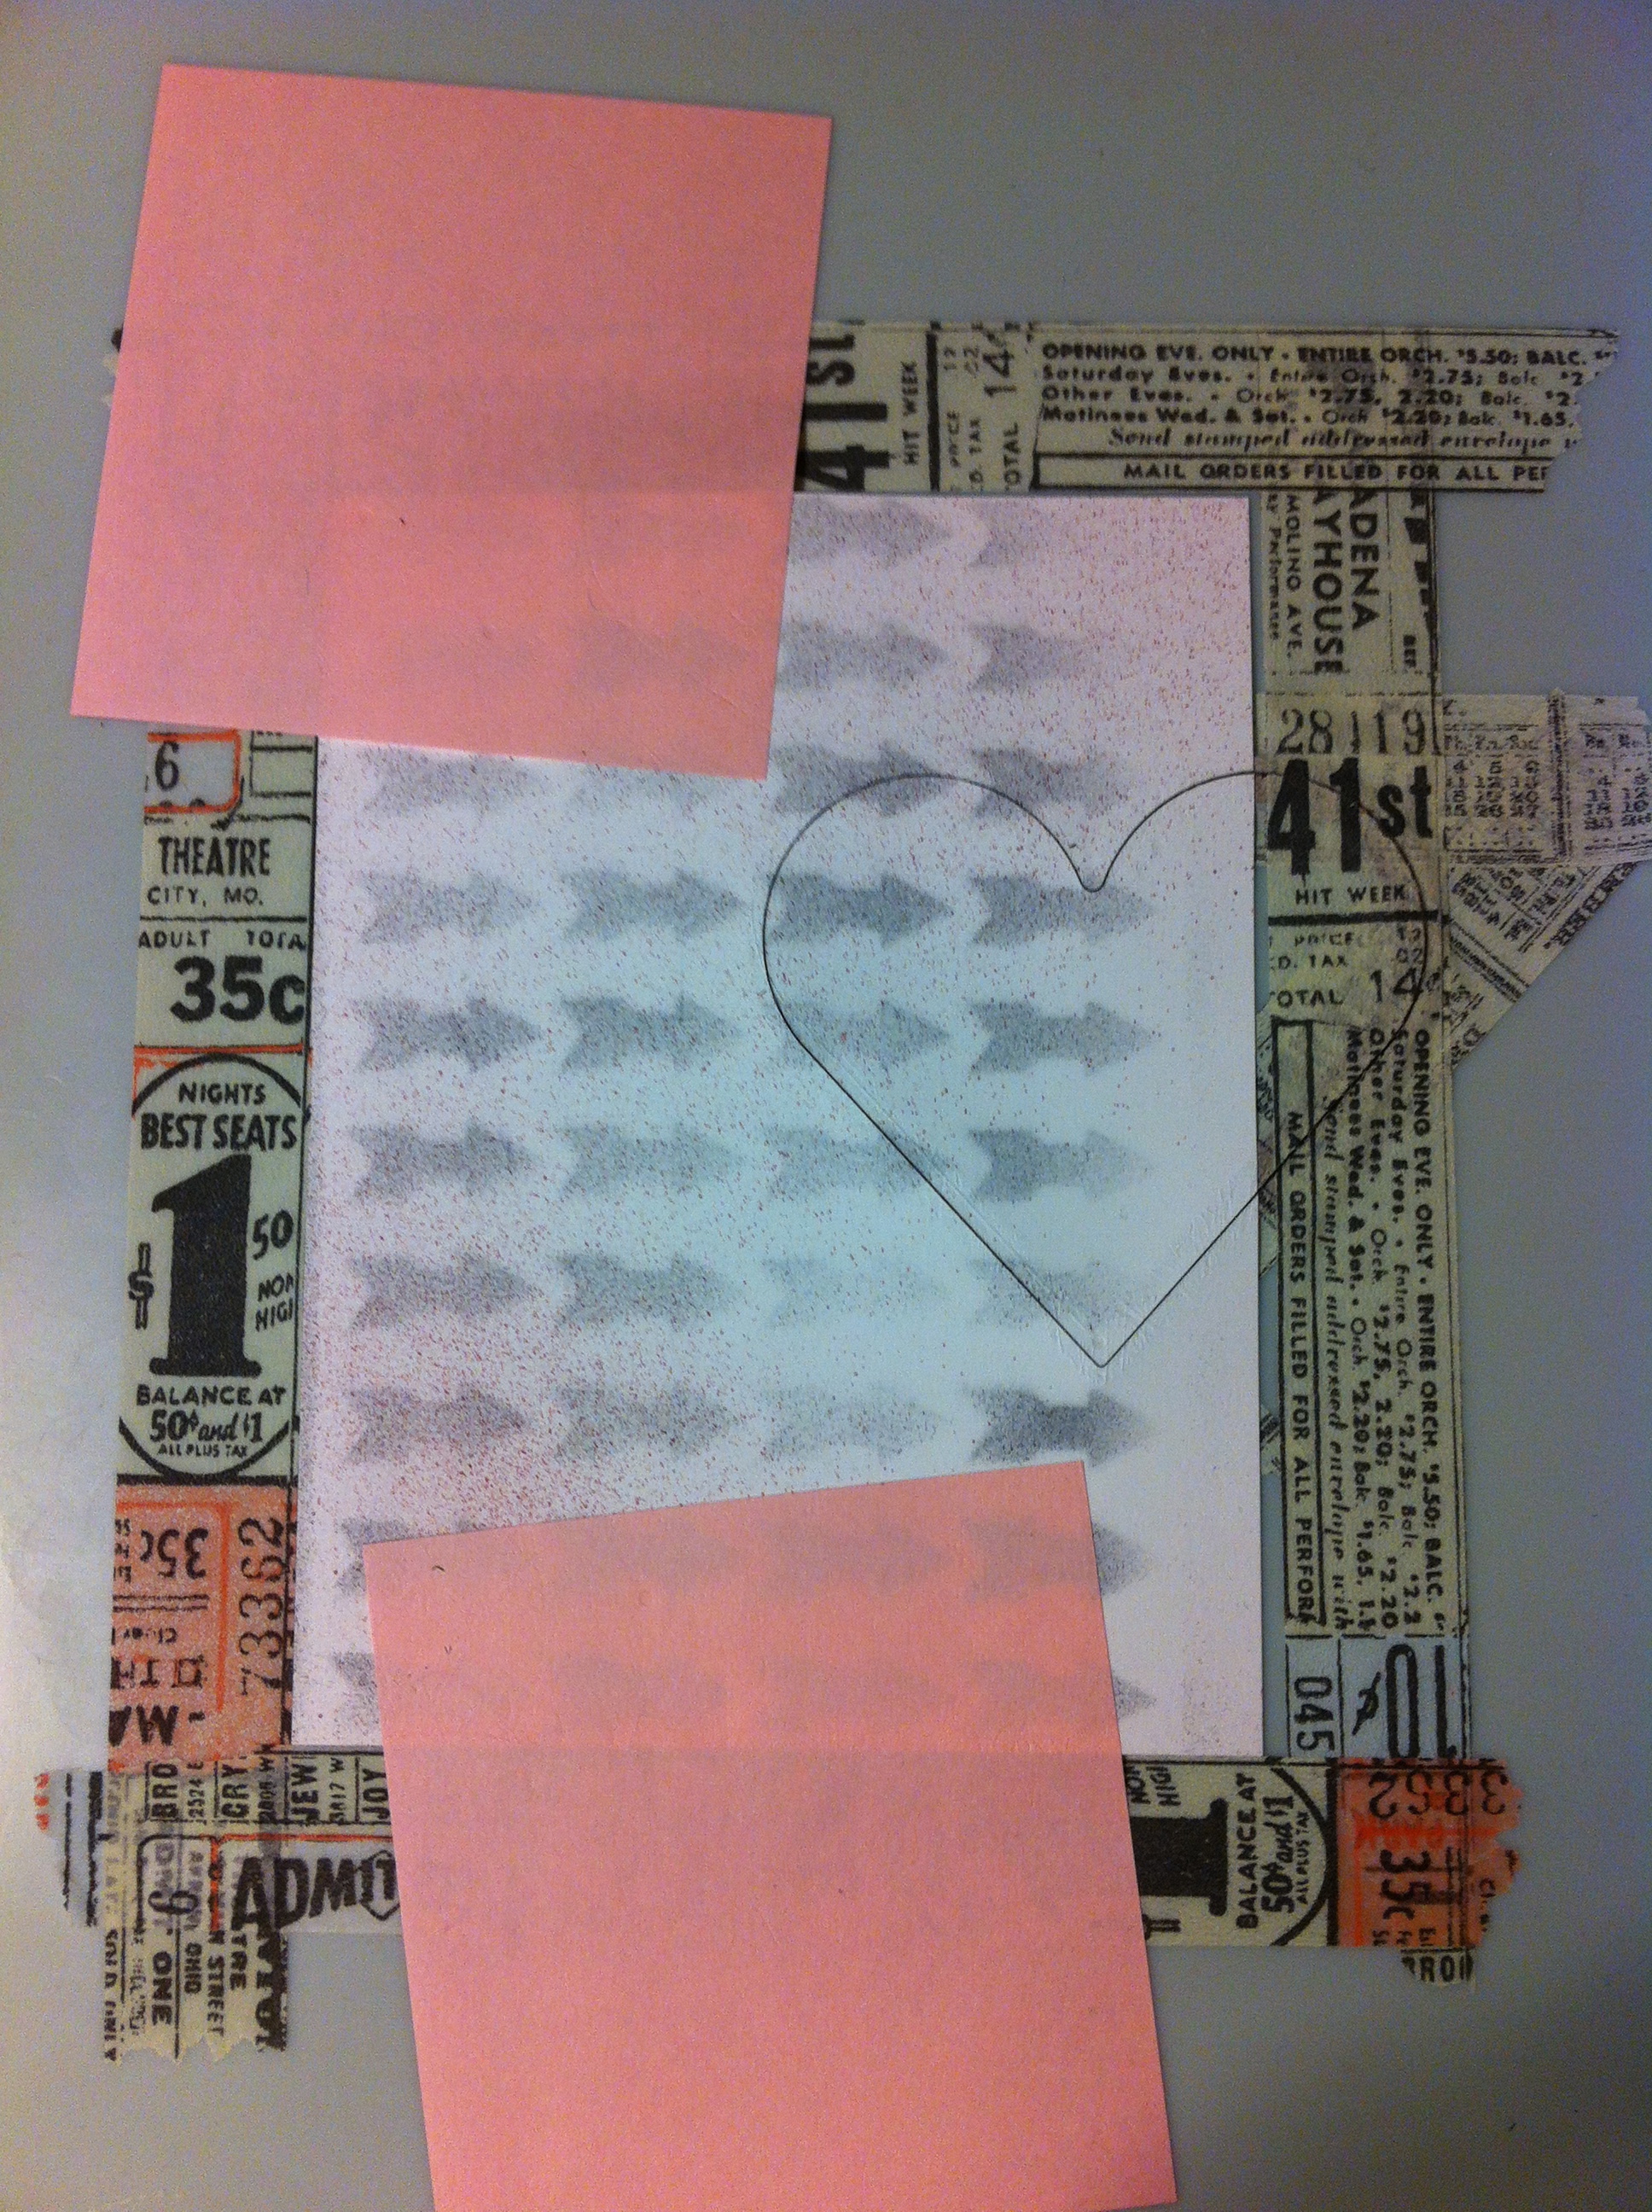
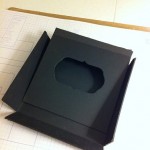
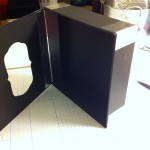
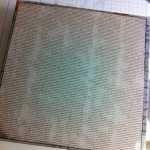
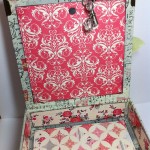
This picture shows the separate layers of the napkins I’m using. For my charms, I just used the very top layer.

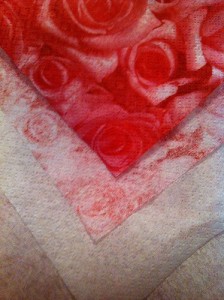
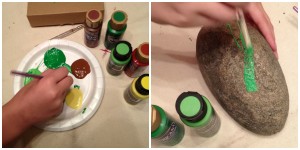
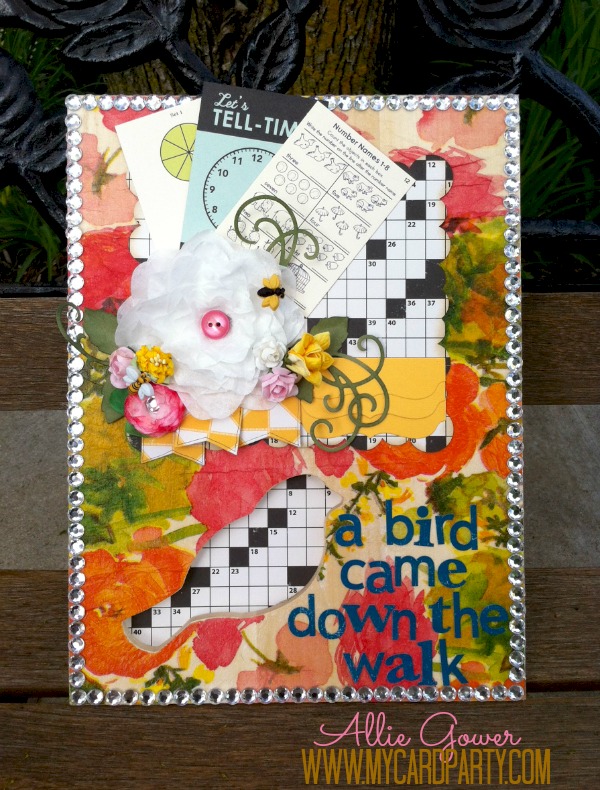
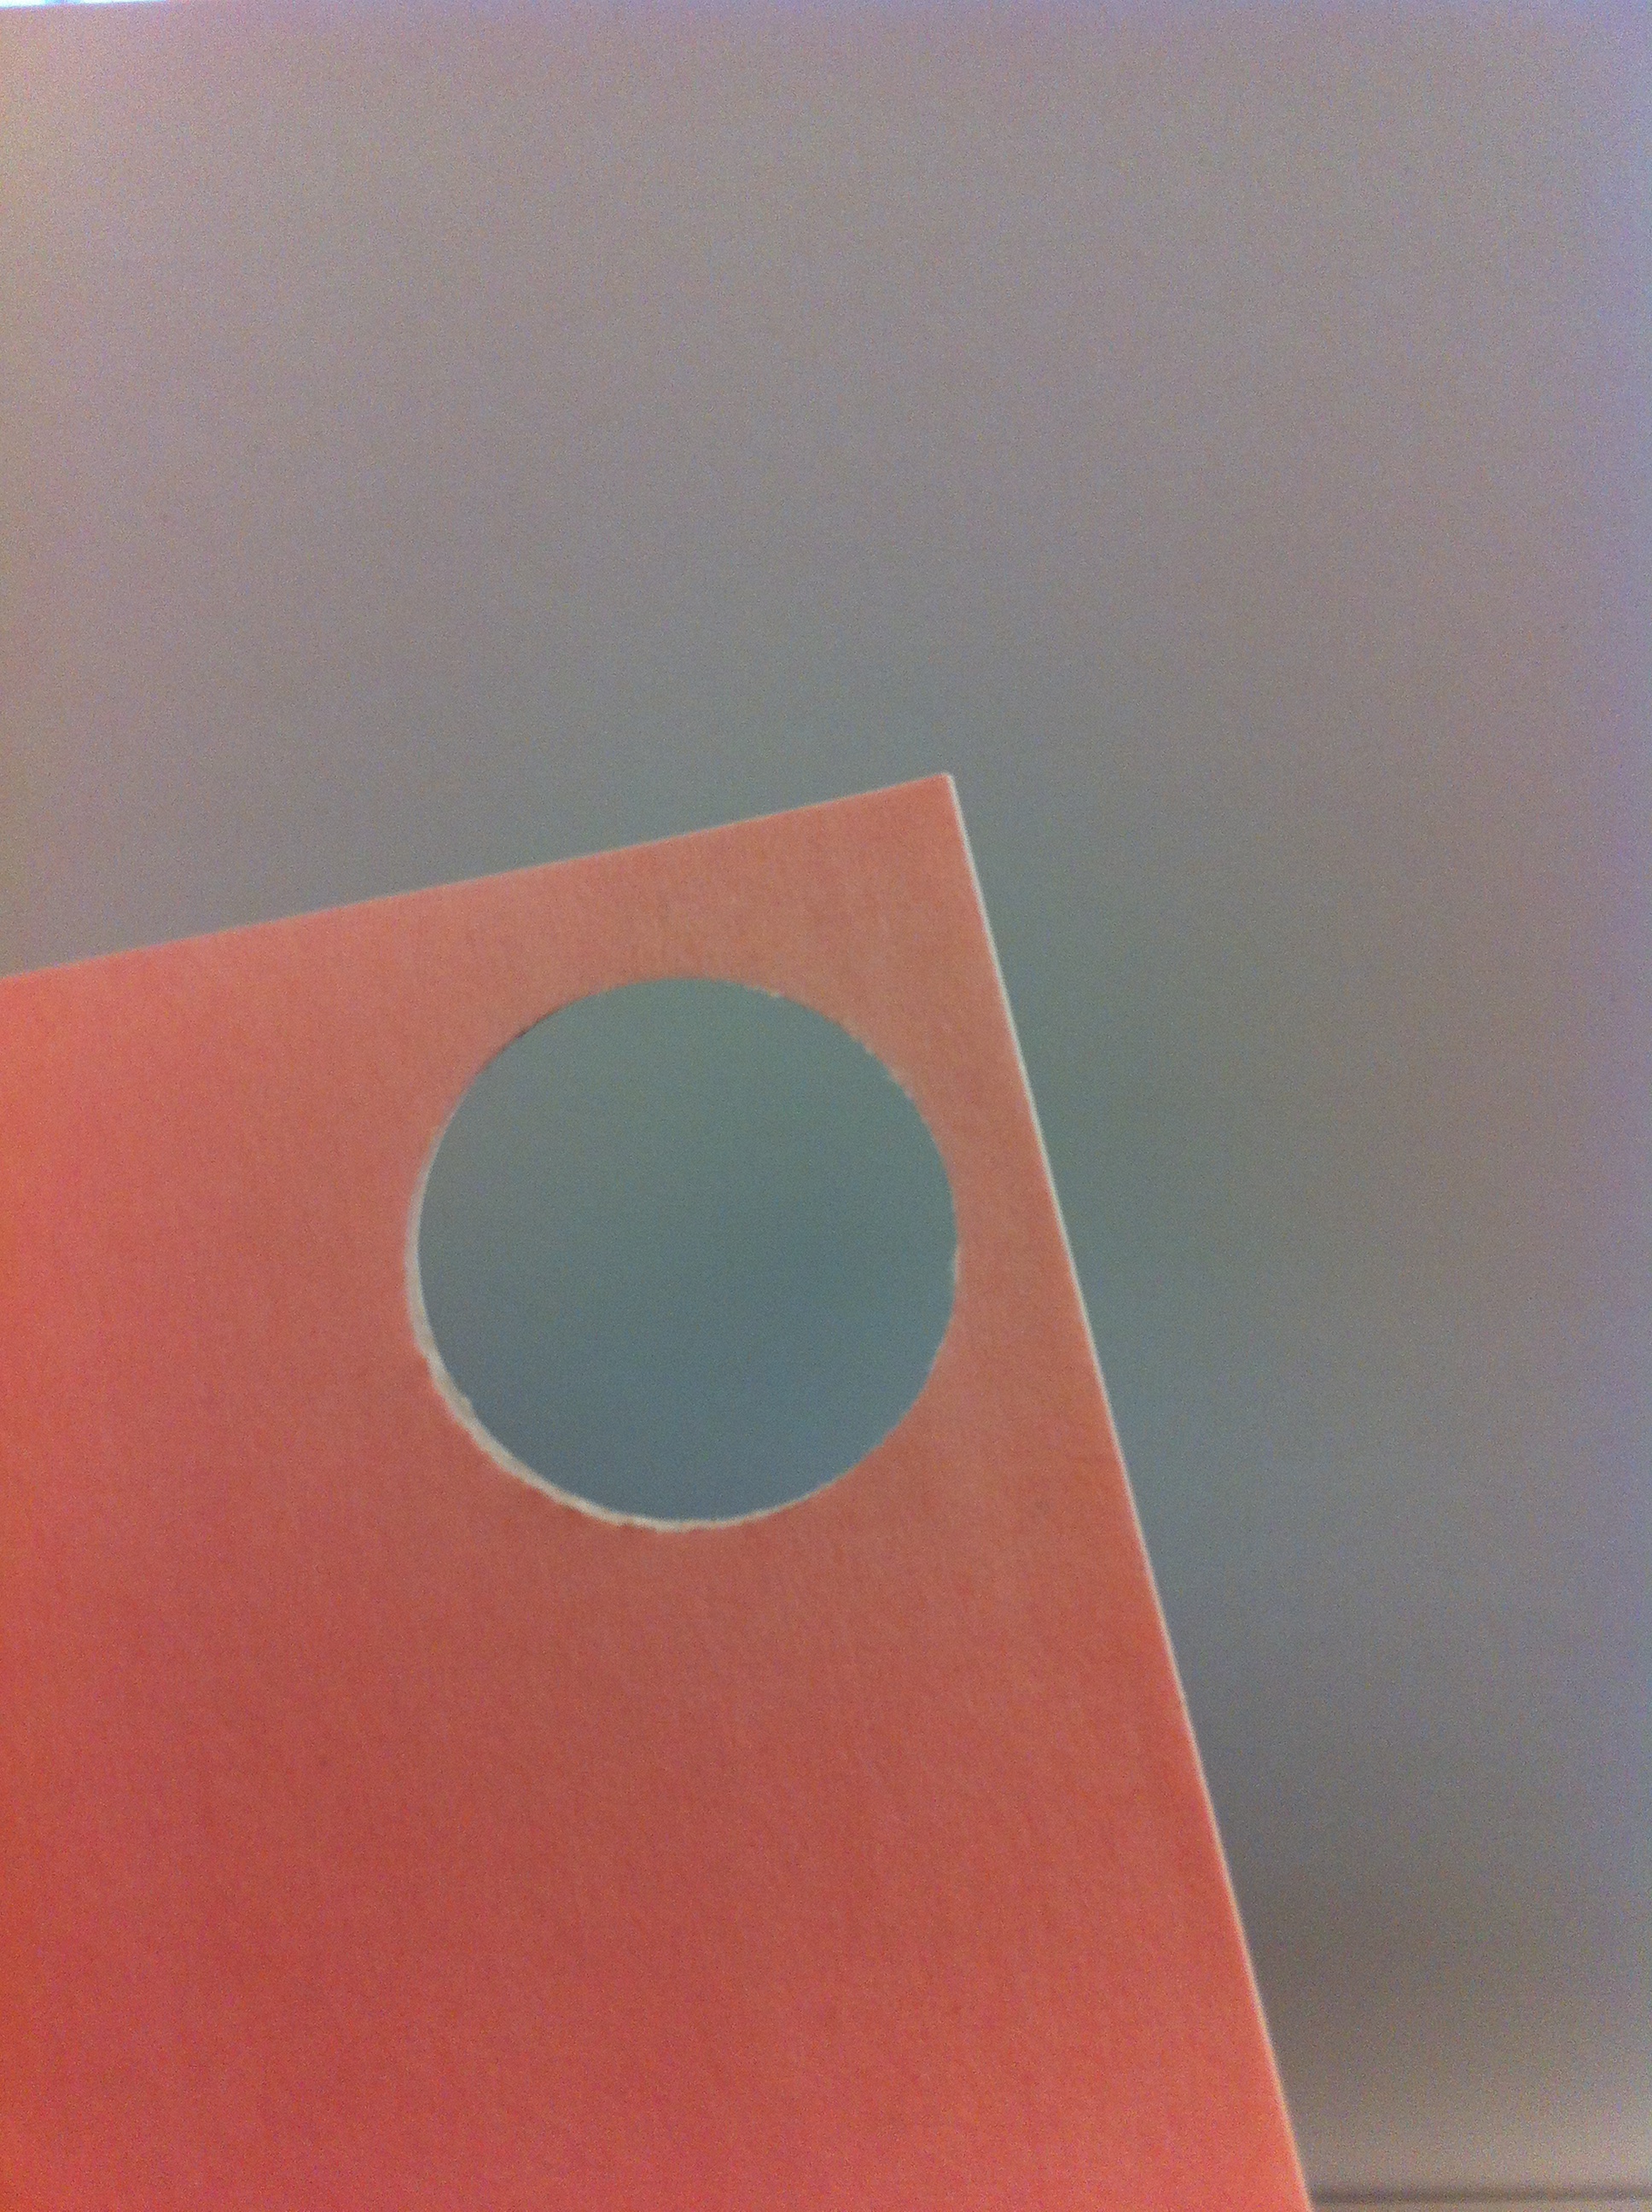
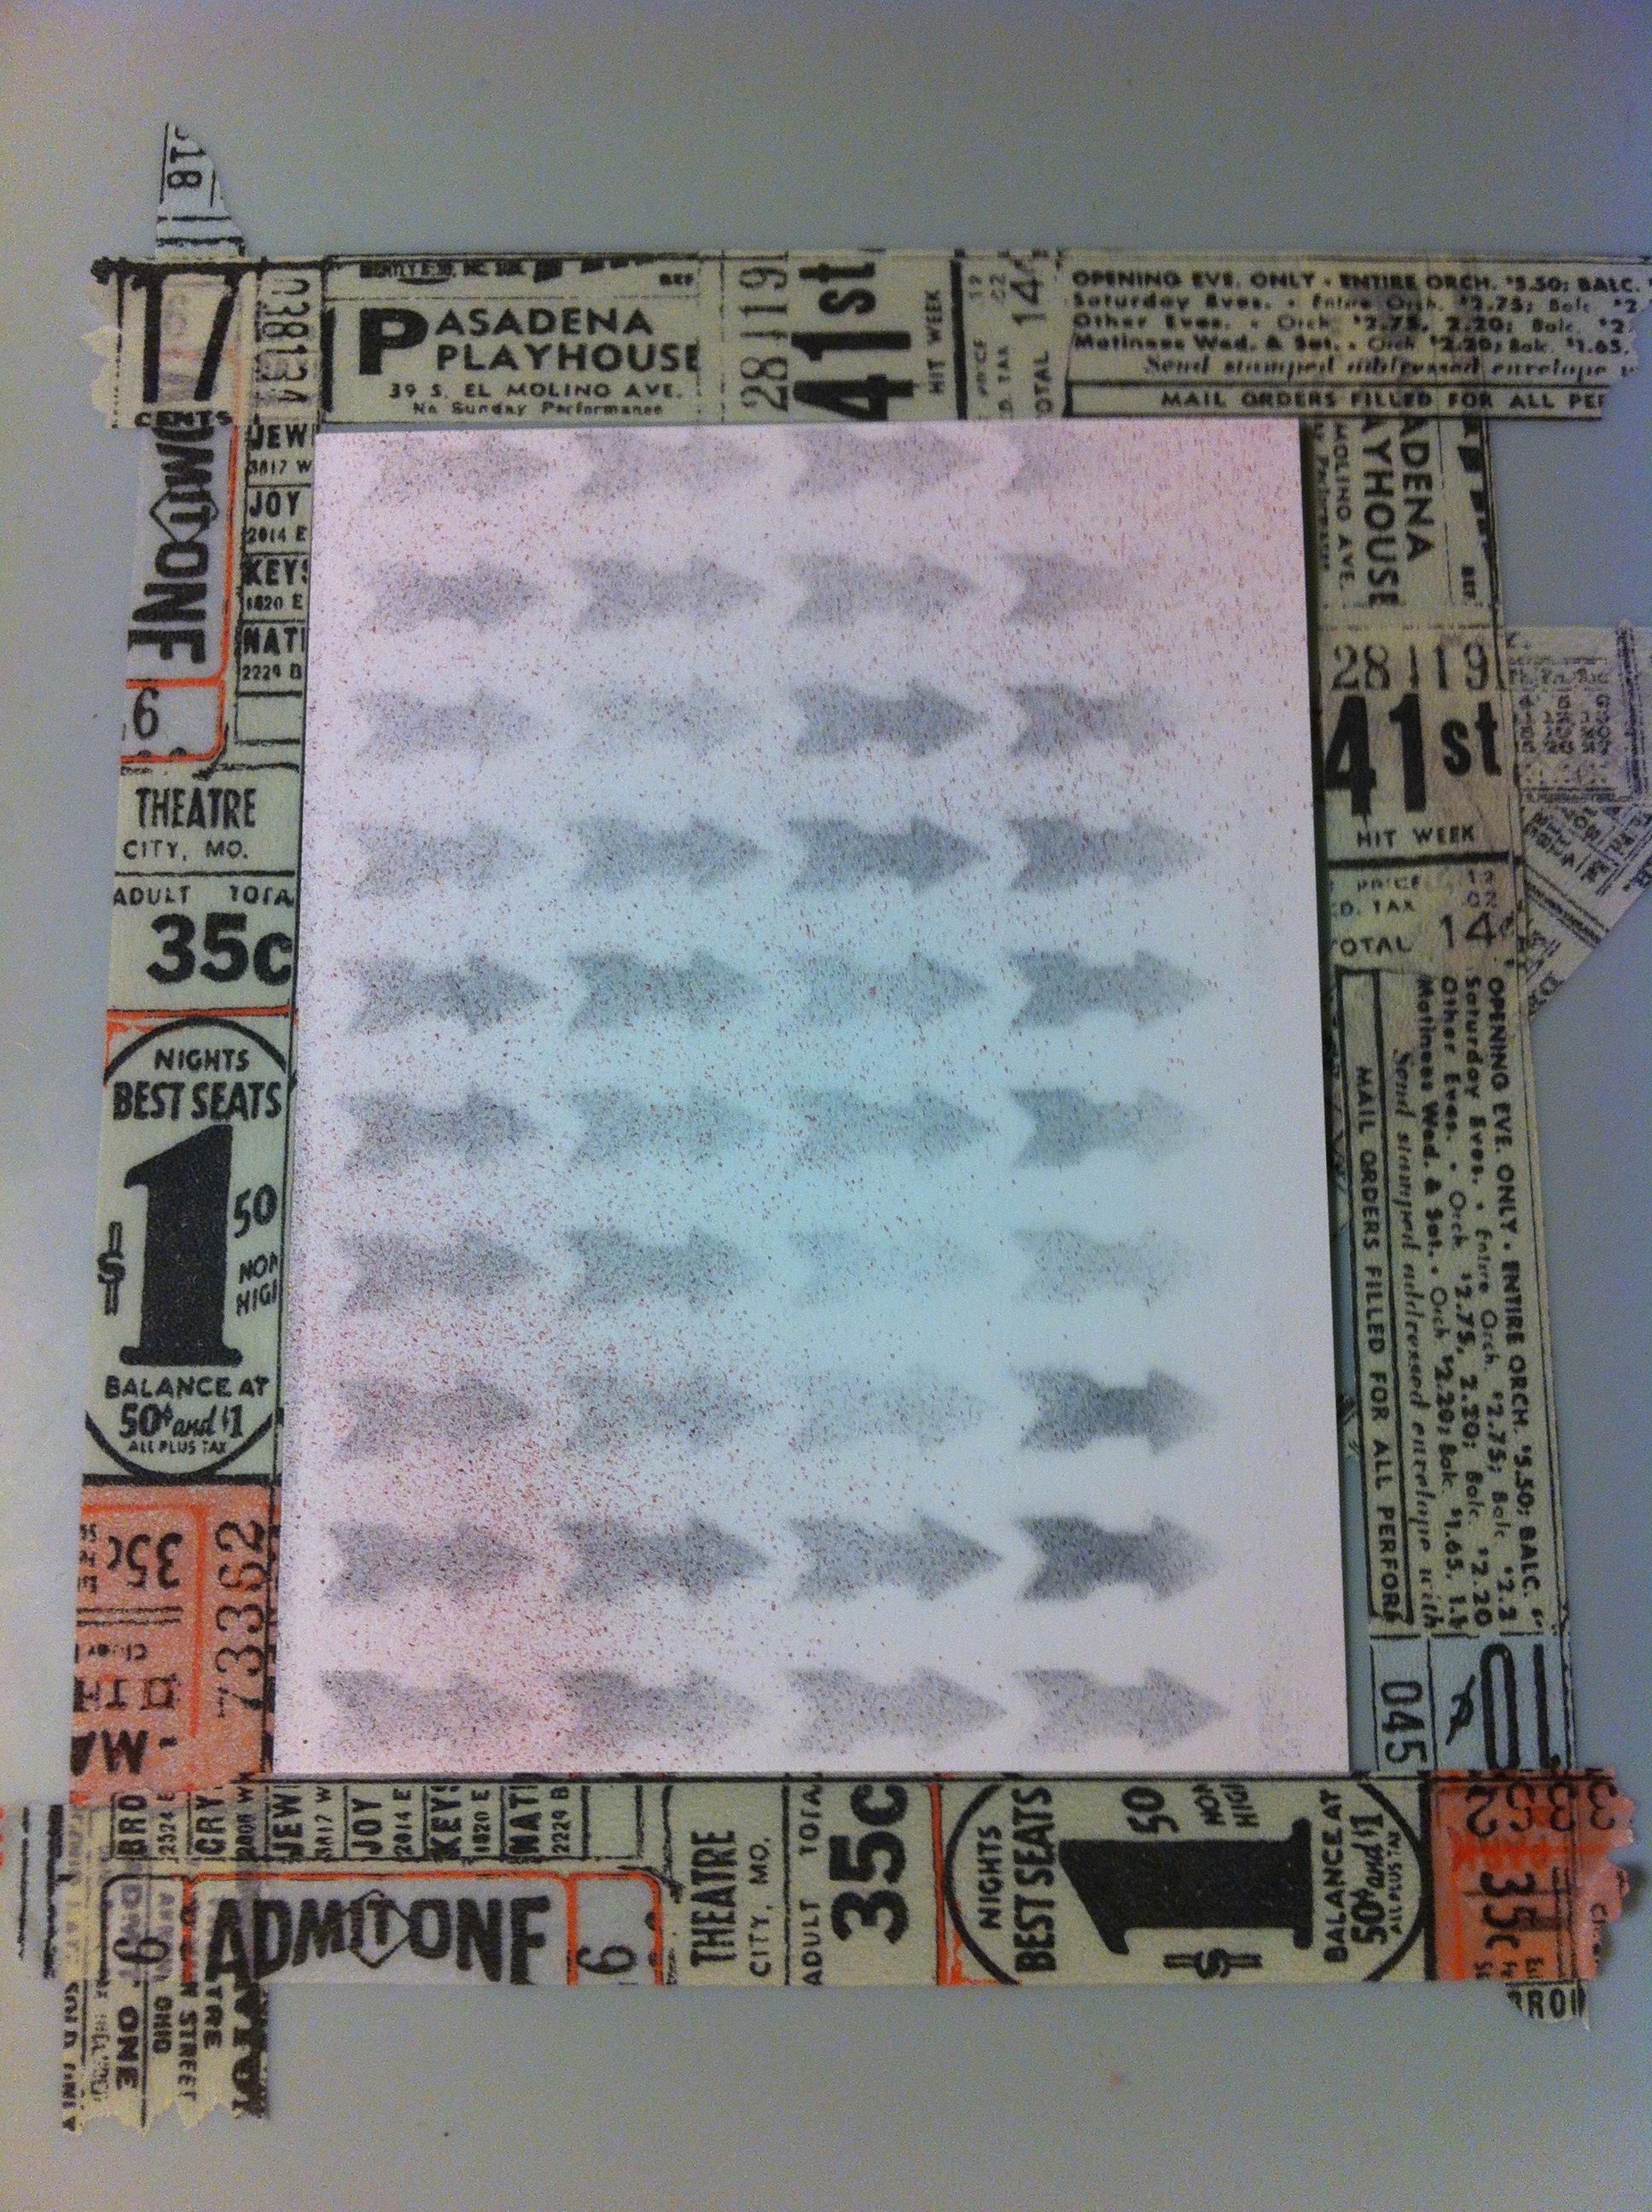
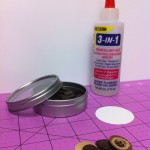
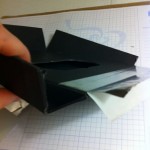
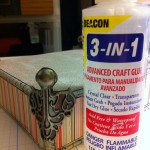
I decided to collage with napkins. I start by separating the layers of the napkin, so I’m working with the top designer layer. I use Claudine Hellmuth’s Matte Medium from Ranger, with a flat brush. Some people like to use a wet Q-tip to “cut” through the napkin, but I prefer to tear, and sand off any excess.

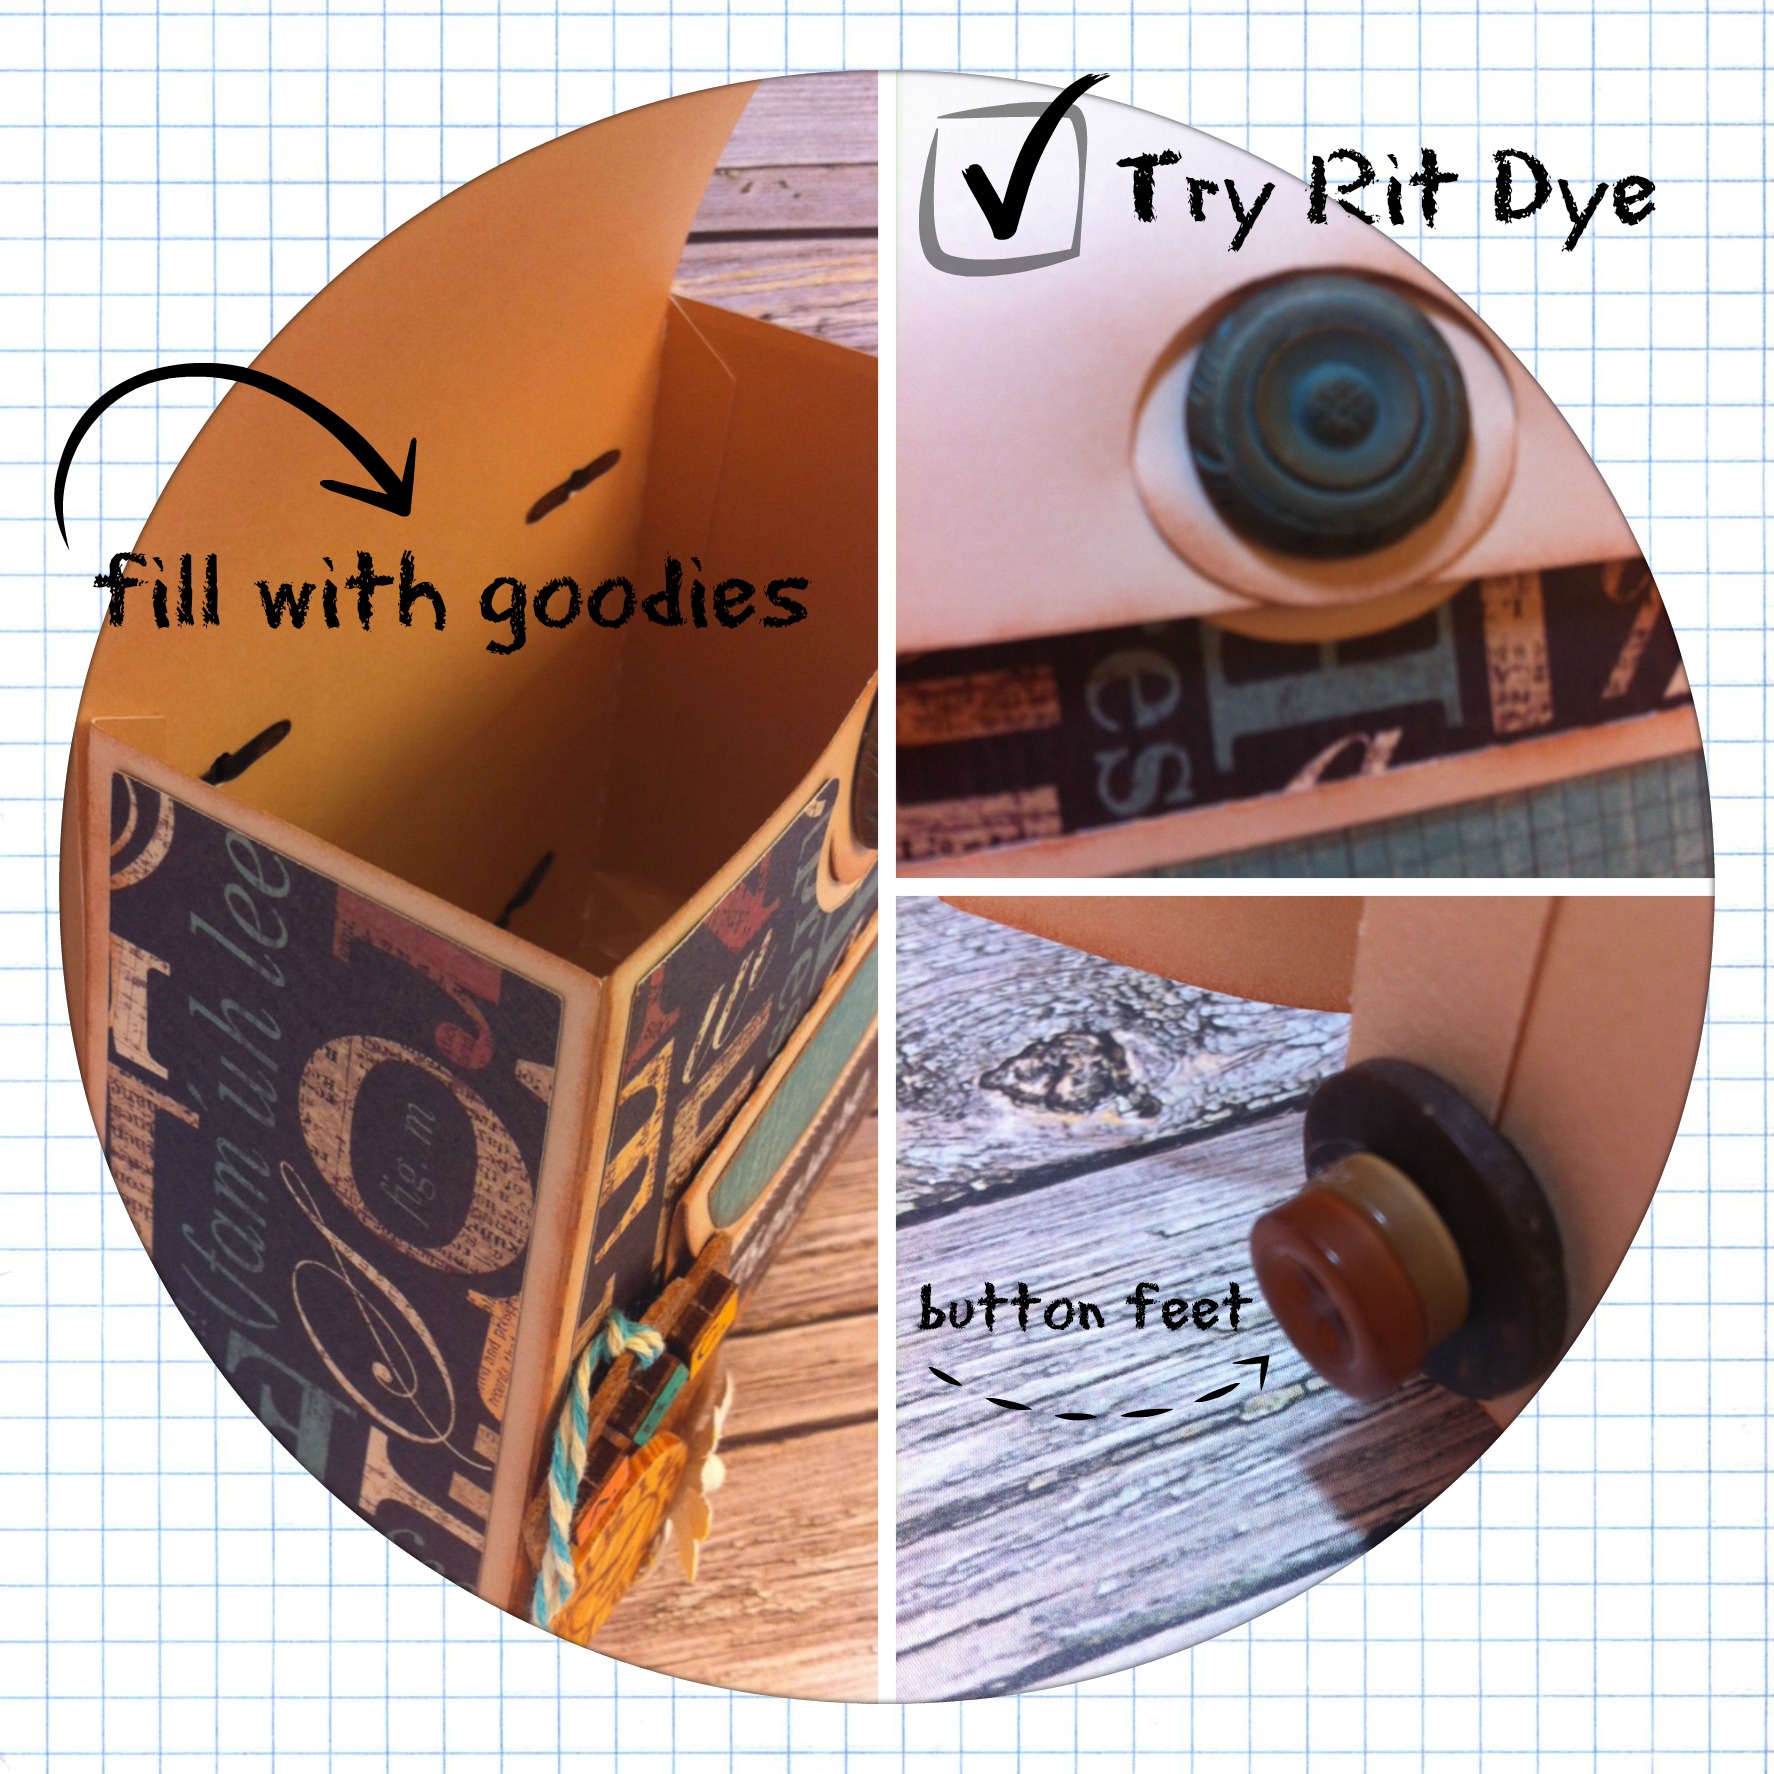
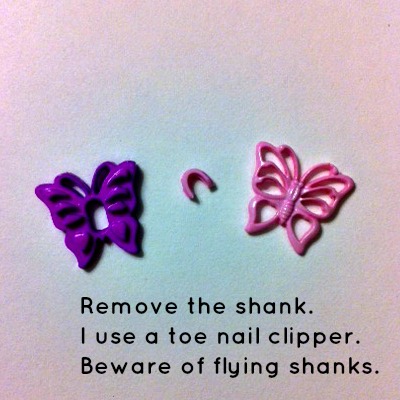
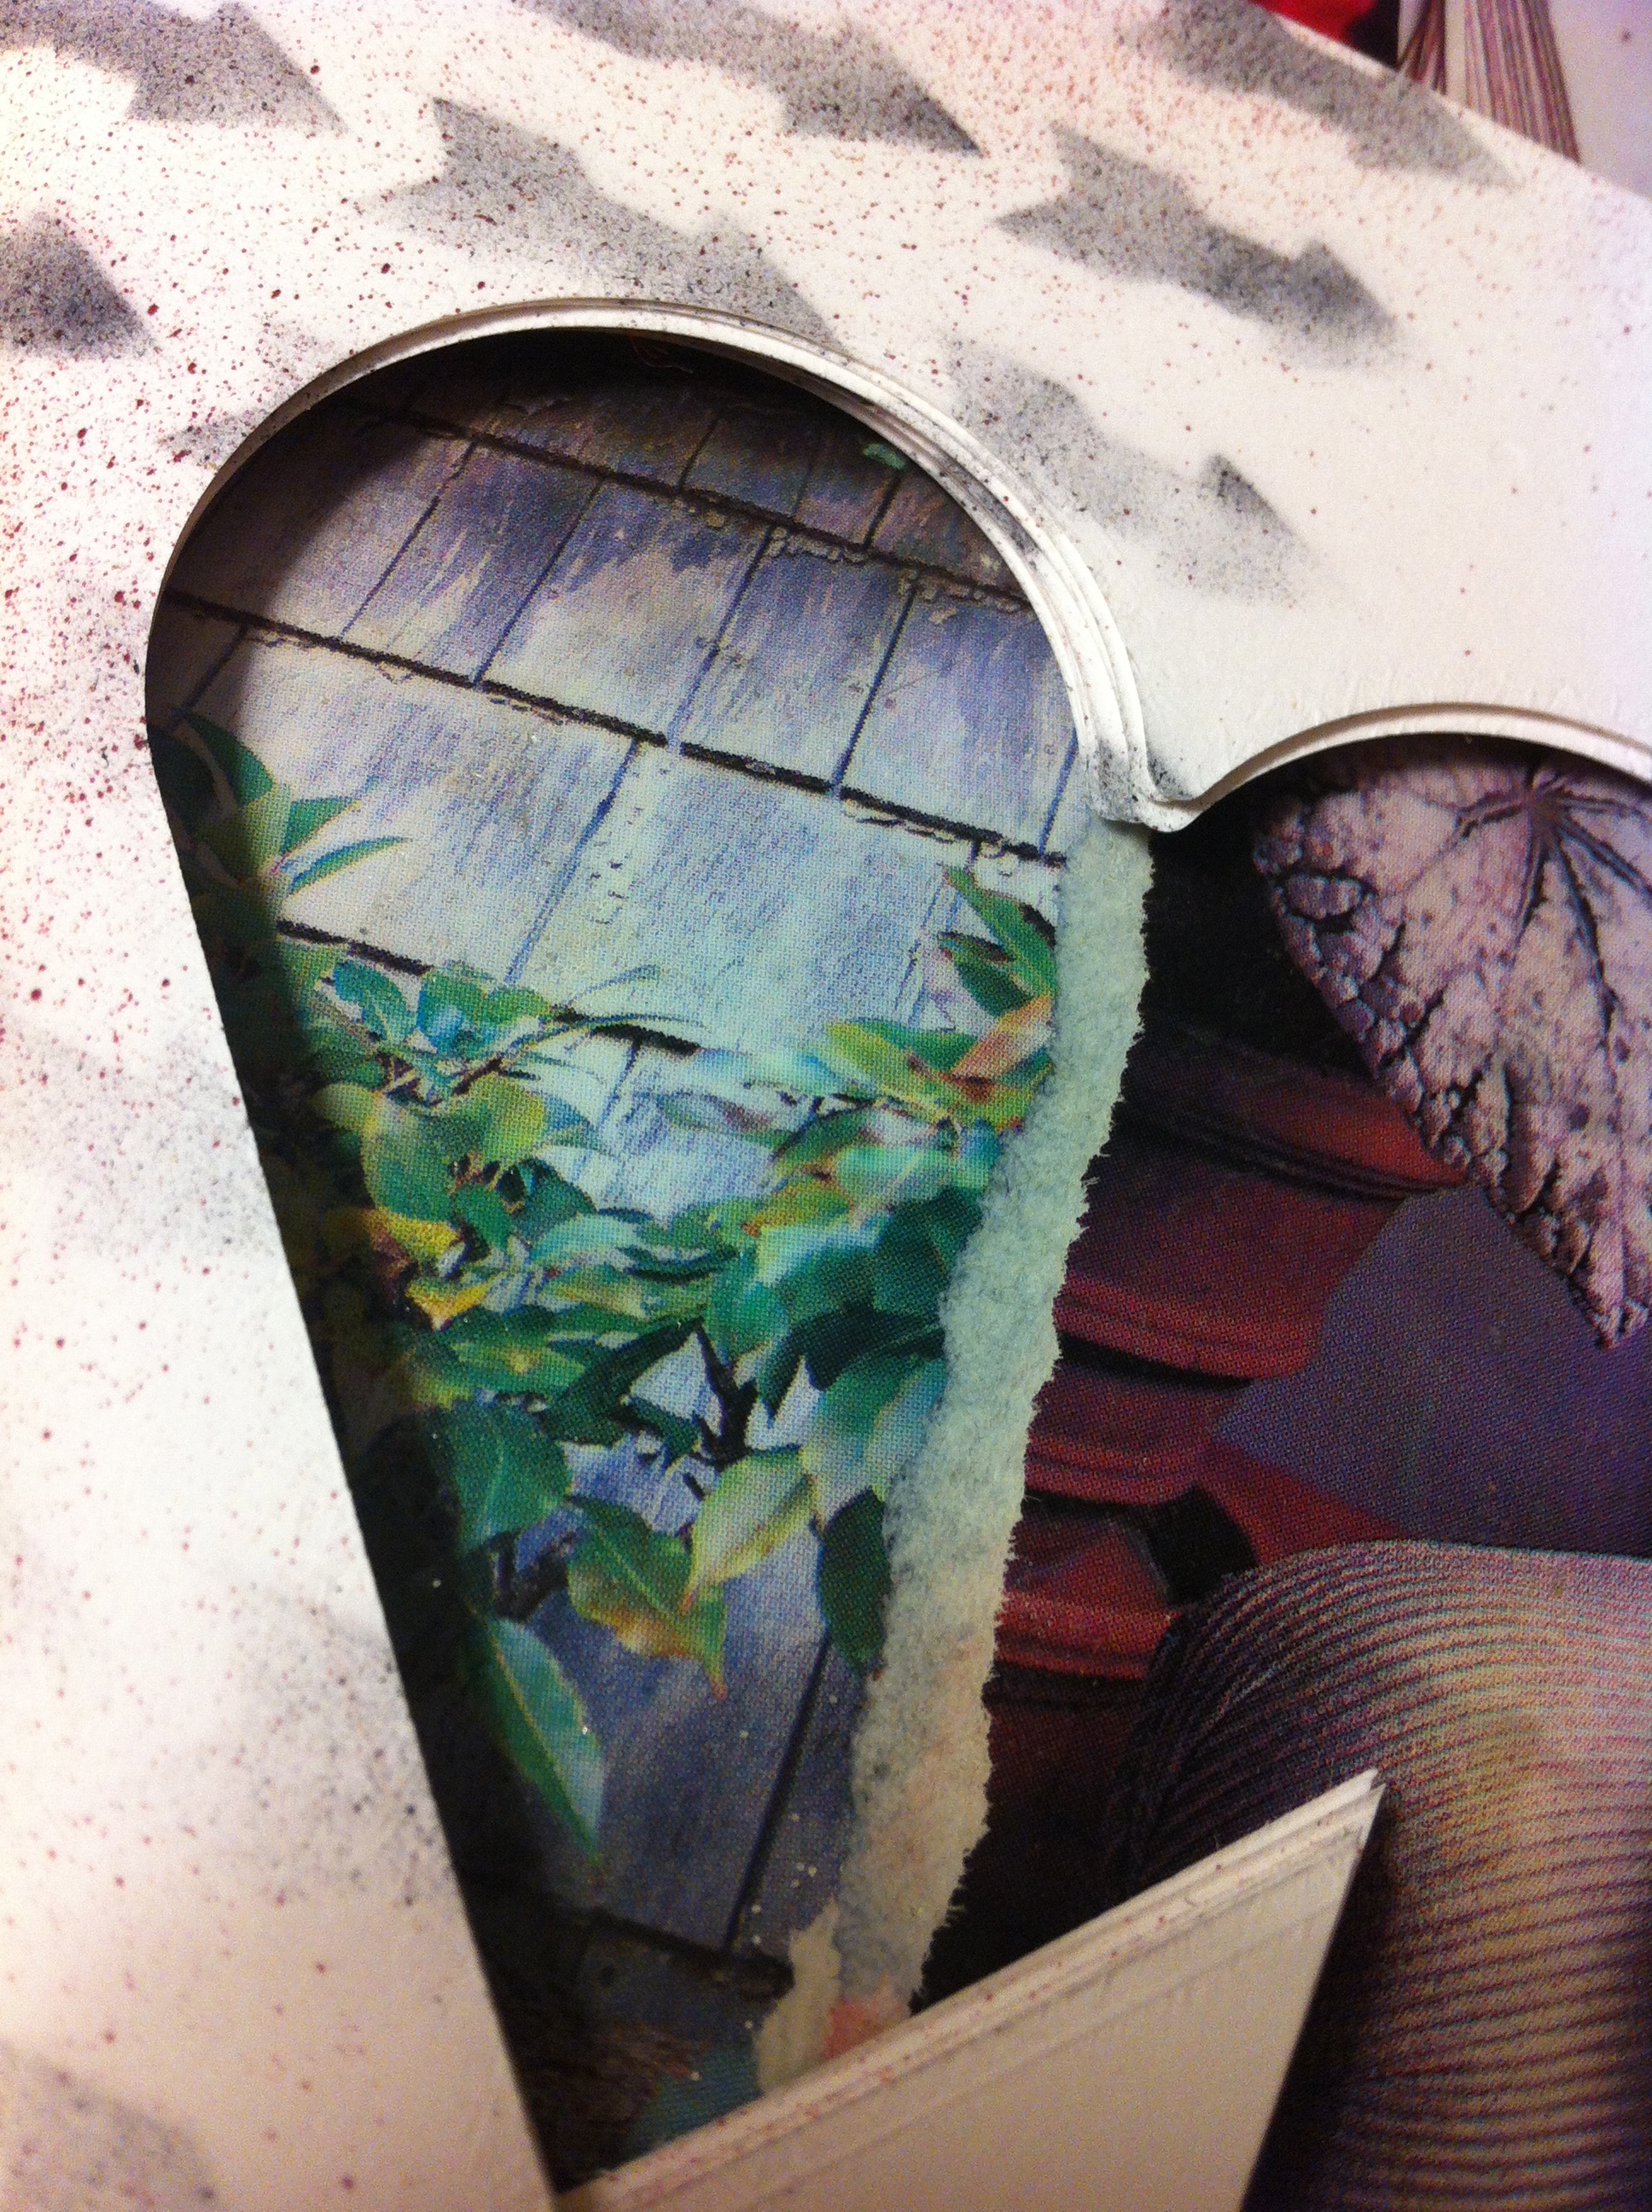
I used a little round file to clean out the holes in the charms. You can use any decoupage medium, whatever you prefer. I also like to seal the top when I’m done.


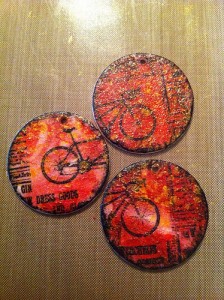
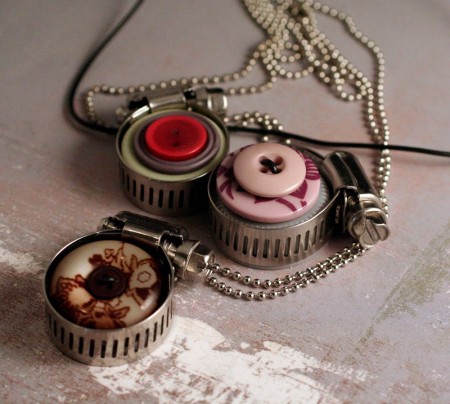
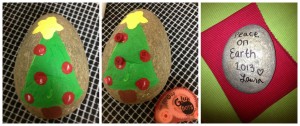
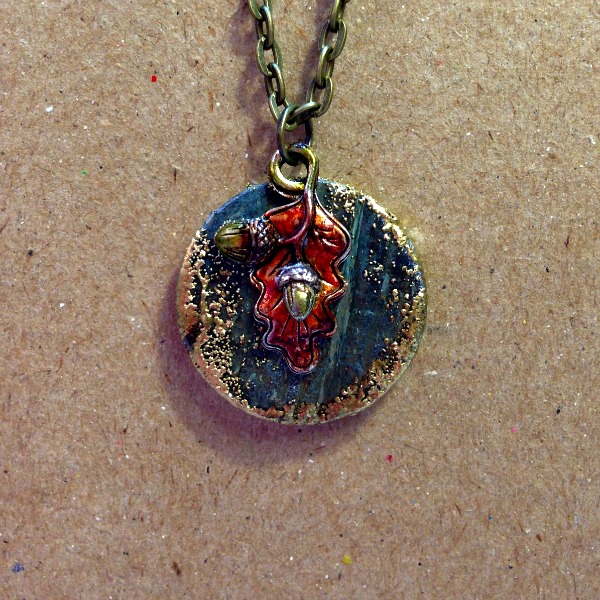
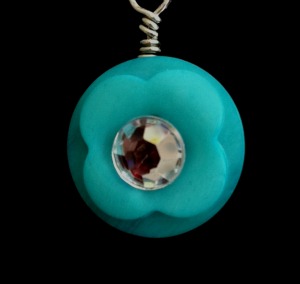
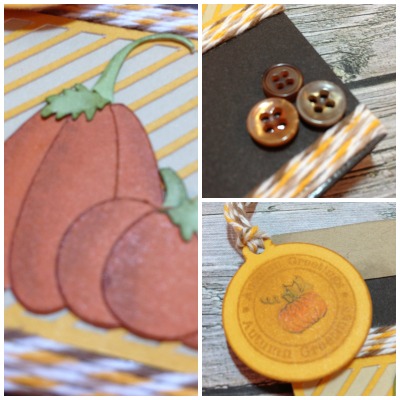
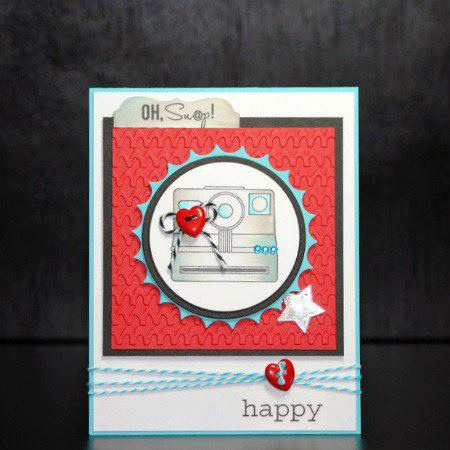
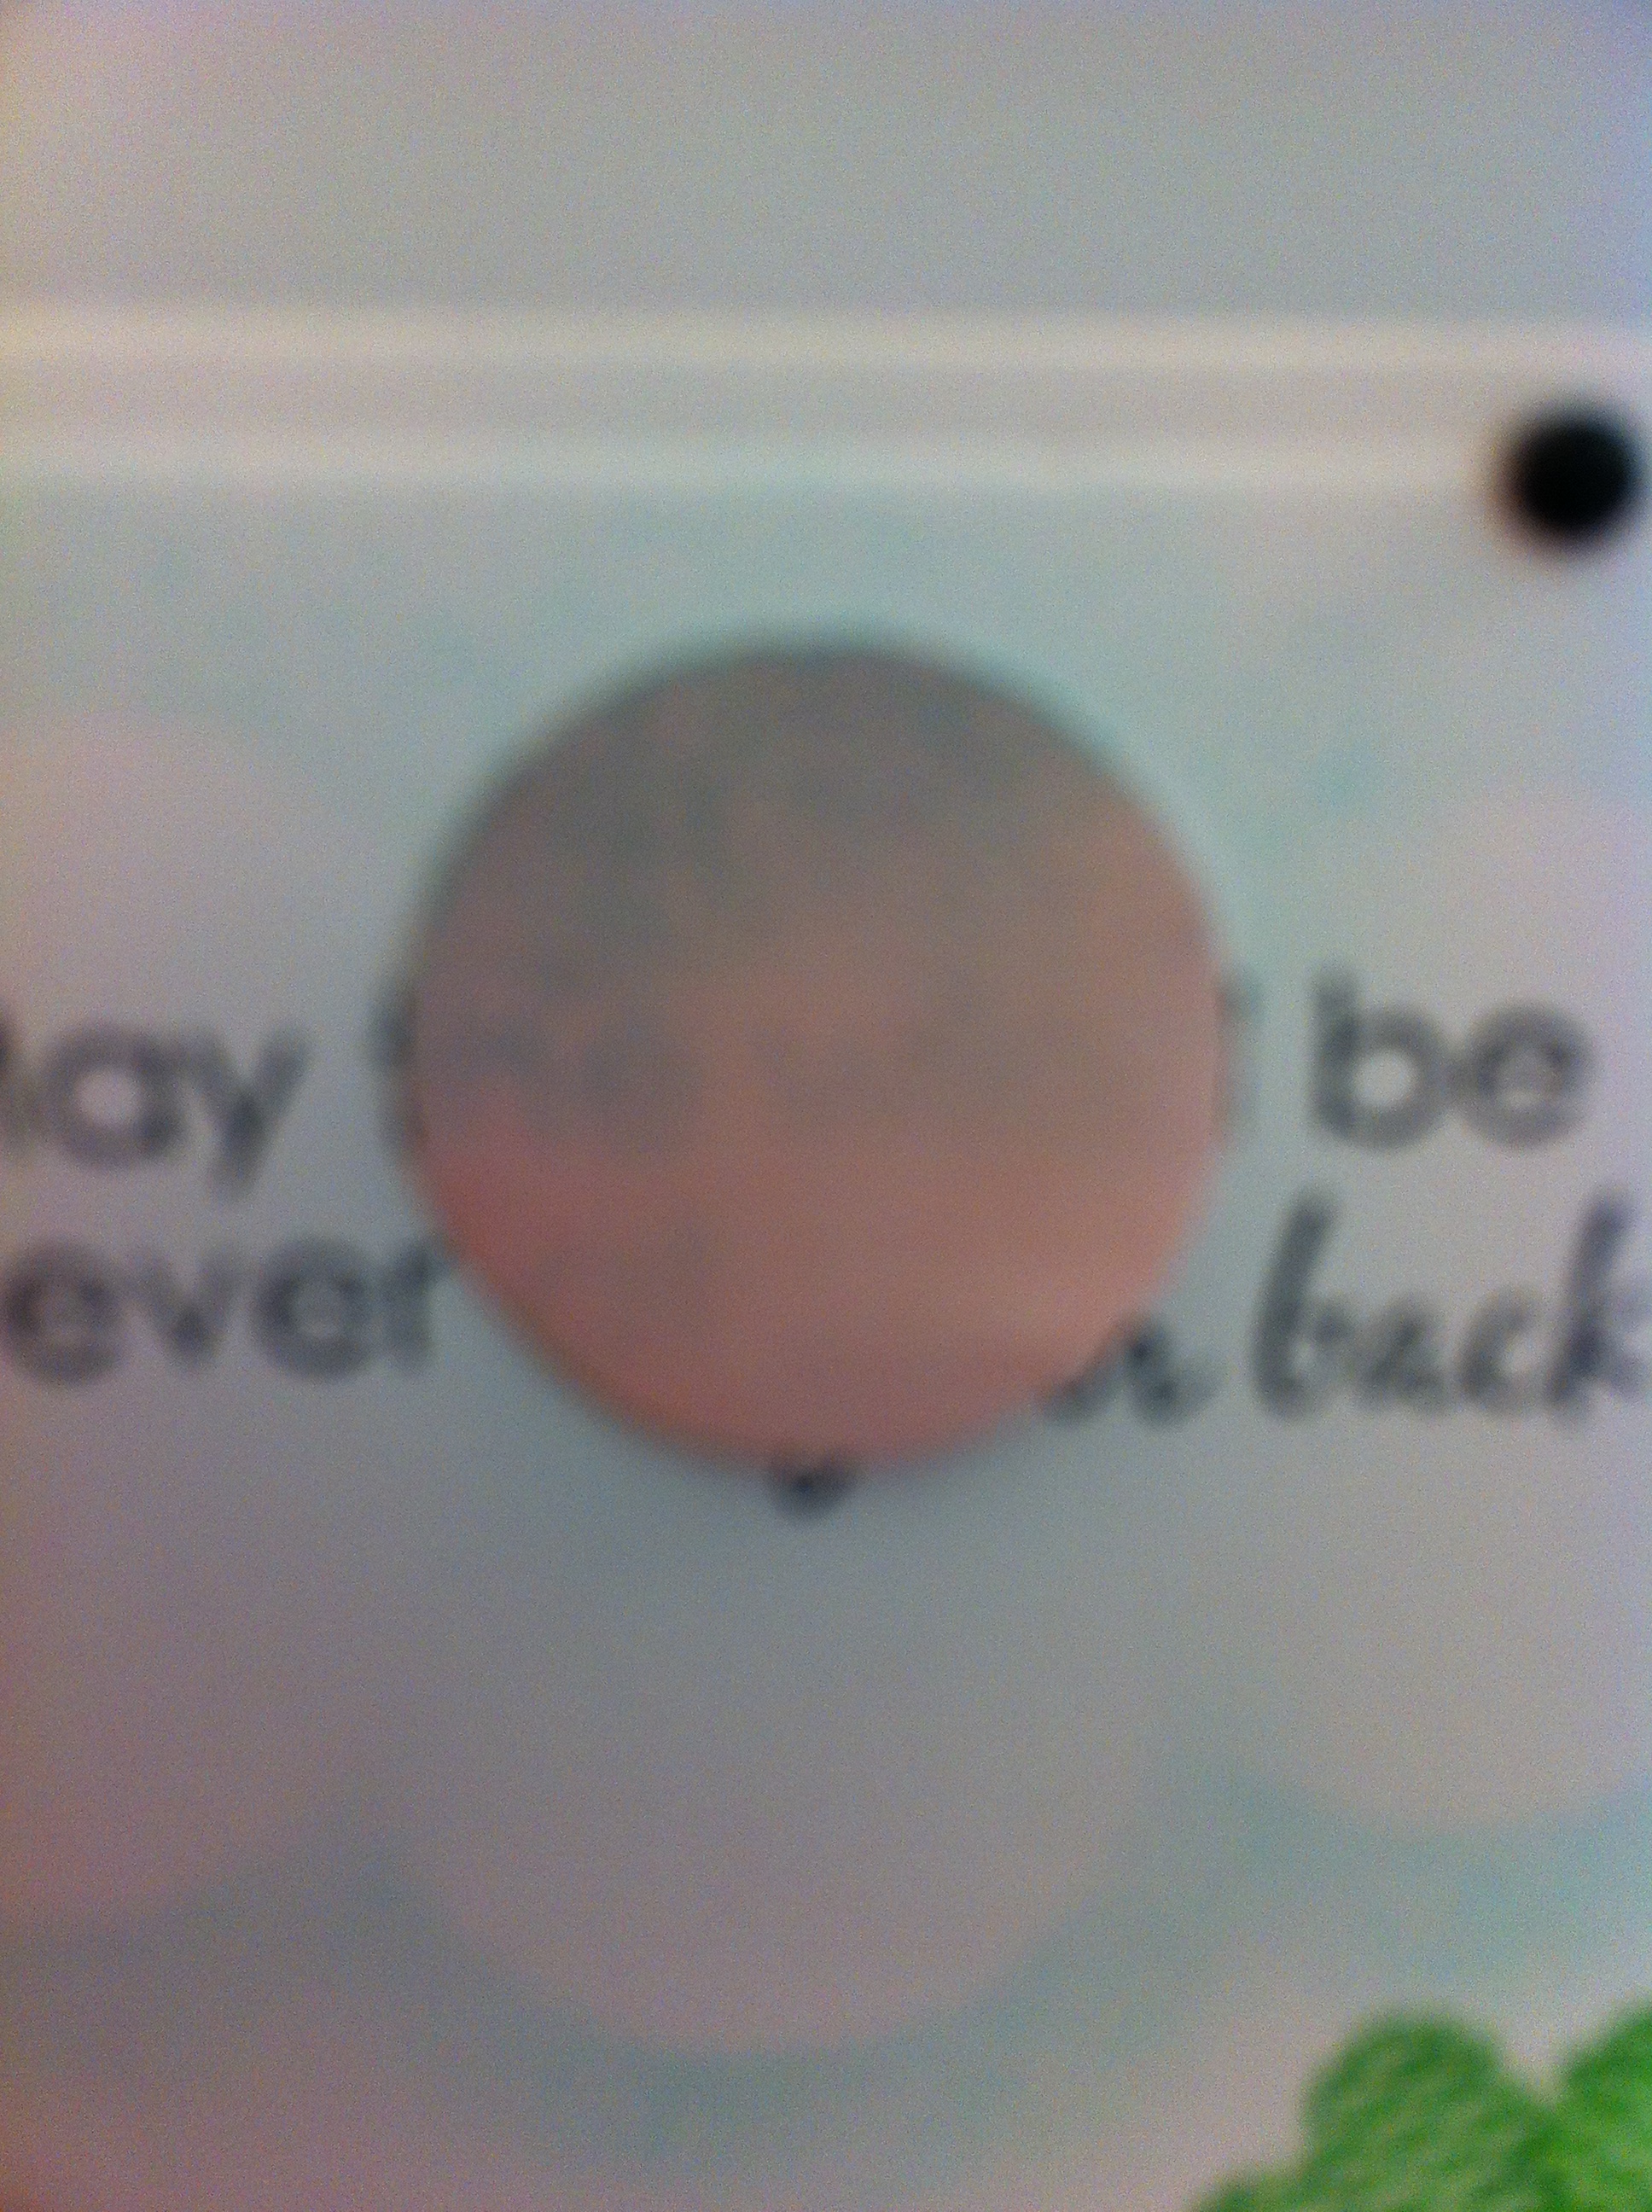
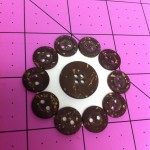
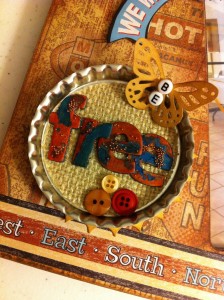
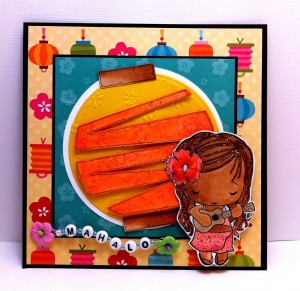
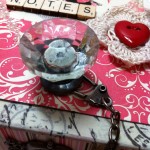
I skipped a few photos, but this is what happens after the decoupage step. I stamped the Large Circles with an Itty Bitty bicycle stamp from Unity Stamp Company. I used Jet Black Stazon ink from Tsukineko. I also lightly tapped around the edges of the Large Circles with the same black Stazon Ink. Once the ink was set, I gave the Large Circles a light spritz with Mr. Huey’s Gold spray from Studio Calico.

Use your favorite spritz, or you could even make your own.

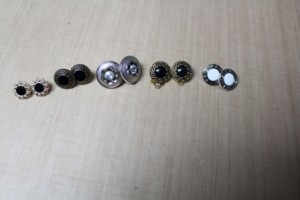
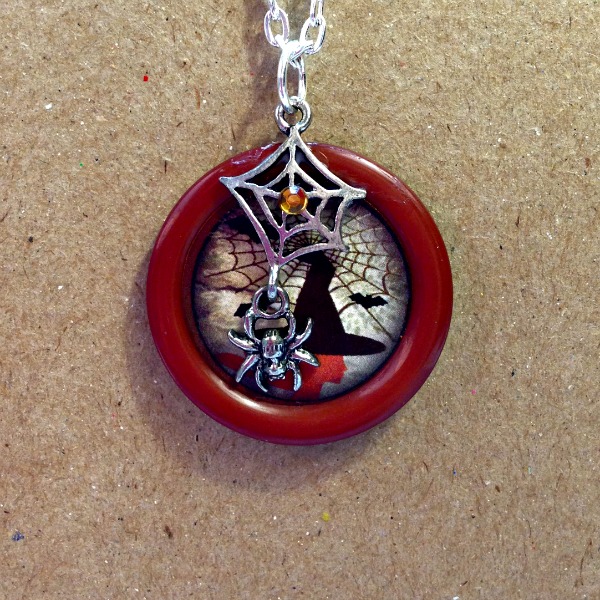
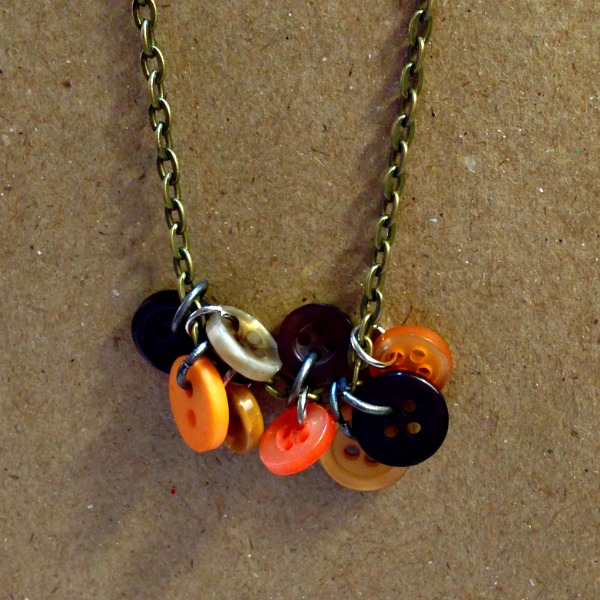
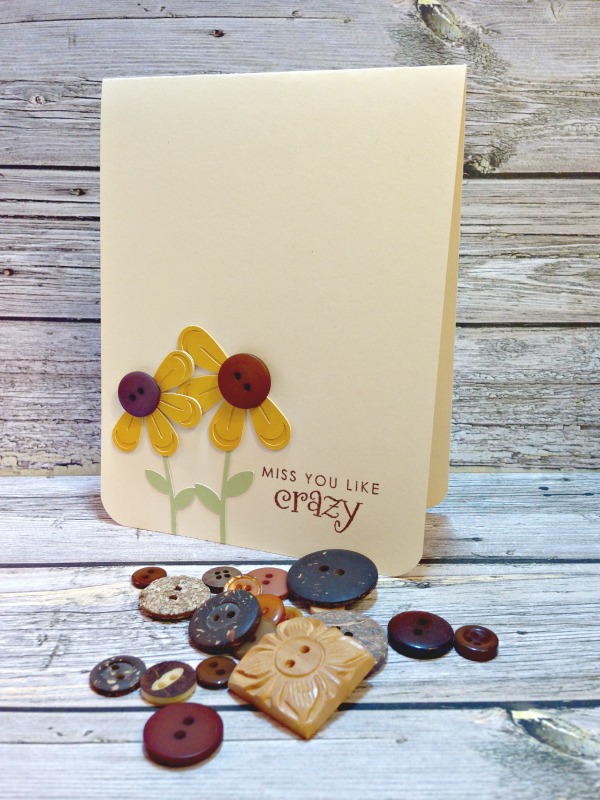
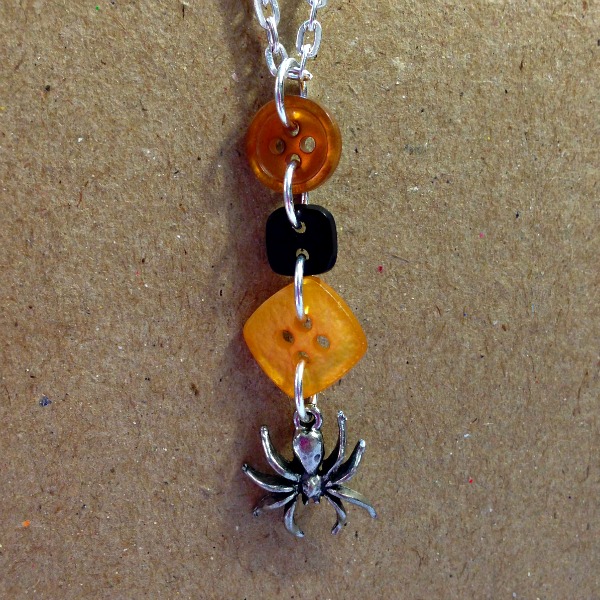
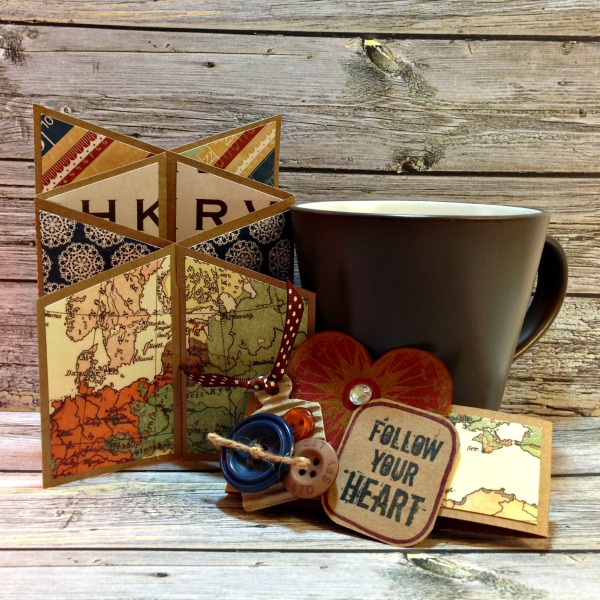
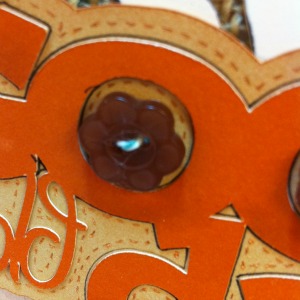
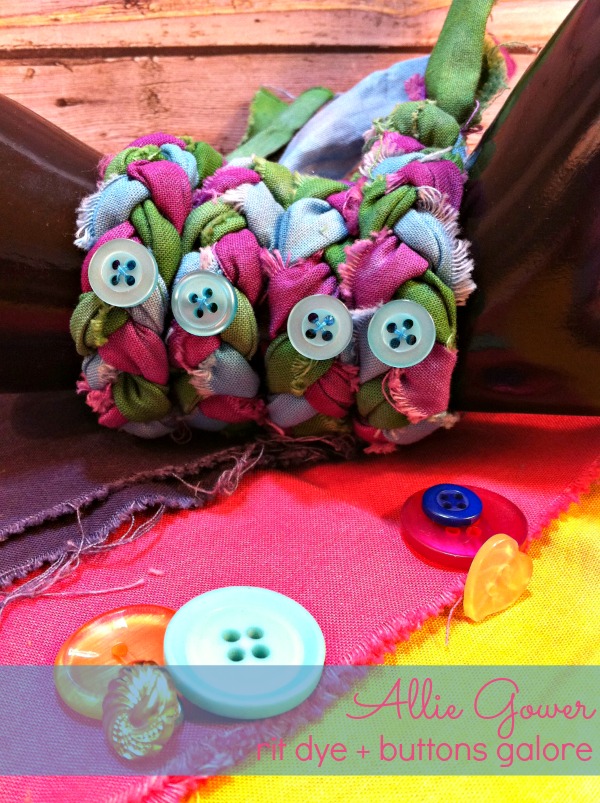
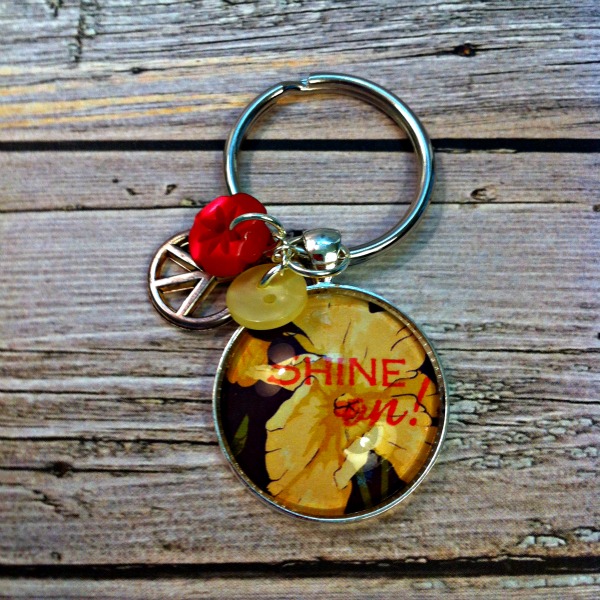
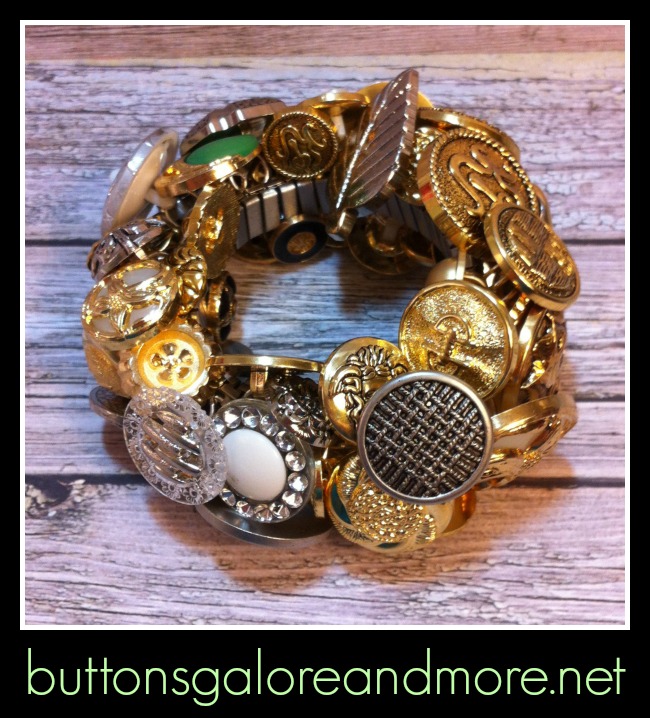
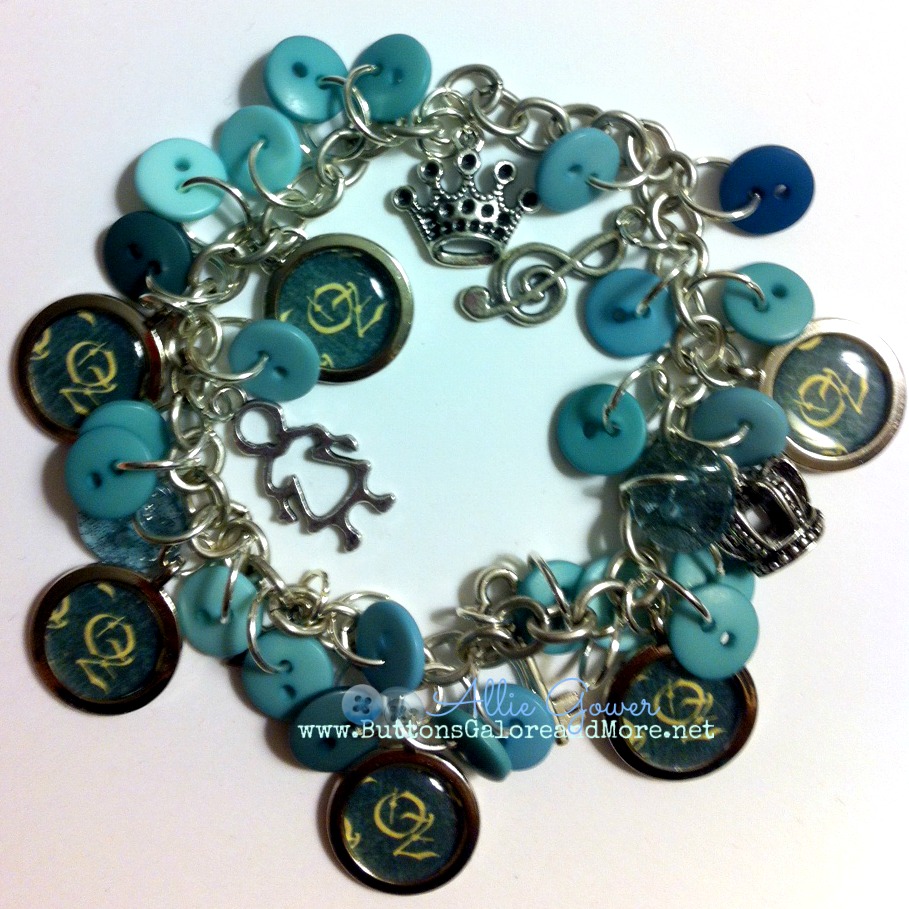
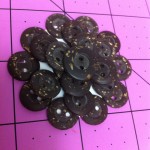
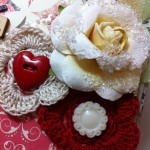
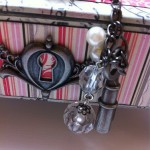
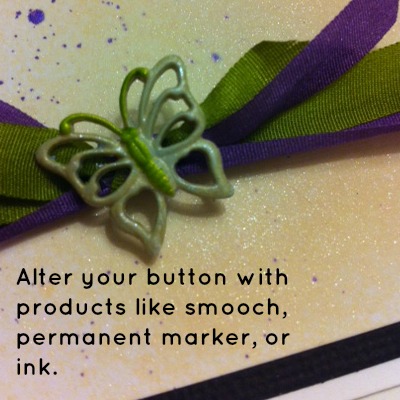
You can add anything you like to these little charms. I put a jump ring on each of them, and added little trinkets and bling. The metal pieces and the little pearls are from Ideaology, and are designed by Tim Holtz. I added bling to the sprocket, on the second row, the charm on the left. I love a little sparkle, don’t you?

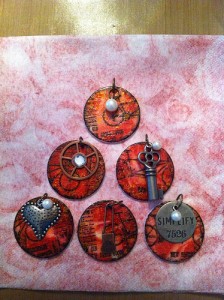
Add some bling, little trinkets or baubles.

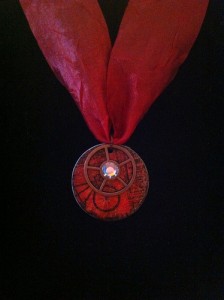
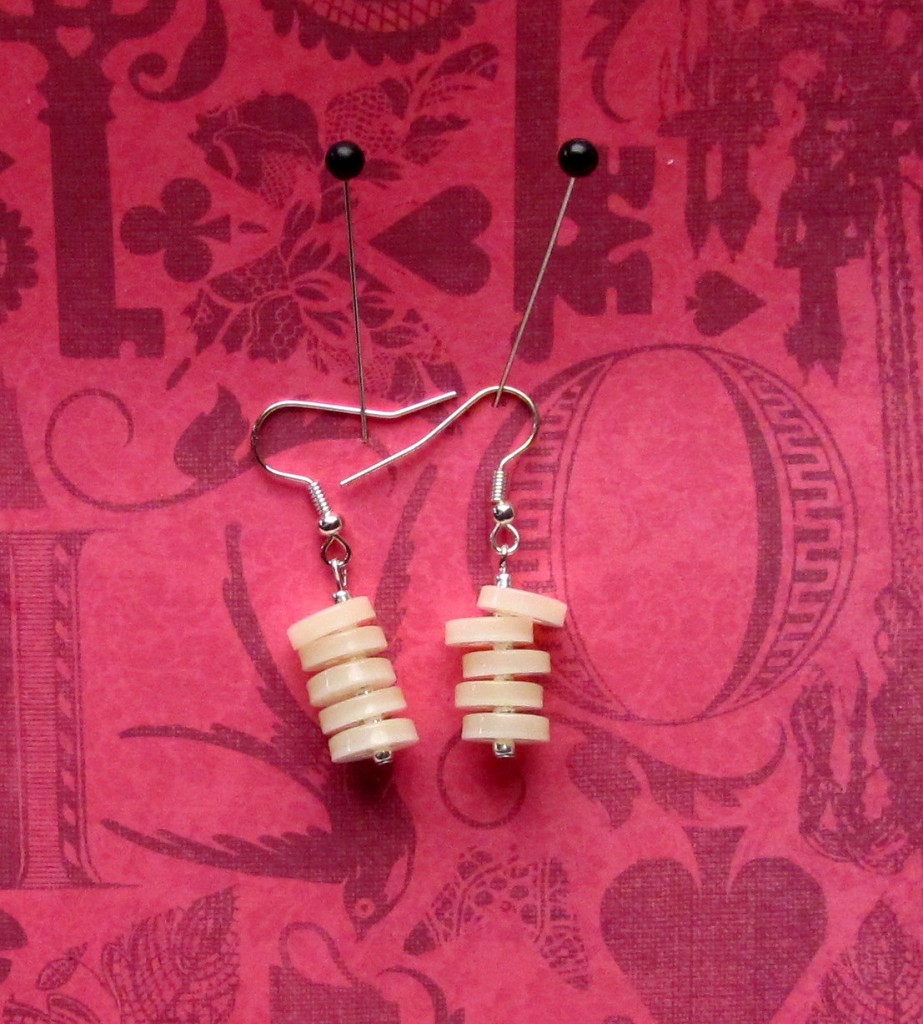
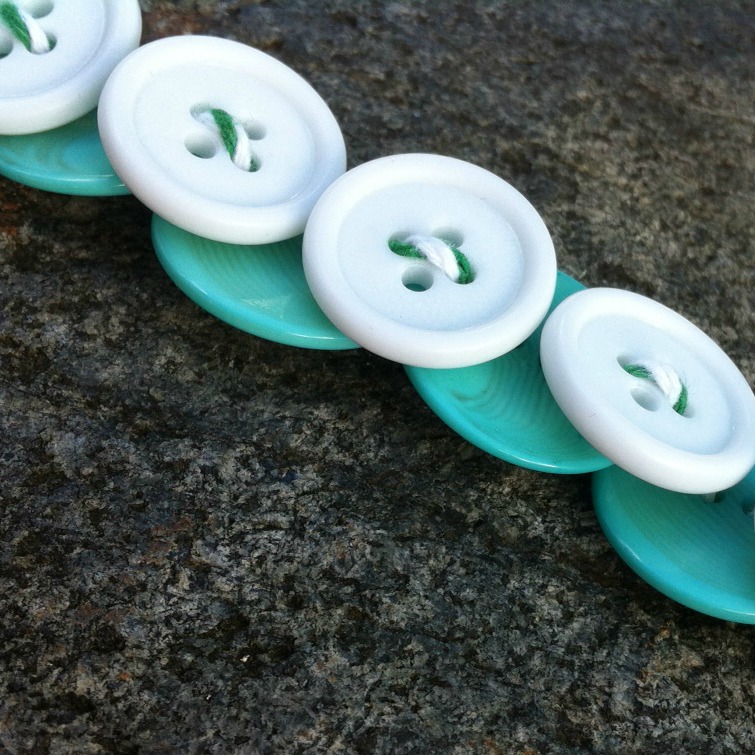
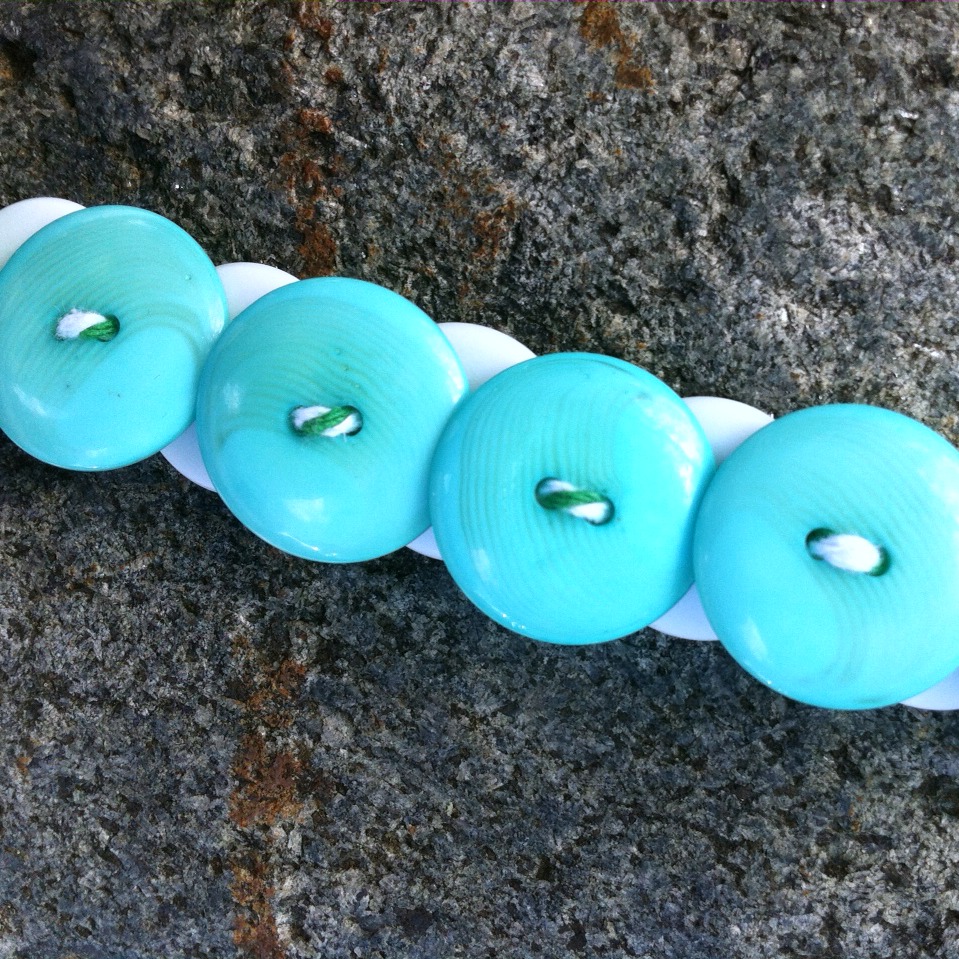
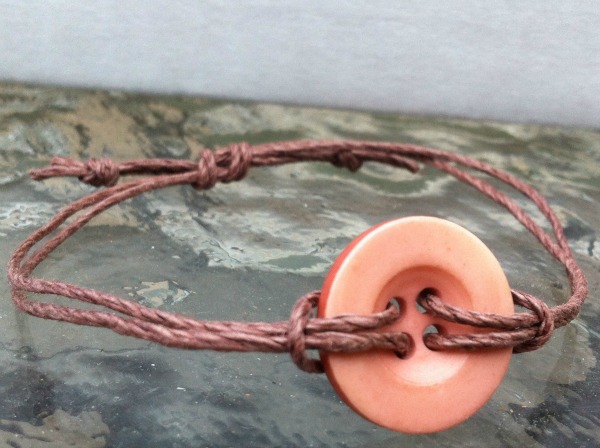
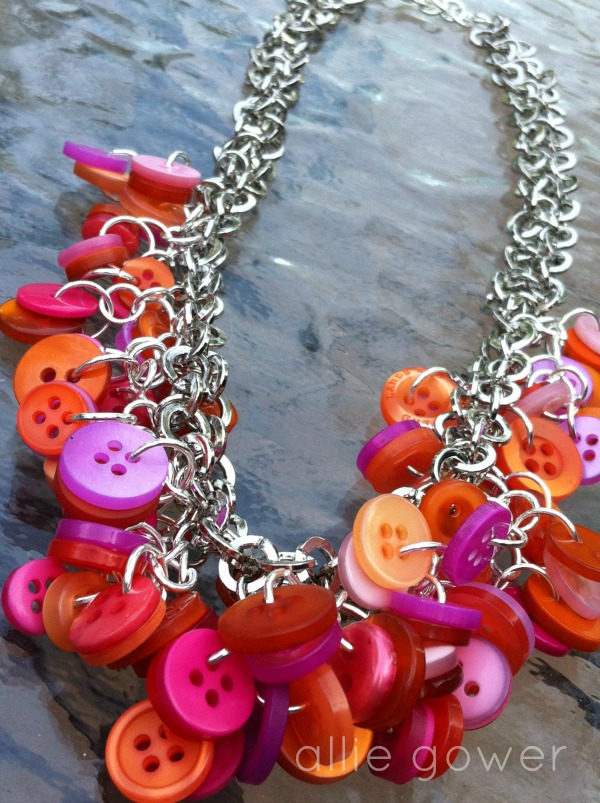
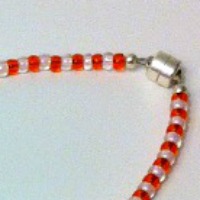
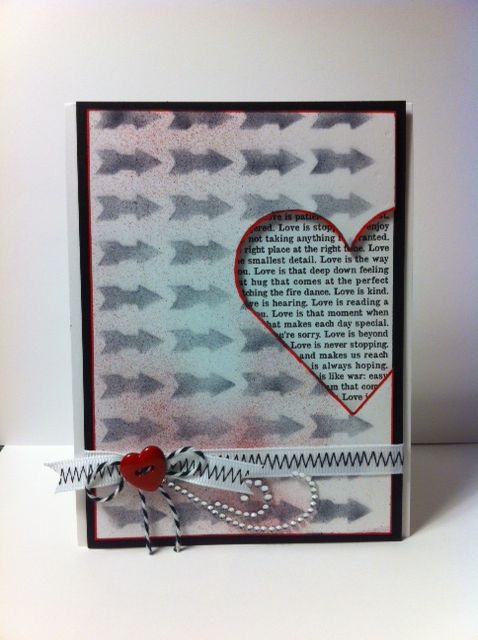
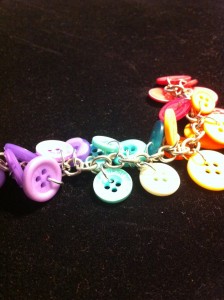
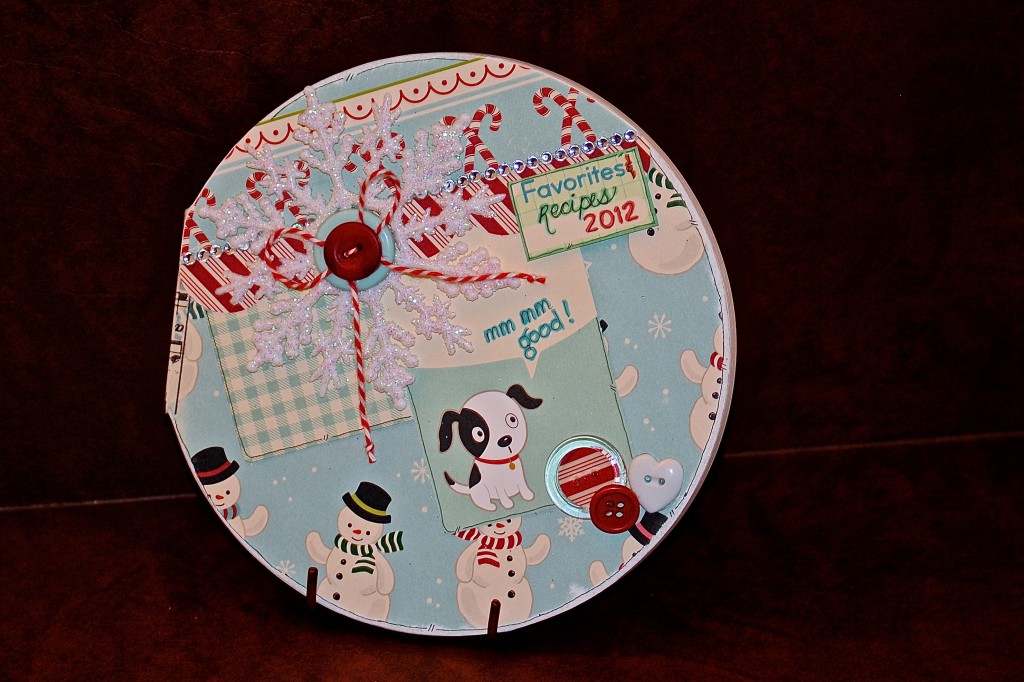
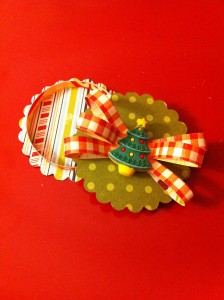
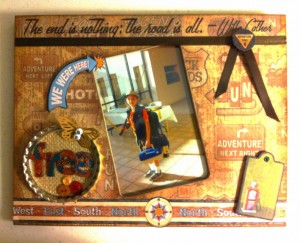
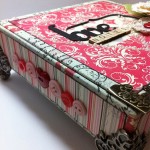
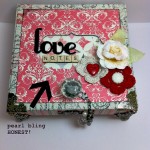
You could attach these charms to a chain, a hoodie, or anything you like. You can even keep it simple, and just thread it onto some crepe ribbon, as shown below. This ribbon is from Creative Impressions.


SUPPLIES AND MATERIALS

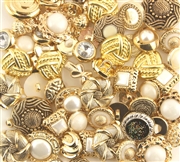
  • Blank Craft Shapes – Large Circles
  • Napkins
  • Decoupage Medium and a Brush for application
  • Stamps and Ink
  • Spritz
  • Trinkets and Jump Rings

0

BaZooples Card with hidden gift card holder idea

BZ100

Gertrude and Friends - BZ100


Handmade cards are extra special when they contain a gift cardI had some fun with the butterfly from this cute set of BaZooples novelty buttons. I paired it with a BaZooples image from Inky Antics that I colored with pencils and gamsol.

Handmade hippo card

Handmade hippo card

The card is a little larger than usual and has a mini card on top. Notice the “LIFT HERE” pennant? When you lift that, you have a space for a gift card! I didn’t have a gift card,yet.   So I placed a post it note just so you can see where that gift card would go. Inside the main card, there’s a panel of patterned paper, and plenty of room for a nice note. The sentiment reads “Just wanted to let you know… Love you tons!” Isn’t that the perfect sentiment for a Hippo card?


close up lift here

close up lift here


The gift card portion of the card was created using circle and scalloped circle dies from Spellbinders Paper Arts. The paper is from Authentique, and is accented with bling from Want2Scrap and some flowers from Creative Impressions. I used some additional buttons from my Buttons Galore jar for the flower centers.

inside close up gift card

inside close up gift card

close up flowers and buttons

close up flowers and buttons

I finished off the handmade card with a quick bow using some ribbon from my local craft supply. Sheer ribbon is so pretty and easy to tie.

Thank you for stopping by today!

1

Tropical Flowers – Mahalo means Thank You!

Tropical Flower Buttons - item $033

Tropical Flower Btuttons #4033

I played with Tropical Flowers buttons this week. I used them as an accent for my stamped image, and as part of my card’s sentiment, Mahalo. Mahalo means THANK YOU!

Directions:

Make card black card base to 6×6.

Adhere pattern paper from My Little Shoebox to card base.

Begin card by die cutting a two circles using dies from Spellbinders Paper Arts.

Embossed the yellow circle. I added some stripe to make a lantern.

I embellished the flower in the little girl’s hair (Image – Greeting Farm) and on either end of the beaded sentiment, Mahalo.

Mahalo Card.

Mahalo means thank you.

Mahalo means thank you.
0

Novelty Heart Button Love Notes

Handmade love notes are not just for Valentine’s Day.  I’m sharing a little trash to treasure project with you using heart buttons and a paper box.  The box hada little accident. I have several other boxes like it that I’ve decorated with my favorite Authentique papers, and this was my last box, so I wanted to use it for something special.

I took pictures along with way.  A little love, a lot of tape, some heart buttons (of course) and other Doo-Dahs, and I think it outshines all my other boxes.  There is a funny little story about embellishments below too.

Do you love, love, love Clearance? When my kids were little, they thought Clearance was a person.  We regularly visit Uncle Clarence to see what he’s got for us. [insert chuckle here]

Anyway, I got the beautiful chunky glitter encrusted flower on clearance. It’s from Prima. The bad news, if it was on clearance, maybe they don’t make them any more? Sorry! Any gorgeous flower will do, and you could always add your own glitter.

Do you love those crocheted flowers? My friend Linda Weber makes them. I make things or send her stuff I don’t need, and she sends me hand made flowers. It’s a sweet barter system.

I added a small leaf underneath the rose, it’s from Creative Impressions. To the centers of the handmade flowers I added yes, a favored heart button, and a button from my Buttons Galore and More stash and used Beacon’s to glue it all down.

Supplies:

Heart Shaped Buttons

Beacon’s 3-1 Glue

Additional Supplies

  • Additional Buttons – from my stash
  • Papers – Authentique
  • Embellishments (Knob, Trinket Pin, Crystals and Pearls, Key Hole and Key, Feet, Corners) and Tissue Tape – Tim Holtz for Advantus, the Ideaology line
  • Rose – Prima
  • Crocheted Flowers – handmade by my good friend Linda Weber,
  • Bling – Nestabling from Want2Scrap
  • Ink – Black Ink from Close To My Heart
Thanks for looking today! Allie G.
1

Altered Frame

Suzi Blu in Paris

Suzi Blu in Paris


Hi, this is Allie, shivering in Minnesota, getting ready for some snow. I hope you are warm and happy wherever you are today!

I have a fun altered frame to share with you today. I started with a blank MDF frame from my local craft store.

I used the following supplies:

  • Buttons Used:  Vagabond Buttons in a Jar
  • frame from craft store
  • napkins from Punch Studio
  • Suzi Blu stamps from Stampavie
  • Tuxedo Black Memento Ink from Tsukineko
  • paints from Claudine Hellmuth Studio (Ranger)
  • Liquid Pearls from Ranger
  • Stickles from Suze Weinberg (also Ranger)
  • beaded spray from Hydrangea Hippo (Etsy)
  • leaves from Creative Impressions
  • crystal flower from a local wedding supply
  • adhesive :  Matte Medium from Claudine Hellmuth to apply the napkin and seal the project. I used Beacon’s 3-1 glue to adhere the buttons to the project.

I decoupaged a pretty napkin onto the frame. The frame was rather dark, so I actually decoupaged a second layer on top. It is layered slightly askew, to give the frame a little more of a 3D effect. Once everything was dry, I stamped the girl and painted her. I added Ruby Slippers Stickles to her lips. Every girl loves to sparkle!

The butterflies you see above Suzi Blu and in her hair are from the napkin – they were cut and decoupaged onto cardstock and then mounted to the frame. I arranged the buttons as desired, then glued them into place.

To finish it off, I gave the girl a small bouquet.

The project was simple decoupage and paint. I am sure you have an old frame that needs a new look. Buttons are great for dressing up everything. This particular set of Vagabond buttons was the perfect assortment of colors and sizes for the project. The jar is chock full of buttons, and I still have plenty left for another project!

Thank you for stopping by.

2

Powered by WordPress. Designed by WooThemes