Window Cards are cool. Have you ever wanted to make a window card? Have you ever had to make a BUNCH and wanted them all to be the same?
Materials to make Window card:
I have a Grand Calibur from Spellbinders, but this should work in any machine. You need repositionable tape – I use Tissue Tape – as you can see! You will also need two post it notes.
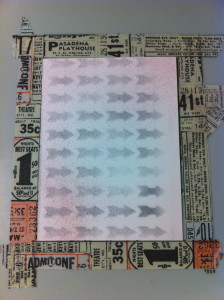
Start by making an outline of your card, so that you know where to place each card front.
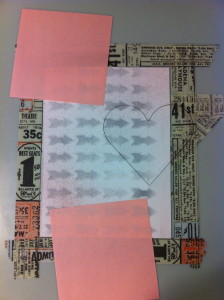
You also want to tape down the die. You will cut through the tape – no worries, just put tape all over it and really rub it down. Then, you are ready to die cut your panels. Use some post it notes to hold it in place. These will really stick after running through your machine, but won’t leave any residue.
Rinse. Lather. Repeat. Just kidding. Keep going, just line up your panel and secure with post – its. Before you know it, you’ll have a nice neat stack of card fronts.
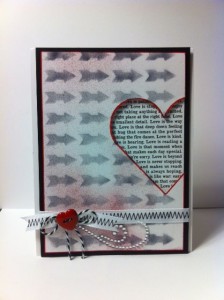
My card fronts were created with an arrow stencil. This is a new stencil that Donna Salazar designed for Want2Scrap. It worked great. I used my trust post its to hold it in place, and airbrushed some black ink. Afterwards, I sprayed on a little red ink, and outlined the card.
I finished the card off with ribbon, a Red Heart Button and some twine, and a rhinestone flourish.
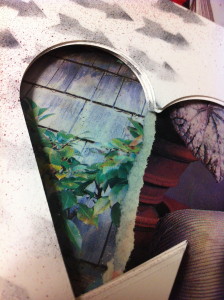
Behind the opening is some cardstock. I raised up the card front with some dimensional adhesive. The card front is matted on black, and then adhered to the card base.
If you have to make several cards, or even just one – this easy technique will help you get it right – the first time, and every time.
Buttons Galore Supplies Used to Make the Window Card:
Additional Supplies Used to Make the Window Card:
- Cardstock – My Favorite Things Replenishments
- Patterned Paper – Canvas Corp.
- Stencil and Flourish – Want2Scrap
- Die – Classic Heart from Spellbinders
- Ink and Airbrush System – Copic
- Ribbon – American Crafts
- Twine – Doodlebug Design
Would you like me to send this card to you? I will be sending it to one lucky winner.
Simply leave a comment and Pin this card!
Thanks for joining me, I’ll be back next Sunday with a fun Card Making Tutorial for you featuring, of course, fabulous BUTTONS!
Latest posts by Allie Gower (see all)
- Buttons Galore 2014 Valentine Round Up - February 1, 2014
- BeBunni Blue Birthday Card - December 26, 2013
- CHRISTMAS DIY: Colorful Buttons for Doll Stockings - December 10, 2013


I love the technique will have to give this a try! Thanks for sharing!
So beautiful!!