Header

Tag Archives | American Crafts

Sunday Cardmaking: Make a St. Patrick’s Day Card

Let’s make a FUN St. Patrick’s Day Card.

As an Irish lass, I just HAVE to share another St. Patrick’s Day Card.

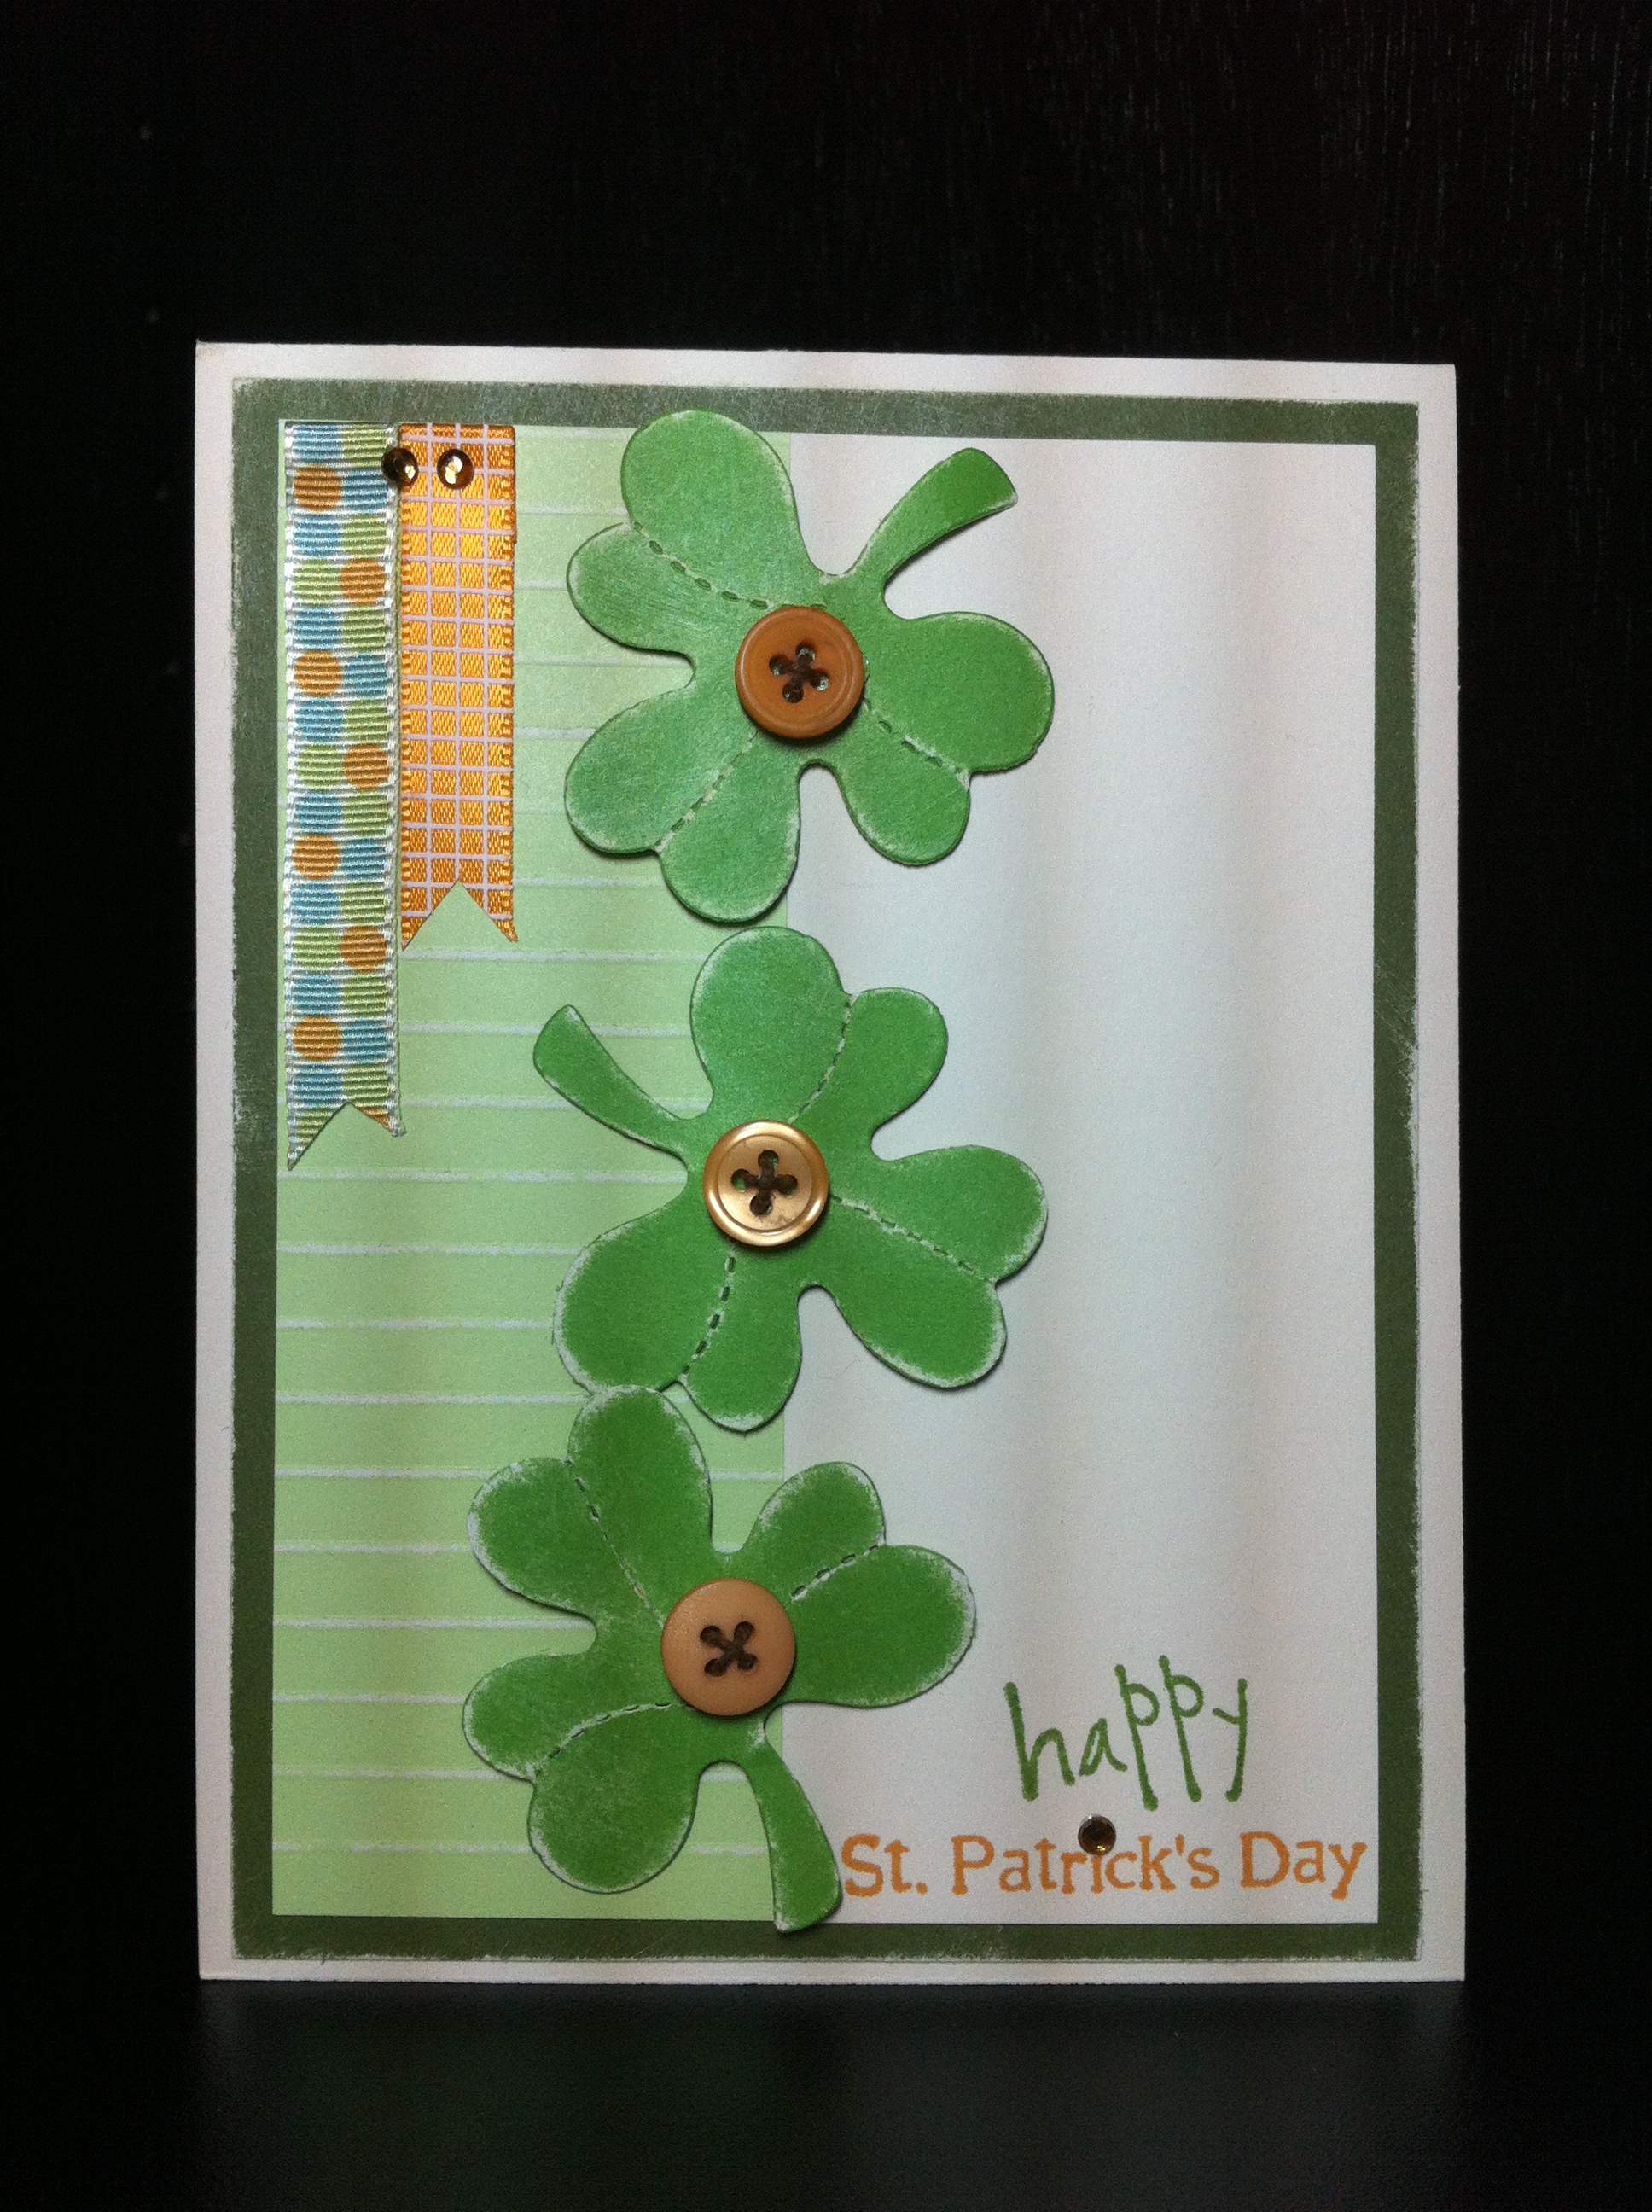
Sometimes I like to make easy cards. Other times, I like to pull out lots of toys and tools, and for this card, I got out sandpaper, my scor-board and all kinds of goodies.

Let’s get started!

Happy St Patricks Day

How to make this FUN St. Patrick’s Day Card.

  1. The base is a standard A2 size (4.25 x 5.5″) and opens at the bottom. The dark green mat is 4 x 5.25″ and the white mat it 3.75 x 5″. The light green strip is 1.75 x 5″.
  2. Score light green strip at every quarter inch. Turn over and sand score lines.
  3. Stamp sentiment. Assemble card.
  4. Die cut three clovers and sand around the edges. Tie twine through assorted Orange Buttons and adhere to clovers with Beacon’s.
  5. Add ribbon. I like to fold over the top edge and use Red Liner Tape to hold it down. Add bling to ribbon and dot i in St. Patrick’s.

We had a lot of fun using tools, but it wasn’t hard… Was it? Grammar Note – the plural of clover really is clovers, I researched it. It sounds wrong, doesn’t it?

Buttons Galore Supplies Used to make this FUN St. Patrick’s Day Card.

Cross Promotional Supplies Used to make this FUN St. Patrick’s Day Card.

Additional Supplies Used to make this FUN St. Patrick’s Day Card.

  • Sentiment, Twine, and Cardstock – Close To My Heart (I like to use this cardstock because it has a fun white core.)
  • Clover die cuts – Sizzix
  • Sandpaper – Bazzill Sanding tool
  • Ribbon – American Crafts
  • Bling – Want2Scrap
  • Dimensional Foam Adhesive

Thanks for stopping by today. I hope your St. Patrick’s Day is filled with luck to last you through the year.

2

Sunday Card Tutorial: Make a Window Card

Window Cards are cool.  Have you ever wanted to make a window card? Have you ever had to make a BUNCH and wanted them all to be the same?

Window Card by Allie Gower


Materials to make Window card:

I have a Grand Calibur from Spellbinders, but this should work in any machine. You need repositionable tape – I use Tissue Tape – as you can see! You will also need two post it notes.

Start by making an outline of your card, so that you know where to place each card front.

Making the Perfect Cut


You also want to tape down the die. You will cut through the tape – no worries, just put tape all over it and really rub it down. Then, you are ready to die cut your panels. Use some post it notes to hold it in place. These will really stick after running through your machine, but won’t leave any residue.

Making the Perfect Cut


Rinse. Lather. Repeat. Just kidding. Keep going, just line up your panel  and secure with post – its. Before you know it, you’ll have a nice neat stack of card fronts.

Making the Perfect Cut


My card fronts were created with an arrow stencil. This is a new stencil that Donna Salazar designed for Want2Scrap. It worked great. I used my trust post its to hold it in place, and airbrushed some black ink. Afterwards, I sprayed on a little red ink, and outlined the card.

I finished the card off with ribbon, a Red Heart Button and some twine, and a rhinestone flourish.

Behind the opening is some cardstock. I raised up the card front with some dimensional adhesive. The card front is matted on black, and then adhered to the card base.

If you have to make several cards, or even just one – this easy technique will help you get it right – the first time, and every time.

Buttons Galore Supplies Used to Make the Window Card:


Additional Supplies Used to Make the Window Card:

  • Cardstock – My Favorite Things Replenishments
  • Patterned Paper – Canvas Corp.
  • Stencil and Flourish – Want2Scrap
  • Die – Classic Heart from Spellbinders
  • Ink and Airbrush System – Copic
  • Ribbon – American Crafts
  • Twine – Doodlebug Design

Would you like me to send this card to you? I will be sending it to one lucky winner.

Simply leave a comment and Pin this card!


Thanks for joining me, I’ll be back next Sunday with a fun Card Making Tutorial for you featuring, of course, fabulous BUTTONS!


Powered by WordPress. Designed by WooThemes