Header

Tag Archives | Want2Scrap

Mason Jar Valentines

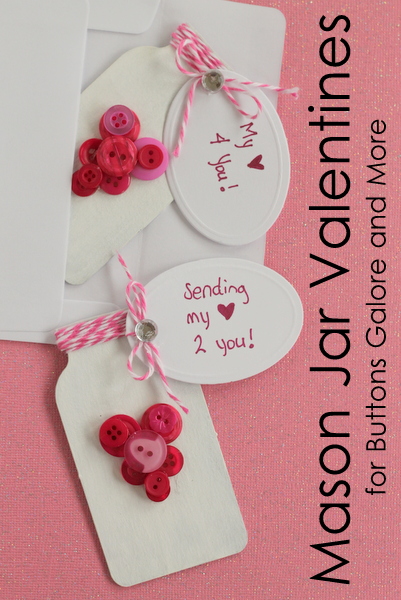
Give the gift of handmade Valentines this year with these super simple mason jar Valentines.  The perfect way to bottle up your heart and give it to someone you love.  Grab a few supplies and your buttons from Buttons Galore and More to get started.

Fun mason jar valentines to make for someone you love!

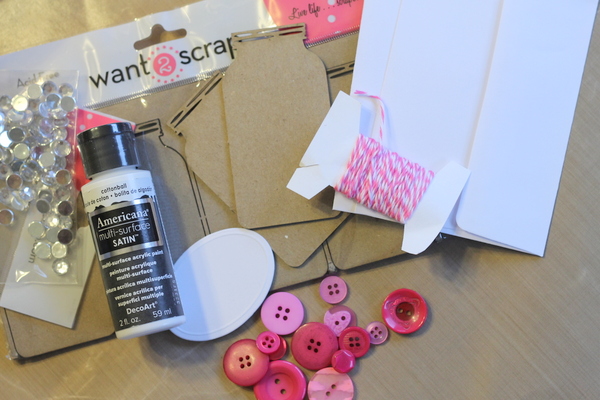
Mason Jar Valentines Supplies:

Fun mason jar valentines to make for someone you love!

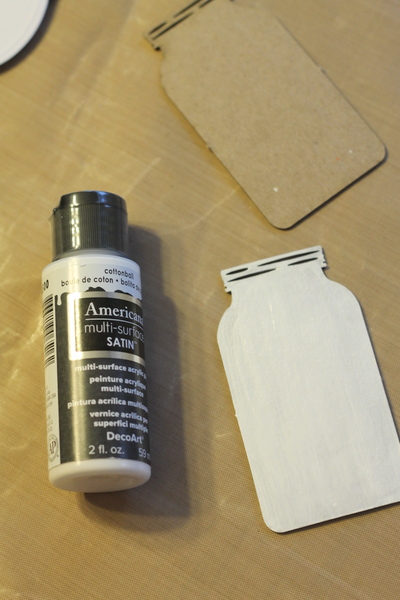
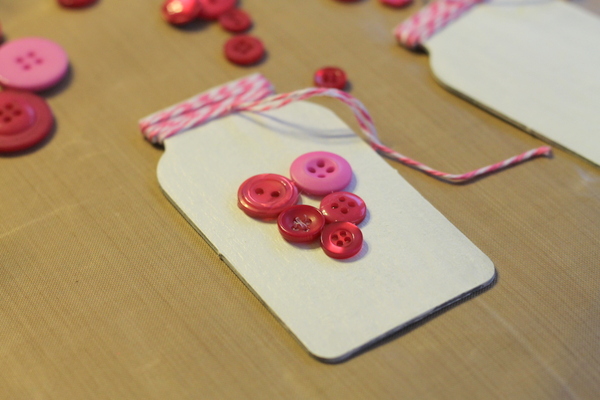
Paint both sides of the mason jar chipboard embellishment with the white paint.  It will take 2 – 3 light coats of paint to completely cover the embellishment.

Fun mason jar valentines to make for someone you love!

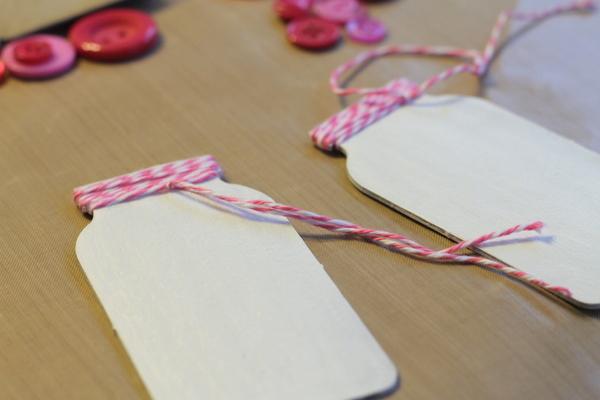
Allow your mason jar to dry completely.  Then wrap the top with baker’s twine.  Tie and leave your ends loose as shown below for now.

Fun mason jar valentines to make for someone you love!

Play with your buttons until you get a heart like shape.  Hot glue the first layer of buttons to your mason jar.

Fun mason jar valentines to make for someone you love!

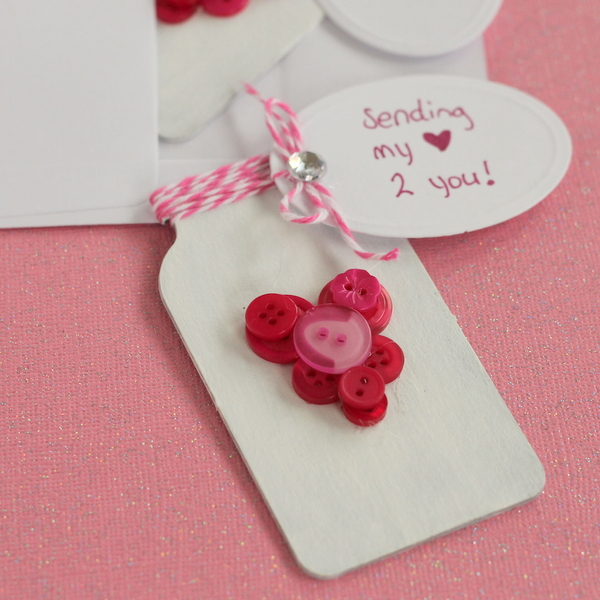
Add a second layer of buttons with hot glue.  Write a sentiment on your tag and punch a hole.  Tie your tag to the mason jar.  Tie the baker’s twine in a bow and trim any excess.  Apply a rhinestone to the center of the bow again using hot glue.

Fun mason jar valentines to make for someone you love!

Slip your mason jar Valentines inside an envelope for delivery to that special someone.  Who will you give your heart to this Valentine’s Day?

1

Paris Wall Art

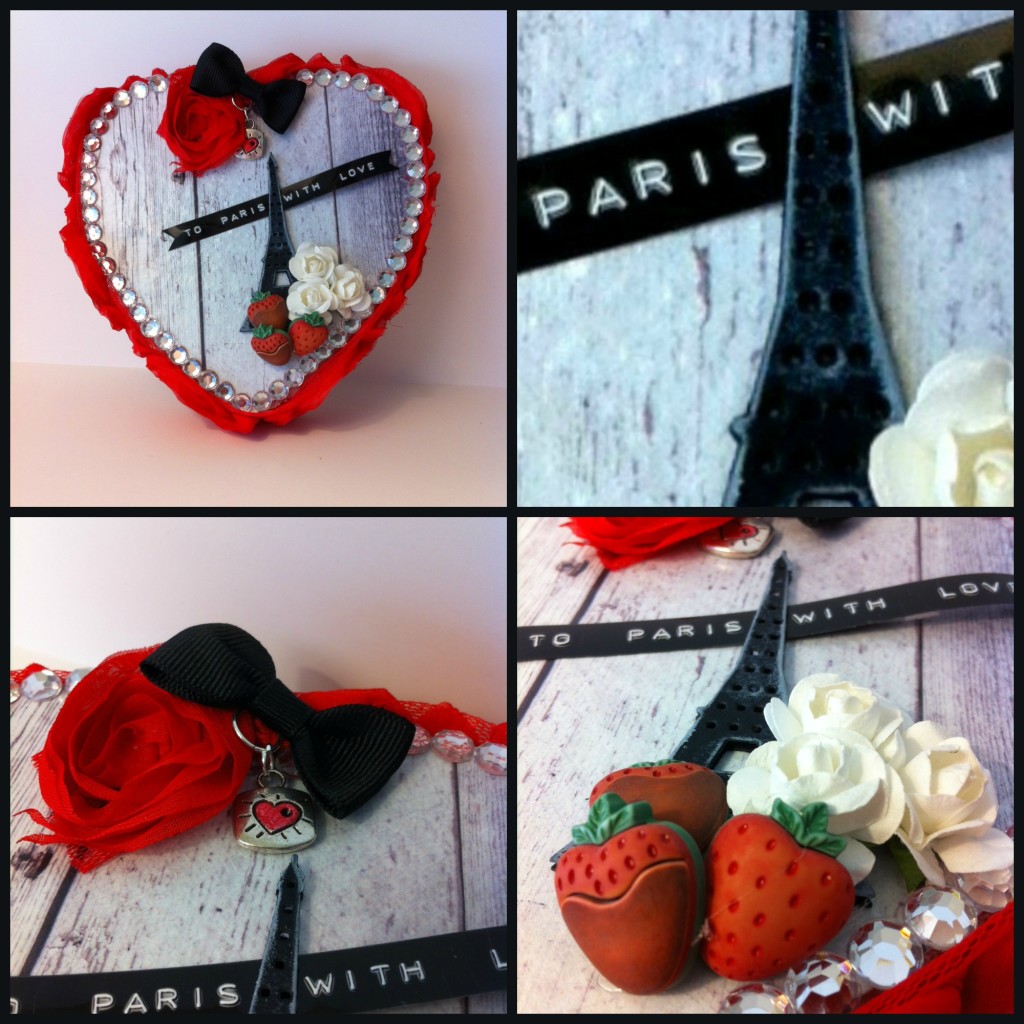
STYROFOAM™ and Buttons – Paris Wall Art.

Paris Wall Art

I could never get tired of Paris. Let’s make some Paris Wall Art!  I was surprised at how easily this came together.

Paris Wall Art Supplies:

  • Buttons – Sweet Delights
  • Adhesive – Beacon’s 3-in-1Mini Glue Dots, Fabri Tac
  • Heart Shape – Styrofoam Crafts
  • Ribbon, Charm and Bling – Want2Scrap
  • Paris Die – My Favorite Things
  • Patterned Paper – Bo Bunny
  • Cardstock – DiscountCardstock.com
  • Flowers – Wild Orchid
  • Other – Dymo Labeler and Label Tape, Jump Rings, White Versacraft Ink, Red Copic Marker

Instructions:

  1. Trace heart and cut out of patterned paper. Adhere with Beacon’s 3-in-1.
  2. Line outer edges with rose ribbon using Fabri Tac.
  3. Create Dymo Label. Pink edges and adhere to heart.
  4. Die cut Eiffel Tower and distress with White Versacraft Ink. Adhere with Mini Glue Dots.
  5. Embellish with rhinestones, flowers and additional ribbons.
  6. Accent charm with Copic Marker. Add charm to black bow using jump rings.

Thanks for joining me today.

See more of my creations at My Card Party.

0

Flower Button Pendant

Quick and Simple Flower Button Pendant

Some buttons are just too cute to pass up. Enjoy your favorites by wearing them. Simply make a Flower Button Pendant … or whatever shape your favorite button is!

flower button pendant

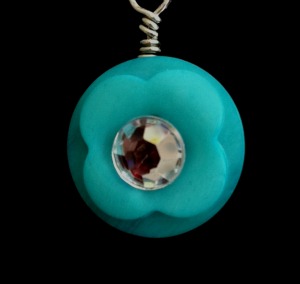
Some of the Bulk Buttons have a really fun assortment, and I found this pretty flower shaped button and thought it would make such a cute pendant.

I looped wire through the button holes and then wrapped to create a loop at the top. I adhered a rhinestone using Beacon’s 3-in-1 Adhesive.

These would be so fun to make with girls, and inexpensive, too!

Supplies for Flower Button Pendant


Thanks for joining me today.

See more of my creations at My Card Party.

1

Walnut Hollow Wall Art

Walnut Hollow Wall Art

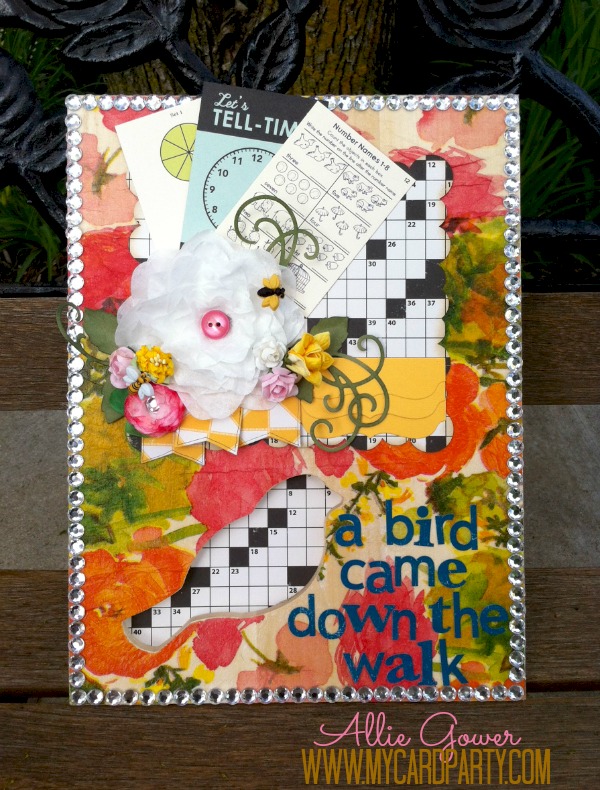
Allie here today making some Walnut Hollow Wall Art. This is really not hard, so colorful, and a lot of fun.

Walnut Hollow Wall Art

Supplies for my Walnut Hollow Wall Art:

  • Sweet Blush Buttons
  • Garden Bug Buttons
  • Board – Walnut Hollow
  • Bulk Bling – Want2Scrap
  • Fucschia Dye – Rit Dye
  • Crossword Puzzle Paper, Stickers and Vintage Cards – October Afternoon
  • Flowers – some are handmade using Spellbinders, additional flowers from Wild Orchid
  • Adhesives – Glue Dots, Adtech Hot Glue Gun and Glue Sticks, Plaid (Mod Podge)
  • Dies – Spellbinders, My Favorite Things, and Heartfelt Creations, Silhouette
  • Other – decorative napkin, coffee filters (for handmade flowers)

Instructions

  1. Decoupage a napkin onto the board and seal with Mod Podge.
  2. Cut main mat (Silhouette), flourish (Heartfelt Creations – Belle Rose Collection), tabs (My Favorite Things) and flowers (Spellbinders).
  3. Assemble large flower and add Sweet Blush Button center and Garden Bug accent. Assemble smaller flower (this flower was dyed with Rit Dye in Fuschia) and add Silver/Clear Bulk Bling Rhinestone.
  4. Add vintage cards and other paper embellishments. (Note – I doodled along the edges of some of these pieces.)
  5. Decorate edges with Bling.
  6. Add a sentiment using stickers. I chose a line from an Emily Dickinson poem. Note, stickers don’t stick well to the mod podge surface, so you may want to reinforce with adhesive.

Note – I lined the back of board with matching paper so that the crossword pattern would show through where the bird cutout is.

Thanks for joining me today.

See more of my creations at My Card Party.

2

Organizing with Nautical Buttons

Try organizing with nautical buttons.

Keep your supplies stored in style this year!

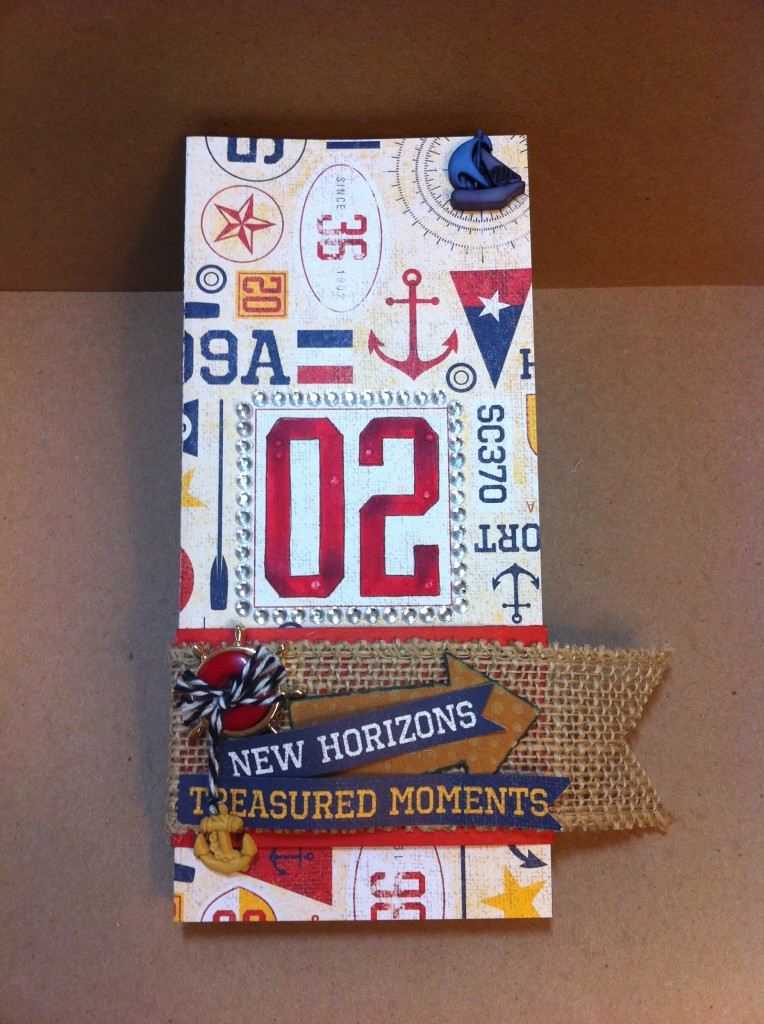
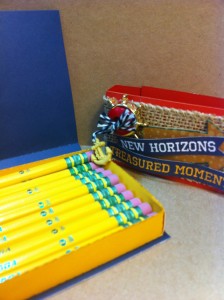
Create a fun storage tray for pencils.

Supplies for Organizing with Nautical Buttons

Additional Supplies

  • Patterned Paper – Tommy Collection, Cardstock (Honey, Cranberry, Outdoor Denim), Burlap Ribbon, Chipboard Arrow – all from Close To My Heart
  • Bling – Want2Scrap Sleek Strips Silver Rhinestones
  • Twine – Doodlebug Design Doodle Twine
  • Ink – Copic R46, R29, C3, C4, Blender (0) and SP05 Multiliner, Cantaloupe and Bahama Blue Memento Dye Ink (Tsukineko)
  • Adhesive – Scor-Tape (Scor-Pal Company) and AdTech Adhesive Hot Glue
  • 3d Pencil Box with Wrap SVG – Designed by Jamie Cripps (Silhouette Online Store)

Create a fun storage tray for pencils.Create a fun storage tray for pencils.Create a fun storage tray for pencils.

Directions:

  1. Cut two outer panels, one of the Tommy themed paper – one of Outdoor Denim (both from Close to My Heart). Adhere together with Scor-Tape. Save leftover patterned paper – on the back there is a word strip that is used in the embellishments. Note – the Outdoor Denim liner is a special addition – it gives the box a little bit of added sturdiness.
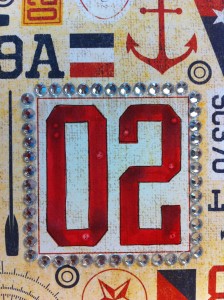
  2. Color numbers of choice using Copic Marker R29 and R46. Add shadows with C3 and C4. Add accents with Blender pen and Copic Multiliner.
  3. Cut insert from Honey Cardstock. Assemble and attach to the outer portion of the box.
  4. Cut band from Cranberry Cardstock.
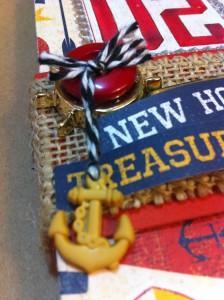
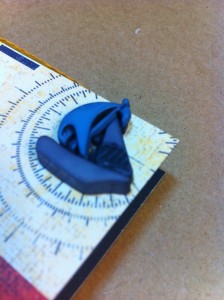
  5. Loop twine through Anchor button and tie through red button. Adhere red button to Ship’s Wheel button using AdTech Adhesives hot glue.
  6. Adhere burlap ribbon and buttons with AdTech Adhesives hot glue.
  7. Ink Chipboard Arrow (From Lucky Level 2 Assortment – Close To My Heart) with Cantaloupe Ink and edge with Bahama Blue Ink (Tsukineko – Memento Dew Drop). Adhere with AdTech Adhesives hot glue.
  8. Choose sentiments from leftover Tommy paper and “pink” edges. Attach to burlap using AdTech Adhesives hot glue.
  9. Outline numbers with Sleek Strips Silver Rhinestones.

Create a fun storage tray for pencils. 

Note – for additional assistance assembling the box, Jamie has a wonderful tutorial on her blog.

http://www.jamielanedesigns.blogspot.com/2013/07/pencil-box-with-wrap.html

 Thanks for joining me today. Hope you have fun getting organized in style.


* * * * * * * * * * * * * * *

Linking up with Transformation Thursday


TT logo

1

Encouraging Card

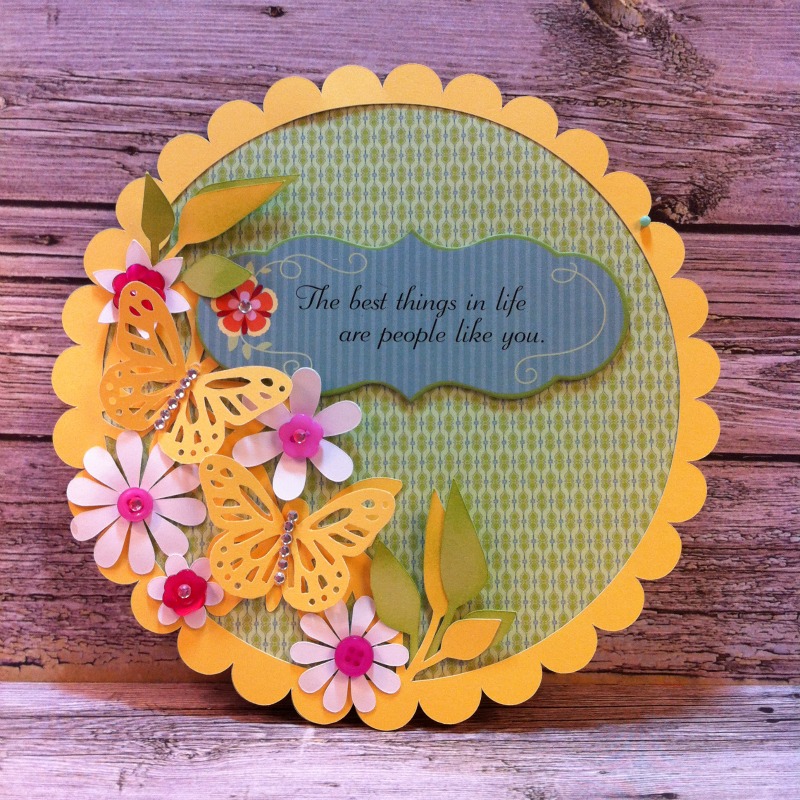
Sometimes, a friend needs to hear they are fabulous, thus the need for an …

ENCOURAGING CARD

An Encouraging Card featuring buttons, Close To My Heart embellishments and papers, along with Close To My Heart bling.

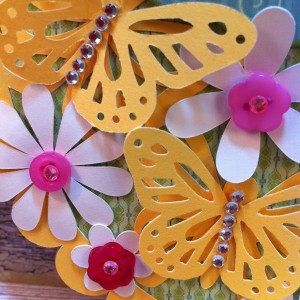
I cut the card base and flowers using the Silhouette. I cut an extra set in green to add some more leaves. Laura Kelly’s Sweet Blush Buttons dot the centers of the flowers, and these are accented with pink rhinestones. I punched some Martha Stewart butterflies from matching card stock to give a little more dimension to the butterflies on the card, and those are accented with rhinestones as well.

An Encouraging Card featuring buttons, Close To My Heart embellishments and papers, along with Close To My Heart bling.

Buttons are always a fun and inexpensive embellishment!

Supplies for an Encouraging Card:

Thanks for stopping by today. To see more cards and creative ideas, please visit me at My Card Party.


5

Me and My Peeps Projects

It’s time for more Me and My Peeps Projects!

Did you see the “how to” on this charm yesterday? If not, hop on back and check it out.
Allie Gower created a sweet charm using Peeps packaging.


Princess Peep is Pretty in Pink


So c’mon, let’s get started!

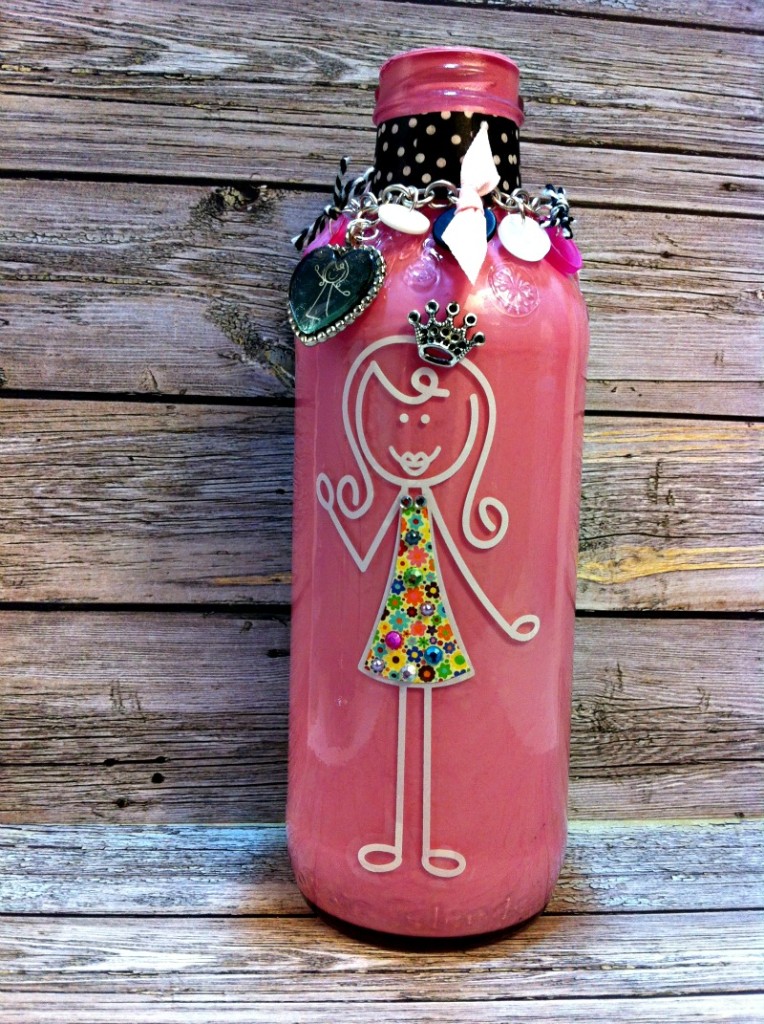
PRINCESS PEEP’S BOTTLE

Step One…. You’re gonna need supplies, a bottle – I used my favorite Calypso Southern Peach Lemonade bottle … some paint … and a peep.

Step Two… Pour some of that paint IN the mason jar and coat the insides. Let dry.

Step Three… Clean the outside of the jar and apply the decal.

EMBELLISH!

I put a post it note on the packaging and made myself a stencil. I used the stencil to cut some Jillibean Soup patterned paper for Princess Peep’s dress. I added all kinds of bling from Want2Scrap, along with a crown (also from Want2Scrap). I adhered the crown with Dazzle Tac.

Around the opening of the jar, I made a little bracelet with buttons and snippets of ribbon. It’s just some jump rings and charms and buttons and stuff. Note, the neck of the bottle had a code that I could not wash off, so I covered the neck with small strips of washi tape.

Supplies

  • Jump Rings, Chain – Fire Mountain Gems
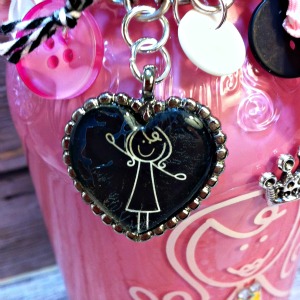
  • Heart Charm – Peeps packaging, Epiphany Hearts 14 Punch, Bubble Cap and Jewelry Setting
  • Bling, Crown – Want2Scrap
  • Paper – Jillibean Soup
  • Tools – pliers
  • Other – Calypso Bottle, tissue tape, paint, ribbon

Thanks for stopping by!

 Please visit all of the talented Peeps playing with us!

Special thanks to our Sponsors and Promoting Partners

Laura Kelly Designs + Niki Meiners + Laura Kelly Buttons + Plaid Enterprises + A.C. Moore + Cre8time

Day two  

There is also an awesome CONTEST for a giveaway. [giveaway ended]


Happy Creating Connections with The PEEPS that you LOVE,

Me and My Peeps

3

Snap Happy

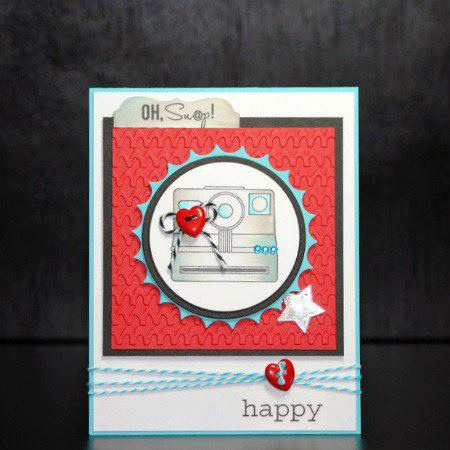
It’s Red, White & Blue season, the perfect colors for this Snap Happy Card. Will you be taking lots of pictures on the 4th?

Every week we share fresh card making ideas using buttons. This week we’re using my absolute favorite Heart Novelty Buttons. I made a card with a gift card inside that’s good for some prints at one of our local stores. What family doesn’t print a ton of pictures?

Snap Happy

Supplies for creating Snap Happy Card

Buttons – two Heart Novelty Buttons – Buttons Galore and More

Stamps  – Gina K Designs

Cardstock – DiscountCardstock.com

Embellishments – Turquoise Rhinestones – Want2Scrap; Twine – Doodlebug Design; Stickers – SRM

Tools: Dies (Inverted Scalloped Circles, Star, Circles – Spellbinders Paper Arts; Labels – My Favorite Things) ; Embossing – Sizzix

Adhesive: Hot Glue – Adtech; Dimensional Foam Tape – 3M; Scor-Tape – Scor-Pal

Other: Ink – Tsukineko; Markers – Copic; Flashing Tape – available at most Home Improvement Stores

Directions

  1. Create a Neenah Solar White cardstock base 4.25 x 11″. Score and fold in half.
  2. Cut your mats: Neenah Solar White mat 4 x 5.25″ – Black Licorice mat 3.5 x 3.5″ – Currant Red mat 3.25 x 3.25″ – Emboss Currant Red mat.
  3. Adhere mats to card with Scor-Tape.
  4. Die cut pieces: inverted circle from Lunar Blue Cardstock, a Black Licorice circle, and slightly smaller Neenah Solar White circle and label shape.
  5. Stamp and color image on Neenah Solar White circle. Stamp sentiment on label shape and attach to card.
  6. Embellish with Turquoise Rhinestones. Tie black and white twine through one Heart Novelty Button and glue to stamped image.
  7. Layer round pieces with Dimensional Foam Tape.
  8. Adhere Flashing Tape to scrap paper and die cut and emboss star. Adhere to card with Dimensional Foam Tape
  9. Wrap aqua and white twine around card and secure with second Heart Novelty Button.
  10. Add sticker sentiment to bottom of card.

Thanks for stopping by today. To see more of my art, please visit me at My Card Party. I’ll see you on Thursday with some new Button Jewelry.

Until then, keep creating!

2

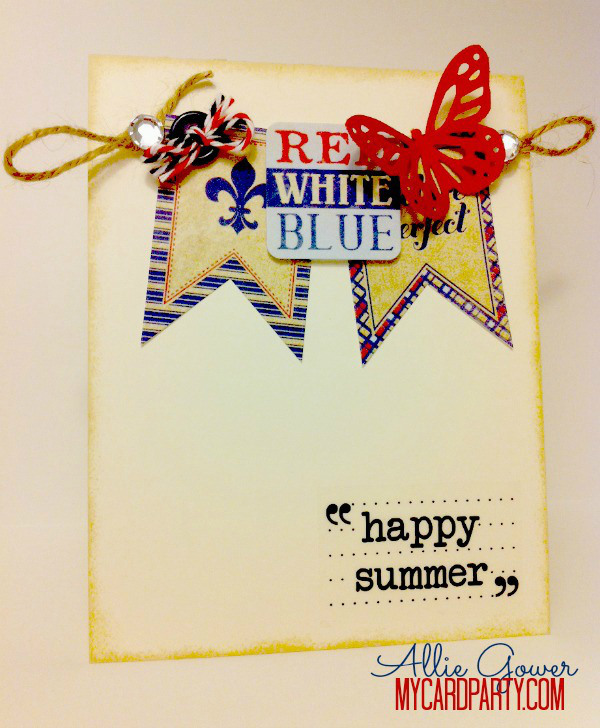
Red White and Blue Card

Create a quick Red White and Blue card to celebrate Summer

Hi, it’s Allie here from My Card Party. I had some extra patriotic stickers from Authentique, and lots of patriotic cardstock from DiscountCardstock.com so I thought I’d make a summery card.

Red, White, and Blue

Happy Summer to you!

Red White and Blue Happy Summer to You


Shopping at Buttons Galore is always fun. There are so many categories and styles. My favorite thing to do is Shop by Color. I had so much red, white and blue going on in this card that black buttons seemed to be the way to go. There are many choices in the Black and White category.  I settled on a package of Cookies and Cream Buttons.

Supplies for creating Red White and Blue Card

  • Cookies and Cream Buttons
  • Ivory Smooth Cardstock #80 and Currant Red Cardstock (Discount Cardstock)
  • Bulk Bling (Want2Scrap)
  • Stickers (Authentique, Sentiment – SRM)
  • Twine and Baker’s Floss (Jo-Anne’s Fabrics)

Tools

  • Other – Martha Stewart Butterfly Punch, Martha Stewart Score Board
  • Hot Glue (AdTech)
  • Scissors (Westcott Brand)
  • Desert Sand Ink and Ink Sponge (Tsukineko)

Instructions

  1. Create a card base 4.25 x 11 and fold in half.
  2. Ink edges of card front with Tsukineko Desert Sand Memento Dew Drop.
  3. Tie multiple colors of floss through Cookies and Cream Button.
  4. Add twine and embellishments. Finish with sentiment and bling.

Thanks for joining me today. I’ll see you next Sunday.

See more of my creations at My Card Party.

0

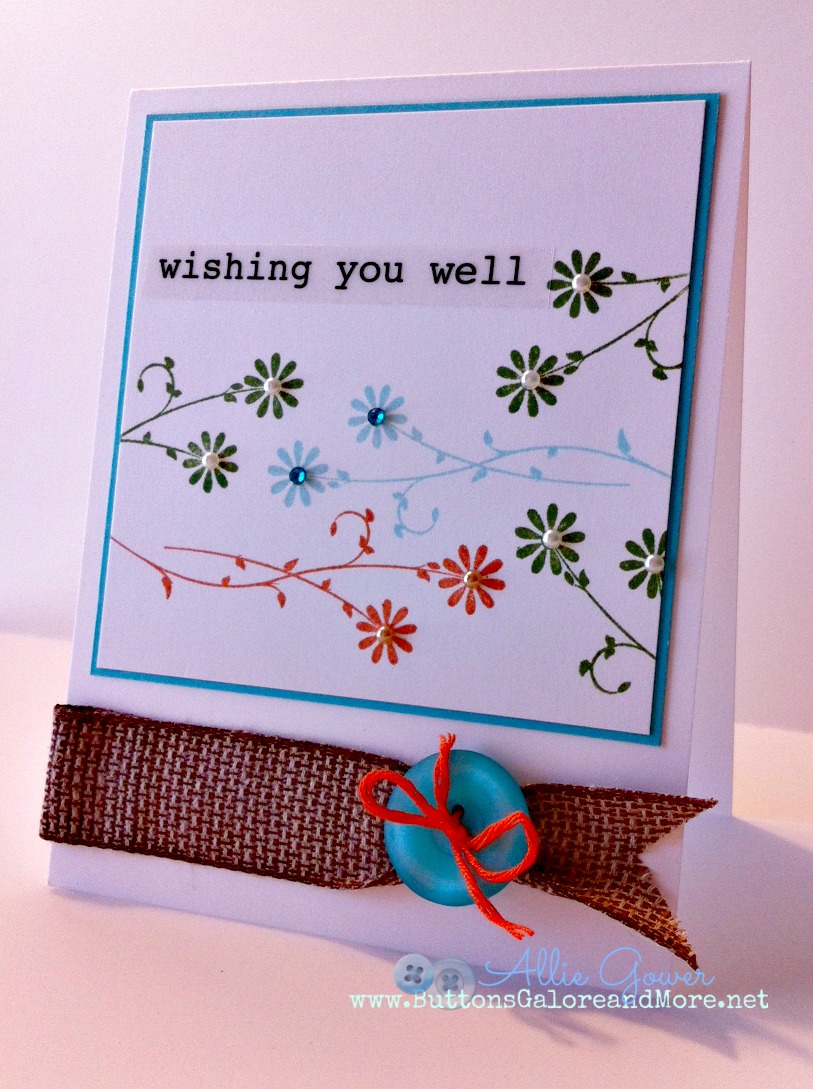
Get Well Card

Make a simple Get Well Card.

A Get Well Card is always a good card to have in your stash, because injury and illness never arrive at a convenient time.

I randomly stamped flowers and accented with Bling. At the bottom of the card, I’ve cinched some ribbon with a Teal Ice button and some orange floss.

Get Well Card from BUTTONSGALOREANDMORE

Supplies Used to make Get Well Card

  • Buttons – Teal Ice
  • Stamps and Cardstock – Gina K Designs
  • Sticker Sentiment – SRM Sticker
  • Bling – Want2Scrap
  • Trim – Berwick, We R Memory Keepers
  • Ink – Tsukineko/Imagine Crafts

Thanks for joining me today. I hope you don’t NEED a card wishing you well, but if you do, I hope you get well soon!

1

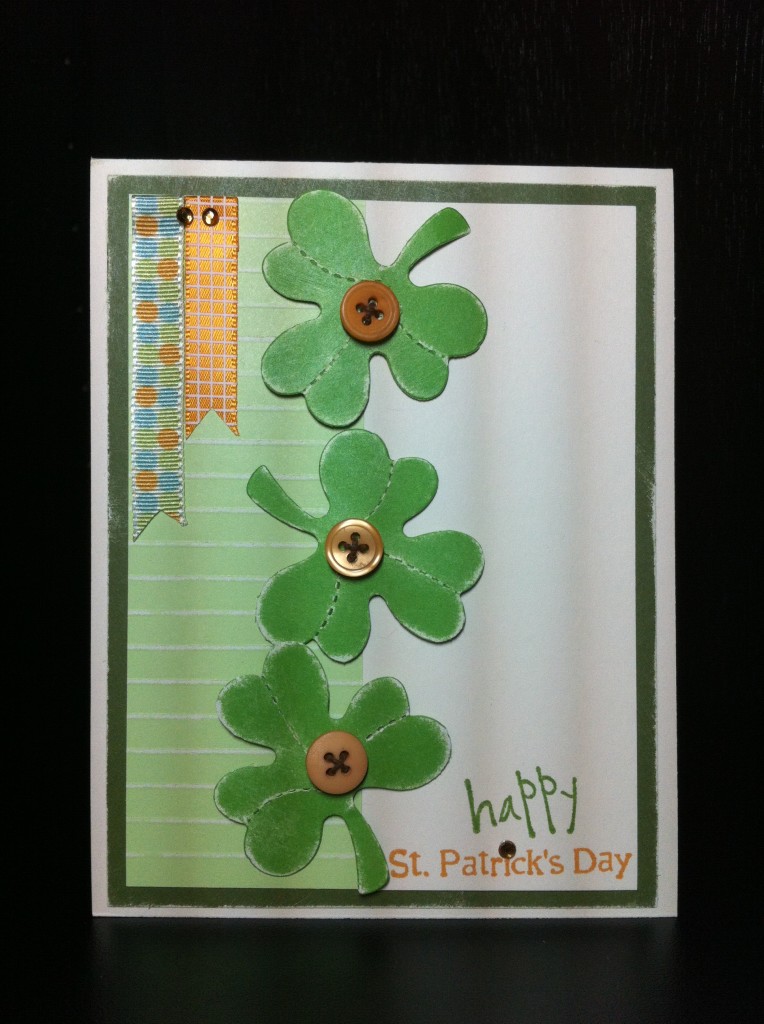
Sunday Cardmaking: Make a St. Patrick’s Day Card

Let’s make a FUN St. Patrick’s Day Card.

As an Irish lass, I just HAVE to share another St. Patrick’s Day Card.

Sometimes I like to make easy cards. Other times, I like to pull out lots of toys and tools, and for this card, I got out sandpaper, my scor-board and all kinds of goodies.

Let’s get started!

Happy St Patricks Day

How to make this FUN St. Patrick’s Day Card.

  1. The base is a standard A2 size (4.25 x 5.5″) and opens at the bottom. The dark green mat is 4 x 5.25″ and the white mat it 3.75 x 5″. The light green strip is 1.75 x 5″.
  2. Score light green strip at every quarter inch. Turn over and sand score lines.
  3. Stamp sentiment. Assemble card.
  4. Die cut three clovers and sand around the edges. Tie twine through assorted Orange Buttons and adhere to clovers with Beacon’s.
  5. Add ribbon. I like to fold over the top edge and use Red Liner Tape to hold it down. Add bling to ribbon and dot i in St. Patrick’s.

We had a lot of fun using tools, but it wasn’t hard… Was it? Grammar Note – the plural of clover really is clovers, I researched it. It sounds wrong, doesn’t it?

Buttons Galore Supplies Used to make this FUN St. Patrick’s Day Card.

Cross Promotional Supplies Used to make this FUN St. Patrick’s Day Card.

Additional Supplies Used to make this FUN St. Patrick’s Day Card.

  • Sentiment, Twine, and Cardstock – Close To My Heart (I like to use this cardstock because it has a fun white core.)
  • Clover die cuts – Sizzix
  • Sandpaper – Bazzill Sanding tool
  • Ribbon – American Crafts
  • Bling – Want2Scrap
  • Dimensional Foam Adhesive

Thanks for stopping by today. I hope your St. Patrick’s Day is filled with luck to last you through the year.

2

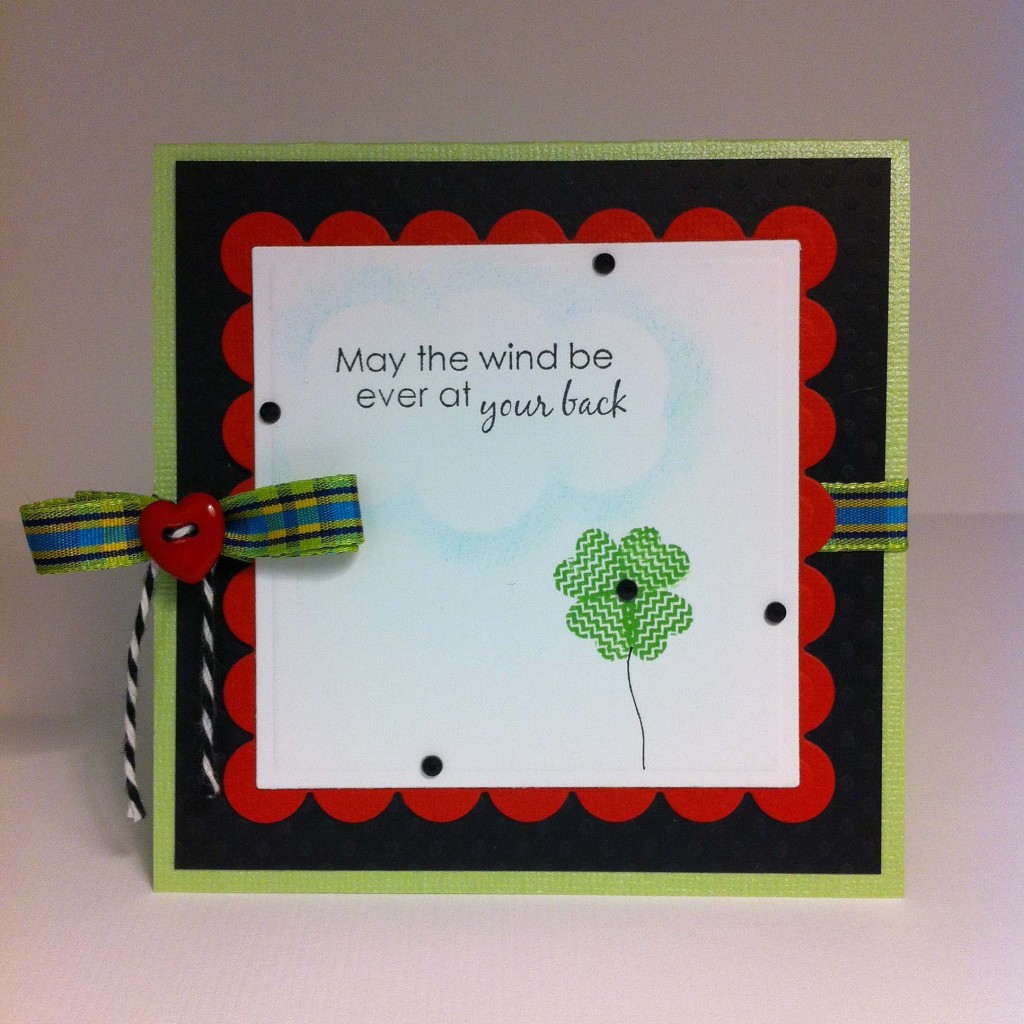
Sunday Card Making: Make a St. Patrick’s Day Card

Make a St. Patrick’s Day Card with hearts. I found that I did not have many St. Patrick’s Day themed stamps and embellishments in my stash. I decided on an Irish styled saying and a clover made of stamped hearts. You can make a card any size you like. My card is 4×4″.

Buttons Galore celebrates St. Patrick's Day with Allie Gower

Material used to create St. Patrick’s Day card:

Buttons Galore Product used:

I also used:

In addition you will need:

  • Post-it Note
  • Circle punch or die
  • Finger Dauber or Sponge
  • Copic Multiliner ( for drawing stem )

Directions for making the St. Patrick’s Day Card:

  1. Create a card base by cutting a piece of cardstock 4×8″ and fold in half.
  2. Cut a mat – 3 3/4×3 3/4″ and adhered to card base.
  3. Tie ribbon around card base and attach button using twine.
  4. Die cut scalloped square and adhere to card.
  5. Die cut a classic square.
  6. Stamp sentiment on classic square. Stamp heart four times to create a shamrock, and hand draw a stem.
  7. To create the cloud around the sentiment, you can make your own stencil, as shown below. Attach a Post-it Note to some scrap paper and punch a circle out – near the sticky edge of the Post-it note. Remove sticky circle and place on card and gently sponge around it, moving as needed, to create a cloud shape.
  8. Adhere classic square to card and add bling.

create a cloud step onecreate a cloud step two create a cloud step three create a cloud

I hope you enjoyed this St. Patrick’s Day card and the quick cloud tutorial. May the wind be ever at your back!

Thanks for stopping by.

Allie

5

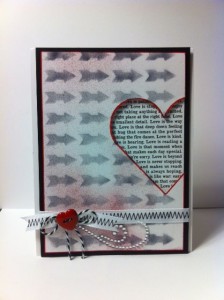
Sunday Card Tutorial: Make a Window Card

Window Cards are cool.  Have you ever wanted to make a window card? Have you ever had to make a BUNCH and wanted them all to be the same?

Window Card by Allie Gower


Materials to make Window card:

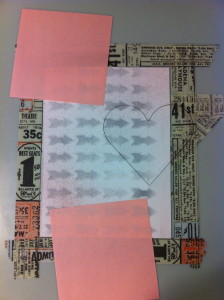
I have a Grand Calibur from Spellbinders, but this should work in any machine. You need repositionable tape – I use Tissue Tape – as you can see! You will also need two post it notes.

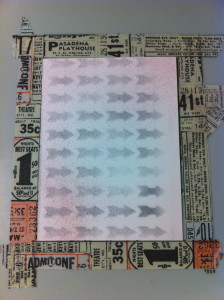
Start by making an outline of your card, so that you know where to place each card front.

Making the Perfect Cut


You also want to tape down the die. You will cut through the tape – no worries, just put tape all over it and really rub it down. Then, you are ready to die cut your panels. Use some post it notes to hold it in place. These will really stick after running through your machine, but won’t leave any residue.

Making the Perfect Cut


Rinse. Lather. Repeat. Just kidding. Keep going, just line up your panel  and secure with post – its. Before you know it, you’ll have a nice neat stack of card fronts.

Making the Perfect Cut


My card fronts were created with an arrow stencil. This is a new stencil that Donna Salazar designed for Want2Scrap. It worked great. I used my trust post its to hold it in place, and airbrushed some black ink. Afterwards, I sprayed on a little red ink, and outlined the card.

I finished the card off with ribbon, a Red Heart Button and some twine, and a rhinestone flourish.

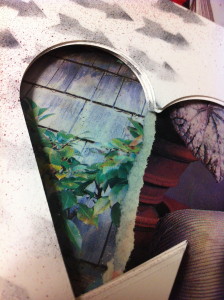
Behind the opening is some cardstock. I raised up the card front with some dimensional adhesive. The card front is matted on black, and then adhered to the card base.

If you have to make several cards, or even just one – this easy technique will help you get it right – the first time, and every time.

Buttons Galore Supplies Used to Make the Window Card:


Additional Supplies Used to Make the Window Card:

  • Cardstock – My Favorite Things Replenishments
  • Patterned Paper – Canvas Corp.
  • Stencil and Flourish – Want2Scrap
  • Die – Classic Heart from Spellbinders
  • Ink and Airbrush System – Copic
  • Ribbon – American Crafts
  • Twine – Doodlebug Design

Would you like me to send this card to you? I will be sending it to one lucky winner.

Simply leave a comment and Pin this card!


Thanks for joining me, I’ll be back next Sunday with a fun Card Making Tutorial for you featuring, of course, fabulous BUTTONS!


Sunday Card Making: Make an OWL LOVE YOU Valentine Card

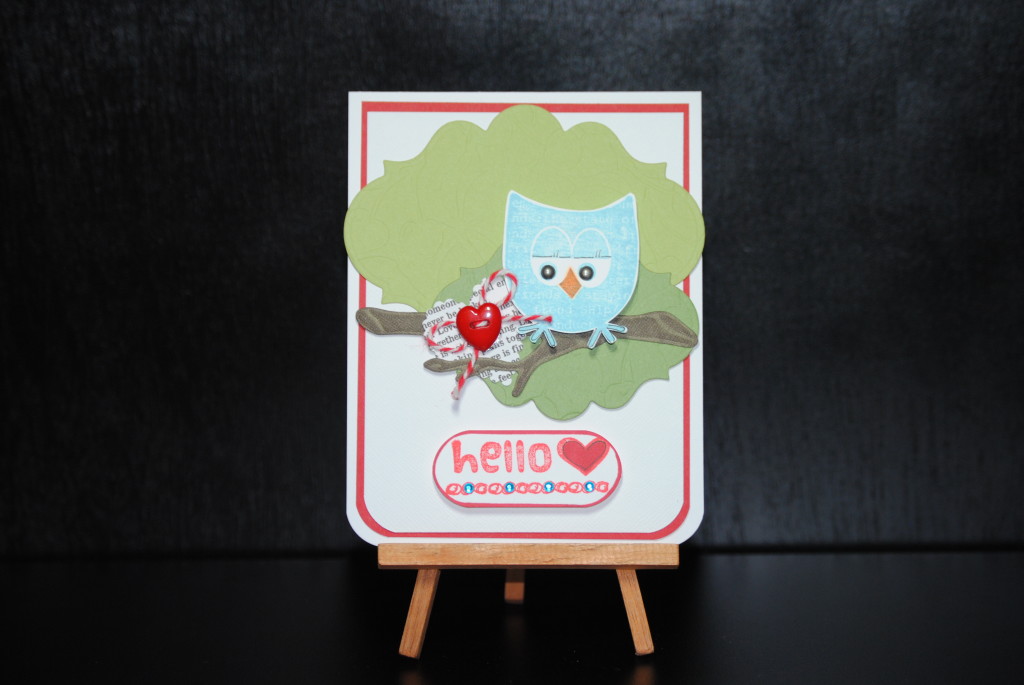
Do you like puns?  There is nothing cuter than OWL LOVE. I think this card would work well for Valentine’s Day, or any day with the simple HELLO!

This card is not difficult, but it’s got a little cutting and some die cutting and punching.

I started with Spellbinders Labels 20 and cut two green shapes and embossed them. I though these worked well for bushy foliage. I also die cut a branch from the Spellbinders BUGS set, and I also embossed it and added some ink for added contrast.

I stamped the Owl with some Crystal Blue ink from Close To My Heart – the owl is a Stamp of the Week from Unity Stamp Company. I have a love for owls, and some of my close friends call me Owlie – it’s even the name of my character on the Wii. It’s okay to laugh! I fussy cut the owl – not as hard as SOME shapes. I doodled around his feet and gave him some eyelashes with a Copic multiliner. I stencilled on his nose – I stamped a second owl and cut out the nose. I colored and outlined. An owl can be blue and sit in a tree, but a blue nose – never! I added some metal brads for his eyes.

I punched a heart using a Fiskars punch. The paper is from Canvas Corp and has all kinds of love words on it. I added a Red Heart Button. I tied a little bow with some Doodlebug Design Twine. At the bottom, I stamped “hello” from the same stamp set. I colored in the heart with a Copic Marker and added some Turquoise Rhinestones from Want2Scrap.

I did a little rounding at the bottom of the card and on the sentiment.

That’s it!

I hope you will love this card.


Hello by Allie Gower

Buttons Galore Supplies used to make the OWL LOVE YOU Card:

Additional supplies used to make the OWL LOVE YOU Card:

  • Cardstock – My Favorite Things Replenishments
  • Stamps – Unity Stamp Company (Stamp of the Week Program)
  • Dies – Spellbinders Labels 20 and Bugs
  • Punches – Scalloped Heart and Corner Punch from Fiskars
  • Twine – Doodlebug Design
  • Ink – Close To My Heart and Copic
  • Bling – Want2Scrap

Do you want this OWL to love you forever?

I will send him to a lucky winner.

Leave a comment and PIN him. I know, you were going to do that anyway. Good luck and I’ll see you all next week.

Sunday Cardmaking: Making a Valentine that Hides a Sweet Surprise

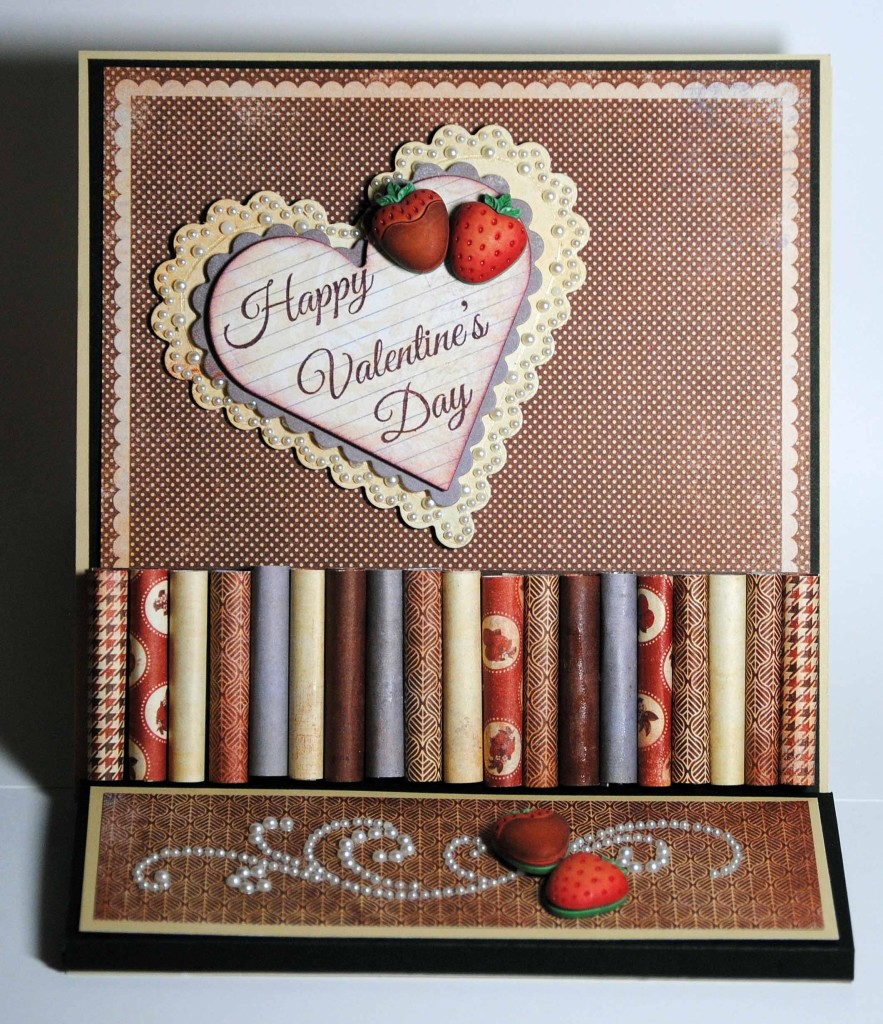
Have you ever wanted to hide a sweet surprise in a Valentine card?

Sweet Surprise Card by Allie Gower

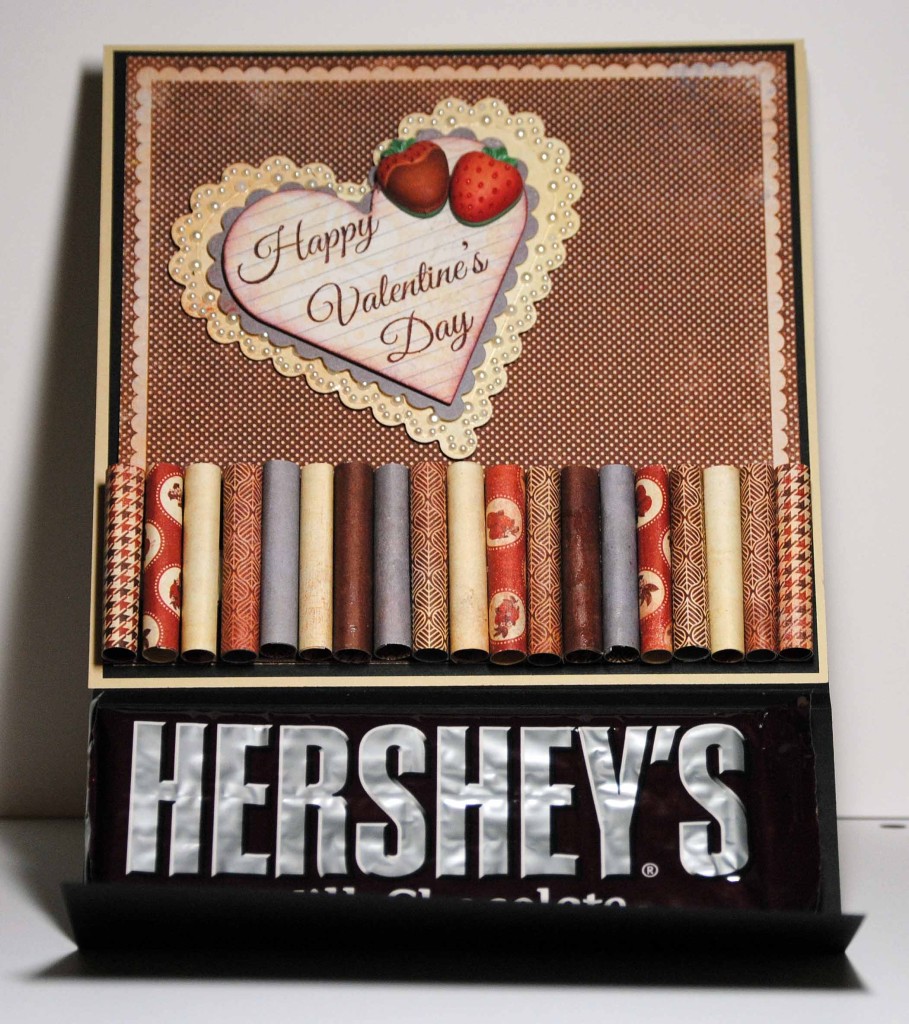
This is a standard Easel Card Valentine with a sweet surprise.

If you’ve never created an Easel Card, here is a very easy tutorial. On my Valentine, I’ve made the size a little larger – the card is 6×6.

The sweet surprise is that in the bottom half of this Valentine, I’ve wrapped a Hershey Bar.

I added a panel of black cardstock, and scored it to make a little sleeve for the candy bar. I didn’t glue it, so the card doesn’t have to be destroyed to enjoy the candy. Apparently, no one wants to rip up the card to get to the goods! Nothing stops me from getting to chocolate.

Hershey Valentine

Sometimes people ask about the buttons and other dimensional items, and if it makes the cards hard to mail, or expensive.

Once you get a certain size, you’re paying a premium anyway, so I just pop my cards in a bubble mailer or a small box, and grin and bear the cost of mailing. My only other option is to hand deliver, which I love to do! I don’t want to hold back on my creativity – so I say layer it on, and on, and on.

Buttons Galore and More Supplies Used to Create this Valentine:

Chocolate Covered Strawberries

Strawberries

Mini Glue Dots

Beacon’s 3-in-1 Glue

Additional Supplies Used to Create this Valentine:

Paper – Authentique

Stamps – Gina K Designs

Ink – Close to My Heart

Dies – Spellbinders

Bling – Want2Scrap

Thanks for checking out my Valentine.

If you have any questions, just leave me a comment below.

I’d like to send this card to someone! Leave a comment here, and PIN the photo for a chance to win.

15

Christmas Craft with Styrofoam Brand Authentique

Vintage Style  Christmas Craft Decoration with Styrofoam cubes, Authentique papers, Red and Green Button Galore Buttons.

Christmas Craft Bristle Brush Tree

Today I bring you a Christmas Craft for your home.  The Vintage Christmas Cube has an old world Christmas feel.

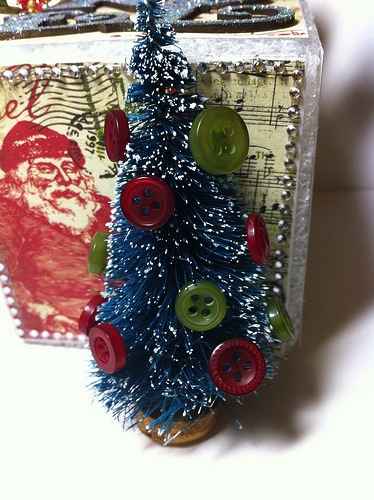
I love digging through my Buttons Galore buttons. I selected several from the Color Bulk buttons. This is a tree I purchased at a hobby shop (for train landscape). I simply adhered tiny buttons with Mini Glue Dots.

Close Up

This is the full project.

I used a styrofoam cube from the Styrofoam Corporation. It’s about 3×3. I cut some papers (Authentique) 2 3/4″ square and applied them with Buttons Galore’s Beacon 3-in-1 glue. I’ve decorated some chipboard letters (Want2Scrap) with some sharpies that I received in my DT box. I then coated those with a layer of adhesive and some glitter from Donna Salazar. I finished the project off with a little bling (also Want2Scrap) and a Christmas tree that is decorated with what else … BUTTONS, using some mini dots, also from Buttons Galore. There are also some buttons held in place with a fancy pin (Maya Road).

 Supplies for  Vintage Style Christmas Craft :

  • styrofoam cube – Styrofoam Corporation

  • buttons – Color Bulk buttons

  • paper – Authentique

  • bling, chipboard – Want2Scrap

  • adhesive – Beacon’s, Glitter It, Mini Dots – all from Buttons Galore

  • glitter – Clearsnap

  • flowers – prima

  • stick pin – Maya Road

    I hope you enjoyed this Vintage Style Christmas Craft.
2

How to make a statement by using a grouping

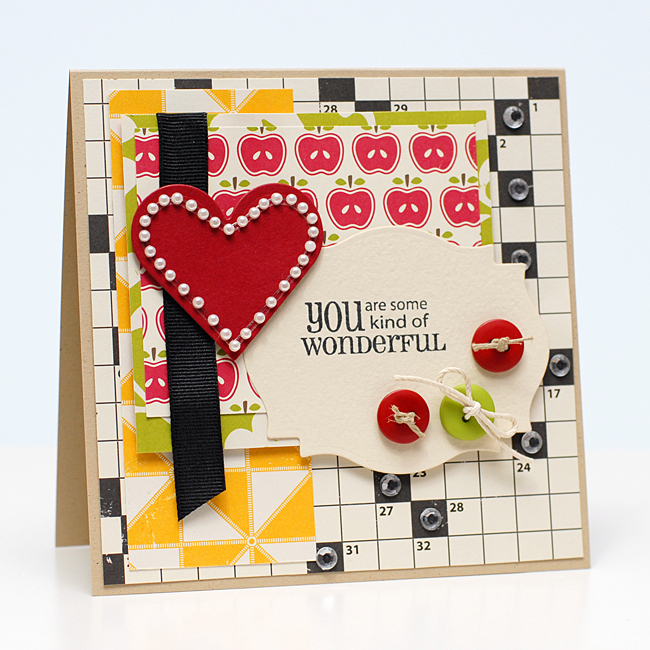
A few weeks ago I was stuck. I had to make my weekly card for Card Positioning Systems and I had everything but the finishing touch just wasn’t working. The sentiment I wanted to use was too small for the label die cut I was working with and I really wanted to use THIS SENTIMENT. You know how you can just get stuck with the image in your mind and nothing else works?? Yeah I was there…so I decided to embellish my main image…and not just with one, not two, but THREE fun buttons. Here you can see I chose some buttons from the Girly Button Pack. They were JUST THE RIGHT COLORS to go with my chosen patterned papers. So I kinda played around with the color balance and felt the two reds and one green was just what I needed. To spice things up I decided to use natural colored hemp in the red buttons, tied in a knot and snipped short. For the green button to add balance and interest I tied white twine, tied a big loopy bow and snipped the tails a bit longer. I felt it gave the card fun whimsy! If you’d like more info feel free to pop over to my blog Pink Lemonade. Enjoy!!

0

Powered by WordPress. Designed by WooThemes