Header

Tag Archives | Doodlebug Design

ScrapFest – Boy Candy Bar Congratulations

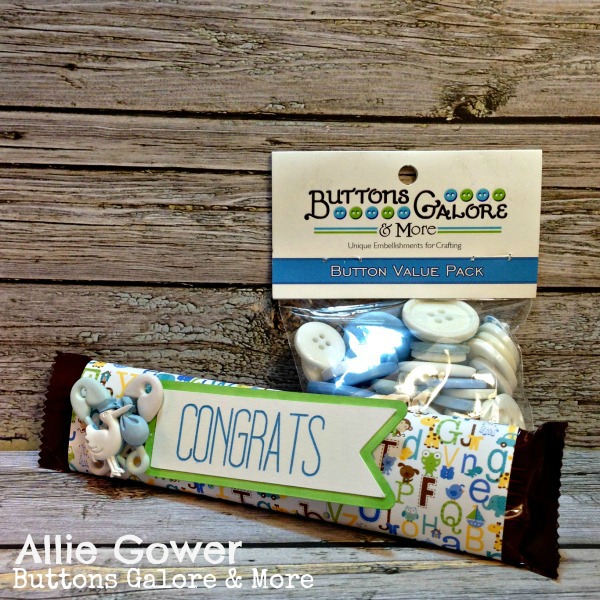
Allie Gower has created a Boy Candy Bar Congratulations using the It’s a Boy Button Assortment, an Archiver’s Exclusive.

ScrapFest – Boy Candy Bar Congratulations Sample

Buttons Galore is heading to Archivers Mall of America for ScrapFest 2013.

Join us for fun make and takes each day of ScrapFest.

Candy Bar Wrapper, Paper Crafts, Baby Boy Congratulations

Supplies for Boy Candy Bar Congratulations

  • It’s a Boy Buttons, Archivers Exclusive
  • Paper – Doodlebug Design
  • 3 Sketch Sentiments – Pens, Lori Whitlock Sketch Font and Banners
  • Copic Markers
  • Adhesive – AdTech Hot Glue and Thermoweb iCraft Tape, Dimensional Foam Tape
  • Other – candy bar (candy bar used was a Heath Bar)

Instructions

  1. Cut patterned paper to fit around candy bar. Wrap candy bar in chosen Doodlebug Design patterned paper. Adhere with iCraft Tape.
  2. Die cut pennants and assemble, placing top layer on nested pennant with dimensional foam tape.
  3. Hot glue It’s a Boy Buttons.

Project Note – 3 Sketch Sentiments was edited to read CONGRATS. Bottom pennant was hand colored to match using Copic Markers.

Please note that all of these supplies used to make the ScrapFest projects are readily available in your local Archivers, and many of them are available in the Archiver’s Annex Online. Projects will be on display in the Archiver’s at the Mall of America.

See more of Allie’s work at her blog, My Card Party.

0

Snap Happy

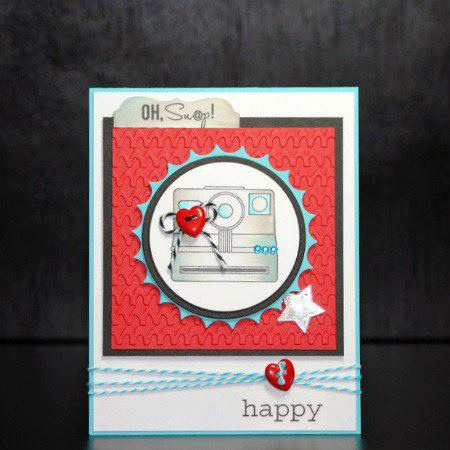
It’s Red, White & Blue season, the perfect colors for this Snap Happy Card. Will you be taking lots of pictures on the 4th?

Every week we share fresh card making ideas using buttons. This week we’re using my absolute favorite Heart Novelty Buttons. I made a card with a gift card inside that’s good for some prints at one of our local stores. What family doesn’t print a ton of pictures?

Snap Happy

Supplies for creating Snap Happy Card

Buttons – two Heart Novelty Buttons – Buttons Galore and More

Stamps  – Gina K Designs

Cardstock – DiscountCardstock.com

Embellishments – Turquoise Rhinestones – Want2Scrap; Twine – Doodlebug Design; Stickers – SRM

Tools: Dies (Inverted Scalloped Circles, Star, Circles – Spellbinders Paper Arts; Labels – My Favorite Things) ; Embossing – Sizzix

Adhesive: Hot Glue – Adtech; Dimensional Foam Tape – 3M; Scor-Tape – Scor-Pal

Other: Ink – Tsukineko; Markers – Copic; Flashing Tape – available at most Home Improvement Stores

Directions

  1. Create a Neenah Solar White cardstock base 4.25 x 11″. Score and fold in half.
  2. Cut your mats: Neenah Solar White mat 4 x 5.25″ – Black Licorice mat 3.5 x 3.5″ – Currant Red mat 3.25 x 3.25″ – Emboss Currant Red mat.
  3. Adhere mats to card with Scor-Tape.
  4. Die cut pieces: inverted circle from Lunar Blue Cardstock, a Black Licorice circle, and slightly smaller Neenah Solar White circle and label shape.
  5. Stamp and color image on Neenah Solar White circle. Stamp sentiment on label shape and attach to card.
  6. Embellish with Turquoise Rhinestones. Tie black and white twine through one Heart Novelty Button and glue to stamped image.
  7. Layer round pieces with Dimensional Foam Tape.
  8. Adhere Flashing Tape to scrap paper and die cut and emboss star. Adhere to card with Dimensional Foam Tape
  9. Wrap aqua and white twine around card and secure with second Heart Novelty Button.
  10. Add sticker sentiment to bottom of card.

Thanks for stopping by today. To see more of my art, please visit me at My Card Party. I’ll see you on Thursday with some new Button Jewelry.

Until then, keep creating!

2

Quick and Easy Place Cards Ideas

Quick and easy place cards ideas!

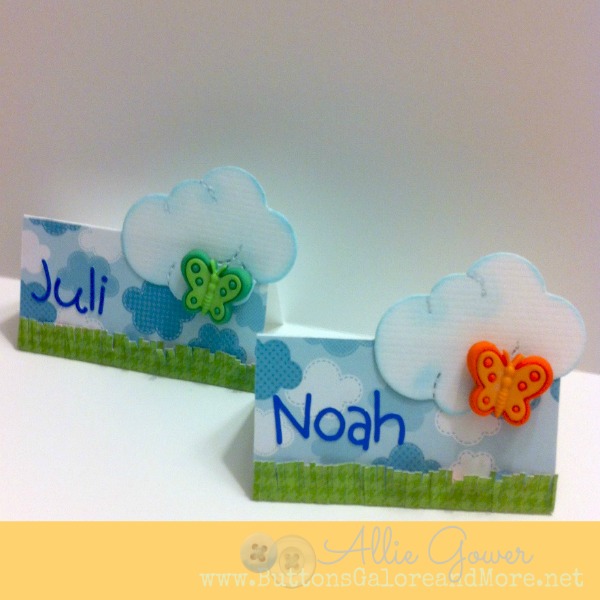
Do you need place cards for your next event? Create some with just buttons and paper. Here are some quick and easy place cards ideas.

Quick and Easy Place Cards Ideas


These are easy to create.

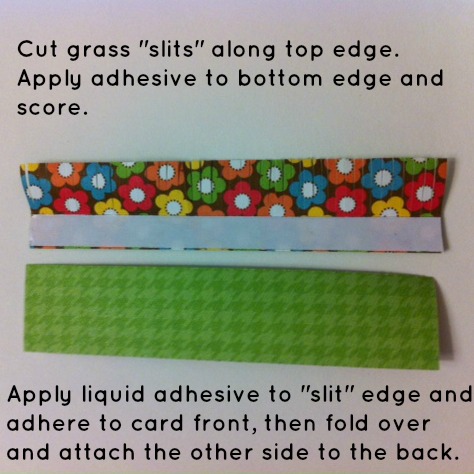
I’ve cut my cards 3X3″ and folded them in half. The image below shows how the easy grass border is made and attached. This month we’re lucky enough to be playing with Fiskars products, so of course I used my Fiskars orange handled scissors. Thanks, Fiskars!


Quick and Easy Place Cards Ideas - Making the Grass Border


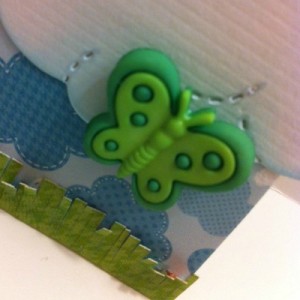
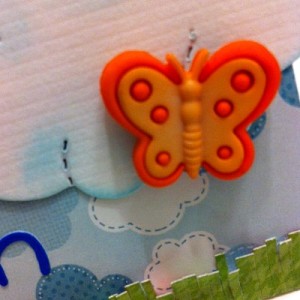
The cloud is a die cut that I inked. To finish off these quick and easy place cards, just add stickers. I love these adorable, chunky butterflies from Buttons Galore’s Butterfly Kisses Collection. I like to use Beacon’s 3-1 glue to make sure they stay put. Buttons Galore has several kinds of adhesive to offer in their Adhesives section.

Quick and Easy Place Cards Ideas Close Up Green

Quick and Easy Place Cards Ideas Close Up Orange


Supplies Used

Tools Used

  • Fiskars scissors
  • Sizzix Vagabond and cloud die

Thanks for joining me today. I hope you will find that our buttons are a great embellishment for all of your paper crafts.

1

Sunday Card Tutorial: Make a Window Card

Window Cards are cool.  Have you ever wanted to make a window card? Have you ever had to make a BUNCH and wanted them all to be the same?

Window Card by Allie Gower


Materials to make Window card:

I have a Grand Calibur from Spellbinders, but this should work in any machine. You need repositionable tape – I use Tissue Tape – as you can see! You will also need two post it notes.

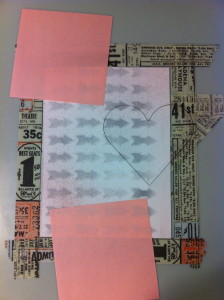
Start by making an outline of your card, so that you know where to place each card front.

Making the Perfect Cut


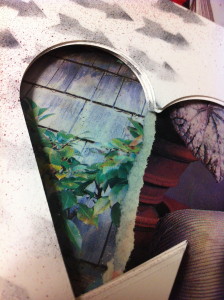
You also want to tape down the die. You will cut through the tape – no worries, just put tape all over it and really rub it down. Then, you are ready to die cut your panels. Use some post it notes to hold it in place. These will really stick after running through your machine, but won’t leave any residue.

Making the Perfect Cut


Rinse. Lather. Repeat. Just kidding. Keep going, just line up your panel  and secure with post – its. Before you know it, you’ll have a nice neat stack of card fronts.

Making the Perfect Cut


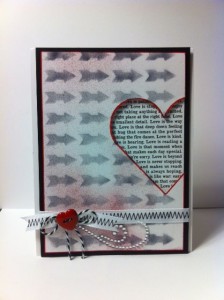
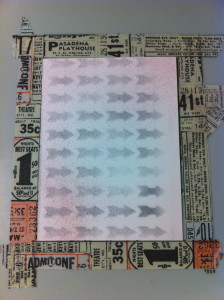
My card fronts were created with an arrow stencil. This is a new stencil that Donna Salazar designed for Want2Scrap. It worked great. I used my trust post its to hold it in place, and airbrushed some black ink. Afterwards, I sprayed on a little red ink, and outlined the card.

I finished the card off with ribbon, a Red Heart Button and some twine, and a rhinestone flourish.

Behind the opening is some cardstock. I raised up the card front with some dimensional adhesive. The card front is matted on black, and then adhered to the card base.

If you have to make several cards, or even just one – this easy technique will help you get it right – the first time, and every time.

Buttons Galore Supplies Used to Make the Window Card:


Additional Supplies Used to Make the Window Card:

  • Cardstock – My Favorite Things Replenishments
  • Patterned Paper – Canvas Corp.
  • Stencil and Flourish – Want2Scrap
  • Die – Classic Heart from Spellbinders
  • Ink and Airbrush System – Copic
  • Ribbon – American Crafts
  • Twine – Doodlebug Design

Would you like me to send this card to you? I will be sending it to one lucky winner.

Simply leave a comment and Pin this card!


Thanks for joining me, I’ll be back next Sunday with a fun Card Making Tutorial for you featuring, of course, fabulous BUTTONS!


Sunday Card Making: Make an OWL LOVE YOU Valentine Card

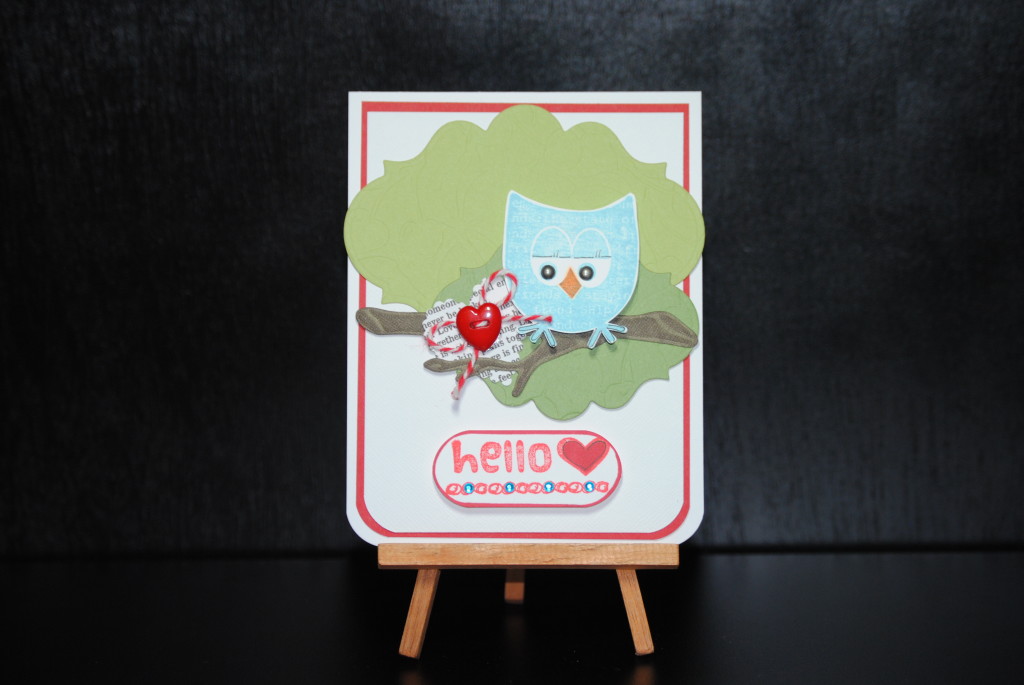
Do you like puns?  There is nothing cuter than OWL LOVE. I think this card would work well for Valentine’s Day, or any day with the simple HELLO!

This card is not difficult, but it’s got a little cutting and some die cutting and punching.

I started with Spellbinders Labels 20 and cut two green shapes and embossed them. I though these worked well for bushy foliage. I also die cut a branch from the Spellbinders BUGS set, and I also embossed it and added some ink for added contrast.

I stamped the Owl with some Crystal Blue ink from Close To My Heart – the owl is a Stamp of the Week from Unity Stamp Company. I have a love for owls, and some of my close friends call me Owlie – it’s even the name of my character on the Wii. It’s okay to laugh! I fussy cut the owl – not as hard as SOME shapes. I doodled around his feet and gave him some eyelashes with a Copic multiliner. I stencilled on his nose – I stamped a second owl and cut out the nose. I colored and outlined. An owl can be blue and sit in a tree, but a blue nose – never! I added some metal brads for his eyes.

I punched a heart using a Fiskars punch. The paper is from Canvas Corp and has all kinds of love words on it. I added a Red Heart Button. I tied a little bow with some Doodlebug Design Twine. At the bottom, I stamped “hello” from the same stamp set. I colored in the heart with a Copic Marker and added some Turquoise Rhinestones from Want2Scrap.

I did a little rounding at the bottom of the card and on the sentiment.

That’s it!

I hope you will love this card.


Hello by Allie Gower

Buttons Galore Supplies used to make the OWL LOVE YOU Card:

Additional supplies used to make the OWL LOVE YOU Card:

  • Cardstock – My Favorite Things Replenishments
  • Stamps – Unity Stamp Company (Stamp of the Week Program)
  • Dies – Spellbinders Labels 20 and Bugs
  • Punches – Scalloped Heart and Corner Punch from Fiskars
  • Twine – Doodlebug Design
  • Ink – Close To My Heart and Copic
  • Bling – Want2Scrap

Do you want this OWL to love you forever?

I will send him to a lucky winner.

Leave a comment and PIN him. I know, you were going to do that anyway. Good luck and I’ll see you all next week.

Powered by WordPress. Designed by WooThemes