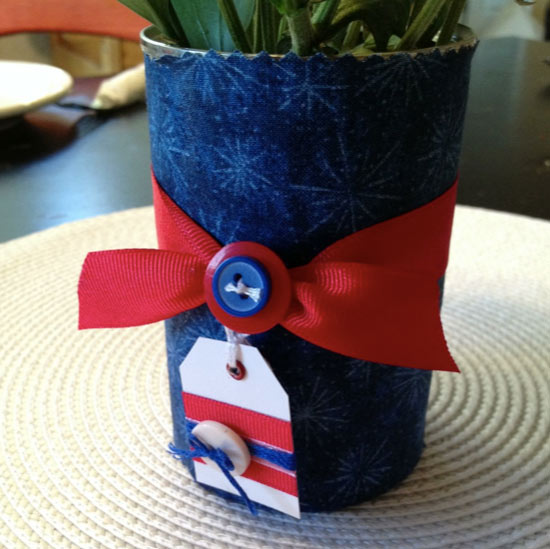
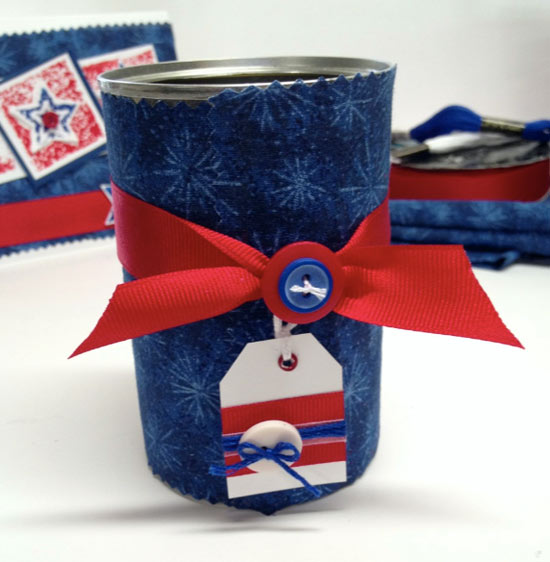
I love decorating empty cans and turning them into something fun and useful again. All those canned beans and soup can really be a DIY project waiting to happen. Add some fabric, ribbon and brightly colored buttons and you have yourself a whole slew of possibilities. For today’s project I decorated a can with patriotic colors and turned it into a pretty little flower vase, perfect for adding to the table for July 4th.
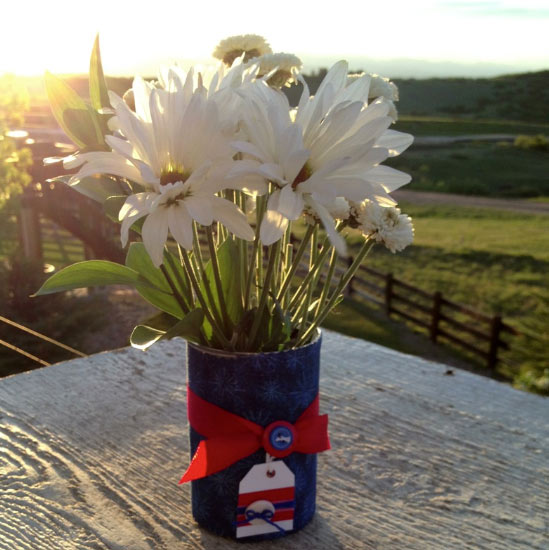
Red White and Blue flower vase
Materials:
- Empty aluminum can, washed and dried
- Blue fabric
- Red ribbon
- White card stock
- White and Blue embroidery thread
- Red, white and blue buttons
- Red eyelet and eyelet tool
- Glue
Patriotic flower vase DIY
Instructions to make your own patriotic flower vase decor
- Cut fabric and wrap around the outside of the can. Glue in place.
- Wrap ribbon around the can, tie in a knot, trim edges. Tie a red and blue ribbon together using white embroidery thread. Tie to center of ribbon covering the knot.
- Make a mini gift tag using the white card stock. Apply ribbon, wrap with blue embroidery thread and attach a white button. Add an eyelet with eyelet tool and then attach the tag to the button/ribbon on the can.
Recycled can to patriotic vase
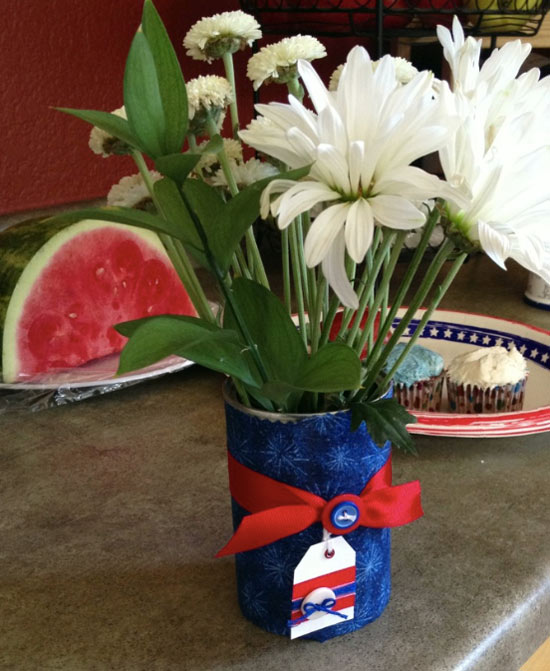
Simple patriotic flower vase
You can make a bunch of these patriotic flower vases to decorate for your July 4th festivities. I use these same kind of decorated cans as utensil holders and pencil/marker holders for parties. You can add a little sparkle by using glitter or rhinstones to the tag and ribbon wrap. You can even add buttons all around the can. Get creative and make your own fun patriotic decorations!