Header

Author Archive | Laura Evangeline

Handmade ‘i love you’ Card Idea with flowers

I can’t believe it’s August! I feel like the summer has really flown by. I haven’t had time to enjoy any summer festivities this year being in school the whole time, but it’s finally coming to an end. I can’t wait to get a few days off before the next semester starts. I don’t know about you, but I love it when all the kiddos go back to school. My tot is only two, but I do love those rare days when I get the house all to myself. I can actually make something! Today was one of those days, so let me take you through my design process…

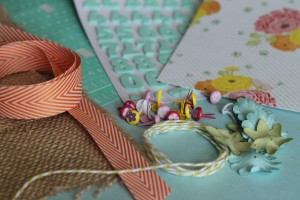
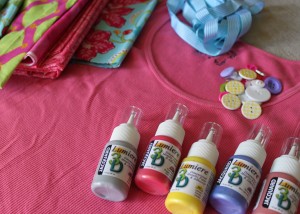
As usual, the first thing I do when I start a project is to create a palette. This is what I laid out…

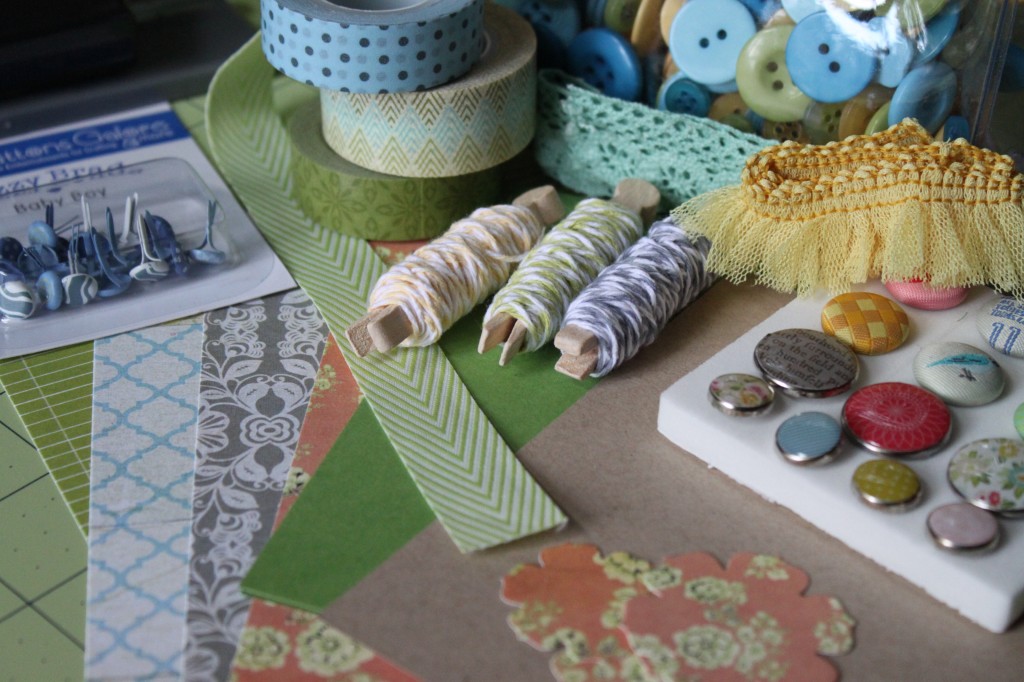
…and here’s what I ended up using on my project:

  • Studio Calico Take Note 6×6 Paper Pad
  • Jazzy Brads
  • Alphabet Stickers
  • Aqua Striped Ribbon
  • Baker’s Twine
  • Cardstock
  • Flower Stickers
  • Foam Adhesive Dots
  • Baby Powder
  • Small Brush
  • Sewing Machine & Thread
  • Westcott Paper Trimmer
  • Adhesive 

Assembly Instructions:

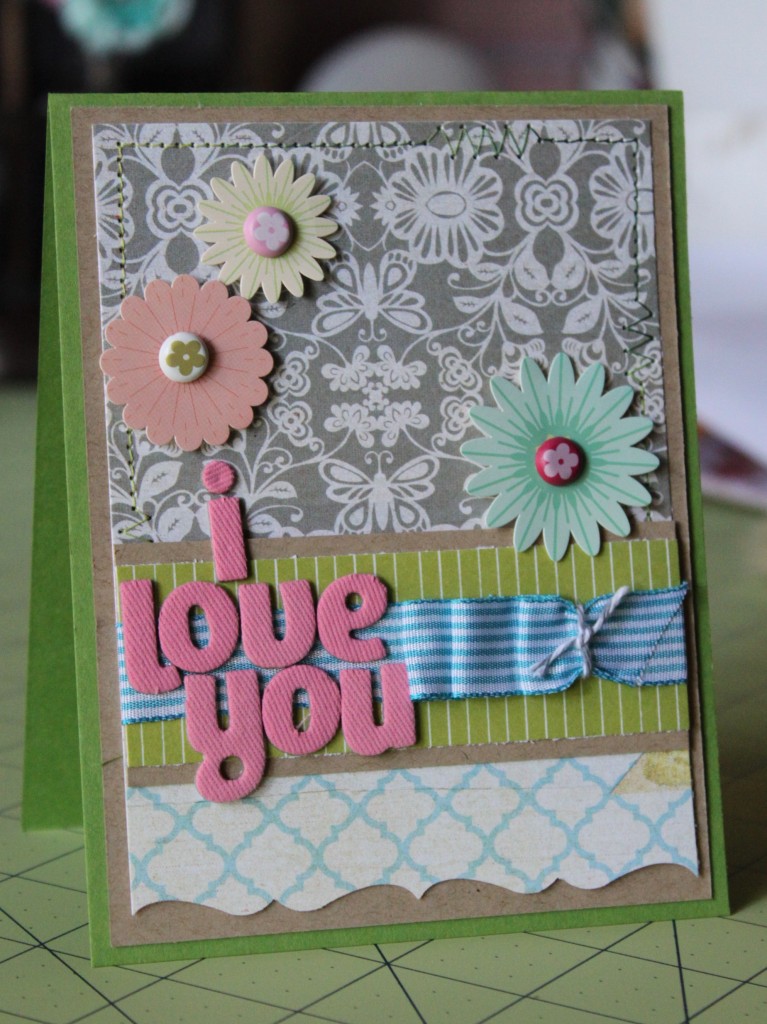
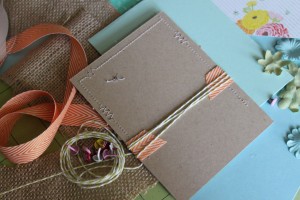
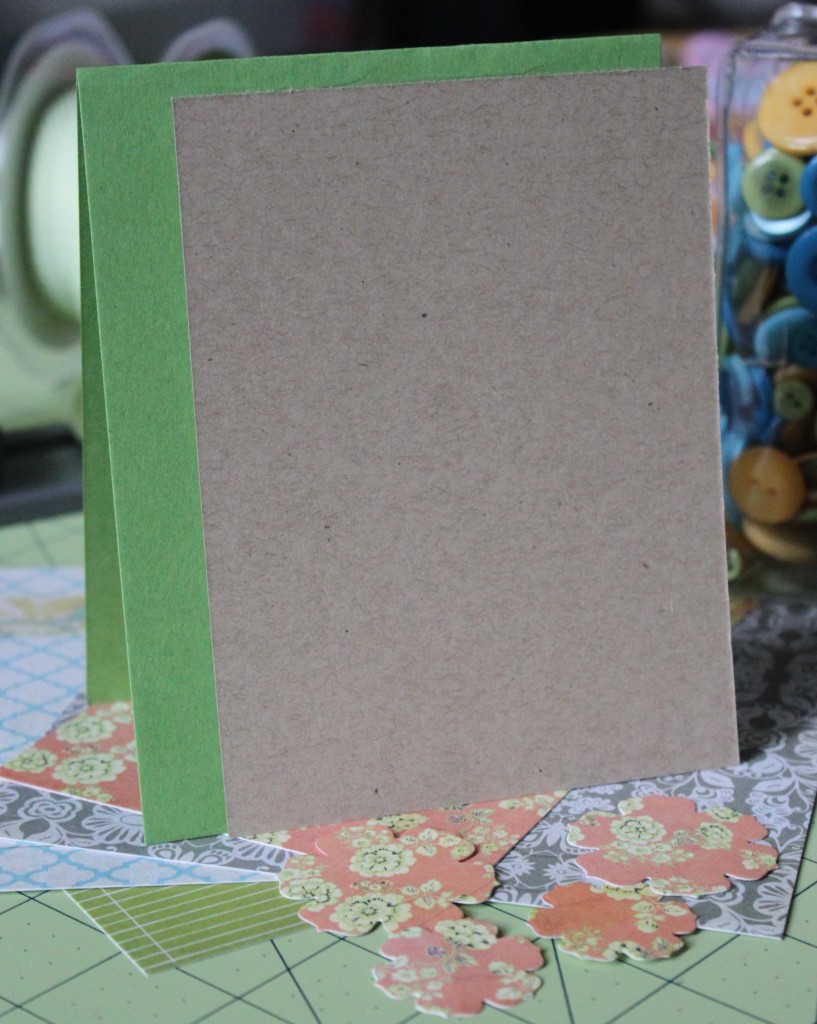
1. Trim Caterpillar green cardstock to 8.5″x4.25″ and fold in half for card base. Trim Kraft cardstock to 4″x5.25″.

2. Trim Grey floral patterned paper to 3.75″ square and scantly secure to upper portion of Kraft piece. Trim blue/white quatrefoil tp 3.75″ x 2.75″ and use border punch along the bottom edge before securing to bottom edge of Kraft cardstock. Use sewing machine for decorative edge.

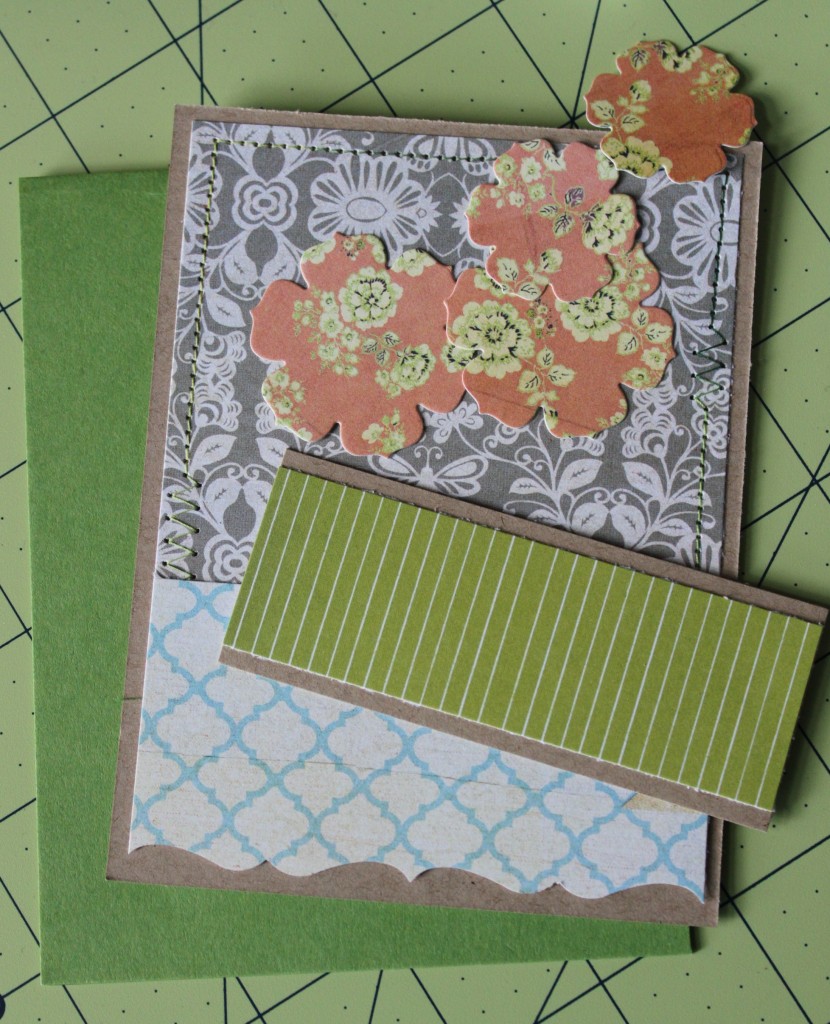
2. Next, trim a 2.25″ wide strip of Kraft and layer on top of it a 2
wide strip of green stripe paper. Wrap a strip of ribbon around this piece before securing to card front.

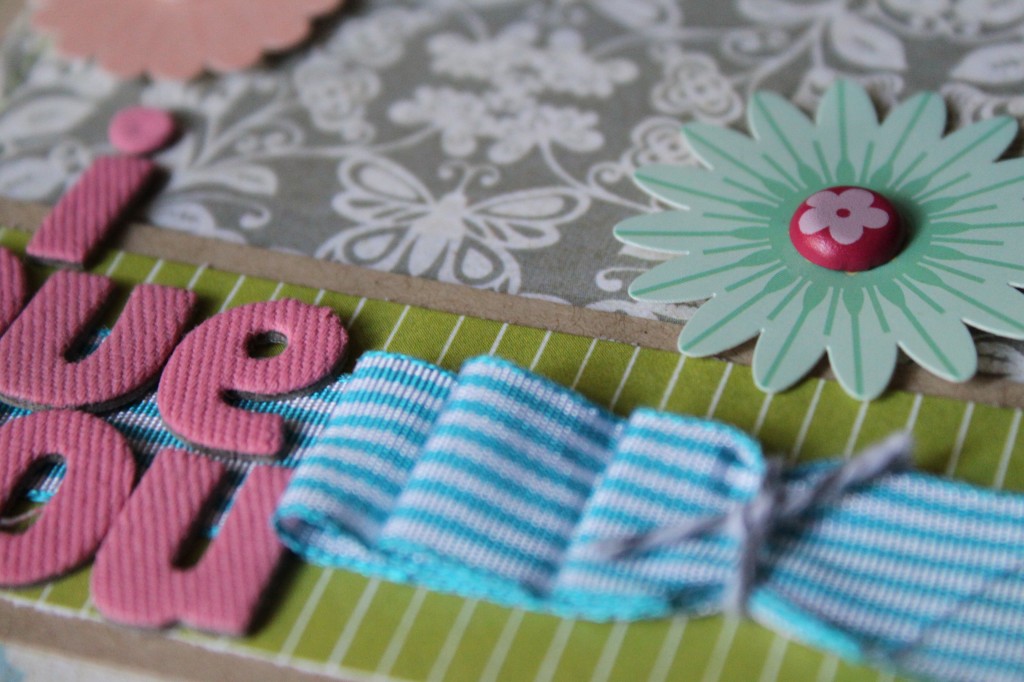
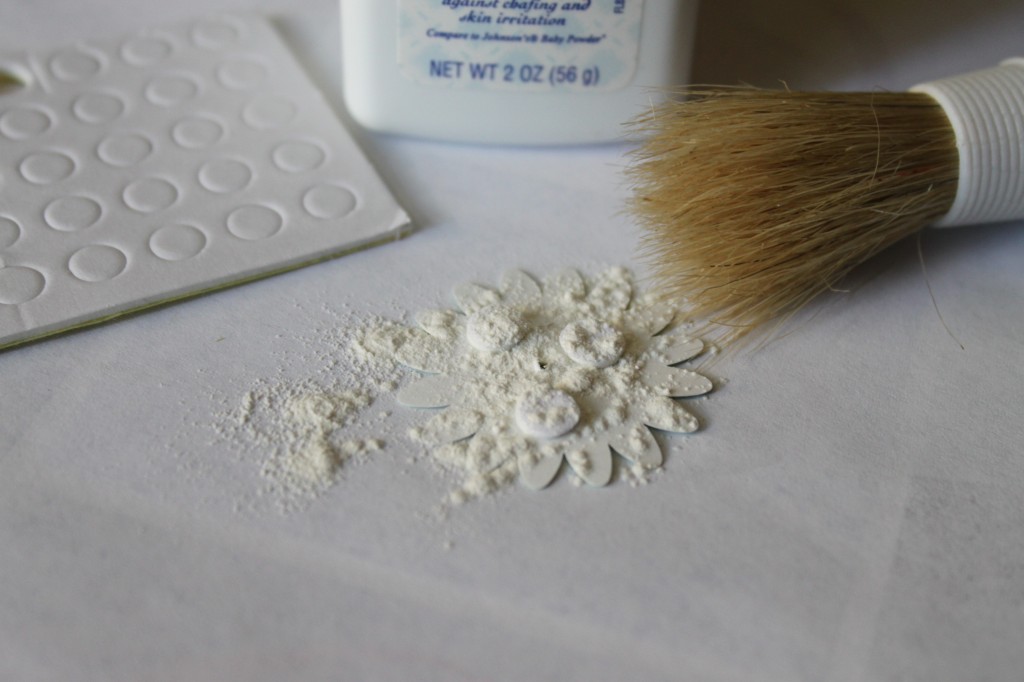
3. At this point I decided to leave out the punched flowers and go with some cardstock stickers I found in my stash. I wanted them to pop off the card, so I put foam adhesive on the back.

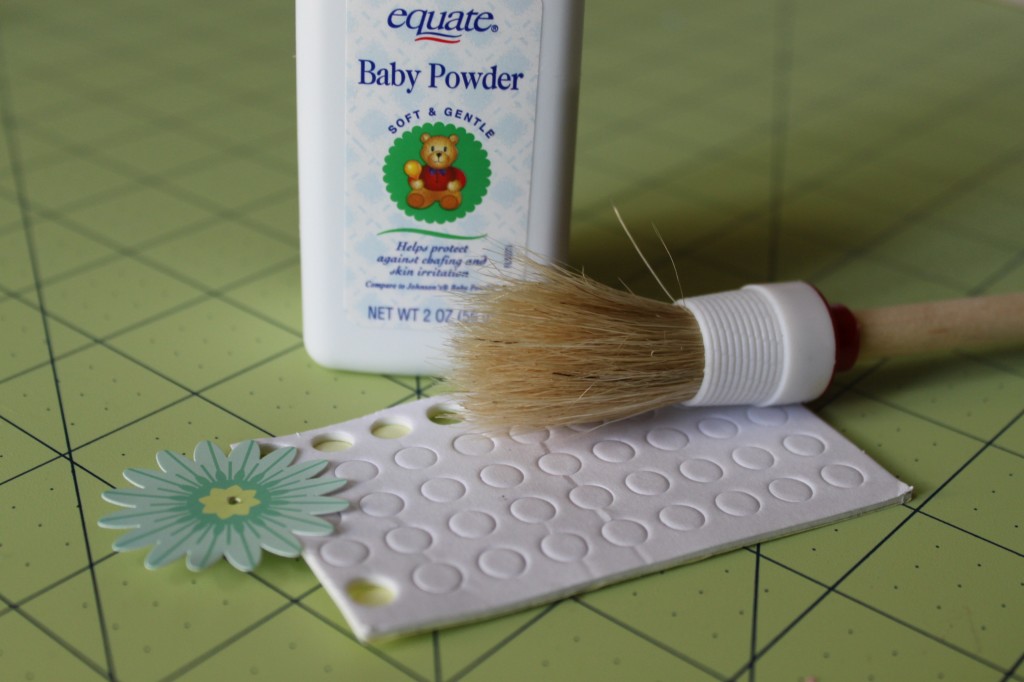
I left on the second sticker backing, so that I could then brush baby powder on the back of the sticker without getting powder on my foam dots. I still want to use that part of the adhesive to stick the flowers to my card, but I didn’t want the actual sticker to be sticky, so it wouldn’t catch stuff and end up looking weird.

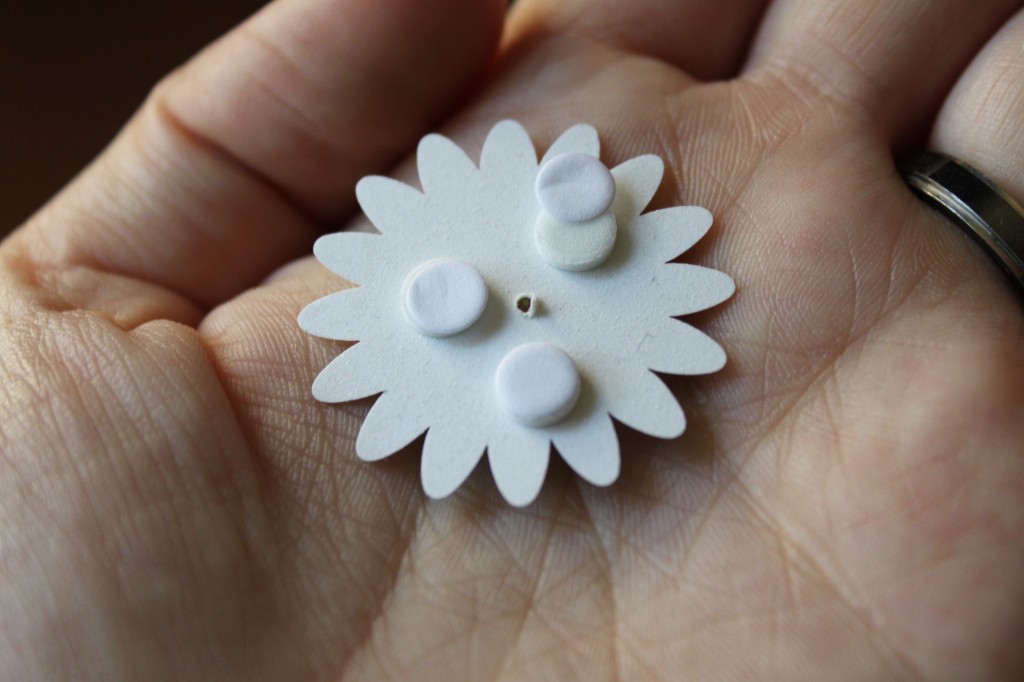
4. I poked a hole in my flowers here with a sharp point and added brads. The brads will push through most paper alright, but to keep the cardstock from buckling and wrinkling, you should always use a small hole punch, paper piercer, or even a tack or needle.

5. The final step is to assemble all of your embellishements and sentiment where you like it. I hope you enjoyed this project today.

Here’s the finished card all ready to give to your special loved one… 

1

Buttons and Burlap Love

When I initially started creating a card starting with burlap, I thought I would be creating a very masculine project, but it some morphed into a lovely fun card instead. I absolutely love the way this project turned out, so I hope you do too.


Supplies:

Burlap

Jazzy Brads

Paper Flowers

Alphabet stickers

Twine & Ribbon

Patterned Paper

Sewing Machine & Thread

Circle Punch

Cardstock

Paper Trimmer

Adhesive

Assembly Instructions:

1. Attach a piece of burlap to to the upper half of a piece of kraft cardstock cut to 4″x5.25″ and stitch around the border .25″ from the cardstock edge. Trim excess burlap with pinking shears.

2. Attach a piece of patterned paper trimmed to 4″x2.5″ to the lower half of the cardstock, and cover the seam with a strip of ribbon.

3. Layer brads, punched cardstock circles, and flowers together before adhering them through burlap & cardstock.

4. Attach letter stickers for desired sentiment and add baker’s twine.

5. Secure entire card front to an A2 (4.25″x5.5″) card stock base.

(Tip: I always create my card front entirely before attaching it to the card base in order to hide any artistic imperfections.)

Here’s the finished card all cute & ready to give to your special loved one…

0

Bib Tank Tutorial

I keep seeing adorable clothes for little girls, but never for us “big girls” like me. I want cute clothes too! So… I decided to see what I could do with my sparse sewing skills.  After rummaging through my tank top drawer and fabric scrap bin, I came up with a plan to work up a cute little bib tank.

LauraEvangeline

Supplies:

Tank Top or T-Shirt

Fabric Scraps

Aqua Striped Ribbon

Plaid Round Buttons

Scrap Paper

Fabric Marker

Scissors

Sewing Machine/Kit

Iron

Fusible Web/Stabilizer

Lumiere 3D

MicroBeads

LauraEvangeline

1. Take a scrap piece of paper and draw out a template that suits you and trim it out. This is your pattern. I sketched my design, folded it in half, and then cut it out to ensure it was symmetrical.

2. Once you’ve come up with a pattern that you like, cut out your pattern in a fun fabric. The fabric I chose was an old drawstring bag used to keep shoes nice when traveling.

3. To make the center strip, measure the top of your pattern to the bottom and add an extra inch to fold over later. You can create the strip as wide as you’d like, but I made mine 1.5″ wide keeping in mind that I’d be folding over 1/4″ on each long side to hide my raw edges.

4. For the outside ruffle, measure around the bib of your pattern and double it. This is about how much fabric or ribbon you’ll end up using once you ruffle or pleat it. You can also purchase a trim that is already ruffled if you like. If you’re using ribbon, you may want to consider the materials to ensure it can be washed (won’t bleed or melt). All of your cut pieces should end up looking like this:

5. To ensure that my center piece would be mid-line, I took a washable fabric marker and drew a line to mark the center of my bib.

6. You’ll then want to fold and iron the top edge of your bib down about 1/4″. I snipped the fabric in a bit about every 1/2″ so there would be less bulk and puckering. Fold and press over 1/4″ on each long side of your center strip fabric and apply a strip of fusible web 1/2″ narrower than the width of your fabric strip to the back before ironing to the bib. You’re then ready to sew the strip to your bib and attach the buttons. It should look something like this…

7. Sew the ribbon on top of the bib around the bottom 1/4″ from the edge. (If the material you choose to make a ruffle or pleat is single sided, you’ll want to ensure that is facing down for this portion.)

8. Carefully iron your ruffle/pleat out flat, add fusible webbing to the back, and iron on to your tank top.

9. Sew the bib to the tank top ensuring you don’t sew all the way through to the back (like I did). Now for bling… Use the Lumiere 3D to embellish the existing pattern on your chosen fabric and sprinkle on microbeads. I pressed the beads in lightly with the back of the measuring spoon once a hefty amount was sprinkled over each dot. Once the Lumiere dries for 72 hours it’s completely washable.

10.  And… that’s it! Wear it, enjoy it, and maybe even make a few more!

LauraEvangeline

I hope you’re feeling inspired, and have a crafty kinda day!

0

Powered by WordPress. Designed by WooThemes