
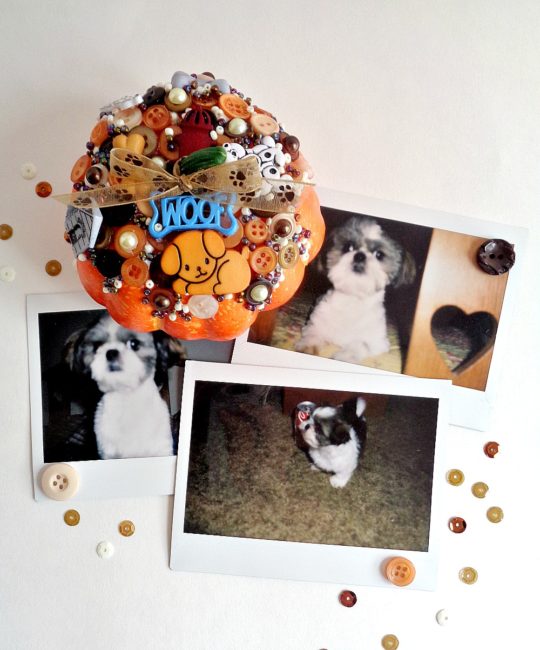
Hello Everyone! This is Katie from the Buttons Galore & More Design Team and today I have a cute pumpkin decorating project that involves your furry four-legged friend!
The project I will be showing you how to make today is a Decorative Pet Pumpkin. This Pet Inspired Pumpkin is a cute way to represent your pet during the fall pumpkin decorating season. The nice thing about this pumpkin decorating idea is that it only involves a few supplies and can be completed in just 3 easy steps. Also, if you create this idea on a fake pumpkin, you will now have pumpkin decor that you can use year after year!
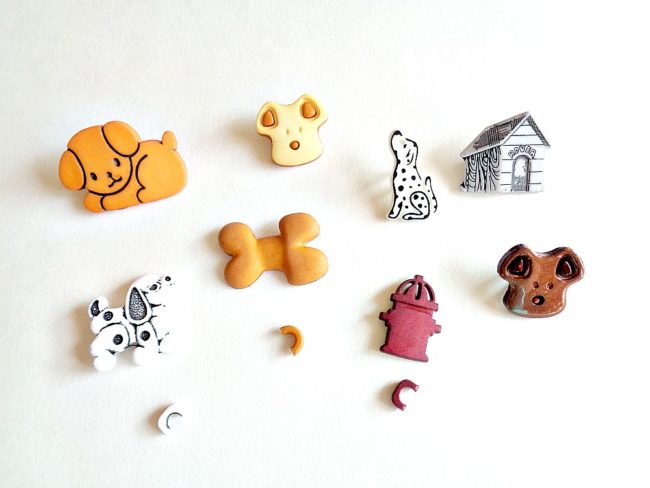
To create my Decorative Pet Pumpkin, I used the 28 Lilac Lane ”Paws and Pets” Embellishment Kit and Buttons Galore & More ‘’Dogs Value Pack’’. The 28 Lilac Lane ‘’Paws and Pets’’ Embellishment Kit contains a variety of items, like buttons, seed beads, etc., which coordinate together and match in color. I used most of the items in the kit to decorate my Pet Inspired Pumpkin. However, to add more decoration to my pumpkin and to have it represent my dog, I used the Buttons Galore & More ‘’Dog Value Pack’’. Now, with that being said, if you have a cat and are wanting to make this project, then I would check out Buttons Galore & More ‘’Cat Value Pack’’.
So, to find out how to make your own Decorative Pet Inspired Pumpkin, keep reading below!
Supplies
- 28 Lilac Lane ”Paws and Pets” Embellishment Kit
- Buttons Galore & More ”Dogs Value Pack” 3D buttons
- pumpkin (real or fake)
- Mod Podge Glossy Decoupage Glue
- foam paint brush
- scissors
- hot glue gun + glue sticks
Step 1: Grab the shank buttons from your Buttons Galore & More ”Dogs Value Pack” and cut off the shank part using scissors.
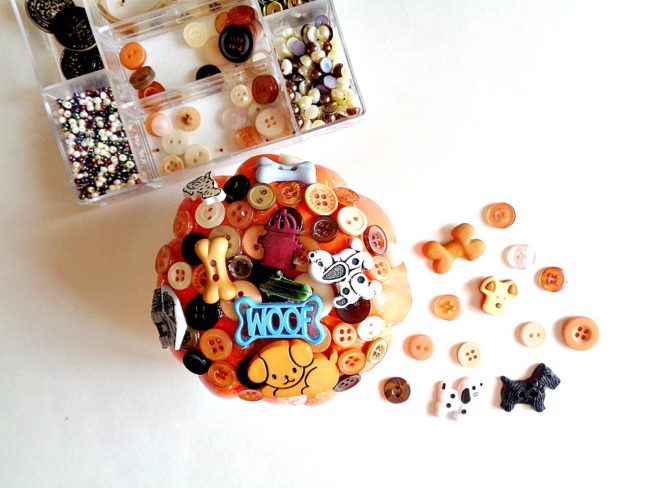
Step 2: Gather up all your dog buttons and your 28 Lilac Lane ‘’Paws and Pets’’ Embellishment Kit. Then, using your hot glue gun, glue down regular buttons onto the top of your pumpkin. Once you are happy with how your regular buttons look, begin gluing down your dog buttons and shimmering half pearl flat backs.
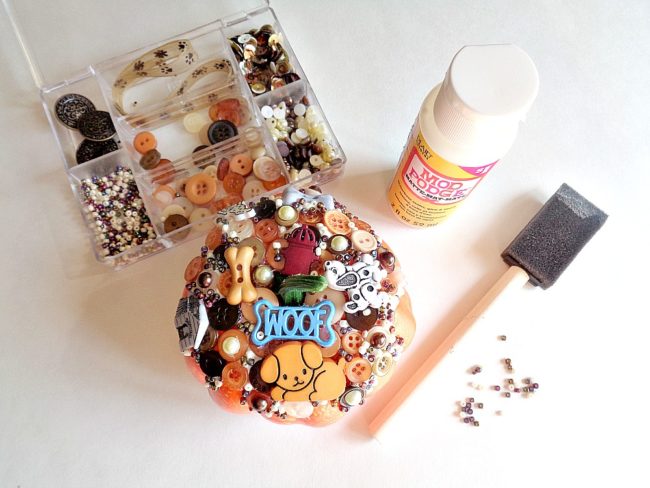
Step 3: To fill in the small spaces on the top of your pumpkin, grab your Mod Podge and place glue in those small spaces. Then sprinkle on some seed beads, from your 28 Lilac Lane ‘’Paws and Pets’’ Embellishment Kit, onto the top of the glue.
Keep repeating this process until you are happy with how your pumpkin looks.
Finally, set the only thing aside to dry.
Once your pumpkin has completely dried, you are now ready to display it!
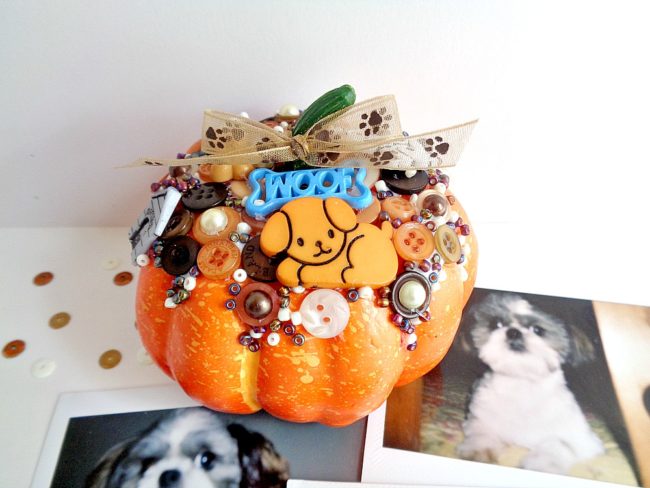
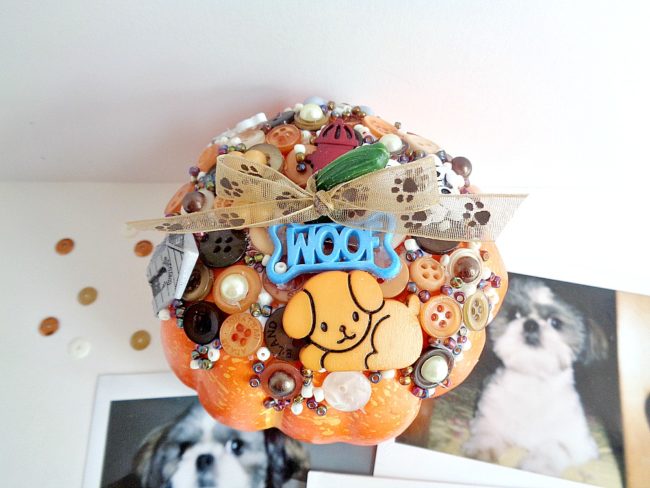
I love how this Decorative Pet Pumpkin turned out! I think this would be so cute to display next to a photo of your pet or where you keep your pet’s personal items (like their leash).
Before I end this post, I wanted to say that this Pet Inspired Pumpkin is just for decorating! This is not an item that your pet should be playing with or have near their food bowl. When displaying your Pet Inspired Pumpkin, my suggestion would be to display it on a mantel, bookshelf, or counter, so your pet can not get to it.
If you made this Decorative Pet Inspired Pumpkin, what Buttons Galore & More Value Pack (dog or cat) would you use?
Latest posts by Katie King (see all)
- How to Make DIY Confetti Poppers for New Year’s Eve - November 26, 2017
- Gift a DIY Friendship Sign to Someone Special This Holiday! - November 10, 2017
- Easy Thanksgiving Day Candle Holder Table Decor - October 27, 2017
Wow !! That’s the greatest pumpkin ever !!