
Hello Everyone! This is Katie from the Buttons Galore & More Design Team, and today I will be showing you how to make a fun handmade gift that can be given during the holiday season!
As a gift-giver, I have always loved making handmade signs for my friends and family. This is because handmade signs are super easy to make and are so fun to personalize. Also, from a gift-giving perspective, handmade signs can be very inexpensive to make if you are on a tight budget. With all that in mind and with the holidays fast approaching, today I am going to show you how to make a DIY Friendship Sign.
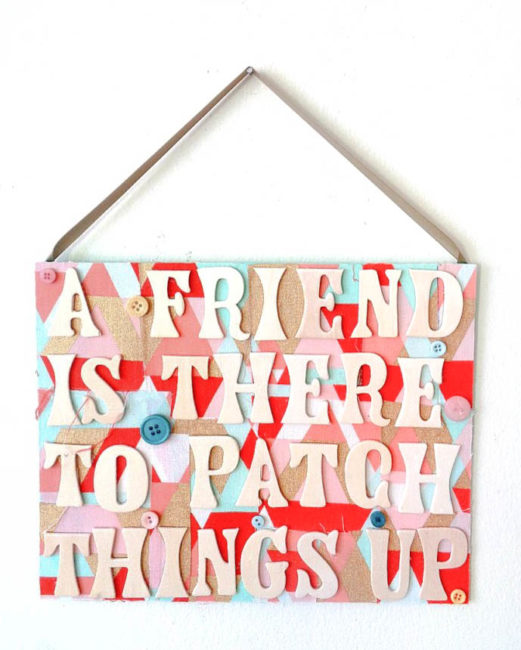
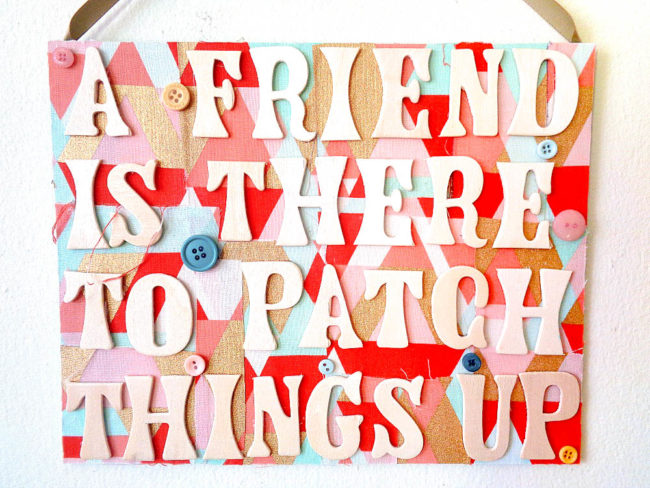
The DIY Friendship Sign that I am making today is made from a wooden plaque, wooden letters, some scraps pieces of fabric, and Buttons Galore & More Button Basics ‘’Bohemian Style’’ buttons. The look I was trying to achieve was something bright and cheerful. Also, I wanted the buttons to be ‘’holding’’ the patches of fabric together since my phrase was ’’A Friend Is There to Patch Things Up’’. Now, if a bright and bohemian style is not your thing, Buttons Galore & More has a variety of Button Basics which are perfect for projects like this handmade sign.
So, to find out how to make your own DIY Friendship Sign, keep reading below!
Supplies to Make DIY Friendship Sign:
- Buttons Galore & More ‘’Bohemian Style’’ Button Basics
- wooden plaque
- wooden letters
- fabric
- acryclic paint
- foam brush
- ribbon
- scissors
- craft glue
- hot glue gun + glue sticks
Instructions to Make DIY Friendship Sign:
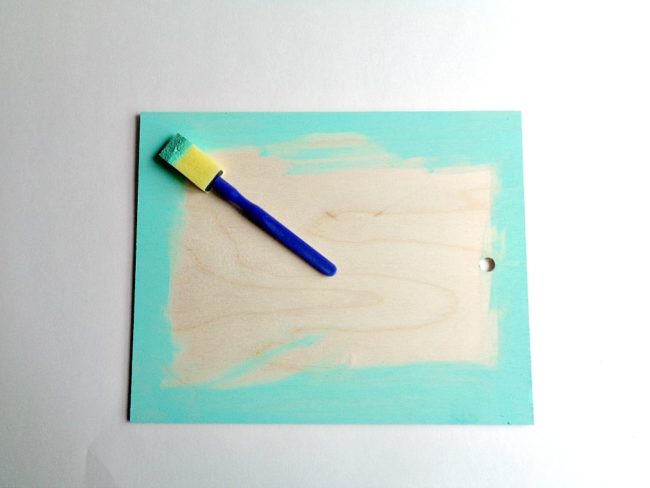
Step 1: Paint your wooden plaque around the edges and on the back. Then set the whole thing aside to dry.
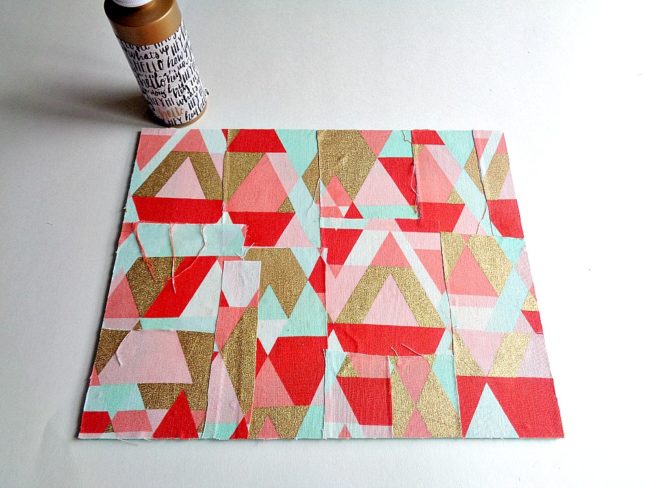
Step 2: Grab your fabric and start cutting out random squares. These squares should be random in size and not look perfect. Once you have your squares begin gluing them down (using your craft glue) to your wooden plaque.
Keep repeating this step until your wooden plaque is completely covered.
When your wood plaque has been covered set it aside to dry. Also, once the fabric has dried, cut off any extra fabric that is around the edges.
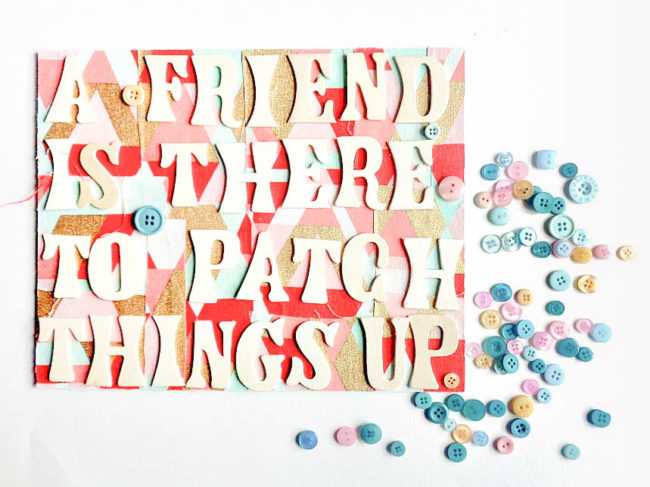
Step 3: Now gather up your wooden letters and begin spelling out the phrase ‘’A Friend Is There to Patch Things Up’’. Then grab your Buttons Galore and More Button Basics ‘’Bohemian Style’’ buttons and begin placing them where the fabric squares meet on the wooden plaque. Once you are happy with how everything looks, glue each piece down using your hot glue gun.
Finally, cut a piece of ribbon that matches your fabric and hot glue it to the back of your wooden plaque.
When all your pieces and ribbon have been glued down, you are ready to give your Friendship Sign as a gift!
I love how this handmade sign turned out! I think this sign would be so cute if you had a friend who was a crafter or a quilter.
One thing I wanted to mention about this project, is that you can change the word ‘’friend’’ (in the phrase that I used) to another word. For example, you could plug in the word ‘’Mom’’, ‘’Dad’’, or ‘’Aunt’’ into the phrase. The only thing to be mindful of is having enough wooden letters to spell out the entire phrase or any phrase that you decide to use.
Latest posts by Katie King (see all)
- How to Make DIY Confetti Poppers for New Year’s Eve - November 26, 2017
- Gift a DIY Friendship Sign to Someone Special This Holiday! - November 10, 2017
- Easy Thanksgiving Day Candle Holder Table Decor - October 27, 2017
No comments yet.