Header

Author Archive | Guest Author

Video | DIY Rose Christmas Ornament with 28 Lilac Lane

Pink is hot, hot, hot for Christmas this year! Today we’re sharing a beautiful rose Christmas ornament by 28 Lilac Lane designer May Flaum that will add a brilliant touch of pink and gold to your Christmas tree.

DIY Rose Christmas Ornament by May Flaum using 28 Lilac Lane shaker mixes.

May’s rose Christmas ornament is created with one of her six brand new 28 Lilac Lane shaker mixes that have just been released. This pink and gold shaker mix is called – you guessed it! – Rose Garden. This gorgeous mix will take you from a retro pastel Christmas, into Valentine’s Day, or use it to create beautiful girly embellishments year-round!

And now, May herself will show you how it is done!

horizontal-line

DIY Rose Christmas Ornament by May Flaum:

With the holidays fast approaching I am always looking for hand crafted gift ideas and special homemade touches. These new shaker mixes are great for so many projects including homemade ornaments. In this video tutorial I will walk you through creating a lovely rose garden ornament perfect for my aunt who loves pink & gold at the holidays.

Here’s a closer look at my finished DIY rose Christmas ornament project!

DIY Rose Christmas Ornament by May Flaum using 28 Lilac Lane - make Christmas pink!

horizontal-line

Don’t miss the chance on our Black Friday Sale to get May’s 28 Lilac Lane embellishment bottles for 15% off! Use code EMB15 through Friday, November 25th to save on all your favorite bottles from the collection. Don’t miss out on the new ones like Savannah Stroll, Winter Wonderland, and Coral Reef!

0

Make an Adorable Layout with Guest Laura Vegas!

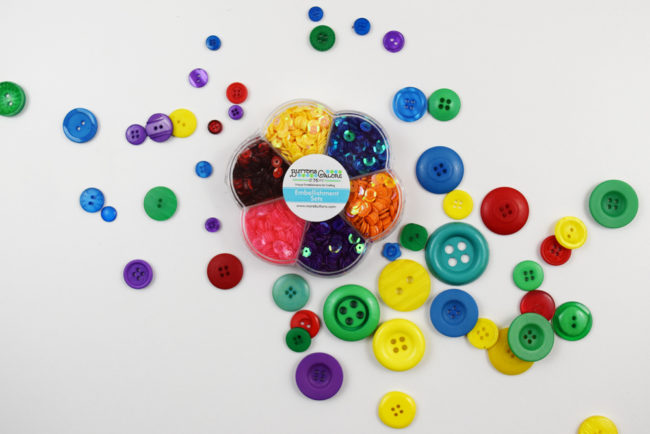
Today Buttons Galore is excited to welcome guest blogger Laura Vegas, who is sharing with us an adorable layout and also a card. These fun projects are made with our 
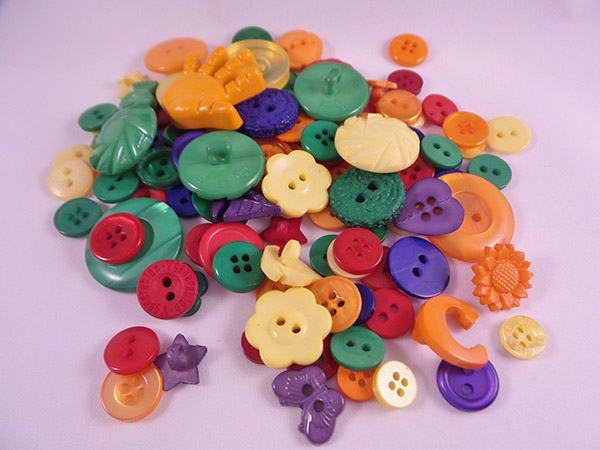
Button Basics in Sky Blue, Candy Apple Green, Cotton Candy, and Lemon Yellow.
lauravegas_bg_sheisadorable
Hey everyone, it’s Laura Vegas here. I’m so excited to be here guesting on the Buttons Galore blog, and have created two projects to share with you all today. Buttons are one of my absolute favorite embellishments! I have a massive button collection, and yet I can never pass up adding more colorful buttons to my stash. They just speak to me!
lauravegas_bg_sheisadorable_detail1
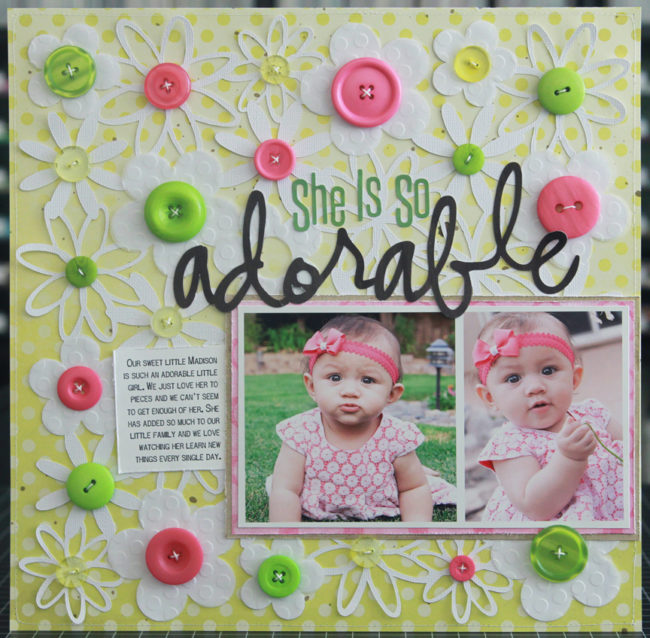
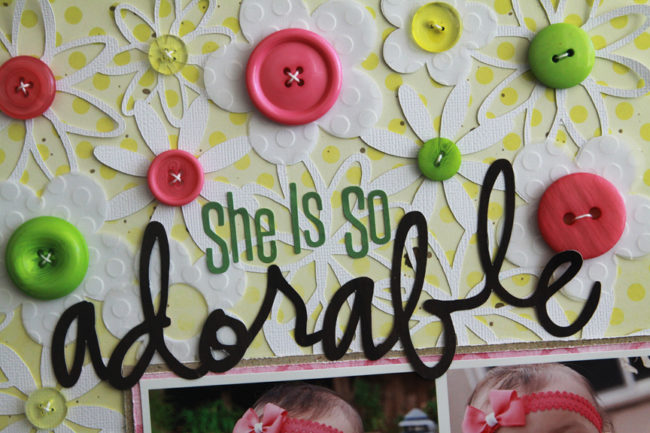
One of my favorite ways to incorporate buttons onto my projects is to add them to the centers of shapes. I tend to use a lot of flowers, circles, and stars on my layouts, and buttons are the perfect addition to any of those shapes. For this layout, I started by die cutting a floral background piece from white cardstock, using my Silhouette Cameo die cut machine. I love that it had lots and lots of flowers to embellish with my buttons!
lauravegas_bg_sheisadorable_detail2
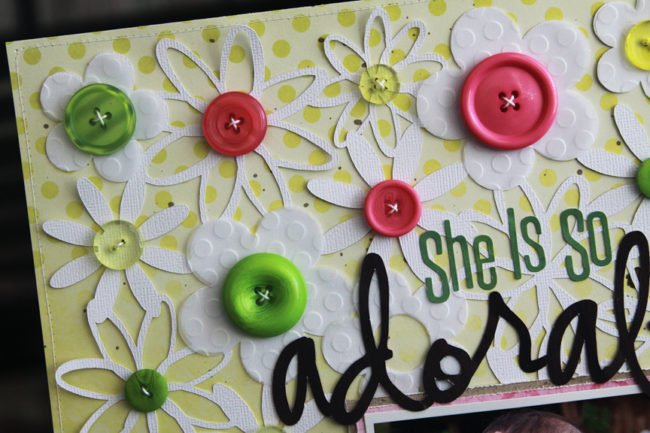
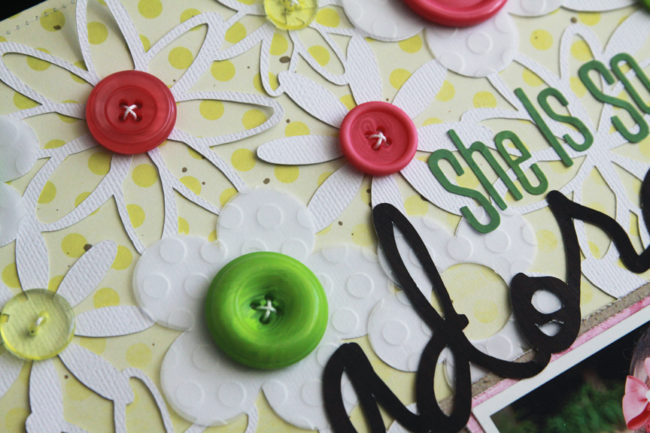
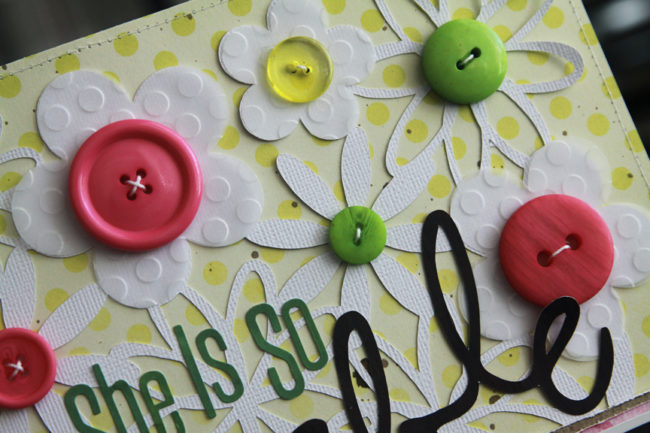
I wanted to add some subtle interest to some of the flowers on the background piece, and vellum came to mind. I was able to find an individual flower cut file that matched one of the flowers on the background piece. I sized the flower numerous times to match up with the flowers on the background piece, and then cut them all from a sheet of vellum. To add some texture, I ran each vellum flower thru a dotted embossing folder before layering them over the background flowers.
lauravegas_bg_sheisadorable_detail3
Personally, I always thread my buttons when using them on layouts and cards. I don’t like to have any “naked” buttons on my projects ;) My go-to way to adhere my buttons, is to thread my string through the button holes, and then laying the string ends flat against the button, I add a glue dot (or sometimes two if it’s a larger button) right over the string. This holds the ends in place, and I can them simply adhere my button to where it needs to go.
lauravegas_bg_sheisadorable_detail4
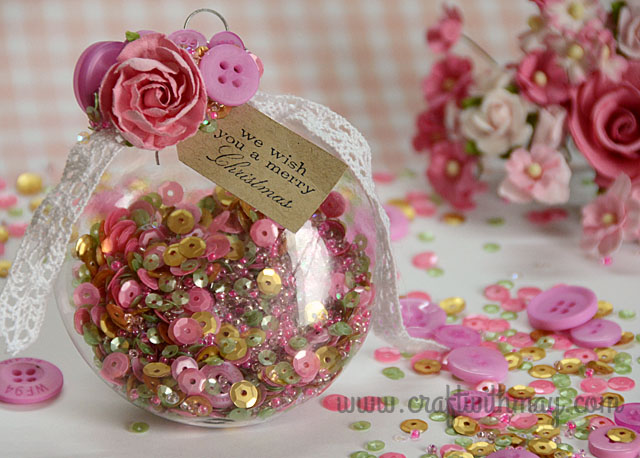
The exception to this rule, is when I’m working with clear buttons. I don’t want those strings and glue dot to show through the clear button. So for those buttons, I will take the extra time to use a needle and stitch my button directly onto the page.
lauravegas_bg_sheisadorable_detail5
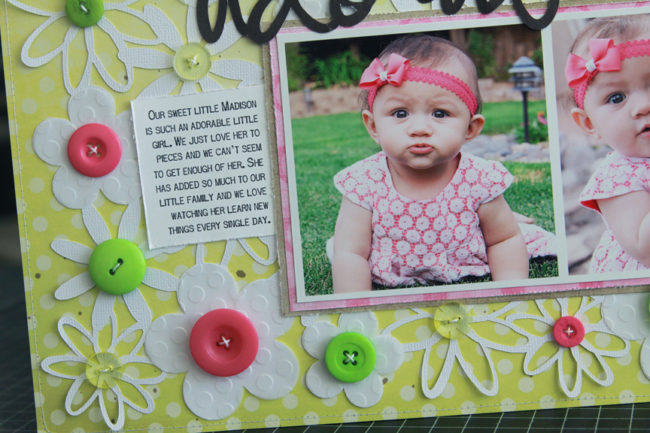
I tend to be a more simpler scrapper, in that I keep my embellishments more on the simpler side. So I am always turning to buttons, as well as basics like brads and enamels. Oftentimes, they are all I need to finish off a project mostly made up of photos, cardstock, and patterned paper.
lauravegas_bg_itsyourbirthdaycard
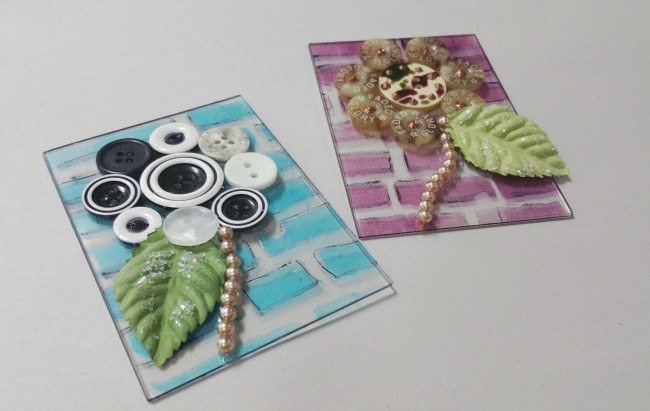
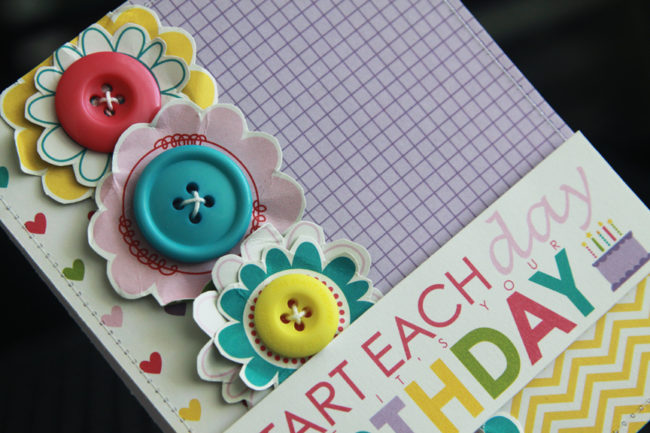
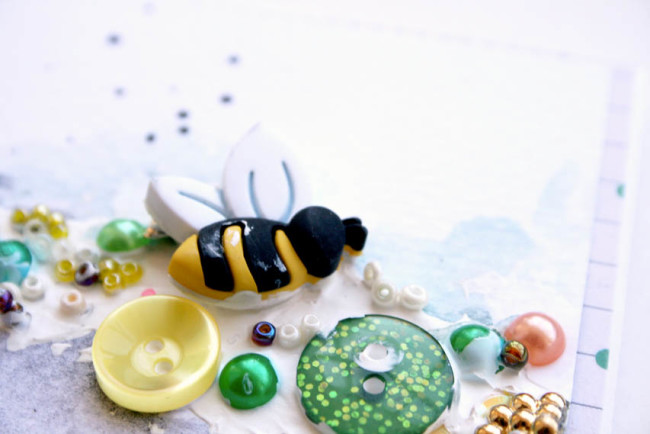
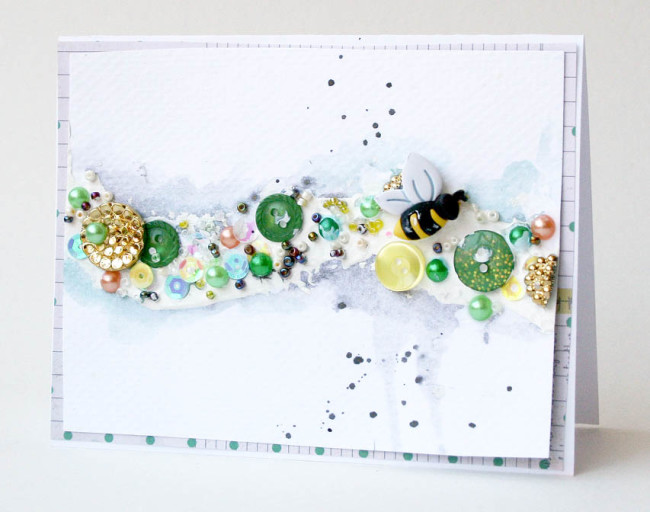
I wanted to whip up a quick card to share with you as well, using the same idea of adding buttons to the center of flowers. This time I fussy cut some flowers from a sheet of patterned paper to create this easy birthday card.
lauravegas_bg_itsyourbirthdaycard2
A fun, and super simple, way to add texture to paper flowers (whether die cuts or fussy cut from patterned paper), is to crumble them up really good. You can even lightly mist the paper with water to make it easier to work with. Then you simply un-crumble your flower, flattening it out as much or as little as you like. Add a threaded button to the center of each flower, and you’ve got the most adorable little flowers to add to your projects!
I’ve had so much fun creating these projects, and I hope you enjoyed them too! Thanks Buttons Galore for the opportunity to guest design for you and create with your colorful buttons!
laura vegas headshot
Learn more about today’s guest blogger, Laura Vegas: Hi there! I’m Laura Vegas, from Northern California, where I live with my husband Joe, and my two daughters, Alyssa (20) and Sarah (17). I have been scrapbooking for well over 22 years now. I scrapbook mostly about my girls and our family, but like to mix it up now and then by scrapping photos and stories about my daycare kids and family friends as well. I have been fortunate enough to design for some amazing manufacturers in the industry over the last 11 years, and have also had my work published in a variety of publications for the last 10 years. I was honored to be a member of the 2010, 2011 and 2012 Creating Keepsakes Dream Team and the 2013, 2014 and 2015 Scrapbook & Cards Today design team. I just recently left my position as Creative Team Coordinator for Bella Blvd after 5 years, and am currently designing for Kerri Bradford Studio.
0

Create an Easy & Fun Button Title with Becki Adams!

Buttons Galore is delighted today to welcome blogger and designer Becki Adams to share her tutorial for a button title using some of her favorite Buttons Galore products! Becki’s impressive resume of design teams includes work with Carta Bella Paper, American Crafts, Bella Blvd, Elle’s Studio, Imaginisce, Pebbles, and many others. To learn more about her, visit her blog.
becki-adams-profile
Hey Buttons Galore friends and fans, I’m Becki. I’m thrilled to be here on the Buttons Galore blog today. I’ve been a crafter for years. And through those years many supplies have come and gone. Buttons, however, have always remained a staple in my stash. I always keep buttons! I am a scrapbooker/memory keeper. I chose to use lots of these buttons and sequins to create a scrapbook layout with a button title.

becki-adams_read-to-me_5

 When I sat down to create with such an awesome array of primary colored buttons and sequins, I wanted them to make a big impact on my layout. I chose to make a button title “read to me” with a huge emphasis on the word “read”.
becki-adams_read-to-me_4
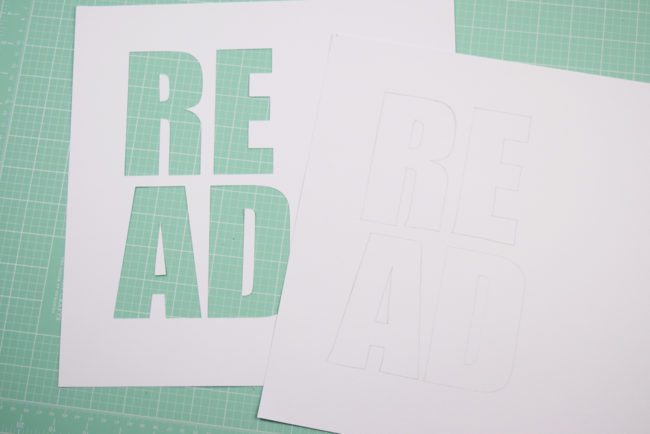
I started by cutting my title with an electronic die cut machine. I cut the “read” portion of the title out of white cardstock with large block letters. Using a pencil, I traced the cut portion of the title onto another piece of white cardstock. I used this as a template for adhering the buttons and sequins.

Becki Adams button title

For this portion of the project, I turned on Netflix and started gluing buttons and sequins in place. I started adhering the larger buttons first and then filling in the gaps with smaller buttons and sequins. I would recommend using a strong adhesive for this technique as the cardstock can buckle under the weight of the buttons.

Becki Adams button title

When I had all the buttons and sequins adhered to the background cardstock I used foam pop dots to adhere the die cut “read” on top of the button/sequin layer to create this awesome button title.
becki adams button title
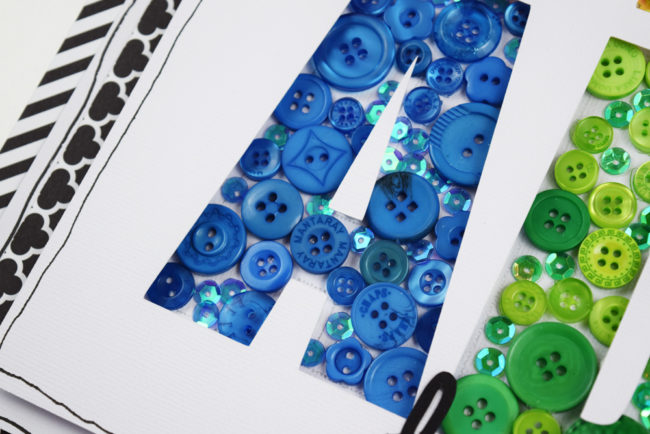
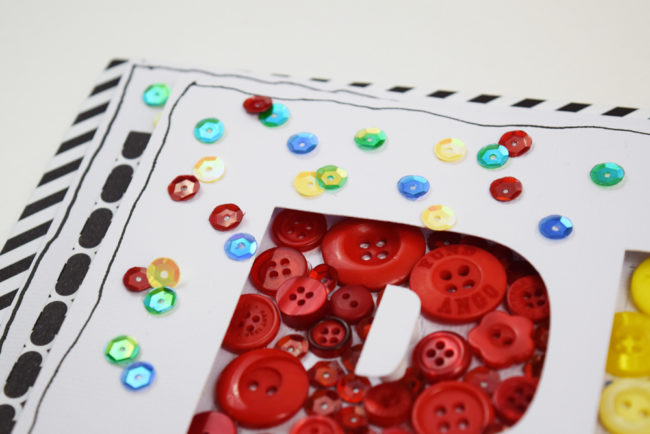
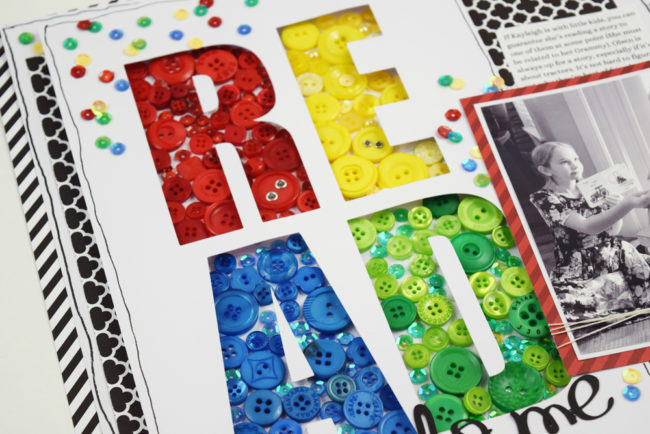
I finished the layout by adding my photo, journaling, and a few more sequins on the top layer.

Read to Me scrapbook layout by Becki Adams featuring a button title for www.buttonsgaloreandmore.net

The buttons and sequins made this layout stand out with TONS of bright colors and textures. I can’t wait to use this button title technique again! Thank you for stopping by the Buttons Galore blog today! I’ll see you again soon!

white cardstock
black and white patterned paper
glue dots
liquid adhesive
dimensional foam adhesive
0

Dress Up A Button Dress Form

Today Buttons Galore is pleased to be welcoming guest artist Candy Rosenberg to share her beautiful button dress form project.

Vintage craft designer Candy Rosenberg

Going out on the town always requires a fancy dress, and this occasion is no different – 0nly this girl is dolled up with buttons from Buttons Galore! Buttons are so fun and versatile in crafting and I am really excited to show off this project.

Button Decorated Dress Form

My button fetish is no secret to those who know me so I am always looking for ways to use them in unique ways. I’d had this bare “girl” laying around for awhile when I got this invitation to guest post for Buttons Galore. Buttons…dress form…The lightbulb went off and I thought that I could make a dress from buttons for my girl!

Button collage on dress form
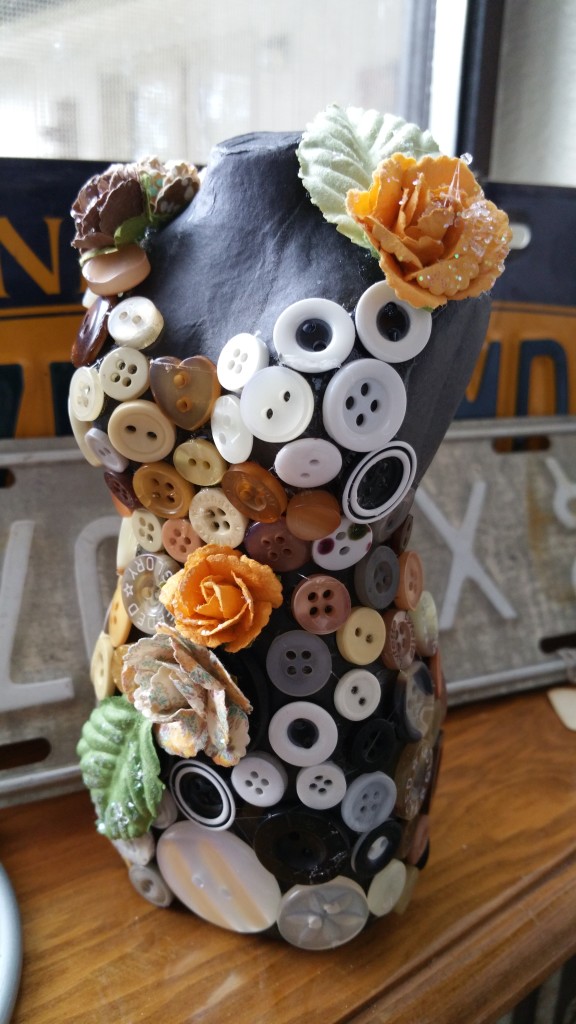
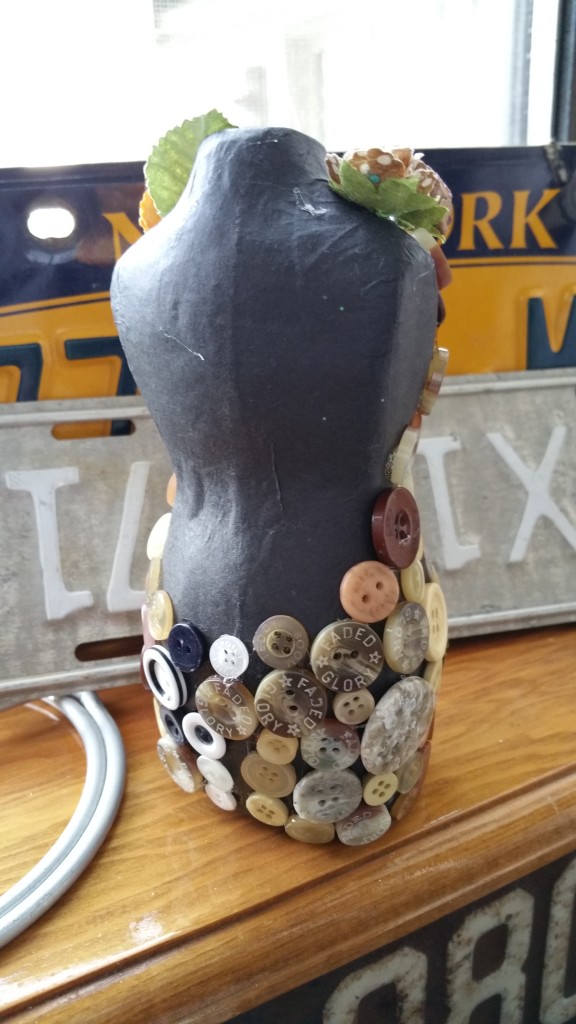
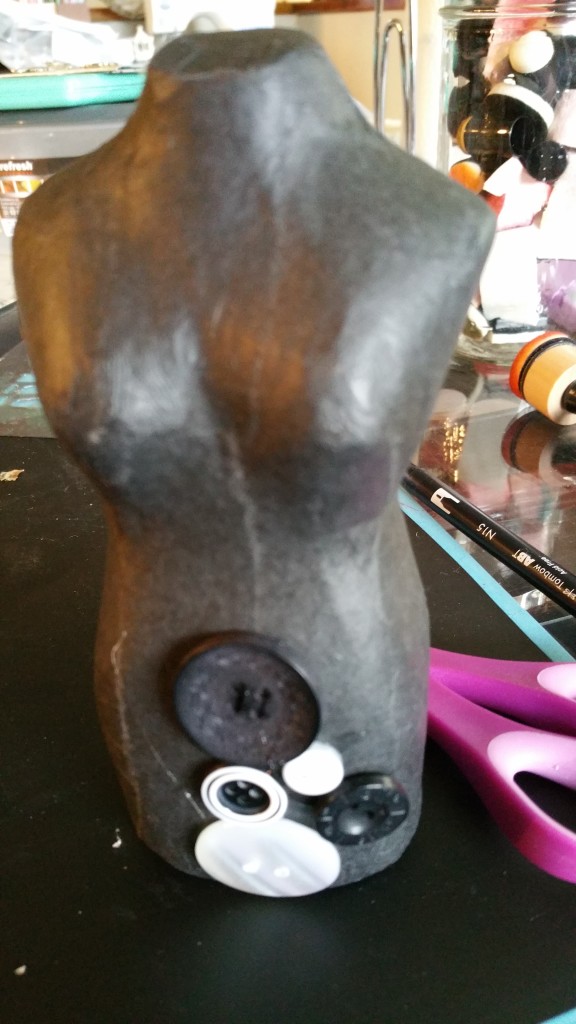
Covering an item like a dress form with buttons is not much different than covering a canvas or other flat surface. The major difference is that you have to consider three dimensions instead of two when placing a button in your collage. I poured out my bags of buttons and adhered them one at a time, seeing which ones worked best especially around her curves.

Button collage dress form close-up

This button dress form is super easy and such a great project to give as a gift or to use to decorate a studio!
finished button dress form - rear
 Buttons Galore Supplies:

If you like Candy’s mixed media creations like this button dress form, don’t miss her previous guest post for Buttons Galore that featured Artist Trading Cards!

Candy Rosenberg resides in beautiful Southern Oregon and has been crafting since she was a little girl. Known for her vintage steam punk style and beautifully crafted dress forms, she still likes to color outside the lines so to speak. Keep tabs on her latest creations at her blog, A Vintage Girl, or follow her on Facebook,Twitter, Instagram, Pinterest, YouTube and Google+.

0

Good Morning Sunshine Layout with 28 Lilac Lane

Today, the Buttons Galore blog is pleased to welcome Karla Yungwirth as guest blogger to share this beautiful scrapbook layout with us.

Sunshine scrapbook layout using 28 Lilac Lane embellishment by Karla Yungwirth
I am so excited to share a layout with you today that I’ve created with the new collection from 28 Lilac Lane by May Flaum! I am so in love with these amazing embellishments – the kits are full of beautiful sequins and lovely buttons, along with an amazing assortment of goodies that just make you need to create something gorgeous with them!
Title with 28 Lilac Lane embellishments
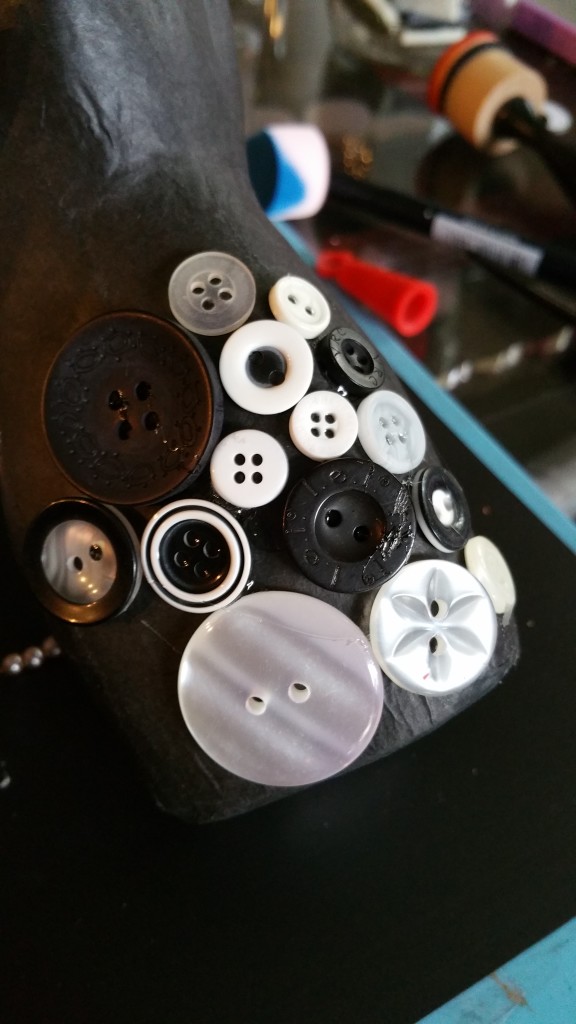
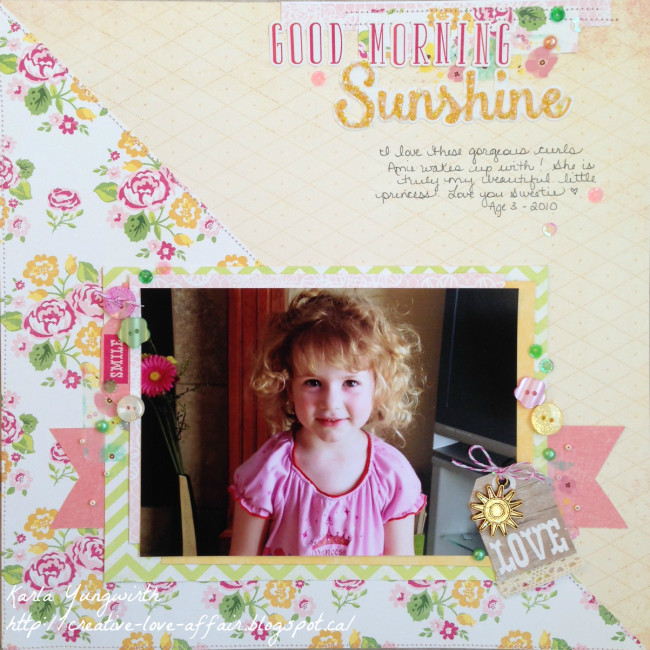
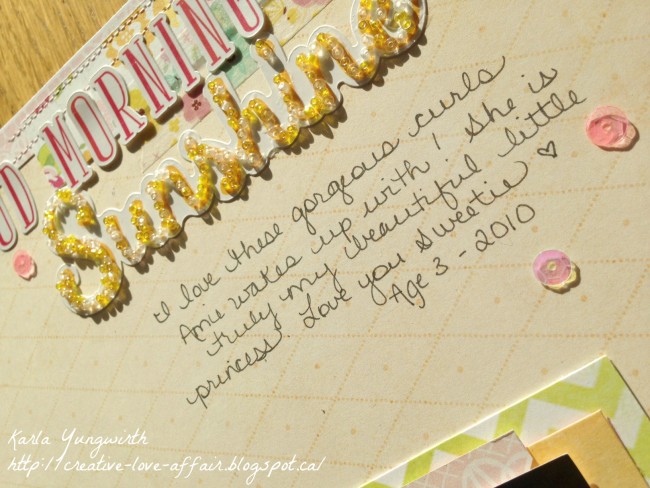
I wanted to create a light, spring-like look to my page, so I started off by using some of the white and yellow beads over my Sunshine title sticker, gluing them on with matte medium liquid adhesive. They give such a cool effect over the sticker!
Scrapbook layout embellishment close-up
 I layered my photo and some coordinating papers over a diagonal paper arrangement, which I stitched on using my sewing machine. The pretty buttons, beads, sequins and pearls created lovely clusters on each side of my photo. The pink and white bakers twine, included in the Tropical Twist Embellishment kit, was perfect to tie through a pink button and my Love tag. I even added some of the lovely lace, which you can find in the Attic Findings kit, on the bottom of the tag along with the golden sun charm from the Tropical Twist kit!
Scrapbook layout embellishment
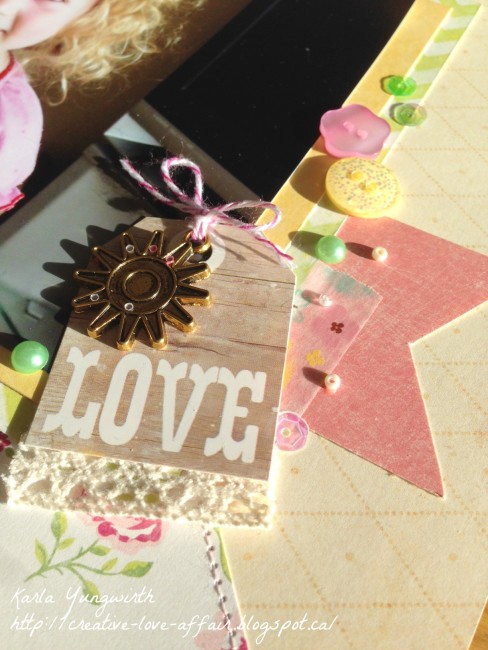
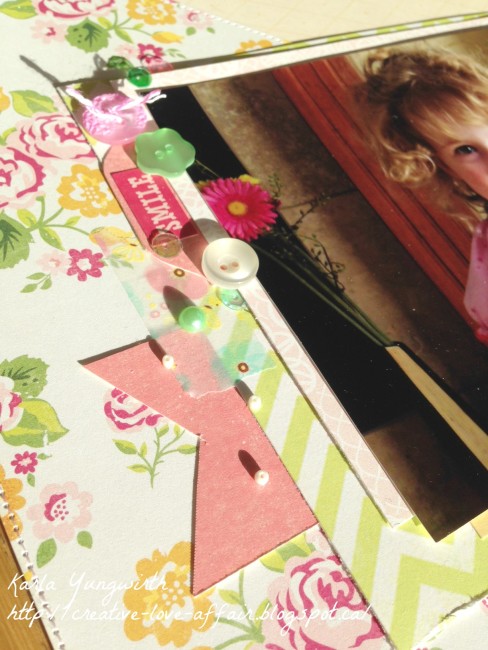
I scattered sequins around my page and near my title and stitched paper strips at the top of my page, along with another pretty pearl. It’s amazing how the embellishments in these kits can really make a layout pop! I had so much fun creating this layout, and I have so many more ideas that I can use these pretty embellishments kits on! Wishing you a happy, crafty and creative day!

Supplies used:


Karla YungwirthAbout Karla: I’m Karla Yungwirth, a Canadian mom to 3 beautiful girls, a wife of an amazing man, a scrapbooker, a card maker, a lover of gorgeous paper, a boo-boo kisser, a master Lego builder, a baker of lopsided birthday cakes. I have been crafting for as long as I can remember. My grandmothers taught me to sew, knit and crochet, and my mom was always repurposing to create something wonderful and magical – before recycling was even cool! I love being creative – it’s what makes my soul sing and my heart happy. You can find me on my blog at http://creative-love-affair.blogspot.ca//, on Facebook, and on Instagram.

2

Buzzing into Spring with a 28 Lilac Lane Card

Hello there!

Ashli Oliver here with you today to share a super easy mixed media card with big impact!

After swiping on white acrylic paint and drizzling liquid glue on top, I simply stuck lots of little goodies in. The key to making this work is sticking your buttons, sequins, and pearls into your painty goodness while everything is still wet!

Mixed Media Spring Bee Card by Ashli Oliver for Buttons Galore

Don’t be afraid to get paint on your embellishments… that is half the fun, after all!

Mixed Media spring card with 3D bee button and 28 Lilac Lane embellishments

I used a three dimensional Bee Button, goodies from the Antique Tin set, and plenty of the amazing 28 Lilac Lane Collection!

TIP: Did you know that many buttons can be cut in half? That’s right! Using my Tim Holtz scissors, I cut one of the gold Antique Buttons right in half so that I could add it to the edge of my card and tuck the other piece behind my bee!

What a great way to stretch the stash too!

Oh, and of course… I also used those same scissors to cut the backs off of any buttons so I could adhere them to my card.

Once my embellishments were set in, I simply let the paint dry overnight. Then, I added in some watercolor and mist droplets. A piece of patterned paper layered behind the card front finishes this card off!

Mixed Media spring card by Ashli Oliver for Buttons Galore

Super fun and a great card for spring! In fact, I think this will serve as a Mother’s Day card around here as my mother loves bees!

Thanks for stopping by today!

Supplies Used:

Ashli Oliver
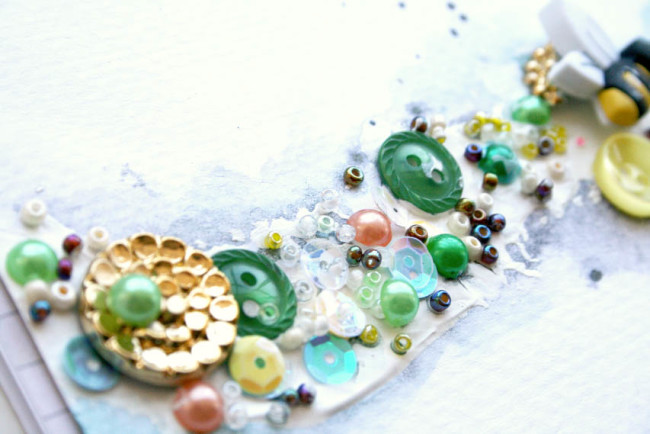
Ashli Oliver (aka soapHOUSEmama) lives with her husband and four girls, age 10 and under, in a suburb of Atlanta, Georgia. Ashli is a recovering graphic designer and when she is not busy homeschooling her kiddos, you can find her drinking copious amounts of coffee while playing with paint and pretty paper in her studio. Not only does Ashli love documenting her family’s memories, but she finds great joy in the creative process… which, in her case, usually involves lots of messy, painty fun!

You can find Ashli, and her work, at her Website,  YouTubeInstagram, and Classes.

1

ATC Cards with Button Flowers

Today Buttons Galore is pleased to be welcoming guest artist Candy Rosenberg.

Vintage craft designer Candy Rosenberg

Artist Trading Cards (ATCS) are miniature artworks about the same size as modern trading cards or baseball cards at 2.5 x 3.5 inches. They were popularized in 1996 from the mail art movement and have their origins in Switzerland. They are produced in various media, including dry media (pencils, pens, markers), wet media (watercolor, acrylic paints), paper media (collage, die cuts, found objects) or even metals, fibers and now buttons!
I love clear acrylic and mix it with an Artist Trading Card and buttons…and I am in heaven.
ATC cards with fun button flowers by Candy Rosenberg on acrylic ATC cards
 I used Prima stencils andStazOn ink to create the background right on the acrylic of each card using two different colors.
Stinking on Acrylic ATC card base
I then added the Black & White assortment from the Buttons Galore Haberdashery collection on one and the Natural assortment on the other to create button flowers using Beacon 3 in 1, a great adhesive for attaching buttons to acrylic. Note that most paper-only adhesives will not hold to the acrylic.
Beacon 3 in 1 adhesive for acrylic and buttons
A little snippet of pearl string and a leaf and you have beautiful button flowers!
Close-up of black and white button flower ATC on a fun acrylic base.
Close-up of wood button flower ATC with acrylic base.
Candy Rosenberg resides in beautiful Southern Oregon and has been crafting since she was a little girl. Known for her vintage steam punk style and beautifully crafted dress forms, she still likes to color outside the lines so to speak. Keep tabs on her latest creations at her blog, A Vintage Girl, or follow her on Facebook, Twitter, Instagram, Pinterest, YouTube and Google+.
2

Back to School Photo Frame by Lorrie McCullers

Today we’re joined by designer Lorrie McCullers, who is sharing a back to school project that is both a countdown calendar and school picture frame! 

It’s back to school time! And what better way to keep track of time until the big day than with a countdown frame?

back to school frame I used three sets of buttons for this project: the School Value Pack, the Primary Grab Bag, and the Primary Tiny Round Buttons. I also used a pre-colored acrylic frame so there was no need to paint!

buttons galore buttons

Supplies needed:

Buttons Galore School Value Pack
Buttons Galore Primary Grab Bag
Buttons Galore Primary Tiny Round Buttons
Deflecto acrylic 5”x7” frame
Aleene’s Liquid Fusion glue
button shank remover
dry erase pen
computer and printer (optional)

Directions:

  • Choose your larger buttons first. That way, you can fill in the empty spaces with smaller buttons.

  • Some of the buttons in the School Value Pack and the Primary Grab Bag have shanks on the back. To have your buttons lay flat to the frame, remove the shanks with a button shank remover.

  • Apply Aleene’s Liquid Fusion to the back of each button. Don’t apply too much or the glue will ooze out the sides of your buttons! Let dry for about 24 hours.

  • Print (or handwrite) a countdown for the first day of school, such as “____ days until school begins” or “School starts in ____ days!”

  • Keep track of the days with a dry erase marker. Acrylic frames are so great because you can just write on and wipe off!

school-picture-frame

After school starts, you can then use your project as a frame for that first day of school picture of your kiddo! Since the dry erase marker comes right off, you can use this frame year after year. This is a great project for kids to help with as well as a fun gift idea for a favorite teacher!

Lorrie McCullers is a paper crafts designer who blogs at Forty11 Designs. She is a Craft & Hobby Association Designer Member and currently designs for Etch All and Deflecto Crafts. To see more of her work, visit her blog

0

Patriotic Scrapbook Layout by Linda Auclair

Linda enjoyed the Collage Trim Kit so much that she couldn’t stop with just the wallhanging! So, she created a layout to share using the same paper collection and leftover buttons from the supply list on the Patriotic Wall Art from last week. She was able to chaperone her youngest daughter’s recent class trip to the NH State House, and took a bazillion photos!

Materials Used –

If you would like to know more about Linda you can read her bio below or check out her blog. I know you will find so much more inspiration there!

About Linda:

Hi! I’m Linda Auclair, and I live in New Hampshire with my husband and daughters, Brigid and Aileen. My son Jonathan is away attending grad school at UPenn this year. I’ve been a papercrafter forever, and in the past decade, I have had the good fortune to work for a variety of companies, such as Fiskars, Creative Imaginations, Epiphany Crafts, and my current Design Team post at Echo Park Paper, as well as a number of online retailers. I have had my work published in magazines and eZines, and have been guest blogger/designer for a number of manufacturers. I am an active blogger, and love to share my designs, along with tips and tricks I have discovered, with my readers at http://elendae.wordpress.com/

3

Patriotic God Bless the USA Wall Hanging by Linda Auclair

Patriotic Collage trim Kit

PLease welcome this weeks guest designer – Linda Auclair.  Linda is an avid paper crafter who is know for her prolific work and her fantastic use of embellishments.  She is a natural pairing with Buttons Galore and More.  She does such fun and timely work  that we are going to feature today and next week too.  Both projects have a patriotic flair and are perfect to display for Memorial Day and the  4th of July.  If you would like to view more of her lovely work please visit her blog.


Materials used –

NicoleCrafts wooden décor heart (purchased at AC Moore)

Echo Park Paper’s “4th of July” Mini Theme Collection Kit    http://www.parttimesally.com/

HAB602 Nautical Trim Collage Kit    http://www.buttonsgaloreandmore.com/product/HAB602.html

DF93 Patriot Matte Round buttons     http://www.buttonsgaloreandmore.com/product/DF93.html

CH34 Star Charms     http://www.buttonsgaloreandmore.com/product/CH34.html

Tattered Angels chipboard alphabet

Jillibean Soup Alpha Beans alphabet stickers in Roma Red

The Twinery Twine in Marachino and Denim    http://thetwinery.com/

Stickles Glitter Glue (Ranger)

Mod Podge Decoupage Medium (Plaid)

Folk Art acrylic paint in Brilliant Ultramarine (Plaid)


Instructions:

  • Remove hardware from wooden heart.  Sand and paint the edges with the blue acrylic paint.
  • Trim patterned paper to cover wooden pieces and apply to surfaces with Mod Podge.  Allow to dry and trim with craft knife.
  • Cut 15 2 inch lengths of assorted ribbons from the Nautical kit.  Trim edges and apply to the back of the wooden heart with favorite liquid adhesive.


  • Embellish ribbon strips with buttons tied with twine and star charms.


  • Apply a thick coat of Stickles Glitter Glue to self-adhesive chipboard letters.  Let dry completely before handling.
  • Apply sticker alphabet and chipboard alphabet to wooden heart.


  • Embellish heart with ribbon rosette, and banner with buttons tied with twine and star charms.


button embellished wall hanging


  • Hang and enjoy.
Thank you for checking out this button embellished patriotic wall hanging by our guest designer Linda Auclair


3

Powered by WordPress. Designed by WooThemes