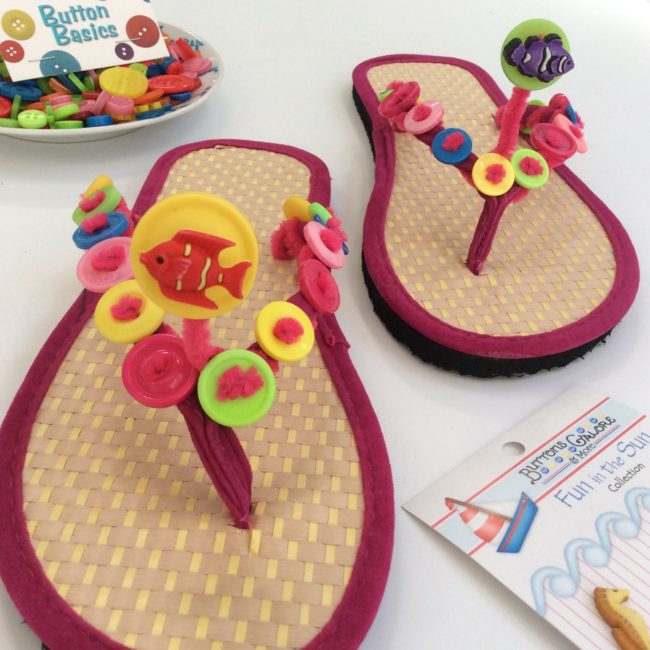
Every summer I like to get a fresh new pair of flip-flops…or two, and decorate them to give them a personal touch. What better way to adorn than with buttons!

Every summer I like to get a fresh new pair of flip-flops…or two, and decorate them to give them a personal touch. What better way to adorn than with buttons!
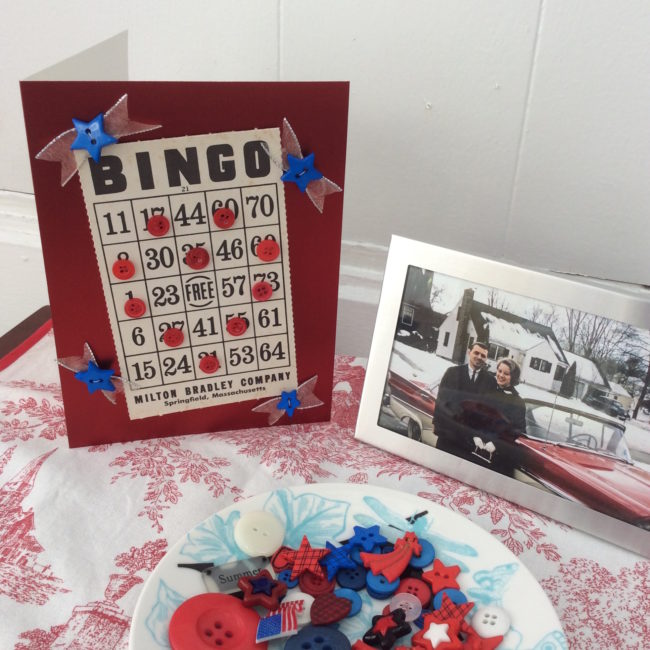
Vintage Bingo cards can be so fun to embellish with buttons. The grid makes a perfect surface to create patterns such as a heart outline. Our family tradition to play Bingo on the holidays and mu Dad is always the number caller. This card is for him.
Here is a fantastic way to create custom DIY gift wrapping in fifteen minutes (or less) using buttons, fabric markers and glue. Check it out! Yay, it’s Fifteen MINUTE Friday!!!
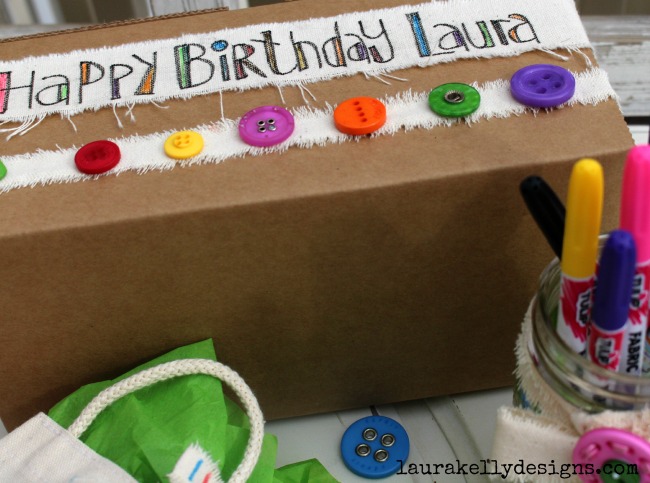
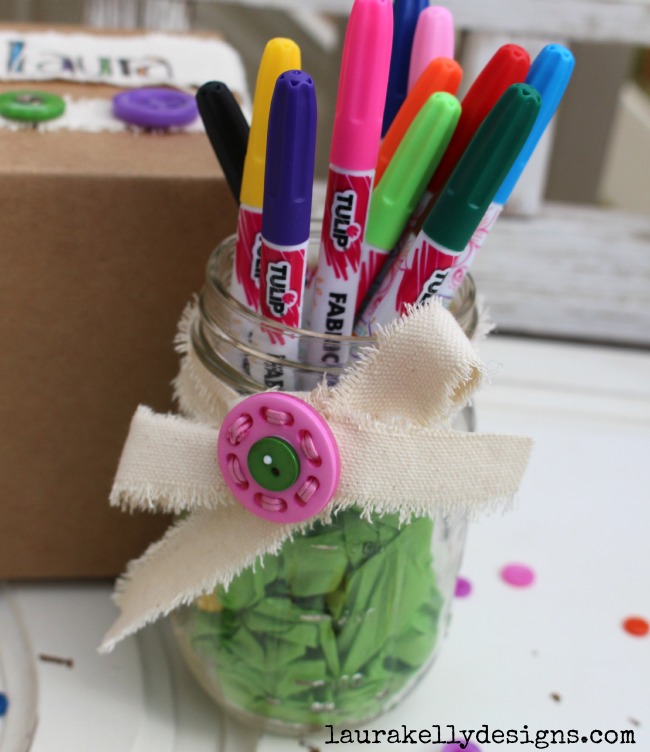
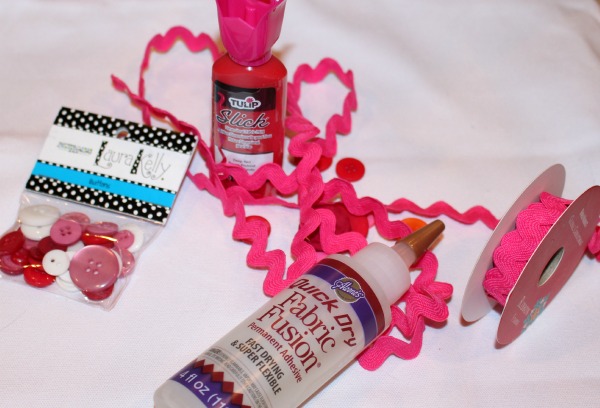
A tip for buttons and fabric if you are not up for sewing…super tacky adhesives work best! I love the Fast Grab Tacky from Aleene’s because it holds the buttons right away and keeps them in place until totally dried. You can see in the next picture that the buttons are in place and the glue is still wet. I love that!
You can get more ideas and the full tutorial over on my blog HERE.
How cute is this pillow that I made with my Laura Kelly buttons and a few things from i Love to Create? I think is creates adorable decor for to celebrate the holiday of love.

I used Aleene’s Quick Dry Fabric Fusion to adhere the rick-rack around the edges. Then I used Tulip dimensional paint (red) to spell out love and add the buttons. I LOVE that it works as a paint and as an adhesive too!
There are so many ways to create with buttons and products from i Love to Create. Here are a bunch.
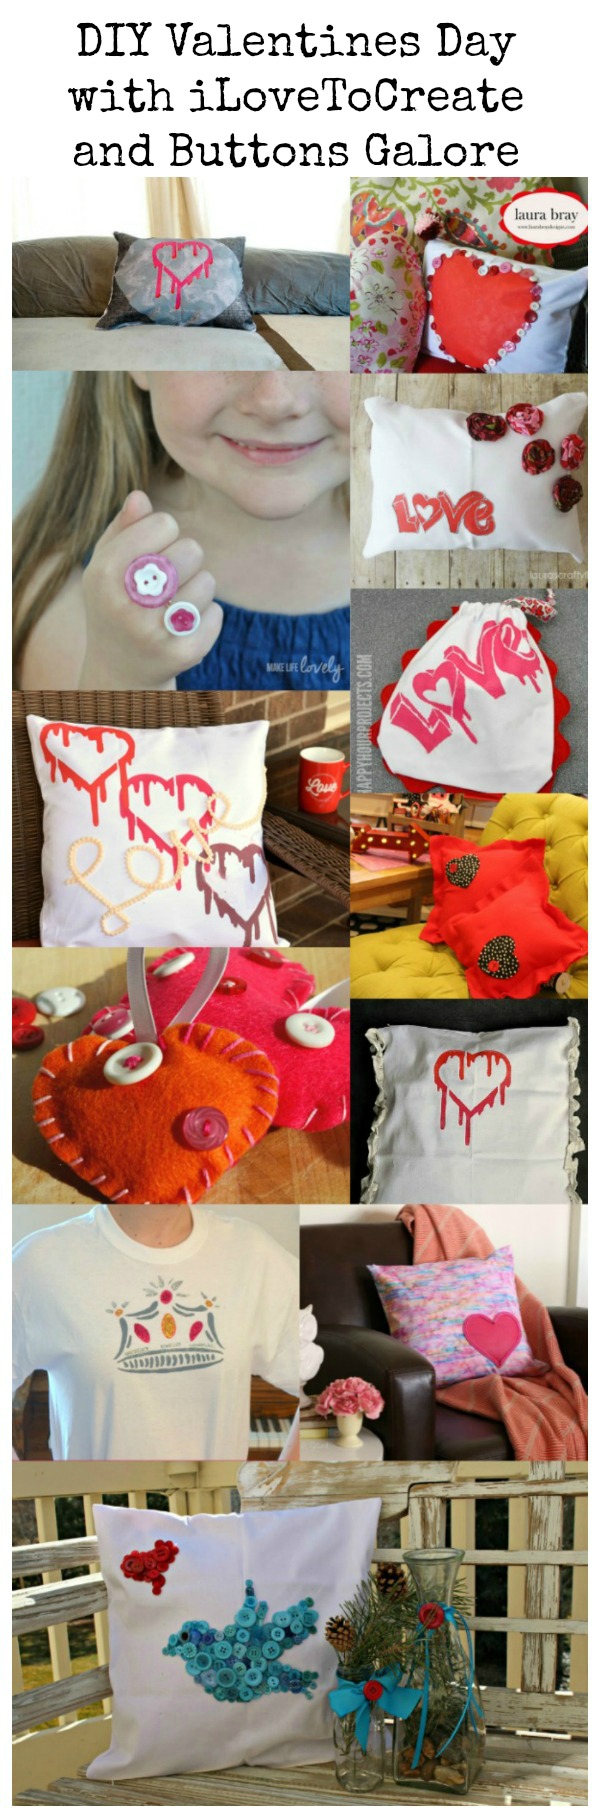
You can click around and check them all out.
You can also enter to win this awesome contest.
Cheers and Happy Decorating,
Laura
How adorable is this advent calendar? It was created in a matter of minutes using buttons from my Holiday Collection!
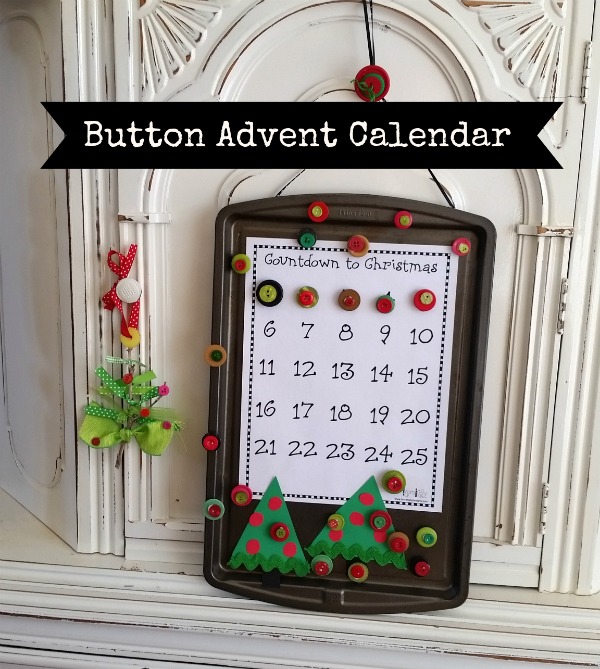
For the free printable and the tutorial, visit the full post on my blog here. To order the buttons, click on the image below!
There are lots of great ideas, activities, crafts and ways to celebrate the holiday season with kids. Here are lots of great ones for you to try out by fabulous bloggers!
And you can enter a contest too to win buttons and a crafty stash along with a $50 VISA card! That rocks! a Rafflecopter giveaway
Cheers,
Laura
This project is super easy and fast and creates coaster fun with felt and buttons.
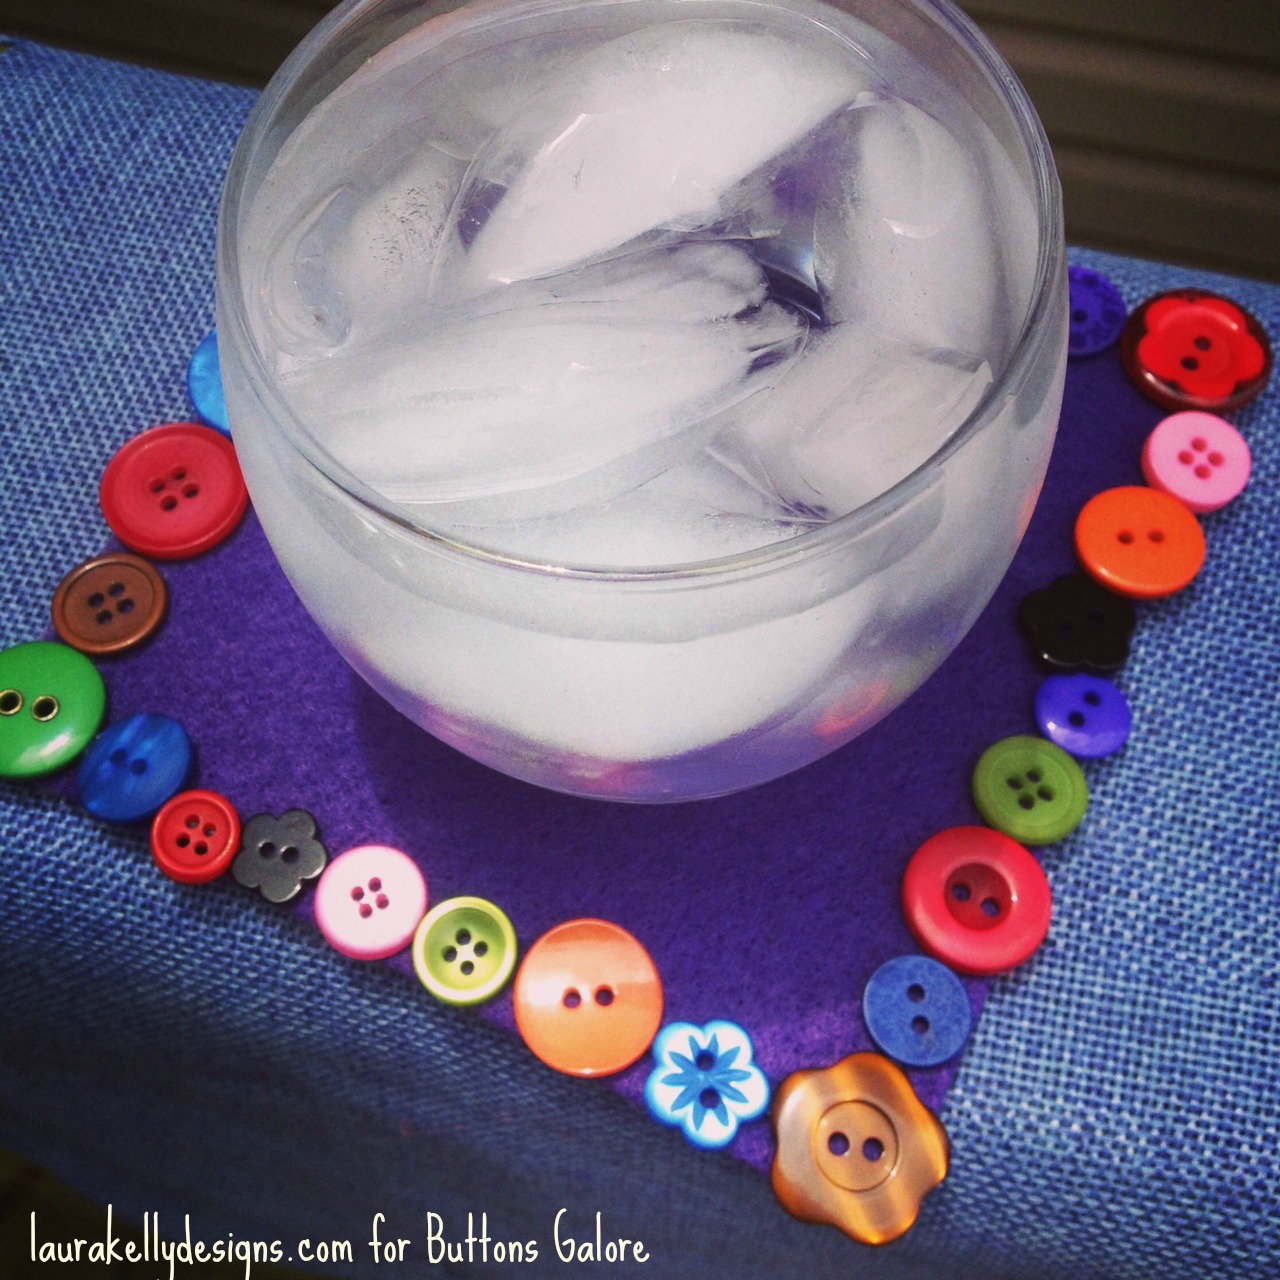
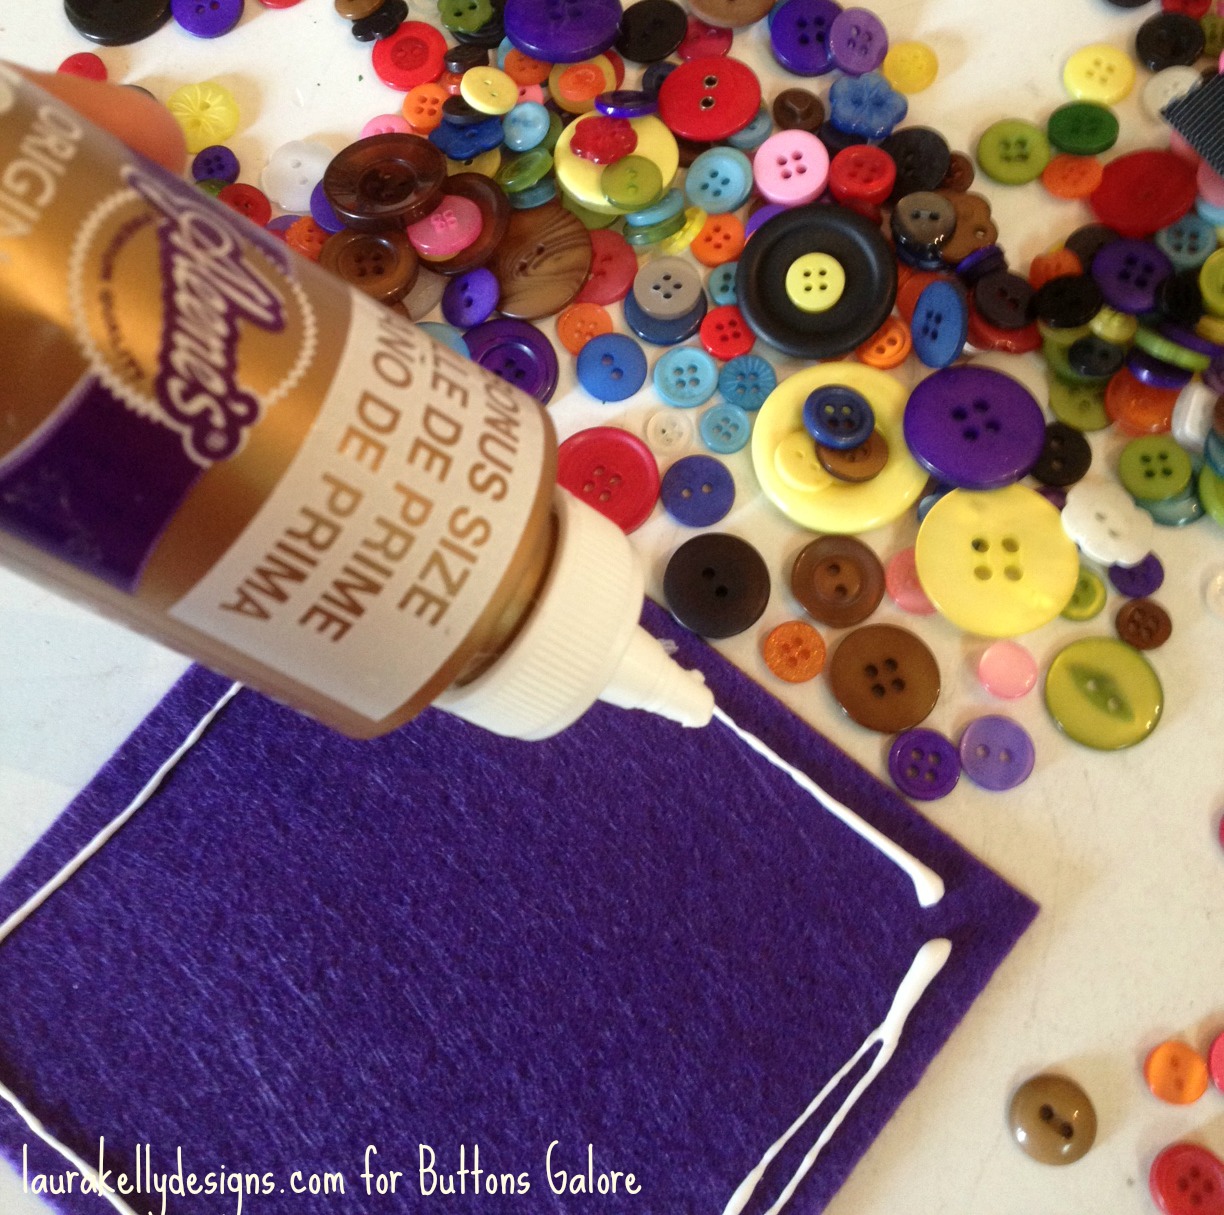
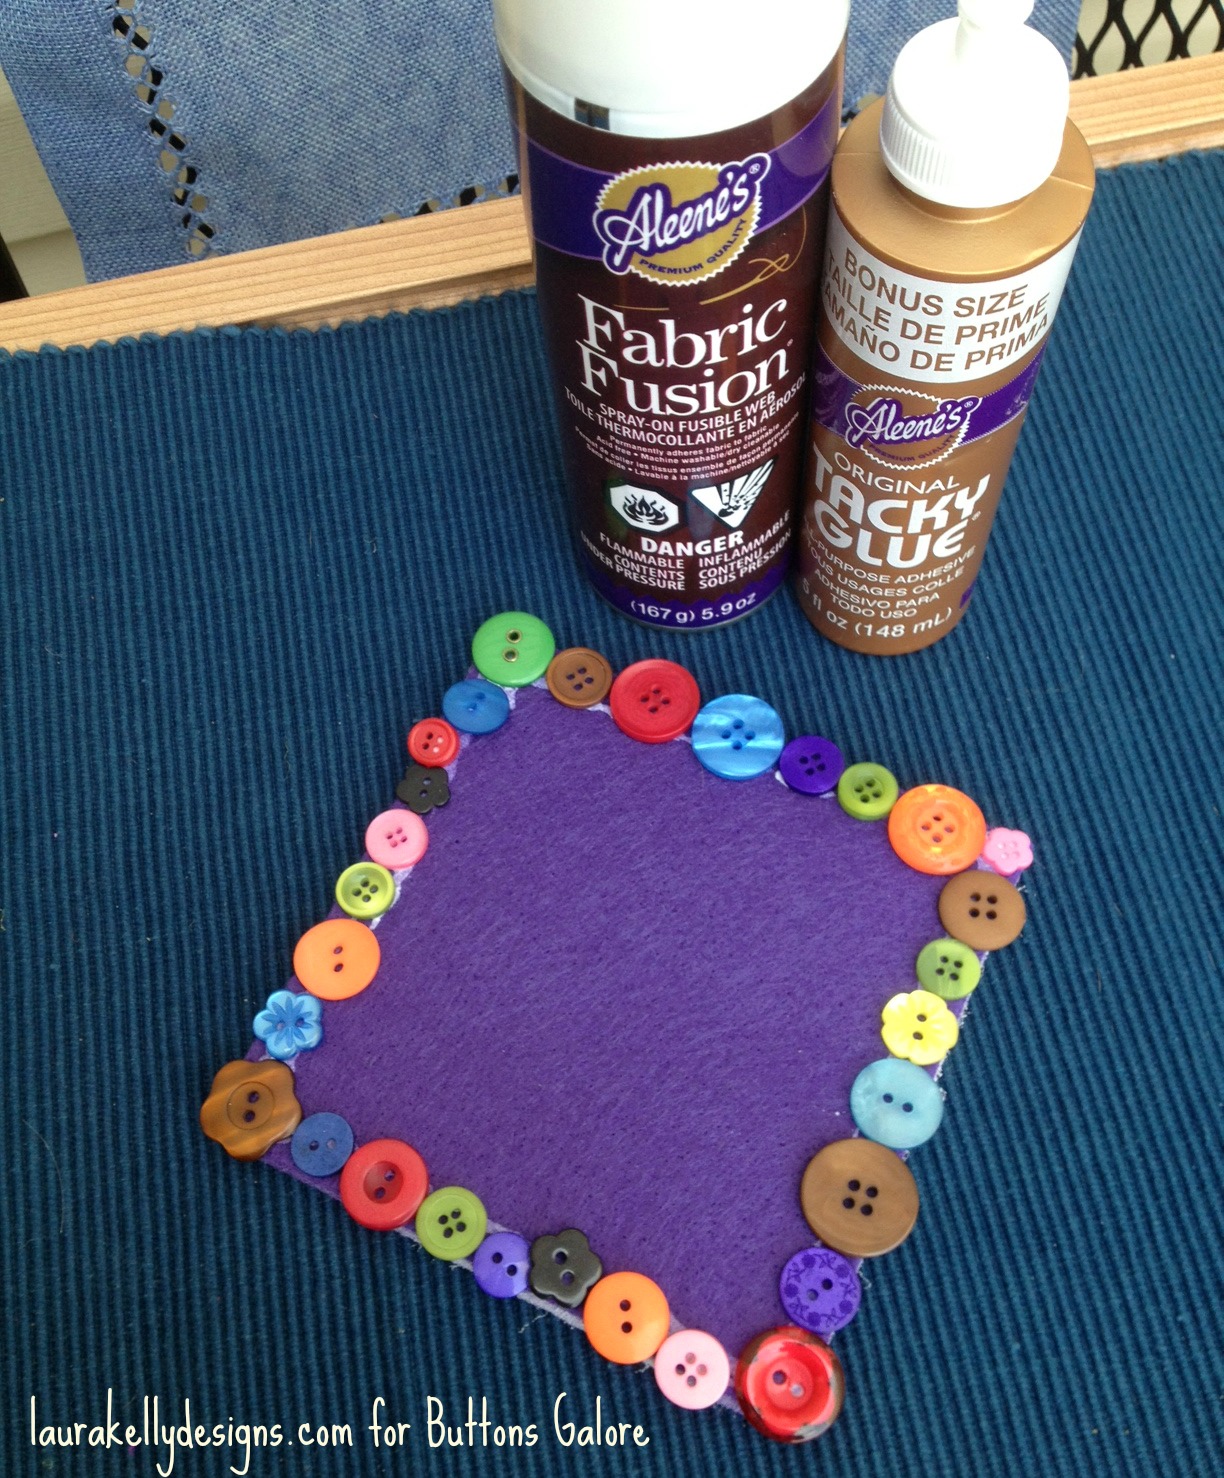
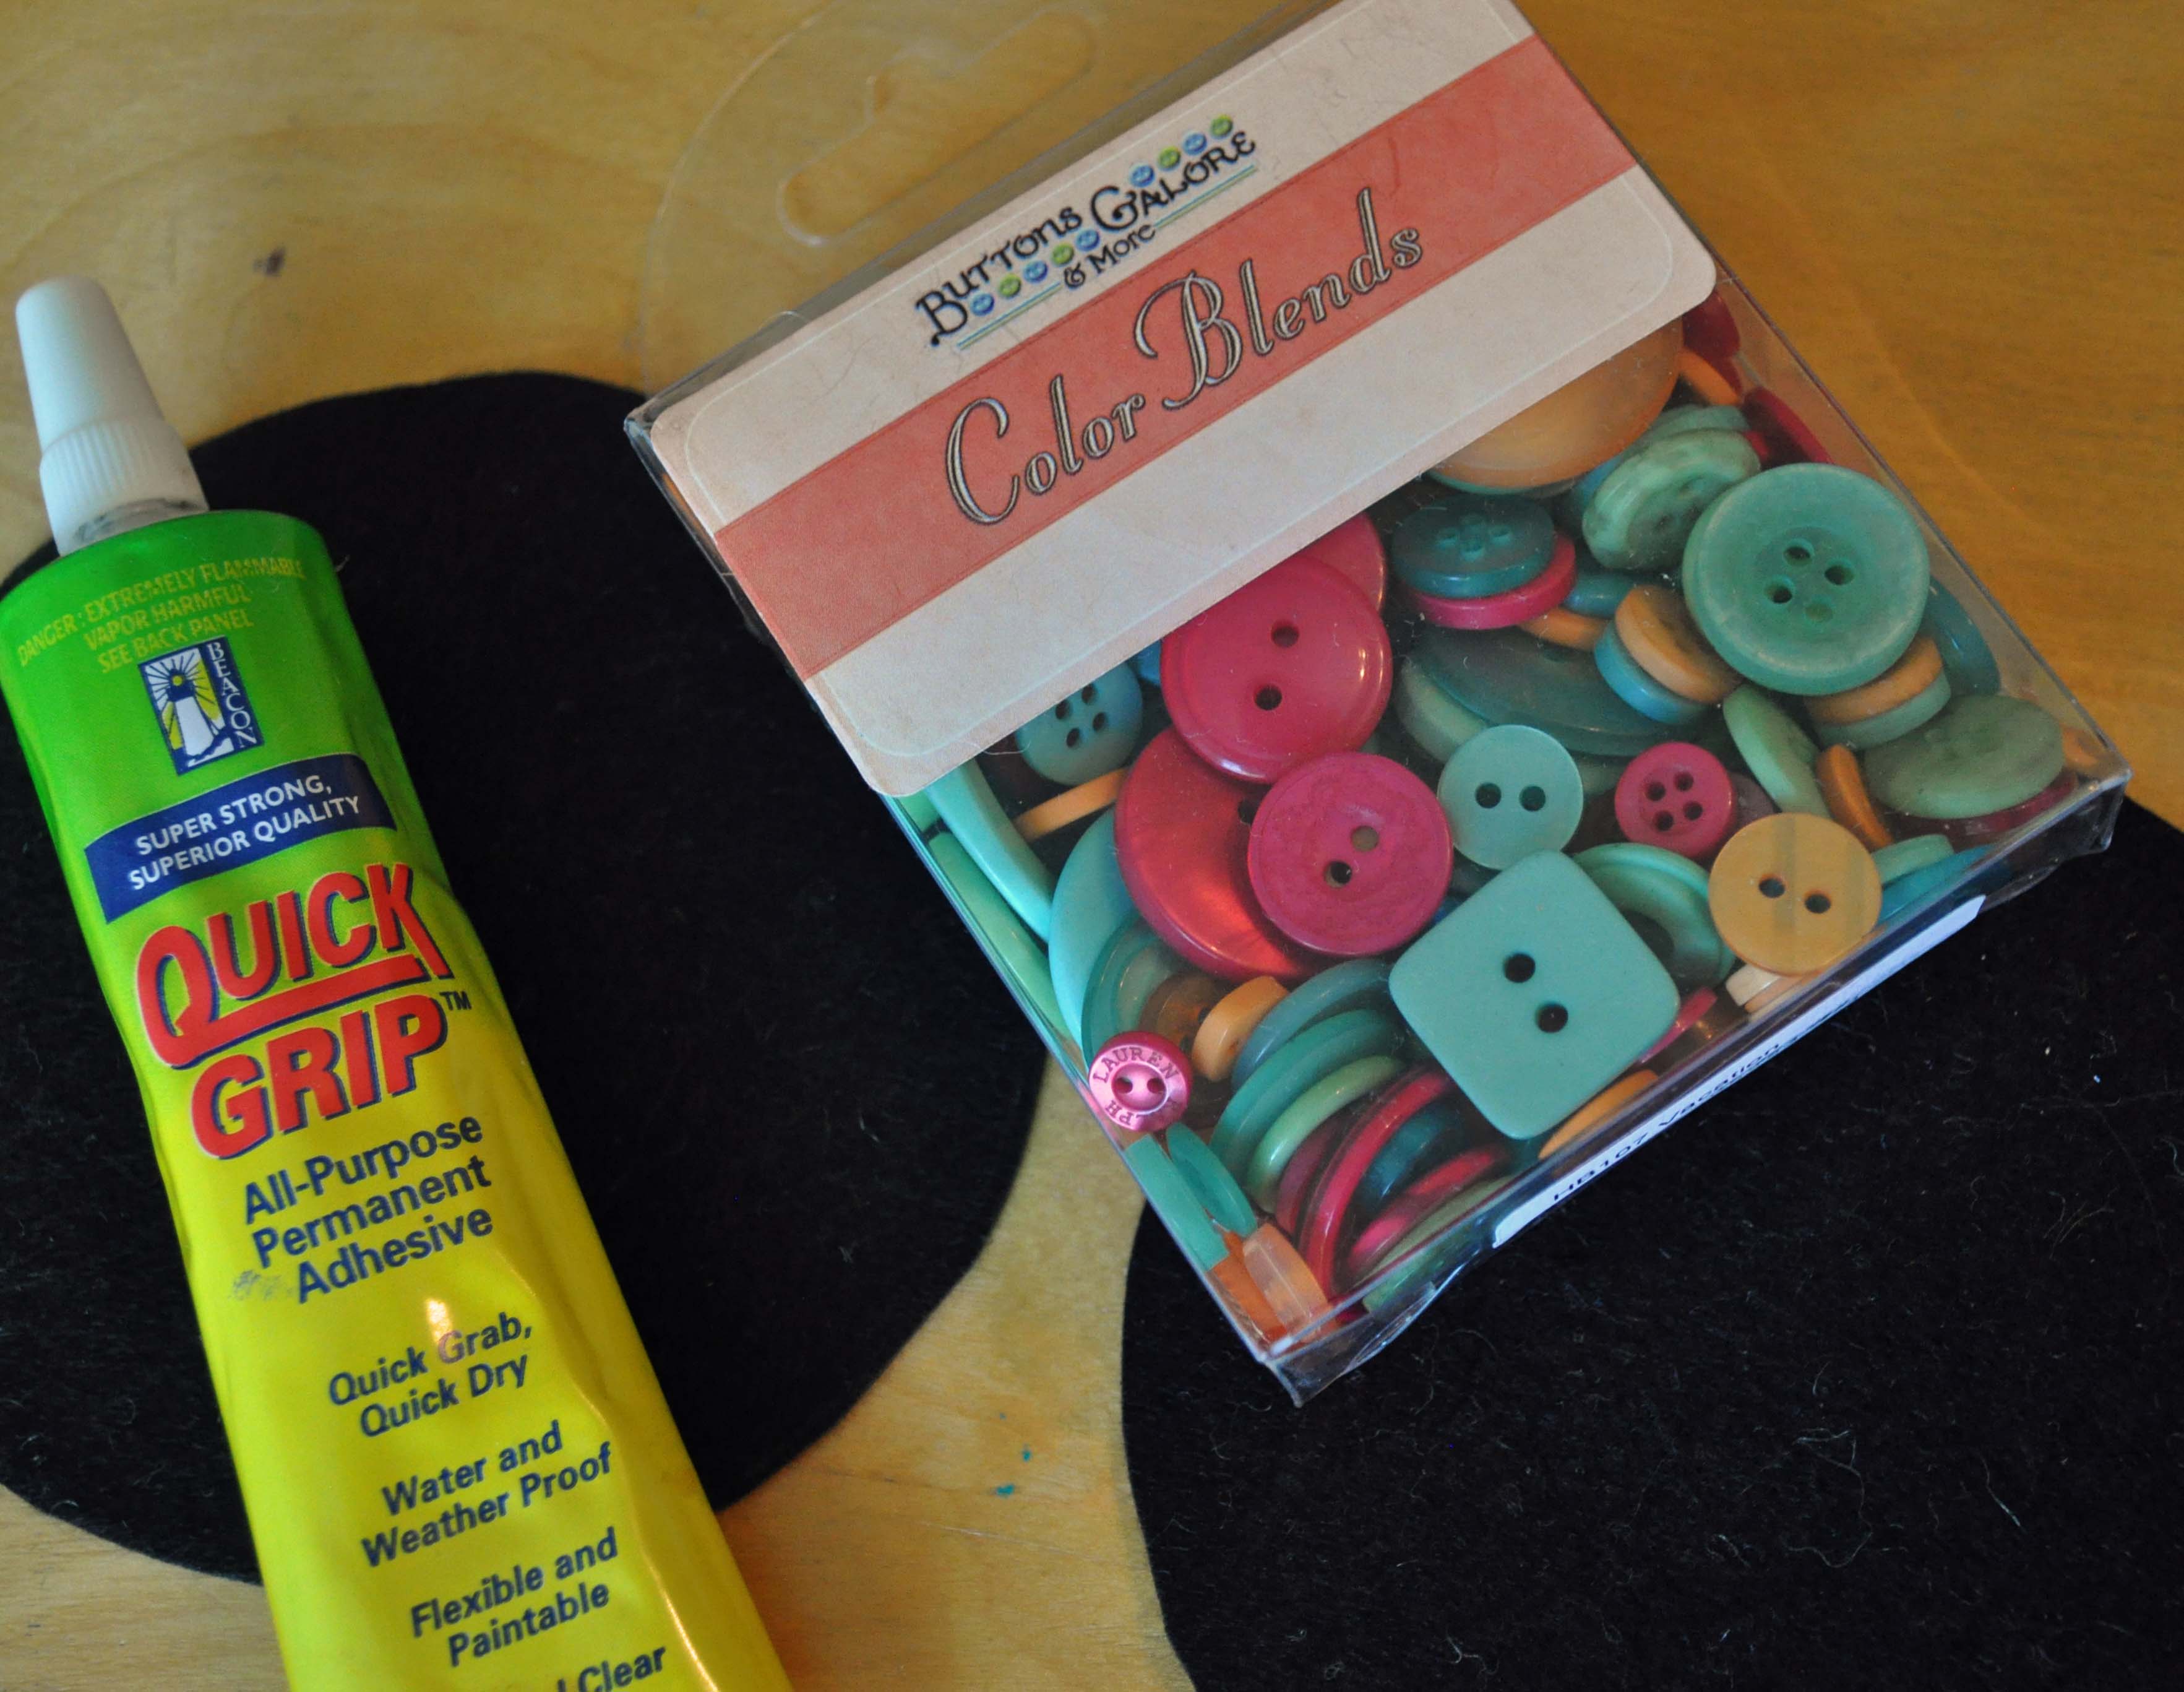
Cut your felt squares to 5 inches by 5 inches. You will need two squares per coaster. I used the high quality Kunin Felt to get a thick classy feel. Put a layer of Aleene’s Tacky Glue around the edge of one square then line it with your favorite buttons from the BRIGHTS collection by me, Laura Kelly, for Buttons Galore.
Spray the other square with a heavy layer of Aleene’s Fabric Fusion and put the two pieces of felt together.
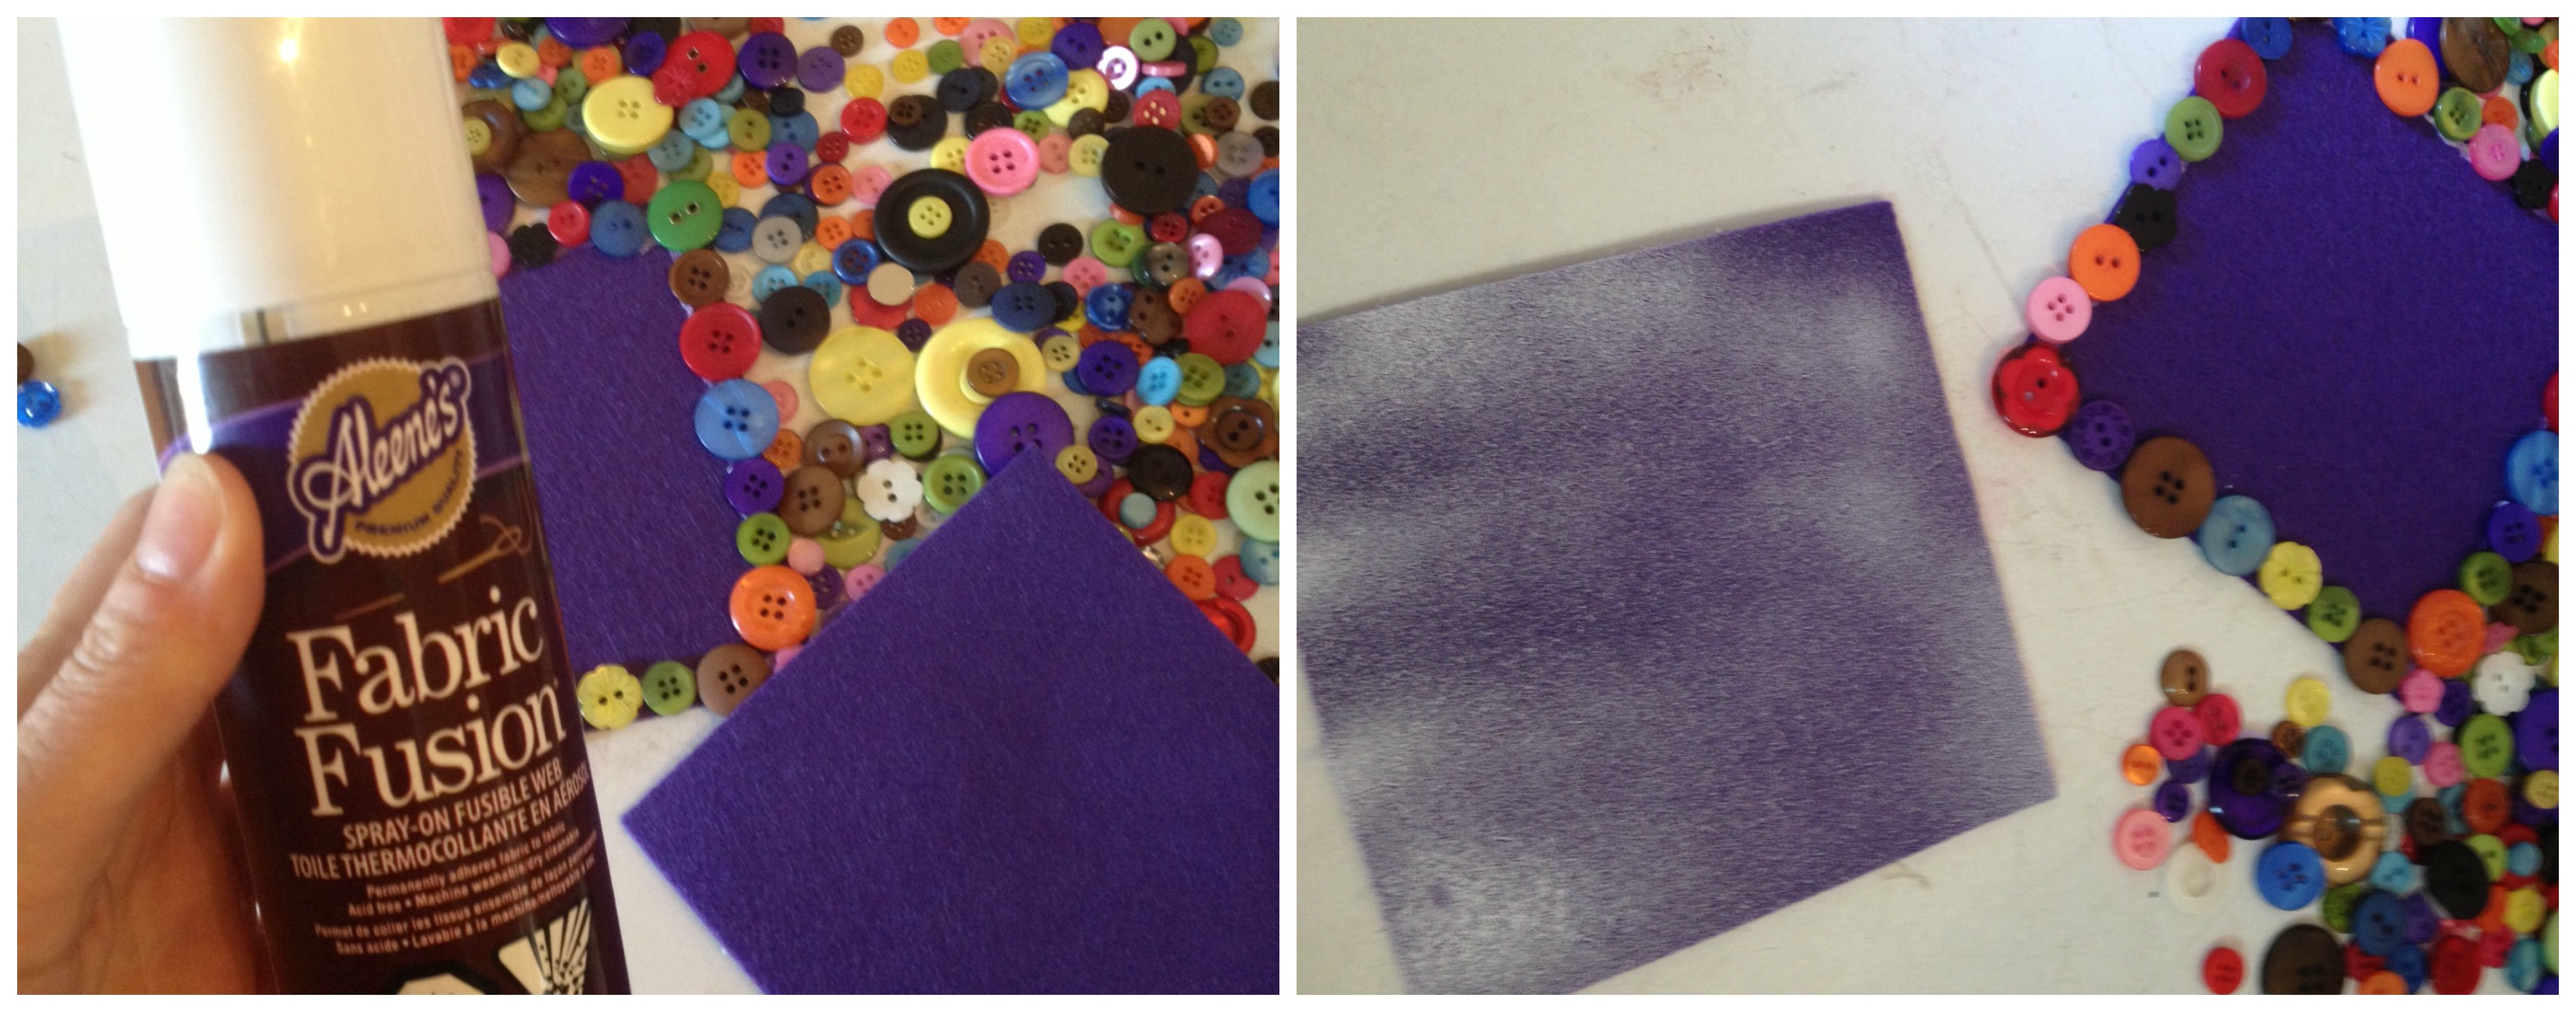
Let it dry completely and it is ready for use. Create a bunch of these in different colors and you will be all ready for a cocktail party!
Happy Creating,
Laura
Girls love to make things for their dolls. Some of these girls are little as in young. Some of these girls are bigger as in not so young. The magic of doll play never grows old. There are lots of things that can be made for doll using Laura Kelly’s collection of bright colored buttons.
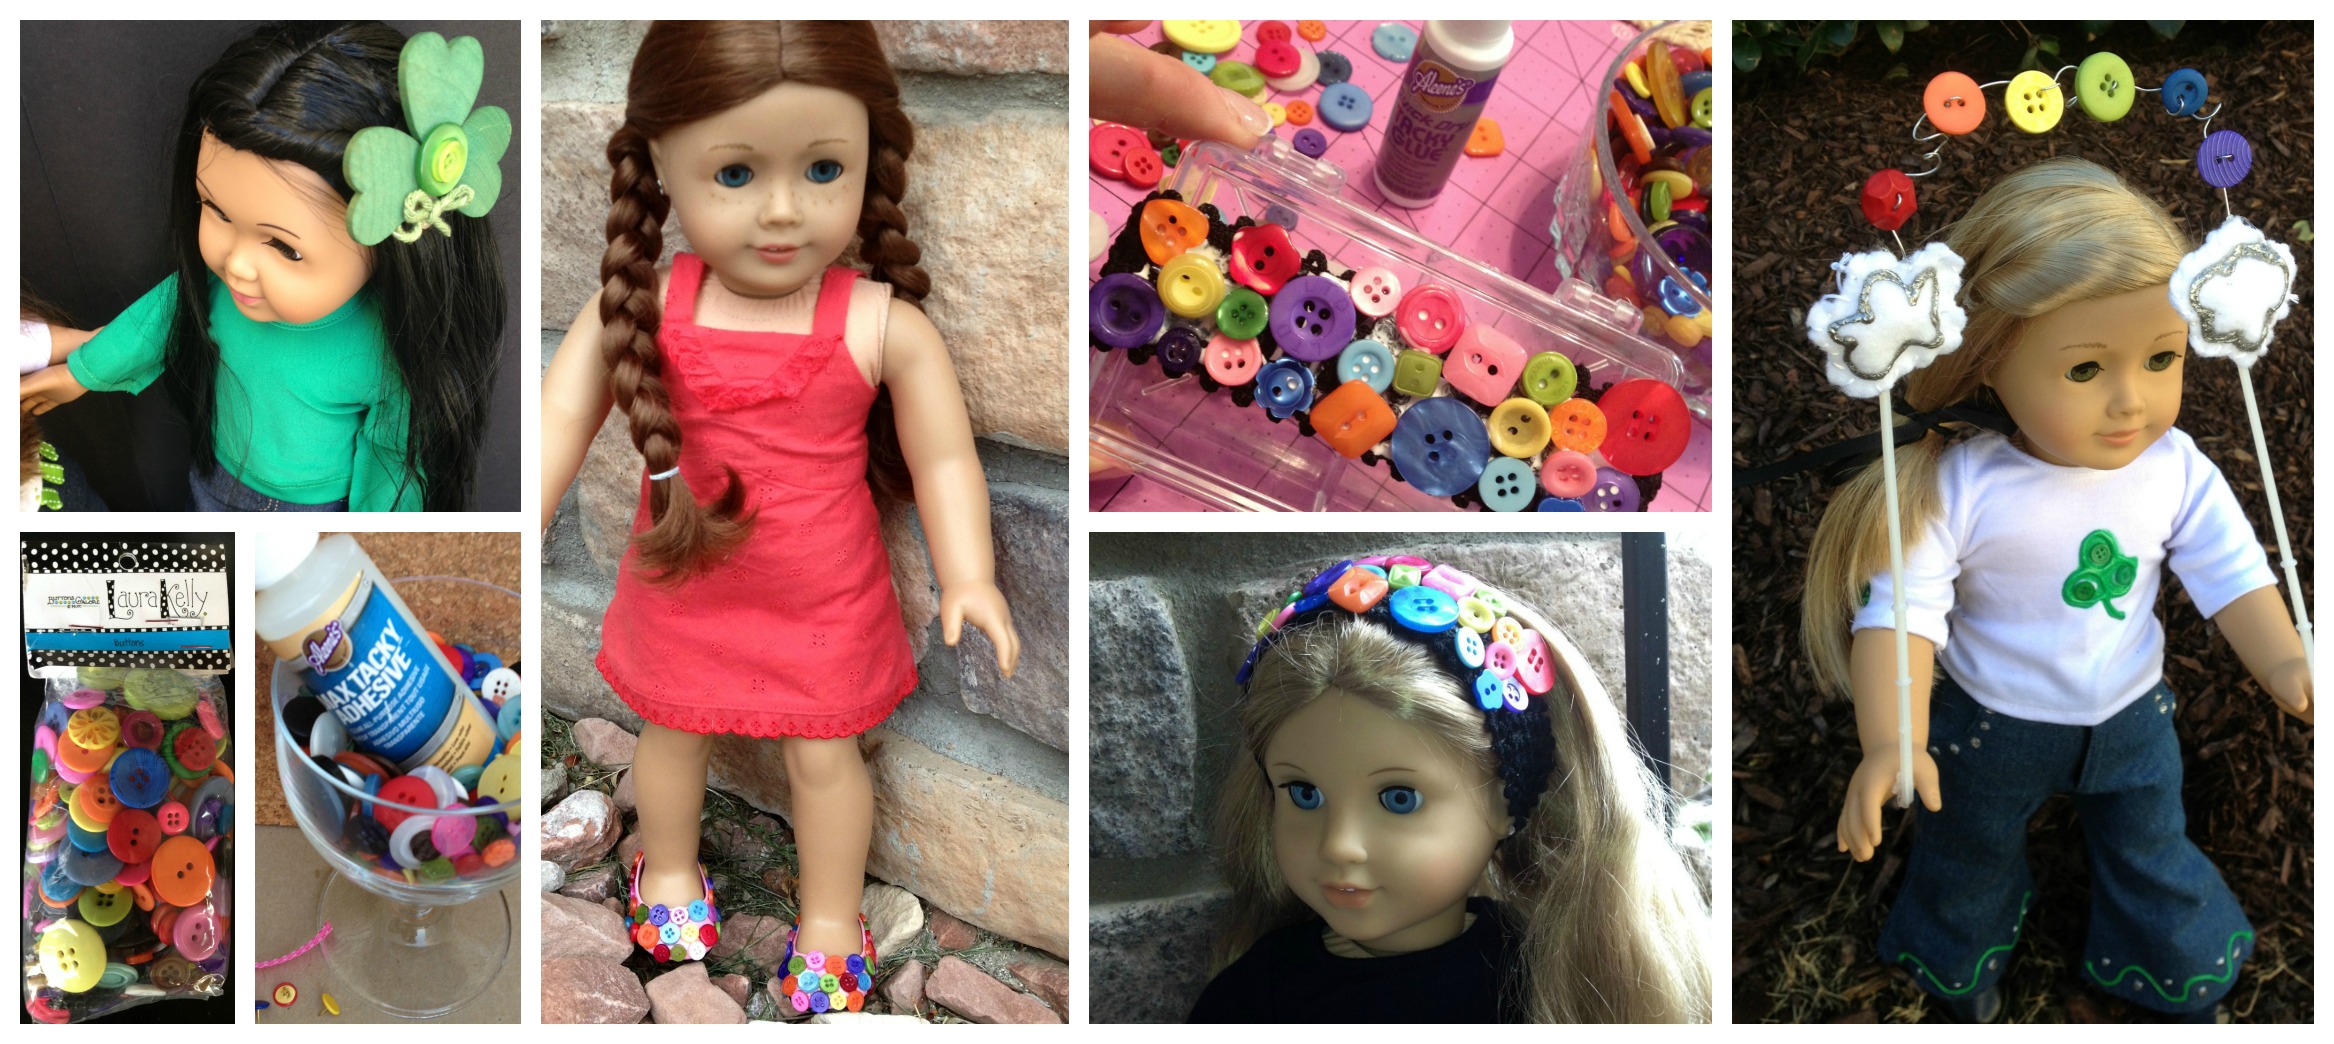
If you are interested in making any of these projects, I encourage you to give them a try.
Happy Creating,
Laura
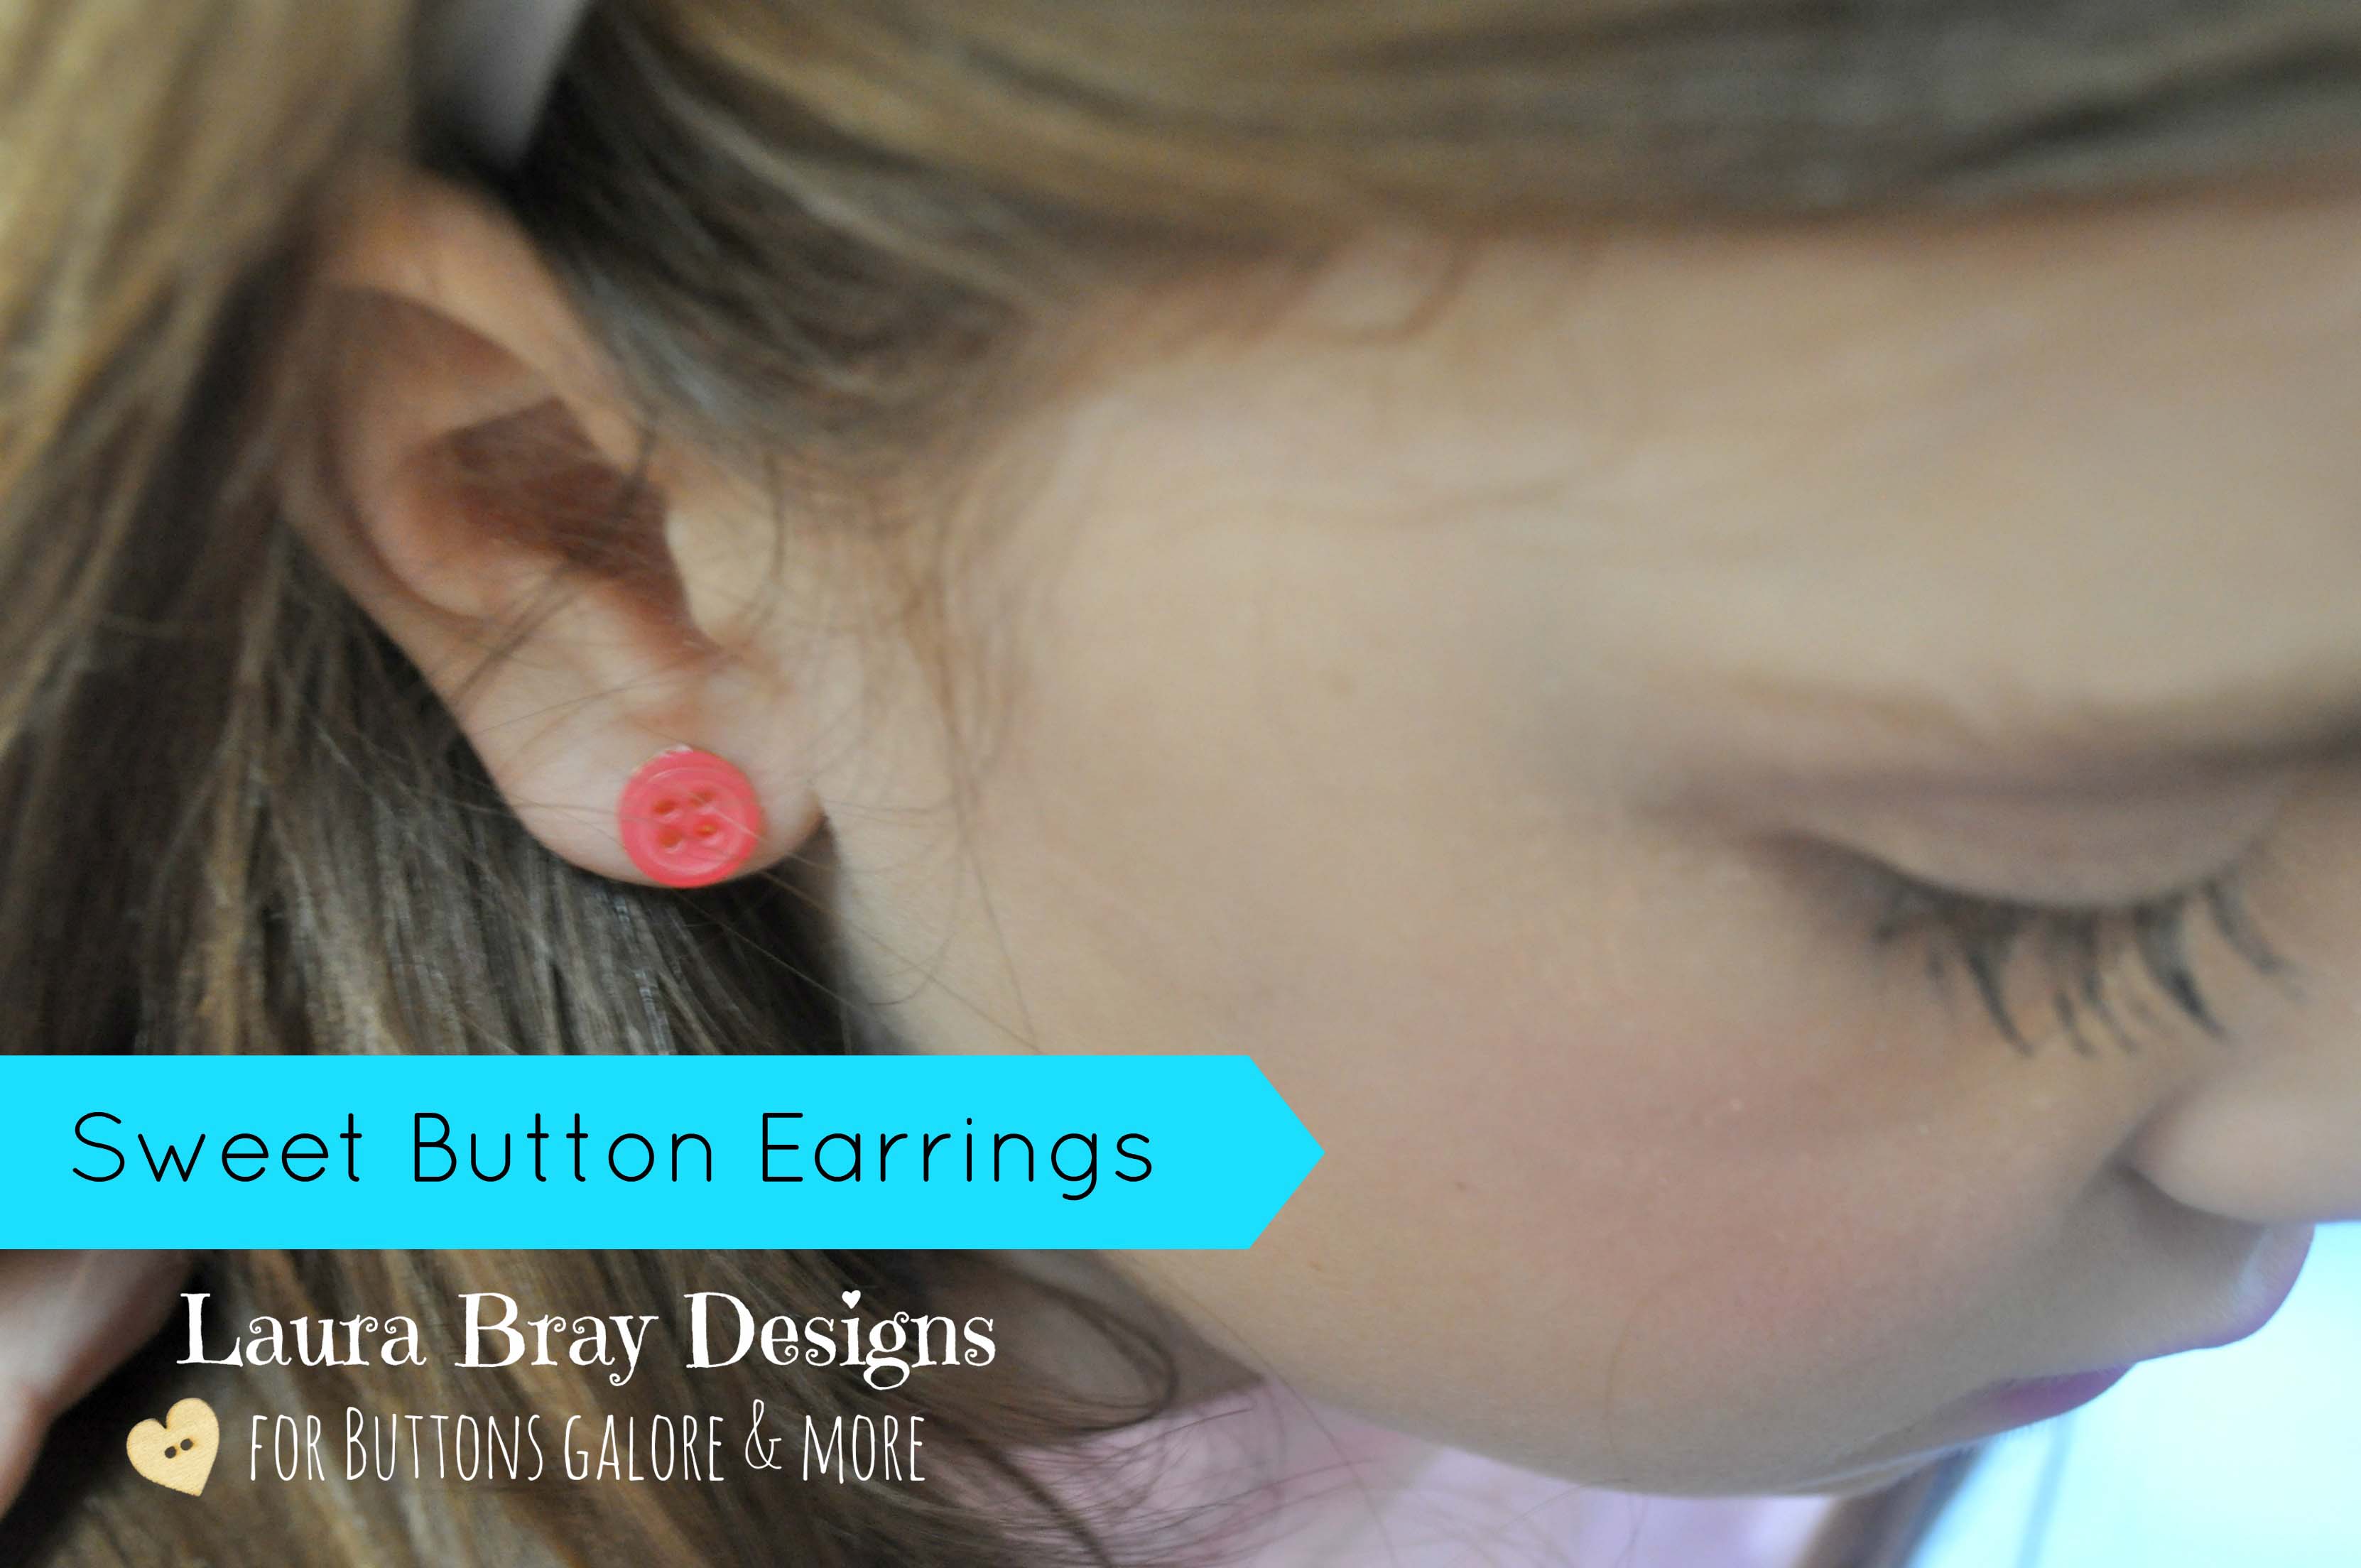
Need to make a set of super quick earrings? It doesn’t get any faster or easier than these.
Supplies:
Instructions:
This project is easy enough for children to do it. It would be a fun party activity for your little girl’s next party. Teachers-this would make a nice Mother’s Day craft project too!
Added bonus: Go to my blog, Laura Bray Designs to download some free, printable Mother’s Day cards that you can put your button earrings on!
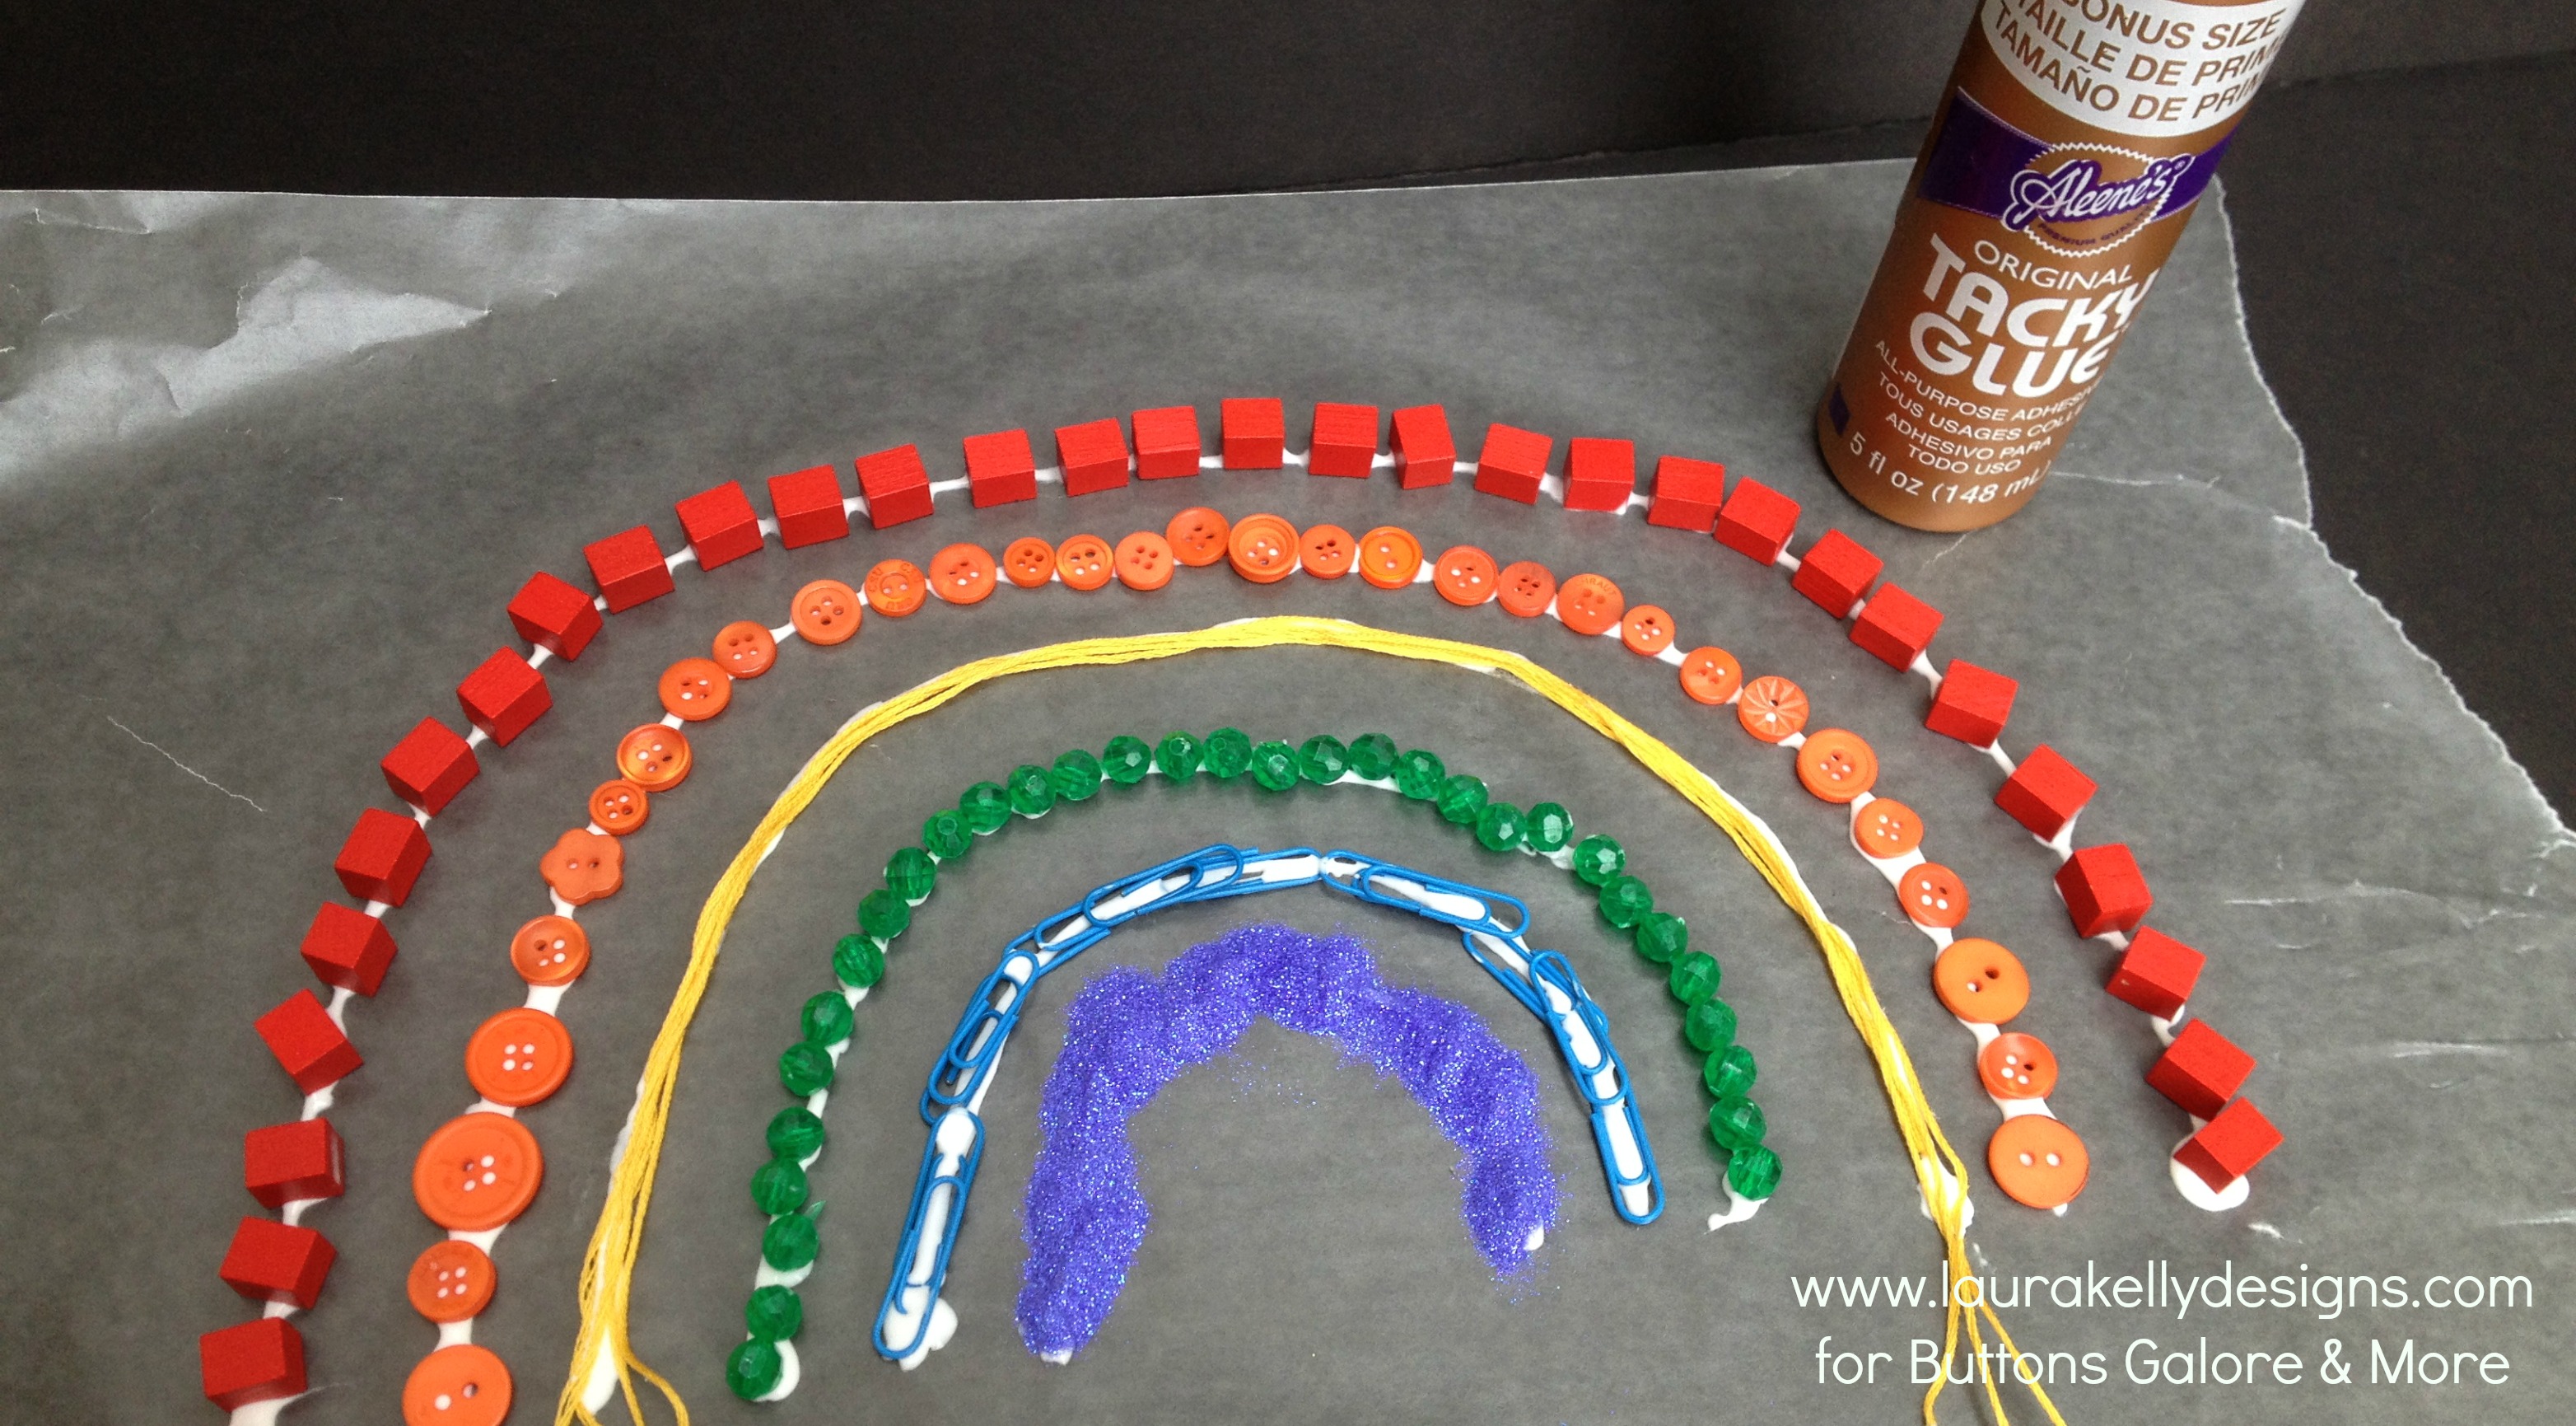
This is a really fun activity for kids, for kids of all ages that is. You can use this project as a guideline to create using a variety of bright materials but I, of course, love BUTTONS! You can find all of the colors of the rainbow in buttons in my Laura Kelly collection for Buttons Galore!
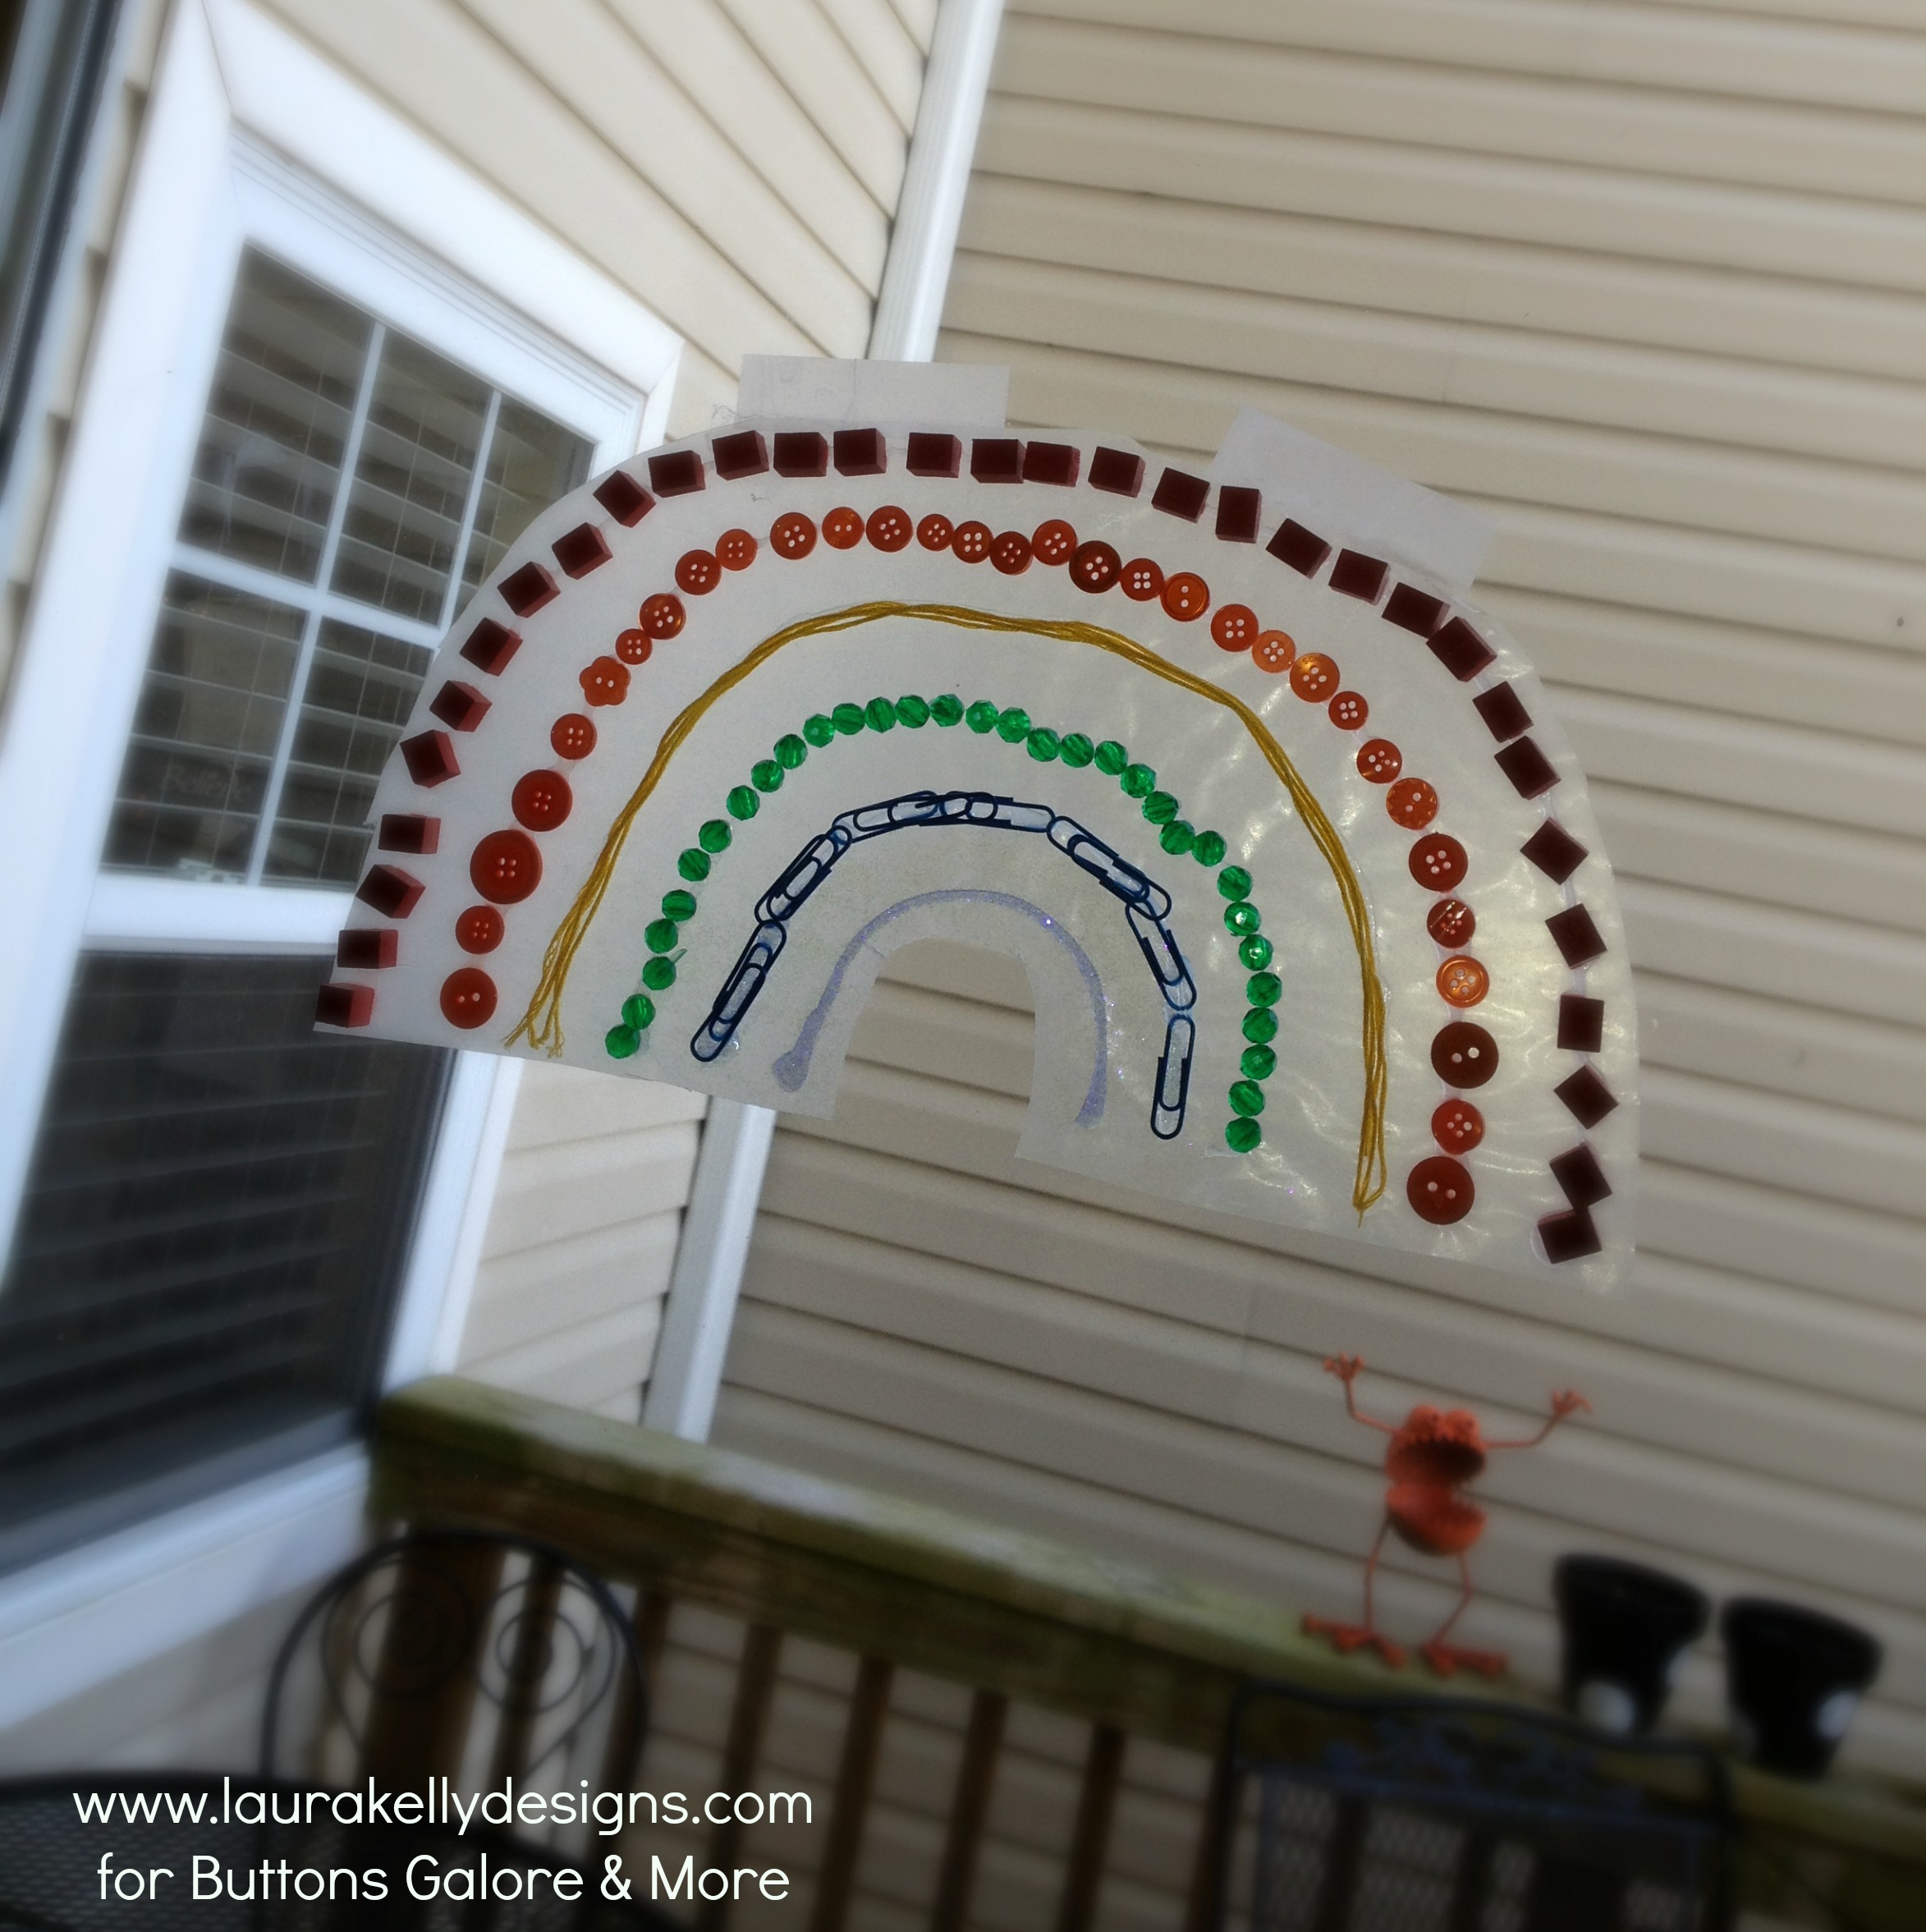
To create a rainbow of colorful fun, use a piece of waxed paper and create the arcs with Aleene’s Tacky Glue.

Then add objects in the colors of the rainbow to create the beauty. Buttons works GREAT but so do other embellishments and random things from around the house.
Ta Da! Once it is totally dry, cut it out and hang it up. It works great on a glass window or door.

Happy Being Bright and Cheerful,
Laura
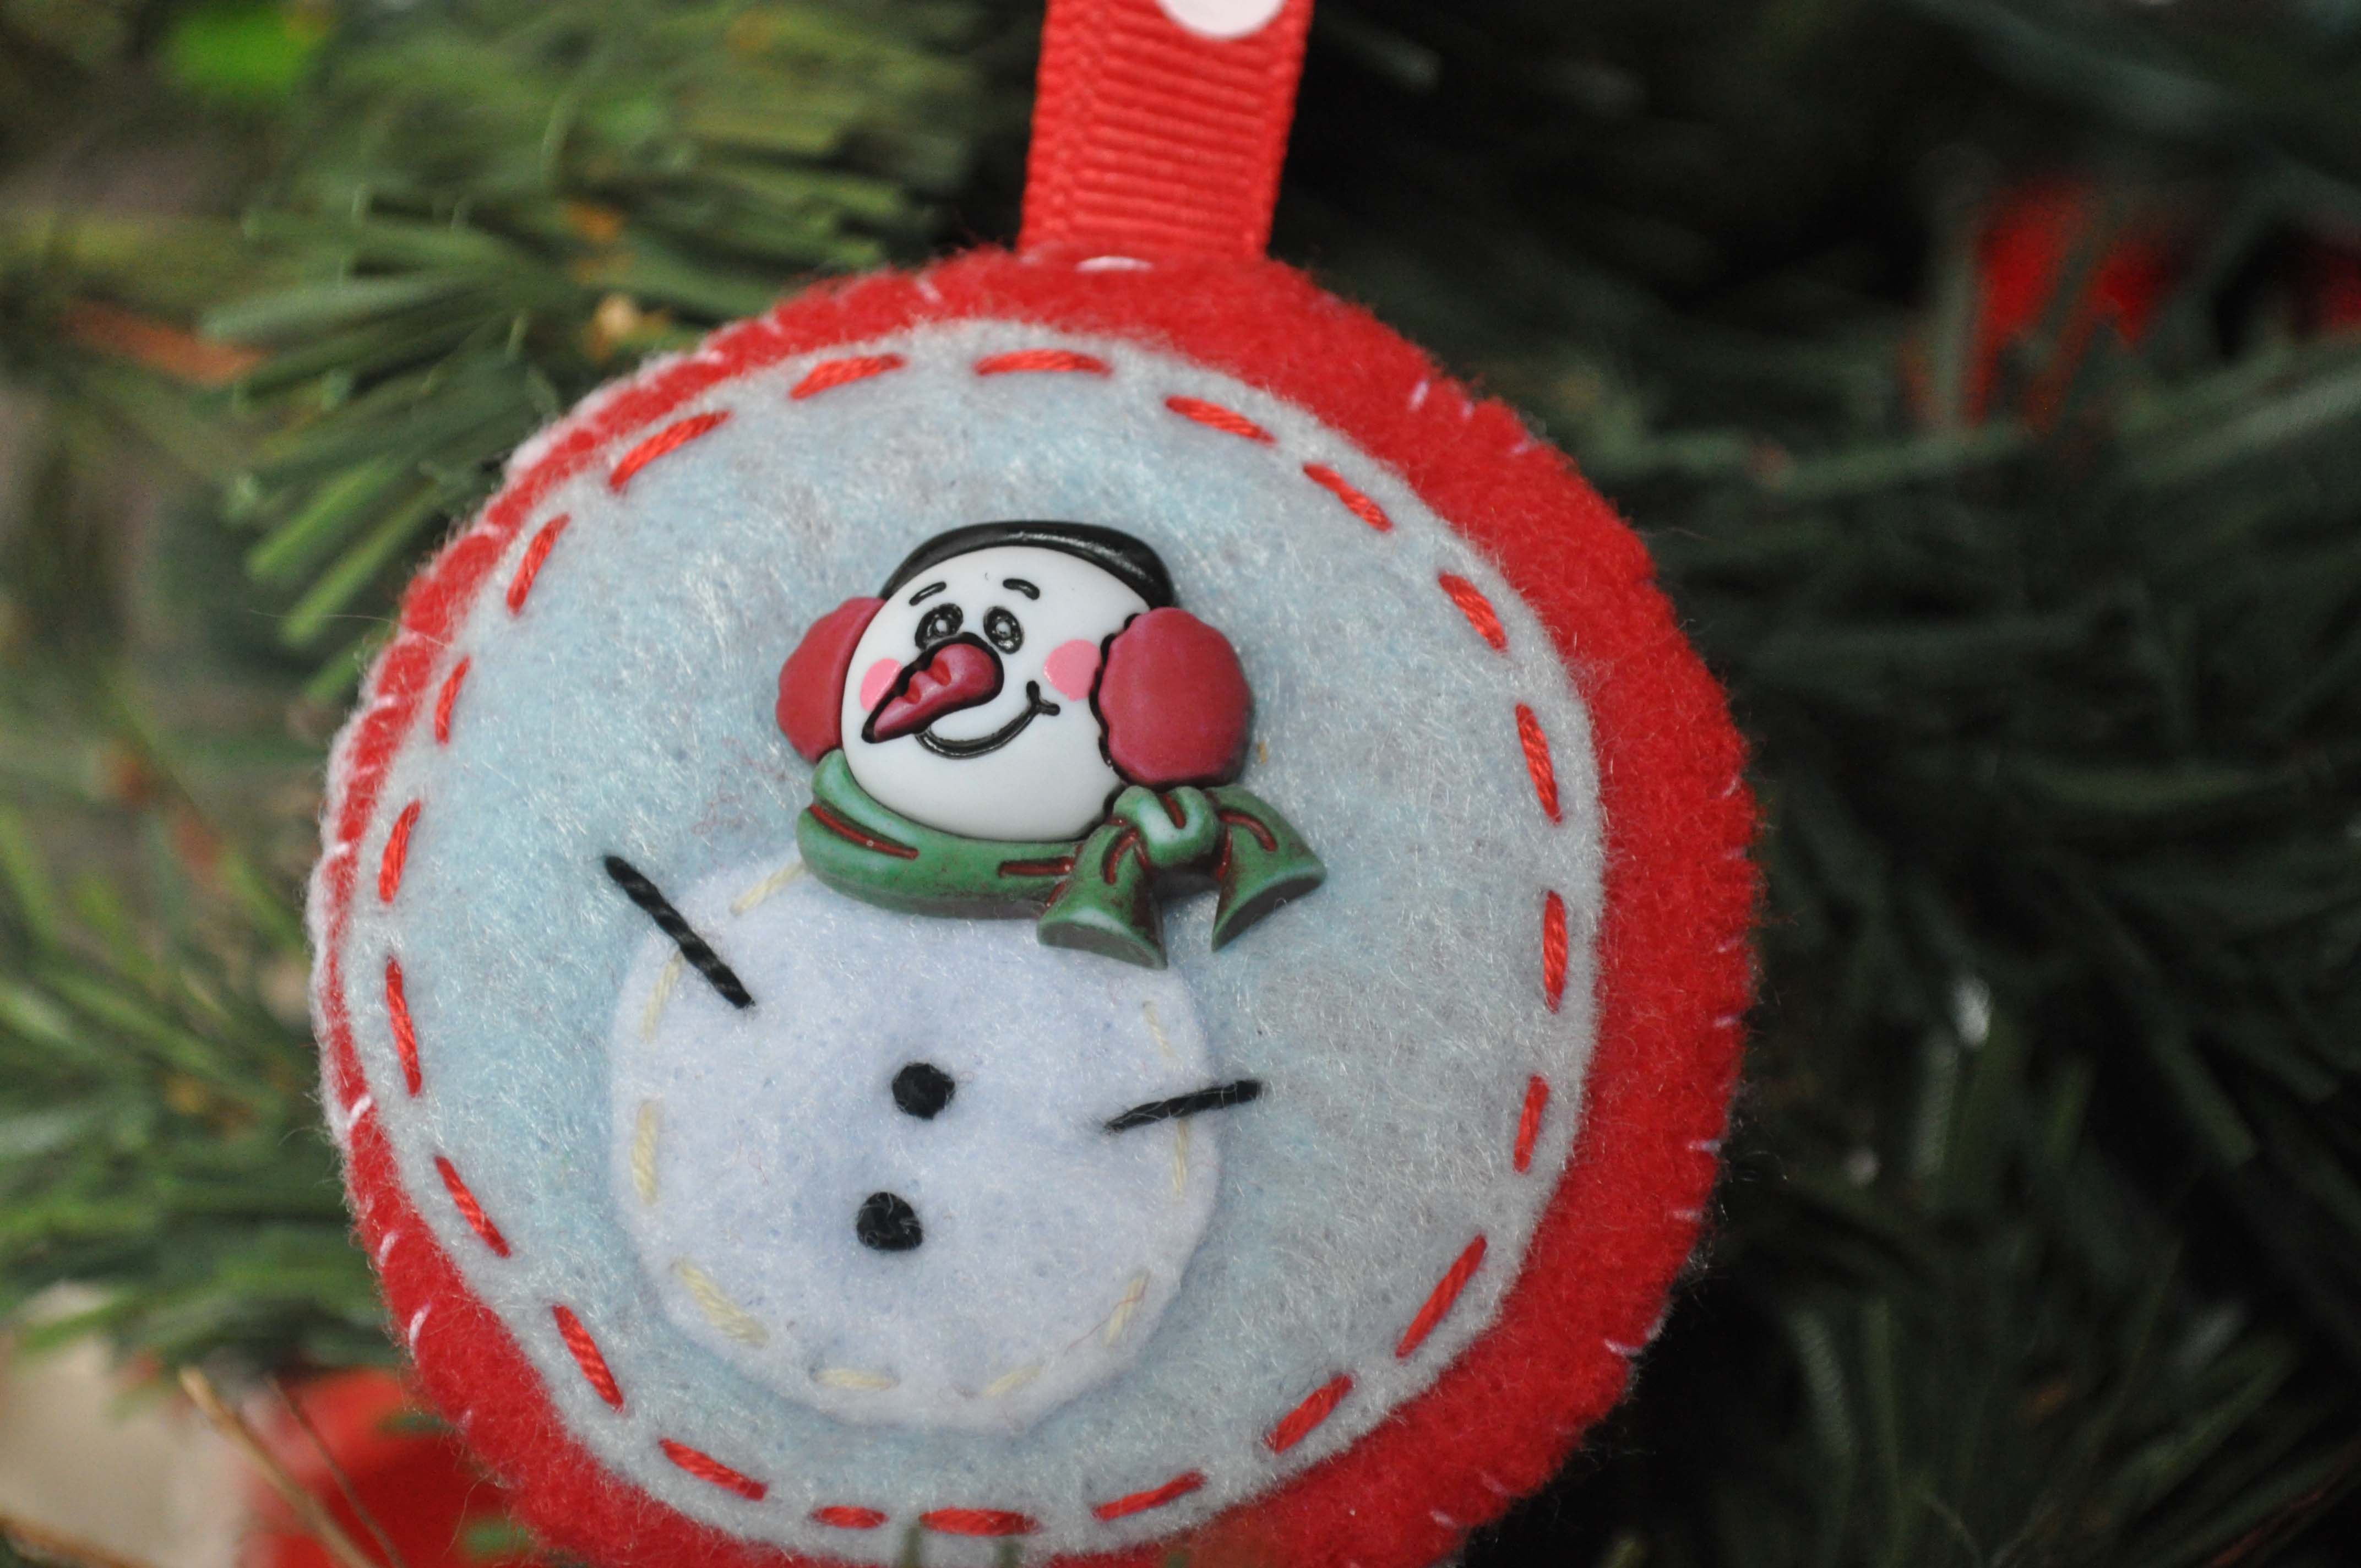
I love to make ornaments for my daughter, nieces, and nephew. When I was a girl, my grandfather made all the children in the family wood ornaments and I treasure them more than words can say. My grandfather has passed away so I’ve taken over the ornament making duties. Instead of wood, I make felt ornaments.They are different every year, but you can be sure they usually include buttons and embroidery! The Snowman Medley buttons by Vicki Schreiner were a great inspiration for this year’s ornaments. This project is great to work on while you are watching your favorite holiday movie, just cut out the pieces and stitch while you sip cocoa and put your feet up for a minute.
Supplies for felt ornaments
Instructions for felt ornaments
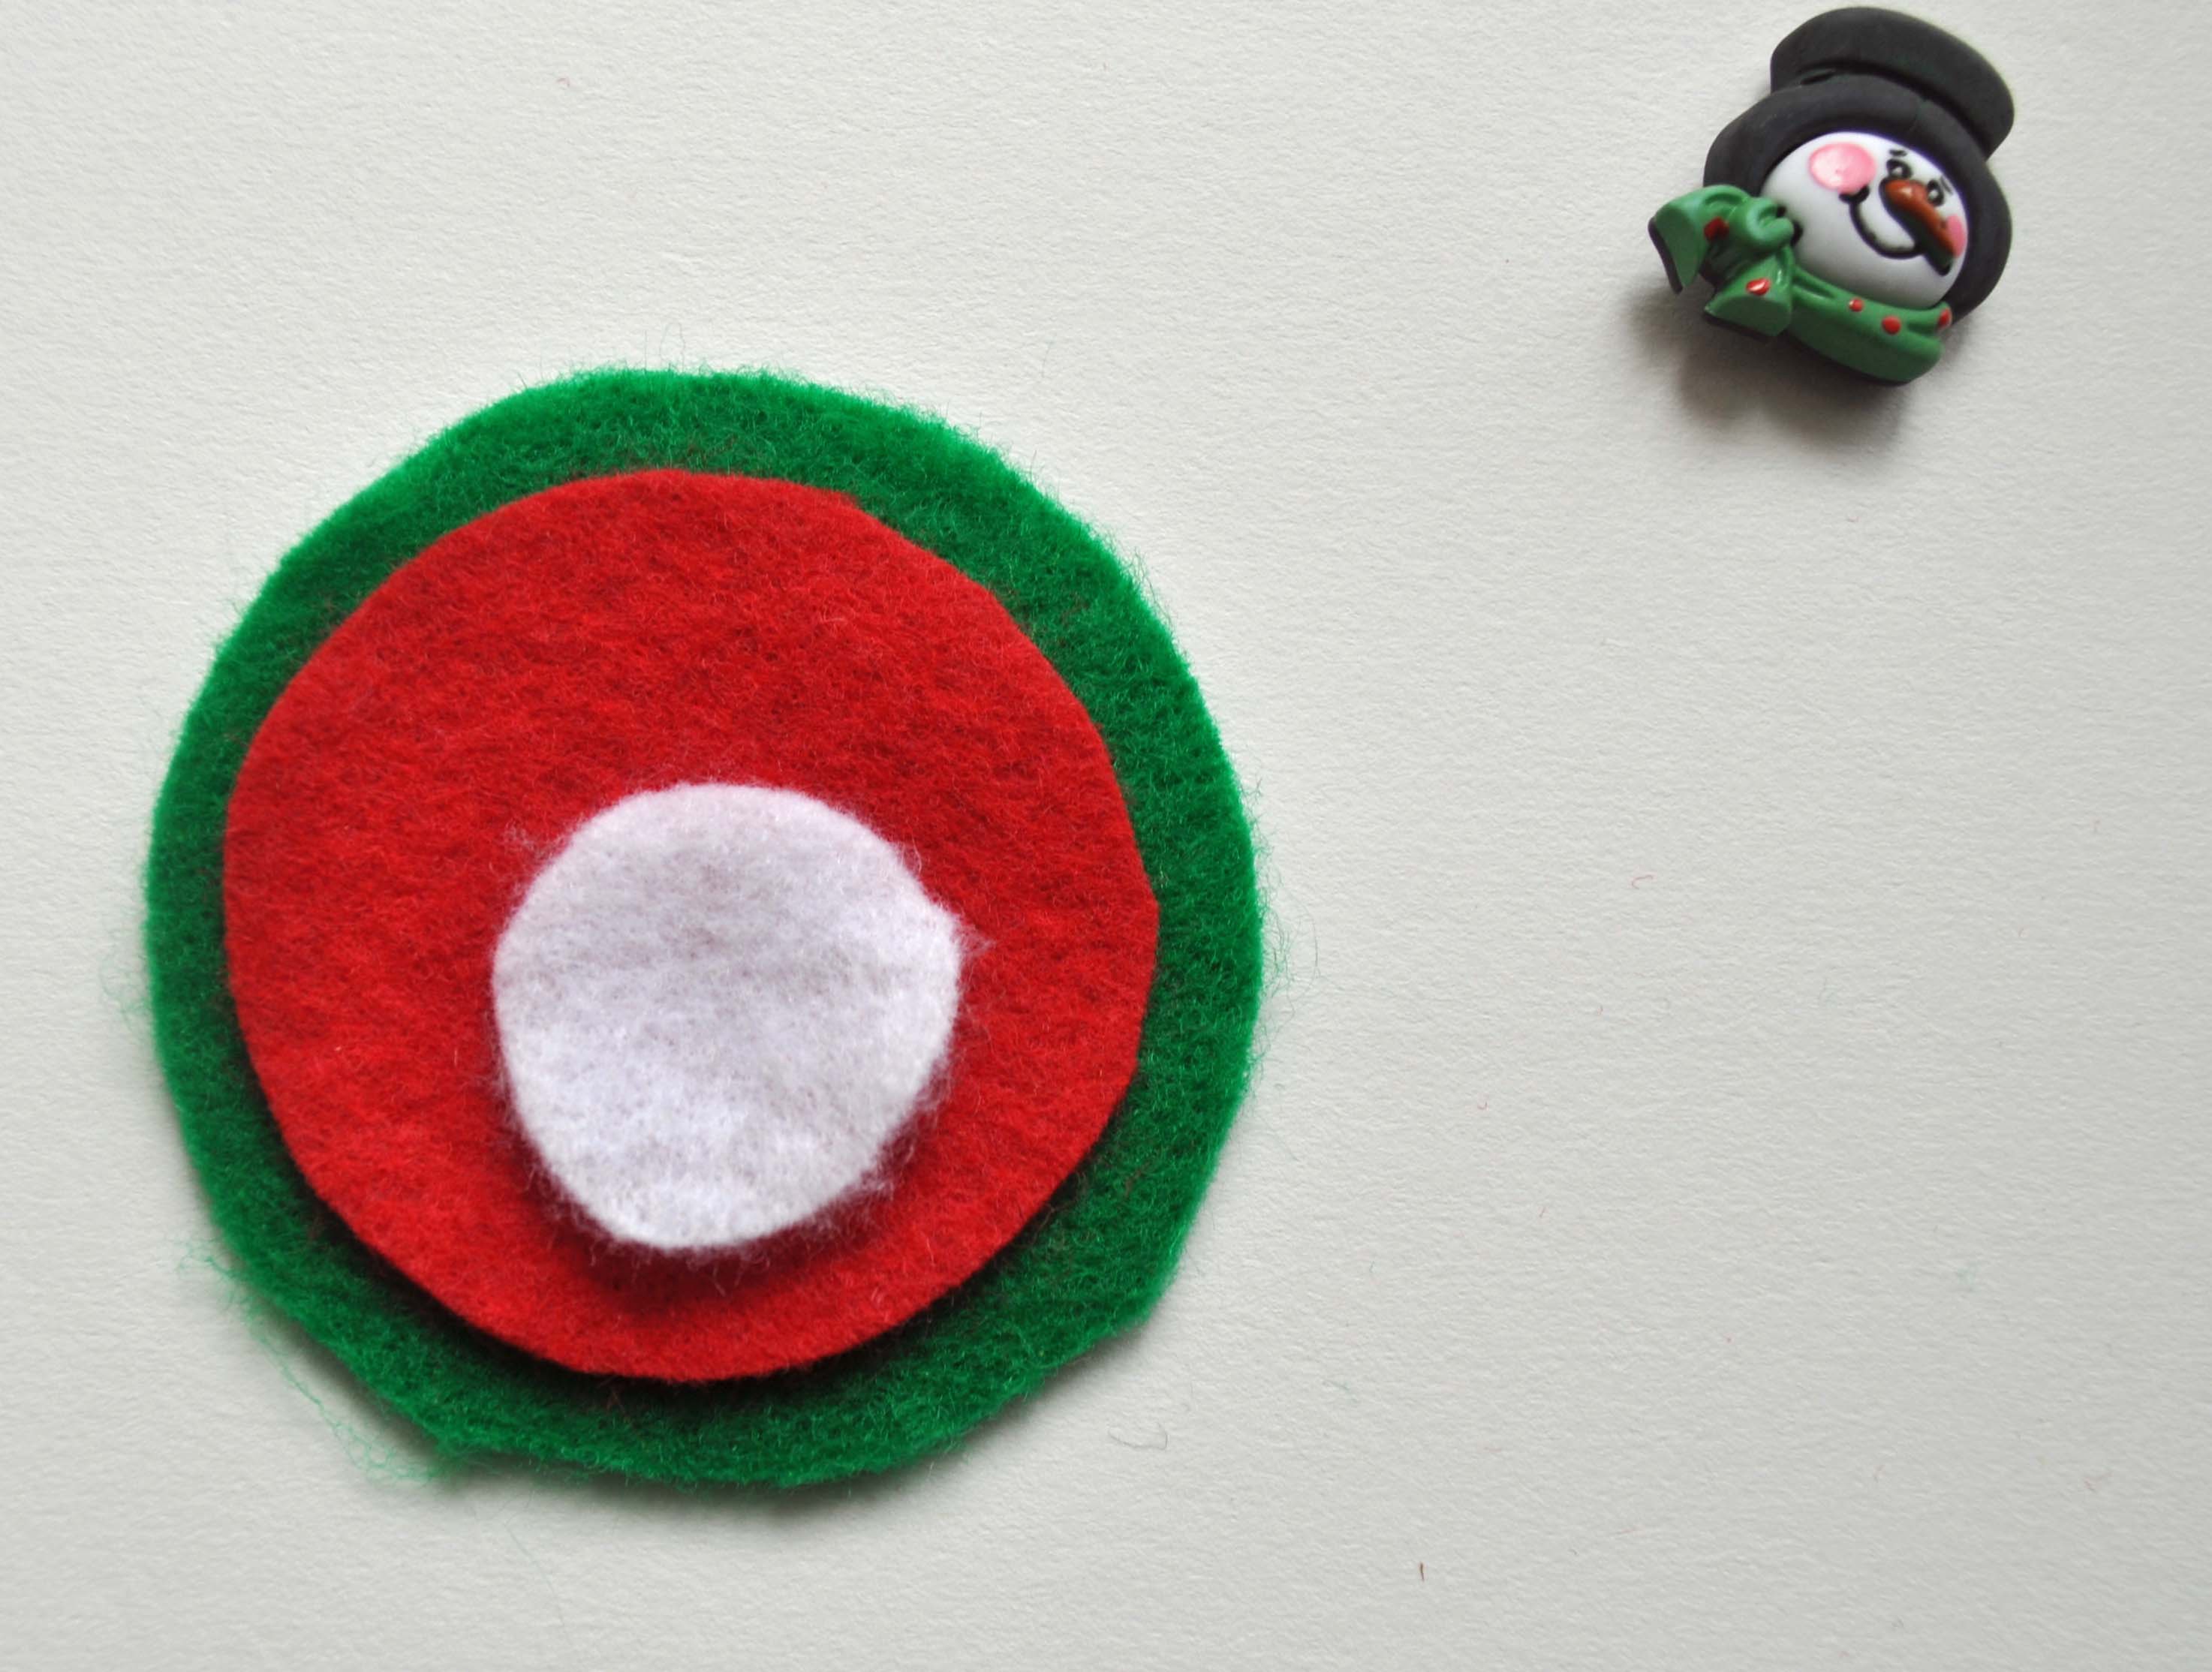
1. Cut two, 2 1/2″ circles from felt. They can be the same color or different. One circle will be the large background of your felt ornament and one will be the back.
2. Cut one, 2″circle from a coordinating felt color.
3. Cut one, 1″ circle from white felt. This will be the snowman’s body.
4. Place the 2 1/2″ circle on your work surface.

5. Lay the 2″ circle in the middle of the larger circle. Tack it down with a drop of glue.
6. Place the snowman body onto the 2″ circle and tack it down with glue. Make sure you place the snowman body towards the bottom of the felt to allow for room for the snowman button.
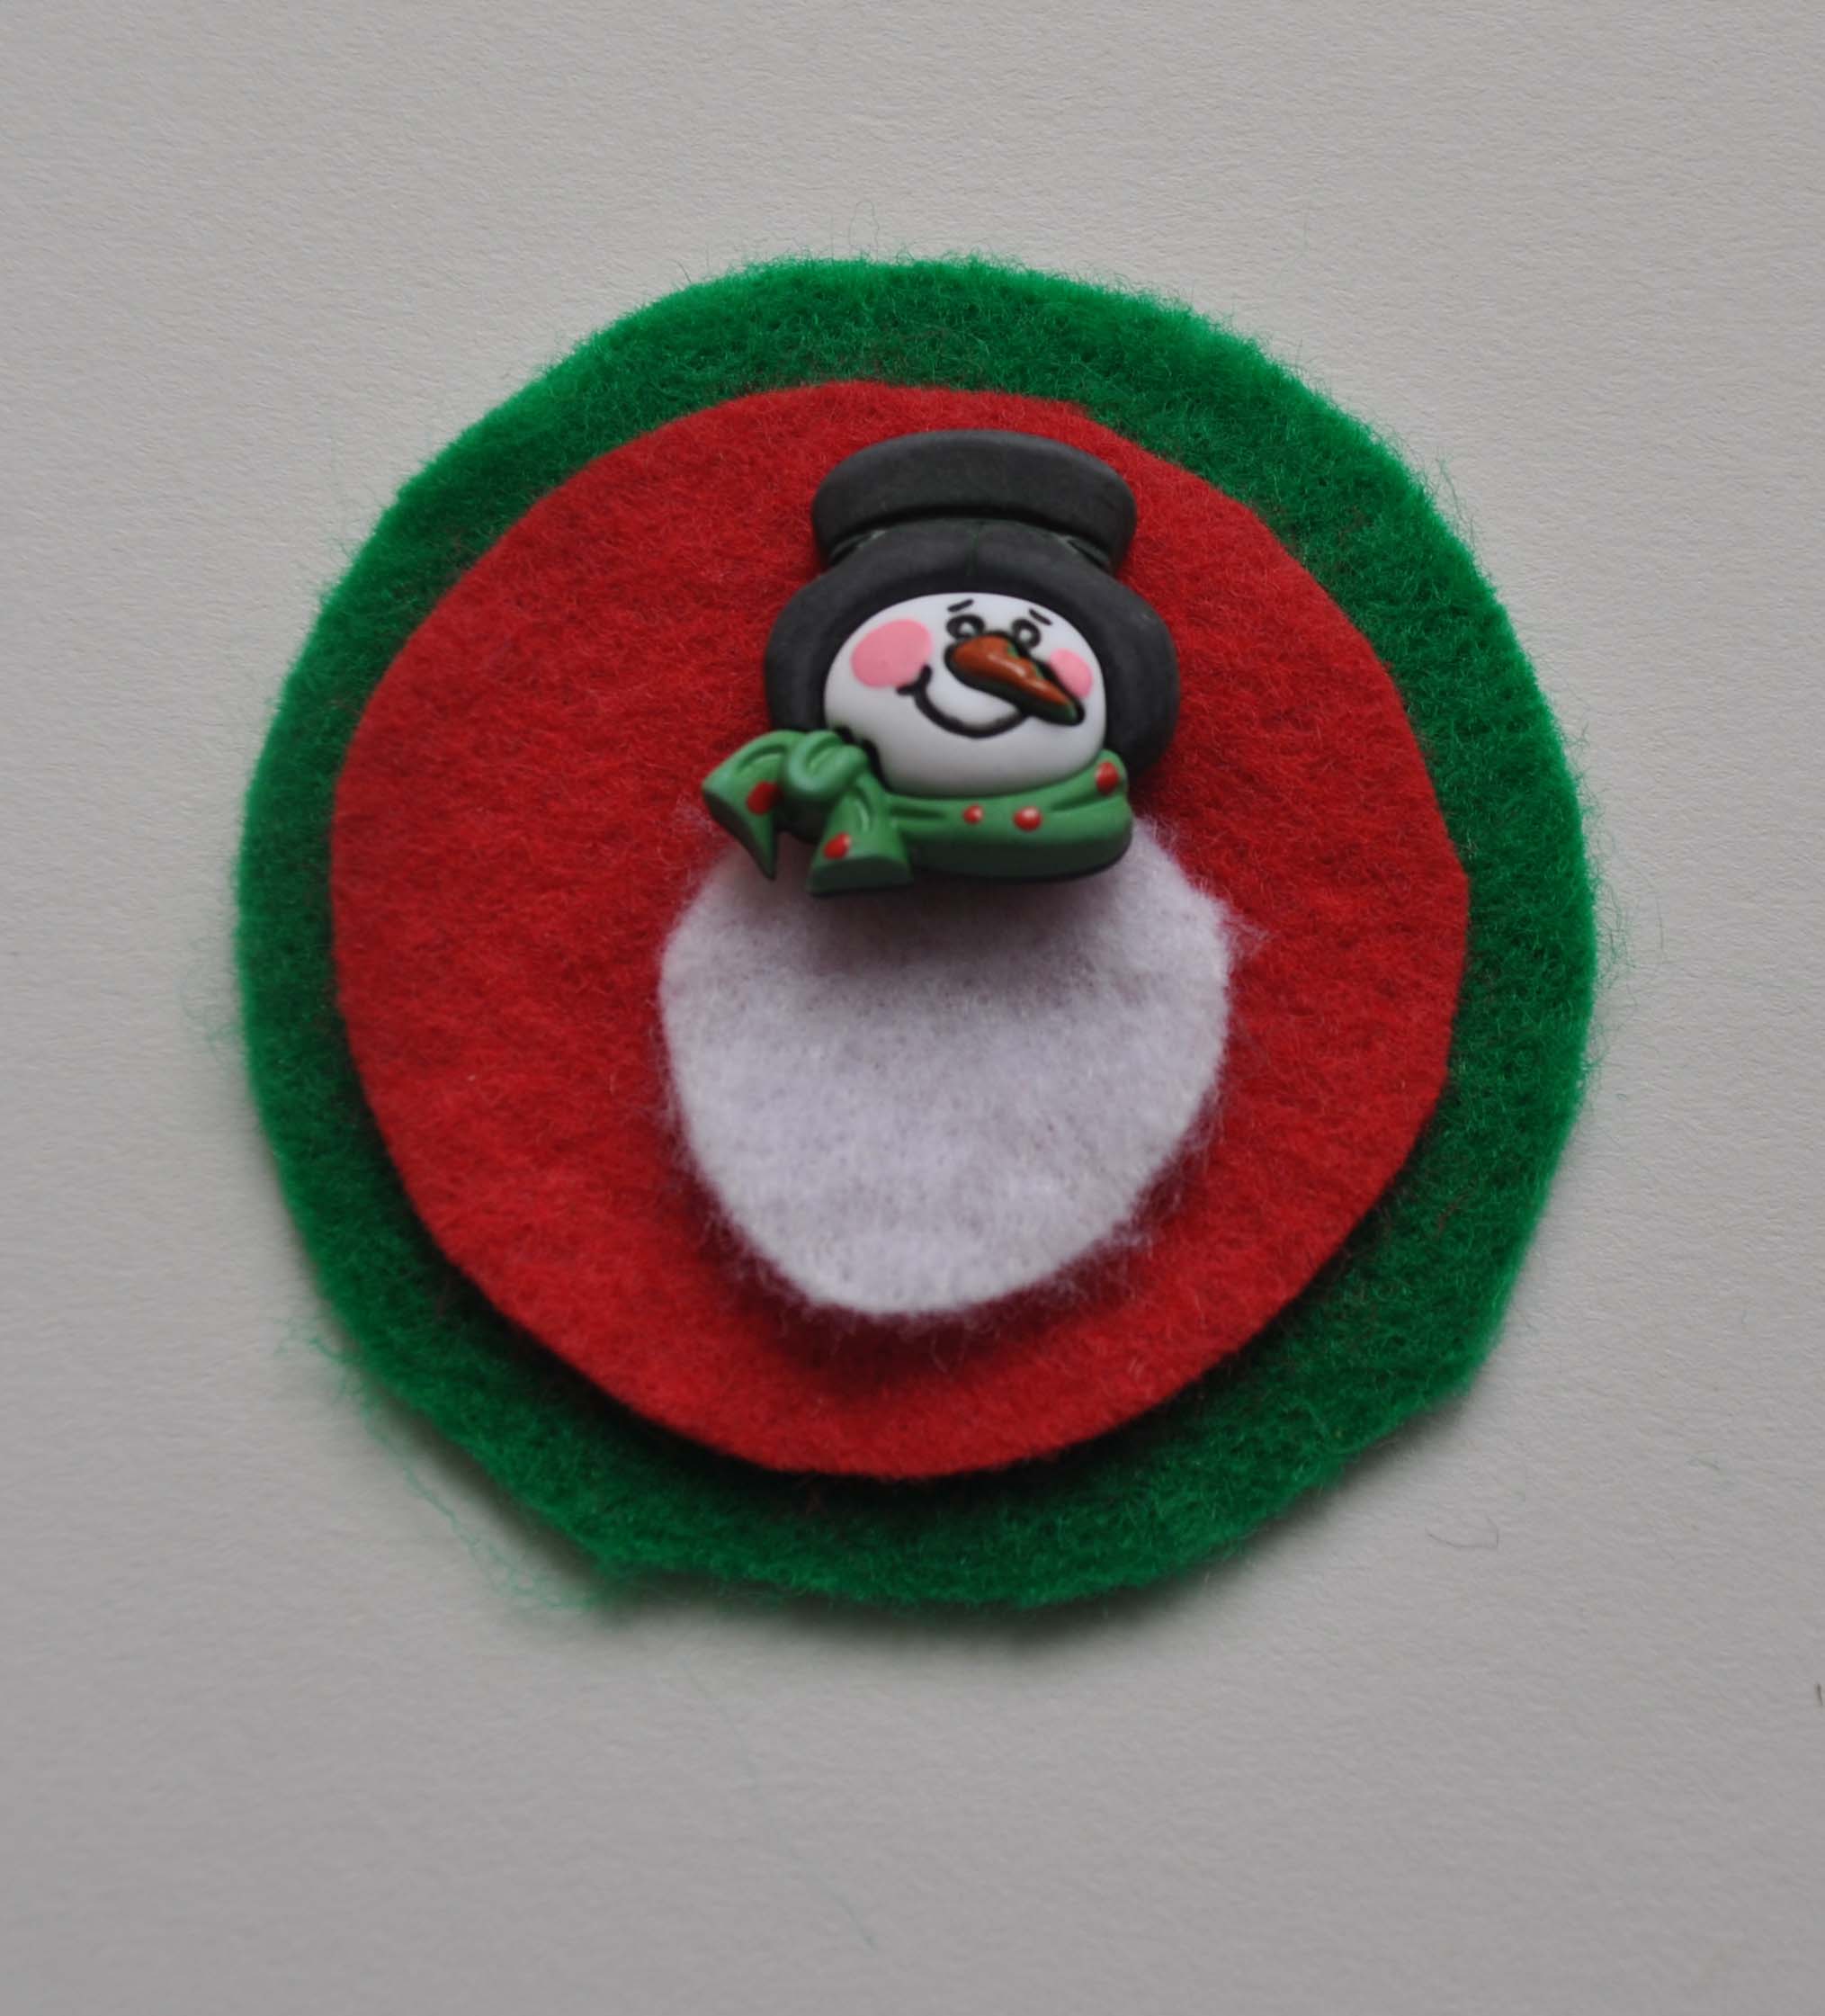
7. Using scissors, clip the shank off the back of the snowman button and glue it down.
8. Now it’s time to stitch! First stitch the 2″ circle onto the 2 1/2″ circle. I used a simple running stitch to do this.
9. Stitch the snowman body down. I used a running stitch to attach the body to the ornament, then added some arms with a straight stitch and coal button French knots. Play with the position of the arms on the snowman as this gives the little guy some personality. Is he throwing his arms up in delight? Keeping them by his side? Pointing the way to the North Pole?
9. Once everything is stitched into place on the front, it’s time to stitch the back felt circle to the front. You want to do this last as the back piece will cover all your stitching on the front piece. First, fold your ribbon piece in half and tuck it behind your stitched, front circle, at the top. Then place the back circle of felt on. Pin it all in place and do a blanket or running stitch to hold it all together.
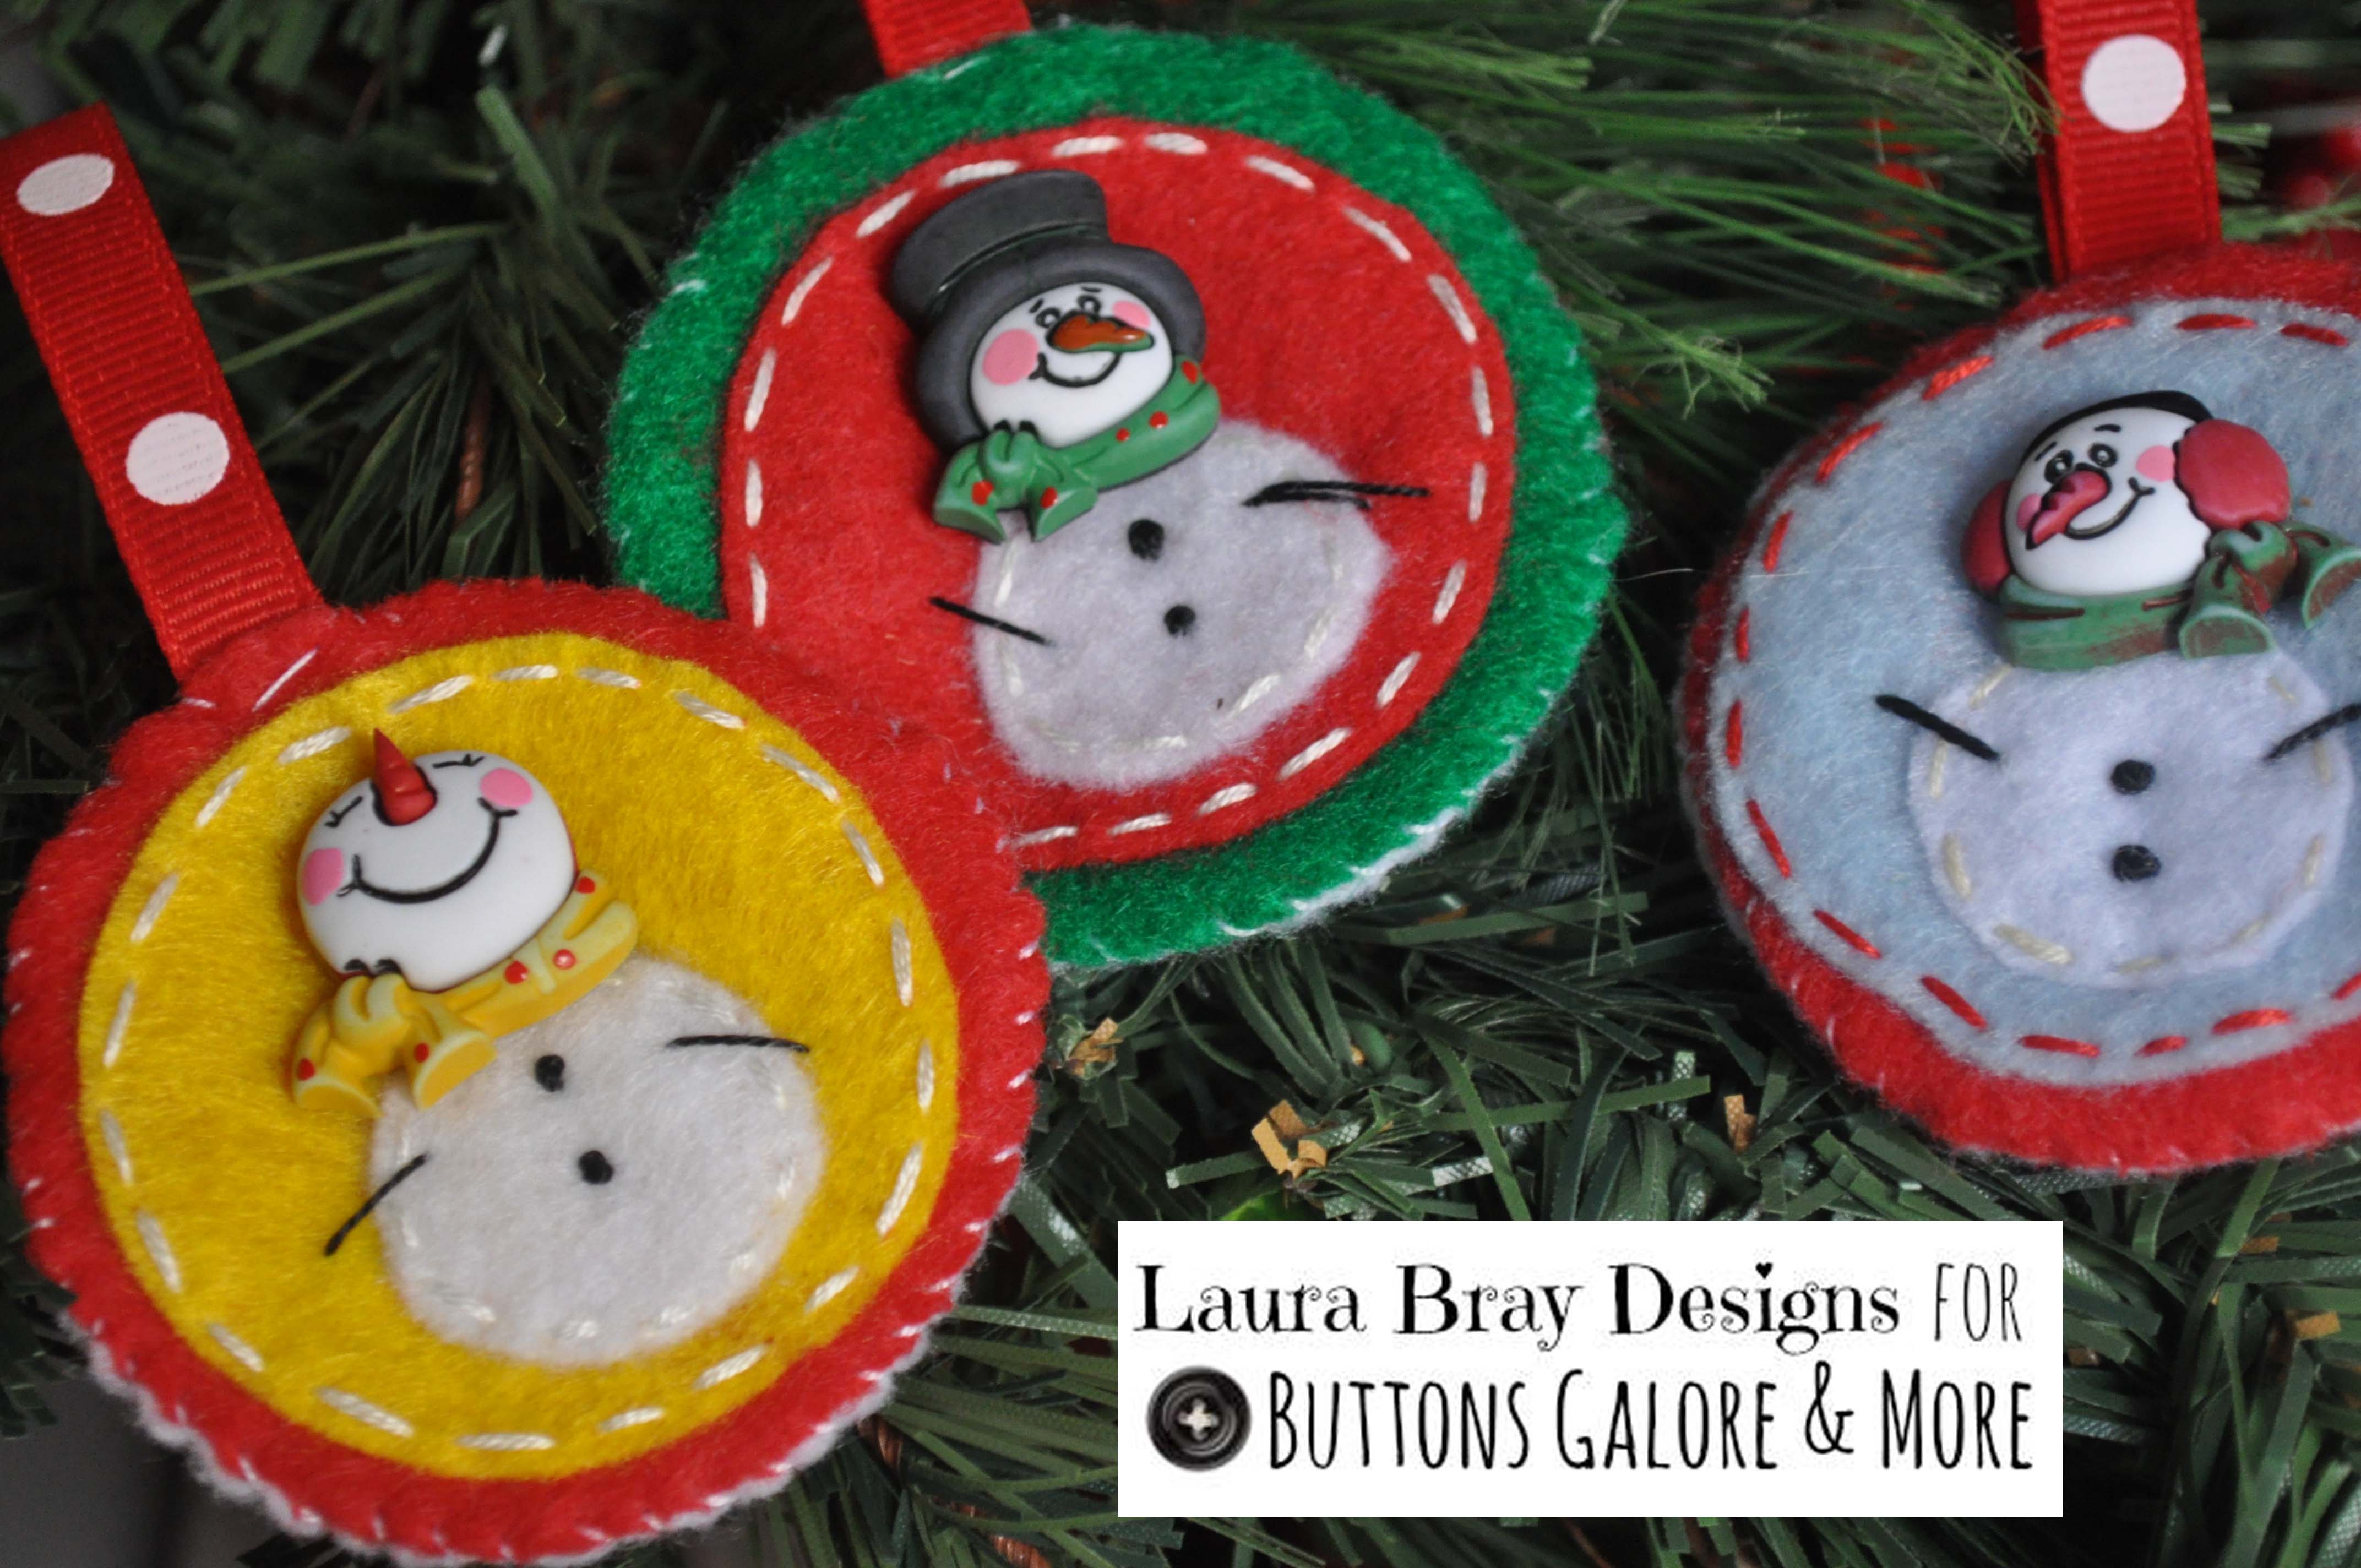
I hope you enjoy making holiday ornaments this year. Maybe you will even start a tradition of a yearly handmade ornament at your house!
Wishing you the Happiest of Holidays! To get lots of more crafty holiday ideas and recipes, please come and visit me on my blog at Laura Bray Designs.
![]()

Remember, you can enjoy 50% off the buttons used in our project today. Visit our Coupons page for details! Special offer ends January 14, 2014.
Happy New Year!!!
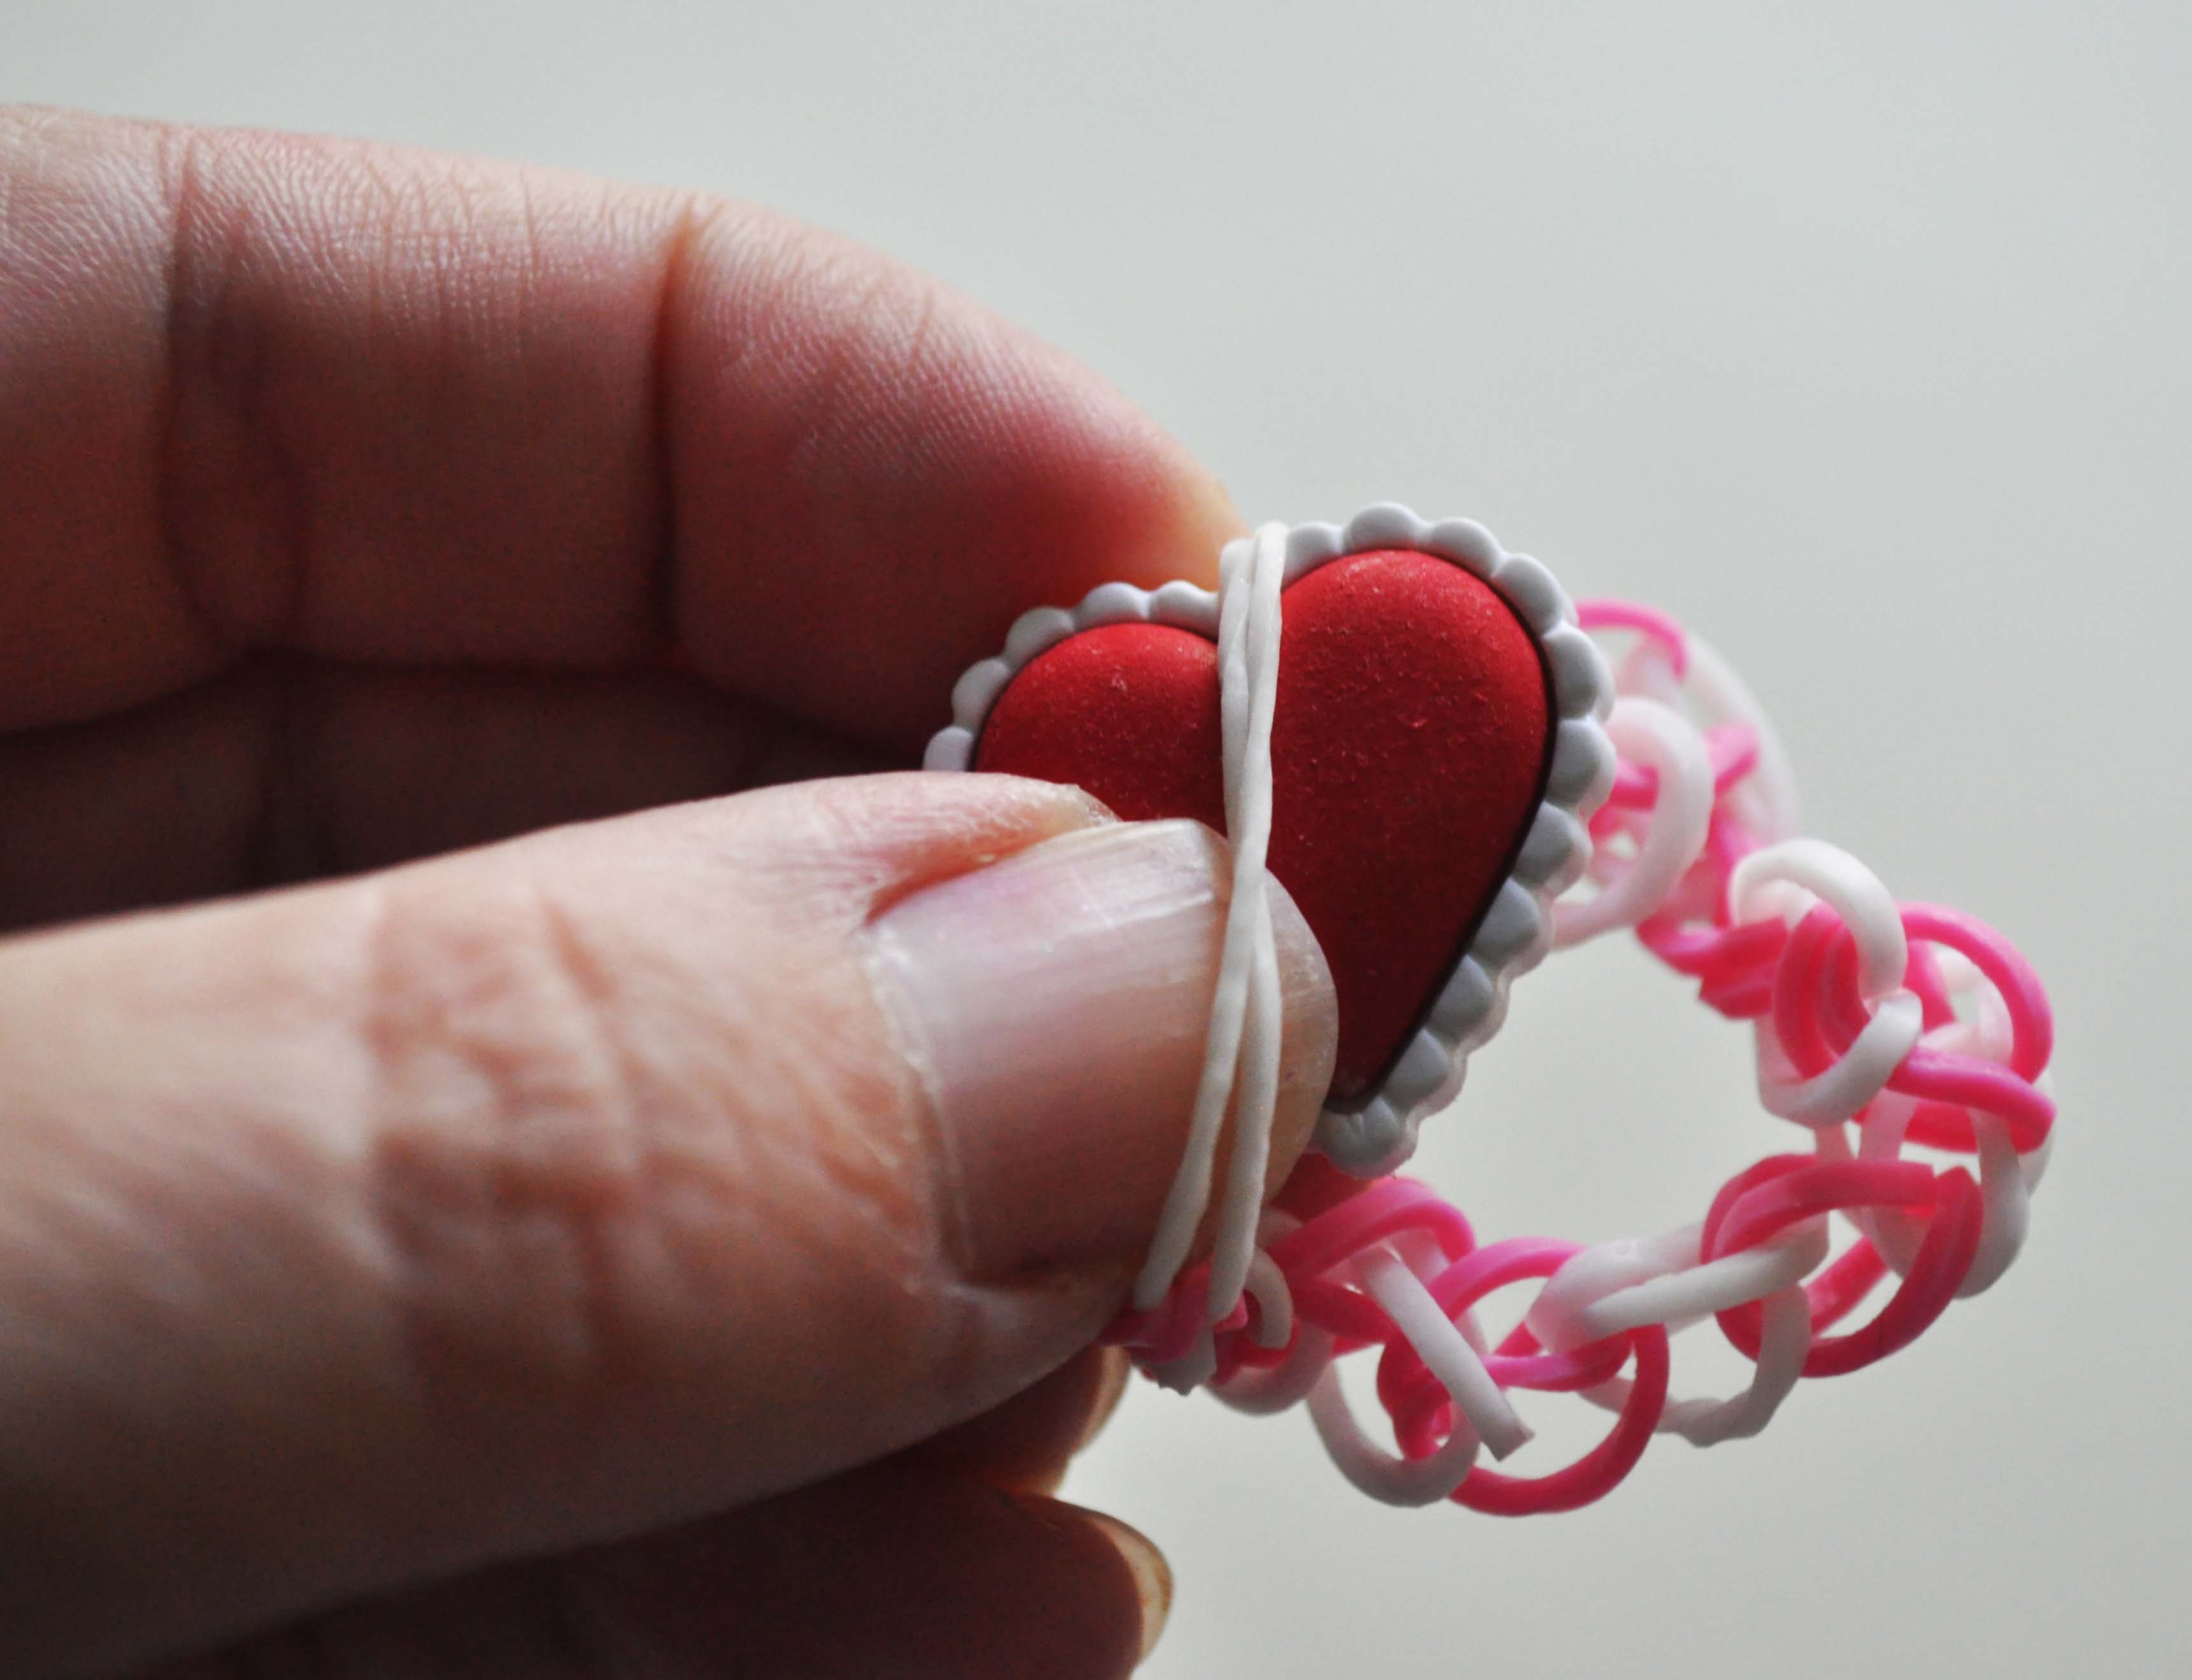
Rubber band bracelets are all the rage with kids these days. Some crafters use a special loom to create the bracelets, but you can also use your fingers and some super cute novelty buttons to create a closure for your bracelet. This is definitely a kid-approved project as my daughter was wildly impressed that she could now make rubber band bracelets that stood out from the crowd.


1. With your fingers, squeeze one of the bands in half and thread it through the shank of your button.
2. Squeeze another band in half and weave it through the loops of the band that you pushed through your button.

3. Continue weaving your bands together until you get the length you want. Don’t forget the bands stretch!
4. When you get to the end of your band, take the two last two loops and wrap it over the button.
Thanks for crafting with me today! For more crafts, lifestyle tips, and button projects, visit me on my blog at Laura Bray Designs.
![]()
Your dog is an important part of your family so why not make a Dog Treat Jar? If you’re a dog lover, you’re gonna love the Buttons Galore Dog Gone It buttons.

Ya know anything looks great in displayed in a Mason Jar. Even plain ole’ Milk Bones.

To embellish the jar lid, I adhered a piece of patterned paper on the lid then used Ultra Thin Glue Dots to adhere various Buttons Galore Dog Gone It buttons.

Buttons Galore makel Blank Craft Shapes that are perfect to use if you want to customize a tag.
1. Choose a Blank Shape
2. Ink with color
3. Set the ink with a heat gun.

Taa Daa-There you have it, a cute Dog Treat Jar tag!
My dog has no interest in eating plain Milk Bones. She’s only interested in the gravy covered Milk Bones like the in the jar. When I was done taking the photos of this project, I came back in the room a few hours later and noticed my dog bone props were missing off the table. Hmmm…I wonder who might of snatched them??

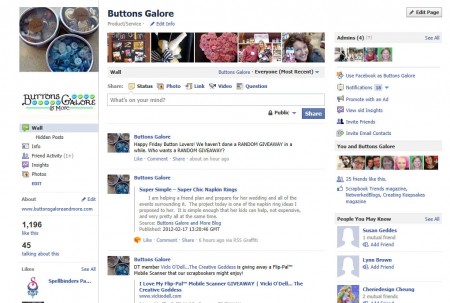
Like Me on Facebook!
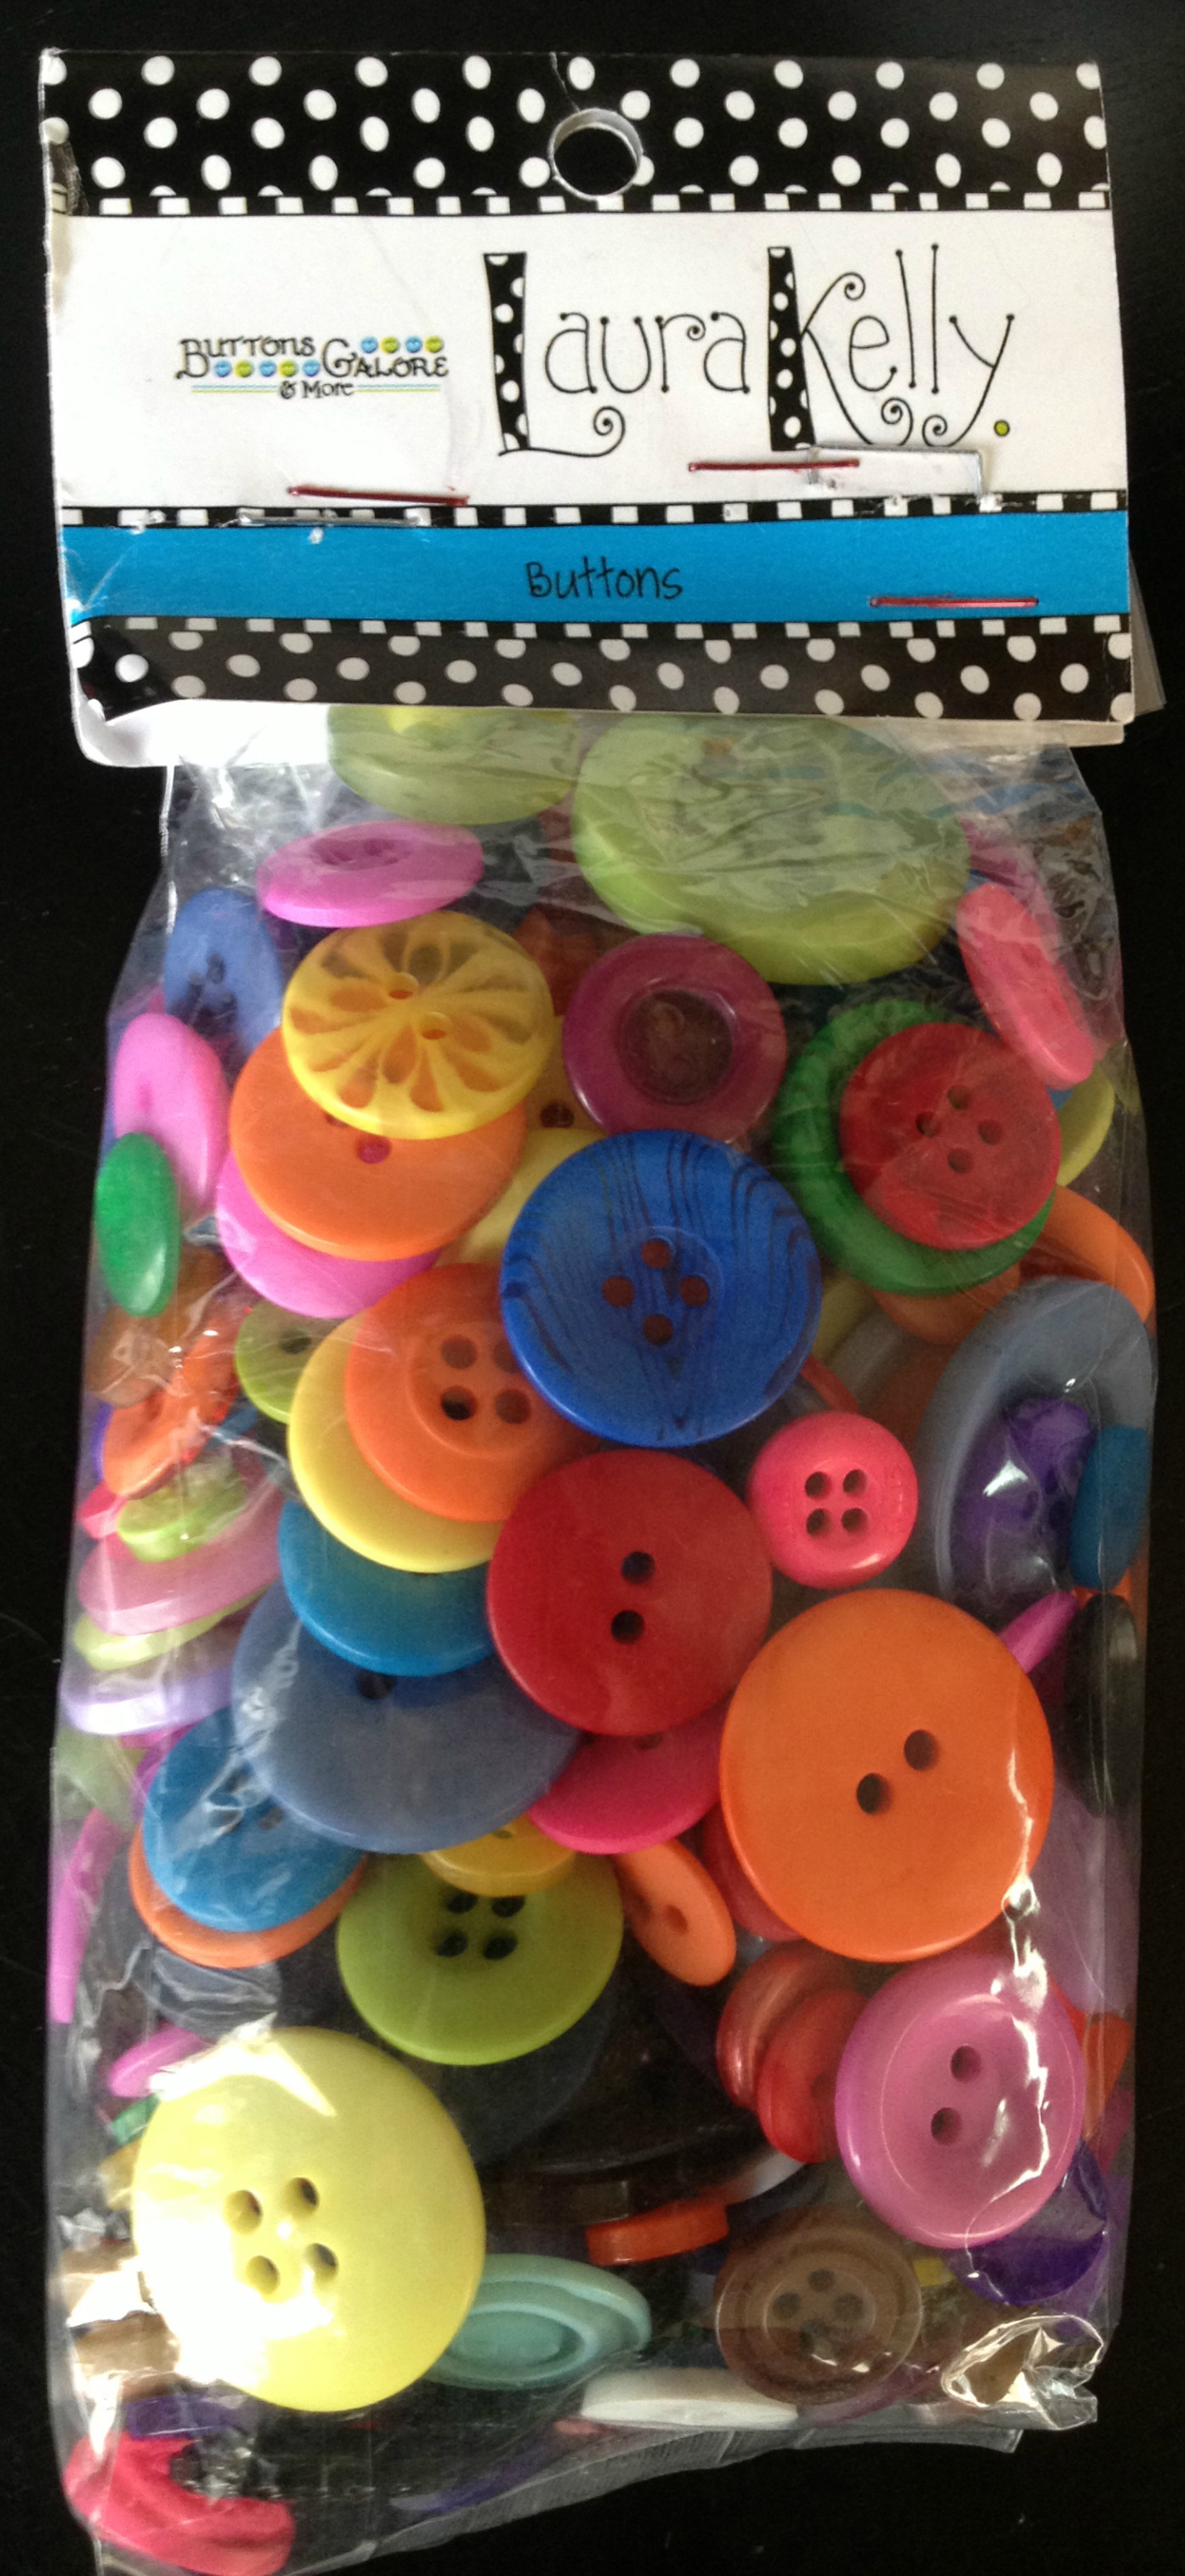
I love the mixed color collection of Laura Kelly buttons and keep finding fun ways to use them.
When socks get work and need a little bit of fancying up, here is a great way to make them fun again. The first step is to wash them and get them bright and white again. I recommend Rit’s Laundry Whitener and Brightener. If they are too far gone, you can dye them a fun new color. When they are clean and dry, sew on miscellaneous buttons to decorate them. I used embroidery floss to get a secure stitch.
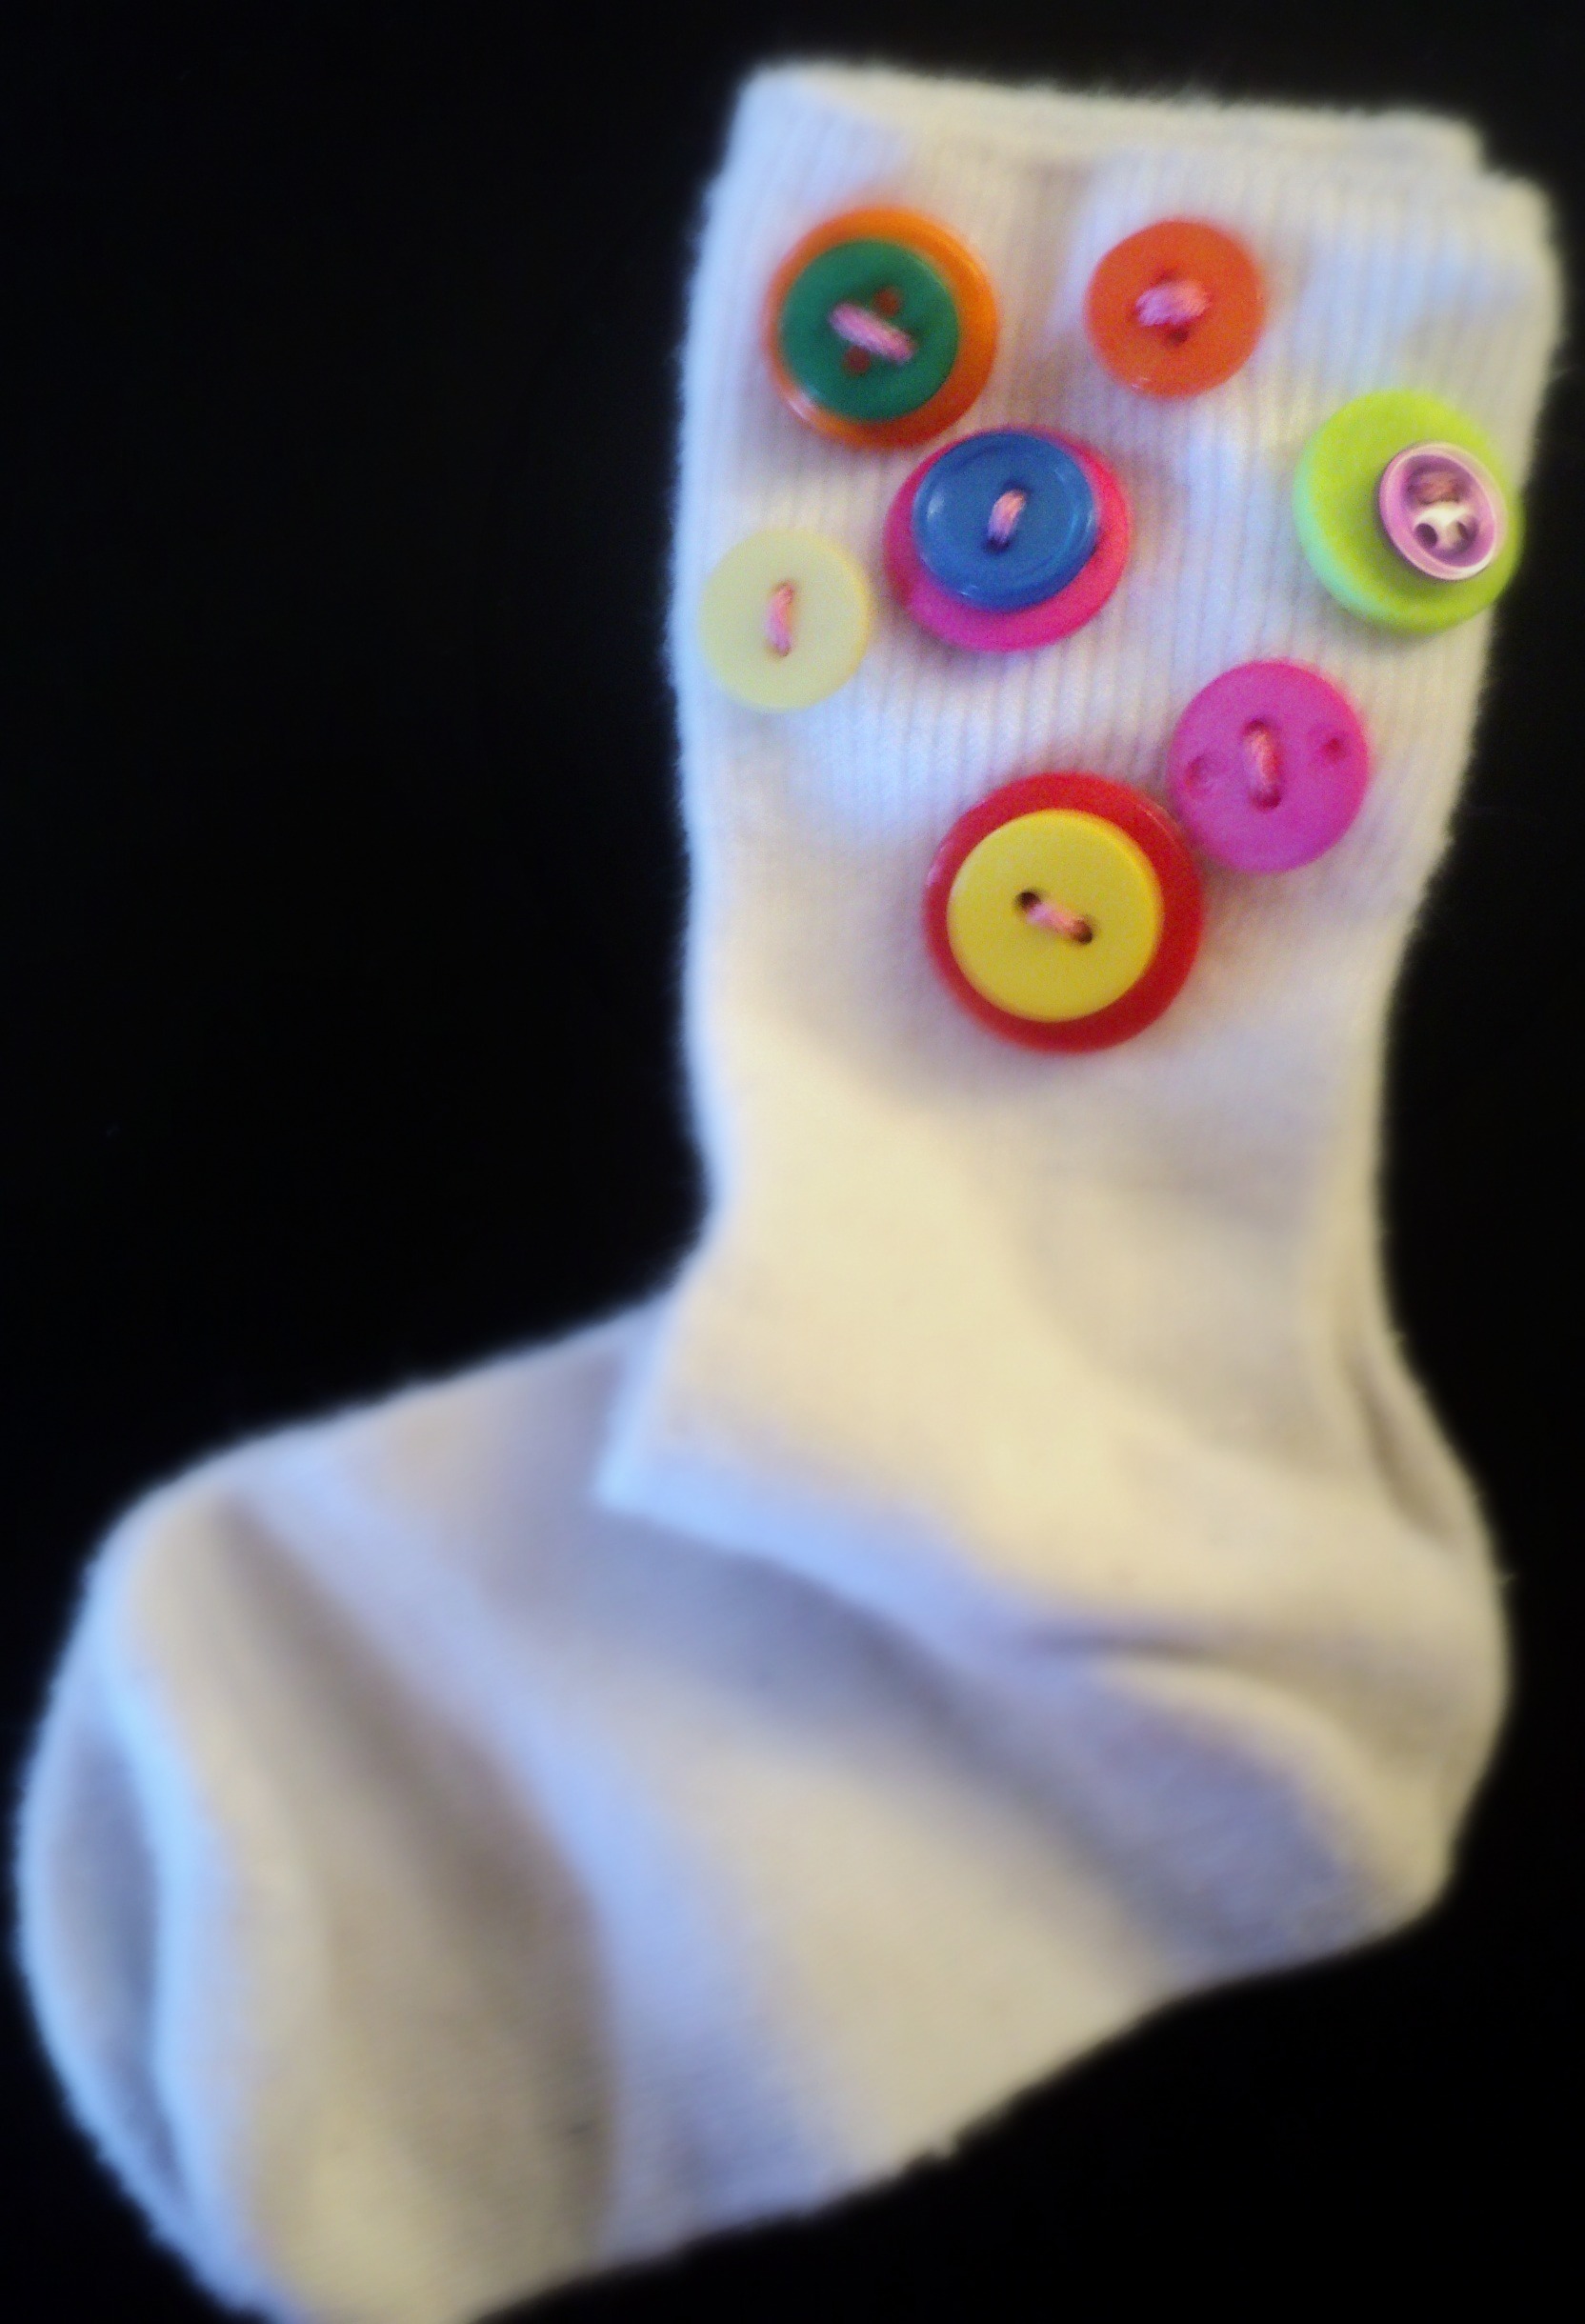
Awesome way to up cycle worn out apparel.
It would be fun to do them in school colors (or football team colors) or to match a favorite outfit. I think I might try them on a pair of knee socks next.
Happy Buttons,
Laura
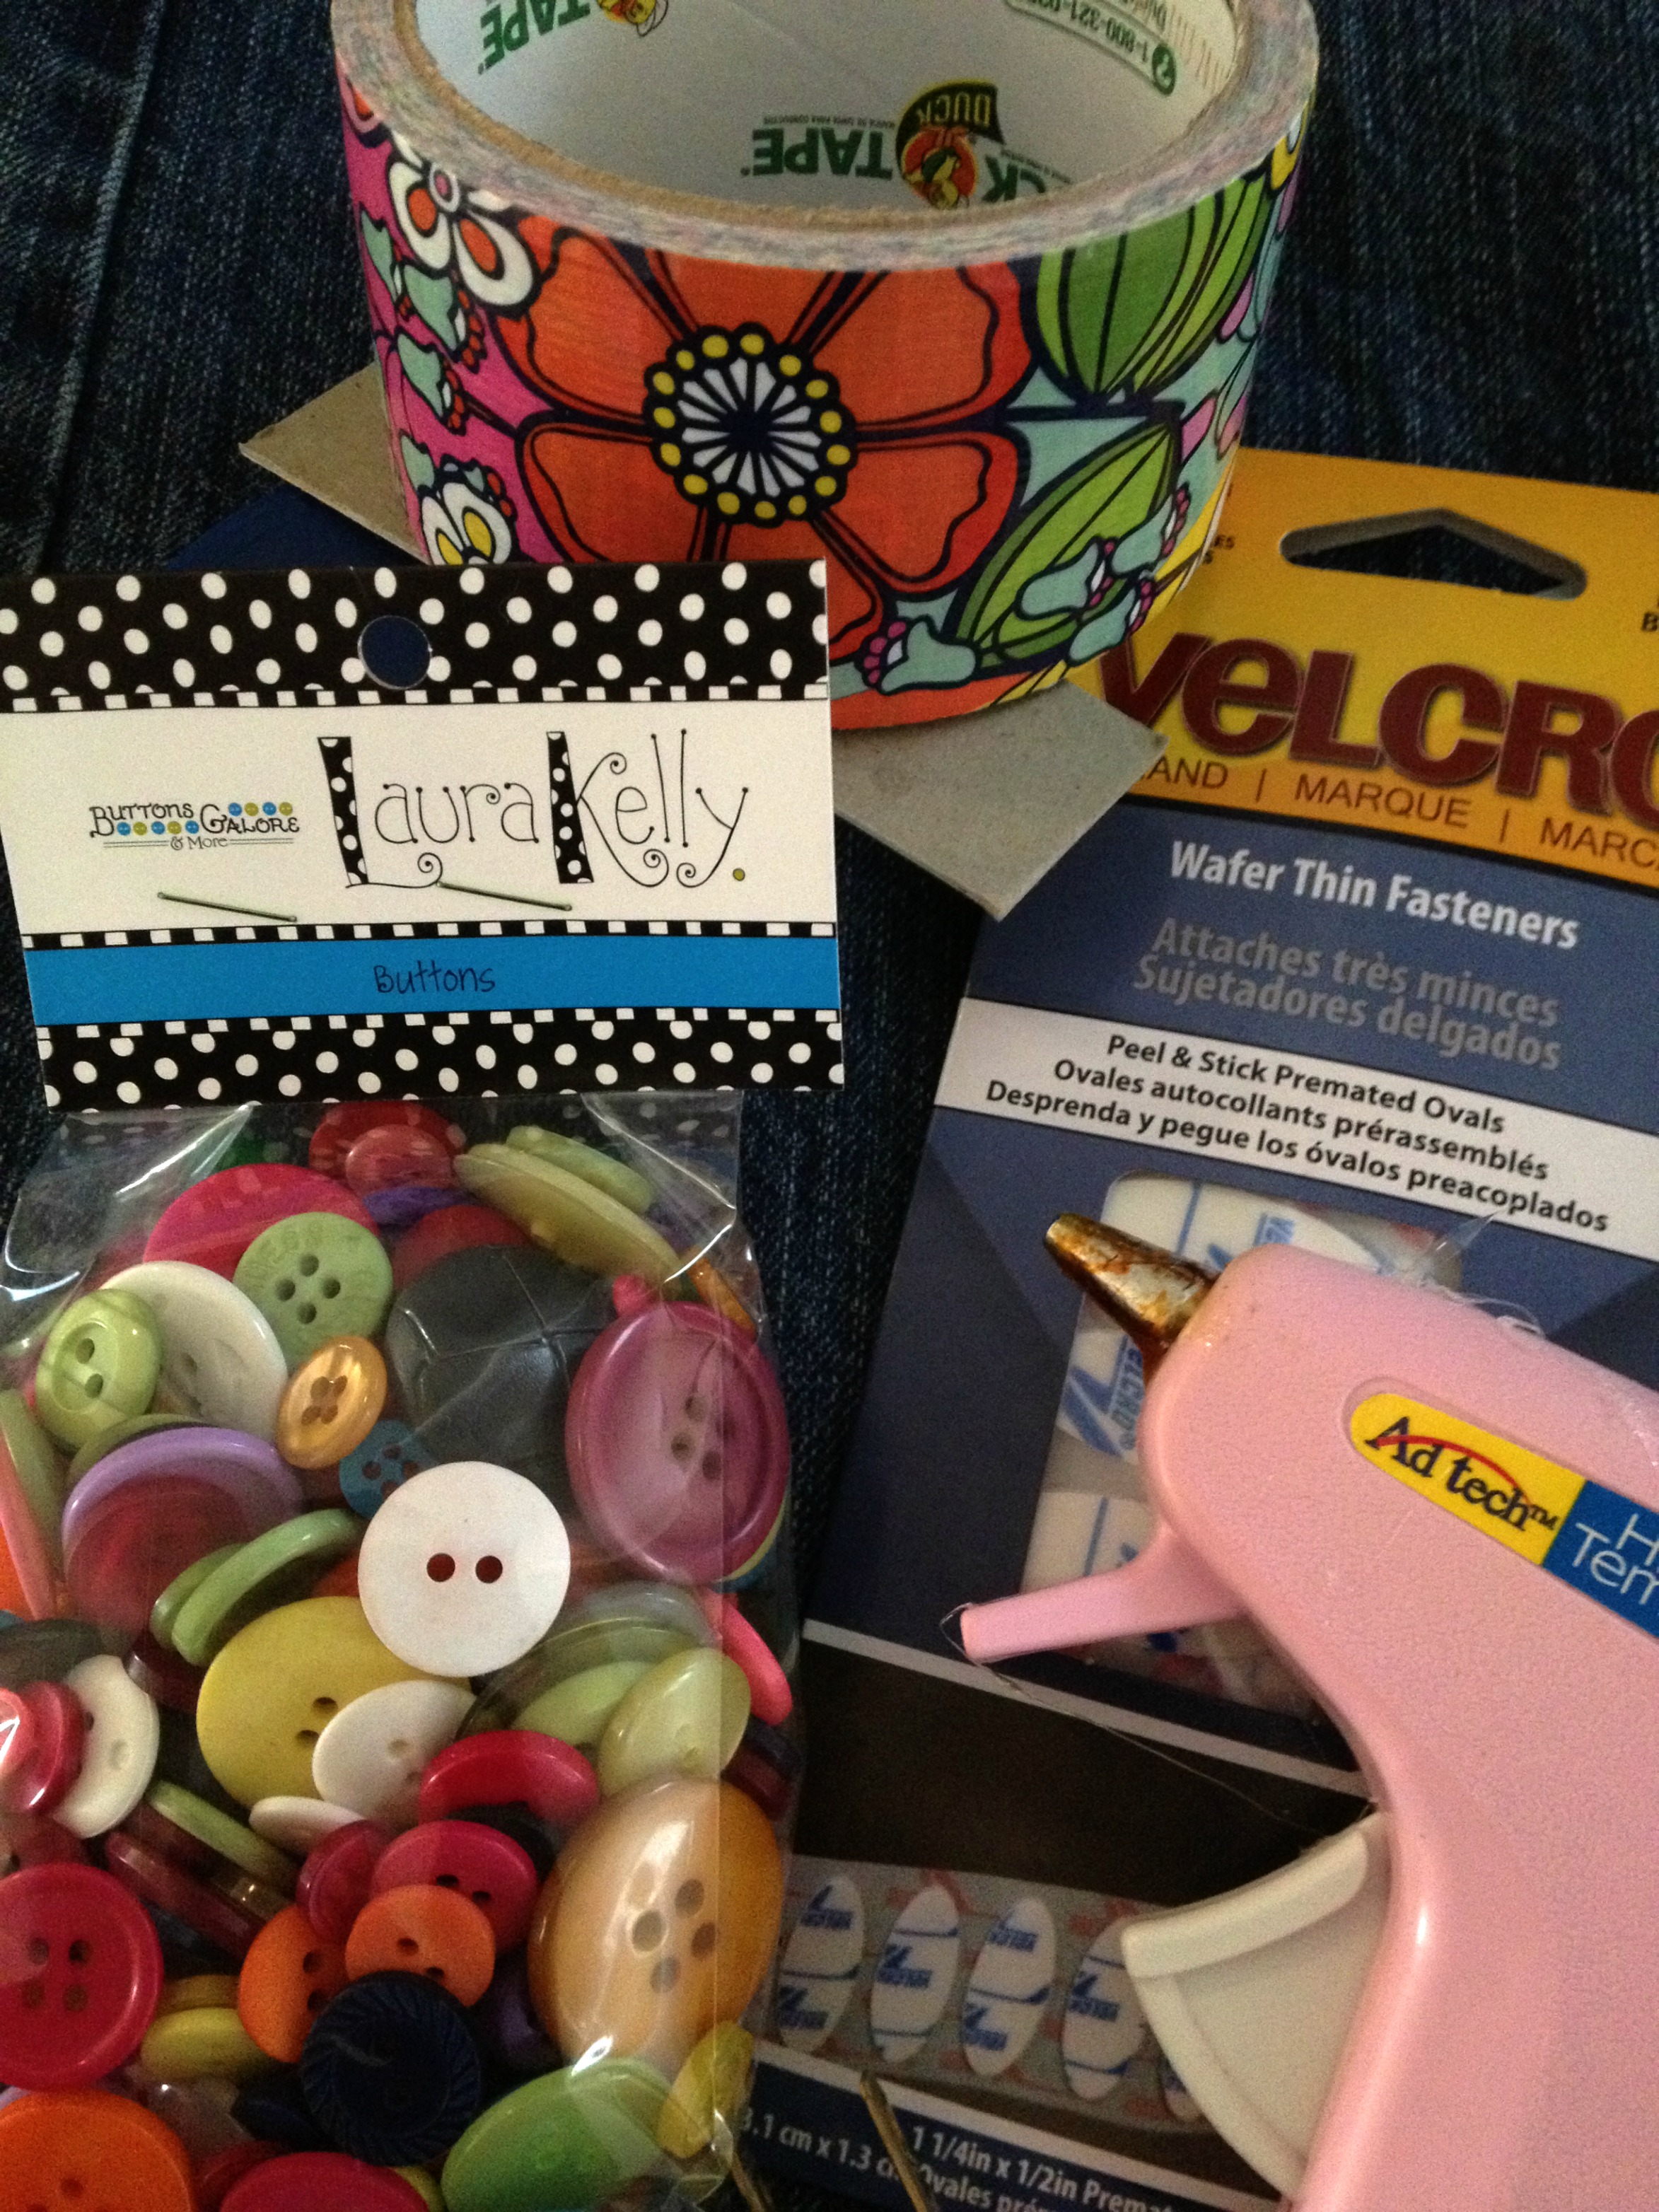
This trendy wrist cuff is so simple to make and takes very little time. It is a great DIY project for girls of all ages and would be perfect for a party activity or a gift. I got the idea from Marisa Pawelko’s book, Crazy-Cool Duck Tape Projects then modified it to add…BUTTONS!

You will need Duck Tape, Buttons, Cardboard, Velcro and Ad-Tech Hot Glue. That is it!
Cut a circle out of cardboard the size you want your flower to be. Then Cut a long strip of tape and fold it, leaving only a small amount to stick to the cardboard. Adhere the tape around the circle folding it each time you stick it down to create the rippled effect. When you have made it around, trim your excess, flip it over and add a long folded strip the length of your wrist, attaching it with…tape of course! Add Velcro to hold your bracelet closed.
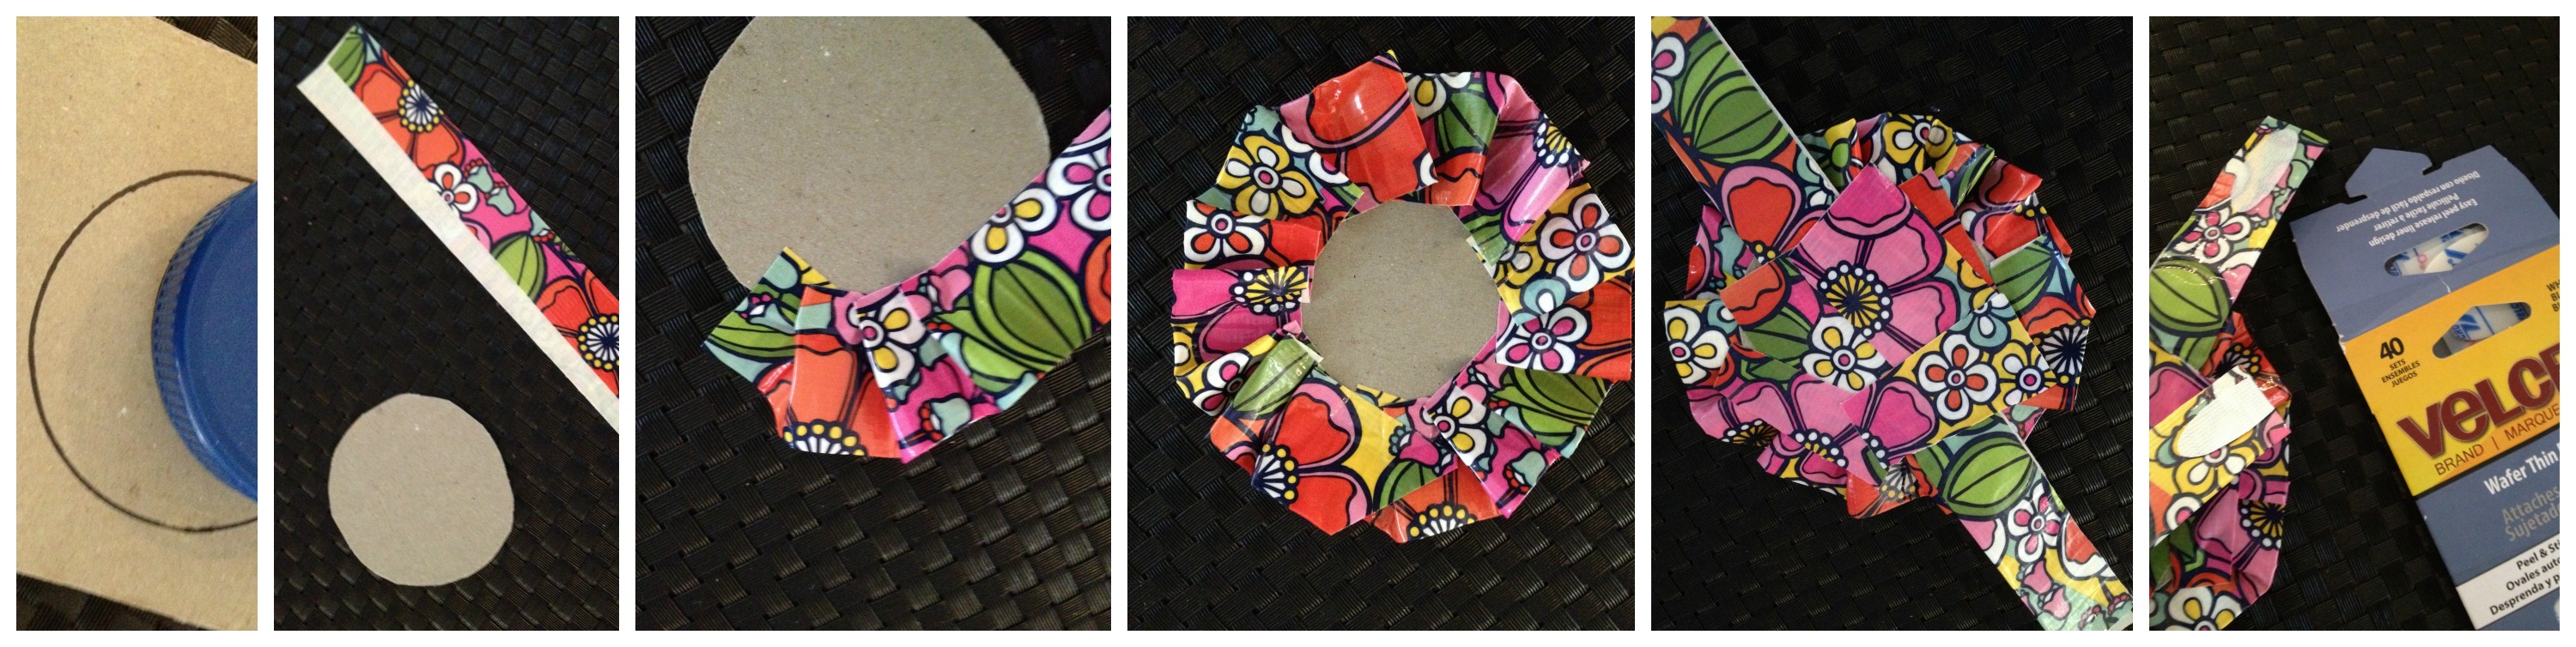
Then flip it back over and hot glue gun your buttons to the front. I used buttons to match the tape in Apple Green, Purple Possibilities, Robbins Egg Blue and Watermelon.
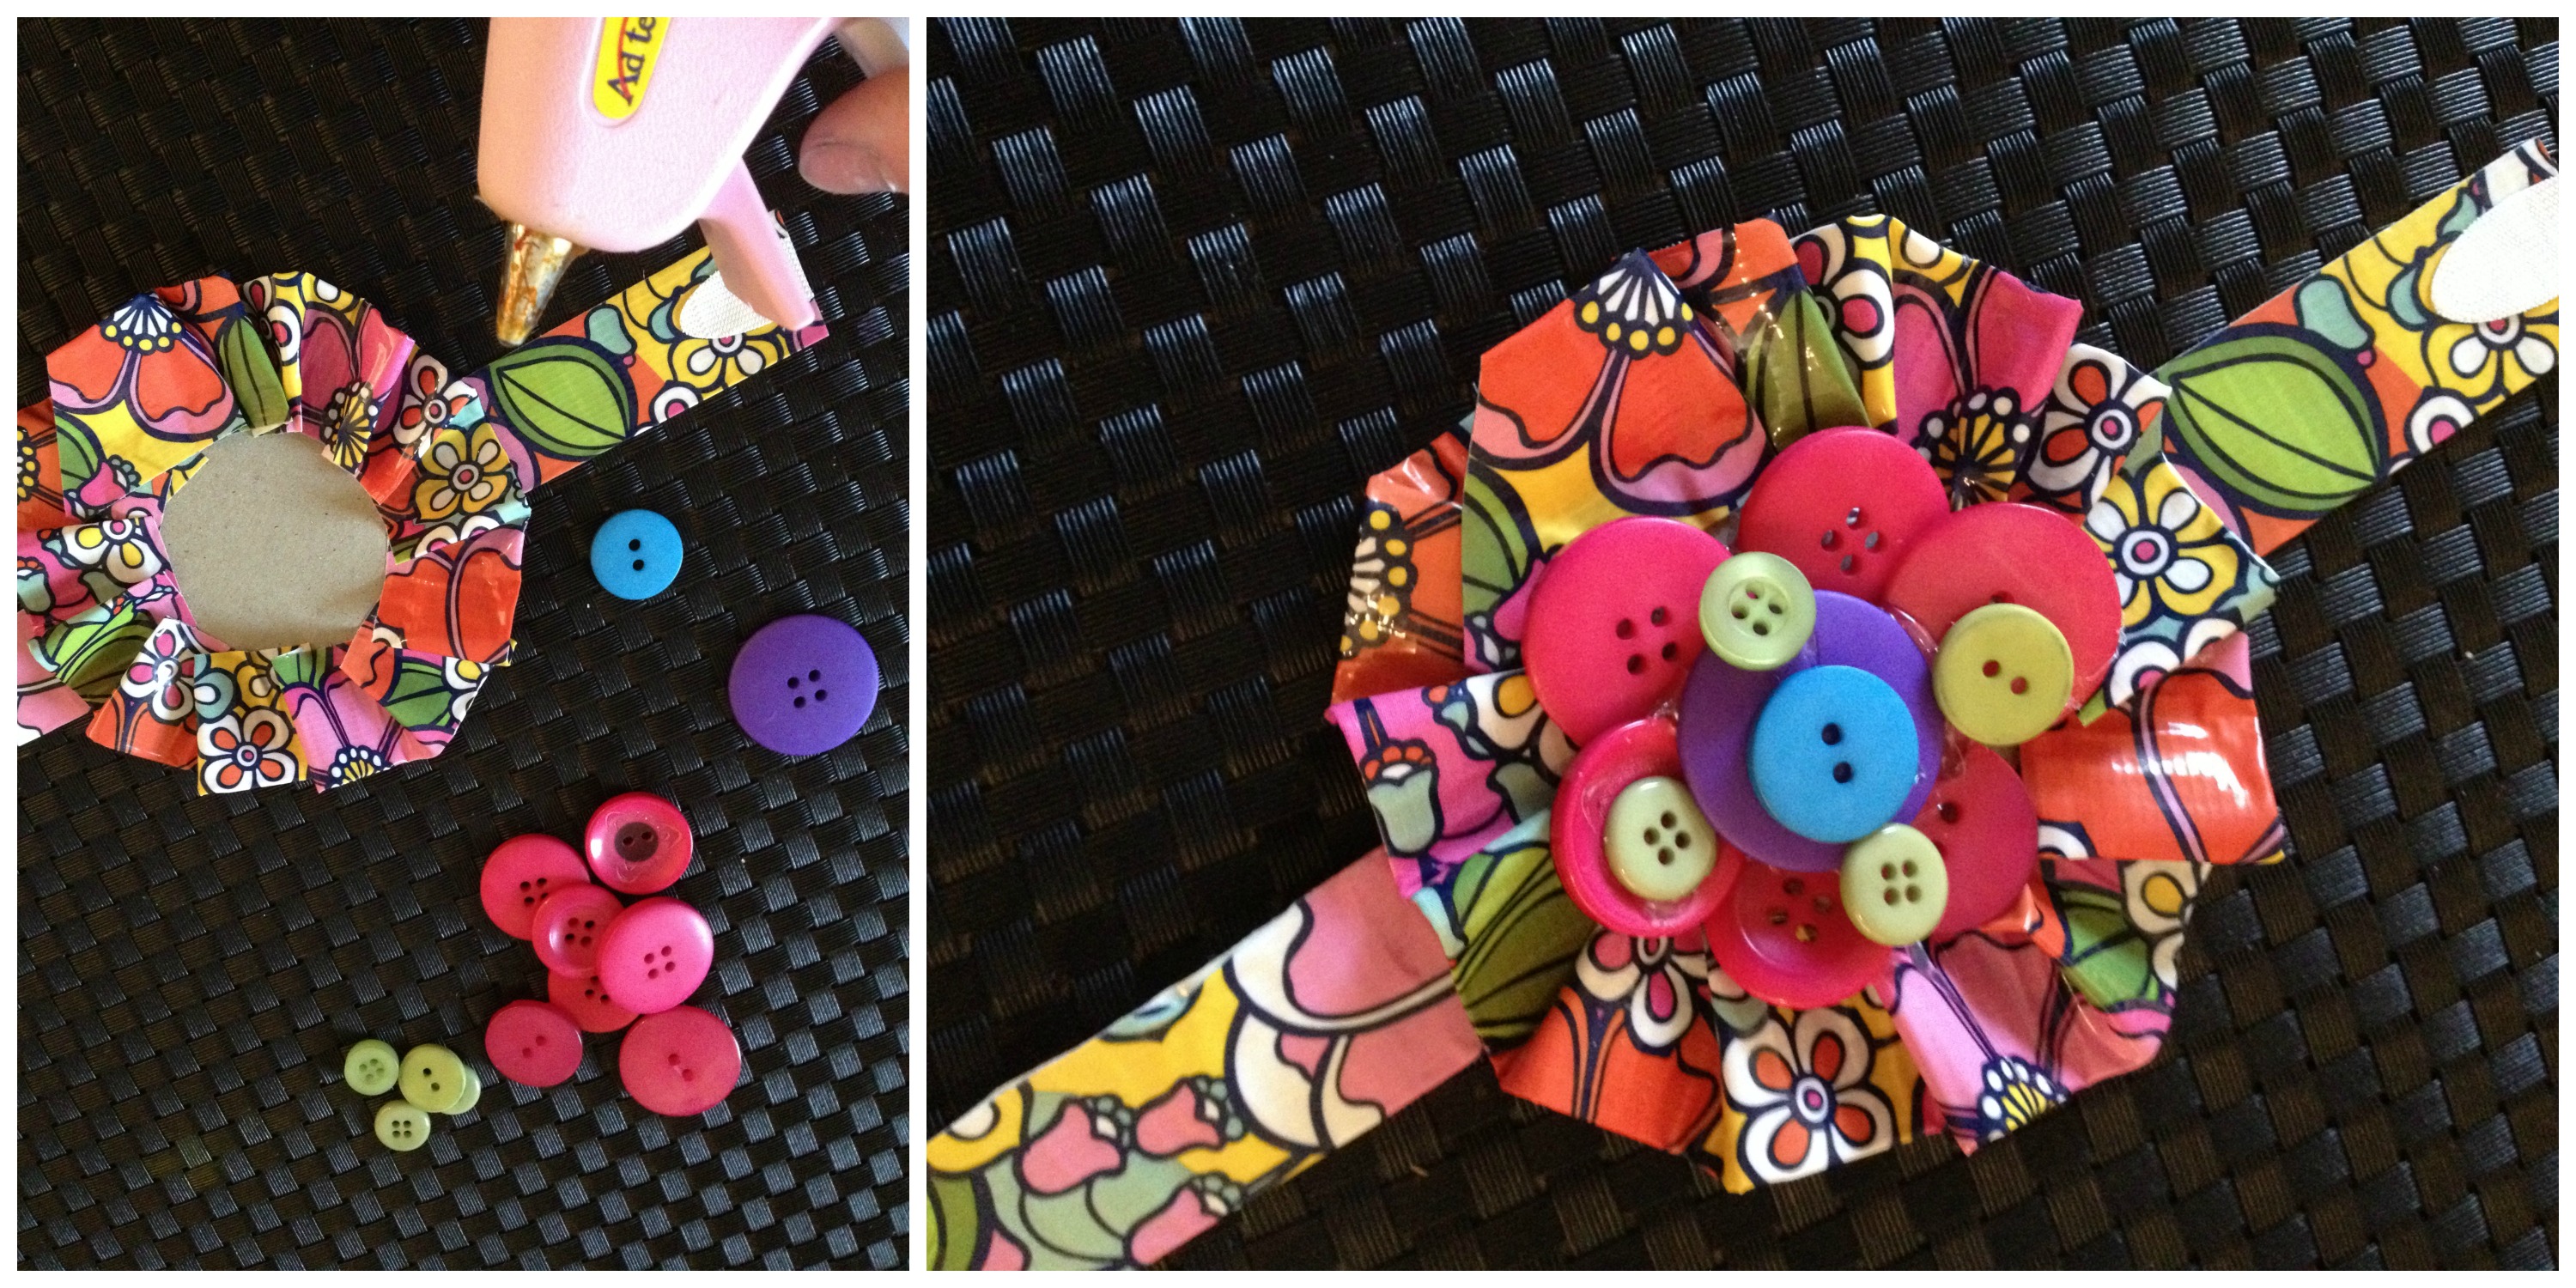
Ta Da…a designer wrist cuff in fifteen minutes or less! For more ideas with Duck Tape and Buttons, visit my blog post from earlier this week!
Happy Taping and Buttoning Up Some Fabulous Fashion,
Laura
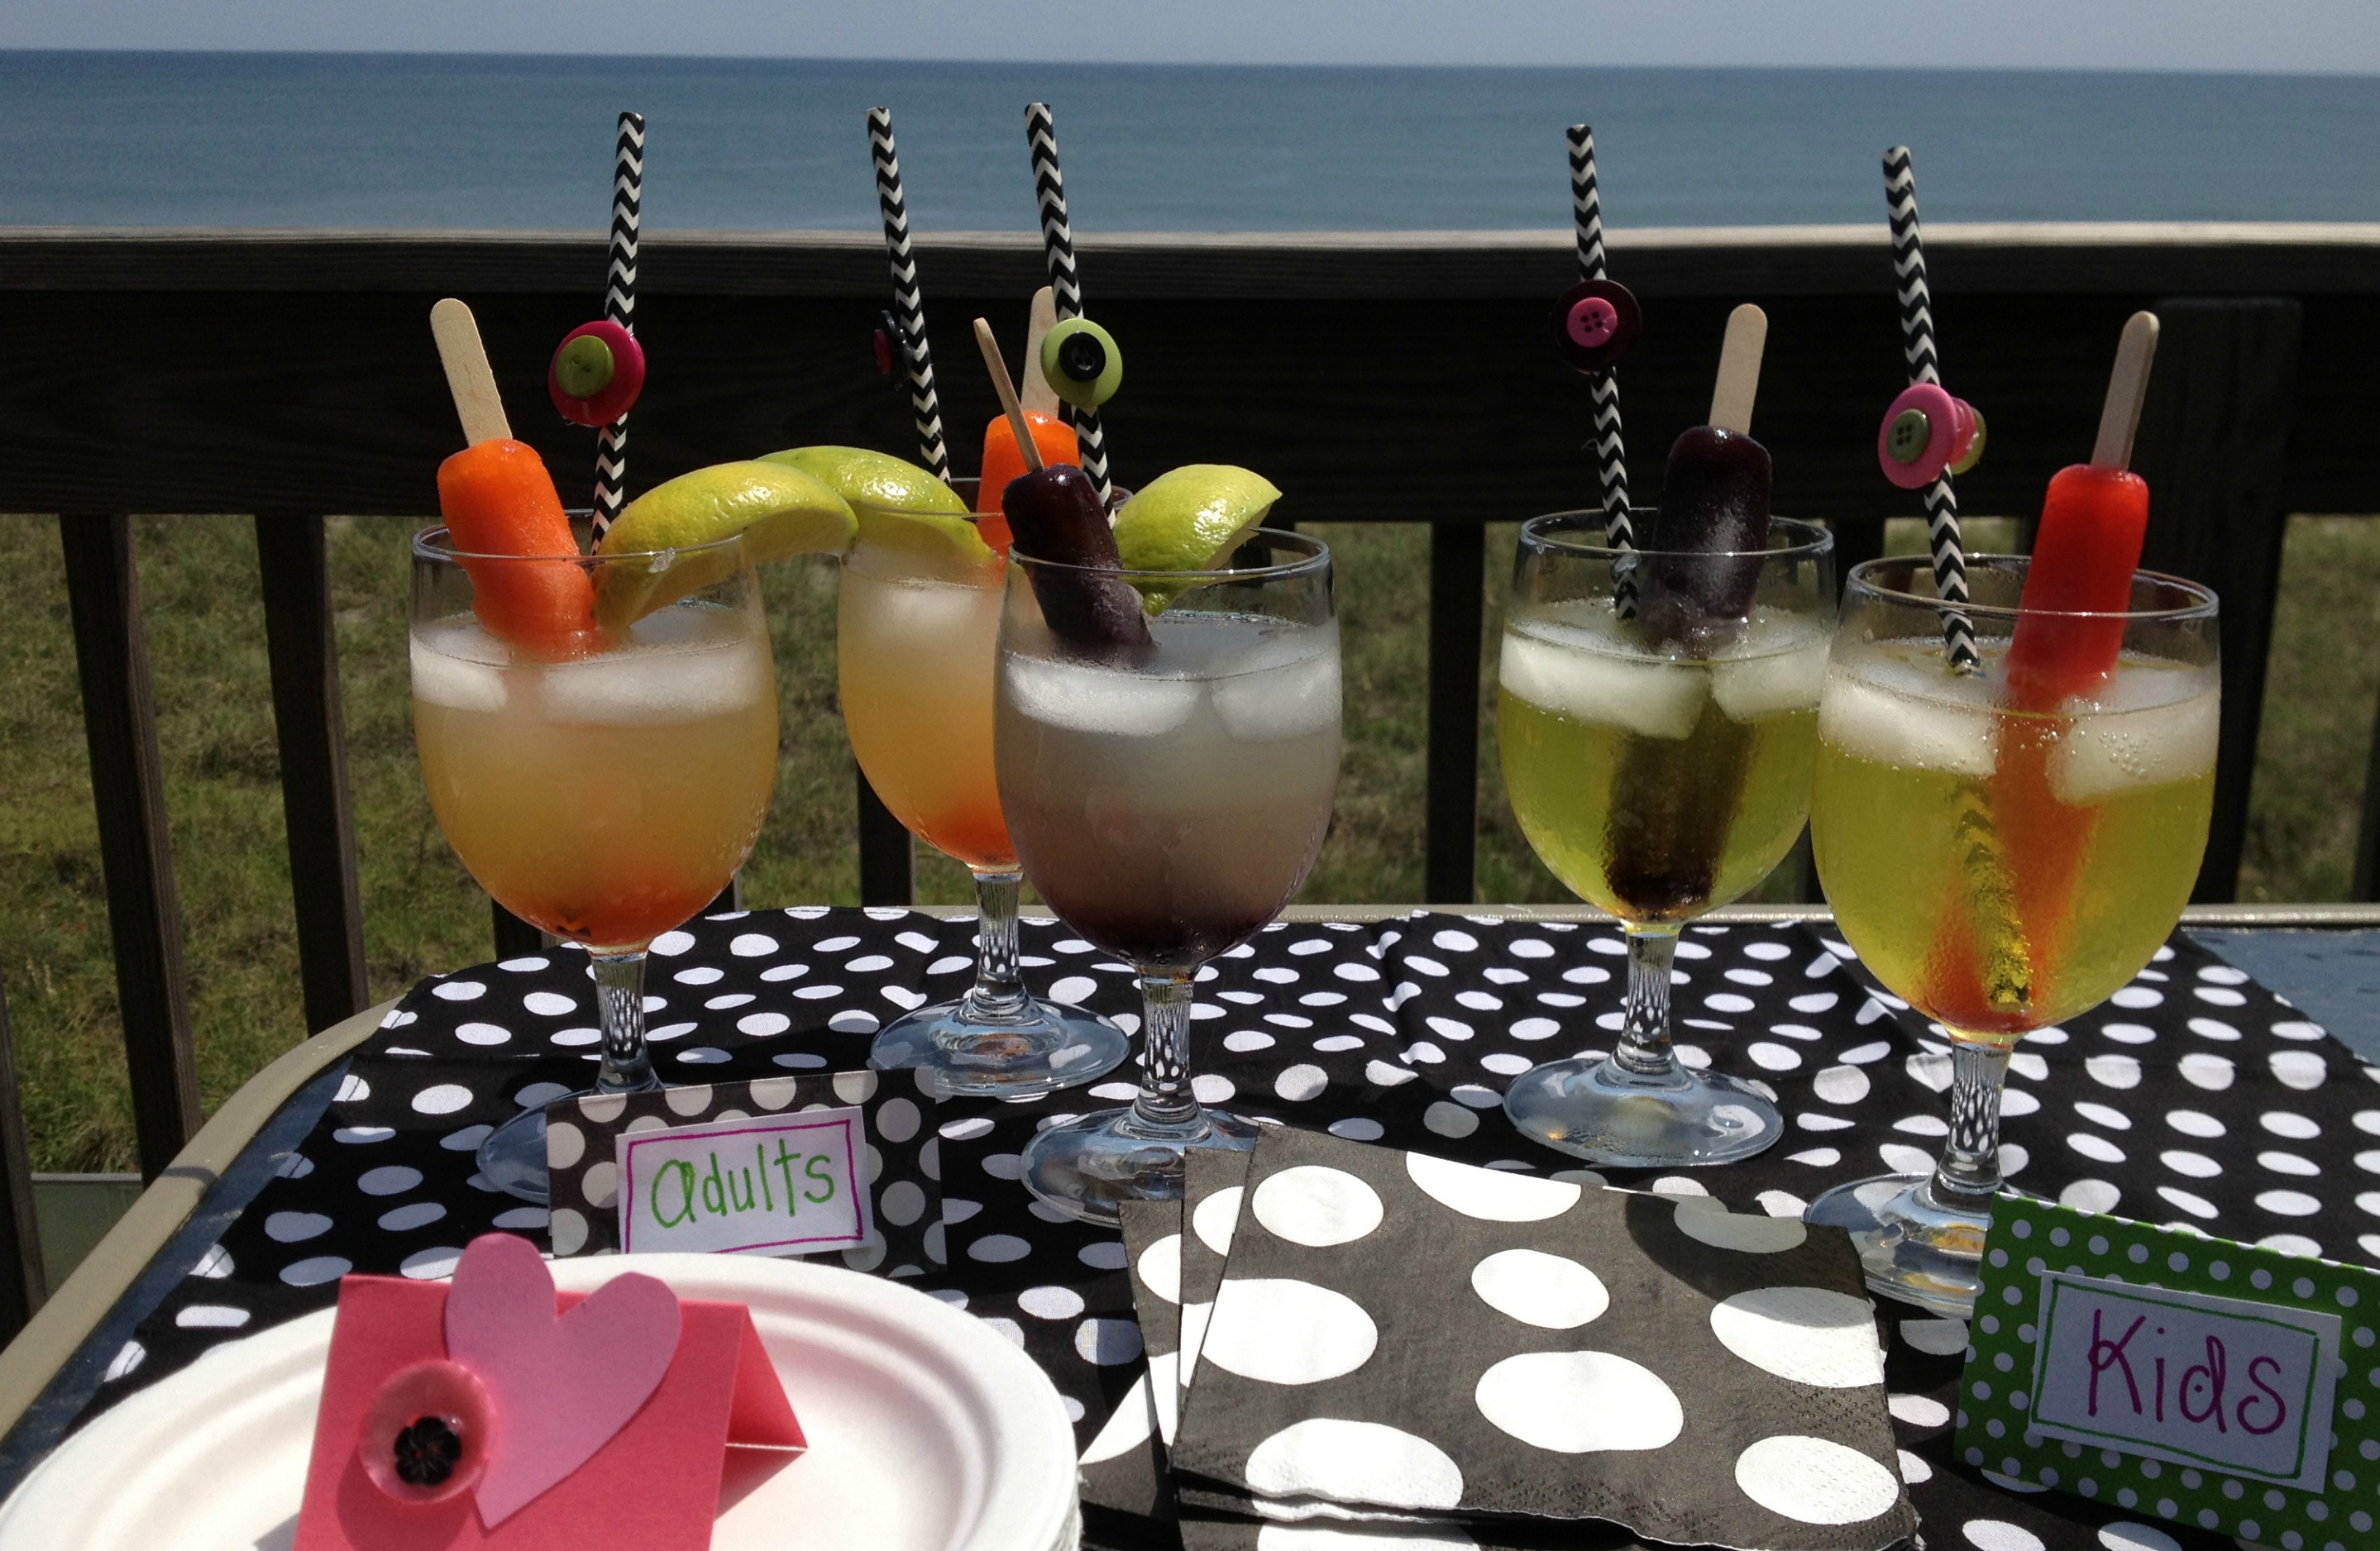
We are on vacation at the beach and I am loving this opportunity to create in a new environment. We love to make up new drink concoctions when we are on vacation and I love to decorate them and make them fancy. Here is today’s special…Popsicle drinks with fancy straws!
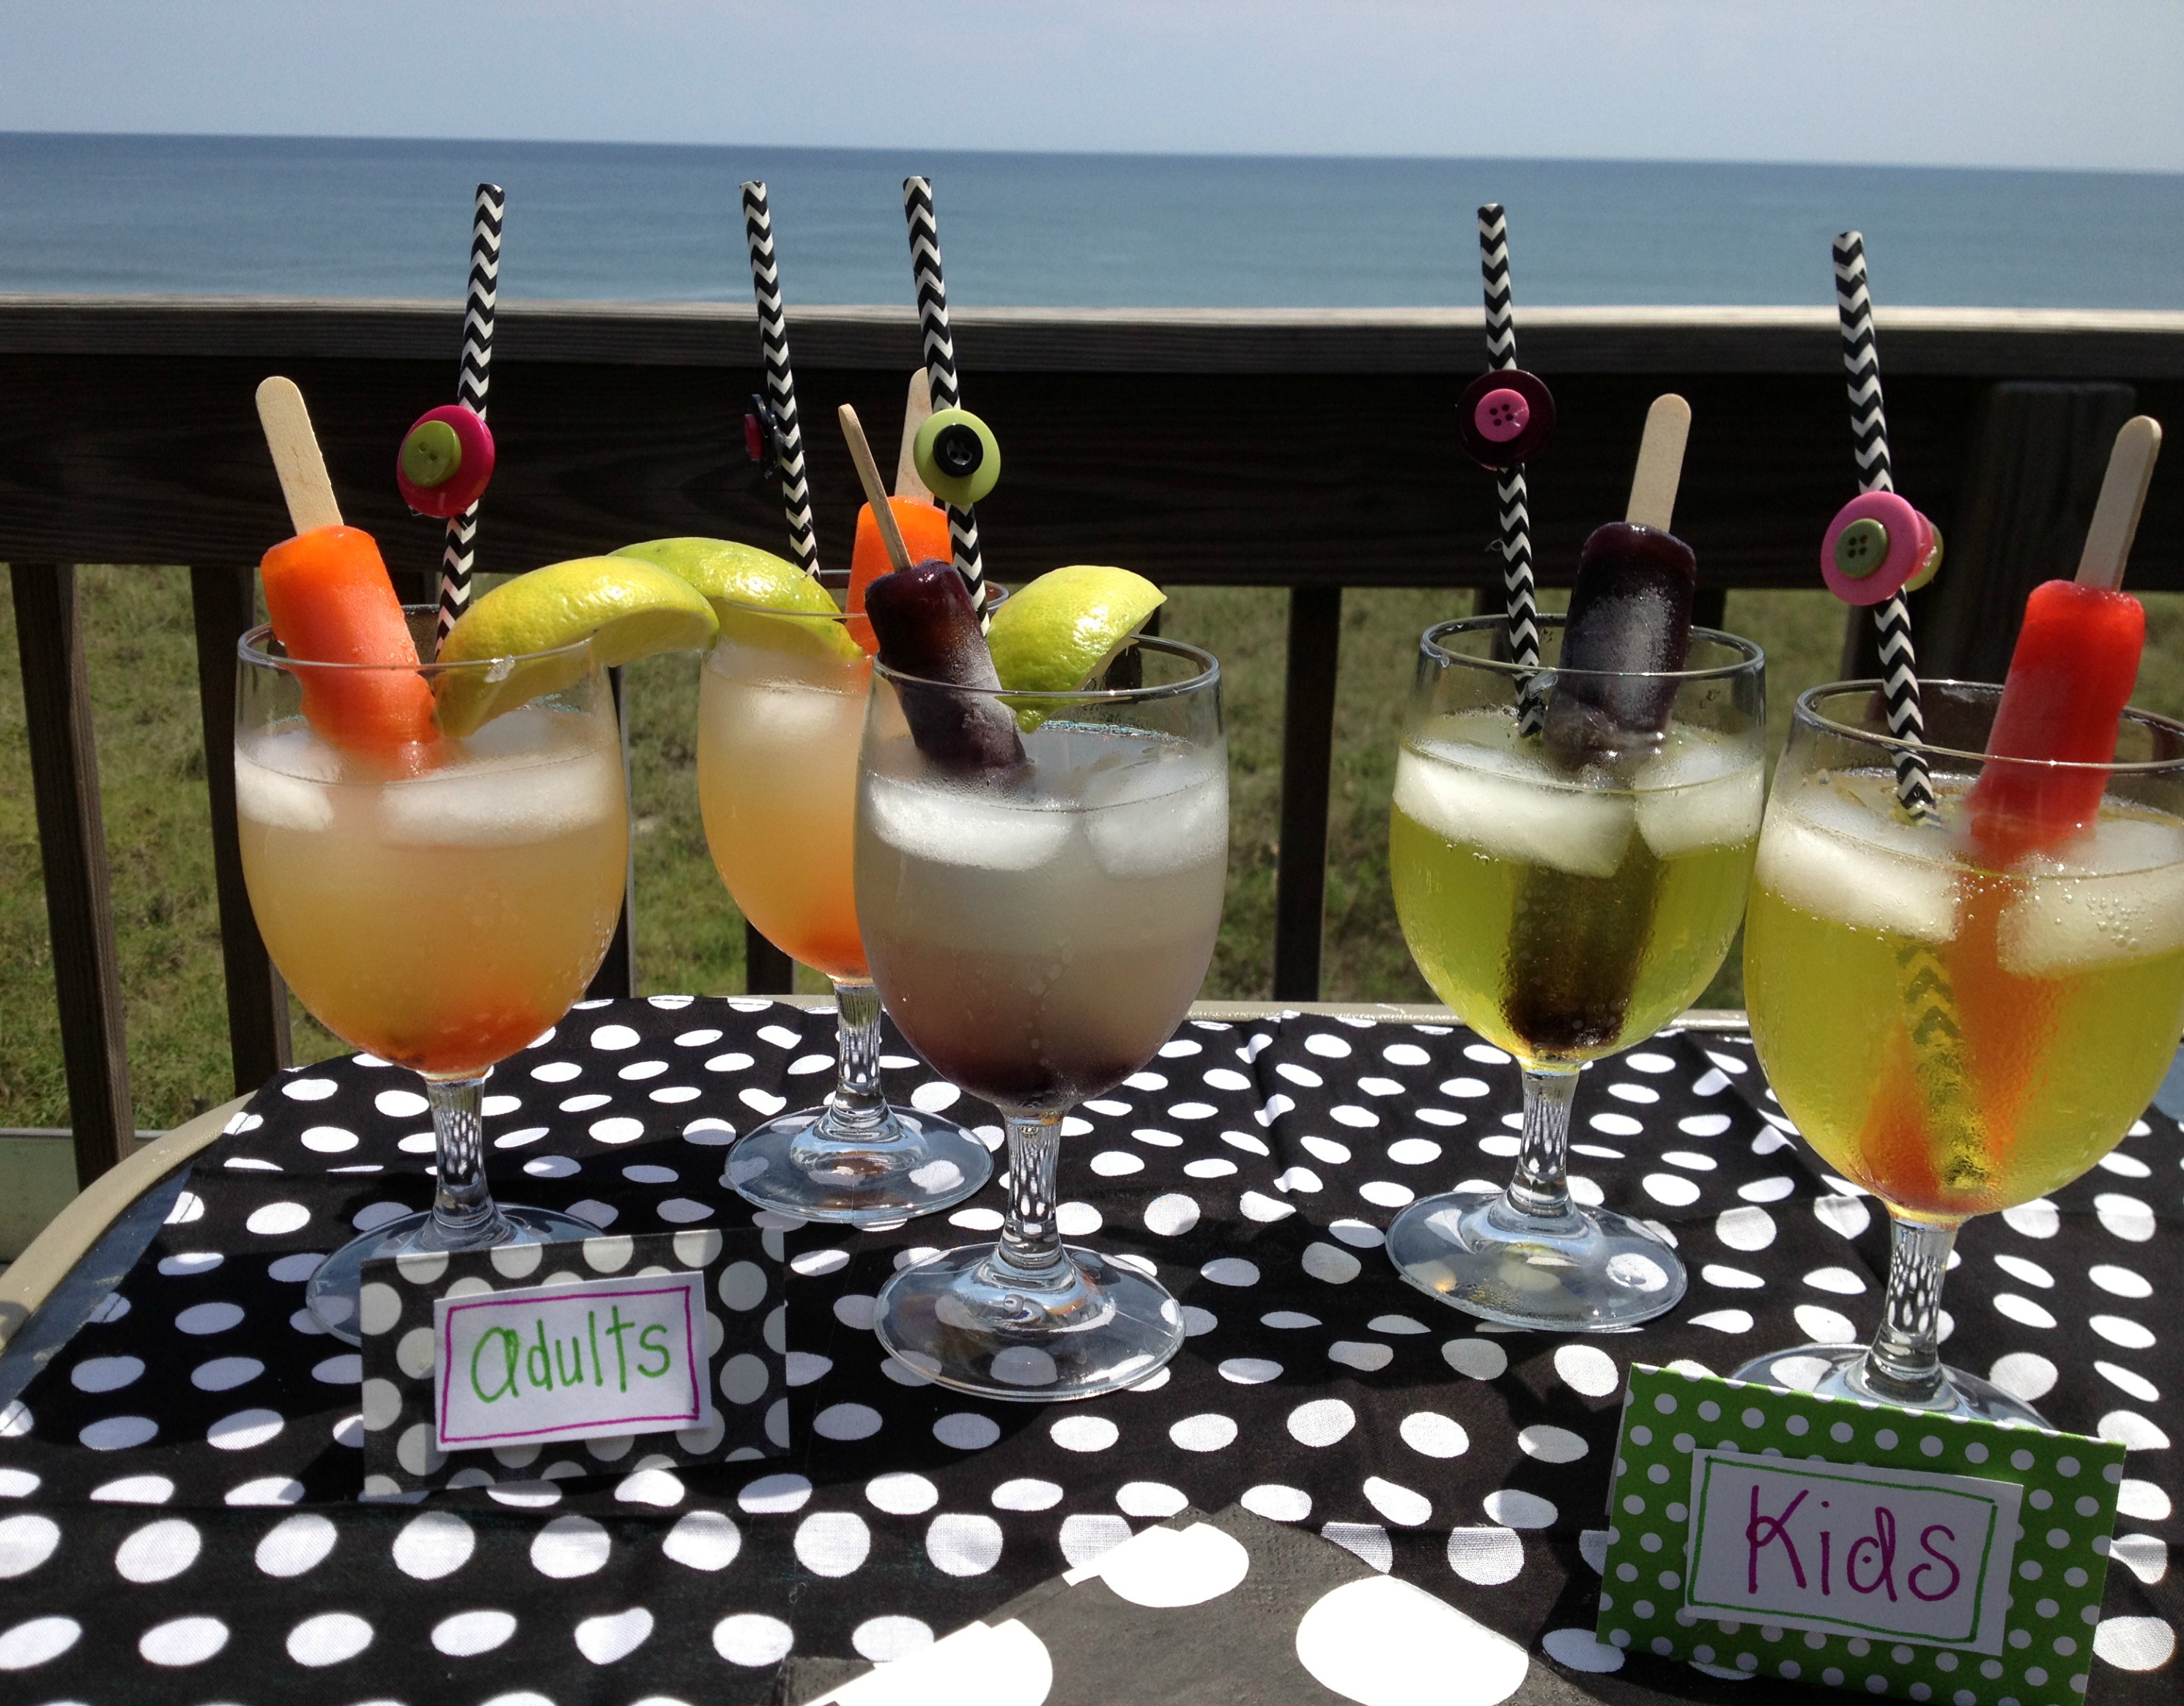
I used my Ad-tech hot glue gun (never leave home with out it) and buttons from my Laura Kelly mix to create a fancy straw collection for our drinks. We stirred them with Popsicles and sipped through the straws. They were yummy and decorative and lots of fun. Buttons are a great way to decorate when you are in a hurry or don’t want to spend a lot of time on something that might end up getting thrown away. The color selection in the Laura Kelly mix is really festive and bright.
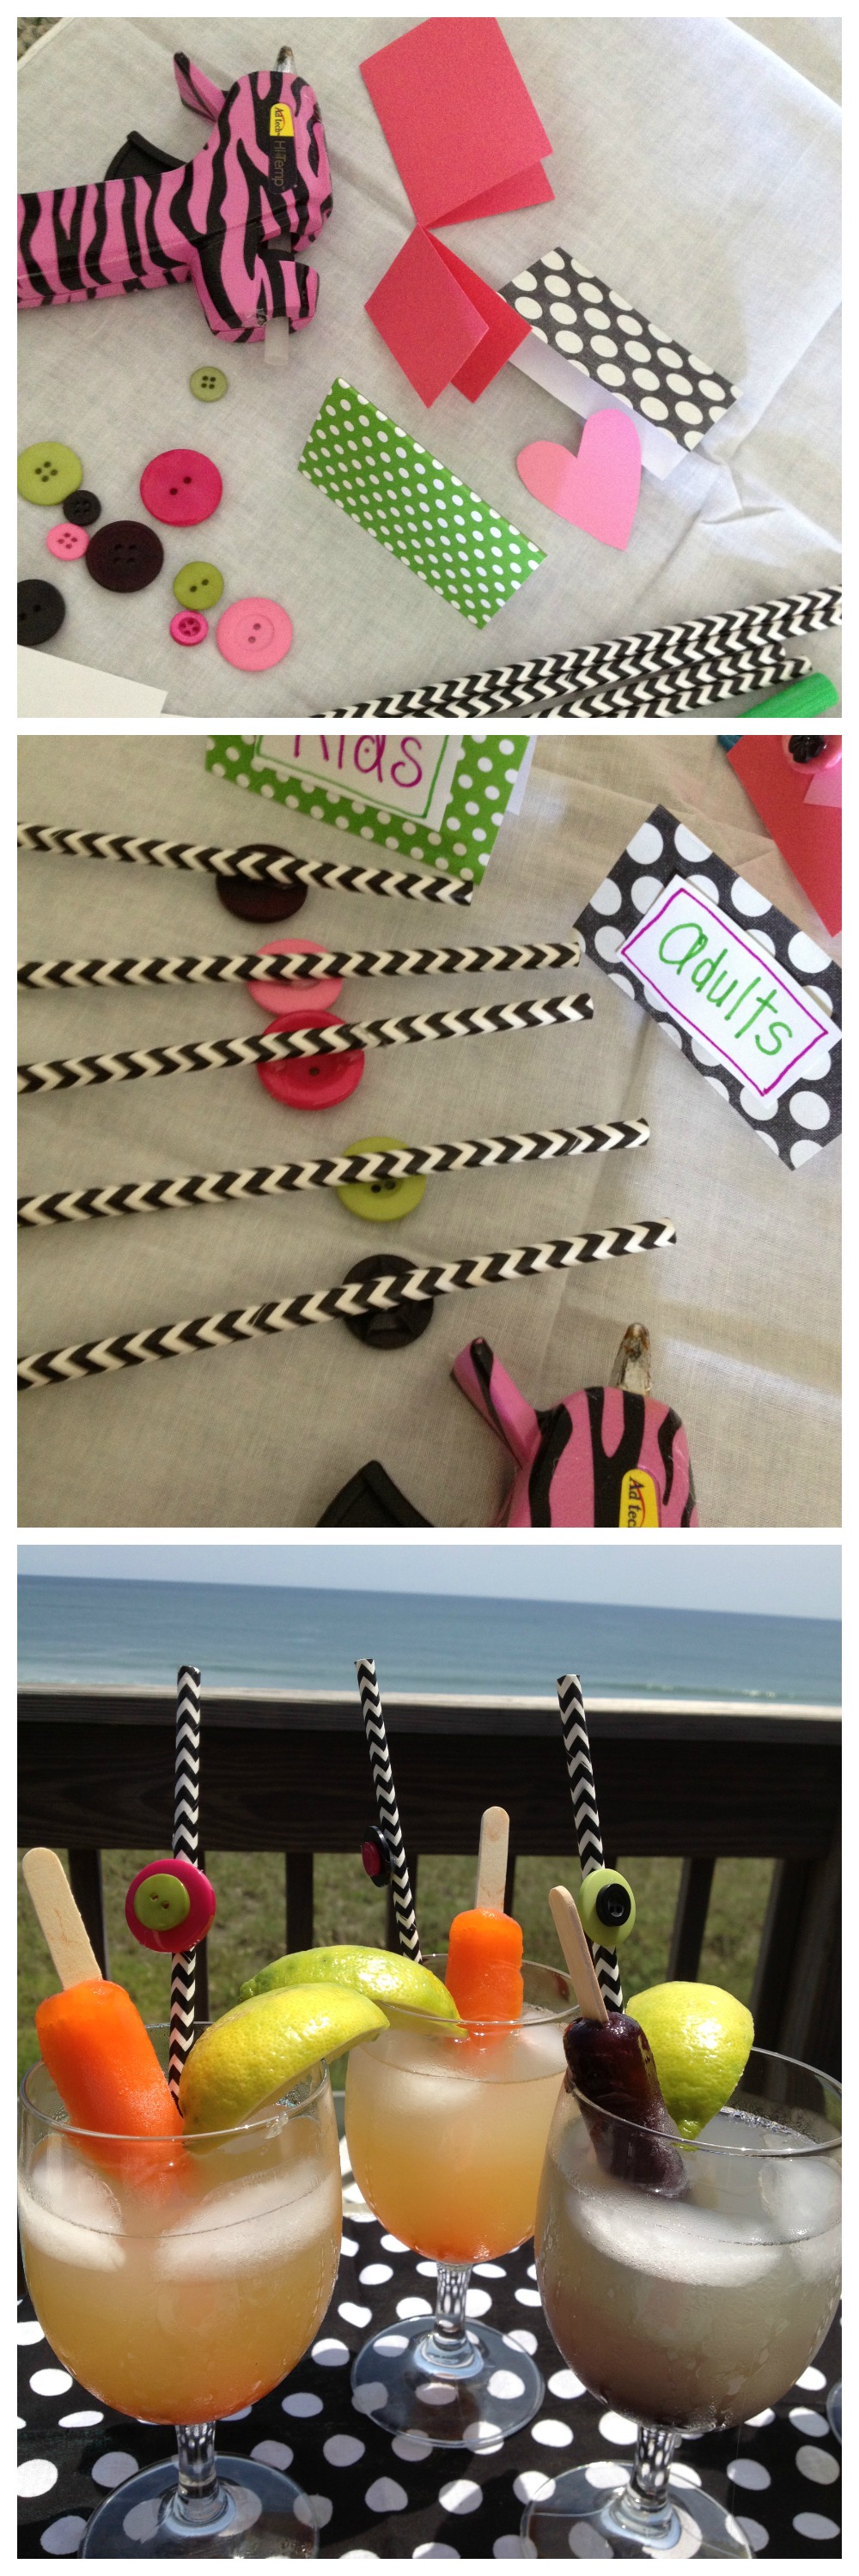
We made two versions of the drinks, one for kids and one for adults. Which ones do you think look yummier.
Happy Creating Fun Drinks and Decorations with Buttons,
Laura
I’ve admired bib necklaces for quite some time now. I love how whimsical they look, especially if they are covered in buttons. They can elevate a plain t-shirt and jeans outfit into something really special and it doesn’t have to cost much. Yes, you can buy very expensive “statement” necklaces, but with a little felt and a jar of buttons you can create something really beautiful.

Supplies for a button bib necklace
Instructions for a button bib necklace
1. Lay the bib necklace template onto felt, pin in place, and cut out two bib shapes.

2. Starting at the center of one of the bib shapes, begin sewing buttons onto the felt. Working your way out from the center will give your necklace a centered focal point.

3. Leave about 1″ of the felt on the ends unembellished.
4. Measure two pieces of ribbon (one for each side) to the length you want your necklace to hang. Bib necklaces usually look best hung at your collar bone. Don’t forget to allow some length so you can tie the necklace around your neck!
5. Lay the unembellished piece of felt down on your work surface. Place the front piece over it. Make sure it lines up nicely. Gently lift the ends and slide your ribbon ties in places. Pin and either hand or machine sew the ribbon between the two pieces.

6. To attach the front and back of the bib, use a strong fabric glue or whip stitch them together.

Thanks for getting crafty with me today! For more button crafts, stitching and lifestyle ideas visit me on my blog at www.laurabraydesigns.com.
![]()
There’s nothing I love more than a summer afternoon spent sipping a cool drink. To make the experience even better, I made some colorful coasters to protect my table. Get out the lemonade and red and white straws.

1. Cut circles from felt using the Shape Template. I used the 4″ diameter size circle.

2. Glue buttons onto the felt circle in a random pattern.
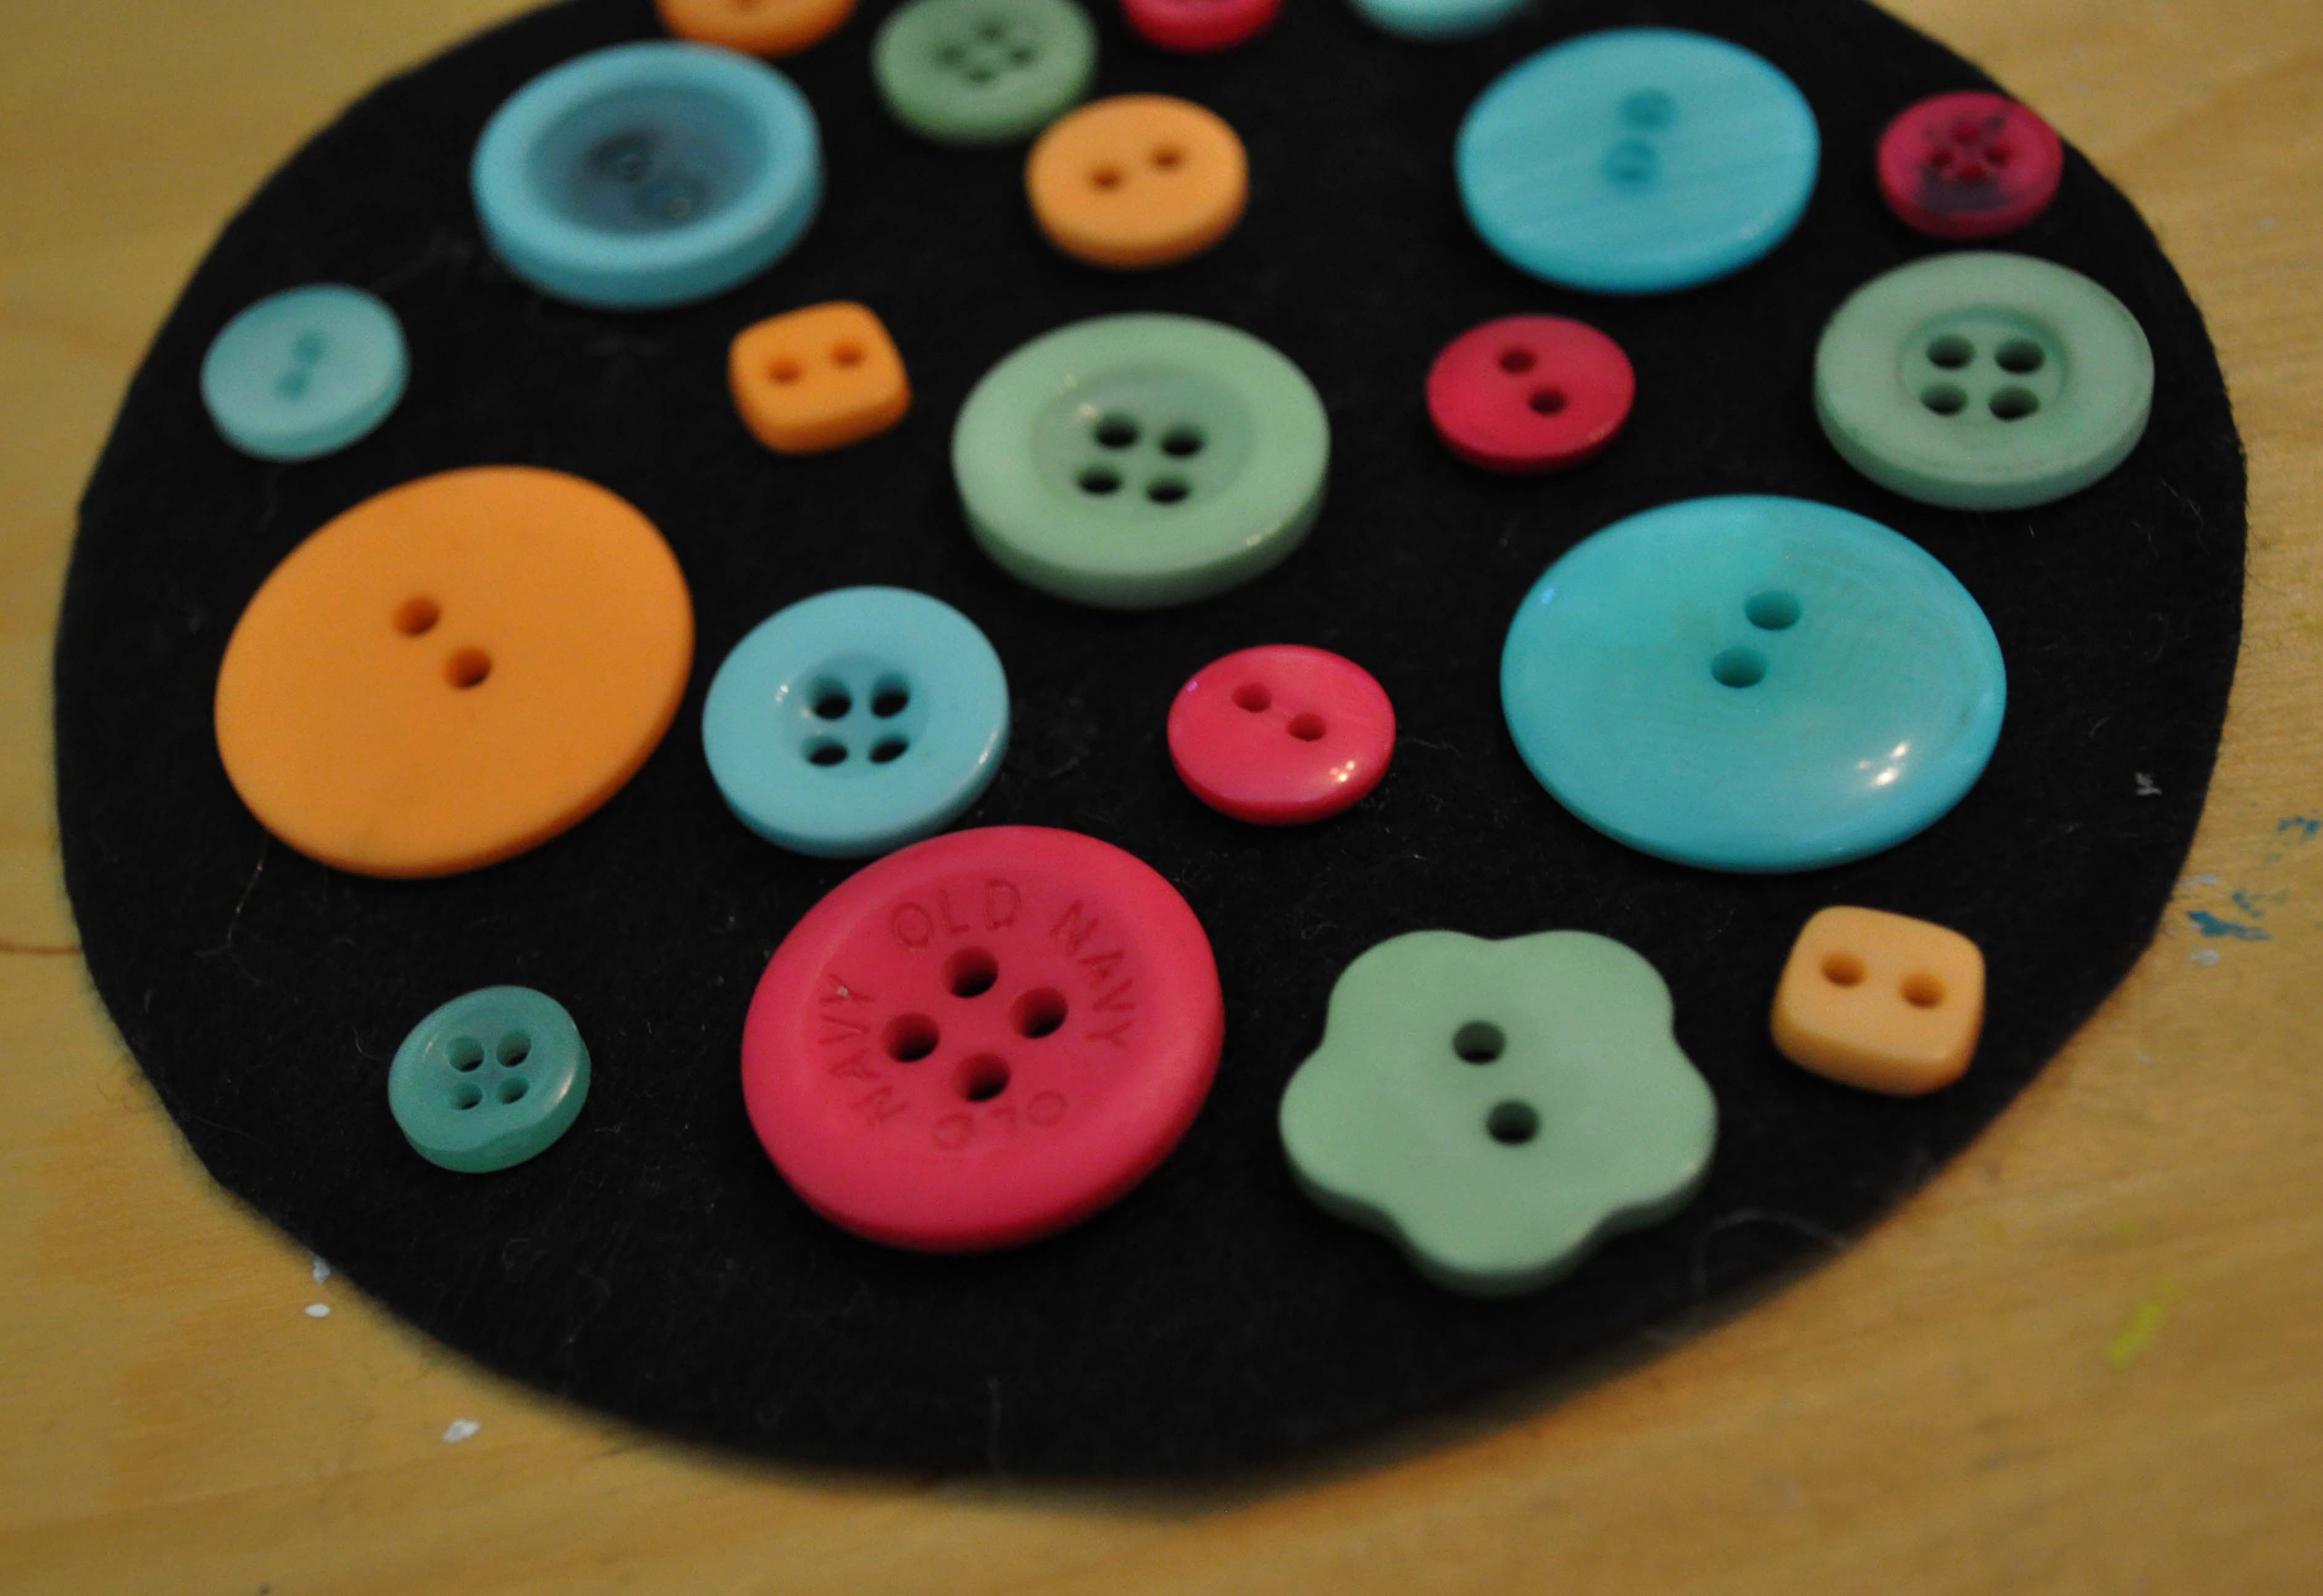
Tip: Make sure the buttons are approximately the same thickness as this will keep your coaster surface stable for your drink glasses.
Remember! These coasters should only be used for cold drinks. Hot drinks might melt the buttons.
Thanks for crafting with me today. To get more button craft tutorials, recipes, and lifestyle tips, visit my blog at www.laurabraydesigns.com.
![]()
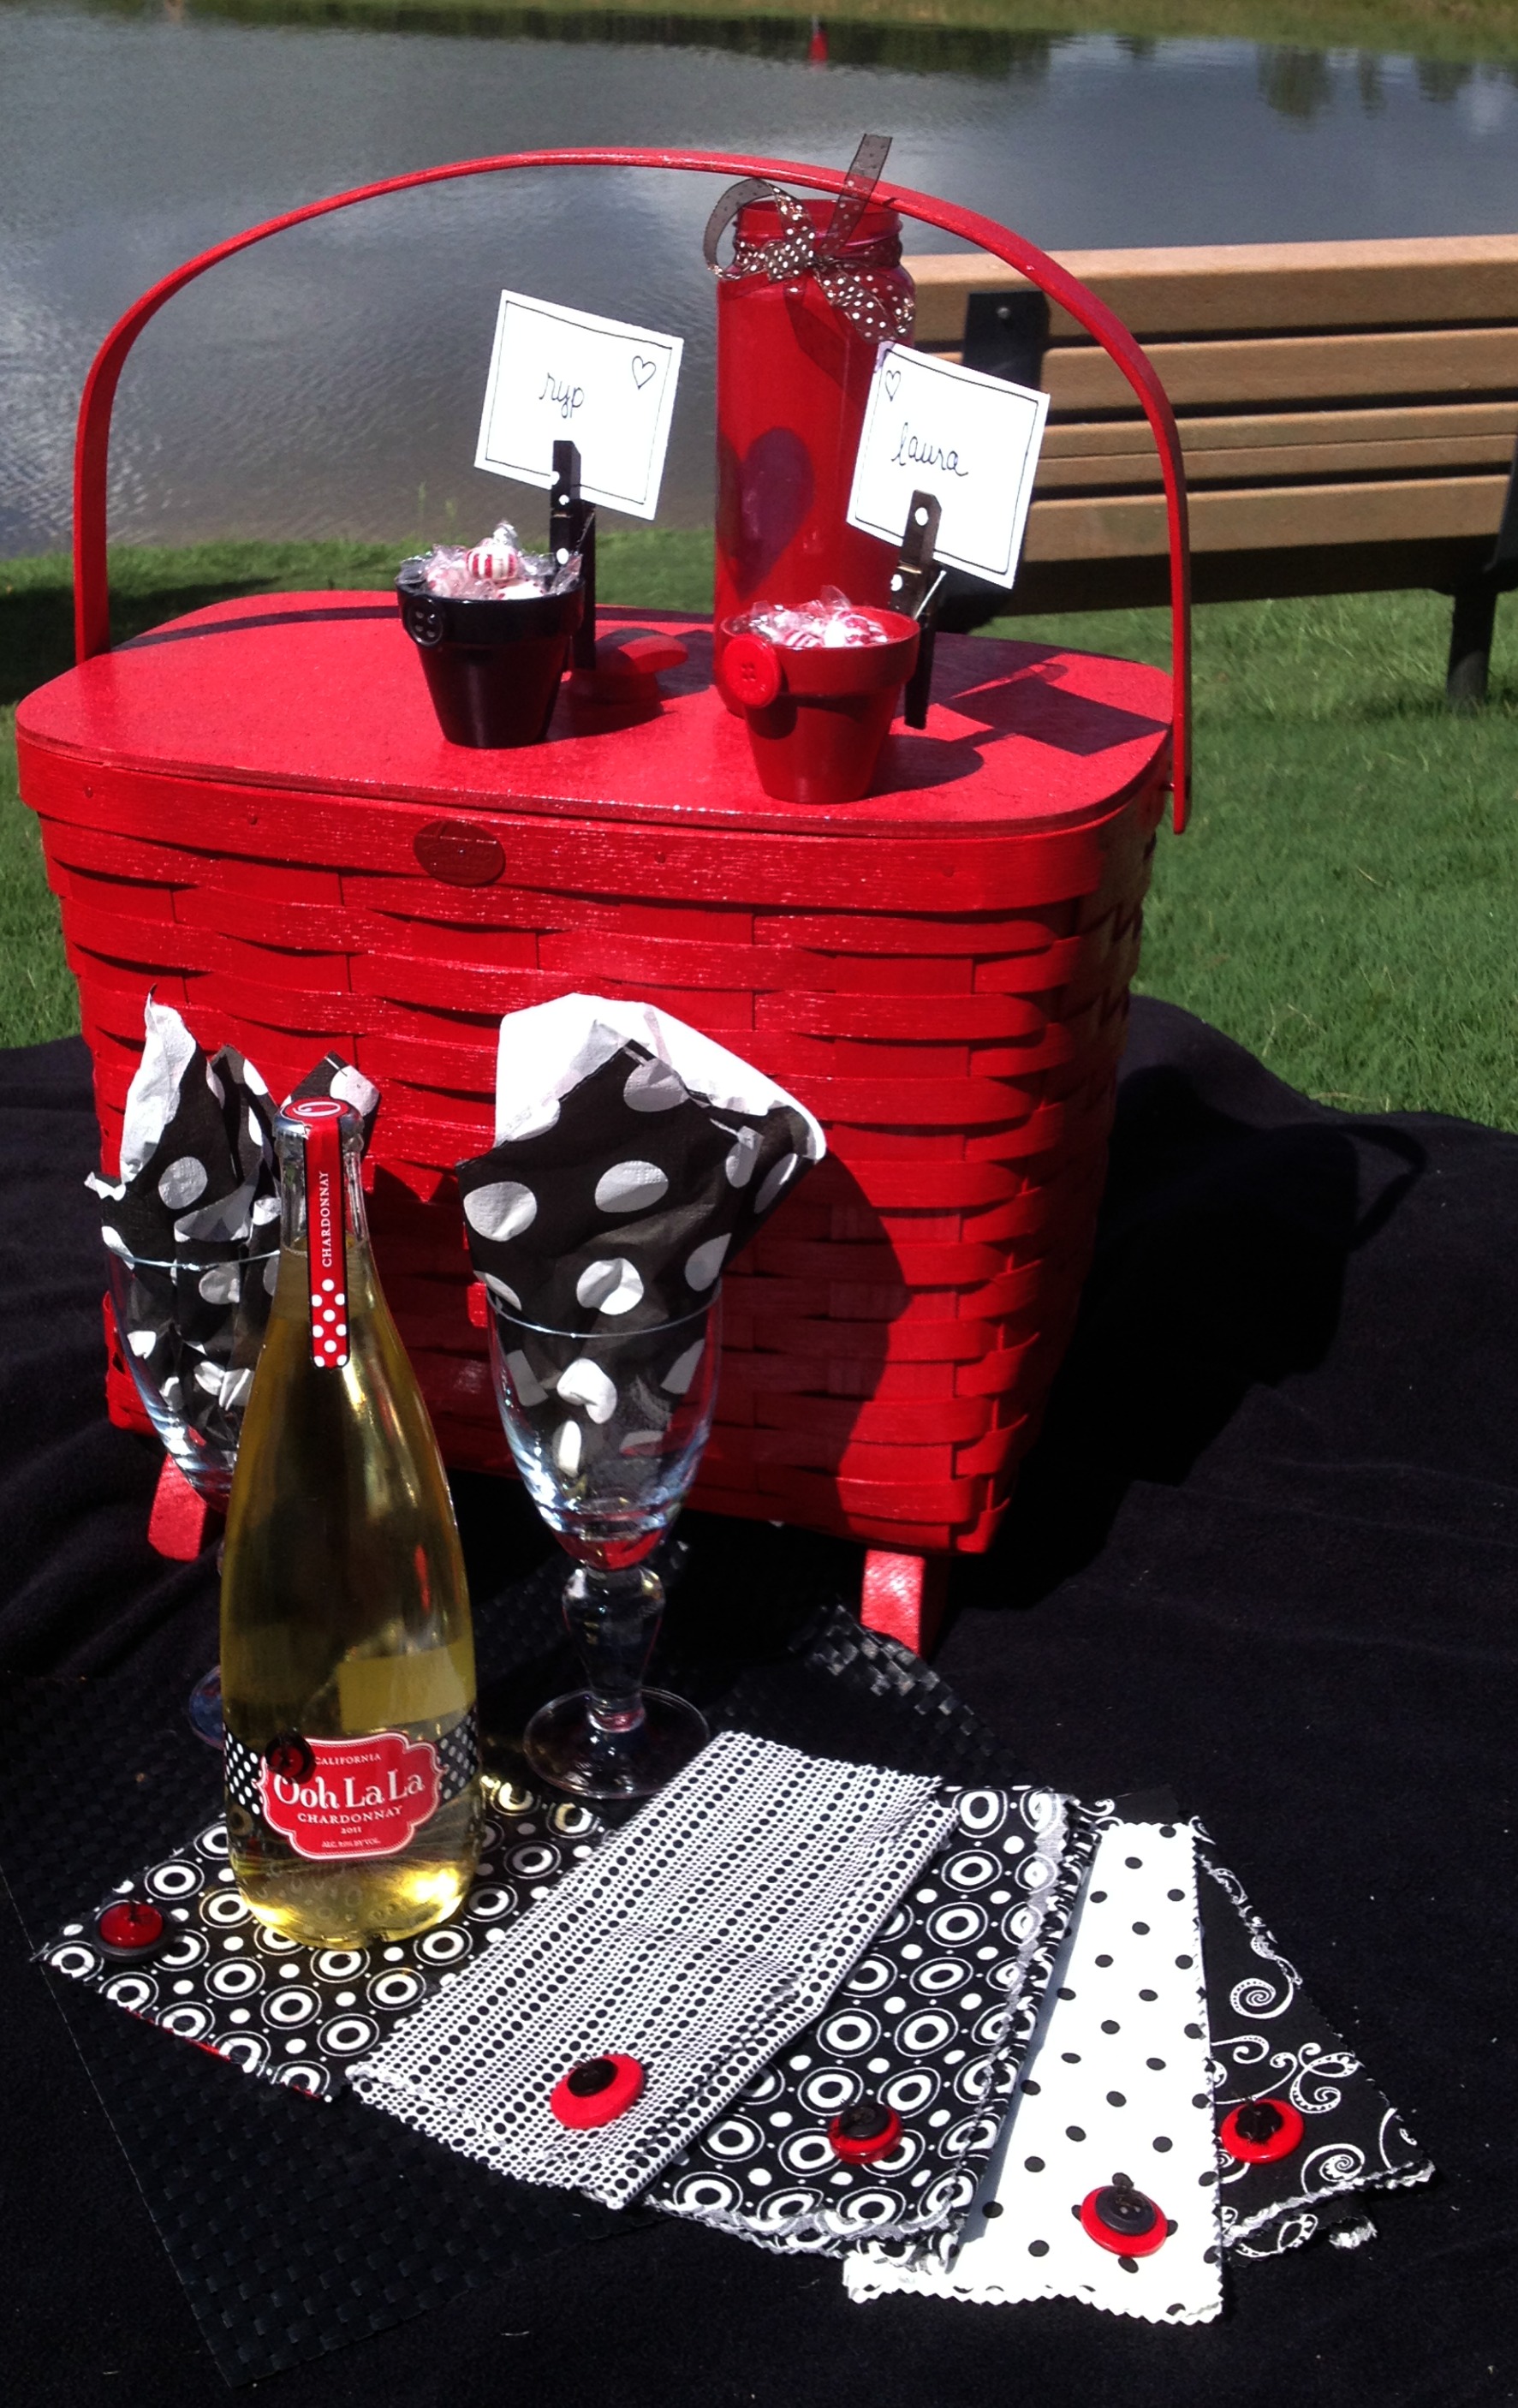
It is always nice to have a personalized touch when celebrating special times. These little flowerpots turned place card holders add that special touch and they are really simple to make. You only need a few things to make them (spray paint, mini terracotta pots, clothespins, buttons (Radical Red and Black Beauty were used on these pots, hot glue).
Spray paint the pots a solid color. I used Krylon’s Cherry Red to match the picnic basket set.
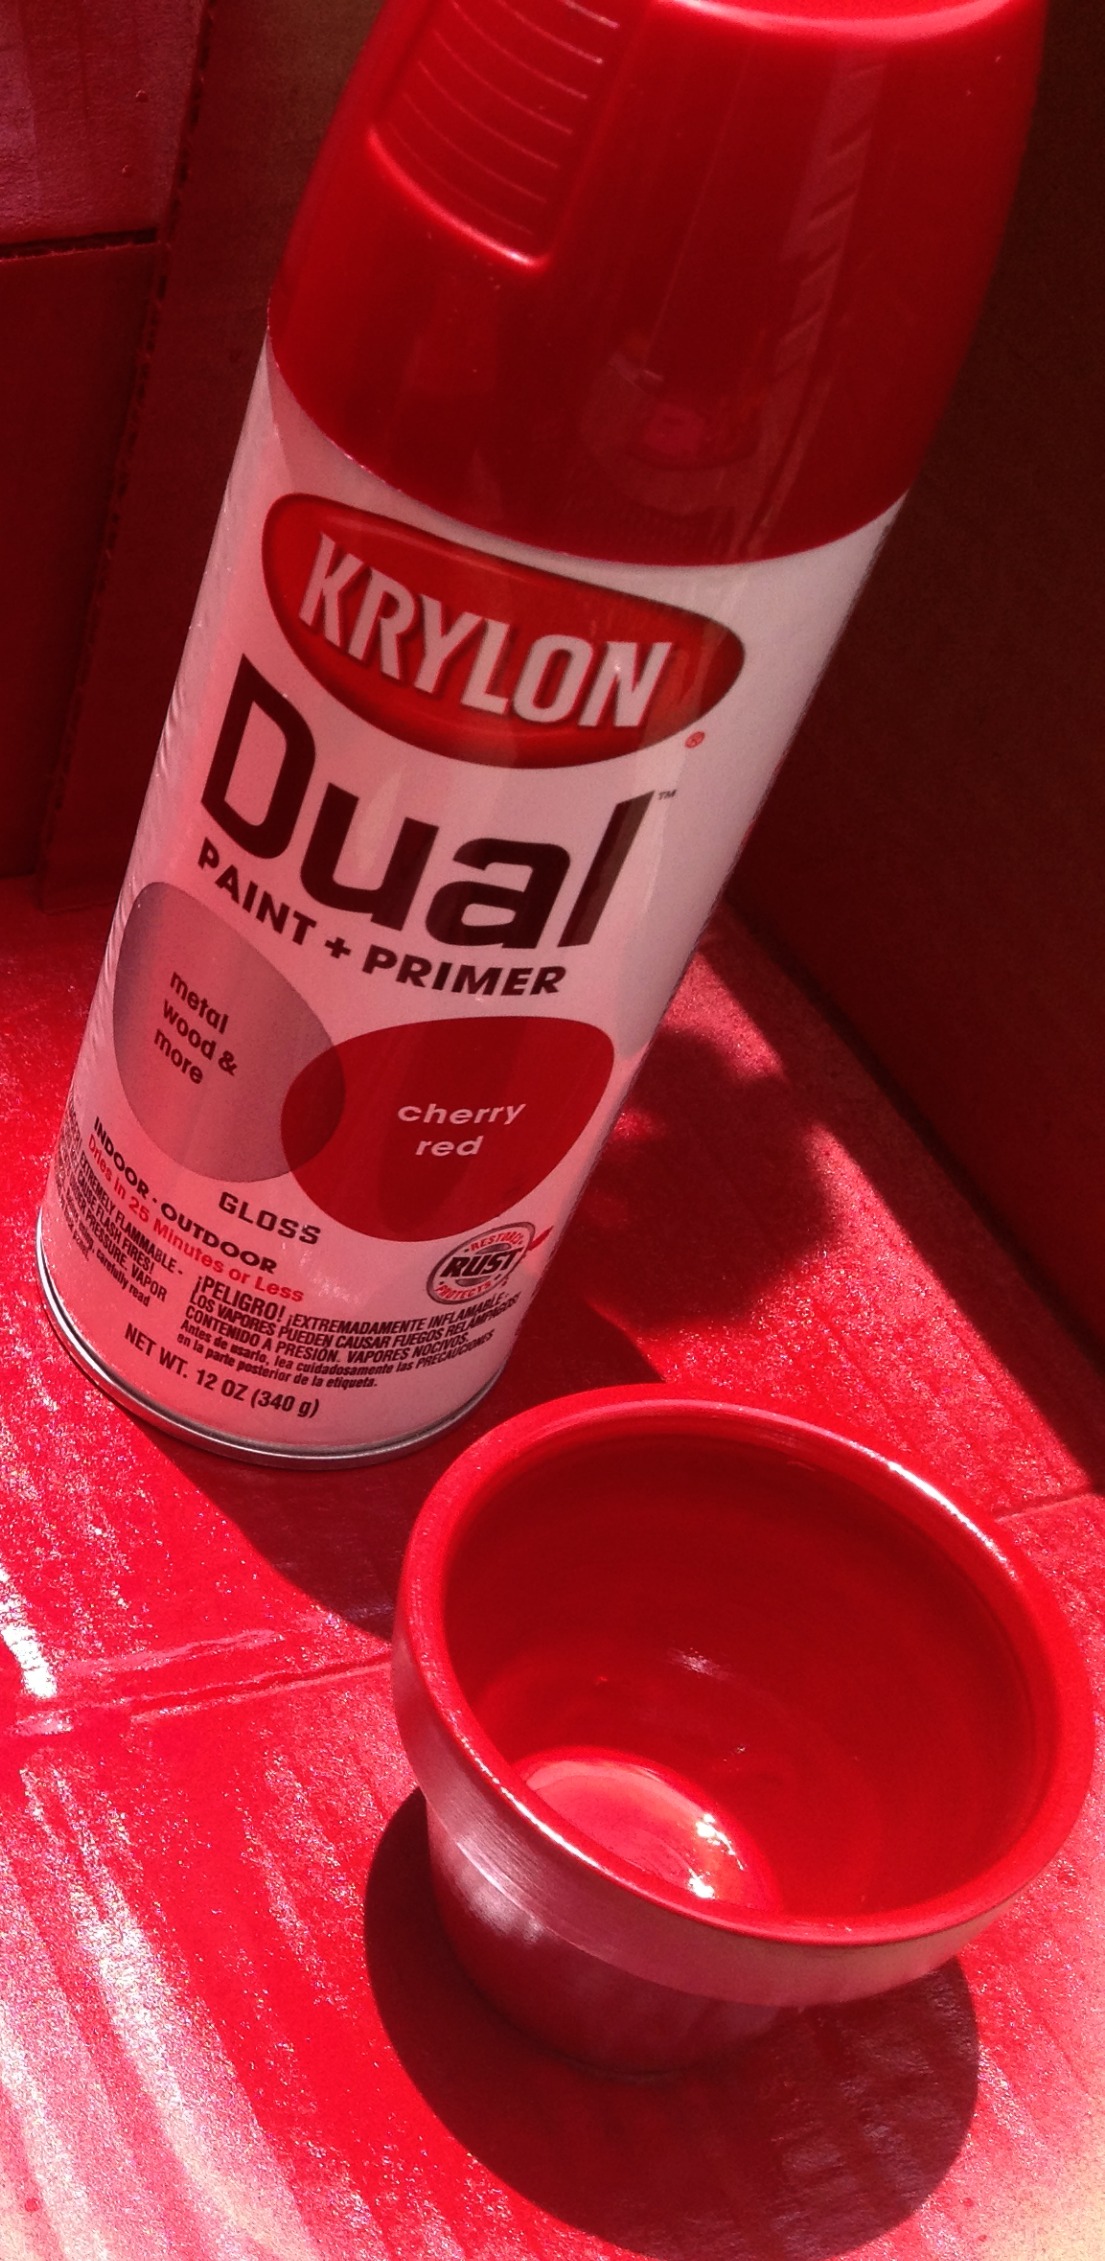
Glue on the clothespin upside down to hold the cards. You can paint it the same color or make it different. Add a button (or more) and you are ready to personalize.

I filled the pots with my husband’s favorite organic mints for our picnic outing. There are so many creative things you could put in the pots, even flowers! For more ways to create a picnic basket ensemble, you can find in a previous Fifteen Minute Friday the project for the napkins.
You can also visit my blog today today for directions on making the recycled glass jar heart candle.
Happy Friday,
Laura
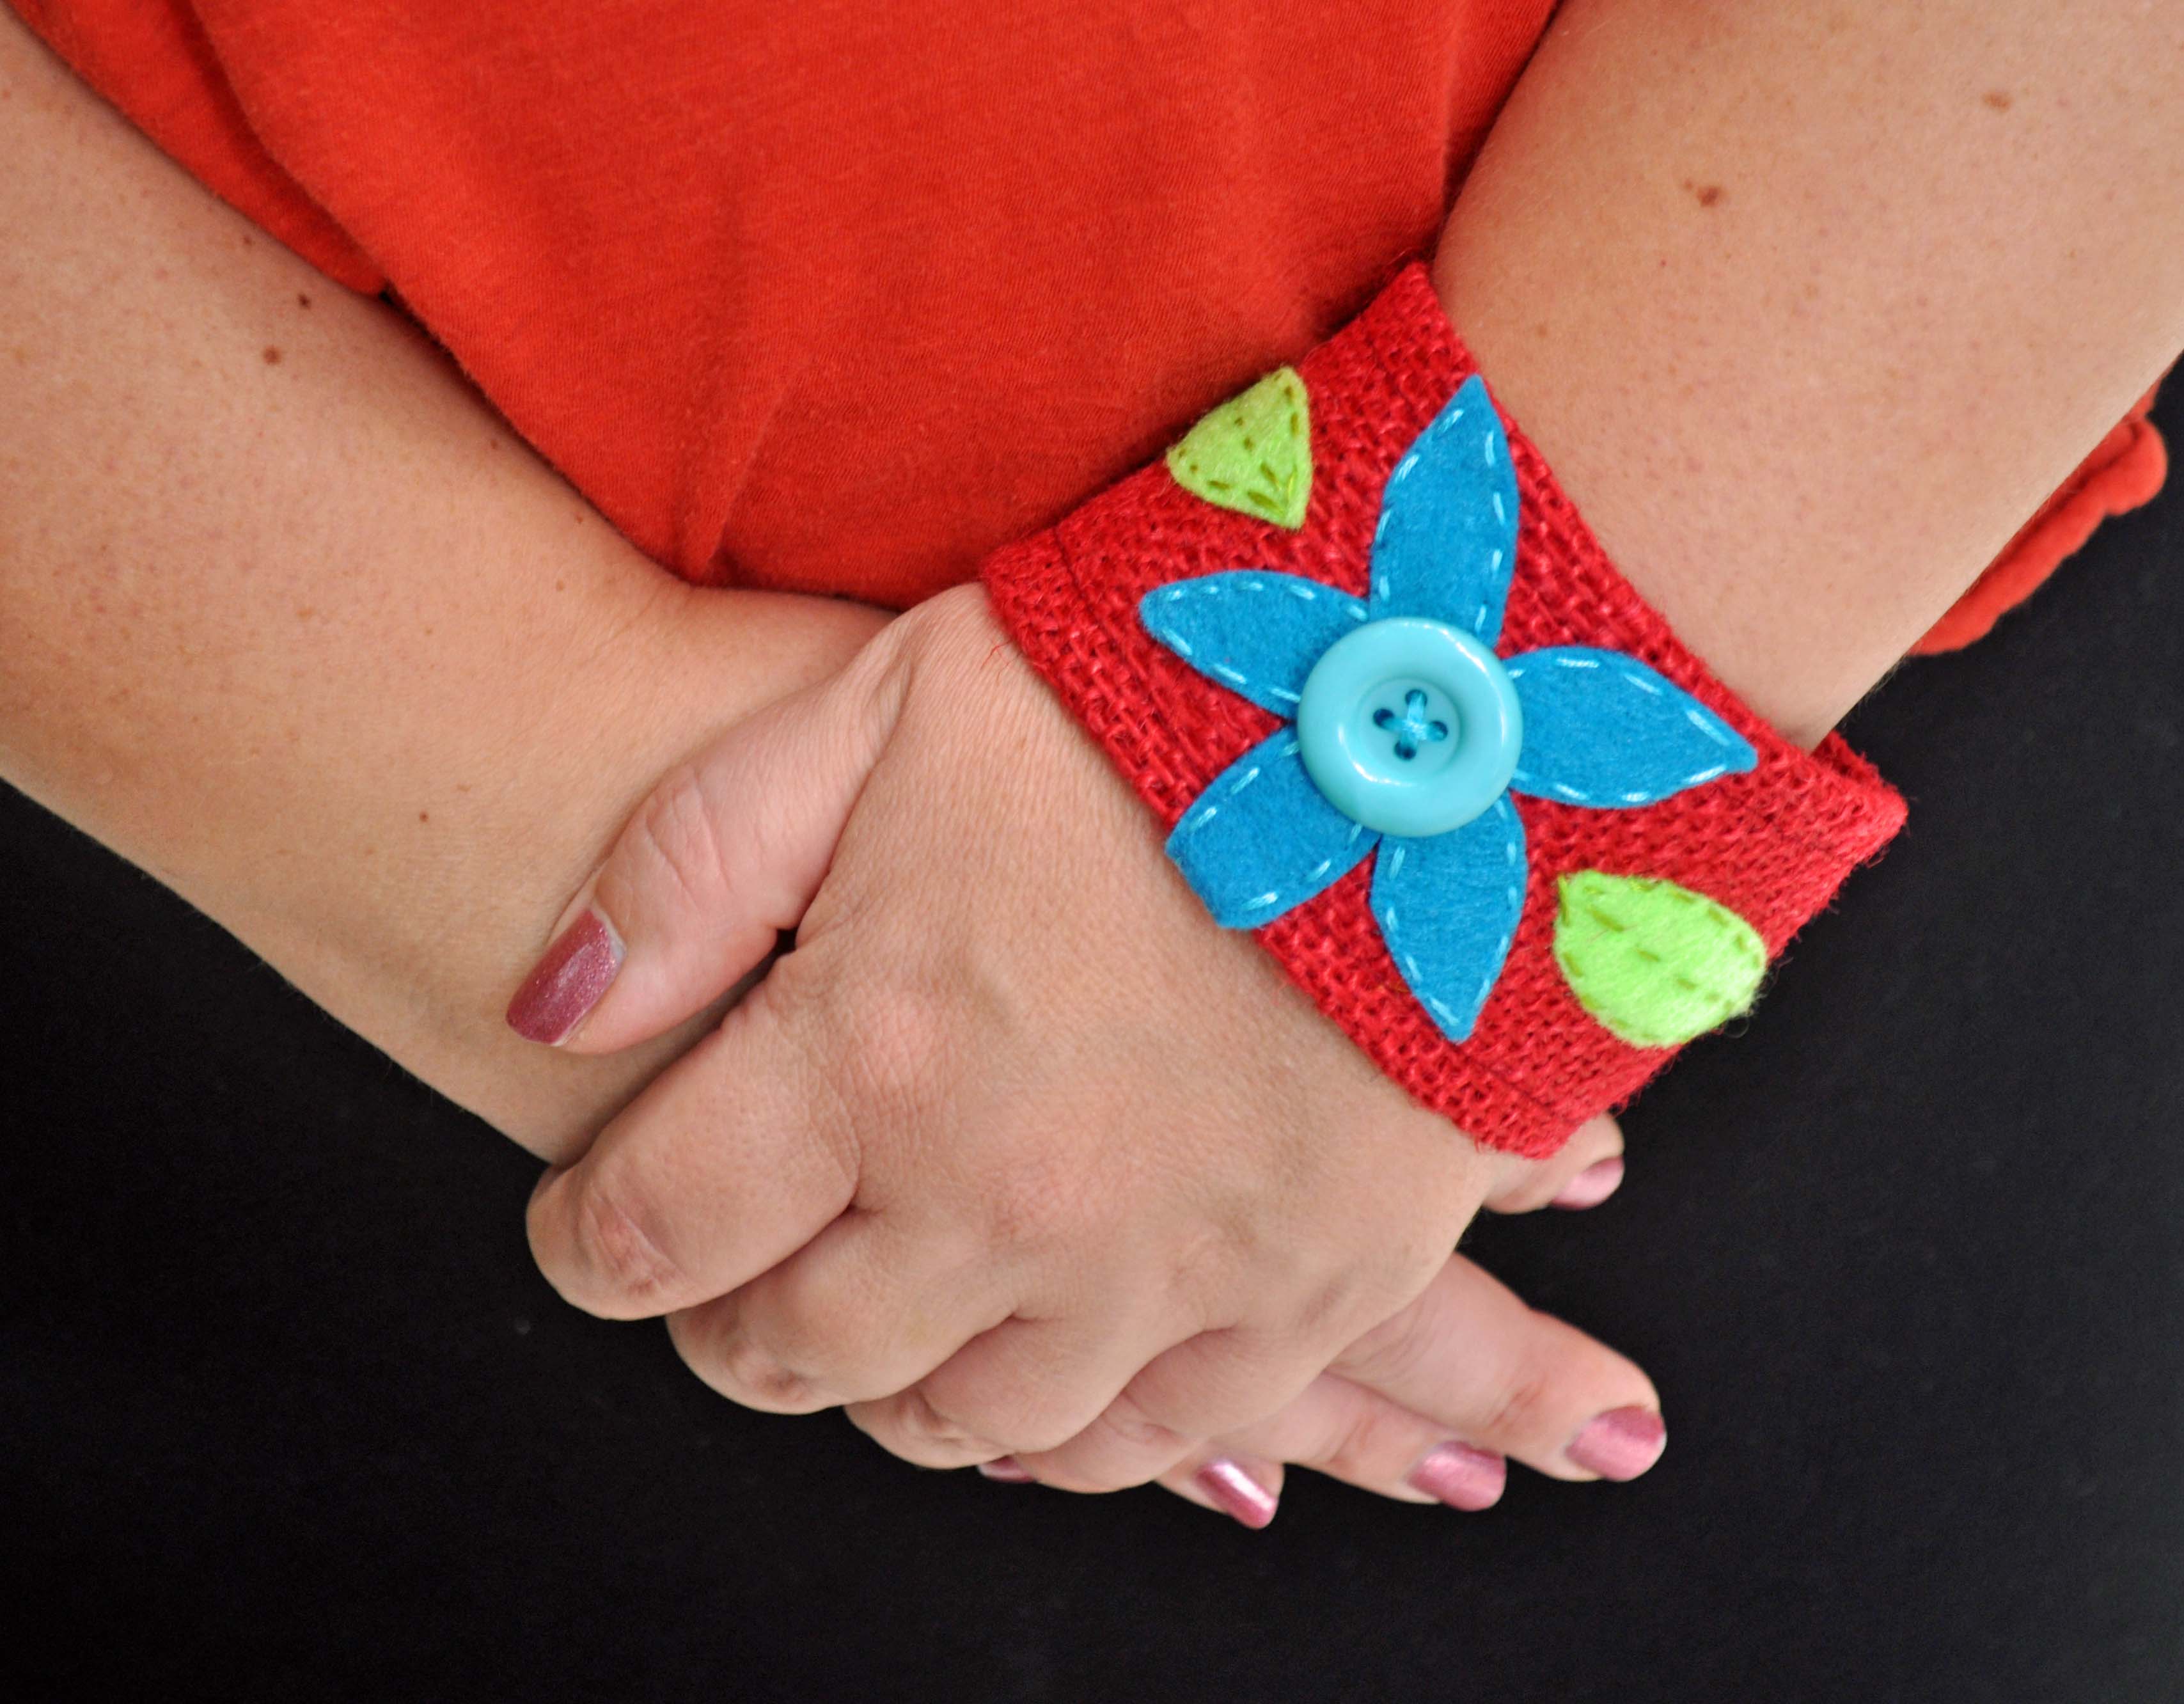
Short-sleeved, summer tops demand a good burlap and buttons cuff, don’t you think? Create this simple and rustic burlap cuff for your next walk on the beach. It’s hip and cool and so easy to make!
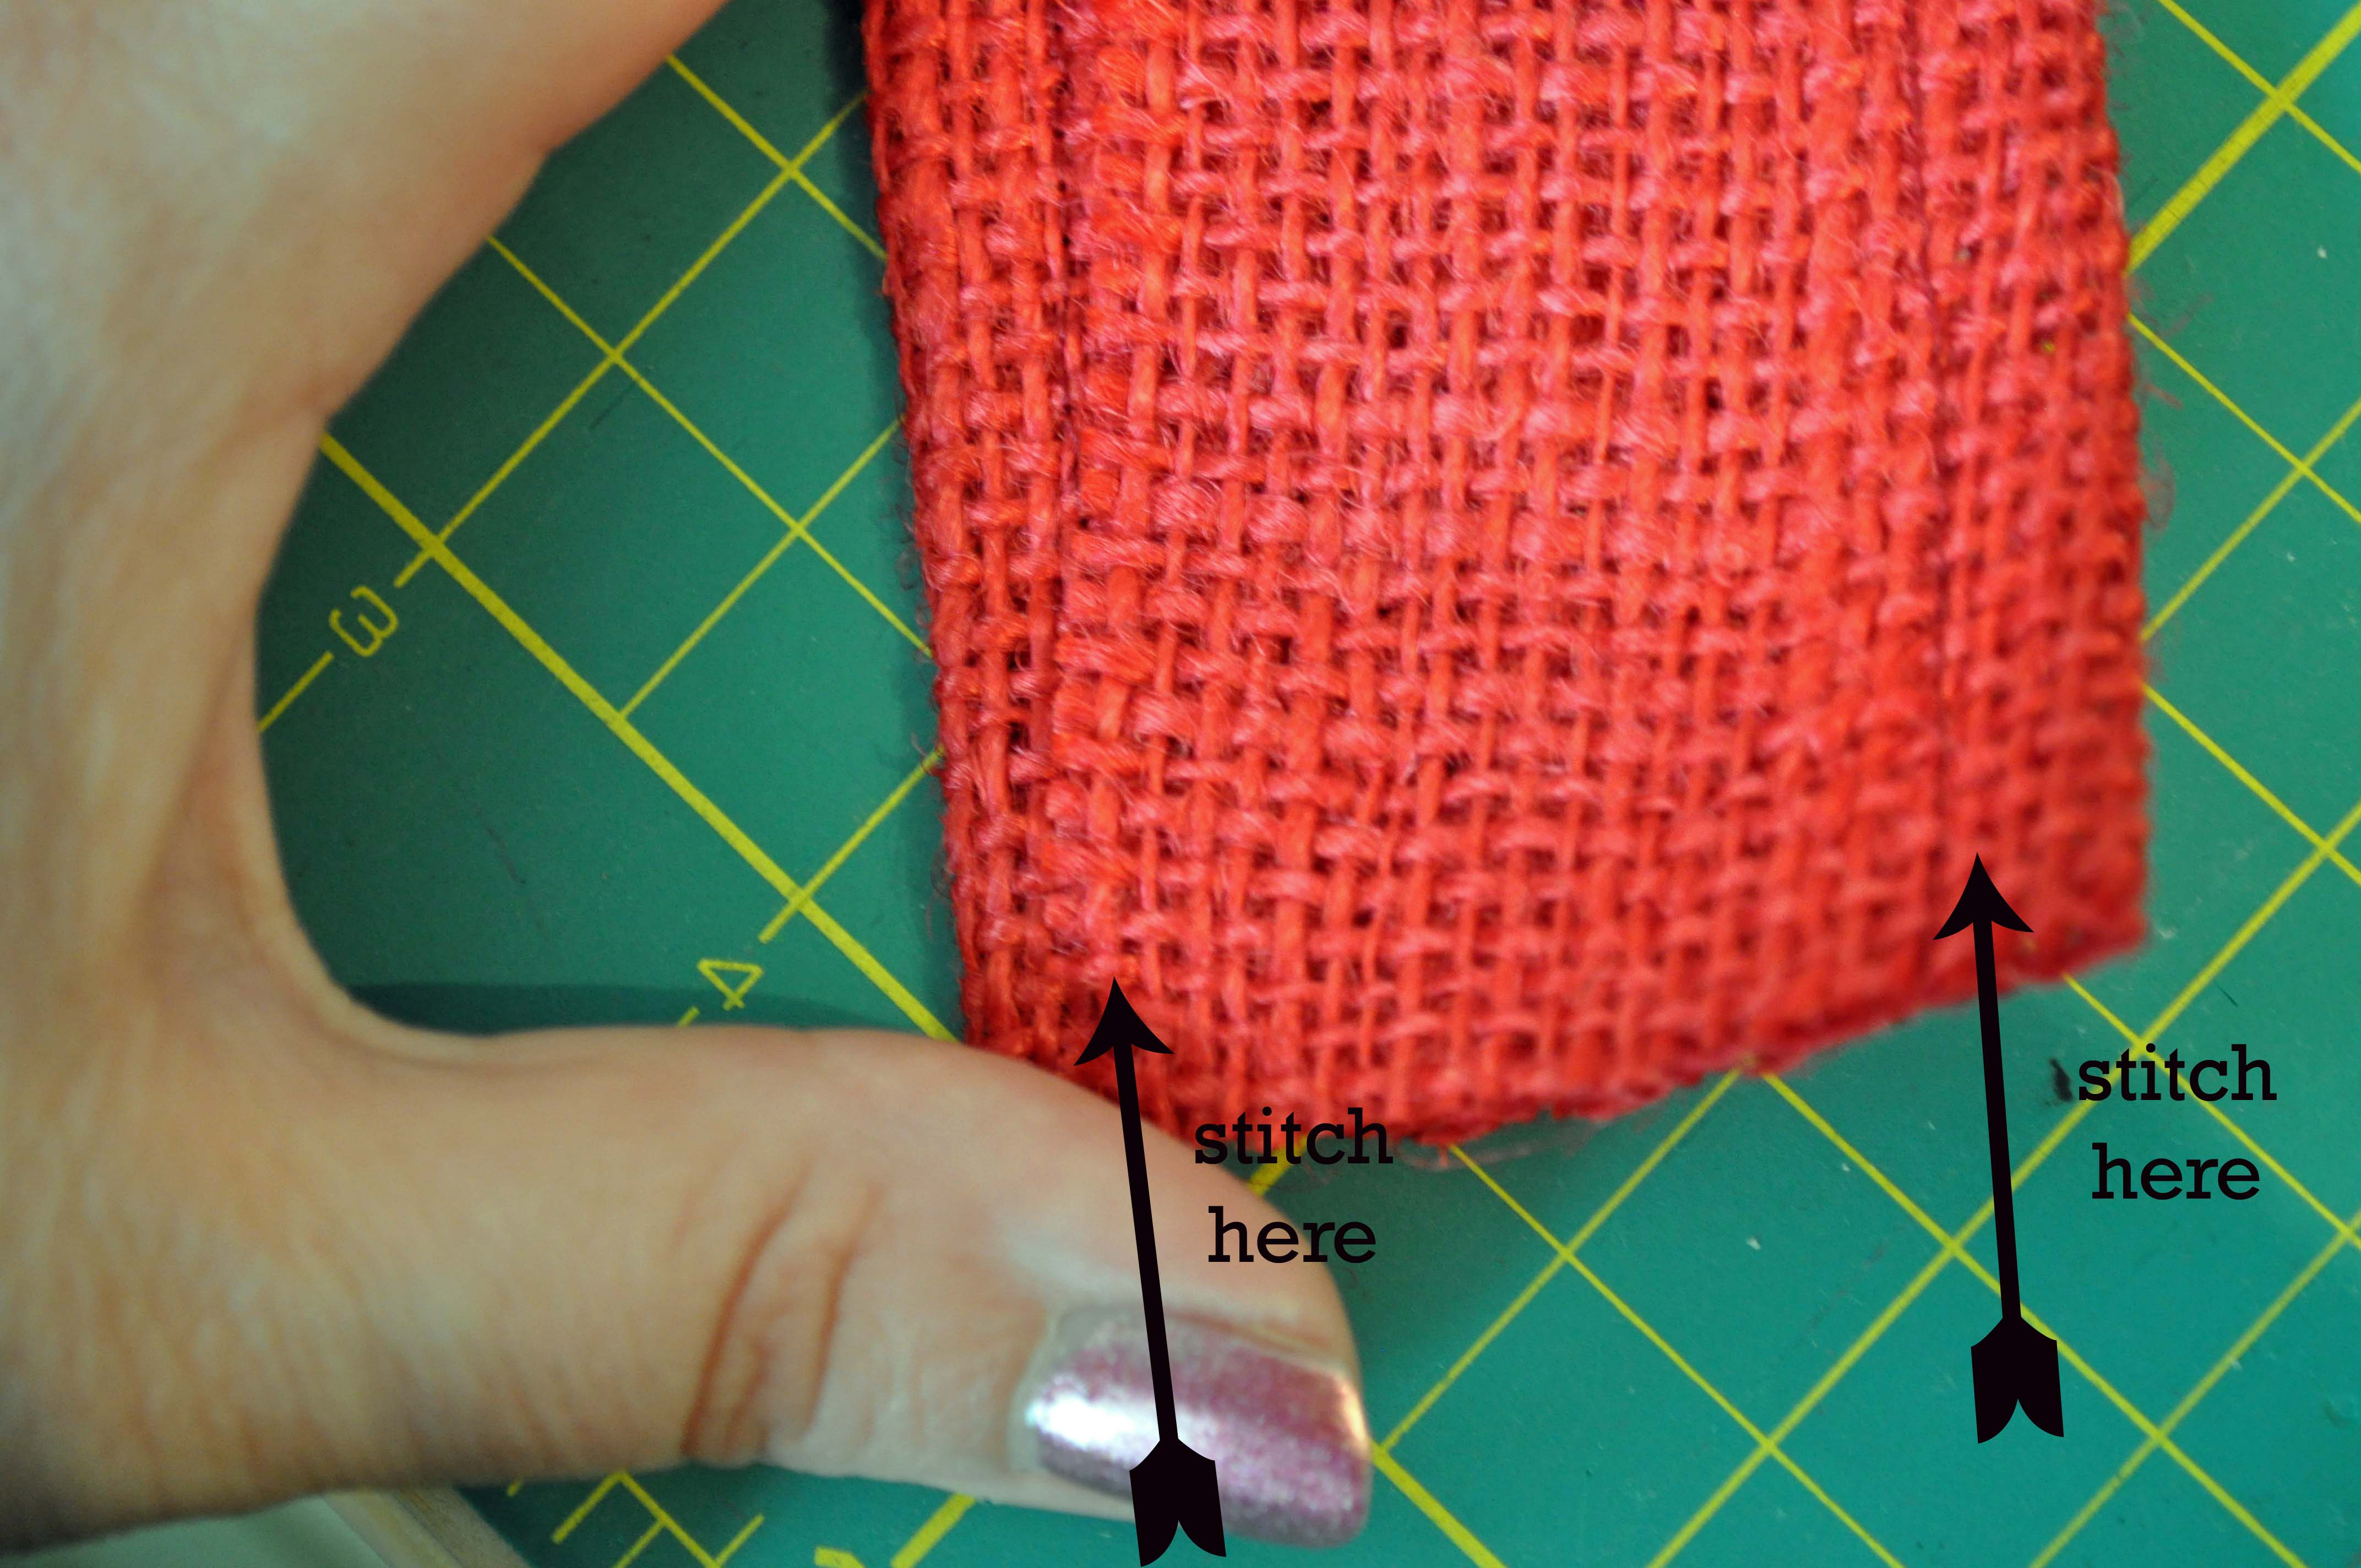
1. Fold the burlap into thirds to create a long strip measuring 10″ x 2″. Pin in place and stitch along the edges.
2. Using felt scraps, cut out petals and leaves to form a flower. Arrange in the center of the burlap rectangle and using embroidery thread, stitch them into place.
3. Stitch buttons into place. Use them for the center of the flower. You can really go crazy and add more into the design. (I strongly believe you can never have too many buttons on a project!)
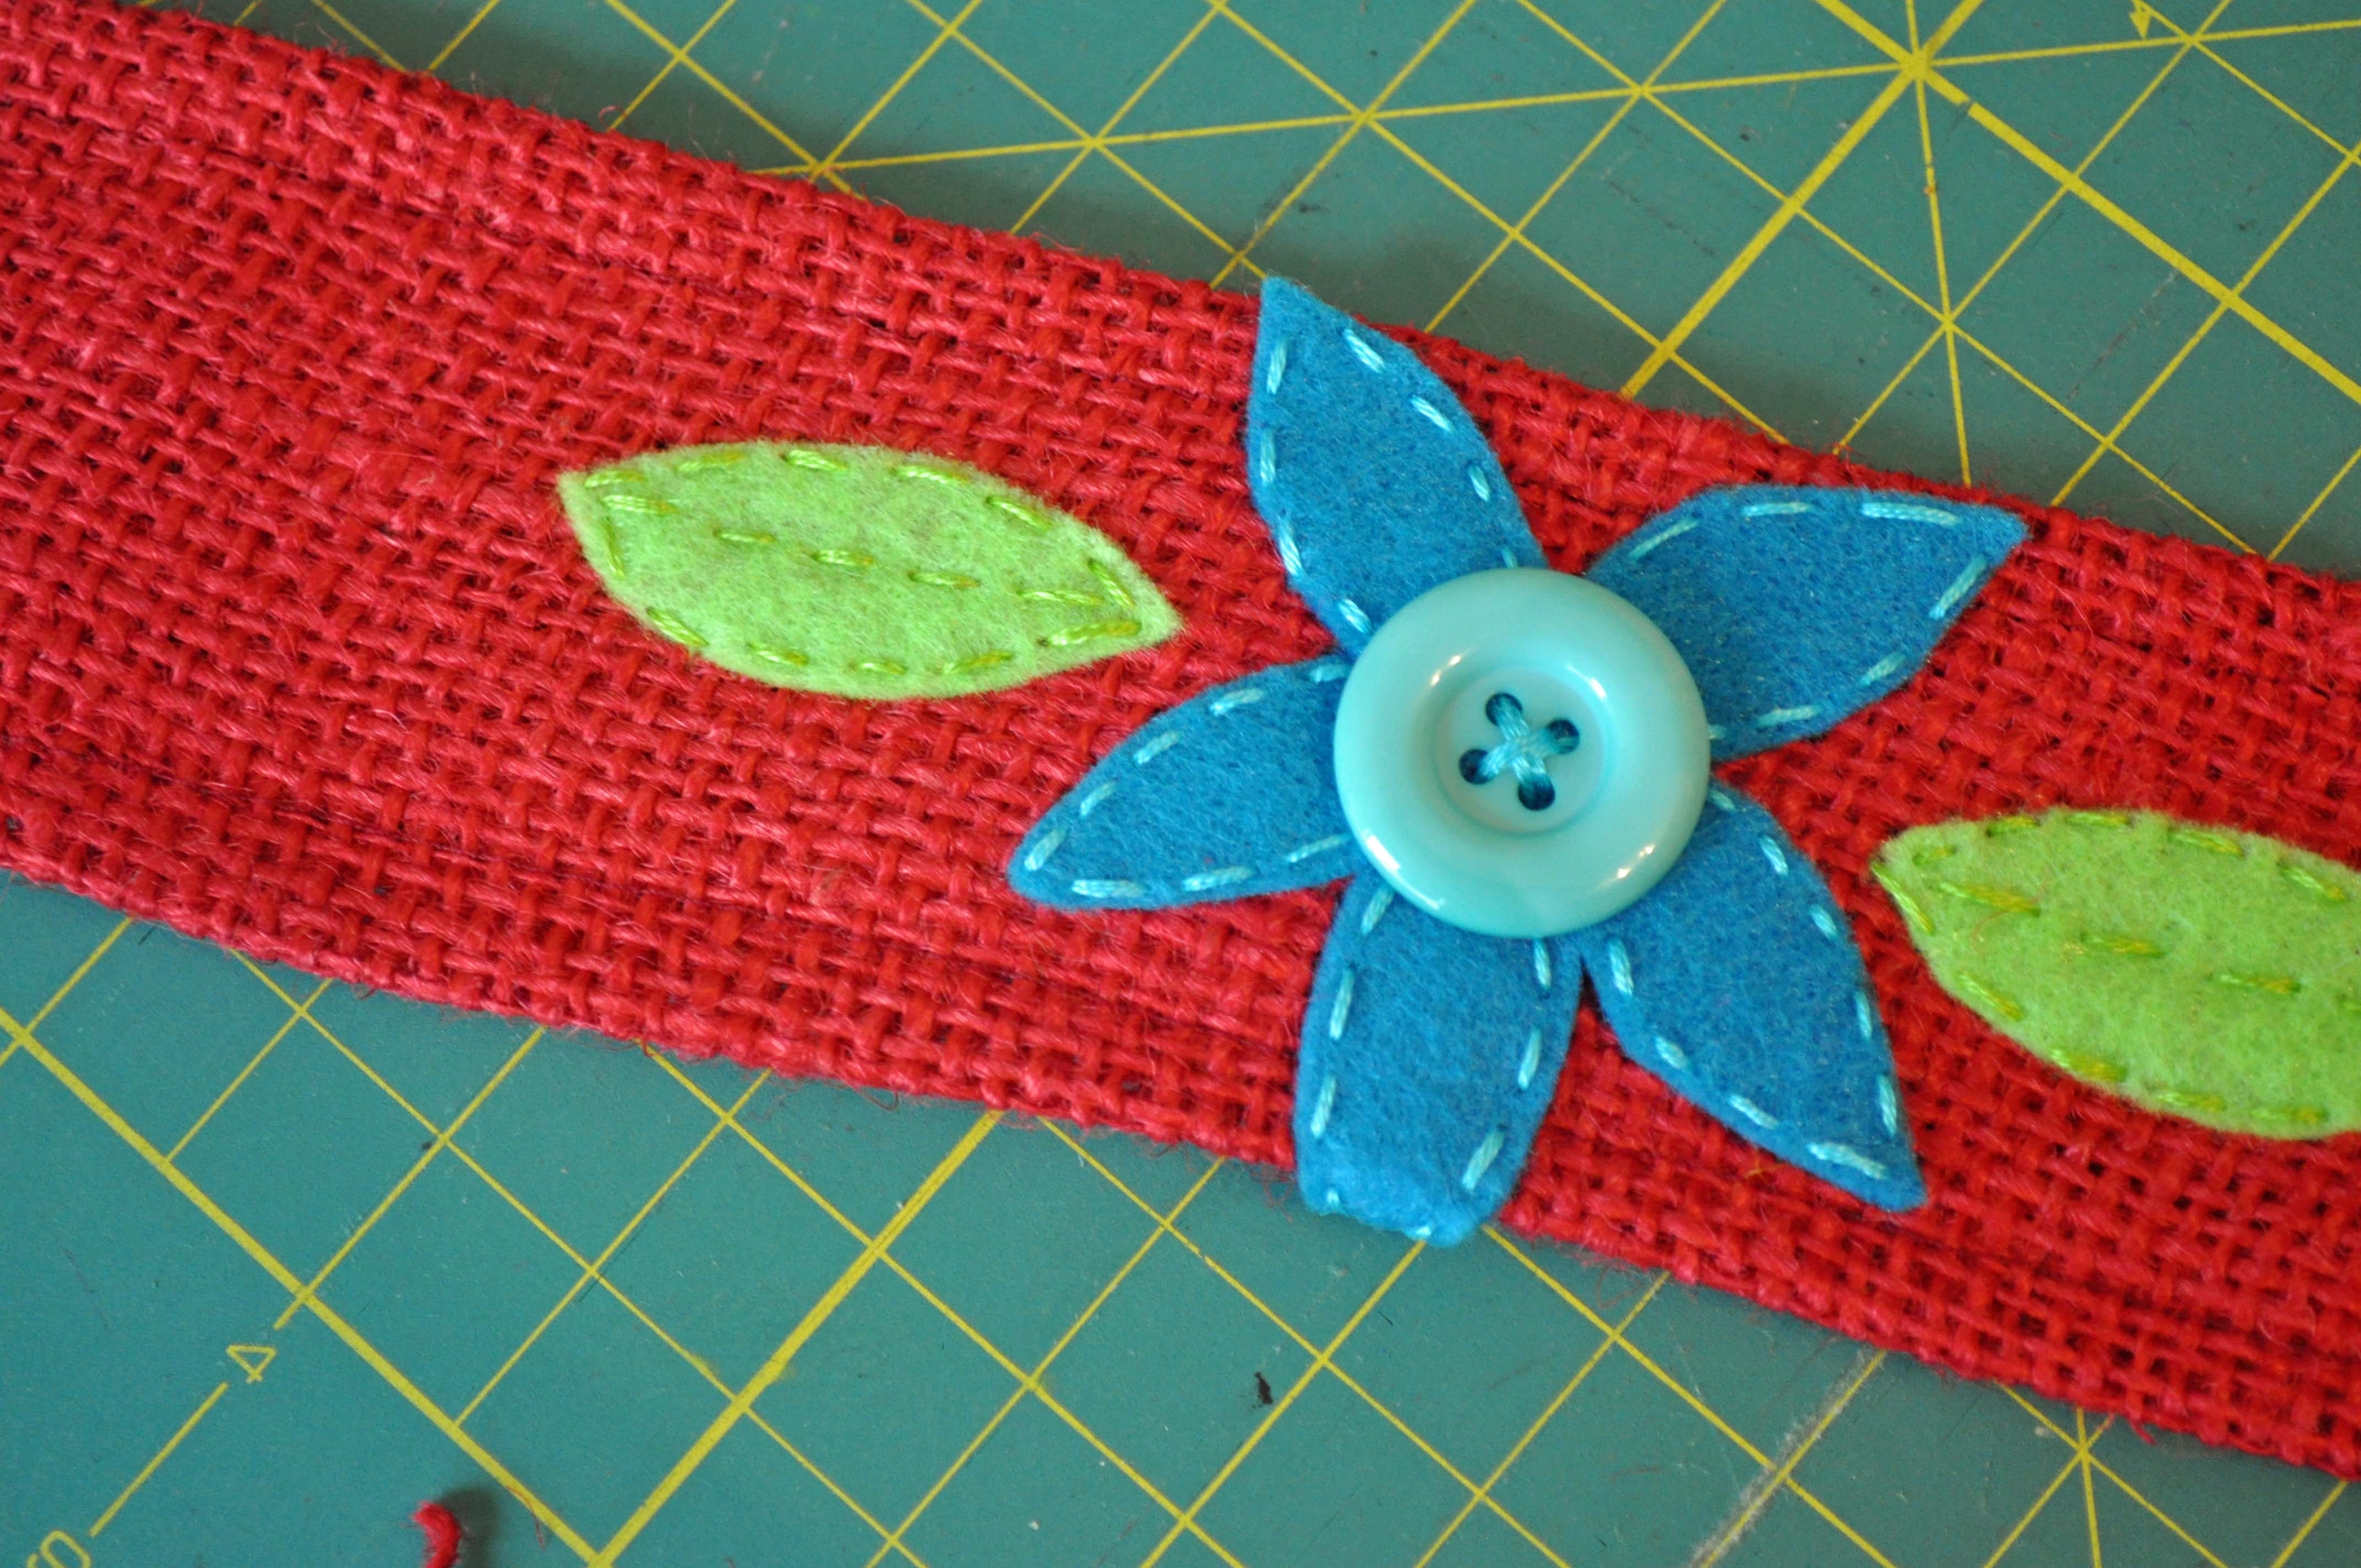
4. Once the design is stitched in place, use embroidery thread to attach the two short ends of the cuff together.
Note: I measured my wrist at the beginning of the project and made sure that I could slip the cuff on and off. If you prefer a tighter fitting cuff, measure your wrist size and then use a hook & loop, snap, or BUTTON closure to secure the cuff on your wrist.
Thanks for getting crafty with me today! For more button crafts, stitching and lifestyle ideas visit me on my blog at www.laurabraydesigns.com.
![]()
It is that time of year, the red…white…and blue time that is! Here is a quick and easy way to up-cycle an old t-shirt into a festive masterpiece fit for the grandest of parades. It is shown in patriotic style but could be done in any color theme for any occasion.
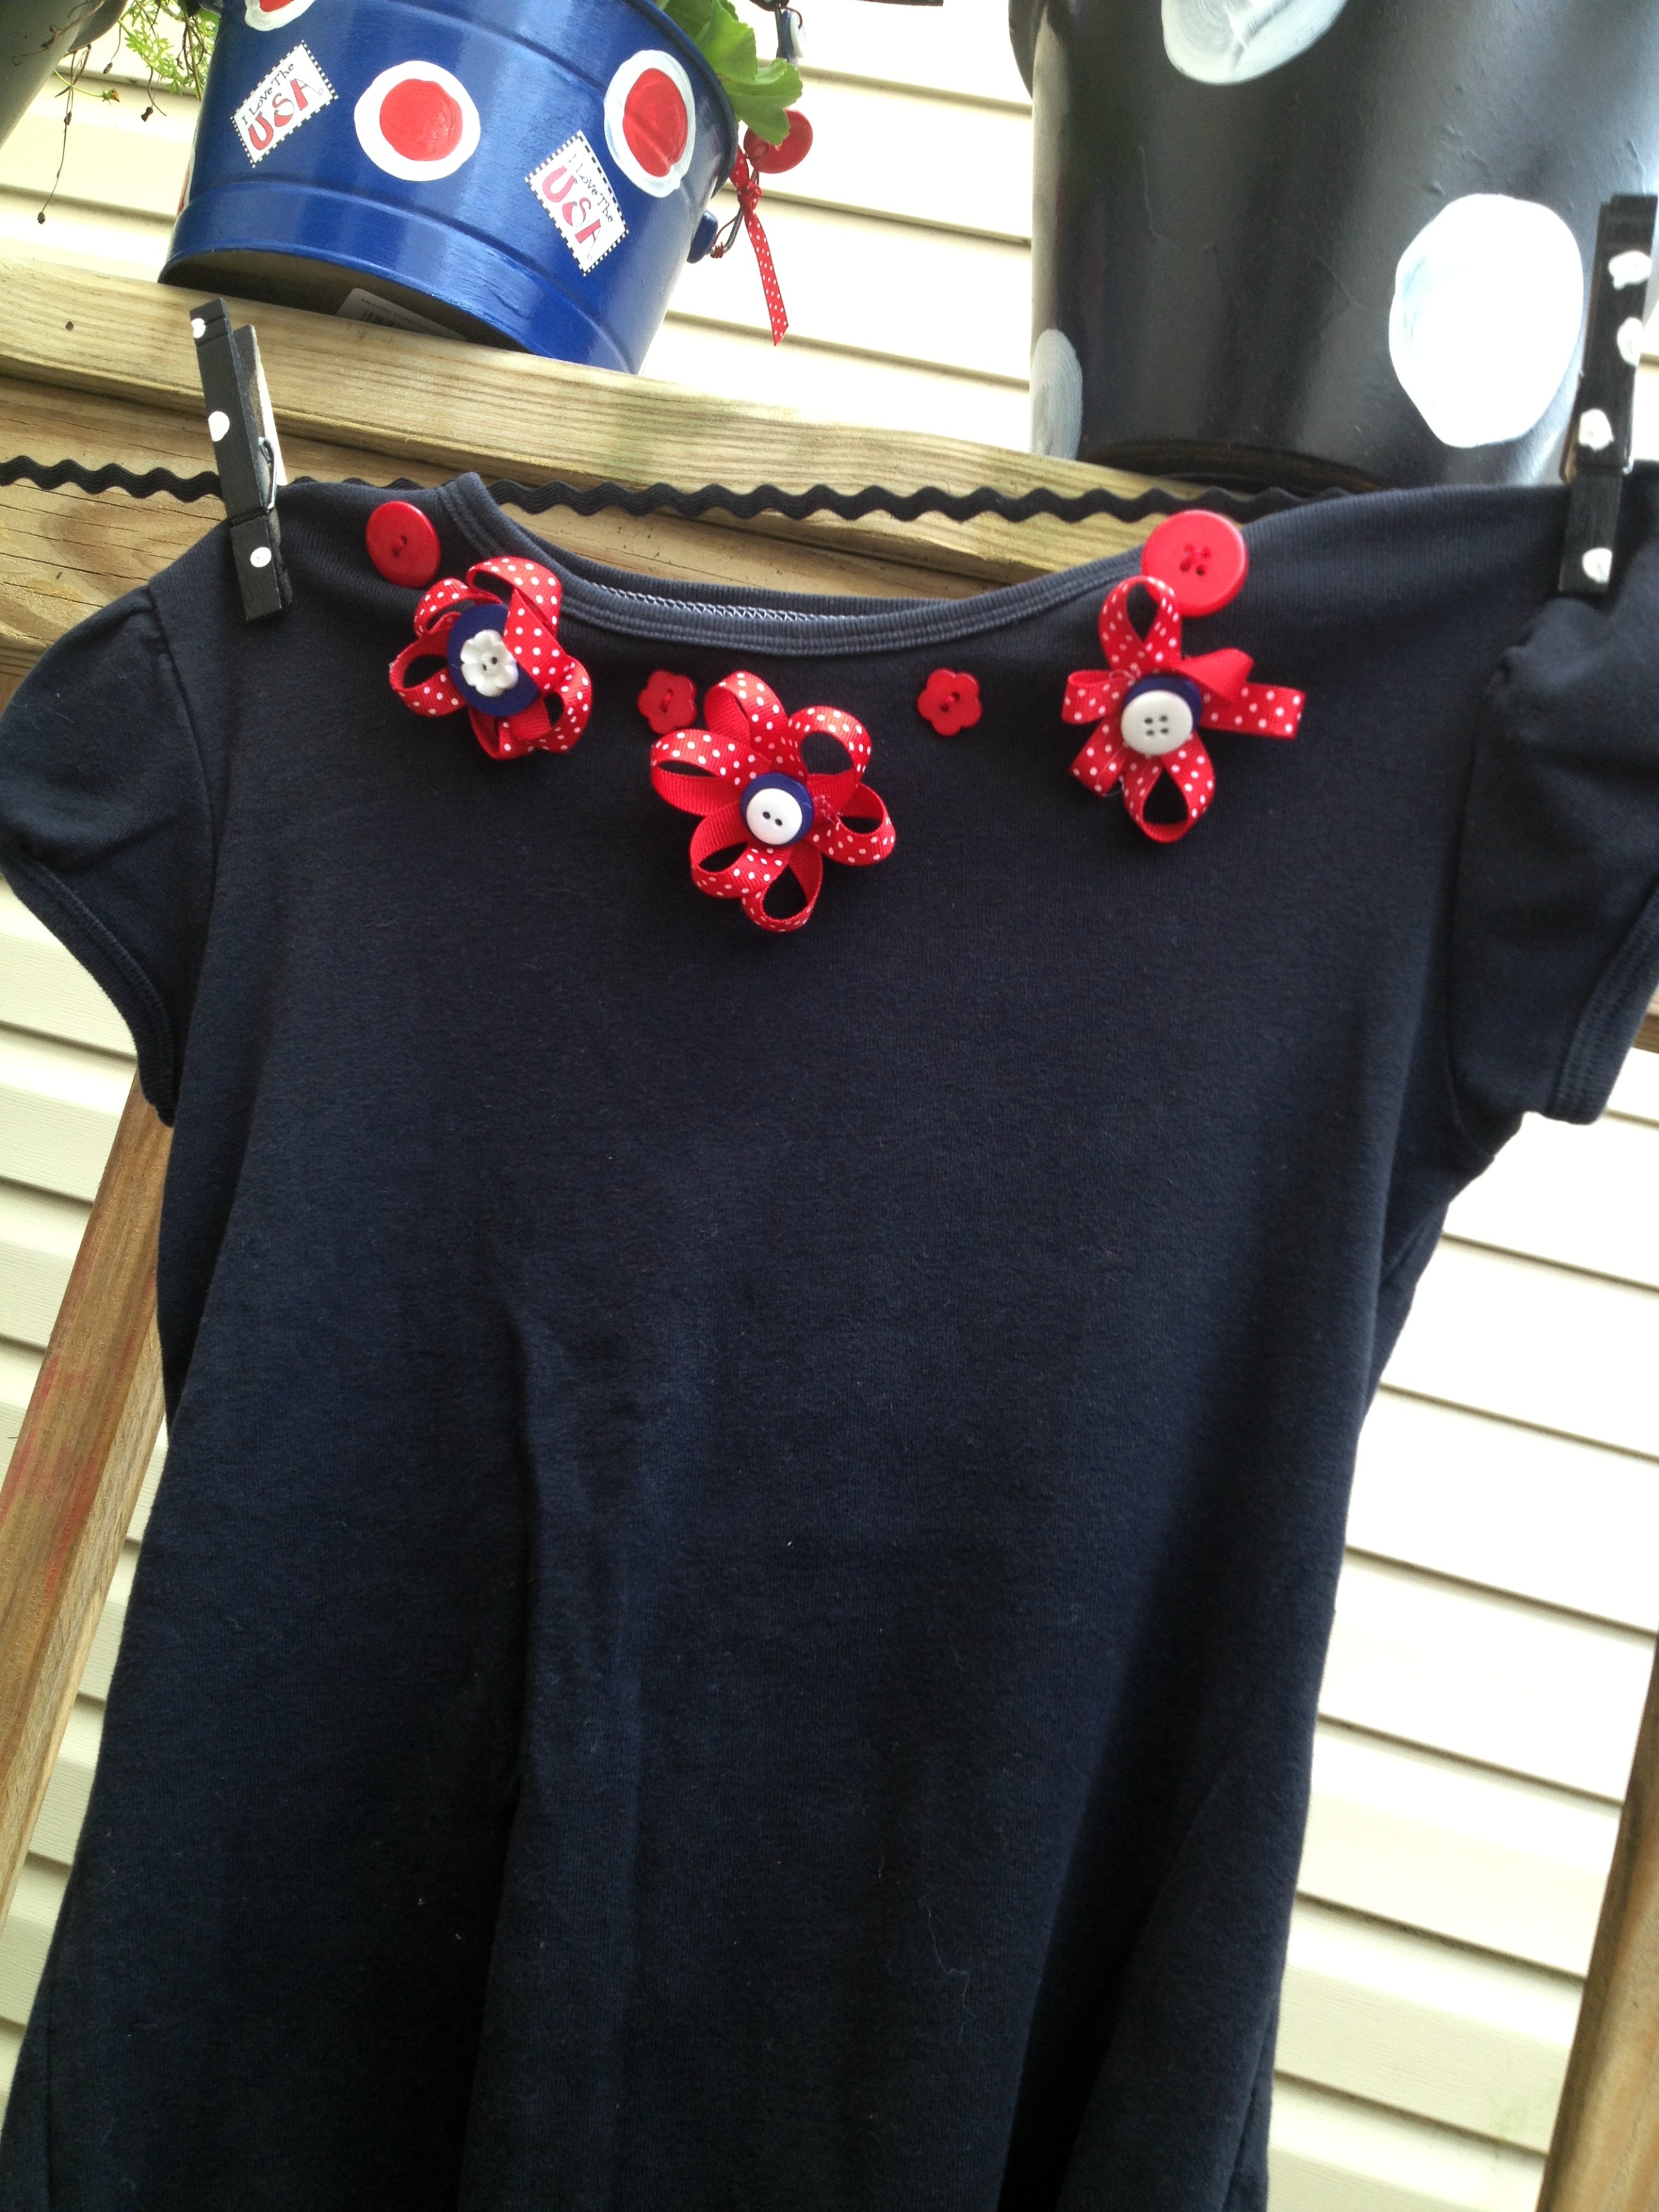
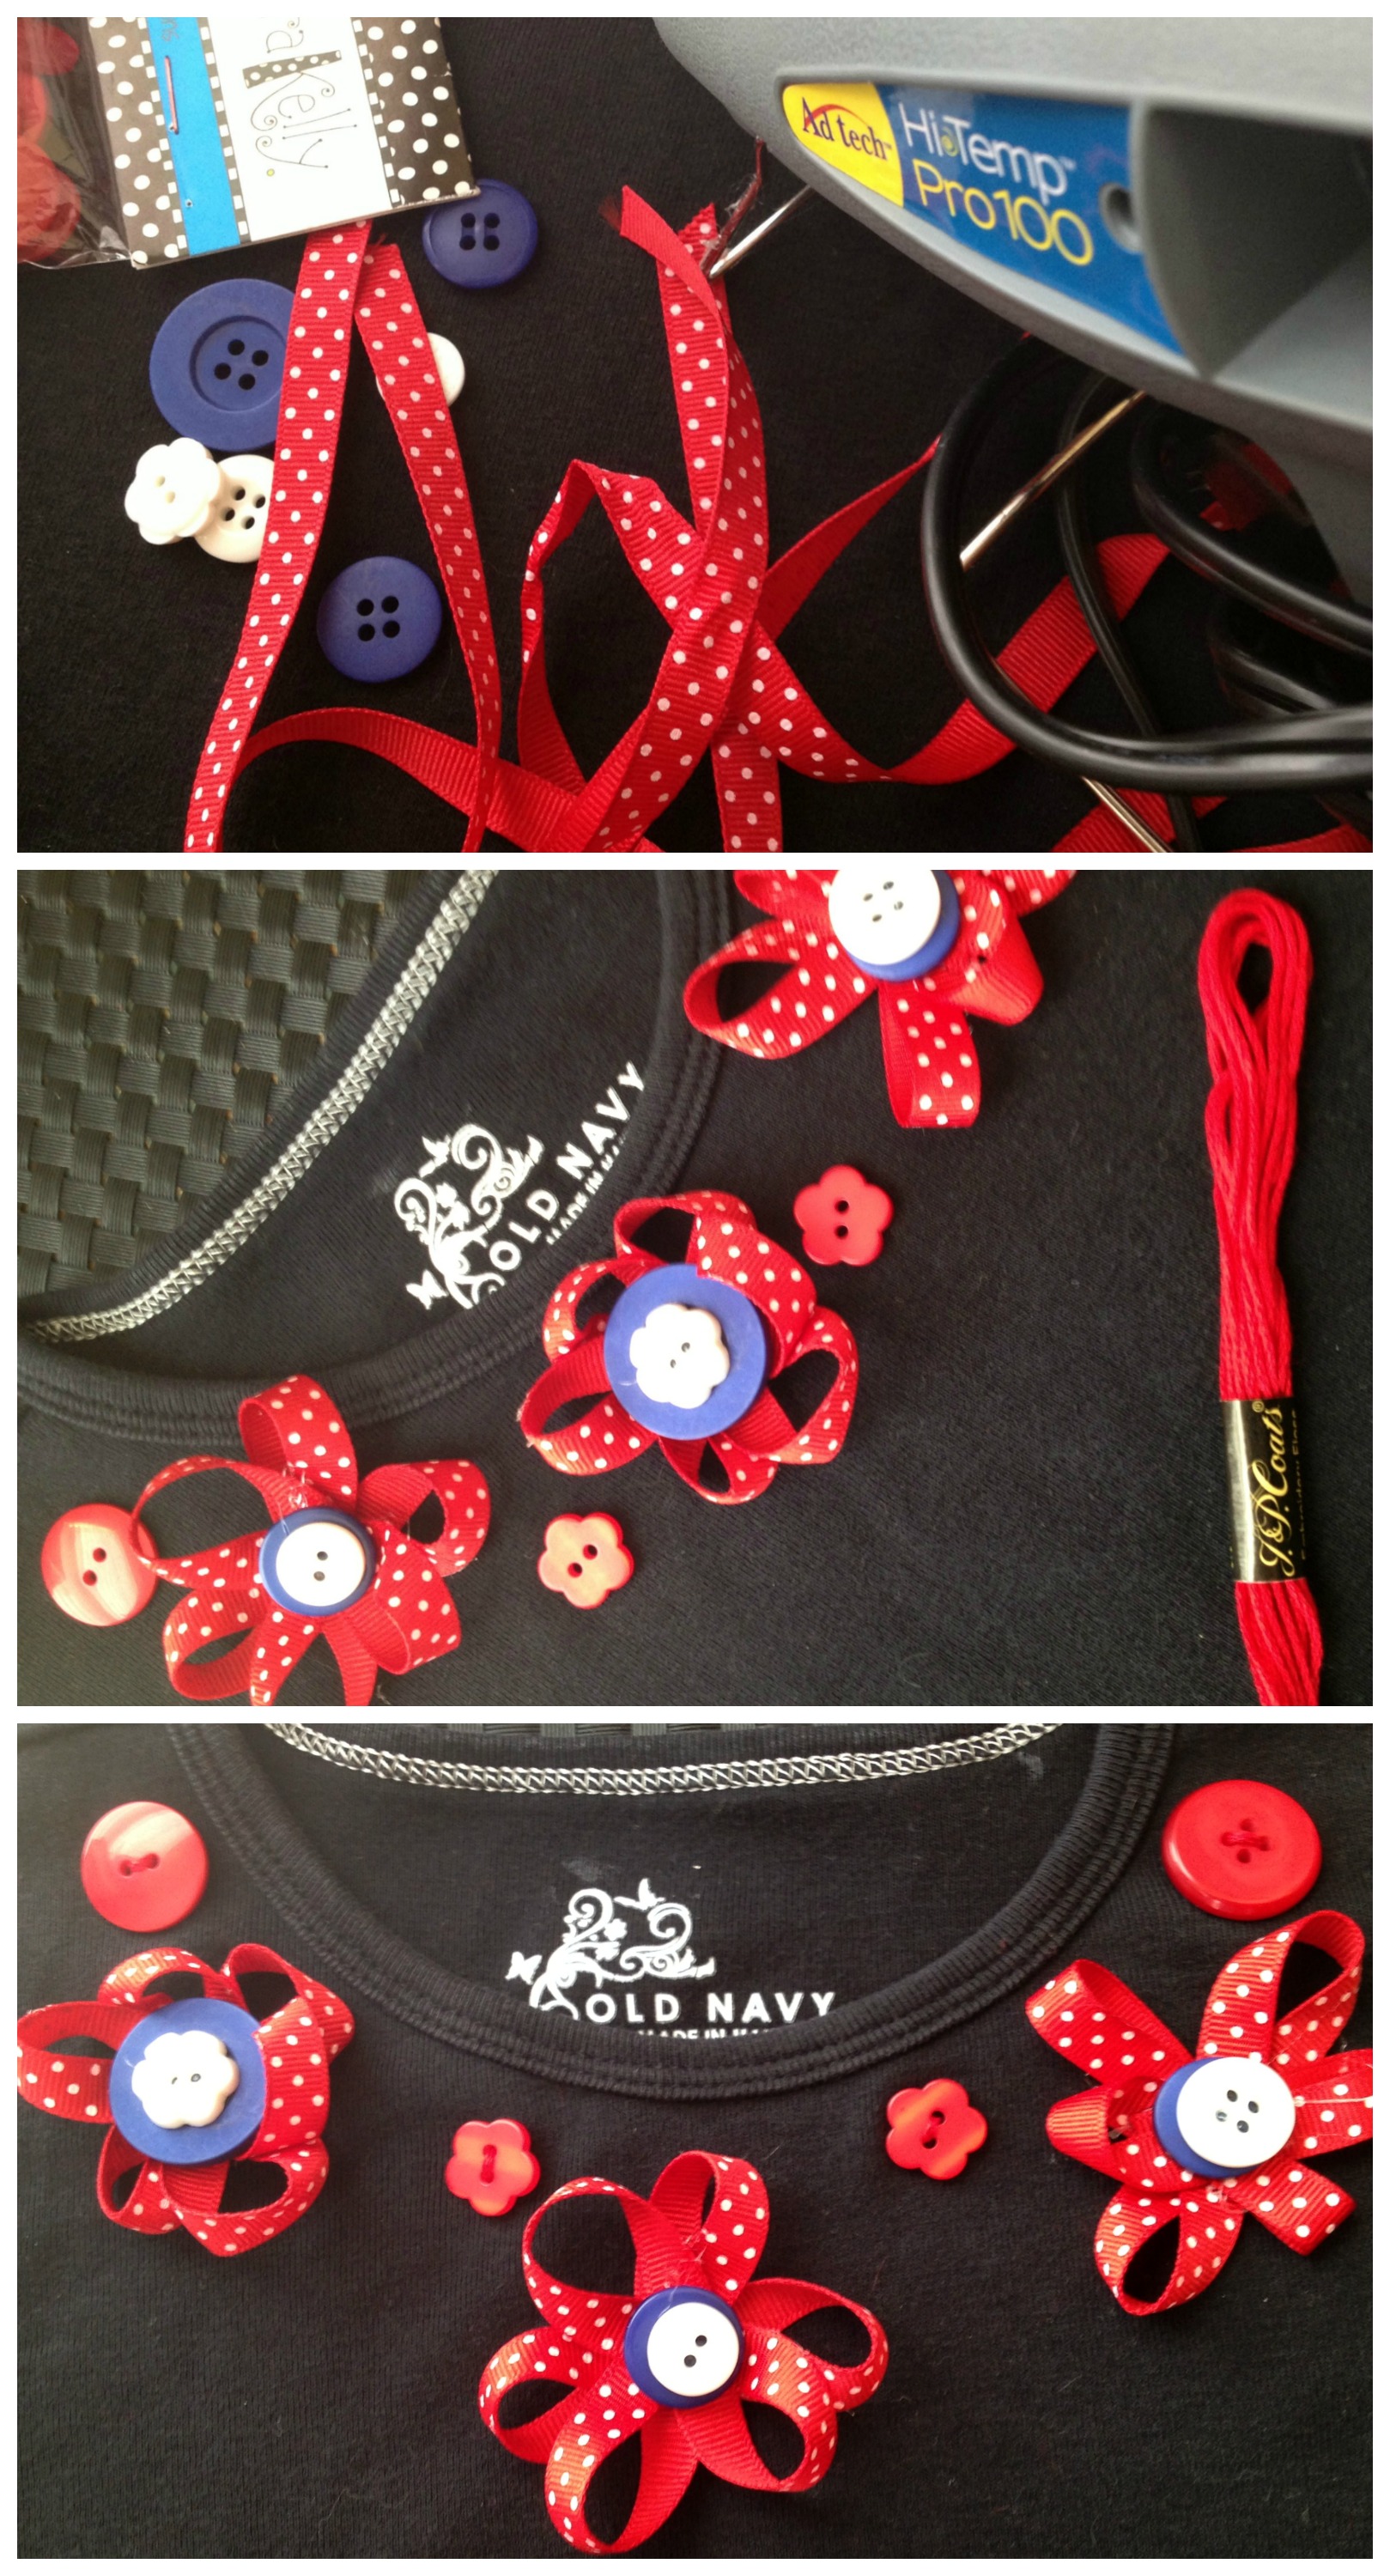
You only need a few things…buttons (Laura Kelly’s patriotic mix is best), embroidery floss (Coats and Clark is my favorite), HOT glue (Ad-tech of course) and ribbon.

Make the ribbon flowers with button centers using your HOT glue. It works best to do the ribbon part first and then add the buttons at the end. Then sew them and additional buttons around the neck of the shirt. If you want to go button crazy, you can sew red, white and blue buttons all of the shirt to look like polka dots.

If you like the shirt and you want an additional patriotic button craft idea to upcycle these denim shorts, visit Laura on her blog for directions.
If you want to win this prize, (buttons in an awesome Viewtainer, Beacon Zip Dry, and a Laura Kelly notepad with a Sharpie, go like Laura on her Facebook page or post a comment on this blog and you will be entered!

Happy Creating using BUTTONS, imagination and LOVE.
Cheers,
Laura
Hi, Allie here and I’m sharing my Patriotic Craft – a Country Chic Flag. We are your LAST stop on the I Love the USA Blog Hop today. Are you hopping with us for this amazing Patriotic Craft Party? You should arrive here via Jen Hadfield’s Tator Tots & Jello Blog.
*******If you’re just getting started – be sure to visit Laura Kelly at Laura Kelly Designs so you don’t miss a SINGLE project! (Also, this is where you enter for the great prizes)******
The designers have worked long and hard to bring you patriotic inspiration. We have gathered top name designers in their respective fields such as: sewing, scrapbooking, card making and many more. We hope you can share in their pride and enthusiasm for all that America stands for and the beautiful country that she is.


designed by Allie Gower for Buttons Galore
Materials needed:
I’ve used lots of Patriotic Buttons along with Laura Kelly’s Beautiful America Fabric. (click the links to purchase) We really appreciate you hopping with us today. Are you inspired to create something patriotic?
If so please share your projects with us on our Facebook page or on Pinterest or even Twitter using hashtags #ilovetheusabloghop #craftpatriotic #laurakellyart
Four more days left of the I LOVE THE USA BLOG HOP… so, keep hopping. Don’t forget to share your crafts too. We really do love seeing what you all create. Comments are always welcome. We all like a little love now and then, right? From all of us at Buttons Galore and More, we wish you a creative, happy and safe Flag Day and 4th of July too! Keep crafting!!!
To enter the I love the USA BLOG HOP, enter the -> a Rafflecopter giveaway
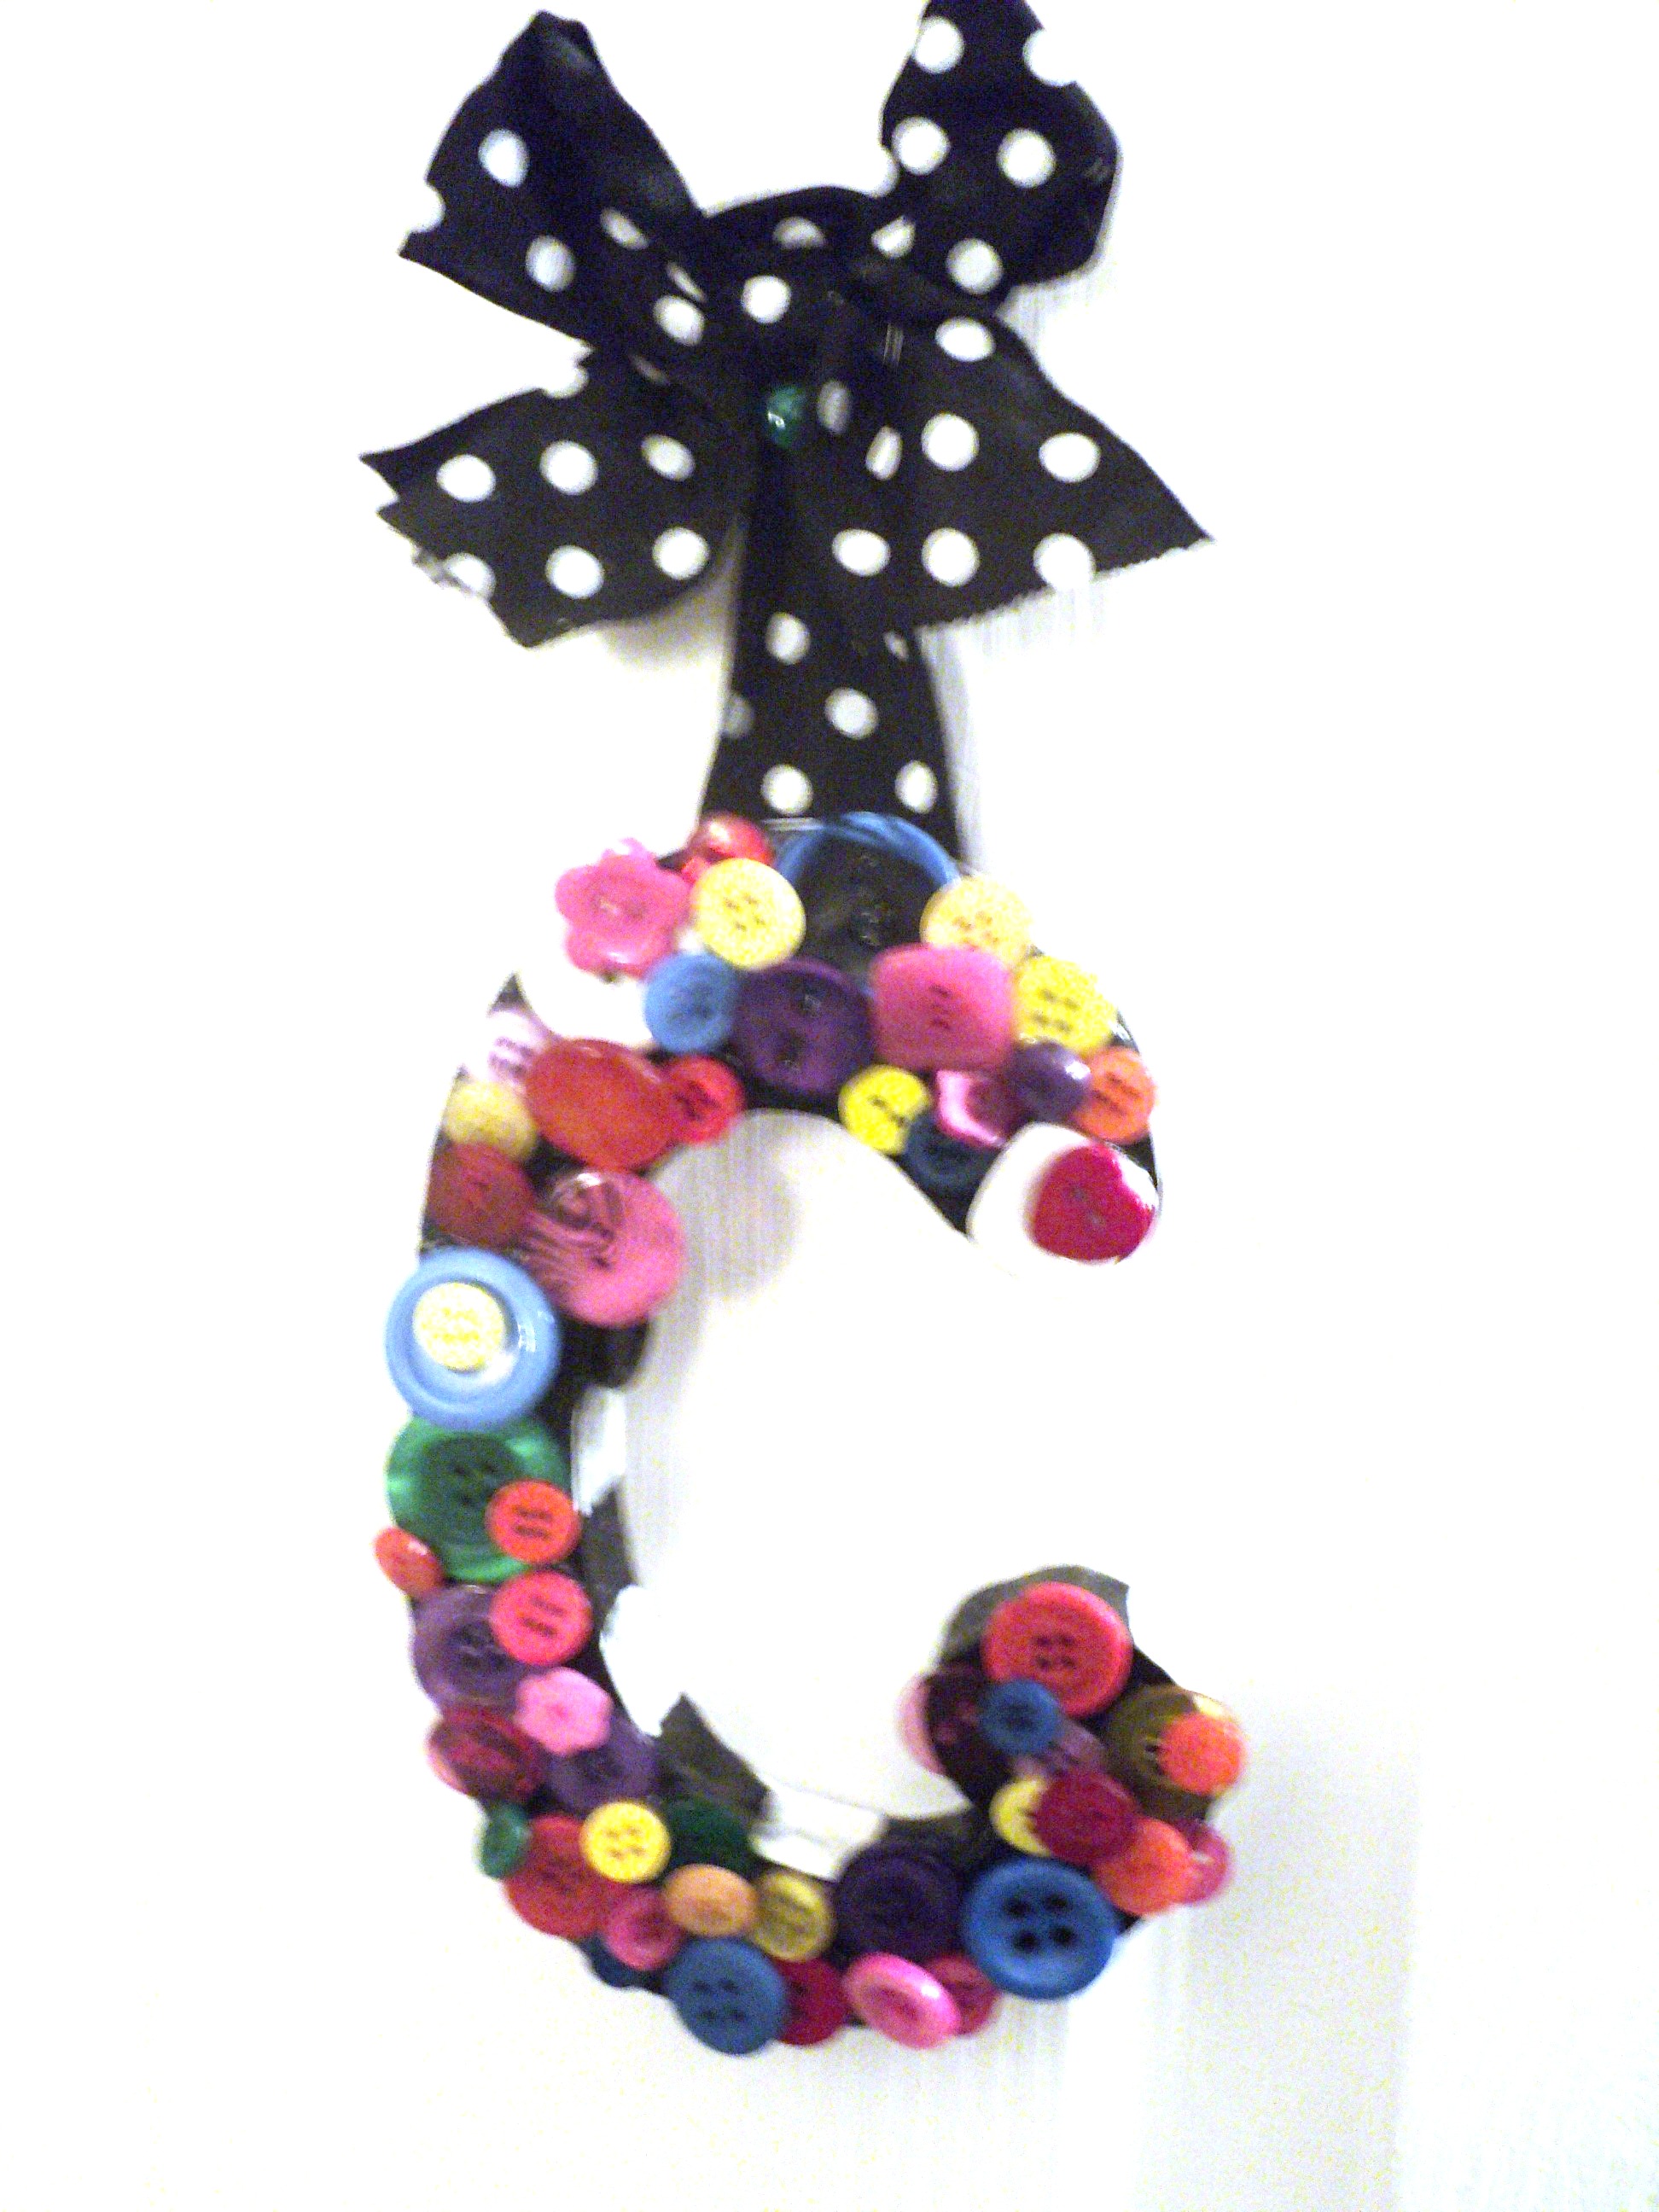
For a quick and personalized gift, cover a monogram in buttons and add a bow to hang it up. You can use letters made from wood or cardboard. They are sold in all kinds of sizes at the craft stores. The best way to adhere buttons to them is with Ad-tech hot glue and a glue gun.
This letter “C” (for Chloe) is covered in buttons from the Laura Kelly collection.
Happy Creating!
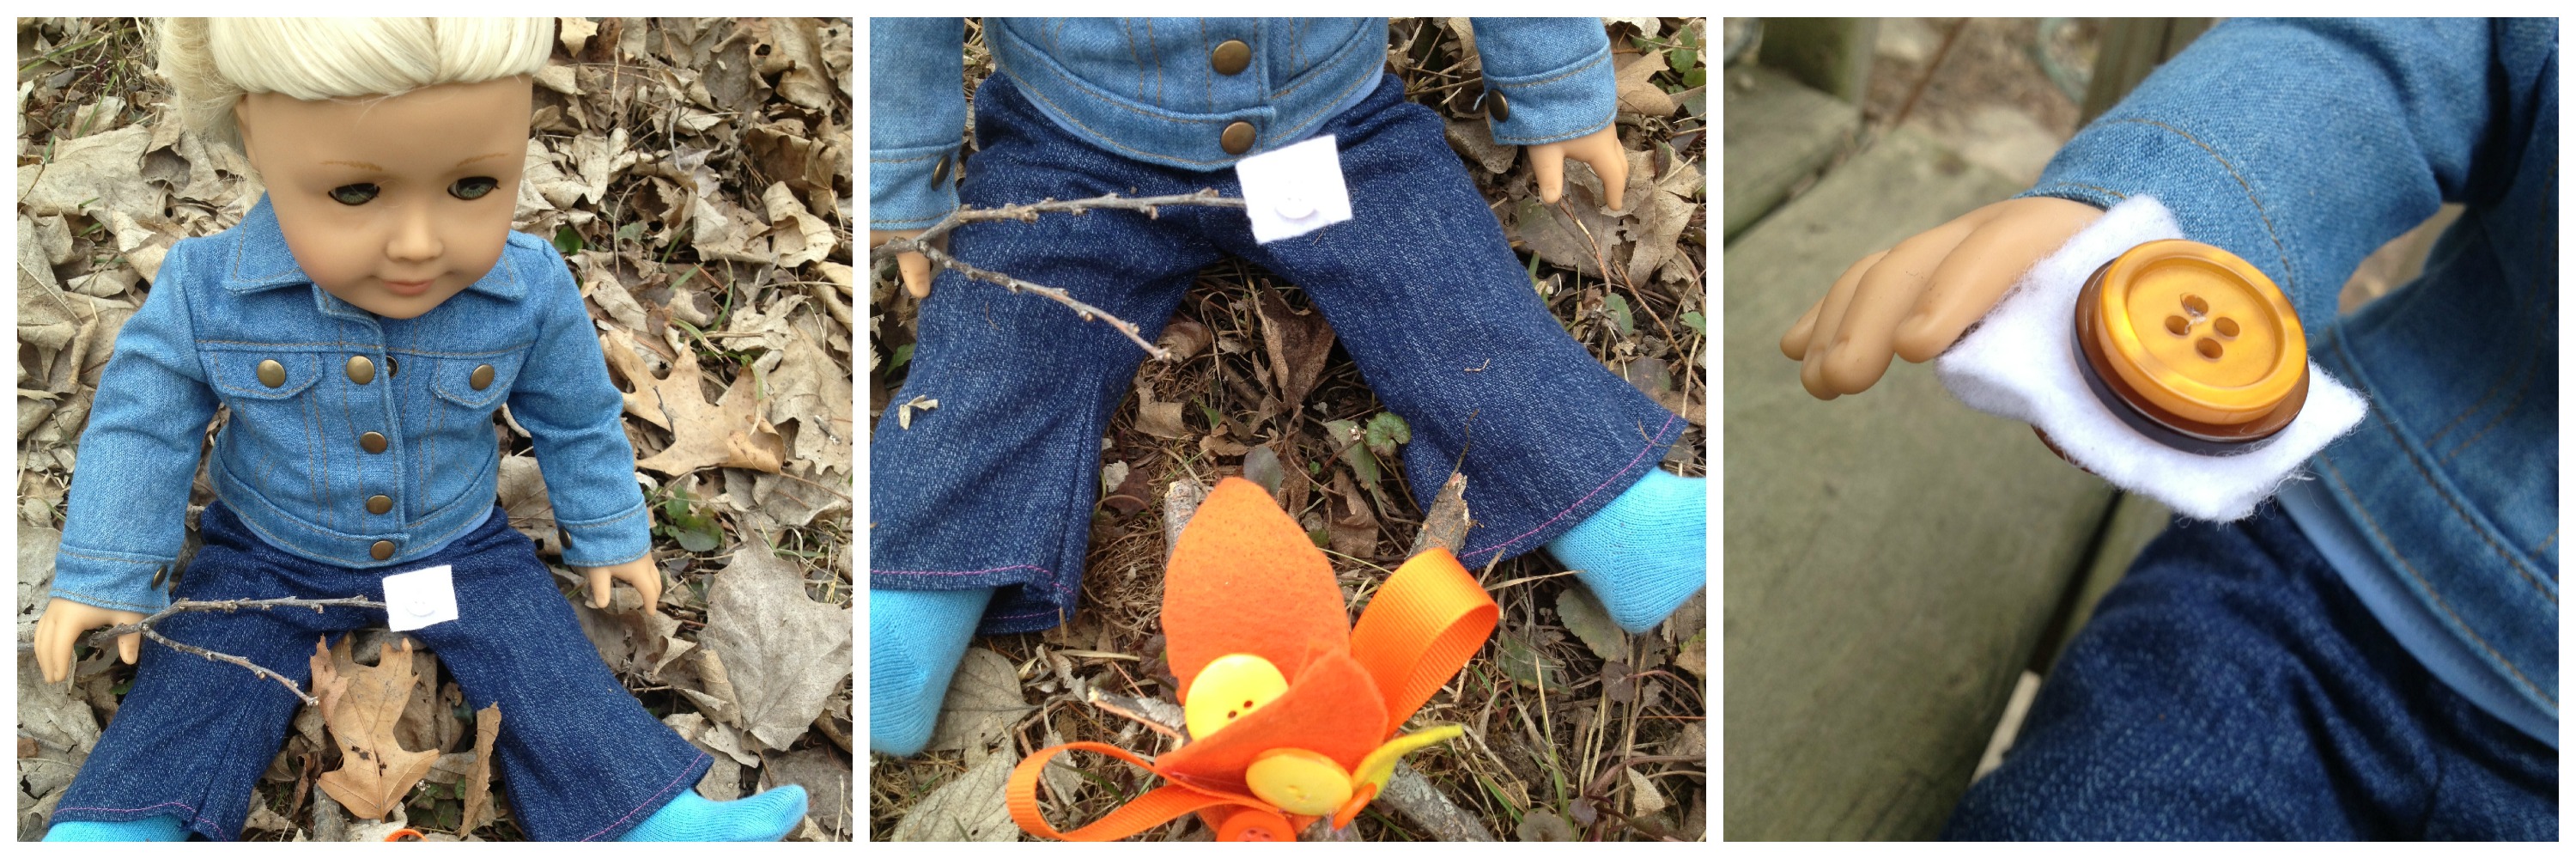
Felt and button crafts – S’mores by the Fire – DOLL Size are quick and easy kids crafts that are created with bright and colorful Laura Kelly buttons.
It is that cool and breezy…camping time of year again.
Here is a quick and fun craft idea by Laura Kelly (and her beautiful step-daughter Jordan) for little girls…and their dolls to enjoy. Creating with felt and buttons is both economical and simple.
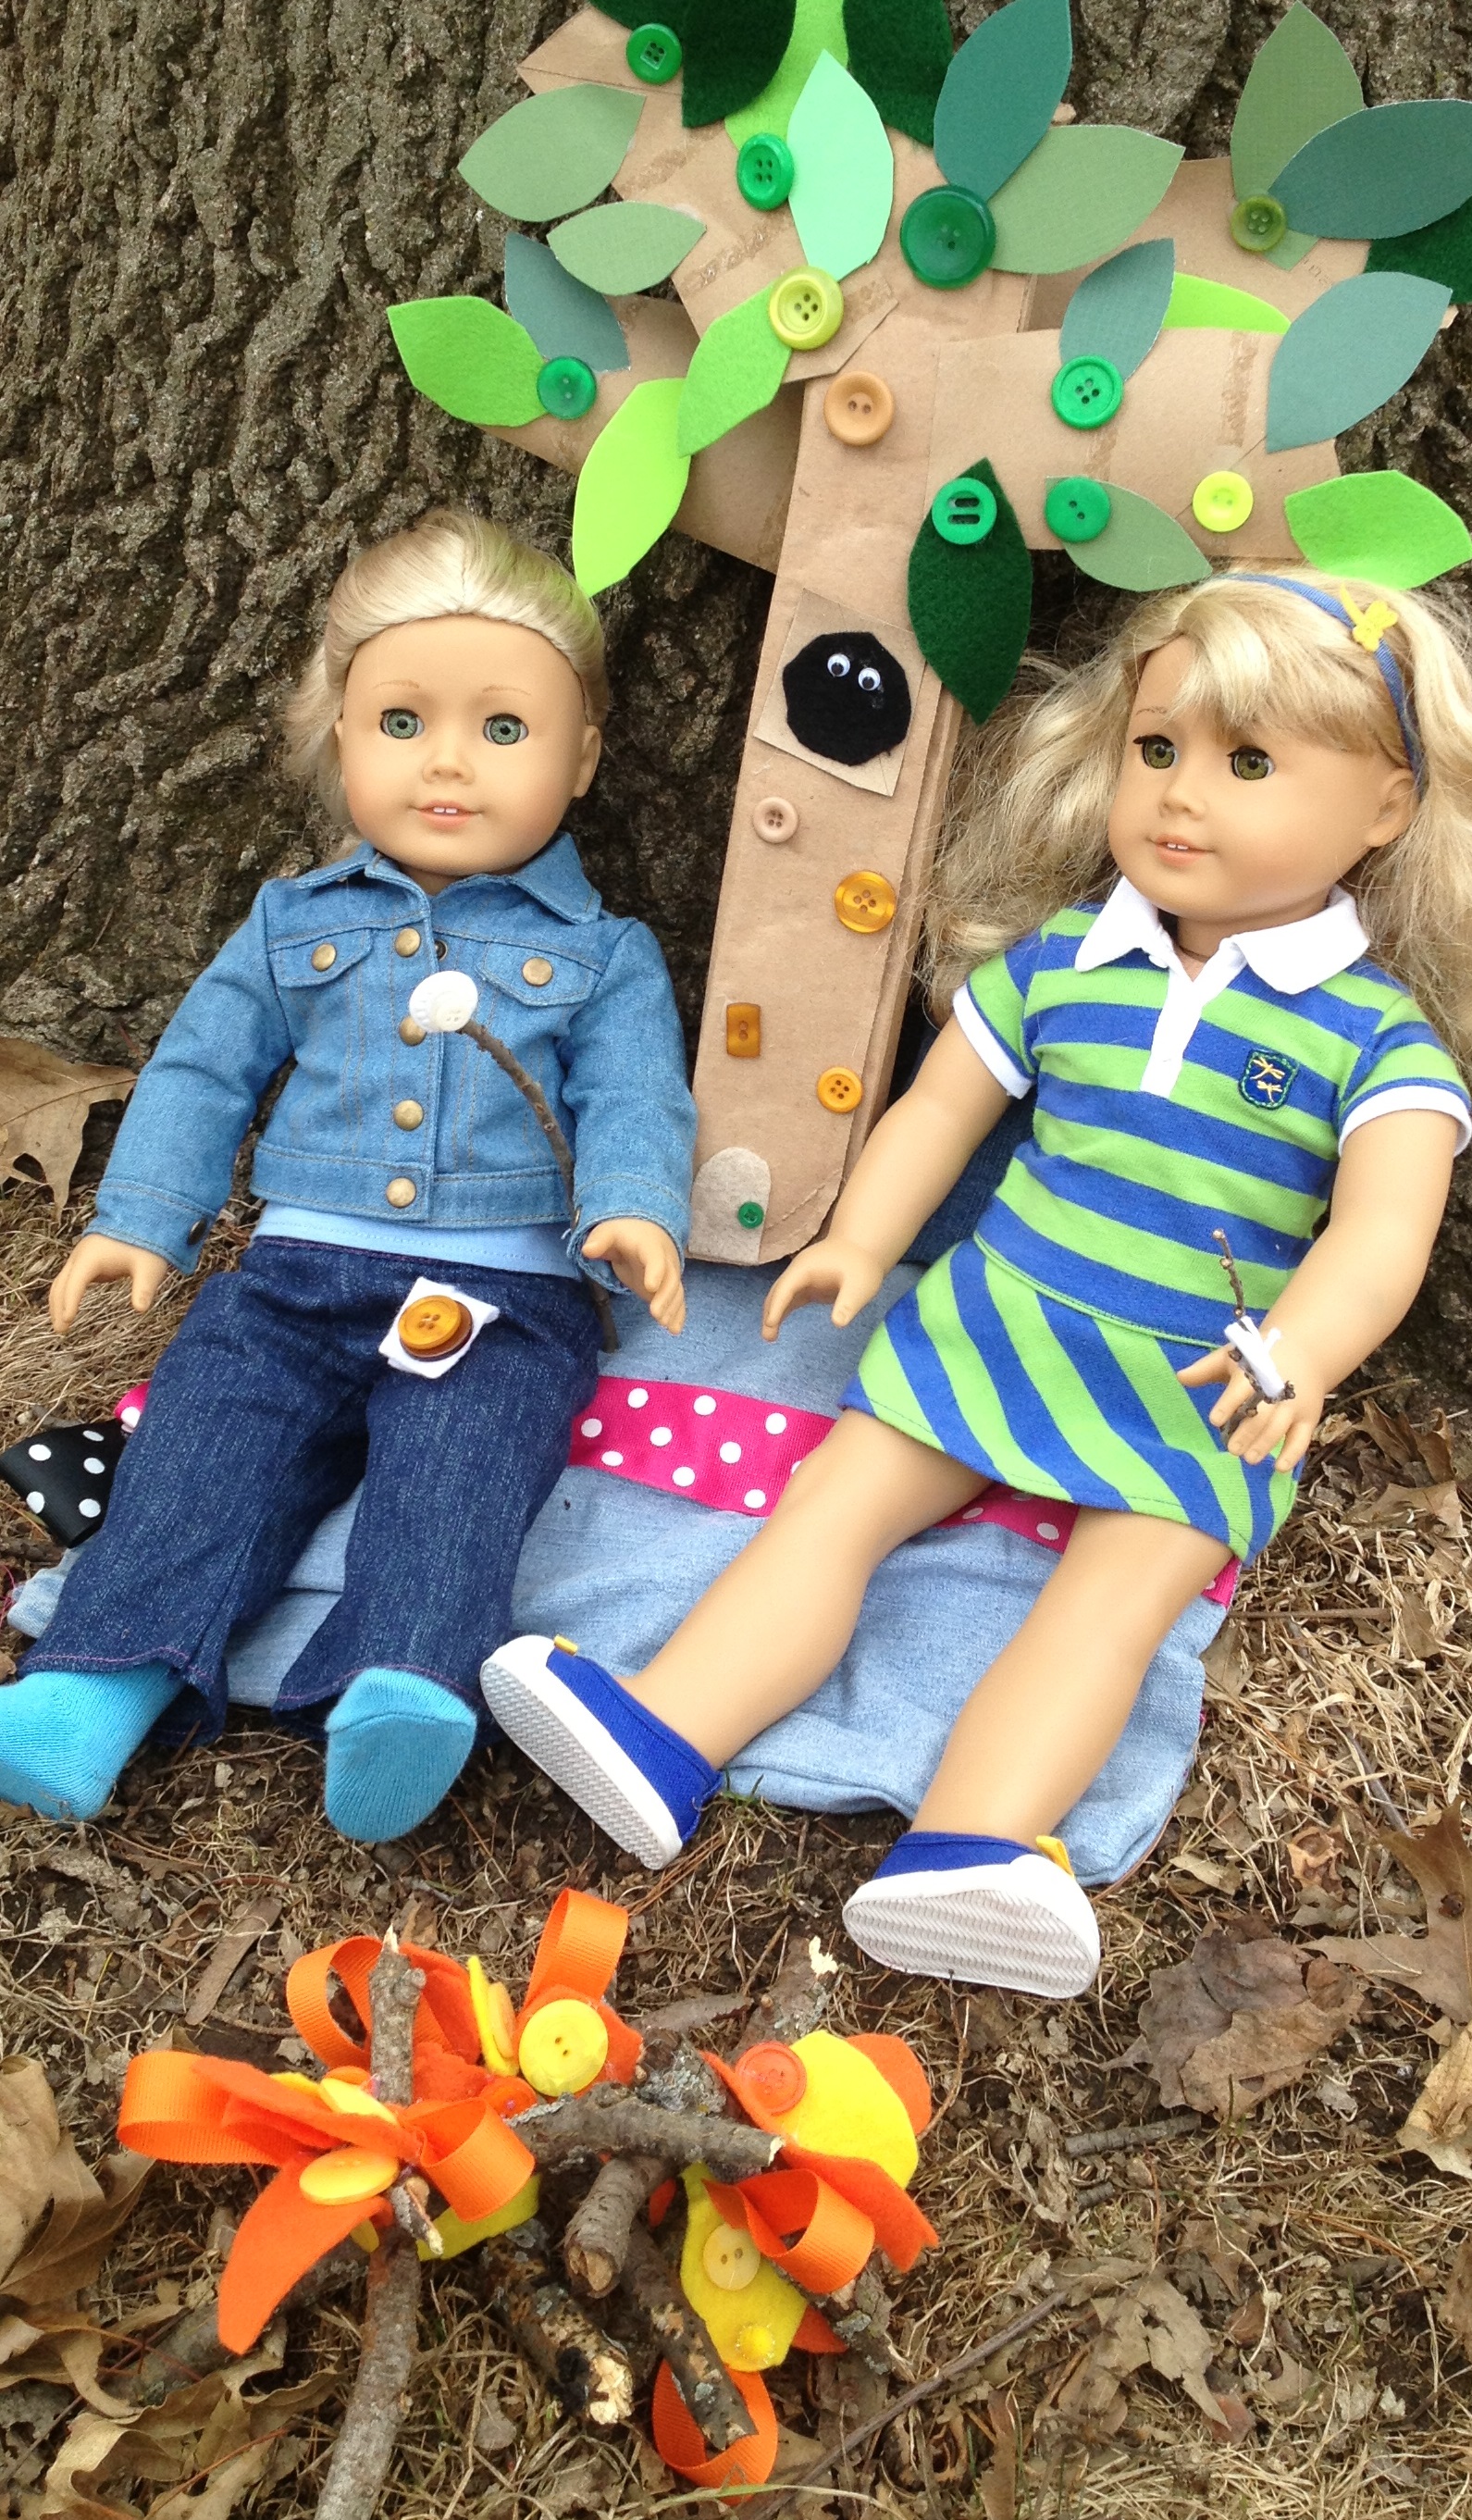
Laura Kelly buttons in Sunshine Yellow and Outrageous Orange, Sticks (real ones from the yard), Felt in yellow and orange, orange ribbon and hot glue (ad-tech lo-temp is what I used with kids)
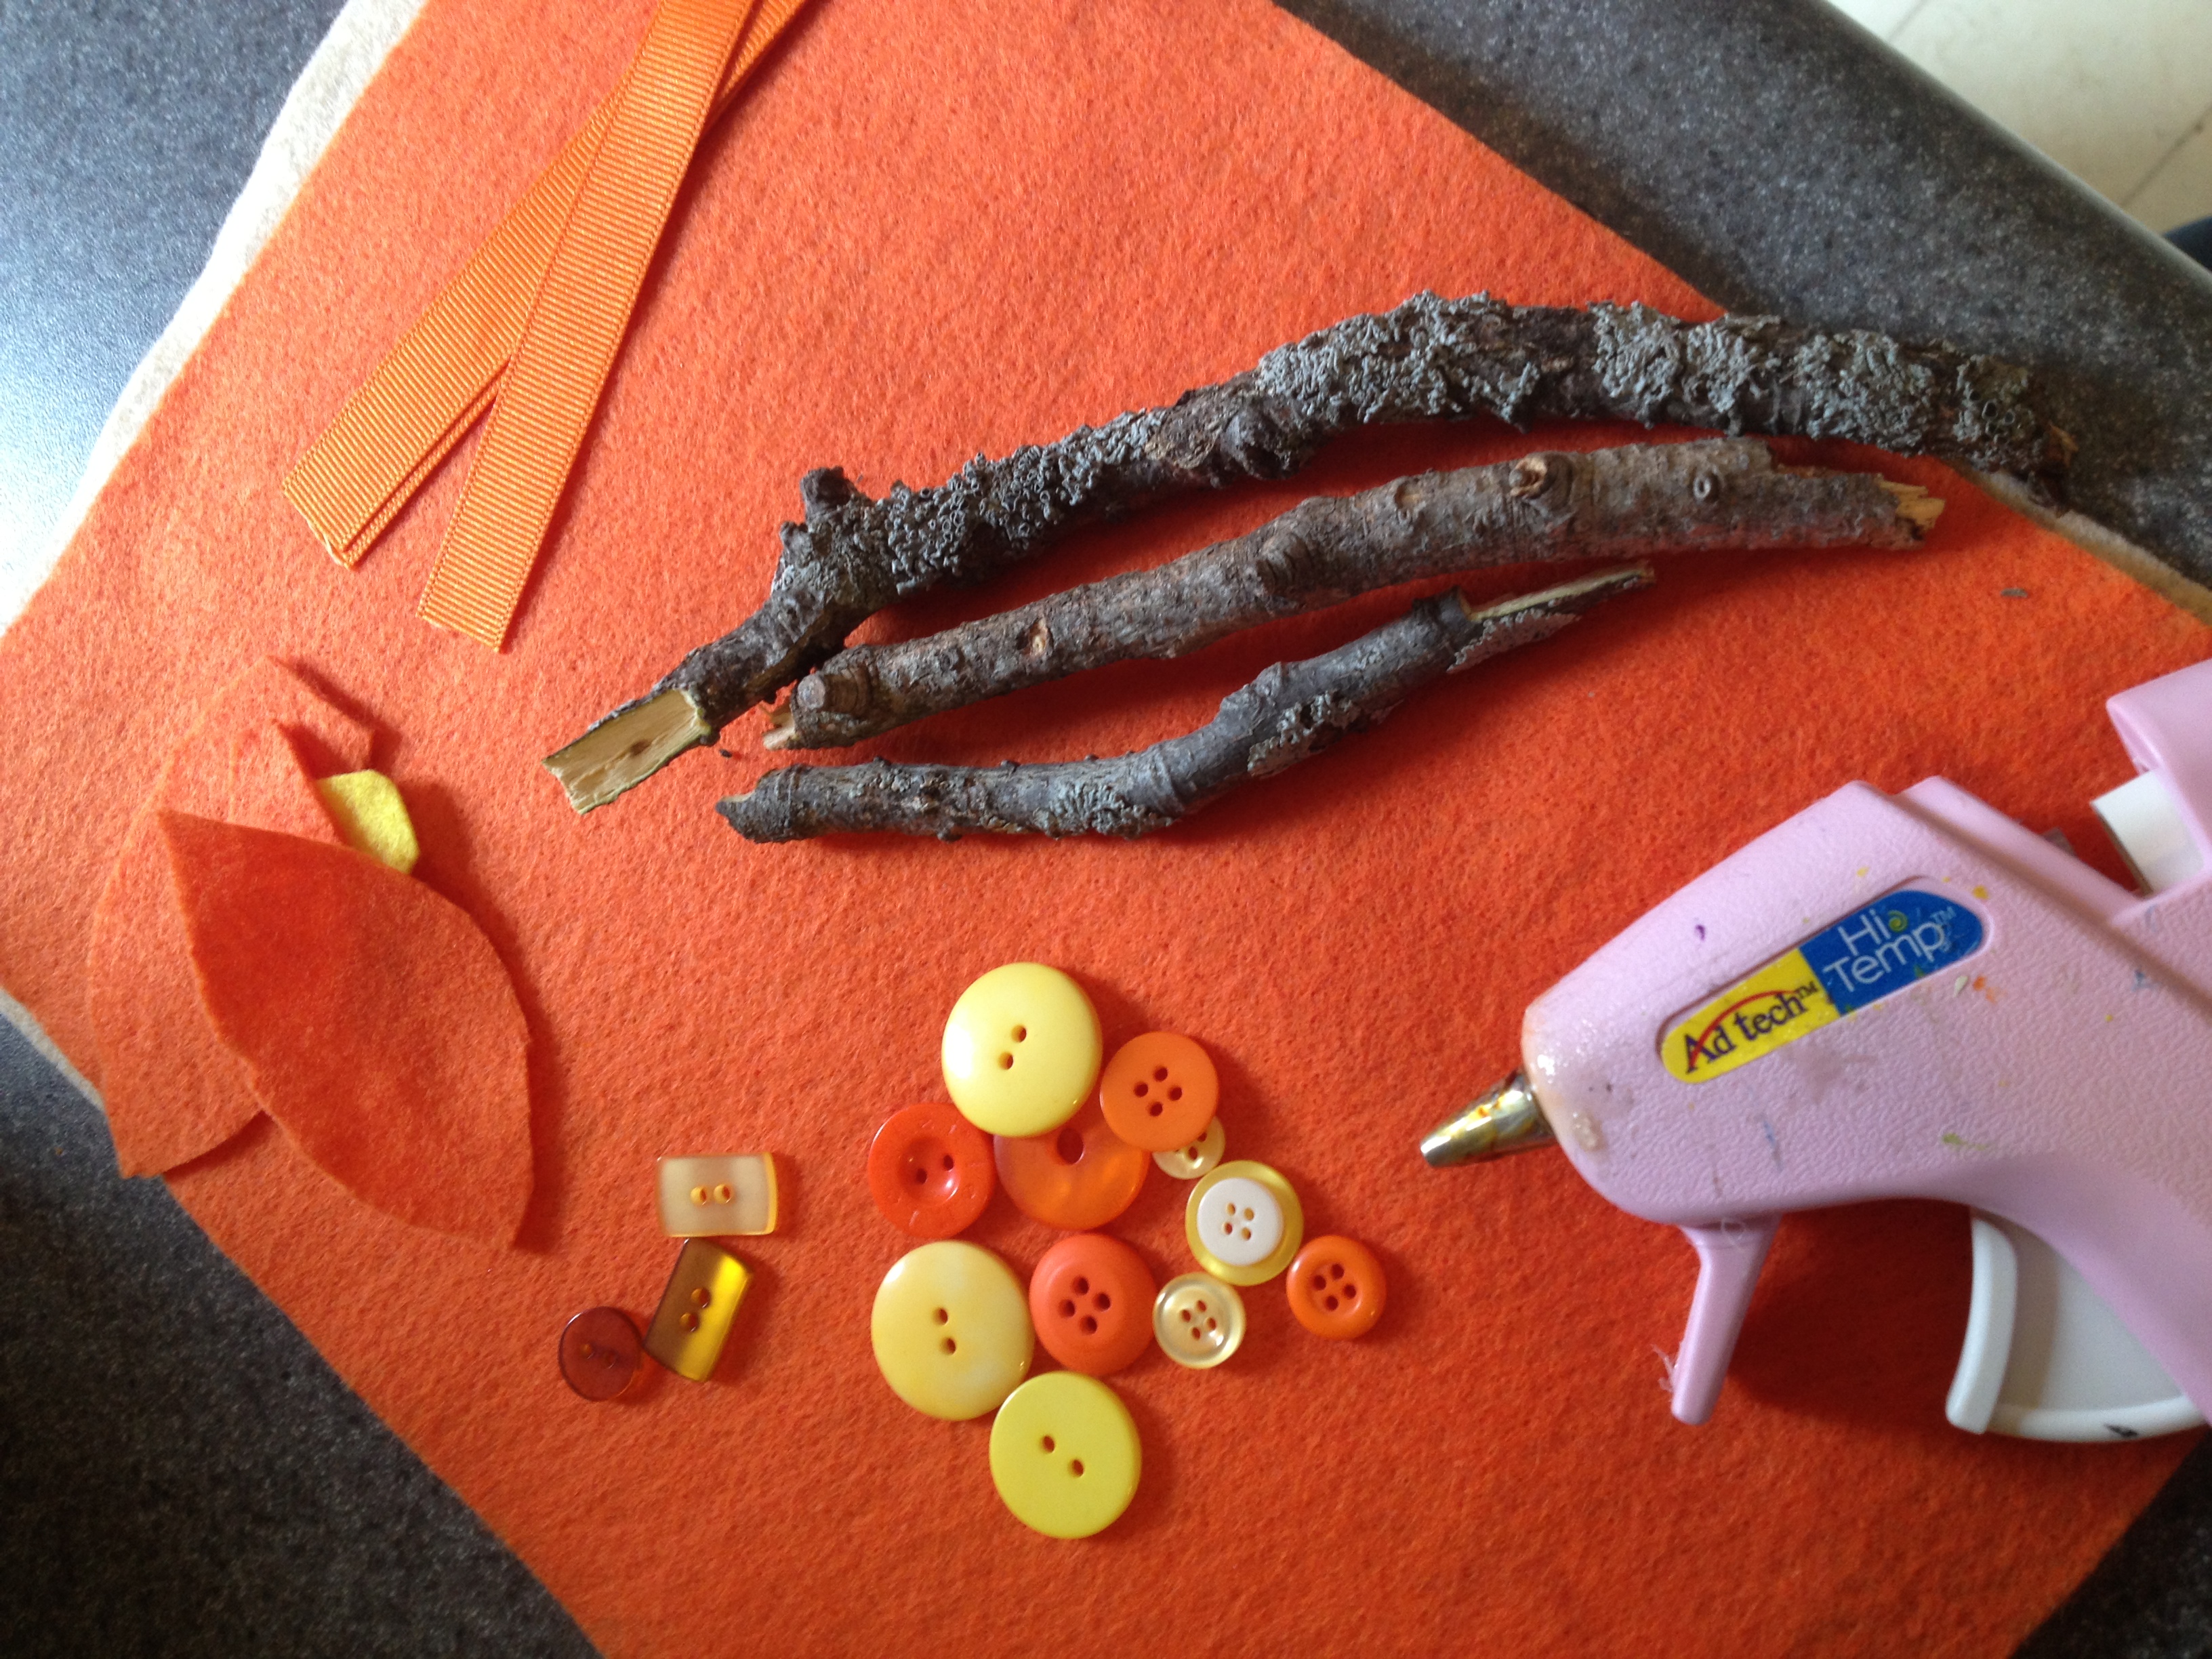
Assemble three sticks approximately 5-6 inches long each in a bonfire arrangement and hot glue them together. Add felt flames in orange and yellow followed by buttons and ribbon in the same colors. Using similar colors will help to make it look real.
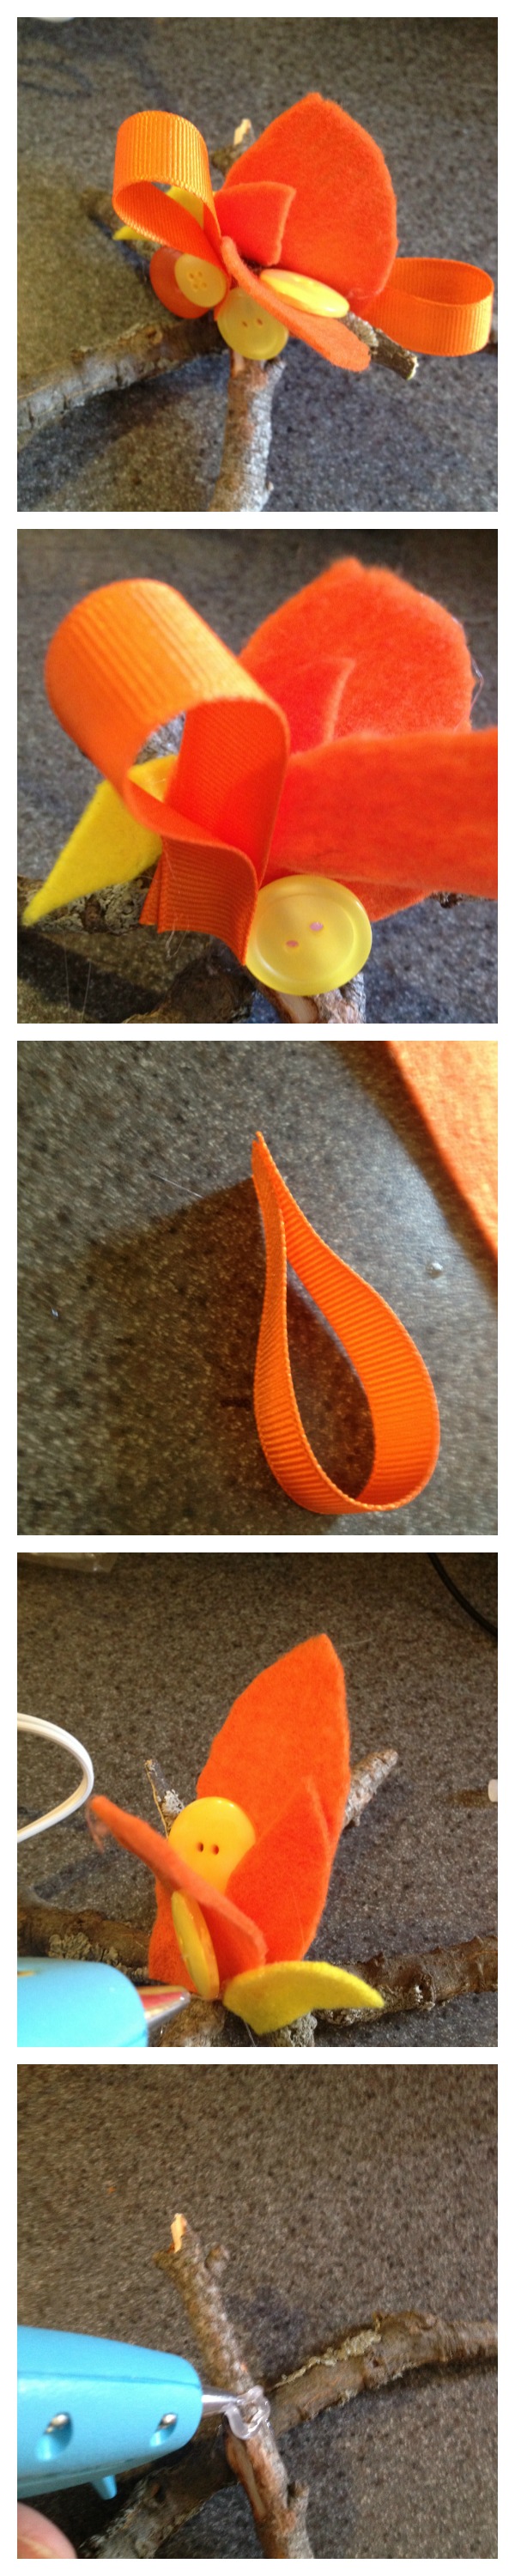
For extra fun, make a marshmallow out of white felt and a white button or a s’more out of brown buttons for crackers and chocolate added to your pretend marshmallow.
Have a great time enjoying your camp fire and your button and felt S’mores. Happy Springtime, Camping, Outdoors and Creating!
I am in love with doilies. Seriously, I think everything looks better with a doily. And, as Spring and Summer approach, I’ve also got pinwheels on my mind. So, when I was brainstorming some wedding ideas to share with you, I decided to combine my two loves. Of course I threw in a button for good measure too! These doily pinwheels would be great wedding favors or, if you want to give your wedding a whimsical touch, why not line the ceremony aisle with them? I can’t imagine a better way to walk into life as a newlywed than between pinwheels. After all, doesn’t your groom make your heart spin?
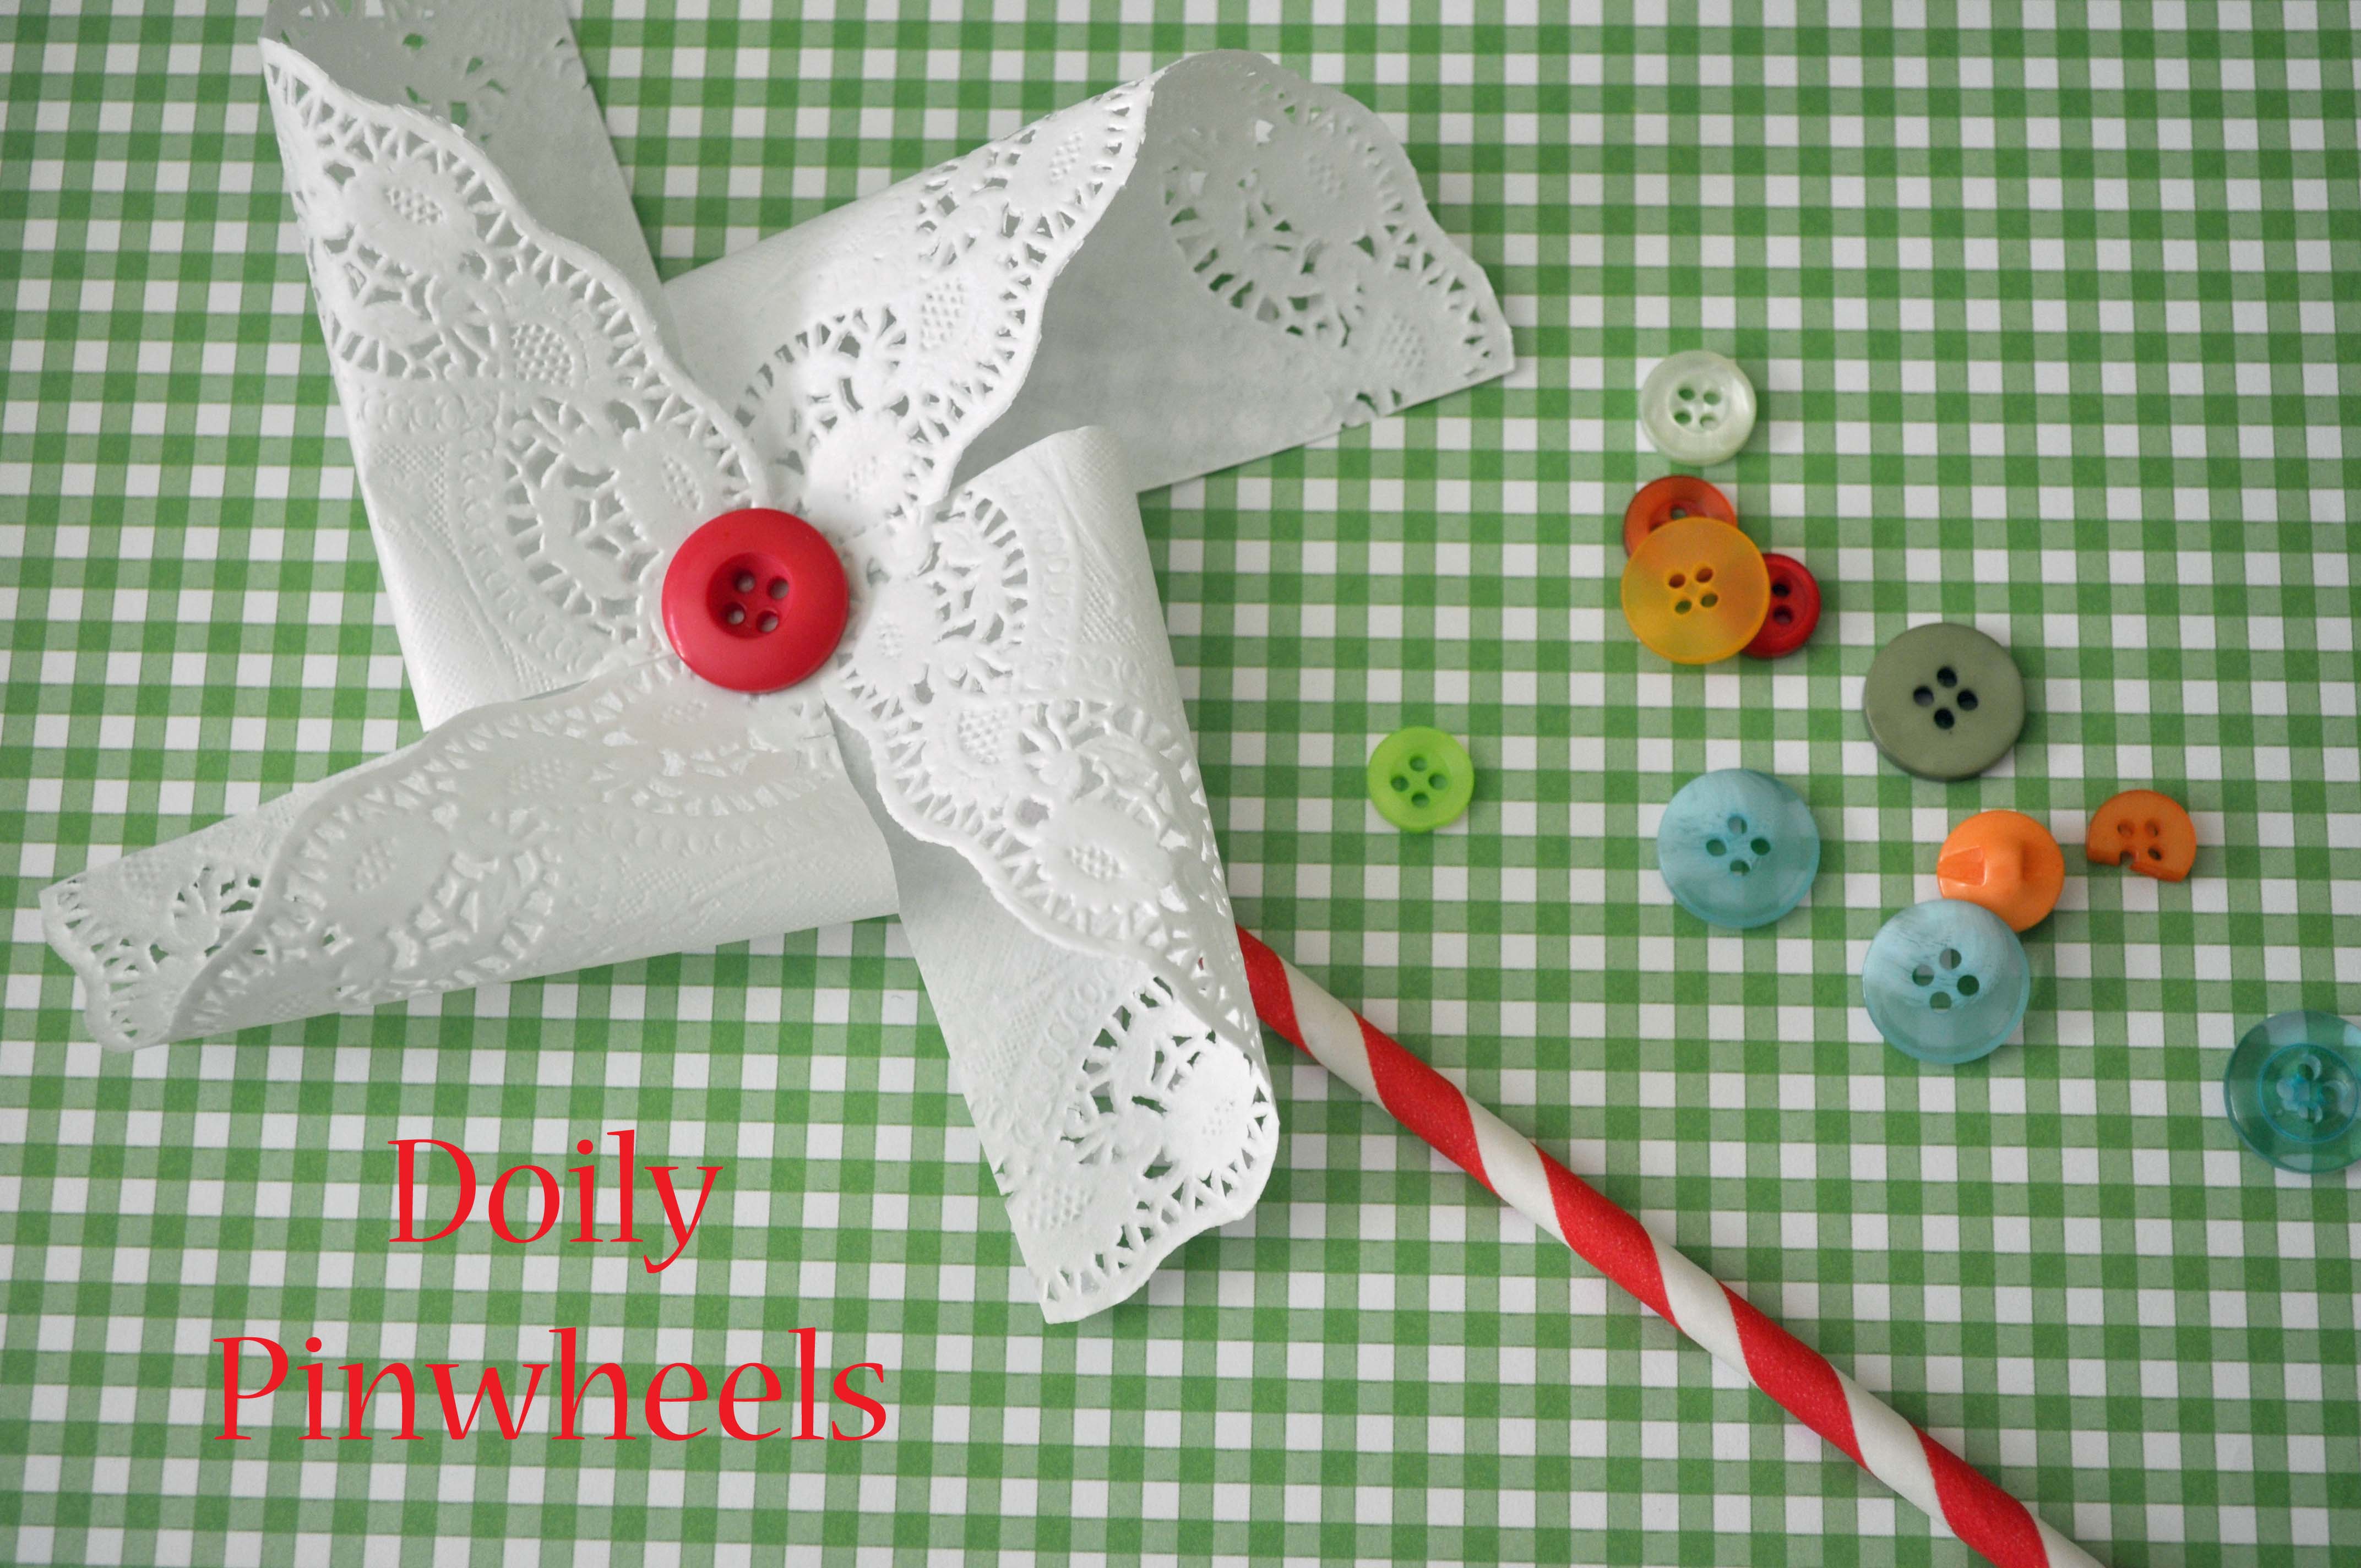

Tip: Match the button and the stripes of the straw to your wedding colors. If you can’t find straws to match, use wood sticks and paint them to match!
![]()

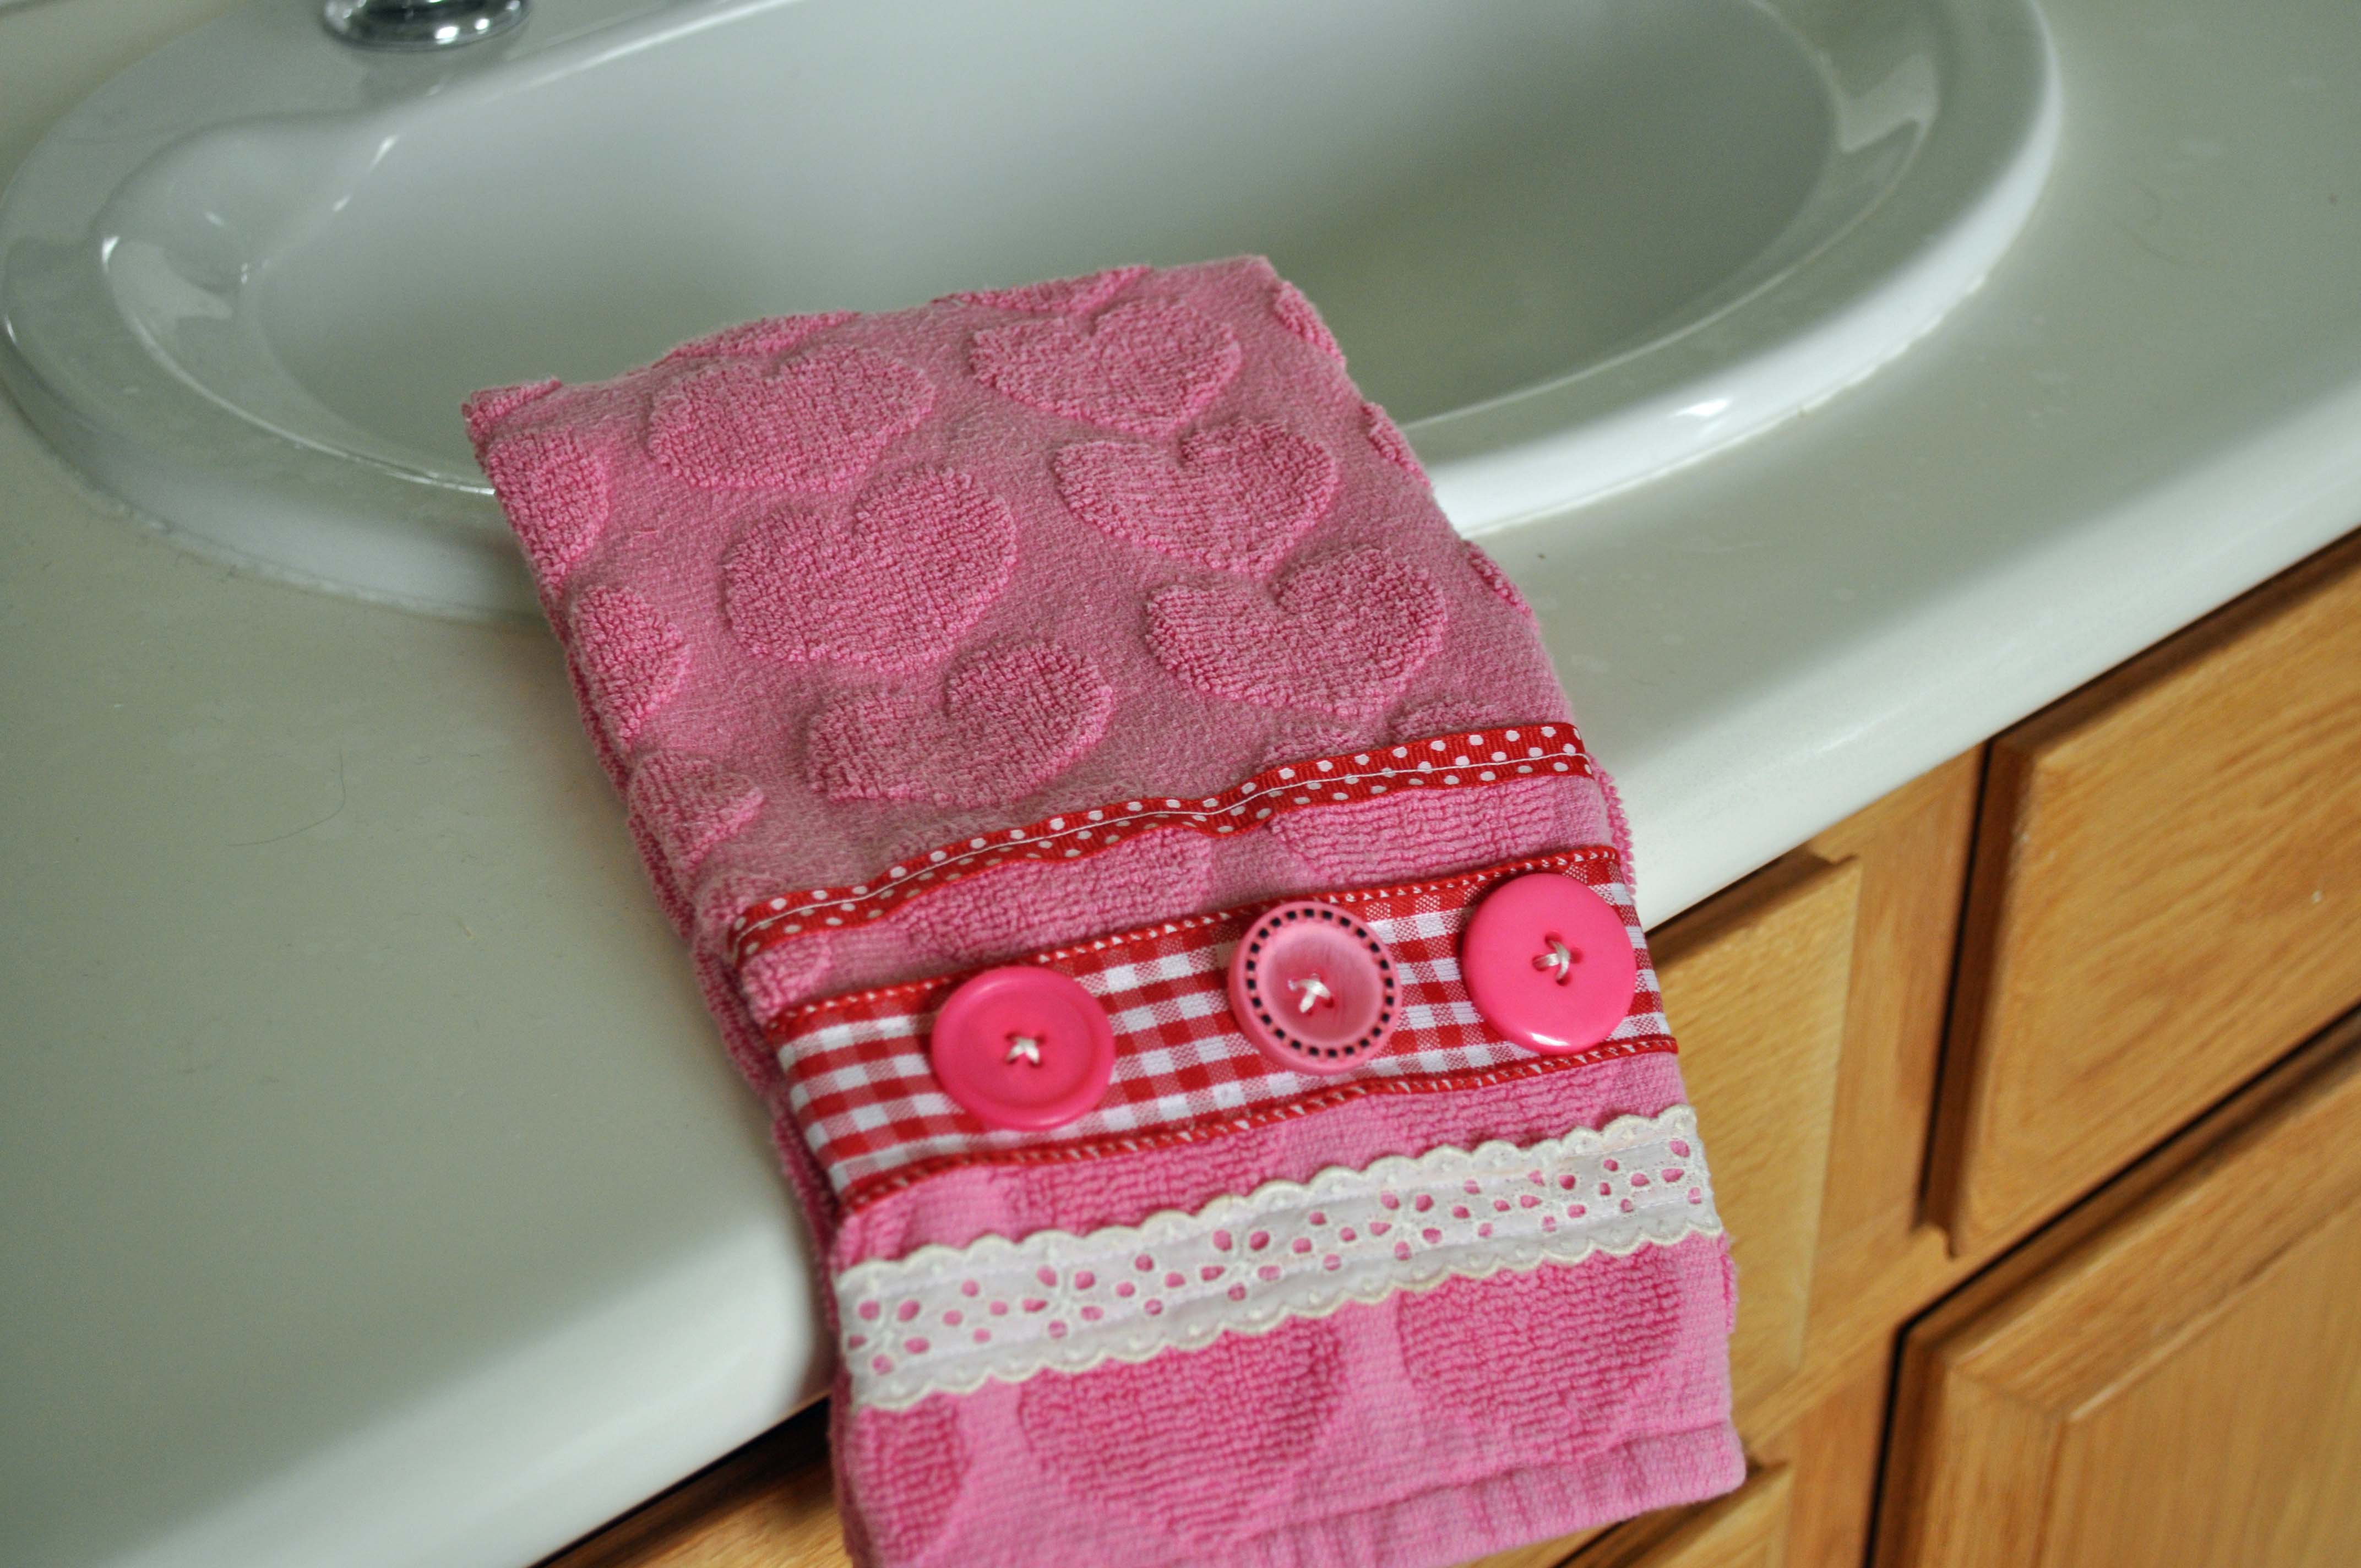
Embellished hand towels are one of my favorite home decor crafts. I think little holiday touches, throughout the house, make everyone smile and turns an ordinary day into something special. Today, I have a DIY project for an embellished Hand Towel. It’s simply a matter of embellishing a store-bought hand towel with ribbons and buttons. You’ll be amazed by how easy the project is and how cute your guest bathroom will look when you hang this cute, embellished hand towel in it!

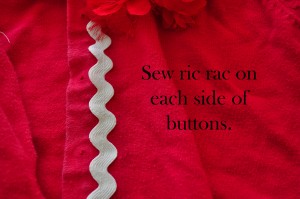
2. Fold the towel in half in order to establish the center mark of the towel. Place a button on top of the ribbon at the center mark and stitch in place.

3. Sew buttons on either side of the center button.
It’s best to gently hand wash the towel once it has been decorated. Alternately, go ahead and drive your family crazy by telling them the towel is only for decoration and not to be used.
![]()

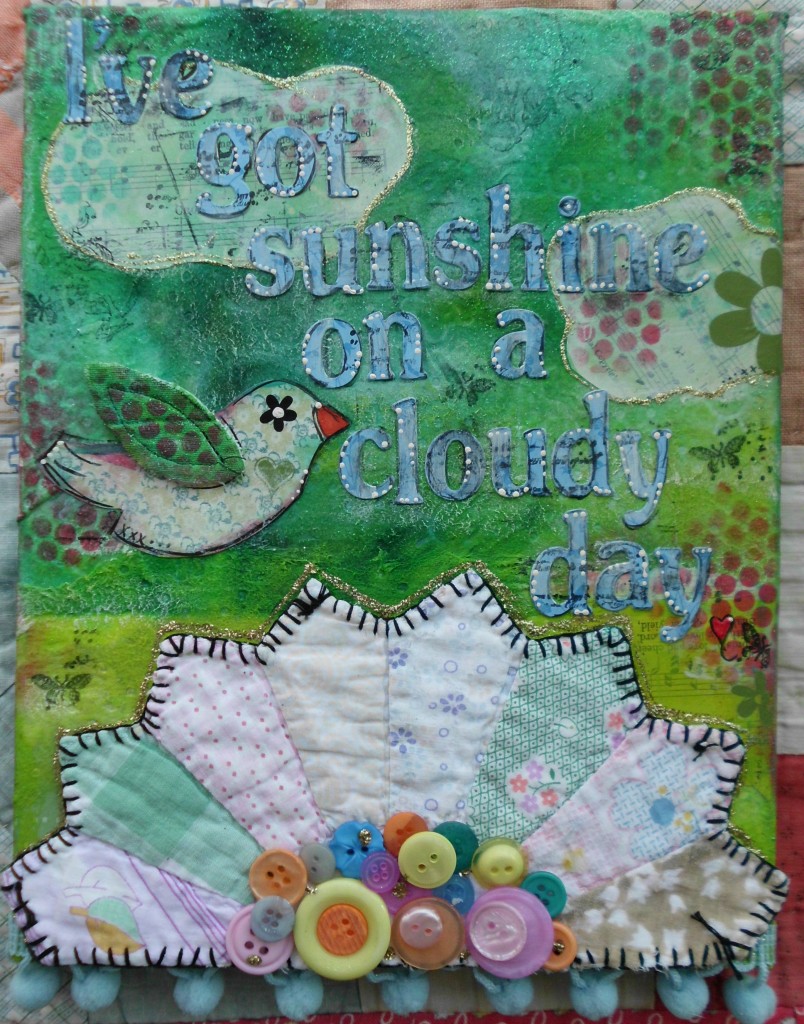
OH ME…OH MY!!!….I am soooo “over the top” excited about my guest designer post here at Buttons Galore & More!
Buttons have ALWAYS been a passion of mine…one of my favorite “collections”.
I have been crafting some way or another most of my life….Recently I have been drawn to mixed-media….because I can use bits & bobs of all my “stuff” to make ART!
I also enjoy music…and wordage….so, here I have encorporated my “loves” into this canvas.
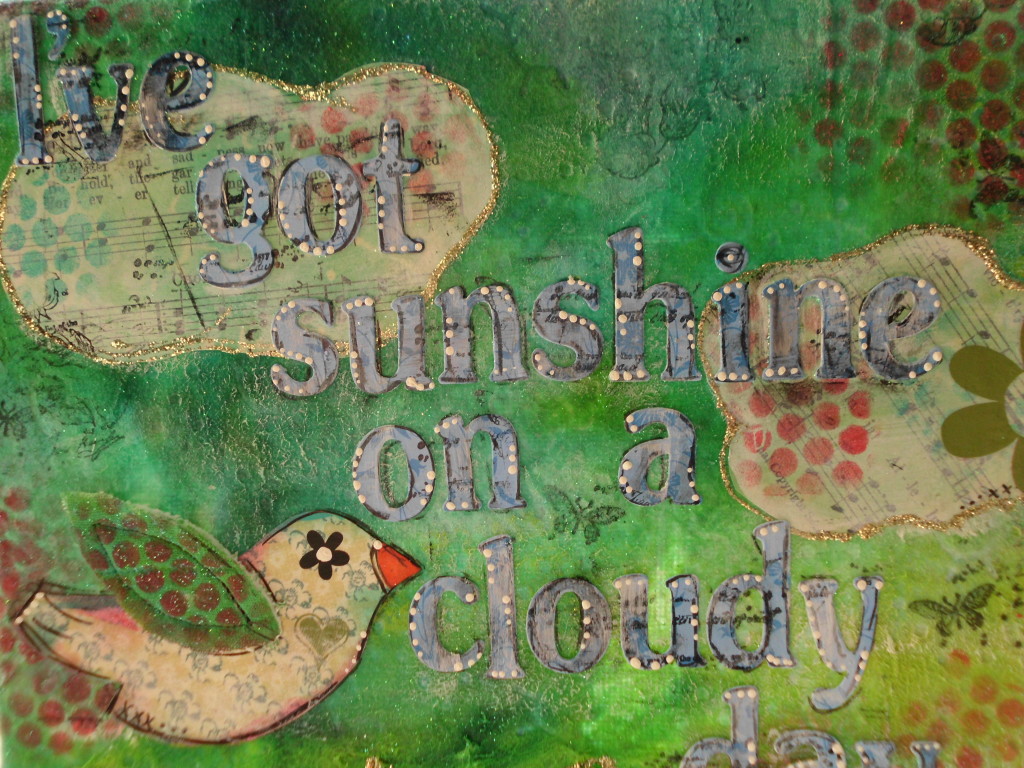
I have taken an 8×10 canvas….added loads of texture….vintage music pages,along with (believe it or not) babywipes that I used to wipe up some inks and paints from a previous project…..some inks, rubber stamps,rub-ons, great alpha stickers from my stash and an ANTIQUE quilt piece “rescued” from a dresden plate quilt piece….it realy looks like sunshine…doesn’t it?…..and to top it all off….a YUMMY assortment of buttons from ButtonsGalore&More….these just make me HAPPY!
With my favorite medium Mod Podge, it all comes together in a fun piece of art…..Each time I create these canvases…even tho the same products are used, they all come out uniquely OOAK!(one-of-a-kind)
I currently have my wares for sale at my etsy shop http://www.etsy.com/shop/Studiobeecreations
..more items being added this week!
Loveeeeeeeeeeee all of the assortments BG&M offer for my creative pleasure!
creative blessings, Debbie
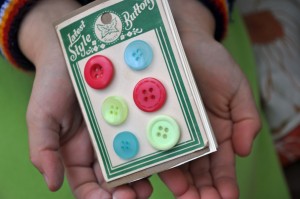
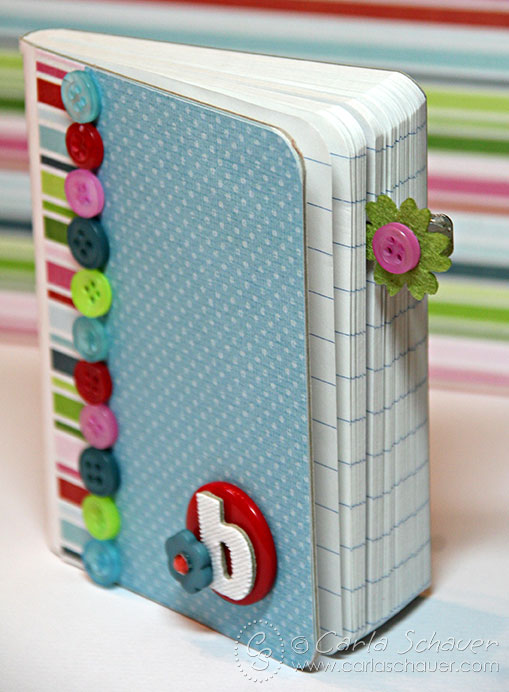
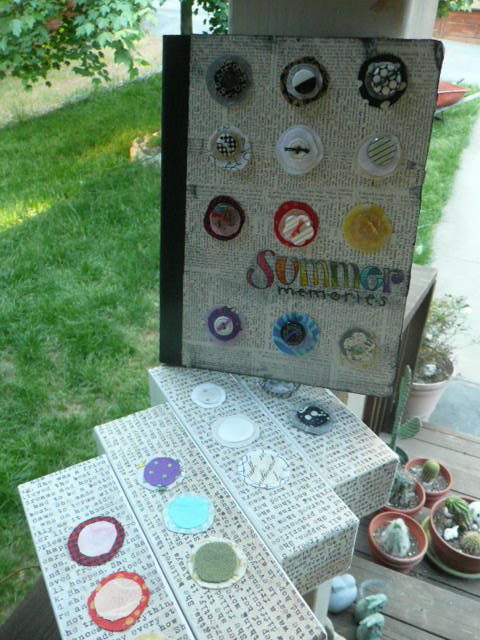
I decided to make a vintage button card journal because I love to make lists. With the new year here I find I’m making lists every day. Goals for the year, things to do, crafts to make. They all go onto lists. Then I lose the lists. In order to stop this vicious cycle, I’ve started keeping my lists in journals. The thing is, I come up with some of my best ideas on the go so I need something compact, hence the birth of my Button Card Journals.
All the vintage button cards I owned had some buttons that were hideous. The buttons were odd colors and looked damaged, so I pulled off the old buttons and glued on new ones! Presto! A little bit vintage, a little bit modern. Perfect!
Tip
Instead of gluing your new buttons onto the vintage button card, you can also sew them on, then you can clip them off later and use them in a project, which would make the journal a darling gift for the seamstress in your life!
Contest closes January 10,2013 at midnight. Winner will be posted on Facebook and on this post.
![]()
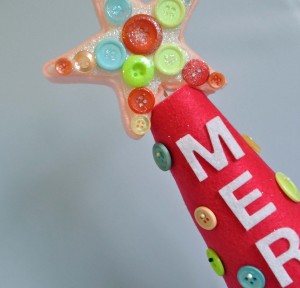
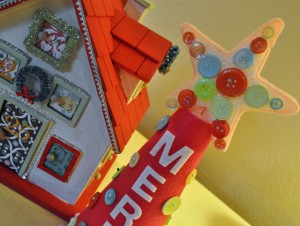
I love to make holiday trees with buttons and Styrofoam cones. It’s such an easy project and the possibilities are endless! This year I created some merry and bright trees using brightly colored felt and buttons (and a little glitter of course!) You can make the trees in any color combination, to coordinate with your decor.
 Supplies to make holiday trees:
Instructions

![]()
I hope you make holiday trees for your home.
Button snowman gift tags with buttons and felt are easy to make. These cute gift tags will take your gift giving to the next level and when the gifts are unwrapped, the tags can be used as tree ornaments. I love it when things can be multi- purpose. The nice thing about a button snowman is that he can be used past Christmas.
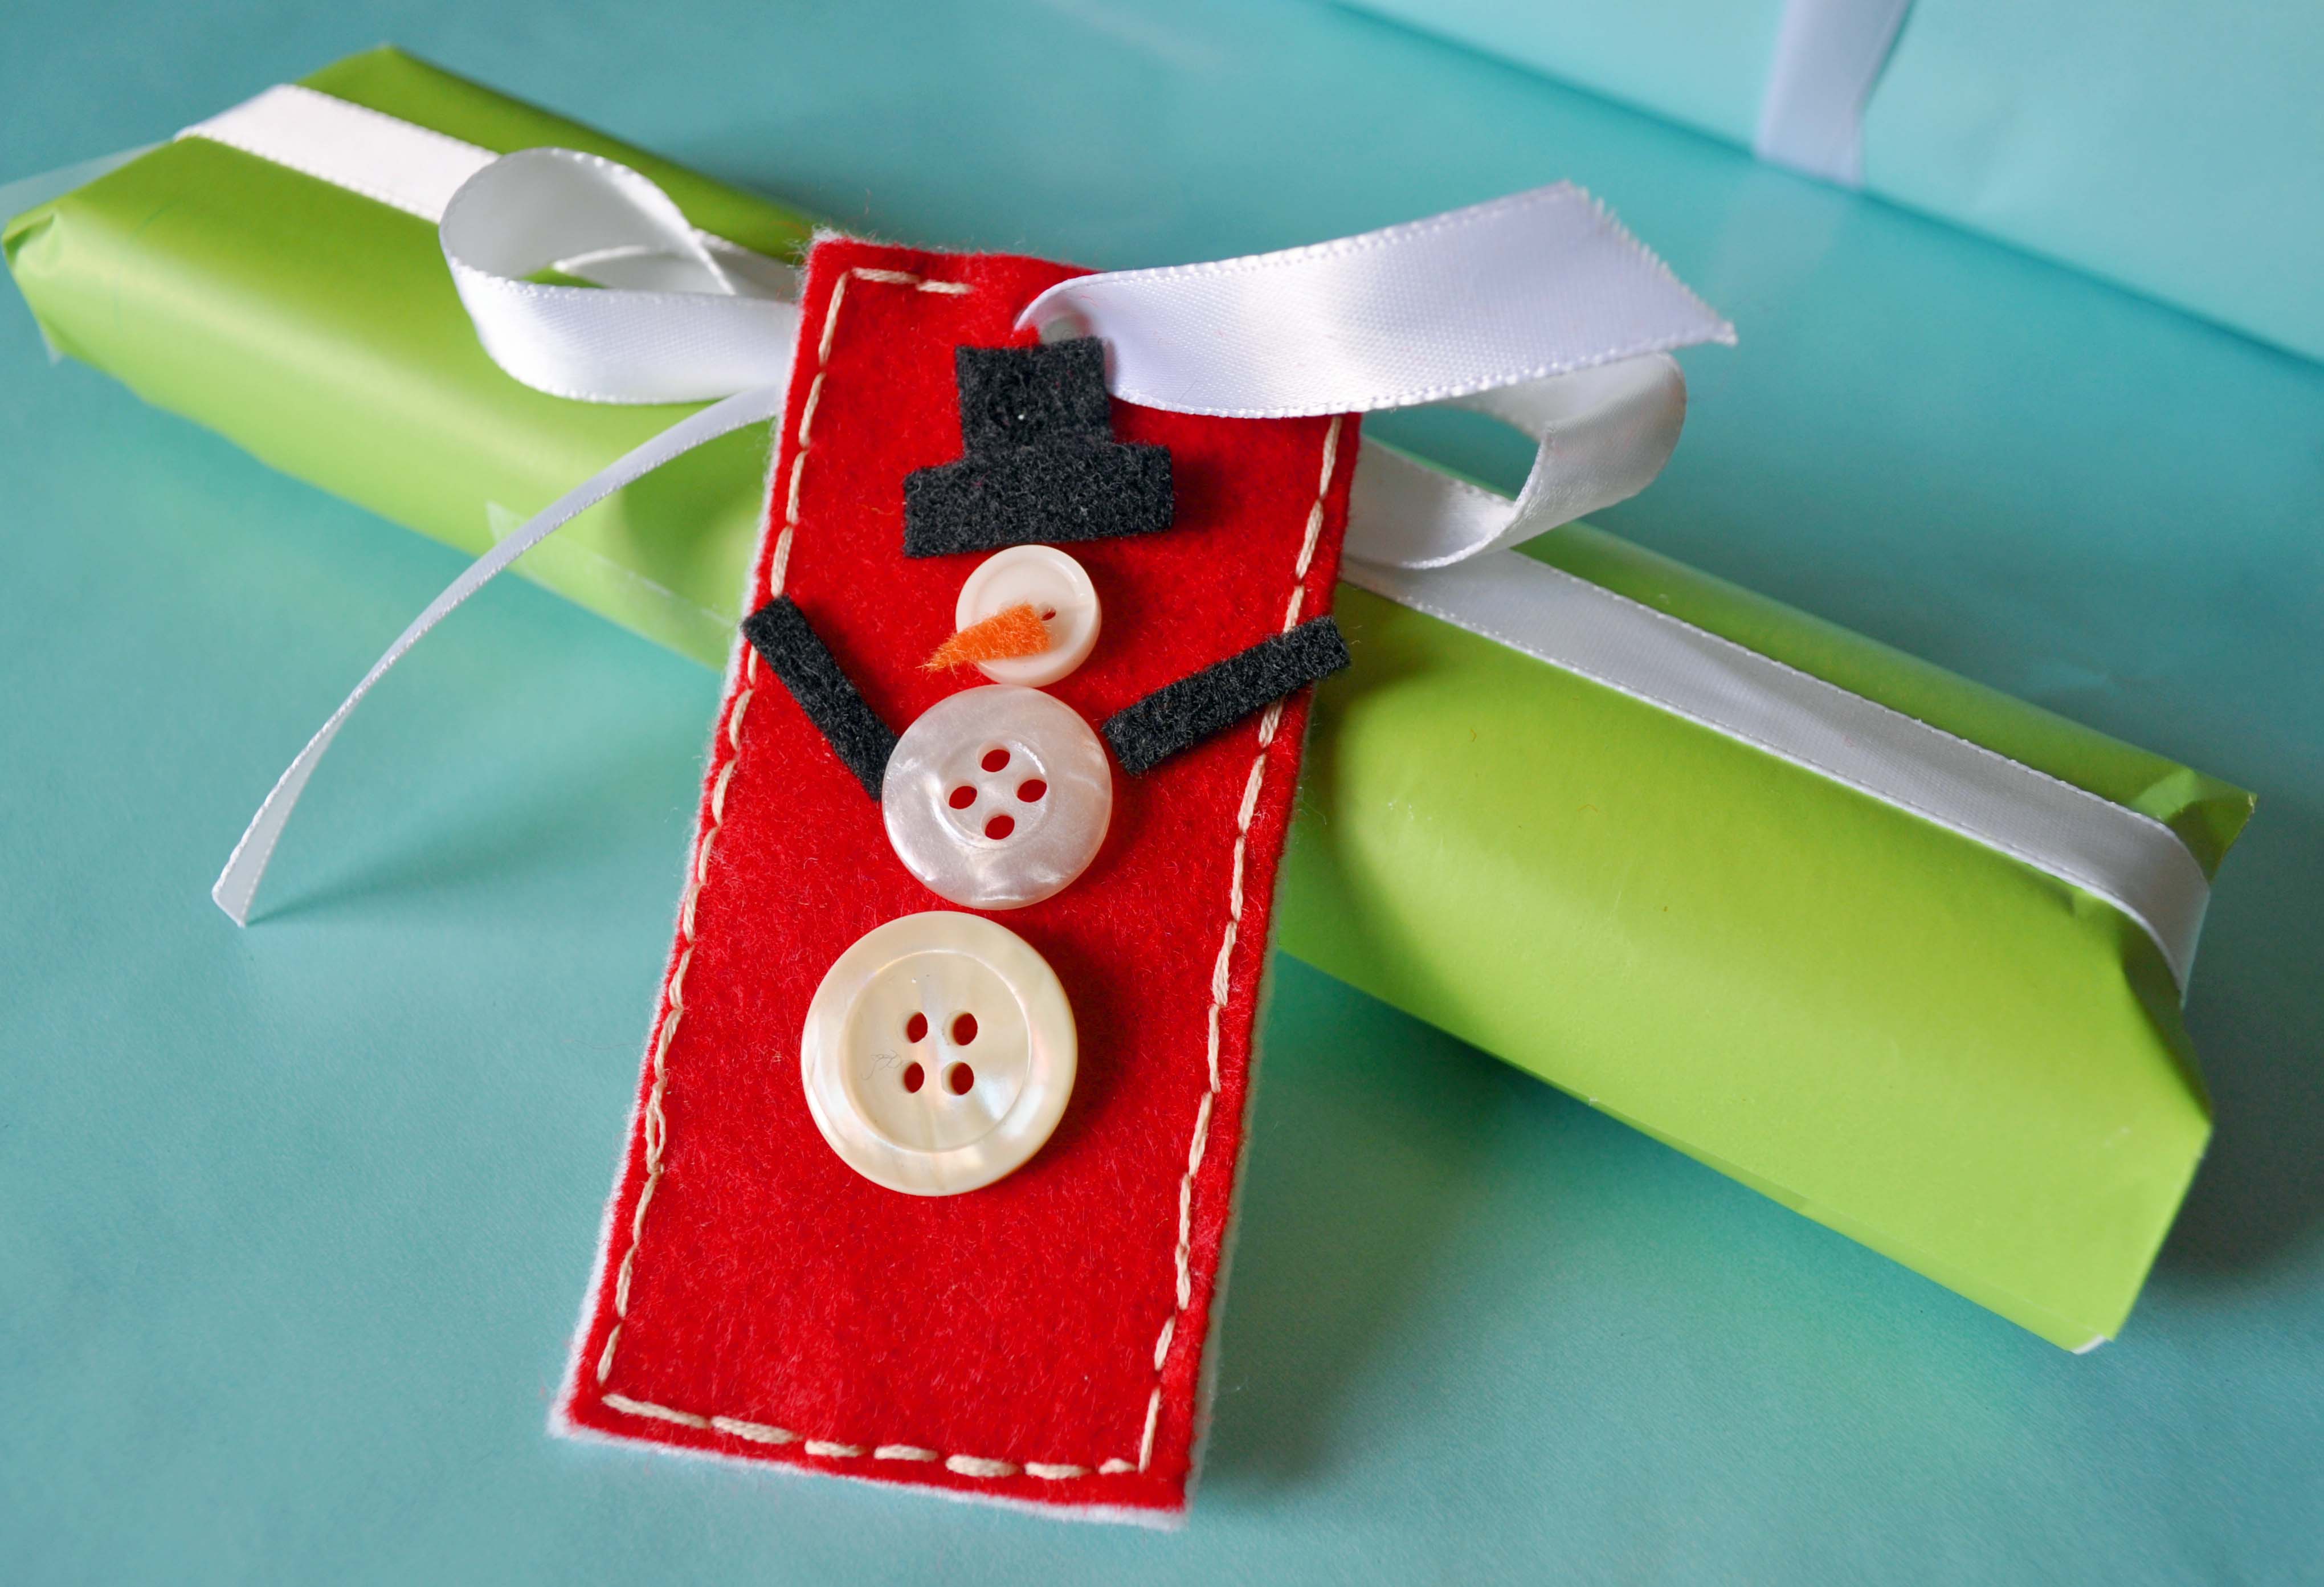

After making the button snowman gift tags, I came up with a few other tag ideas:
Ric Rac and green buttons make a cute Christmas Tree tag.

Isn’t the back cute?

Some garland really makes this Christmas Ornament gift tag sparkle!

Have fun and let your holiday spirit take control!
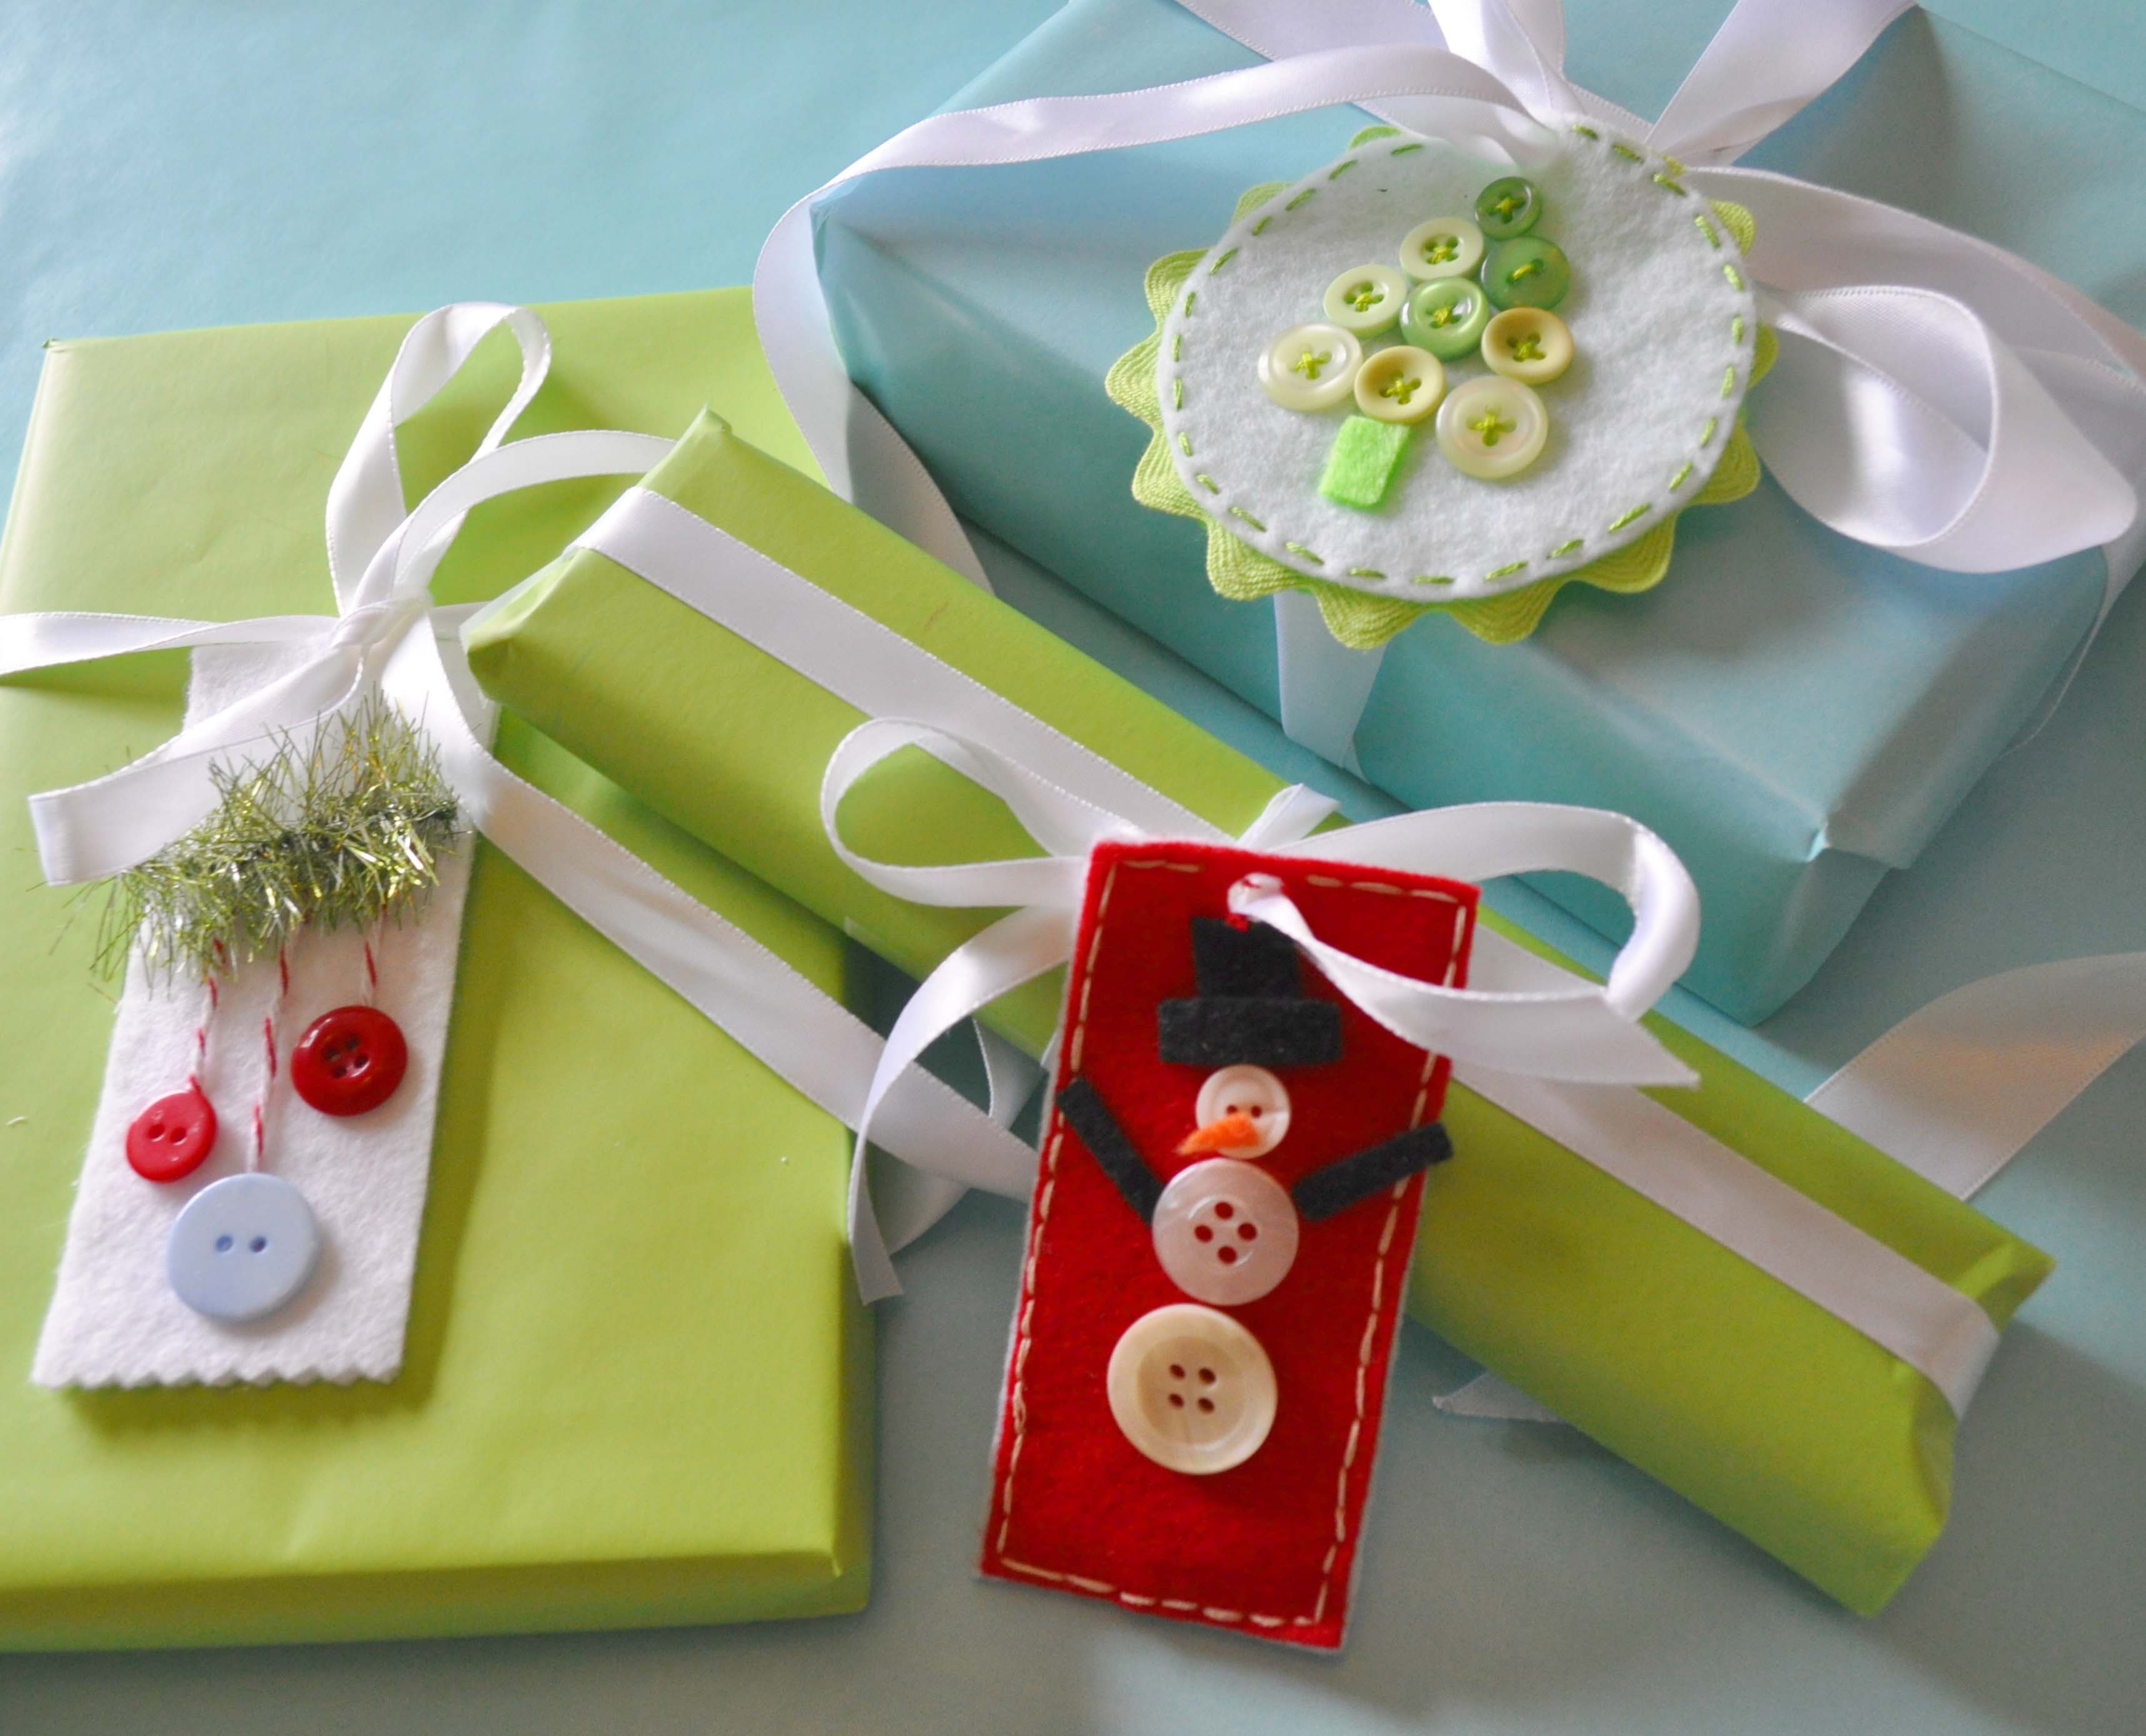
Thanks for taking the time to look at the button snowman gift tag and the other ideas too.
![]()
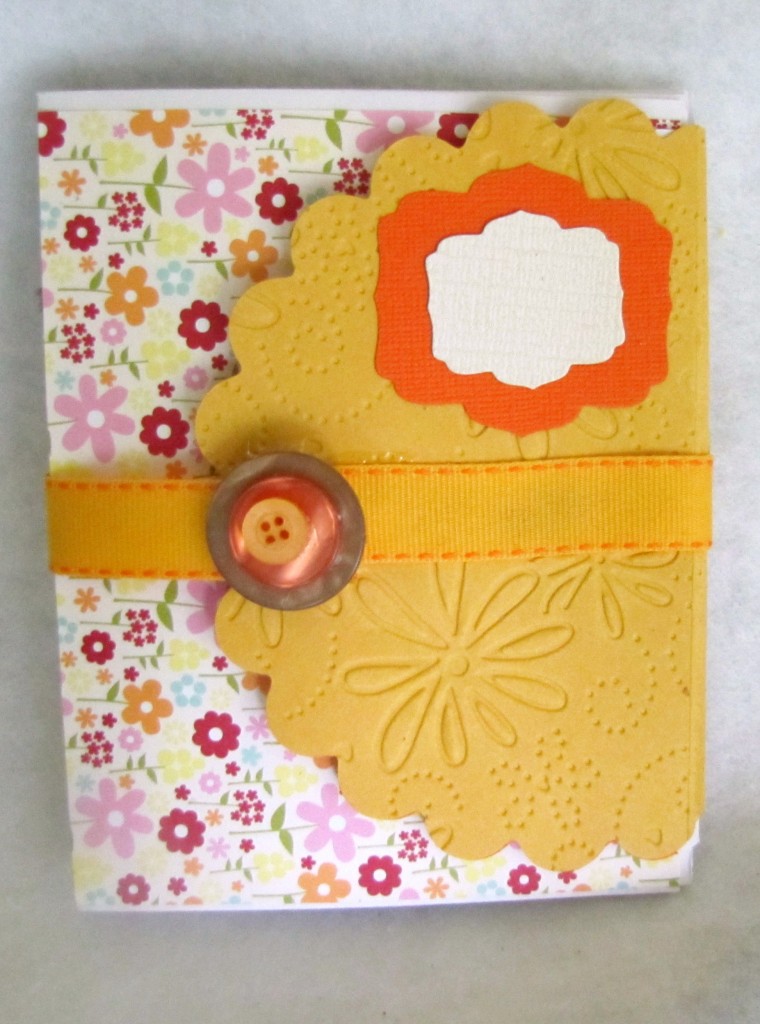
It’s that time of year where we all start looking for quick and easy gifts. Being able to make them homemade is a bonus!!! Why not make a handmade note card set? Mine is not Christmas themed, or Fall themed…I like generic…it works well when I am in a pinch! I can just grab & go! BUT I do like to make my gifts in good seasonal colors. So for this set I thought I would show you my “thought process” on how to make a set of cards in a quick and easy assembly fashion. :) Just add in your papers, matching buttons, ribbon and bling of your choice and you are all set and ready to get creating your very own quick and easy gifts!

Gather up supplies. I generally like to pick my papers first, then cardstock, ribbon and embellishments. As you can see, I have chosen three different colors of Button Bonanza Bags just to be sure I have the perfect color when the time comes for embellishing. You can also see I have printed out my sentiments panels using Duetica Lettering Arts Studio’s Mandolyn Font in the Outline feature then colored it in using my Copic markers. Another neat trick to PERFECTLY matched sentiments that say JUST what you want in just the perfect size for your project. :) Once I was done coloring them in I die cut each sentiment panel using Spellbinders Nestabilities and I was all set!

Using a Bow Easy Ribbon Tool REALLY helps make the set look polished, all of my bows look exactly alike!

Add an extra touch by outlining the first letter using a glue pen then shake on a bit of coordinating glitter.

Another great touch that really doesn’t take too long is to embellish the embellishments! I love to add a bit of bling to the center of my buttons.

And here you have it! A cute set that took less than an hour start to finish! Not bad….
Good Morning! Today I have a stepped up version of a no sew tutu tutorial from a great DIY blog called – Skip To My Lou. I followed all of her steps but where she stops is where I picked up to make this fun and oh so seasonally perfect button embellished tutu! Here’s how I just kicked her’s up a notch – Enjoy!

Find an adorable little girl who you can transform into an Autumn Forest Nymph!!

Follow tutorial found on Skip To My Lou’s Blog (http://www.skiptomylou.org/2011/11/01/no-sew-tutu-tutorial/) but cut away the excess elastic.

Add a bit of superglue to the knot to be sure it is held securely.

Wrap the ribbon around your finger to measure out how much ribbon will be needed to fit round the knot and still have plenty of room to pass the other length of ribbon through.

Wrap the ribbon around the knot and hot glue in place.

Be sure to keep edges of ribbon even and hold end of ribbon in glue until glue cools.

Pass the ribbon through the loop and tie into a perky little bow.

Embellish the center of the bow with a large button that has a bow of hemp tied through the center.

Gather a few different colors of Autumn colored felts.

Cut felt into approximately 2″ x 3″ rectangles.

Fold rectangle in half and cut a half leaf shape on fold.

Open to reveal leaf shape.

Repeat with additional colors of felt until you have a good assortment of felt leaves.

Place leaves all over tutu before gluing into place to be sure you have a good mix of colors and spacing.

CAREFULLY adhere using hot glue. Be careful as the glue will go right through the tulle if you aren’t careful!

Using either heavy duty scissors or a button shank remover tool, remove the button shanks from as many buttons as you glued leaves.

Carefully adhere a button to the top of each leaf on the tutu.

Finish gluing a button to each leaf to finish embellishing the entire tutu.
Find an adorable little girl who you can transform into an Autumn Forest Nymph!!
I hope you have enjoyed this no sew tutu tutorial /Autumn Forest Nymph Tutu. It was fun and easy to make and my daughters love it.
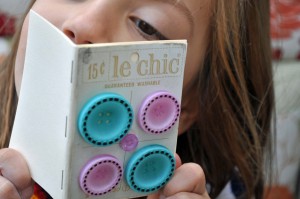
Personalize a mini-composition notebook with buttons. With the recent beginning of the school year, composition notebooks are featured prominently in grocery and office supply stores. After the first few weeks of school they are often deeply discounted. It is a great time to stock up on these notebooks, which make a great surface for embellishing with buttons.
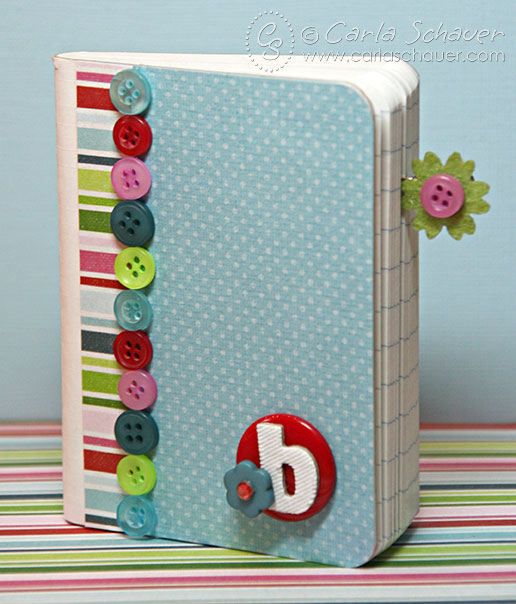
This button covered mini composition notebook happens to be one of the mini-sized versions. This size is fun for kids to pop into backpacks without a lot of extra weight to carry around. My daughter likes to use them as entertainment on her bus ride.
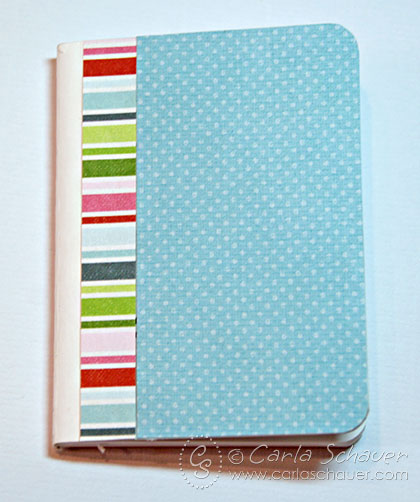
First, cover the notebook with patterned paper, including a contrasting border along the side next to the binding.
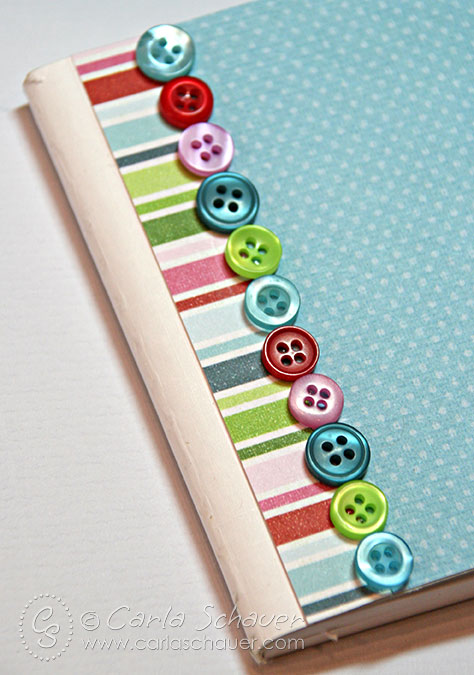
Then, use an all-purpose thick glue to attach small coordinating buttons in a pattern to cover the seam. I used buttons from the Citrus Splash Grab Bag and Juke Box Button Bonanza from Buttons Galore and More.
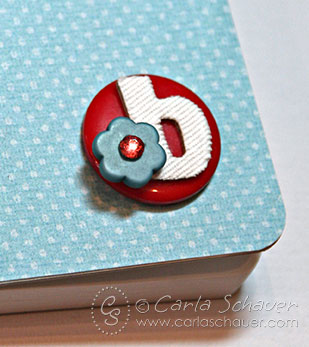
I added a fabric sticker letter to the top of a 7/8″ red button, and accented the monogram with a flower button from the Juke Box Button Bonanza (shank removed).
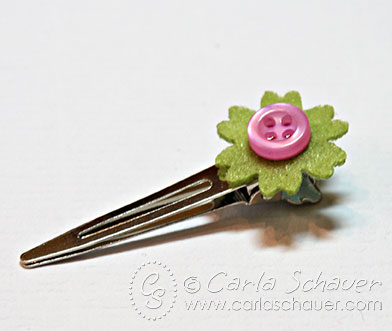
I created a fun bookmark using a premade felt flower and pink button glued to a metal, pinch-style hair clip. The clips are easily moved, and don’t easily slip out of the book, making them easy for littler hands to use.
Small and easily portable, button-embellished composition notebooks are a wonderful way to encourage writing and imagination in children, and are also easy to place in a purse or diaper bag for parents. Personalize one for someone you know!
Thanks for stopping by!
Carla

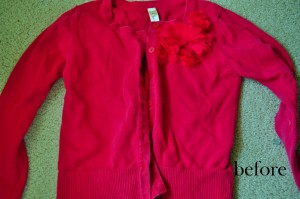
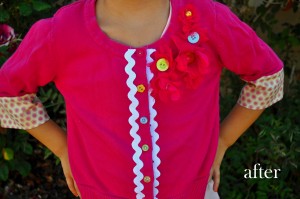
My daughter and I have champagne taste and apple juice budget so I decided to make an upcycled sweater to get a boutique style look at a fraction of the cost. I’ve been busy doing our annual back to school shopping. We saw a ton of button embellishments on the clothes in all the children’s boutique clothing stores this year, so when we got home, I got out my buttons and an old sweater and got to work. The sweater was cute last year, but the sleeves are too short for my growing daughter and the flowers on the shoulder were looking a little tired. The end of the sleeves were also stained. (Why oh why can’t my daughter pull up her sleeves before eating or crafting?) It hardly cost me anything to make as I already has some ric rac and I used fabric scraps for the sleeves.
Did I inspire you? Here’s how you can upcycle a sweater!
Directions:
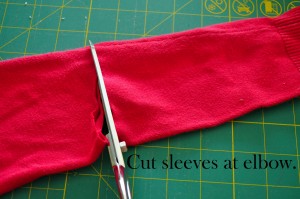
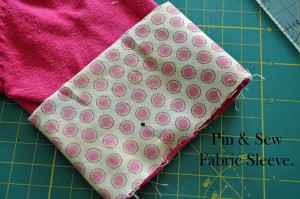
That’s it! Easy. It took me less than an hour to do this upcycled sweater project. If you aren’t feeling adventurous, simply changing out the buttons on an old sweater will give it a new look. Or if you are feeling extra adventurous, you could add some fabric to the bottom edge of the sweater. (Which also lengthens it if the sweater is too short for your child!)
![]()
Today I thought I would bring you an Autumn themed card and share a few tips on how to alter buttons for embellishments. I know it is hard to believe Summer is passing and we are moving into the Autumn season? Creating distressed or altered buttons is not a new concept, that I know. But sometimes being reminded that creating handmade embellishments isn’t feasible and that altering embellishments is the next best thing! Here I will share with you one way I like to alter my button embellishments that takes just a few quick strokes of sandpaper in two different grits and you have an entirely new and interesting look to your buttons! I started with two buttons of the same size and color from the Gingerbread Assortment and then went to town!

The buttons I chose to use from the Gingerbread Assortment matched perfectly with my color palette however,
I thought they’d look good with a little “character”.

Starting with a rough grit side of the sanding block, sand the edges.

Next using a less rough grit, sand the surface of the face of the button to lightly distress it.

Notice the difference? It’s just a few simple steps to really personalize your button embellishments.

And the finished result!
It’s time to get busy making something to freshen up the house! We have been busy all summer and as the Autumn season fast approaches having a few handy tutorials on how to make personalized gifts and hand made home decor just seems fitting. So today I have a Personalized Monogram Home Dec project to share with you. Enjoy!

Supplies Needed: Buttons, Brads, Micro Beads, Gem Tac (R), Scrapbook Paper, Hot Glue Gun, Scissors, Frame

Print letter of your choice as large as you would like finished monogram to be. Place beneath paper and put against a well lit window to serve as a light box. Then trace onto scrapbook paper.

Outline one third of the traced letter with Gem Tac.

Fill in the area fully with Gem Tac.

Place as many buttons as fit onto the glue covered area.

Quickly cover the entire surface with micro beads.

Remove excess beads before moving onto next step.

Continue covering the entire traced area a bit at a time following the steps above.

Cut the prongs off of the brads using strong sharp scissors.

See how much flatter brads lie once the prongs have been removed?

Hot glue the altered brads to the surface of the monogram randomly. Here I chose to hide "barren spots" with the brads. :)

Once your piece has fully dried, place in a frame and you are ready to enjoy your brand new PERSONALIZED home decor!!!
I would love to see what you make! Please leave a comment with a link to your personalized home decor projects! :) I will be sure to pop over and leave you some love on your project!! :)
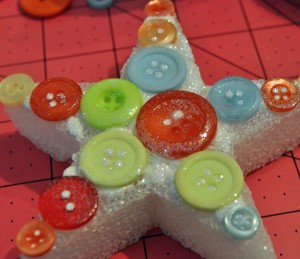
 Supplies Needed: STYROFOAM Cone, Two Tones of Butt ons, Acrylic Paint and Paint Brush, Glitter, Hot Glue, wood circle for trunk or other trunk material.

Begin by placing a pool of paint onto a piece of scrap paper as a palette for easy clean up.

Apply a full coverage layer of paint to entire surface of cone.

While the paint is still wet, liberally cover surface with glitter.

Find a button the same size as the top of the cone.

Build a stack of buttons in graduating size and hot glue together to be a "tree topper".

Once the paint has fully dried, hot glue the topper to the top of the cone.

Randomly glue buttons all along the outside of the cone in various sizes and shades of green.

Glue a line of large Ivory buttons along the bottom edge.

Hot glue the piece of cut tree limb to bottom as a tree trunk.

Ahhh your brand new hip and happening home decor project ready for the mantle, table top or anywhere else in your home!
I would LOVE to see your home decor pieces! Please share a link here so I can come to your blog and see how you decorate for the holidays!!! And hey if you happen to have a great button project that is just a HUGE BONUS! :) Enjoy!
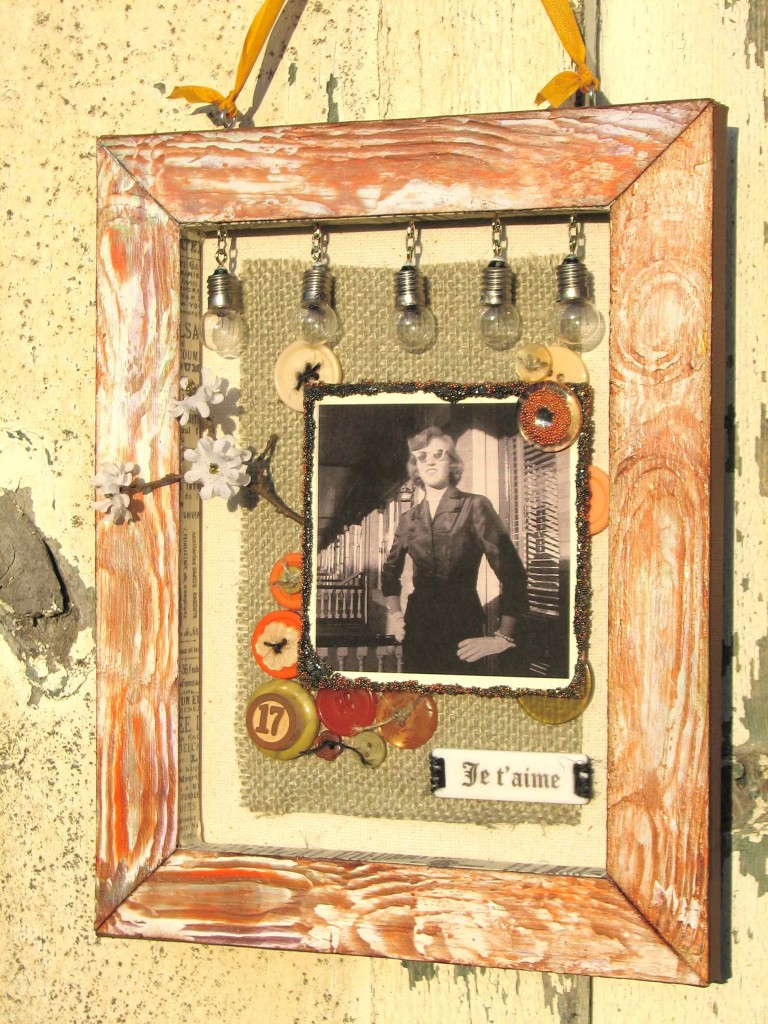
Taking a little break from our “Christmas in July” theme we have a delightful project of Mixed Media Art in this great Keepsake Frame by Elise! :)
Glamor, art and intrigue – a perfect recipe to play with buttons!
Teaming up with some HEAVENLY materials, including burlap, Lumiere Dimensional Paint by Jacquard, Glitter, Ink and Smooch Accent ink by Clearsnap, MICRO PEARLS {Yes! Micro pearls!} and a whole lot of GORGEOUS buttons form Buttons Galore and More, I was COMPLETELY inspired to alter this simple “value” artist canvas to become “priceless” in no time!
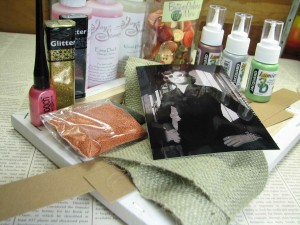
Supplies:
Button Tote Bag Assortment – Cornucopia
Lumiere 3D Metallic Paint and Adhesive
Glitter, Smooch and Ink – Clearsnap
Trimmer, Knife, Ruler & Mat – Westcott
Adhesive – Beacon via Buttons Galore and More
Acrylic Paint – Eco Green Crafts
Burlap
Micro pearls
Tissue Tape
Faux Wood Grain tool (Local Hardware supply)
Other – Vintage light bulbs, twigs and fabric flowers (Misc. stash)
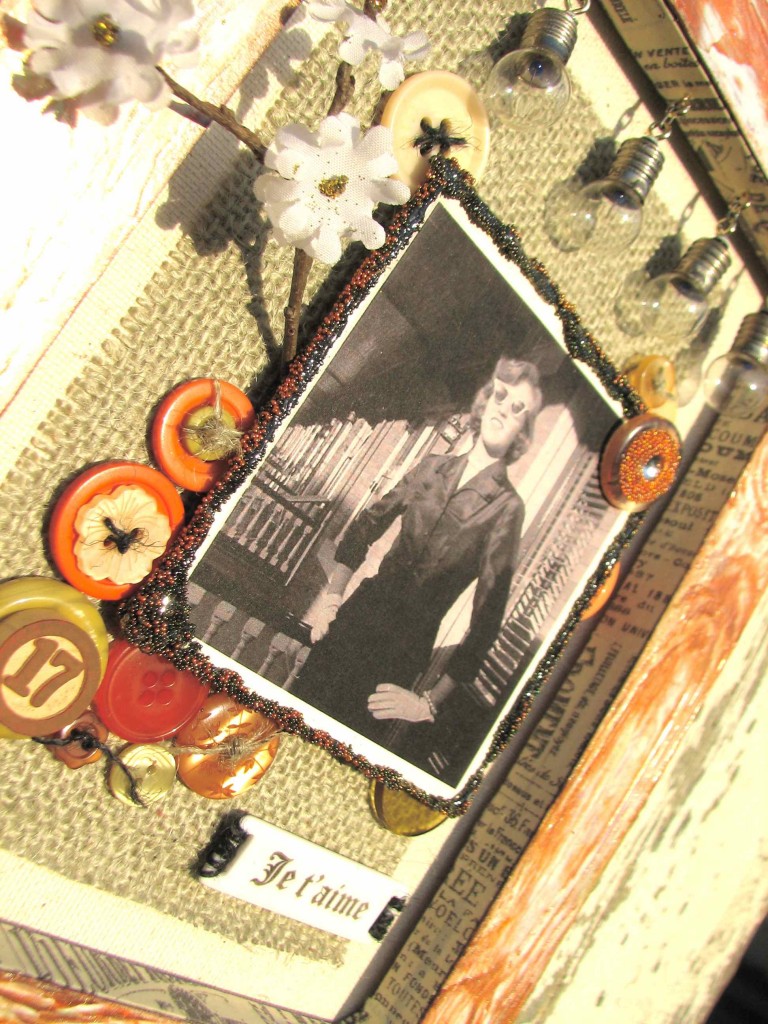
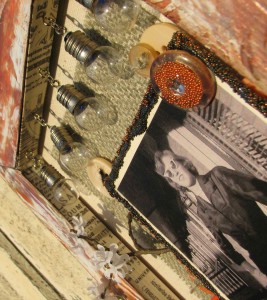
To begin, select a glamor shot of your choosing, to feature in finished frame. {I chose a cool, black and white shot of my sweet Mama at the wee-age of 17! Wasn’t SHE a dish!}
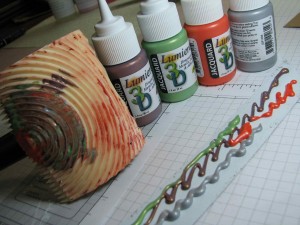
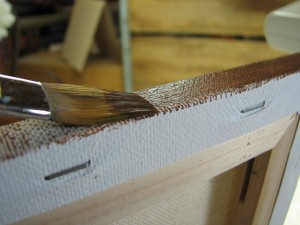
By accessing the back side of a traditional canvas, there is a whole wealth of crafty potential to play with. To customize the “frame” of this look, I created faux wood grain with a simple wood grain tool (available at most hardware stores!), Lumiere 3D paint, as well as regular acrylic paint and some strips of chipboard, cut and sized to metier together to match the stretcher bar framework of the canvas. Start by applying an acrylic base to the chipboard.
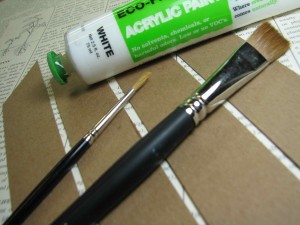
For rich wood grain effect, the MORE color, the better… I used FOUR different Lumiere colors for this look! In case you’ve never dabbled in faux wood grain – it’s TOTALLY easy and addicting… Apply Lumiere on top of dried, painted (with regular acrylic paint) chipboard strips, then pull and rock the tool to create the MOST amazing effects! If you don’t like how it looks, keep working! The 3D quality of the Lumiere gives you some decent working time – you’ll see! (G’head – TRY it!) Once you get all four strips done, set to the side to dry.
Paint the outside edge of canvas with color of your choosing.
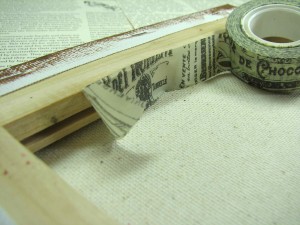
Line the INSIDE of the frame edge with printed tissue tape.
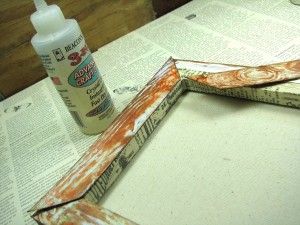
Glue faux wood grain strips to frame. I love, love, LOVE how beautifully Beacon 3 in 1 works for an assignment like this!
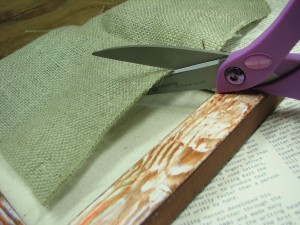
Westcott fabric scissors cut burlap, flawlessly! Cut burlap to size of your choosing. I decided to let some canvas frame the edge of the burlap, just because it looked YUMMY! So many textures! What’s a girl to DO!?!
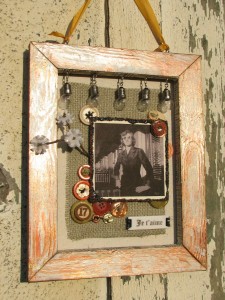
Arrange picture and embellishments to your liking. For this project, I mounted the photograph on chipboard, mixed micropearls and glitter and then adhered with Beacon 3 in 1 adhesive for a luscious, tactile effect. Having TOO much fun to stop there, I added micro pearls to button centers, as well… OMG! {My middle name is DANGER!}
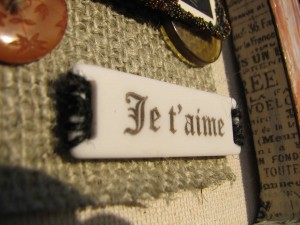
If you’ve never ventured, I can’t recommend HOARDING, uh, I mean, collecting some of our Blank Craft Shapes, in every size! Love the mood that can be created with theses! Easy to stamp and beautiful to behold – Je t’aime! {See what I’m sayin’!}
YOU can get your glamor on, too! Just pick up a selection (or TWO/FIFTEEN!) of some lovely button assortments from Buttons Galore and More, toss in some HEAVENLY crafty supplies, a canvas and old picture or two… I guarantee you’ll beat the heat if you spend a few hours crafting away on a cool keepsake, like this! I hope so!
Thanks for visiting! Here’s to a glorious, button-craft filled day! Keep CALM and BUTTON onnnnnnn!
Summer, when you hear that word what images does it conjure up in your mind? For me I think of the heat, the BRIGHT colors and RELAXING! I love Summer. I know a ton of people who just hate the heat, but being a gal who’s always got cold fingers and toes, I love that during the summer month’s my body feels WARM all over, all day long! Bright colors, well I love those too! Wearing them, creating with them, you name it, I love it! And relaxing…well let’s just say there’s a well loved, well worn hammock in my backyard that my kids and I all enjoy piling into and having a good snuggle time in. I can relax with the best of them, and in STYLE to boot! LOL
For my project today you can see each of these elements we are talking about have been captured perfectly! From the bright sunshine, the bright colors of the porch chair and the slouchy posture of my sweet Elliott, this scrapbook layout just screams SUMMER. Pairing up bright buttons & bright papers with a nice wide swath of burlap helps to give this layout rest amongst the busyness. Now, while I was creating I got to the point where everything was on the layout EXCEPT the title. And I was STUCK…I mean the page was cute, but needed something…but what….that was when I emailed a photo of the layout and then called our DT Lead Niki Meiners and said “What’s wrong with this page..I am stuck” As if on cue she replied “Oh just add a title to the page – SUMMER” “Where??? Where would I even put a title??” I replied. “Ummm right there under the photo overlapping the patterned paper, burlap and above the cluster of red big buttons…” And you know, she hit the nail on the head!!! It was JUST what this layout needed. Talk about a friend being a help just when you need it!!! So now you tell me…who do you call if you get stuck or just can’t seem to “make it all workout” in your creative process??

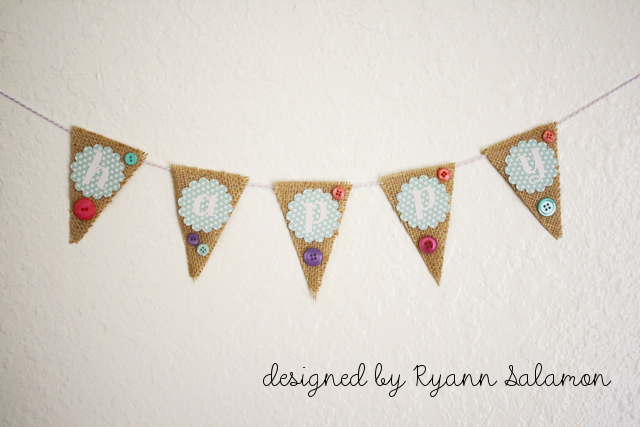
Hi all! Ryann here with a quick and easy tutorial to share with you today featuring burlap and buttons. Making little banners is a great way to use up scraps of paper or fabric because it doesn’t take much of either to put together a great little project to use for family celebrations! Your banner can be as big or as little as you want it, it all really depends on how large of a word you want to use. I find it’s best to use an odd number of pennants to achieve the “best” look for a banner.
Supplies Used:
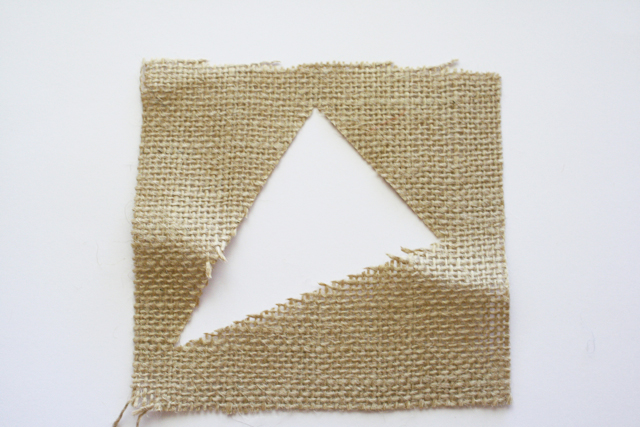
1. Die cut enough pennants to make your banner. If you do not have a pennant die cut, trace a triangle shape on a piece of heavy weight cardstock and use it as a template.
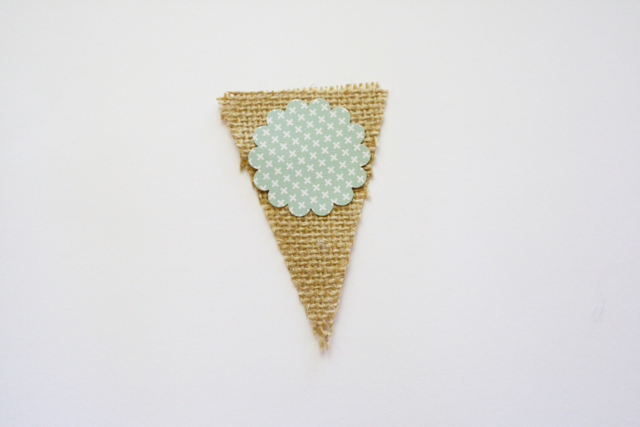
2. Cut out enough scalloped circles to place one on top of each burlap pennant. Place alphabet stickers onto scalloped circles to create message.
3. Decorate with buttons.
4. Thread burlap pennants with twine.
The possibilities are truly endless when making pennant banners from burlap and buttons. If you wanted to make a longer banner such as “Happy Birthday”, you could split your sentiment into two banners and have one hanging below the other. I’m going to hang my little “Happy” banner in my craft room! :) I hope you will give pennant banners a try – they are so simple to make and fun to have! Thanks for joining me today!
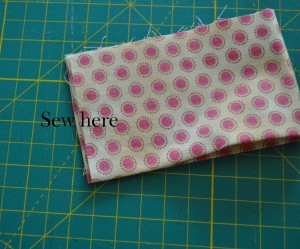
![]() It’s the end of the school year and time to give your favorite teacher a token of your appreciation. This easy burlap gift bag can hold a small gift and has a darling felt & button badge pin. After the gift is opened, the badge can be worn as a pin on a favorite sweater or tote bag and the burlap bag can be reused for future gifting.
It’s the end of the school year and time to give your favorite teacher a token of your appreciation. This easy burlap gift bag can hold a small gift and has a darling felt & button badge pin. After the gift is opened, the badge can be worn as a pin on a favorite sweater or tote bag and the burlap bag can be reused for future gifting.
Supplies:
Instructions:
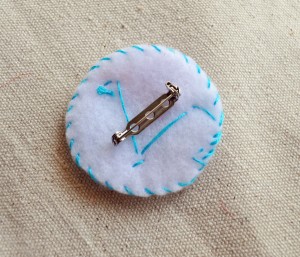
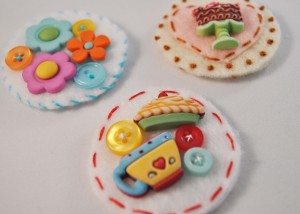
Felt & Button Badges by Laura Bray
Hi there and welcome back!!! Today I have alot of info to share so get comfy! :) First I wanted to tell you about our June theme, then I have a really cute tutorial for you on how to make these delightful burlap & button rosette hair bows.
 Our theme this month if you didn’t guess by my intro project is Buttons & Burlap!

Keep any eye out for our Buttons & Burlap Challenge Contest coming later in the month...if you don't have any burlap or buttons you may just want to go get some...just thinking out loud here. ;)
So this month we were given a theme where we as designers have been challenged to work with Buttons & Burlap. I think you will really enjoy what the design team has cookin’ for you! And today, I have the first project and it comes with a FULL STEP BY STEP PHOTO TUTORIAL!!! Yay!!! Who doesn’t love a good tutorial? So let’s get started. The supplies I have used are:
Buttons – I think my two came from various Button Jar assortments.
Burlap – you can find this at most big box craft stores and it’s CHEAP!
Westcott Brand Rotary Trimmer, Cutting Mat, Steel Ruler & Tiny Thread Snips
Large Needle
Twine or Yarn
Sharpie Oil Based Paint Pens
Ribbons & Trims
Hot Glue Gun & Hot Melt Glue

Begin by cutting a 1.5" strip of burlap in your choice of color...length is not all that important but these were approximately 12" long.

Use a large needle threaded with twine or yard and sew a large basting stitch about .25" from one edge.

Pull on the ends of the twine used to create a gather. Tie a knot to the back of the rosette and spread the ruffles so that they are evenly spaced along the tied circle of twine.

Remove outer few bands of burlap to create distressed edges

Use hot glue to attach hair clip to back side of rosette

Create polka dots on surface of button using Sharpie paint pen

Tie a length of green twine through the buttons and tie in a knot on the under side trim ends with sharp snips

Liberally cover entire knot with hot glue

Press onto front center of rosette to finish hair bow

Alternate button idea - try out all the various color/pattern themes you can think of! Get creative!!!

Just a quick shot of the two side by side.
And finally my adorable little model (my daughter :) ) who was just over the moon to be getting such “high fashion hair bows” today when Momma was done working…. :)

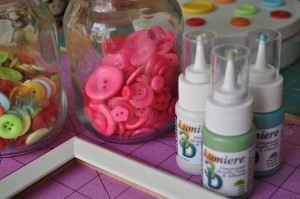
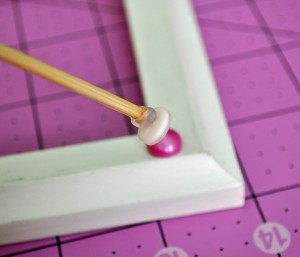
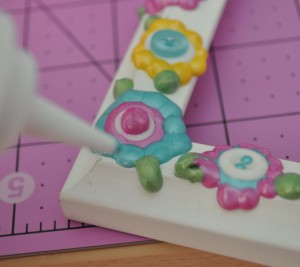
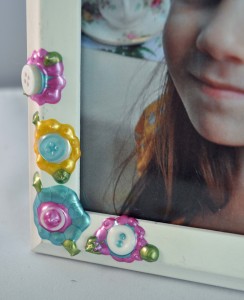
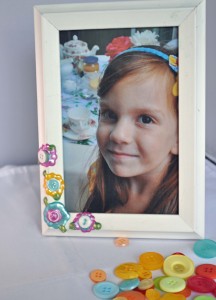 You probably know by now that I love all things bright, cute and floral. I found a plain, white, photo frame in my closet and knew that plain just wasn’t going to cut it around here, so I grabbed a few bottles of Jacquard’s Lumiere 3D paint and some buttons and got to work. The great thing about using the 3D paint is that it’s also an adhesive, allowing you to have a seamless look without dealing with a glue mess. I also love how the paint squeezes through some of the button holes to give more interest to the design.
 Supplies:
Instructions:

I love my mom. She’s a wonderfully fun person who everyone loves! She has a joyful spirit that just oozes to all those around her. This week I decided it would be fun to scrap a layout with her as the subject! :) If any of you have followed my work you know I love stamping, I love paper, I love ink, I love all things “crafty”…and here on this project I went all out and decided to not use any patterned paper but instead to get creative and make my own backgrounds.

I really wanted there to be attention to all the fine details on this layout so as you can see I used buttons as a border. Nifty Tip: Jacquard Lumiere 3D can be used to adhere buttons to your project AAAAAND it doesn’t leave you with “naked” button holes (personal preference of mine is to NOT have naked buttons!!!). The Lumiere 3D fills in the holes as well as adheres the buttons right where you want them to stay! The Lumiere 3D Turquoise is a dead match for the buttons in our Sea Glass Tin.

I also found that the Pearl Lumiere 3D was just right for holding my little white mother of pearl buttons from the Genuine Vintage Tin right where I needed them for the “buds” on my tree branch as well as for creating perfect domed centers for all my flowers.

As you can see here I have printed repetitive words using the Duetica Mandolyn 1 Font. I love how crisp and clean this font is but still has a flowing feminine feel at the same time. I decided it would be cute to make a list of all the names my mom has answered to in her life time….Marilyn, Mon, Mom, Kiddo, Momma, Mommy, Mother, Mimi etc…I then just repeated the list over and over and printed in a light gray on Kraft cardstock to make the background strip beneath the photo.

Then for my title I again used the Duetica Mandolyn1 Font in a larger point size and a cool teal color. One of the best things I am finding when working with the Duetica fonts is that I can customize EVERYTHING about them, the way they type out, the colors I print in, the size, the layout…you name it, you do it! :) Since we just celebrated Mother’s Day now is a great time to get out that photo of your mother and treasure that memory as you create a keepsake scrapbook layout…
Supplies:
Buttons: Buttons Galore & More – Sea Glass, Genuine Vintage
Jacquard – Lumiere 3D: Pearl & Turquoise
Duetica Font: Mandolyn 1 & Adobe Photoshop
Cardstock: Prismatics & Coredinations
Cricut Electronic Cutting Machine, Serenade & Winter Wonderland Cartridges
Stamp: Layers of Color – Fairy Wishes
Ink: Clearsnap Colorbox Pigment Ink – Glacier Ice
Glitter: Ultrafine Iridescent
Rhinestones: Want2Scrap
Flowers: Prima “e!” line
Die: Spellbinders Labels Four Nestabilities
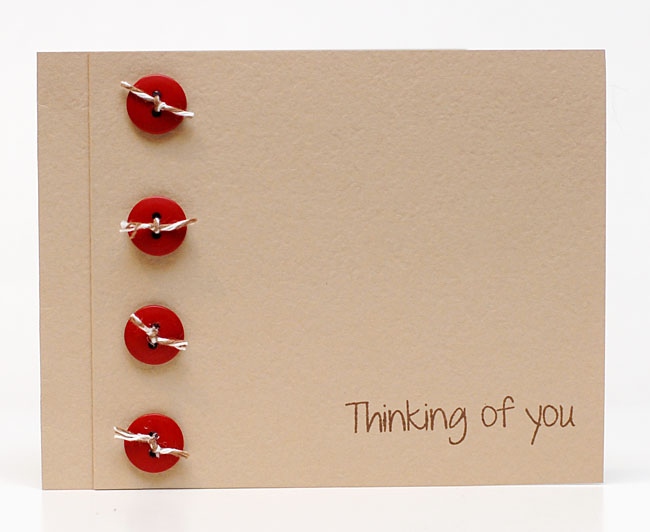
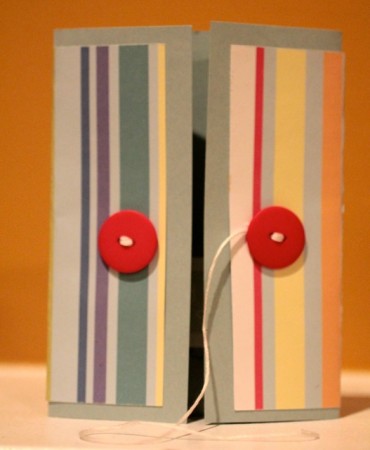
A few weeks back I was perusing Pinterest and I saw this totally cute pin idea and instantly thought “I could make a really cool clean and simple card with this as inspiration”. So I repinned the blog post over at Imparting Grace where she had seen a Pottery Barn Pillow using buttons and was inspired to make it herself.
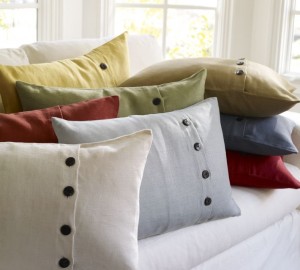 Image courtesy of Pottery Barn
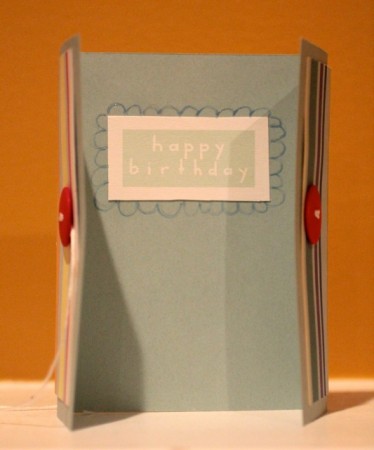
I in turn was inspired by her post to make the general idea into a card!! Here’s my take on the simple but oh so button savvy design! I started with a 4 1/4 ” x 11 1/2″ strip of cardstock. I scored 5 1/2″ from the end and folded along the score line to make the spine of my card. I then made and additional two score lines using my Scor-Pal Scoring Tool 1″ from the spine of the card and 1 1/2″ from the spine of the card. I then folded at the score lines to create the “pleat” that you see on the left side of the card lining up the ends of the cardstock strip. A little line of 1/4″ Scor-Tape to hold the folds and the base of the card was done. I then used four red buttons from the Girly Button Pack and tied a bit of twine through each before adhering them to the card front just past the “pleat”, stamped the simple sentiment and BAM! Done! :)
Have you ever been inspired by something and gone in a totally different direction with it? For example this was a pillow design and I translated it into a clean and simple card. Share a link! We’d love to see what inspires you and how you translate it into making it your own!
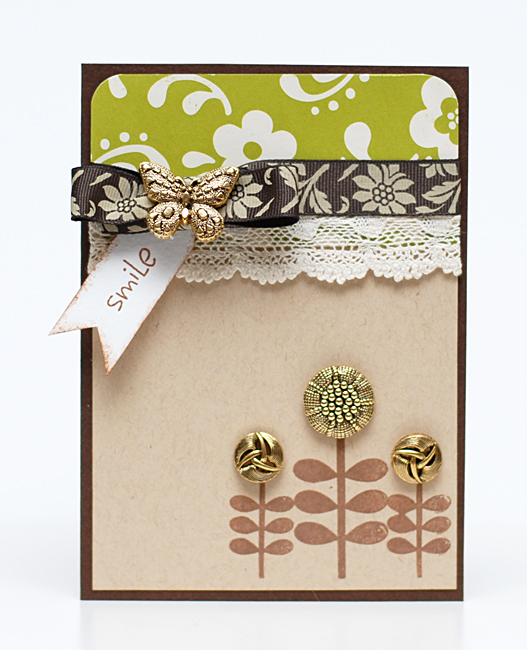
Have you ever been in the middle of a project and felt you needed just the “right touch” but couldn’t really put your fingers on what that “right touch” was? Well I thought I would share my card that shows just such a moment.
I had this cute little stamp that was the flowers’ “stems & leaves” and I wanted to go 3-D with the flowers themselves…so I put my thinking cap on~ I sorted through my fun Gold Buttons and found three that were JUST THE RIGHT THING!!! So I snipped the shank off the back using some Hefty Duty Scissors….the shanks are plastic so you will not need wire snips or anything but I certainly recommend that you use a good strong pair of scissors!!! (And eye protection is a good idea too because the shanks can kinda take off on you! LOL)
Anyway, here’s my card…can you spot my BONUS HAPPY FIND? Yep! That is right, the butterfly on the knot of the ribbon is ALSO one of the buttons I found while pecking through my Gold Buttons! If you’d like more details about this card just pop over to my blog Pink Lemonade…enjoy your day!
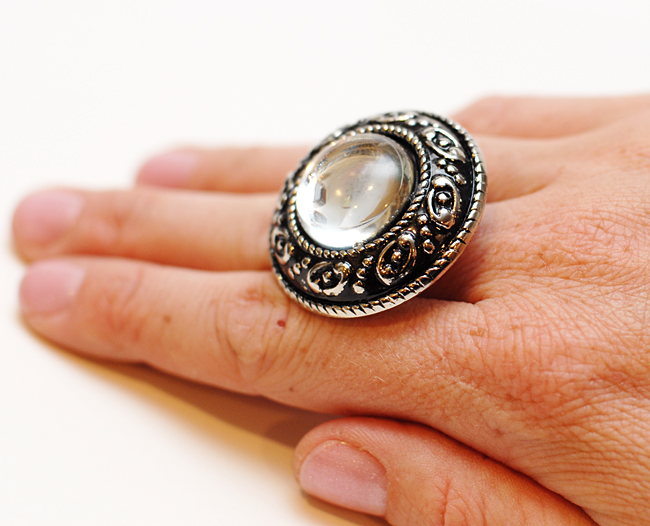
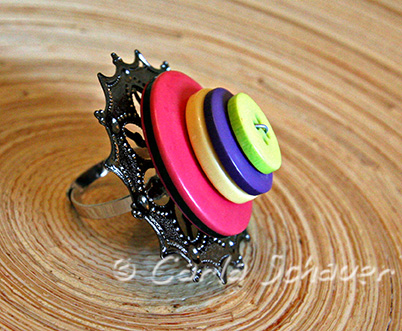
Well I hope you enjoyed my ring tutorial yesterday. I really enjoyed putting it together. I especially love when people try out my tutorials and then let me know how it worked for them! :)
Today I just have a quick post to share with you. Here I wanted to show you a few more button rings I have made. First I will show you all three, then I will expound on them just a bit for you.
Here you can see that you can use buttons of all shapes and sizes. There’s no “right size” button for making a ring!

When I found the first one on the left in the Gold Bulk Button Pack I was thrilled that it wasn’t GOLD! LOL I was so excited to see it was silver because I am generally a “silver/copper/bronze” kinda gal… the only gold I typically wear is my wedding band and engagement ring. This button measures almost an inch and three quarters at the widest part!!! Suuuuch a fun “cocktail ring” size.
Here it is on my hand. Fun right??
Well then I thought I would also make one from the sweet dainty little Cameo Button in the Genuine Vintage Button Tin. It’s just so little and cute compared to the ginormous one in the picture above, isn’t it?
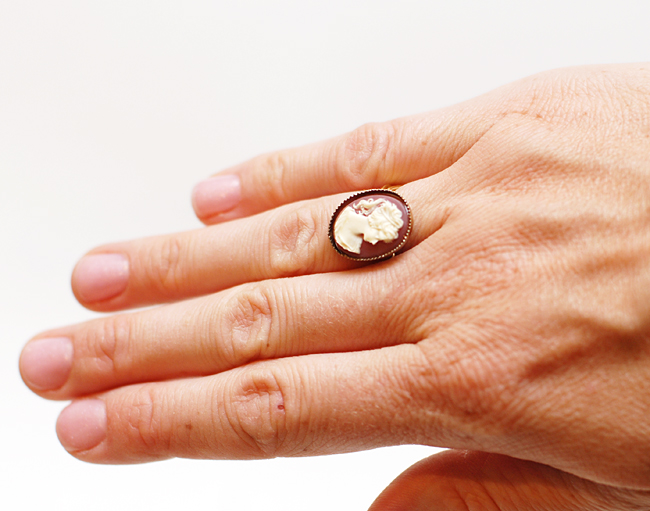 I have some really cute colored buttons that I plan on doing another ring soon with…I hope you will come on back to see them! Please be sure to comment with a link to your button ring creations. I would love to see what you have done either on your own or using the tutorial I created! Have a great day!
P.S. Be sure to check out our “Pin it to Win it Contest” that runs all the way through April 27th!!!
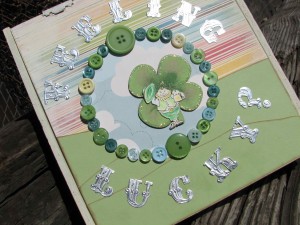
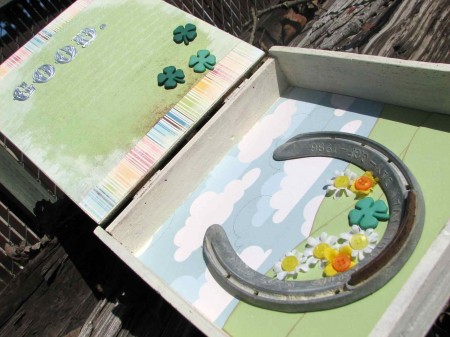
Button embellished St. Patrick's Day Keepsake box
Is the luck of the Irish with you?
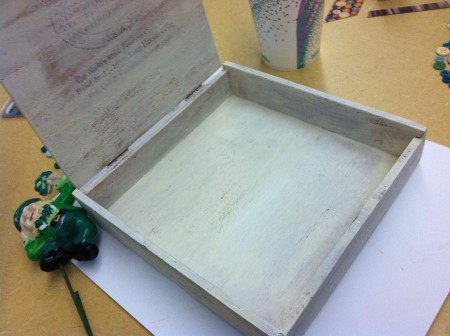
It was WITH ME, when I re-purposed this old cigar box, to become a sparkling keepsake, with a St. Patty’s Day twist…
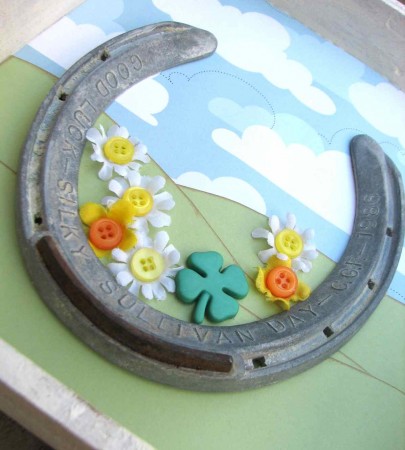
A delightful assortment of Buttons Galore & More buttons and just the right amount of good old Irish magic…
Buttons Used:
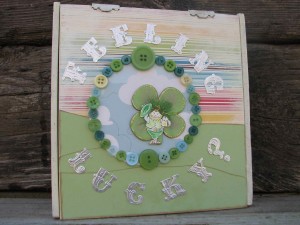
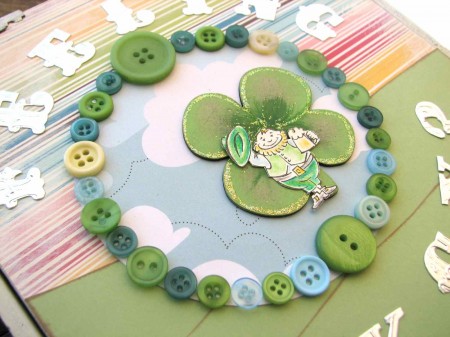
The spirits moved me to create this festive, button embellished medallion, to house a wee-leprechaun and invite contemplation of one’s sense of optimism…
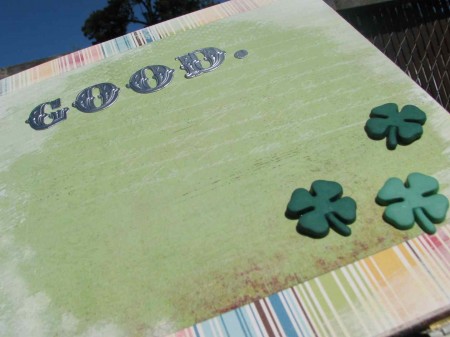
And being, ever the optimist, myself – I confirmed what EVERYONE should feel….
L-U-C-K-Y!
And HOPEFULLY, inspired as well!
I hope you do a little jig and get your BUTTONS on – it’s a great time for crafting with Buttons Galore & More!
Thanks for visiting!
Thank you everyone who commented on the RANDOM GIVEAWAY this weekend. “And the Winner Is” has chosen:
awesome giveaway! became fan of fb sent by Pinky. thanks for a chance to win.

Black and white button bridal shower invitations
Hello, Pinky here with hand made Bridal Shower Invitations.
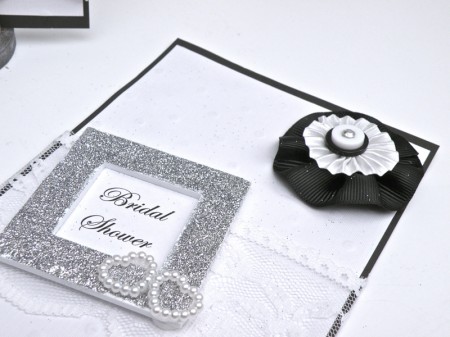
Step 1. Trim Black embossed cardstock to 4X6″ Trim white embossed cardstock to 3.75X5.75″. Layer onto each other.
Step 2. Blank Craft Shape Frames & Glitter It Glue, adhere ultra fine silver glitter to frame. Set aside to dry.
Step 3. Print up BRIDAL SHOWER to fit inside frames on plain white cardstock. Trim and adhere to frames.
Step 4. Adhere 2 LOVE buttons to frame (I used hot glue gun).
Step 5. Using Beacon Zip Dry, adhere white 2.5″ lace
Step 6. Adhere White Pleated Rosettes to corner of cards.
Step 7. Print invitation information (at 3X5″) and adhere to back.
These are going to add that perfect handmade touch to any wedding/bridal shower. It really expresses how much you care and will be a wonderful hit!

Button Bon Bons by Laura Bray
I love Valentine’s Day, but my hips don’t. If you give me a box of chocolates, I will eat it! So I whipped-up some calorie-free, faux chocolates. Tucked into an old chocolate box (of which I have more than a few, ahem), they make a darling Valentine vignette. Or pack up a few as party favors. Here’s the recipe:

Button Bon Bons
Ingredients:
Instructions:

Button Bon Bons for Valentine's Day
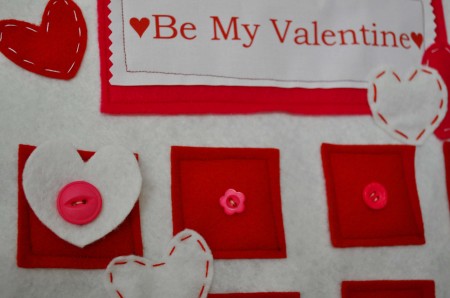
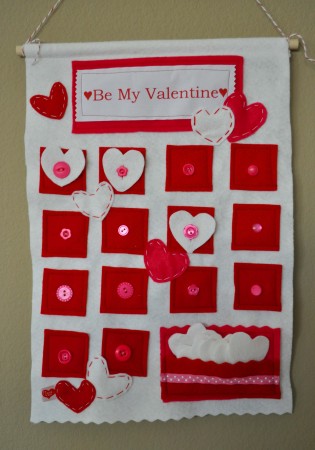
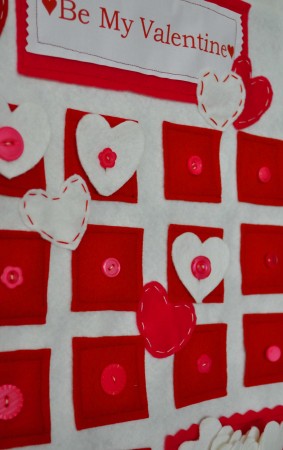
If your little one is anything like mine, you pretty much start looking forward to Valentine’s Day right after Christmas. I created this felt and button Valentine’s Day Countdown Calendar to channel some of my daughter’s excitement.
Supplies:
Instructions:
You are done! Store your white hearts in the pocket. As each day dawns, allow your child to button a heart onto one of the red squares. When the all the squares are full, it’s Valentine’s Day! Use the now empty pocket to store a few Valentine’s and enjoy your calendar for a couple of extra days after the holiday.
Valentine Countdown Calendar by Laura Bray
I know this calendar is a lot of work, but I was able to get mine done in about 3 hours total. I think it’s worth the work-after all it’s a heirloom item.

It’s always kind of sad to say goodbye…especially to such talented people as Carla Schauer, Jenny Barnett Rohrs, Beth Watson, and Jen Goode.

Some of our original design team are still with us … Vicki O’Dell, Niki Meiners, Elise Durenberger and Laura Bray.

Haberdashery Heart by Laura Bray
And to them we have added new members to our design team… Dana Gustafson, Cristal (Pinky) Hobbs, Ann Butler, Laura Evangeline and Allie Gower.
To see the bios of our Design Team Members as well as links to other sites where you can follow them please visit our MEET THE DESIGN TEAM PAGE.

Haberdashery Button Heart by Laura Bray
I love, love, love the Haberdashery Trim Collage Kits by Buttons Galore and More. Just the word “haberdashery” makes me feel all happy & old-fashioned. And the goodies included in the kit? Well, once I started brainstorming for a Valentine project, I couldn’t stop myself. There are a million ways to use this kit. You could even buy a few, invite your friends over for a Valentine tea, and make these hearts. They’ll make great Valentine’s Day gifts, but would also be sweet in a baby’s nursery.
Haberdashery Hearts
Supplies:
Heart Plaque by Laura Bray
Instructions:
Button Closure
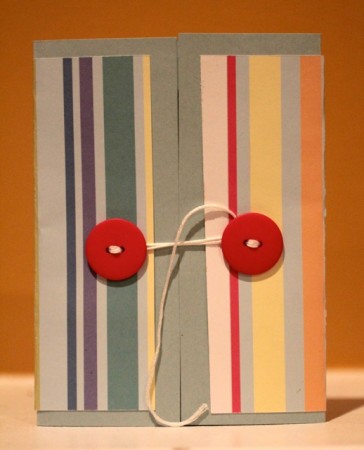
Create a cool closure for your handmade cards by sewing on two buttons. The card above is a a birthday card. You can use this technique for any occasion. Very few tools are involved and little skill is needed. It is quick and easy yet it makes the card feel extra special.
Button closure untied
Tools:
Needle with large opening
Embroidery floss in color of your choice
Paper cutter
Mouse pad
Material:
Contemporary Christmas Button Jar
12 x12 Cardstock of your choice
Pattern Paper of your choice
Rubber stamped sentiment of your choice
Adhesive
Directions:
1. Cut paper to 6×12. Make a score line 3 inches from each end. Fold flaps in so that they meet in the middle.
2. Trim pattern paper to 5.5 x 11.5 and adhere to card.
3. Stamp sentiment and add to center of card.
4. Measure in one inch on each flap. Place card open on mouse pad and use needle to make holes for floss.
5. Using floss sew on one button. Tie knot to secure and trim off excess.
6. For the second button cut a generous piece of floss. Sew on button and tie a knot. Do not trim off excess. Use it to fasten the card closed
Inside of card

In case you haven’t heard, Pinterest is one of the hottest new sites around. For those of us who operate VISUALLY it’s nothing short of eye crack! LOL! Just look at this button embellished Mona Lisa I found the other day. Crazy cool!!
Be sure to follow our Pin Boards to share the button love!

Our Design Team Member Laura Bray needed a little inspiration for using up some gold and silver buttons from our Gold and Silver Grab Bag … so she grabbed a can of spray paint and created some adorable wall art. You can read all about how she did it in her blog post Button Decor.
I think that one or two buttons in a small frame would be an excellent idea for an ornament too, don’t you?

About this time of year, my kids get the itch to start making gifts for friends, teachers, and grandparents. I came up with a kid-friendly craft that will enable them to give a gift they’ll be proud of- and it’s a great way to share those wallet-size photos from school pictures!
I used a manual die-cutting machine for this (the Spellbinders Grand Calibur) because my kids, ages 6 and 10, know how to use it independently and frankly the results are great! But you can use hand punches if you like, instead.
Supplies:
First, have your kids cut large circles in 3 1/2″ or 4″ size for the bases. Then, cut the “wreath” portion by positioning the 3″ or the 3 1/2″ die and centering the 2″ die into the middle. Use a piece of painter’s tape to keep it from shifting around while you run it through the machine.

Save that area that is punched out- we’ll use it on the back!
Next, cut a piece of ribbon at least 6″ long and glue it to the base.

Take your wallet-size photos and position them so the face is centered in the middle. Cut away the excess with scissors. use a dab of glue to secure the photo to the wreath, then add more glue to the entire thing and glue it to the base.
Now to decorate! Use a little more ribbon to make a bow, and add a decorative button. Then glue little buttons around the wreath as ornaments.
While that’s setting up, write the child’s name and year on the Angel Start-up and glue it to that center from the first step. Lastly, glue that to the back of the ornament so that both sides are festive.

You’ll have such a good time crafting together as a family, and the kids will be so proud that they made the gifts themselves!


Recently one of our Facebook fans posted a photo on the wall of a finished project. I thought it was so cool I just HAD to share!
Notice the mirrors rescued from the trash in the above photo?

And see what they are becoming here?
You’ve got to go visit Notions and Devotions to see more!
Do you have a project that uses Buttons Galore and More buttons that you like to share with other button crafters? Maybe a blog project you’d like me to link to and share with our community? Be sure to head over to the Facebook page and share your photo!!
P.S. Our welcome page on facebook always has exclusive content just for our friends! :)

I’ve been recording a new video about once a month featuring my favorite crafts made with buttons.
This is last months’ video.
Why is it a month old?
Well, that’s because I keep the video and share it EXCLUSIVELY with our facebook friends first.
When you get to our facebook page, and you haven’t liked us yet, you’ll see the Landing Page where I have a link to the video.
So, what are you waiting for? Go like us and see THIS MONTHS video FIRST!

The instructions for row 10 are up on the Fabric Party page here.
And as always there is a give away that includes a Techie button pack from Buttons Galore and More!! WhooHoo! :)
The instructions for row 8 are up on the Fabric Party page here.
And as always there is a give away that includes a Birthday Balloons from Buttons Galore and More!! WhooHoo! :)

I love this party favor idea from Melody Nuñez. Simple yet sophisticated.
Please visit the Vintage Party Favor Tutorial to find out how to make them for your own gifts or party favors!
The instructions for row 5 are up on the Fabric Party page here.
And as always there is a give away that includes School Days buttons from Buttons Galore and More!! WhooHoo! :)

Pink and red button necklace
Here is the product of a recent experiment. I think it turned out rather well, don’t you?
I haven’t turned this into a tutorial yet but I will… maybe it’ll even be a video! But until then I can tell you that it’s one single length of strong quilting thread with the buttons threaded on.

Zinnia Style Button Brooch
I was tooling around the web recently, minding my own business when I happened upon this tutorial by Diane Gilleland of Crafty Pod over on Craft Leftovers.
I’m madly in love with these little zinnias with button centers. Check out the tutorial here to see how quick and easy they are to make.
If you ask me this is the PERFECT time of year to make a batch of them to wear… or to give!
I’ll take one in red please! :)
Try these bright and cheerful buttons for YOUR zinnia brooch

“Tulip” button jar

“Citrus” button jar
While some people look at jewelry as investment pieces, keeping them to wear long-term over the years, I love bright funky jewelry that I can wear as my mood or the trends change.

Button web ring
This particular piece I made in under 10 minutes, using supplies I had on hand, buttons from the Mixed-Color Grab Bag from Buttons Galore & More, a large metal jewelry finding, a ring blank, and a 6 inch piece of wire.
I started by choosing buttons of different colors and sizes. The Grab Bags are fun to use because the colors and sizes are all mixed together and it’s easy to just pluck several different buttons from the same package. The Button Bonanzas and Button Totes would also work well to get the same look.
After choosing my buttons, I strung the wire up from the bottom button through one hole of each, then bent the wire and strung it back down through one different hole of each button. I wanted the funky look, so for my piece it didn’t matter which hole I used or whether the button had 2 or 4 holes, I was going for the wacky stacked look. After the buttons were strung, I fed both ends of the wire through the jewelry finding and twisted the ends of the wire together to secure, clipped the extra wire off, and pressed the twisted ends as flat against the jewelry finding as possible.
I decided to use the piece as a ring, so I glued it to a ring blank using a heavy duty, multipurpose glue. I could have also used it as a pin, a pendant, or a hair accessory. The sky is the limit when making button accessories. Have fun!

I found this adorable table runner while cleaning up my Mother In Law’s house a couple of weekends ago. For some reason she had only worked half of it and then put it away to never be worked on again.
I felt bad cutting it up but it didn’t quite fit on the front of this messenger bag. So I cut it to fit and then cut the lace from the edge and sewed it back on. Same thing…only smaller.

I sewed a small heart shaped doily to the lower corner and embellished it with buttons from a Button Bonanza bag in Bubblegum. Finally, I stitched again around the outside edge of the heart with pink embroidery floss and put embroidery floss through a couple of the buttons.
I haven’t decided if it’s finished or not. I’ll have to sit with it for a day or two and decided if I need to add anything more.
What do you think? Is it finished? If not what would you add?

Button embellished cowgirl shirt
Whether it’s time for some ropin’ and ridin’, or just a fancy night out on the town… There’s not much fashion that doesn’t look better with BUTTONS!
It may be a little early to start thinking of fall leaves… but maybe not.
Last week I introduced you to Start Ups here and I made an easy “metal” piece to put on all sorts of Mixed Media or Scrapbooking projects.

This week I used the Start Up Leaves and my trusty collection of Ranger Alcohol Inks to create multi-colored fall leaves.

The colors I used were Oregano, Butterscotch and Red Pepper.
Oh, the possibilities!
What would YOU use Start Up Leaves on?
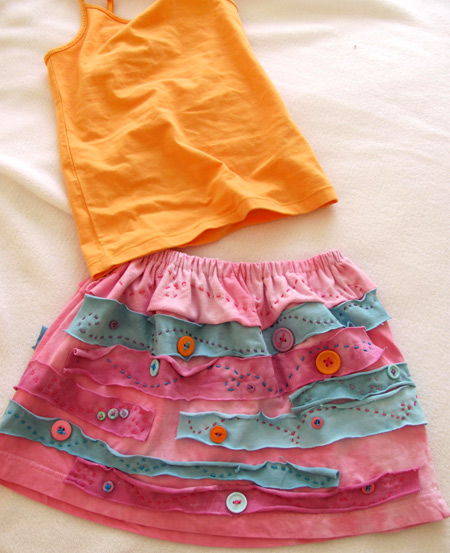
DIY recycled t-shirt button skirt by Jen Goode
Between all my kids, the house is always filled with someone’s clothes that don’t fit anymore. With hand-me-downs, the boys have had a great selection of new clothes in every size, but my daughter isn’t about to get excited over monster truck t-shirts unless that have bling in sparkly pink and purple. However, with a little creativity, we can turn any rough, tough boy-wear to fabulous girly in no time!

“Amazing Plastic Crafty Goodness” is what they really ought to be called! :)
What are Start Ups? They are small, white plastic shapes. Perfect blanks for lots of scrapbook, mixed media and even jewelry projects.

Button name plate
My very first Start Ups project. :)
I spray painted the blank silver and let it dry, then I rubbed my thumb over it to take out some of the shine. I stamped VICKI with a small set of alphabet stamps and Staz On ink in black. Finally, I gave it a quick spray with a Matte Sealer and it’s all ready to go on… well, WHATEVER I want to make! I love that it looks like an old piece of metal. Cool!
Keep checking back as I continue to explore all of the crafty fun to be had with these little gems!
And click HERE to see the available shapes of Start Ups that Buttons Galore and More Carries!

By Elle Price - from Flickr
I know, I know. The grill is still hot from the 4th of July and I’m posting a photo of a Christmas project.
But really, can’t you just see pouring all of your left over Button Bonanza bags into a large bowl and making this little cutie to use up the buttons you have hanging around?
Unfortunately there weren’t any instructions with the photo but it’s a great inspiration project. In fact, I can think of a lot of reasons to make a mini wreath with buttons. Can’t you?
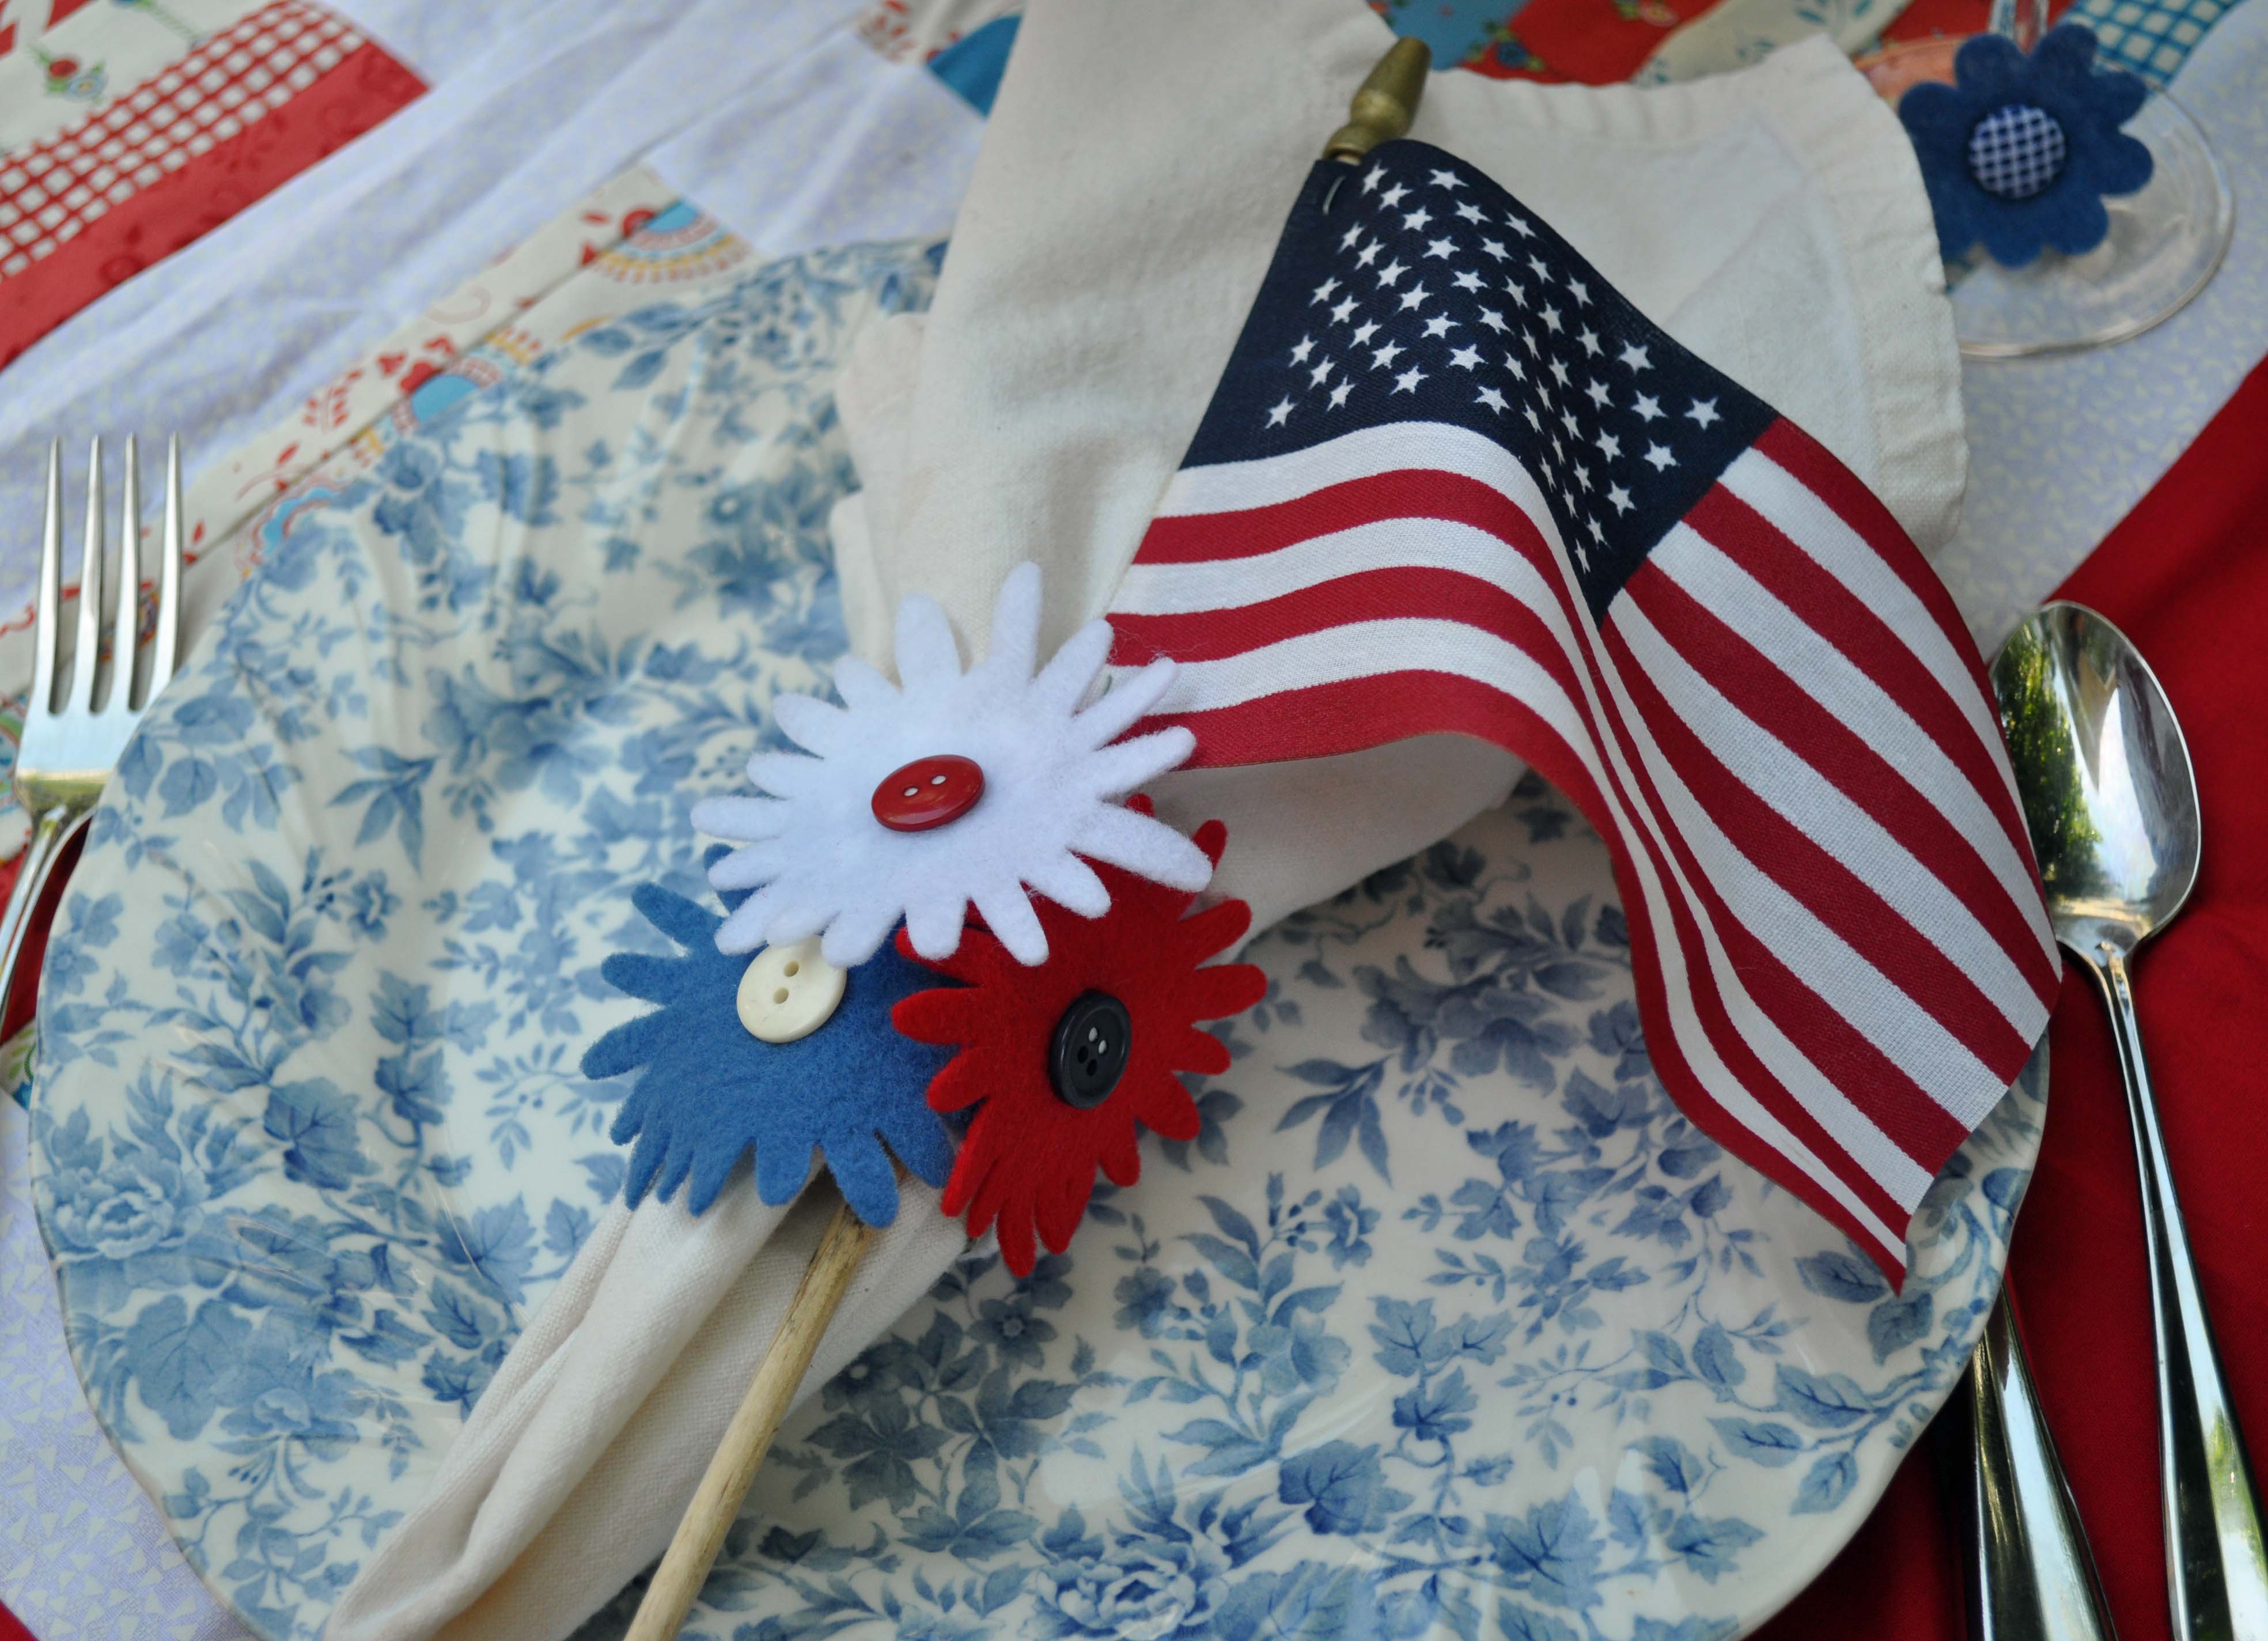
Happy Fourth of July to all our U.S. readers! Today, I thought I would share a cute tutorial for festive napkin rings. They are so easy you can probably whip-up a set for this afternoon’s BBQ!
Supplies:
Instructions:
Now, slip a napkin and maybe a little flag into the ring and you’ve got a party!
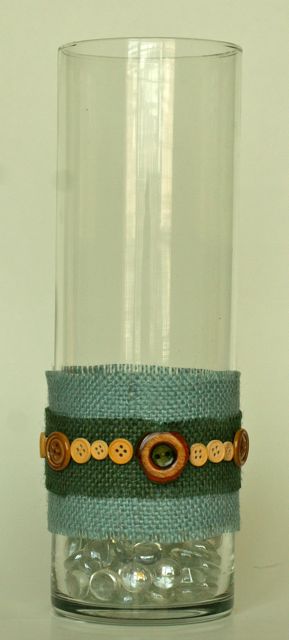
Country Chic
Burlap has been one of my “old favorites” and I am so pleased that it is back en vogue in the crafting world. To create this chic candle holder I used a glass container that I purchased from the dollar store.

Button Detail
Tools:
Scissors, Embossing stylus
Materials:
Wood buttons, Blue and green burlap, Beacon Adhesive Fabri-Tac, Rusted Heart, Bo-Bunny Rub ons, glass marbles and a candle.
Directions:
Cut blue burlap into a 3×9 strip and fray edges. Cut green burlap into a 2×9 strip and fray edges. Adhere strips to container. Adhere buttons randomly around the center.
For a variation add rub-ons to rusted metal heart. Trim heart with the tiniest buttons. Add butterfly rub on to glass exterior.
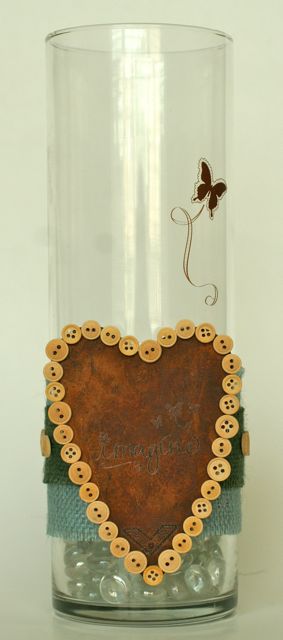
Country Chic - Variation
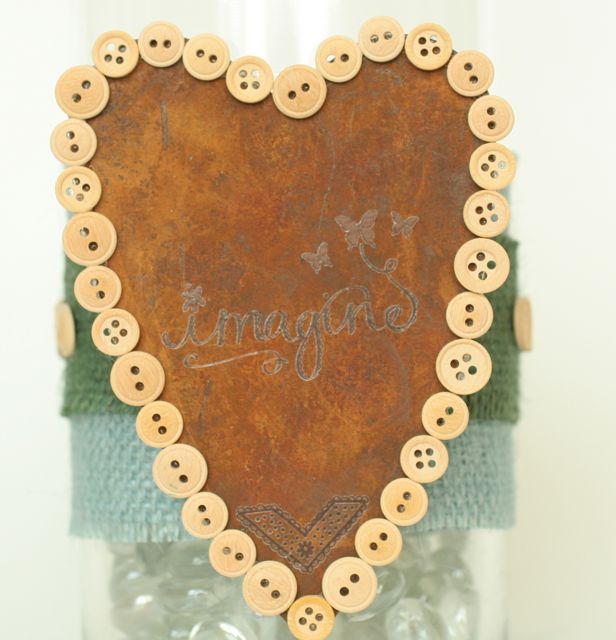
Rusted Heart Details
I hope you have enjoyed this country chic candle container.
Toodles, Niki

Drink Charms by Laura Bray
This is a fun new twist on drink charms for parties AND the charms double as a charming party favor as well.
You can read all about how to make these lovely drink charms on Design Team member Laura Bray’s Blog post here.
journal and pencil boxes
A few months back, I made some boxes to hold my colored pencils. I loved the design so much that when I was doing my summer journal, I chose to make a matching journal to coordinate with my boxes. Cute, huh!
Make an Envelope Booklet to hold coupons, photos, or stationery.
I love little gifts that I can make with items that I’ve got on hand and give as hostess gifts, thank you tokens, and teacher’s presents. Usually it’s on short notice- and I can whip up one of these Envelope Booklets in an hour. WIN!

All around the web I’m seeing that fellow crafters, designers and artists seem to be taking time out to clean up their creative spaces.
It’s also a GREAT time to be thinking of little gifties and gift tags that you could use the rest of the year. Don’t think so? Read the rest of this post that was originally published on my blog. (You can visit my NEW blog here: www.vickiodell.com)
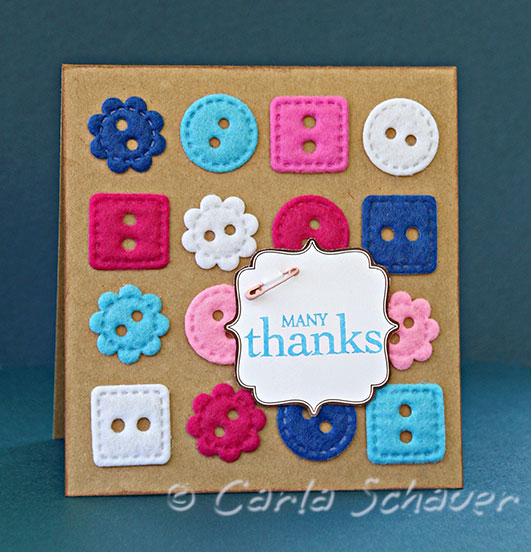
I love a simple grid arrangement when creating a quick card. In this case, the grid combined with a neutral kraft cardstock really lets the texture and color of the Fiesta Felt buttons take center stage. Tie embroidery thread through button holes, or leave them open as I did to make the card even more quickly.
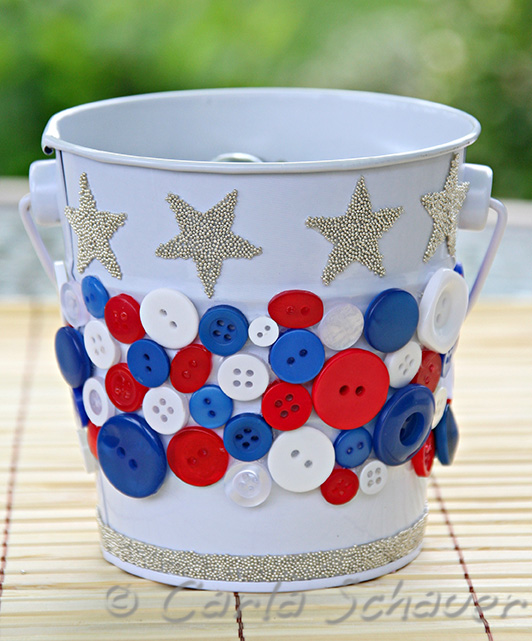
The 4th of July weekend is the perfect reason for a celebration barbeque in the backyard. Use these $1 white metal buckets and Button Bonanza All American Mix by Buttons Galore & More to make patriotic décor perfect for the party!
The instructions for row 2 are up on the Fabric Party page here.
There is a give away that includes buttons from Buttons Galore and More – the give away happens Monday morning!!
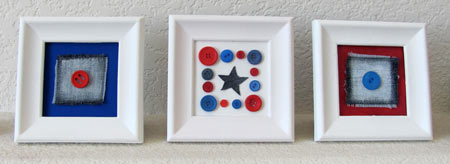
Patriotic mini art frames by Jen Goode
There are so many great ways to create extra decor pieces for July 4th and other patriotic holidays. Add a little extra fun to your home with buttons in red, white and blue to show off your American spirit. This 3 piece button art requires only a few supplies and is fairly quick and easy to create. I used many recycled pieces and scraps including buttons from a grab bag button pack which added to the variations of sizes and colors I had available.
This is a quick and easy project to do with your children, but you could also do a few for yourself too. Match the button colors to your decor and you’ll have a striking piece of art for your home.

I don’t know about your house but in my house we have FOUR young people. They are VERY BUSY young people and each one has a bulletin board. They are a super easy way to communicate within such a busy family. (Besides text messaging that they tend to read and then forget) A note on a bulletin board is a little harder to forget. It stays there, quietly reminding, until the event or reason for the note has passed.
Anyway, why have a boring bulletin board when you can have one that fits your decor, your personality or your hobbies?

This bulletin board uses a cork tile, a bandanna and a 12×12 frame along with a few other supplies.

Cover the cork tile in Mod Podge.

And then smooth the bandanna over the Mod Podge and let dry.
Here is a tip: Before spreading any Mod Podge decide which portion of the bandanna design you want to see on your bulletin board. Don’t cut it all out ahead of time. Just figure out where you want to place the bandanna. (Cutting out the fabric ahead of time makes it too hard to line up.)

While the Mod Podge is drying you can make your thumb tacks or push pins. I simply hot glued white buttons to a flat topped thumb tack. Be careful of that hot glue! You could also use Amazing Goop or a cool temp glue gun a well. Poke the tacks into a piece of corrugated cardboard or foam core while they are drying to keep them upright.

My button push pins.
After the Mod Podge is dry cut away the excess fabric and insert it into the 12×12 frame.

Now you can embellish to your little hearts’ content. I used hot fix rhinestones in two sizes, Thickers alphabet stickers and the heads from 4 “silk” daisies.

Isn’t this fun? Girlie but not too girlie. Country but not too country.
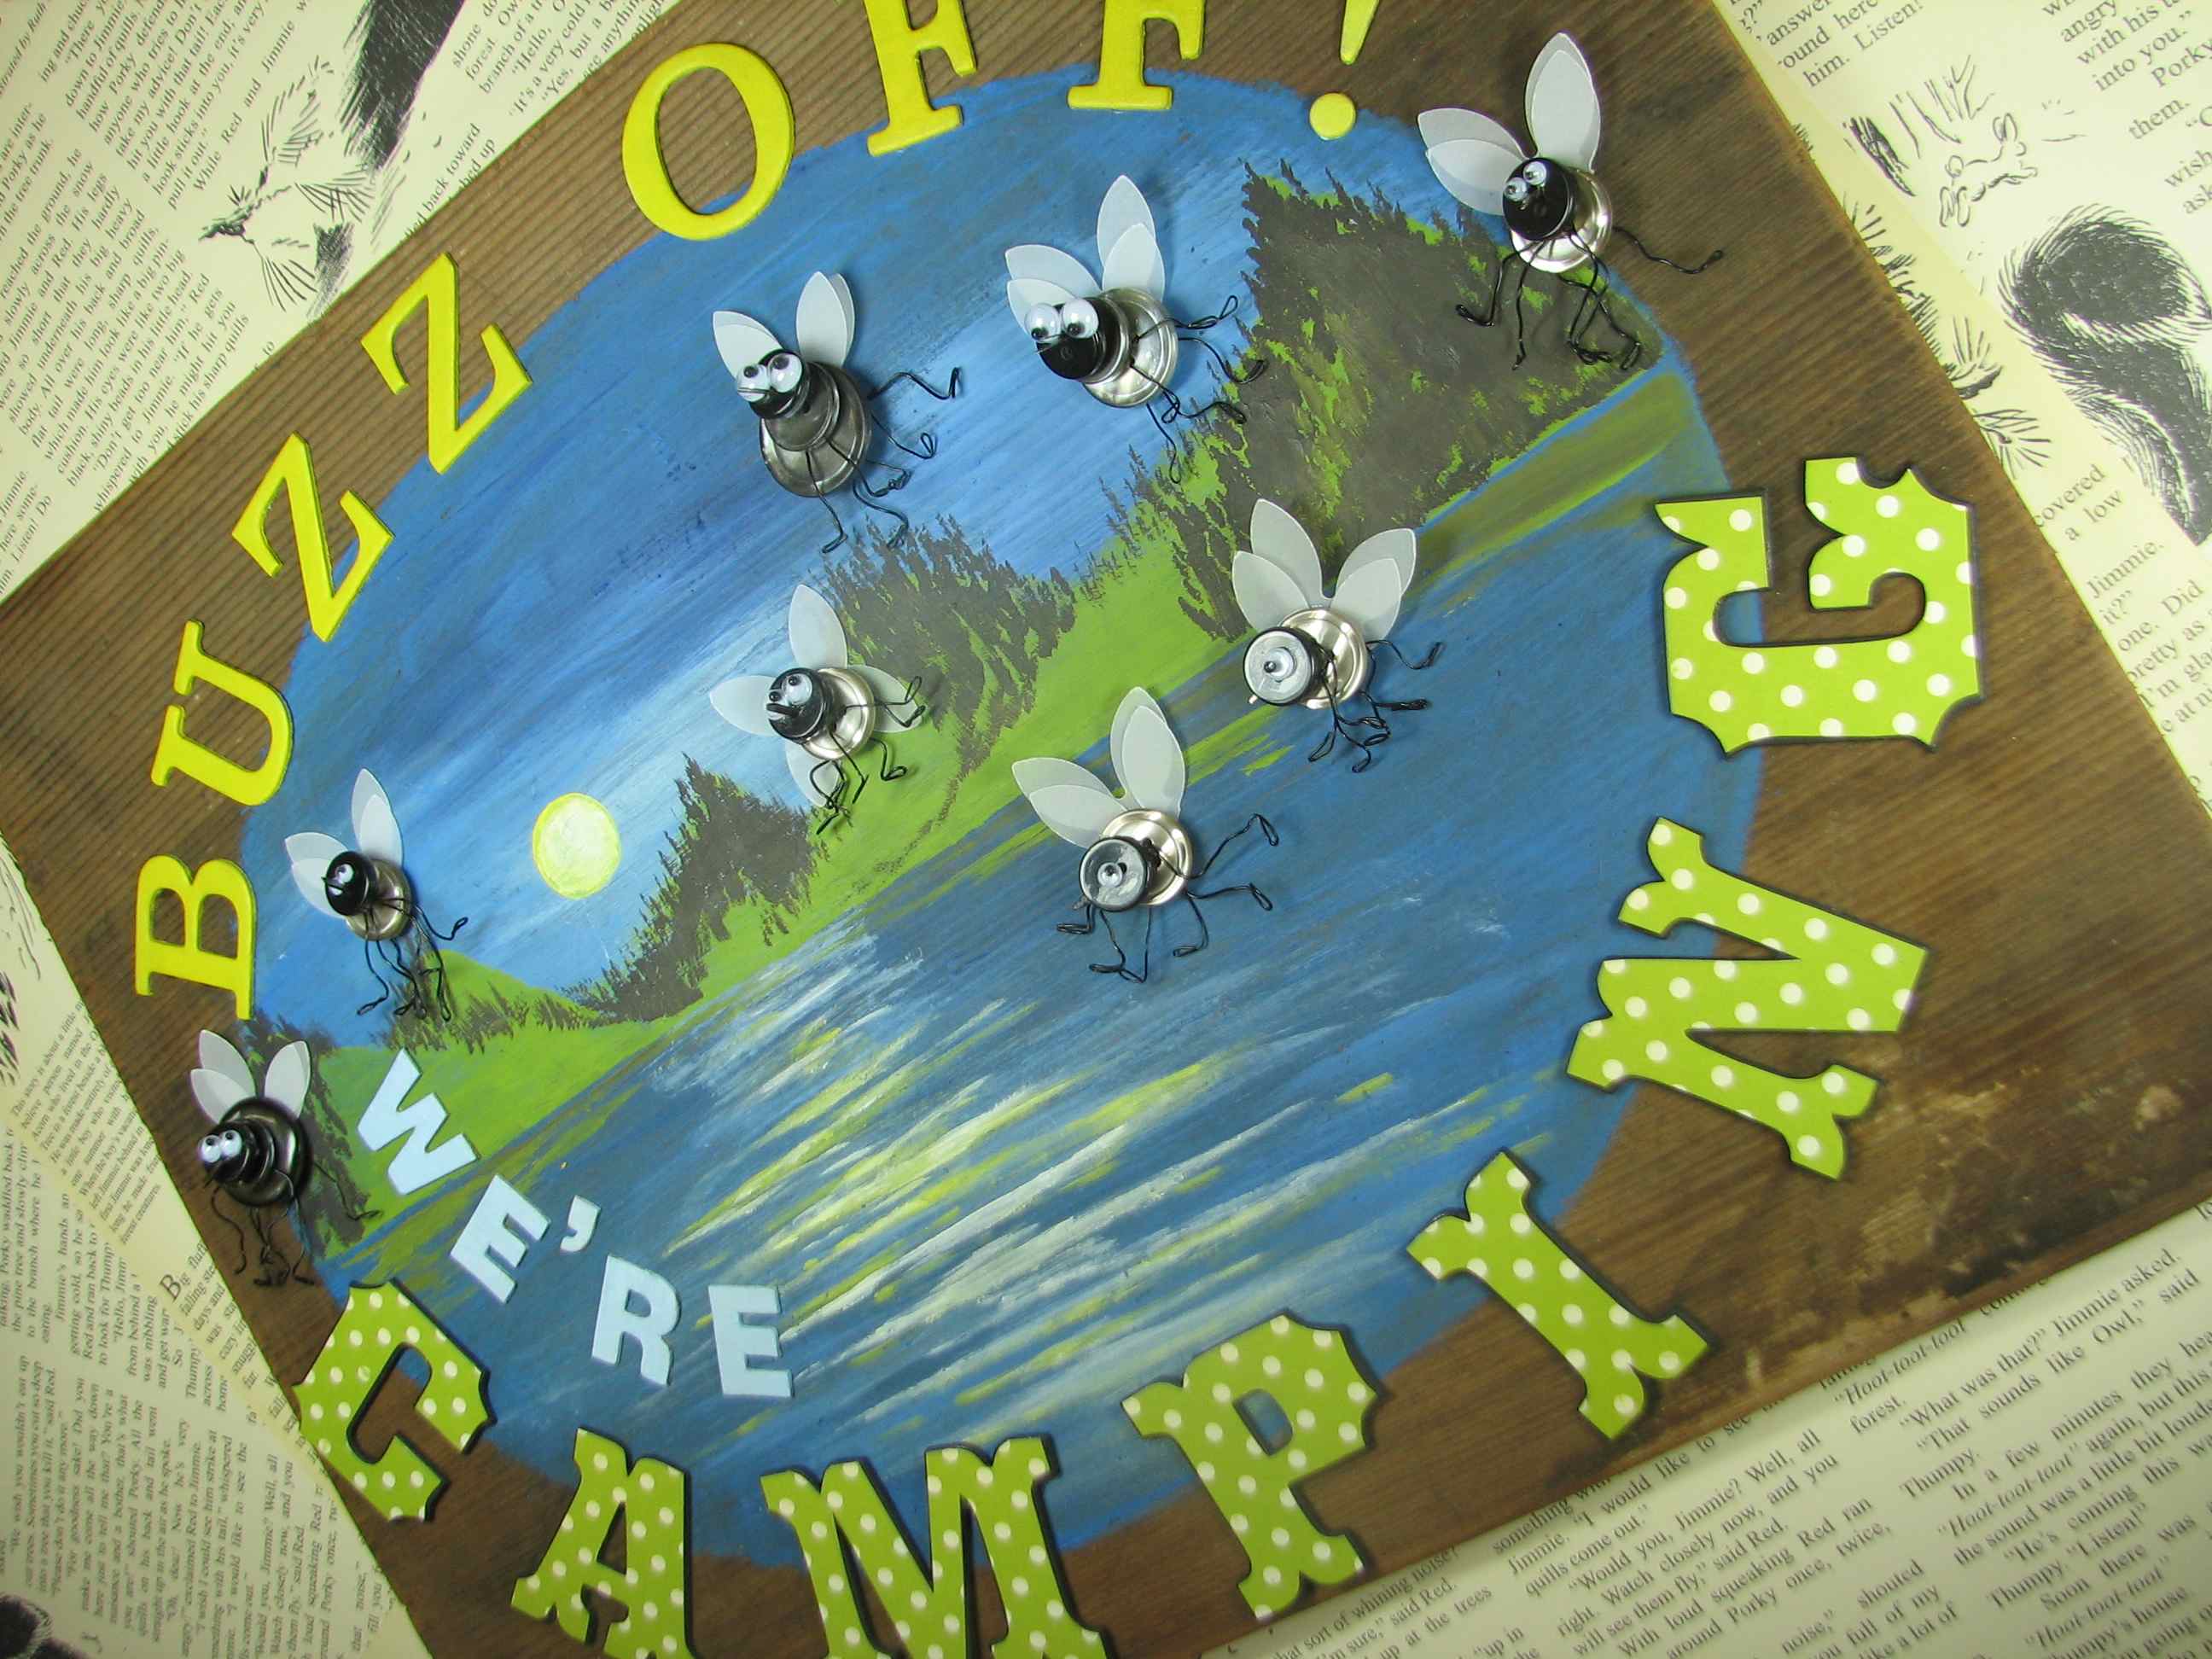
It’s the season when our plans shift to wide open spaces and the great outdoors! I just love CAMPING! Pack up the kids, the tents, chairs, granola bars… Camera, inner tube and….
The BUG spray!
The instructions for row 1 are up on the Fabric Party page here. There is a give away that includes buttons from Buttons Galore and More – the give away happens Monday morning!!

Here’s a special gift for Dad- a handmade frame with a photo of someone who loves him!


These quick and easy Button Bugs are a great solution to the “Mom, I’m bored” statement that we hear all Summer long.

We are pleased to announce that we are a sponsor in the Victoriana Quilt Designs Fabric Party!!
You can learn more about this great online party by clicking on the link: http://bit.ly/VQDFabricParty
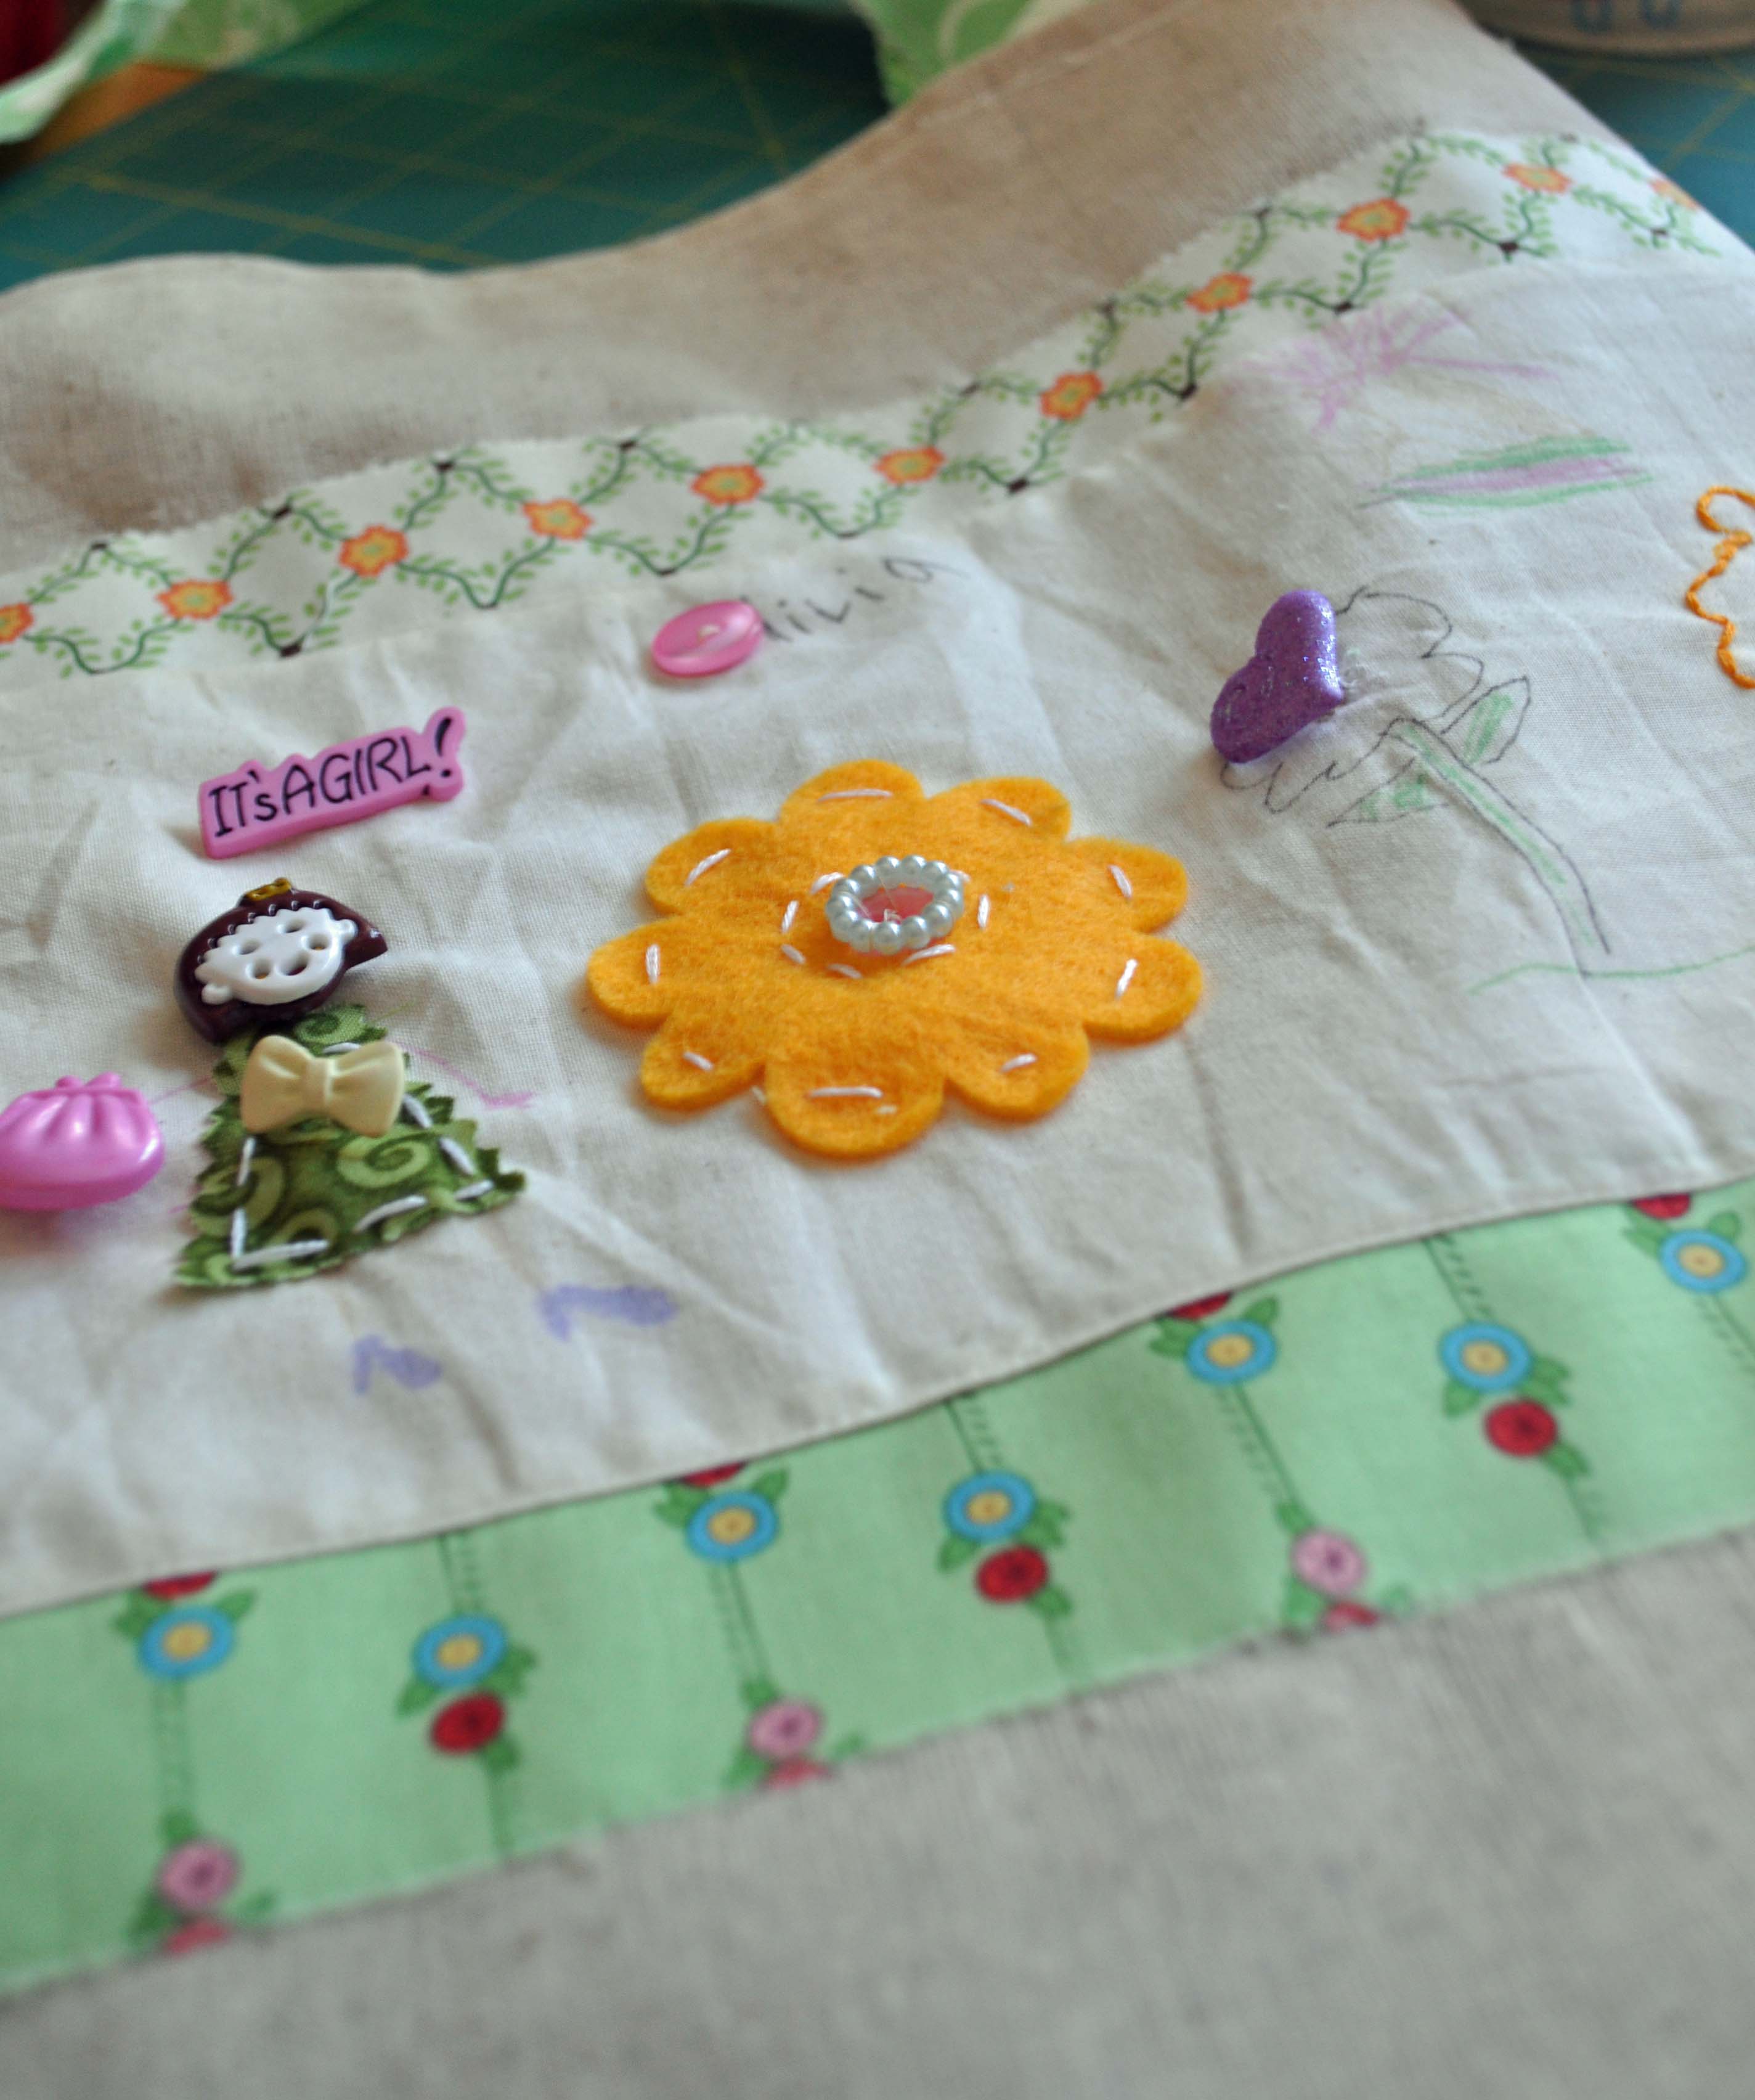
Do you remember how much you loved to sift through your mom, aunt, or grandmother’s button boxes? I still play with my buttons all the time, and I know I can always keep my five year old daughter busy with buttons. I recently came up with a project that takes button play beyond just looking at buttons, but also uses them as a creative tool. The end result is a darling little sampler of all my daughter’s favorite buttons and artwork. It’s truly an heirloom piece that will be cherished for years to come. Here’s how to make a button embroidery sampler with your child.

Aren’t these hand painted buttons from design team member Laura Bray adorable? Visit her blog Katydiddys and see how you can make some for yourself!
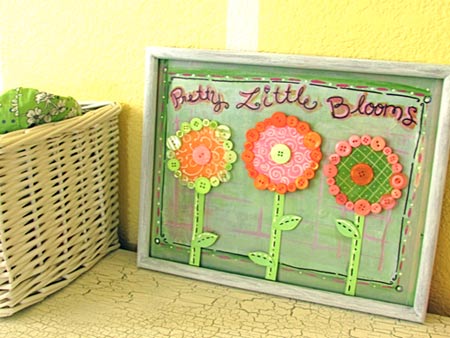
This project can be made using a variety of recycled materials combined with your favorite pretty buttons. Add a touch of color to your decor for a flower garden inspiration all year long. I created this project to accent pieces in my daughter’s bedroom, but you can adapt it to fit where ever you’d like some “pretty little blooms”.
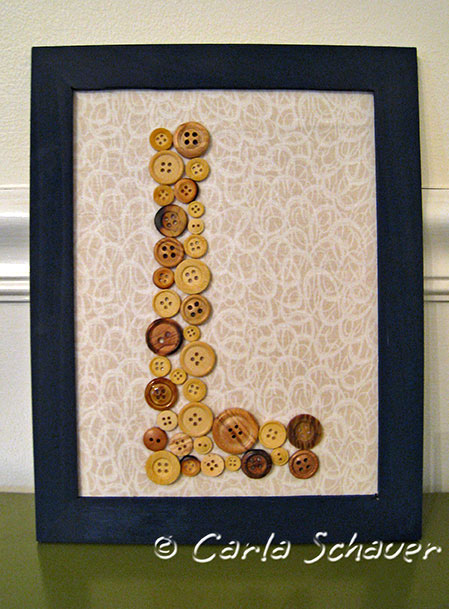
Add texture and detail to a simple framed monogram using a variety of wood buttons from the Haberdashery collection. These buttons are a gorgeous mix of natural wood colors, and I couldn’t resist showcasing them in a project that let their beauty take center stage.
In order to play up the texture of the wood, I covered chipboard with neutral fabric to create a background that didn’t compete with the wood buttons. The buttons were then arranged to make the monogram, and glued into place using fabric adhesive (Beacon Fabri-Tac). A simple inexpensive Ikea wood frame painted navy gives just enough color to draw the eye to the project.
On a wall or on a table, this monogram is a great way to easily personalize a room.
Thanks for stopping by!

Thank You Card and Party Favor
Read more about making this adorable Thank You Card and Party Favor project on 365 Days of Crafts.
Recently, my son participated in an Invention Convention- and when he didn’t win a prize, I could tell he took it kinda hard. So I whipped up this little card to encourage him to “Shine On” and not get discouraged.
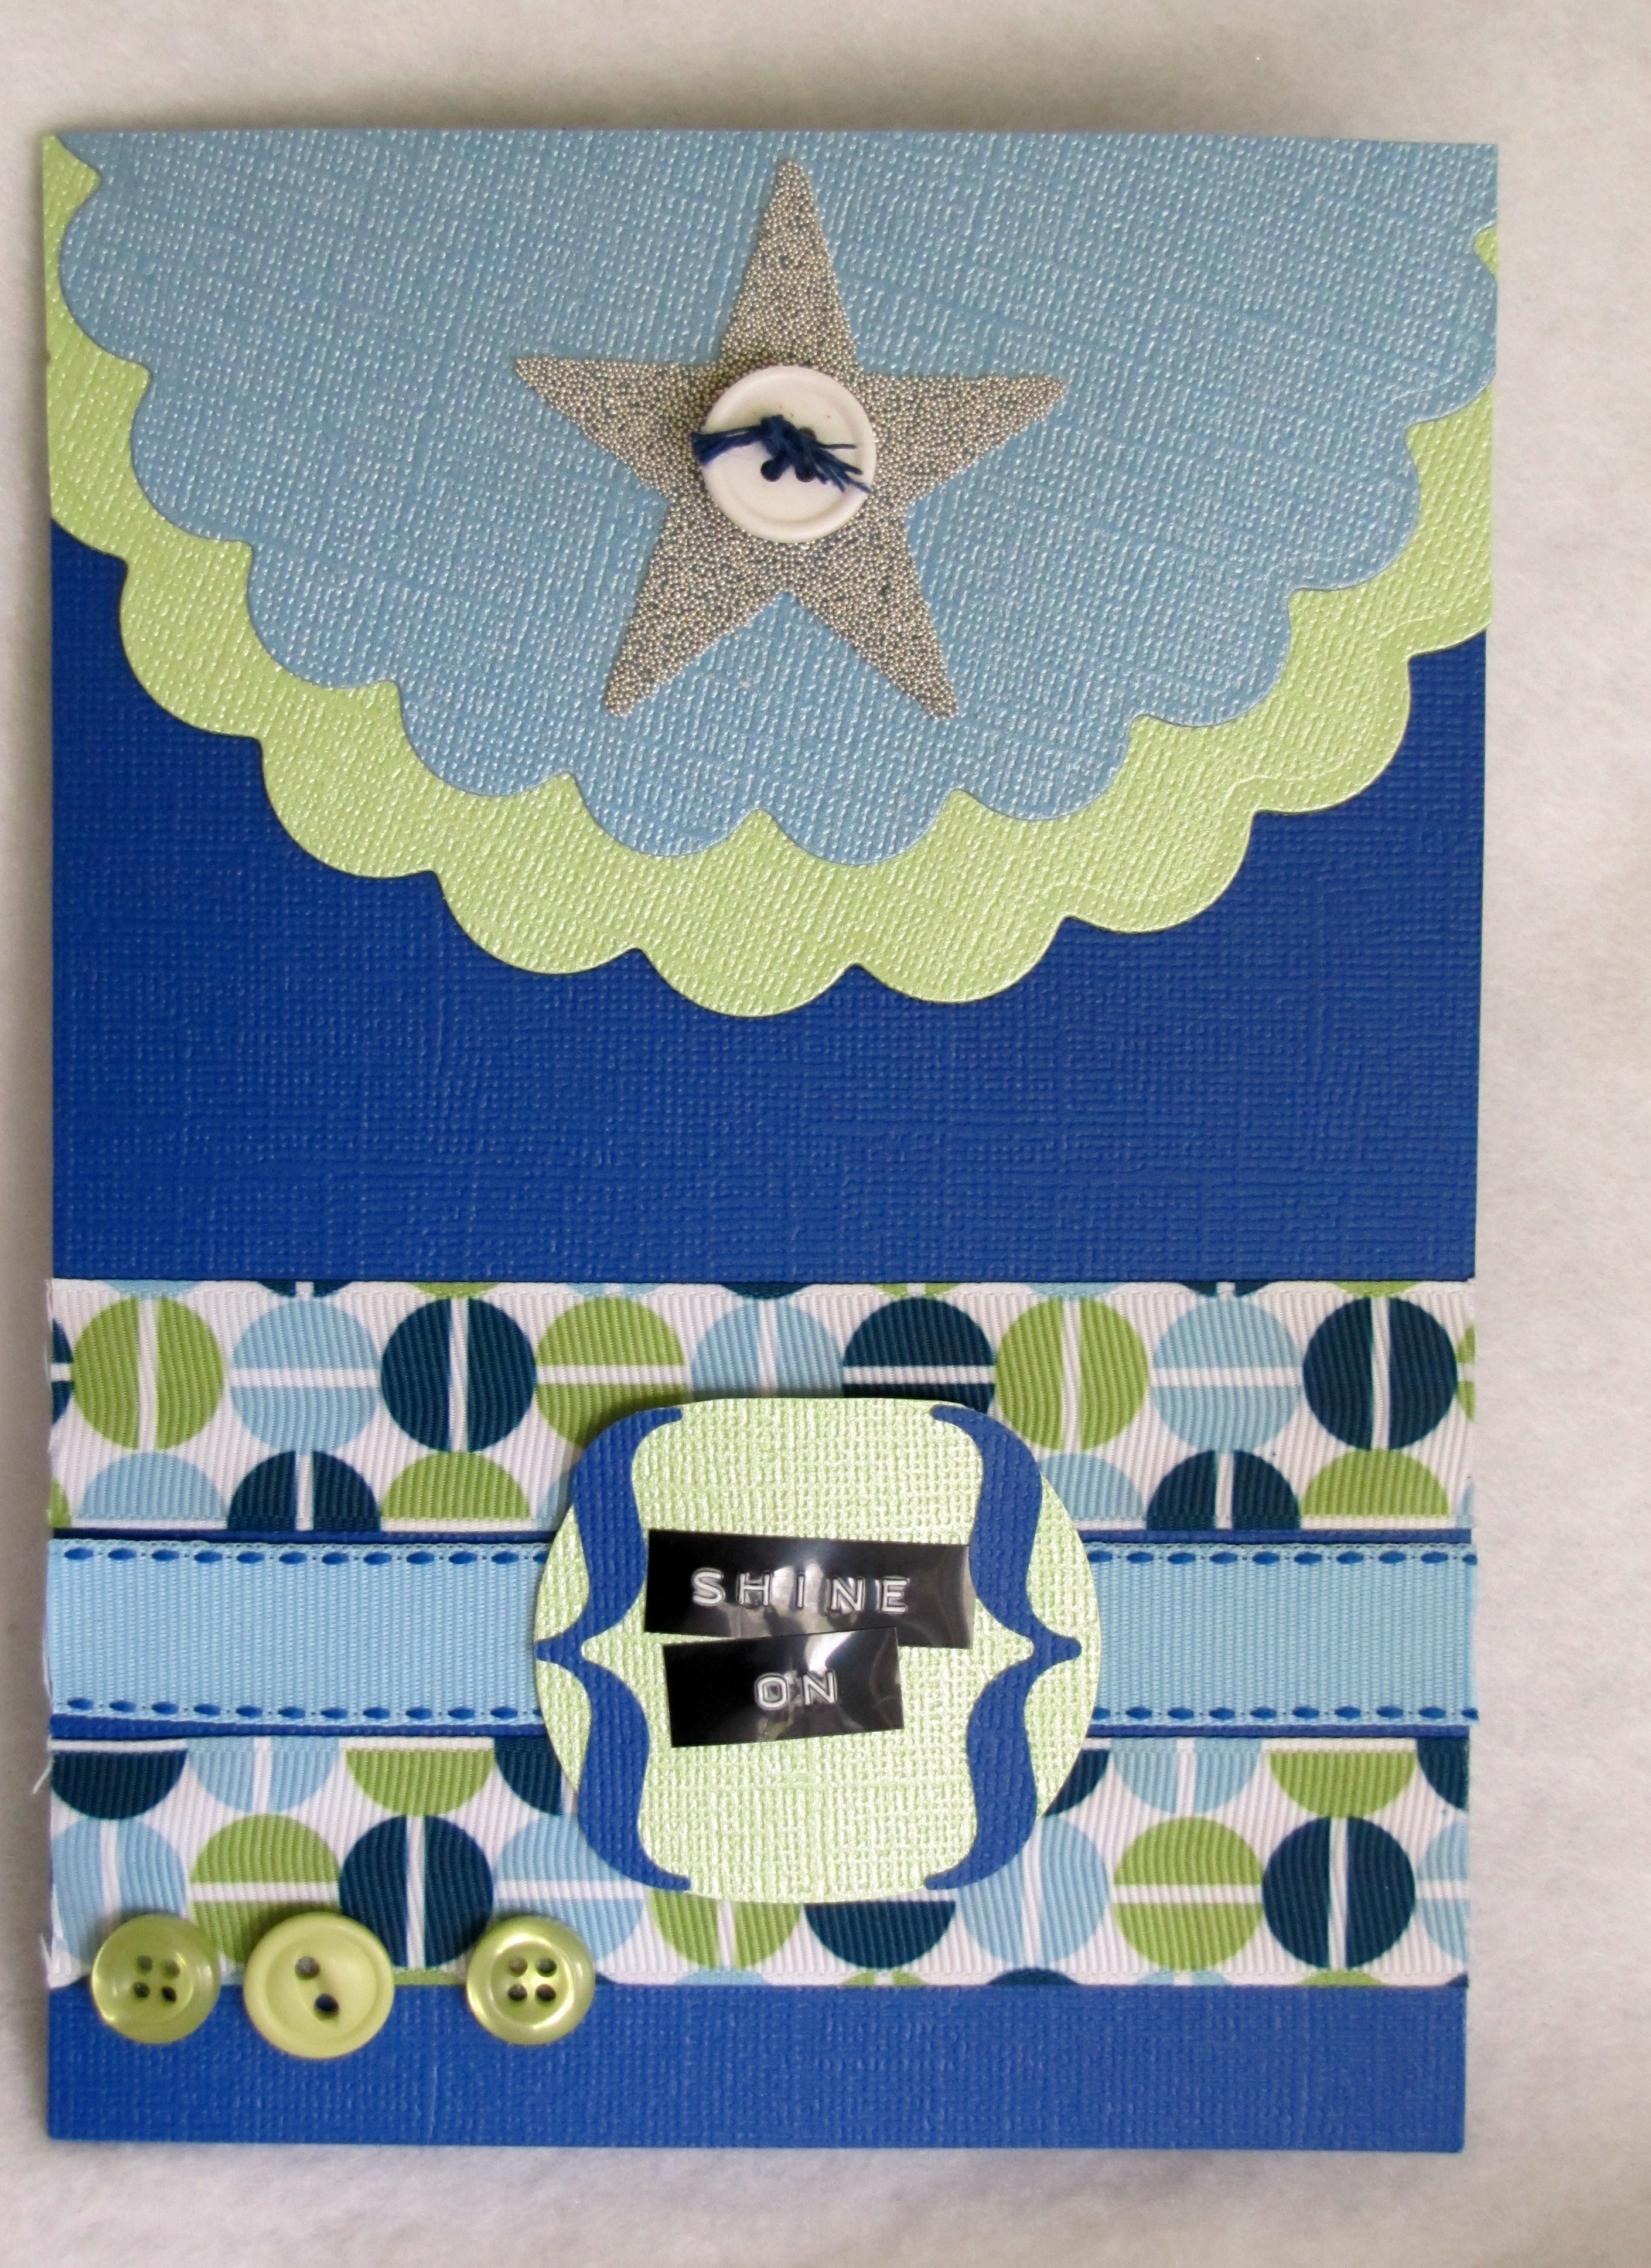
To make it, I cut 2 circles from Core’Dinations cardstock Gemstones Collection and mounted them at the top of the card. Then I applied a Wacky Tacky Tape star shape and sprinkled silver microbeads on top. I finished it off with a white button threaded with a little embroidery floss, held in place with a mini Glue Dot.
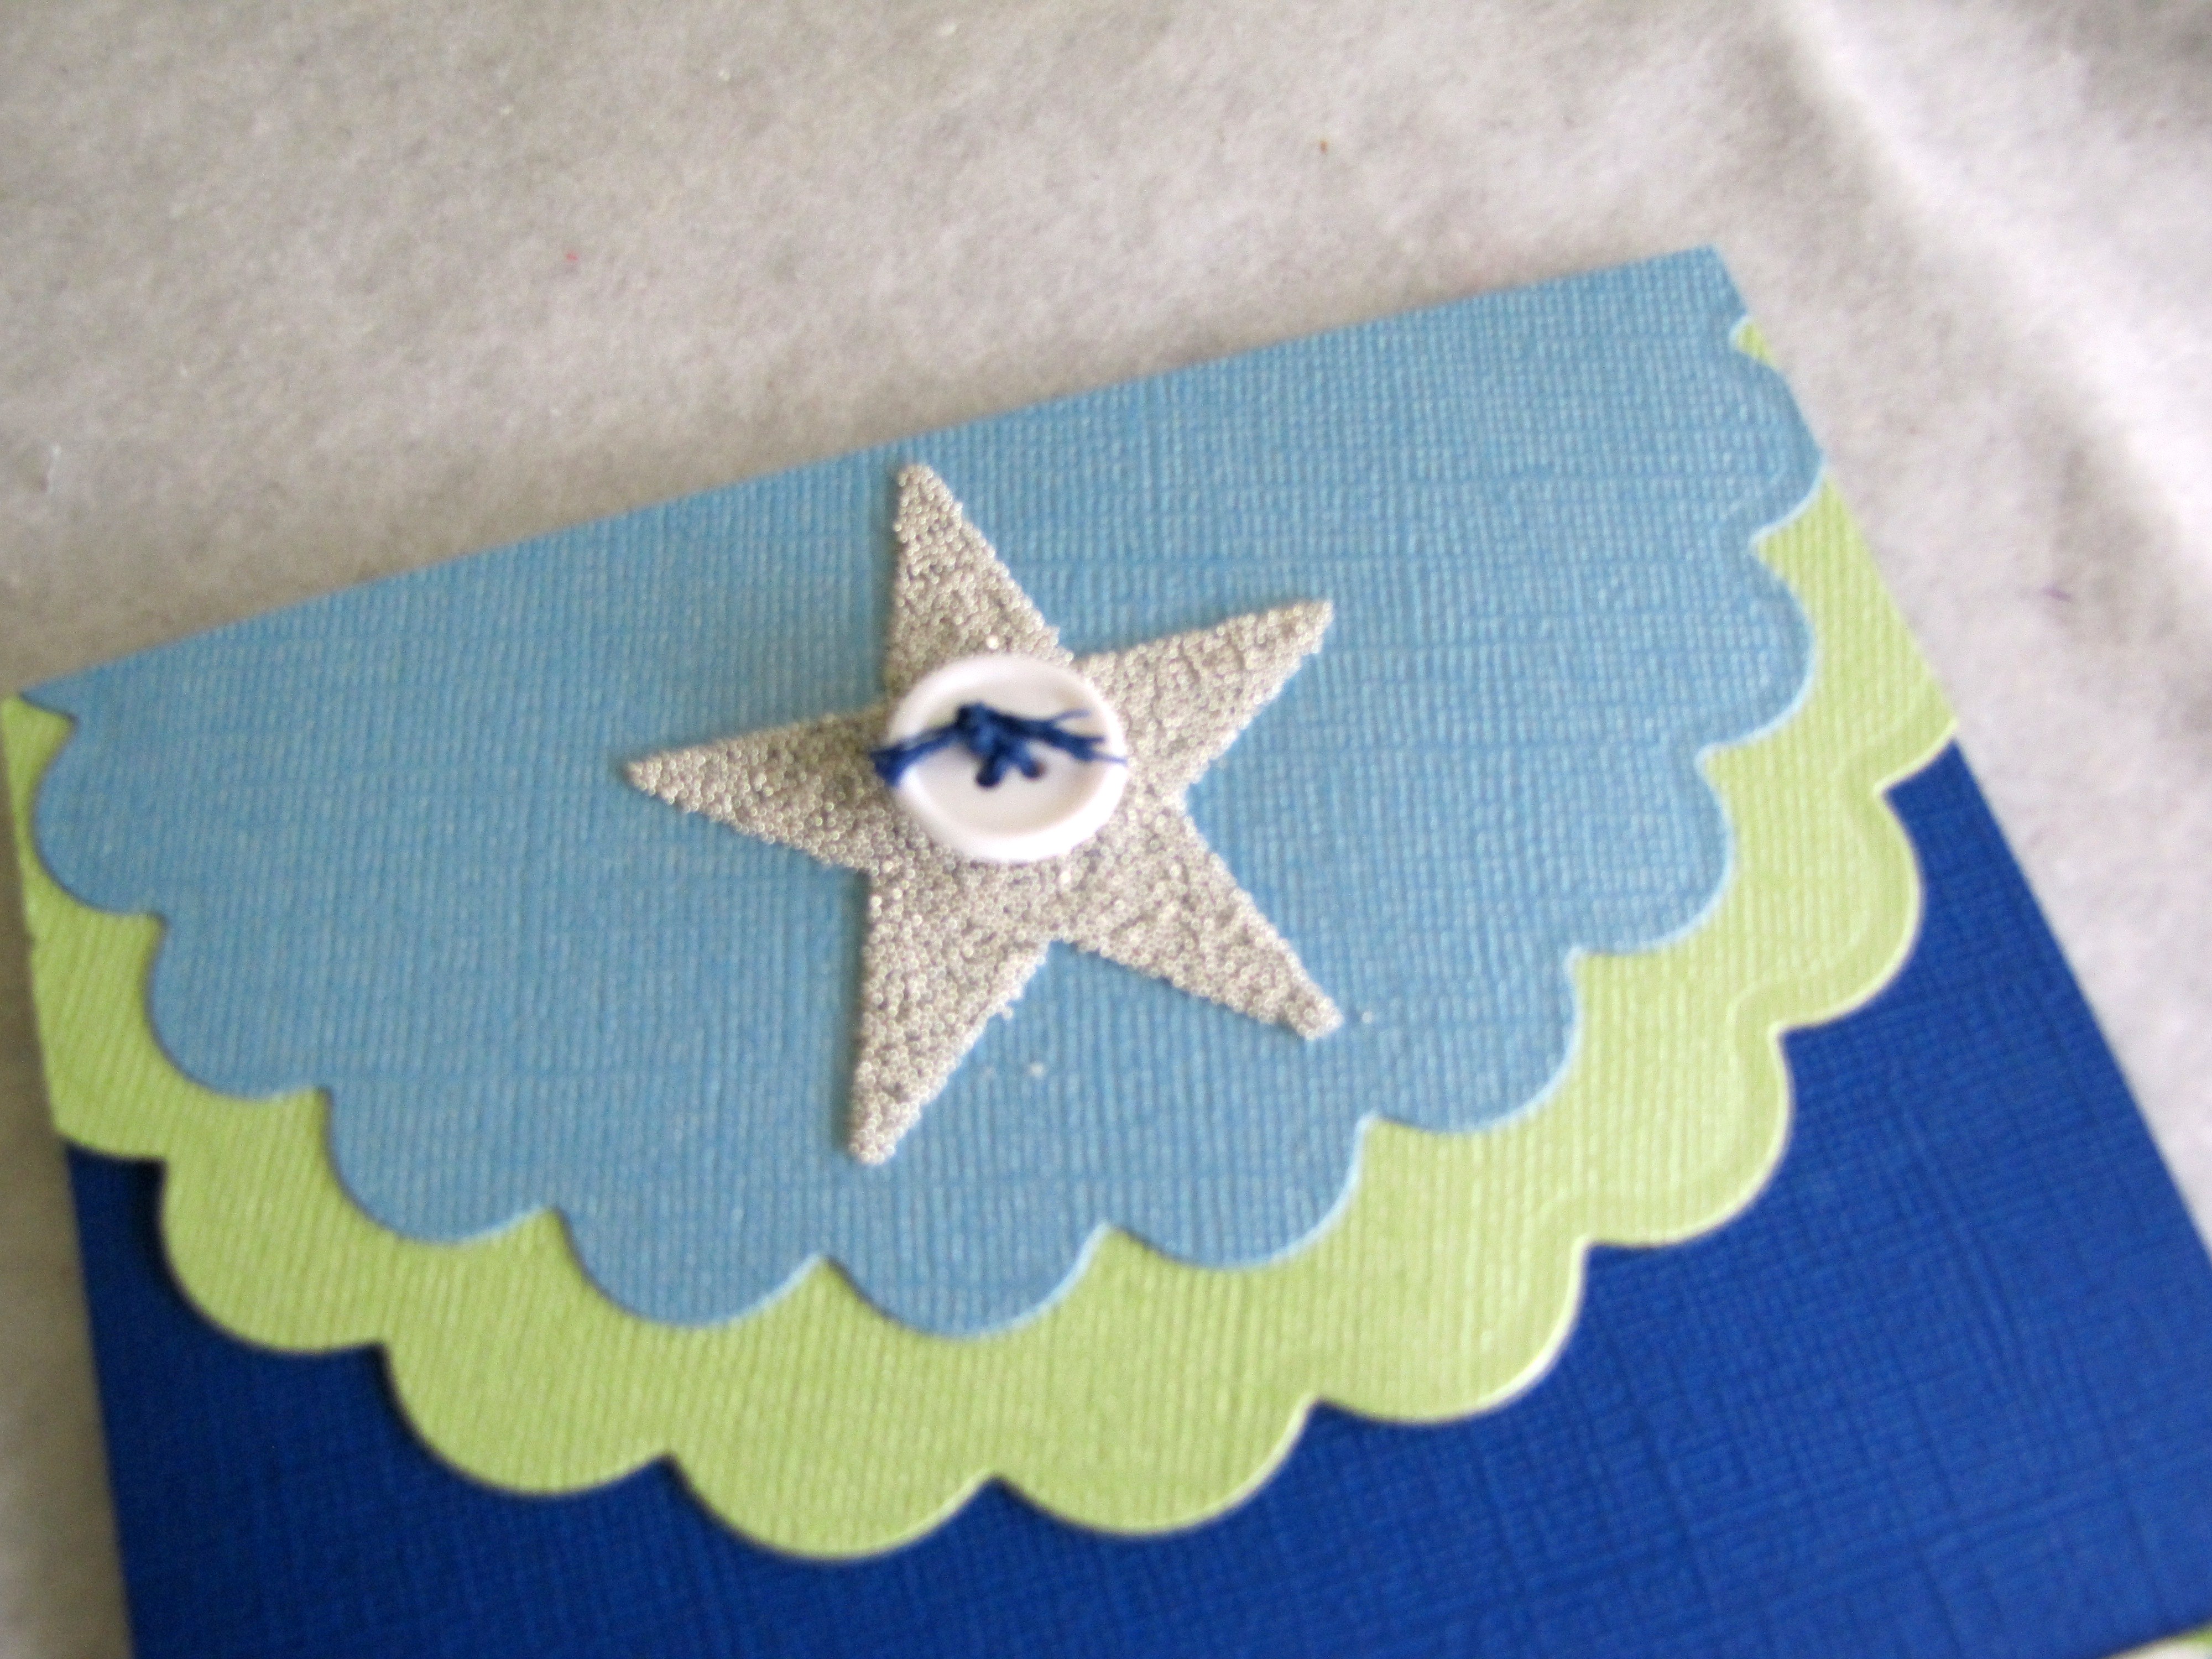
To create the texture at the bottom, I “stacked” three rows of patterned and solid ribbon from the Retro Blue Button & Ribbons collection and adhered it with Zip Dry. I made a text block and brackets with more cardstock and used my trusty Dymo Label Maker to create the words. A few more coordinating buttons finished off my design.
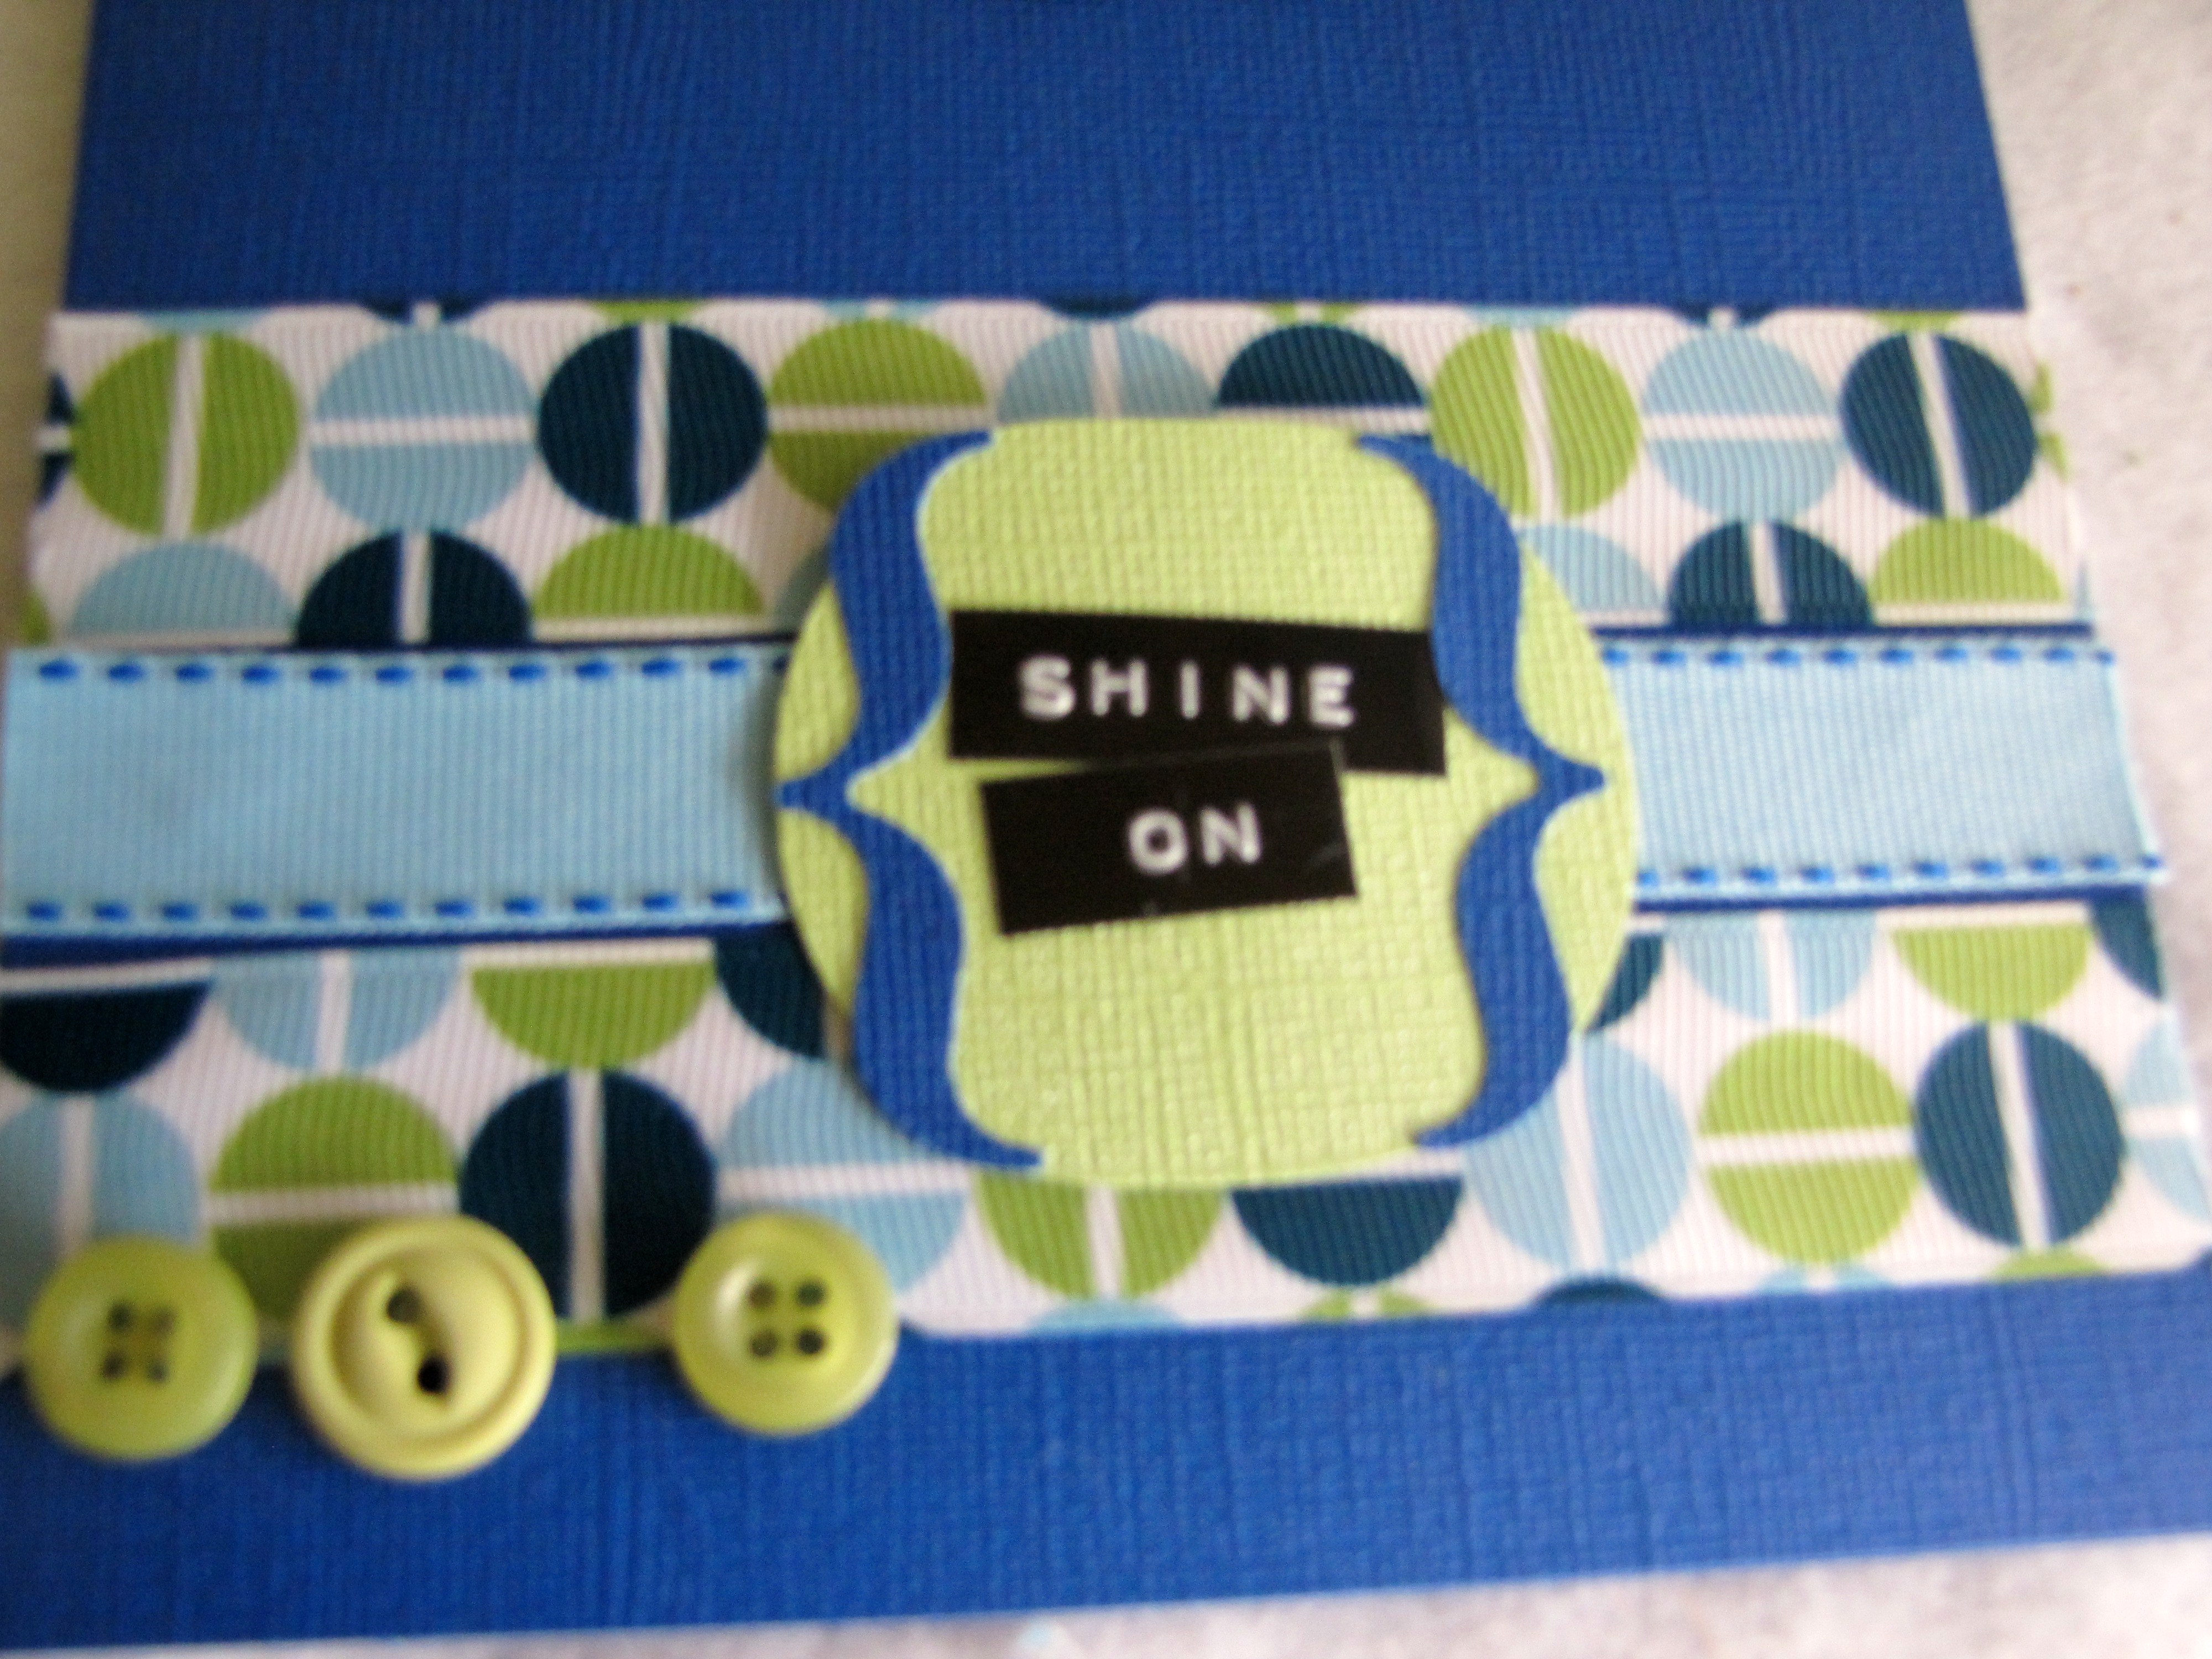
You could also use the sentiment, "Reach High."
I really love this color scheme, and it would be lovely for either a boy or a girl…and could easily stand in for a graduation card, too! Now wouldn’t it be a lovely card to send to someone who needs a little “pick-me-up?”
To see another card using another color scheme and a flower/ladybug motif, visit my blog, CraftTestDummies.com.
Patriotic Card Idea
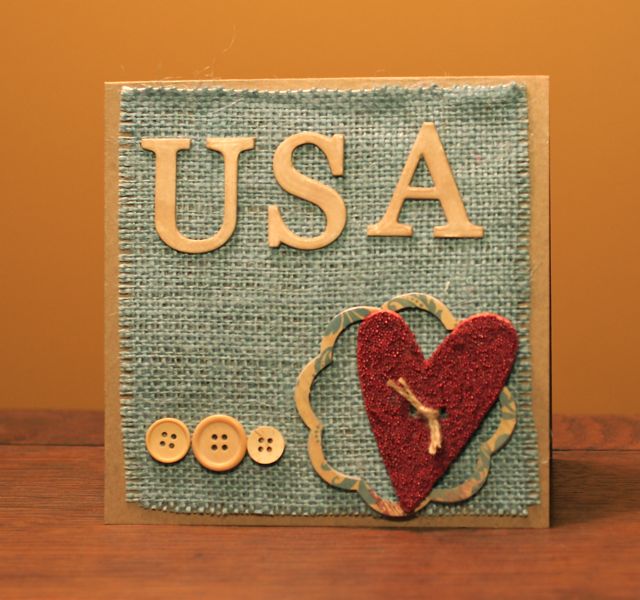
Patriotic Card with Burlap
The traditional patriotic colors on this card get a warm vintage feel with softer colors and the use of burlap. Using wood buttons instead of white buttons also adds to the warm feel. The micro-beads give it a touch of shimmer. The card is a 6×6 with a craft card stock base.
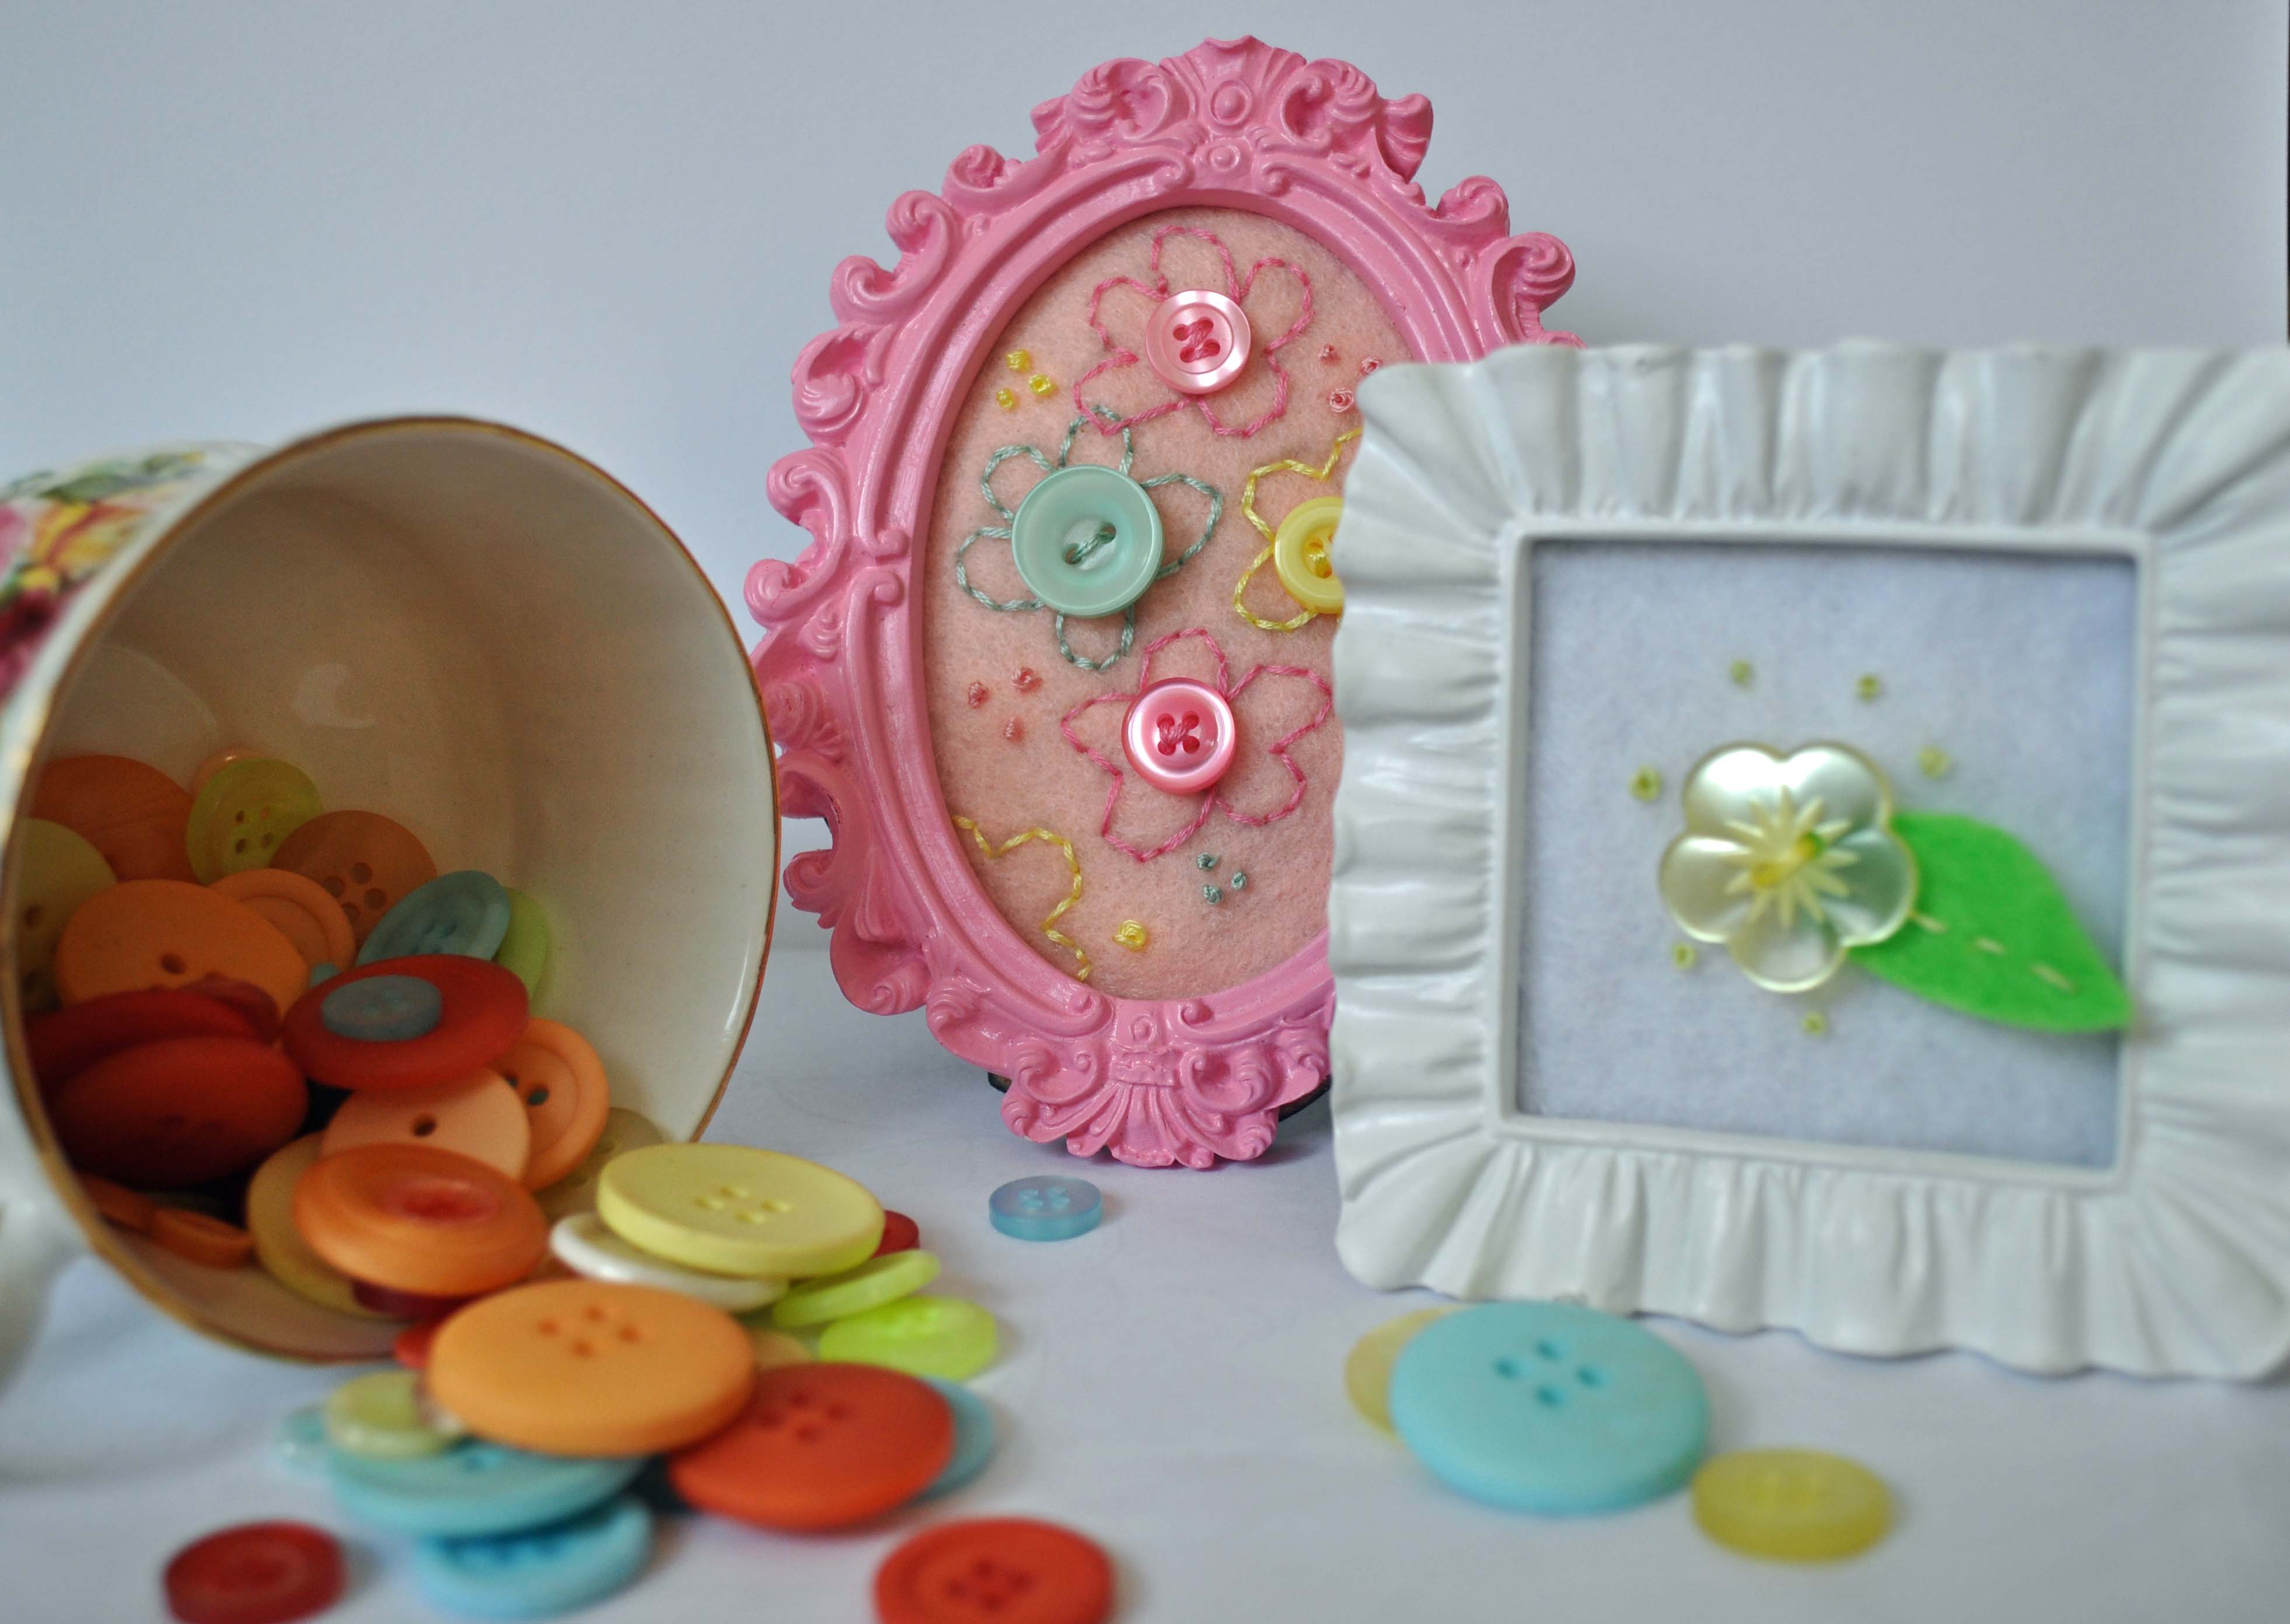
I love buttons and don’t want to just hide them in a box somewhere. I showcase some of my favorite buttons by creating little pieces of art. This is a super quick project that is great for a beginner button fan!

Button Earrings
Here is a pair of earrings I made as a last minute, I’m walking out the door right now, kind of thing.

Monochromatic Button Pin and Button Gift Box
Working with monochromatic color schemes is a quick and easy way to design a project. You don’t have to worry about the colors not coordinating.
This pin is going to be for Mother’s Day. My mom sent me a link to the dress she is wearing and I thought the pin would be a great surprise. If I know my mom well and I think I do, she will also save the box and re-use it. If she does that will make me happy.

Beachy Button Bracelet Set
These blue buttons caught my eye right away. I love the beach and these buttons have the color and shimmer of the ocean on a summer day. They are aptly named “Sea Glass”. I have a big container of natural beads left over from some beachy home décor projects I made last year, and they seemed a perfect complement to the “Sea Glass” buttons. With the addition of some copper findings and chain, I had the supplies for my bracelet.
For my first blog post here on Buttons Galore… I chose my new obsession. Art quilting. I can eat, sleep and breathe it (and I used to be a paper girl ). It’s fun to go out of your comfort zone to test your creativity and try something new! Give it a try.

Aren’t these adoable? I think they would look great at Easter brunch place settings or mixed in with other decor down the center of a Easter dinner table.
Click the link to find out how to make these super cute Button Adorned Easter Egg decorations.
Oh! And if you like these eggs you must check out Lynda’s other egg craft; Easter Sewing Basket.
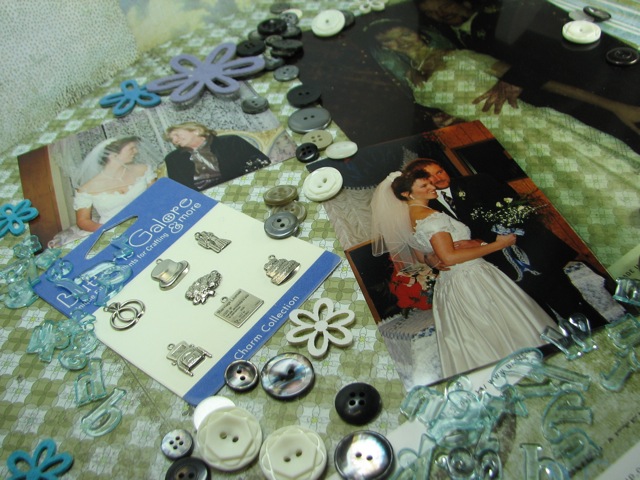
Scrapbooking

A beloved, but horribly neglected department of my personal crafty output.
What follows is a fun and crafty filled post that helped bring my wedding memories into much more beautiful light and will, hopefully, inspire you to get your craft on as well.

This is a simple votive favor I made for a baby shower but it could easily be transformed into a wedding reception/shower favor by using buttons in white or in the wedding colors.
Simply glue buttons on the bottom 1/4 of a straight sided votive candle holder. Fill with small gems and place a battery operated candle inside.
Of course, you can use a real candle but most halls, churches and other public spaces won’t allow an open flame. Check with the venue where you are holding the event prior to choosing a real candle.
Yo Yos and buttons seem to be made for one another. I recently made a few projects with yo yos using the Clover Yo Yo makers and our beautiful buttons.

Yo Yo button headband
I do have a little confession to make… I had never made a yo yo before. True story. But the yo yo maker was soooo easy and if I had a yo yo that didn’t look “just right” adding a button to it made it look fine. My good yo yos looked even better with a button.
I covered the headband above with fabric and then covered the seam with some grosgrain ribbon. Finally I attached a yo yo made with coordinating fabric and topped it off with a button. Super cute hair accessory in about 20 minutes. Seriously.
Look how cute the minis look on a barrette!!
I love this mini tote with a doily, yo yo and button. Wouldn’t it make a great gift bag?
Yo Yos and Buttons go together like peanut butter and jelly. Don’t you think?
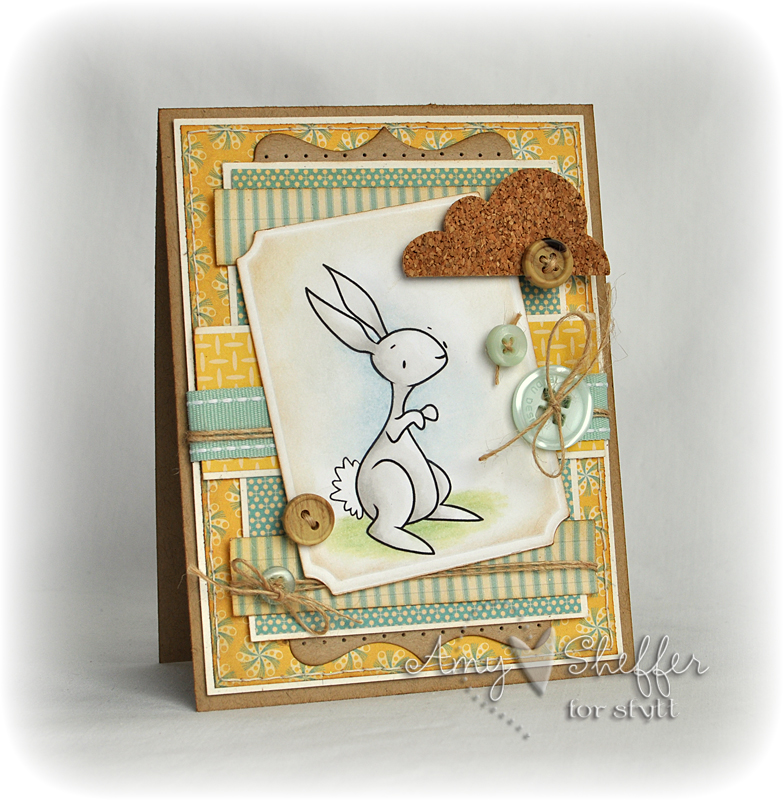
Isn’t this little bunny simply adorable? This card is by Amy over at Pickled Paper Designs. She has a serious talent for card making. You really should check out her blog. Even if you don’t think you are into card making I’m sure her beautiful work will make you want to make a card or two!
Oh! And to learn more about how to make this card visit Amy here.

Button bracelet
Here is a video I made a little while back showing how to use buttons to make an adorable charm bracelet. I hope you like it!

Here is a fabulous button craft project from Think Crafts created by my wonderfully crafty friend Amy of Mod Podge Rocks. I think it would be super in a kids room. Don’t you?
You can visit the tutorial to make a button embellished coat rack of your own here. And while you are out surfing on the web stop by Mod Podge Rocks here and say “HELLO” to Amy.
Did your little one just tell you that you need to make party favors for school on St Patricks day? No worries, Laura Kelly has you covered.
Cut a large shamrock out of dark green felt and a smaller shamrock out of light green felt. Laura used pinking shears to give her shamrock a decorative edge.
Sew buttons (or glue them) onto the light green felt and then glue the smaller shamrock onto the larger one.
Attach the finished shamrock to a ribbon or whatever you might have on hand and attach it to the treat bag.
Isn’t this adorable? What is super impressive is that all of the buttons are SEWN on! The stitched “lucky” is just the icing on the cake. Super cute!
Please visit the Sweet Little Smoothie blog for the complete tutorial.

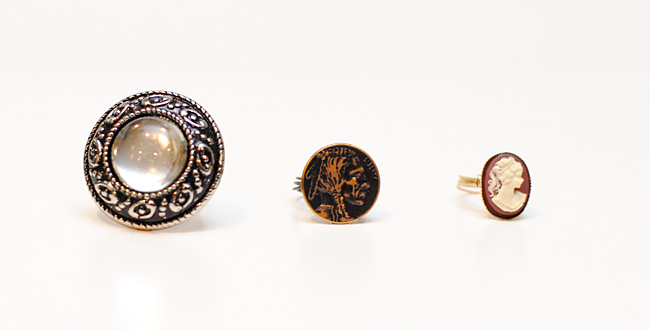


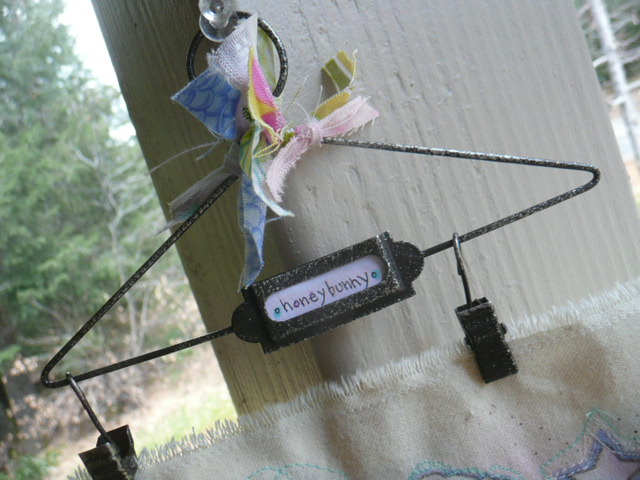