
Nothing beats a cute holiday project that everyone can make together. With Independence day fast approaching, here is a simple project the whole family can enjoy.

Nothing beats a cute holiday project that everyone can make together. With Independence day fast approaching, here is a simple project the whole family can enjoy.
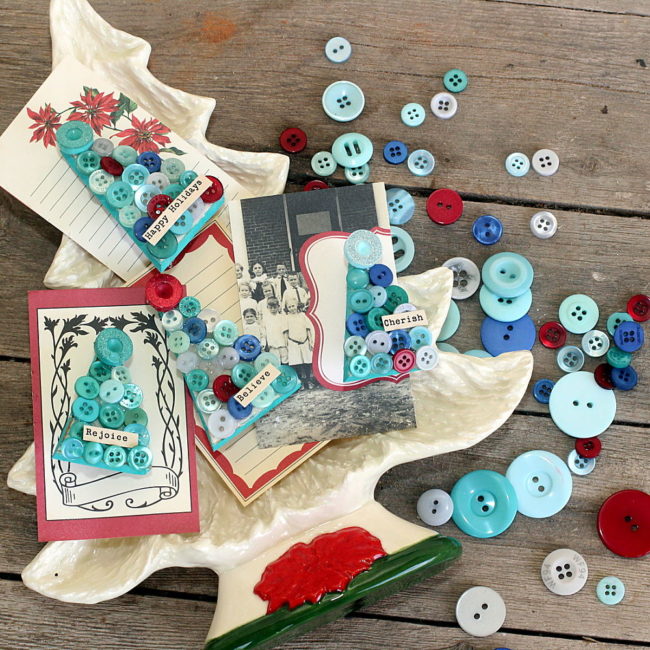
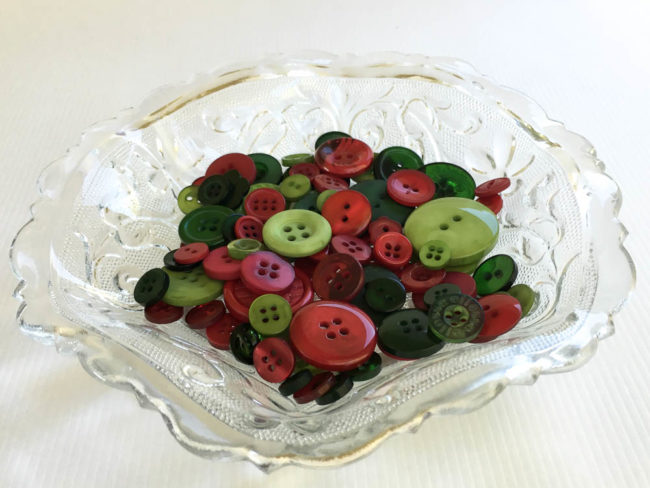
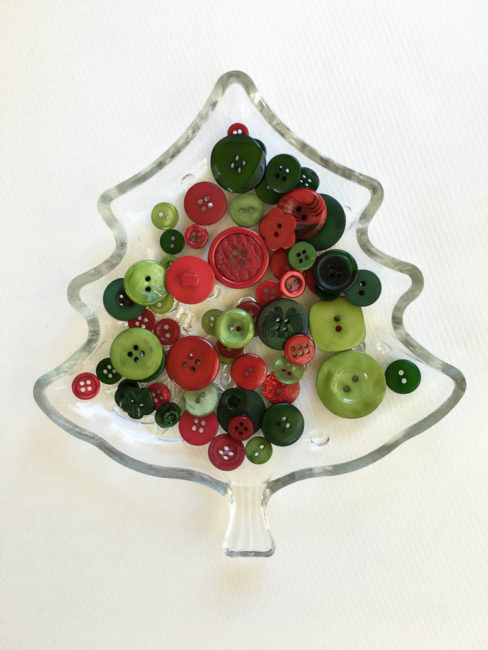
Hi, it’s Connie here today with the Buttons Galore & More design team sharing some really cute, wintery Christmas tree pins. These pins were created using a beautiful mix of buttons called “Winter Wonderland“. They are beautiful and perfect for this project! Continue Reading →
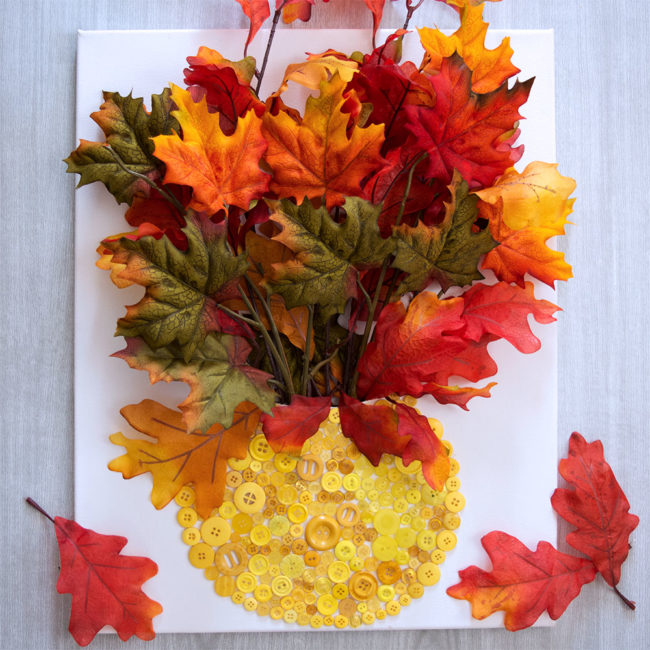
Autumn is one of my very favorite seasons. I love the cooler (but not cold) temperatures and the gorgeous bright colors that appear in nature. This Button Vase Fall Canvas wall art is the perfect project when you’re short on table space but want to add those beautiful fall colors to your home.
Use a pencil to draw (or trace) a simple vase shape to the bottom half of your blank 16×20 canvas.
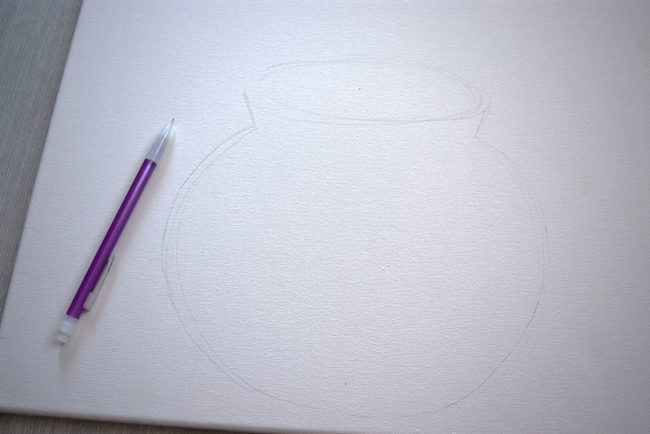
It doesn’t need to be perfect, just a rough outline so that you know where to place the buttons for the button vase. The buttons will cover up any pencil marks. I drew a round vase, but you can make it any shape you want. Whichever shape you use, make sure to keep it on one end of the canvas.
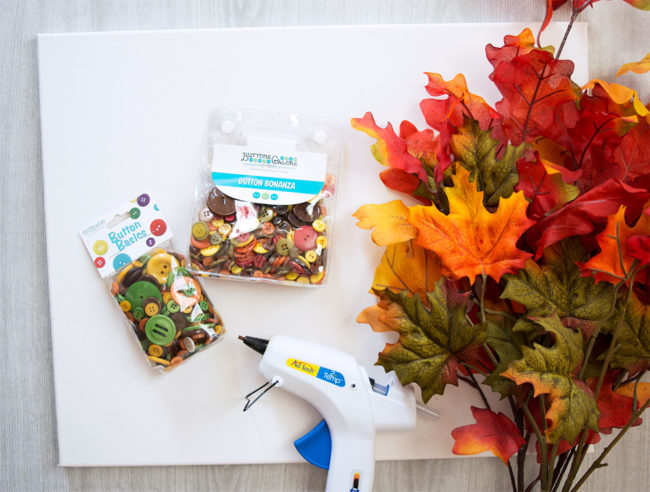
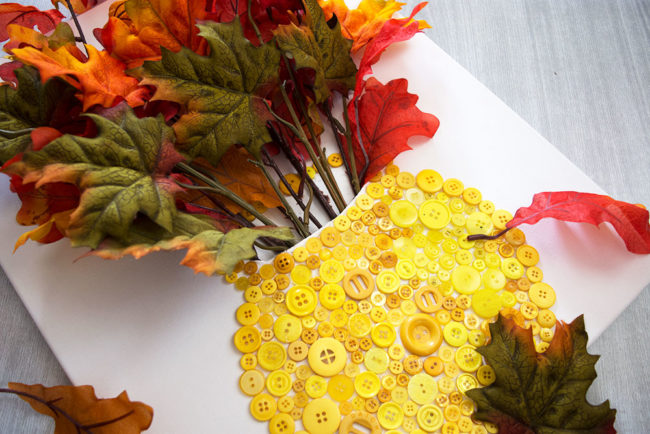
Glue buttons to the outlined vase you drew on the canvas. I used a hot glue gun to attach the buttons.
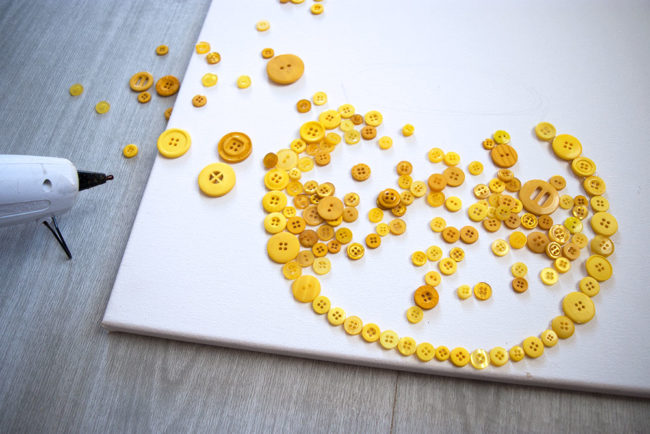
Because I was using Silk Autumn Leaves in my vase with beautiful red and orange colors, I made my vase Yellow to complement them. I used every yellow button in the Harvest and Fall Festival button sets to fill my round yellow vase. I liked that the shades of yellow in these two sets were in line with the yellow you’d actually see on fall leaves.
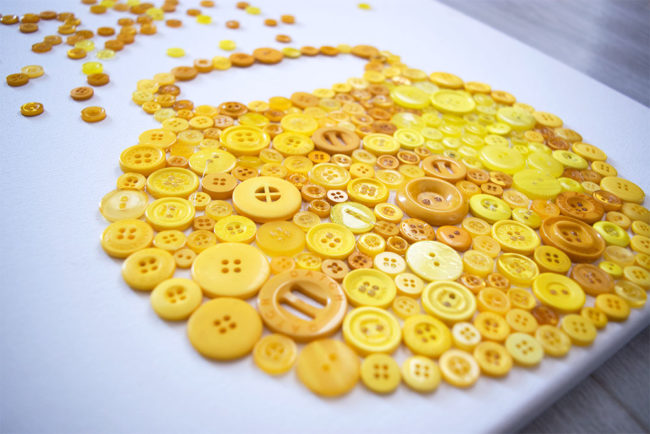
Don’t glue buttons inside the mouth part of the vase at the top but fill the rest of the vase.
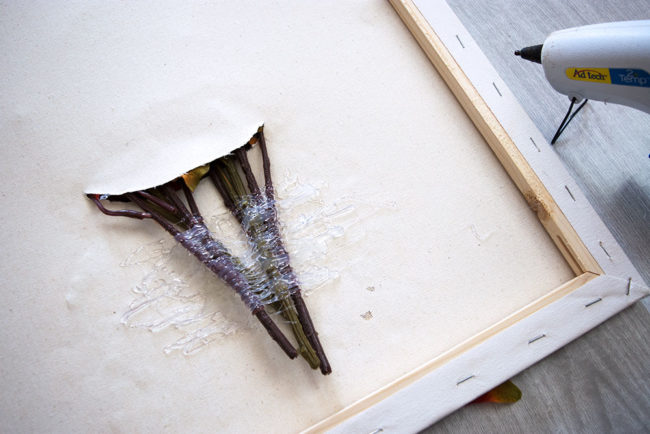
Use a sharp craft knife to cut a line in the canvas just above the buttons in the mouth of the vase.
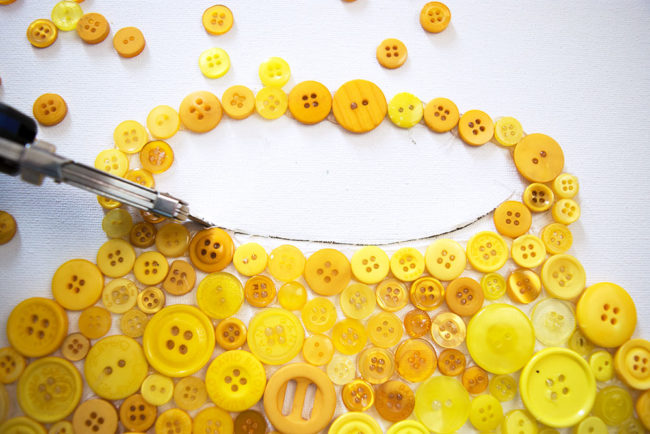
Insert your Autumn Silk Florals or Leaves through the hole in the canvas. Arrange them however you like. I find that the canvas vase looks best when it’s full. I used four Silk Leaf stems to fill my vase.
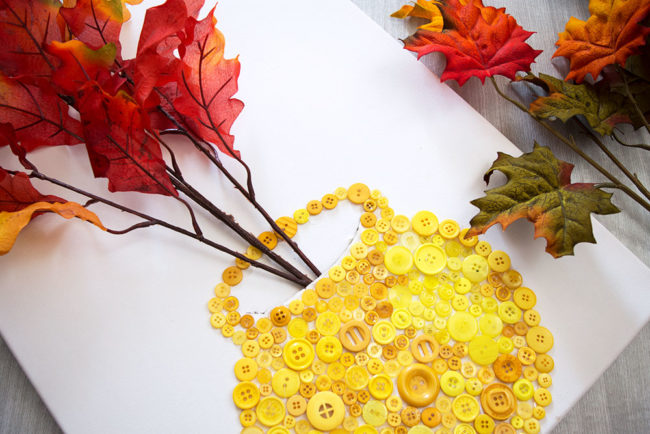
Turn your canvas over, and use hot glue to secure the stems in place for added stability. I used an entire small glue stick to fix my stems in place.
Use single leaves to fill in any blank spaces or gaps at the base of the stems. Secure them in place with hot glue.
If you have some unruly leaves on the stems that aren’t laying quite right, a dot of hot glue can help secure them to the canvas in a more pleasing way.
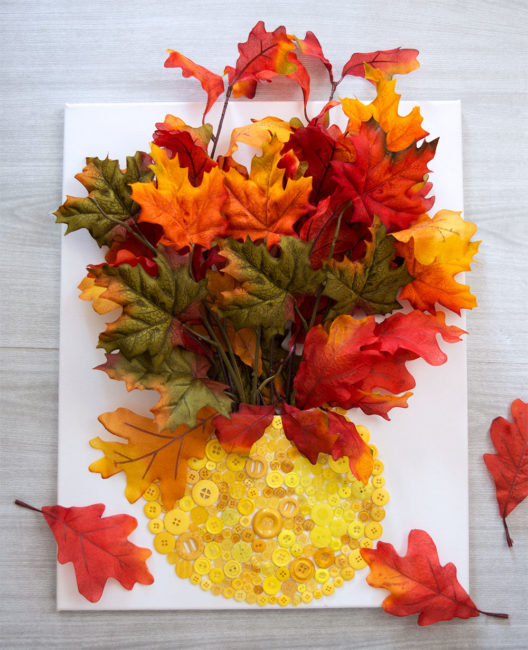
Hang your canvas on the wall, or prop it up on a table for a beautiful bright pop of autumn colors! I think that I will take a slightly smaller canvas and use the red buttons in the Fall Festival and Harvest button packs to make a smaller red vase with some pretty silk sunflowers! The pair will look great together with my fall decor. The possibilities are endless if you just change the color of the buttons for your vase to complement the flowers or leaves you have! Happy Fall Crafting!
You can celebrate a little bit of Christmas in July by crafting this fun and easy Embroidery Hoop Christmas Card Holder. This simple craft is a great way to get your kids involved and teach them basic button sewing. It will look so cute on the wall holding your Christmas cards! You can customize it by changing the button shapes, or colors to suit your decor needs.

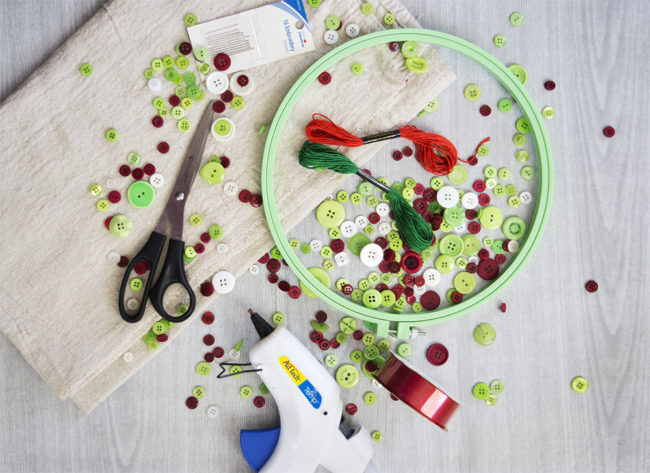
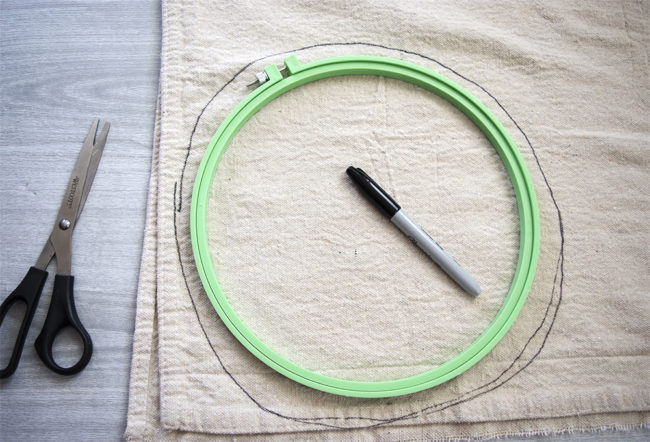
To start making your embroidery hoop Christmas card holder, lay your embroidery hoop on your fabric and trace around the outside edge of the hoop. Don’t trace right along the edge of the hoop, since you want the fabric circle to be bigger than the embroidery hoop. The circle doesn’t need to be perfect. You will need two fabric circles. I used a canvas drop cloth that I already had, but you could also use a cotton fabric or even burlap. You don’t want the fabric to have too much stretch though, since it needs to hold the weight of the buttons and the cards firmly.
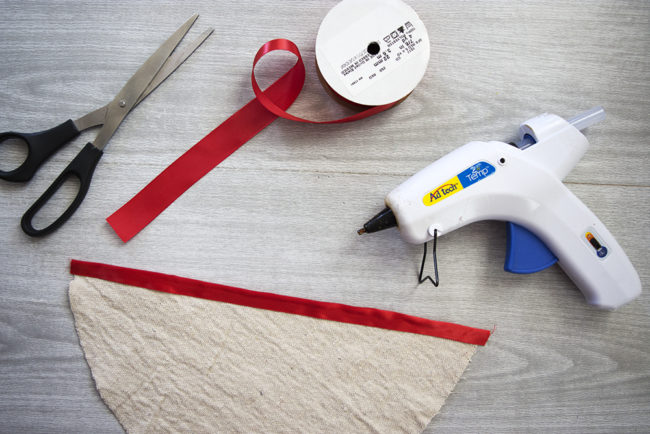
Cut out the circles of fabric, and then cut one circle in half. Don’t waste too much time trying to get the cuts perfect. You won’t even be able to tell if they are or not once the project is finished!

Finish the straight cut edge of your half circle by gluing ribbon to the edge and folding it over.
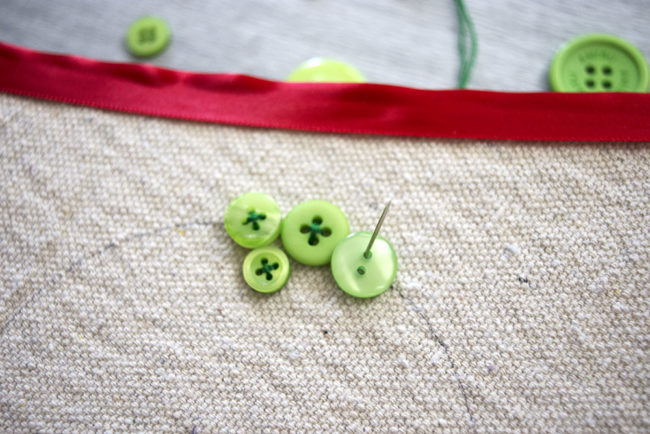
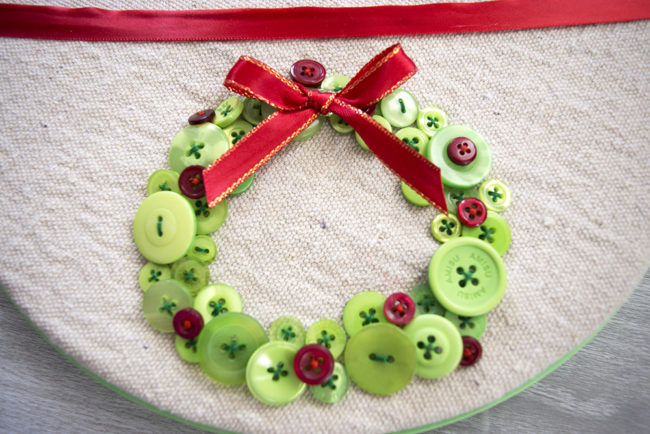
Trace a small circle onto the half circle of fabric. I used a wide mouth mason jar lid to trace the circle for my wreath.It was a perfect size. You can make your wreath bigger or smaller as desired.
Stretch the half circle fabric piece into the embroidery hoop for stability. Sew green buttons around the circle that you traced on the fabric. Tie a knot in your string and start under the fabric. Bring the needle up through the button and back down into the fabric.
Repeat this step again so that your button is firmly attached to the fabric.

I used big buttons and small buttons around my wreath for some visual interest, and I used green buttons from both the Contemporary Christmas mix and the Button Bonanza Christmas Mix to vary the colors.
Use a few small red buttons for berries in the wreath. Sew them randomly into the green buttons using the red thread.
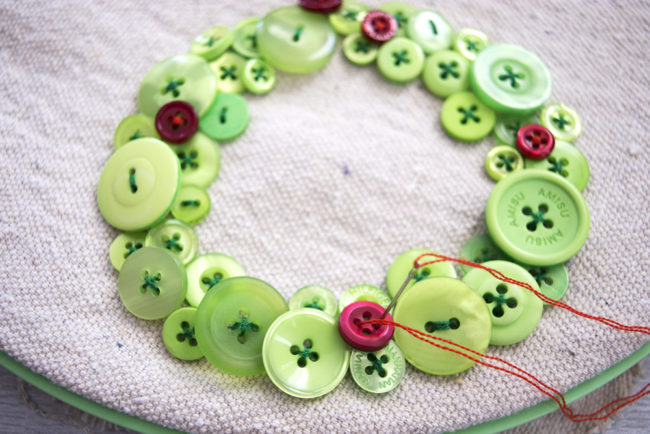
Add a small red ribbon bow to the button wreath. You can sew the bow to the wreath with your red thread, or you can use hot glue to attach it.
Lay your button wreath half circle of fabric over the full circle you cut in step one, and stretch them into the embroidery hoop. This creates the pocket for your cards to go into. Trim any extra pieces of fabric on the back of the hoop. Hang your completed embroidery hoop Christmas card holder on your wall!
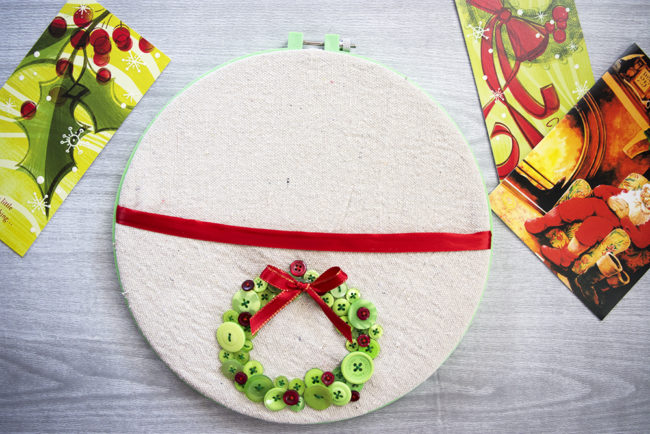
You can fit quite a few cards in one hoop, but if you typically get lots and lots of cards from your friends and family, you might want to make a couple of these fun hoops and hang them in a fun arrangement on the wall.
I think I will make two more hoops and put a Christmas tree shape on one, and perhaps some Christmas holly on another. The buttons are such a fun and cute way to add the colorful shapes to the fabric. Do you do any Christmas in July crafts? If Christmas in July isn’t your thing, this fun card holder can be customized to any time of the year! Create a fun button flower shape and hang it on the wall year round to hold other special occasion cards you might receive, or even just to hold your mail!
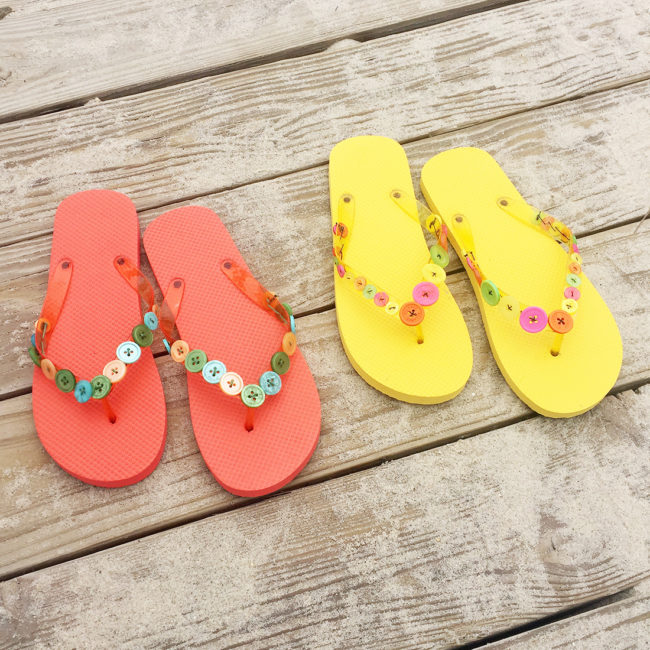
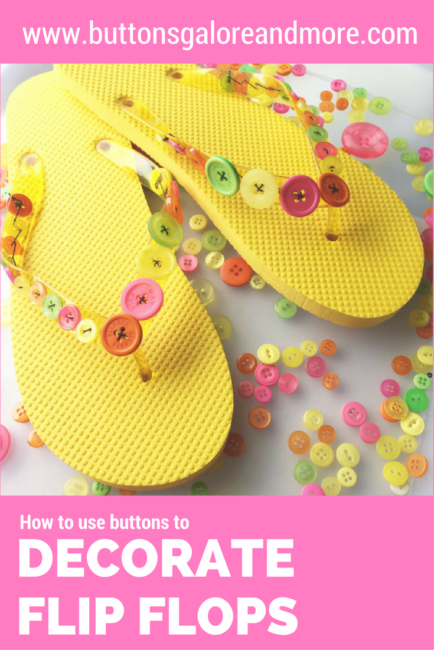
Summer is almost officially here! I’ve got a super easy project to decorate flip flops with buttons to keep you looking fashionable on the hot days ahead.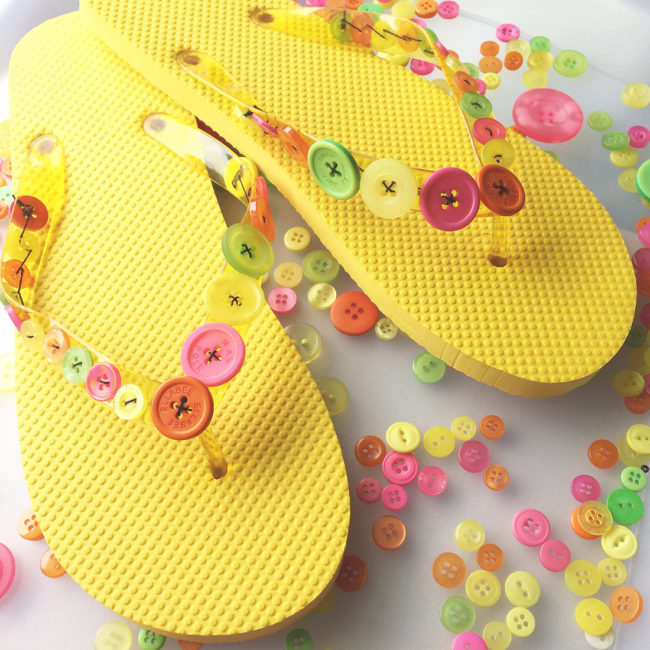
Supplies Needed:
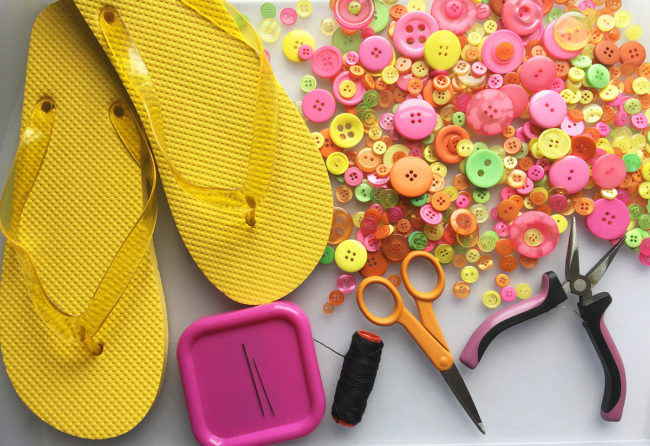
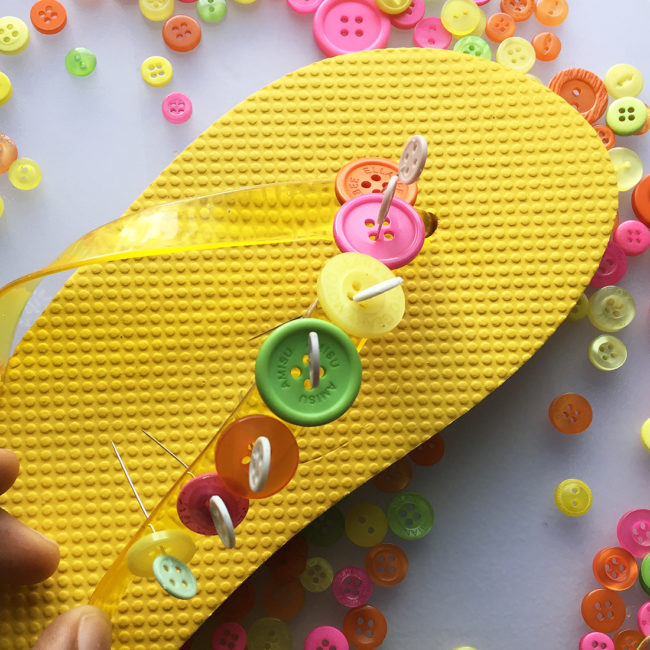
It’s surprisingly easy to decorate flip flops with buttons! Before you get started, make sure you have a thick strong thread. To begin, select buttons from the pack you want to use and line them up on the flip flop strap using pins. This step is optional, but it will provide you with a preview of way the shoe will look and give you the opportunity to work out the placement of the buttons prior to sewing them into place.
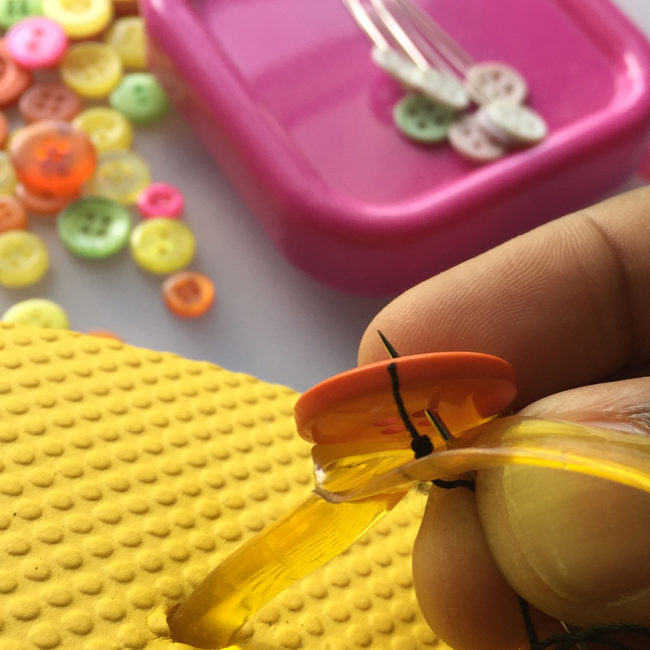
Thread the needle and start attaching the buttons starting at the center of the strap. The first stitch goes into the strap from the top. If you are using a very thick thread or clear plastic thread this will ensure the knot is not rubbing against your foot. After all, you want your shoes to be comfortable!
Be sure to tie all of your knots tightly. Don’t worry about the knot showing, as it will be hidden once you start adding your buttons. Depending on the thickness of your flip flops’ strap and the bulkiness of the thread, you may find it easier to push and pull the needle using pliers. I didn’t have any issues doing it by hand, but I would suggest you have a pair handy just in case you run into any issues.
Continue adding buttons until you get to within an inch or two of the end of the strap. After you have secured the last button, push the thread through so you can again tie the knot on the top of the strap.
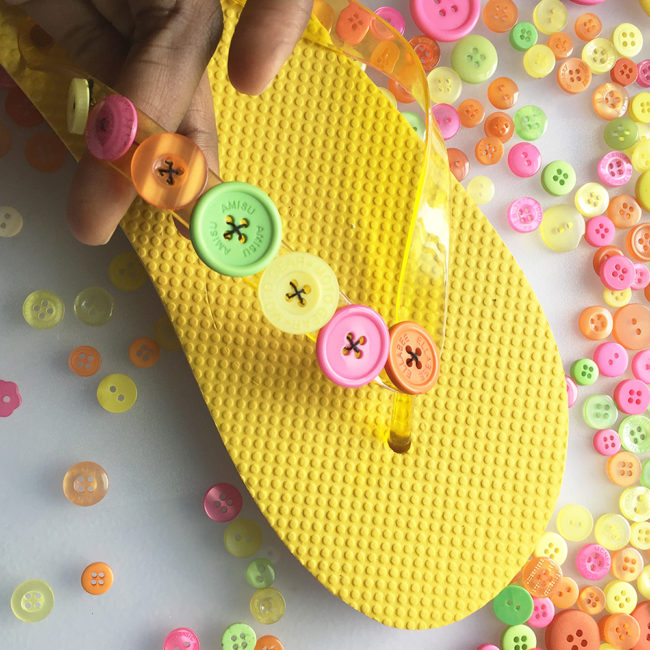
Beginning at the center again, add the next set of buttons to the other half of the strap.
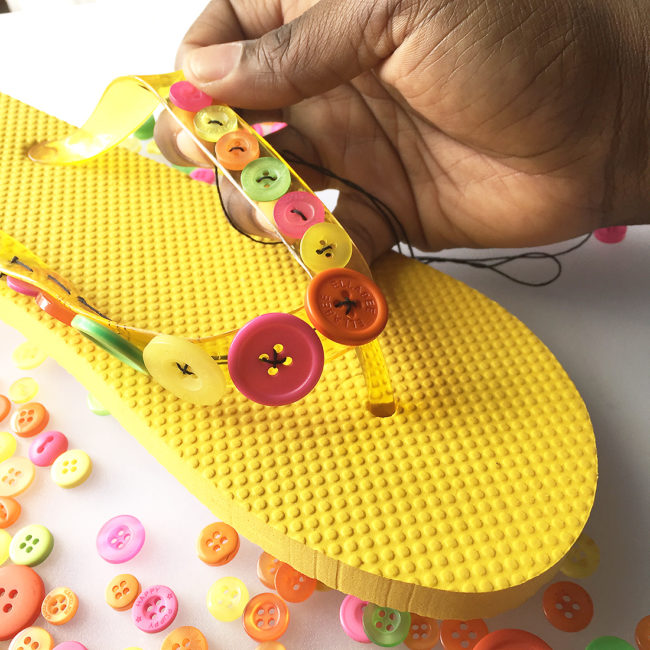
Now you just repeat the process for the other shoe and your flip flops are ready to wear! This time of year it’s easy to find inexpensive flip flops just about everywhere in every color you could need. It’s such an easy affordable project to decorate flip flops with buttons and you can make several a pairs in festive colors to coordinate with every outfit for your summer events. I had so much fun with this project I’ve already got two pairs ready for a stroll on the boardwalk!
Don’t waste any time…the beach is waiting! Grab a Button Bonanza bag and a pair of flip flops to start creating your summer wardrobe today!
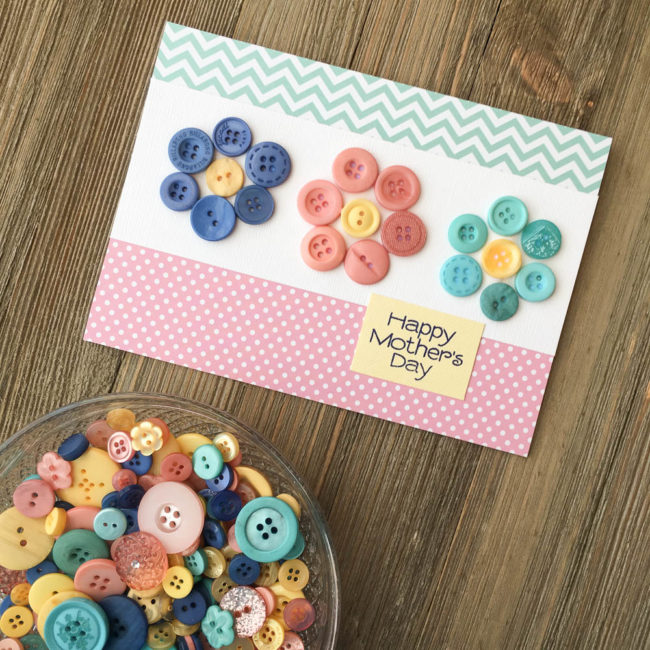
The spring flowers are in bloom, and Mother’s Day will be here before you know it! So why not combine the two to make a pretty button flower card for mom for Mother’s Day?
Supplies Needed:
This 5″ by 7″ button flower card is super simple to make but so cute! And it’s so easy to make that it would make a great kids’ project for the holiday.
To start this card project, cut a 10″ by 7″ piece of white cardstock and fold in half along the 10″ edge to create your card base.
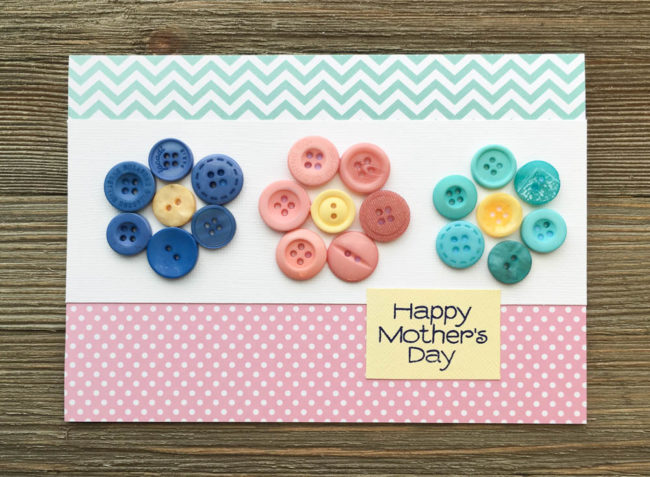
Cut a 2.5″ by 7″ piece of cardstock from the scraps of the white sheet. Select buttons from the Glam Girl Button Bonanza to make your button flowers with. Then, using the PPA Matte Adhesive, adhere the buttons in place using dots of glue. Set the flower strip aside to dry.
While the glue dries, cut a 1.5″ by 7″ strip of paper for the top of the card, and a 2″ by 7″ strip of paper for the bottom. Adhere them in place along the top and bottom of the card front.
Stamp “Happy Mother’s Day” on a yellow cardstock scrap in dark blue ink. Trim the cardstock to slightly larger in size than the sentiment.
After the glue on the flowers is dry, adhere the flower strip in place across the card front. Glue the sentiment block down on the right side of the card front, over the seam between the flower strip and the bottom patterned paper.
This card design is so versatile! Just by changing the sentiment, the design could also be used for a thank you card, or for a birthday, or for a variety of other occasions. It’s a classic that you can use over and over! To create a smaller card, just use smaller sizes of buttons. With theGlam Girl Button Bonanza bag, you can make this beautiful button flower card over and over!
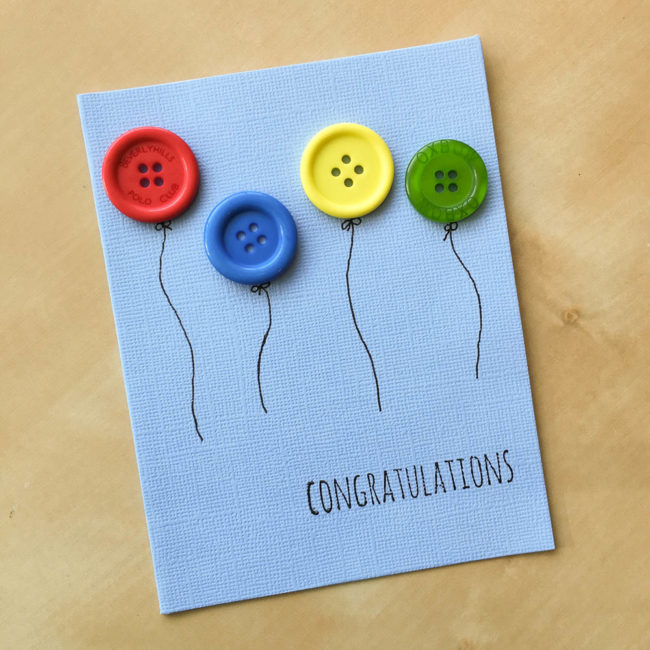
This time of year means graduations, and all sorts of other occasions for which congratulations are in order. Running out of time to make cards for all of them? Just dive into your Button Bonanza bags and dig out some of the largest buttons to make balloons!
Supplies:
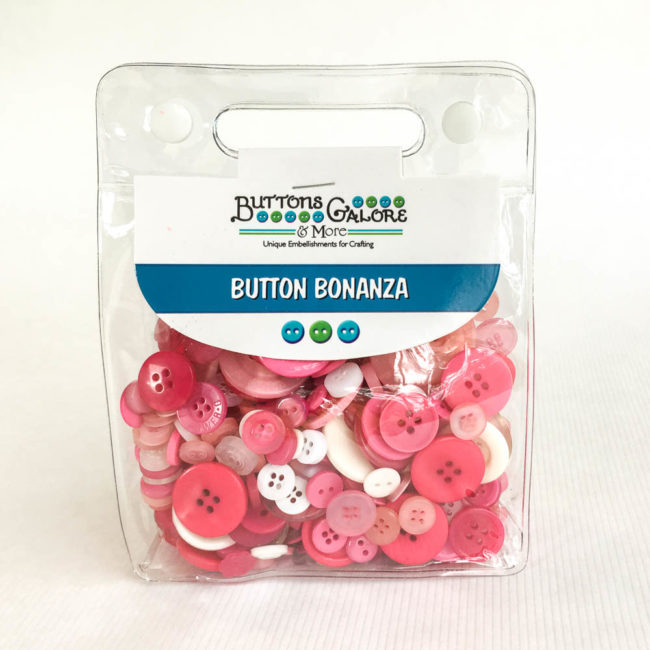
I used the “primary” Button Bonanza bag for this but the beauty of a simple design like this is that you could use any color scheme that works for your occasion. For a graduation or sports-related occasion, use school colors! Recent graduate got a new job? Make your balloons the recipient’s favorite colors or their new employer’s corporate colors. With our huge palette of Button Bonanza colors, the options are endless!
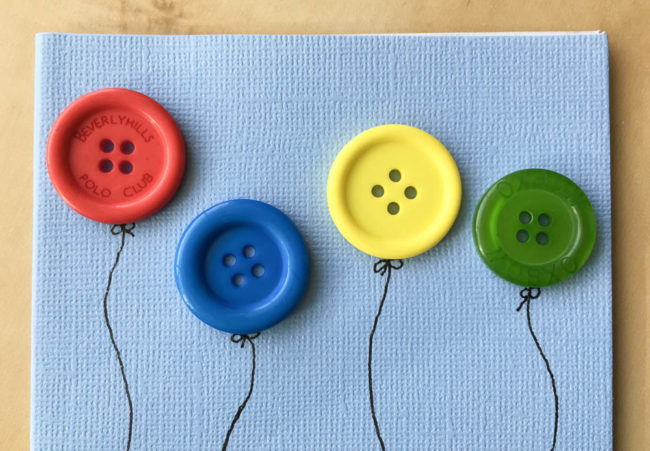
To make this card, select the buttons that you want to use and arrange them to make a row of “balloons”. Before you glue them down, nudge them up just slightly to get a pen in to draw your “string” lines and bows. Then use clear drying adhesive like PPA Matte Adhesive to glue the buttons down so that it looks like the strings are tied to their bottoms.
For the final step, get out a handwritten sentiment stamp (or a pen if you are braver than I am) and use black ink to stamp the sentiment in the lower right corner of the card front.
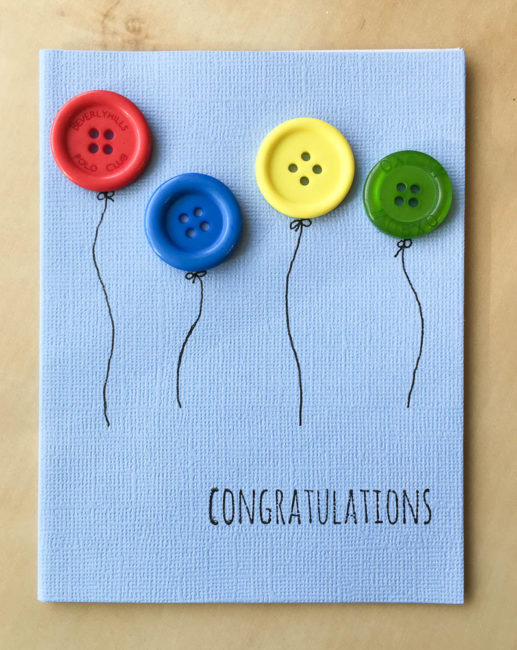
Send some button balloons to someone special!
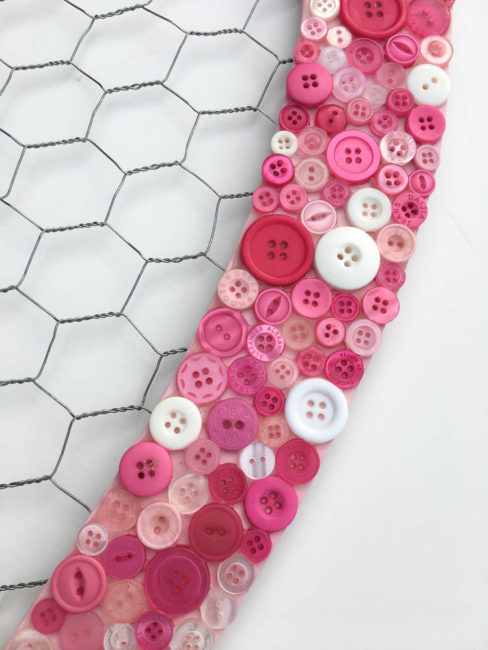
It’s time to share more of our Creativation booth projects! Chicken wire is so trendy right now and, paired with a button collage, it makes a gorgeous memo board!

This bright and fun button collage memo board is great decor for a kid’s room or nursery, a craft studio, or for displaying old family photos at a wedding or baby shower!
To make this heart memo board, which is about 17″ tall, it only takes two bags of our “Bubblegum” Button Bonanza buttons! This fun mix includes several shades of pink from pastel to brilliant fuchsia mixed with some white buttons. It’s perfect for everything from little girl projects to spring flowers – and of course, hearts!
The shades of pink in “Bubblegum” make a beautiful button collage on this heart memo board. The shades create a wonderful visually textured look on the frame – and there’s no worry about color matching since the shades are already pre-coordinated!
This memo board was created completely from scratch, starting with a piece of 1/4″ birch plywood. But it’s easier than you think to make, with only a few basic tools and techniques. To get the full tutorial, click here!
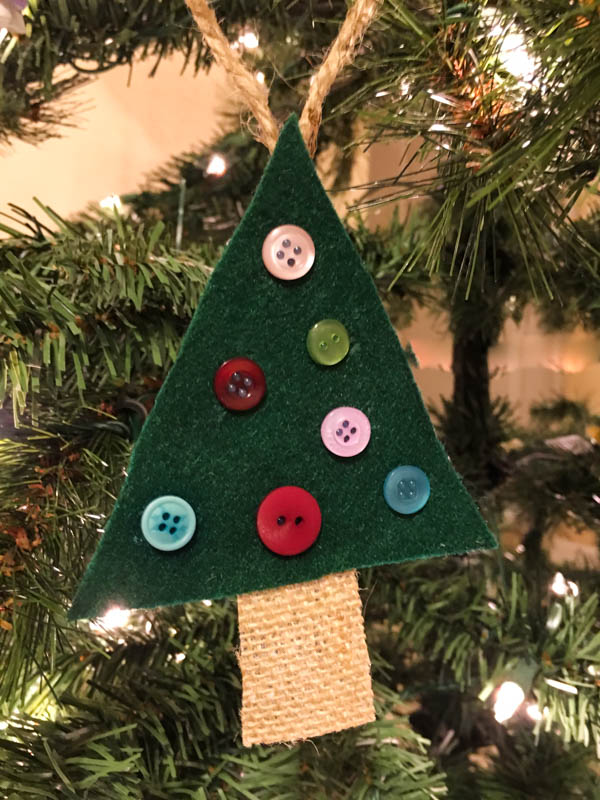
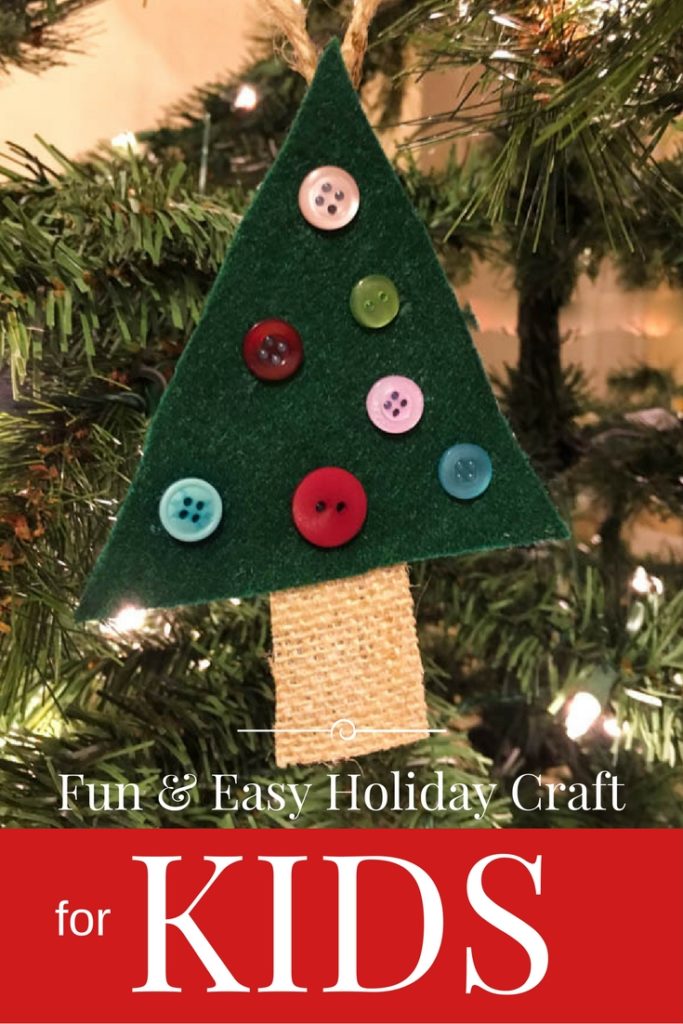
Looking for an activity to entertain the kids this Christmas? Our felt Christmas tree ornament project is quick and easy, and perfect for kids of all ages! Better yet, it’s a great (and affordable) activity for doing with large groups for parties and class activities.
Supplies:
Any felt will work for this project, but I chose to use the heavier Eco-Fi Plus because it stands up better to the weight of the buttons than thinner felts and hangs better as a result.
Constructing these tree ornaments are fast and simple. They are created from two simple shapes cut by hand from felt and/or burlap. Older children can draw and cut their own shapes, and the shapes can be pre-cut for younger children.
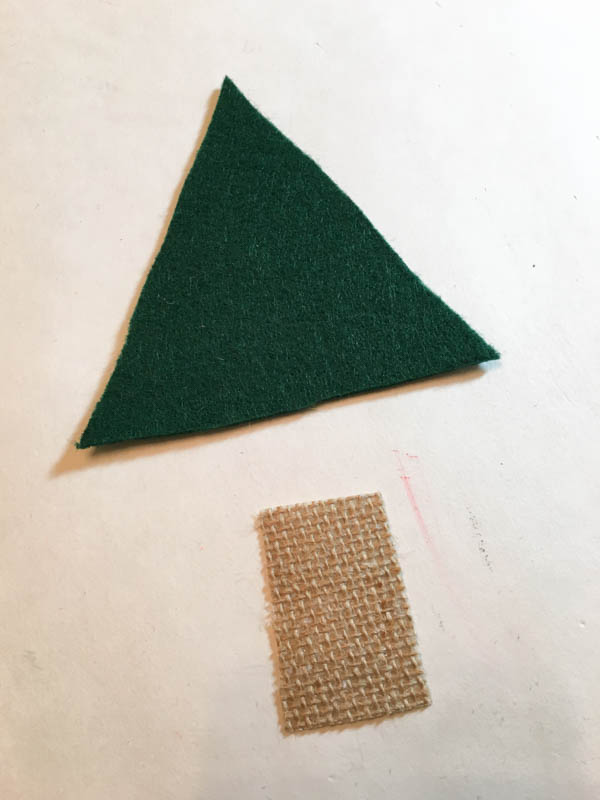
Assembling the tree parts (and adhering the buttons) can be done with hot glue or with a clear drying white glue, depending on the age of the kids making the ornaments. The hot glue will dry faster, if the ornaments need to be moved or hung quickly. Or, to make the project even more educational, practice some sewing skills and sew everything together!
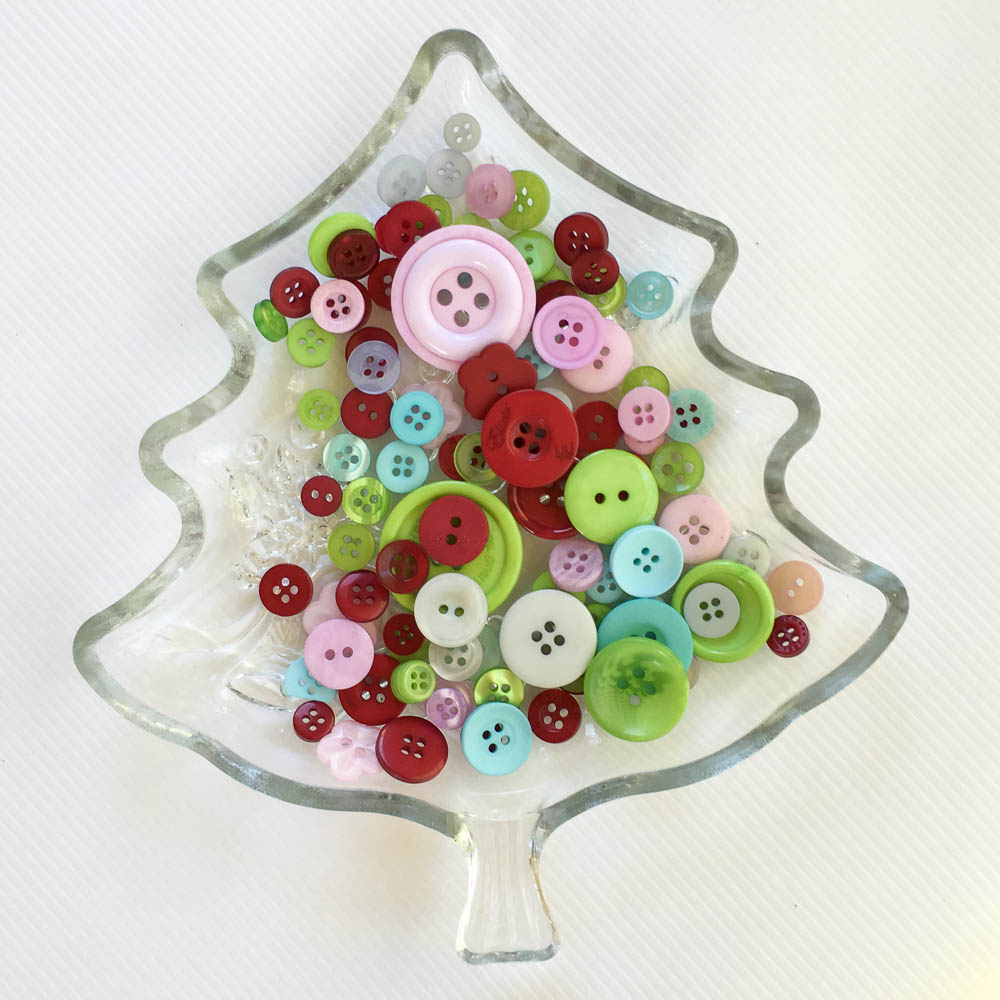
Choosing different buttons will make each kid’s felt Christmas tree ornament look unique! For a fun country Christmas look, I decorated my felt Christmas tree ornament with buttons from our new Button Bonanza called “The Merriest”.
To complete your ornament, it needs a hanger. I made a loop of twine and attached it to my ornament with hot glue. Ribbon or yarn could also be used.
This easy and fun felt Christmas tree ornament will provide fun for the whole family, and the kids will love creating their own personal design for it! These ornaments would also make beautiful custom gift tags (with the addition of an address label sticker on the back for writing on) for grandparents that can be saved and treasured for years to come.
Are you going to button up your Christmas tree this year?
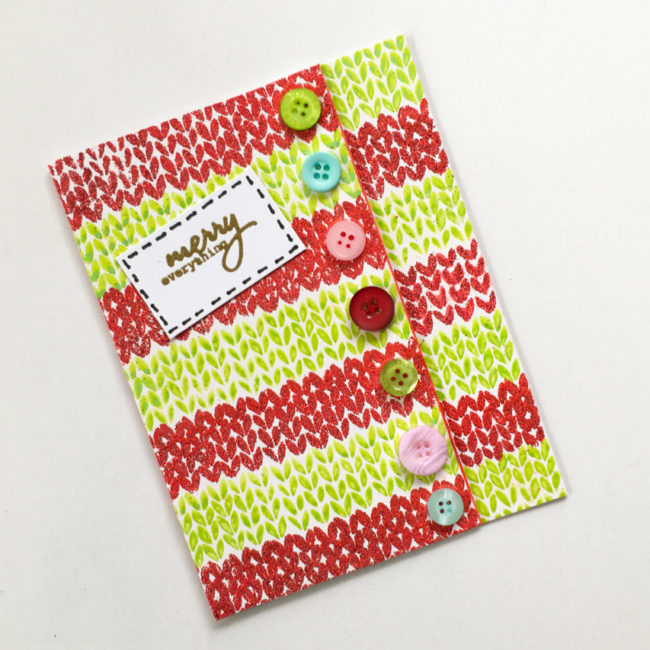
Nothing’s more fun at Christmas than an ugly Christmas sweater. So why not send one to a friend in the form of an ugly Christmas sweater card for the holidays?
Supplies Needed:
This card’s technique is simple – just creating two strips of paper by stamping the sweater knit stamp over and over, alternating the color and embossing it. The Twisted Citron ink is embossed with clear embossing powder, and the red is clear embossing ink that is heat embossed with Red Tinsel powder. The strips need to alternate to create the effect on the front of the card.
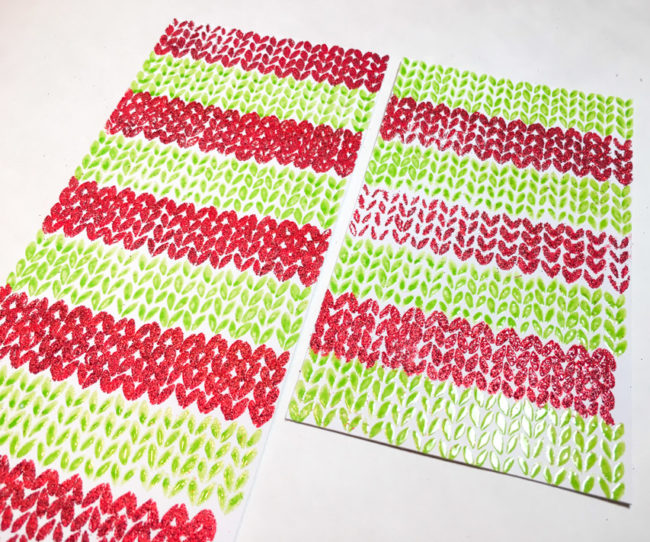
Doing all that stamping and embossing while changing colors takes a bit of time, but the result is a great effect!
Once strips are made, they can be adhered to a card base. Start by attaching the one on the right side of the front. Position it, glue it down, and then trim off any excess. The front is layered, with the left side overlapping the right panel, so there’s no need to worry about how wide the panel is on the card front.
To emphasize the layered effect and create bulk in it as if it really is a sweater placket, adhere two inch wide strips of paper underneath the right edge of the left panel before attaching it to the card front. This will slightly raise the area under the buttons up, creating depth and shadow that look like a true sweater! For a little extra shadow, run a dark red pen or inkpad along the paper edge where the pieces overlap as well.
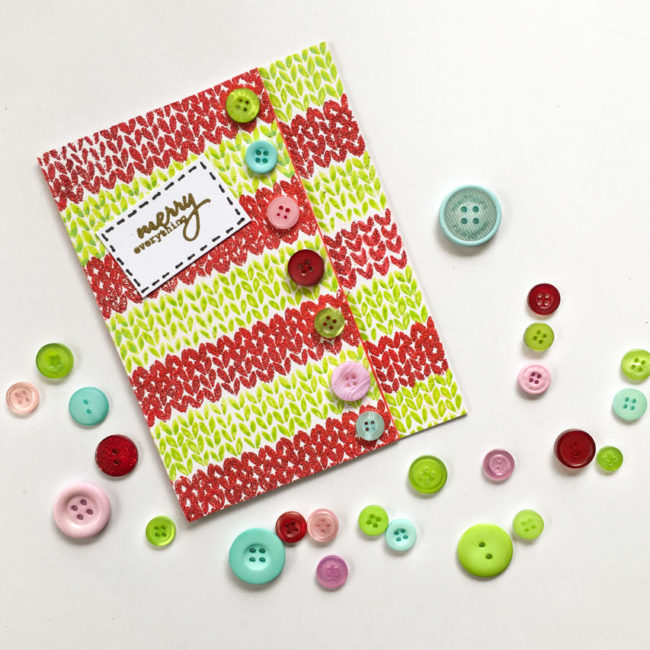
Now that your sweater has a placket, it needs buttons to fasten it! “The Merriest” Button Bonanza has red and green shades that match the card base. Adding in the the pink and blue shades that are also in the assortment looks a bit random on top of all of that red and green, and is the perfect way to “ugly” up your ugly Christmas sweater card. Glue your buttons down with a clear drying adhesive like PPA Matte Adhesive.
The finishing touch is the “patch” that has the sentiment on it. Just stamp and emboss the sentiment, and then draw stitching lines around it with a pen. Adhere it at a jaunty angle to your sweater’s “front” and you are done!
Who do you know that needs an ugly Christmas sweater card? Send them one today!
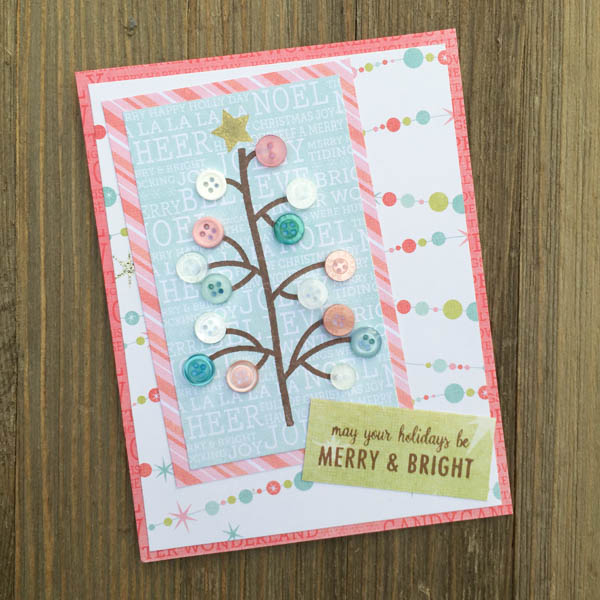
Christmas isn’t just green and red anymore…pink and blue are also becoming more part of the palette. Today, I’m going to show you how to create a beautiful pastel Christmas tree card with our versatile new “Coral Reef” Button Bonanza bag!
Supplies Needed:
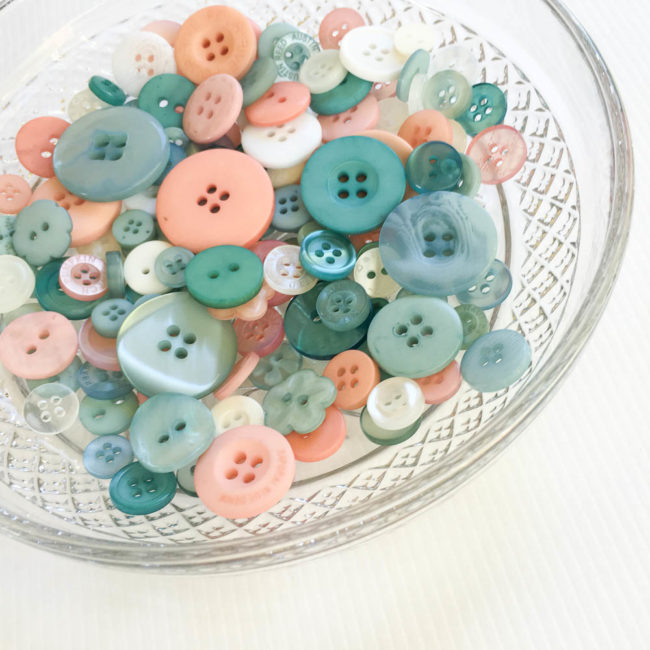
This card uses our new “Coral Reef” Button Bonanza to create a fun pastel blue and pink Christmas look that is super trendy and oh-so-pretty! The shades of pale blue, soft rose pink, and white are perfect for a retro pastel Christmas tree card look.
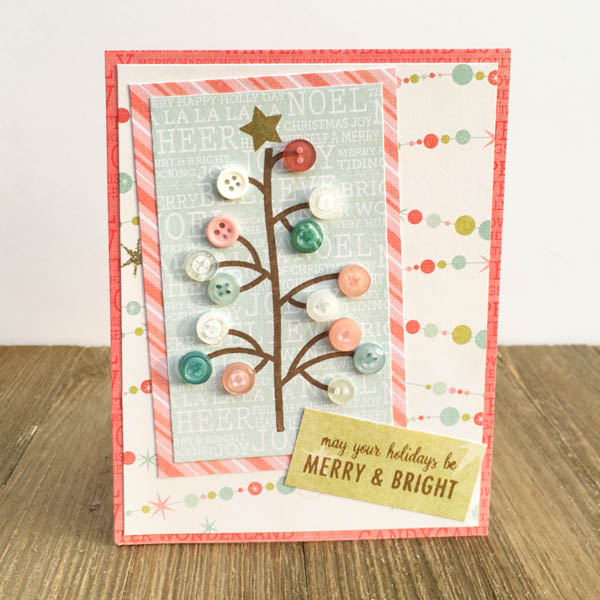
Making this card is fast and easy, but with the gorgeous patterned papers and the pearly button accents, it looks anything but plain!
To begin your card, cut the pink background for your card base to 4.25″ by 5.5″. Then cut the garland paper to 4″ by 5.25″, and adhere it on top of the pink base. Next, get out a blank card base and adhere the layered background to the front of it.
Stamp the Christmas tree in brown ink on blue text pattern paper, and then add the star in gold at the top. Trim closely to the tree in a rectangle shape. Adhere the tree block on top of the pink striped paper, and trim it to leave a small border around the edges of the tree.
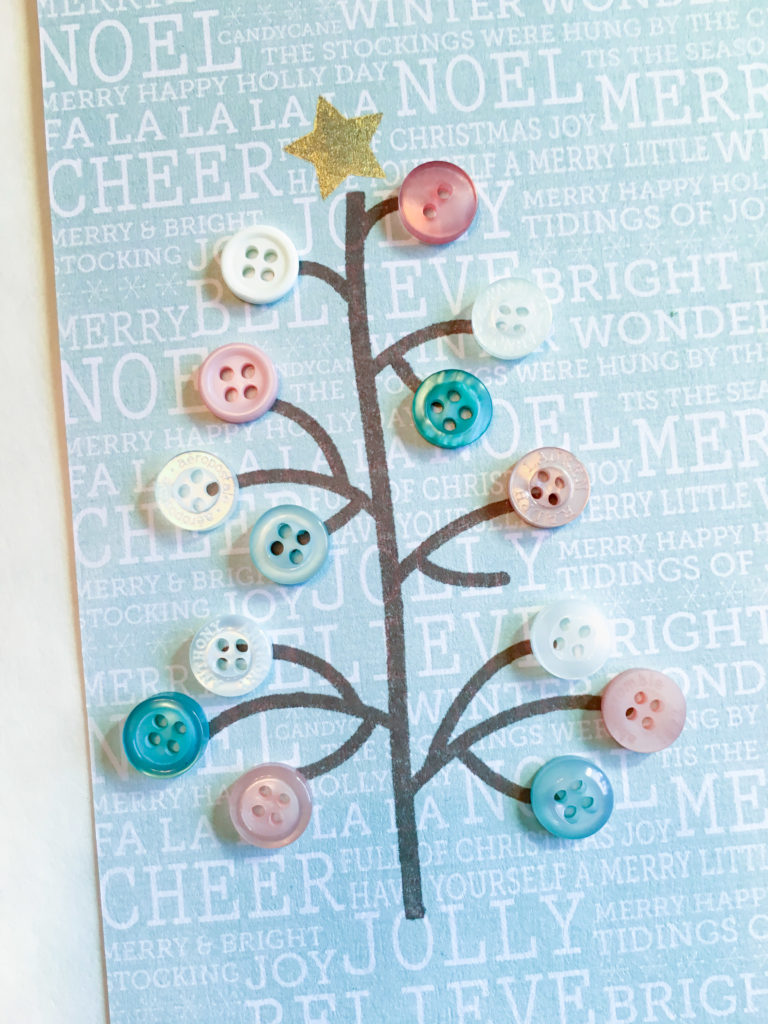
Select buttons from the Coral Reef collection, and use PPA Matte Adhesive (or other clear glue) to adhere them to the tree. Once the glue is dry, attach the tree block to the card base, angled in the upper left corner.
Stamp sentiment on green patterned paper, and trim to size. Adhere in lower right corner.
This pastel Christmas tree card design could be used to create seasonal trees all year round – pretty spring blossom colors mixed with bright green, fall colors, or all white for a snow covered winter tree! What season’s tree will you button up?
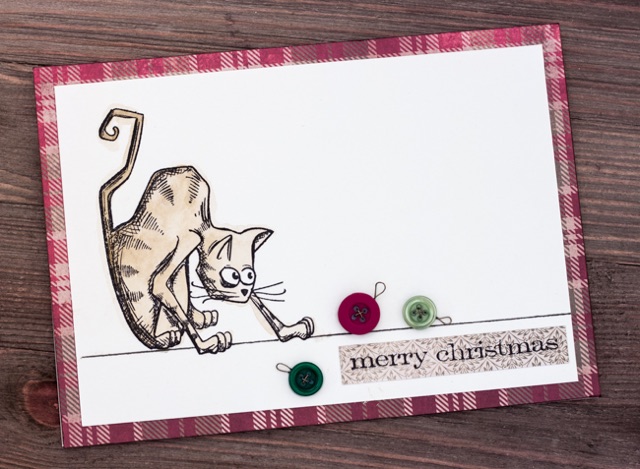
We’re cat owners at our house, and as anyone who owns a cat knows…it makes Christmas decorating extra, well, interesting. We decorate, the cat un-decorates. So today, my project is a Merry Christmas cat card that celebrates that annual feline-human war of December!
Supplies:
This Christmas cat card has a very simple design. It’s featured embellishments are Christmas ornaments made from buttons from the “Tis the Season” Button Bonanza that is brand new for this holiday season. Featuring deep red and green tones that are accented by a light sage green shade, “Tis the Season” is a versatile button mix for almost any holiday craft project.
Instructions:
Cut a piece of watercolor paper to 4.5″ by 6.5″. Use Archival ink to stamp the Crazy Cat.
Use a ruler and the black pen to draw the line across the bottom underneath the cat. Don’t draw through the cat’s paws!
Scribble on a scrap piece of watercolor paper with the Distress Crayon. Using your waterbrush, pick up some of the color and use it to watercolor the cat.
Cut a piece of patterned paper to 5″ by 7″ and ink the edges. Adhere the watercolor paper centered on it. Cut a piece of cardstock to 7″ by 10″. Fold in half to make a 5″ by 7″ card, and adhere card front to it.
Cut a strip of patterned paper 1/2″ wide. Stamp the sentiment on it, and trim the ends. Adhere to bottom right of card.
Select three buttons to serve as your “ornaments”. Thread the holes on the buttons with German style wire. Use the tail of the wire to create a loop for the ornament’s “hanger” before snipping off the excess wire.
Use liquid glue like PPA Matte Adhesive to glue the button ornaments in place.
Since it mostly relies on bulk supplies like buttons and tools like stamps to make, this Christmas cat card could easily be made in quantity. Simply substitute cardstock or a variety of patterned paper for the paper used for the matted background and the sentiment strip. and you can make this card over and over with a Button Bonanza and your stamp! And since it is fast and easy to make, your cards will be done in no time!
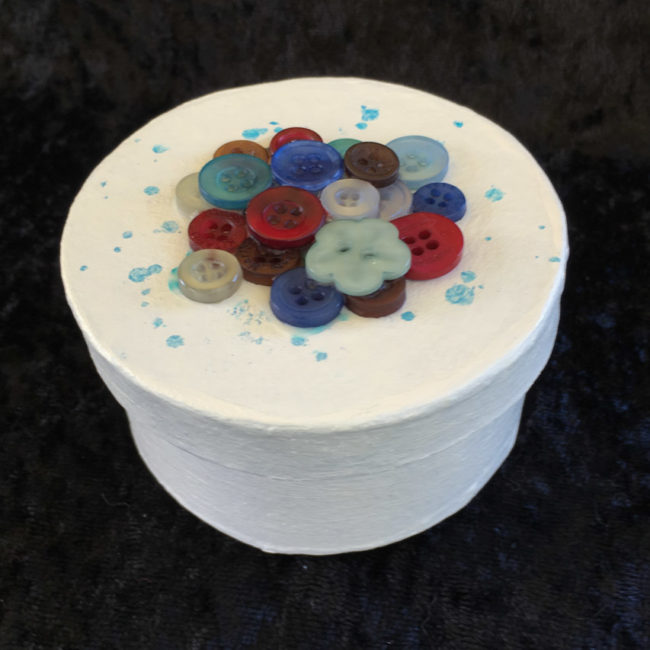
October is half over and that means it’s beginning to look a lot like Christmas in most crafter’s work spaces! Today, we’re going to share a few ideas of how to embellish a Christmas gift box with buttons to make your gifts look extra special.
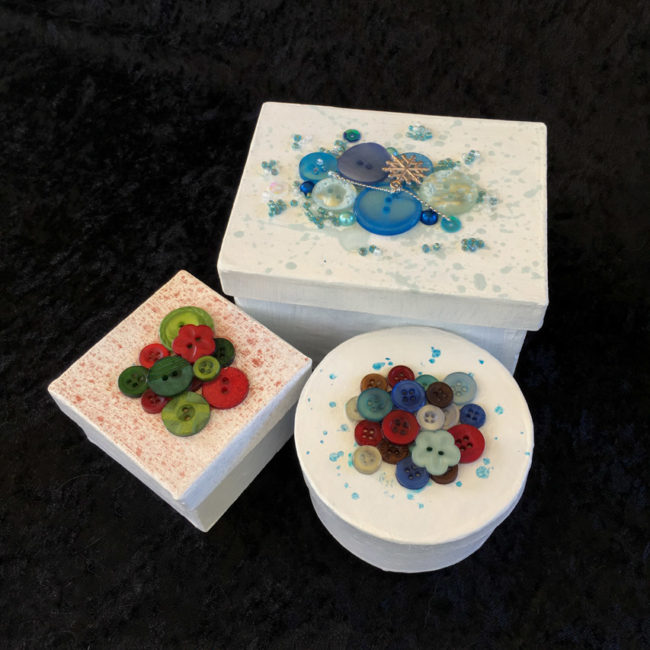
All of these boxes are created from paper maché boxes that are painted with white acrylic paint. Then the tops of the boxes were splattered with spray ink or paint to add some color, before buttons and other embellishments were added.
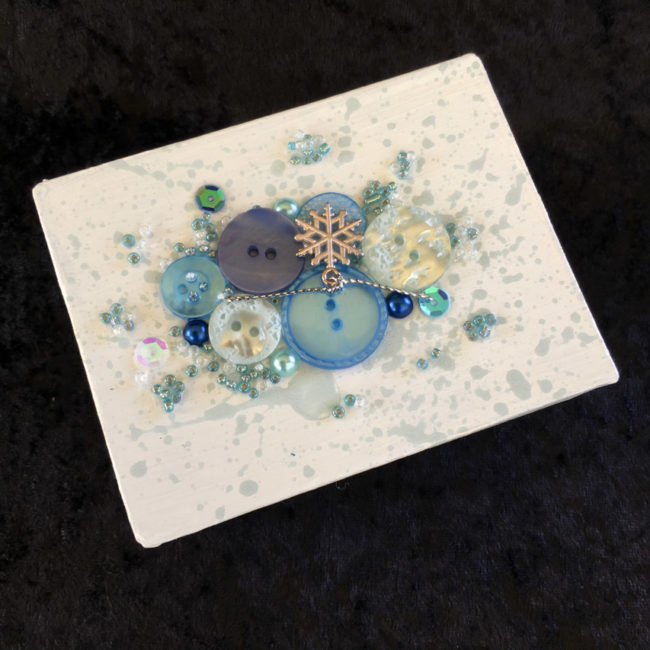
The large rectangle Christmas gift box is created with embellishments from the 28 Lilac Lane “Let It Snow” embellishment kit. To create this embellishment collage, I started by laying down a pool of white glue in the middle of the lid. Then I placed the large items first, creating the arrangement of the buttons. I filled in around the buttons with the small embellishments like the sequins and beads, creating a feeling of an explosion of embellishment spreading across the lid. For the final touch, I glued the snowflake charm from the “Let It Snow” kit on top of the button collage.
Supplies:
For the round box, I used the new “Winter Wonderland” Button Bonanza. I started this one by making the first layer of buttons. Then, once that layer had dried securely in place, I glued a second layer of buttons on top of the center of the first layer.
Supplies:
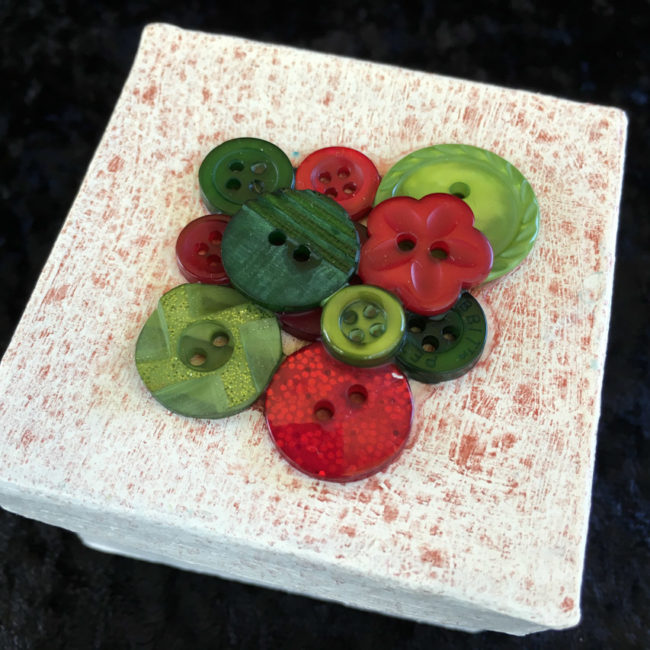
I used the same technique on the square box, creating a two layer collage of buttons one layer at a time. The key to making the prettiest collage is to vary the size and type of the buttons that you use. Also, it helps to balance the colors. On this box, the center has one of each color, and then there is an outer ring that shows the green shades alternating with red.
Supplies:
Grab some boxes…grab some glue…this project only takes a few minutes to make beautiful holiday gift packages. And it’s so easy that the kids can help out. What are you waiting for? Button up a few holiday gifts!
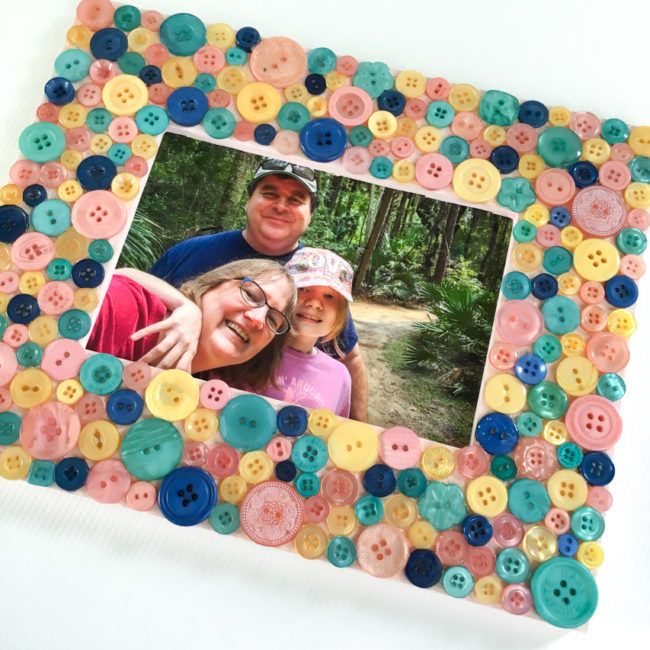
We recently announced six new Button Bonanza assortments for fall – great mixes of colors that are seasonal and trendy. Today I’m here to show you a beautiful button frame project with what is probably my absolute favorite of the new mixes: Glam Girl!
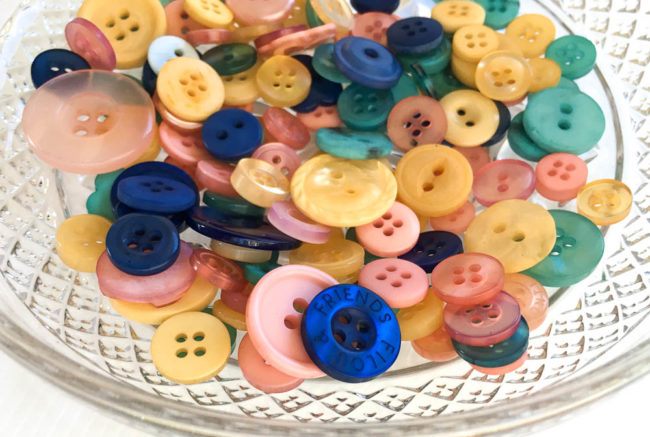
This lovely assortment of pink, turquoise, butter yellow, and dark blue is oh-so-trendy and so versatile for a variety of projects!
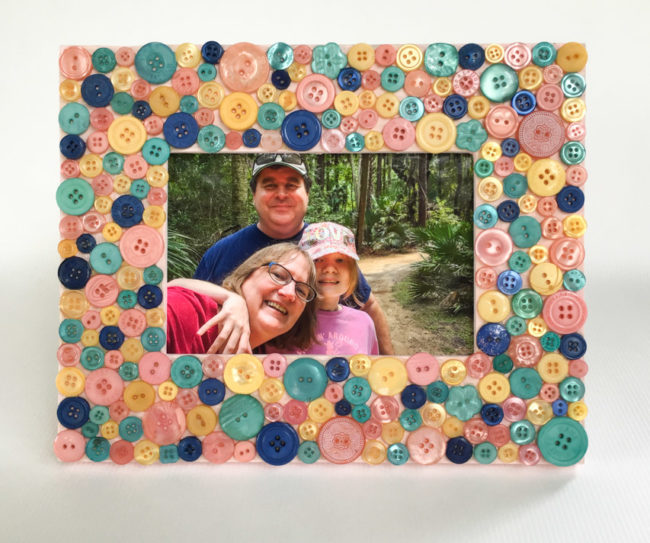
This button frame project would make a gorgeous addition to the decor in a teen/tween’s room (and it’s easy enough for them to make themselves). Or it could add a pop of color to a flea market decor in a living room or bedroom!
The steps to completing this project are super simple.
To begin this project, paint the unfinished wood frame with the Pink Dogwood paint. The soft pink color provides a delicate background to fill in between the buttons in the collage, and coordinates beautifully with the shades of the Glam Girl buttons.
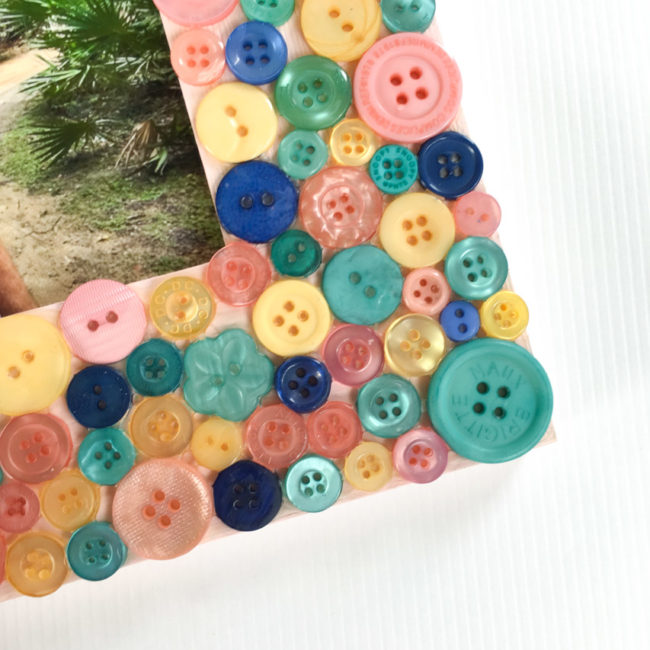
Once the paint is dry, then it is time to start the button collage! My tip for doing this is to work in sections laying down an inch or two long section of the white glue and filling it in with buttons. Once it is dry, then start the next section. This technique prevents a huge mass of buttons that are sitting in still-wet glue from accidentally being shifted as you work your button collage into place.
The key to a nice balanced button collage is to spread out the larger buttons, and to try to avoid placing the same colors next to each other too much. With only four colors, it’s not possible to avoid it entirely, but I mostly managed to avoid more than two that were connected to each other of the same color.
Creating a button frame collage like this can be a bit time-consuming, but also a relaxing and fun project! And the end result is a button frame that will be enjoyed for years to come!
Supplies:
We’ve got Christmas cards on the brain here at Buttons Galore! Since World Cardmaking Day the first weekend of October is the unofficial launch of the holiday card making season, we’re sharing another card idea today to help your Christmas card planning. Our buttons, sequins, and beads are the perfect easy and affordable embellishment to use for making loads of Christmas cards.
Supplies:
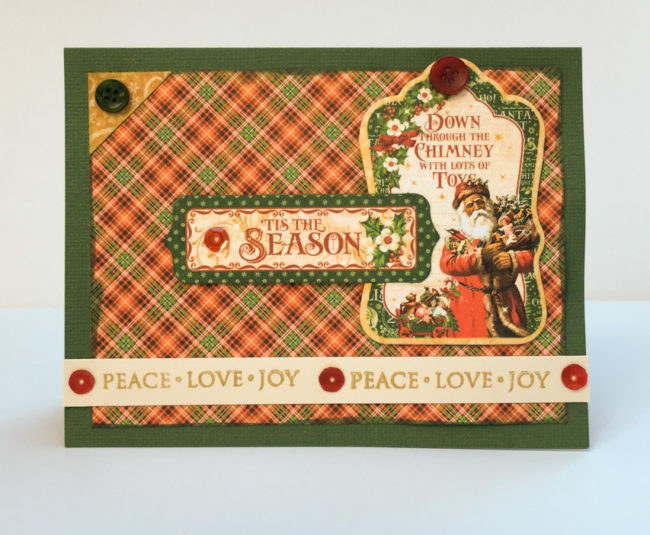
Creating this Christmas card is quick and easy with buttons, and pre-coordinated paper and embellishments.
Start by cutting a piece of plaid paper that is 5″ by 3.75″. Ink the edges with the green Fluid Chalk and adhere it in the center of the front of the card base.
Cut a triangle from the gold paper, and adhere it in the upper left corner of the plaid paper block.
Adhere the large chipboard piece in the upper right corner of the card. Adhere the “Tis the Season” tag layered on top of it, using foam adhesive dots for the end not on top of the chipboard.
To create the bottom text strip, cut a 1/2″ strip of cream cardstock. Use the Shimmer ink to stamp the sentiment twice across it, leaving room in the middle for a button. Adhere across the bottom of the card.
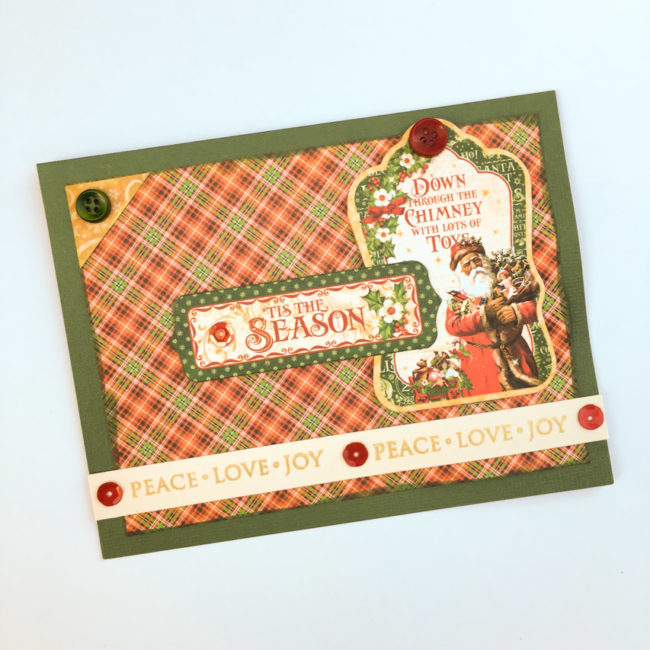
Using the PPA Matte Adhesive, place small dots of adhesive on the stamped strip and the sentiment tag. Press sequins into them and allow to dry. Also use the Matte Adhesive to adhere the buttons on the corner frame and the chipboard embellishment, and allow to dry.
“Tis the Season” Button Bonanza is perfect for vintage color schemes, and if brighter is more your style, don’t miss “The Merriest” Button Bonanza, with bright green, bright red, and pastel pink & blue! We’ve got your Christmas cards buttoned up!

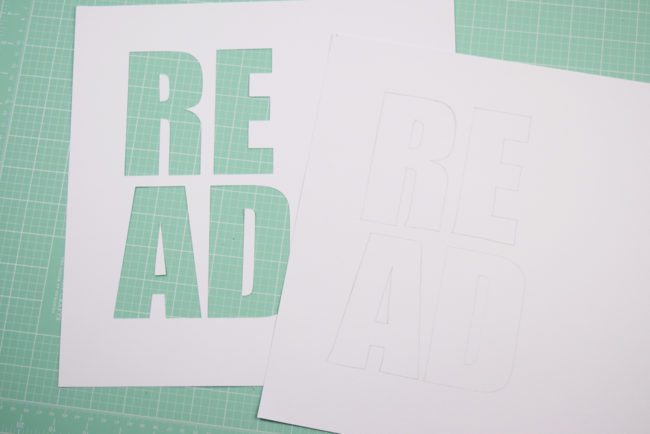 I started by cutting my title with an electronic die cut machine. I cut the “read” portion of the title out of white cardstock with large block letters. Using a pencil, I traced the cut portion of the title onto another piece of white cardstock. I used this as a template for adhering the buttons and sequins.
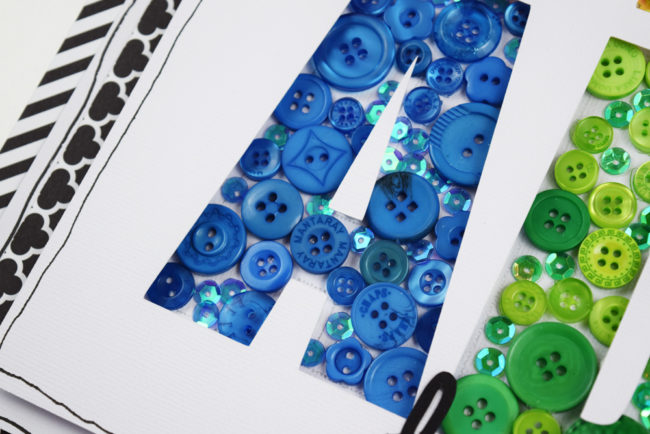
For this portion of the project, I turned on Netflix and started gluing buttons and sequins in place. I started adhering the larger buttons first and then filling in the gaps with smaller buttons and sequins. I would recommend using a strong adhesive for this technique as the cardstock can buckle under the weight of the buttons.
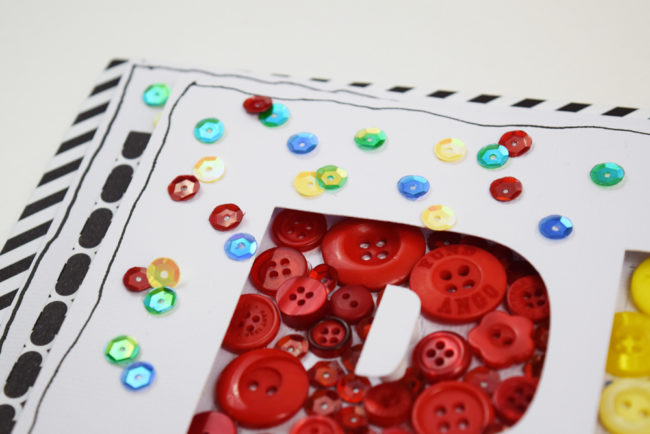
When I had all the buttons and sequins adhered to the background cardstock I used foam pop dots to adhere the die cut “read” on top of the button/sequin layer to create this awesome button title.
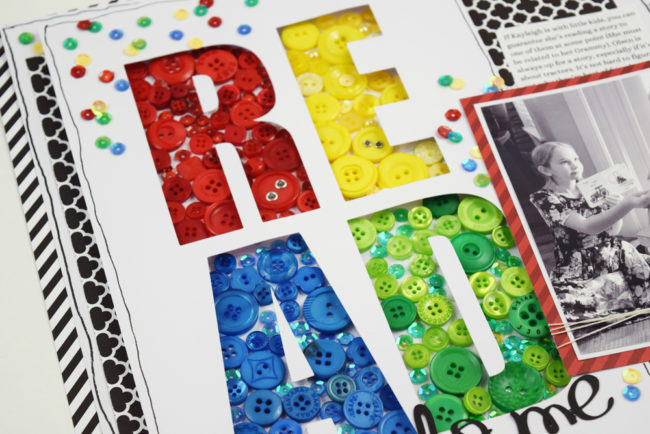 I finished the layout by adding my photo, journaling, and a few more sequins on the top layer.

The buttons and sequins made this layout stand out with TONS of bright colors and textures. I can’t wait to use this button title technique again! Thank you for stopping by the Buttons Galore blog today! I’ll see you again soon!
The days are ticking down to the start of the holiday season! Today, we’re going to kick off the holiday crafting season with a fun Christmas ornament full of buttons!
Supplies:
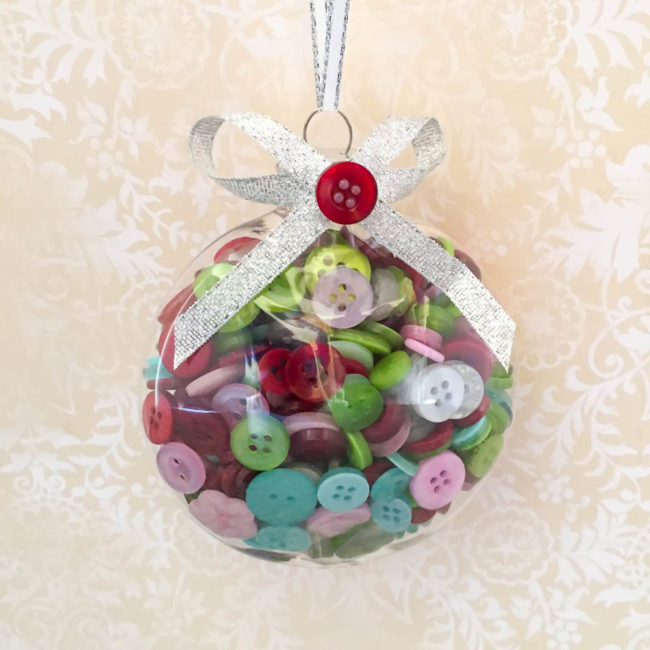
To make this ornament, I started with a clear acrylic Christmas ornament from a local craft store. These sorts of ornaments are widely available during the holidays and have removable tops because they are designed to be filled. The one I chose to work with was round, flat, and about 3/4″ thick.
For my buttons for this project, I had three beautiful new holiday Button Bonanzas to choose from! I chose “The Merriest”, a delightful combination of pastel blue, light pink, lime green, bright red and white. These colors will have beautiful pop against the dark green branches of a Christmas tree!

Making my button filled Christmas ornament was super simple! I started by filling the ornament with a selection of small buttons from “The Merriest” and replacing the top.
To decorate the top, I first wrapped a small piece of silver ribbon around the neck of the cap and secured it with my hot glue gun. Then I made a bow by looping another length of the ribbon, and secured it with the hot glue as well. Finally, I used hot glue to attach a button to the center of the bow.
This cute Christmas ornament is just a pretty decoration – it also doubles as a fun little gift for a crafter! After it’s done being decorative for the season, the recipient can just remove the top of the ornament to empty it out and enjoy using all these gorgeous button colors year-round.
Who do you know that would love a buttoned up Christmas ornament this year?
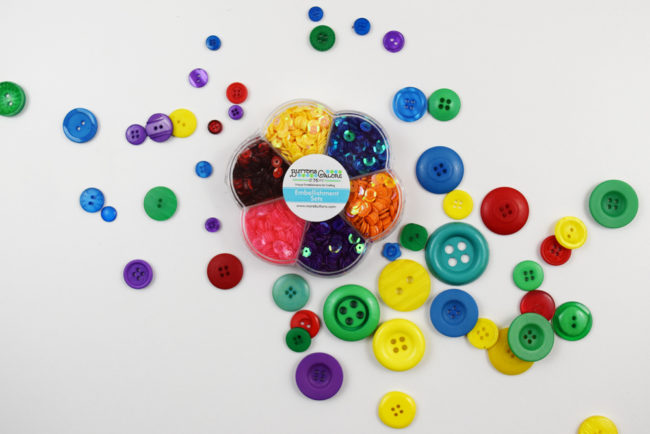
Today we are thrilled to share with you some gorgeous new products for crafting and sewing – six new seasonal and trendy Button Bonanza color mixes!
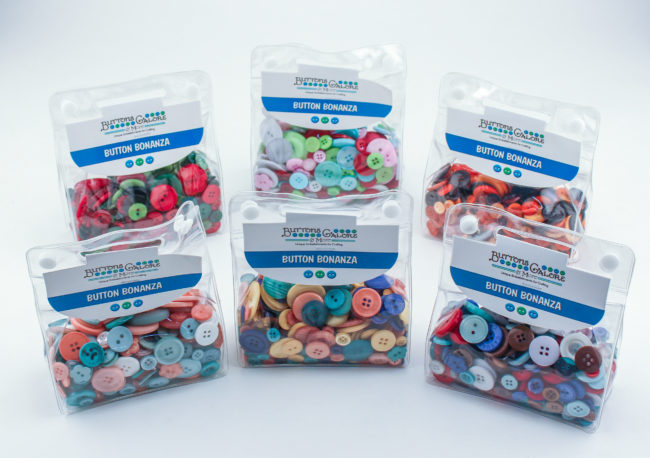
Our six new Button Bonanza totes, available today, include two new trend mixes, a Halloween mix, and three new Christmas and winter holiday mixes! Let’s take a closer look!
First up is Coral Reef, full of beautiful heathered blues and pinks that are reminiscent of this year’s colors of the year. Also, there’s a touch of white for some neutral to pair them with.
Coral Reef is great for baby projects, of course…but also so much more! These on-trend tones are great for stylish fashion projects, coordinating with many of the latest paper crafting collections, and so much more.
Up next is Glam Girl. This collection combines several very hot color trends into one gorgeous color palette that will make your projects look girly and glamorous! Navy, the neutral of the moment, anchors a palette of yellow, aqua, and rose pink to create Glam Girl. Yellow is THE home decor color at the moment.

This palette of trend forward colors will work well year-round for all sorts of projects. Glam Girl is especially perfect for quilting, papercrafting, and feminine fall fashion projects!
Now, let’s talk holidays! The weather may still be hot, but cooler days are coming soon and with them the fall holidays. We’ve got the perfect new Button Bonanza for all of your Halloween crafting: Scary! It’s a mix of seasonal orange shades, with some black thrown in for extra scare!
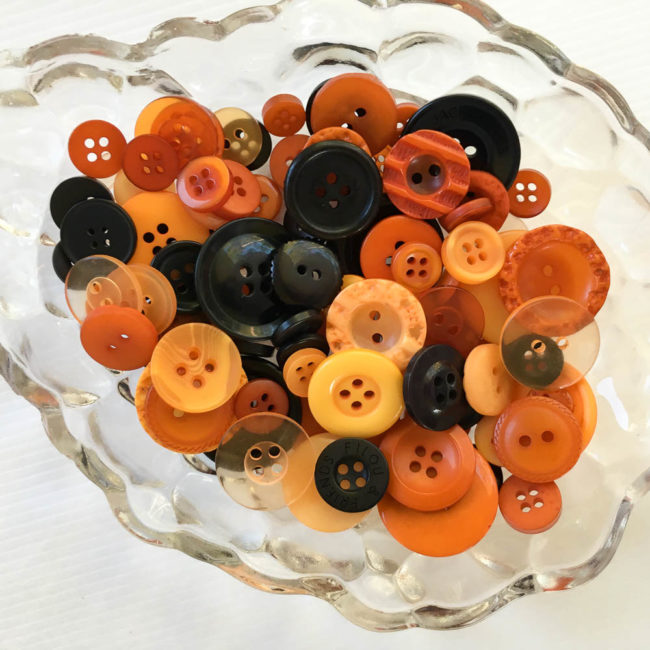
The Scary collection will take you from fall to Halloween to Thanksgiving with a perfect shade of orange for every project. Whether it’s treat bags, table decor, or a scrapbook page of your adorable trick or treater – it’s got to be Scary!
Christmas will also be here before you know it! Our three new Button Bonanzas for Christmas cover a wide range of popular color schemes for winter holidays.
Our Tis the Season Button Bonanza is a classic holiday color scheme – rich reds and deep greens, with a few contrasting lighter green shades to create perfect Christmas greenery!
This versatile combination is great for making ornaments & cards, wrapping presents, festive sewing projects…Tis the Season!
Blue, red, and white is also a popular winter color scheme and for fans of that palette, we bring you Winter Wonderland! Two different shades of blue – one light and one dark – paired with deep red and topped off with white and brown neutrals make Winter Wonderland perfect for everything from cute Christmas projects to winter snow scrapbooking!
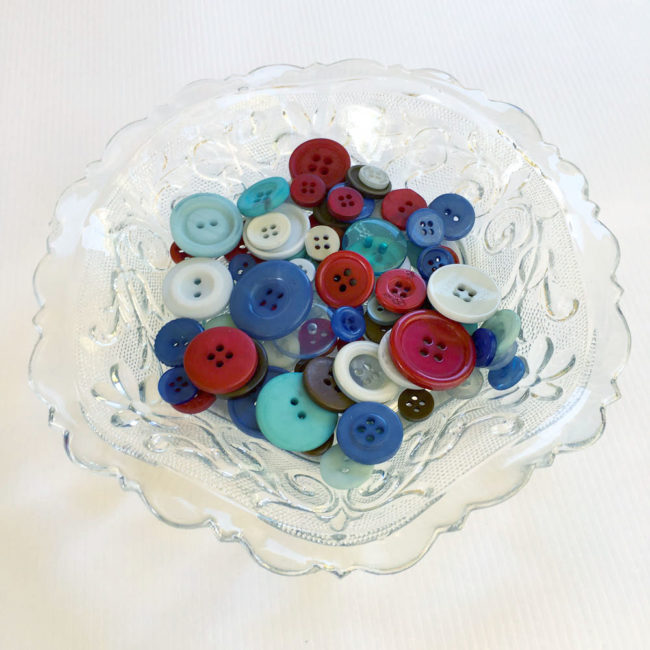
Winter Wonderland is a really versatile addition to your embellishment collection – when the winter is over, use the red, white and blue buttons for patriotic projects!
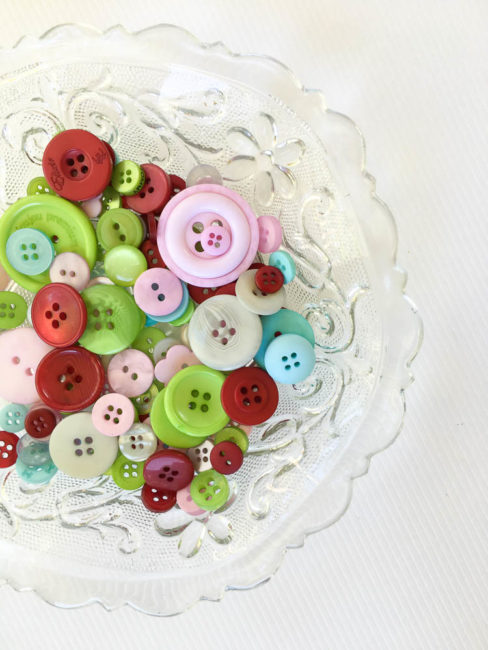
Finally, we have what may be The Merriest collection of all – a mix of pink, pale blue, lime green, and cranberry with white neutral. This fun combination is a great match for kids’ projects and for many of season’s more whimsical papercrafting collections. It’s a lighthearted alternative to the more traditional shades of green and red.
All of these new Button Bonanza products are available today in the Buttons Galore online store (and for wholesale order as well for our retail clients). We can’t wait to see what you all make with them!
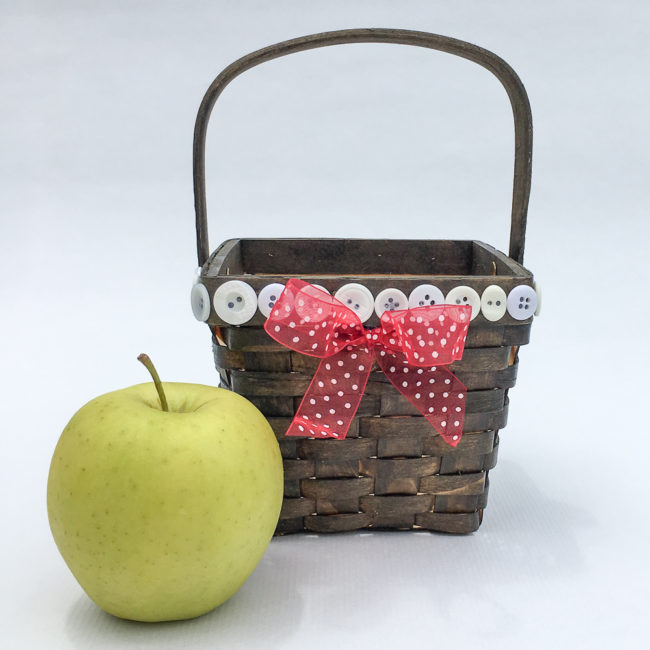
It’s that time of year to think about a teacher gift! Today’s project will show you how to take an inexpensive basket available at any craft or discount store, and turn it into a beautiful back-to-school teacher gift.
Supplies:
The basket that I used was a simple wood woven one that started out as unfinished wood. It cost less than $3 at a local craft store! It was the perfect size to hold a 15 ounce potted plant from the local home center.
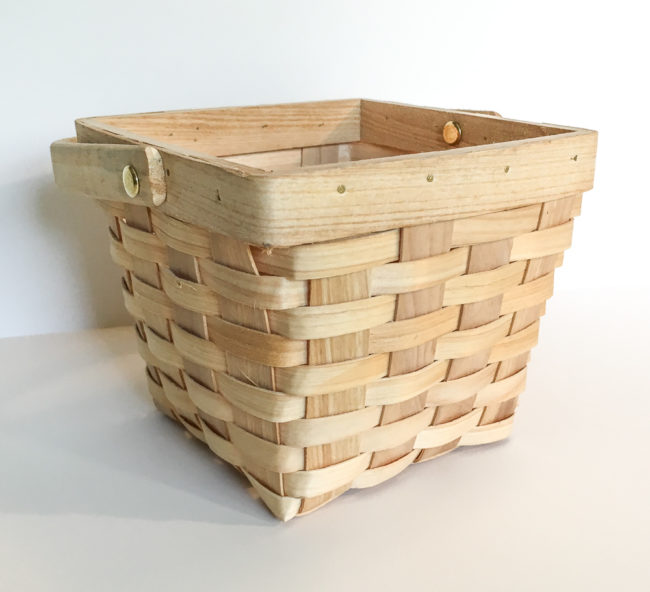
Start your teacher gift basket project by using a paint brush to apply the wood tint or stain to the basket. Be sure to use the brush to push the stain down into the cracks in the weaving so the basket’s original color won’t show through! Wipe off any excess tint and leave to dry.
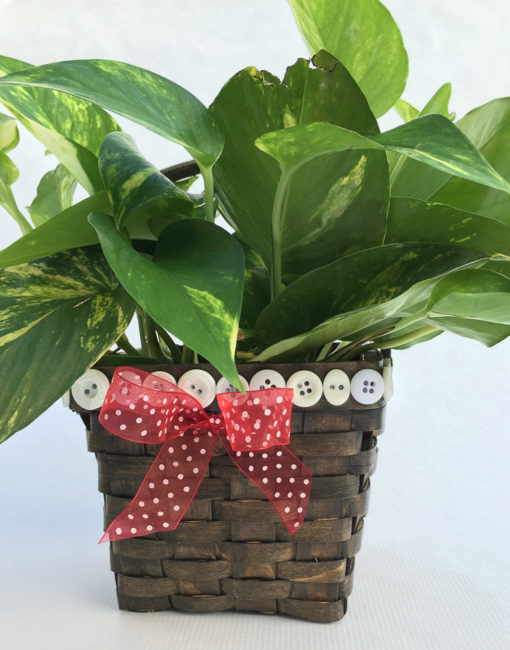
While the basket is drying, select from your Button Bonanza bag a grouping of buttons that are approximately the same size and that will fit around the front edge of the basket. (You only want to do the front edge of the basket so that the handle will still be able to be put down.)
Once the basket is dry, use a hot glue gun to adhere the buttons around the top edge of the front of the basket. (Make sure to leave clearance for the handle to go up and down!)
A beautiful bow is the final touch to make your basket special. Tie a bow using some ribbon and snip off the ends at an angle. Use the hot glue gun to adhere the bow to the front of the basket.
Your completed teacher gift basket can be used to deliver a wide variety of gifts to teacher: a small plant, an assortment of snacks or school supplies, or useful goodies like hand sanitizer and wet wipes.
Change up the color scheme a bit (such as by trying red buttons with green ribbon) and this basket will make a great way to deliver a small gift for Christmas or another occasion!
What occasion will you make a button gift basket for?
Even thought it’s still hitting temperatures close to 90 degrees at blog central here in Florida, Labor Day passing means fall will rapidly be settling in at Buttons Galore headquarters in New Jersey. And fall means a chance to pull out some colors and designs that many of us haven’t used all summer!
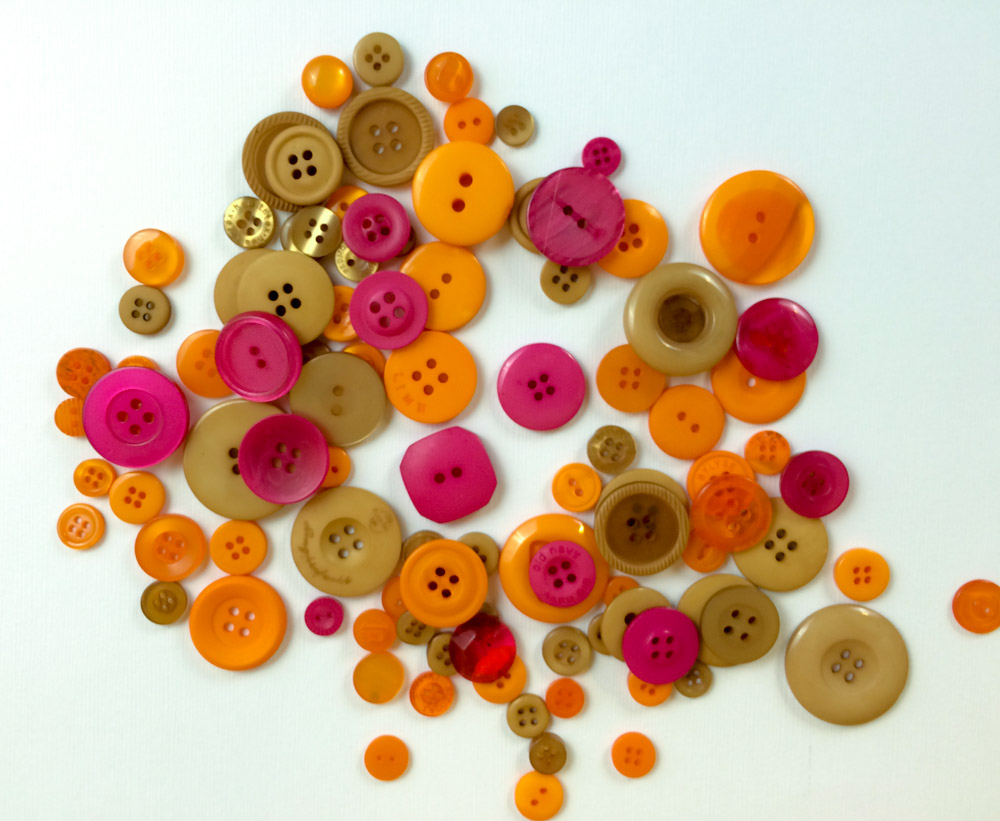
How about the Buttons Basics in Caramel and Outlandish Orange?
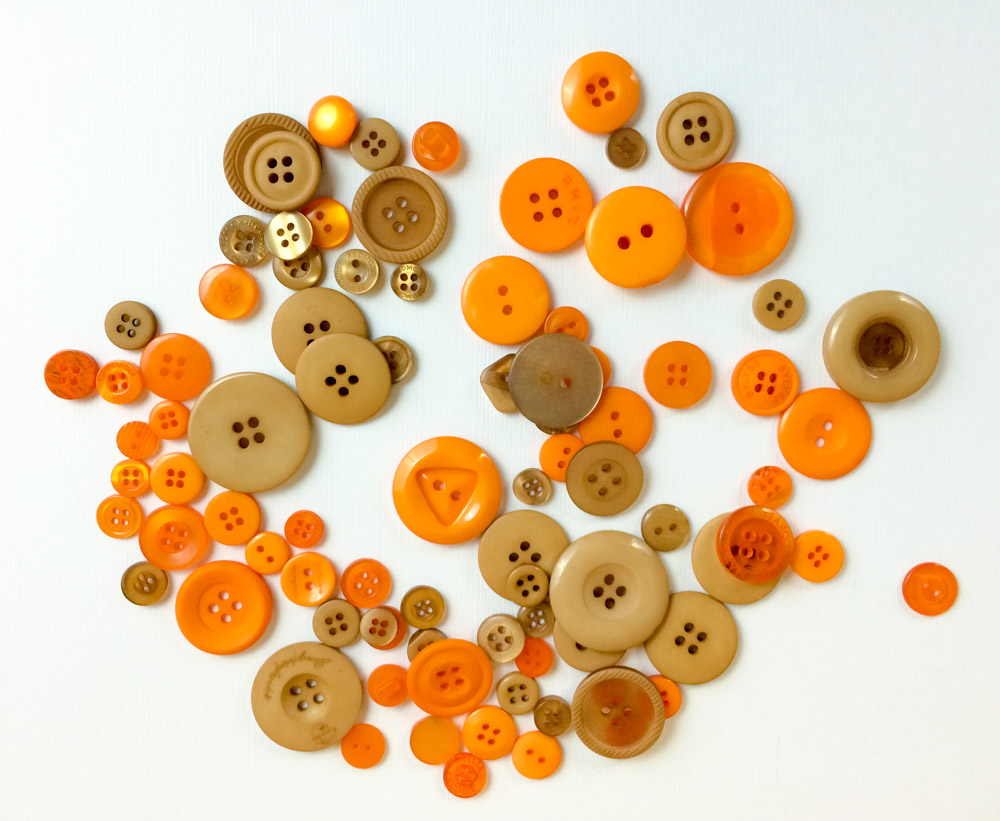
Add a nice holdover from summer – some deep pink from the “Summertime” Button Bonanza – and you’ve got a great mix of fall leaf colors!
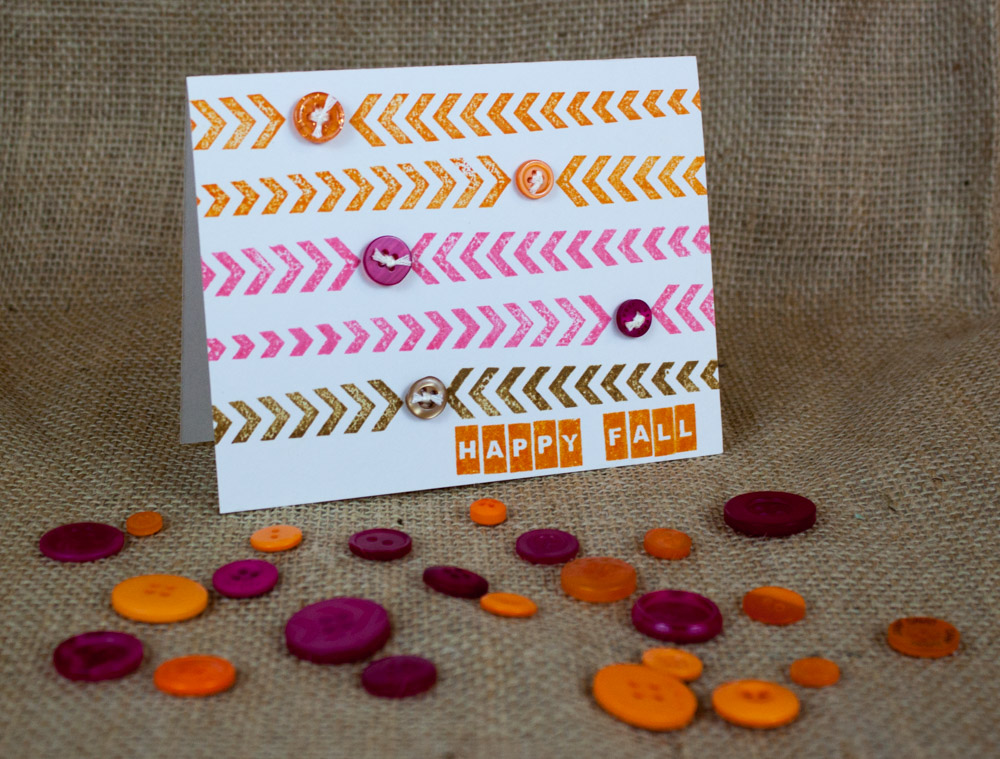
Fall brings many occasions that call for dashing off a quick note to someone. Let’s make them pretty – and festive!
Look for Outlandish Orange, Caramel, and the Summertime mix at AC Moore!
1. Cut paper in half longwise and fold to make a card base.
2. Starting near the fold, use the stamp set to stamp the arrow border once from each side, leaving a gap in the middle to place a button. Work your way down the card, changing colors as you get closer to the bottom.
3. Use the alphabet stamps to create the phrase “Happy Fall,” aligned with the right edge.
4. Thread buttons and tie them using embroidery floss and needle.
5. Attach buttons in border gaps with adhesive dots.
This versatile button card design could work for any season or holiday, simply by changing up the color scheme and the sentiment that is stamped. Try the bright primary colors in our Primary Button Bonanza (also available at AC Moore) for a birthday card, or red, white, and blue for a patriotic theme!
Lisa Fulmer visited us this week to share a project! We hope your enjoy her immensely creative interpretation of storage using the Farmhouse Button Bonanza!
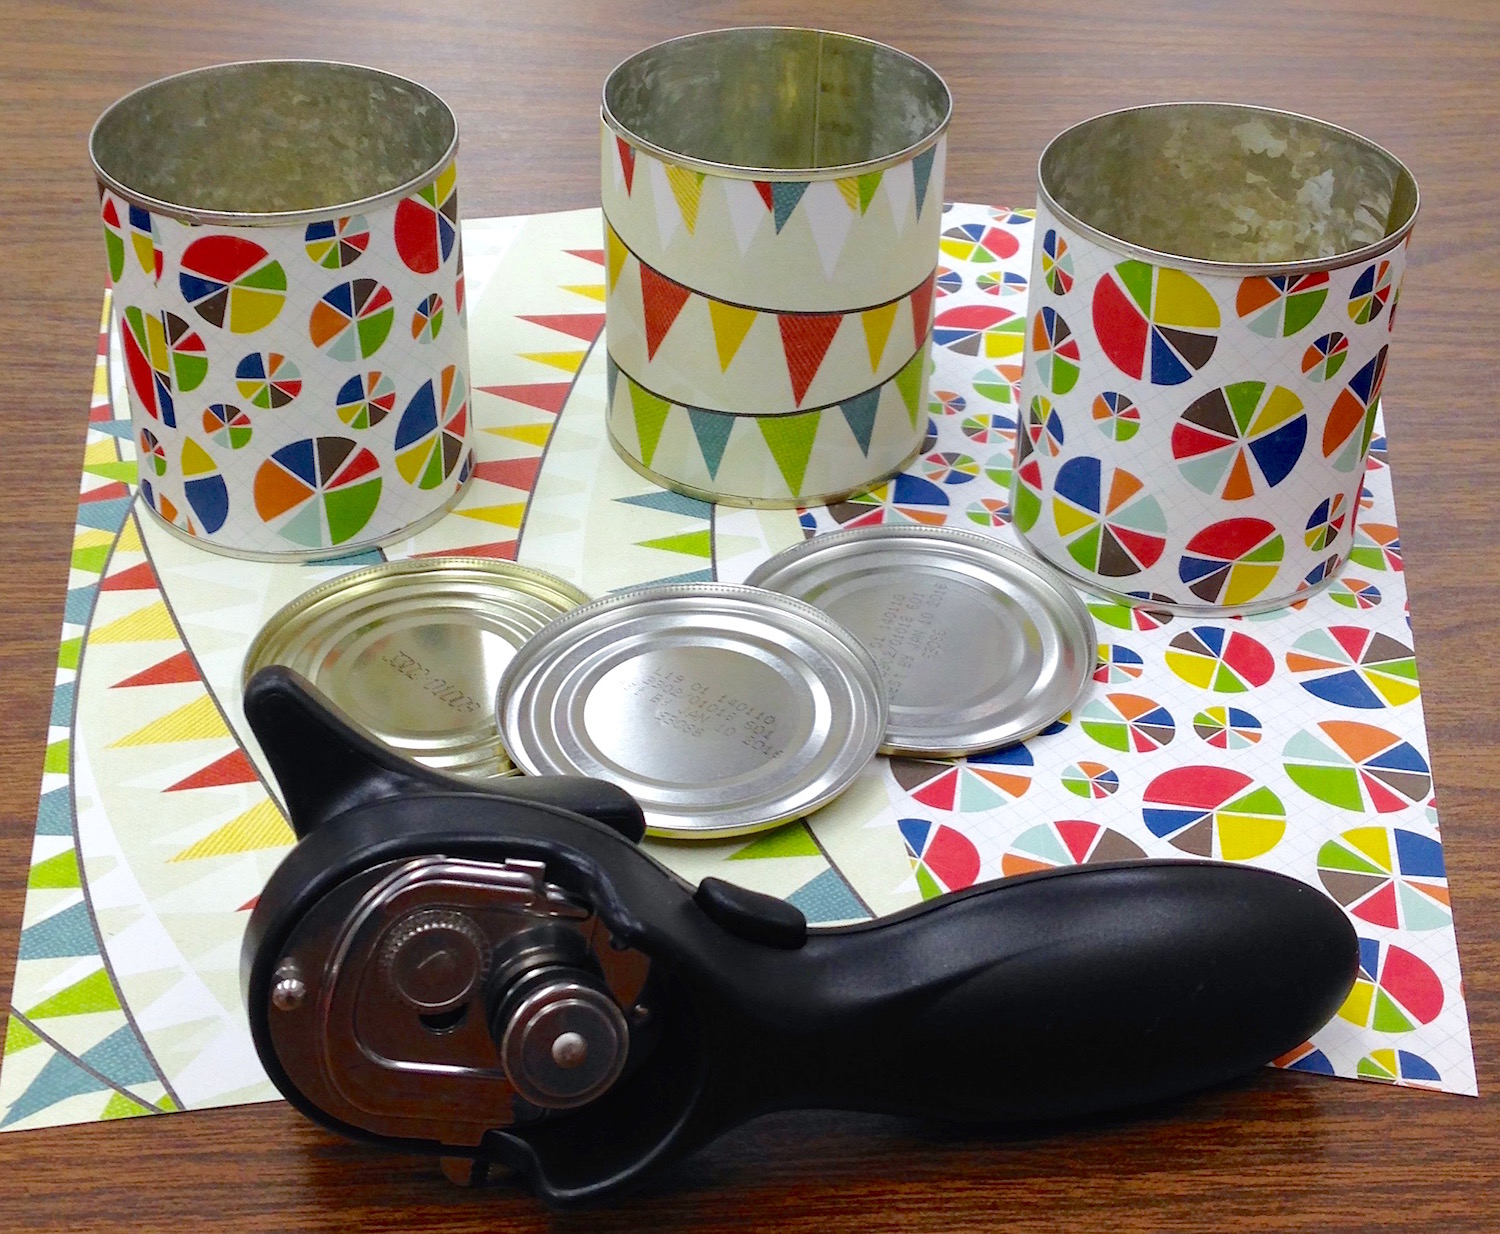
With the right type of can opener that leaves no sharp edges, you can turn any tin can into an adorable storage container!
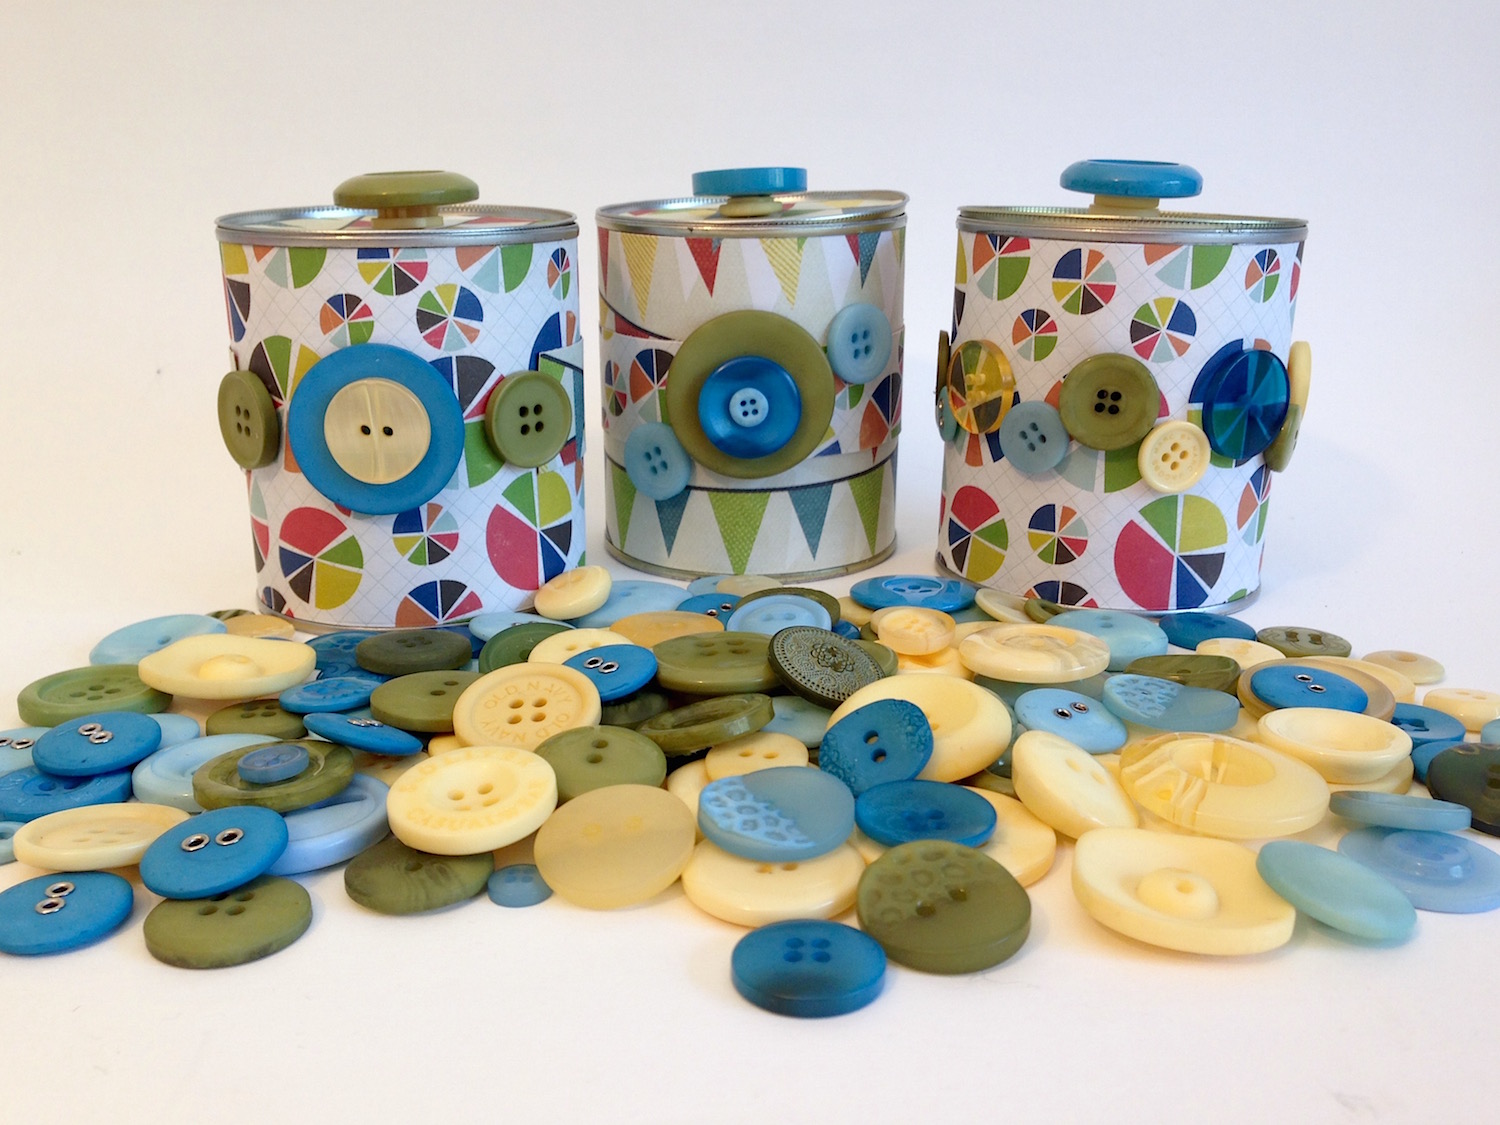
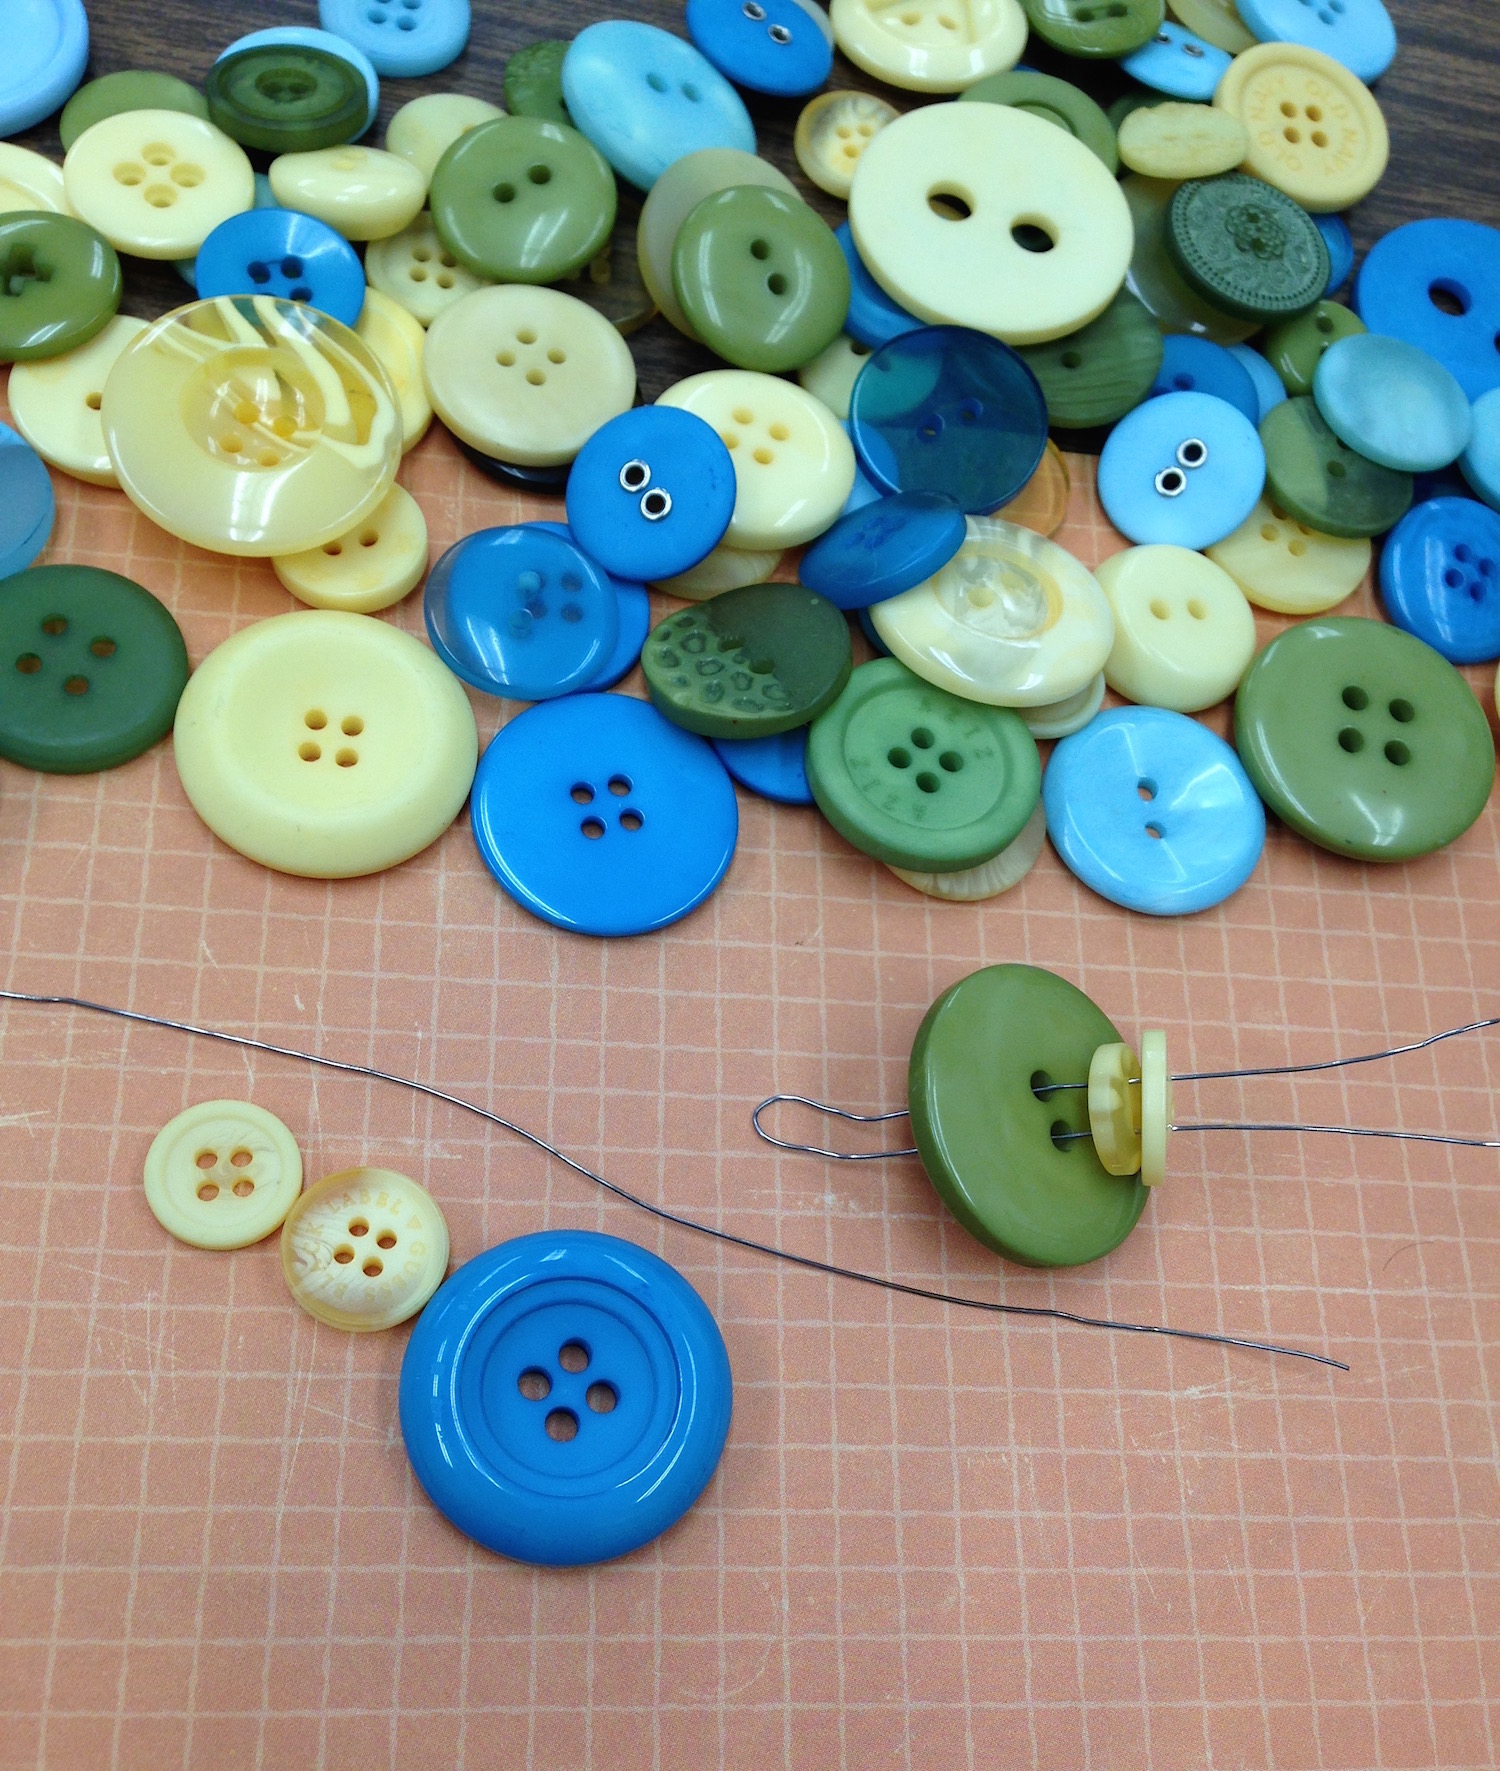
I used the Buttons Galore Farmhouse Button Bonanza in creams, blues and greens, along with some adorable scrapbook papers, to embellish these tin cans that used to hold mandarin oranges. A trio of these little tin can storage containers would be perfect for your desk or craft table.
Supplies:
 Directions:
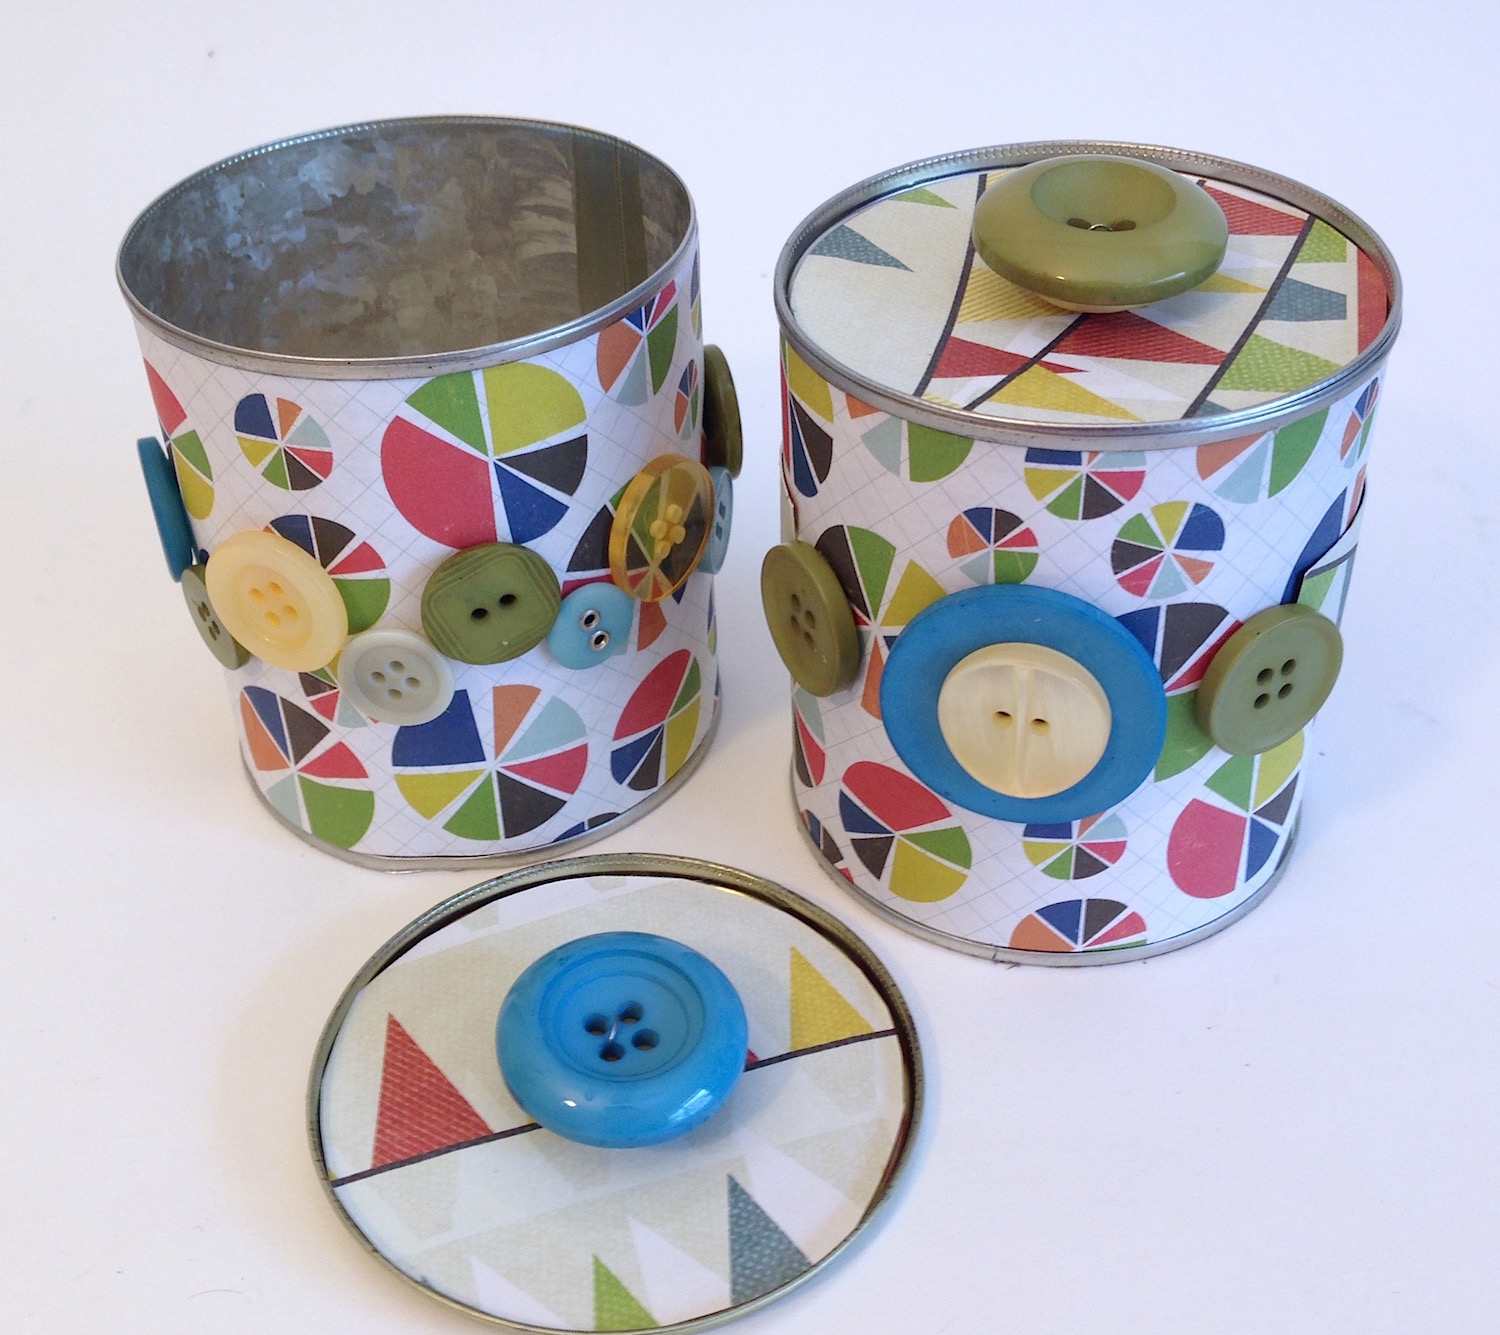 What would you like to store in these containers? They’d be perfect for storing buttons!
Lisa Fulmer is an artist, crafter, teacher, writer, on-air talent, as well as a marketing consultant. She’s also the author of two books – Craft Your Stash and Stylish Craft Foam Projects – and has worked with brands such as Spellbinders Paper Arts, Ranger Ink, DecoArt, SmoothFoam and Plaid. She’s currently a columnist and blogger for Bella Arts Quarterly magazine. To learn more about her work, visit her website.
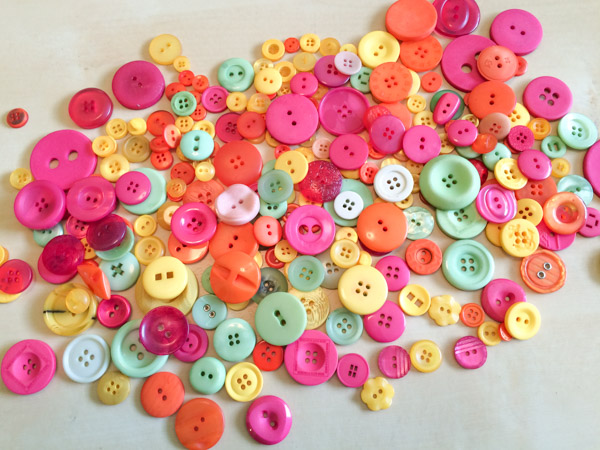
When I got my hands on this gorgeous Tutti Fruity Button Bonanza pack, it just called out for some card making. The beautiful yellow, orange, pink and mint green palette is so summer-y and happy!
Probably the most frequent card I reach for out of my card stash is a thank you card. Paired with some burlap and a few other supplies, some orange buttons from the assortment give me a thank you card that is perfect for just about any occasion: baby, wedding, or everyday. It’s bright, a bit rustic, and very on trend with the burlap!
 Supplies:
A button makes a great cheat to perfectly finish off a wrap of baker’s twine – no more messy bows that just aren’t quite right, or knots that look messy! And a button is always a great substitute for the center piece of a flower.
The tiny square button on the sentiment block actually serves two purposes. It completes a visual triangle of orange highlights that lead the eye across the card, and it also “anchors” the text block to the background visually.
What kind of card are you inspired to make by Tutti Fruity Button Bonanza?
It’s time to get busy making something to freshen up the house! We have been busy all summer and as the Autumn season fast approaches having a few handy tutorials on how to make personalized gifts and hand made home decor just seems fitting. So today I have a Personalized Monogram Home Dec project to share with you. Enjoy!

Supplies Needed: Buttons, Brads, Micro Beads, Gem Tac (R), Scrapbook Paper, Hot Glue Gun, Scissors, Frame

Print letter of your choice as large as you would like finished monogram to be. Place beneath paper and put against a well lit window to serve as a light box. Then trace onto scrapbook paper.

Outline one third of the traced letter with Gem Tac.

Fill in the area fully with Gem Tac.

Place as many buttons as fit onto the glue covered area.

Quickly cover the entire surface with micro beads.

Remove excess beads before moving onto next step.

Continue covering the entire traced area a bit at a time following the steps above.

Cut the prongs off of the brads using strong sharp scissors.

See how much flatter brads lie once the prongs have been removed?

Hot glue the altered brads to the surface of the monogram randomly. Here I chose to hide "barren spots" with the brads. :)

Once your piece has fully dried, place in a frame and you are ready to enjoy your brand new PERSONALIZED home decor!!!
I would love to see what you make! Please leave a comment with a link to your personalized home decor projects! :) I will be sure to pop over and leave you some love on your project!! :)
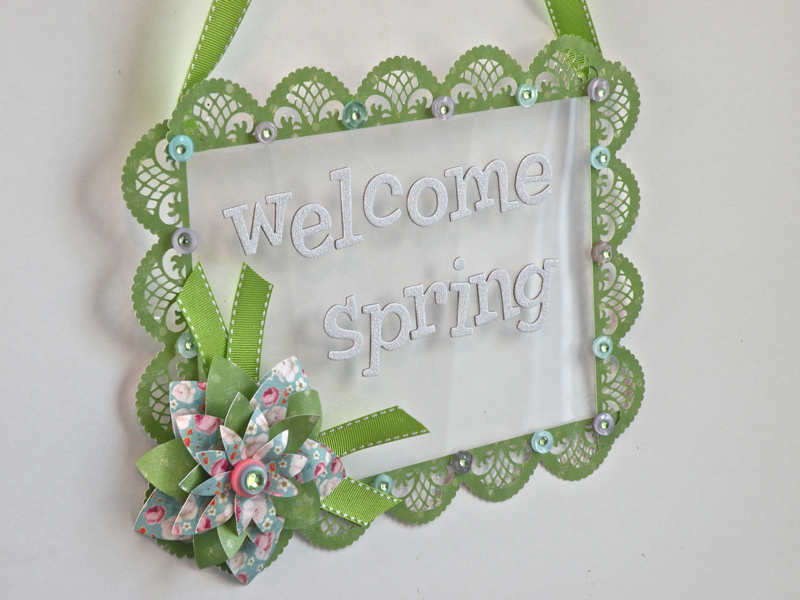
Good morning! It’s official…SPRING HAS SPRUNG! So why not create a fun wall hanger to match the season? I don’t know about you, but I could use some spring colors in my house.
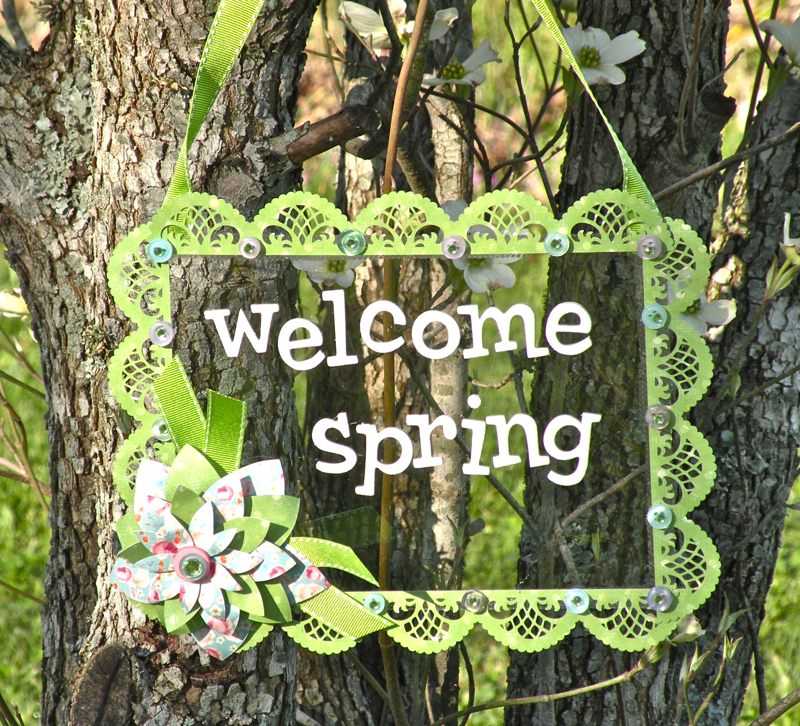
For this seasonal wall hanging, take a sheet of 12×12 acrylic, and trim it down to 6×8.
Then using your die cut machine or even a good punch, create your border with 2″ strips from patterned paper.
Adhere the border to the acrylic using the Beacon Zip Dry Adhesive (my favorite for acrylic and paper).
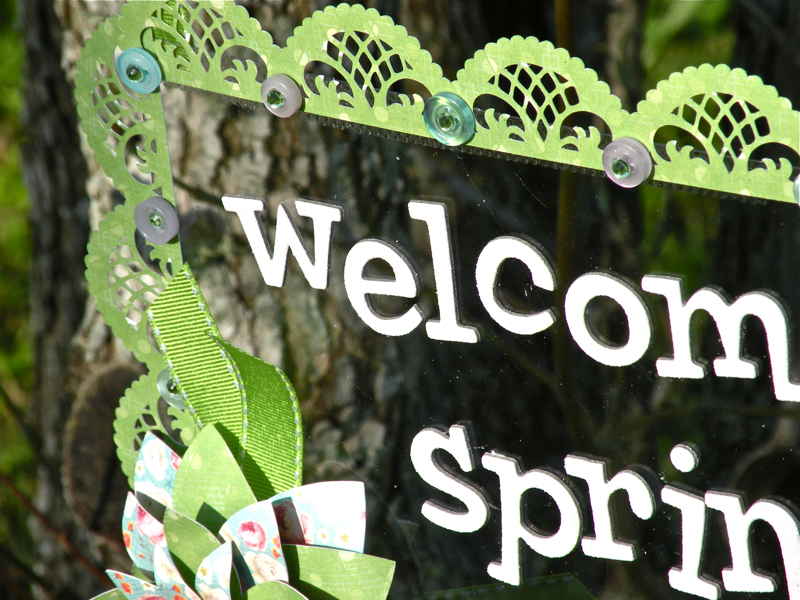
Grab a beautiful Buttons Galore & More Button Bonanza Pastel Pack and alternate buttons, complementing the edges of the frame. Then adhere a gemstone to the top of each button using Beacon Gem Tac. (I used pastel blue and purple buttons with pastel green gemstones).
After that, hand cut or use your die cut machine to cut 5 flower layers. I used double-sided patterned paper and alternated sides.
Layer flowers using foam pop dots, and then adhere 2 more Bonanza Pastel Buttons and one more gemstone right on top.
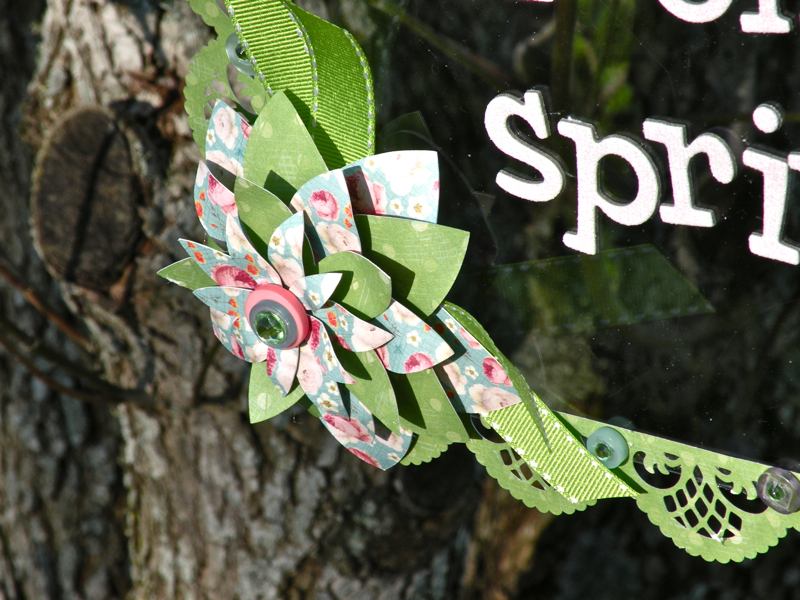
Adhere flower to corner of frame, and then add Lime Green Stitched Grosgrain Ribbon underneath the flower and also use as hanger behind frame. And that’s it! Beautiful and perfect to bring in spring and lighten your room!
I hope you found some inspiration from the post today!
With spring in the air and Easter approaching it’s that time of year to make baskets and give sweet little gifts.What crafter would not want a basket filled with Buttons Galore & More buttons! Forget the candy, give her buttons. I made this basket from cardstock, and found a pattern online. You can find patterns from the simple pattern you hand cut by hand, to the elaborate patternthat you cut with your machine.
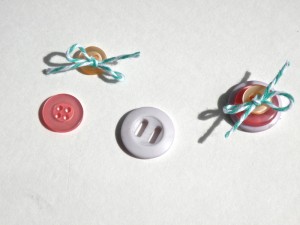
To layer the buttons take 3 buttons from the Button Bonanza Pastel Pack
Tie twine into the smallest button, then hot glue buttons on top of one another.
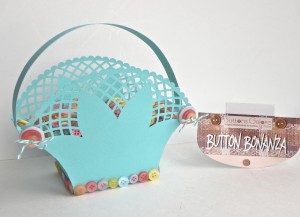
After you layer buttons adhere to basket using hot glue again.
Then carefully adhere buttons randomly along bottom edge for added flair.
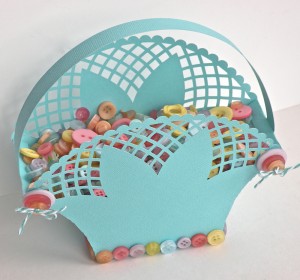
Pour rest of Pastel Button Bonanza into basket and make someone’s day bright and happy!

I hope you have fun with this project- Pinky- Buttons Galore & More Design Team
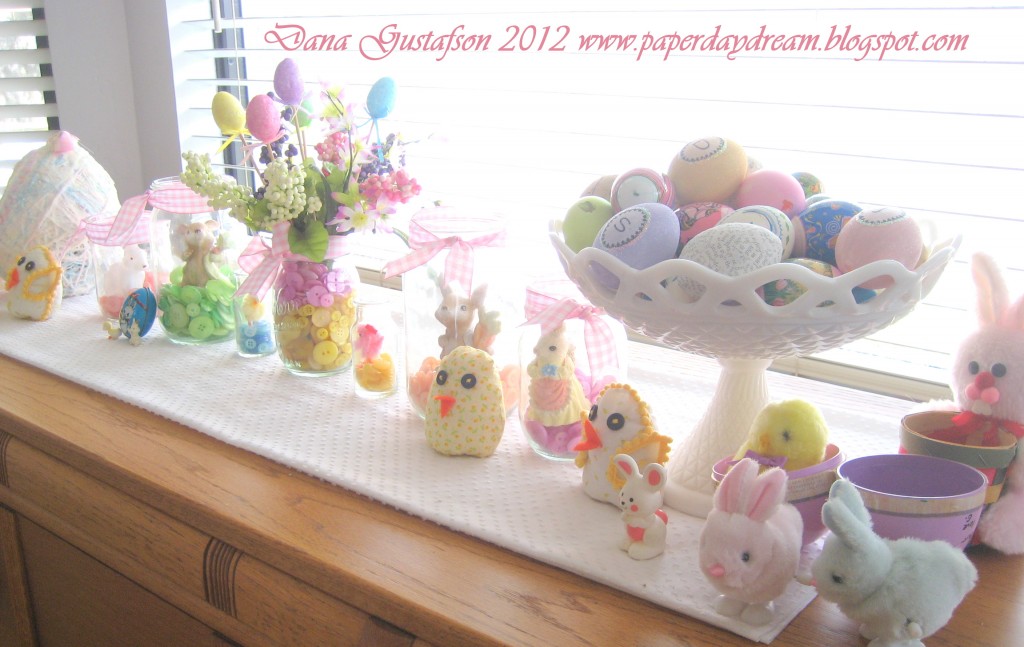
Hello there! Today I am bringing you a super simple tablescape idea for spring using buttons, ribbon and clear glass jars…a “button-scape” if you will! I’m willing to bet we all have a hodge podge of glass containers around the house (mason jars are one of my favorites) along with small spring and Easter themed nic-nacs. Why not pull them together and make them a cohesive tablescape with the unifying ingredients of buttons, jars and ribbon?
Materials from Buttons Galore and More:
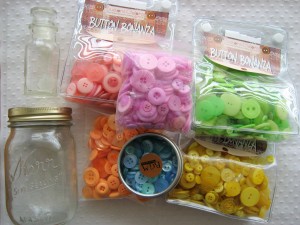
Other items needed:
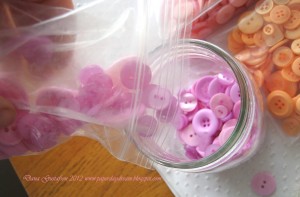
Are you ready for the super complicated directions???? Just kidding, this process is simple.
Check out the various items I used in my tablescape…
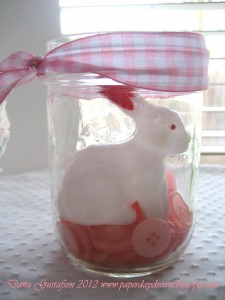
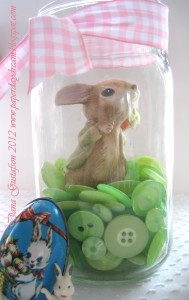
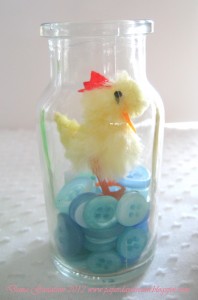

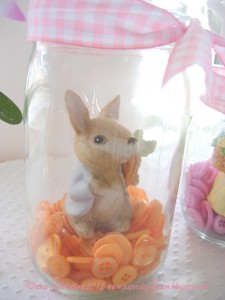
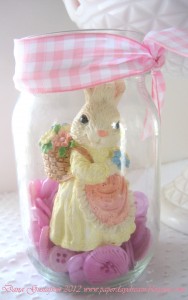
I loved the glass domed effect of the jars on my little treasures and the buttons are just the perfect pretty stage to show them off with!
Thank you for hopping by my post today! I hope it inspires you to put your buttons to work this spring!

Dan and Lisa - Owners
We’re back! From Winter CHA (Craft and Hobby Association) trade show, that is.
A few members of our design team, past and present, were able to make the trip to Anaheim, CA from January 29th – February 1st 2012. I was lucky enough to be there and I thought I’d share a few photos I took of the booth with you.
Above are Dan and Lisa – the owners of Buttons Galore and More. Buttons Galore and More was one of only a few companies I found that sells both to wholesale customers and on their retail website at buttonsgaloreandmore.com

Summer
I love the seasonal themed packages.

Spring

New button collections by Laura Kelly. The packages all have a little project sheet as part of the packaging!

The Haberdashery line is probably my favorite!

Aren’t the Color Blends great? No matter what project you are working on you’ll have a selection of buttons in the same color family to choose from!

And the Button Bonanza packages… because you can NEVER have too many buttons!

Buttons Galore and more on TV with Vicki O'Dell
Our very own Design Team member (ME!) appeared on a local Cleveland TV show in June to show viewers how easy it is to make a one of a kind button bracelet.
While there is a can of old collected buttons in a tin can shown – and they are fine to use – you may not find enough buttons in the colors you need or you may not want to use Grandmas buttons on a piece you will give away.
Our Button Bonanza packages hold enough buttons to make 2-3 bracelets and they come in lots of colors!