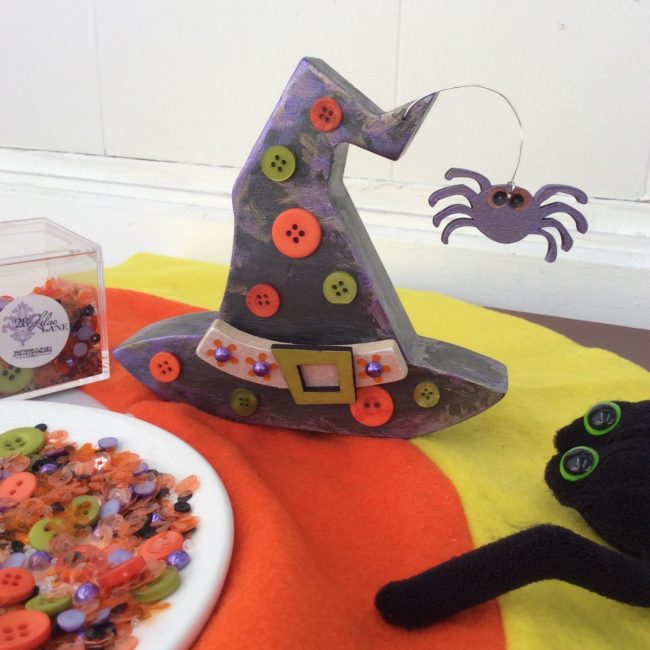
For this witch hat Halloween decoration I started with a wooden witches hat from Foundations Decor. The hat comes with a band, buckle and a cute little spider with a piece of wire you can curl any way you like.

For this witch hat Halloween decoration I started with a wooden witches hat from Foundations Decor. The hat comes with a band, buckle and a cute little spider with a piece of wire you can curl any way you like.
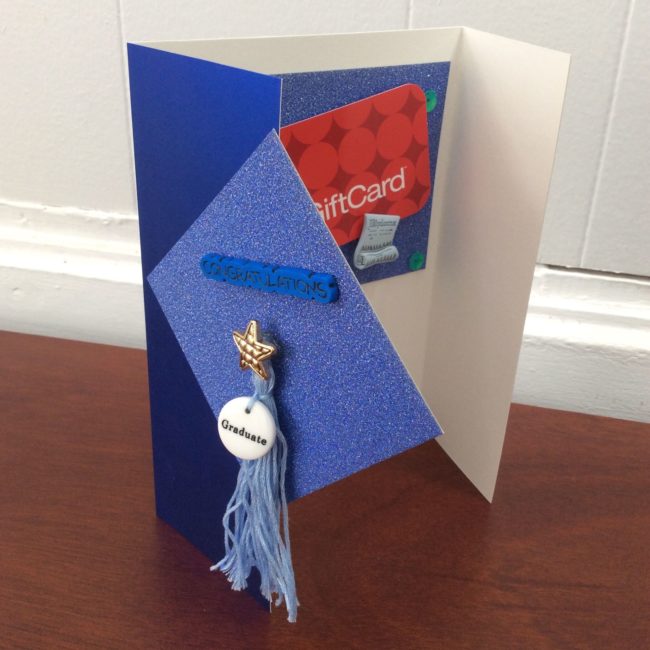
Create this unique graduation card for your very special graduate.
This card features a square on the top that looks like a graduation cap along and is adorned by a tassel. It is fun to make and embellish with buttons and elements from the Grad collection.
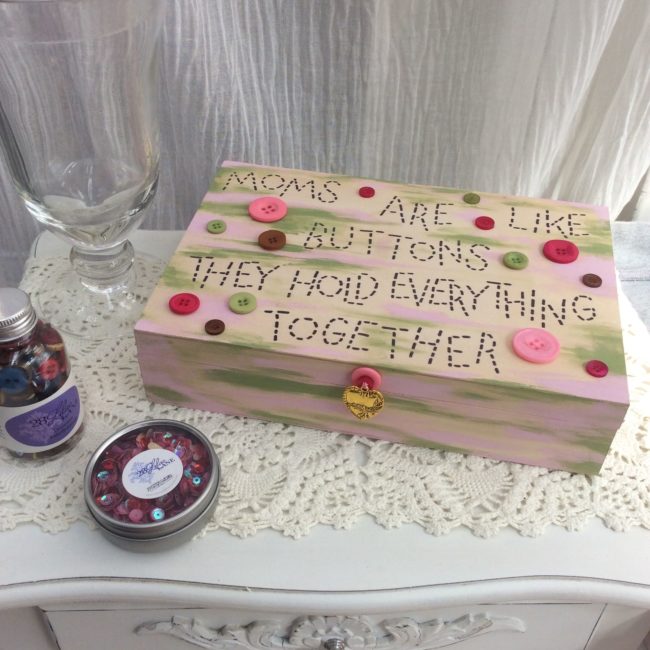
Here is an idea to keep Mom’s craft supplies organized. It’s both thoughtful and practical.
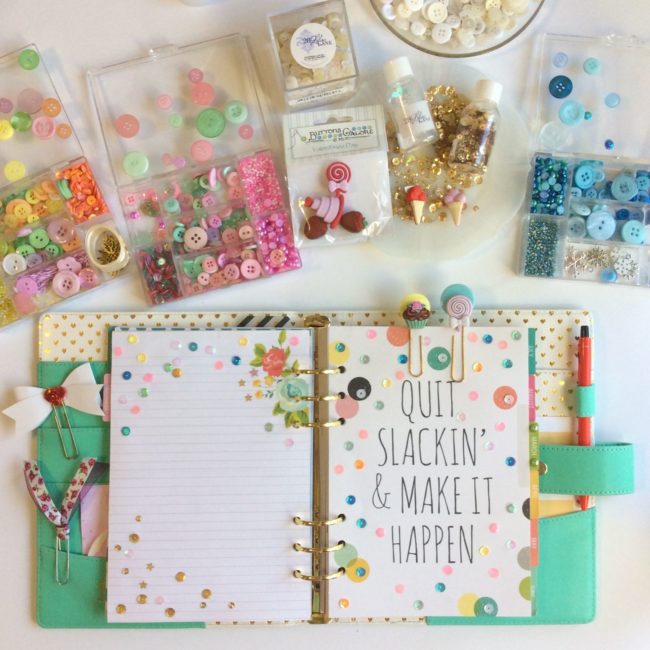
I like to make my planner pages stand out by adding a bit of sparkle and bling. A fun and easy way to make your planner unique is by adding some sequins and buttons. I used a variety of sequin colors from the 28 Lilac Lane line of embellishments from Buttons Galore.
Simply position or sprinkle the sequins on my planner divider page spread.
Once I liked the placement I glued each sequin down. I recommend using Perfect Paper Adhesive. It dries clear and there is no odor plus once dry, you will never see any residue of he glue. I have to say it was very zen. I like repetitive crafts like this.
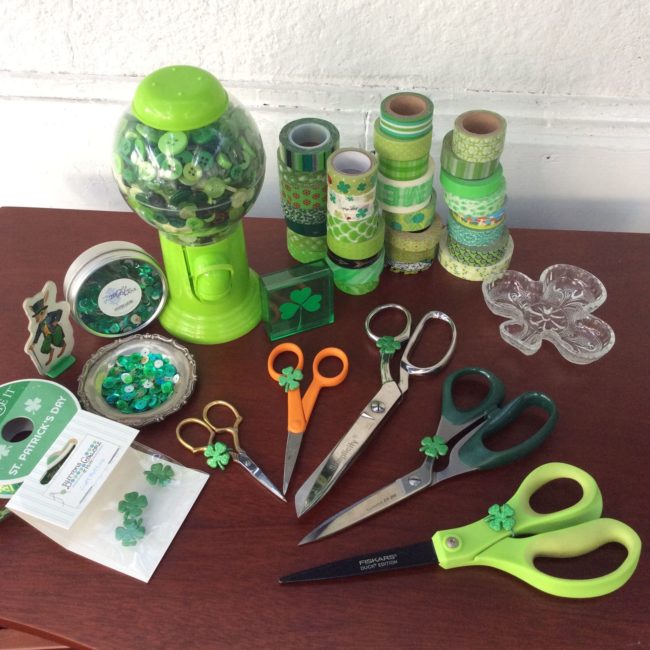
Everybody has a pair of scissors. Some of us, well, have a few pairs of scissors. In the past, I have customized my scissors with ribbon or decorative tape. I thought it might be fun to decorate the scissors for St. Patrick’s Day with Buttons Galore’s Glitter Shamrock Buttons. This is a fun and easy project for any level of crafter.
A whole year has gone by! Wow. It seems like yesterday when I was making this spider for the 2013 Halloween Popcorn Box Blog Hop!
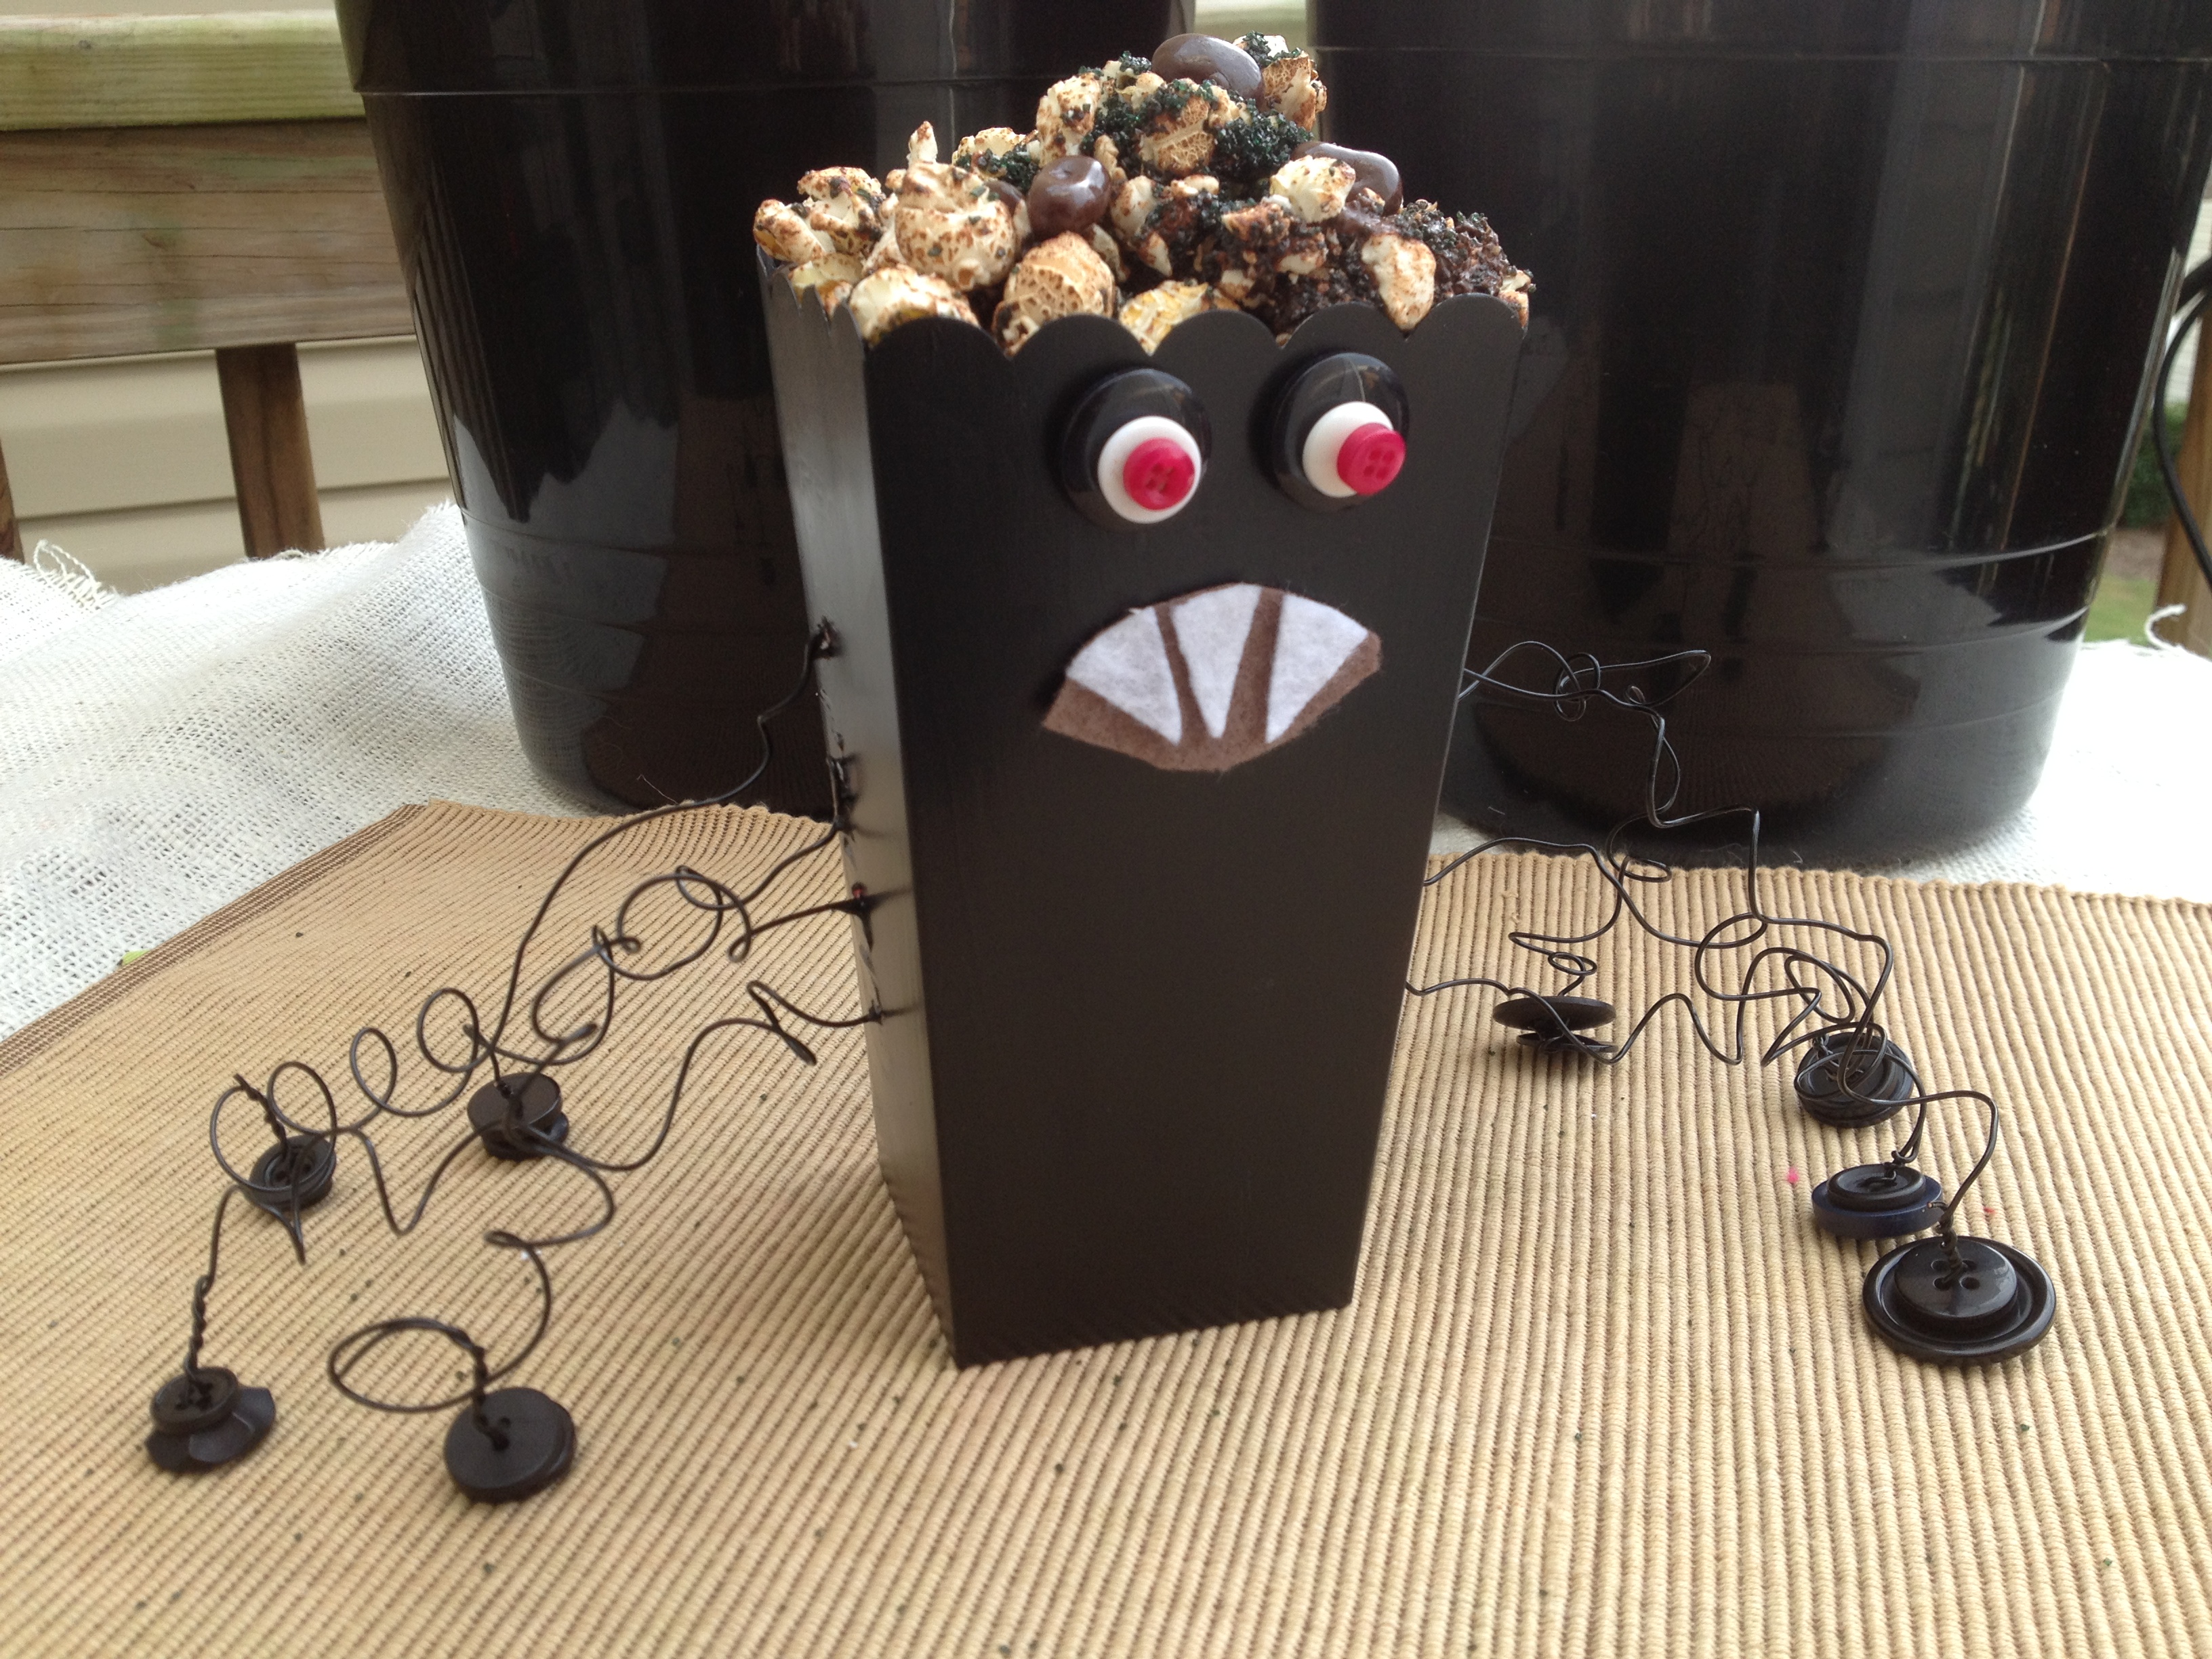
Well, it’s here again and I am loving this little box that I created as a pumpkin filled with….BUTTONS!
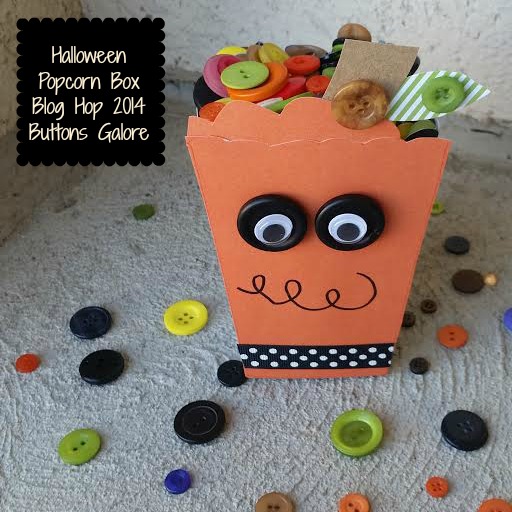
There are LOTS Of great creative inspiring projects this year!
And you can enter to win a fabulous prize too! a Rafflecopter giveaway
Buttons Make Everything Funner,
Laura
Holly here from Ribbons & Glue sharing with you a lil’ sneak of Laura Kelly‘s Me and My Peeps, Personalized Family Magnets made from Expressionery Stationary and Buttons Galore buttons.
Head over to my Blog to see the full tutorial on how I made these Personalized Family Magnets and enter into the Rafflecopter for a chance to win a $200 Expressionery Gift Set.
Stay connected with Expressionary.com
Facebook * Twitter * Instagram * Blog

Like Me on Facebook!

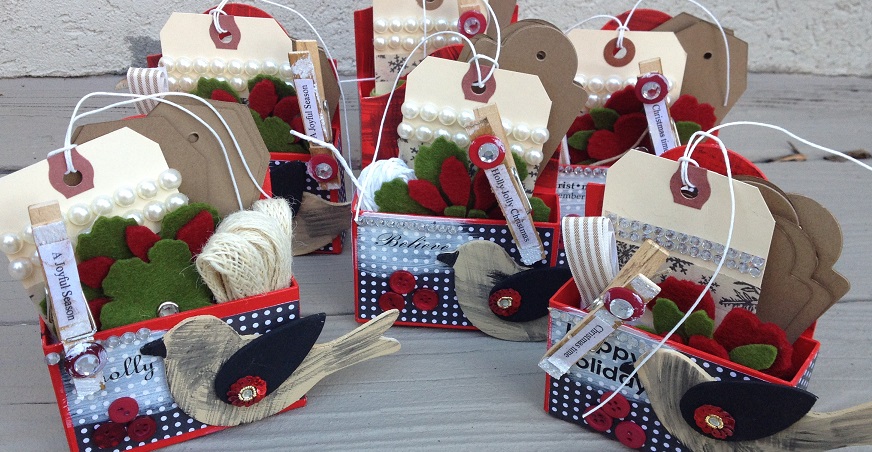
This Christmas, why not give your artsy crafty friends and family Inspiration kits? These adorable Christmas Inspiration Kit Gifts are embellished with buttons. They are fun to make and will surely delight every creative person on your list.

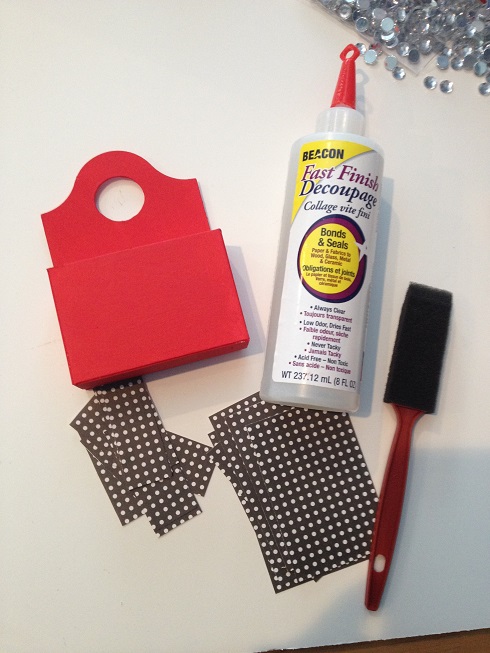
To create your Inspiration Kit Gifts, die cut one Bag Caddy from the matboard. Assemble it according to manufacturer’s instructions using the red line tape.
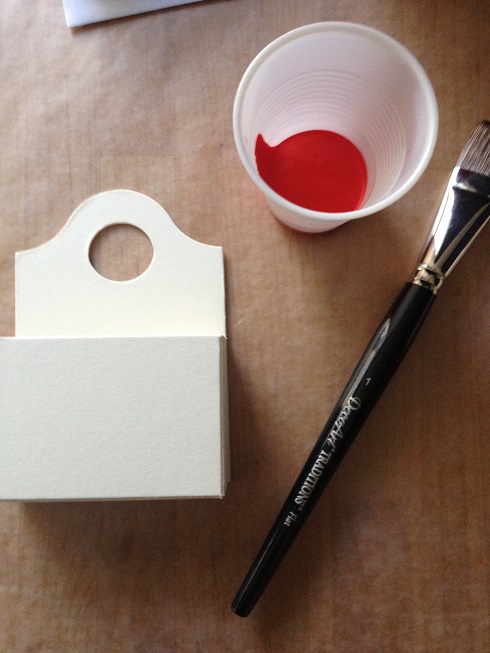 Paint the box, inside and out Tuscan Red. Measure the front and sides of the box and cut patterned paper using the paper trimmer. Use the foam brush and decoupage medium to apply the paper to the box.
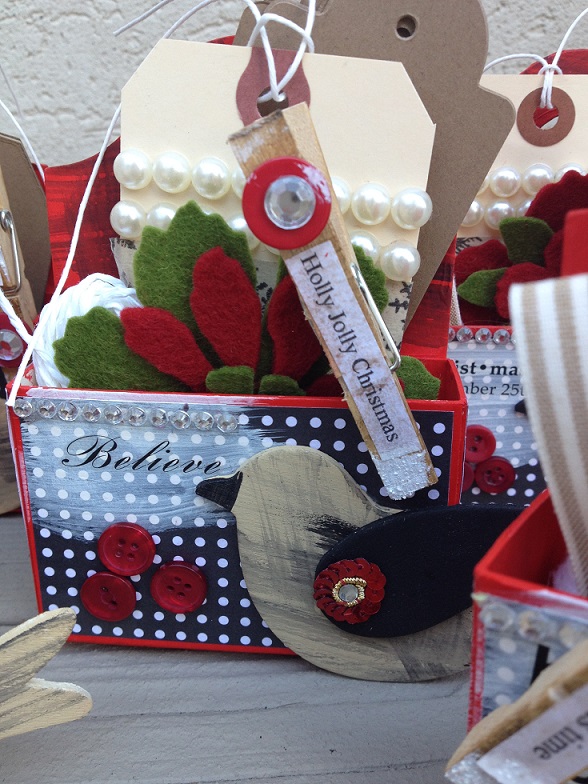
 Dry brush snow white on front of box. Paint the bird shape Antique White. Paint the teardrop for wing and bird beak Lamp Black.

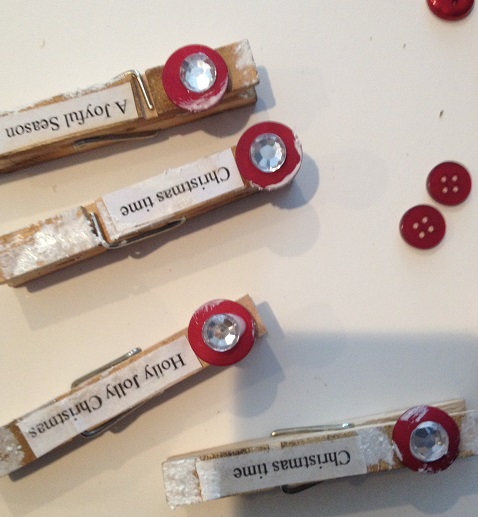
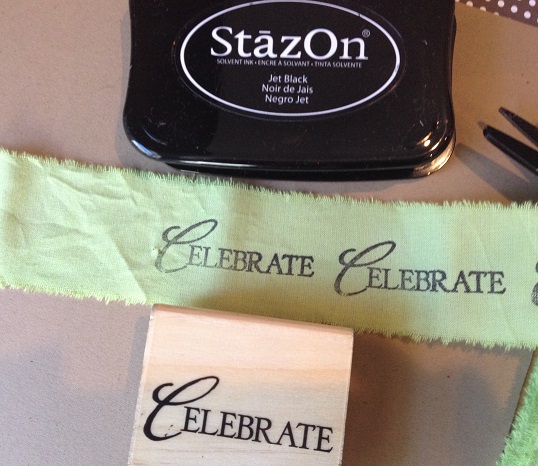
 Using the brown chalk ink, ink the clothes pin. Print out holiday sentiments using plain computer paper and a printer.

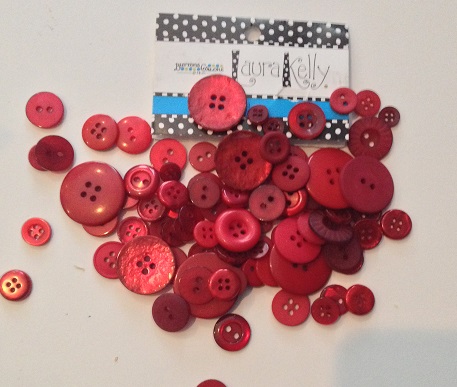
Cut the sentiments out with the scissors. Use the decoupage medium to apply them to the clothes pin. Glue button on one end of clothes pin with the Gem-Tac. If desired, glue a flat backed acrylic stone to the center of the button.
 Glue the bird shape, wing and flower center to the box.
 Stamp sentiment over white swatch of paint on box front.
Here is the super fun part… die cut flowers, tags, etc. to fill your Christmas Inspiration Gift Kits. Die cut the cardstock and the wool felt.
 I also included some hand dyed stamped ribbon in my Inspiration Gift Kits.
 Glue some buttons to the front of the box.
These Inspiration Kit Gifts are great gifts for teachers, hostesses, neighbors, gift exchanges, etc. Make several at once so they will be on hand if an unexpected guest drops by. Instead of art supplies, fill the boxes with homemade edible goodies.
Thanks for letting me share my Inspiration Kits with you.
Live Life Creatively,
Buttons and Boho Bracelets … Say that three times fast.
This Dyed Boho Bracelet DIY is extra fun and special. Why BUY when you can DIY? Right?
We’ve all been having a lot of fun with the Rit Dye, and I had a lot of Moda Jelly Roll Strips left, so I was playing around with braiding and made this Boho style bracelet. It’s actually braided, but it has that vibrant, Boho feel.
It’s funny, I work with buttons a lot, obviously … but it had been a while since I’d sewed. My fingertips would highly recommend you use a thimble!
Take three dyed Moda Jelly Roll strips and braid them. Determine placement for the buttons on your wrist and add the buttons. For specifics on how I dyed my fabric, please see my Rit Dye Blog Hop Post. It was really very easy! The strips naturally fray a bit and will fold and show different bits, it really adds to the look of the braid.
Knot your braids at each end. Tip – use a clip board to hold your strips and leave plenty of extra length at each end so that you can knot the ends and also tie it on your wrist.
You will also need needles, and as suggested by my fingertips, a thimble! I hope you enjoyed this Dyed Boho Bracelet DIY.
Have you hopped with us? There are so many fun projects with buttons and dye that you won’t want to miss.

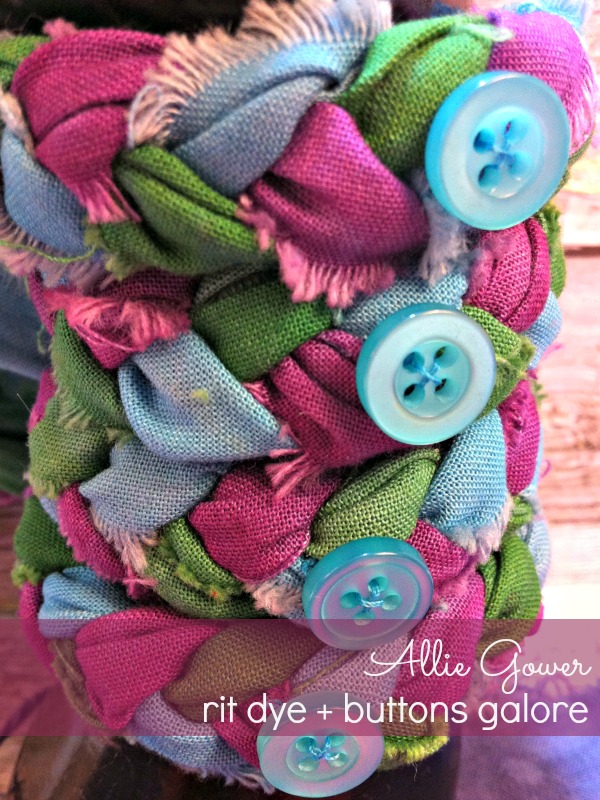
Braided T-Shirt Bracelets, we are seeing this unique idea for repurposing old t-shirts everywhere! After having experimented many times making several in different colors and styles, I think this is my best version. The secret? The buttons. I first made a batch of these to wear to my Zumba classes. No matter how sturdy the construction seemed to be, after a few sweat sessions, they kept falling apart. So finally I decided to give it another try but added buttons to the mix this go-round.

First you will need to cut strips of some old t-shirts. I cut mine into a strips measuring approximately 2″ x 10.” I used about five but you can use 2 or 3 more or less depending on how large you want the end result to be.
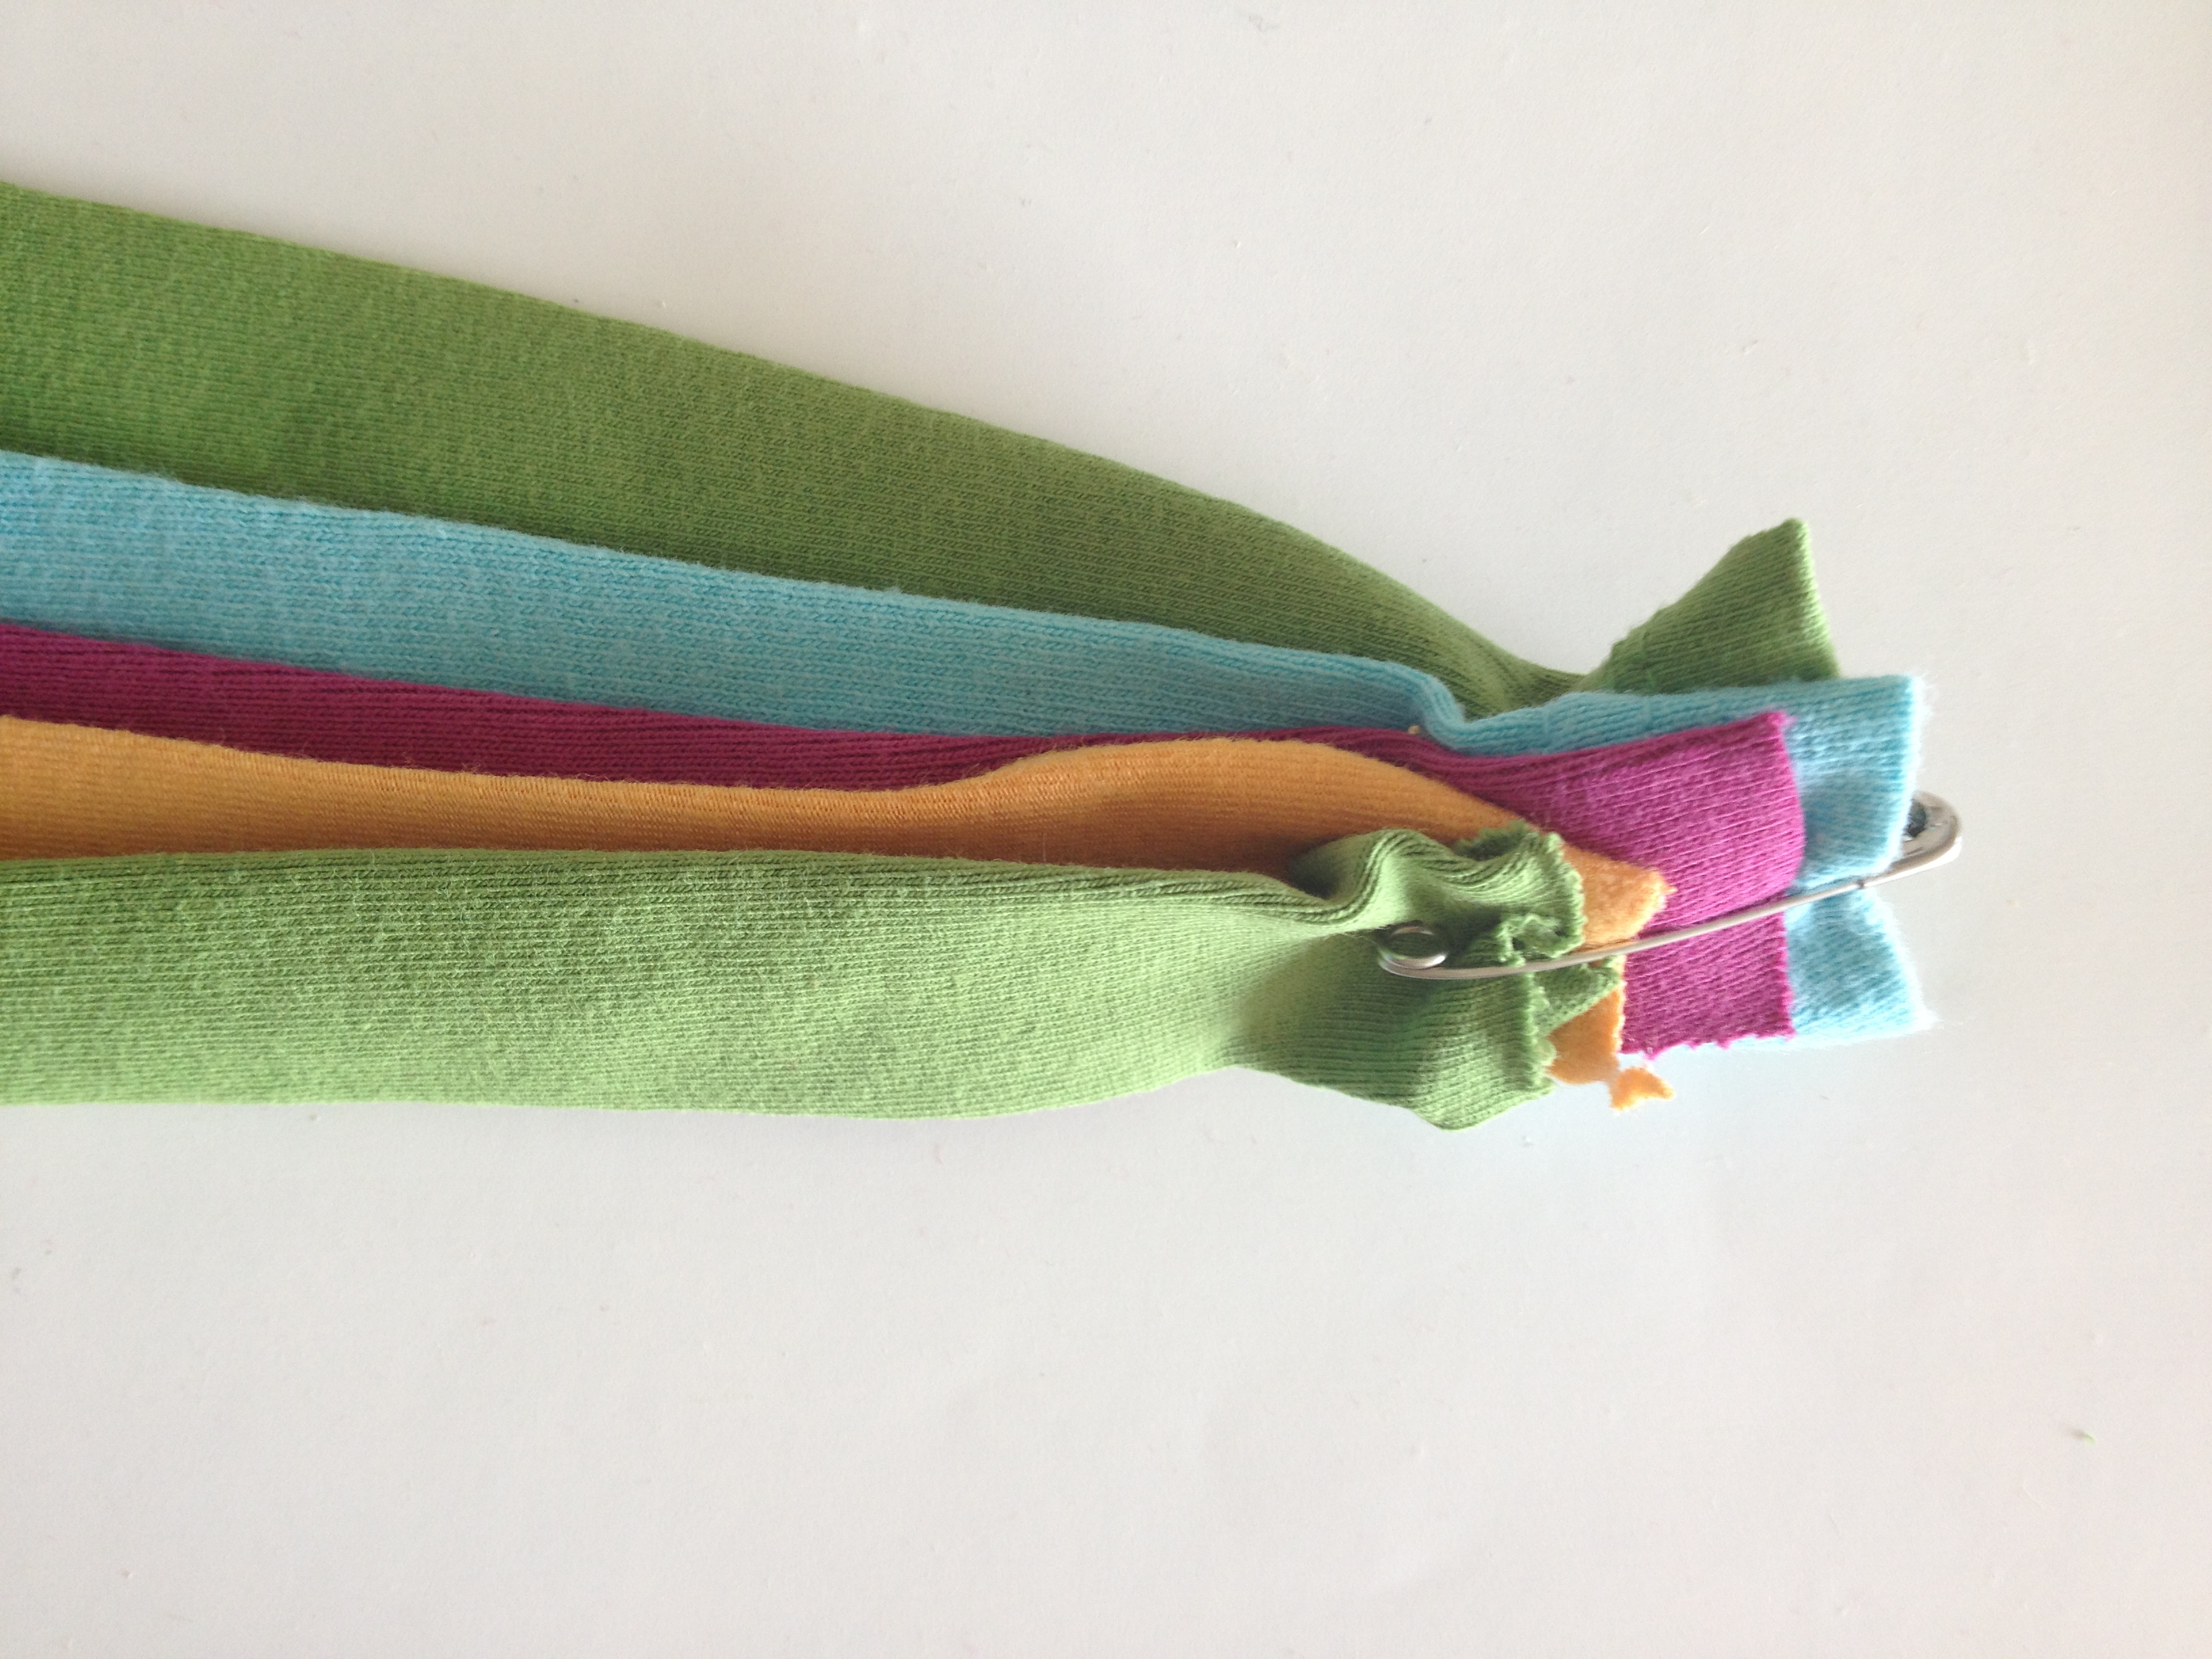 To keep your strips in place while braiding them, secure the ends with a safety pin.
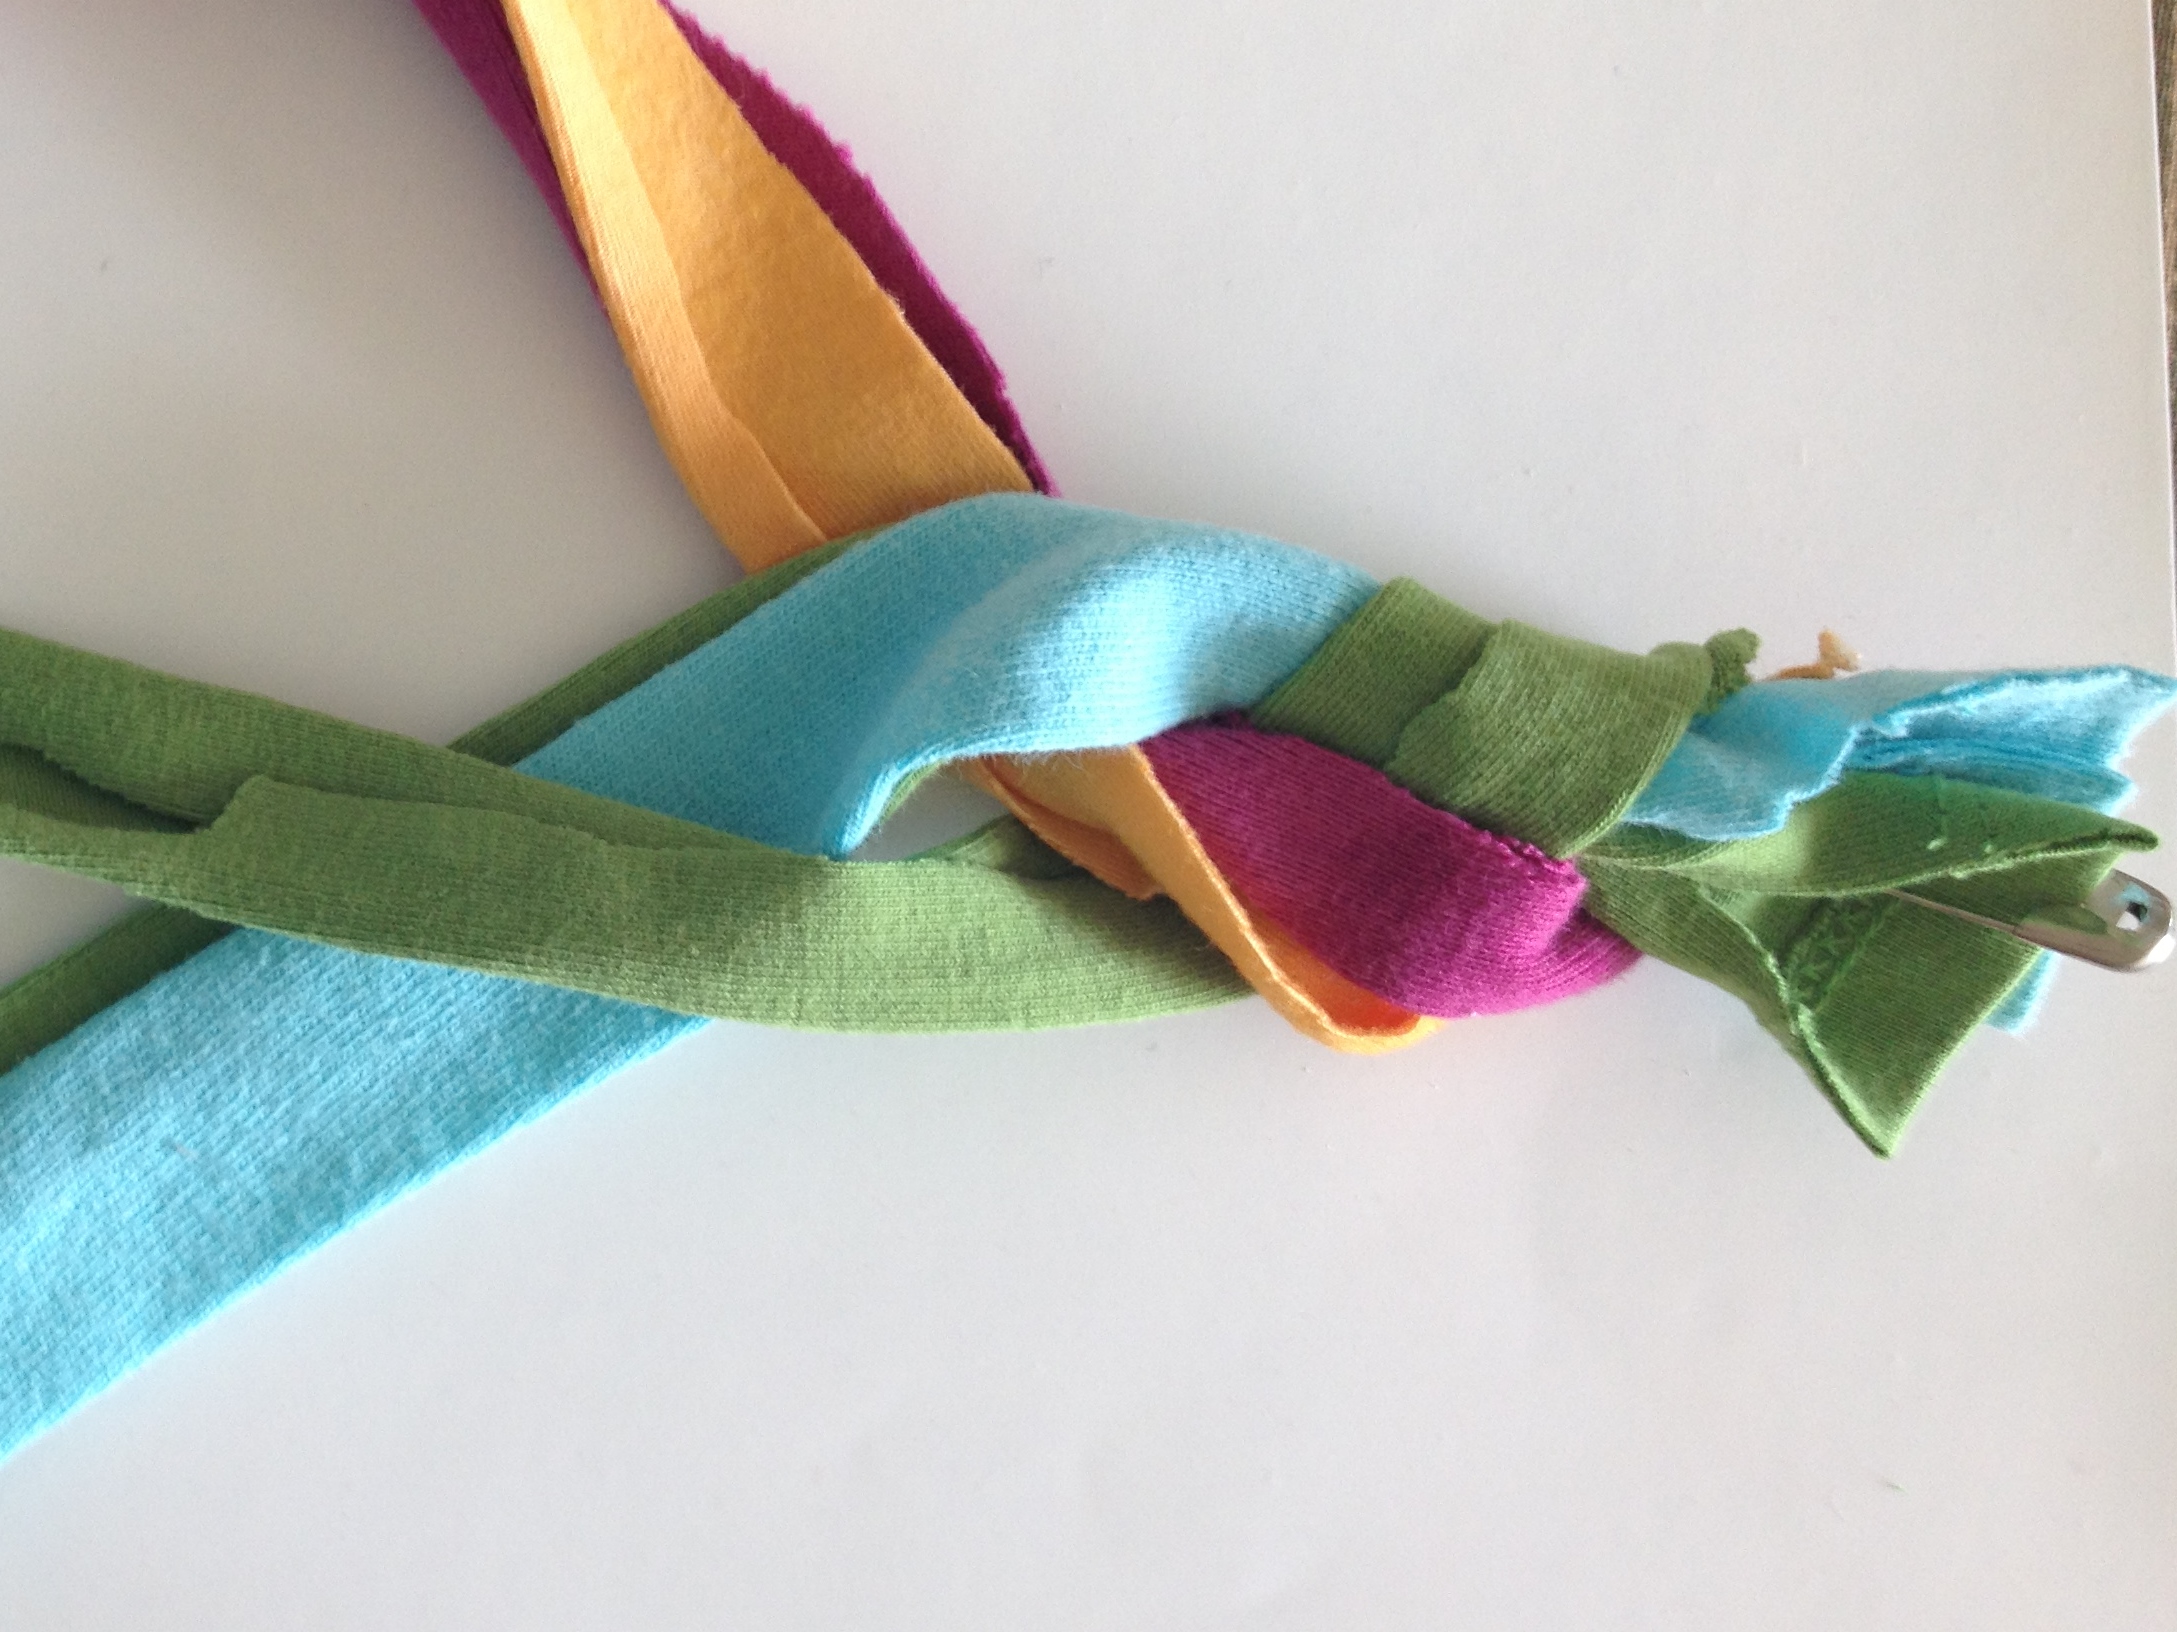 Start to braid the strips working in bundles of two or three strips at a time.
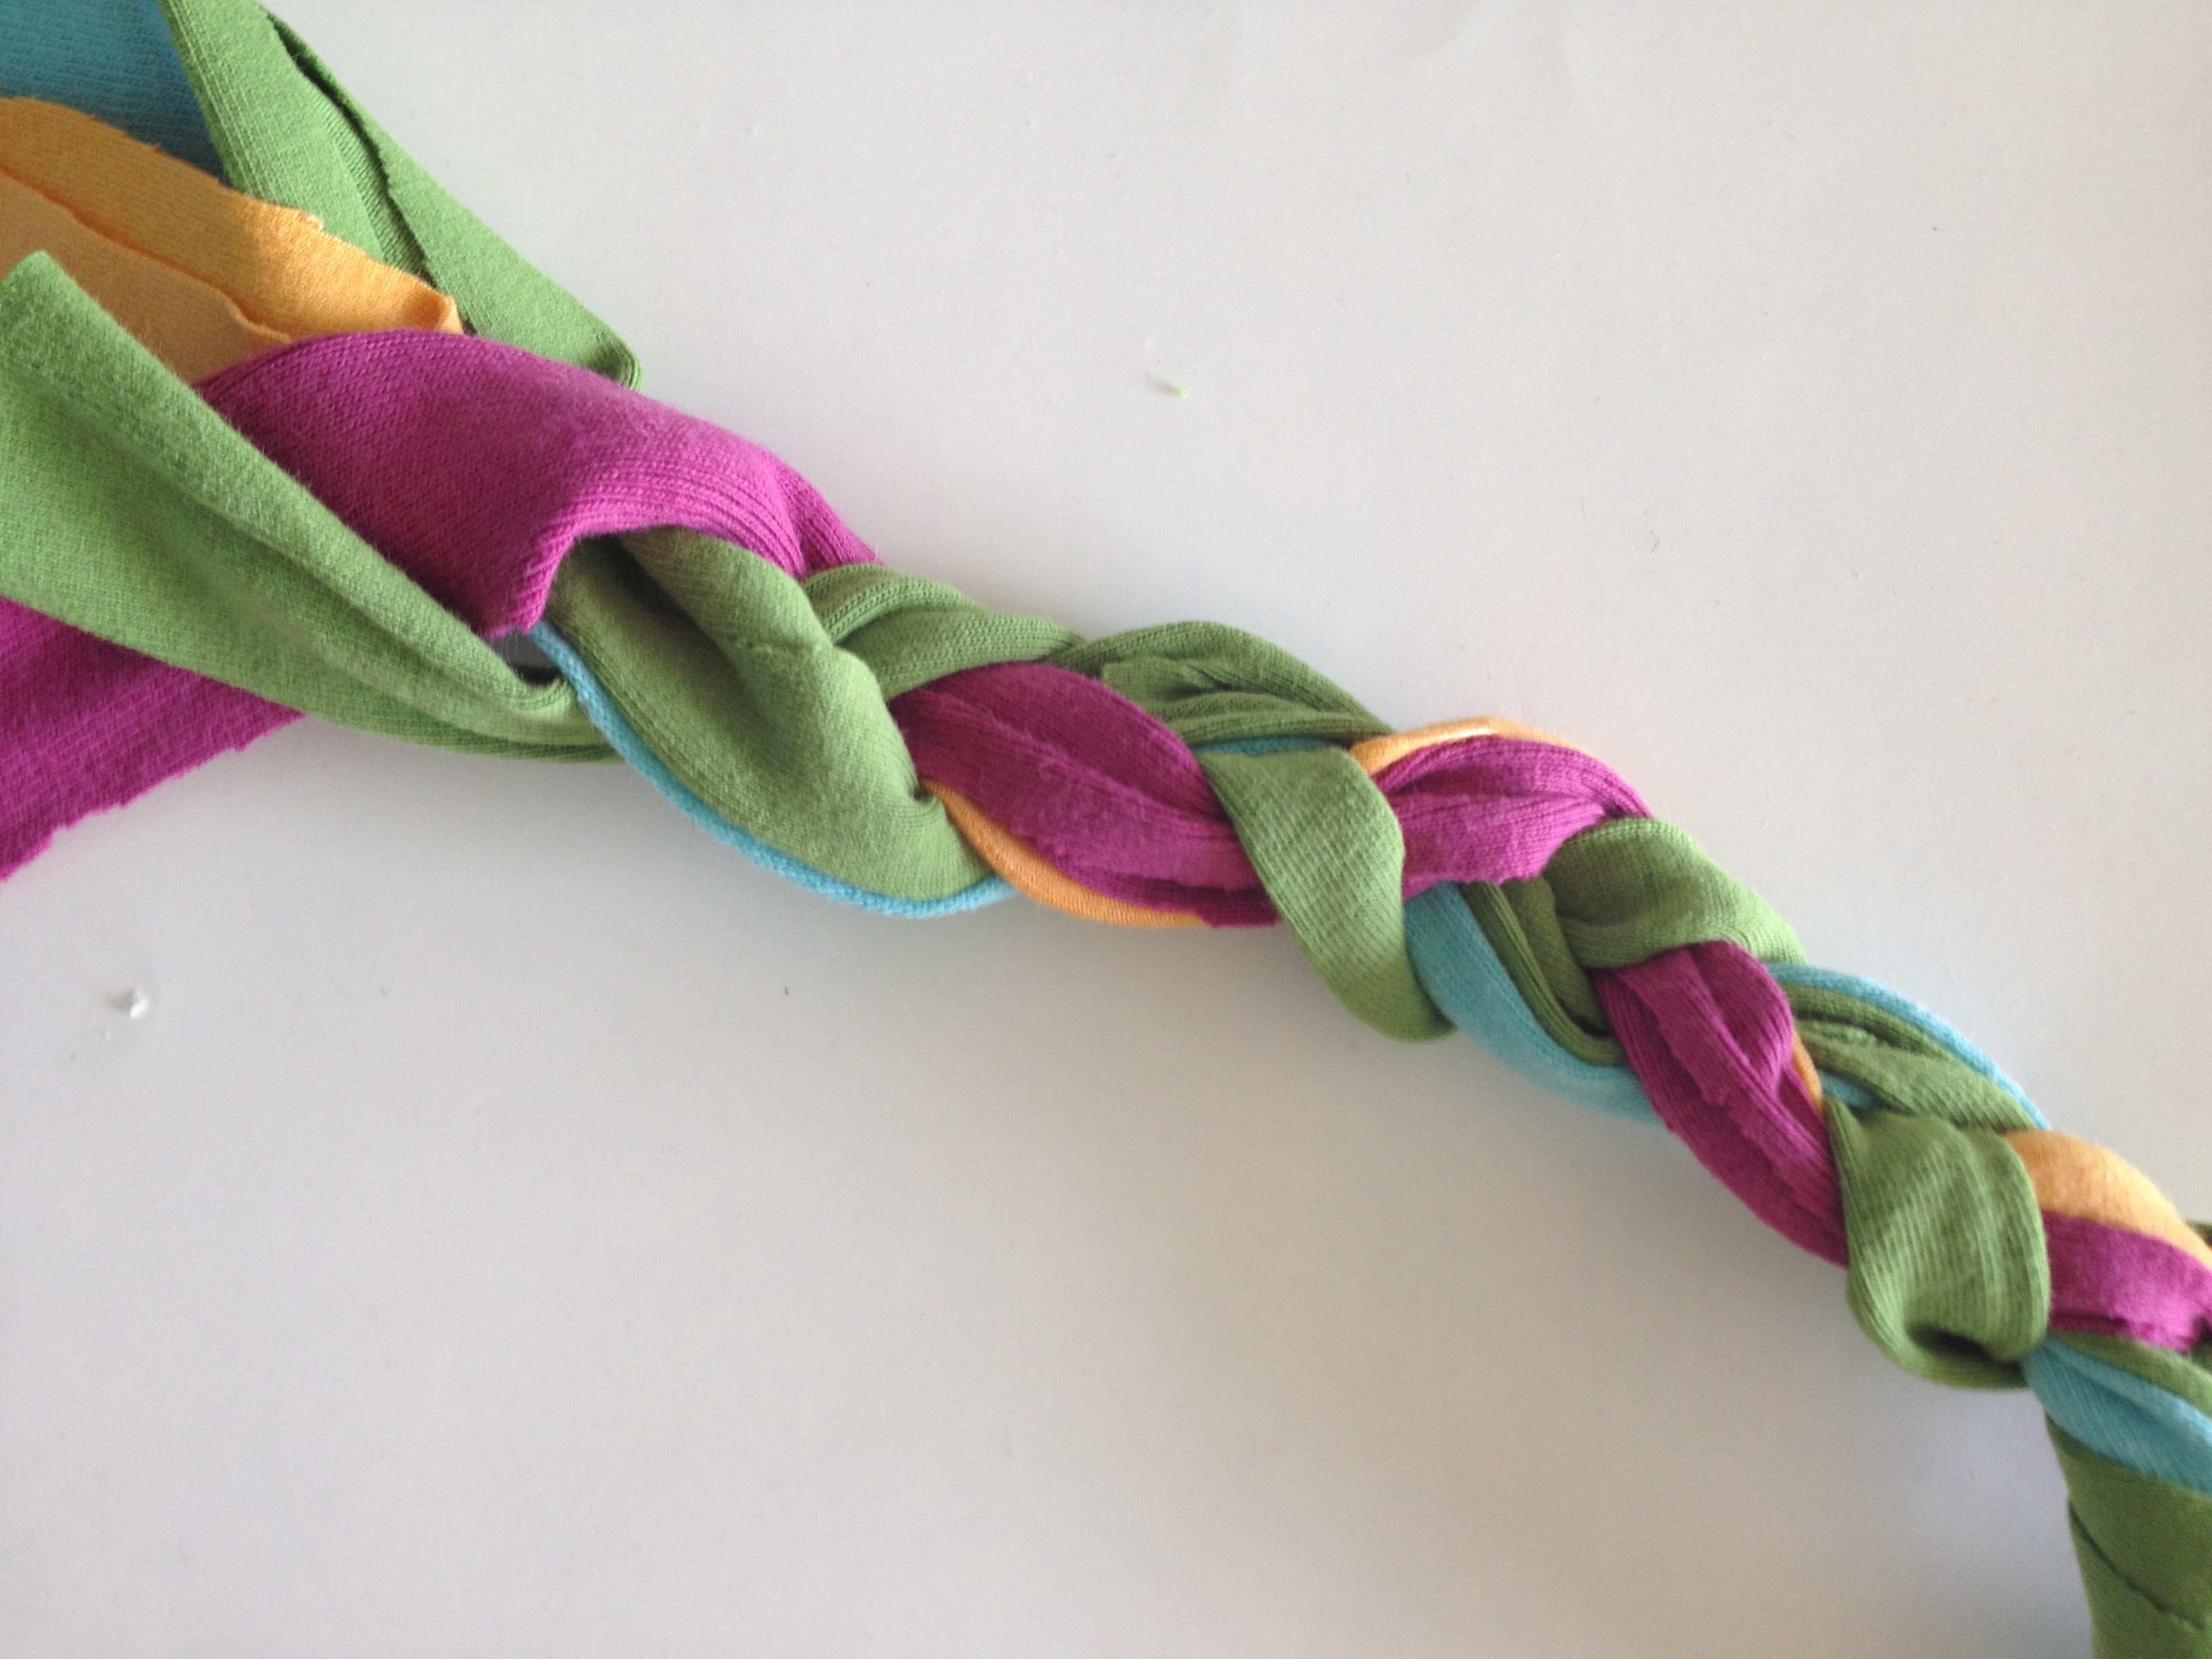 Continue to braid to the end, tightening the braid as you go along.
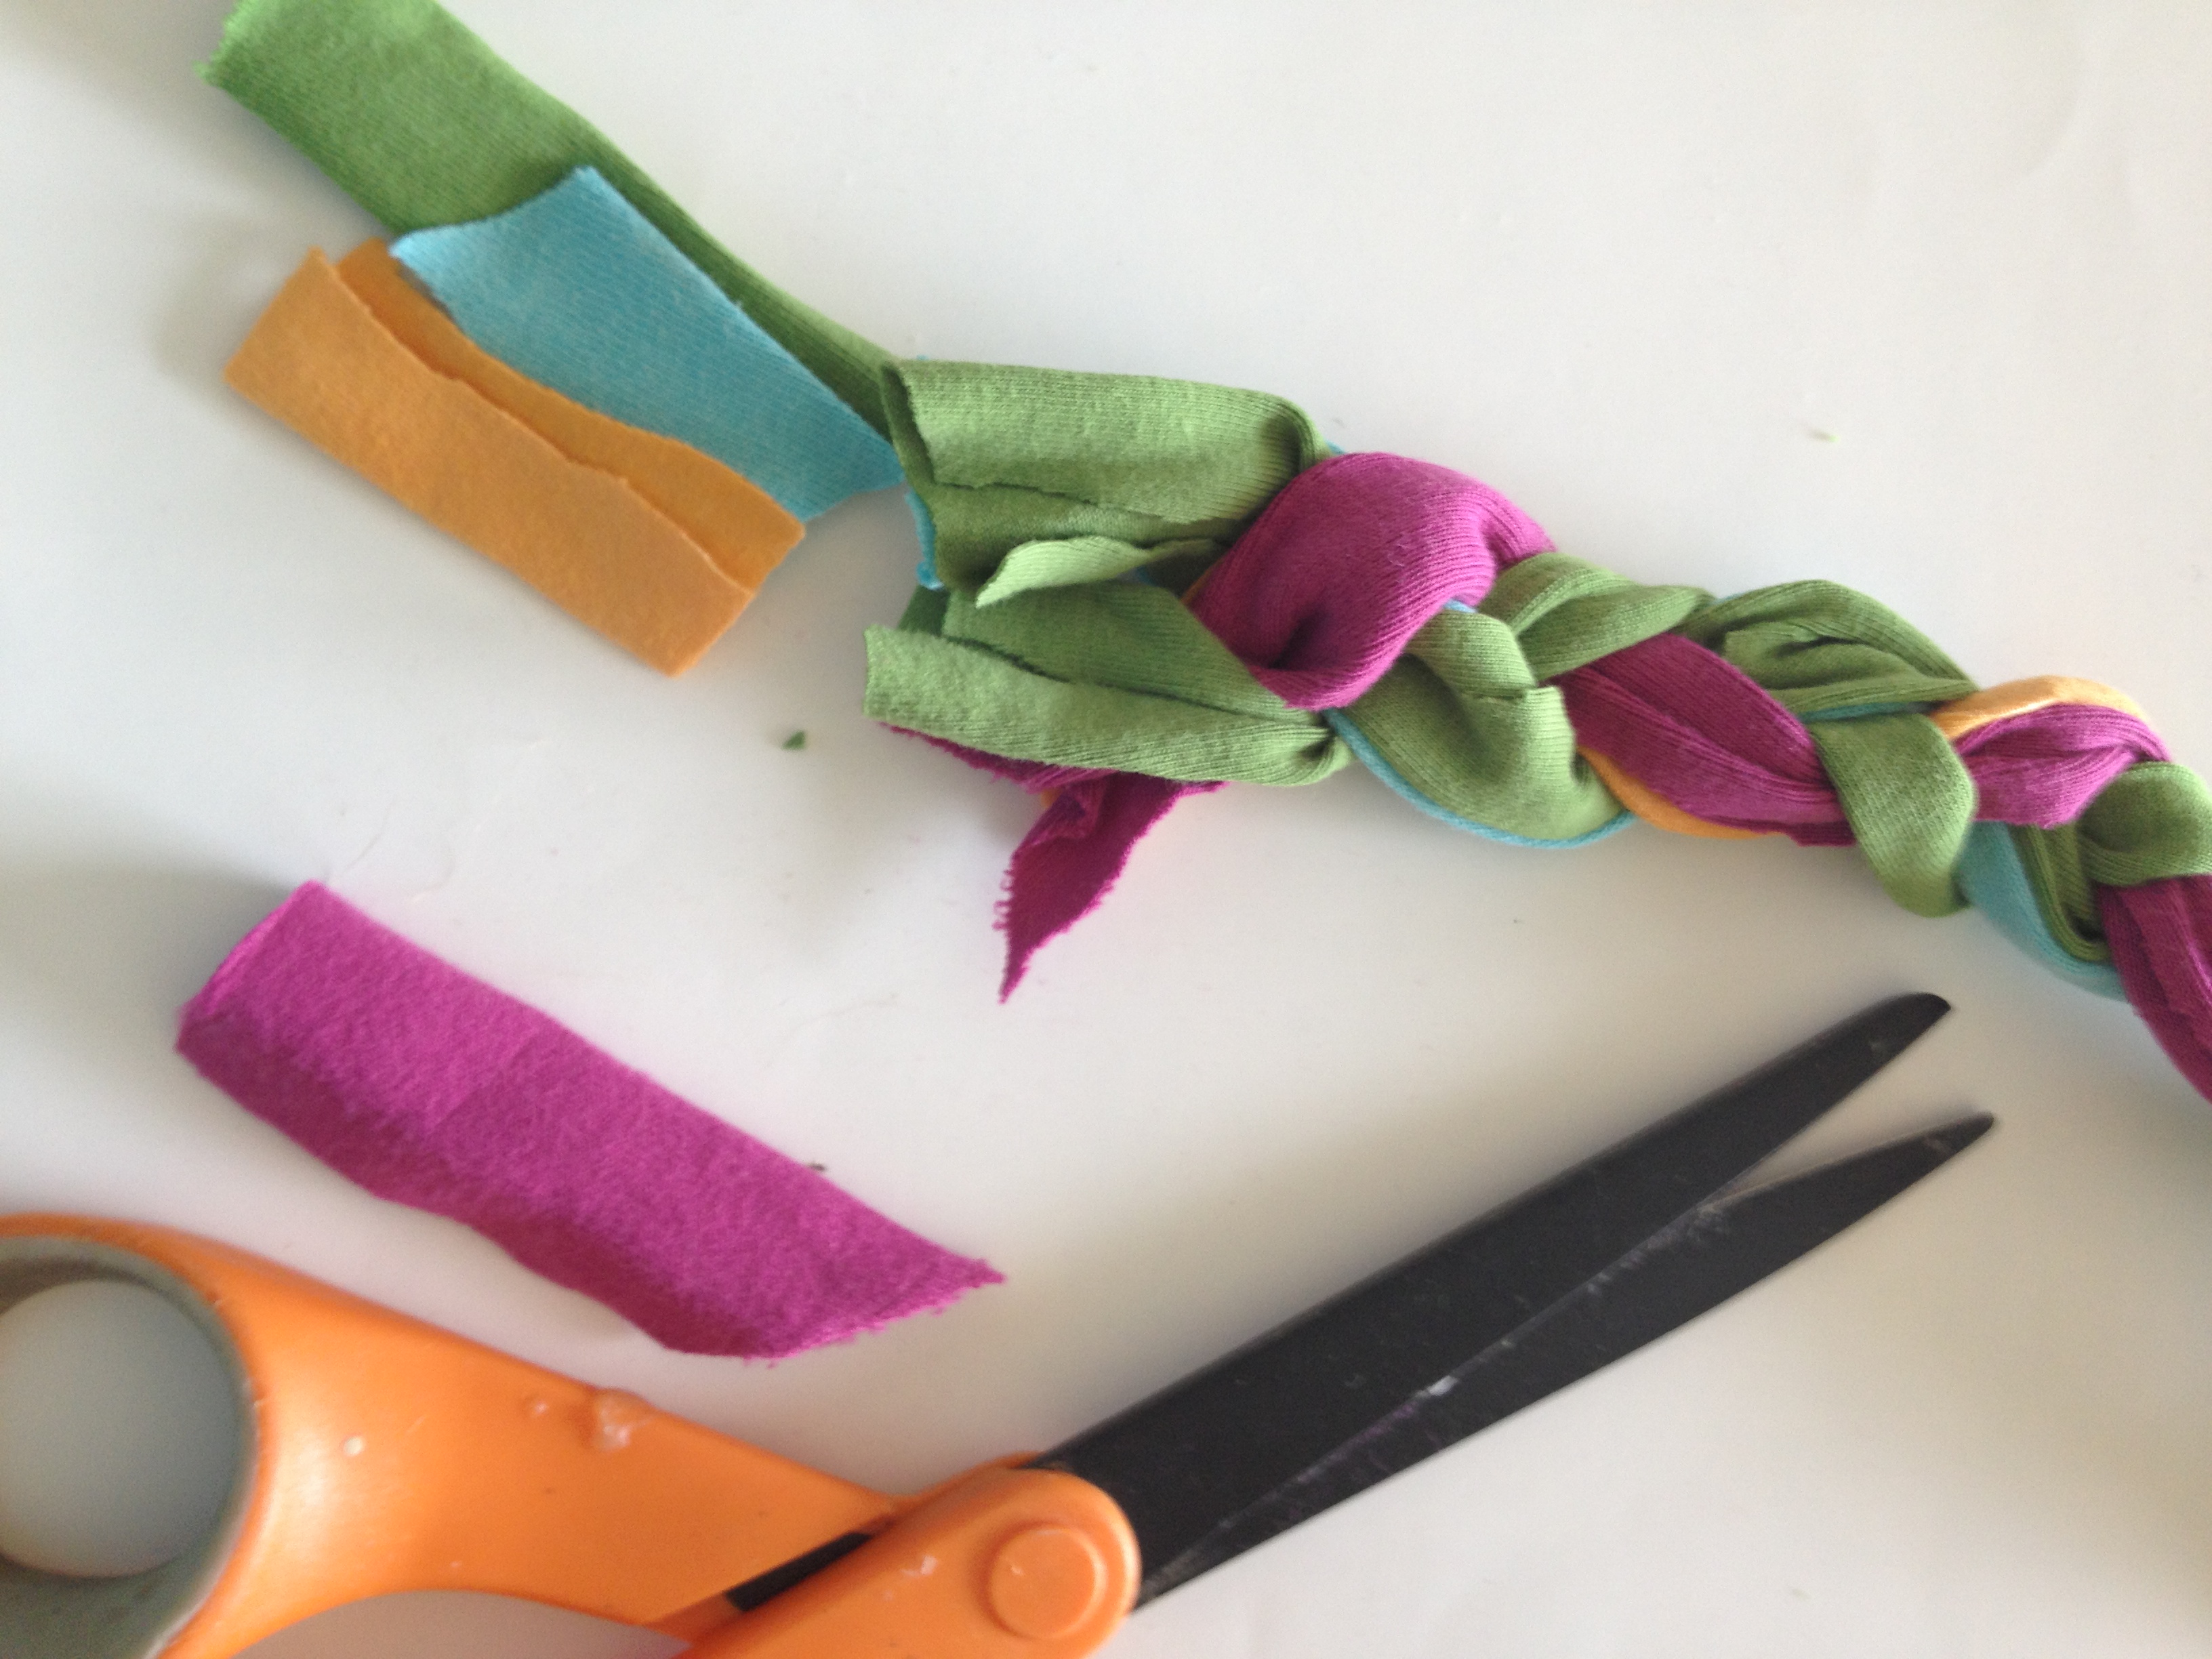
Decide how big your bracelet needs to be to fit your wrist and cut off the excess end if needed.
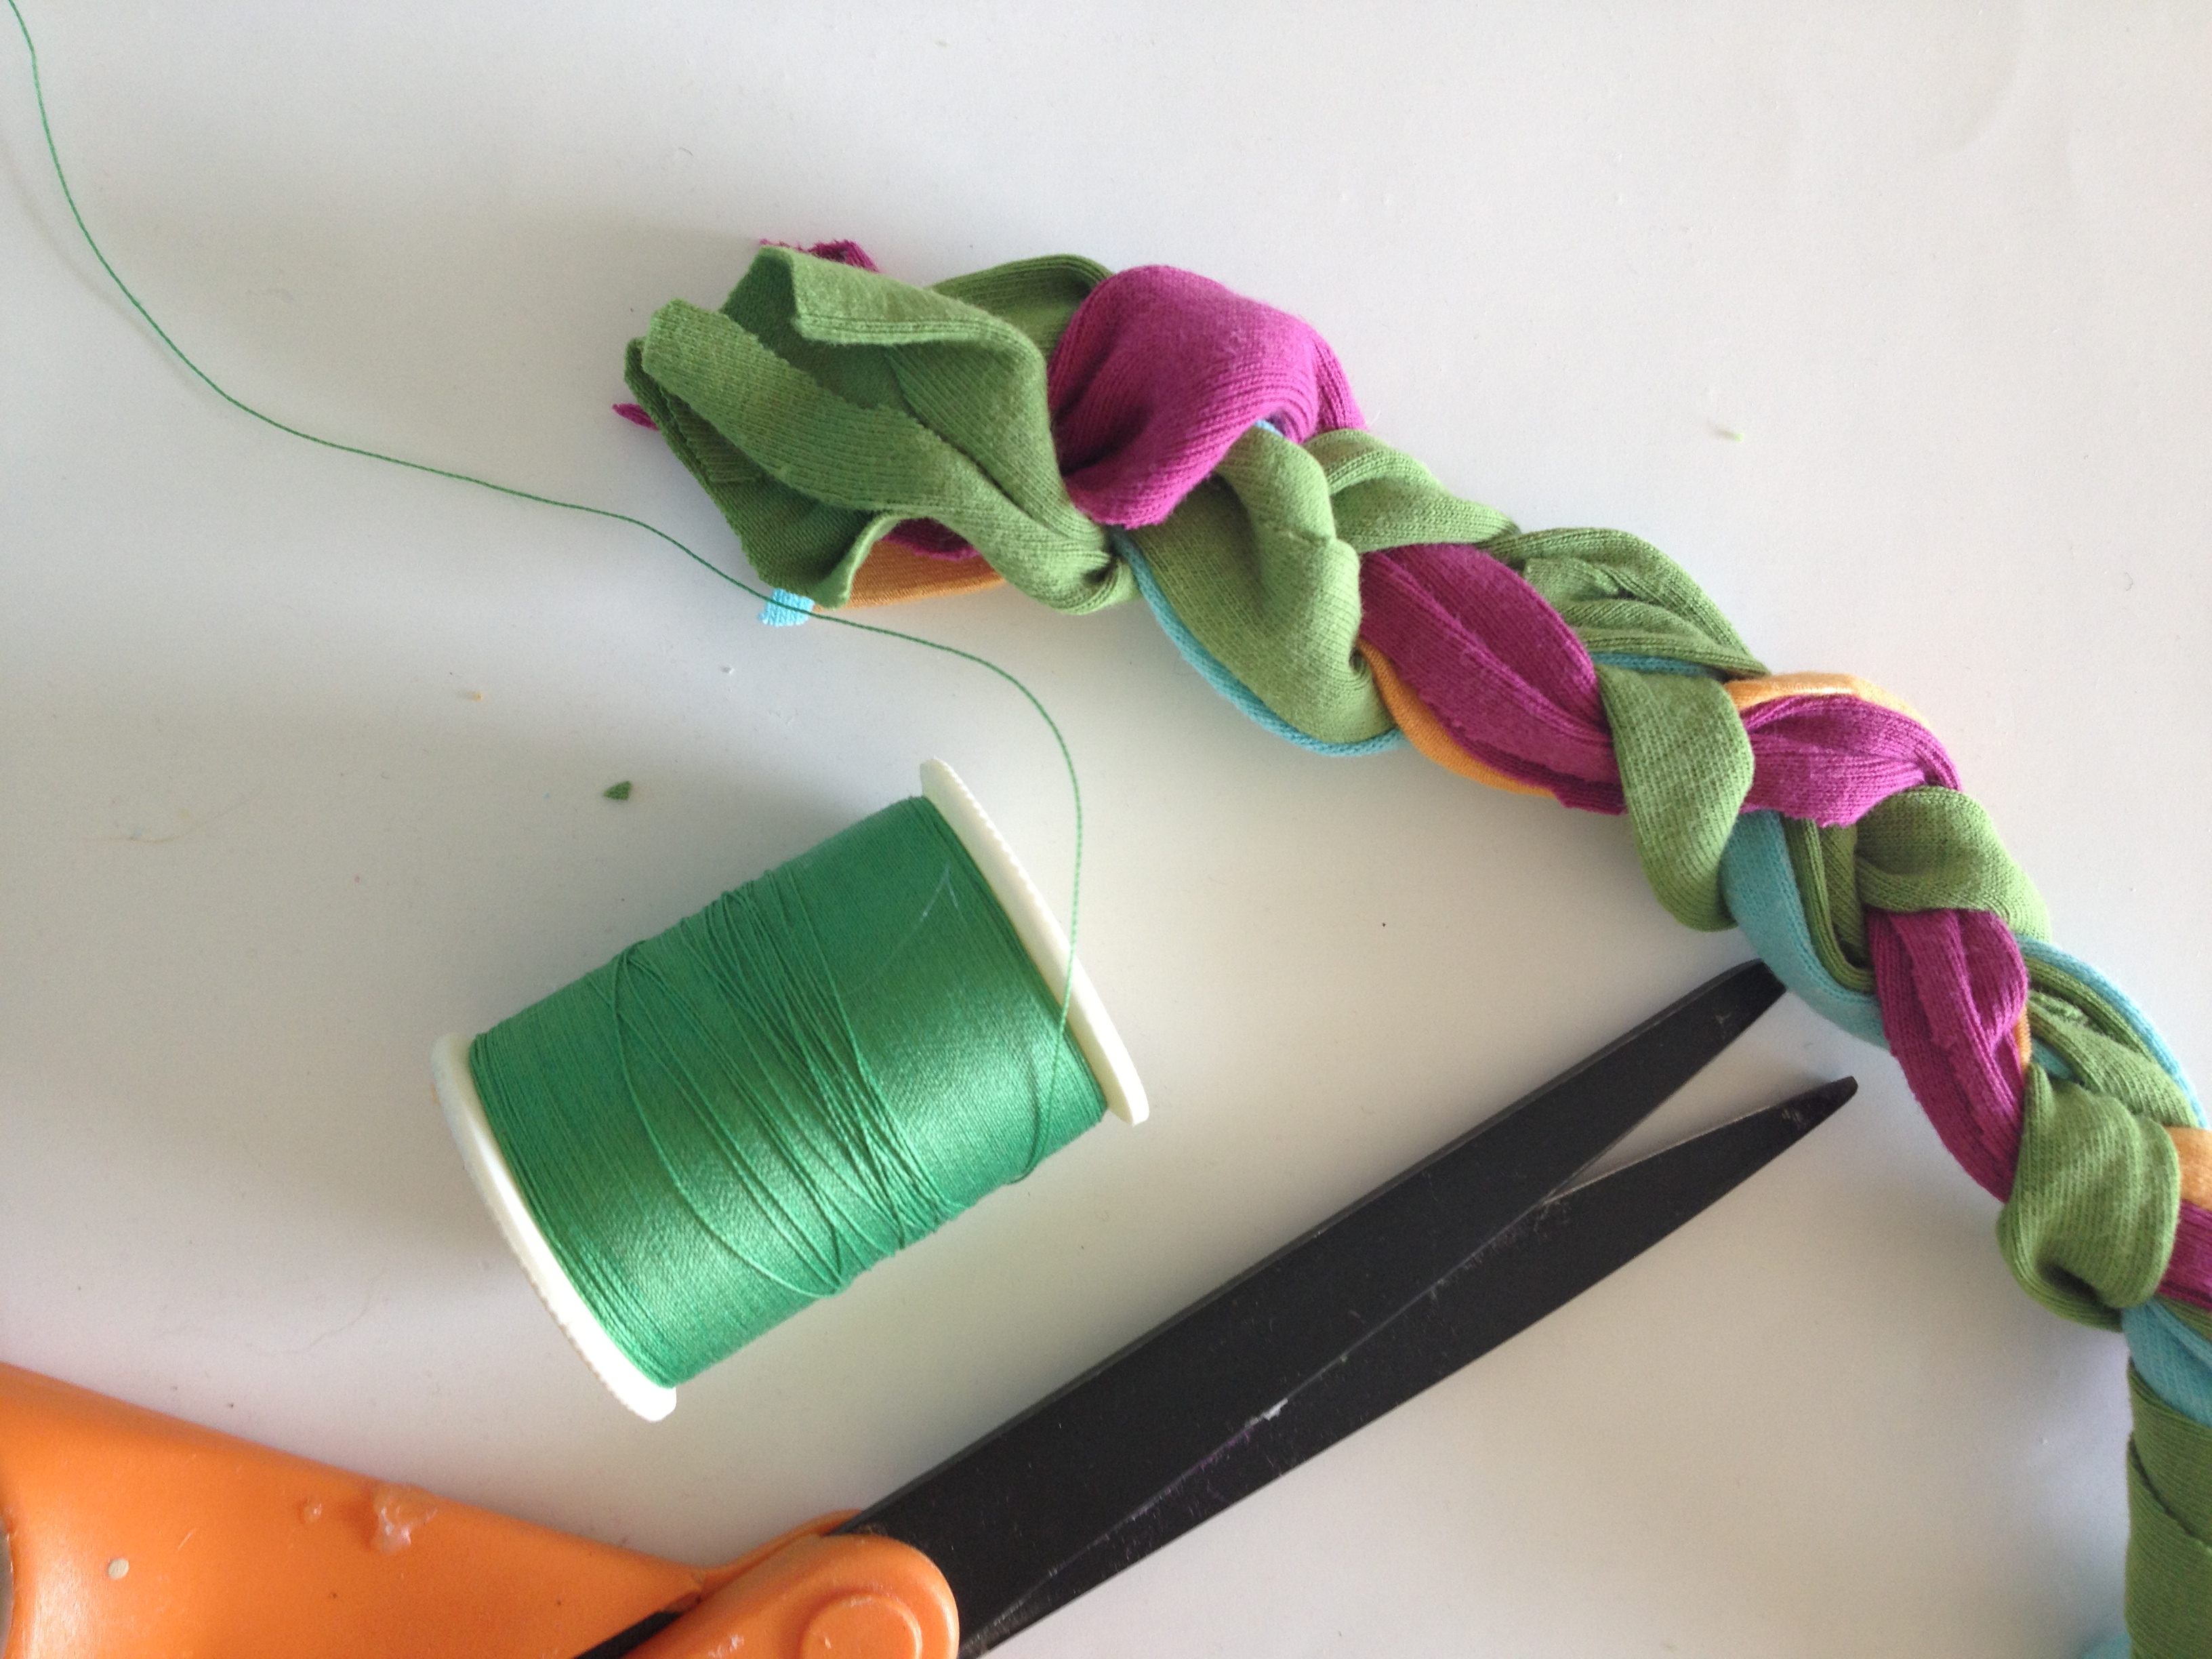 Secure the end of the bracelet with a hand sewing needle and thread.
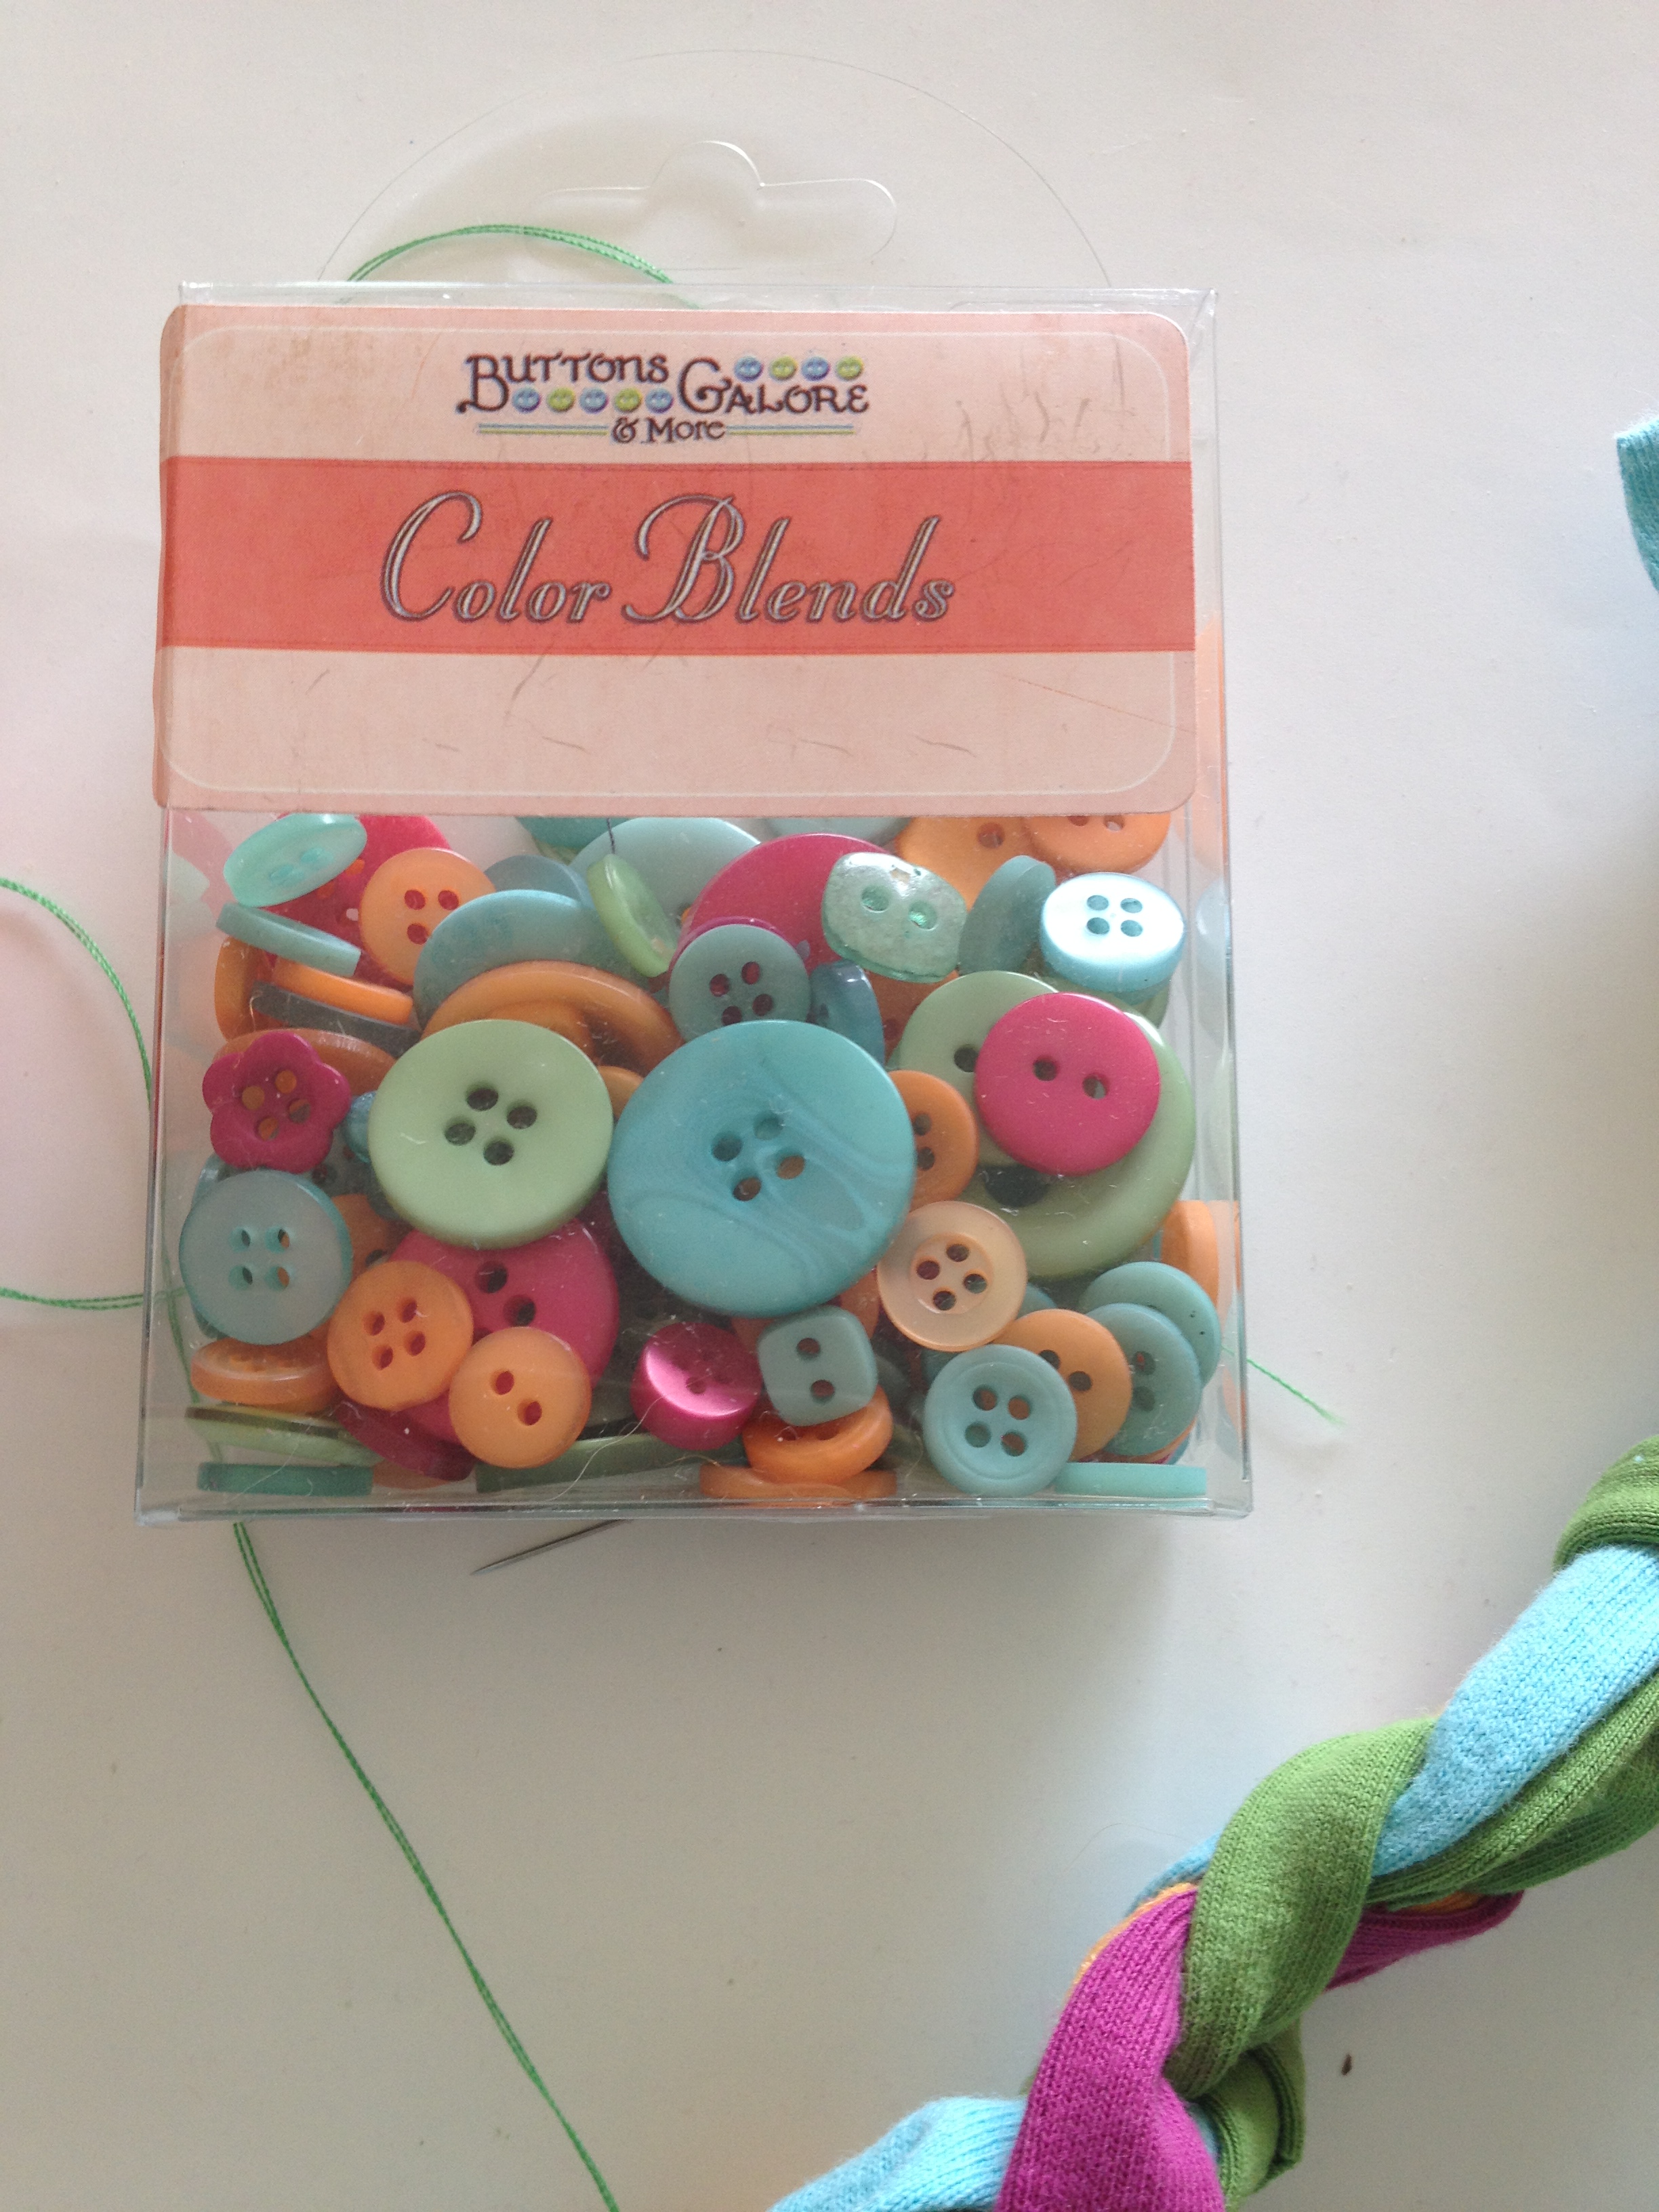
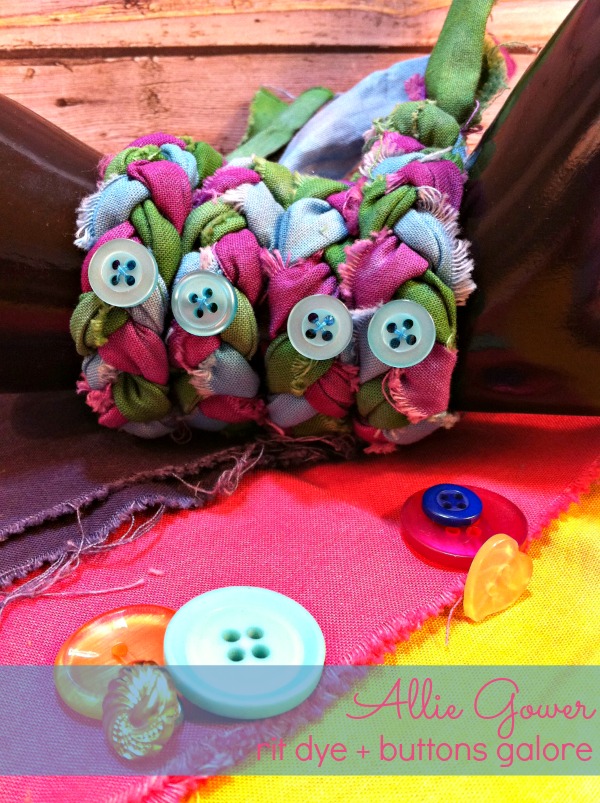
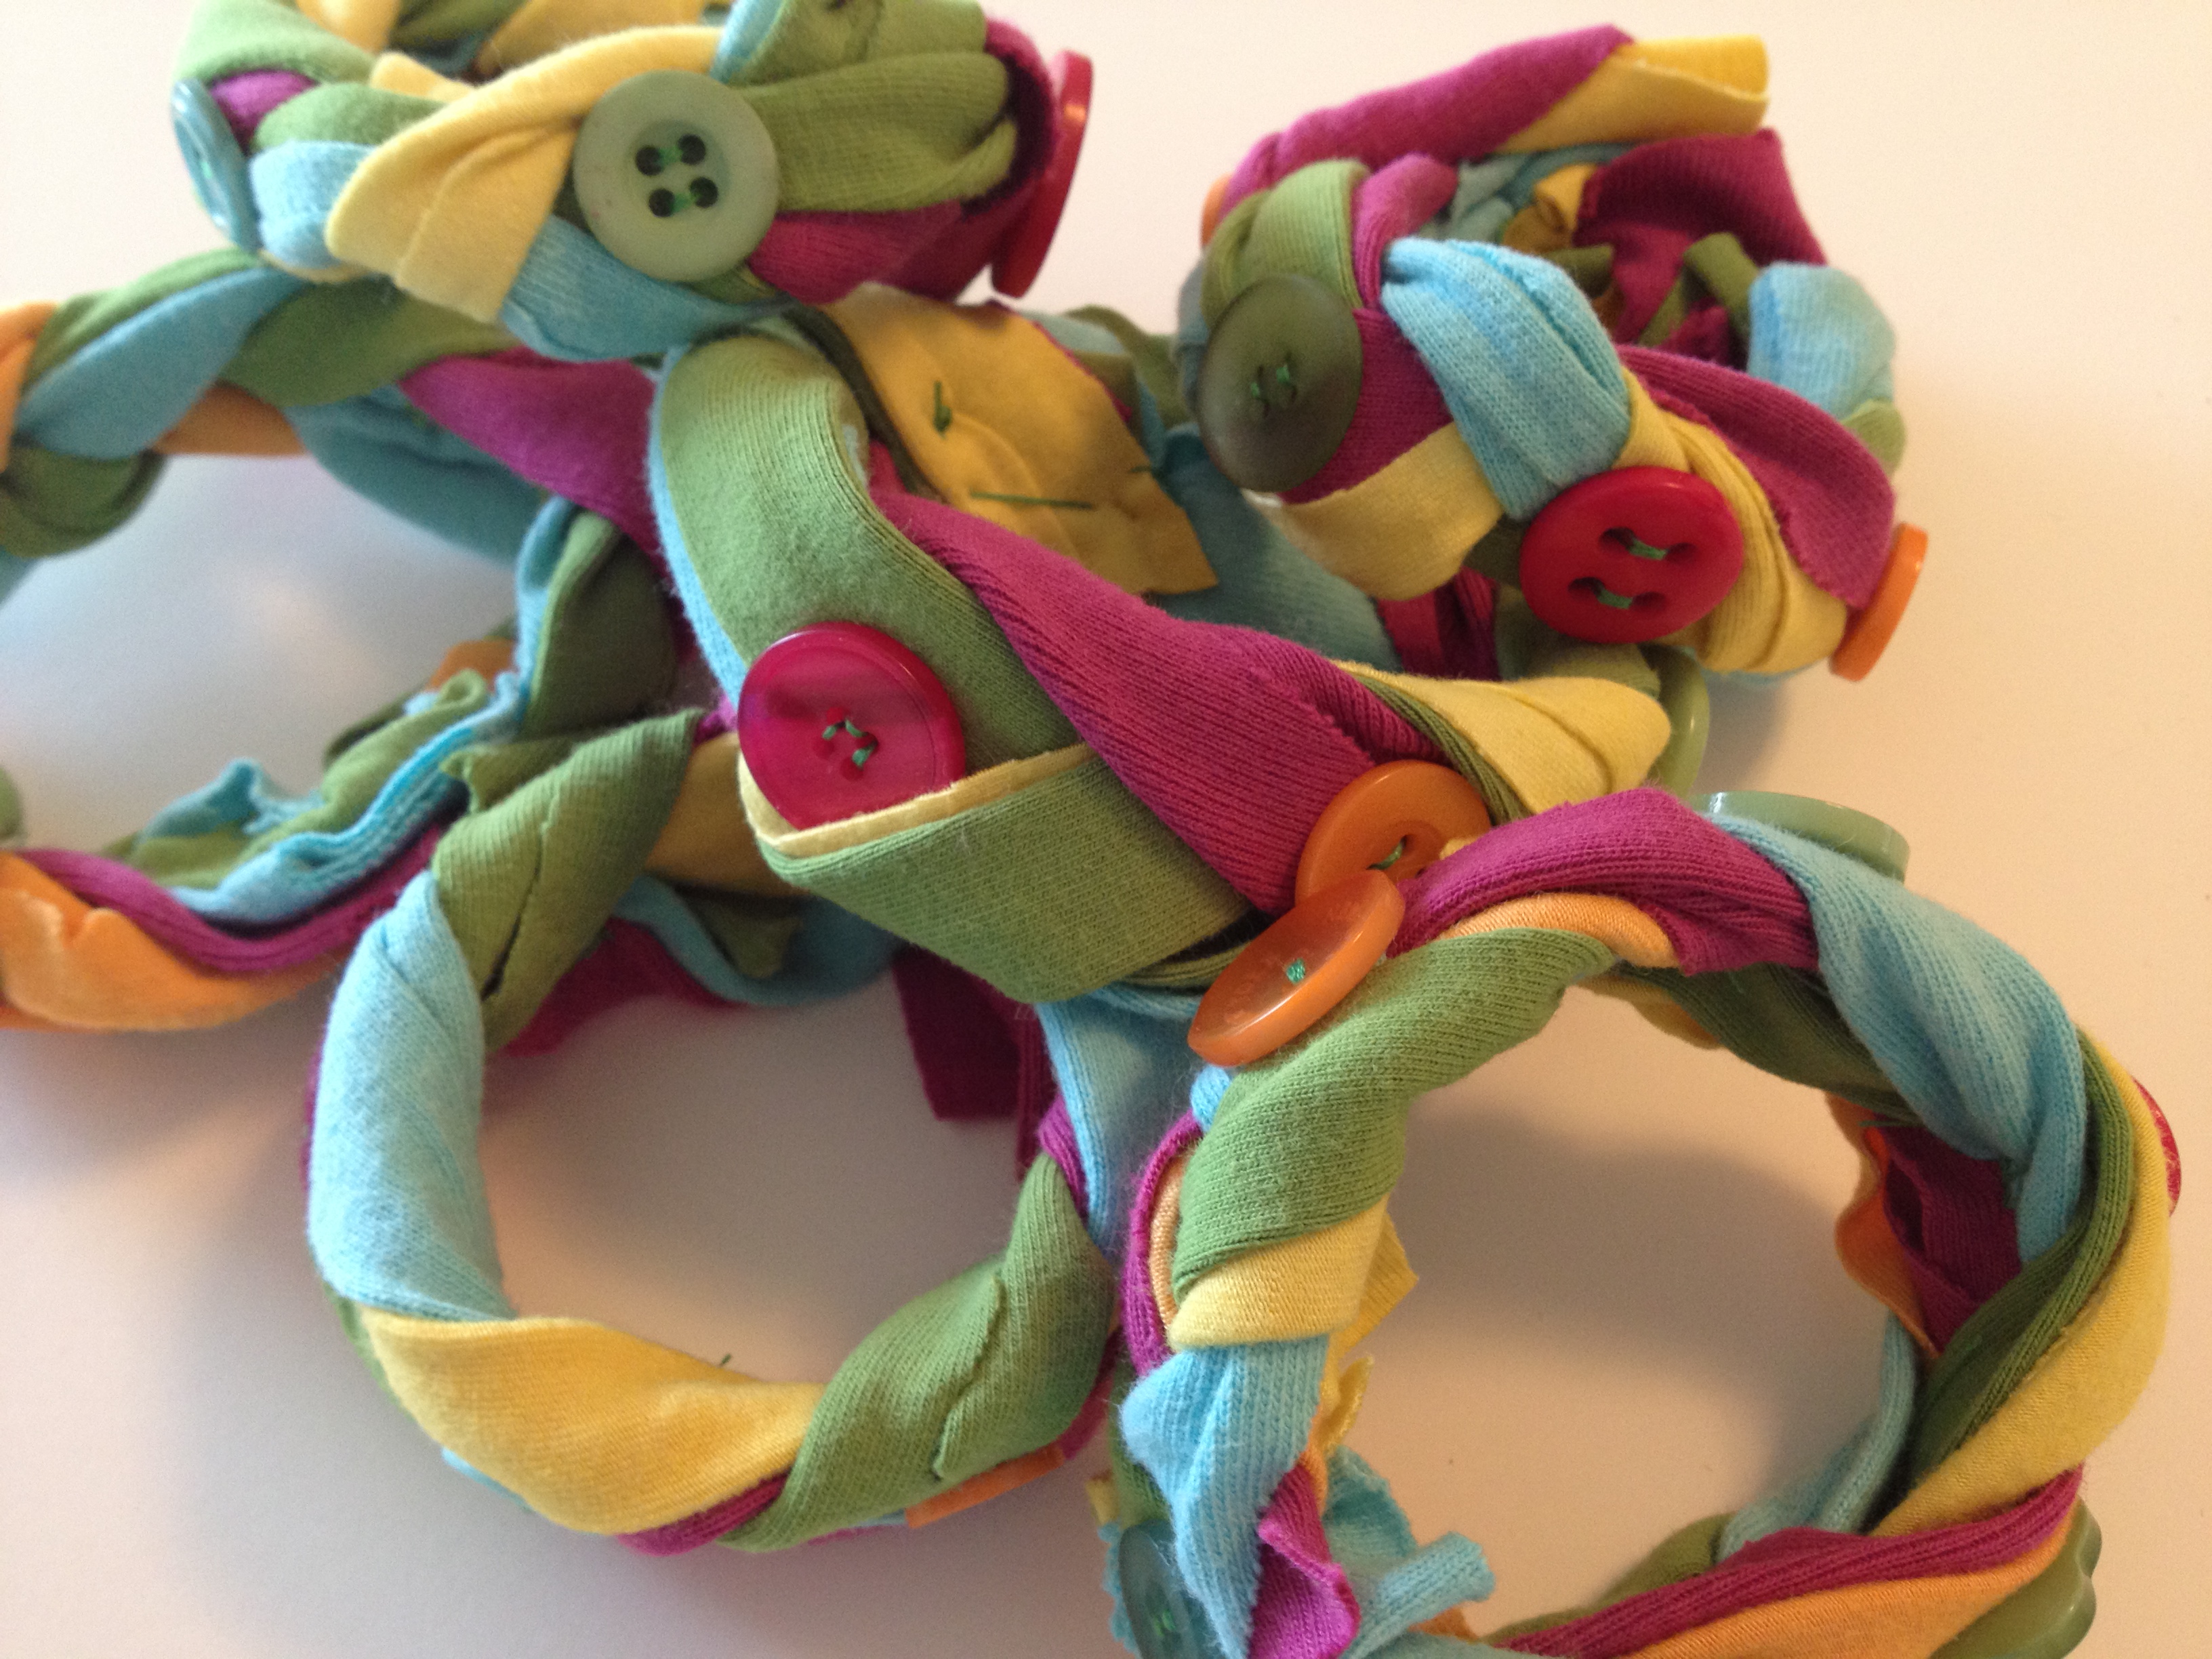
To secure the braided bracelet, I chose these Color Blend Buttons by Buttons Galore and More.
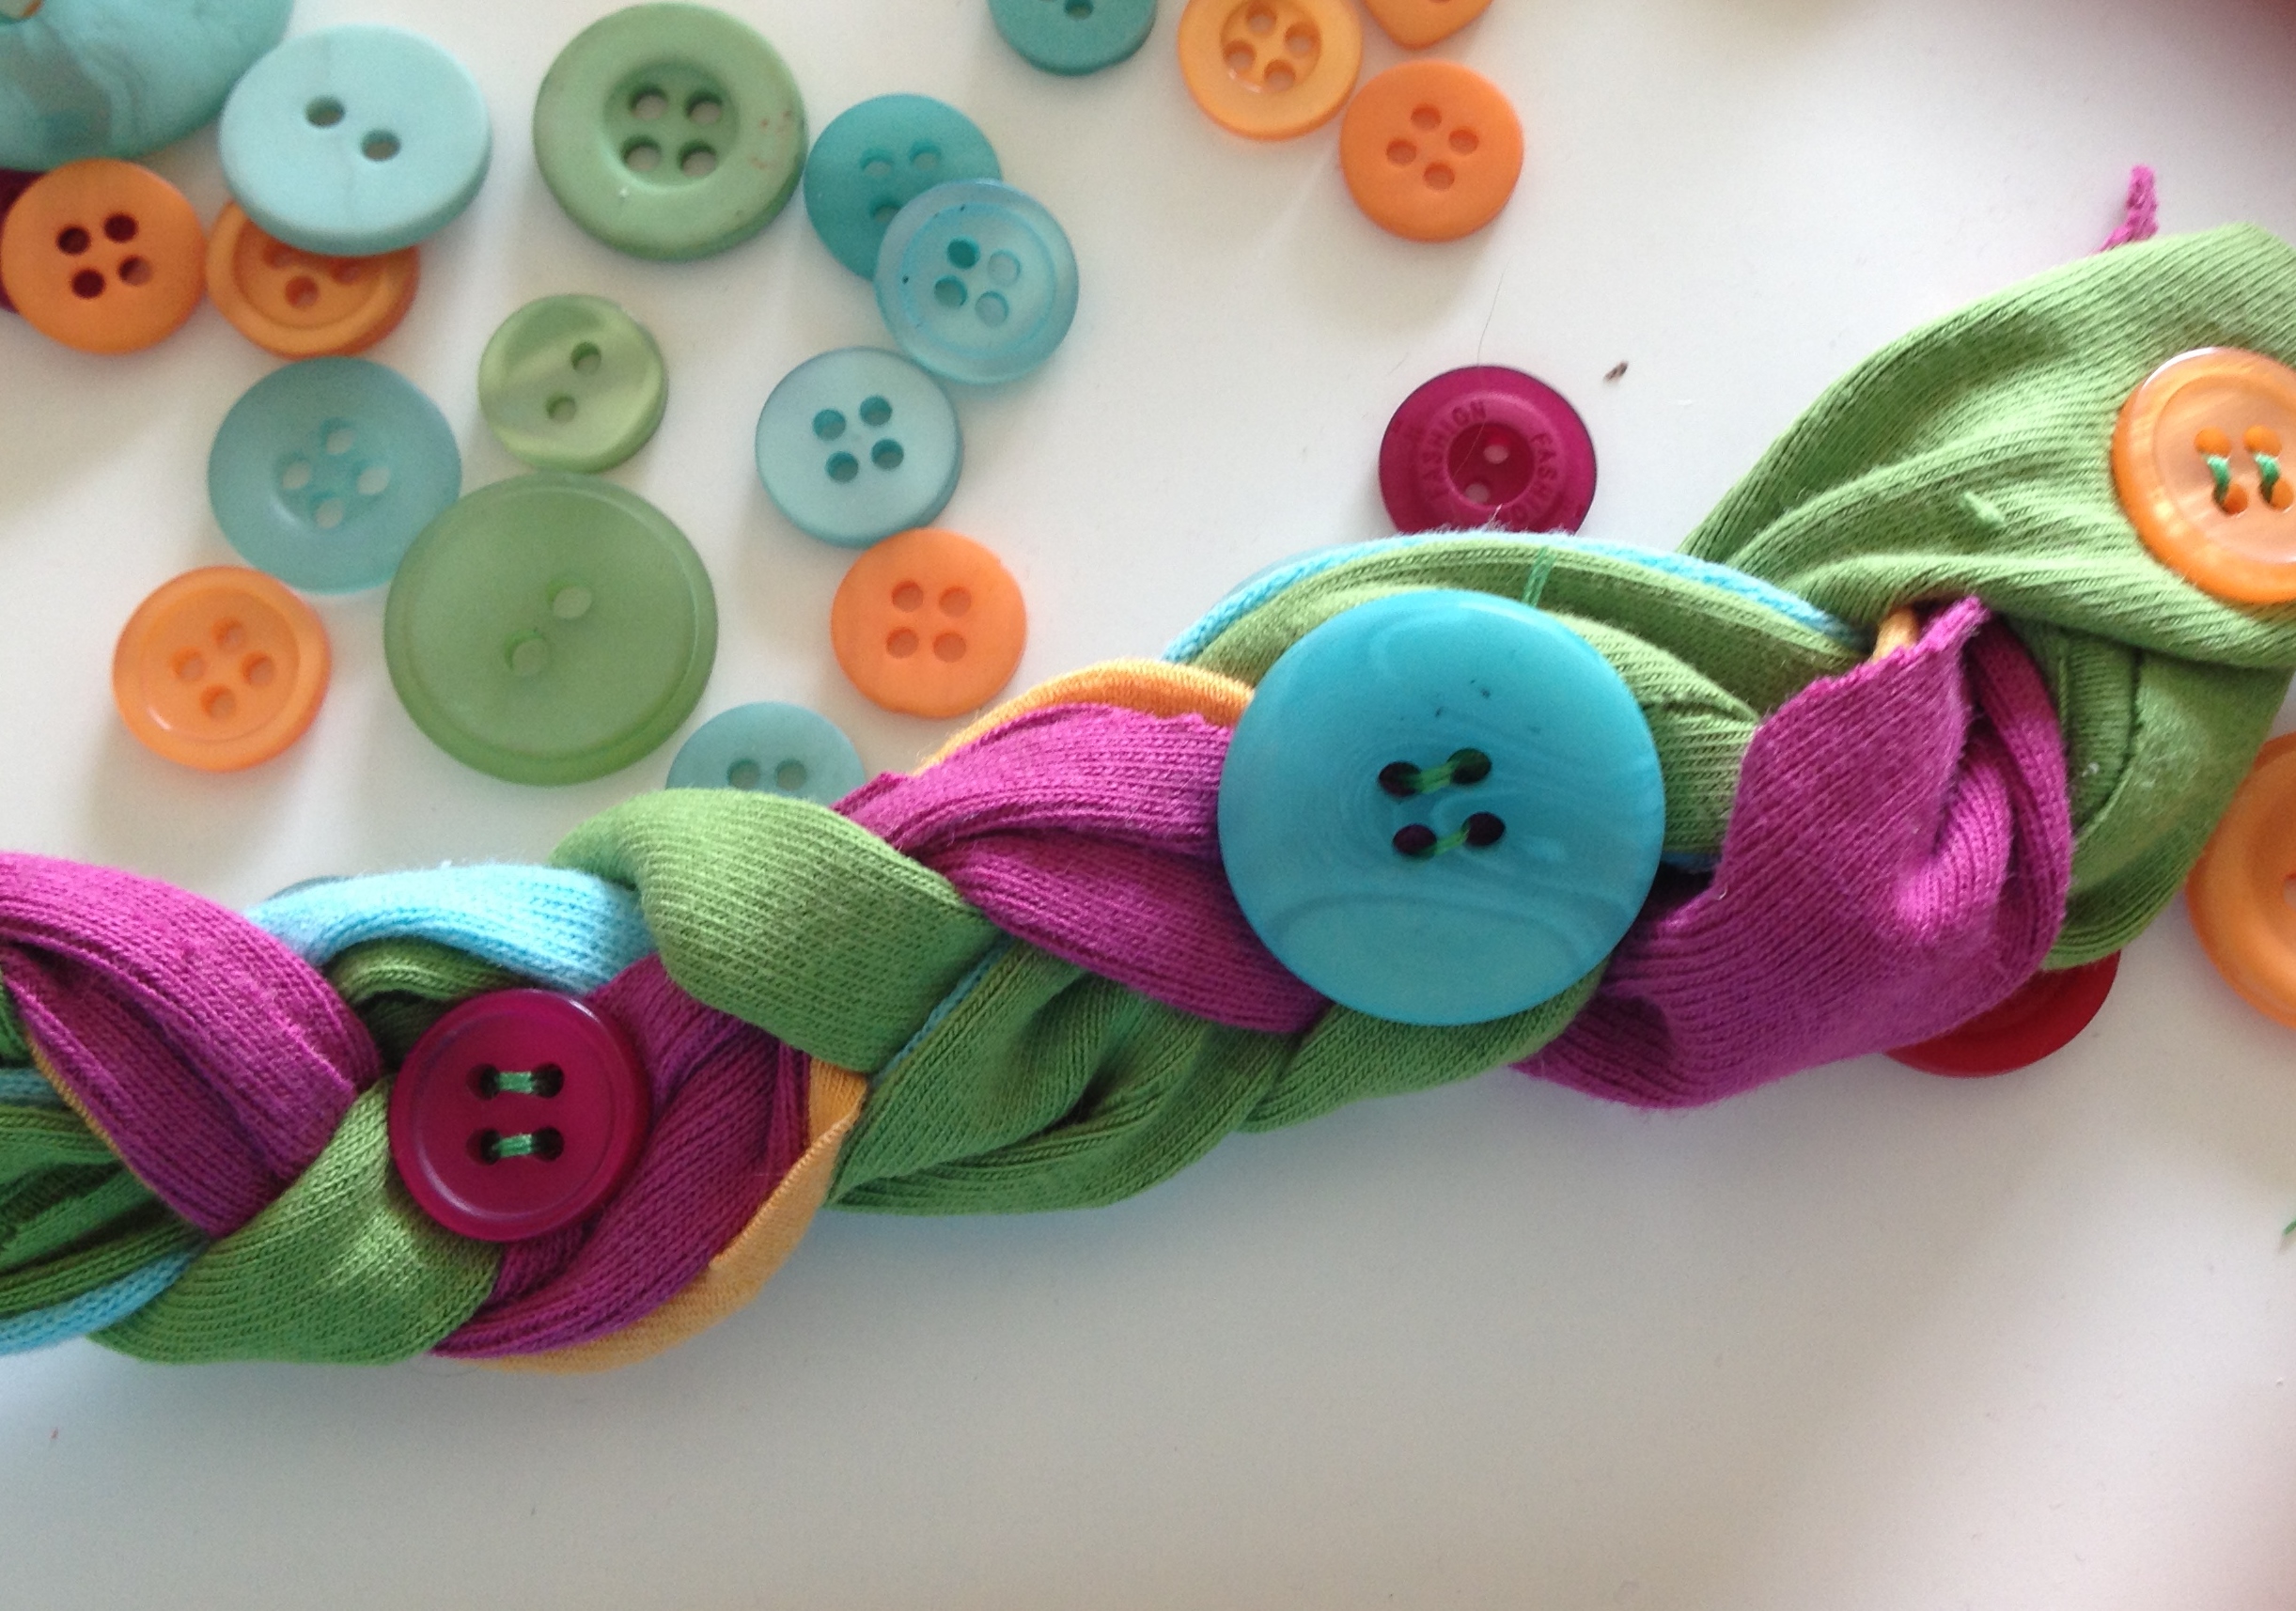 I spaced them somewhat evenly on the braided bracelet and sewed them down with the hand sewing needle and thread. This is what will keep your bracelet in tact during heavy periods of wear and tear and sweat, like dance class!
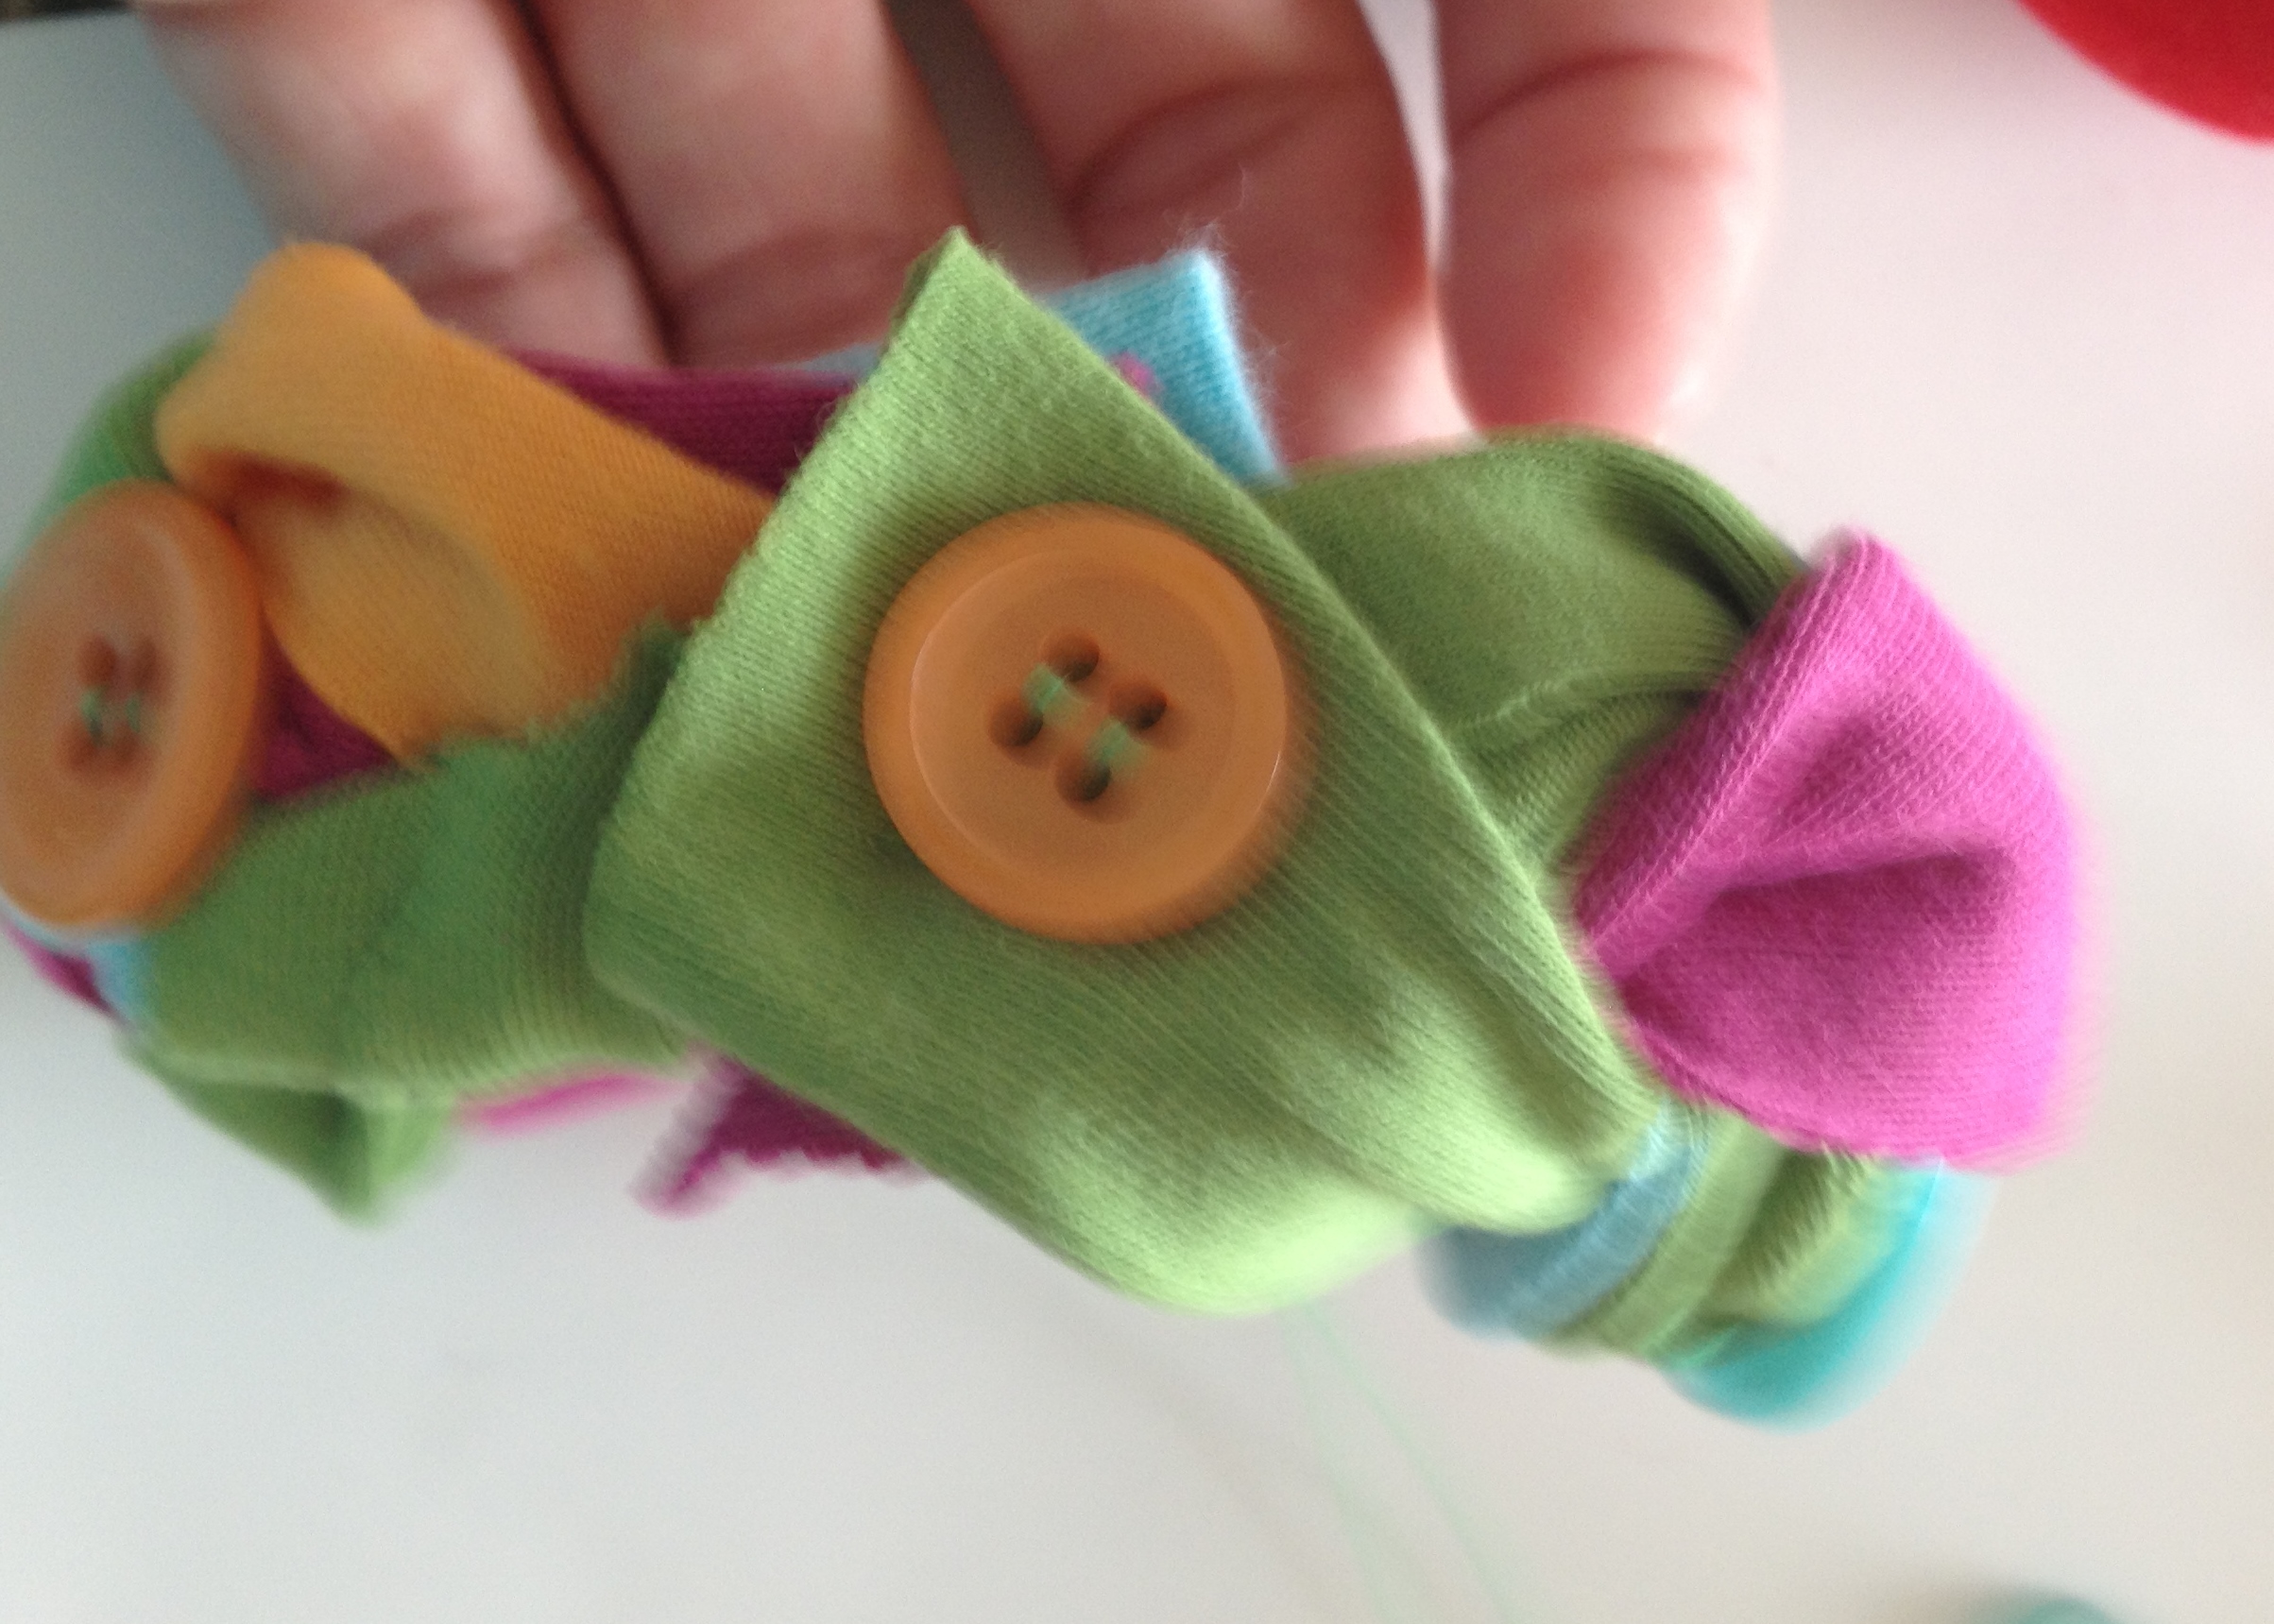
Finish your bracelet with a button, sewing the ends together.
 Live Life Creatively,
Melony
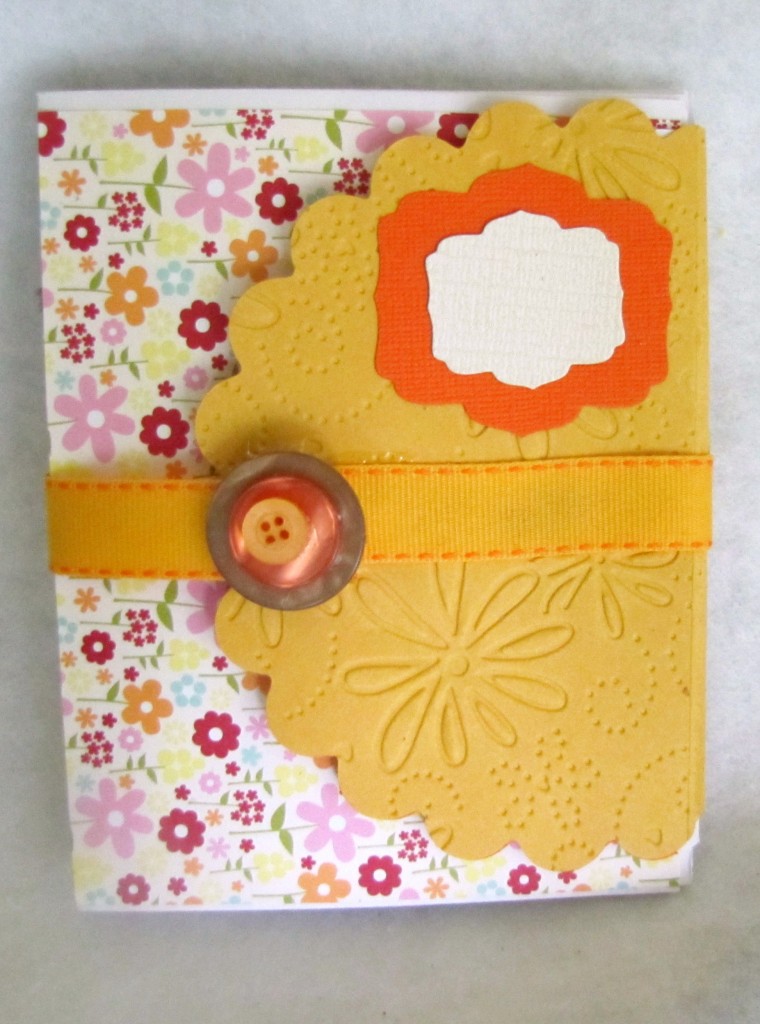
It’s that time of year where we all start looking for quick and easy gifts. Being able to make them homemade is a bonus!!! Why not make a handmade note card set? Mine is not Christmas themed, or Fall themed…I like generic…it works well when I am in a pinch! I can just grab & go! BUT I do like to make my gifts in good seasonal colors. So for this set I thought I would show you my “thought process” on how to make a set of cards in a quick and easy assembly fashion. :) Just add in your papers, matching buttons, ribbon and bling of your choice and you are all set and ready to get creating your very own quick and easy gifts!

Gather up supplies. I generally like to pick my papers first, then cardstock, ribbon and embellishments. As you can see, I have chosen three different colors of Button Bonanza Bags just to be sure I have the perfect color when the time comes for embellishing. You can also see I have printed out my sentiments panels using Duetica Lettering Arts Studio’s Mandolyn Font in the Outline feature then colored it in using my Copic markers. Another neat trick to PERFECTLY matched sentiments that say JUST what you want in just the perfect size for your project. :) Once I was done coloring them in I die cut each sentiment panel using Spellbinders Nestabilities and I was all set!

Using a Bow Easy Ribbon Tool REALLY helps make the set look polished, all of my bows look exactly alike!

Add an extra touch by outlining the first letter using a glue pen then shake on a bit of coordinating glitter.

Another great touch that really doesn’t take too long is to embellish the embellishments! I love to add a bit of bling to the center of my buttons.

And here you have it! A cute set that took less than an hour start to finish! Not bad….
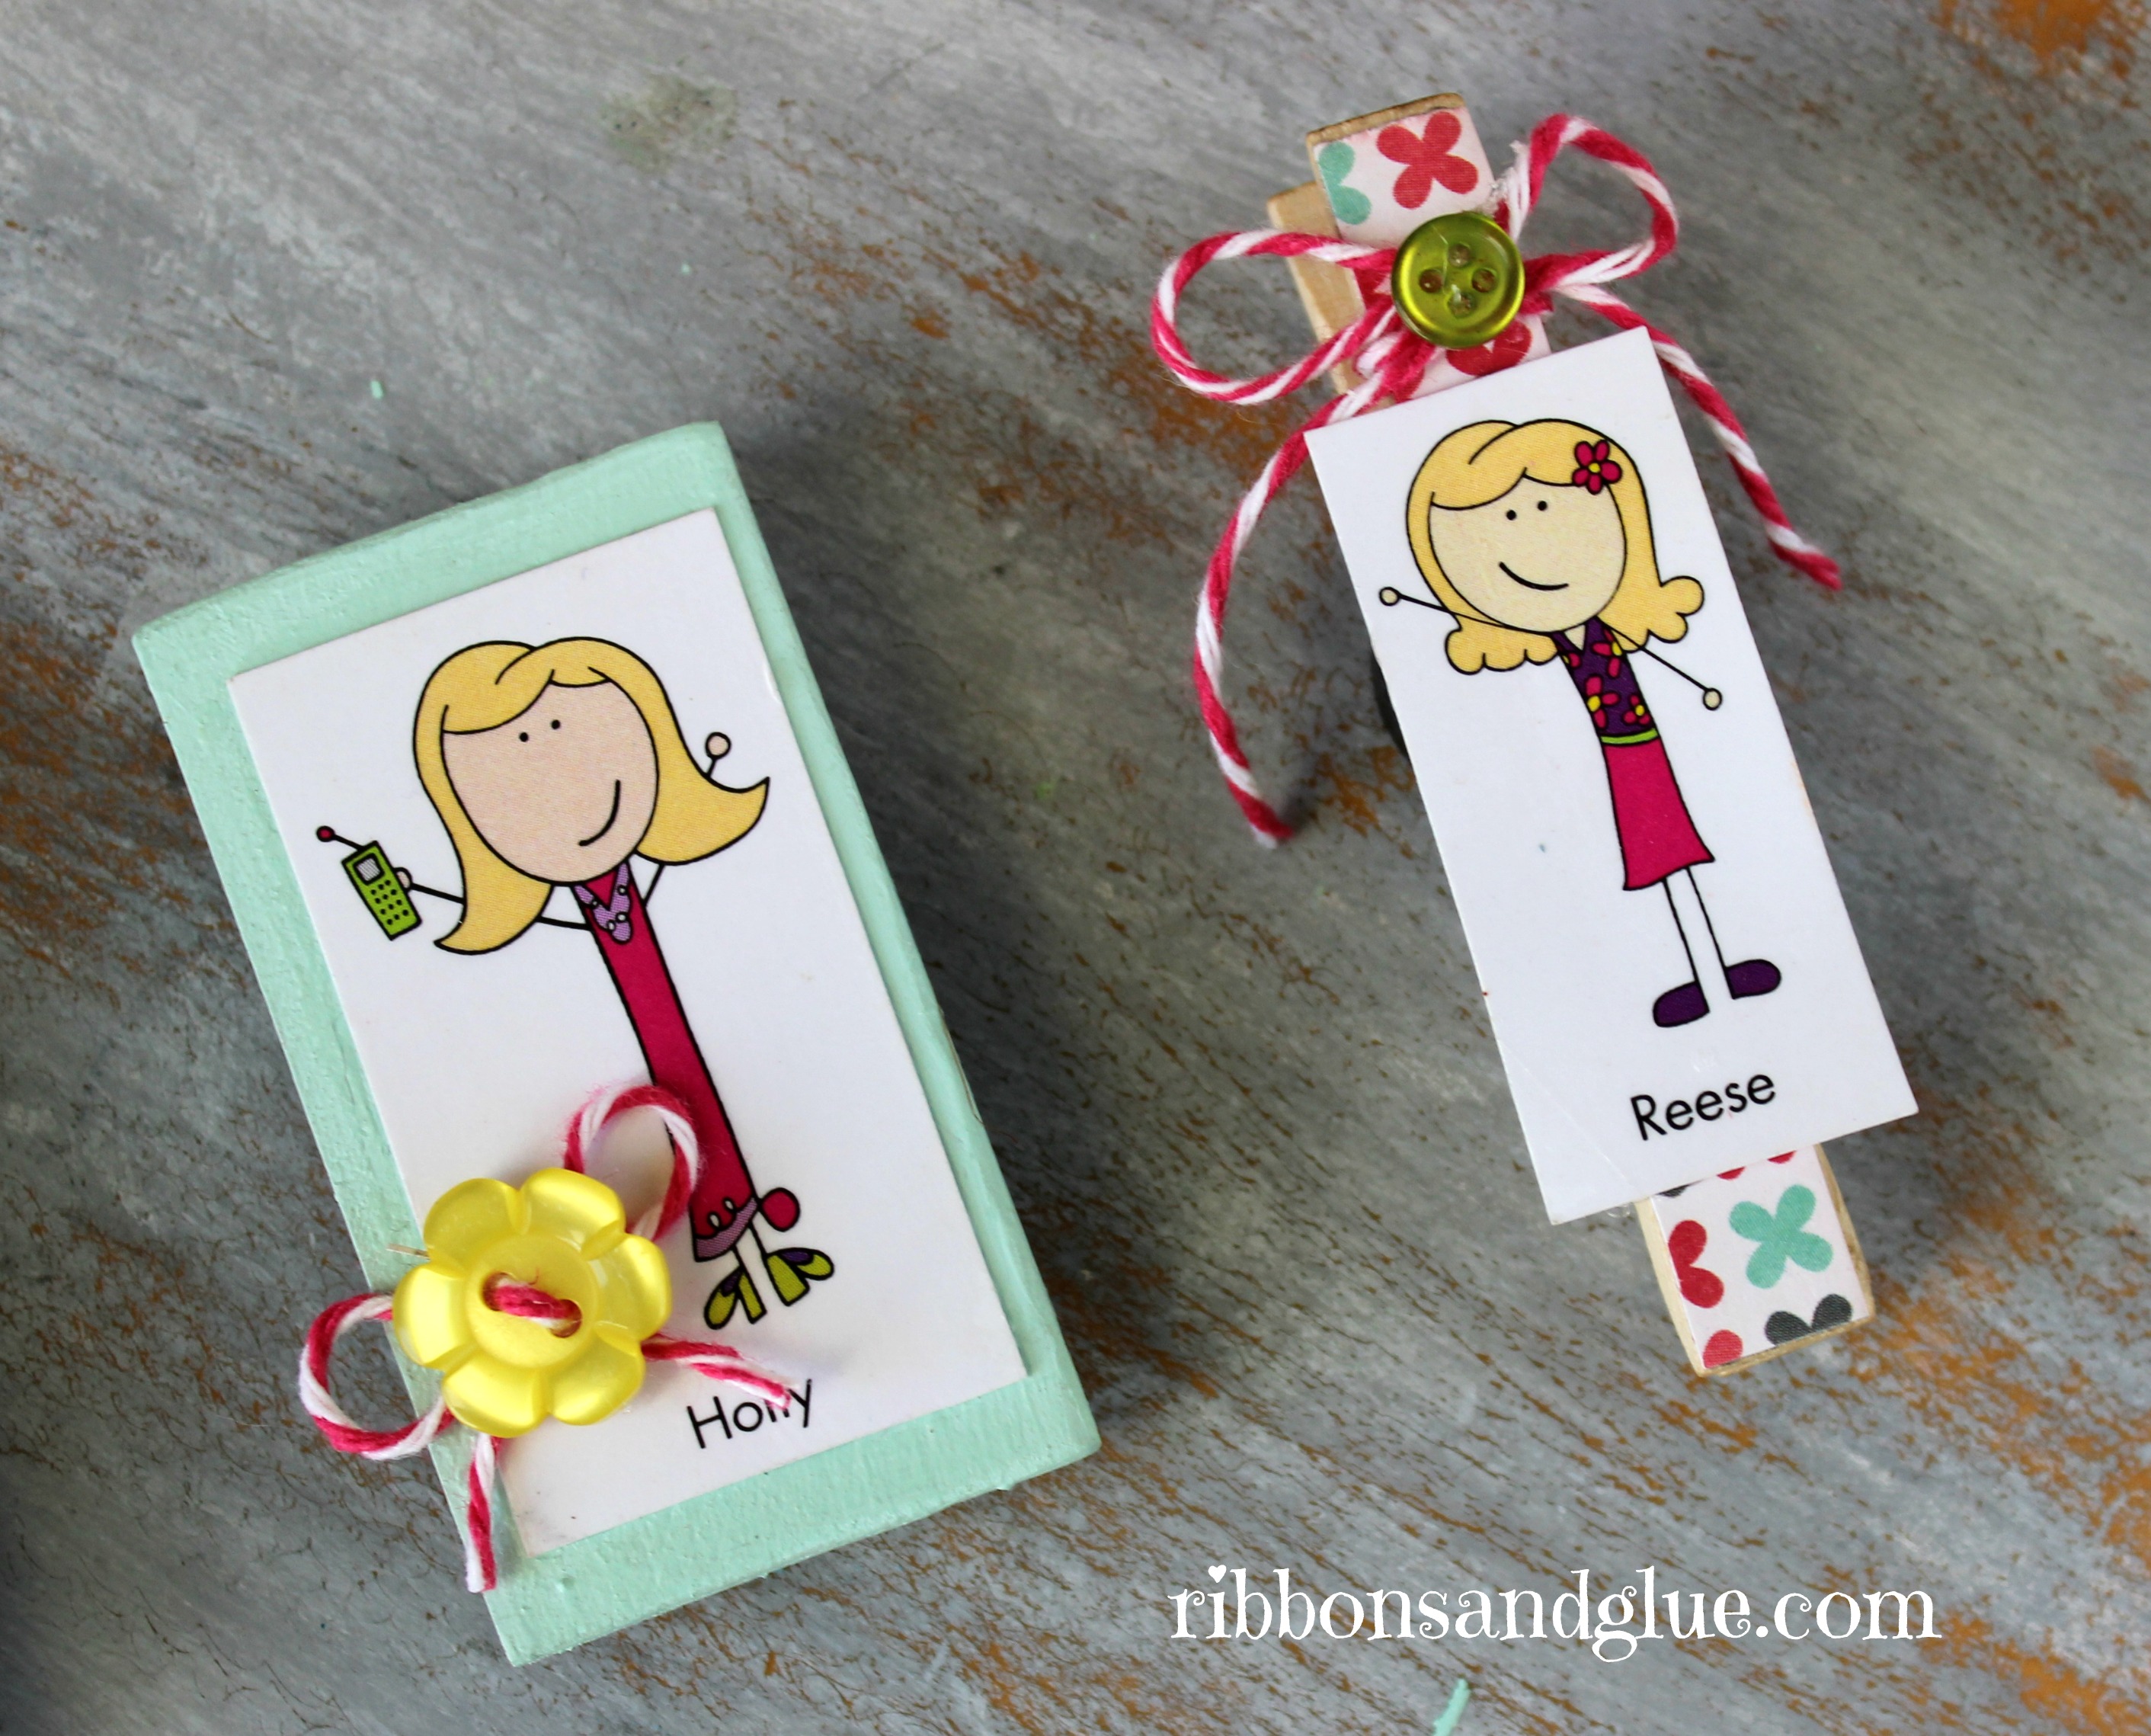
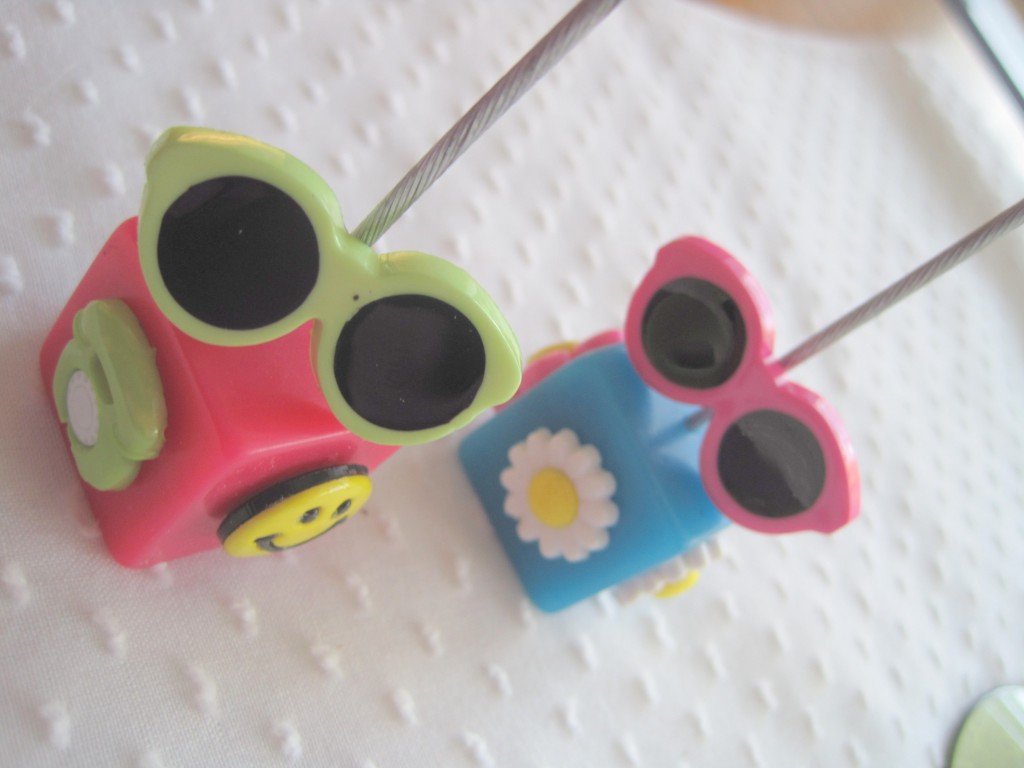
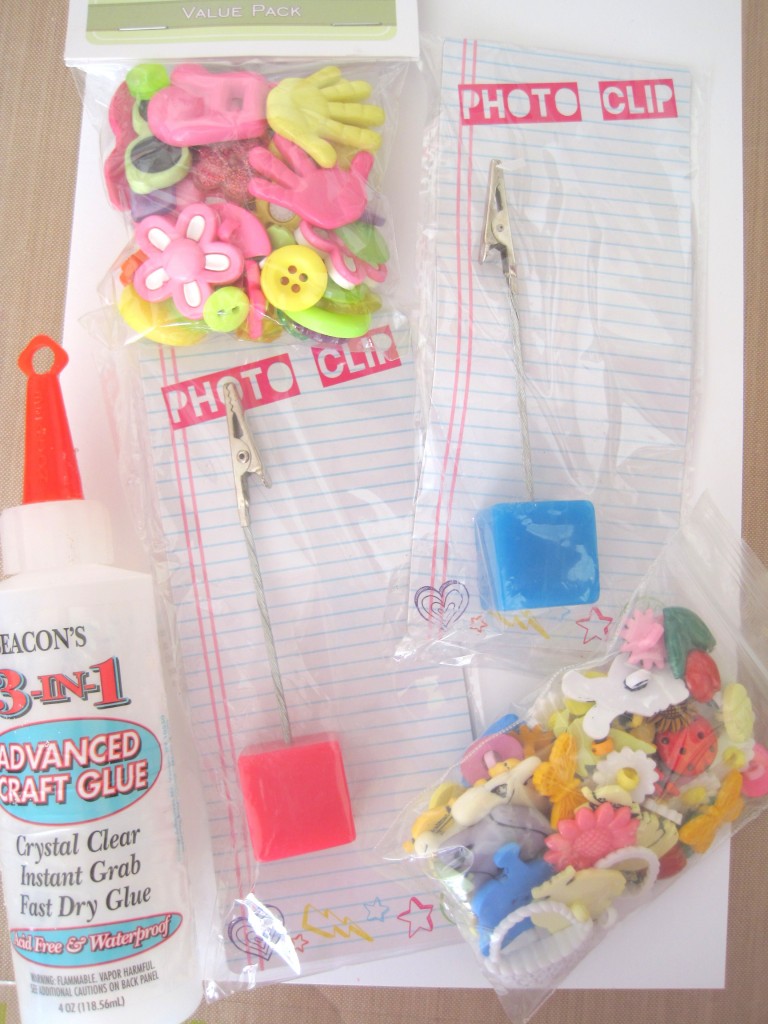
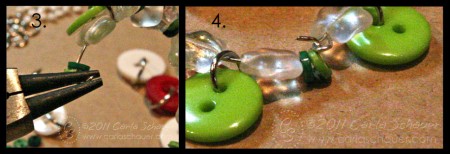
Who doesn’t love the dollar aisle? I picked up some simple photo clips the other day that I knew I could dress up with theme buttons to customize them for my daughters. It’s so quick and easy!
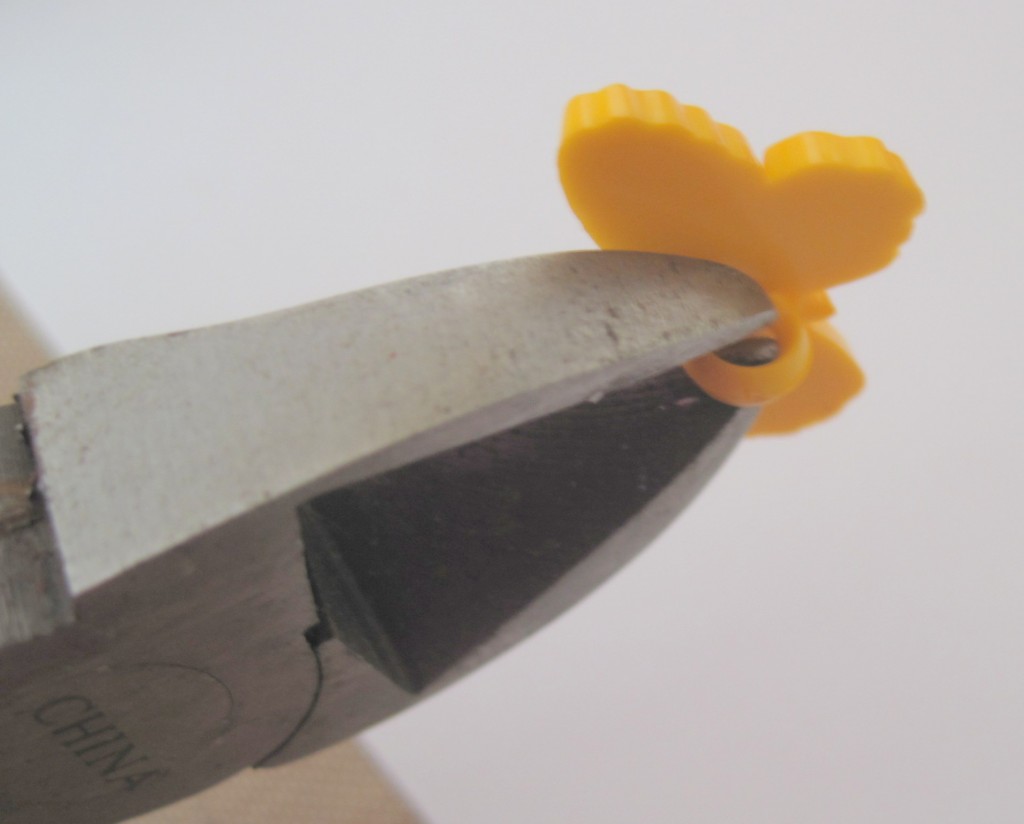
Start by removing the shanks from buttons.
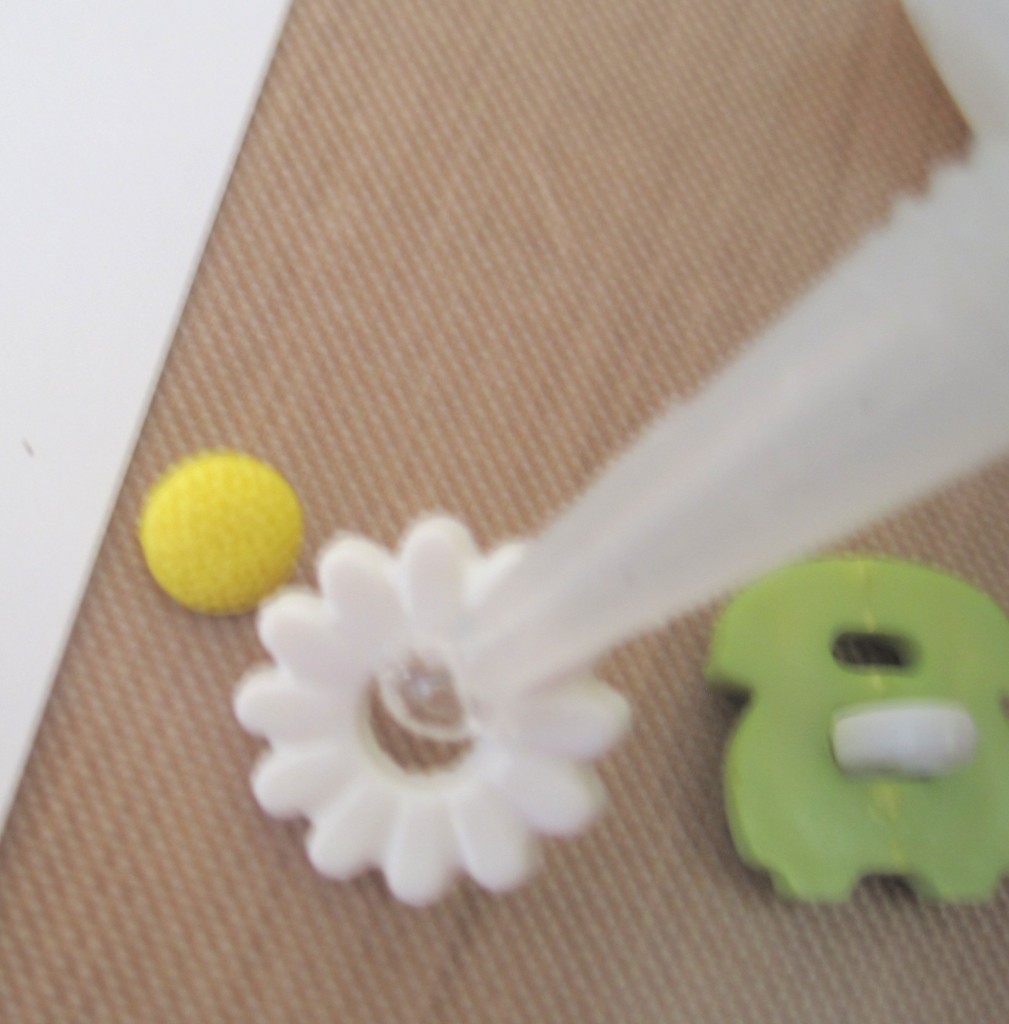
If the theme button has layers, glue them back together with a dot of glue.

Adhere the chosen buttons to the four sides of the photo clip cubes.
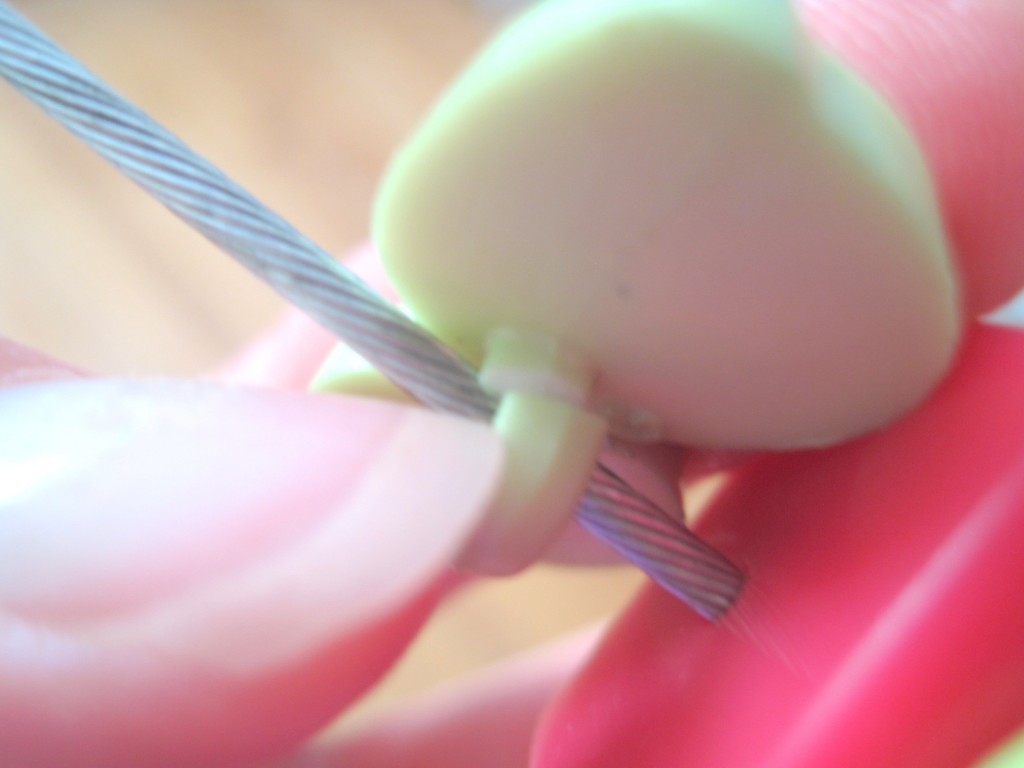
The sunglasses are a fun moving element by just clipping one side of the button shank and snapping in on the wire .
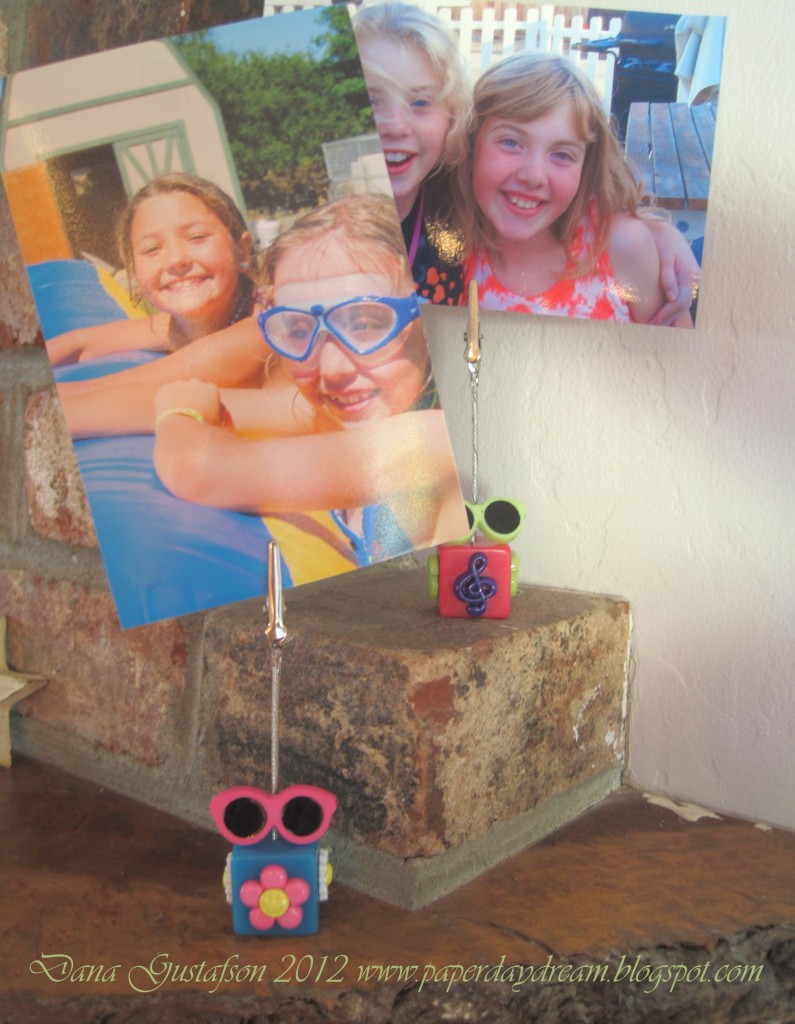
Final step…add cute pictures of fun times! This is a fast and easy way to customize a photo holder with theme buttons. Less than a half an hour including dry time and you have a great project.
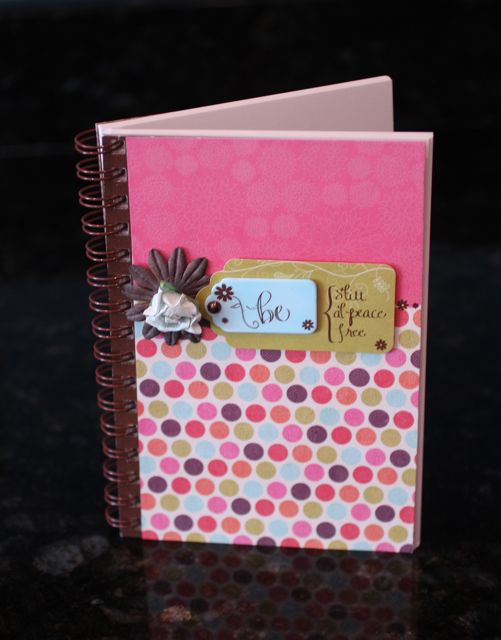
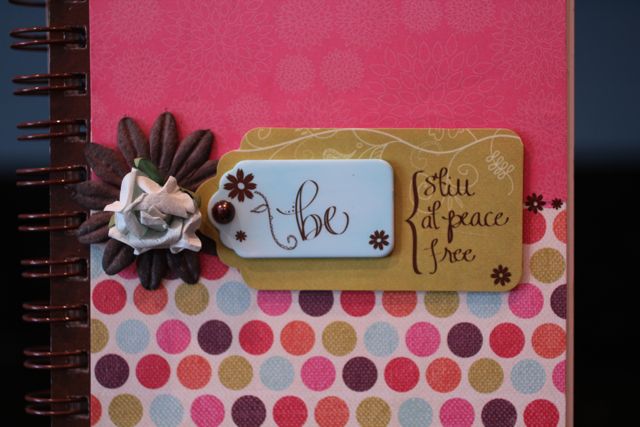
Today I thought I would bring you an Autumn themed card and share a few tips on how to alter buttons for embellishments. I know it is hard to believe Summer is passing and we are moving into the Autumn season? Creating distressed or altered buttons is not a new concept, that I know. But sometimes being reminded that creating handmade embellishments isn’t feasible and that altering embellishments is the next best thing! Here I will share with you one way I like to alter my button embellishments that takes just a few quick strokes of sandpaper in two different grits and you have an entirely new and interesting look to your buttons! I started with two buttons of the same size and color from the Gingerbread Assortment and then went to town!

The buttons I chose to use from the Gingerbread Assortment matched perfectly with my color palette however,
I thought they’d look good with a little “character”.

Starting with a rough grit side of the sanding block, sand the edges.

Next using a less rough grit, sand the surface of the face of the button to lightly distress it.

Notice the difference? It’s just a few simple steps to really personalize your button embellishments.

And the finished result!
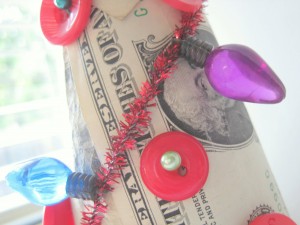
Money doesn’t grow on trees!!!….or does it? Check out this fun and easy way to give a money tree gift in a creative way.
Today I am excited to use a Styrofoam plus BUTTONS from Buttons Galore! Check out the supplies…
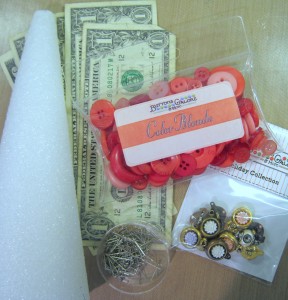
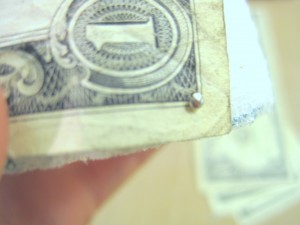
Begin by wrapping your cone in bills and securing the corners with sequin pins. Once you have all of the foam covered you can embellish to your heart’s content with buttons, colorful seamstress pins, tinsel chenille and more! Important to note that non of the items were adhered with adhesive because in the end this money tree is meant to be harvested so make it easy for the recipient to wrap and just use pins.
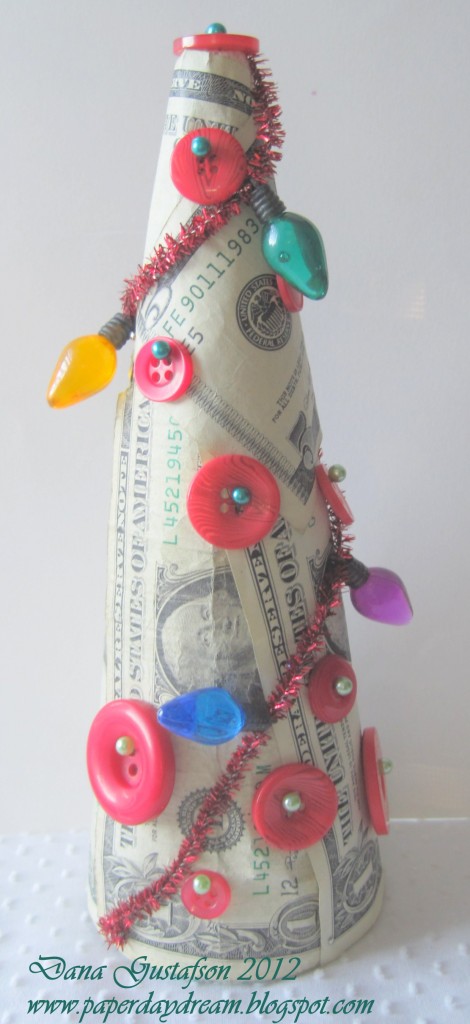
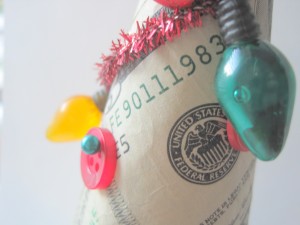
I love the glow on the “lights”!
Thanks for joining me today! I hope you will make a money tree for your next gift. No matter if it is a Christmas money tree, birthday money tree or a graduation money tree, the recipient will surely love a tree made of money. I know I would.
It’s time to get busy making something to freshen up the house! We have been busy all summer and as the Autumn season fast approaches having a few handy tutorials on how to make personalized gifts and hand made home decor just seems fitting. So today I have a Personalized Monogram Home Dec project to share with you. Enjoy!

Supplies Needed: Buttons, Brads, Micro Beads, Gem Tac (R), Scrapbook Paper, Hot Glue Gun, Scissors, Frame

Print letter of your choice as large as you would like finished monogram to be. Place beneath paper and put against a well lit window to serve as a light box. Then trace onto scrapbook paper.

Outline one third of the traced letter with Gem Tac.

Fill in the area fully with Gem Tac.

Place as many buttons as fit onto the glue covered area.

Quickly cover the entire surface with micro beads.

Remove excess beads before moving onto next step.

Continue covering the entire traced area a bit at a time following the steps above.

Cut the prongs off of the brads using strong sharp scissors.

See how much flatter brads lie once the prongs have been removed?

Hot glue the altered brads to the surface of the monogram randomly. Here I chose to hide "barren spots" with the brads. :)

Once your piece has fully dried, place in a frame and you are ready to enjoy your brand new PERSONALIZED home decor!!!
I would love to see what you make! Please leave a comment with a link to your personalized home decor projects! :) I will be sure to pop over and leave you some love on your project!! :)
I love the blank canvas of a brown kraft gift bag! While keeping it simple is a great way to go with the brown bag, going a little fancy and fabulous is pretty fun too! Follow me as I upcycle a brown gift bag by adding a fun handmade rosette to add a punch of color to this gift wrapping staple!

Nothing like the summer skies to inspire a bright pop of yellow and blue! Today’s project uses the following supplies:
Let’s get started!

I began with a piece of burlap, approximately 5×10 inches.
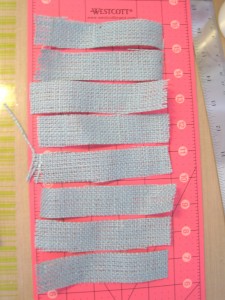
Cut burlap with a metal ruler and rotary cutter into 1×5 inch strips.
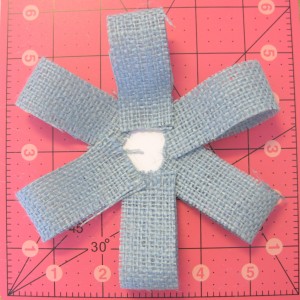
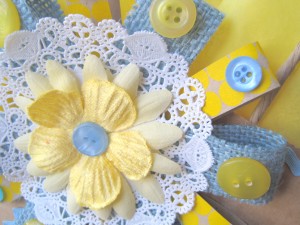
Loop and glue strips of burlap around a scrap of paper that will serve as the base for our rosette. Continue gluing and layering paper strip, doily, flowers, ric rac and buttons until you get a fun rosette that can be added to your brown bag like this….
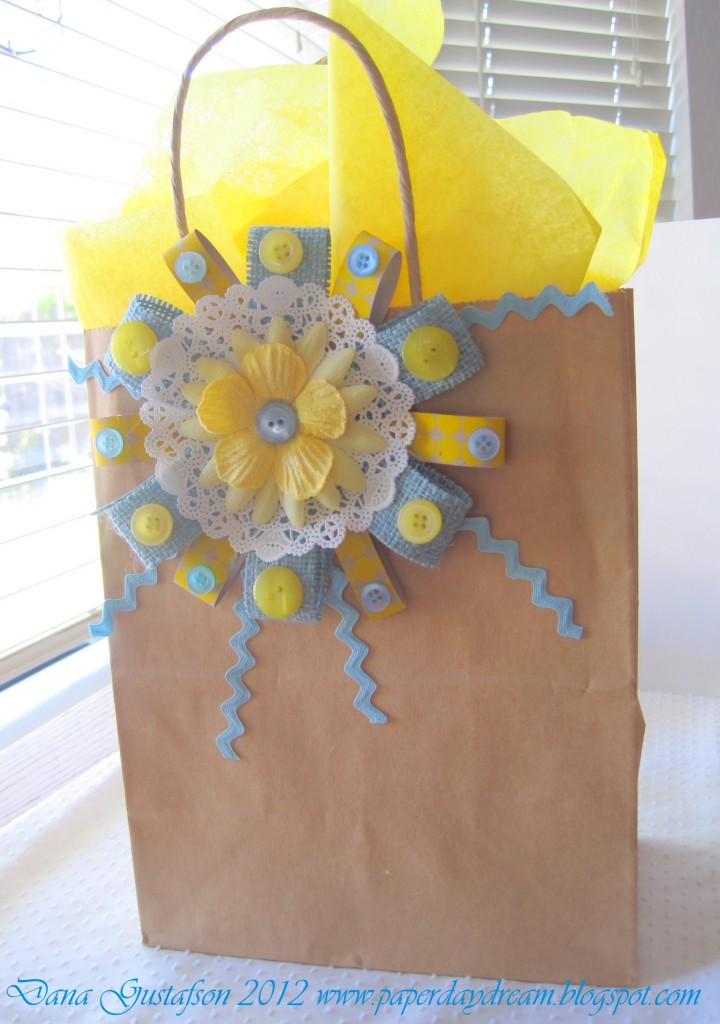
Hello sunshine! We just went from drab to fab with a very simple addition to this bag!
Thanks so much for joining me! I hope you’ll try fancy-ing up your gift bags with burlap, buttons and other craft supplies!

I love my mom. She’s a wonderfully fun person who everyone loves! She has a joyful spirit that just oozes to all those around her. This week I decided it would be fun to scrap a layout with her as the subject! :) If any of you have followed my work you know I love stamping, I love paper, I love ink, I love all things “crafty”…and here on this project I went all out and decided to not use any patterned paper but instead to get creative and make my own backgrounds.

I really wanted there to be attention to all the fine details on this layout so as you can see I used buttons as a border. Nifty Tip: Jacquard Lumiere 3D can be used to adhere buttons to your project AAAAAND it doesn’t leave you with “naked” button holes (personal preference of mine is to NOT have naked buttons!!!). The Lumiere 3D fills in the holes as well as adheres the buttons right where you want them to stay! The Lumiere 3D Turquoise is a dead match for the buttons in our Sea Glass Tin.

I also found that the Pearl Lumiere 3D was just right for holding my little white mother of pearl buttons from the Genuine Vintage Tin right where I needed them for the “buds” on my tree branch as well as for creating perfect domed centers for all my flowers.

As you can see here I have printed repetitive words using the Duetica Mandolyn 1 Font. I love how crisp and clean this font is but still has a flowing feminine feel at the same time. I decided it would be cute to make a list of all the names my mom has answered to in her life time….Marilyn, Mon, Mom, Kiddo, Momma, Mommy, Mother, Mimi etc…I then just repeated the list over and over and printed in a light gray on Kraft cardstock to make the background strip beneath the photo.

Then for my title I again used the Duetica Mandolyn1 Font in a larger point size and a cool teal color. One of the best things I am finding when working with the Duetica fonts is that I can customize EVERYTHING about them, the way they type out, the colors I print in, the size, the layout…you name it, you do it! :) Since we just celebrated Mother’s Day now is a great time to get out that photo of your mother and treasure that memory as you create a keepsake scrapbook layout…
Supplies:
Buttons: Buttons Galore & More – Sea Glass, Genuine Vintage
Jacquard – Lumiere 3D: Pearl & Turquoise
Duetica Font: Mandolyn 1 & Adobe Photoshop
Cardstock: Prismatics & Coredinations
Cricut Electronic Cutting Machine, Serenade & Winter Wonderland Cartridges
Stamp: Layers of Color – Fairy Wishes
Ink: Clearsnap Colorbox Pigment Ink – Glacier Ice
Glitter: Ultrafine Iridescent
Rhinestones: Want2Scrap
Flowers: Prima “e!” line
Die: Spellbinders Labels Four Nestabilities
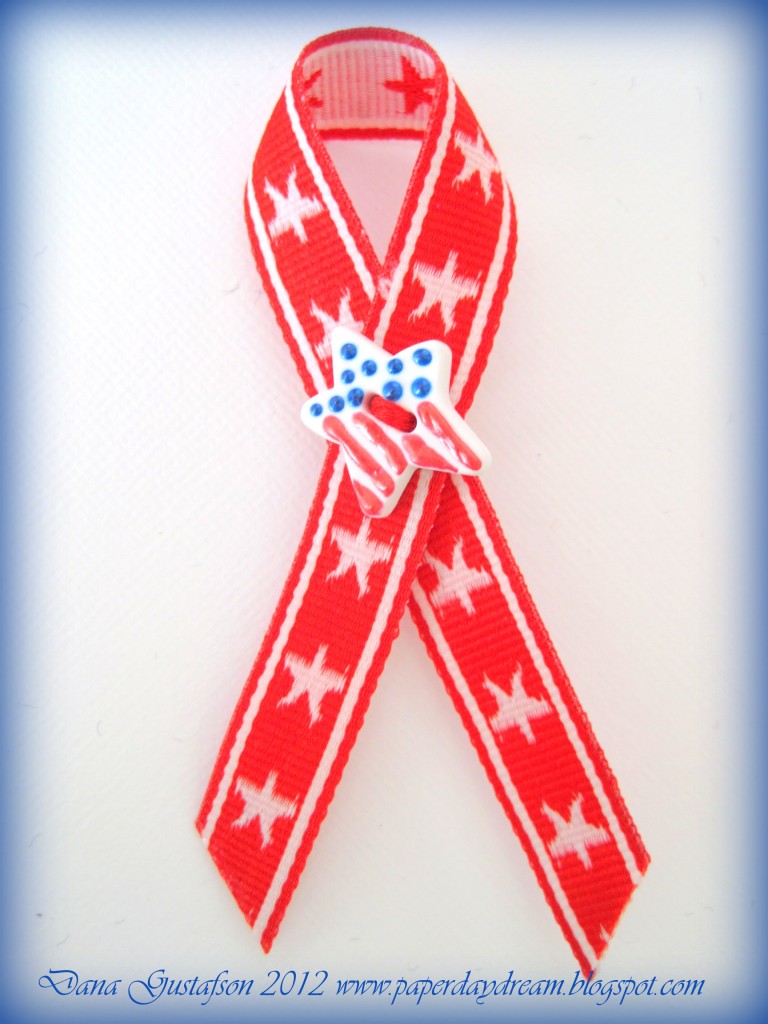
Here in the U.S. we will be celebrating Memorial Day at the end of May. We also celebrate Independance Day on the 4th of July. Today I am sharing a simple way to show pride in your country with handmade lapel pins.
Gather a few simple supplies…
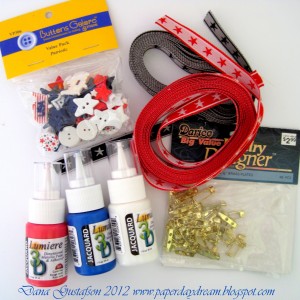
Supplies:
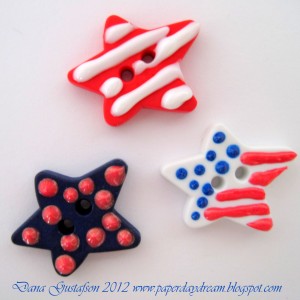
I chose to decorate the stars in the value pack using dimensional paint from Jacquard. Free handing dots and stripes is a breeze with the fine tip applicators on the bottles. Let the dimensional paint dry completely before the lapel pin assembly steps.
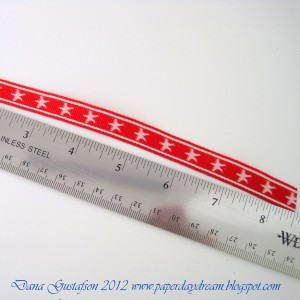
Prep your ribbons by cutting at approximately 8 inches long.

Using a contrasting color of embroidery floss, sew the lapel pin together with the looped ribbon between the pin back and the embellished button.
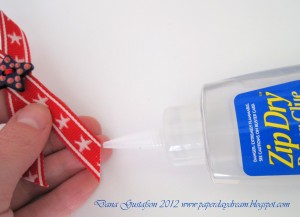
Run a fine detail glue like Zip Dry along the edges of the cut ribbon to prevent fraying.
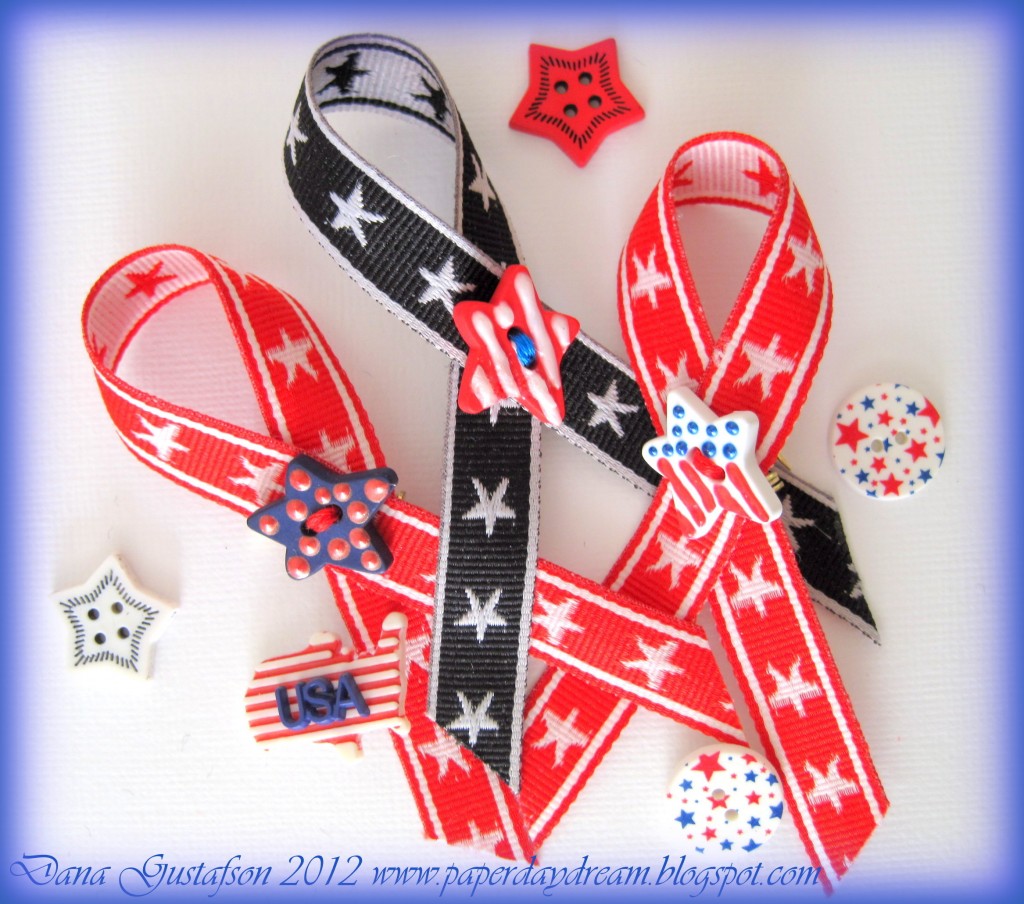
These are a snap! Make a few and share them with your friends and family. Not a lapel pin wearer? I’ve pinned these on the side of canvas tote or they would look cute on a hat too. Thanks for stopping by! Have a great one!
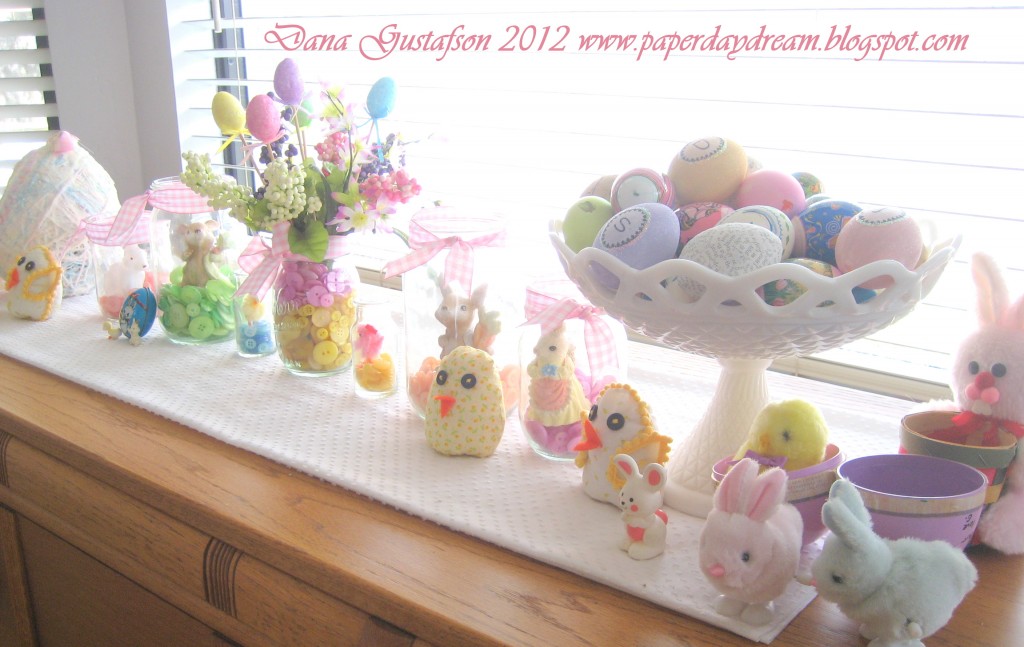
Hello there! Today I am bringing you a super simple tablescape idea for spring using buttons, ribbon and clear glass jars…a “button-scape” if you will! I’m willing to bet we all have a hodge podge of glass containers around the house (mason jars are one of my favorites) along with small spring and Easter themed nic-nacs. Why not pull them together and make them a cohesive tablescape with the unifying ingredients of buttons, jars and ribbon?
Materials from Buttons Galore and More:
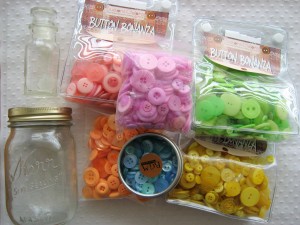
Other items needed:
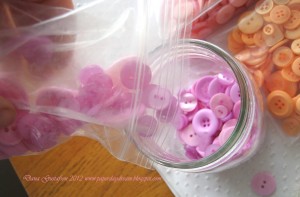
Are you ready for the super complicated directions???? Just kidding, this process is simple.
Check out the various items I used in my tablescape…
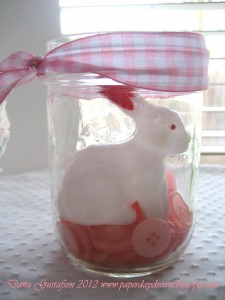
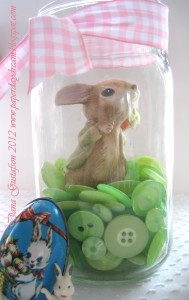
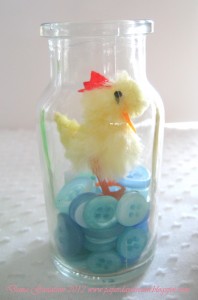

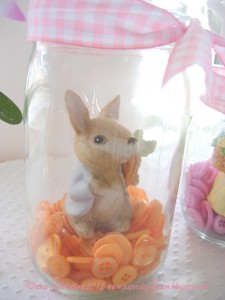
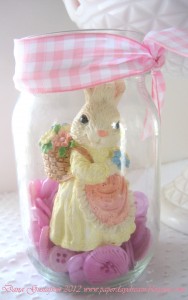
I loved the glass domed effect of the jars on my little treasures and the buttons are just the perfect pretty stage to show them off with!
Thank you for hopping by my post today! I hope it inspires you to put your buttons to work this spring!
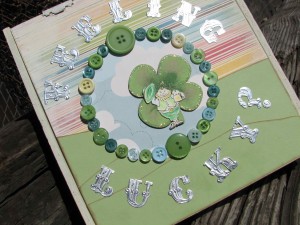
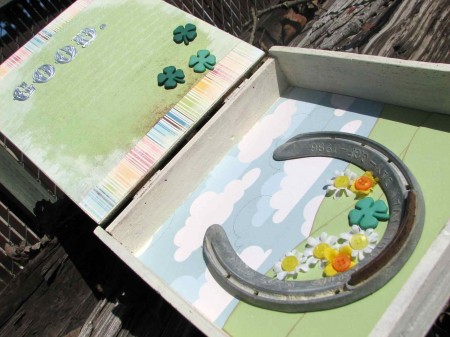
Button embellished St. Patrick's Day Keepsake box
Is the luck of the Irish with you?
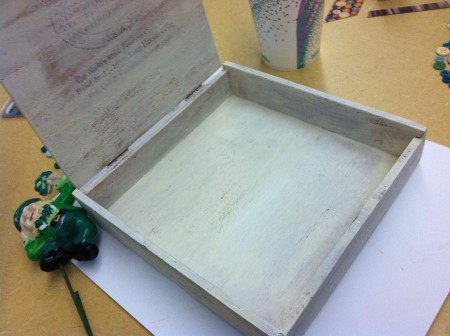
It was WITH ME, when I re-purposed this old cigar box, to become a sparkling keepsake, with a St. Patty’s Day twist…
A delightful assortment of Buttons Galore & More buttons and just the right amount of good old Irish magic…
Buttons Used:
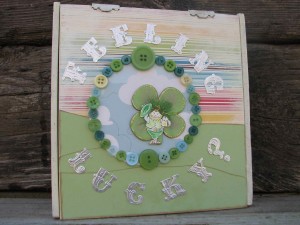
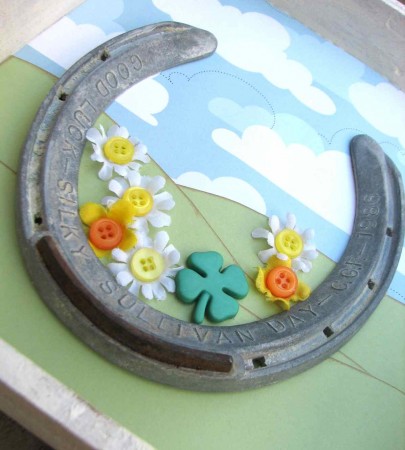
The spirits moved me to create this festive, button embellished medallion, to house a wee-leprechaun and invite contemplation of one’s sense of optimism…
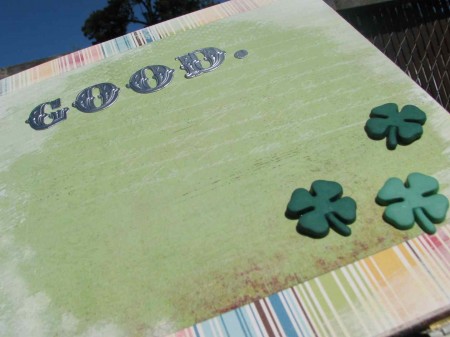
And being, ever the optimist, myself – I confirmed what EVERYONE should feel….
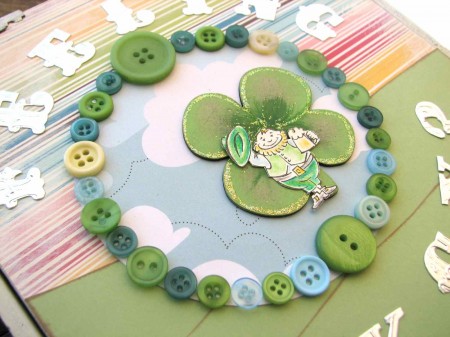
L-U-C-K-Y!
And HOPEFULLY, inspired as well!
I hope you do a little jig and get your BUTTONS on – it’s a great time for crafting with Buttons Galore & More!
Thanks for visiting!

Luck of the Irish Key Fob
I’m 50% Irish and I make sure everyone knows it on St. Pat’s Day! Today’s project is a “Luck of the Irish” Key Fob. Put it on your key ring for a little extra luck. Who doesn’t need that on the roads today?
Luck of the Irish Key Fob
Supplies:
Instructions:
These would also make cute gift tags or luggage tags (you would always be able to spot your suitcase at the airport).
Happy St. Patrick’s Day!

Dan and Lisa - Owners
We’re back! From Winter CHA (Craft and Hobby Association) trade show, that is.
A few members of our design team, past and present, were able to make the trip to Anaheim, CA from January 29th – February 1st 2012. I was lucky enough to be there and I thought I’d share a few photos I took of the booth with you.
Above are Dan and Lisa – the owners of Buttons Galore and More. Buttons Galore and More was one of only a few companies I found that sells both to wholesale customers and on their retail website at buttonsgaloreandmore.com

Summer
I love the seasonal themed packages.

Spring

New button collections by Laura Kelly. The packages all have a little project sheet as part of the packaging!

The Haberdashery line is probably my favorite!

Aren’t the Color Blends great? No matter what project you are working on you’ll have a selection of buttons in the same color family to choose from!

And the Button Bonanza packages… because you can NEVER have too many buttons!

It’s always kind of sad to say goodbye…especially to such talented people as Carla Schauer, Jenny Barnett Rohrs, Beth Watson, and Jen Goode.

Some of our original design team are still with us … Vicki O’Dell, Niki Meiners, Elise Durenberger and Laura Bray.

Haberdashery Heart by Laura Bray
And to them we have added new members to our design team… Dana Gustafson, Cristal (Pinky) Hobbs, Ann Butler, Laura Evangeline and Allie Gower.
To see the bios of our Design Team Members as well as links to other sites where you can follow them please visit our MEET THE DESIGN TEAM PAGE.

Isn’t this a sweet, simple decoration for Valentine’s Day? Or a baby girls’ room?
It’s a little time consuming but not very hard to make. Let me show you how…

First off you’ll need a 14 inch extruded foam wreath, some fleece and Fabri-Tac from Beacon Adhesives.

Cut the fleece in a long strip wide enough to wrap around the foam wreath and to meet at the edge. Glue the fleece around the wreath as shown. Scrunch the fleece together to make it kind of wrinkly.
TIP: When I’m using Fabri-Tac to “sew” I often use pinch clothes pins to hold the fabric together while the glue dries!

Next grab yourself some yo yo makers from Clover. I used a large circle, large heart and medium circle.

I made about 24 yo-yos with four different fabrics. I have to say, that I love the yo yo makers. They made it really easy!
This part of the project is perfect for crafting while watching television!


Then sew buttons in the center of the yo yos. The Button Bonanza in Bubblegum is PERFECT for this!

Next, lay the yo yos out on the wreath in a pleasing pattern and then take small pins and pin them in place.

I used a bone folder to tuck the pins down in deep so that you can’t see them in the finished wreath.
You can either fill in the whole wreath or only fill in a portion of it like I did. And of course, it doesn’t have to be in pinks.. it can be any colors you choose! :)
Yo-yos on Girly Messenger bag by Niki Meiners
This feminine messenger style tote is perfect for a Valentine’s Day gift. It is soft and girly and it can be carried long after. Plus the flowers on this bag will last a lot longer than a dozen roses.
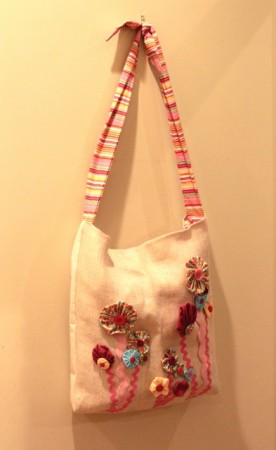
Gusseted Messenger Style Tote
Tools:
Scissors, Cutting matt, needle, thread, pins, Clover Yo Yo Maker in extra small, small, medium, large, extra large circle, small and medium heart and the small and medium flower.
Materials:
Confection Button Collection and FabriTacCream canvas, cream burlap small dark pink rick rack, large light pink rick rack, various scraps of coordinating fabric. Two strips of 6×24”, burlap, Velcro ®
Directions:
1. Cut burlap to 36″ by 22″ to make a bag about the same size as a grocery bag. So if you buy 44″ wide fabric, you can make two bags with a yard. Cut in half. to measure &&& Cut canvas to $x#. Sew the burlap to the canvas. Fold the top edge down 1/2 inch. Then stitch ¼” from edge. Place wrong sides together and sew on the three remaining sides.
2. To make a gusset, flatten the bag with the bottom seam on top. (It looks like an odd triangular shape, but makes more sense when you actually do it). Then sew across the triangle so that your seam is about 3-4″ long (mark it by sliding a ruler down until it reads 3″). When you turn the bag right-side-out, it will stand up like a paper grocery bag just not as deep.
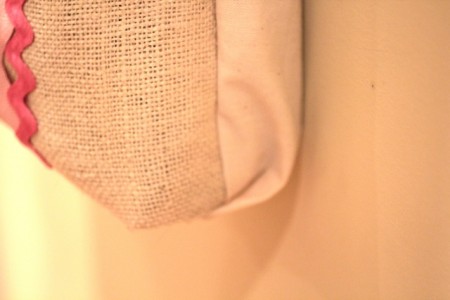
Gusset on Messenger Style Tote
3. Cut striped fabric for handles to 6×24. Fold in one inch on each side finger press. Then stitch ¼” from edge. Fold ends of each tip to form a diagonal and sew along edges. Sew the other end inside the bag. Straps can be made of self-fabric, very sturdy ribbon, matching fabric remnants, nylon webbing, or whatever else seems you have handy. I tied the fabric strips into a knot for a decorative effect.
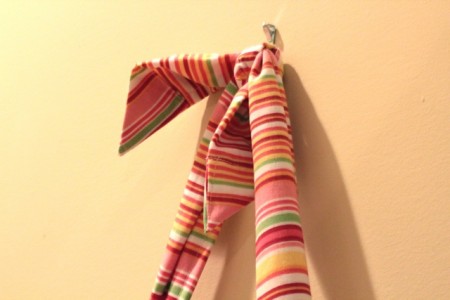
Knot at the top of the straps
4. To embellish the tote use Fabri-tac to adhere various lengths of rick rack. The rick rack mimics flower stems. Mine vary from 4-10″.
5. Follow manufacturers directions to make the yo-yos. I used a variety of the sizes listed above. Hand sew buttons in the center of each yo-yo. You can either adhere the yo-yos with a quick stitch or you can use the Fabri-Tac.

Yo-yos flowers with button center

In case you didn’t get enough wrapping, tags and holiday goodness, last month… It’s onward and FORWARD: Valentine’s Day is just around the corner!
Good thing Buttons Galore & More has SUCH a wide assortment of buttons and lovely bits to get the imagination and crafty thoughts flowing.

With some simple supplies and a splash of colorful fun, a button embellished Valentine’s candle seems is the perfect project for a little post-Christmas togetherness time. Gather a willing, crafty kid, and LOVELY buttons from Buttons Galore & More. The wee-child in your life might just be heading back to school with some Valentine’s teacher gifts “in the can”, as it were. Move to the head of the class… AND have fun!

With satisfying crafty abandon, have the child pin buttons to the outside of a pillar candle, using half inch stick pins.

We had A LOT of fun with the pins! Use as many or as few as desired – you MAY want to remove them when decorating is complete.

Once button layout is complete, prepare 3 – 4 feet of wax paper, folded in half. Fold in half, again, and insert candle.

On a hard surface, with a heat resistant mat, heat the candle with heat gun, through the wax paper, until very hot. {This is where “parent” supervision kicks into high gear – I recommend a good heat glove for the first go-round} Going “horizontal” sections at a time, heat until the wax is visibly melting beneath the sheet of wax paper. Firmly roll and press the candle so that the warmest, meltiest section is then pressed, firmly, onto the hard surface. Repeat this step until entire candle has been well heated/melted and then remove wax paper. Buttons should appear sunken, and possibly covered with wax. When satisfied, pins can be removed, if desired.

Embellish base with cardboard, baker’s twine and wonderful button/accessory goodness from Buttons Galore & More.

Prepare a paper bag for presenting teacher Valentine’s gift, and finish with stamped Start Up tag, using solvent based permanent ink.

Save the chocolate {for YOURSELF!} and help YOUR child gift teacher, with a Valentine’s keepsake that will surely LIGHT up the heart! Enjoy!

The instructions for row 10 are up on the Fabric Party page here.
And as always there is a give away that includes a Sock Hop button pack from Buttons Galore and More!! WhooHoo! :)

Do YOU have a great button project that you would love to share with our readers?

Did you discover a great technique or alter an object?

Looking for an ‘ATTA GIRL/BOY from someone other than your mom or best friend?
Would you like to have a button for your blog saying you’ve been Featured on Buttons Galore and More and maybe a little THANK YOU gift to boot?
Send a photo of your great idea, project or technique to buttonsgaloreteam (at) yahoo (dot) com and we’ll let you know if we can feature your idea/project on our blog. If your project is accepted we’ll ask for more photos (step out process photos if they are available) and written instructions. We’ll let you know when your project will be featured so you can share the good news with all your friends and we’ll even send you a little thank you gift!

Close-up of Laura Bray's Button Journal
I can’t believe another year is winding down. Time to make your resolutions for the new year! It’s always easier to do it if you have a cute journal to work in. Why not make a little felt cover, embroidered with a cute design and embellished with buttons?
Supplies:
Instructions:
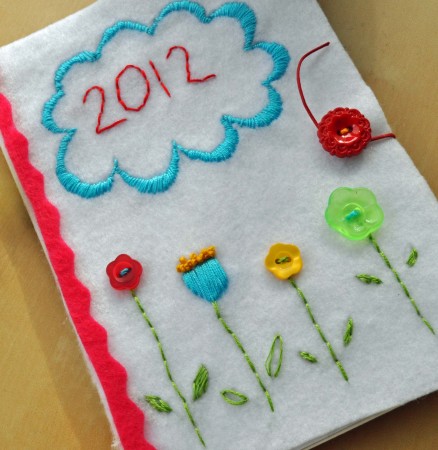
Button Journal by Laura Bray


In case you haven’t heard, Pinterest is one of the hottest new sites around. For those of us who operate VISUALLY it’s nothing short of eye crack! LOL! Just look at this button embellished Mona Lisa I found the other day. Crazy cool!!
Be sure to follow our Pin Boards to share the button love!

Buttons Galore and More Design Team Call
We are looking for gifted designers for our Button Bevy! If you want to be a part of a fun, creative community that is passionate about connecting with and empowering crafters while promoting our products then we would love to have you apply. We seek paper crafters, card makers, scrapbookers, mixed media artists, jewelry makers etc.
To apply, please email to buttonsgaloreteam (at) yahoo (dot) com:
Current and prior Design Team Members are welcome to apply!
Requirements:
Compensation:
Our goal is to have the design team together and begin posting on buttonsgaloreandmoreblog.com by February 1st. So please make sure your application is submitted by Friday January 4th 5pm EST.
Email your application by emailing buttonsgaloreteam (at) yahoo (dot) com
Please email us with any questions. We look forward to your applications!

I can’t begin to tell you how much I love these small brightly colored ornaments! Kristin at Urban Paisley shows you how to create a colorful table top tree to chase away any overcast winter day doldrums in her Tiny Button Ornament post.
Do you think I could get away with keeping this one out until Spring?
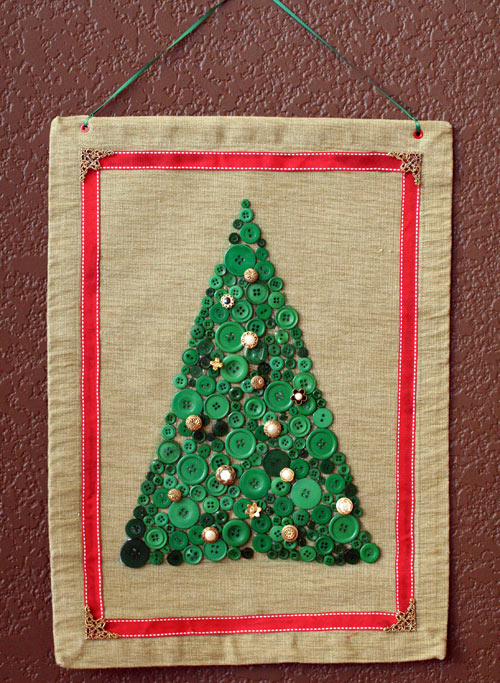
Christmas Tree Button Collage by Jen Goode
Make your own pretty Christmas Tree decor with buttons. You can add any extras you like including button ornaments and mini garland. I created this holiday button decor using an old placement that I recycled to create the background piece. I love it when a project is completed without sewing a single thing!
Materials you need:
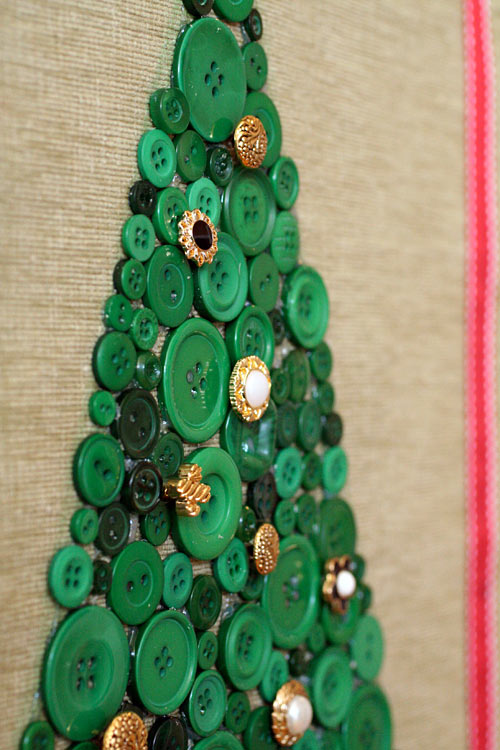
Christmas Tree Button Collage - close up
How to make this Button Collage Christmas Tree holiday decor
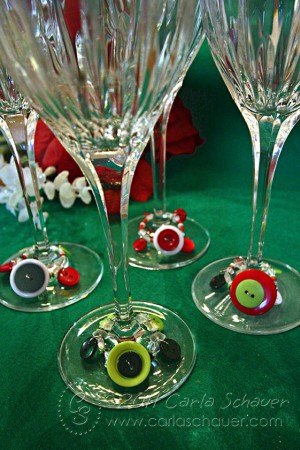
As holiday party season rapidly gets underway, one of the tasks the party host(ess) needs to consider is how guests can keep track of their drink glasses. One of the best ways to accomplish this is by using drink charm. Plus, it looks fancier than the plastic cup/black marker method.
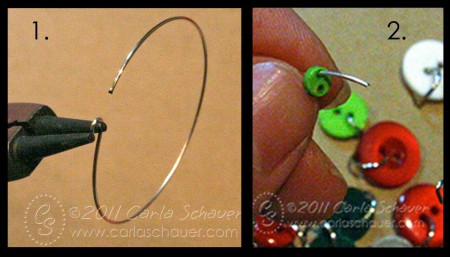
I started by using a coil of memory wire, cut into 4 rings with wire cutters. With a couple jewelry tools, some frosted beads, and my Buttons Galore & More buttons, I had my charms made in no time at all.
Supplies and Instructions:
Buttons Galore & More buttons (Christmas Button Bonanza, Rainforest Button Bonanza, Winter Holiday Micros, and Rainforest Mix Micros)
Frosted and clear star and bicone-shaped beads
Red seed beads
Silver jump rings
Silver wire
Round nose jewelry pliers
Wire cutters
Each charm has a different combination of buttons and beads, and each has a unique focal button set. I used fairly traditional Christmas colors in this set, but the charms can be made to coordinate with any party theme.

Our Design Team Member Laura Bray needed a little inspiration for using up some gold and silver buttons from our Gold and Silver Grab Bag … so she grabbed a can of spray paint and created some adorable wall art. You can read all about how she did it in her blog post Button Decor.
I think that one or two buttons in a small frame would be an excellent idea for an ornament too, don’t you?

About this time of year, my kids get the itch to start making gifts for friends, teachers, and grandparents. I came up with a kid-friendly craft that will enable them to give a gift they’ll be proud of- and it’s a great way to share those wallet-size photos from school pictures!
I used a manual die-cutting machine for this (the Spellbinders Grand Calibur) because my kids, ages 6 and 10, know how to use it independently and frankly the results are great! But you can use hand punches if you like, instead.
Supplies:
First, have your kids cut large circles in 3 1/2″ or 4″ size for the bases. Then, cut the “wreath” portion by positioning the 3″ or the 3 1/2″ die and centering the 2″ die into the middle. Use a piece of painter’s tape to keep it from shifting around while you run it through the machine.

Save that area that is punched out- we’ll use it on the back!
Next, cut a piece of ribbon at least 6″ long and glue it to the base.

Take your wallet-size photos and position them so the face is centered in the middle. Cut away the excess with scissors. use a dab of glue to secure the photo to the wreath, then add more glue to the entire thing and glue it to the base.
Now to decorate! Use a little more ribbon to make a bow, and add a decorative button. Then glue little buttons around the wreath as ornaments.
While that’s setting up, write the child’s name and year on the Angel Start-up and glue it to that center from the first step. Lastly, glue that to the back of the ornament so that both sides are festive.

You’ll have such a good time crafting together as a family, and the kids will be so proud that they made the gifts themselves!


Recently one of our Facebook fans posted a photo on the wall of a finished project. I thought it was so cool I just HAD to share!
Notice the mirrors rescued from the trash in the above photo?
And see what they are becoming here?
You’ve got to go visit Notions and Devotions to see more!
Do you have a project that uses Buttons Galore and More buttons that you like to share with other button crafters? Maybe a blog project you’d like me to link to and share with our community? Be sure to head over to the Facebook page and share your photo!!
P.S. Our welcome page on facebook always has exclusive content just for our friends! :)
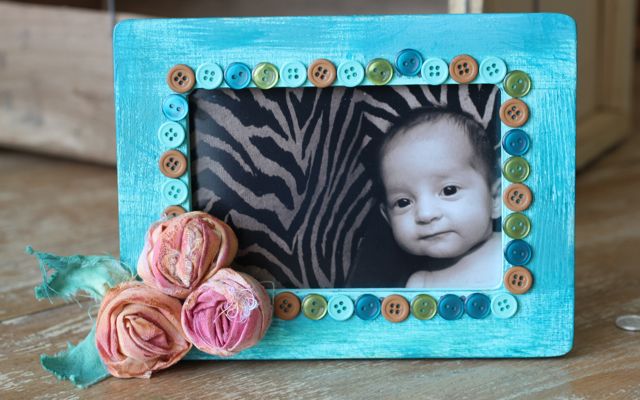
Button and rosette frame by Niki Meiners
Looking for a holiday gift or a for a fun decoration? Why not make a frame embellished with buttons and rosettes? I love the blank wood frames from Michael’s. I usually purchase a dozen or so when they go on sale for $1. They are great, low cost homemade gifts. To make this project:
Tools and Materials:
Blank wood frame, paint brushes, 3 colors of paint ( similar colors work best), glue, floral decoration and buttons green, waterfall, and bittersweet.
Directions:
Paint wood frame with paint color of choice. Dry brush on other colors. Glue on rosettes and buttons as shown.
Toodles,
Niki
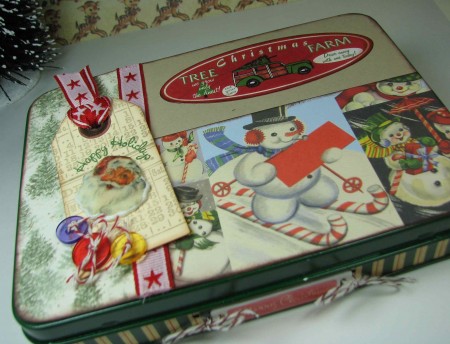
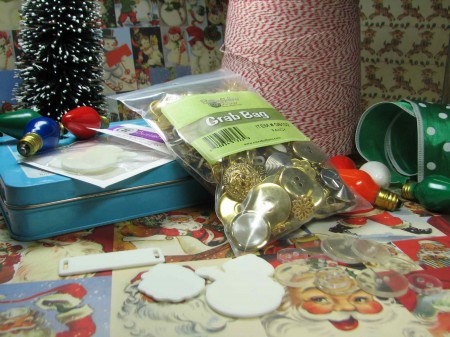
The buttons are OUTSIDE of the box, friends! {And… inside, too!} For your creative consideration, I’ve mixed things up with a crafty menagerie of buttons, Start Ups, Ribbon and more!
Buttons Galore & More products used:
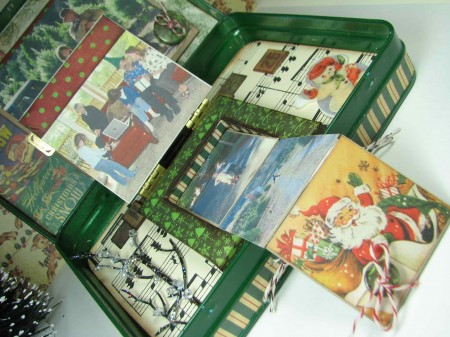
Just to help set the Christmas mood, I created a “beyond the box” scrapbook project, within… {wait for it…!} a darling altered box! The PERFECT assignment, to help stimulate crafty projects to give this season… {or KEEP for yourself!} Armed with assorted materials from Buttons Galore & More, and miscellaneous extras, just kicking around the craft room… I made this fun, interactive memorabilia box to share with all of you!
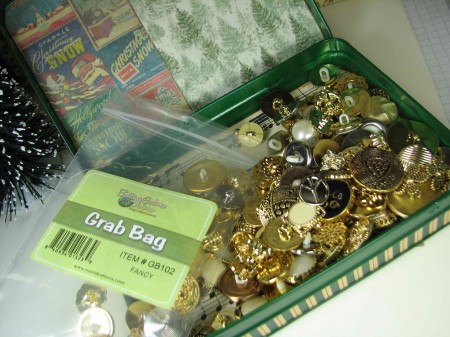
Spray paint and embellish metal box with color and papers of choice. Contemplate BUTTONS!
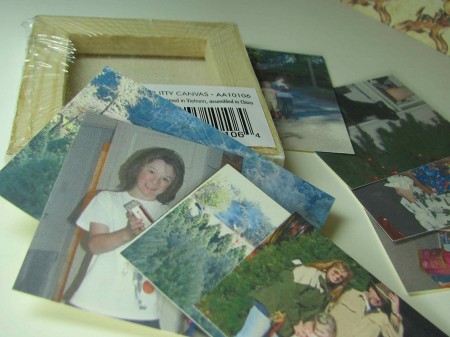
Reduce and print photos on a small scale to create accordion album to fit into mini canvas. Choose several photos to highlight your subject and print at normal scale.
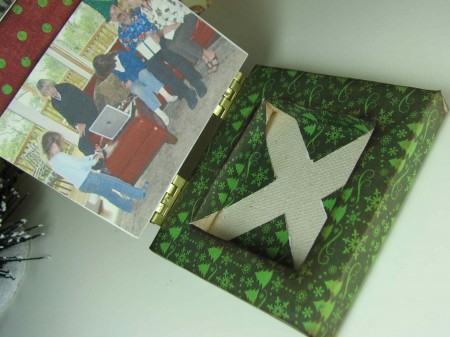
Wrap mini canvas so that the backside is covered completely by the paper. Glue flaps to the front of the canvas, as tightly as possible. Using a sharp blade, score an “x” across the covered backside of the canvas, exposing the inside. Fold triangular flaps down and secure with glue to create an open box type of frame. Cut a piece of chipboard to cover the entire frame and screw two sets of hinges to the front of the chipboard, after it’s been decorated, to create a “lid”.
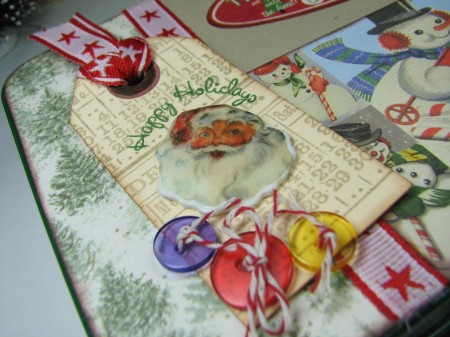
Embellish cover of canvas box with a stunning button of your choosing!
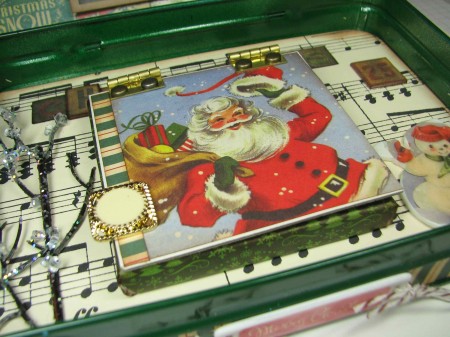
Acclimate small scale pictures to work in an accordion motion. Secure with glue and tape. For opening, pull attachment, add button, glued and sewn with clear thread, for strength.
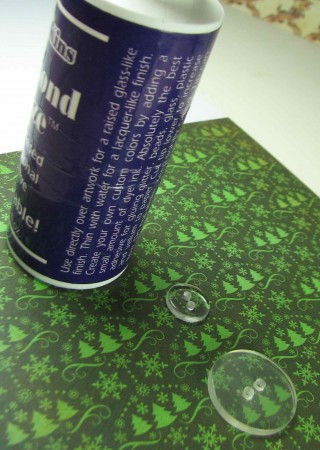
Customize clear buttons with clear, dimensional glue and decorative paper. Cover underside of button with glue, place on desired pattern from paper and gently push the excess glue out from under the button, then let dry. Once dry, cut the excess paper away from the button, re-poke the holes and embellish with baker’s twine.
![]()
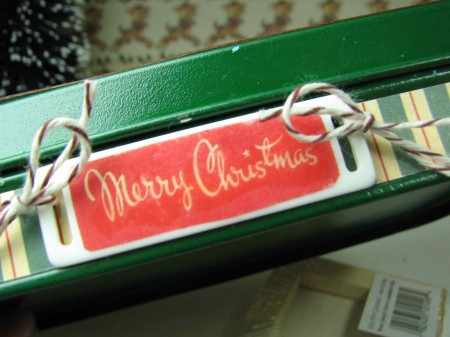
Create packing tape transfers with desired printed images to fit onto Start Up shapes. Apply directly to Start Ups with clear glue and let dry.
![]()
Embellish box, as desired.
Yes, indeed! I’ll say the Holidays are off to a mighty happy start! Let the CRAFTING begin!
Thanks for letting me share this joyfully button festooned project with you!

Button Embellished Lariat Style T-Shirt Necklace
Here is my second version of the T-Shirt necklace made with buttons. My first T-Shirt necklace was the Button Embellished T-Shirt Necklace and you can read more about it by clicking on the title.
To find out how to make the t-shirt portion of the necklace visit Whole Living or there are a few companies such as consumercrafts.com who sell the strips of colorful cotton all cut up and ready to go. And BTW one package of the Accessory Loops made BOTH necklaces. ;)
Why yes, I DID take the easy way out! AGAIN!

To make this style of necklace I cut all of the t-shirt strips (just one snip on each strip to make a long T-Shirt strand) and threaded the buttons on.
Getting the fabric through the shank of the button is a little tricky and I used a wooden skewer to push the fabric through the hole. It’s a tight enough fit that you don’t have to tie knots to hold the buttons in place.
To finish it off – tie a knot in the ends of the t-shirt strands.
To wear this style necklace fold the strands in half and lay it around your neck. Feed the ends through the fold and adjust to your liking.
The buttons I used are from the Gold and Silver Grab Bag.
Inspiration journal with Start Ups
Make a journal to keep handy when inspiration strikes. The journal is 5×8 and the perfect size to keep bedside or to tote along with you. I like to use spiral bound notebooks for several reasons. The spiral binding is a great place to keep the pen handy and it allows you to open the notebook only to the page you need. To make this inspiration journal follow these simple directions:
Tools and Materials:
Scissors, two pattern papers and a tag,two flowers, paint, paint brush, rub-ons, stylus and Start Ups large tags and Fabri Tac.
Directions:
Cut two coordinating pieces of pattern paper to fit on the front. Adhere the two papers with Fabri Tac. Adhere flowers and let dry.
Paint large tag and let dry. Apply rub-ons and adhere to pre-cut tag. Adhere tag as shown. Embellish with fowers

Free Form Bead Weaving with Button Closure
Every once in a while one of our Design Team members creates a project that’s either published or promoted in another way and we like to share them here.
It feels a little different this time because I’m usually the one promoting one of my DT members but this time it was ME who got a little publicity that I wanted to share!
Why? Because I want to encourage my fellow crafters to think of using buttons in lots of different ways… even high end jewelry.

The Emmy Necklace: Free Form Bead Weaving
This is the necklace I created for the Emmys and the photo above shows the button closure.
Here are some related articles:
DIY-ing the Emmys: The Gown, Shoes and Accessories
The Emmy Necklace – Free Form Bead Weaving: Tips for Choosing Beads
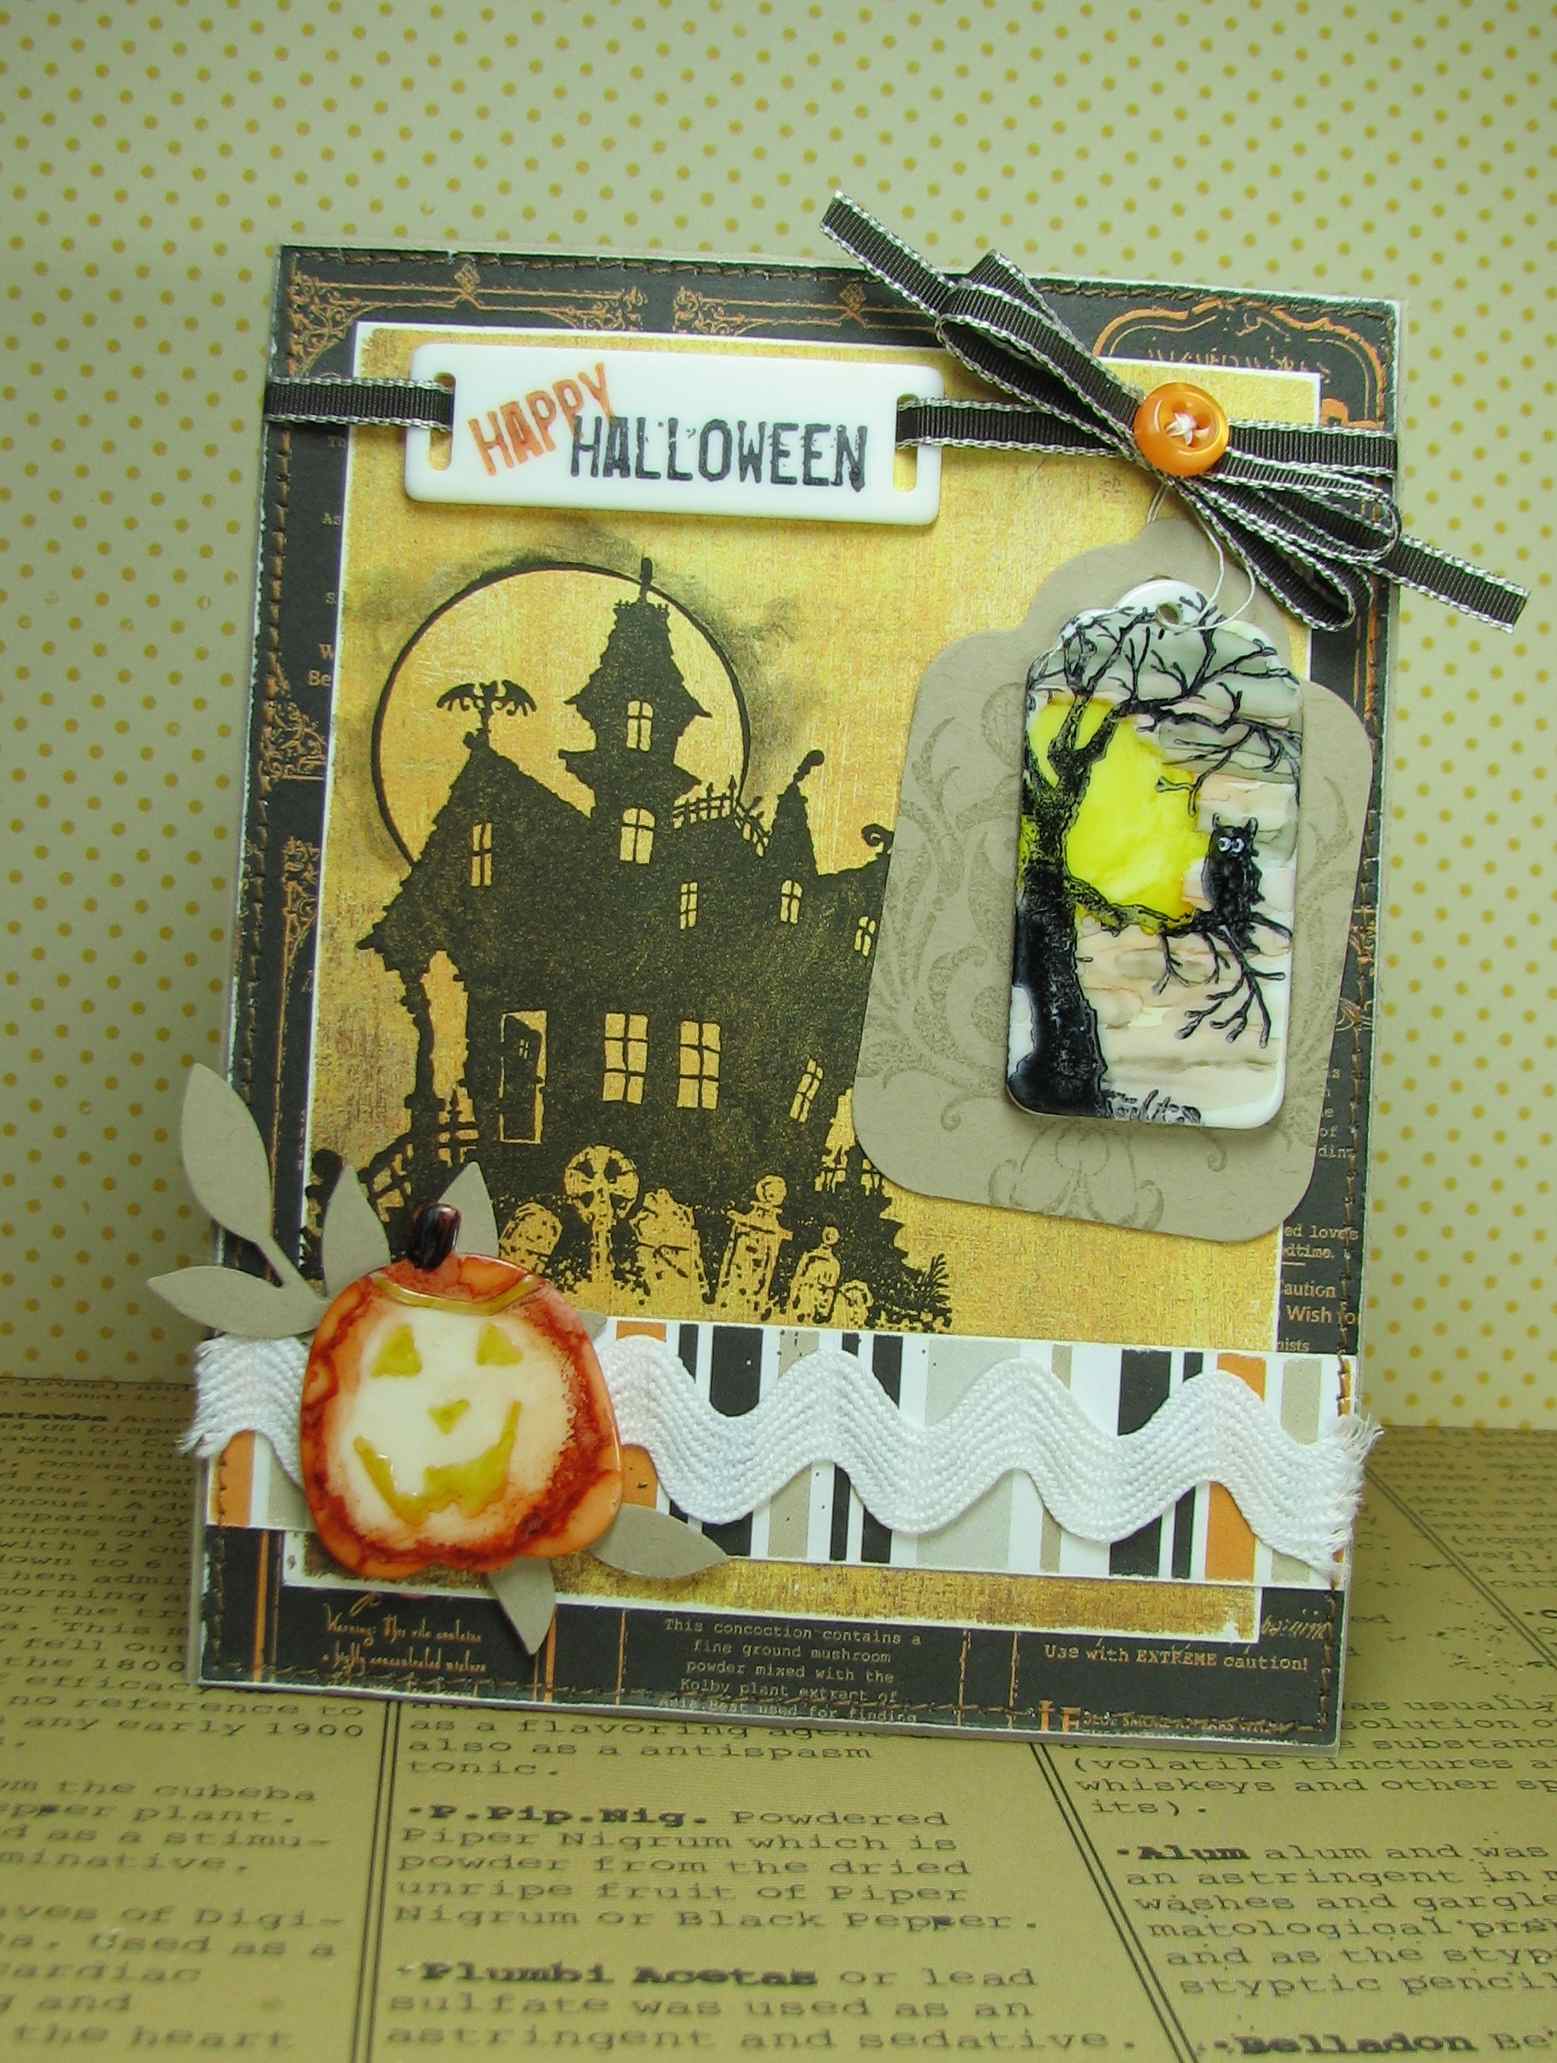
Let’s face it, the light is changing, shadows are deeper and FALL is a comin’!
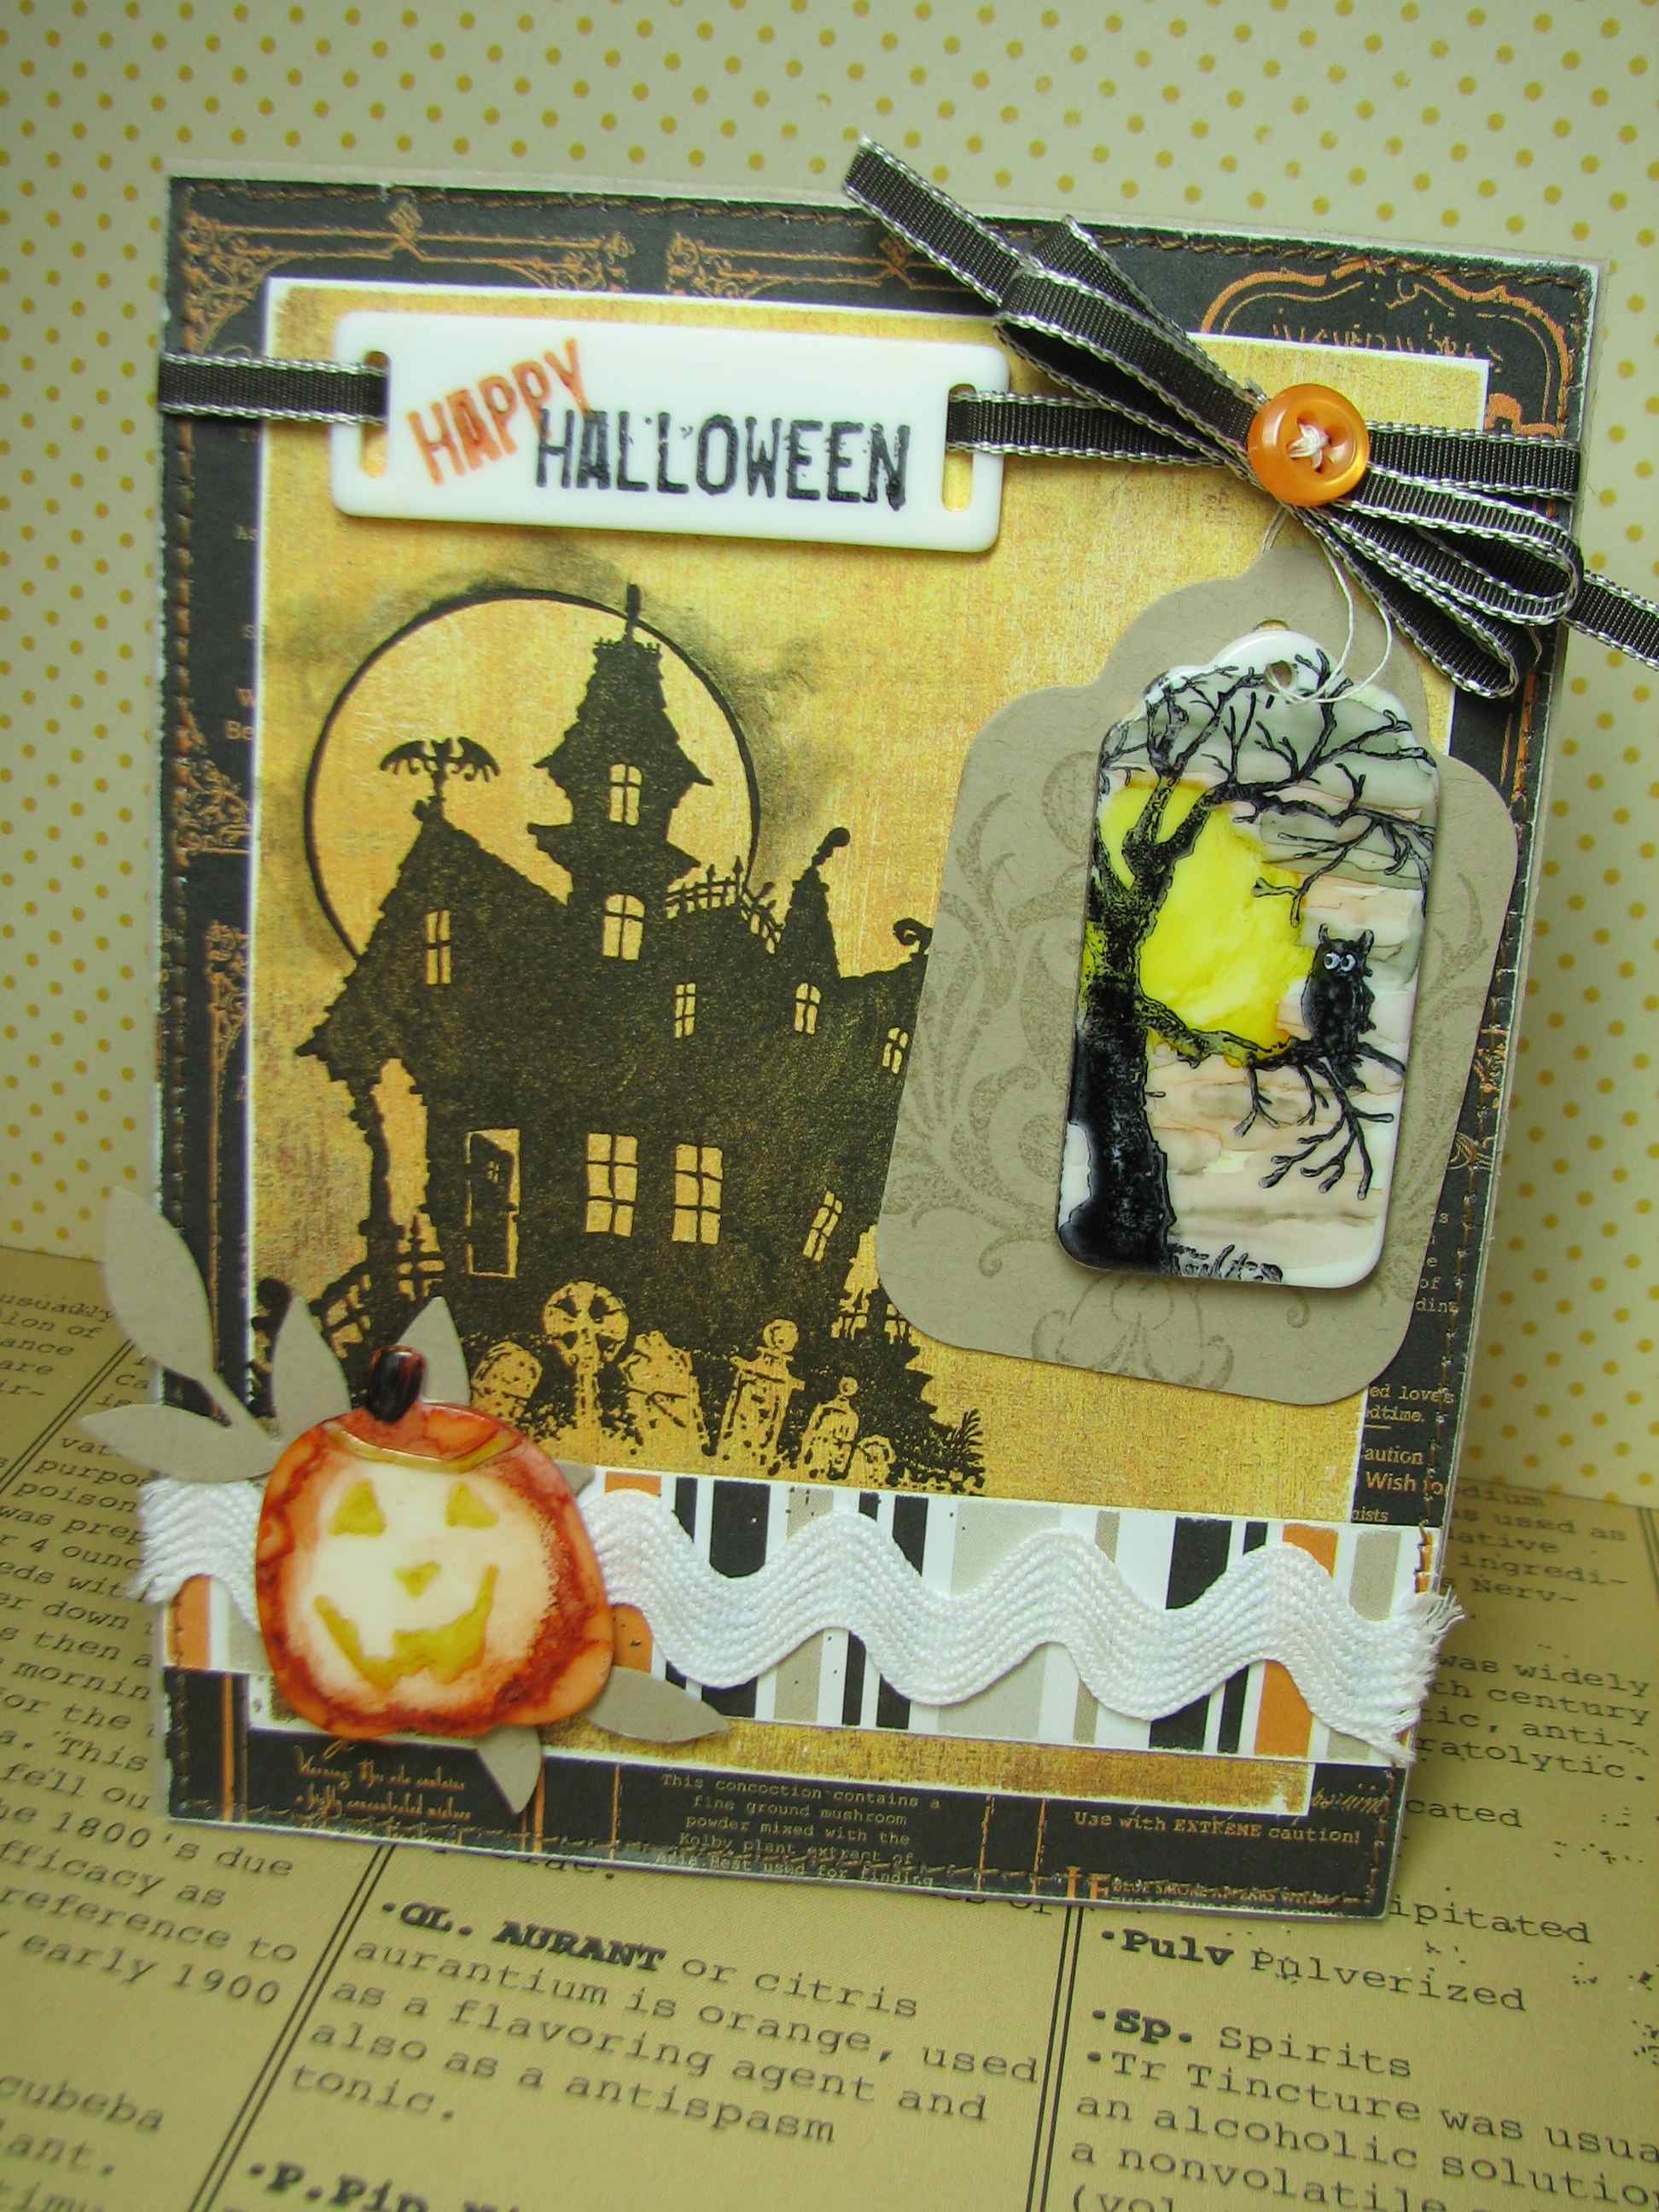
TIME to get your HALLOWEEN on! And what a send off: HAVE YOU SEEN the START UPS? NOT even exaggerating – they are AWESOME!

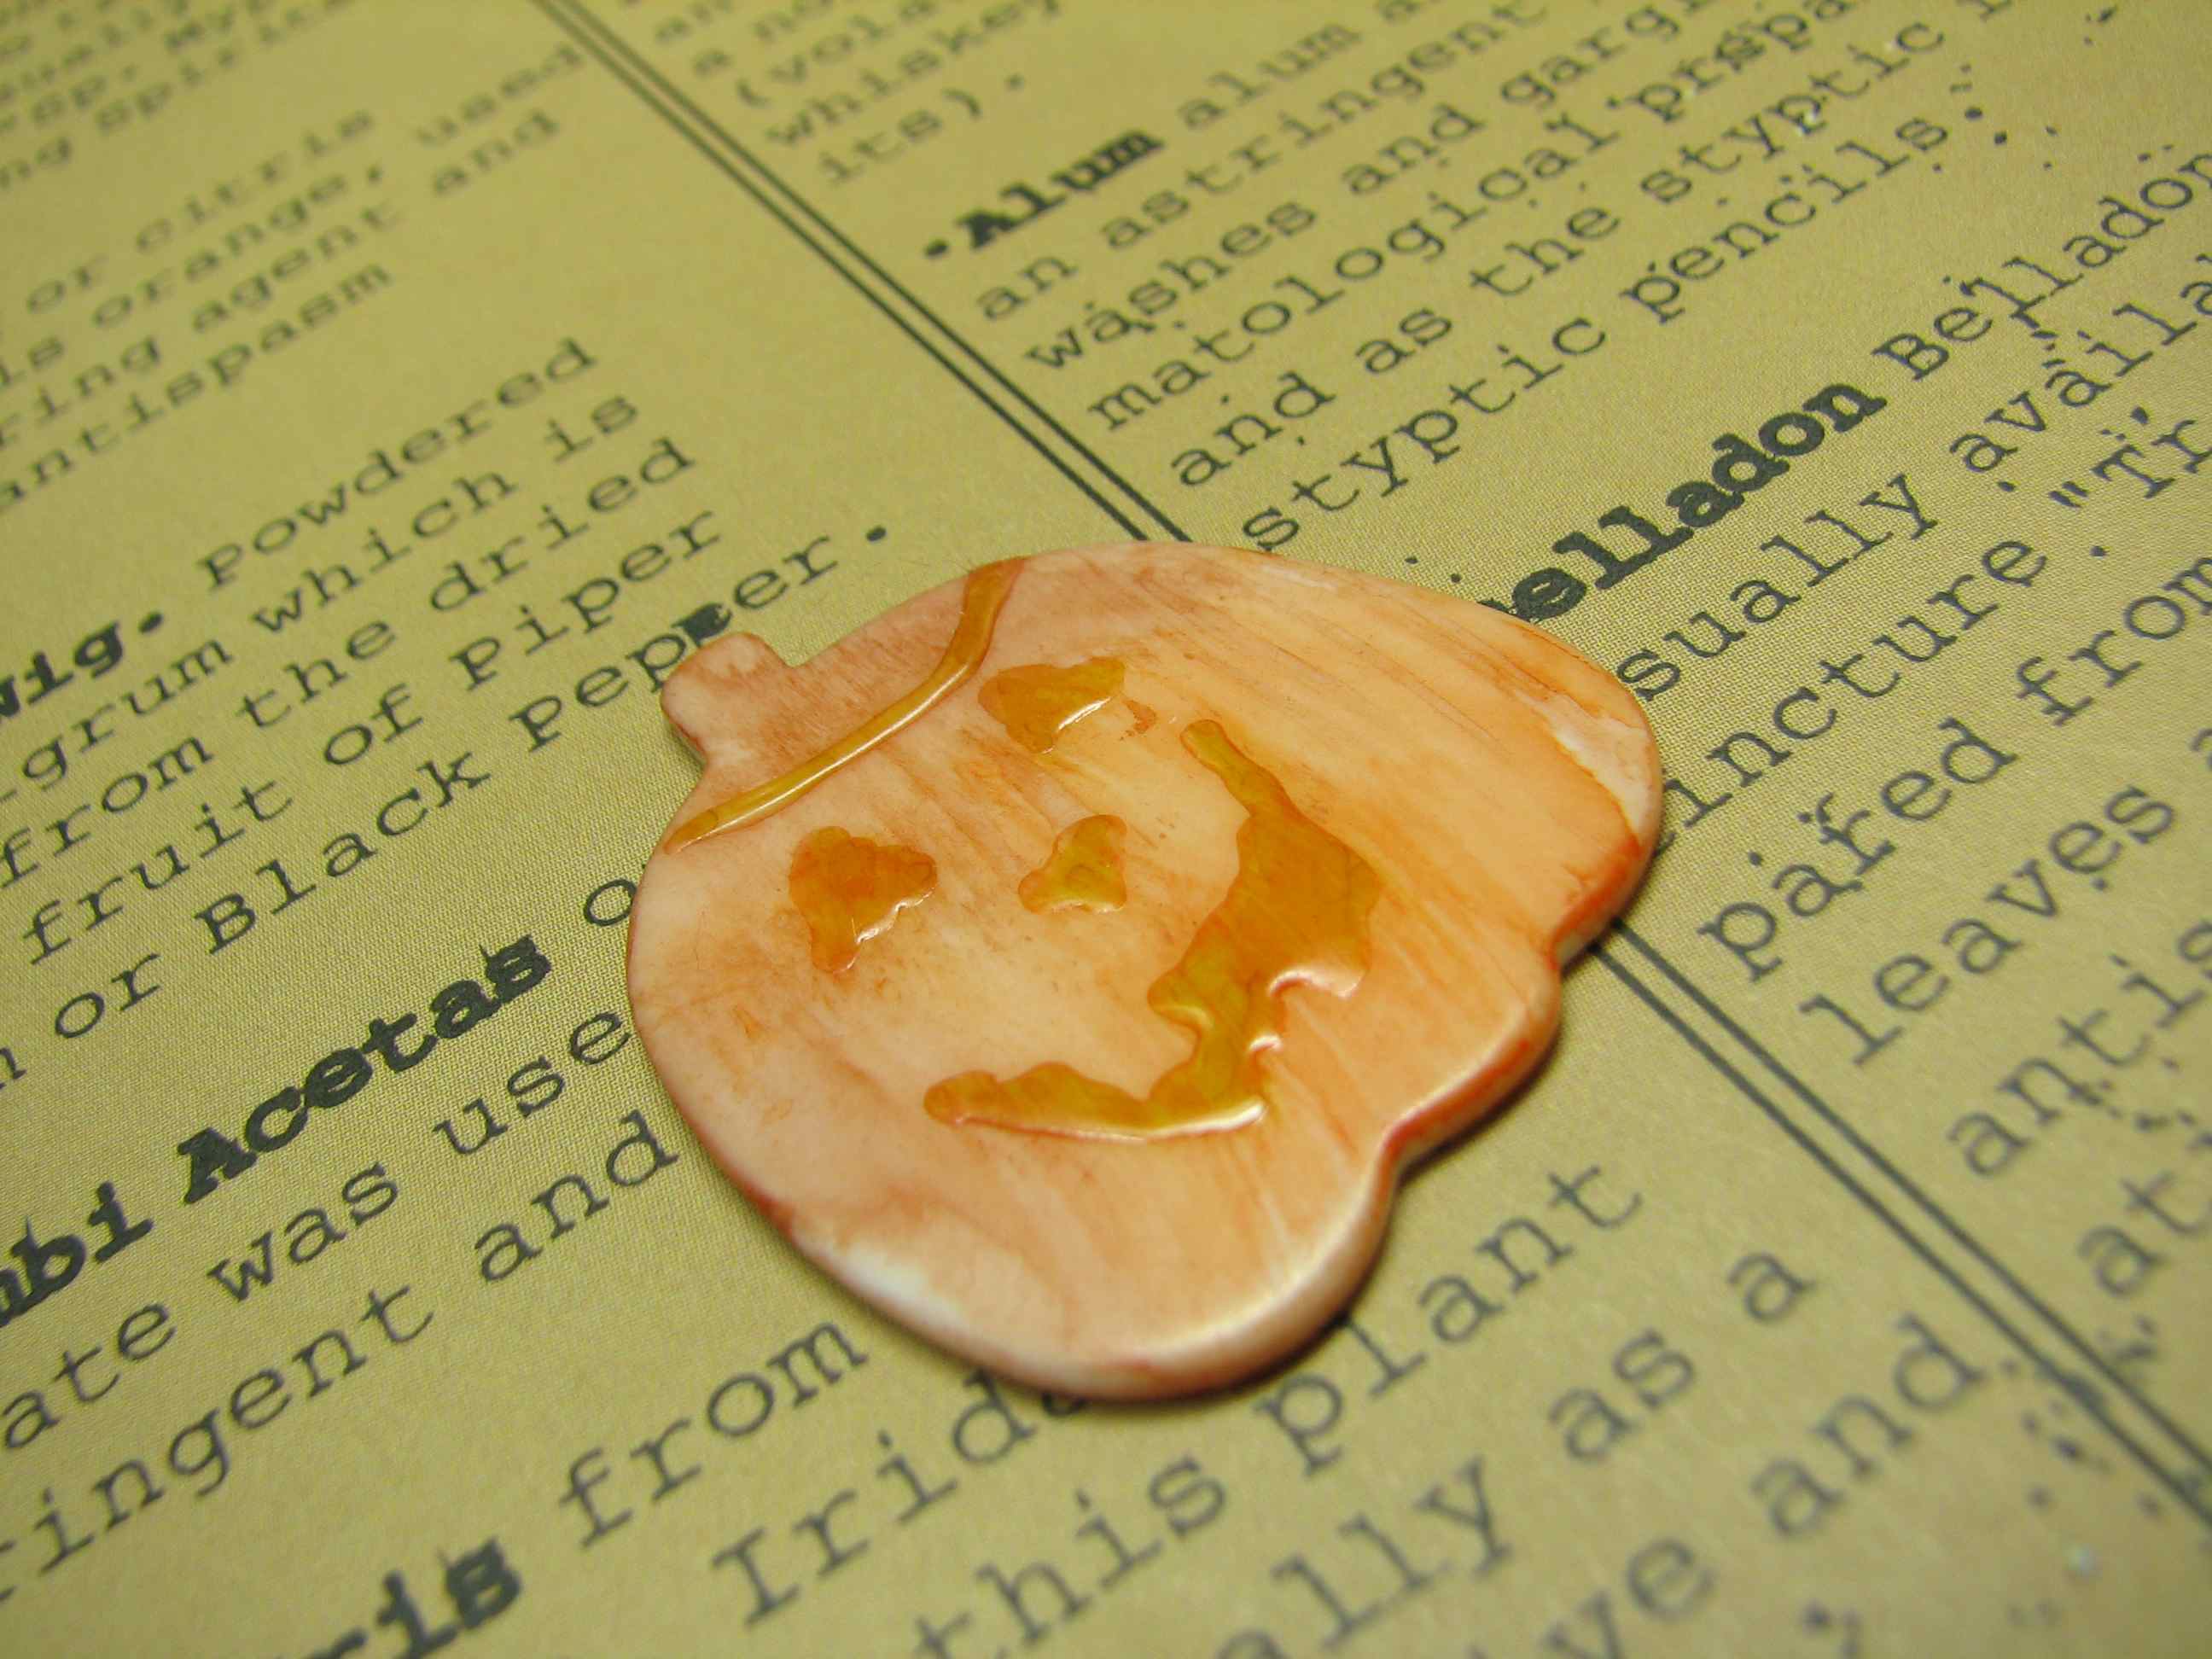
How could I resist these ADORABLE lil’ pumpkins?
Some materials just have PERSONALITY!
It’s up to US crafty folks – to RELEASE it!

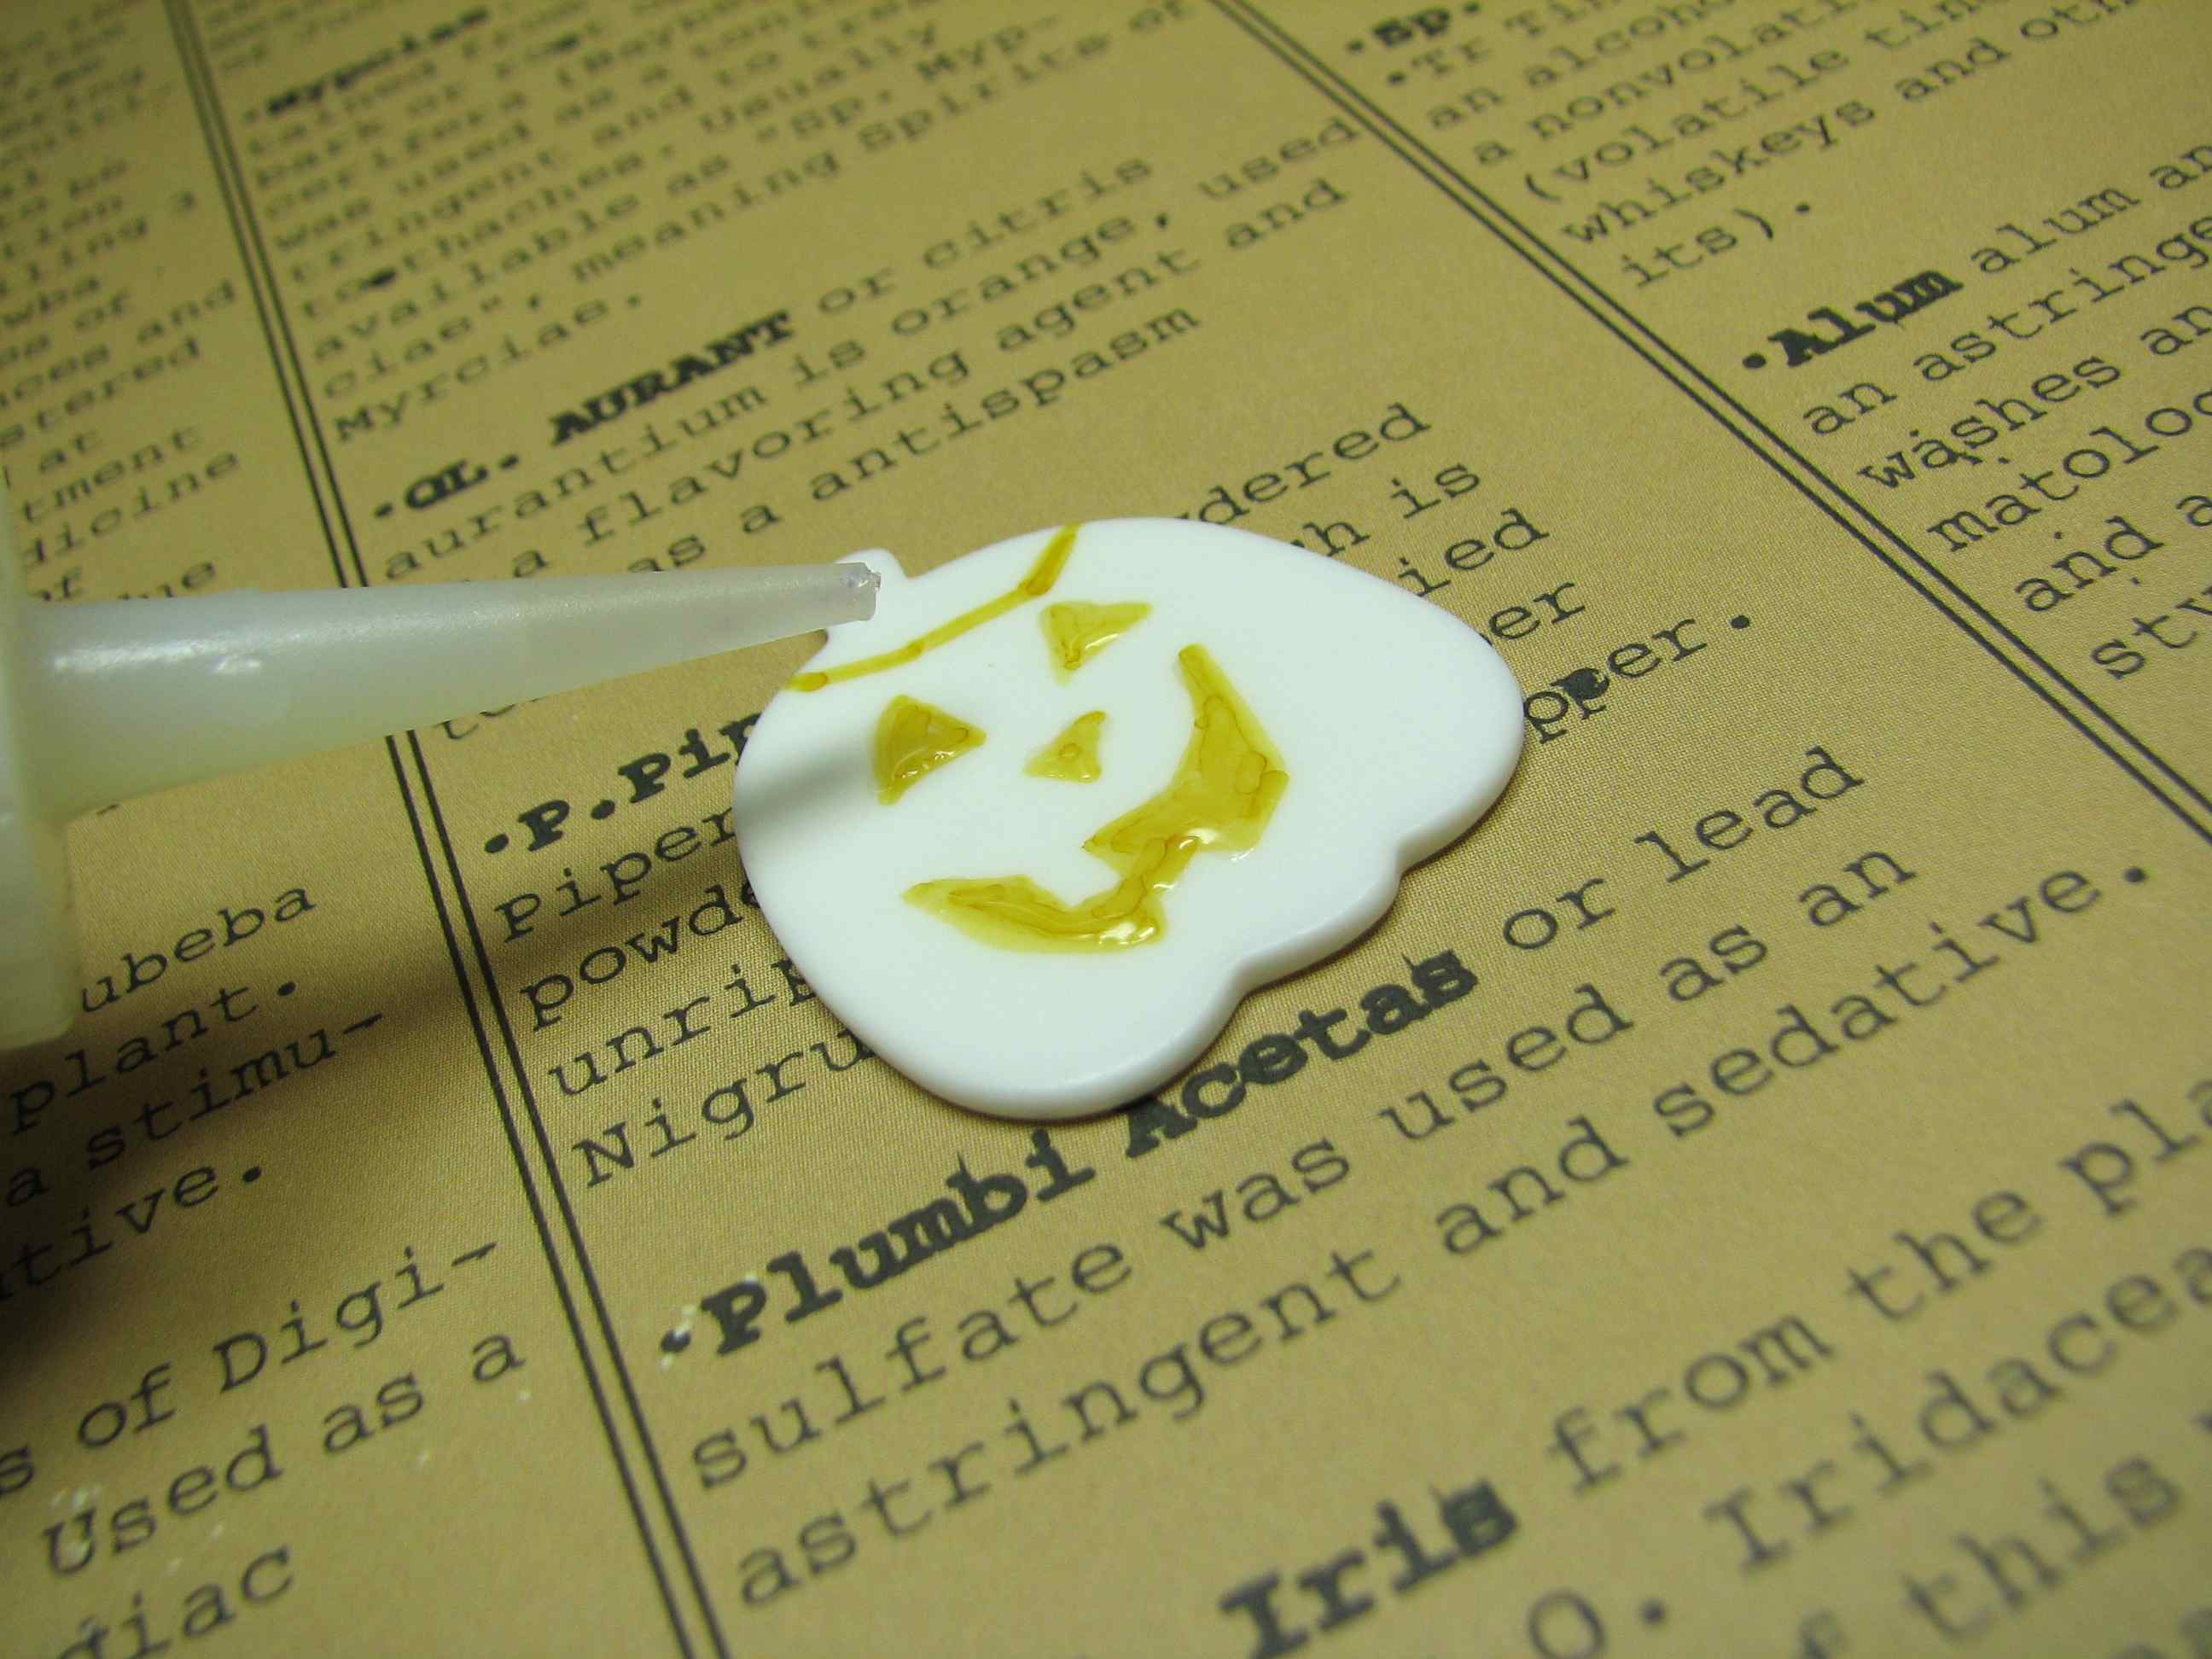
Start Ups are stampable, alterable and ADORABLE! With permanent marker for face accents, some dimensional glaze to preserve the “glow” factor, and some alcohol ink for all over color – THIS darling pumpkin character is ready to greet the world! Mwah ha ha!
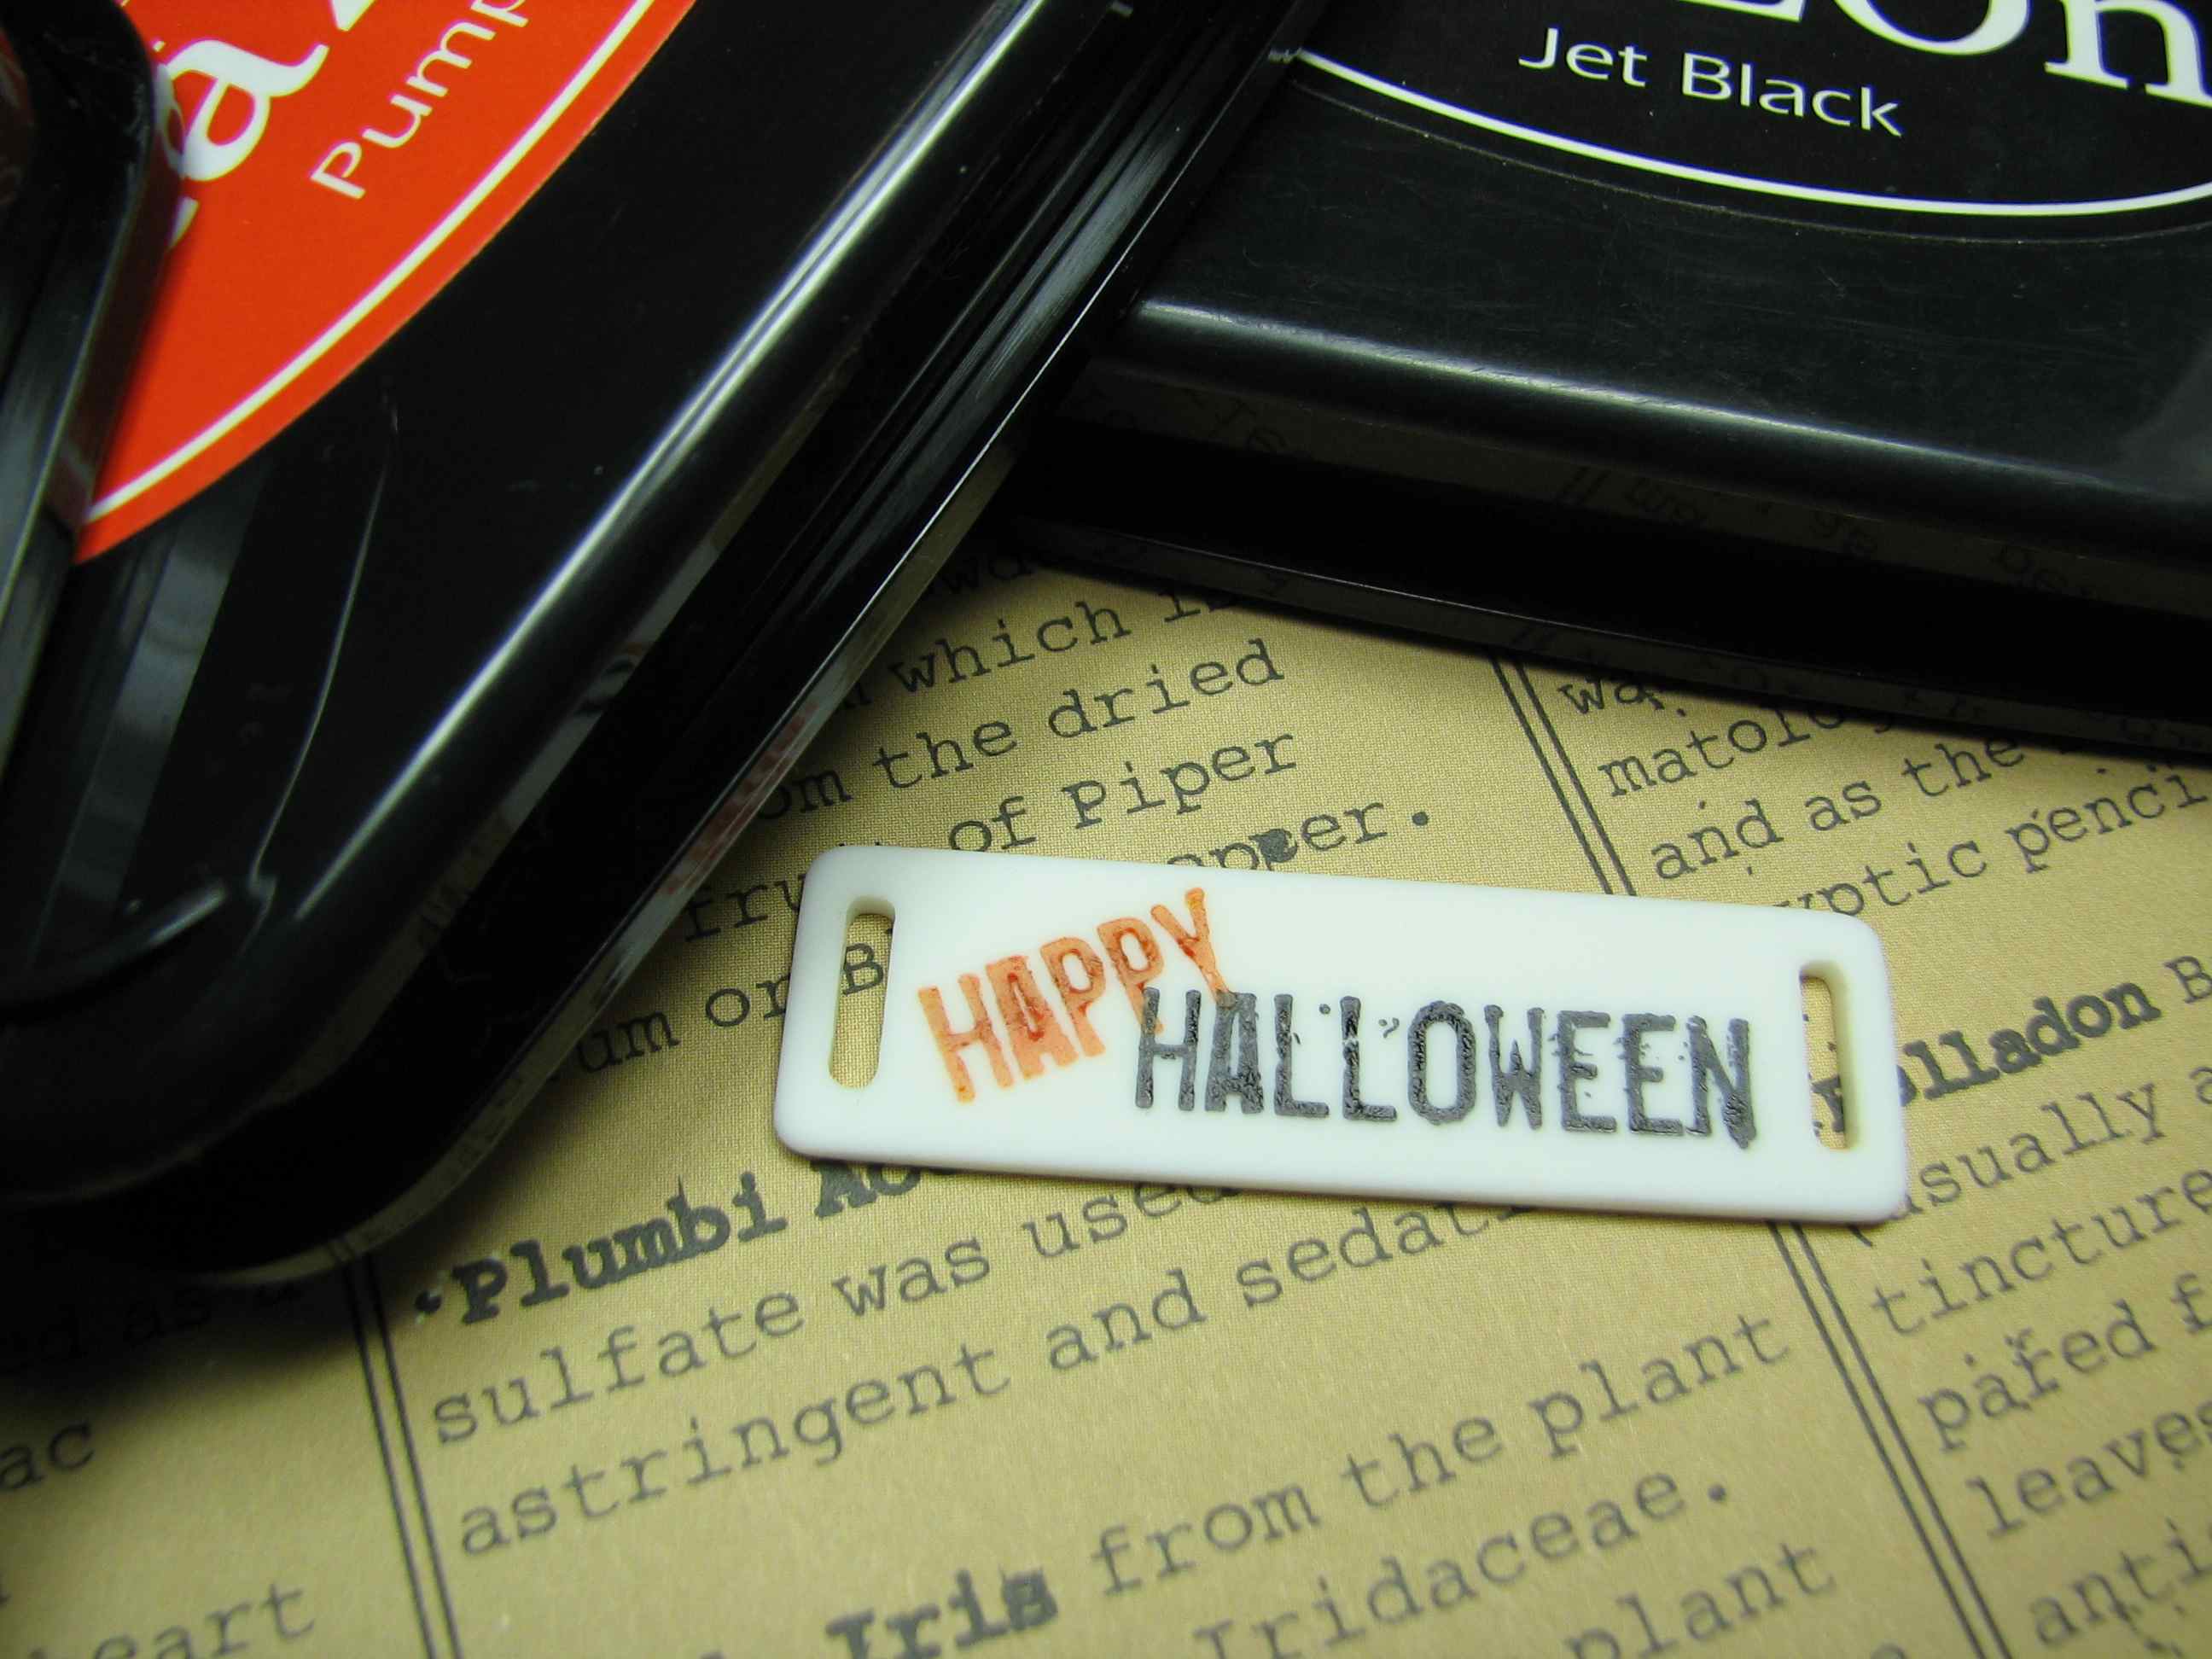
Solvent based inks STAMP like a dream on these babies!

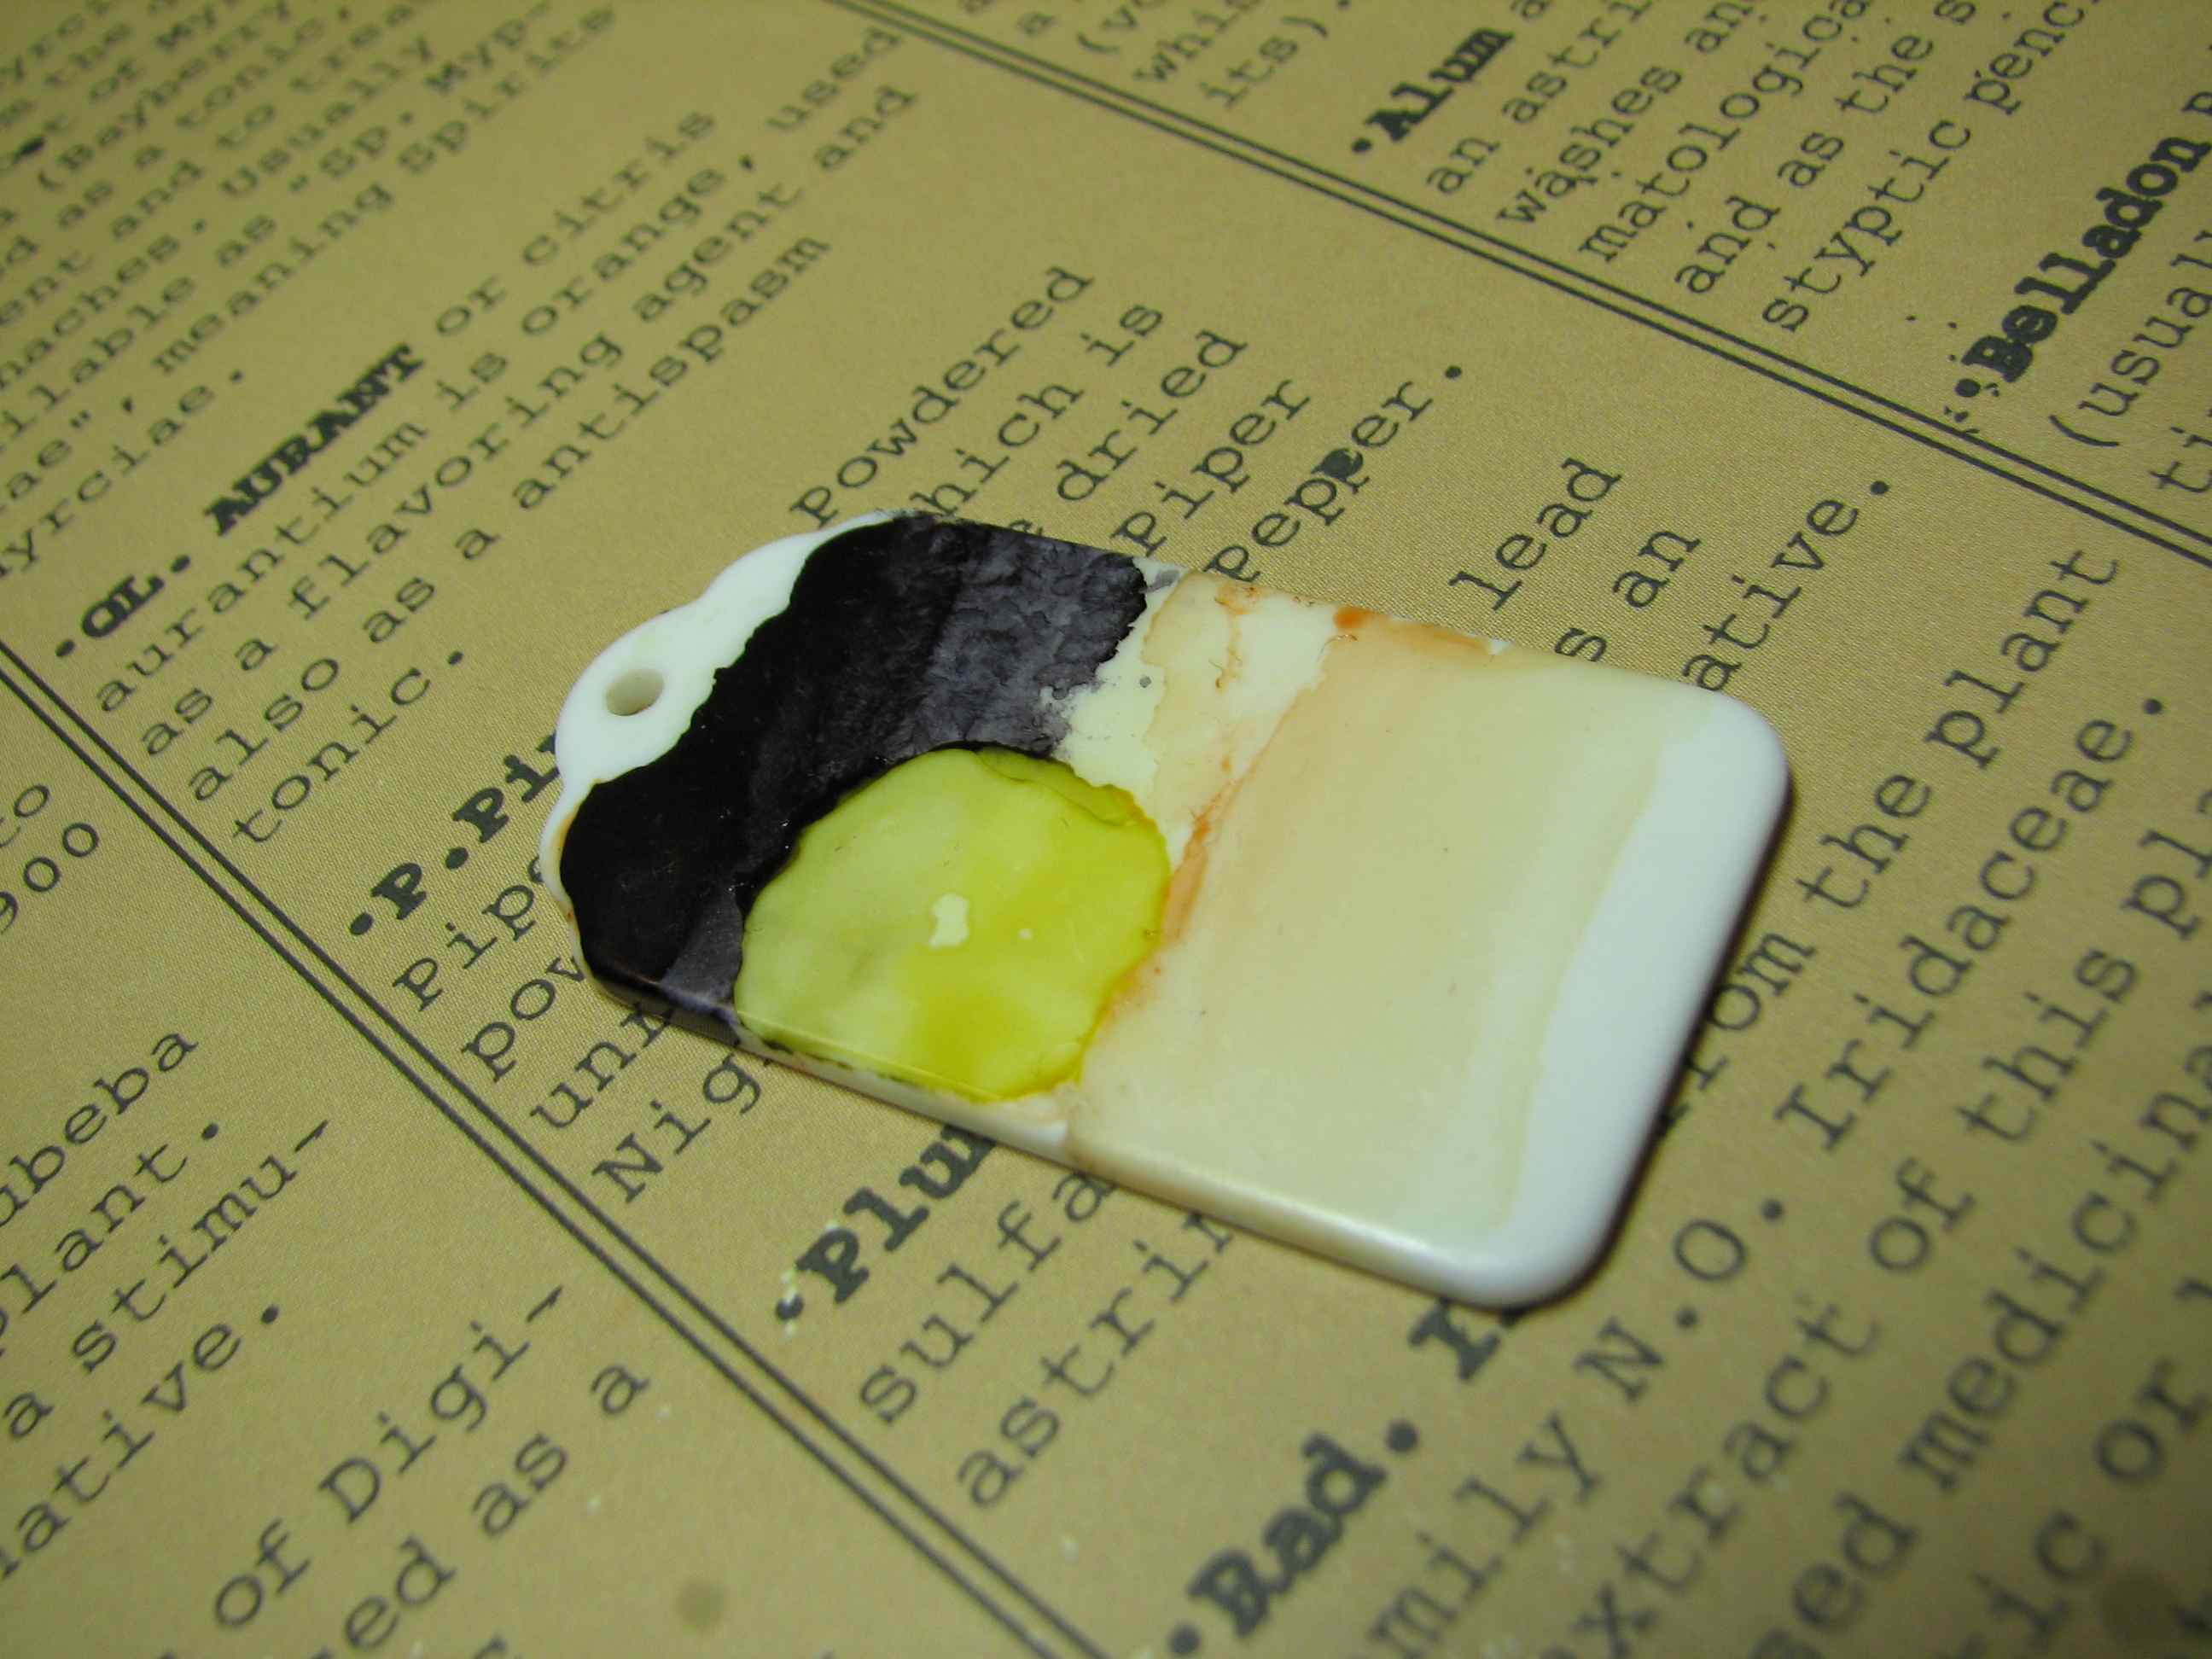
Alcohol ink provides a plethora of crafty magic on Start Up material! Aren’t these tags darling? The material for Start Ups is like DOMINO ingredients – BECKONING to become a keepsake! I could get LOST in these babies!
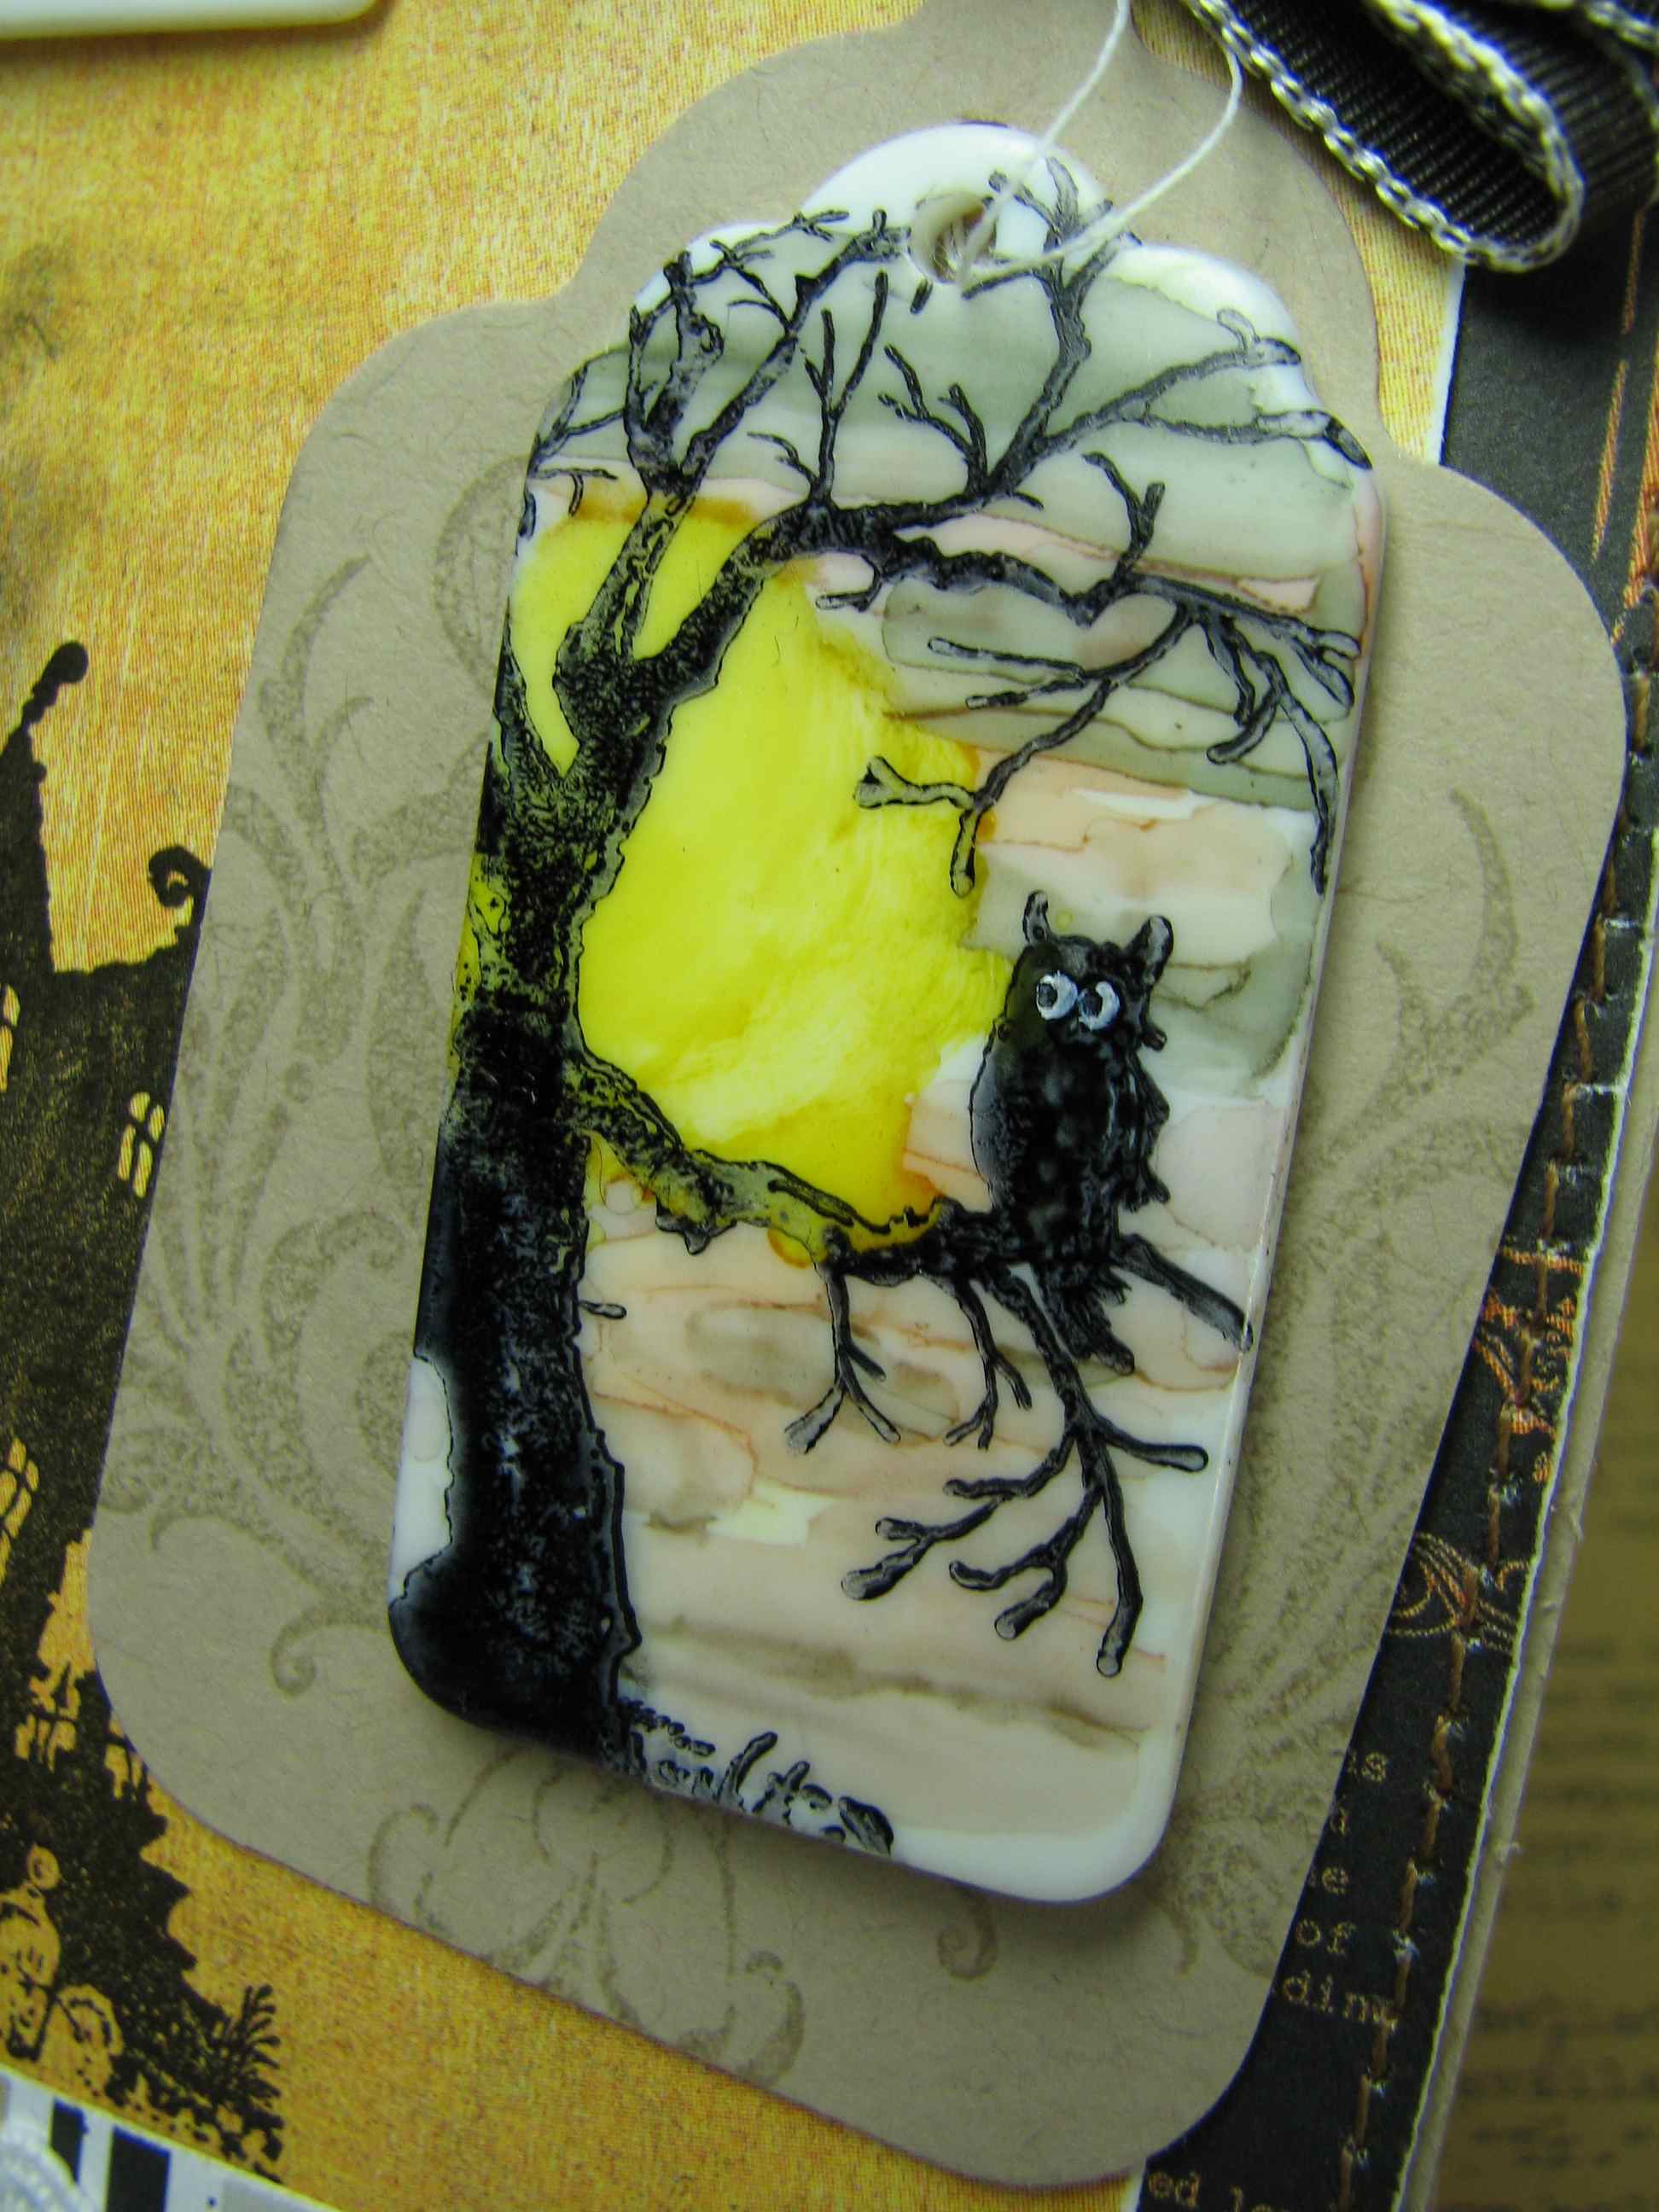
So, I got busy, creating a LITTLE SCENE! {I LOVES me a little scene!}

Easy to stamp, but for my detailed ambition, I pressed this tag shape DIRECTLY to a well inked stamp for ultimate control…

If you’re not happy with your results, clean Start Up with alcohol blending solution and PLAY again! BOTH sides are ready for love, so you REALLY cannot make a mistake!
Bust OUT the candy corn, Pumpkin Spice Lattes and START UPS!
Let the CRAFTY season begin! THANKS for letting me share the wonders of the season and BUTTONS GALORE AND MORE!
Supplies –
C/S – Stampin’ Up!; D/P – Echo Park & Basic Grey; Stamps – Stampin’ Up!; Ric Rac – Brytex; Die Cut leaves – Sizzix; Ribbon – Stampin’ Up!; Button – Buttons Galore & More; Start Up Shapes – Buttons Galore & More;

I found this adorable table runner while cleaning up my Mother In Law’s house a couple of weekends ago. For some reason she had only worked half of it and then put it away to never be worked on again.
I felt bad cutting it up but it didn’t quite fit on the front of this messenger bag. So I cut it to fit and then cut the lace from the edge and sewed it back on. Same thing…only smaller.

I sewed a small heart shaped doily to the lower corner and embellished it with buttons from a Button Bonanza bag in Bubblegum. Finally, I stitched again around the outside edge of the heart with pink embroidery floss and put embroidery floss through a couple of the buttons.
I haven’t decided if it’s finished or not. I’ll have to sit with it for a day or two and decided if I need to add anything more.
What do you think? Is it finished? If not what would you add?

Button embellished cowgirl shirt
Whether it’s time for some ropin’ and ridin’, or just a fancy night out on the town… There’s not much fashion that doesn’t look better with BUTTONS!
It may be a little early to start thinking of fall leaves… but maybe not.
Last week I introduced you to Start Ups here and I made an easy “metal” piece to put on all sorts of Mixed Media or Scrapbooking projects.

This week I used the Start Up Leaves and my trusty collection of Ranger Alcohol Inks to create multi-colored fall leaves.

The colors I used were Oregano, Butterscotch and Red Pepper.
Oh, the possibilities!
What would YOU use Start Up Leaves on?
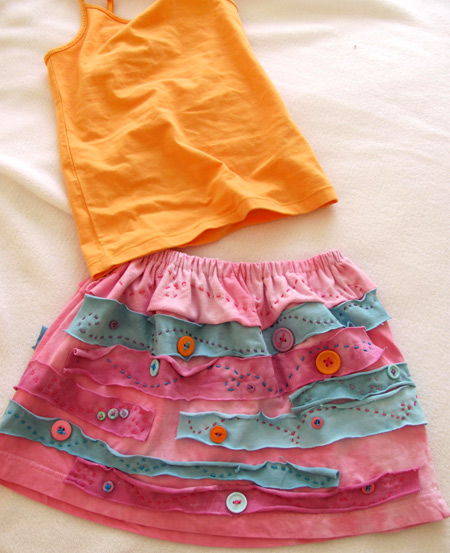
DIY recycled t-shirt button skirt by Jen Goode
Between all my kids, the house is always filled with someone’s clothes that don’t fit anymore. With hand-me-downs, the boys have had a great selection of new clothes in every size, but my daughter isn’t about to get excited over monster truck t-shirts unless that have bling in sparkly pink and purple. However, with a little creativity, we can turn any rough, tough boy-wear to fabulous girly in no time!

“Amazing Plastic Crafty Goodness” is what they really ought to be called! :)
What are Start Ups? They are small, white plastic shapes. Perfect blanks for lots of scrapbook, mixed media and even jewelry projects.

Button name plate
My very first Start Ups project. :)
I spray painted the blank silver and let it dry, then I rubbed my thumb over it to take out some of the shine. I stamped VICKI with a small set of alphabet stamps and Staz On ink in black. Finally, I gave it a quick spray with a Matte Sealer and it’s all ready to go on… well, WHATEVER I want to make! I love that it looks like an old piece of metal. Cool!
Keep checking back as I continue to explore all of the crafty fun to be had with these little gems!
And click HERE to see the available shapes of Start Ups that Buttons Galore and More Carries!
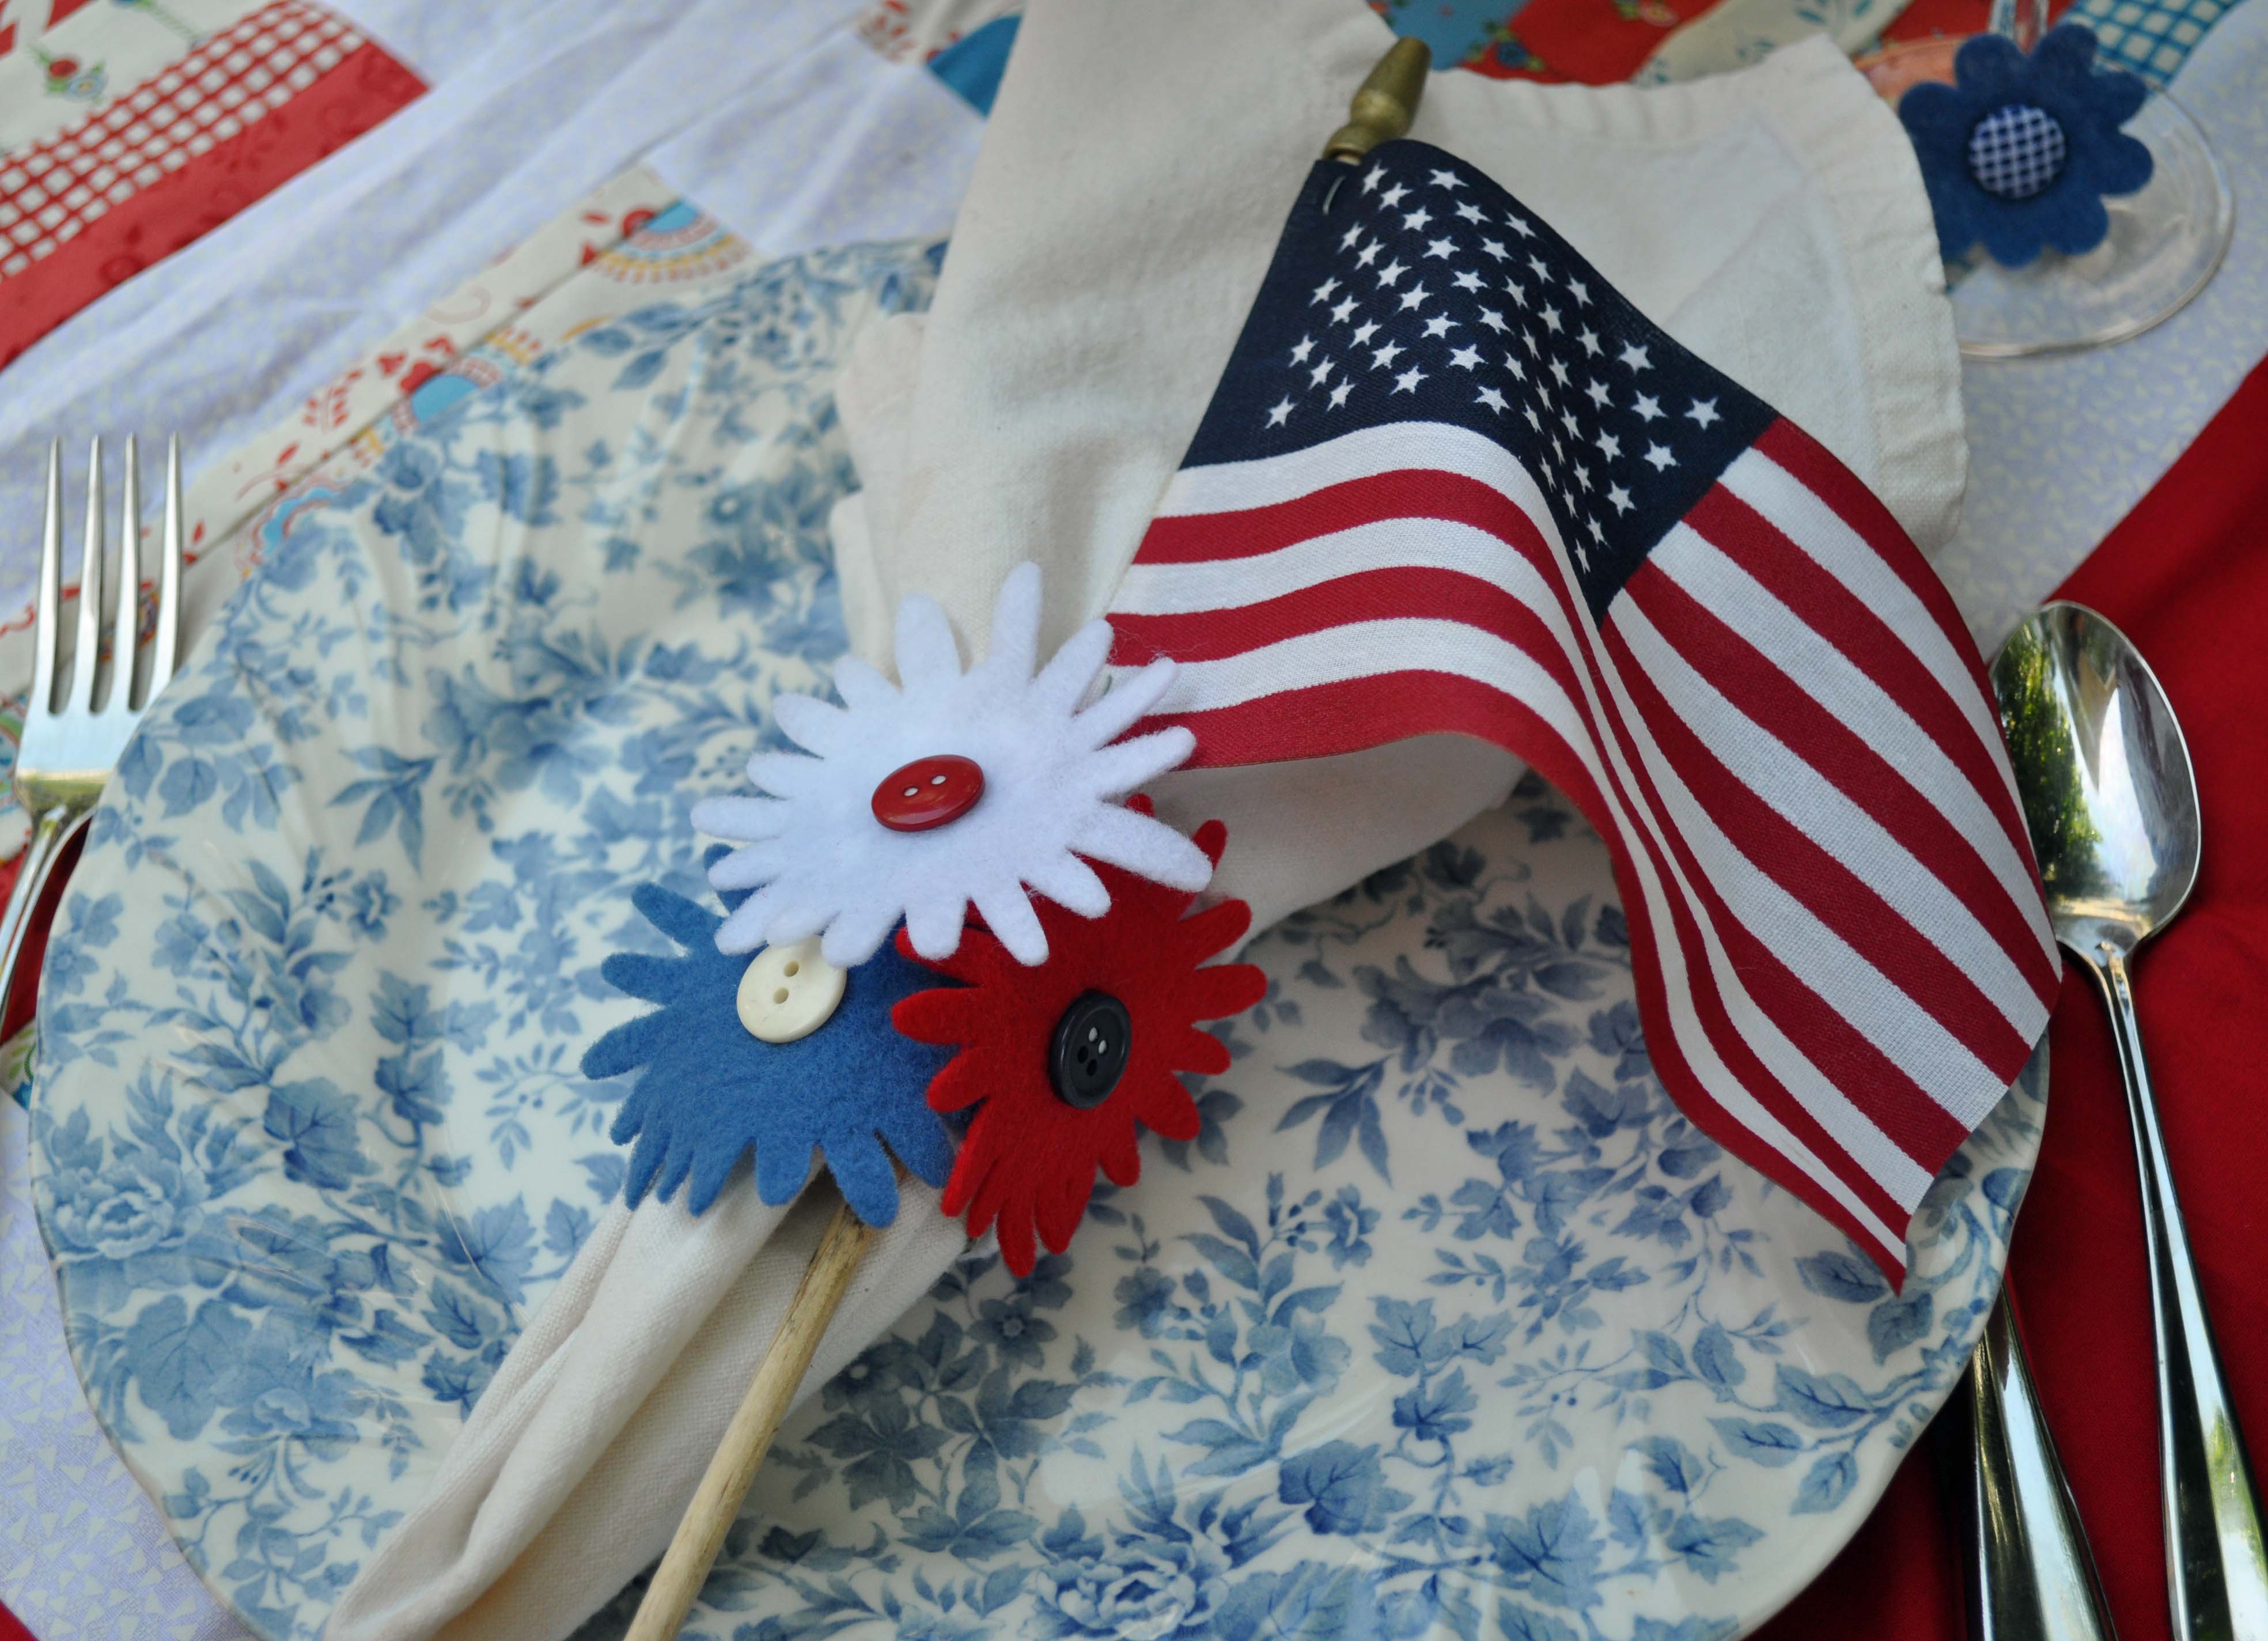
Happy Fourth of July to all our U.S. readers! Today, I thought I would share a cute tutorial for festive napkin rings. They are so easy you can probably whip-up a set for this afternoon’s BBQ!
Supplies:
Instructions:
Now, slip a napkin and maybe a little flag into the ring and you’ve got a party!
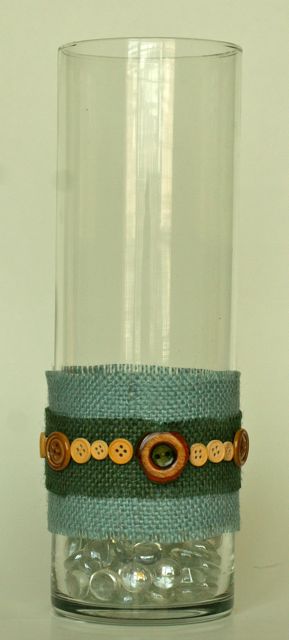
Country Chic
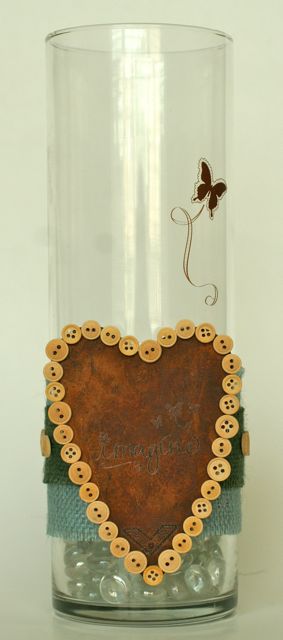
Burlap has been one of my “old favorites” and I am so pleased that it is back en vogue in the crafting world. To create this chic candle holder I used a glass container that I purchased from the dollar store.

Button Detail
Tools:
Scissors, Embossing stylus
Materials:
Wood buttons, Blue and green burlap, Beacon Adhesive Fabri-Tac, Rusted Heart, Bo-Bunny Rub ons, glass marbles and a candle.
Directions:
Cut blue burlap into a 3×9 strip and fray edges. Cut green burlap into a 2×9 strip and fray edges. Adhere strips to container. Adhere buttons randomly around the center.
For a variation add rub-ons to rusted metal heart. Trim heart with the tiniest buttons. Add butterfly rub on to glass exterior.
Country Chic - Variation
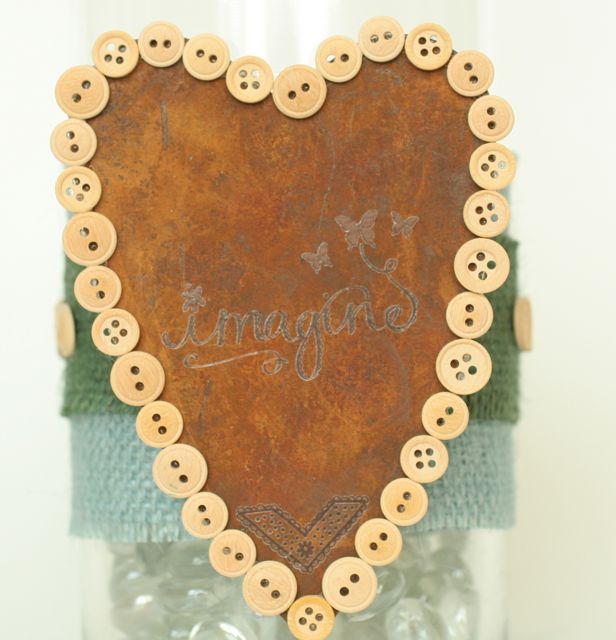
Rusted Heart Details
I hope you have enjoyed this country chic candle container.
Toodles, Niki
Make an Envelope Booklet to hold coupons, photos, or stationery.
I love little gifts that I can make with items that I’ve got on hand and give as hostess gifts, thank you tokens, and teacher’s presents. Usually it’s on short notice- and I can whip up one of these Envelope Booklets in an hour. WIN!

All around the web I’m seeing that fellow crafters, designers and artists seem to be taking time out to clean up their creative spaces.
It’s also a GREAT time to be thinking of little gifties and gift tags that you could use the rest of the year. Don’t think so? Read the rest of this post that was originally published on my blog. (You can visit my NEW blog here: www.vickiodell.com)
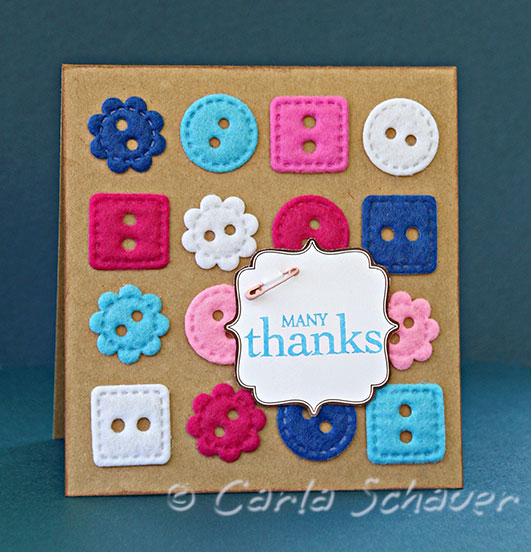
I love a simple grid arrangement when creating a quick card. In this case, the grid combined with a neutral kraft cardstock really lets the texture and color of the Fiesta Felt buttons take center stage. Tie embroidery thread through button holes, or leave them open as I did to make the card even more quickly.
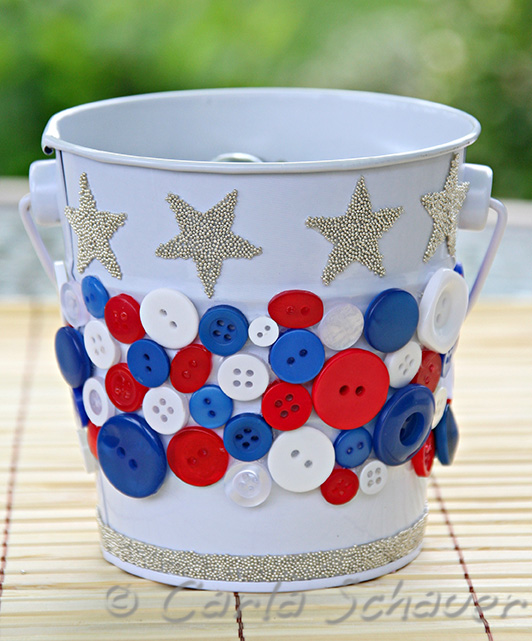
The 4th of July weekend is the perfect reason for a celebration barbeque in the backyard. Use these $1 white metal buckets and Button Bonanza All American Mix by Buttons Galore & More to make patriotic décor perfect for the party!
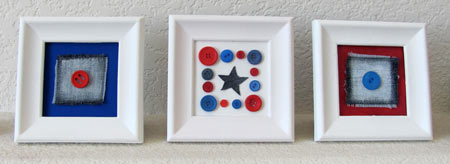
Patriotic mini art frames by Jen Goode
There are so many great ways to create extra decor pieces for July 4th and other patriotic holidays. Add a little extra fun to your home with buttons in red, white and blue to show off your American spirit. This 3 piece button art requires only a few supplies and is fairly quick and easy to create. I used many recycled pieces and scraps including buttons from a grab bag button pack which added to the variations of sizes and colors I had available.

I don’t know about your house but in my house we have FOUR young people. They are VERY BUSY young people and each one has a bulletin board. They are a super easy way to communicate within such a busy family. (Besides text messaging that they tend to read and then forget) A note on a bulletin board is a little harder to forget. It stays there, quietly reminding, until the event or reason for the note has passed.
Anyway, why have a boring bulletin board when you can have one that fits your decor, your personality or your hobbies?

This bulletin board uses a cork tile, a bandanna and a 12×12 frame along with a few other supplies.

Cover the cork tile in Mod Podge.

And then smooth the bandanna over the Mod Podge and let dry.
Here is a tip: Before spreading any Mod Podge decide which portion of the bandanna design you want to see on your bulletin board. Don’t cut it all out ahead of time. Just figure out where you want to place the bandanna. (Cutting out the fabric ahead of time makes it too hard to line up.)

While the Mod Podge is drying you can make your thumb tacks or push pins. I simply hot glued white buttons to a flat topped thumb tack. Be careful of that hot glue! You could also use Amazing Goop or a cool temp glue gun a well. Poke the tacks into a piece of corrugated cardboard or foam core while they are drying to keep them upright.

My button push pins.
After the Mod Podge is dry cut away the excess fabric and insert it into the 12×12 frame.

Now you can embellish to your little hearts’ content. I used hot fix rhinestones in two sizes, Thickers alphabet stickers and the heads from 4 “silk” daisies.

Isn’t this fun? Girlie but not too girlie. Country but not too country.

Here’s a special gift for Dad- a handmade frame with a photo of someone who loves him!


We are pleased to announce that we are a sponsor in the Victoriana Quilt Designs Fabric Party!!
You can learn more about this great online party by clicking on the link: http://bit.ly/VQDFabricParty
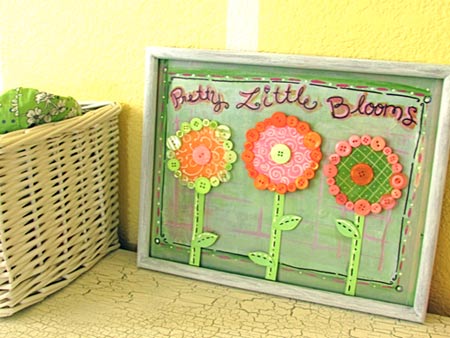
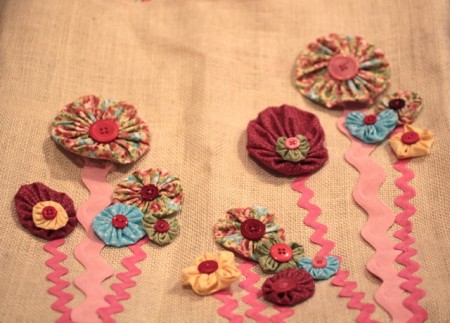
This project can be made using a variety of recycled materials combined with your favorite pretty buttons. Add a touch of color to your decor for a flower garden inspiration all year long. I created this project to accent pieces in my daughter’s bedroom, but you can adapt it to fit where ever you’d like some “pretty little blooms”.
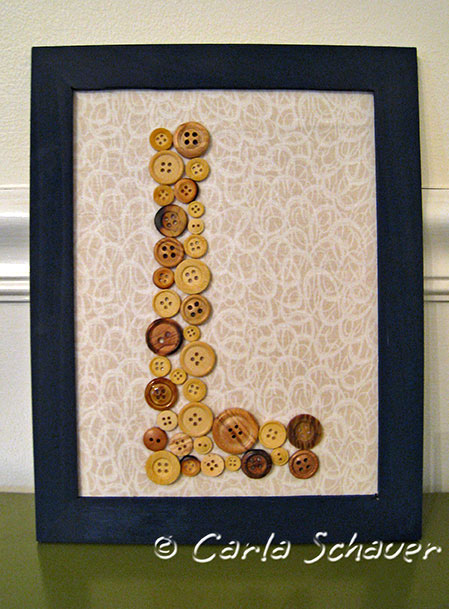
Add texture and detail to a simple framed monogram using a variety of wood buttons from the Haberdashery collection. These buttons are a gorgeous mix of natural wood colors, and I couldn’t resist showcasing them in a project that let their beauty take center stage.
In order to play up the texture of the wood, I covered chipboard with neutral fabric to create a background that didn’t compete with the wood buttons. The buttons were then arranged to make the monogram, and glued into place using fabric adhesive (Beacon Fabri-Tac). A simple inexpensive Ikea wood frame painted navy gives just enough color to draw the eye to the project.
On a wall or on a table, this monogram is a great way to easily personalize a room.
Thanks for stopping by!
