Header

Tag Archives | handmade

Fall Button Serving Tray

My fall button serving tray is one of my favorite buttons projects I have ever made.  Plus it is easy to make which is a win win right?  Grab your buttons and a thrift store tray to get started making your own version.  Don’t need a serving tray for fall?  Maybe use this same idea with a button ornament in the center for Christmas?  Or a heart in the center for Valentine’s Day?  I can think of all sorts of different tray designs for all seasons of the year.

Fall Button Serving Tray -- an idea to spruce up a plain thrift store serving tray for all of your fall parties.

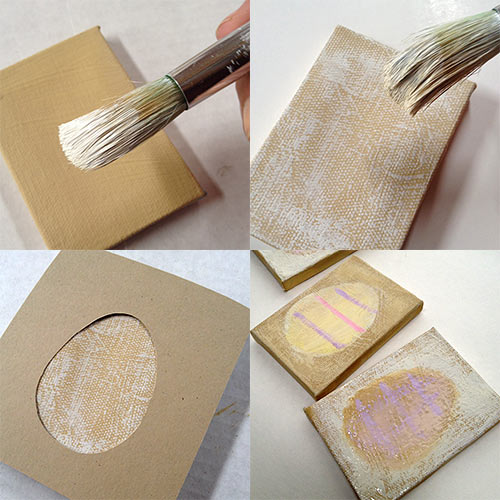
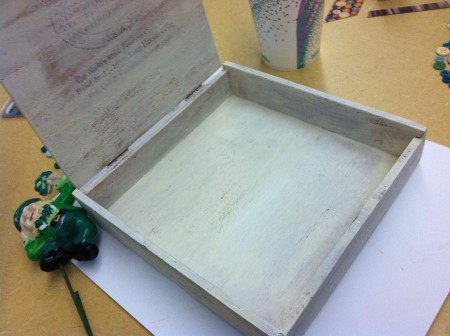
I started with a tray from the thrift store for 99 cents and a bottle of Americana gloss enamels in Antique Gold.

Fall Button Serving Tray -- an idea to spruce up a plain thrift store serving tray for all of your fall parties.

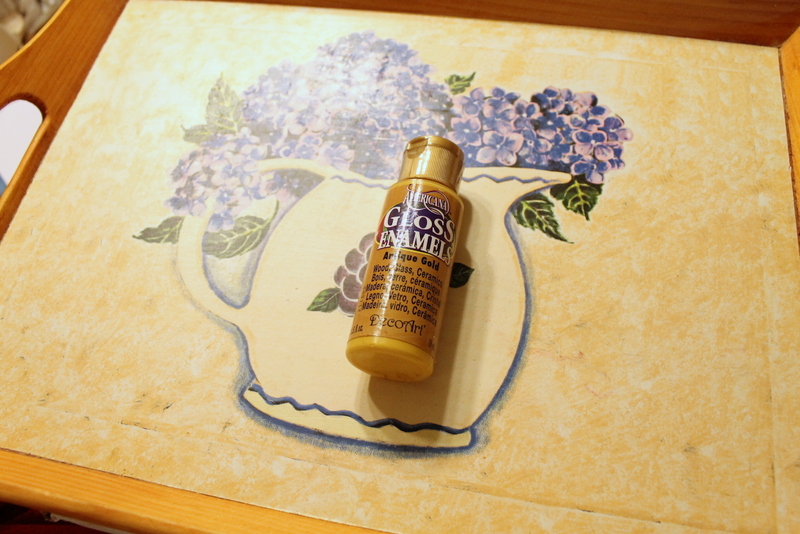
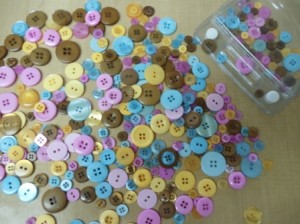
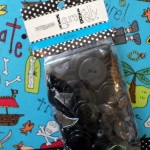
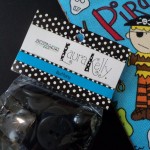
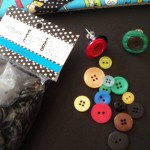
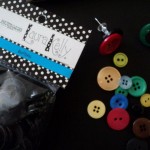
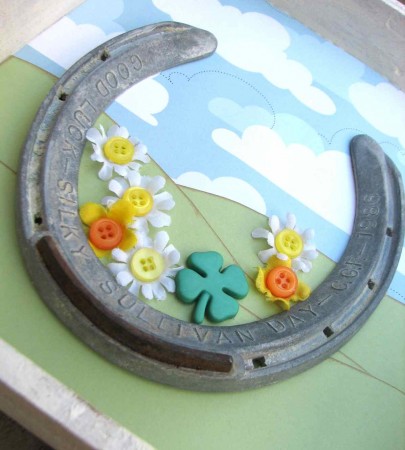
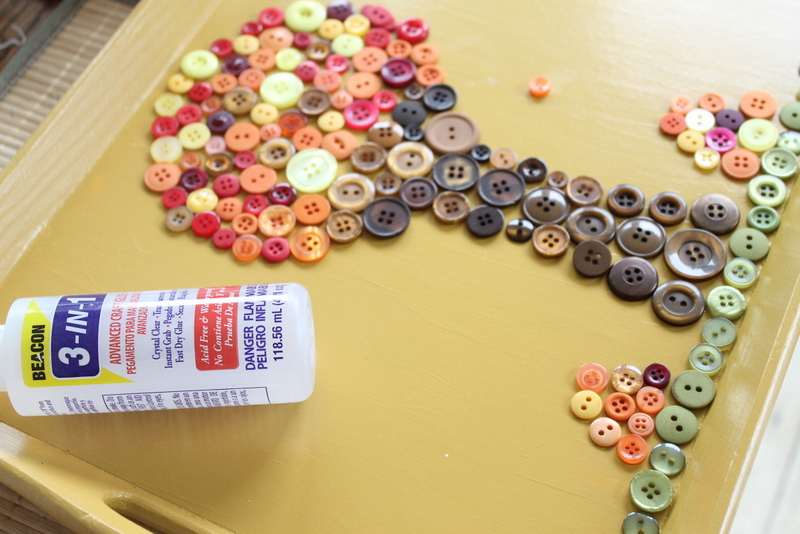
I painted my entire tray with 2 coats of the paint then grabbed some fall themed buttons from Buttons Galore and More.

Fall Button Serving Tray -- an idea to spruce up a plain thrift store serving tray for all of your fall parties.

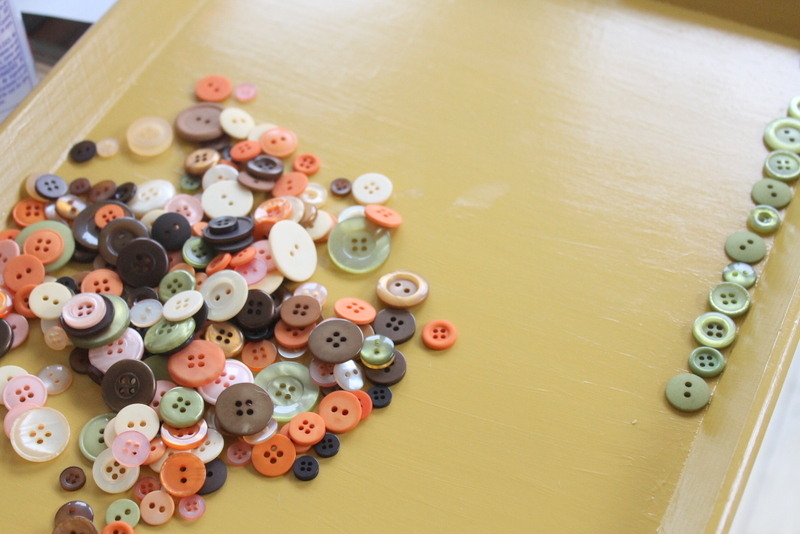
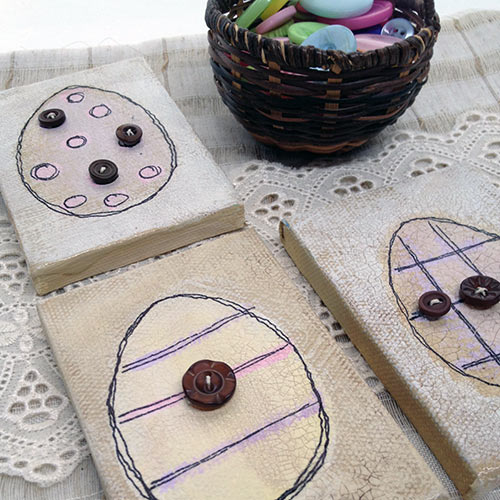
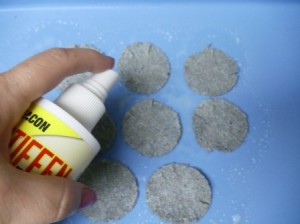
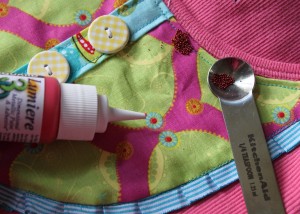
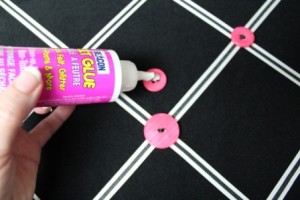
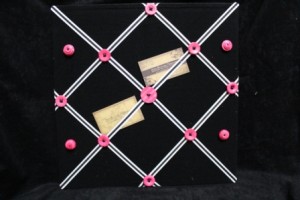
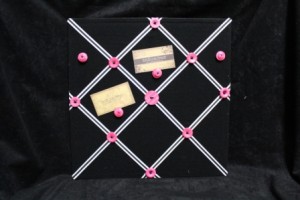
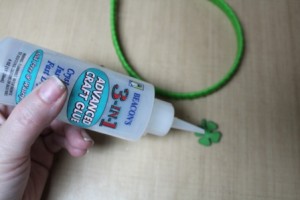
I laid the buttons out on my tray until I was happy with the arrangement.  I then used my 3 in 1 Beacon adhesive to glue them directly to the tray.

Fall Button Serving Tray -- an idea to spruce up a plain thrift store serving tray for all of your fall parties.

Once the glue was completely dry, I mixed a two coat epoxy to make my tray nice and smooth.  Don’t be afraid of epoxy!  Just mix and pour according to the package directions.  I spent quite a bit of time using a flame to pop bubbles that come up from the epoxy itself and the buttons.  Yes my finished project still has a few bubbles but overall it looks amazing.  The buttons seem to create more bubbles than is normal with an epoxy project.

Fall Button Serving Tray -- an idea to spruce up a plain thrift store serving tray for all of your fall parties.

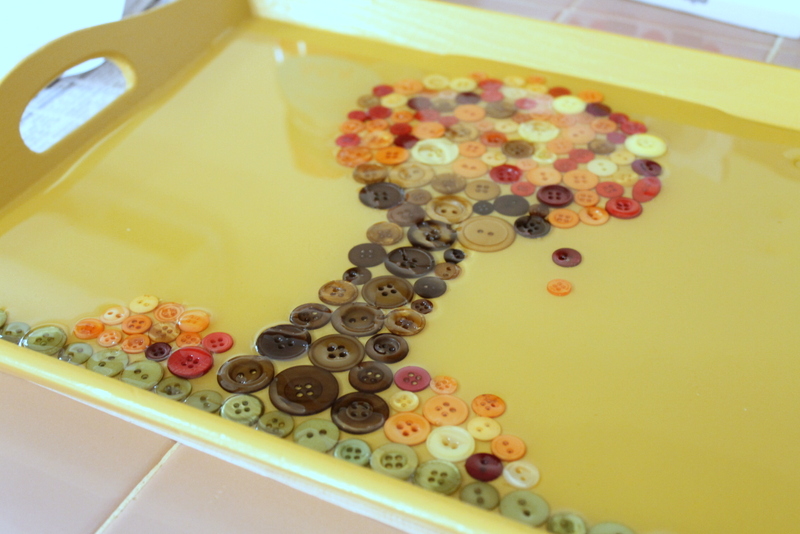
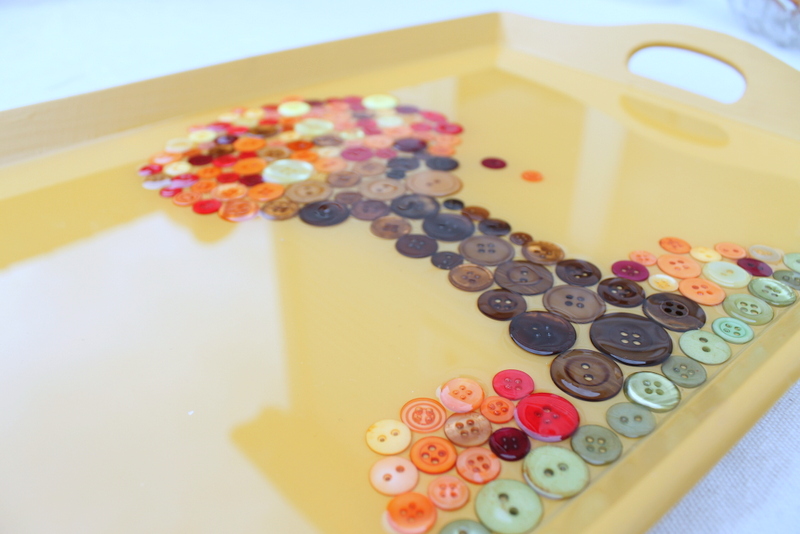
Allow your epoxy to dry for a nice long time before you touch it (don’t be tempted to touch!!).  You will be left with a glossy flat serving tray with buttons in it!  Now some of my buttons stick up just slightly out of the epoxy (there is a slight hump in the epoxy).  This can easily be fixed with a second epoxy pour however the bumps do not really bother me for my needs so I am leaving them.  You could also be extra careful when choosing buttons for your design and choose only the flattest buttons to include.

Fall Button Serving Tray -- an idea to spruce up a plain thrift store serving tray for all of your fall parties.

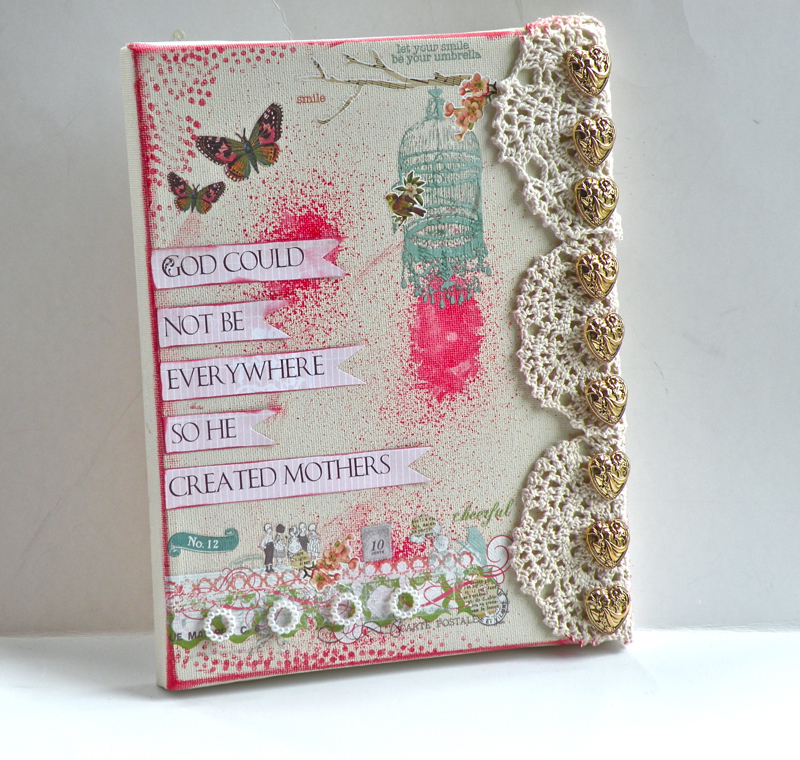
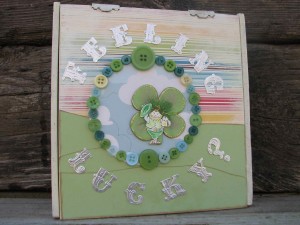
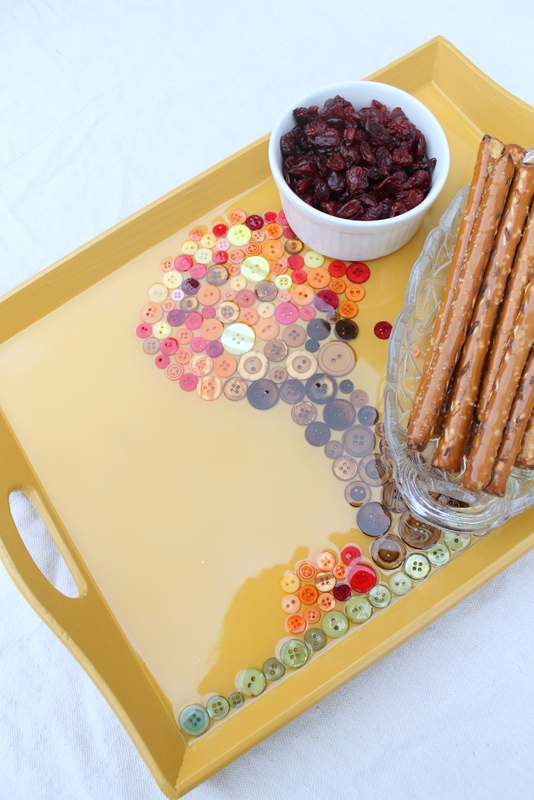
Just so you can see my entire button fall scene here is a picture of the entire tray.

Fall Button Serving Tray -- an idea to spruce up a plain thrift store serving tray for all of your fall parties.

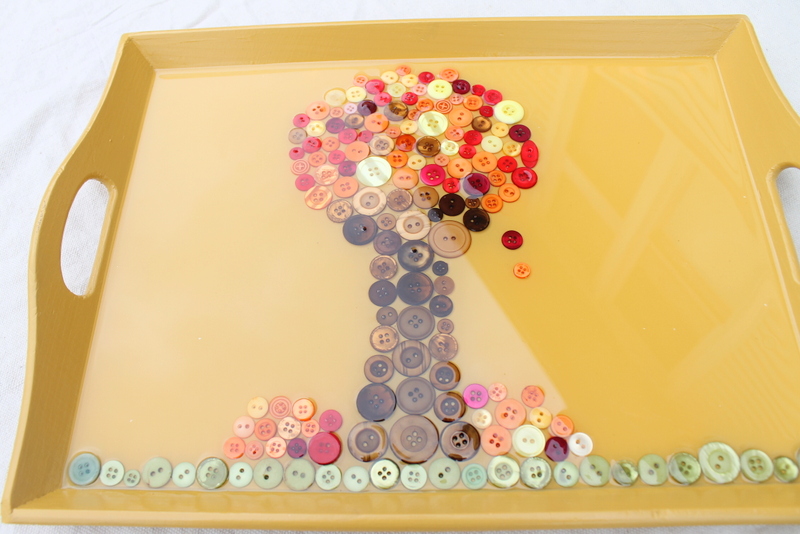
It is so darn cute I could eat it up.  Speaking of eat it up, use your fall tray to serve snacks to the kids or for a wonderful addition to your Thanksgiving and fall themed parties.  Want more buttons on your Thanksgiving table?  Be sure to check out my rustic burlap napkin rings as well.

Fall Button Serving Tray -- an idea to spruce up a plain thrift store serving tray for all of your fall parties.

Will you be adding buttons to a tray anytime soon?  Don’t let that epoxy pour scare ya!  My fall button serving tray will make an appearance at our Thanksgiving meal and many snacks in the meantime.

4

Movember Mustache Craft for guys

mustache notebook craft idea movember

Movember is here again,  and it is a great  time to make crafts for guys.  Former Designer for Buttons Galore and More designer friend Jen Goode of  http://www.100directions.com designed a mustache stamp wheel from Clearsnap so you can get your mustache creativity going all over the place. AND, she has  asked a group of designers to create whatever they’d like to make, showcasing this fun craft tool and her stamp.  One of my favorite things to do with the rollagraph is to make my own pattern paper.  I used a piece of kraft card stock to make the cover or this journal.  My son is in 5th grade and they have to keep a reading journal.  I thought this would be perfect for him.  Man was I right.  He took it to school last week and I have a request for 4 more.

Materials to make Movember mustache craft:


Movember mustache craft idea supplies


I used the Sharpie markers to make my own name plate, The thin Glue dots to adhere the buttons, and the name plate.  The rollagraph to create the pattern paper for the cover and scissors to trim the edges.  You can use a craft knife too.

Mustache craft with name plate

3

Tie-Dye Pajama Party with Rit and Buttons

A Party without buttons and bright colors, well that’s hardly a party to me!

IMG_6959

Several of the Buttons Galore Design Team members and myself participated in a “Pajama Party to DYE For” this week with some fantastic creative new friends from Rit Studio.  I created and brought the goody bags and, of course, added bright Laura Kelly Buttons to the elements in them. They ended up being a part of the party!  Here are a few pictures from the creations being made.

TieDyeGoodyBags  ButtonPJ2

Yes, those are buttons on my tweezers and buttons on the mini journals.

TieDyeGoodyBagJars

I added buttons into jars too, just in case we wanted to use them at the party.

RIT_PJParty_PajamaFlower

Which we did.  I sewed a scrap flower from my dyed PJ remnants and added a button center.  The tearing of the fabric, sewing of the ribbon and adding the button took me about fifteen minutes!   I think it came our really cute and can’t wait to wear them!  It just goes to show, a party just isn’t complete with dye and buttons!  It was a BLAST and then more fun on top of that.

To learn more about our celebration of creativity and color, search the hashtag #pjrit around the web and see what you can find.

Happy Adding Buttons To Your Parties!


0

Mini Easter Egg Art – make your own art

Mini Easter Egg Art is fun to make.  Combine paint and buttons to create a pretty vintage look when decorating this Easter. Create your own mini Easter egg art in just a few steps. You can make a whole pile of these cute little art canvases and use them to accent your Easter decor throughout the house, just change the design and alternate the colors and you’ve got a new art piece.

Easter Egg canvas art by Jen Goode

Easter Egg canvas art by Jen Goode

Easter Egg canvas art with buttons

Easter Egg canvas art with buttons

Materials you need for Mini Easter Egg Art:

  • Small brown buttons
  • Mini canvas
  • Twine
  • DecoArt Americana Craft Paint – tan, white, pink, purple and yellow
  • DecoArt One Step Crackle
  • DecoArt Gel Stain
  • Liquid glue
  • Cardstock
  • Scissors
  • Paint brushes
  • Black fine tip marker

Steps to make mini Easter Art

Allow materials to dry between applications.

  1. Paint each canvas tan.
  2. Dry brush paint over tan with white.
  3. Create an egg shape stencil using the cardstock.
  4. paint the egg art on each canvas. Alternating tan and white, create an egg shape on each canvas with the stencil. Layer color until you get the look and texture you’d like. Lightly paint color on each egg. Create a pattern or apply in various areas for each piece. Coat with One Step Crackle. Using a cloth, rub on gell stain. Immediately wipe off.
  5. Using black marker, doodle outlines and patterns on each egg design.
  6. Tie twine through each button. Glue buttons in place as desired.
paint canvases

paint canvases


close up of Easter Egg art

close up of Easter Egg art


Easter egg button art by Jen Goode

Easter egg button art by Jen Goode


Tip: Use colorful Spring buttons in mini Easter baskets to accent your Easter decor instead of jelly beans. Just make sure not to leave the buttons where young children can reach them. Have a Happy Easter!

Basket with spring buttons

Basket with spring buttons

4

altered buttons make great embellishments!

Today I thought I would bring you an Autumn themed card and share a few tips on how to alter buttons for embellishments. I know it is hard to  believe Summer is passing and we are moving into the Autumn season?  Creating distressed or altered buttons is not a new concept, that I know. But sometimes being reminded that creating handmade embellishments isn’t feasible and that altering embellishments is the next best thing! Here I will share with you one way I like to alter my button embellishments that takes just a few quick strokes of sandpaper in two different grits and you have an entirely new and interesting look to your buttons! I started with two buttons of the same size and color from the Gingerbread Assortment and then went to town!


 The buttons I chose to use from the Gingerbread Assortment matched perfectly with my color palette however,

I thought they’d look good with a little “character”.


 Starting with a rough grit side of the sanding block, sand the edges.


 Next using a less rough grit, sand the surface of the face of the button to lightly distress it.


 Notice the difference? It’s just a few simple steps to really personalize your button embellishments.


And the finished result!

0

Cozy Brads + 15 minutes = cute handmade card!

Good Morning! It’s a great day to encourage someone to reach up and go for their dreams….what better way to do that than with a handmade card??? And this one can be created in less than 15 minutes! I know for a fact because…..
Confession time: I should have had it done and up on the Card Positioning Systems blog, ready to run first thing on Tuesday morning, but totally spaced it and didn’t create it or load it!!! So I had to whip it up first thing and it took less than 15 mins start to finish. I just used the weekly sketch, threw in a mix of fun patterned papers, some ribbon and two fabulous Cozy Brads and BAM!!! Done! Enjoy!!


Supplies:

Stamps: Hero Arts – Anytime Messages
Ink: Tsukineko Memento Dye Ink – Tuxedo Black
Patterned Paper: Fancy Pants Designs – Childish 6×6 Paper Pad
Cardstock: Bazzill Basics
Brads: Buttons Galore & More – Cozy Brads: All Boy
Dies: Spellbinders Paper Arts
Ribbon: Generic Grosgrain
Punch: Fiskars Scalloped Punch

0

Button Magnets – Internet Inspiration

Quick Button Project Idea

Tutorial Tuesday is a regular post on Big Box Detox and they have a fun,quick and easy tutorial on how to make magnets out of buttons.  I can picture these magnets on my fridge.  They would make a great back to school project to place inside a locker.  They might even make a nice teacher gift too.

I think the Granny’s Stitched Buttons and Big Ol’ Buttons would work great.  You could even layer other buttons on top of them.  If you were looking for Christmas gifts to have on hand you could make a bunch of these and package them in a pretty gift sack and have them on hand when you need a last minute thank you or hostess. gift.  After who does not like buttons?

1

Make a DIY Gift bag rosettes…

dress up that kraft bag with burlap and buttons!

I love the blank canvas of a brown kraft gift bag!  While keeping it simple is a great way to go with the brown bag, going a little fancy and fabulous is pretty fun too!  Follow me as I upcycle a brown gift bag by adding a fun handmade rosette to add a punch of color to this gift wrapping staple!

Nothing like the summer skies to inspire a bright pop of yellow and blue!  Today’s project uses the following supplies:

Let’s get started!

I began with a piece of burlap, approximately 5×10 inches.

Cut burlap with a metal ruler and rotary cutter into 1×5 inch strips.

Loop and glue strips of burlap around a scrap of paper that will serve as the base for our rosette.  Continue gluing and layering paper strip, doily, flowers, ric rac and buttons until you get a fun rosette that can be added to your brown bag like this….

Hello sunshine!  We just went from drab to fab with a very simple addition to this bag!

Thanks so much for joining me!  I hope you’ll try fancy-ing up your gift bags with burlap, buttons and other craft supplies!

2

Scrapbook Page with Buttons – Internet Inspiration

One of our  Creative Team member Designs for Duetica.  While I was checking out her work I saw a scrapbook page that was loaded with buttons and wanted to share.  I printed repetitive words using the Duetica Mandolyn font. I love how crisp and clean this font is but still has a flowing feminine feel at the same time. I love how Keri Lee used all the names her mom has answered to in her life time….Marilyn, Mon, Mom, Kiddo, Momma, Mommy, Mother, Mimi etc…

0

Happy- A Burlap and Button Banner

Hi all!  Ryann here with a quick and easy tutorial to share with you today featuring burlap and buttons.  Making little banners is a great way to use up scraps of paper or fabric because it doesn’t take much of either to put together a great little project to use for family celebrations!  Your banner can be as big or as little as you want it, it all really depends on how large of a word you want to use.  I find it’s best to use an odd number of pennants to achieve the “best” look for a banner.

Supplies Used:

1.  Die cut enough pennants to make your banner.  If you do not have a pennant die cut, trace a triangle shape on a piece of heavy weight cardstock and use it as a template.

2.  Cut out enough scalloped circles to place one on top of each burlap pennant.  Place alphabet stickers onto scalloped circles to create message.

3.  Decorate with buttons.

4.  Thread burlap pennants with twine.


The possibilities are truly endless when making pennant banners from burlap and buttons.  If you wanted to make a longer banner such as “Happy Birthday”, you could split your sentiment into two banners and have one hanging below the other.  I’m going to hang my little “Happy” banner in my craft room!  :)  I hope you will give pennant banners a try – they are so simple to make and fun to have!  Thanks for joining me today!


1

Button Up Candy Jar

Candy Jars are quick and easy to make so it is a good idea to have several on hand for last minute gifts.  The one pictured below is no exception, it combines buttons and burlap which has great texture.  There is also a small gift tag with a flower button on the front on the front to go along with the burlap flower…..check out the instructions below….


Supplies:

Buttons from Confetti BB87 and Mardi Gras GB127

Burlap 6″ x 18″ 2 colors of choice

Beacon Adhesives Stiffen Stuff

Beacon Adhesive Felt Glue

Sizzix Big Shot

Sixxix Fringe Flower Die

Mason Jar with Lid

1 1/2″ x 3″ cardstock

Scissors, hole punch

Instructions:

Die cut 6 – 8 medium fringe flowers.

Spray both sides with Stiffen Stuff; let dry.

Scrunch each flower piece up to give it fullness.

Pick out your buttons.

Layer flower pieces together gluing between each layer.  Pull a thread from burlap to insert through holes of button and blue to top of flower.

Cut out burlap to fit lid.

Glue burlap to lid and place inside jar band; then place on jar that is filled with candy.

Cut burlap 1 1/2″ x width of jar, fringe by pulling threads; wrap around center of jar and glue in place.

Glue burlap flower onto front.  Fold cardstock in half to form a gift tag, glue threaded button to the front; punch hole in corner.  Pull thread from burlap, wrap around top of jar and thread through gift tag, tie.  Layer and thread three buttons together, glue onto the top of jar.

There you have it; a quick and easy button and burlap candy jar….


0

Button and Burlap Patriotic Welcome Decor

I don’t do as much decorating for the patriotic holidays as I’d like. I do have quite a few family members in the military, so I think I get more caught up in remembering their service than I do decorating. This year I wanted to change that, so when I was challenged with using burlap in a button project, I knew right away what I wanted to do…

paint burlap and button American flag decor

paint burlap and button American flag decor by Jen Goode

Make an American flag decor sign using buttons and burlap. Using some paint on the burlap, it’s easy to get that rustic look with lots of fun texture and interest without having to create a super detailed piece. This project can easily be created in just a couple hours. I used Decoart craft paints for this project. Feel free to use what you have on hand.

Burlap and button project supplies

Burlap and button project supplies

Materials you need:

  • Ivory buttons
  • Tan/natural colored burlap
  • American Paint in Alizarin Crimson, Primary Blue and Light Buttermilk.
  • Decoart Dazzling Metalics paint in Glorious Gold
  • Craft glue
  • 1/4″ Wood dowel
  • Natural colored twine
  • Paint brush and Scissors
  • Wood letters to spell “Welcome”
Tie twine and glue buttons for faux sewn look

Tie twine and glue buttons for faux sewn look

Welcome patriotic wall art

Welcome patriotic wall art

Step by Step instructions

Make your own Patriotic wall decor using buttons and burlap:

  1. Cut burlap to your desired size
  2. Paint an American flag on the burlap (make sure to protect your work surface under the fabric). Let dry.
  3. Attach buttons to blue area of flag. You can either sew or glue. I tied twine through the buttons and then glued the buttons in place.
  4. Cut second piece of fabric, paint blue.
  5. Paint wood letters and dowel using Gold. I used a paper towel to spread the paint to give a bit more aged look. Let dry.
  6. Glue letters in place.
  7. Attach Welcome piece to flag fabric piece. either sew or glue. Add final buttons on edges as shown.
  8. Attach to dowel. I pinned mine but you can sew or glue – whichever you prefer. Tie twine around the edges of the dowel and hang as desired.

Tips:

  • Using a flat, square brush helps make nice stripes and blocks of color with the paint.
  • To create frayed look, gently pull threads of burlap on top or bottom of fabric to remove. Repeat until desired frayed look.
Patriotic wall decor using buttons and burlap

Patriotic wall decor using buttons and burlap

1

Bib Tank Tutorial

I keep seeing adorable clothes for little girls, but never for us “big girls” like me. I want cute clothes too! So… I decided to see what I could do with my sparse sewing skills.  After rummaging through my tank top drawer and fabric scrap bin, I came up with a plan to work up a cute little bib tank.

LauraEvangeline

Supplies:

Tank Top or T-Shirt

Fabric Scraps

Aqua Striped Ribbon

Plaid Round Buttons

Scrap Paper

Fabric Marker

Scissors

Sewing Machine/Kit

Iron

Fusible Web/Stabilizer

Lumiere 3D

MicroBeads

LauraEvangeline

1. Take a scrap piece of paper and draw out a template that suits you and trim it out. This is your pattern. I sketched my design, folded it in half, and then cut it out to ensure it was symmetrical.

2. Once you’ve come up with a pattern that you like, cut out your pattern in a fun fabric. The fabric I chose was an old drawstring bag used to keep shoes nice when traveling.

3. To make the center strip, measure the top of your pattern to the bottom and add an extra inch to fold over later. You can create the strip as wide as you’d like, but I made mine 1.5″ wide keeping in mind that I’d be folding over 1/4″ on each long side to hide my raw edges.

4. For the outside ruffle, measure around the bib of your pattern and double it. This is about how much fabric or ribbon you’ll end up using once you ruffle or pleat it. You can also purchase a trim that is already ruffled if you like. If you’re using ribbon, you may want to consider the materials to ensure it can be washed (won’t bleed or melt). All of your cut pieces should end up looking like this:

5. To ensure that my center piece would be mid-line, I took a washable fabric marker and drew a line to mark the center of my bib.

6. You’ll then want to fold and iron the top edge of your bib down about 1/4″. I snipped the fabric in a bit about every 1/2″ so there would be less bulk and puckering. Fold and press over 1/4″ on each long side of your center strip fabric and apply a strip of fusible web 1/2″ narrower than the width of your fabric strip to the back before ironing to the bib. You’re then ready to sew the strip to your bib and attach the buttons. It should look something like this…

7. Sew the ribbon on top of the bib around the bottom 1/4″ from the edge. (If the material you choose to make a ruffle or pleat is single sided, you’ll want to ensure that is facing down for this portion.)

8. Carefully iron your ruffle/pleat out flat, add fusible webbing to the back, and iron on to your tank top.

9. Sew the bib to the tank top ensuring you don’t sew all the way through to the back (like I did). Now for bling… Use the Lumiere 3D to embellish the existing pattern on your chosen fabric and sprinkle on microbeads. I pressed the beads in lightly with the back of the measuring spoon once a hefty amount was sprinkled over each dot. Once the Lumiere dries for 72 hours it’s completely washable.

10.  And… that’s it! Wear it, enjoy it, and maybe even make a few more!

LauraEvangeline

I hope you’re feeling inspired, and have a crafty kinda day!

0

Mixed media button art with a little love

I really love collage and mixed media. I’m sure I’ve said it before already, but really, I love collage. The idea of mixing textures to create a cohesive piece of fabulousness is a fun challenge I really enjoy. It’s neat to see what you can come up with when you mix odds and ends and some fantastic color. So, today’s project is an example of such fun… button art using Jacquard Lumiere dimensional metallic paint, fabric, old book paper and of course buttons!

Heart and Swirls button art by Jen Goode

Heart and Swirls button art by Jen Goode

Materials you’ll need to make this button art:

steps to make button art

steps to make button art

How to make your own button art

This dimensional paint is also as adhesive, so while you can use it to create pretty pieces, you can also use it to “glue” things in place.

Something to note, The directions I’m sharing are not in the order I did things… I painted the heart and then did the background which turned out to be a bit backwards, so instead, I’m sharing steps in the order I should have done them.

  1. Download and print the heart art onto a piece of book paper or newspaper.
  2. Color the background. Put some paint onto a paper plate for easy use. Using a damp paper towel, rub some Brass paint on to the paper. Add a layer of Copper directly to the edge of the paper and then rub using the damp paper towel. Add dots of Brass paint to create a bit of a pattern inside the heart, then add another line of Brass paint directly to the paper on all 4 sides and let dry as it.
  3. Using a paint brush, paint the heart and flowers first Brass and then add accents of Copper.
  4. Once all paint dries, gently tear both the top and bottom of the art completely off, creating two strips of paper. Tear a bit to trim down the size, adhere extra embellishments as desired.
  5. Cut burlap to fit your frame opening. Adhere heart image in place and then both top and bottom pieces, leaving a bit of space to allow the burlap to show through.
  6. Finish by tying twine through buttons and then adhering in place.
  7. Frame as desired.
Button art and illustration by Jen Goode

Button art and illustration by Jen Goode

Layering buttons creates a more interesting look and compliments the dimensional paint. Choose buttons of different sizes and finishes to create a more interesting art piece. I really like mixing shiny buttons with flat finish buttons to add more dimension between  them. Use buttons in your own decor to add a little fun interest and detail!

Tell me about your favorite button art!


3

Friendship Mixed Media Canvas with Jacquard Lumiere

Hi all!  Ryann here with my take on a mixed media canvas piece.  Now I am first and foremost a card maker, but every once in a while I like to stretch my boundaries a bit and try something new. I recently took a paper doll tag class from Julie Nutting and left feeling inspired to create my own paper doll.  After deciding on a mixed media canvas, I began my project!

Supplies used:

Directions:
  1. Tear book pages into small pieces, tearing off any large white spaces (you want to work with just the words).
  2. Adhere onto canvas using Mod Podge.  Cover adhered book page pieces with a layer of Mod Podge and allow to dry.
  3. Lightly paint a layer of light blue acrylic paint.  Let dry completely and follow it up with a lightly painted layer of light green.  Allow to dry.
  4. On a book page, draw out your doll figure and cut out.  Draw doll clothes on patterned paper and cut out.  Adhere onto canvas using Mod Podge.  Apply layer of Mod Podge on top of doll and allow to dry.  Do the same for the flowers.
  5. Lightly go around edges of doll/clothes/flower with white paint and allow to dry.
  6. Draw and then paint doll hair and allow to dry.
  7. Create sentiment in computer and print out.  Cut words out individually and adhere to canvas with Mod Podge.  Apply layer of Mod Podge on top of words and allow to dry.
  8. Stamp large polka dots with white ink onto canvas.  Stamp small polka dots with pink acrylic paint randomly around canvas.  Allow to dry completely.
  9. Adhere buttons onto canvas.
  10. Apply Lumiere 3D paint to doll to create texture on dress, neck and hair.  Allow to dry completely.
Thank you for joining me today.  I hope my story of creating outside my comfort zone inspires you to give it a try it too!  :)
Signing off,
Ryann


5

Handmade Cards for All Skill Levels

Hi all!  Ryann here with my first Buttons Galore & More design team post and I couldn’t be more thrilled to be here with you today!  I have a fun handmade card set to share with you today in a weather theme using lots of buttons!  Now I know not everyone makes cards so I thought it would be neat to have a project for each type of card maker.  So whether you are a beginner, intermediate or more seasoned card maker, there is a project here for you!

Supplies used:

Cloud card:  cardstock, ink, stamps, Neutrals buttons

Rainbow card:  cardstock, ink, stamps, sewing machine, thread, Primary buttons

Sun card:  cardstock, ink, stamps, ribbon, marker, circle die, yellow spray mist, Harvest buttons, Tuxedo buttons

Cloud Card Directions:

1.  Sketch out the shape of your card onto a piece of sturdy cardstock and then cut out.  This will be your template to trace onto your gray card base and white mat layer.

2.  Trace the cloud shape onto your card using the template.  The top of the template should match up to the top of your card (at the fold).  Cut out and set aside.  (Note: You’ll notice the template is backwards from the card pictured.  When you turn it around, your trace lines will be on the backside of your card, so they won’t be visible when decorating!)

3.  Trace the cloud shape onto white cardstock using the template.  Draw a cloud just a little bit smaller than the cloud you traced.  Use the traced cloud as your guide.  Cut out the inside cloud.  This piece will be the layer you adhere the buttons to.

4.  Turn over your white cloud so the trace lines are on the back and adhere to your cloud shaped card base.  Adhere buttons onto card.

5.  Cut out three long strips of yellow/orange shades of cardstock.  Notch the ends to look like banners and arrange them how you want them to be placed behind the cloud.  Adhere the three strips together using scotch tape.  Adhere the sun rays behind the card front panel, NOT the backside of the card.

6.  Stamp sentiment onto strip of white cardstock and adhere onto card base.  Notch end of strip hanging off side of card.

Rainbow Card Directions:

1.  Create A2 card from white cardstock.

2.  Cut kraft cardstock to measure 4″ x 5-1/4″.  Sew along edges of kraft panel then adhere onto card base.  (Note: If you don’t have a sewing machine, faux stitching made with a marker will look just as good!)

3.  Stamp sentiment onto card, then adhere buttons in rainbow pattern.

Sun Card Directions:

1.  Cut out two circles.  Place them on top of each other and cut off a small section that will be the bottom of your card.  Set one circle aside.

2.  Stamp sentiment onto circle (card front) and create faux stitching along edges using marker.  Spray with yellow mist.

3.  Turn card front over and begin creating your sun rays from ribbon.  Create a loop from a small length of ribbon with your fingers and secure onto backside of card front.

4.  Alternate ribbons going along the edge of your card front, securing as you go.

5.  When done, use a piece of foam tap at top of your card, on the backside, to adhere your card front and back together.  Turn over and adhere buttons onto the card.


I hope this handmade card set has inspired you to get crafting today!  Thanks for joining me in my first post with Buttons Galore and More.  We’ll see you again tomorrow for more crafty button inspiration!!

Signing off,

Ryann


8

Buttoned up Memo Board – May

Make a quick and easy memo board using a VELCRO® Brand Memo Board, Buttons and Ribbon…..the theme of these can change easily by the buttons you use….Make several for gifts but be sure to keep one for yourself!

Supplies:
Assorted Buttons (Brilliant Pink BB84 was used here)
VELCRO® Brand Memo Board
VELCRO® Brand Sticky Back Adhesive
Beacon Adhesives Felt Glue
Kreinik Threads
Scissor

Gather your supplies


Place ribbon on memo board from corner to corner in a large X; cutting as needed; then place ribbon to create a square as shown in photo. Glue in corners and where ribbons cross.


Sew thread onto buttons then glue onto board....


where ribbons cross. For a finished look glue ribbon around edge of memo board also.


Now you can place cards onto the memo board under the ribbons.


For a more useful board pick out some buttons to layer on top of each other....


stack them together and tie off with thread.


Add Velcro Sticky Back Adhesive at the bottom over thread.


These buttons will stick the the memo board giving.....


you more ways to hold your papers on the memo board.

0

Mother’s Day Canvas With Pinky

Can you believe Mother’s Day is quickly approaching? It is right around the corner and I love to make a handmade gift.

I want to share this artistic canvas made just for “Mom” using vintage doilies from around the house.

For this Canvas use an 8×10 canvas, and paint it with a sand colored acrylic paint.

After allowing the canvas to dry, take a craft spritz and carefully spritz canvas in random places. Set aside to dry for 10 minutes.

Using coordinating ink color, ink edges or canvas.

Take a pencil with eraser and dab into coordinating paint or ink, ink or paint onto canvas as shown in photos.

Adhere vintage doilies.

Grab some packages of beautiful Buttons’ Galore & More Vintage Gold buttons and apply buttons between doily stitches using hot glue.

Mothers Day Canvas

Using rub-ons, carefully apply rub-ons in desired locations.

Mothers Day Canvas

Using shank & pearl keepsake buttons, adhere over rub-on using hot glue gun.

Mothers Day Canvas

Set canvas aside.

Choose a lightly colored patterned paper, using home printer, print quote onto page.

Trim out words and hand cut pennant edging.

Ink edges.

Adhere quote to canvas.

Wrap it up and give with love.

I hope you enjoyed the post today- Pinky: Buttons Galore & More Design Team

 [Note: some products used in this tutorial have been discontinued so we have provided links to similar substitutes.]
1

Quick pony tail holder with buttons

We have a ton of plain colored pony tale holders around the house. This is fine for me, but for my little princess, sometimes a plain ponytail just isn’t enough. Instead of buying a ton of different decorated rubber bands, make them yourself using buttons with the loophole in the back. It’s easy, quick and gives you the opportunity to customize the look of your little hair pieces. (This would even be great for grown up princesses, using some pretty shiny or elegant buttons ~ wink).

Ponytail holder made with a button

Ponytail holder made with a button

Make a ponytail holder using buttons

Make a ponytail holder using buttons

Pink flower button ponytail holder

Pink flower button ponytail holder

The best part about these button ponytail holders is that I can change the buttons to make a whole new look at any time. There’s no glue or cutting… just pulling the rubber band through the button back and voila! You could add more than one button if you’d like, but I think you’d need a little bigger rubber band. I used a small 1.5″ diameter rubber band for this example. This would also be a fun project for kids to make!

What quick and fun projects do you like to use buttons for?

1

Mixed Media Canvas Collage

Today’s Internet Inspiration is from a product partner Helmar.  Their Designer Trudy made a darling mixed media canvas collage.

Mixed Media Collage Canvas

This is a quote from Trudy about our products.

“I love buttons and am excited to share my mixed media canvas with you. I used lots of buttons form our prefered partner company Buttons Galore’s – Candy Apple Green mix and a few from some of their other beautiful assortments.”

You can see the post HERE

0

Tween Baking Party Favors with Buttons

While I love throwing birthday parties for my children, I often struggle to think of fun party favors that are also useful.  With the popularity of baking-themed parties for the tween girl set, layered jar mixes are a perfect complement to the theme, and won’t become clutter later.

Layered Jar Baking Party Favors using buttons

I focused on the Ebony & Ivory Trim Collage Kit to create most of this layered cookie jar, along with some bright pink fabric and the cake button from the Sweet Treats collection.  There are 12 yards of ribbon in this collage kit, so I could make several coordinating jars from one kit.

Materials:

Ebony & Ivory Trim Collage Kit
Sweet Treats Buttons
Precision Diagonal Craft Cutters
Pint canning jar with ring & lid, layered cookie mix (instructions found online try www.recipegolmine.com)
Bright pink fabric remnant (approximately 1-4”square and 1-12×1.5” strip for each jar)
Polyester fiberfill (or cotton balls)
Liquid glue
Fabric scissors
Computer printer or white cardstock and black pen
Black and white patterned paper
Black cardstock

  1. Cut circle of fabric approximately 4” diameter.  Place small amount of fiberfill (or 1 slightly pulled apart cotton ball) onto lid, and cover with fabric circle.  Add ring and screw on tightly.  Trim away excess fabric.
  2. Cut 1 length of striped ribbon, approximately 10” and glue around lid ring, trimming away excess.
  3.  Cut 2 pieces of striped ribbon and one piece of stitched ribbon long enough to fit around the jar, approximately 10.5 inches, and glue into place.  Trim excess ribbon.
  4. Accordion-fold and glue a strip of pink fabric in a circle to create 2.5” diameter folded rosette.  Glue striped ribbon and button rosette from kit to center of pink fabric rosette.
    Layered jar cookie mix party favor with button decorations
  5. Remove shank from cake-shaped button using Precision Diagonal Craft Cutters.  Glue black and white pattern kit button to top right, and cake button to bottom right of rosette, and glue embellishment cluster to ribbons on jar base.
  6. Print cookie baking directions onto 1.5” square tag.  Mat directions onto patterned paper (I used my own design) and black cardstock.  Punch hole in tag corner.  Thread ¼” pink ribbon through punched hole, cross through holes of small white button, and thread back through punched hole.  Tie ribbon around jar ring to attach directions.
    Layered jar  mix party favor tag with button decorations

These baking jars are easy to make assembly-line fashion, and are a fun way to send an activity home with guests after a party.  Paired with a fun apron party craft, they make wonderful, useful party favors!

0

Sketch Create Share – Sketch 1

Greetings fellow crafters!  A member of our Button Bevy, Carla Schauer has created a sketch to give you a little inspirational kick. I know that my mojo sometimes runs a little low and I look to the internet for help.   Sketches can be a great way to get the mojo flowing.  Save this pin to your PINTEREST account and create a Sketch board.  There will be more inspiration to come.  If pinterest is not you thing, you can save it to your computer or even print it for your sketch note book.  Check out her project with the sketch.

triangle-banner-tag Sketch

triangle-banner-tag Sketch

How you choose to use this sketch is completely up to you.  We would love to see what you create.  We are pretty social and there are so many ways to share your creativity with us.

Share it with us on twitter.  You can start a conversation by including #sketch1

Leave us a link to your blog here in the comments section or even pin it on your pinterest boards and tag us with #buttonsgalore.

Post it on Facebook – tag us in the photo or share a link to your blog on our page.

0

More Handmade Button Rings…”variety is the spice of life”, right?

Well I hope you enjoyed my ring tutorial yesterday. I really enjoyed putting it together. I especially love when people try out my tutorials and then let me know how it worked for them! :)

Today I just have a quick post to share with you. Here I wanted to show you a few more button rings I have made. First I will show you all three, then I will expound on them just a bit for you.


Here you can see that you can use buttons of all shapes and sizes. There’s no “right size” button for making a ring!

When I found the first one on the left in the Gold Bulk Button Pack I was thrilled that it wasn’t GOLD! LOL I was so excited to see it was silver because I am generally a “silver/copper/bronze” kinda gal… the only gold I typically wear is my wedding band and engagement ring. This button measures almost an inch and three quarters at the widest part!!! Suuuuch a fun “cocktail ring” size.

Here it is on my hand. Fun right??

Well then I thought I would also make one from the sweet dainty little Cameo Button in the Genuine Vintage Button Tin. It’s just so little and cute compared to the ginormous one in the picture above, isn’t it?
I have some really cute colored buttons that I plan on doing another ring soon with…I hope you will come on back to see them! Please be sure to comment with a link to your button ring creations. I would love to see what you have done either on your own or using the tutorial I created! Have a great day!

P.S.  Be sure to check out our “Pin it to Win it Contest” that runs all the way through April 27th!!!

0

Pirates, Princess and Projects…Oh my! Blog Hop

How is that for a title of a post?  Today we are having a blog hop to showcase the Buttons Galore and More buttons that coordinate with Laura Kelly Pirate Island and Princess fabrics.  The fabric is manufactured by General Fabric and is available through Hancock Fabric both in stores and online.  The Laura Kelly button blends are custom dyed to match the fabric.

What Is A Blog Hop? New to Blog Hops? Here’s the low-down on how they work.  A blog hop is a list of blogs sharing a similar theme.  The blog “host” lists of links to other blogs on their page, along with the Blog Hop rules.  As the reader, you hop from blog to blog looking at fun projects.

Rule to this hop – Visit each blog, leave a comment if you want.  Come back here to the main blog.  Leave a comment on this post saying what is your favorite project and  if you would want the BOY prize or the GIRL prize.  It is that simple.

These are the blogs participating in the hop

Laura Bray www.katydiddys.blogspot.com

Cristal – www.blueyecicle.blogspot.com

Keri Lee – www.pinklemonade.typepad.com

Niki- www.nikimeiners.wordpress.com

Jen- http://www.100directions.com

Allie –http://welltrainedpaper.blogspot.com/

Ann – http://www.creativitystirsthesoul.com/

Elise – http://mamacowcreations.blogspot.com/

Now for a quick project using fun material and Buttons Galore and More  buttons by Laura Kelly

If you are not a fan on Facebook please “LIKE”  us.  We have so much button craft ideas to share.  We also have  a PIN IT TO WIN IT CONTEST  going through April 27.

If you are interested in obtaining the material you can check out Hancock fabric stores or click the links below for online purchases.

Pirate Fabric

Fleece Pirate Fabric

Princess Fabric 

***Contest now closed  *** Two winners will  be announced by 5pm April 11, 2012 on this site.

19

Button Craft Ideas – Internet Inspiration

Tuesdays Button Craft Idea is a handmade card from Made in a Muddle.  When I came across her handmade cards the clean lines, bright colors and placement caught my eye.  Her blog has a nice blend of crafts, food, repurposing and humor  Her cute as a button card and supplies she used can be found here.


http://madeinamuddle.blogspot.com/ Cute as Button

http://madeinamuddle.blogspot.com/ Cute as Button

0

Easy St Patrick’s Day Headband with Novelty Buttons

St Patrick's Day Headband

St Patrick’s Day Headband

Make this Quick & Easy St Patrick’s Day Headband today and wear it this evening….using “Match Ups” makes it so easy to do!

Supplies:

• Match Ups Spring Collection #2133 (5 clovers)

• Thin White Headband

• 2 yards ¼” Green Grosgrain Ribbon

• Beacon’s 3 in 1 Glue

• 5 Rhinestones

Scissor

Instructions:

Glue small piece of ribbon onto ends of headband

Glue small piece of ribbon onto ends of headband

Then glue one end of ribbon at the end of headband and wrap around at an angle until headband is covered, glue end; let dry.

Then glue one end of ribbon at the end of headband and wrap around at an angle until headband is covered, glue end; let dry.

Glue rhinestones onto center of clovers.

Glue rhinestones onto center of clovers.

Glue clovers to headband starting on one side.

Glue clovers to headband starting on one side; you can stop with just one clover or

Glue and space clovers evenly onto headband as shown.

Glue the rest of the clovers onto headband as shown.


0

St. Patrick’s Day Keepsake Box

Button embellished St. Patrick's Day Keepsake box


Is the luck of the Irish with you?


It was WITH ME, when I re-purposed this old cigar box, to become a sparkling keepsake, with a St. Patty’s Day twist…


A delightful assortment of Buttons Galore & More buttons and just the right amount of good old Irish magic…

Buttons Used:

Luck Button Tote

Shamrock


The spirits moved me to create this festive, button embellished medallion, to house a wee-leprechaun and invite contemplation of one’s sense of optimism…


And being, ever the optimist, myself – I confirmed what EVERYONE should feel….


L-U-C-K-Y!


And HOPEFULLY, inspired as well!

I hope you do a little jig and get your BUTTONS on – it’s a great time for crafting with Buttons Galore & More!

Thanks for visiting!


2

Luck of the Irish Key Fob

Luck of the Irish Key Fob

Luck of the Irish Key Fob

I’m 50% Irish and I make sure everyone knows it on St. Pat’s Day!  Today’s project is a “Luck of the Irish” Key Fob.  Put it on your key ring for a little extra luck.  Who doesn’t need that on the roads today?

Luck of the Irish Key Fob

Supplies:

  • White felt, cut into a 2.5″ X 2.5″ square
  • Green felt, cut into a 2.5″ x 2.5″ square
  • 3″ piece of shamrock ribbon
  • Craft glue
  • 3 green buttons-Buttons Galore and More Spring Green
  • Green embroidery floss and needle

Instructions:

  1. Place three buttons onto the white felt in the shape of a shamrock.  Trace an outline of the shape about 1/8″ from the buttons.
  2. Stitch the buttons into place.  Embroider the shamrock-shaped outline you traced.  Add any other embroidery embellishments to the square.
  3. Lay the green felt square down on your work surface.  Fold the shamrock ribbon in half and place the cut ends on the edge of the top of the felt.  Make sure it is centered.  Glue in place.
  4. Apply glue to the back of your button and embroidered piece of felt.  Lay on top of the green felt.  Make sure the ribbon is sandwiched between the pieces securely.
  5. Allow to dry.  Attach to your key ring.

These would also make cute gift tags or luggage tags (you would always be able to spot your suitcase at the airport).

Happy St. Patrick’s Day!


3

Super Simple – Super Chic Napkin Rings

Button embellished napkin rings

Button embellished napkin rings


I am helping a friend plan and prepare for her wedding and all of the events surrounding it.  The project today is one of the napkin ring ideas I proposed to her.  It is simple enough that her kids can help, not expensive, and very pretty all at the same time.  She wants to go with shades of olive ( his favorite color), peach ( her favorite color, coral and turquoise (mine).  Not that my colors matter at all.  By adding shades of the four colors it helps to expand our options and stretches our budget even further.  By limiting the colors it allows us to many things that we already own.

To make the napkin rings I used scrapbooking paper that had all of her colors.  I buttons I used are Avacado and adhered with a glue dot.


Cut 1.5 inch strips

Cut 1.5 inch strips

Add a glue dot to one end

Add a glue dot to one end

Wrap around napkin

Wrap around napkin

Viola!  Super Chic Napkin Rings

Add buttons with a glue dot and VIOLA!

1

Heartfelt Handmade Wedding Gifts

Button embellished Wedding Keepsake

Button embellished Wedding Keepsake

A wedding is such a blessing and a wonderful occasion. I love to add something handmade to every gift I give to the lovely Bride and Groom or on an anniversary. This keepsake acrylic wall hanging is the perfect addition to a gift or the perfect anniversary gift. It is a great way to memorialize the date of the wedding and show that you really care.

Supplies Used:

After I added paper to my acrylic base I used  my  Zip Dry and the Classic Hearts adhering them over each cutout.

Then using a foam pop dot I lifted up the Flat Back Heart Button adhering the Valentine’s Day Charm underneath.

I also added the Valentine’s Charms in and around the Ribbon Rosettes I also used with my vintage ribbon stash that was from my grandmother.

In the end this is what I came up with, it’s soft and beautiful and will last a lifetime.

You could easily add fabric, lace or anything else you can find to make it personalized.

Thanks for coming by today ~ Pinky

0

Celebrate Your Unique Wedding with a Handmade Button Boutonniere

Handmade Button Boutonniere

Handmade Button Boutonniere


Hello!  It’s my distinct honor to be writing up my first post here at Buttons Galore and More!  I am also so excited about sharing a creative way to make a one of a kind boutonniere that will definitely stand up to the activity of the wedding day…all the way from getting ready in the morning to the ceremony to the dancing and celebrating into the night and beyond!  A button boutonniere can be made as unique as the person who will wear it!


Celebrate your unique love with a button boutonniere


Supplies:

  • mix of buttons like those in Button Bonanza White
  • ribbon (check out Black/White Striped Grosgrain  or a beautiful satin ribbon)
  • craft wire
  • florist’s tape
  • pearl-topped corsage pins
  • wire cutters
  • floral leaf picks

Celebrate your unique love with a button boutonniere


Begin by threading a stack of buttons of increasing size onto the craft wire(cut to 10-12 inches in length), smallest buttons first down to the largest in your selection.  Twist the wire at the bottom of the stack tightly to secure the stack.  I used different amounts and heights of buttons to make each stack a slightly different height when finished.


Celebrate your unique love with a button boutonniere


Twist wrap the florists tape around the wire stem approximately half way down the wire.


Celebrate your unique love with a button boutonniere


Add floral leaf picks or other decorative items the same way by wrapping the bundle with florist tape to approximately the mid-point.


Celebrate your unique love with a button boutonniere


Once you have all three button flowers and leaf stems individually wrapped, group them in a pleasing way as one bouquet and twist the wire stems together.  Wrap the whole stem from base of the bouquet to the tip of the wire with white florist’s tape.


Celebrate your unique love with a button boutonniere


Once the wrap is in place, use your fingers to corkscrew the bottom tail of the boutonniere.  You can also arrange and shape the leaves and button flowers since they are wired which makes this boutonniere extra friendly to design!


Celebrate your unique love with a button boutonniere


Add a bit of ribbon and corsage pins so this boutonniere is ready for the big day!


Celebrate your unique love with a button boutonniere


Ta da!  That’s it!  The great thing about button floral designs are that they can be done way in advance and will still look perfect on the big day.  Not to mention, the cost on these per boutonniere are pennies compared to their fresh flower counterparts.  These can also be easily translated into other holidays or get-togethers and customized with pretty vibrant colored buttons, ribbons and other trims.  Add an elastic wrist strap to the back and this is a wrist corsage too.  Got creative teenagers in your life?  Gather the kids for a button corsage/boutonniere making day and they’ll be the newest smash hit since duct tape prom dresses!  The sky is the limit and Buttons Galore and More has you covered with beautiful buttons and trims to make your day extra special!

Thanks so much for stopping by!

1

Easy Button Valentines

Cute Button and Ribbon Valentine by Jen Goode

Cute Button and Ribbon Valentine by Jen Goode


You can make pretty little button Valentines for your true love, or with the kids for their class using buttons and felt. I created these three pieces using scraps of felt and ribbon and a bit of glue, that’s it! You could use fabric scraps, paper or cardstock. You could even paint a background and use the buttons to access the art.

This is a great Valentine’s Day project to do with the kids. Cut shapes for the little ones and let them glue everything together.Easy peazy, right? Tip: lay out everything before adding glue. Then put glue in the shape where buttons will be placed, example: I make a heart outline using glue and then placed all the buttons on the glue.

Supplies you need:


Button Valentines by Jen Goode

Button Valentines by Jen Goode


Mix and match your supplies with different layouts to create a wide selection of Valentines using your buttons. If you have a little frame, you could even turn these pieces into pretty Valentine’s Day art. Gotta love the buttons!


2

Gusseted Girly Messenger Bag – Great Valentine Gift


Yo-yos on Girly Messenger bag by Niki Meiners

Yo-yos on Girly Messenger bag by Niki Meiners


This feminine messenger style tote is perfect for a Valentine’s Day gift.  It is soft and girly and it can be carried long after.  Plus the flowers on this bag will last a lot longer than a dozen roses.


Gusseted Messenger Style Tote

Gusseted Messenger Style Tote


Tools:  

Scissors, Cutting matt, needle, thread, pins, Clover Yo Yo Maker in extra small, small, medium, large, extra large circle, small and medium heart and the small and medium flower.

Materials:

Confection Button Collection and FabriTacCream canvas, cream burlap small dark pink rick rack, large light pink rick rack, various scraps of coordinating fabric. Two strips of 6×24”, burlap, Velcro ®

Directions:

1.  Cut burlap to 36″ by 22″ to make a bag about the same size as a grocery bag. So if you buy 44″ wide fabric, you can make two bags with a yard.  Cut in half.   to measure &&& Cut canvas to $x#.  Sew the burlap to the canvas.  Fold the top edge down 1/2 inch. Then stitch ¼” from edge.   Place wrong sides together and sew on the three remaining sides.

2.  To make a gusset, flatten the bag with the bottom seam on top.  (It looks like an odd triangular shape, but makes more sense when you actually do it). Then sew across the triangle so that your seam is about 3-4″ long (mark it by sliding a ruler down until it reads 3″). When you turn the bag right-side-out, it will stand up like a paper grocery bag just not as deep.

Gusset on Messenger Style Tote

Gusset on Messenger Style Tote

3.  Cut striped fabric for handles to 6×24.  Fold in one inch on each side finger press.  Then stitch ¼” from edge.  Fold ends of each tip to form a diagonal and sew along edges.  Sew the other end inside the bag.  Straps can be made of self-fabric, very sturdy ribbon, matching fabric remnants, nylon webbing, or whatever else seems you have handy.  I tied the fabric strips into a knot for a decorative effect.


Knot at the top of the straps

Knot at the top of the straps


4. To embellish the tote use Fabri-tac to adhere various lengths of rick rack.  The rick rack  mimics flower stems.  Mine vary from 4-10″.

5.  Follow manufacturers directions to make the yo-yos.   I used a variety of the sizes listed above.  Hand sew buttons in the center of each yo-yo.  You can either adhere the yo-yos with a quick stitch or you can use the Fabri-Tac.


Yo-yos flowers with button center

Yo-yos flowers with button center


1

Be Our Guest – How YOU Can Guest Post On Our Blog


Christmas Gift Idea - Crochet Dishcloth Embellished with a Useful Button


Do YOU have a great button project that you would love to share with our readers?


Trash to Treasure with Polymer Clay and Buttons


Did you discover a great technique or alter an object?


Looking for an ‘ATTA GIRL/BOY from someone other than your mom or best friend?

Would you like to have a button for your blog saying you’ve been Featured on Buttons Galore and More and maybe a little THANK YOU gift to boot?

Send a photo of your great idea, project or technique to buttonsgaloreteam (at) yahoo (dot) com and we’ll let you know if we can feature your idea/project on our blog. If your project is accepted we’ll ask for more photos (step out process photos if they are available) and written instructions. We’ll let you know when your project will be featured so you can share the good news with all your friends and we’ll even send you a little thank you gift!

  • All projects/ideas need to feature buttons from Button Galore and More.
  • Final decision as to weather a project gets featured or not rests with buttonsgaloreandmore.com & our social media coordinator
  • We will post your name and state, website or other info that is both approved by US and YOU
  • You own the rights to your project and photos


0

New Year Button Journal Cover

Close-up of Laura Bray's Button Journal

Close-up of Laura Bray's Button Journal

I can’t believe another year is winding down.  Time to make your resolutions for the new year!  It’s always easier to do it if you have a cute journal to work in.  Why not make a little felt cover, embroidered with a cute design and embellished with buttons?

Supplies:

  • 5″ X 7″ Journal
  • 5″ x 7″ piece of white felt
  • Embroidery floss and needle
  • Buttons (the ones I used are from the Citrus Splash collection)
  • 1″ x 7″ piece of pink felt
  • Scallop rotary cutter
  • Craft glue

Instructions:

  1. With a pencil, lightly draw your design onto a piece of felt.
  2. Embroider over your pencil lines and stitch buttons onto your design.
  3. Using scallop rotary cutters, cut a “binding” strip from the pink felt.
  4. Glue your embroidered and embellished piece of white felt onto the cover of your journal.
  5. Glue the scalloped binding strip along the edge of the journal cover.
  6. Start writing your resolutions!


Button Journal by Laura Bray


1

Holiday Decor – Christmas Tree Button Collage

Pretty button collage Christmas Tree by Jen Goode

Christmas Tree Button Collage by Jen Goode


Make your own pretty Christmas Tree decor with buttons. You can add any extras you like including button ornaments and mini garland. I created this holiday button decor using an old placement that I recycled to create the background piece. I love it when a project is completed without sewing a single thing!

Materials you need:


Christmas tree button collage close up

Christmas Tree Button Collage - close up


How to make this Button Collage Christmas Tree holiday decor

  1. Sketch the tree shape on to the finished fabric background. I used a dark green colored pencil on lighter green fabric so the pencil would blend in once I was finished with my collage.
  2. Apply fabric glue all around the inside of the tree shape.
  3. Place green buttons on glue making sure to mix the sizes up while still covering the majority of the space with buttons. Let dry.
  4. Using craft glue, add gold buttons throughout tree to appear as ornaments on the tree.
  5. Measure, cut and adhere red ribbon along each side of the fabric background leaving at least an inch of green fabric on either edge of the ribbon. Glue gold corners on top of ribbon.


3

Video: Christmas Gift Idea – Crochet Dishcloth Embellished with a Useful Button

Christmas Gift Idea - Crochet Dishcloth Embellished with a Useful Button


I recently made a video that is a great project for quick and easy Christmas gift giving; Crochet Dishcloth Embellished with a Useful Button.

Useful button? How does THAT work? Well, you’ll just have to watch the video to find out! :)


PS. This video started out as a “Freebie” project to our new facebook fans. To get all of the special goodies we offer on facebook please visit our FACEBOOK PAGE

1

Holiday Glass and Bottle Charms

Button Wine Charms by Carla Schauer


As holiday party season rapidly gets underway, one of the tasks the party host(ess) needs to consider is how guests can keep track of their drink glasses.   One of the best ways to accomplish this is by using drink charm.  Plus, it looks fancier than the plastic cup/black marker method.


I started by using a coil of memory wire, cut into 4 rings with wire cutters.  With a couple jewelry tools,  some frosted beads, and my Buttons Galore & More buttons, I had my charms made  in no time at all.

Supplies and Instructions:

Buttons Galore & More  buttons (Christmas Button Bonanza, Rainforest Button Bonanza, Winter Holiday Micros, and Rainforest Mix Micros)

Frosted and clear star and bicone-shaped beads

Red seed beads

Silver jump rings

Silver wire

Round nose jewelry pliers

Wire cutters

  1. Use round nose pliers to form loop on one end of each memory wire ring. (Photo 1)
  2.  Attach medium buttons in lime, dark green, red, and white to jump rings.  Thread beads, micro buttons and jump rings with attached buttons in desired order half way around ring.  (note:  micro buttons  were threaded directly on memory wire.  Photo 2)
  3.  Layer large and medium buttons in contrasting colors and attach together with silver wire.  Twist on reverse side to secure, then use wire ends to secure layered buttons to charm ring. Continue threading remaining loop with buttons and beads.
  4. Use round nose pliers to create loop in remaining end. (Photo 3).  Join loops together to connect ends.  (Photo 4)


button wine charms by Carla Schauer

Each charm has a different combination of buttons and beads, and each has a unique focal button set.  I used fairly traditional Christmas colors in this set, but the charms can be made to coordinate with any party theme.


1

Button Art

Button Art


Our Design Team Member Laura Bray needed a little inspiration for using up some gold and silver buttons from our Gold and Silver Grab Bag … so she grabbed a can of spray paint and created some adorable wall art. You can read all about how she did it in her blog post Button Decor.

I think that one or two buttons in a small frame would be an excellent idea for an ornament too, don’t you?

1

Kid's Crafts- Button Embellished Photo Ornaments


About this time of year, my kids get the itch to start making gifts for friends, teachers, and grandparents. I came up with a kid-friendly craft that will enable them to give a gift they’ll be proud of- and it’s a great way to share those wallet-size photos from school pictures!

I used a manual die-cutting machine for this (the Spellbinders Grand Calibur) because my kids, ages 6 and 10, know how to use it independently and frankly the results are great! But you can use hand punches if you like, instead.

Supplies:

  • Manual Die Cutting Machine and Nesting Dies (I used Scalloped Circles) OR
  • Hand Punches 1.5″ and 3″
  • Feltie Sheets (stiffened felt) OR Foamies
  • Elmer’s Craft Bond Glue OR Foamie Glue (you DO need special glue for foamies, FYI)
  • Buttons (I used Ocean Blue and Gold and Silver Grab Bag)
  • Ribbon for hanging
  • Start-Ups Angels
  • Permanent marker

First, have your kids cut large circles in 3 1/2″ or 4″ size for the bases. Then, cut the “wreath” portion by positioning the 3″ or the 3 1/2″ die and centering the 2″ die into the middle. Use a piece of painter’s tape to keep it from shifting around while you run it through the machine.


Save that area that is punched out- we’ll use it on the back!

Next, cut a piece of ribbon at least 6″ long and glue it to the base.


Take your wallet-size photos and position them so the face is centered in the middle. Cut away the excess with scissors. use a dab of glue to secure the photo to the wreath, then add more glue to the entire thing and glue it to the base.

Now to decorate! Use a little more ribbon to make a bow, and add a decorative button. Then glue little buttons around the wreath as ornaments.

While that’s setting up, write the child’s name and year on the Angel Start-up and glue it to that center from the first step. Lastly, glue that to the back of the ornament so that both sides are festive.


You’ll have such a good time crafting together as a family, and the kids will be so proud that they made the gifts themselves!


2

Button and Rosette Frame

Button and rosette frame by Niki Meiners

Button and rosette frame by Niki Meiners

Looking for a holiday gift or a for a fun decoration? Why not make a frame embellished with buttons and rosettes?  I love the blank wood frames from Michael’s.  I usually purchase a dozen or so when they go on sale for $1.  They are great, low cost  homemade gifts. To make this project:

Tools and Materials:

Blank wood frame, paint brushes, 3 colors of paint ( similar colors work best), glue, floral decoration and buttons green, waterfall, and bittersweet.

Directions:

Paint wood frame with paint color of choice.  Dry brush on other colors.  Glue on rosettes and buttons as shown.

Toodles,

Niki

0

Button Snowball for Home Decor

Button Snowball by Laura Bray

These super simple snowballs, made of buttons, are perfect for a romantic Christmas decor theme.  Hang them in your tree, stack them in a bowl, tuck them into a wreath or give them as gifts.

Supplies:

  • 2″ Styrofoam balls (You could use even larger balls and make large, dramatic, snowballs too!)
  • Hot glue and glue gun
  • Buttons Galore & More Gold & Silver Grab Bag buttons
  • White glitter flakes

Instructions:

  1. Using hot glue, apply buttons to styrofoam ball.
  2. Fill in spaces around buttons with glitter flakes to give the snowball sparkle

Tip:

If you want to use the snowballs as ornaments, thread a ribbon through the ball, using a long doll needle.  Be sure to add the ribbon before gluing on the buttons!


2

Button Embellished Lariat Style T-Shirt Necklace

Button Embellished Lariat Style T-Shirt Necklace

Button Embellished Lariat Style T-Shirt Necklace


Here is my second version of the T-Shirt necklace made with buttons. My first T-Shirt necklace was the Button Embellished T-Shirt Necklace and you can read more about it by clicking on the title.

To find out how to make the t-shirt portion of the necklace visit Whole Living or there are a few companies such as consumercrafts.com who sell the strips of colorful cotton all cut up and ready to go. And BTW one package of the Accessory Loops made BOTH necklaces. ;)

Why yes, I DID take the easy way out! AGAIN!


Button Embellished Lariat Style T-Shirt Necklace


To make this style of necklace I cut all of the t-shirt strips (just one snip on each strip to make a long T-Shirt strand) and threaded the buttons on.

Getting the fabric through the shank of the button is a little tricky and I used a wooden skewer to push the fabric through the hole. It’s a tight enough fit that you don’t have to tie knots to hold the buttons in place.

To finish it off – tie a knot in the ends of the t-shirt strands.

To wear this style necklace fold the strands in half and lay it around your neck. Feed the ends through the fold and adjust to your liking.

The buttons I used are from the Gold and Silver Grab Bag.


2

Make a Button Snowman Ornament

Button Snowman Ornament

Button Snowman Ornament

Need and ornament for a gift, package topper or an ornament exchange?  Why not make your own this year.  Button Ornaments are a great and inexpensive solution.  I made a few dozen while catching up on my favorite tv shows.  The buttons I used come in a great storage jar that also makes it easy to craft on the go.  For me on the go is not in my crafting cave.  I also made a cute wreath using green and red buttons.  Stop by http://365daysofcrafts.com after Halloween to check it out.

To make this cute and simple snowman you will need:

a wire cutter

14-20 guage wire. approx. 24 inches

one orange bead ( barrel or bicone)

two brown or black beads for mittens

Various size black buttons (5- 8)

White buttons ( 18-26)

I used buttons from a jar in the Portrait Collection


Directions

Cut a 12 in piece of wire.  Make a loop or add a crimp bead  at the bottom. Stack white buttons on to desired height.  Wrap a six inch piece of wire around to form arms.  Attach beads for mittens and cut off any excess. Cut off a3 inch piece of wire and attach orange bead as the nose.  Stack on more white buttons and then add largest black button to form brim of hat.  Stack on more black buttons to make hat.  Use the remaining wire to form a loop as shown.


Tada!  A snowman button ornament.  If you would like to see more of my work please visit  http://365daysofcrafts.com

Toodles, Niki


1

Inspiration Journal

Inspiration journal with Start Ups

Inspiration journal with Start Ups

Inspiration journal with Start Ups

Inspiration journal with Start Ups

Make a journal to keep handy when inspiration strikes.  The journal is 5×8 and the perfect size to keep bedside or to tote along with you.  I like to use spiral bound notebooks for several reasons.  The spiral binding is a great place to keep the pen handy and it allows you to open the notebook only to the page you need.  To make this inspiration journal follow these simple directions:

Tools and Materials:

Scissors, two pattern papers and a tag,two flowers, paint, paint brush, rub-ons, stylus and Start Ups large tags and Fabri Tac.

Directions:

Cut two coordinating pieces of pattern paper to fit on the front.  Adhere the two papers with Fabri Tac.  Adhere flowers and let dry.

Paint large tag  and let dry.  Apply rub-ons and adhere to pre-cut tag.  Adhere tag as shown.  Embellish with fowers

1

Buttons Galore and More Presents: Start Ups, a Contest and a Give Away

Buttons Galore and More Presents: Start Ups

I am so excited about the month of September here on the Buttons Galore and More blog. We will be sharing lots of ideas and inspiration for our line of Start Ups PLUS we’re having a bit of a Contest style Show Down with the Design Team and, at the end of the month, a GIVE AWAY!

Each member of the Design Team will post a project they made using the fabulous Start Ups giving you lots of inspiration for creating your own amazing cards, crafts, home decor and more with these versatile, white, plastic shapes. At the end of the month, YOU, our wonderful readers will get to vote on which project you liked best and the designer with the most votes will WIN bragging rights and each vote by YOU is an entry to WIN a goodie bag of Start Ups and MORE from Buttons Galore and More!

Here are two warm up posts from yours truly showing just how fun the Start Ups are to create with.

Start Ups Maple Leaves and Alcohol Ink

Maple Leaves and Alcohol Ink

Start Ups Metal Look ID Tag

Metal Look ID Tag

September is STARTING to look like a fantastic month full of crafting inspiration!

0

Messenger Bag with Embroidered Table Runner

Thrifting Thursday - Messenger Bag with Embroidered Table Runner

I found this adorable table runner while cleaning up my Mother In Law’s house a couple of weekends ago. For some reason she had only worked half of it and then put it away to never be worked on again.

I felt bad cutting it up but it didn’t quite fit on the front of this messenger bag. So I cut it to fit and then cut the lace from the edge and sewed it back on. Same thing…only smaller.

http://www.vickiodell.com/wp-content/uploads/2011/04/goddess-transparent1.jpg

I sewed a small heart shaped doily to the lower corner and embellished it with buttons from a Button Bonanza bag in Bubblegum. Finally, I stitched again around the outside edge of the heart with pink embroidery floss and put embroidery floss through a couple of the buttons.

I haven’t decided if it’s finished or not. I’ll have to sit with it for a day or two and decided if I need to add anything more.

What do you think? Is it finished? If not what would you add?

1

Cute recycled T-shirt button skirt

DIY recycled t-shirt button skirt by Jen Goode

DIY recycled t-shirt button skirt by Jen Goode

Between all my kids, the house is always filled with someone’s clothes that don’t fit anymore. With hand-me-downs, the boys have had a great selection of new clothes in every size, but my daughter isn’t about to get excited over monster truck t-shirts unless that have bling in sparkly pink and purple. However, with a little creativity, we can turn any rough, tough boy-wear to fabulous girly in no time!

Continue Reading →

1

Country Chic

Country Chic

Country Chic

Burlap has been one of my “old favorites” and I am so pleased that it is back en vogue in the crafting world.  To create this chic candle holder I used a glass container that I purchased from the dollar store.

Button Detail

Button Detail

Tools:

Scissors, Embossing stylus

Materials:

Wood buttons, Blue and green burlap, Beacon Adhesive Fabri-Tac, Rusted Heart, Bo-Bunny Rub ons, glass marbles and a candle.

Directions:

Cut blue burlap into a 3×9 strip and fray edges.  Cut green burlap into a 2×9 strip and fray edges. Adhere strips to container.  Adhere buttons randomly around the center.

For a variation add rub-ons to rusted metal heart.  Trim heart with the tiniest buttons.  Add butterfly rub on to glass exterior.

Country Chic - Variation

Country Chic - Variation

Rusted Heart Details

Rusted Heart Details

I hope you have enjoyed this country chic candle container.

Toodles, Niki

0

Envelope Booklet Hostess Gift

Make an Envelope Booklet to hold coupons, photos, or stationery.

I love little gifts that I can make with items that I’ve got on hand and give as hostess gifts, thank you tokens, and teacher’s presents. Usually it’s on short notice- and I can whip up one of these Envelope Booklets in an hour. WIN!

Continue Reading →

1

Patriotic Button Mini Art Set

Patriotic mini art frames by Jen Goode

Patriotic mini art frames by Jen Goode

There are so many great ways to create extra decor pieces for July 4th and other patriotic holidays. Add a little extra fun to your home with buttons in red, white and blue to show off your American spirit. This 3 piece button art requires only a few supplies and is fairly quick and easy to create. I used many recycled pieces and scraps including buttons from a grab bag button pack which added to the variations of sizes and colors I had available.

Continue Reading →

0

Bandana Memo Board with Button Push Pins

Bandana Memo Board with Button Push Pins

I don’t know about your house but in my house we have FOUR young people. They are VERY BUSY young people and each one has a bulletin board. They are a super easy way to communicate within such a busy family. (Besides text messaging that they tend to read and then forget) A note on a bulletin board is a little harder to forget. It stays there, quietly reminding, until the event or reason for the note has passed.

Anyway, why have a boring bulletin board when you can have one that fits your decor, your personality or your hobbies?

Bandana Memo Board with Button Push Pins

This bulletin board uses a cork tile, a bandanna and a 12×12 frame along with a few other supplies.

Bandana Memo Board with Button Push Pins

Cover the cork tile in Mod Podge.

Bandana Memo Board with Button Push Pins

And then smooth the bandanna over the Mod Podge and let dry.

Here is a tip: Before spreading any Mod Podge decide which portion of the bandanna design you want to see on your bulletin board. Don’t cut it all out ahead of time. Just figure out where you want to place the bandanna. (Cutting out the fabric ahead of time makes it too hard to line up.)

Bandana Memo Board with Button Push Pins

While the Mod Podge is drying you can make your thumb tacks or push pins. I simply hot glued white buttons to a flat topped thumb tack. Be careful of that hot glue! You could also use Amazing Goop or a cool temp glue gun a well. Poke the tacks into a piece of corrugated cardboard or foam core while they are drying to keep them upright.

Bandana Memo Board with Button Push Pins

My button push pins.

After the Mod Podge is dry cut away the excess fabric and insert it into the 12×12 frame.

Bandana Memo Board with Button Push Pins

Now you can embellish to your little hearts’ content. I used hot fix rhinestones in two sizes, Thickers alphabet stickers and the heads from 4 “silk” daisies.

Bandana Memo Board with Button Push Pins

Isn’t this fun? Girlie but not too girlie. Country but not too country.

0

Child’s Button Embroidery Sampler

Do you remember how much you loved to sift through your mom, aunt, or grandmother’s button boxes? I still play with my buttons all the time, and I know I can always keep my five year old daughter busy with buttons. I recently came up with a project that takes button play beyond just looking at buttons, but also uses them as a creative tool. The end result is a darling little sampler of all my daughter’s favorite buttons and artwork. It’s truly an heirloom piece that will be cherished for years to come. Here’s how to make a button embroidery sampler with your child.

Continue Reading →

1

Pretty Button Flower Wall Decor

Pretty little blooms button flower picture by Jen Goode

This project can be made using a variety of recycled materials combined with your favorite pretty buttons. Add a touch of color to your decor for a flower garden inspiration all year long. I created this project to accent pieces in my daughter’s bedroom, but you can adapt it to fit where ever you’d like some “pretty little blooms”.

Continue Reading →

3

Wood Button Monogram

Add texture and detail to a simple framed monogram using a variety of wood buttons from the Haberdashery collection. These buttons are a gorgeous mix of natural wood colors, and I couldn’t resist showcasing them in a project that let their beauty take center stage.

In order to play up the texture of the wood, I covered chipboard with neutral fabric to create a background that didn’t compete with the wood buttons. The buttons were then arranged to make the monogram, and glued into place using fabric adhesive (Beacon Fabri-Tac). A simple inexpensive Ikea wood frame painted navy gives just enough color to draw the eye to the project.

On a wall or on a table, this monogram is a great way to easily personalize a room.

Thanks for stopping by!

Carla Schauer

http://carlaschauer.com/carla-schauer-blog-whats-new/
0

Flights of Fancy Spring Pillows

I’m madly in love with these pillows!! I’m a big fan of COLOR and I just LOVE that strip of BUTTONS down the right side of each pillow.

Even if you aren’t the kind of person who likes bright colors there might be something here for you. I can see these made in more neutral shades looking just as wonderful. Actually, I can imagine them for several different seasons as well. Can’t you?

Perfect for clearing out your stash of fabrics too!

If you’d like to learn how to make these for yourself please head on over to Carla Schauer Designs.

0

Mini Button Art

I love buttons and don’t want to just hide them in a box somewhere.  I showcase some of my favorite buttons by creating little pieces of art.  This is a super quick project that is great for a beginner button fan!

Continue Reading →

9

Easy Votive Candle Favor

This is a simple votive favor I made for a baby shower but it could easily be transformed into a wedding reception/shower favor by using buttons in white or in the wedding colors.

Simply glue buttons on the bottom 1/4 of a straight sided votive candle holder. Fill with small gems and place a battery operated candle inside.

Of course, you can use a real candle but most halls, churches and other public spaces won’t allow an open flame. Check with the venue where you are holding the event prior to choosing a real candle.

1

Powered by WordPress. Designed by WooThemes