Header

Tag Archives | fall

Decorate Your Home Inside or Out with This Fun Fall Wreath!

Hi everyone! It’s Lorrie here with a fall wreath featuring autumn-themed buttons from Buttons Galore & More! This fall wreath will look great on your front door to greet visitors, or on the wall inside your home to add some seasonal flair.

To make this easy fall wreath, I started with a grapevine wreath and a plain burlap bow that I picked up at my local craft store. I decorated the wreath itself with some plastic leaves that I painted in beautiful autumn colors. But the real fun starts with the bow! Continue Reading →

1

DIY Falling Leaves Home Décor

Hello Everyone! This is Katie from the Buttons Galore & More Design Team and today I will be showing you how you can decorate a new product available from Buttons Galore and More!

If you haven’t noticed, Buttons Galore & More has a new area on their website which is dedicated to home décor. This home décor is a new line of wooden products which are super easy to embellish and decorate. The nice thing about the new line is that you have tons of options for different holidays, themes, or seasons. Continue Reading →

1

How to Make DIY Pom Pom Pumpkins with 28 Lilac Lane

28 Lilac Lane Autumn Afternoon Pom Pom Pumpkins
The weather here has started to cool down this week and so I’ve decided it’s time to bring out those pretty autumn colors. Pumpkins are my favorite seasonal decoration in the fall – I love using both fresh pumpkins and artificial pumpkins in my decor. Yarn pom poms are such a fast and easy craft to make. They can add a bit of whimsy to any decor. I wanted to make some DIY pom pom pumpkins to add to my fall decorations, and the beautiful Autumn Afternoon Embellishment Kit from the 28 Lilac Lane collection was the perfect addition to finish off these cute little poms! Continue Reading →

0

How To Make A DIY Button Pumpkin Wall Hanging

Hello Everyone! This is Katie from the Buttons Galore & More Design Team, and today I have a fun button pumpkin wall hanging project to get you in the mood for fall decorating!

button pumpkin wall hanging

This project is perfect to make if you are looking for an easy and inexpensive way to spice up your home décor for fall, halloween, and thanksgiving. I got the idea for this project when I saw a felt wall hanging designed for the 4th of July. However, instead of a pumpkin, the original wall hanging had a heart shaped flag made from felt and a few buttons. Personally, I thought the idea was cute but could be recreated in a simpler way. In today’s project, the whole DIY is only 3 steps and does not involve any sewing tools!

To decorate my button pumpkin wall hanging, I used two button sets for a majority of the project. Those two button sets were the 28 Lilac Lane ”Pumpkin Spice” Embellishment Bottle and the Buttons Galore Autumn Value Pack. Both of these button sets provided a wide variety of harvest/fall style buttons and worked really well together. My personal favorite out of both of these sets was definitely the 28 Lilac Lane ‘”Pumpkin Spice” Embellishment Bottle because you received a ton of beautiful orange colored buttons.

So, to find out how to make your own pumpkin button wall hanging, keep reading below!

Supplies for Making Button Pumpkin Wall Hanging:

How to Make a Button Pumpkin Wall Hanging

button pumpkin wall hanging

Step 1: Cut one piece of felt that measures 9 inches by 10 inches and two smaller pieces of felt that measure 2 inches by 3 ½ inches. Then cut out one piece of burlap that measures 6 ½ inches by 8 inches and two smaller pieces that measure 1 inch by 3 ½ inches.

button pumpkin wall hanging

Step 2: Layer the larger piece of burlap centered onto the larger piece of your felt and glue it into place with your hot glue gun. Then layer the smaller pieces of burlap centered onto your smaller pieces of felt and glue them into place. Finally, create loops for your wall hanging by folding over the smaller pieces of felt/burlap and glue them in the corners of your larger felt piece.

button pumpkin wall hanging

Step 3: Now take your pen and draw the outline of a pumpkin onto your burlap. Then begin gluing on your buttons around the outside of your pumpkin to create an outline and then fill in the middle with more buttons. For my pumpkin, I decided to go from dark to light buttons and then use shimmering half pearl flat backs for the stem. Finally, use the rest of your normal buttons and decorative buttons to decorate the rest of your wall hanging.

For my button pumpkin wall hanging I used the following:

Once you are happy with how your button pumpkin wall hanging looks, you are ready to hang it on the wall by sliding a dowel rod or wooden stick through the two loops!

button pumpkin wall hanging

button pumpkin wall hanging

I loved how this pumpkin button wall hanging turned out and I think it would look so cute as part of a gallery wall!

While creating this project, I did free hand the design of the pumpkin. However, if you are not comfortable drawing your own pumpkin (in step 3), you can always google ”pumpkin template” and print out a template to trace around. With that being said, if pumpkins are not your thing, you could always change the main image to be something else. For example, I think a leaf created from the 28 Lilac Lane “Toasted Graham” Embellishment Bottle would look really pretty.

If you made this pumpkin button wall hanging, what 28 Lilac Lane items would you use?

1

Celebrate Fall with Button Vase Fall Canvas Wall Art

Autumn is one of my very favorite seasons. I love the cooler (but not cold) temperatures and the gorgeous bright colors that appear in nature. This Button Vase Fall Canvas wall art is the perfect project when you’re short on table space but want to add those beautiful fall colors to your home.

Button Vase Fall Canvas Wall Art

Supplies needed to make a Button Vase Fall Canvas Wall Art:

How to make a Button Vase Fall Canvas Wall Art:

Autumn Canvas Button Vase Supplies

Step one:

Use a pencil to draw (or trace) a simple vase shape to the bottom half of your blank 16×20 canvas.

Pencil Sketch Vase

It doesn’t need to be perfect, just a rough outline so that you know where to place the buttons for the button vase. The buttons will cover up any pencil marks. I drew a round vase, but you can make it any shape you want. Whichever shape you use, make sure to keep it on one end of the canvas.

Step two:

Glue buttons to the outlined vase you drew on the canvas.  I used a hot glue gun to attach the buttons.

Hot Glue Buttons

Because I was using Silk Autumn Leaves in my vase with beautiful red and orange colors, I made my vase Yellow to complement them. I used every yellow button in the Harvest and Fall Festival button sets to fill my round yellow vase. I liked that the shades of yellow in these two sets were in line with the yellow you’d actually see on fall leaves.

Yellow Button Vase on Canvas

Don’t glue buttons inside the mouth part of the vase at the top but fill the rest of the vase.

Step three:

Use a sharp craft knife to cut a line in the canvas just above the buttons in the mouth of the vase.

Vase Opening

Step four:

Insert your Autumn Silk Florals or Leaves through the hole in the canvas. Arrange them however you like.  I find that the canvas vase looks best when it’s full. I used four Silk Leaf stems to fill my vase.

Button Vase with Leaf Stems

Step five:

Turn your canvas over, and use hot glue to secure the stems in place for added stability.   I used an entire small glue stick to fix my stems in place.

Secure Leaf Stems

Step six: 

Use single leaves to fill in any blank spaces or gaps at the base of the stems.  Secure them in place with hot glue.

Single Leaves

If you have some unruly leaves on the stems that aren’t laying quite right, a dot of hot glue can help secure them to the canvas in a more pleasing way.

DIY Button Vase Fall Canvas Wall Art

Hang your canvas on the wall, or prop it up on a table for a beautiful bright pop of autumn colors! I think that I will take a slightly smaller canvas and use the red buttons in the Fall Festival and Harvest button packs to make a smaller red vase with some pretty silk sunflowers! The pair will look great together with my fall decor. The possibilities are endless if you just change the color of the buttons for your vase to complement the flowers or leaves you have! Happy Fall Crafting!

1

Oh Sweet Autumn with 28 Lilac Lane Autumn Afternoon!

I’m dreaming of shorter days and weather cool enough to wear sweaters! This summer has been so hot and rough – I’m ready to be done with it! Oh, and it probably has something to do with fall being my favorite season as well.

Today I’ve got a card to share that features my fall inspired Autumn Afternoon embellishment kit from my 28 Lilac Lane line. Here is a look at the finished card:

sweet-autumn-card-by-may-flaum

The process to make this card is simple!

  1. Place a stencil on white cardstock and use assorted colors of dye ink with a chevron stencil, skipping some parts and going lighter in some areas.
  2. Use embossing ink to stamp the sentiment, and then coat it in black embossing powder and heat set.
  3. Stitch the background to a blank card, and then embellish! I used the stencil design and a general sweep across the card to find places for the leaves and details.

It is really that easy!

sweet-autumn-card-close-up

Now I’m back to dreaming of autumn, cocoa, and ending these triple digit days!

Autumn Afternoon isn’t the only fall-themed 28 Lilac Lane kit…don’t miss out on the 28 Lilac Lane Limited Edition Fall Mix that is only available in the Buttons Galore online store!  Looking for some inspiration of what to do with my fall limited edition mix? Check out these bloggers! Ashli Oliver, Libby Hickson, Maura Hibbitts, and Rebecca Vick all have outstanding posts up. Enjoy!

0

Top 6 Halloween Crafts to Make with Buttons!

The calendar is about to turn October, and most of us are in full-speed Halloween crafting mode! In case you are still in need of some Halloween crafts inspiration, here’s a round-up of our favorite Halloween crafts using our favorite crafting embellishment – buttons, of course!

Top Halloween Crafts for Halloween using buttons from Buttons Galore

Our autumn frame is super easy to make with no sewing, and will make a great addition to your home decor or your buffet of candy treats. And it’s a great way to use up those fabric scraps!

Autumn Frame

Whether you are planning a hospitality gift for your party hosts, or dropping some fresh baked pumpkin spice brownies at the neighbor’s, this fall pumpkin tag is a warm and friendly way to say “hello” to someone special!

Fall tag

When it comes time to hand out candy, our spooky button eye bags will be the talk of the neighborhood or your kids’ classroom! They are so simple to make that the kids can help!

Spooky Button Eye Ghost Bags - great for Halloween Treat Bags

Pumpkins are seasonal decor that can go from early fall all the way through to Thanksgiving. This decorative pumpkin will add a beautiful touch to your home or porch all season!

Happy Fall pumpkin

Halloween wouldn’t be complete without some bats! These button bats are more cute than spook, and will look great hanging from the ceiling, staked into a plant, or stuck to a wall.

Halloween Button Bats

If you aren’t quite ready to give up all the color in your world for the browns of fall, we’ve got the perfect card for you! This fall card brings nice bright pink and orange to a cheery “happy fall” sentiment.

Happy Fall card

Looking for buttons for your Halloween projects? Don’t miss our brand new Scary Button Bonanza, Trick or Treat Button Basics, and Fall Festival Button Basics!

0

Introducing…New Button Basics Collections for Halloween & Christmas!

The new product introductions keep coming! Today we’re introducing 6 new colorways of Button Basics, our button candy bags that are just the right size for making fun projects. The new additions to the Button Basics line-up include two seasonal offerings for fall and Halloween, two blue assortments for winter and Christmas, and two new trend-based color groupings.

Button Basics Family

First, let’s take a closer look at Fall Festival! This beautiful assortment of browns, leaf green, rusty orange, and mellow yellow will have you yearning for a cup a cider and the crunch of leaves under your feet.

Fall Festival Button Basics by Buttons Galore

For Halloween, we think you’re never too old to love to Trick or Treat! Shades of light orange and green combined with pops of bright purple make this the perfect collection for the cutest Halloween projects on your block.

Trick or Treat Button Basics by Buttons Galore

Blue is a hot color for Christmas, and we’re bringing it to you with Cool Winter! This mix adds a sophisticated shade of red to a cool mix of pale blue and white to create an elegant mix that will work for cards, ornaments – and even holiday party wear.

Cool Winter Button Basics by Buttons Galore

Are you “blue” this Christmas? Then Winter Flurries is the collection for you! Not content with just on shade of blue, this collection gives you an entire range of shades from deep midnight to pale ice to choose from so you’ll be able to find exactly the shade you need for your festive Christmas or winter project.

Winter Flurries Button Basics by Buttons Galore

If you are a fan of heathered pastels – especially the colors of the year for 2016 – then you’ll love our new trend mix Bohemian Style. With rose pink, blue, and a pop of sunshine yellow, this trend mix matches well with current home decor, fabric and fashion color trends so you can create up-to-date looks.

Bohemian Style Button Basics by Buttons Galore

And finally, we have Party Time! This bright and happy combination of teal and bright pink with touches of white is perfect for parties, fashion, and everyday papercrafting projects.

Party Time Button Basics by Buttons Galore

Which of the new Button Basics is your favorite? You can get all of these new Buttons Basics on sale for $1 off from now until September 10th. That’s a great deal at $5.99 each! Why choose just one? Get yours now!

0

Celebrate Fall with Painted Leaves on Slate!

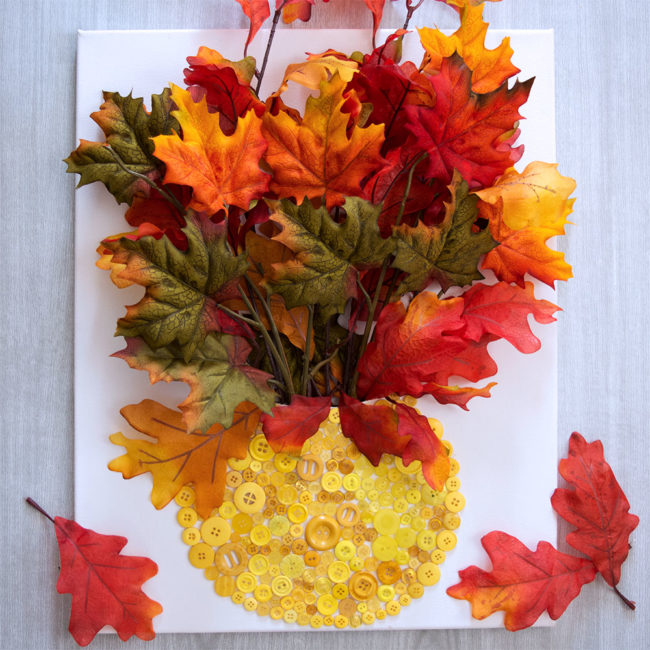
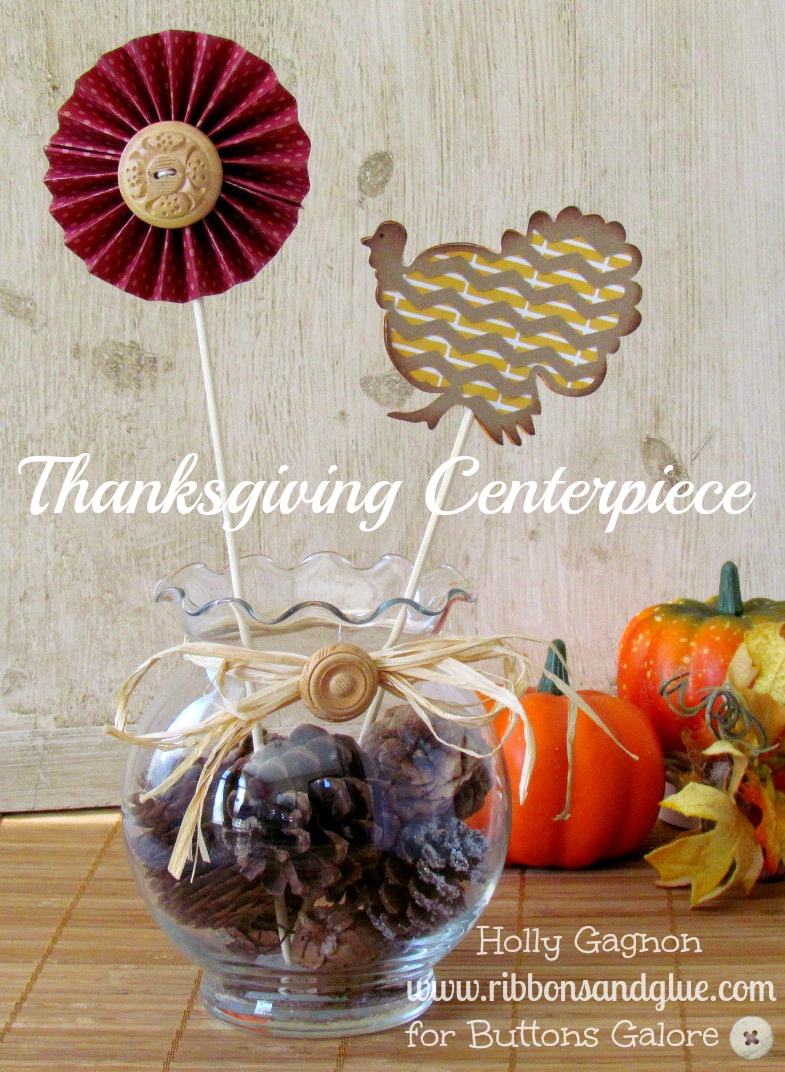
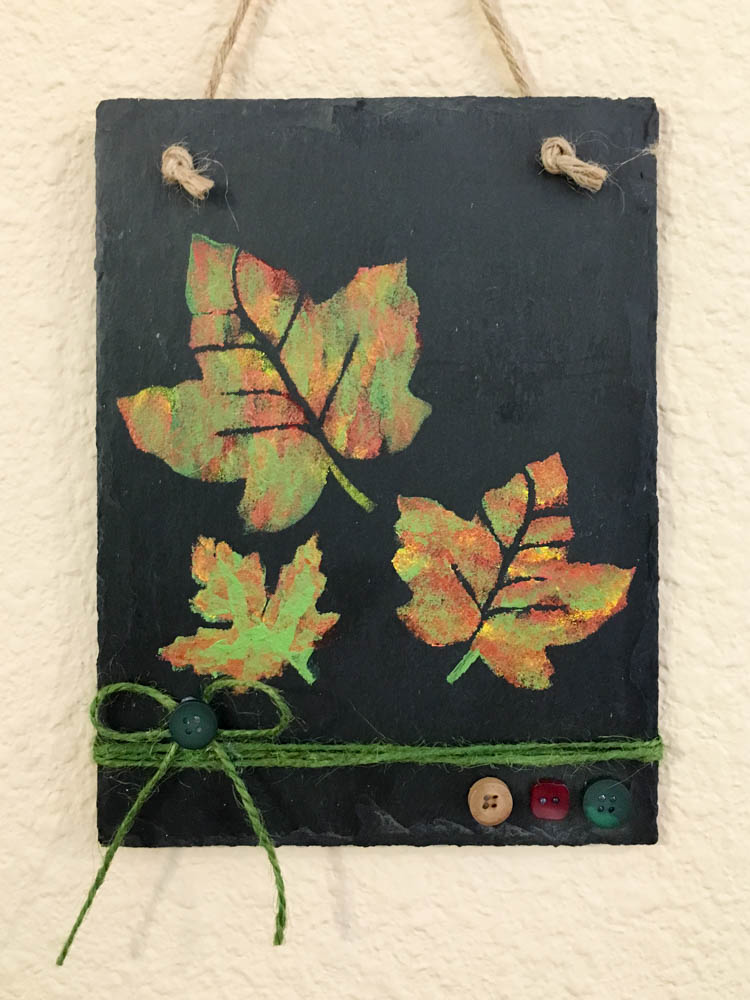
School is starting in many parts of the country, and that means that cooler temperatures – and changing leaves – can’t be far behind! Today’s project is a piece of slate wall decor with painted leaves that will bring fall colors inside so you can enjoy them where it is warm!

Painted Leaves on Slate

Supplies:

(For my paint selections, I used Delta Ceramcoat “Ranchero”, Delta Ceramcoat Select “Light Foliage Green”, Folkart “Cardinal Red” and “Daffodil Yellow”, and Martha Stewart Crafts Metallic Acrylic in “Rust”. But the exact shades aren’t as important as getting a light green, a red, an orange, a yellow, and a metallic.)

Cosmetic Sponges

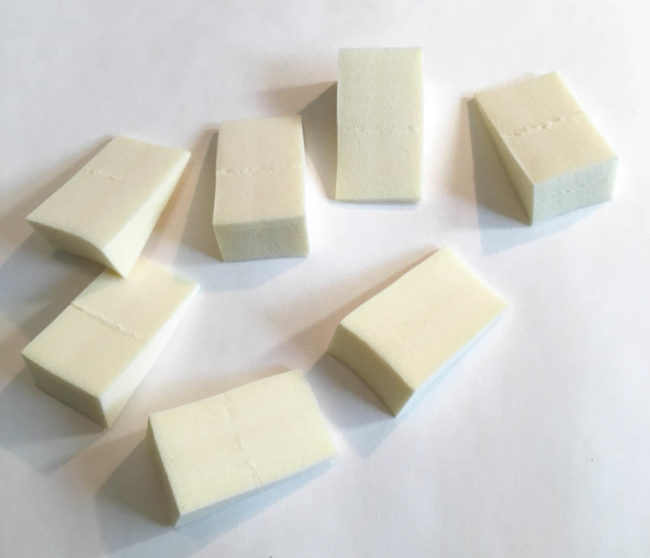
The paint effect looks complex, but the technique is actually really simple. The secret to it is using disposable make-up sponges to apply the paint with a “dabbing” motion, instead of a brush. It’s so simple that even young children can do it!

Leaf Stencil

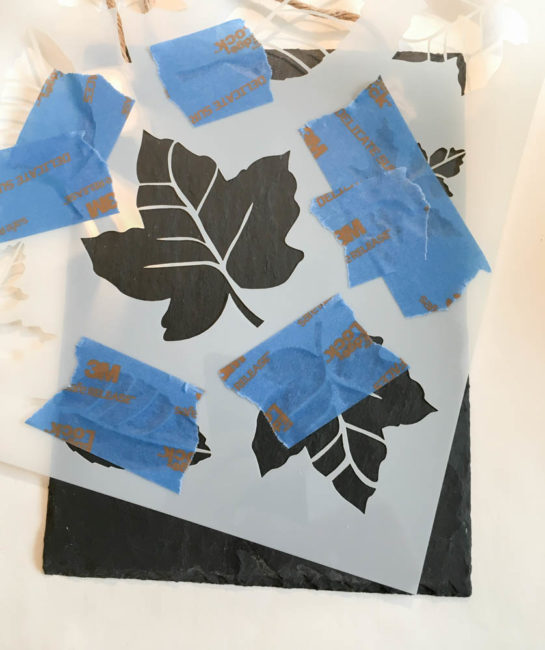
Taping down the stencil, and using tape to cover all of the nearby open areas that I don’t want to paint, helped to ensure that I got a perfect impression from my stencil.

Painted Leaves in progress

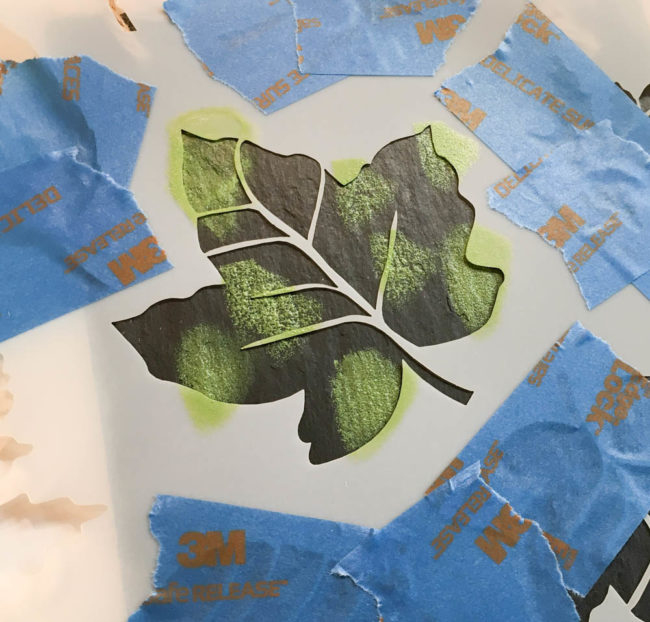
I started with the light green color of paint, using one of the cosmetic sponges. I dabbed one of the end edges of the sponge into the paint, and then dabbed most of the paint off on the palette that I was using. I then used the damp sponge to dab blotches of color onto the stencil. I repeated this process with each color (except the metallic), filling in the whole stencil area.

Then I used the metallic color and dabbed it heavily over the top of the stencil, but not filling in quite completely. I wanted small areas to peek out from underneath. Then I repeated a layer of the light green paint, but not quite as heavily as the metallic.

Sometimes when applying new paint over paint that is still wet your colors might mix and blend a bit. As long as the sponges aren’t too wet, the colors shouldn’t shift too much.

Painted Leaves

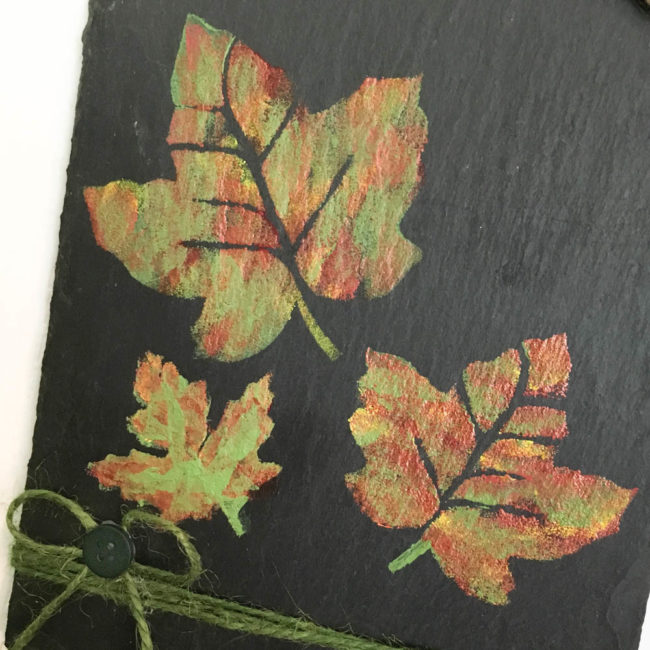
The finished effect will look something like this – a mix of metallic and green with hints of other colors like red and yellow peeking through. Just like with leaves in nature, no two painted leaves will come out the same!

Painted Leaves on Slate Tile

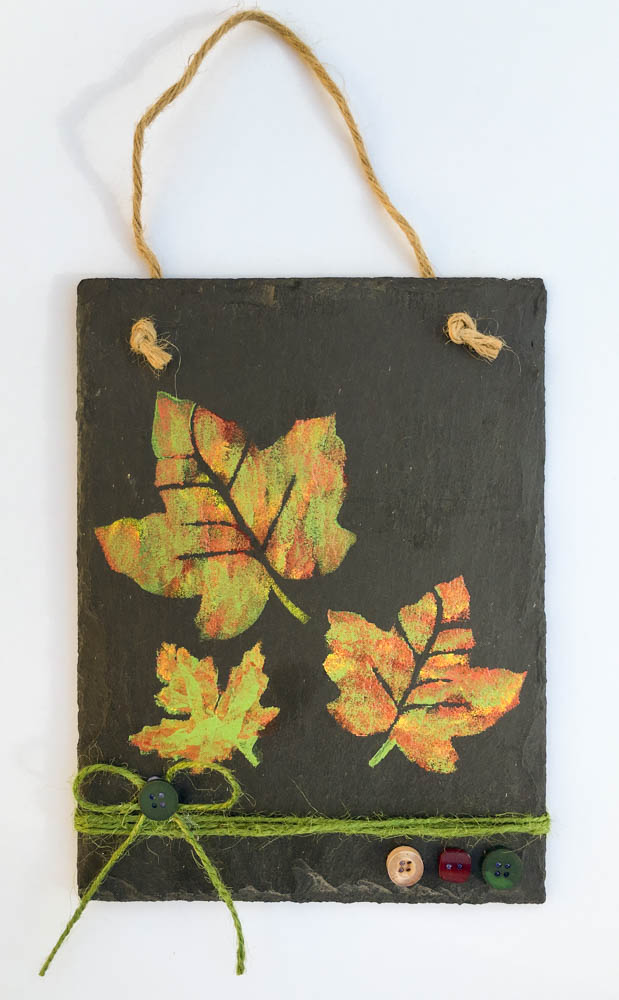
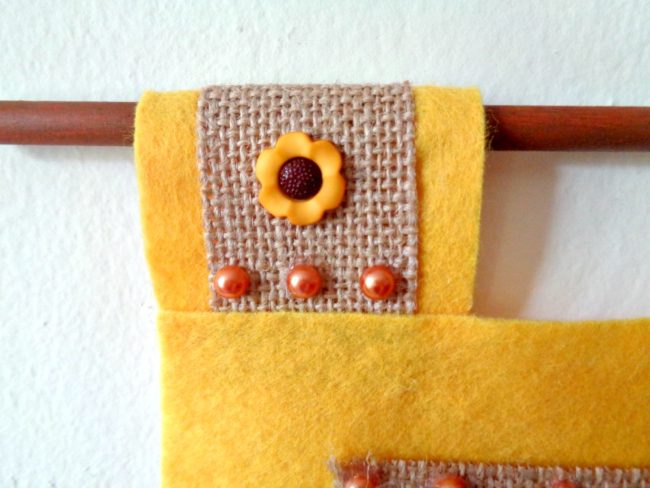
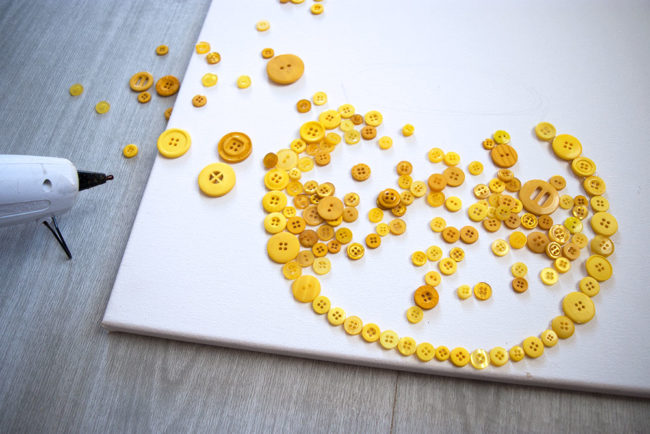
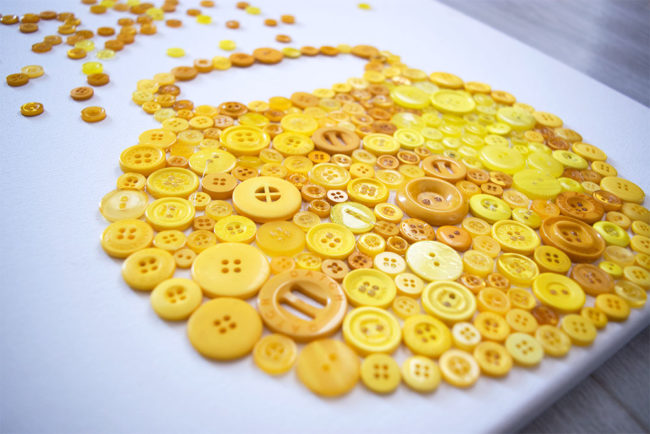
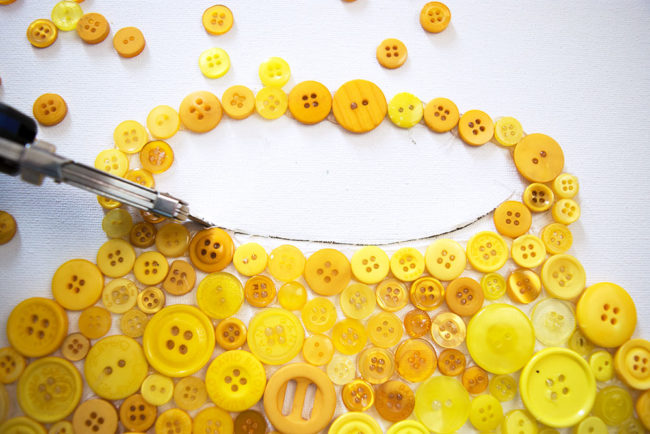
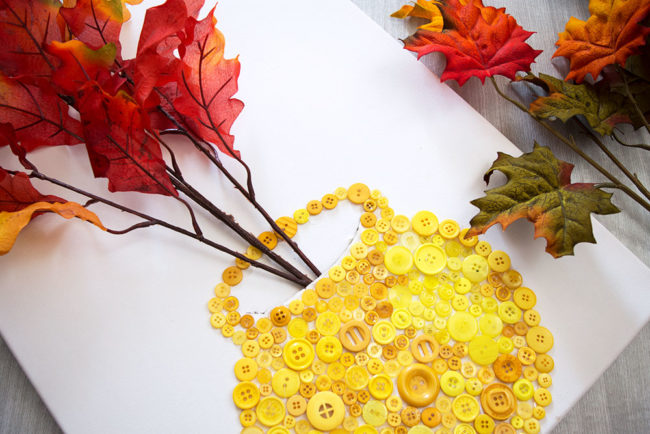
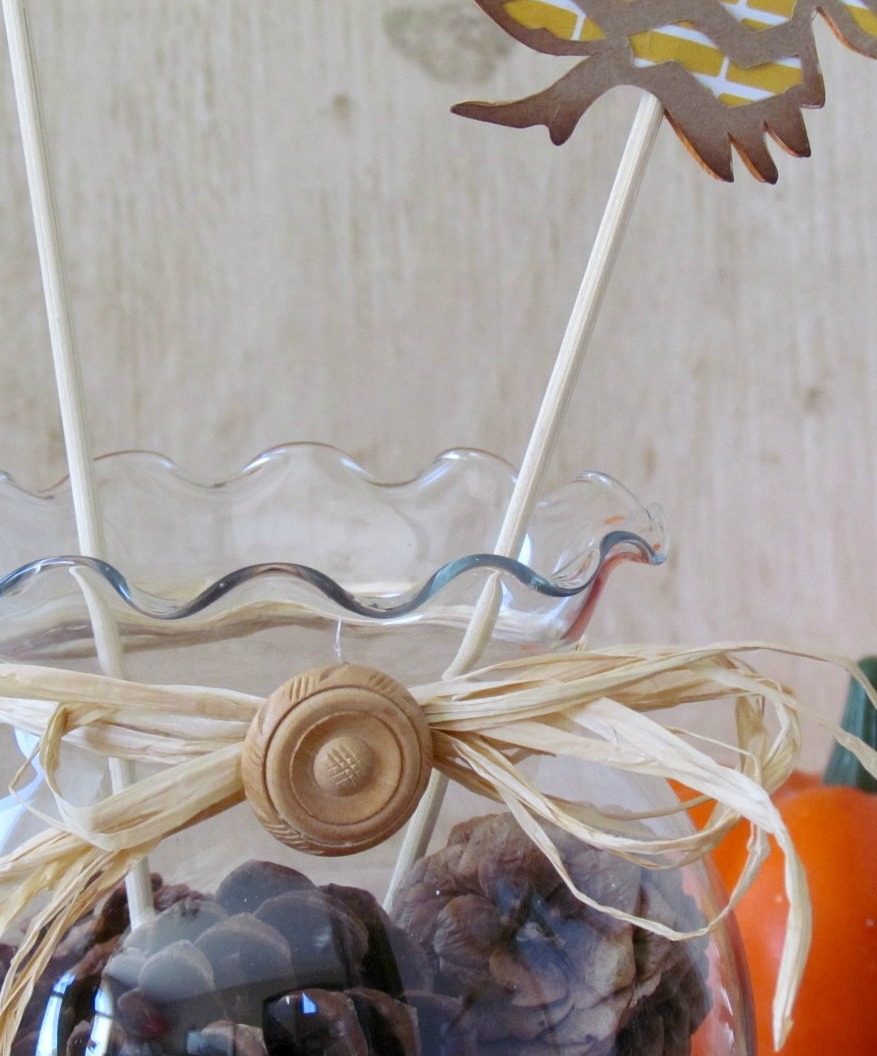
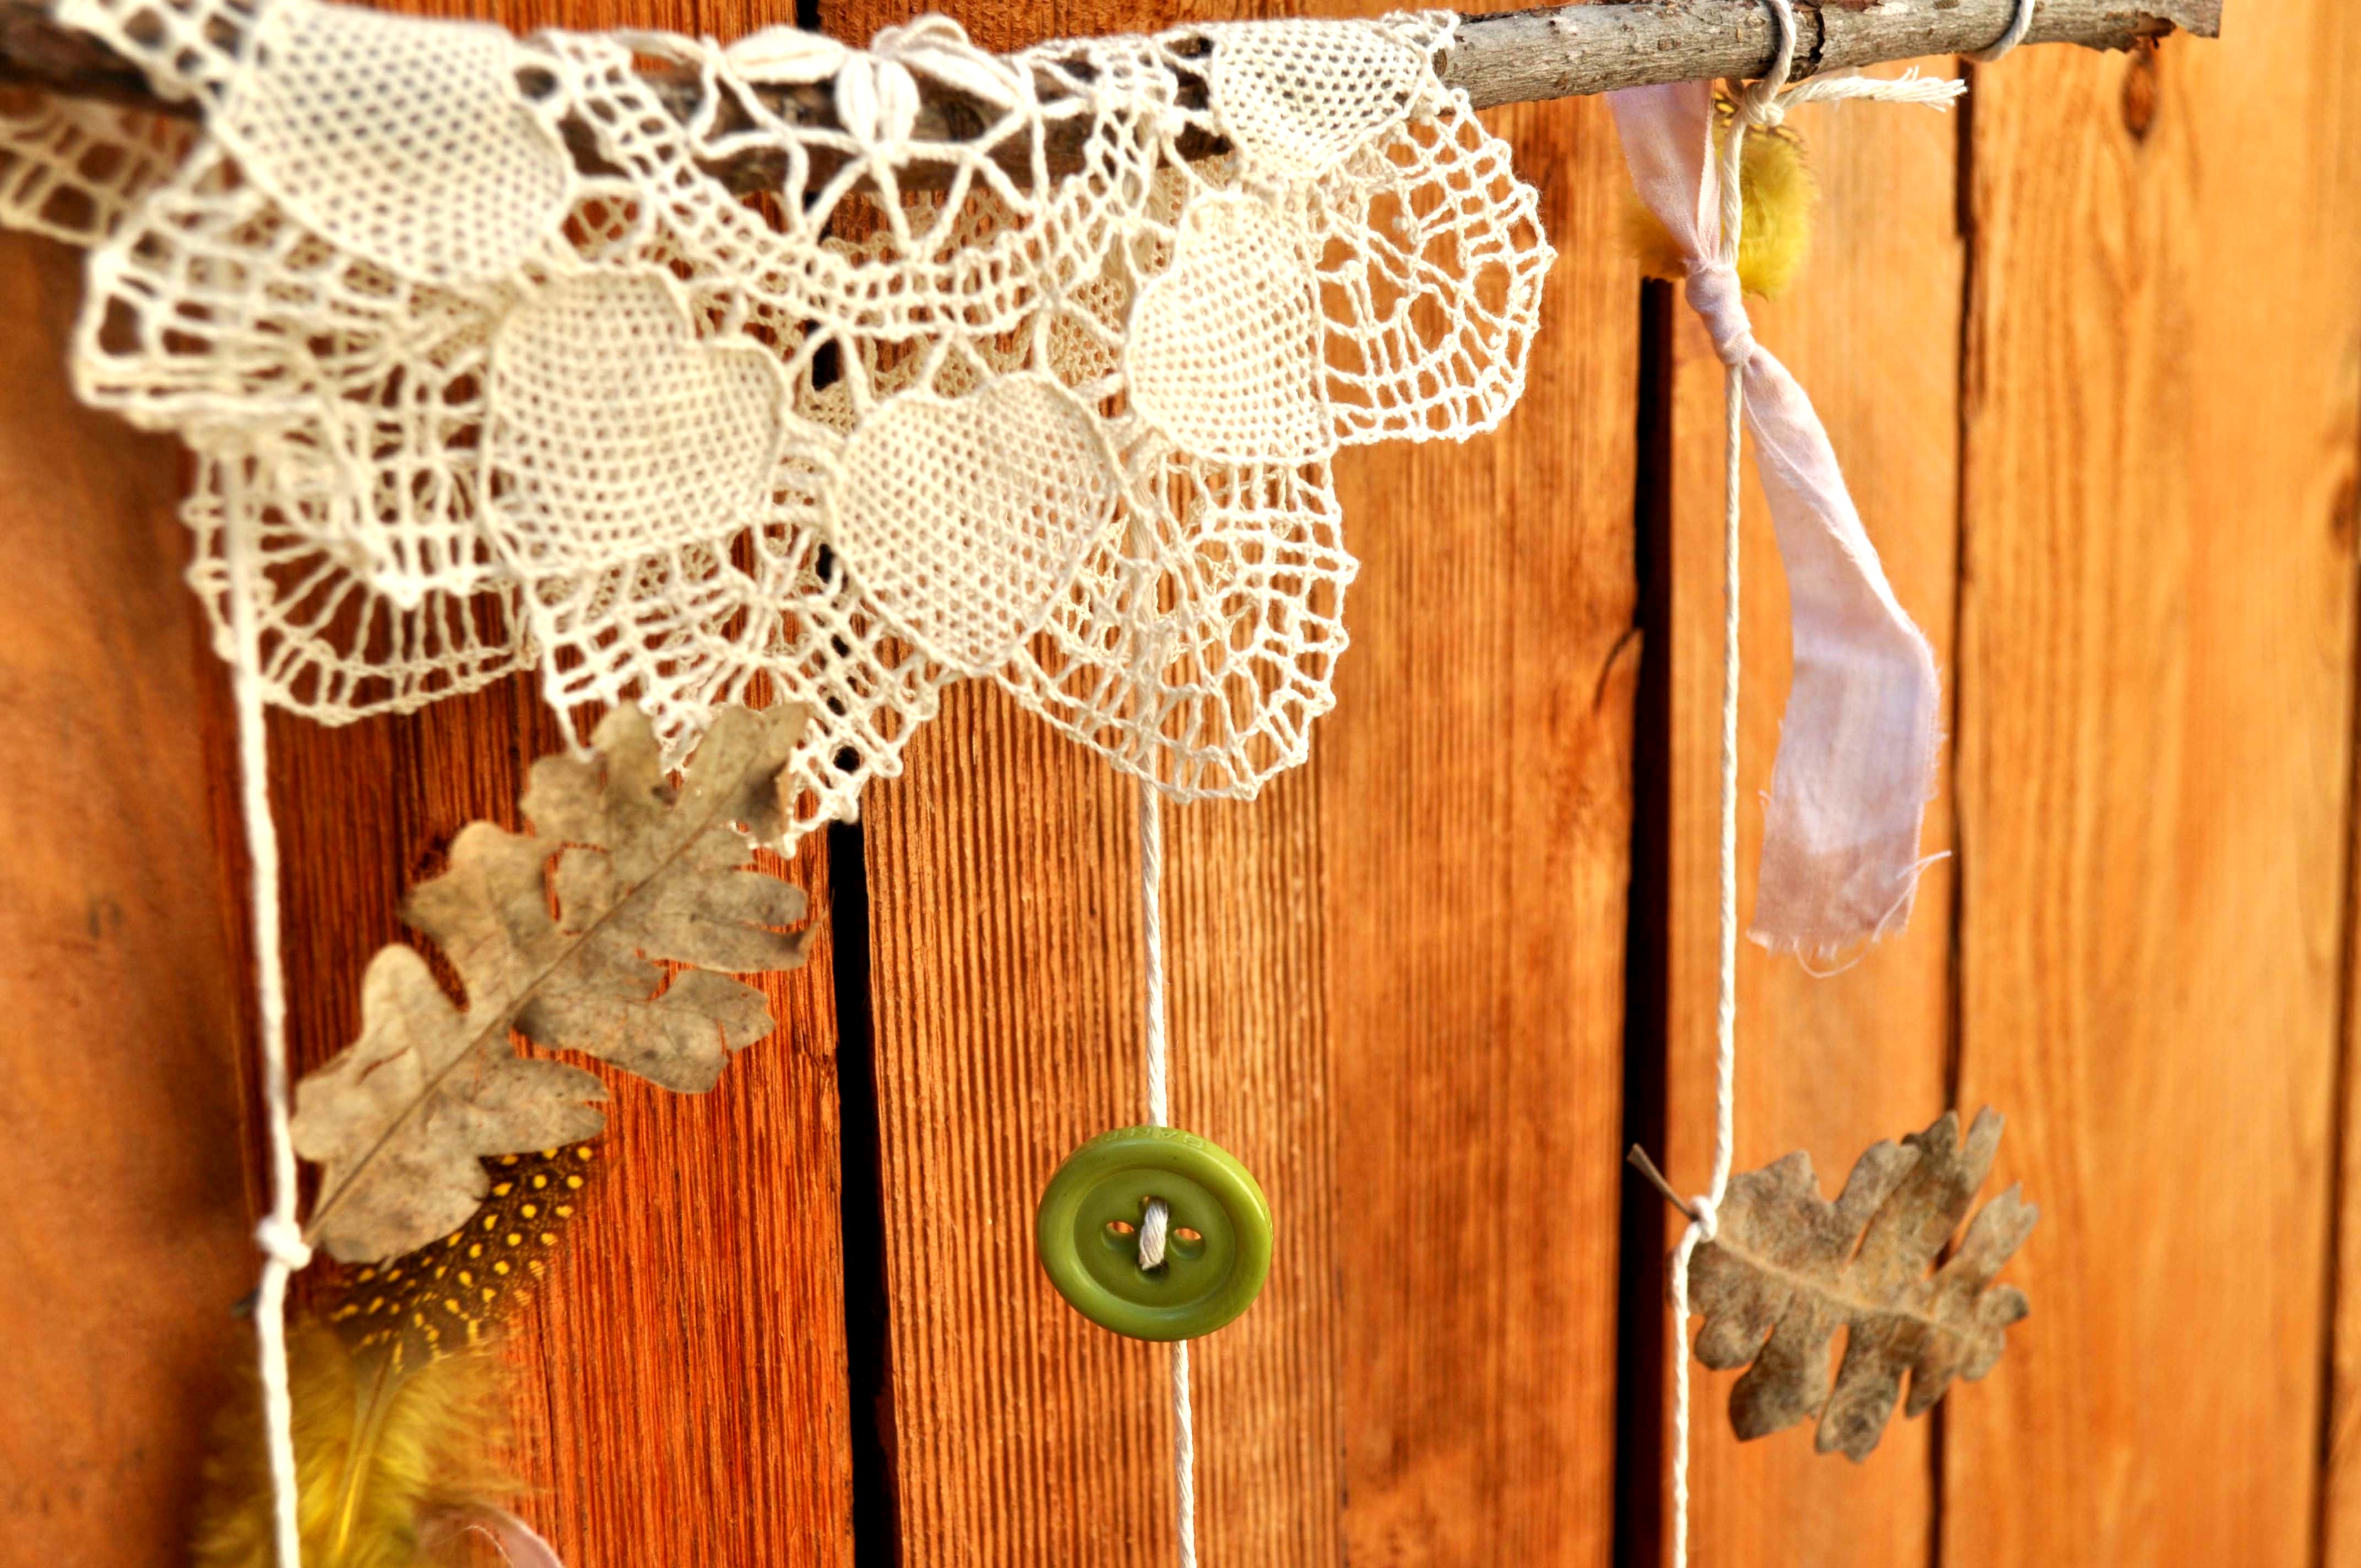
The painted leaves are pretty on their own, but the slate doesn’t really look finished without some dimension on it. I wrapped jute string around the bottom of the slate and secured it on the back with hot glue. The string provides “ground” that the leaves are falling to. Then I made a bow by twisting some string and attached it with some hot glue. I attached a button to hide the hot glue making the bow. Buttons are great concealers for glue and seams! Then, finally, in the bottom corner, I attached three more buttons. I like the repetition of the three leaves as three buttons for balance, and it provides a visual anchor for the other end of the string.

Argyle Button Tote

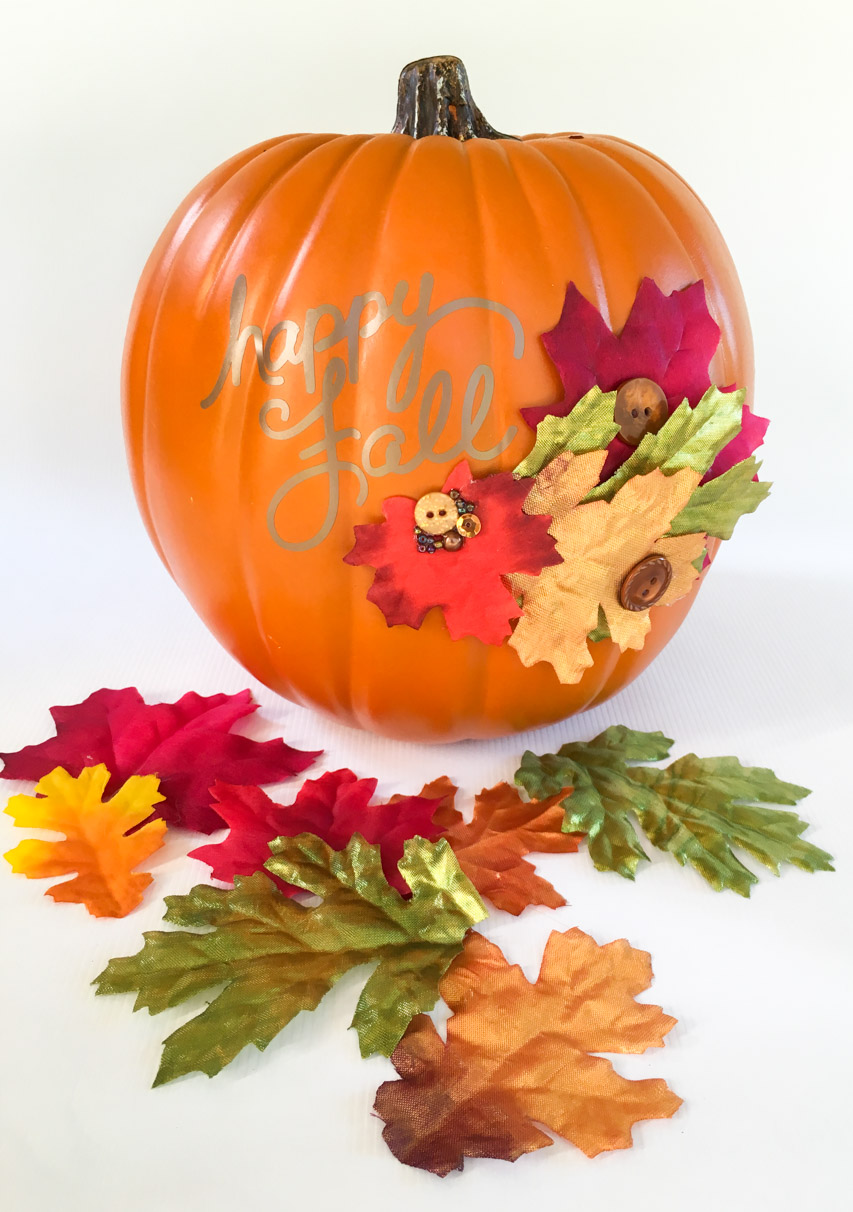
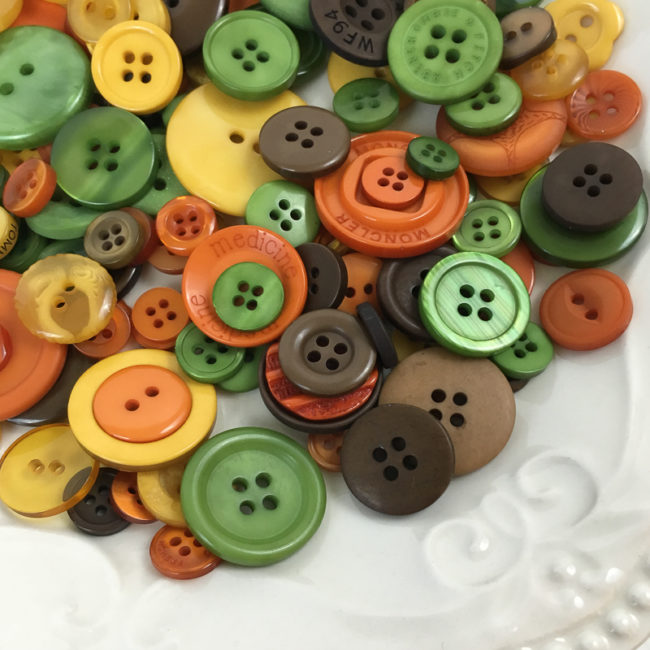
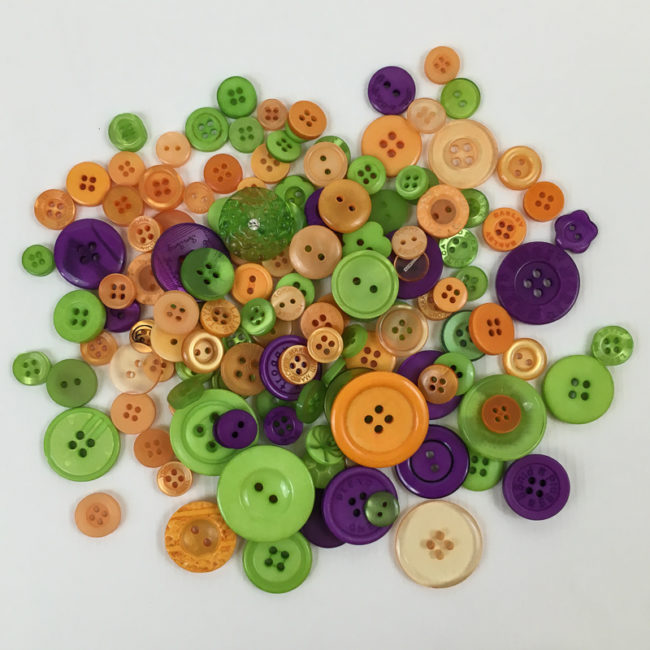
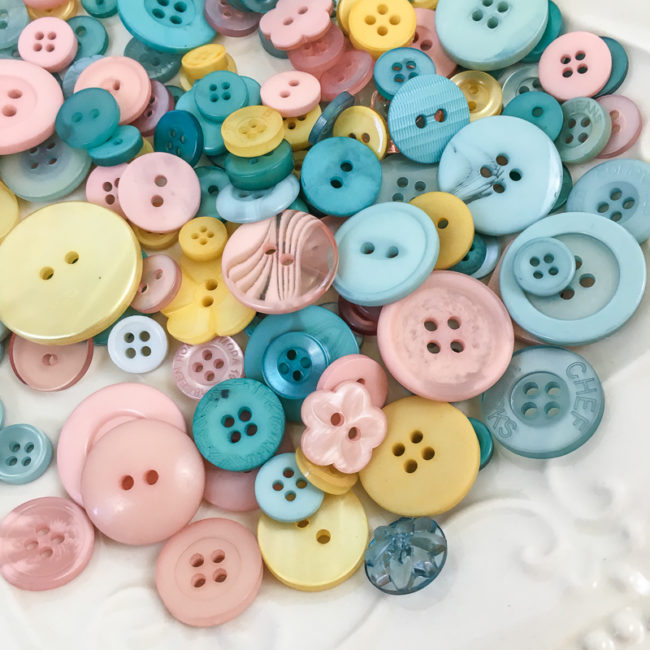
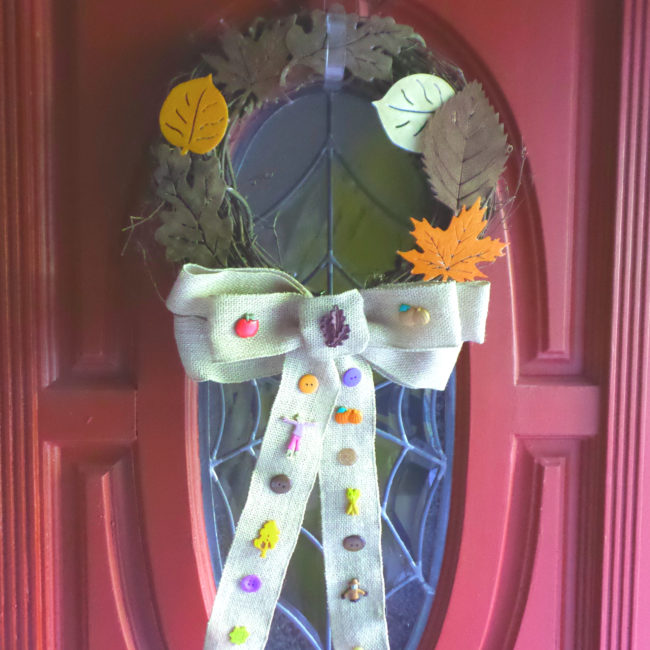
The buttons I used are from our “Argyle” Button Tote. With deep reds and greens, trendy navy, and neutral cream and black, the Argyle mix is a great selection to have in your creative toolbox for the holidays in the last part of the year! What will you use Argyle for?
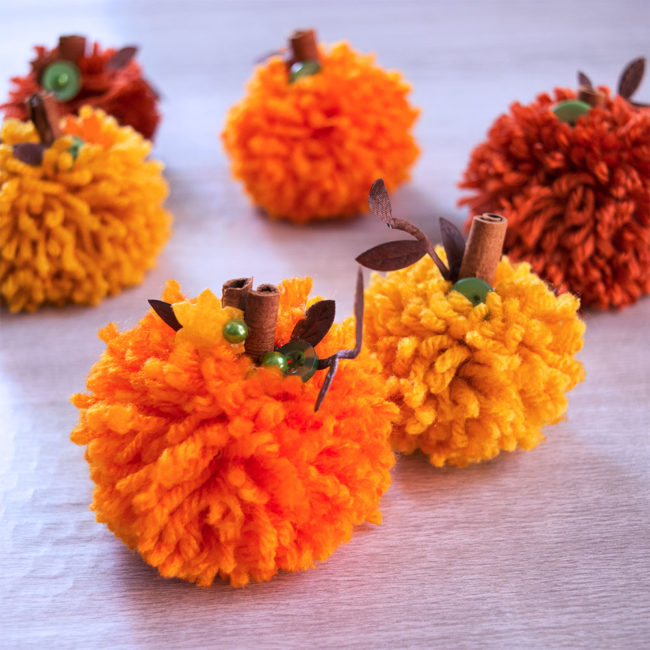
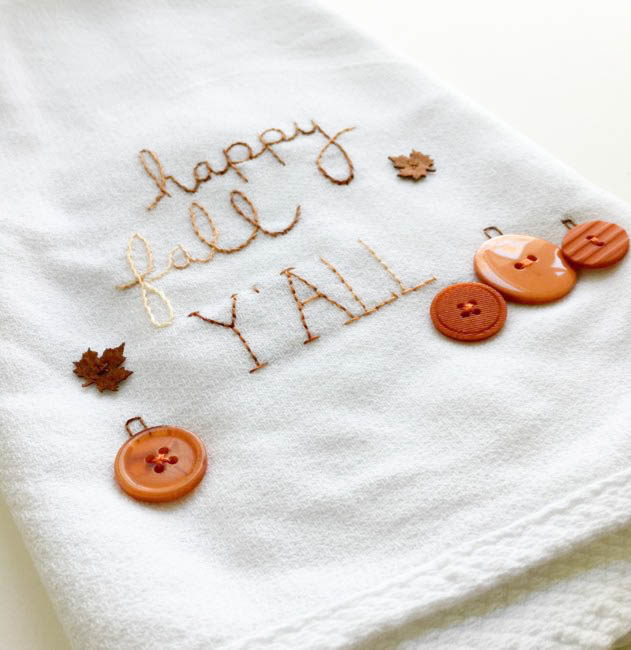
0

Simple Thanksgiving Centerpiece

A simple  Thanksgiving Centerpiece  – I made up in about 15 minutes using  Buttons Galore Carved Wood Buttons and supplies I already had stashed.  It seriously does pay off to hoard craft supplies.

This centerpiece happens to coordinate nicely with my Thanksgiving Dessert Table Decor that was featured on the  Buttons Galore Blog recently too.


BGMturkeycenterpiece


If I need to make up some quick and simple centerpieces, I always turn to making rosettes or finding something fun that can be stuck on a stick.


BGMturkeycenterpiece2


For this simple Thanksgiving Centerpiece, I added pines cones to a dollar store vase,  made a 3″ rosette, added a BGM Carved Wood Button to the center then used my Silhouette to cut out a  Turkey cut file.

If you don’t have access to die cutting machine,  you could easily add more Fall rosettes in various sizes to your centerpiece along with Fall leaves or any other festive decor you like.


BGMturkeycentepiece3


Everything just looks better on a stick right, right?  Plus, Buttons Galore Carved Wood Buttons ties the Fall decor  together  nicely.


Supplies Used to Make a Simple Thanksgiving Centerpiece:

For more Fall inspiration head over to my blog Ribbons & Glue.

newsignature

 Like Me on Facebook!

1

Nature Mobile

My family hikes or goes for a bike ride every weekend and, inevitably, we always return home with a leaf, feather, or pine cone.  The natural bits and bobs were piling up on the table, so I decided to create a nature mobile.  I love how we can now display our finds in a piece of artwork and nothing is glued down, so we can change it out whenever we want.

Nature Mobile Close-Up

Supplies:

  • Buttons from the Autumn Grab Bag
  • Twine
  • Twig
  • Doily
  • Leaves, acorn caps, feathers, anything you find outside that inspires you!
  • Torn pieces of muslin fabric dyed with Rit Dye in Tan

Nature Mobile

Instructions:

  1. Cut a piece of twine to about 16 inches in length.  Tie each end of the twine to the ends of your twig. Put aside.
  2. Cut pieces of twine to the length you like.  I love to cut mine and varying lengths to give the piece interest.
  3. Begin by threading buttons onto your twine.  I found that wrapping a piece of tape around the end of the twine makes it easier to push through the button holes.  Once the button is threaded onto the twine, move it along the twine to where you want it to hang.  Make a knot below the button to hold it in place.
  4. Tie feathers and leaves onto the twine.
  5. Tie torn pieces of dyed muslin onto twine.
  6. Once you are happy with the placement of your materials, tie one end of the twine to the twig.
  7. Repeat the process with at least two more lengths of twine.
  8. Once all the twine is attached to the twig, drape a doily over the twig.
  9. Hang on a wall, a tree outside, or even your ceiling.

Thanks for stopping by today.  Find out how to make another nature display on my blog, Laura Bray Designs.

Business Card Logo in Black copy

1

Fall Bear Card

I have had such fun looking at Fall papers and designs, and fell in love with this Fall Bear and decided to paper piece with buttons to make a Fall Bear Card.

Fall Bear Card


Supplies for making Fall Bear card:

 Instructions:

  1. Prepare a card base – 4.25×5.5 from Green Cardstock.
  2. Create a panel with patterned paper from Doodlebug Design. Wrap Bo Bunny dotted ribbon around this panel and attach panel to card base.
  3. Cut and prepare pieces. Assemble and adhere to card.
  4. Add Apple from “Off to School” assortment, “Micro Buttons” for the Eyes and tie some twine through the  “Heart of Color” button for the Bow.


2

The CSI Project Challenge Linky Party featuring Buttons Galore and More – Giveaway

CSI Project Schedule buttons

The CSI Project Challenge Linky Party featuring Buttons Galore and More – Giveaway

The CSI Project has partnered with us this week.  They have a set schedule of events and this week they will feature tutorials using buttons.  We are sponsoring a FANTASTIC GIVEAWAY – a $100 of goodies. To win the goodies you need to link to the linky party on the CSI site.  There are two other opportunities to win a prize – leave a comment on this page and we will do a drawing at the end of the week and one for our new facebook friends. Entries must be received by midnight November 10th, 2012.

Our design team will also have button projects posted on their blogs this week. Please stop by and visit them.

Sit back relax and grab your favorite cuppa.  We hope you will enjoy all the creative inspiration from both the CSI Project and from the Buttons Galore and More designers.


Each of

Powered by WordPress. Designed by WooThemes