
Welcome to our new Holiday Frame series! This is the first in a series where I will be creating interchangeable inserts for a photo frame to provide year round seasonal decoration for any room in your home!
This 8″ x 10″ frame can stay out all year round, and the interchangeable inserts can be easily filed away when the seasons change until it is time to use them again.
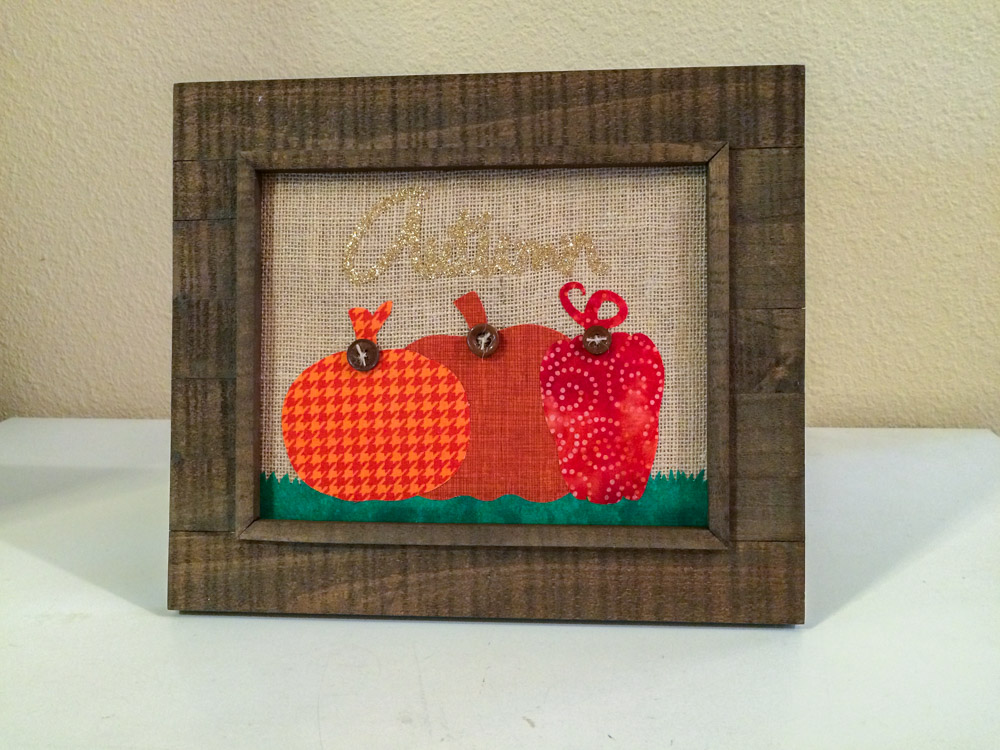
Our first design, with the word “Autumn” and pumpkins, can take you through the fall season and both the Halloween and Thanksgiving holidays.
Supplies:
- Burlap Sheet
- Cotton Quilt Fabric (green and orange)
- Heat-n-Bond Ultra
- Glitter Iron-on
- Cricut Explore machine
- Chipboard Sheet
- Button Bonanza in Natural
- Kraft thread or twine
- 8″ x 10″ frame
Instructions:
- Trim burlap sheet to 8″ x 10″ size to fit frame.
- Adhere Heat-n-Bond Ultra to reverse side of fabric by ironing. Cut out pumpkins with Cricut Explore machine.
- Cut strip of green fabric for the bottom of frame. Snip ends of it to look like grass.
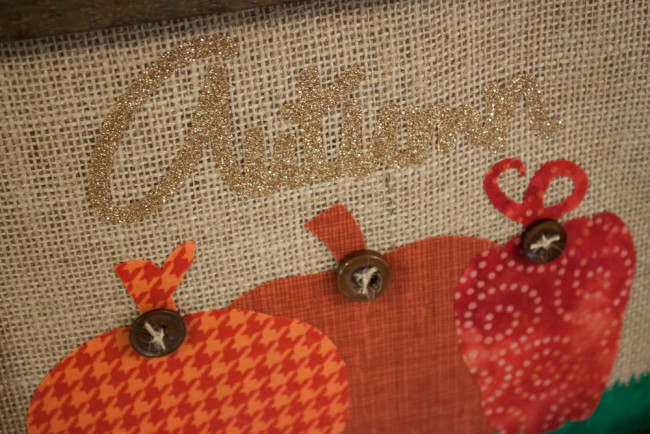 Cut the word “Autumn” from glitter iron-on material.
- Iron all of the cut pieces onto the background.
- Stitch buttons onto the pumpkins.
- Remove glass from photo frame. Insert the completed burlap sheet, backed with a sheet of chipboard to replace the thickness of the glass.
- Display and enjoy!

The buttons provide dimension to the design, as well as providing some brown that ties the design to the frame.
Come back in mid-November for the next installment in the series – for Christmas!
The following two tabs change content below.


Nancy Nally
Nancy Nally is the social media manager of Buttons Galore, and the owner of Nally Studios LLC., which publishes ScrapbookUpdate.com and CraftCritique.com.
Latest posts by Nancy Nally (see all)
- We’re blog hopping with Poppy Stamps! - September 28, 2017
- Announcing…New 28 Lilac Lane Premium Collection Sequin Tins! - June 30, 2017
- Announcing…the new Buttons Galore Design Team! - May 18, 2017
No comments yet.