Header

Tag Archives | frame

Make Easy Victorian Framed Art with Themed Buttons!

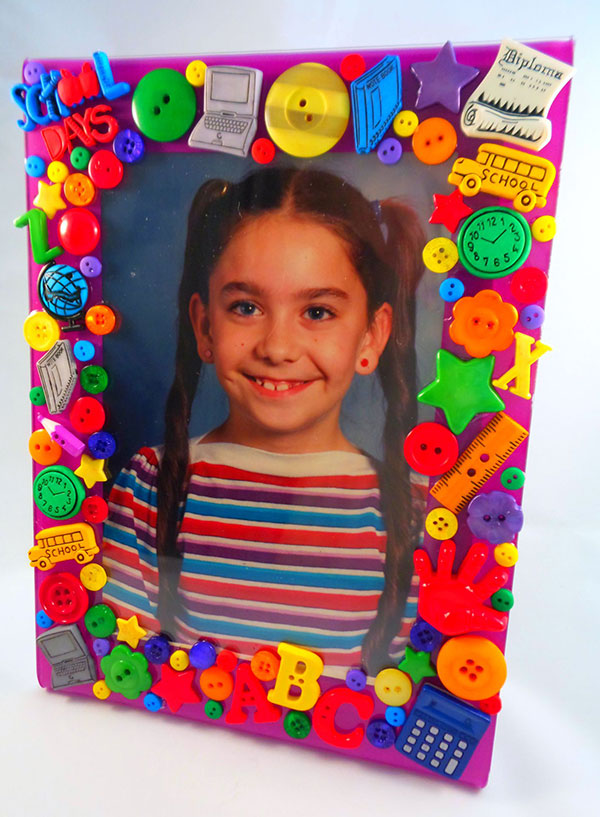
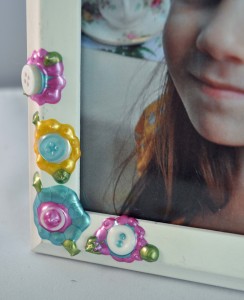
Hi, Connie here with the design team sharing a Victorian framed art piece using Victorian accents by Buttons Galore & More. The themed button selections were the perfect accent for this framed art piece. The beautiful thing about these Victorian accent buttons is that you can change the color so easily. Spray paint works great!

Victorian Framed Art

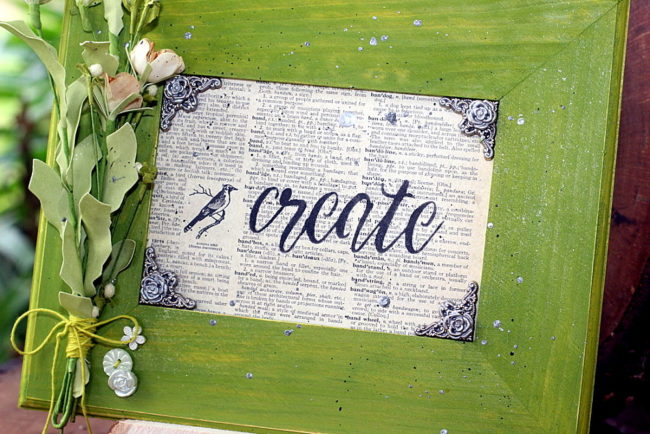
The frame was painted with acrylic paint and sanded to create a distressed finish for a vintage look and feel. The inside piece is vintage dictionary paper. I stenciled the paper with the word “create” in black acrylic paint. The silk flowers were wrapped with twine and then adhered to the side of the frame with strong glue.

Victorian Framed Art
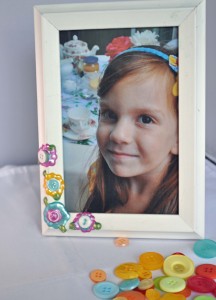
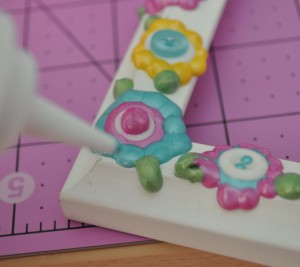
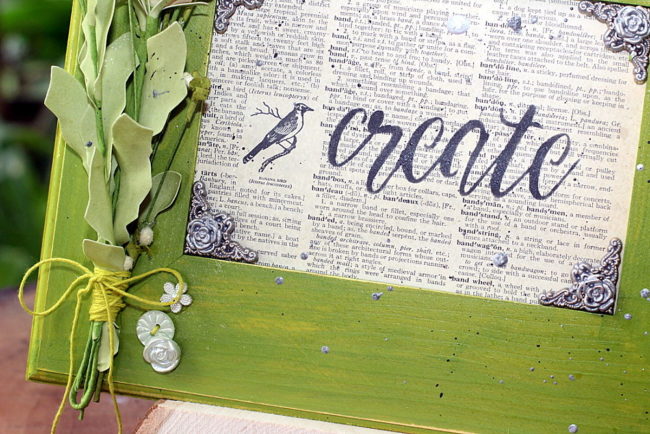
The Heirloom Keepsakes buttons were glued to the side of the flower cluster. They come in several different colors. I used the light green ones for this project.

Victorian Framed Art

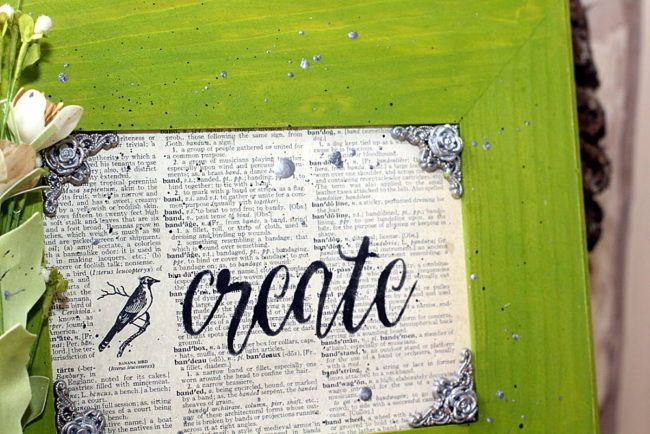
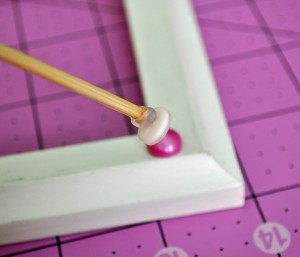
The Victorian Rose buttons and the Gold Filigree corners were spray painted a pewter color and adhered to each inside corner of the frame.  The Filigree corner was attached first and then the Victorian Rose button next.  The shanks were clipped off, using wire snips, to give a flat surface to adhere them.

To finish my Victorian framed art, the frame was splattered delicately with black and pewter paint. That process was achieved by spraying a puddle of paint, on a paper plate, and then using a toothbrush to splat the paint on the frame. It’s an old technique but still one of my favorites!

Supplies needed:

Thanks for stopping by~

Connie Mercer/DT Member

SaveSaveSaveSave

1

Celebrate Fall with a Festive Holiday Frame!

Welcome to our new Holiday Frame series! This is the first in a series where I will be creating interchangeable inserts for a photo frame to provide year round seasonal decoration for any room in your home!

This 8″ x 10″ frame can stay out all year round, and the interchangeable inserts can be easily filed away when the seasons change until it is time to use them again.

Our first design, with the word “Autumn” and pumpkins, can take you through the fall season and both the Halloween and Thanksgiving holidays.

Autumn Frame

Supplies:

  • Burlap Sheet
  • Cotton Quilt Fabric (green and orange)
  • Heat-n-Bond Ultra
  • Glitter Iron-on
  • Cricut Explore machine
  • Chipboard Sheet
  • Button Bonanza in Natural
  • Kraft thread or twine
  • 8″ x 10″ frame

Instructions:

  1. Trim burlap sheet to 8″ x 10″ size to fit frame.
  2. Adhere Heat-n-Bond Ultra to reverse side of fabric by ironing. Cut out pumpkins with Cricut Explore machine.
  3. Cut strip of green fabric for the bottom of frame. Snip ends of it to look like grass.
  4. Autumn Frame close upCut the word “Autumn” from glitter iron-on material.
  5. Iron all of the cut pieces onto the background.
  6. Stitch buttons onto the pumpkins.
  7. Remove glass from photo frame. Insert the completed burlap sheet, backed with a sheet of chipboard to replace the thickness of the glass.
  8. Display and enjoy!

The buttons provide dimension to the design, as well as providing some brown that ties the design to the frame.

Come back in mid-November for the next installment in the series – for Christmas!

0

Back to School Photo Frame by Lorrie McCullers

Today we’re joined by designer Lorrie McCullers, who is sharing a back to school project that is both a countdown calendar and school picture frame! 

It’s back to school time! And what better way to keep track of time until the big day than with a countdown frame?

back to school frame I used three sets of buttons for this project: the School Value Pack, the Primary Grab Bag, and the Primary Tiny Round Buttons. I also used a pre-colored acrylic frame so there was no need to paint!

buttons galore buttons

Supplies needed:

Buttons Galore School Value Pack
Buttons Galore Primary Grab Bag
Buttons Galore Primary Tiny Round Buttons
Deflecto acrylic 5”x7” frame
Aleene’s Liquid Fusion glue
button shank remover
dry erase pen
computer and printer (optional)

Directions:

  • Choose your larger buttons first. That way, you can fill in the empty spaces with smaller buttons.

  • Some of the buttons in the School Value Pack and the Primary Grab Bag have shanks on the back. To have your buttons lay flat to the frame, remove the shanks with a button shank remover.

  • Apply Aleene’s Liquid Fusion to the back of each button. Don’t apply too much or the glue will ooze out the sides of your buttons! Let dry for about 24 hours.

  • Print (or handwrite) a countdown for the first day of school, such as “____ days until school begins” or “School starts in ____ days!”

  • Keep track of the days with a dry erase marker. Acrylic frames are so great because you can just write on and wipe off!

school-picture-frame

After school starts, you can then use your project as a frame for that first day of school picture of your kiddo! Since the dry erase marker comes right off, you can use this frame year after year. This is a great project for kids to help with as well as a fun gift idea for a favorite teacher!

Lorrie McCullers is a paper crafts designer who blogs at Forty11 Designs. She is a Craft & Hobby Association Designer Member and currently designs for Etch All and Deflecto Crafts. To see more of her work, visit her blog

0

wooden pumpkin crafts – DIY a Photo Frame

PumpkinFrameF

Wooden pumpkin crafts are great for autumnal home decor.  I created a whole patch of pumpkins for display in my home.  I am in love with the pumpkin frame and the way it stands out in the patch.  I guess it is partially due to the adorable photograph I placed in the frame .  It is my oldest son and the photo is from 14 years ago, but I really do think the frame is adorable too.

WoodenPumpkins

Materials for Wooden Pumpkin crafts:

  •  The frame is from the dollar section in your local craft store.
  •  Rit Dye in two colors (Tangerine and Apple Green) liquid or powder
  •  Burlap trim, fabric scrap and rosette
  • AdTech Hot glue gun and glue sticks
  • Covered working area, rubber gloves and sand paper


FrameTrims

Directions to make the Wooden Pumpkin Crafts:

  1. Sand any rough surfaces.  Dust off any excess.  Dip dye the wooden frame in Rit Tangerine dye.  Allow the frame to dry completely on a covered surface.
  2. Dip dye the  trims in Apple Green Rit dye.  Allow trim to dry completely.   Use  the  hot glue to attach the trim around the frame to create a band.  Attach the fabric scrap strips as the leaves and tendrils on the top of the frame.
  3. Using the hot glue gun, create a stack of brown buttons to resemble a stem.


DyeingMaterials

I created a button stack for a stem with my Laura Kelly Bold Brown buttons and love the way the stem turned out.

Stem created with buttons dyed buttons for fall craft wooden pumpkin crafts

To find out more about making a whole patch of wooden pumpkin crafts, visit my blog post today.

Happy Decorating for Halloween,

Laura


2

Create a Cute as a Button Frame!

You probably know by now that I love all things bright, cute and floral.  I found a plain, white, photo frame in my closet and knew that plain just wasn’t going to cut it around here, so I grabbed a few bottles of Jacquard’s Lumiere 3D paint and some buttons and got to work.  The great thing about using the 3D paint is that it’s also an adhesive, allowing you to have a seamless look without dealing with a glue mess.  I also love how the paint squeezes through some of the button holes to give more interest to the design.

Supplies:

Instructions:

  1. The best way to create a flower design with paint is to use dots.  Squeeze a large dot of paint for the center of your flower.  While the paint is still wet, press a button into the center.
  2. For petals, simply squeeze dots around the center.  Try to use the same pressure when squeezing the bottle to ensure that the petals are roughly the same size.
  3. Once you have all your flowers on your frame, set aside to dry for 72 hours.  Put your favorite photo in the frame.


0

Powered by WordPress. Designed by WooThemes