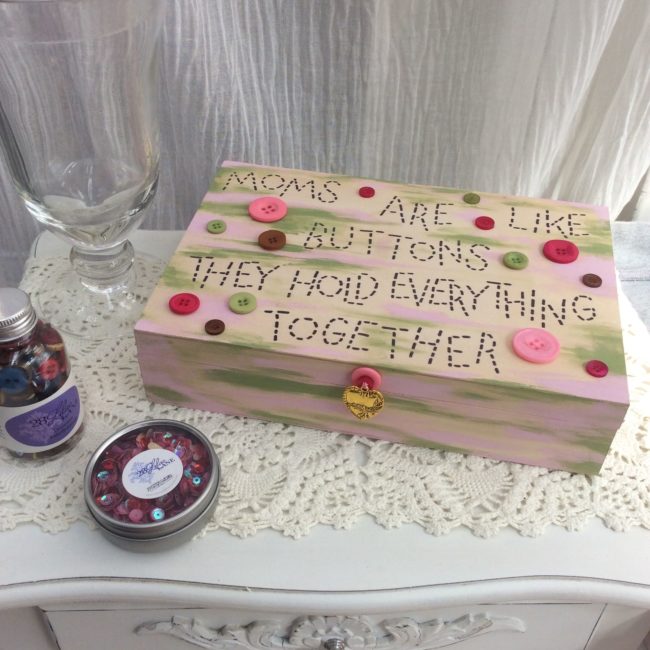
Here is an idea to keep Mom’s craft supplies organized. It’s both thoughtful and practical.

Here is an idea to keep Mom’s craft supplies organized. It’s both thoughtful and practical.
This is super easy! And you can do it with any word and any color sequins.
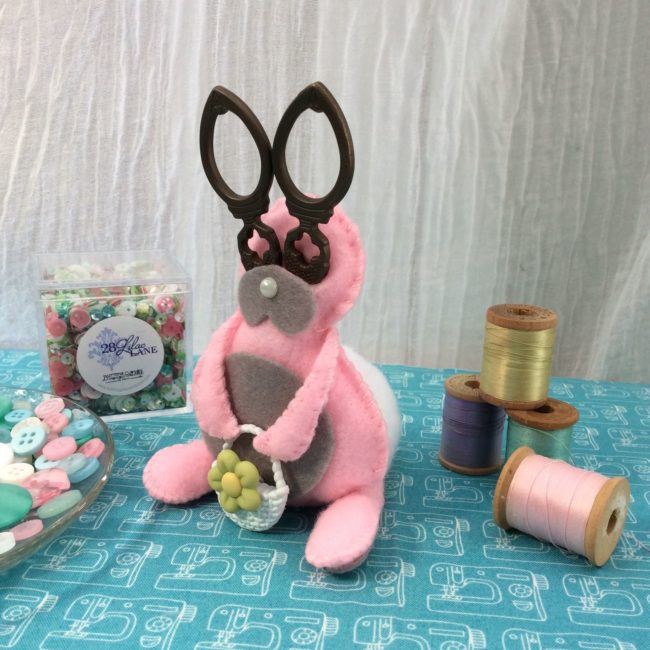
Making cute things to keep your sewing and crafting supplies handy on your desk can be fun.
I like keeping my scissors handy and I am also a big fan of vintage scissor cozies. I thought I’d make a scissor cozy by die cutting felt, stitching it up and embellishing it with novelty buttons from the Buttons Galore Spring Value Pack.
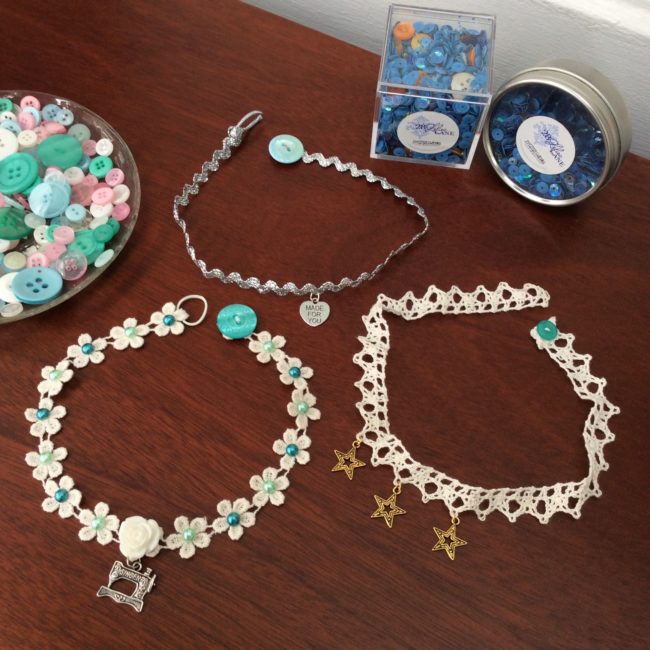
Make fun necklaces with the lace trim found in our 28 Lilac Lane Kits. It is easy to embellish the trim with the pearl flat backs, charms and resin flowers that can be found in each of our Embellishment Kits.
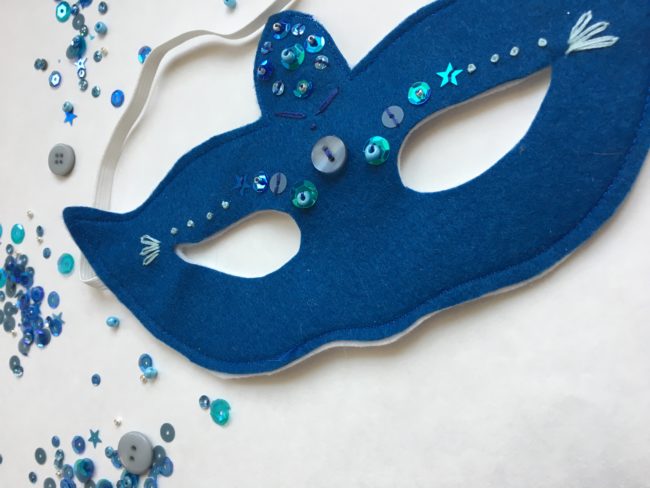
It’s Aimee here today for a little creative project to dress up your New Year’s Eve! (Although I’m still in denial that the holiday season is upon us in general.) This DIY New Year’s Eve mask project can be made with or without a sewing machine and is a great project for a novice stitcher – or even little hands wanting to get busy with a needle and thread. Continue Reading →
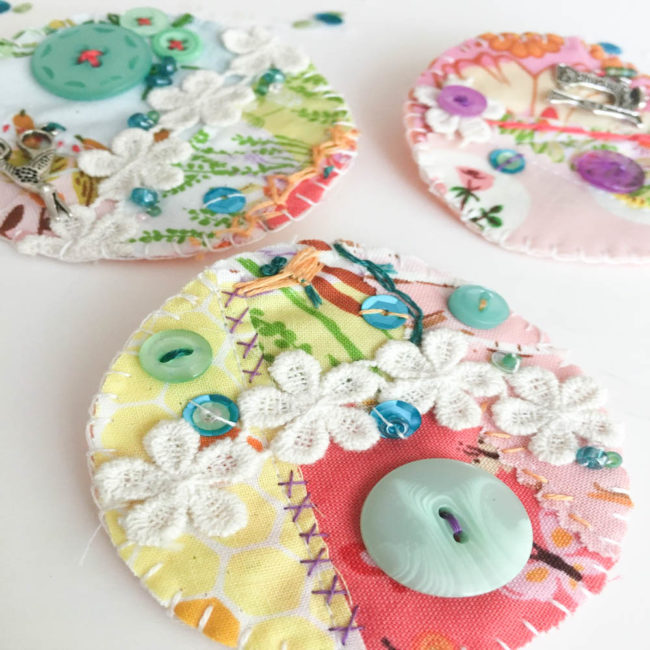
These little crafty brooches make a great quick and easy gift for the lady in your life who loves to sew and create. Use up some scraps of fabric, spread your creative wings and add some bling with a sweet 28 Lilac Lane embellishment kit.

Here’s the supplies you will need:
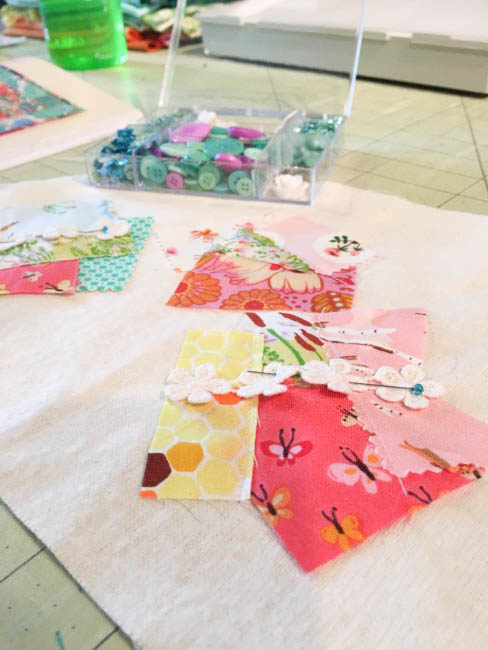
First, I laid out my backing fabric (I used a thicker cotton muslin that I had in my stash, but just a general cotton or even felt would work fine too). With a jar lid I had, I traced an outline of my circles onto the top of the fabric. Then I gathered up some various scraps of fabric and laid them out within the outlined circle. I used my sewing machine to sew down a few of the seams, but this could easily be done by hand with just a back stitch using a single strand of embroidery floss.
Next up, I laid out different elements from the 28 Lilac Lane “Sew Crafty” embellishment kit. The kit includes some trim, sequins, beads, buttons and a few charms. The trim lends itself greatly to being used as a typical trim or even cutting off each flower individually. This is where you can be creative and every brooch you make will be different!
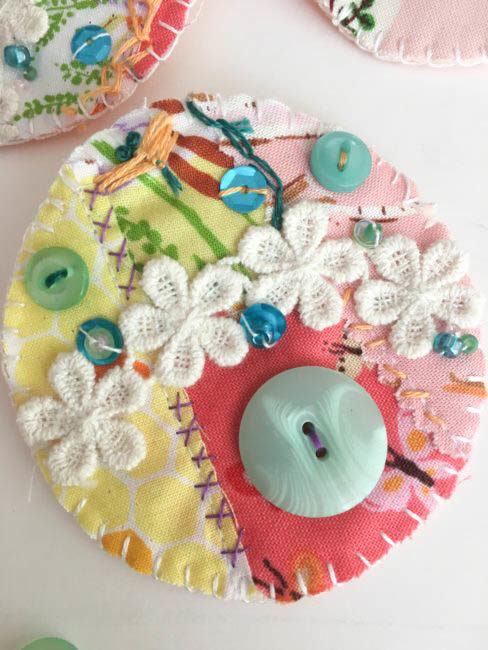
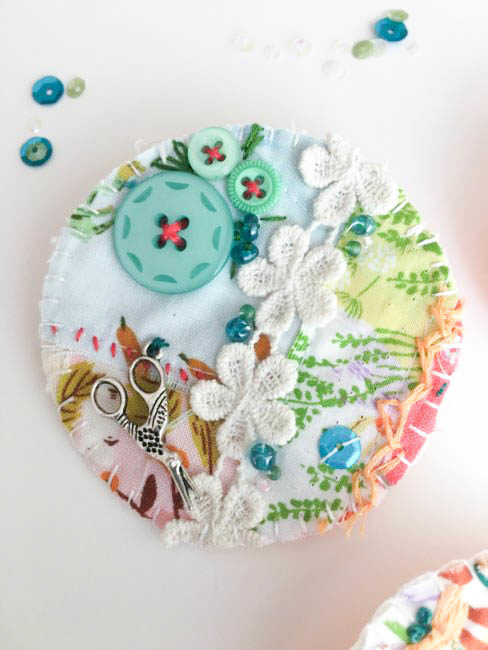
On a few of the seams I chose to add some simple embroidery stitches. I used two strands of divisible embroidery floss for all of my stitching. I made simple X’s, seed stitches, and a chainstitch. I sewed down the trim with a single strand of white embroidery thread and just stitched down on the flowers where the stitches won’t be seen.
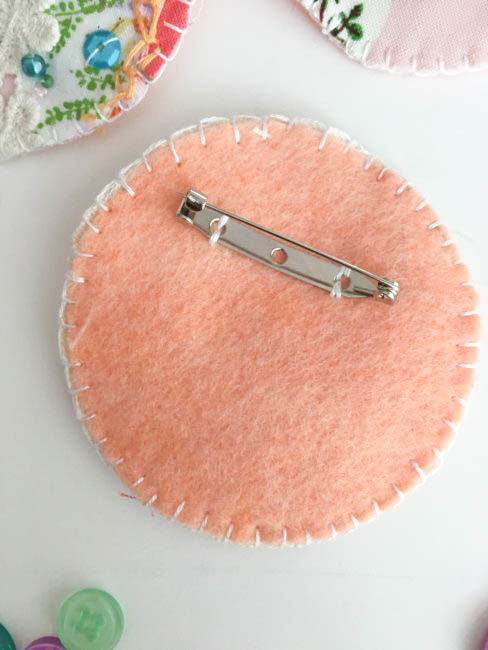
To finish out my crafty brooches, I took some felt and using the same jar lid cut out the felt and the brooch circles. The pin backs I used can be either sewn or glued down. I sewed down the pin back onto the felt.
Finally, I matched the top and backs of the brooches with wrong sides together. The brooches were sewn together using a buttonhole stitch to stitch the two layers together around the edge. There you have it!! Sweet little crafty brooches ready to wear!
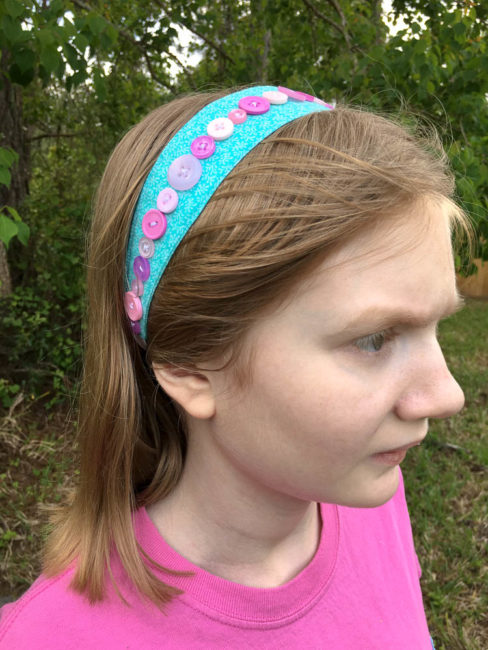
Adding buttons is a beautiful way to add some color and detail to just about any clothing item. On this button headband that I made for my daughter, the buttons create a pretty pink contrast to the turquoise and add some shine and texture.
Supplies Needed:
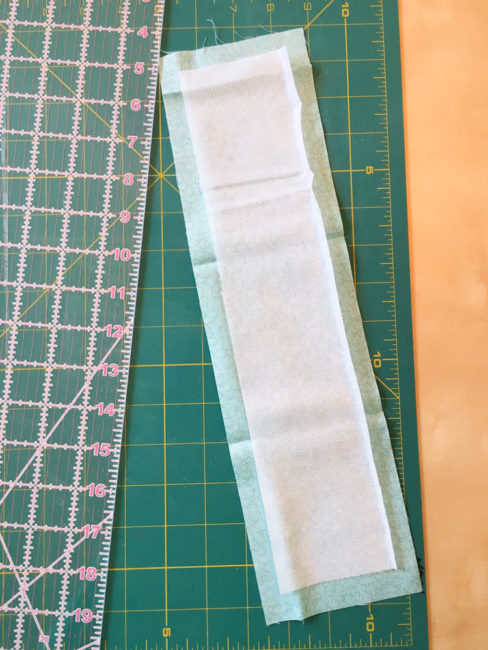
This project is a great way to use up scraps! To begin, I cut a 14.75″ x 4″ piece of quilt fabric. Then I cut a 13.5″ x 3″ piece of the interfacing. I then took them to my ironing board and followed the package directions to fuse the interfacing centered onto the back of the fabric. Before turning my iron off, I folded the piece in half along its length and ironed that fold in place as well.
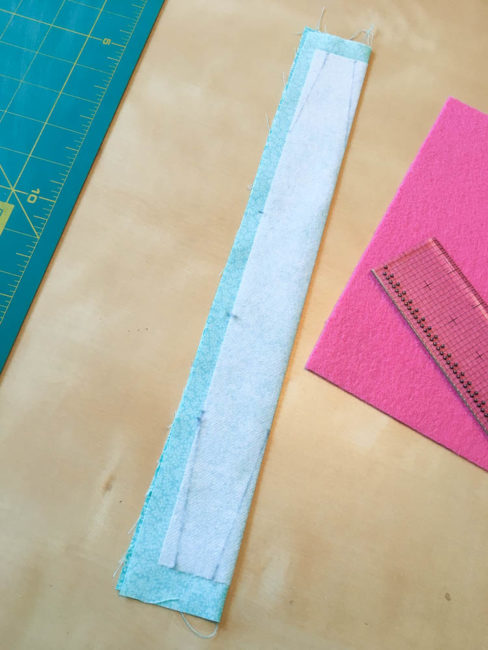
Then I returned to my sewing table and got out my ruler and a fabric marking pencil. I marked dots 3″ from the ends of the interfacing on each side, and marked a .75″ wide measurement centered in the middle of the interfacing’s narrow end. Then I used these markings to draw lines to follow to create the taper on the ends of the headband. I also made some markings to show where my sewing should stop on the long edge that isn’t folded, so that the headband could be turned right side out.
Next I measured around my daughter’s head and figured out how much elastic it would take to make the headband fit her nicely. To figure this out, I took the measurement of her head and subtracted the length of the interfacing (which would be about the finished length of the headband). That gave me the distance that the elastic needed to cover. Then I added about a half inch to that number and cut my elastic to length.
I laid my elastic inside the folded fabric with the ends sticking out between the two lines that I had drawn. I then pinned it into place to hold it securely into position while I sewed.
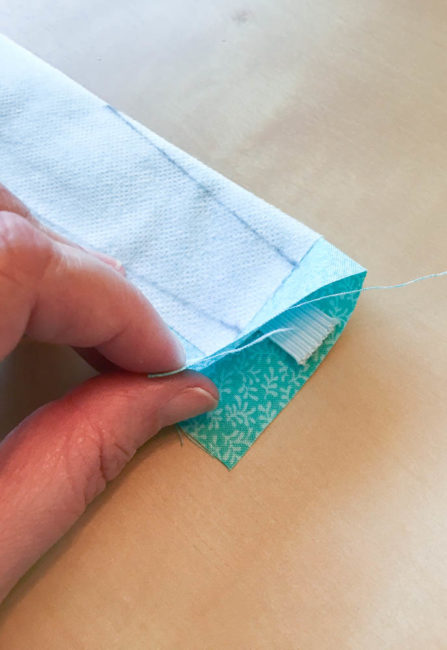
I then sewed on the lines I had drawn and across the end of the headband, reversing across the elastic a few times to make it extra secure.
Then, I pulled the fabric so it was bunched up on one end of the elastic, positioned the other end of the elastic, and pinned it in place to sew.
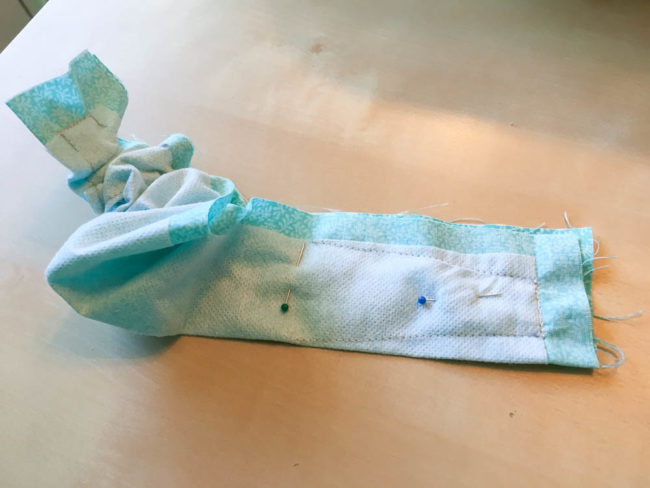
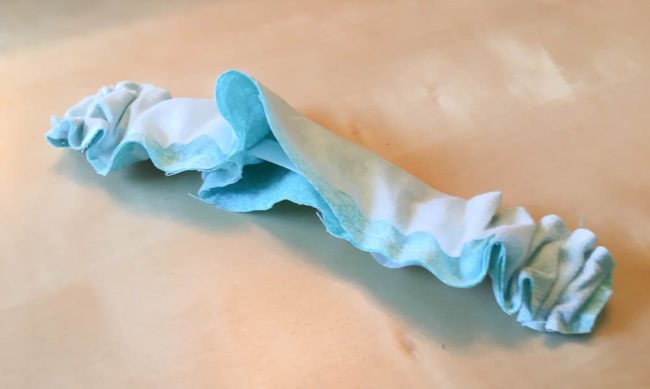
When I was done, I was left with a fabric tube with a hole in the side that was being gathered up by the elastic inside of it.
I used the opening I had left to turn the headband right side out, and after a bit of pressing, was able to fold under the raw edges of the opening and pin them together.
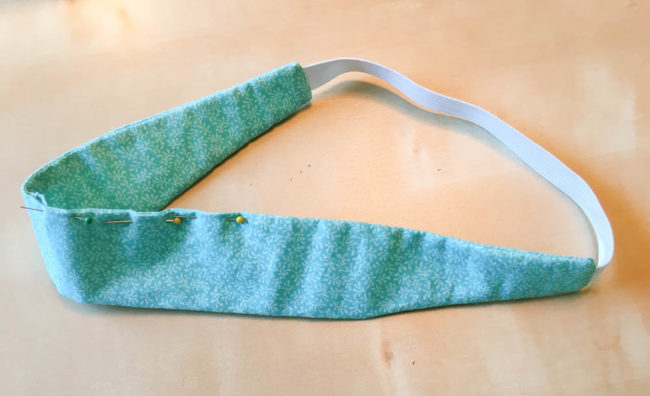
To seal the opening and make the edges of my button headband lie nice and flat, I topstitched around all the way around the edges on my headband. My headband was done…but very plain!
So to fix that, I sat down with a container of the “Strawberry Cheesecake” Color Blend buttons. These shades of pink range from bubblegum to barely there, but all are gorgeous! They are perfect for projects for little girls (and big girls) of any age. I got out a needle and thread, and one and a time sewed a row of buttons along the length of the headband. Yes, by doing this step last the sewing will show on the back side of the headband, but it won’t be visible while being worn. And doing the sewing after the headband is finished makes it easier to ensure the buttons end up exactly in the center, which is a detail that will be seen.
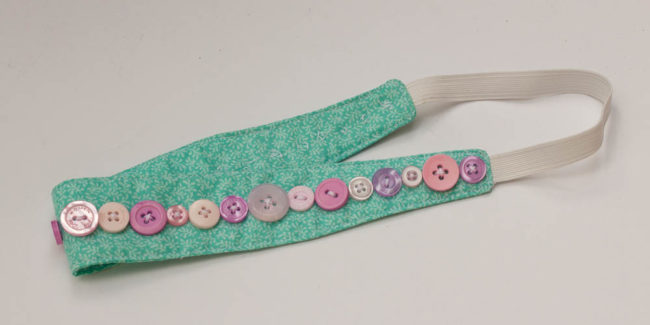
This button headband project is slightly time-consuming but definitely worth the effort! My daughter doesn’t want to take off her beautiful new accessory, and buying a similar one in stores would be much more costly. DIY a button headband for someone special today!
Needles are easy to lose, and not the sort of thing you want to find accidentally in your sewing box (or on the sewing room floor). Our pretty and easy to make needle book will keep your needles safely organized and ready to use any time that you need them!

Supplies:
This needle book can be make in any size that you would like! Cut 2 pieces of felt the same size for the interior pages, and then cut a piece of fabric that is slightly larger than the felt to make your cover with.
 Start construction by working on the piece of felt that will make the inside of the cover (mine is pink).
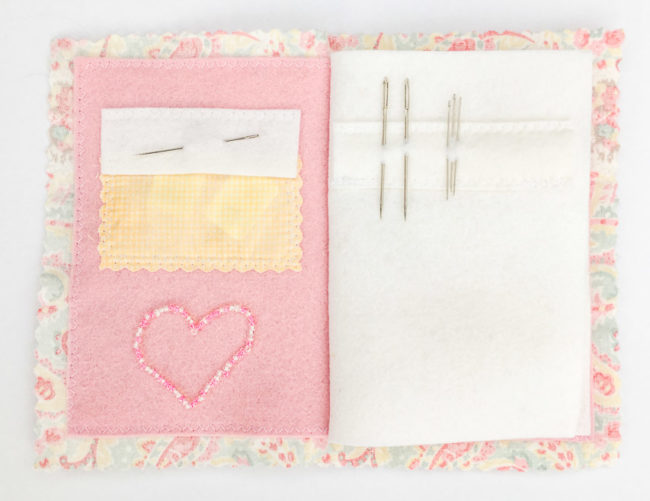
Use pinking shears to cut a small pocket and sew it to the upper left side of the piece (inside the front cover). This will serve as a pocket for needle threaders! To keep them from falling out, cut a flap of felt and stitch it over the top of the pocket.
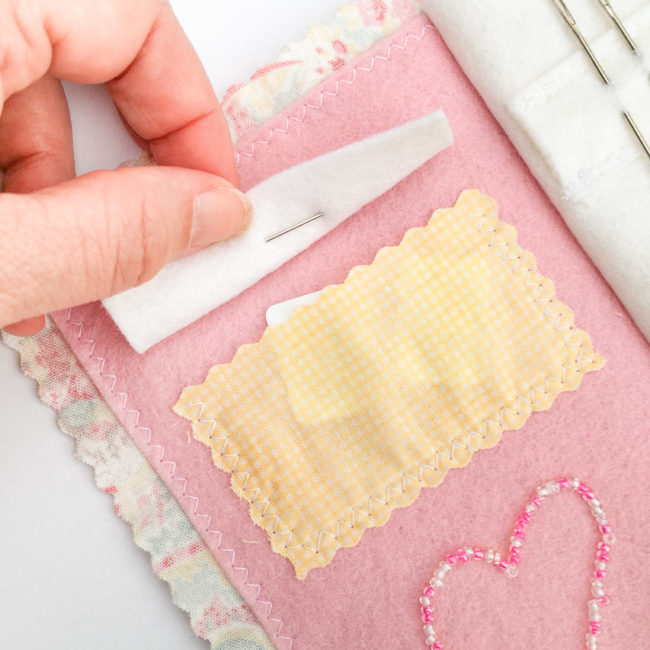
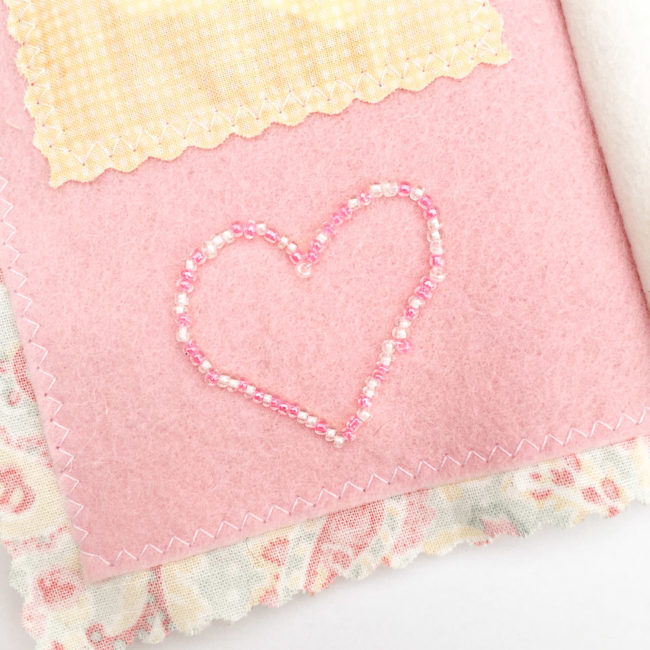
Below the pocket, draw a shape with a fabric pencil. I chose a heart. Use a needle and thread to sew seed beads onto the shape using backstitch.
When the inside of the front cover is done, center the pink felt on the reverse side of the cover fabric. Pin in place, and machine sew using zig zag stitch or by hand.
To create the center page, cut 4 small strips of felt slightly shorter than the width of your pages. (My strips are 1″ high.) Pin them so two strips make a “sandwich” of the page, and one set of stitching will attach both strips. These strips will allow you to put needles on the book’s pages without them going through to the other side.
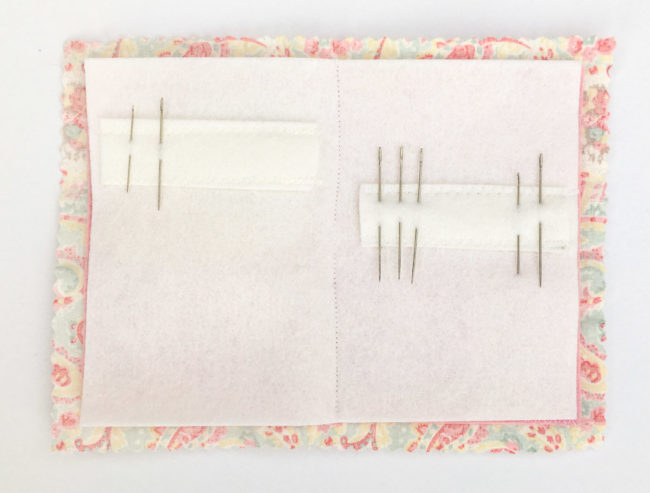
Lay the center page on top of the cover and stitch up the middle to bind your needle book.
For the final touch, finish your needle book’s cover by die cutting a piece of felt to make a flower. Use the flower and buttons from the 28 Lilac Lane “Hello, Cupcake” kit to embellish the cover. Attach them by sewing them through only the fabric layer of the cover so the stitching won’t show through to the inside.
This needle book is a great way to use your scraps, or to make a gift for a sewist or quilter! Putting pockets on all of the pages would allow it to hold packets of machine needles. Sewing in strips of Aida cloth instead of felt to slide the needles into would turn this into a great organizer for cross stitch and embroidery needles!
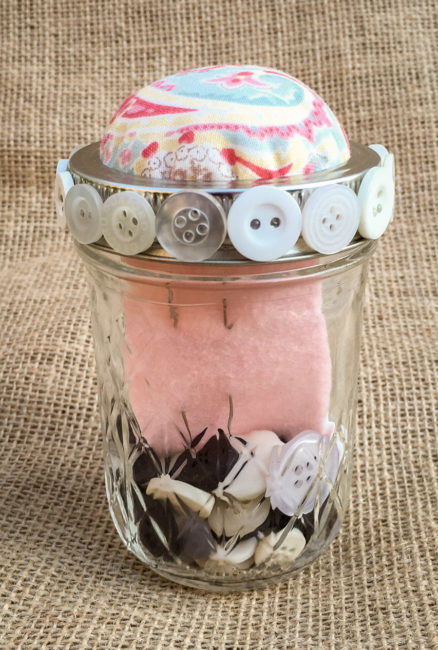
Mason jars are so trendy and so useful. They are perfect for making fun (and affordable) little gifts, like this mason jar sewing kit with a pin cushion top. And this project has another bonus – it’s perfect for using up those fabric scraps you just can’t part with!
Supplies:
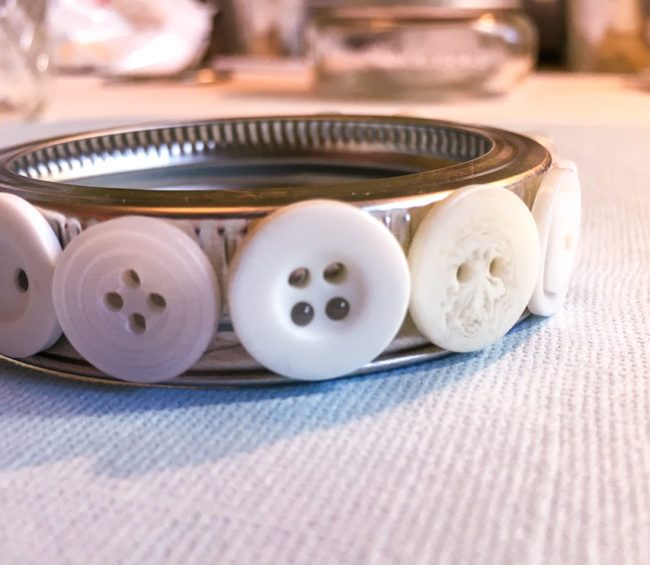
To begin this mason jar sewing kit project, take the ring off of your mason jar. Select buttons from the Haberdashery collection that are approximately the height of the ring. Using the hot glue gun, attach them around the ring. The trick to getting the spacing even is to start adjusting with several buttons to go – select slightly smaller or larger buttons as needed to fill in the remaining space as evenly as possible, and then space them slightly apart if needed to avoid leaving a large gap at the end.
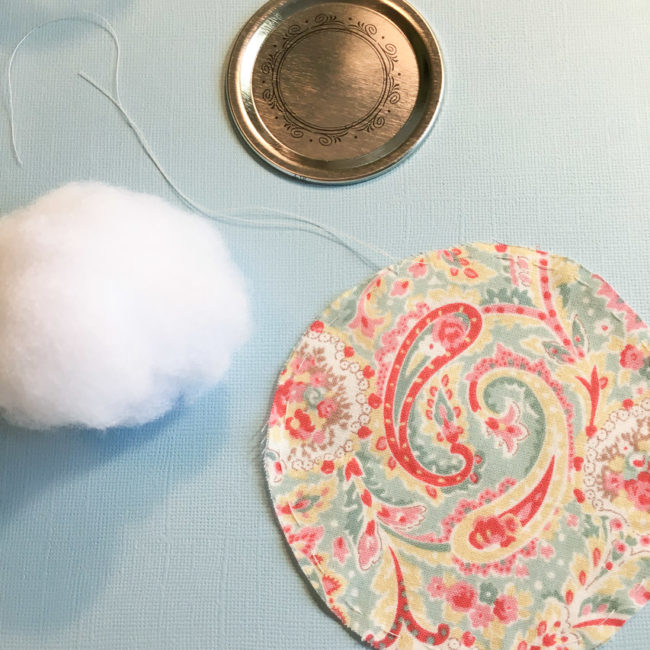
Once the ring is done, cut out a circle of fabric that is about 4.5″ in diameter (if you are using a regular mouth mason jar). Baste around the edges of it to create a gathering stitch, and leave the thread ends hanging. Ball up a a large wad of fiber fill and compress it so it is smaller than the jar lid.
Place the fiber fill on the top of the jar lid. Place the fabric on top of it – right side up – and then flip the entire thing over. Make sure the fiber fill stays bunched in the center of the jar lid! Pull the stitches to gather the fabric. When it snugs tightly onto the back of the jar lid, tie off the ends.Insert the lid with the fabric & fiber fill attached back into the ring and check its fit on the jar. There should be no fiber fill underneath the edges of the ring to ensure the lid screws on all the way. If it fits properly, use the hot glue gun to put glue under the edges of the fabric to seal it to the back of the lid. If the ring will not seal onto the jar, adjust the fiber fill away from the edges of the lid and try again.
The final step is to fill the jar with sewing supplies! A selection of buttons from our Buttons Galore Neutral Button Tote makes a great assortment to have on hand for replacing lost buttons on clothing. Add in a scrap of felt with some needles attached and a spool of thread, and you have an emergency mending kit with a top that will hold pins or needles!
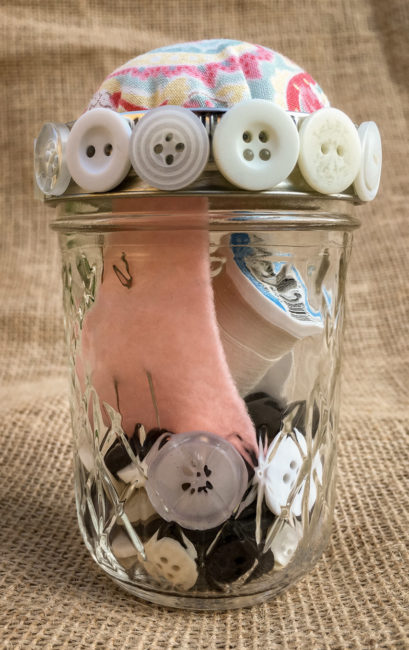
This is a great gift for a bride, a student leaving for college, or someone setting up house for the first time. For a more advanced sewist, fill the jar with buttons, pins, or other sewing necessities to create a handmade gift they’ll enjoy using regularly.
Regular readers of the site may remember this delightful zip pouch that I made last fall during the Handmade Holidays blog hop. It is from a pattern called Everyday Zips by Joanna Figueroa of Fig Tree & Company, available online or at local quilt stores.

Making the pouch was so simple and fun that I decided to make another one for the trade show booths in January…this time in a spring color scheme, and with a few modifications. Because you can never have too many zip pouches, right?
Supplies:
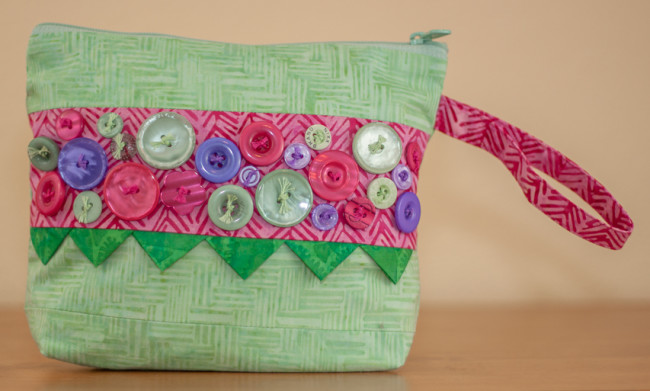
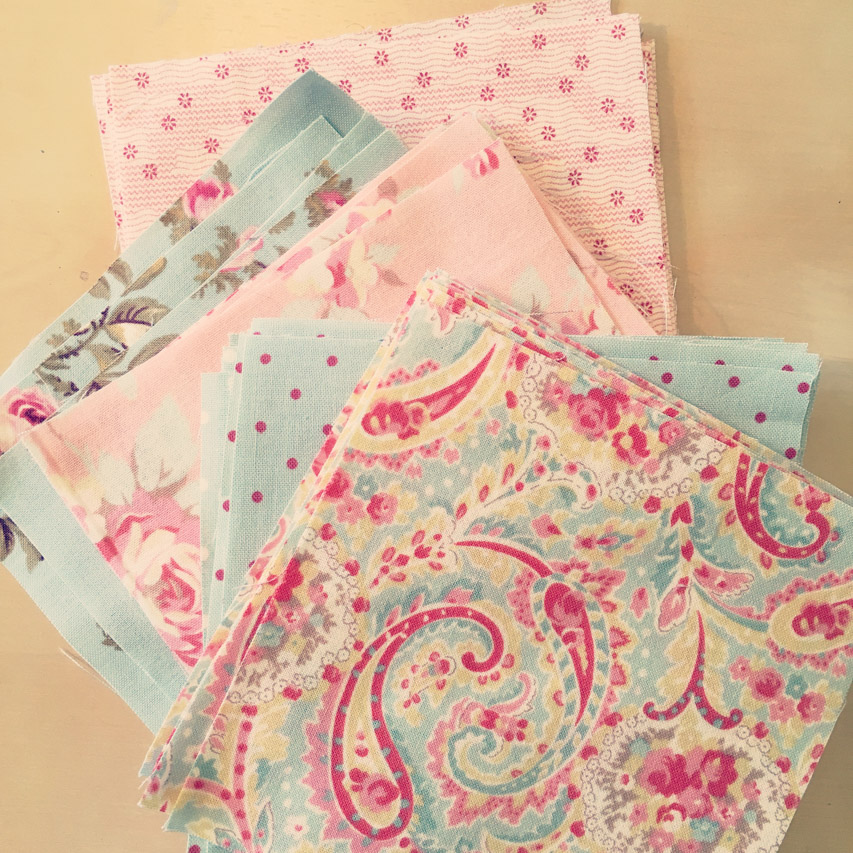
For this version, I created a totally different look. Instead of vintage style neutrals, the new design used batik print quilt fabric in spring colors. The light green fabric was used for both the exterior body and for the lining. The bright pink contrast panel and the green prairie points create an impression of leaves surrounding flowers.
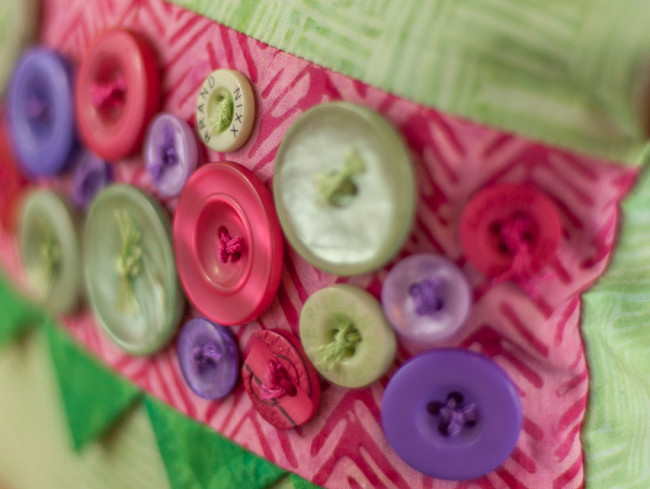
Instead of just a few button accents, the spring zip pouch has a whole collage of buttons decorating its front panel!
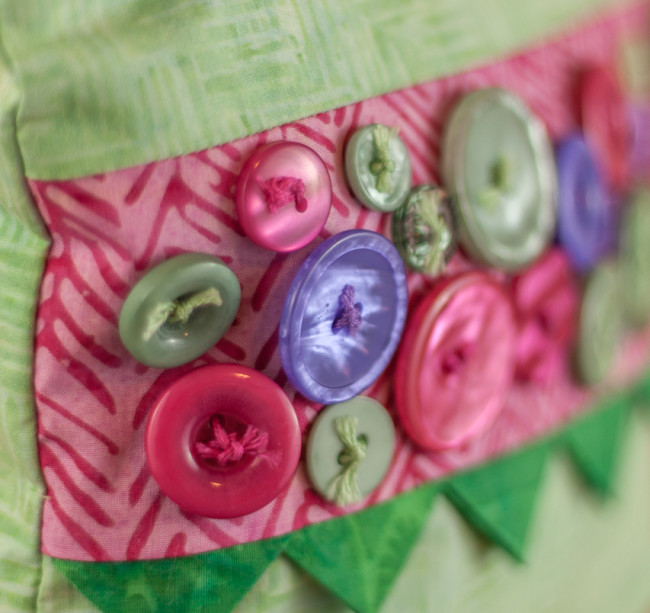
As well as adding buttons, I also took something away from the front of the pouch. You might have already noticed that the zipper pocket isn’t on the front of the new design of the pouch. Removing it simplified the sewing of the pouch and made room for the large decorative button collage.
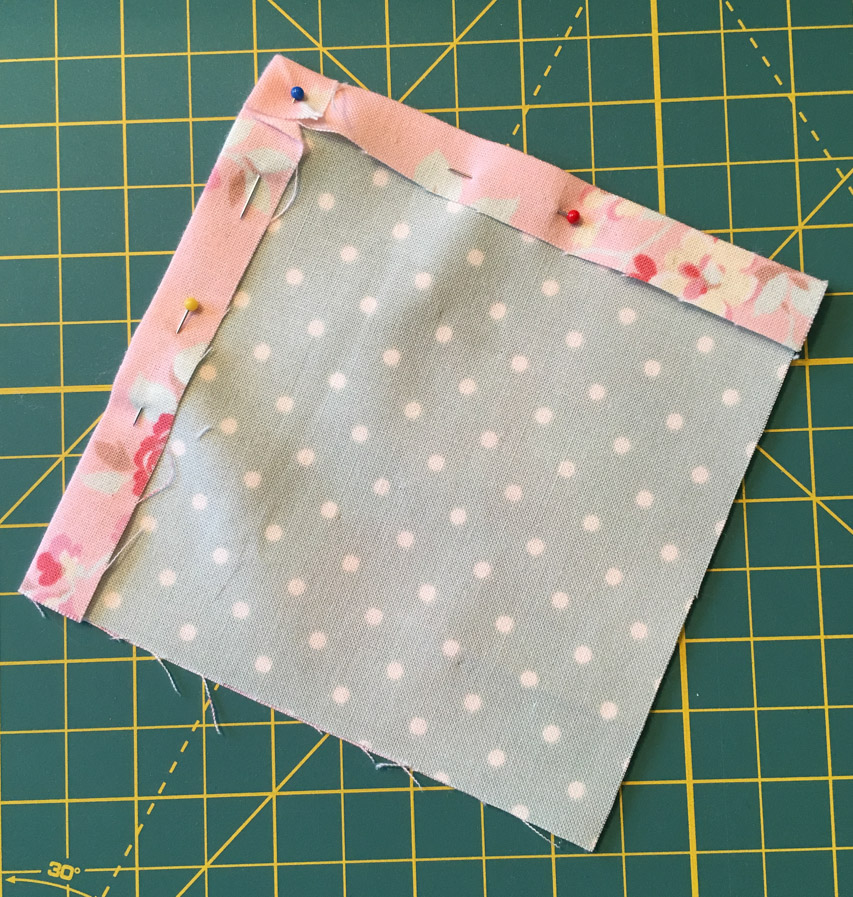
Making the change to remove the zipper from the panel was easy. I measured what each of the three pattern pieces for this panel would be in height after the seam allowances were removed. Then I added those three numbers together, added the seam allowance to the top and bottom of it. That gave me the new height I needed to cut my panel to. (The width is provided by the pieces for above and below the zipper.) Using those dimensions, I created the new pattern piece. The piece I ended up cutting was 3″ by 9.5″. I then simply skipped the steps in the pattern dealing with installing the pocket zipper and the pocket lining.
Zip pouches make great gifts for Mother’s Day, birthdays, and teacher appreciation! What occasion do you have coming up that a fun zip pouch gift would be perfect for?
Welcome to the Handmade Holidays on Buttons Galore! We’re joining in by sharing ideas for handmade Christmas gifts using – of course – buttons!

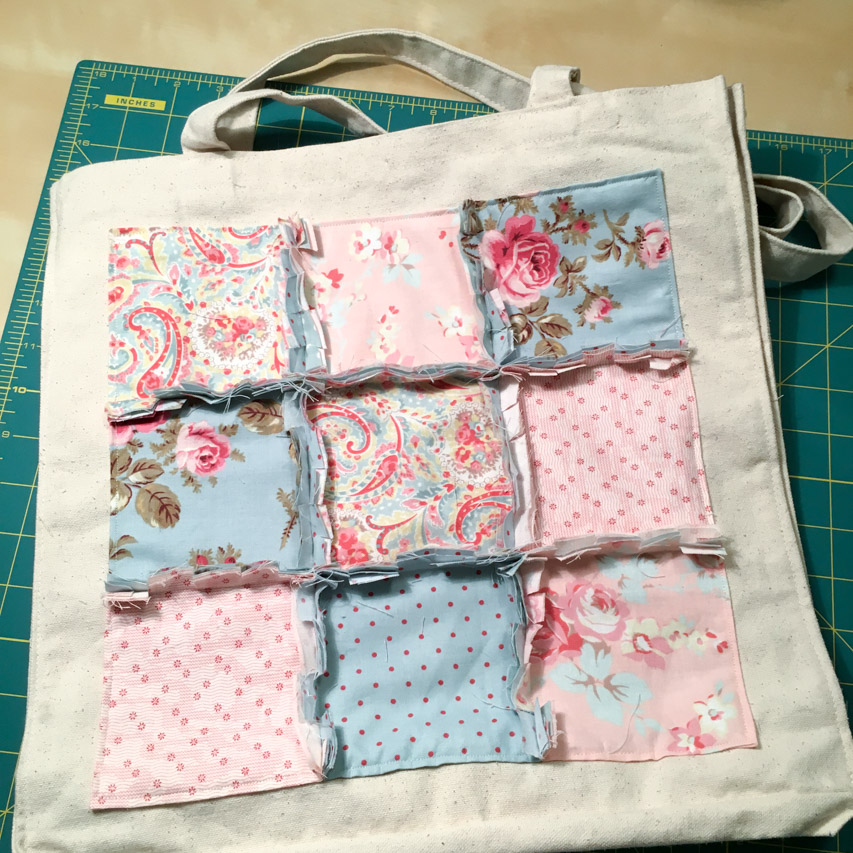
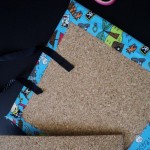
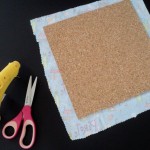
Today’s gift is both practical and pretty! You can never have enough tote bags, and today our gift is a nice sized one that is made gorgeous using an easy rag quilting method.

Supplies:
This bag is quilted using convenient 5″ charm squares. I originally cut these to use on another project but when I switched fabrics for that project, these charm squares went unused. It took 18 of them to quilt this tote: 9 for the front of the squares, and 9 for the backside of them (to help create the bulk in the visible seams).
Laying out the pattern is the first challenge. I inserted a piece of cardboard in the tote to help make it nice and flat while I worked on the layout.

Once your layout is arranged, the next step is to prepare the edges that won’t be quilted of the squares.
On the backing squares, each edge that won’t be part of a rag quilted seam should be trimmed by 5/8″.
On the front (visible in the finished product) squares, press under a 1/2″ seam on each edge that won’t be part of a rag quilted seam. Miter corners where pressed edges meet for best results.
Stack the backing squares on the front squares, folding the pressed edges over the backing squares. Make sure that the raw edges for the rag quilted seams are aligned. Pin together.
 Assemble the 9 blocks into a square by using rag quilted seams. (For easy instructions on assembling rag quilt blocks, see this wonderful article by Deby at So Sew Easy.)
Once the squares are all attached together, the block must be attached to the bag by sewing around the outside edge. This seam must be sewn one block at a time, without passing over the rag quilted seams. So it requires a lot of stopping and starting of your machine. Careful pinning is the key to success in this step.
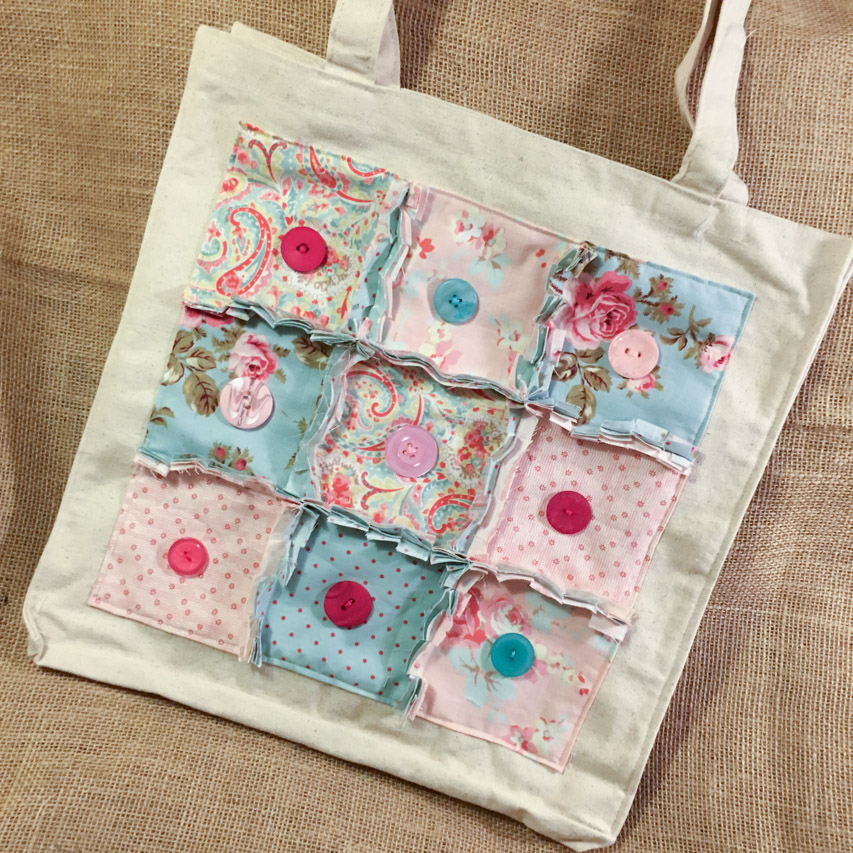
 The final step is to adhere buttons in each square. This project is a great way to use all of those really large buttons in your Button Bonanza bags! The buttons aren’t just decorative – they also serve a purpose as well, by helping to anchor the squares to the bag.
 And that is it! Your tote is ready to hit the street – or be wrapped for under the tree! The rag quilted seams will soften and fray as they are used and washed into an even more beautiful fuzzy fringe.
 Now, did I mention there are fabulous prizes?
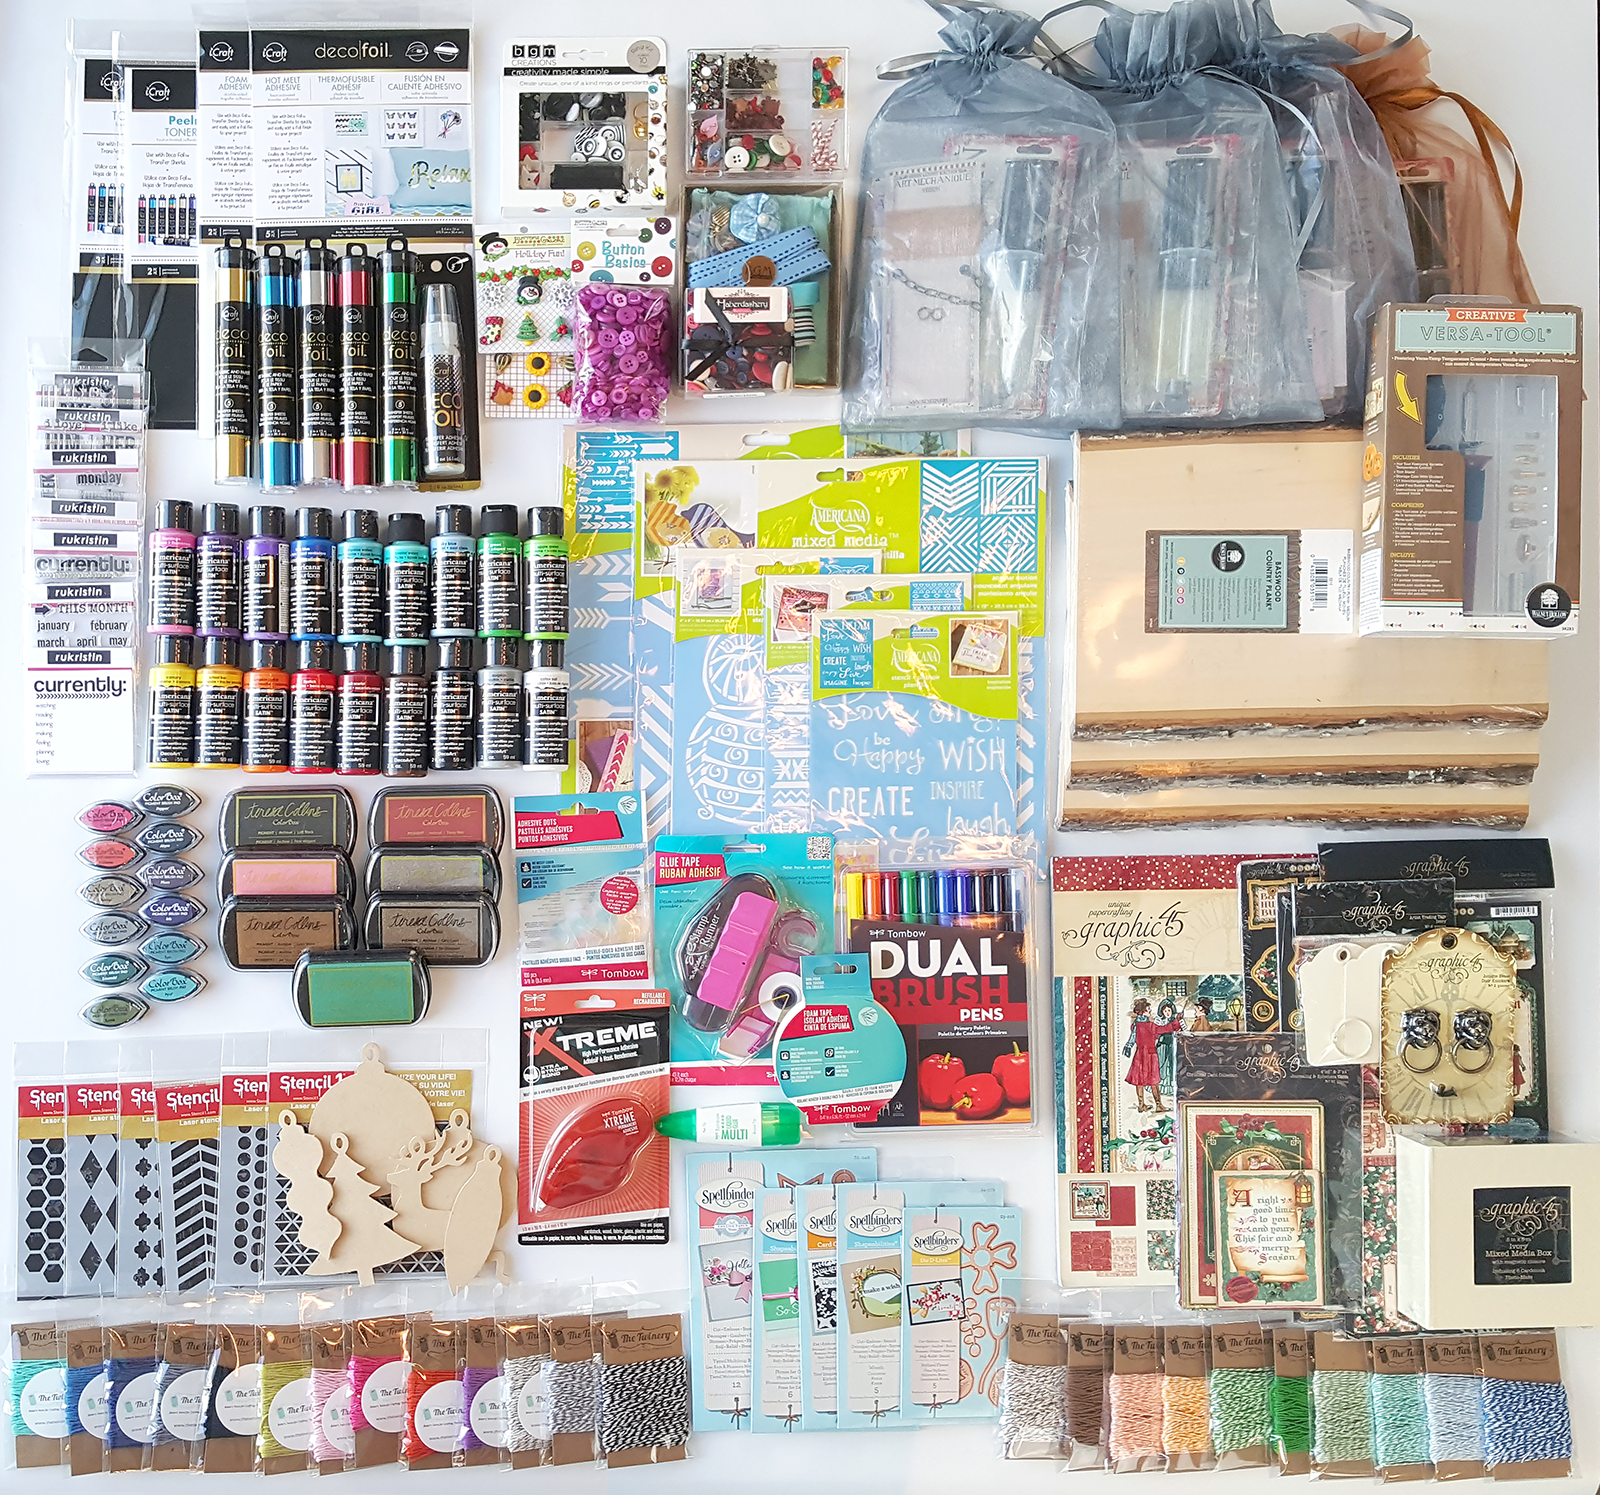
We are having a giveaway of over $600 in craft supplies to help you make this holiday handmade! Enter to win using the widget below:
Many thanks to all of the sponsors of the hop and giveaway!
 Thanks for stopping by, and make sure to use the widget below to visit the other hop participants!
![]()
Thanks for joining us for the three days of the Handmade Holidays blog hop! Make sure you don’t miss day one and day two of the hop, too!
Welcome to the Handmade Holidays on Buttons Galore! For the next 3 days, we’ll be joining in by sharing ideas for handmade Christmas gifts using – of course – buttons!
Our handmade gift project today is a handy little zippered notions bag that is perfect for the sewing enthusiast or frequent traveler in your life! It’s made from a pattern called Everyday Zips by Joanna Figueroa of Fig Tree & Company that is available online or at a local quilt store (which is where I got mine).
Supplies:
One of the most underestimated tasks in the success of a sewing project may be the selection of fabric. Just choose colors you like, right? Not exactly. Color, pattern, and other choices can make the difference between a project you are happy with and one that just isn’t satisfying.
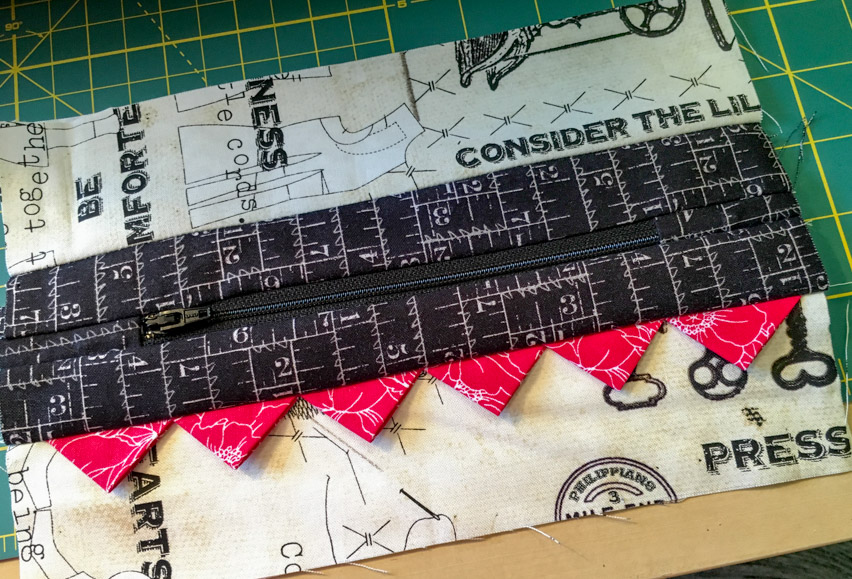
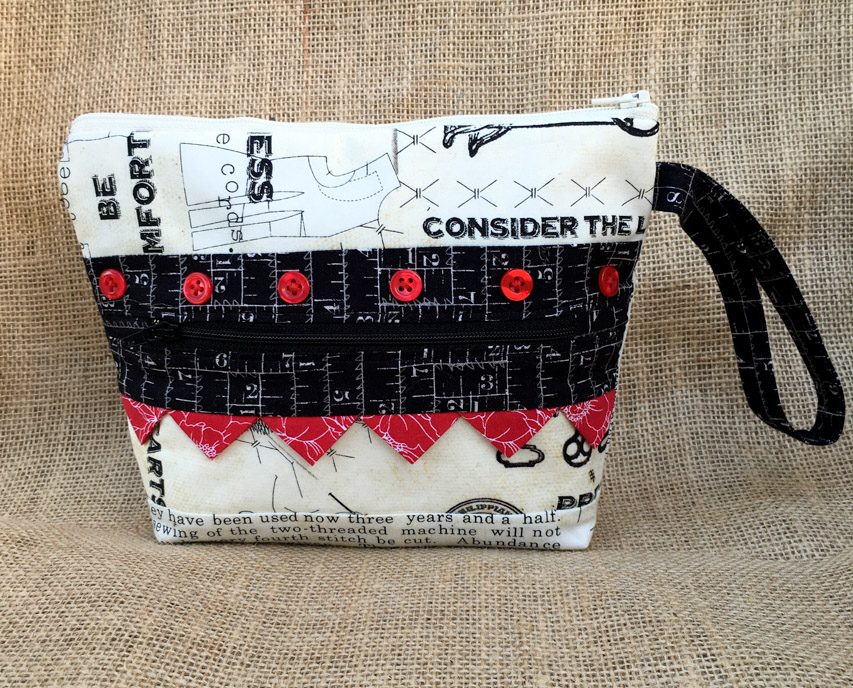
On this project, the pattern called for the body of the bag to be a neutral colored lightweight canvas. But I had found this neutral background vintage sewing themed quilt fabric that I was in love with at my local quilt store. This project seemed like a great excuse to use it! Plus, since this is a “notions tote”, the fabric would reinforce the theme.
I also chose a light color for the interior (not seen here) – an ivory tone on tone chevron design.
For the contrast panel, I chose the black rulers to pull the black out of the background and reinforce the sewing notions theme. That left me the prairie points to decide on. Red, white and black is a classic vintage color scheme, and so it seemed the natural answer here.
But as you can see above during construction, the red is incredibly stark against all that neutral. To me, it made the design look off balance. That’s where the buttons come in! By putting a row of red buttons above the zipper, it balances out the red prairie points and mutes their visual aggressiveness somewhat. And, as a bonus, the buttons add to the sewing theme!
Sometimes color choices make practical sense too. The pattern called for the strap to be the same color as the prairie points but I thought that would be too bold. The best alternative was to use the black ruler fabric, as it is the least likely of the fabrics that I was using to show dirt from while I was handling it.
Even the zipper color choices can make a night and day difference. I really could have used black or natural for either of the zippers. I could have positioned them so the zipper contrasted with the surrounding background, or so that the zipper blended with the background. But I’m well aware that sewing zippers isn’t my most proficient sewing skill. By choosing zipper colors that blend with the fabric around the zipper, I provided a bit of camouflage for any wonky sewing of the zippers. Choosing a contrasting color for the zippers would have the opposite effect: highlighting any errors on the zipper.
One thing that I made sure to avoid on a project like this that had tons of straight seams? Fabric that had stripes or other straight lines in the pattern (such as dots arranged in neat lines) was a no-no. Straight lines in the fabric would only highlight any errors in getting my pieces cut square or sewn straight. The ruler fabric does have straight lines but they are somewhat rough and not continuous so the pattern was workable.
Since the project is mostly just straight seams, sewing the zippers are the most challenging parts of making this tote. While I admit that zippers aren’t my best talent, I do have one secret weapon:
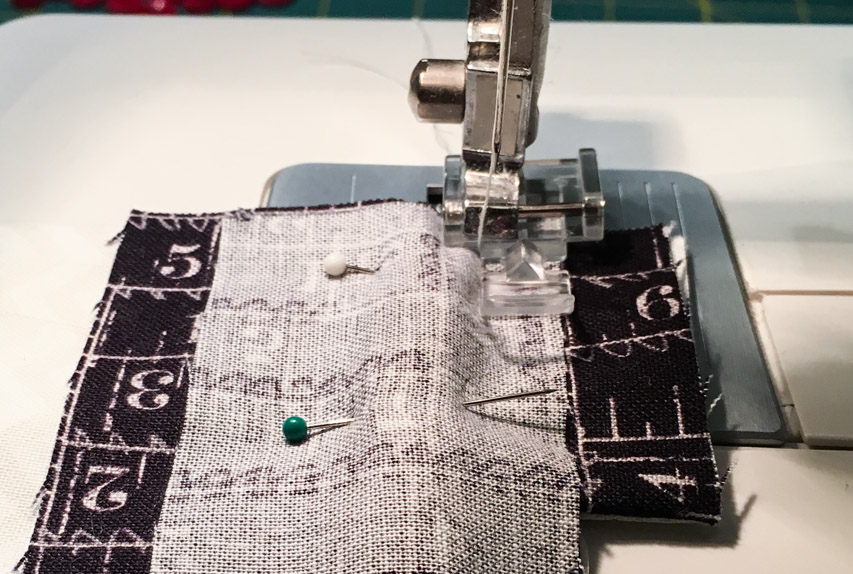
This is the zipper foot on my sewing machine. While it is possible to sew zippers without them, the zipper foot makes it infinitely easier. Having the right tools is often half the battle in producing a quality result. If you are going to sew a zipper, I highly recommend that you invest a few dollars in a zipper foot for your machine. You won’t regret it!
Now, to the blog hop…
Did I mention there are fabulous prizes?
We are having a giveaway of over $600 in craft supplies to help you make this holiday handmade! Enter to win using the widget below:
Many thanks to all of the sponsors of the hop and giveaway!
Thanks for stopping by, and make sure to use the widget below to visit the other hop participants!
![]()
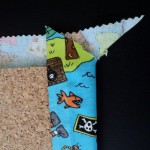
Sew a button and burlap pencil case for the guy in your life. It’s just right for the high school graduate who is heading off to college in the Fall or it would also be a great Father’s Day gift.
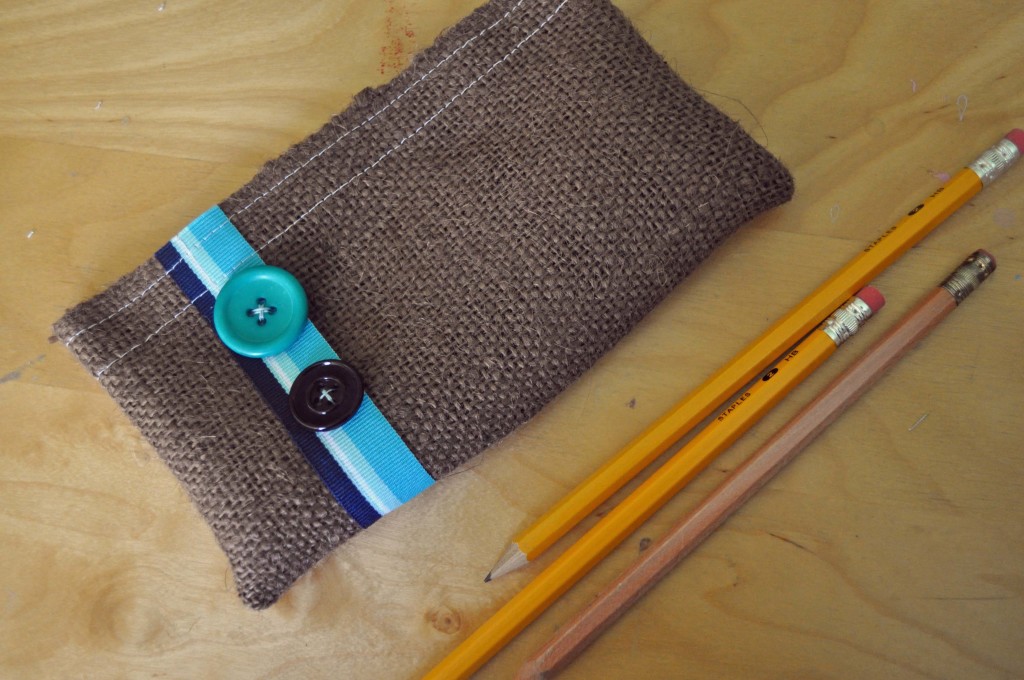
I know I’m always trying to keep my husband organized and he’s always looking for pens and pencils. Do you think there’s any chance a button and burlap pencil case is going to help? Naw, I don’t think so either, but it’s fun to make!
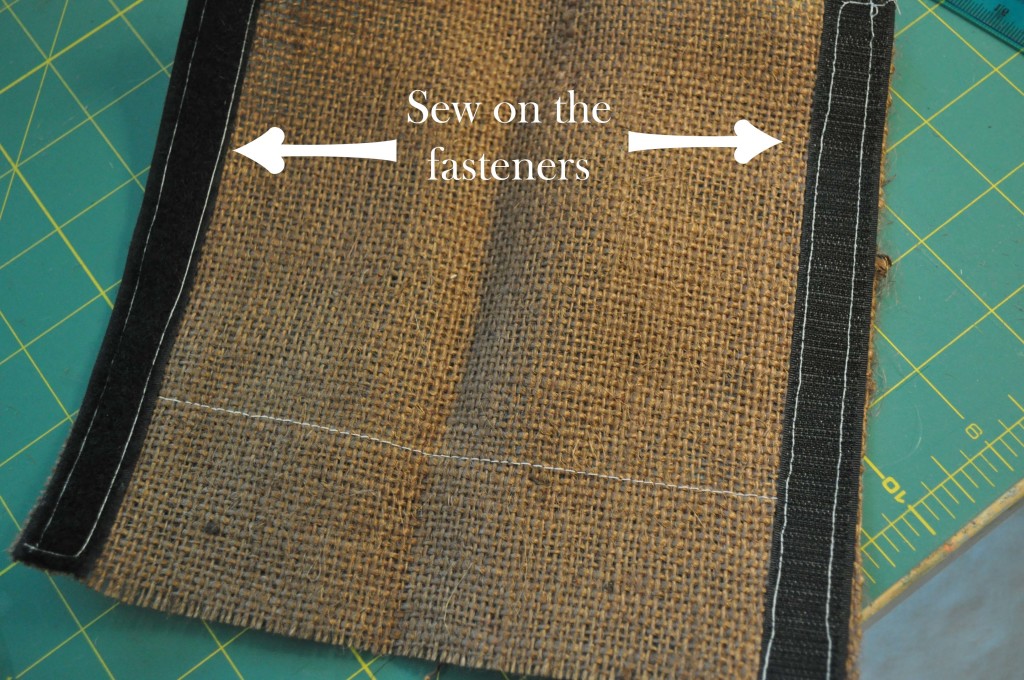
1. Sew ribbon onto burlap parallel to the side that measures 8″. Place it approximately 1.25″ from the edge of the burlap.
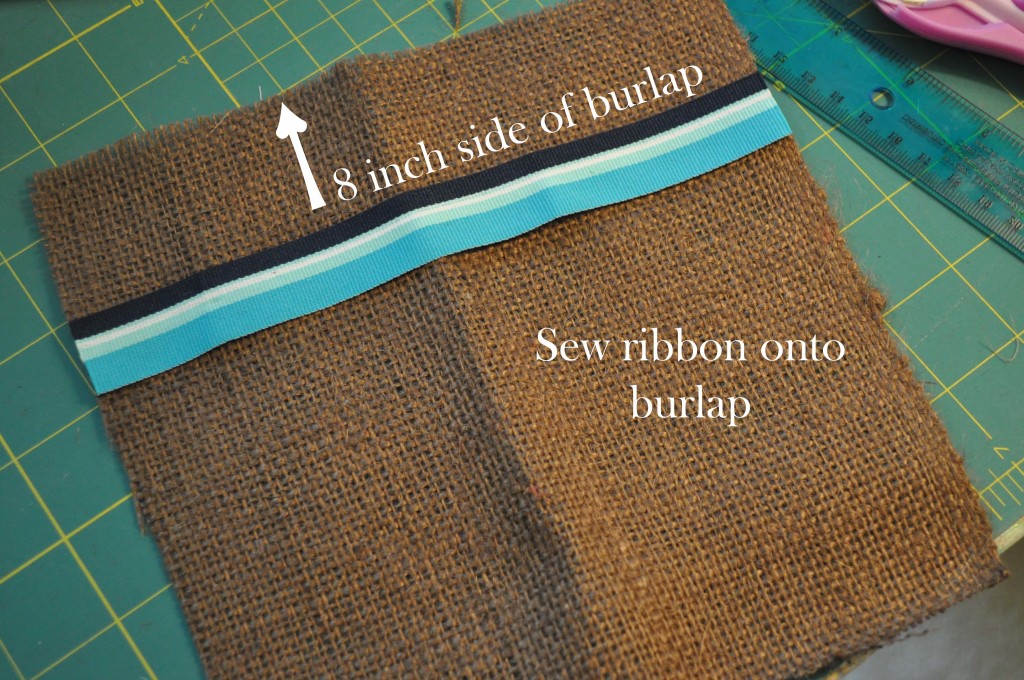
2. Sew the Velcro (R) Brand fasteners onto the 7.5″ inch sides. (These will be perpendicular to the ribbon.) I like to leave the top of the case without finishing it. The rough edge gives it a more masculine touch!
3. Fold in half, right sides facing (the side that you sewed the ribbon onto is the “right” side). The 7.5″ edges should be even. Press with an iron.
4. Sew the short sides closed.
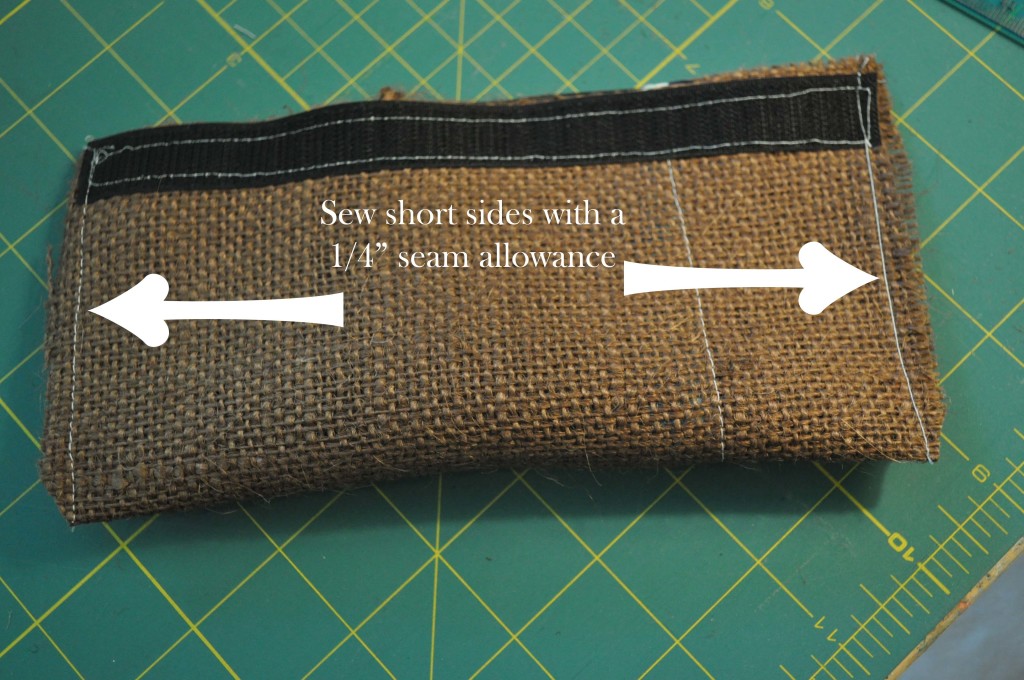
5. Clip the corners and turn the bag right side out.

6. Sew buttons onto ribbon. I know it’s a bit harder to sew them on when the case is sewn, but it’s best to leave this step for last, so you can see the best placement for them.
![]()
You can create these adorable hand stitched little birds using a wide array of materials. Use your mixed-media mojo to create birdies with your own unique look and then embellish with pretty buttons to add color, sparkle and dimension. I absolutely love the new wedding buttons, so I had to use these little glittery hearts for my bird ornaments. Today I’ll share with you how you can make them too.

From the Buttons Galore and More Store:
Other materials used:


Sparkly wedding buttons

Cut off button back before gluing

Pretty button embellished hand stitched birds by Jen Goode
These hand stitched birdies make a great decoration you can add to any centerpiece, accent other key piece or even include as a gift tag accessory. Mix and match the colors of fabric and buttons to create pretty handmade pieces you can include in any occasion.

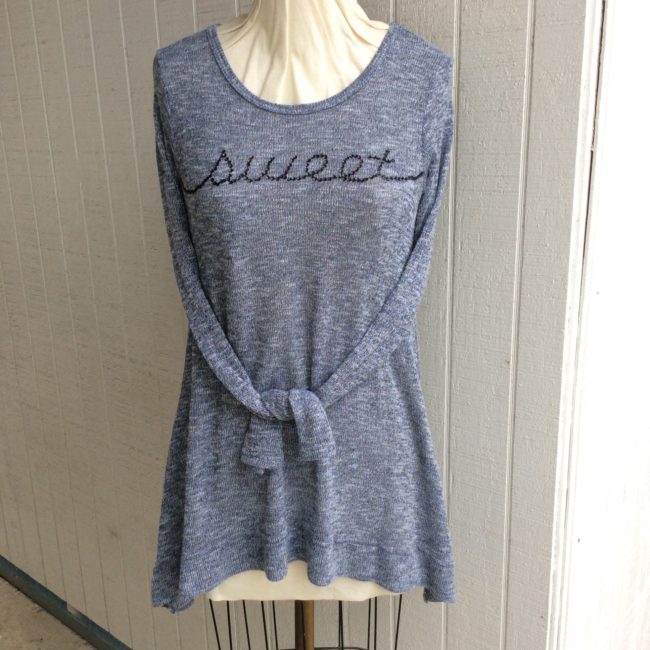
My daughter and I have champagne taste and apple juice budget so I decided to make an upcycled sweater to get a boutique style look at a fraction of the cost. I’ve been busy doing our annual back to school shopping. We saw a ton of button embellishments on the clothes in all the children’s boutique clothing stores this year, so when we got home, I got out my buttons and an old sweater and got to work. The sweater was cute last year, but the sleeves are too short for my growing daughter and the flowers on the shoulder were looking a little tired. The end of the sleeves were also stained. (Why oh why can’t my daughter pull up her sleeves before eating or crafting?) It hardly cost me anything to make as I already has some ric rac and I used fabric scraps for the sleeves.
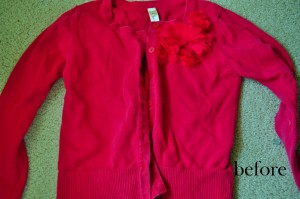
Did I inspire you? Here’s how you can upcycle a sweater!
Directions:
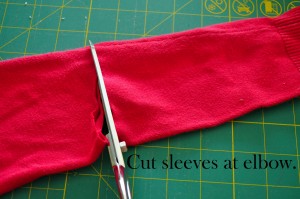
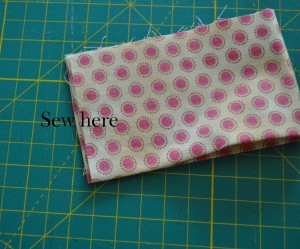
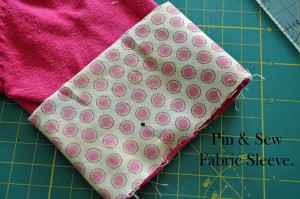
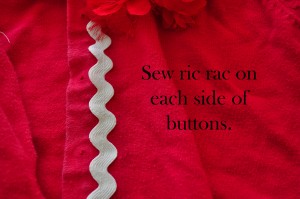
That’s it! Easy. It took me less than an hour to do this upcycled sweater project. If you aren’t feeling adventurous, simply changing out the buttons on an old sweater will give it a new look. Or if you are feeling extra adventurous, you could add some fabric to the bottom edge of the sweater. (Which also lengthens it if the sweater is too short for your child!)
![]()
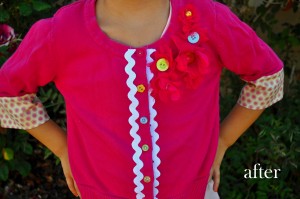
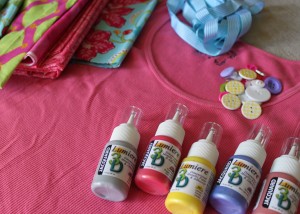
I keep seeing adorable clothes for little girls, but never for us “big girls” like me. I want cute clothes too! So… I decided to see what I could do with my sparse sewing skills. After rummaging through my tank top drawer and fabric scrap bin, I came up with a plan to work up a cute little bib tank.

Supplies:
Tank Top or T-Shirt
Fabric Scraps
Scrap Paper
Fabric Marker
Sewing Machine/Kit
Iron
Fusible Web/Stabilizer
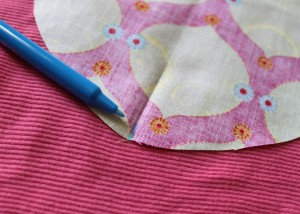
1. Take a scrap piece of paper and draw out a template that suits you and trim it out. This is your pattern. I sketched my design, folded it in half, and then cut it out to ensure it was symmetrical.
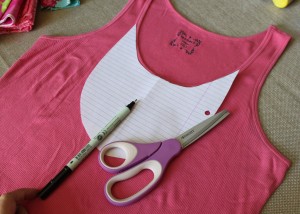
2. Once you’ve come up with a pattern that you like, cut out your pattern in a fun fabric. The fabric I chose was an old drawstring bag used to keep shoes nice when traveling.
3. To make the center strip, measure the top of your pattern to the bottom and add an extra inch to fold over later. You can create the strip as wide as you’d like, but I made mine 1.5″ wide keeping in mind that I’d be folding over 1/4″ on each long side to hide my raw edges.
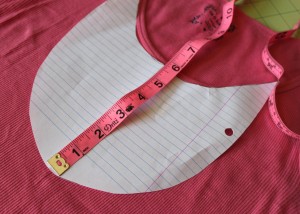
4. For the outside ruffle, measure around the bib of your pattern and double it. This is about how much fabric or ribbon you’ll end up using once you ruffle or pleat it. You can also purchase a trim that is already ruffled if you like. If you’re using ribbon, you may want to consider the materials to ensure it can be washed (won’t bleed or melt). All of your cut pieces should end up looking like this:
5. To ensure that my center piece would be mid-line, I took a washable fabric marker and drew a line to mark the center of my bib.
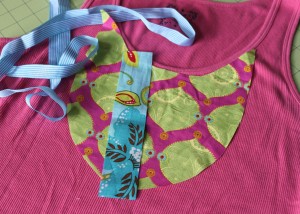
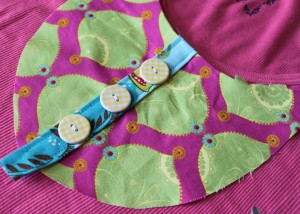
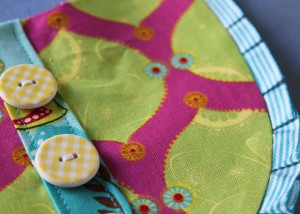
6. You’ll then want to fold and iron the top edge of your bib down about 1/4″. I snipped the fabric in a bit about every 1/2″ so there would be less bulk and puckering. Fold and press over 1/4″ on each long side of your center strip fabric and apply a strip of fusible web 1/2″ narrower than the width of your fabric strip to the back before ironing to the bib. You’re then ready to sew the strip to your bib and attach the buttons. It should look something like this…
7. Sew the ribbon on top of the bib around the bottom 1/4″ from the edge. (If the material you choose to make a ruffle or pleat is single sided, you’ll want to ensure that is facing down for this portion.)

8. Carefully iron your ruffle/pleat out flat, add fusible webbing to the back, and iron on to your tank top.
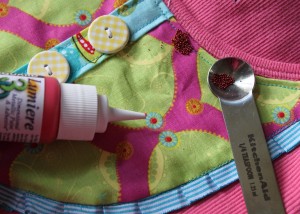
9. Sew the bib to the tank top ensuring you don’t sew all the way through to the back (like I did). Now for bling… Use the Lumiere 3D to embellish the existing pattern on your chosen fabric and sprinkle on microbeads. I pressed the beads in lightly with the back of the measuring spoon once a hefty amount was sprinkled over each dot. Once the Lumiere dries for 72 hours it’s completely washable.
10. And… that’s it! Wear it, enjoy it, and maybe even make a few more!
I hope you’re feeling inspired, and have a crafty kinda day!


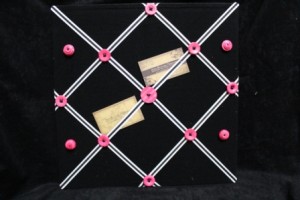
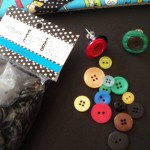
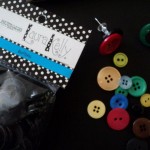
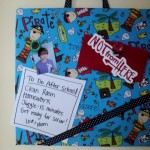
Make a quick and easy memo board using a VELCRO® Brand Memo Board, Buttons and Ribbon…..the theme of these can change easily by the buttons you use….Make several for gifts but be sure to keep one for yourself!
Supplies:
Assorted Buttons (Brilliant Pink BB84 was used here)
VELCRO® Brand Memo Board
VELCRO® Brand Sticky Back Adhesive
Beacon Adhesives Felt Glue
Kreinik Threads
Scissor
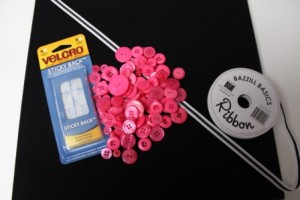
Gather your supplies
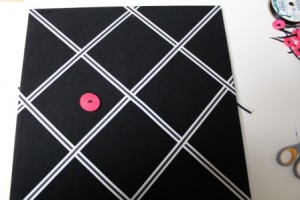
Place ribbon on memo board from corner to corner in a large X; cutting as needed; then place ribbon to create a square as shown in photo. Glue in corners and where ribbons cross.
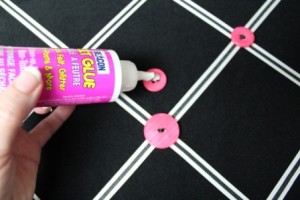
Sew thread onto buttons then glue onto board....
where ribbons cross. For a finished look glue ribbon around edge of memo board also.
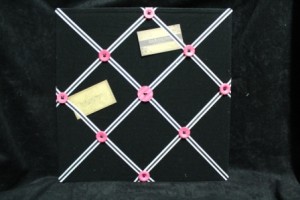
Now you can place cards onto the memo board under the ribbons.
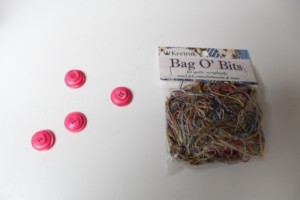
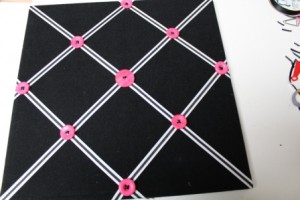
For a more useful board pick out some buttons to layer on top of each other....
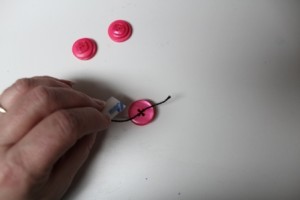
stack them together and tie off with thread.
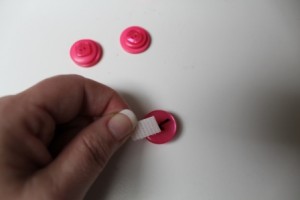
Add Velcro Sticky Back Adhesive at the bottom over thread.
These buttons will stick the the memo board giving.....
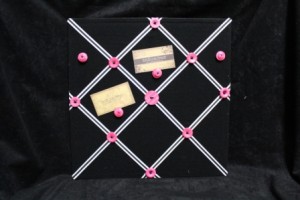
you more ways to hold your papers on the memo board.
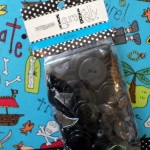
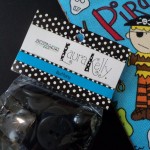
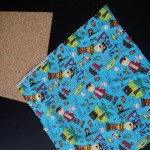
How is that for a title of a post? Today we are having a blog hop to showcase the Buttons Galore and More buttons that coordinate with Laura Kelly Pirate Island and Princess fabrics. The fabric is manufactured by General Fabric and is available through Hancock Fabric both in stores and online. The Laura Kelly button blends are custom dyed to match the fabric.
What Is A Blog Hop? New to Blog Hops? Here’s the low-down on how they work. A blog hop is a list of blogs sharing a similar theme. The blog “host” lists of links to other blogs on their page, along with the Blog Hop rules. As the reader, you hop from blog to blog looking at fun projects.
Rule to this hop – Visit each blog, leave a comment if you want. Come back here to the main blog. Leave a comment on this post saying what is your favorite project and if you would want the BOY prize or the GIRL prize. It is that simple.
These are the blogs participating in the hop
Laura Bray www.katydiddys.blogspot.co
Cristal – www.blueyecicle.blogspot.c
Keri Lee – www.pinklemonade.typepad.com
Niki- www.nikimeiners.wordpress.com
Jen- http://www.100directions.com
Allie –http://welltrainedpaper.blogspot.com/
Ann – http://www.creativitystirsthesoul.com/
Elise – http://mamacowcreations.blogspot.com/
Now for a quick project using fun material and Buttons Galore and More buttons by Laura Kelly
If you are not a fan on Facebook please “LIKE” us. We have so much button craft ideas to share. We also have a PIN IT TO WIN IT CONTEST going through April 27.
If you are interested in obtaining the material you can check out Hancock fabric stores or click the links below for online purchases.
***Contest now closed *** Two winners will be announced by 5pm April 11, 2012 on this site.

Button memory quilted art
This is a mixed media piece I made with items I found while cleaning out my Mother in Laws’ home.
The background is created like a Log Cabin Quilt by stitching strips of fabric one to another and around the photo that is printed on printable canvas. The pieces are not the same width or length. It’s more of a free form kind of piecing. I added some top stitches in pink.
I also used buttons from Bubble Gum Button Bonanza, and added some fabric, buttons, a doily, piece of embroidery iron on, a flash card with the number 18 (which is about how old she was when the photo was taken), part of a greeting card, a key, the address from an old envelope and a small tassel.

I did a lot of remembering while I was putting this together. My mother in law has always been good to me.
Have you created a piece of art/craft to remember someone you loved? What did you make?
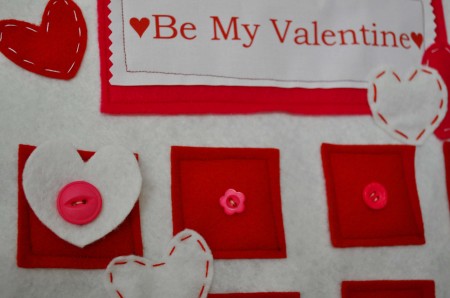
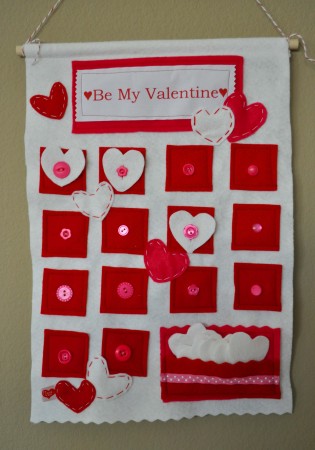
If your little one is anything like mine, you pretty much start looking forward to Valentine’s Day right after Christmas. I created this felt and button Valentine’s Day Countdown Calendar to channel some of my daughter’s excitement.
Supplies:
Instructions:
You are done! Store your white hearts in the pocket. As each day dawns, allow your child to button a heart onto one of the red squares. When the all the squares are full, it’s Valentine’s Day! Use the now empty pocket to store a few Valentine’s and enjoy your calendar for a couple of extra days after the holiday.
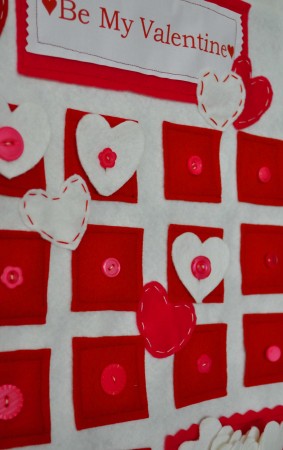
Valentine Countdown Calendar by Laura Bray
I know this calendar is a lot of work, but I was able to get mine done in about 3 hours total. I think it’s worth the work-after all it’s a heirloom item.
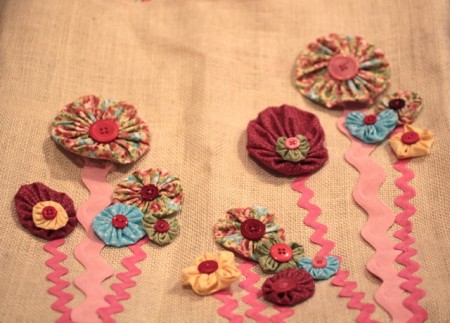
Yo-yos on Girly Messenger bag by Niki Meiners
This feminine messenger style tote is perfect for a Valentine’s Day gift. It is soft and girly and it can be carried long after. Plus the flowers on this bag will last a lot longer than a dozen roses.
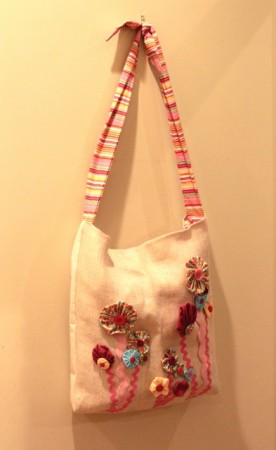
Gusseted Messenger Style Tote
Tools:
Scissors, Cutting matt, needle, thread, pins, Clover Yo Yo Maker in extra small, small, medium, large, extra large circle, small and medium heart and the small and medium flower.
Materials:
Confection Button Collection and FabriTacCream canvas, cream burlap small dark pink rick rack, large light pink rick rack, various scraps of coordinating fabric. Two strips of 6×24”, burlap, Velcro ®
Directions:
1. Cut burlap to 36″ by 22″ to make a bag about the same size as a grocery bag. So if you buy 44″ wide fabric, you can make two bags with a yard. Cut in half. to measure &&& Cut canvas to $x#. Sew the burlap to the canvas. Fold the top edge down 1/2 inch. Then stitch ¼” from edge. Place wrong sides together and sew on the three remaining sides.
2. To make a gusset, flatten the bag with the bottom seam on top. (It looks like an odd triangular shape, but makes more sense when you actually do it). Then sew across the triangle so that your seam is about 3-4″ long (mark it by sliding a ruler down until it reads 3″). When you turn the bag right-side-out, it will stand up like a paper grocery bag just not as deep.
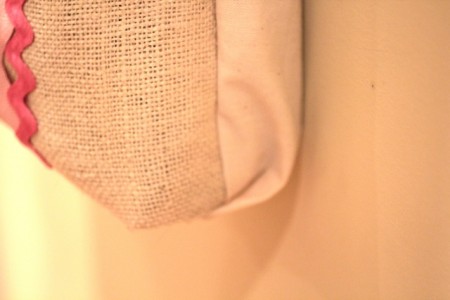
Gusset on Messenger Style Tote
3. Cut striped fabric for handles to 6×24. Fold in one inch on each side finger press. Then stitch ¼” from edge. Fold ends of each tip to form a diagonal and sew along edges. Sew the other end inside the bag. Straps can be made of self-fabric, very sturdy ribbon, matching fabric remnants, nylon webbing, or whatever else seems you have handy. I tied the fabric strips into a knot for a decorative effect.
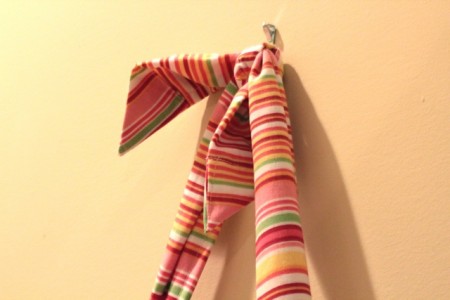
Knot at the top of the straps
4. To embellish the tote use Fabri-tac to adhere various lengths of rick rack. The rick rack mimics flower stems. Mine vary from 4-10″.
5. Follow manufacturers directions to make the yo-yos. I used a variety of the sizes listed above. Hand sew buttons in the center of each yo-yo. You can either adhere the yo-yos with a quick stitch or you can use the Fabri-Tac.

Yo-yos flowers with button center
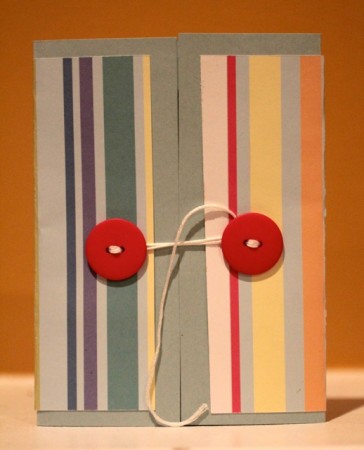
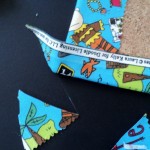
Button Closure
Create a cool closure for your handmade cards by sewing on two buttons. The card above is a a birthday card. You can use this technique for any occasion. Very few tools are involved and little skill is needed. It is quick and easy yet it makes the card feel extra special.
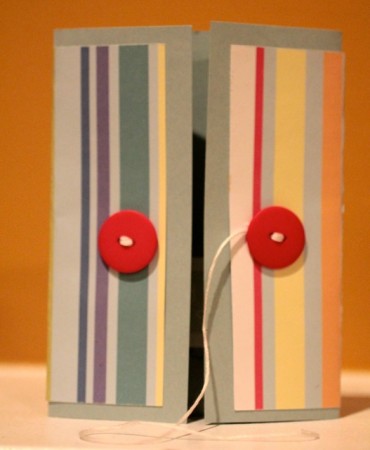
Button closure untied
Tools:
Needle with large opening
Embroidery floss in color of your choice
Paper cutter
Mouse pad
Material:
Contemporary Christmas Button Jar
12 x12 Cardstock of your choice
Pattern Paper of your choice
Rubber stamped sentiment of your choice
Adhesive
Directions:
1. Cut paper to 6×12. Make a score line 3 inches from each end. Fold flaps in so that they meet in the middle.
2. Trim pattern paper to 5.5 x 11.5 and adhere to card.
3. Stamp sentiment and add to center of card.
4. Measure in one inch on each flap. Place card open on mouse pad and use needle to make holes for floss.
5. Using floss sew on one button. Tie knot to secure and trim off excess.
6. For the second button cut a generous piece of floss. Sew on button and tie a knot. Do not trim off excess. Use it to fasten the card closed
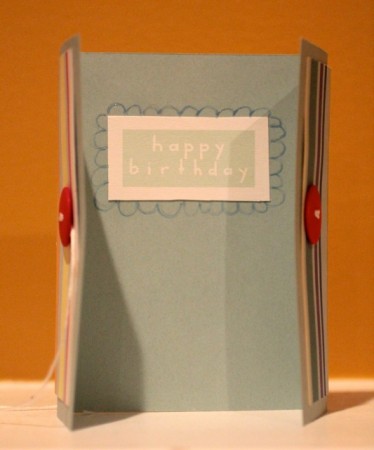
Inside of card

Close-up of Laura Bray's Button Journal
I can’t believe another year is winding down. Time to make your resolutions for the new year! It’s always easier to do it if you have a cute journal to work in. Why not make a little felt cover, embroidered with a cute design and embellished with buttons?
Supplies:
Instructions:
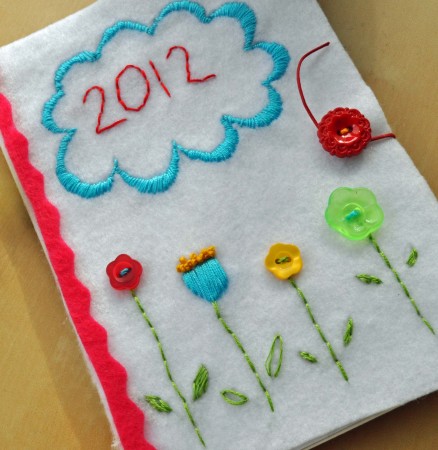
Button Journal by Laura Bray

I’ve been recording a new video about once a month featuring my favorite crafts made with buttons.
This is last months’ video.
Why is it a month old?
Well, that’s because I keep the video and share it EXCLUSIVELY with our facebook friends first.
When you get to our facebook page, and you haven’t liked us yet, you’ll see the Landing Page where I have a link to the video.
So, what are you waiting for? Go like us and see THIS MONTHS video FIRST!

The instructions for row 5 are up on the Fabric Party page here.
And as always there is a give away that includes School Days buttons from Buttons Galore and More!! WhooHoo! :)

Buttons and Embroidery Line Work
Isn’t this gorgeous!?!? I love the simplicity and the colors and it could easily be made to match any decor or for any holiday season too!
Be sure to visit Doe C Doe for complete instructions and you’ll find our “Shades of Red” Button Bonanza in our store so that you can make one like this for yourself!

I found this adorable table runner while cleaning up my Mother In Law’s house a couple of weekends ago. For some reason she had only worked half of it and then put it away to never be worked on again.
I felt bad cutting it up but it didn’t quite fit on the front of this messenger bag. So I cut it to fit and then cut the lace from the edge and sewed it back on. Same thing…only smaller.

I sewed a small heart shaped doily to the lower corner and embellished it with buttons from a Button Bonanza bag in Bubblegum. Finally, I stitched again around the outside edge of the heart with pink embroidery floss and put embroidery floss through a couple of the buttons.
I haven’t decided if it’s finished or not. I’ll have to sit with it for a day or two and decided if I need to add anything more.
What do you think? Is it finished? If not what would you add?

Button embellished cowgirl shirt
Whether it’s time for some ropin’ and ridin’, or just a fancy night out on the town… There’s not much fashion that doesn’t look better with BUTTONS!
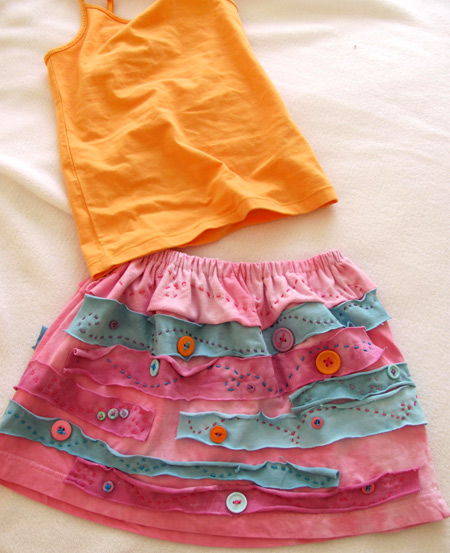
DIY recycled t-shirt button skirt by Jen Goode
Between all my kids, the house is always filled with someone’s clothes that don’t fit anymore. With hand-me-downs, the boys have had a great selection of new clothes in every size, but my daughter isn’t about to get excited over monster truck t-shirts unless that have bling in sparkly pink and purple. However, with a little creativity, we can turn any rough, tough boy-wear to fabulous girly in no time!

“Amazing Plastic Crafty Goodness” is what they really ought to be called! :)
What are Start Ups? They are small, white plastic shapes. Perfect blanks for lots of scrapbook, mixed media and even jewelry projects.

Button name plate
My very first Start Ups project. :)
I spray painted the blank silver and let it dry, then I rubbed my thumb over it to take out some of the shine. I stamped VICKI with a small set of alphabet stamps and Staz On ink in black. Finally, I gave it a quick spray with a Matte Sealer and it’s all ready to go on… well, WHATEVER I want to make! I love that it looks like an old piece of metal. Cool!
Keep checking back as I continue to explore all of the crafty fun to be had with these little gems!
And click HERE to see the available shapes of Start Ups that Buttons Galore and More Carries!

All around the web I’m seeing that fellow crafters, designers and artists seem to be taking time out to clean up their creative spaces.
It’s also a GREAT time to be thinking of little gifties and gift tags that you could use the rest of the year. Don’t think so? Read the rest of this post that was originally published on my blog. (You can visit my NEW blog here: www.vickiodell.com)

Cute button dress
Isn’t this little party dress adorable? I love the way the colors of the buttons echo the polka dots in the bottom.
Oh! And those cheeks! How could a mommy not spend all day kissing those cheeks!
Please visit Craftiness Is Not Optional to read more about this project.

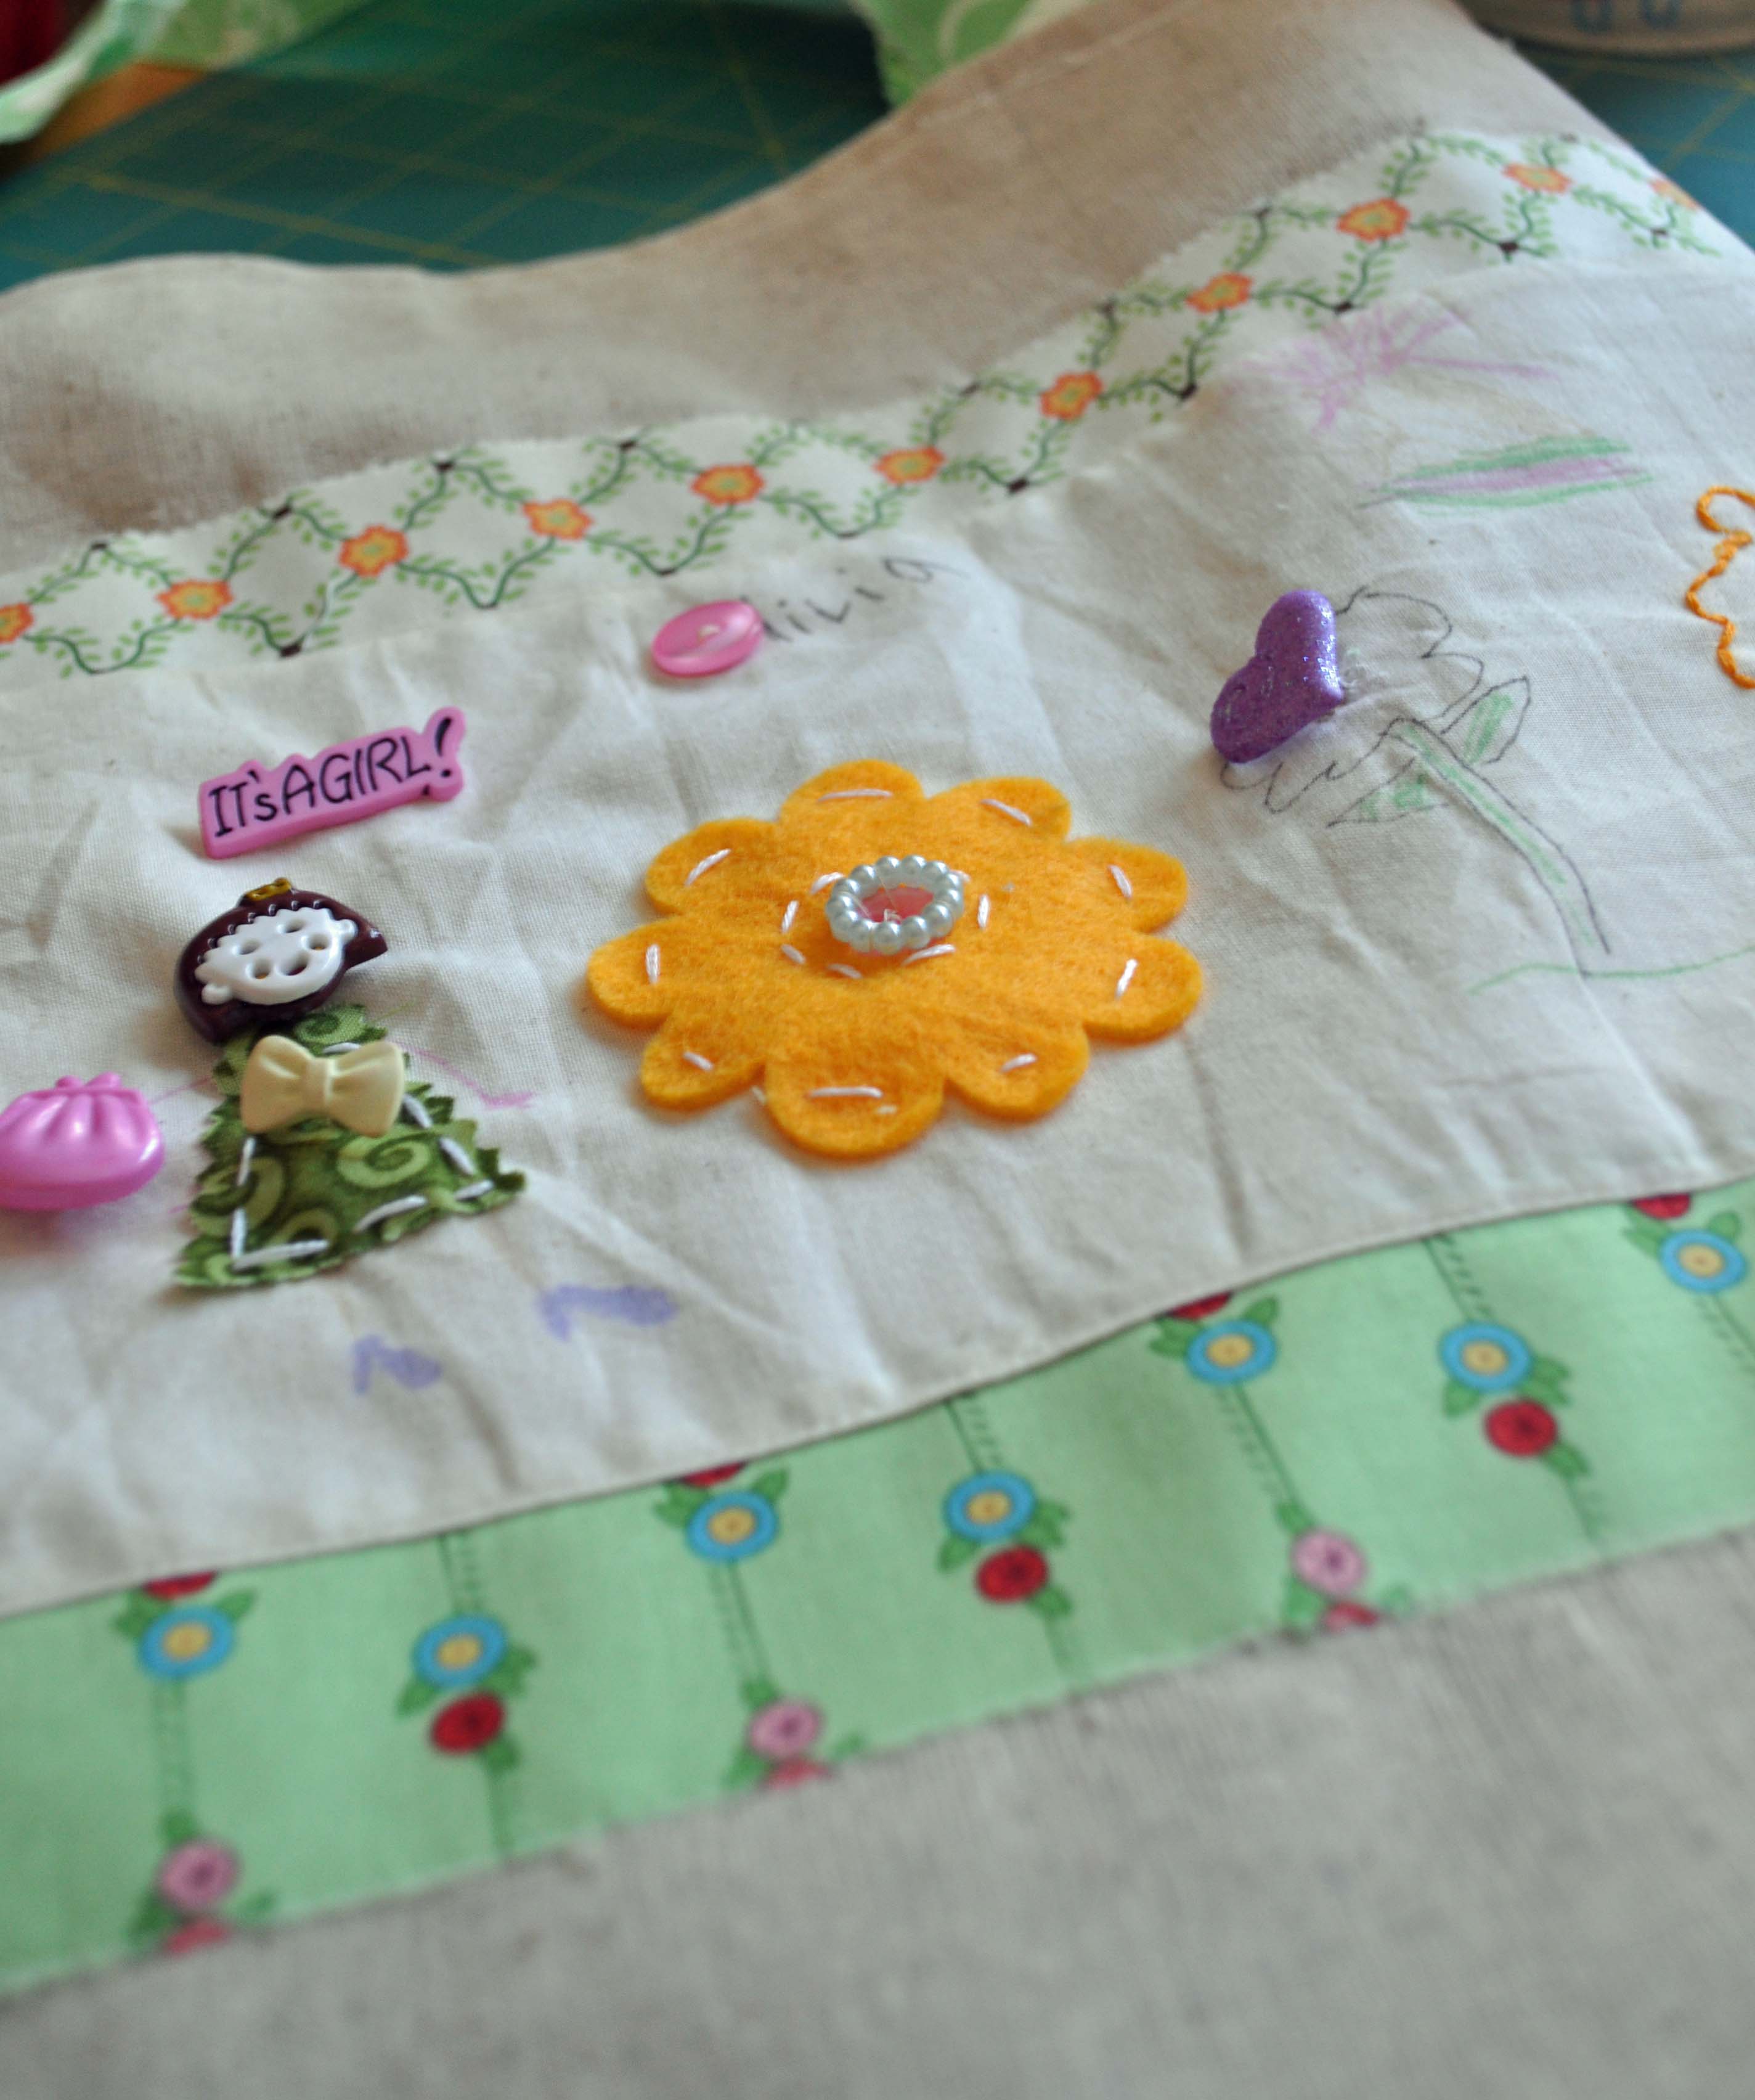
Do you remember how much you loved to sift through your mom, aunt, or grandmother’s button boxes? I still play with my buttons all the time, and I know I can always keep my five year old daughter busy with buttons. I recently came up with a project that takes button play beyond just looking at buttons, but also uses them as a creative tool. The end result is a darling little sampler of all my daughter’s favorite buttons and artwork. It’s truly an heirloom piece that will be cherished for years to come. Here’s how to make a button embroidery sampler with your child.

Aren’t these hand painted buttons from design team member Laura Bray adorable? Visit her blog Katydiddys and see how you can make some for yourself!
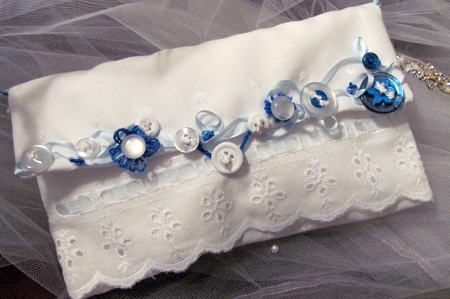
Button embellished bridal clutch by Jen Goode
Something borrowed, something blue this bridal clutch is the perfect accessory with a handmade touch. Use blue and pearl buttons along with delicate blue ribbon, eyelet fabric and faux satin, to create a pretty little purse fit for a wedding.