Header

Tag Archives | homemade

Buttoned Up Gift Box

Create a Buttoned Up Gift Box with paper, ribbon and buttons. A gift is much more special when presented in a handmade Gift Box.
Buttoned Up Gift Bag


Supplies for Buttoned Up Gift Box:

  • Buttons – Teal Ice
  • Cardstock – Discount Cardstock
  • Template – Lori Whitlock
  • Ribbon – American Crafts
  • Snowflakes – Silhouette
  • Glitz Gel – Close To My Heart
  • Twine – Doodlebug Design

Instructions for gift box:

  1. Cut pieces and assemble box.
  2. Accent box with Glitz Gel.
  3. Cut several snowflakes and fold in half. Use three snowflakes for each embellishment and adhere the halves together to create dimension. Accent with Glitz Gel.
  4. Create a small bow and attach button with twine. Adhere to box.
0

Fall Button Serving Tray

My fall button serving tray is one of my favorite buttons projects I have ever made.  Plus it is easy to make which is a win win right?  Grab your buttons and a thrift store tray to get started making your own version.  Don’t need a serving tray for fall?  Maybe use this same idea with a button ornament in the center for Christmas?  Or a heart in the center for Valentine’s Day?  I can think of all sorts of different tray designs for all seasons of the year.

Fall Button Serving Tray -- an idea to spruce up a plain thrift store serving tray for all of your fall parties.

I started with a tray from the thrift store for 99 cents and a bottle of Americana gloss enamels in Antique Gold.

Fall Button Serving Tray -- an idea to spruce up a plain thrift store serving tray for all of your fall parties.

I painted my entire tray with 2 coats of the paint then grabbed some fall themed buttons from Buttons Galore and More.

Fall Button Serving Tray -- an idea to spruce up a plain thrift store serving tray for all of your fall parties.

I laid the buttons out on my tray until I was happy with the arrangement.  I then used my 3 in 1 Beacon adhesive to glue them directly to the tray.

Fall Button Serving Tray -- an idea to spruce up a plain thrift store serving tray for all of your fall parties.

Once the glue was completely dry, I mixed a two coat epoxy to make my tray nice and smooth.  Don’t be afraid of epoxy!  Just mix and pour according to the package directions.  I spent quite a bit of time using a flame to pop bubbles that come up from the epoxy itself and the buttons.  Yes my finished project still has a few bubbles but overall it looks amazing.  The buttons seem to create more bubbles than is normal with an epoxy project.

Fall Button Serving Tray -- an idea to spruce up a plain thrift store serving tray for all of your fall parties.

Allow your epoxy to dry for a nice long time before you touch it (don’t be tempted to touch!!).  You will be left with a glossy flat serving tray with buttons in it!  Now some of my buttons stick up just slightly out of the epoxy (there is a slight hump in the epoxy).  This can easily be fixed with a second epoxy pour however the bumps do not really bother me for my needs so I am leaving them.  You could also be extra careful when choosing buttons for your design and choose only the flattest buttons to include.

Fall Button Serving Tray -- an idea to spruce up a plain thrift store serving tray for all of your fall parties.

Just so you can see my entire button fall scene here is a picture of the entire tray.

Fall Button Serving Tray -- an idea to spruce up a plain thrift store serving tray for all of your fall parties.

It is so darn cute I could eat it up.  Speaking of eat it up, use your fall tray to serve snacks to the kids or for a wonderful addition to your Thanksgiving and fall themed parties.  Want more buttons on your Thanksgiving table?  Be sure to check out my rustic burlap napkin rings as well.

Fall Button Serving Tray -- an idea to spruce up a plain thrift store serving tray for all of your fall parties.

Will you be adding buttons to a tray anytime soon?  Don’t let that epoxy pour scare ya!  My fall button serving tray will make an appearance at our Thanksgiving meal and many snacks in the meantime.

4

DIY Craft ideas – button craft blog hop

DIY CRAFT IDEAS

crafty ideas blog hop  buttons


Handmade craft ideas abound in this creative blog hop.  Please join the Designer Craft Connection, Viewtainer and Buttons Galore in presenting this blog hop.   You have a chance to win a Viewtainer filled with an assortment buttons and 45 feet of ribbon. (picture below)

buttons galore craft ideas blog hop viewtainer

What is a craft ideas blog hop you ask?

A blog hop is where, as a reader you check out the host blog and then follow the links to the other blogs participating in the hop.  You hop from one blog to another by clicking the Designer Craft Connection logo on each page.  The arrows will take you backward and forward.   Leave comments if you like something, follow them on facebook, twitter or even pinterest.  Most of all have fun and enjoy the projects. The designers have created projects that include paper crafts, sewn projects, jewelry and mixed -media and much more.

To win one of the Viewtainers filled with ribbons and buttons – Leave a comment here on this very post.  The comment should contain your favorite project from the hop, and the container you would like to win.  Comments need to be made by March 17th, 2013 at 11:59 eastern standard time.

The Buttons Galore and More Designers participating in the hop are listed below.  Visit their blogs too.  If you really like something leave them a comment.  We all like to hear compliments.  I know I sure do.

DONT FORGET TO LEAVE A COMMENT BELOW FOR YOUR CHANCE TO WIN!

If you would like to purchase any of the buttons used in the many craft ideas presented you can shop the

BUTTONS GALORE AND MORE STORE


Mini Easter Egg Art – make your own art

Mini Easter Egg Art is fun to make.  Combine paint and buttons to create a pretty vintage look when decorating this Easter. Create your own mini Easter egg art in just a few steps. You can make a whole pile of these cute little art canvases and use them to accent your Easter decor throughout the house, just change the design and alternate the colors and you’ve got a new art piece.

Easter Egg canvas art by Jen Goode

Easter Egg canvas art by Jen Goode

Easter Egg canvas art with buttons

Easter Egg canvas art with buttons

Materials you need for Mini Easter Egg Art:

  • Small brown buttons
  • Mini canvas
  • Twine
  • DecoArt Americana Craft Paint – tan, white, pink, purple and yellow
  • DecoArt One Step Crackle
  • DecoArt Gel Stain
  • Liquid glue
  • Cardstock
  • Scissors
  • Paint brushes
  • Black fine tip marker

Steps to make mini Easter Art

Allow materials to dry between applications.

  1. Paint each canvas tan.
  2. Dry brush paint over tan with white.
  3. Create an egg shape stencil using the cardstock.
  4. paint the egg art on each canvas. Alternating tan and white, create an egg shape on each canvas with the stencil. Layer color until you get the look and texture you’d like. Lightly paint color on each egg. Create a pattern or apply in various areas for each piece. Coat with One Step Crackle. Using a cloth, rub on gell stain. Immediately wipe off.
  5. Using black marker, doodle outlines and patterns on each egg design.
  6. Tie twine through each button. Glue buttons in place as desired.
paint canvases

paint canvases


close up of Easter Egg art

close up of Easter Egg art


Easter egg button art by Jen Goode

Easter egg button art by Jen Goode


Tip: Use colorful Spring buttons in mini Easter baskets to accent your Easter decor instead of jelly beans. Just make sure not to leave the buttons where young children can reach them. Have a Happy Easter!

Basket with spring buttons

Basket with spring buttons

4

Handmade ‘i love you’ Card Idea with flowers

I can’t believe it’s August! I feel like the summer has really flown by. I haven’t had time to enjoy any summer festivities this year being in school the whole time, but it’s finally coming to an end. I can’t wait to get a few days off before the next semester starts. I don’t know about you, but I love it when all the kiddos go back to school. My tot is only two, but I do love those rare days when I get the house all to myself. I can actually make something! Today was one of those days, so let me take you through my design process…

As usual, the first thing I do when I start a project is to create a palette. This is what I laid out…

…and here’s what I ended up using on my project:

  • Studio Calico Take Note 6×6 Paper Pad
  • Jazzy Brads
  • Alphabet Stickers
  • Aqua Striped Ribbon
  • Baker’s Twine
  • Cardstock
  • Flower Stickers
  • Foam Adhesive Dots
  • Baby Powder
  • Small Brush
  • Sewing Machine & Thread
  • Westcott Paper Trimmer
  • Adhesive 

Assembly Instructions:

1. Trim Caterpillar green cardstock to 8.5″x4.25″ and fold in half for card base. Trim Kraft cardstock to 4″x5.25″.

2. Trim Grey floral patterned paper to 3.75″ square and scantly secure to upper portion of Kraft piece. Trim blue/white quatrefoil tp 3.75″ x 2.75″ and use border punch along the bottom edge before securing to bottom edge of Kraft cardstock. Use sewing machine for decorative edge.

2. Next, trim a 2.25″ wide strip of Kraft and layer on top of it a 2
wide strip of green stripe paper. Wrap a strip of ribbon around this piece before securing to card front.

3. At this point I decided to leave out the punched flowers and go with some cardstock stickers I found in my stash. I wanted them to pop off the card, so I put foam adhesive on the back.

I left on the second sticker backing, so that I could then brush baby powder on the back of the sticker without getting powder on my foam dots. I still want to use that part of the adhesive to stick the flowers to my card, but I didn’t want the actual sticker to be sticky, so it wouldn’t catch stuff and end up looking weird.

4. I poked a hole in my flowers here with a sharp point and added brads. The brads will push through most paper alright, but to keep the cardstock from buckling and wrinkling, you should always use a small hole punch, paper piercer, or even a tack or needle.

5. The final step is to assemble all of your embellishements and sentiment where you like it. I hope you enjoyed this project today.

Here’s the finished card all ready to give to your special loved one… 

1

Create Personalized Monogram Home Decor using Buttons, Brads & Beads

It’s time to get busy making something to freshen up the house! We have been busy all summer and as the Autumn season fast approaches having a few handy tutorials on how to make personalized gifts and hand made home decor just seems fitting. So today I have a Personalized Monogram Home Dec project to share with you. Enjoy!

Supplies Needed: Buttons, Brads, Micro Beads, Gem Tac (R), Scrapbook Paper, Hot Glue Gun, Scissors, Frame


Print letter of your choice as large as you would like finished monogram to be. Place beneath paper and put against a well lit window to serve as a light box. Then trace onto scrapbook paper.


Outline one third of the traced letter with Gem Tac.

Fill in the area fully with Gem Tac.


Place as many buttons as fit onto the glue covered area.


Quickly cover the entire surface with micro beads.


Remove excess beads before moving onto next step.


Continue covering the entire traced area a bit at a time following the steps above.


Cut the prongs off of the brads using strong sharp scissors.


See how much flatter brads lie once the prongs have been removed?


Hot glue the altered brads to the surface of the monogram randomly. Here I chose to hide "barren spots" with the brads. :)

Once your piece has fully dried, place in a frame and you are ready to enjoy your brand new PERSONALIZED home decor!!!


I would love to see what you make! Please leave a comment with a link to your personalized home decor projects! :) I will be sure to pop over and leave you some love on your project!! :)


1

My Favorite Things Stamps and Buttons Galore Winners

 Blog Hop Winners!


Hand stamped card ideas and mixed media projects by the MFT stamps team and the Buttons Galore team lead to an overwhelming amount of comments.  We appreciate each and every one.  The designers especially send their  THANKS  for all of the wonderful comments that you left  on their Buttons Galore and More and My Favorite Things Blog Hop Projects.

We hope that you had as much fun visiting with all of the designers as they had working on their projects.  If you missed the blog hop for any reason, you can find all the participants here. We’re pleased to announce the two winners of the MFT Gift Certificates.

MFT winners, be sure to check your email boxes, MFT  sent vouchers today via email!

From Laura Evangeline’s Blog Sue Ann said…

“MY DEAR is right ~ this is BEAUTIFUL!! All the elements are pulled together SO beautifully. What a way to wake up with such a beautiful card on this blog hop!!!”

From Jessie’s Blog  Thelma said…

“I absolutely love your coloring, your cards are always so much fun with your signature silver embellishments…LOVE it!!”
Winners of the $25 button assortments are:
liz aka javagirl

Great hop excited to glance at your buttons Who doesnt love buttons

megan mcdonald

“I love all the projects I saw I dont think I could pick a favorite… but I can say that I have add a few more people to my favorites list on the computer.” 

 The Card set winner from www.365DaysOfCrafts.com Blog is
Clare Dempsey

Oh, I started paper crafting as a scrapbooker and now make my own cards. Still not sure of my skills with card layouts. So, I love these ideas to use my MFS and buttons galore! thanks for the chance to win!

Please send and email to buttonsgaloreteam@yahoo.com with your mailing address.  Please allow 2 weeks for shipping.
Now that you have seen many creative ideas how well the products work together we hope you will make some  soon and share them with us.


0

Stamps, Die Cuts and Buttons – A natural Pairing for a blog hop

My Favorite Things and Buttons Galore Blog Hop

Buttons Galore and My Favorite Things have teamed up to bring you an inspiration filled blog hop.  You’ll want to leave a comment on EACH designer’s blog because there is $100 in prizes up for grabs. MFT will give away 2 MFT Gift Certificates for the blog hop.  One $25 gift certificate to one randomly chosen winner from commenters on the MFT Designers’ blogs and one $25 gift certificate to one randomly chosen winner from the commenters on the Buttons Galore Designers’ blogs.  We will give two $25 button assortments the same way. We will take care of choosing the winners and sending the prizes and will announce it on the BGM Blog on July 30.  Deadline to comment will be on July 29.  Same for MFT.

Design Team Blogs:


Link to the MFT Blog:

Grab a cup of coffee, sit back and relax and enjoy the inspiration that is being brought to you by the many talented designers from both Buttons Galore and More and My Favorite Things.

Don’t forget to leave a comment to be entered to win one of 4 great prizes!

Tell us which project you like best. What products you like from My Favorite Things, what your favorite button set is… whatever you like. Then make sure to leave a comment on each designer project page for another chance to win!


Button Magnets – Internet Inspiration

Quick Button Project Idea

Tutorial Tuesday is a regular post on Big Box Detox and they have a fun,quick and easy tutorial on how to make magnets out of buttons.  I can picture these magnets on my fridge.  They would make a great back to school project to place inside a locker.  They might even make a nice teacher gift too.

I think the Granny’s Stitched Buttons and Big Ol’ Buttons would work great.  You could even layer other buttons on top of them.  If you were looking for Christmas gifts to have on hand you could make a bunch of these and package them in a pretty gift sack and have them on hand when you need a last minute thank you or hostess. gift.  After who does not like buttons?

1

Creative card Ideas from Guest Designer Becky Thompson

Greetings!

The three cards on the blog today are handmade by our featured guest designer Beck Thompson.  Becky is and artist, a photographer and an all around great soul.  I have admired Becky’s work for as long as I have been in the creative industry.  At various Scrapbooking shows I was lucky enough to be her assistant and I even worked with a product line she designed.  She is a joy to be around and and she puts lots of details in her pieces.

Trio of  Stamped Cards

Products used:

  • Blank Card:
  • Seaside Big Ole Button
  • Fashion front Brads
  • Stamp  – Stampabilities
  • Ink – Tim Holtz for Ranger
  • Kraft card blank – Stampabilities


Joy Card:

  • Kraft Card Blank – Stampabilities
  • Stamp: Papertrey Ink (background), Stampendous (sentiment)
  • Ink: Stampin’ Up
  • Flower: Start Up Retro Flower
  • Mini Brad


Thinking of You Card:

  • Background Paper: KI Memories
  • Kraft Card Blank:P Stampabilities
  • Flowers: Cha Cha Felt Flowers
  • Sequin: Memory Grab Bag
  • Sentiment: KC& Company


Becky’s Bio

 photography page: www.beckythompsonphotography.com

Becky Thompson has been scrapbooking and paper crafting for over 20 years. Her work has been featured in numerous magazines and books, as well as on television and at many trade shows in the crafting industry. She has taught classes for Big Picture Classes as well as for local stores and various manufacturers. She describes her style as clean and classic.
Becky currently lives in Western Oregon with her husband Brad and their three children. She owns Becky Thompson Photography, specializing in seascape and nature photography of the Pacific Northwest. Her photographs can be found on her website and for sale  in local shops on the Oregon Coast.
0

Scrapbook Page with Buttons – Internet Inspiration

One of our  Creative Team member Designs for Duetica.  While I was checking out her work I saw a scrapbook page that was loaded with buttons and wanted to share.  I printed repetitive words using the Duetica Mandolyn font. I love how crisp and clean this font is but still has a flowing feminine feel at the same time. I love how Keri Lee used all the names her mom has answered to in her life time….Marilyn, Mon, Mom, Kiddo, Momma, Mommy, Mother, Mimi etc…

0

Button Up Candy Jar

Candy Jars are quick and easy to make so it is a good idea to have several on hand for last minute gifts.  The one pictured below is no exception, it combines buttons and burlap which has great texture.  There is also a small gift tag with a flower button on the front on the front to go along with the burlap flower…..check out the instructions below….


Supplies:

Buttons from Confetti BB87 and Mardi Gras GB127

Burlap 6″ x 18″ 2 colors of choice

Beacon Adhesives Stiffen Stuff

Beacon Adhesive Felt Glue

Sizzix Big Shot

Sixxix Fringe Flower Die

Mason Jar with Lid

1 1/2″ x 3″ cardstock

Scissors, hole punch

Instructions:

Die cut 6 – 8 medium fringe flowers.

Spray both sides with Stiffen Stuff; let dry.

Scrunch each flower piece up to give it fullness.

Pick out your buttons.

Layer flower pieces together gluing between each layer.  Pull a thread from burlap to insert through holes of button and blue to top of flower.

Cut out burlap to fit lid.

Glue burlap to lid and place inside jar band; then place on jar that is filled with candy.

Cut burlap 1 1/2″ x width of jar, fringe by pulling threads; wrap around center of jar and glue in place.

Glue burlap flower onto front.  Fold cardstock in half to form a gift tag, glue threaded button to the front; punch hole in corner.  Pull thread from burlap, wrap around top of jar and thread through gift tag, tie.  Layer and thread three buttons together, glue onto the top of jar.

There you have it; a quick and easy button and burlap candy jar….


0

Guest Designer – Becky Thompson

Handmade cards with an ocean theme:

Becky’s cards are simple and classic with added touches that never cease to inspire the creative individual.

Products used:

Breathe Card:
Lighthouse flat back button
Bazzil Cardstock
Patterned paper (SEI)
Washi Tape – Recollections
Ink – Tim Holtz
Stamp: Stampendous


Blank Card:
Seaside Big Ole Button
Fashion front Brads
Stamp – Stampabilities
Ink – Tim Holtz for Ranger
Kraft card blank – Stampabilities

0

Button and Burlap Patriotic Welcome Decor

I don’t do as much decorating for the patriotic holidays as I’d like. I do have quite a few family members in the military, so I think I get more caught up in remembering their service than I do decorating. This year I wanted to change that, so when I was challenged with using burlap in a button project, I knew right away what I wanted to do…

paint burlap and button American flag decor

paint burlap and button American flag decor by Jen Goode

Make an American flag decor sign using buttons and burlap. Using some paint on the burlap, it’s easy to get that rustic look with lots of fun texture and interest without having to create a super detailed piece. This project can easily be created in just a couple hours. I used Decoart craft paints for this project. Feel free to use what you have on hand.

Burlap and button project supplies

Burlap and button project supplies

Materials you need:

  • Ivory buttons
  • Tan/natural colored burlap
  • American Paint in Alizarin Crimson, Primary Blue and Light Buttermilk.
  • Decoart Dazzling Metalics paint in Glorious Gold
  • Craft glue
  • 1/4″ Wood dowel
  • Natural colored twine
  • Paint brush and Scissors
  • Wood letters to spell “Welcome”
Tie twine and glue buttons for faux sewn look

Tie twine and glue buttons for faux sewn look

Welcome patriotic wall art

Welcome patriotic wall art

Step by Step instructions

Make your own Patriotic wall decor using buttons and burlap:

  1. Cut burlap to your desired size
  2. Paint an American flag on the burlap (make sure to protect your work surface under the fabric). Let dry.
  3. Attach buttons to blue area of flag. You can either sew or glue. I tied twine through the buttons and then glued the buttons in place.
  4. Cut second piece of fabric, paint blue.
  5. Paint wood letters and dowel using Gold. I used a paper towel to spread the paint to give a bit more aged look. Let dry.
  6. Glue letters in place.
  7. Attach Welcome piece to flag fabric piece. either sew or glue. Add final buttons on edges as shown.
  8. Attach to dowel. I pinned mine but you can sew or glue – whichever you prefer. Tie twine around the edges of the dowel and hang as desired.

Tips:

  • Using a flat, square brush helps make nice stripes and blocks of color with the paint.
  • To create frayed look, gently pull threads of burlap on top or bottom of fabric to remove. Repeat until desired frayed look.
Patriotic wall decor using buttons and burlap

Patriotic wall decor using buttons and burlap

1

Patriotic God Bless the USA Wall Hanging by Linda Auclair

Patriotic Collage trim Kit

PLease welcome this weeks guest designer – Linda Auclair.  Linda is an avid paper crafter who is know for her prolific work and her fantastic use of embellishments.  She is a natural pairing with Buttons Galore and More.  She does such fun and timely work  that we are going to feature today and next week too.  Both projects have a patriotic flair and are perfect to display for Memorial Day and the  4th of July.  If you would like to view more of her lovely work please visit her blog.


Materials used –

NicoleCrafts wooden décor heart (purchased at AC Moore)

Echo Park Paper’s “4th of July” Mini Theme Collection Kit    http://www.parttimesally.com/

HAB602 Nautical Trim Collage Kit    http://www.buttonsgaloreandmore.com/product/HAB602.html

DF93 Patriot Matte Round buttons     http://www.buttonsgaloreandmore.com/product/DF93.html

CH34 Star Charms     http://www.buttonsgaloreandmore.com/product/CH34.html

Tattered Angels chipboard alphabet

Jillibean Soup Alpha Beans alphabet stickers in Roma Red

The Twinery Twine in Marachino and Denim    http://thetwinery.com/

Stickles Glitter Glue (Ranger)

Mod Podge Decoupage Medium (Plaid)

Folk Art acrylic paint in Brilliant Ultramarine (Plaid)


Instructions:

  • Remove hardware from wooden heart.  Sand and paint the edges with the blue acrylic paint.
  • Trim patterned paper to cover wooden pieces and apply to surfaces with Mod Podge.  Allow to dry and trim with craft knife.
  • Cut 15 2 inch lengths of assorted ribbons from the Nautical kit.  Trim edges and apply to the back of the wooden heart with favorite liquid adhesive.


  • Embellish ribbon strips with buttons tied with twine and star charms.


  • Apply a thick coat of Stickles Glitter Glue to self-adhesive chipboard letters.  Let dry completely before handling.
  • Apply sticker alphabet and chipboard alphabet to wooden heart.


  • Embellish heart with ribbon rosette, and banner with buttons tied with twine and star charms.


button embellished wall hanging


  • Hang and enjoy.
Thank you for checking out this button embellished patriotic wall hanging by our guest designer Linda Auclair


3

Friendship Mixed Media Canvas with Jacquard Lumiere

Hi all!  Ryann here with my take on a mixed media canvas piece.  Now I am first and foremost a card maker, but every once in a while I like to stretch my boundaries a bit and try something new. I recently took a paper doll tag class from Julie Nutting and left feeling inspired to create my own paper doll.  After deciding on a mixed media canvas, I began my project!

Supplies used:

Directions:
  1. Tear book pages into small pieces, tearing off any large white spaces (you want to work with just the words).
  2. Adhere onto canvas using Mod Podge.  Cover adhered book page pieces with a layer of Mod Podge and allow to dry.
  3. Lightly paint a layer of light blue acrylic paint.  Let dry completely and follow it up with a lightly painted layer of light green.  Allow to dry.
  4. On a book page, draw out your doll figure and cut out.  Draw doll clothes on patterned paper and cut out.  Adhere onto canvas using Mod Podge.  Apply layer of Mod Podge on top of doll and allow to dry.  Do the same for the flowers.
  5. Lightly go around edges of doll/clothes/flower with white paint and allow to dry.
  6. Draw and then paint doll hair and allow to dry.
  7. Create sentiment in computer and print out.  Cut words out individually and adhere to canvas with Mod Podge.  Apply layer of Mod Podge on top of words and allow to dry.
  8. Stamp large polka dots with white ink onto canvas.  Stamp small polka dots with pink acrylic paint randomly around canvas.  Allow to dry completely.
  9. Adhere buttons onto canvas.
  10. Apply Lumiere 3D paint to doll to create texture on dress, neck and hair.  Allow to dry completely.
Thank you for joining me today.  I hope my story of creating outside my comfort zone inspires you to give it a try it too!  :)
Signing off,
Ryann


5

Buttoned up Memo Board – May

Make a quick and easy memo board using a VELCRO® Brand Memo Board, Buttons and Ribbon…..the theme of these can change easily by the buttons you use….Make several for gifts but be sure to keep one for yourself!

Supplies:
Assorted Buttons (Brilliant Pink BB84 was used here)
VELCRO® Brand Memo Board
VELCRO® Brand Sticky Back Adhesive
Beacon Adhesives Felt Glue
Kreinik Threads
Scissor

Gather your supplies


Place ribbon on memo board from corner to corner in a large X; cutting as needed; then place ribbon to create a square as shown in photo. Glue in corners and where ribbons cross.


Sew thread onto buttons then glue onto board....


where ribbons cross. For a finished look glue ribbon around edge of memo board also.


Now you can place cards onto the memo board under the ribbons.


For a more useful board pick out some buttons to layer on top of each other....


stack them together and tie off with thread.


Add Velcro Sticky Back Adhesive at the bottom over thread.


These buttons will stick the the memo board giving.....


you more ways to hold your papers on the memo board.

0

How to make distressed buttons- Vintage style

Please welcome Teri – A great paper crafter and fantastic card maker.  She is a Go-To Gal For PaperCrafts magazine, and I know why!  She is very talented, creative and never ceases to amaze me with her fresh ideas.  I love her style and I hope you enjoy the card she made to share with you!  It is a fun technique that makes new buttons look like vintage or distressed buttons. She gives them the perfect touch of vintage.Teri_SewNiceCard1_teri

Supplies:

Classic Circles: Simply Pearls

Tangerine Tango: Color Blends

Clear Rounds

Zip Dry

Other:

Patterned papers from Jillibean Soup, Studio Calico, Crate Paper and My Mind’s Eye

Wood clothespin from Darice

“You’re Sew Nice” sentiment stamp from April 2012: Sew Nice stamp set by Avocado Arts

Jute by May Arts

White floss by DMC


Dressing Up Buttons for Cards

Hi everyone!

Don’t you just love buttons?

There is just something so fun about them and being able to add them to paper crafting projects.

I get bored using them the same old way they come so often times I’ll alter them up before I use them on a card or scrapbook page.

One of the easiest ways to dress them up is to sand them.

Sand buttons

Take a sanding file or distressing tool. Hold it firmly in your hand and then brush a button over it repeatedly. This will scruff it up so you get something like what I got with this button from the Tangerine Tango: Color Blends (http://www.buttonsgaloreandmore.com/product/CB100.html) pack.

Sand buttons

Take things a step farther by adding a circle from Classic Circles: Simply Pearls (http://www.buttonsgaloreandmore.com/product/4207.html) on top of the distressed button. Just be sure to use a strong glue and let the button sit awhile so the glue has time to dry.

I also like to stack them up.

clear buttons

Take a large button, place a small button on top of it and then tie the two buttons together with floss. When it comes time to use them, use a strong adhesive to put them on your project.

Another thing I like to do is add paper to them.

Thread buttons

Start with a Clear Rounds (http://www.buttonsgaloreandmore.com/product/CF80.html) button. Add clear glue under it and then place it on any patterned paper. Let the glue dry completely and then use your scissors to cut away the excess paper. The end result is a cool patterned button.

Here’s a whole collection of buttons I made with these tricks.  They look pretty spiffy on a card.


The trick to getting them to stay on the card is to use a good strong glue. I prefer Zip Dry (http://www.buttonsgaloreandmore.com/product/ZipDry.html).

Teri Anderson

Bio:

Hi! I am Teri, and I’m just girl who loves to play with all things crafty. I’m card maker and scrapbooker. And I am a Go-to Gal for Paper Crafts magazine and on a number of design teams. When I am not making stuff, I am going to concerts, spending them with my family and friends (and two fluffy dogs) and taking a whole lot of pictures. I blog at terisplace.wordpress.com.


1

Quick pony tail holder with buttons

We have a ton of plain colored pony tale holders around the house. This is fine for me, but for my little princess, sometimes a plain ponytail just isn’t enough. Instead of buying a ton of different decorated rubber bands, make them yourself using buttons with the loophole in the back. It’s easy, quick and gives you the opportunity to customize the look of your little hair pieces. (This would even be great for grown up princesses, using some pretty shiny or elegant buttons ~ wink).

Ponytail holder made with a button

Ponytail holder made with a button

Make a ponytail holder using buttons

Make a ponytail holder using buttons

Pink flower button ponytail holder

Pink flower button ponytail holder

The best part about these button ponytail holders is that I can change the buttons to make a whole new look at any time. There’s no glue or cutting… just pulling the rubber band through the button back and voila! You could add more than one button if you’d like, but I think you’d need a little bigger rubber band. I used a small 1.5″ diameter rubber band for this example. This would also be a fun project for kids to make!

What quick and fun projects do you like to use buttons for?

1

Mixed Media Canvas Collage

Today’s Internet Inspiration is from a product partner Helmar.  Their Designer Trudy made a darling mixed media canvas collage.

Mixed Media Collage Canvas

This is a quote from Trudy about our products.

“I love buttons and am excited to share my mixed media canvas with you. I used lots of buttons form our prefered partner company Buttons Galore’s – Candy Apple Green mix and a few from some of their other beautiful assortments.”

You can see the post HERE

0

Tween Baking Party Favors with Buttons

While I love throwing birthday parties for my children, I often struggle to think of fun party favors that are also useful.  With the popularity of baking-themed parties for the tween girl set, layered jar mixes are a perfect complement to the theme, and won’t become clutter later.

Layered Jar Baking Party Favors using buttons

I focused on the Ebony & Ivory Trim Collage Kit to create most of this layered cookie jar, along with some bright pink fabric and the cake button from the Sweet Treats collection.  There are 12 yards of ribbon in this collage kit, so I could make several coordinating jars from one kit.

Materials:

Ebony & Ivory Trim Collage Kit
Sweet Treats Buttons
Precision Diagonal Craft Cutters
Pint canning jar with ring & lid, layered cookie mix (instructions found online try www.recipegolmine.com)
Bright pink fabric remnant (approximately 1-4”square and 1-12×1.5” strip for each jar)
Polyester fiberfill (or cotton balls)
Liquid glue
Fabric scissors
Computer printer or white cardstock and black pen
Black and white patterned paper
Black cardstock

  1. Cut circle of fabric approximately 4” diameter.  Place small amount of fiberfill (or 1 slightly pulled apart cotton ball) onto lid, and cover with fabric circle.  Add ring and screw on tightly.  Trim away excess fabric.
  2. Cut 1 length of striped ribbon, approximately 10” and glue around lid ring, trimming away excess.
  3.  Cut 2 pieces of striped ribbon and one piece of stitched ribbon long enough to fit around the jar, approximately 10.5 inches, and glue into place.  Trim excess ribbon.
  4. Accordion-fold and glue a strip of pink fabric in a circle to create 2.5” diameter folded rosette.  Glue striped ribbon and button rosette from kit to center of pink fabric rosette.
    Layered jar cookie mix party favor with button decorations
  5. Remove shank from cake-shaped button using Precision Diagonal Craft Cutters.  Glue black and white pattern kit button to top right, and cake button to bottom right of rosette, and glue embellishment cluster to ribbons on jar base.
  6. Print cookie baking directions onto 1.5” square tag.  Mat directions onto patterned paper (I used my own design) and black cardstock.  Punch hole in tag corner.  Thread ¼” pink ribbon through punched hole, cross through holes of small white button, and thread back through punched hole.  Tie ribbon around jar ring to attach directions.
    Layered jar  mix party favor tag with button decorations

These baking jars are easy to make assembly-line fashion, and are a fun way to send an activity home with guests after a party.  Paired with a fun apron party craft, they make wonderful, useful party favors!

0

Internet Inspiration

Browsing the internet can provide so much inspiration, and when we found this site we hit the jackpot!  The Paper Players blog not only did a challenge using buttons, they also have a section for their readers to share their creations.  Check out their site http://thepaperplayers.blogspot.com/2012/03/challenge-87-cas-with-buttons-from.html . This card below is one of the many fantastic creations they have for your viewing pleasure.

Paper Players Card with Buttons

Paper Players Card with Buttons

The card Annie made is crisp, clean and full of sparkle.  What is not to love?  Check back here again.  There is so much inspiration from crafters who use buttons in their projects.

Don’t forget we are holding a Pin it To Win It Contest too!


0

Sketch Create Share – Sketch 1

Greetings fellow crafters!  A member of our Button Bevy, Carla Schauer has created a sketch to give you a little inspirational kick. I know that my mojo sometimes runs a little low and I look to the internet for help.   Sketches can be a great way to get the mojo flowing.  Save this pin to your PINTEREST account and create a Sketch board.  There will be more inspiration to come.  If pinterest is not you thing, you can save it to your computer or even print it for your sketch note book.  Check out her project with the sketch.

triangle-banner-tag Sketch

triangle-banner-tag Sketch

How you choose to use this sketch is completely up to you.  We would love to see what you create.  We are pretty social and there are so many ways to share your creativity with us.

Share it with us on twitter.  You can start a conversation by including #sketch1

Leave us a link to your blog here in the comments section or even pin it on your pinterest boards and tag us with #buttonsgalore.

Post it on Facebook – tag us in the photo or share a link to your blog on our page.

0

Button Craft Ideas – Internet Inspiration – Ryann Salamon

feeling-better-soon -Ryann Salamon - Fresh Squeezed

feeling-better-soon -Ryann Salamon - Fresh Squeezed

While scouring the internet for Tuesday Internet Inspiration, I cam across Ryann Salamon.  She is not, new to us as an artist.  We noticed her adorable business cards with handmade accents, while at CHA.  They were wrapped with twine and adorned with a button.  What is not to like?   After visiting her blog  a mental note was made, that she must be featured.  So many of her fabulous handmade cards have buttons as accents.  She creates cards with simple embellishments, crisp stamped images and minimal amounts of material and they look stunning.  She makes CAS ( clean and simple) handmade cards that are awesome.

So when you have a moment, please peruse her site.  You will not be disappointed.  For more information about the card above visit this handmade card post.

2

Pirates, Princess and Projects…Oh my! Blog Hop

How is that for a title of a post?  Today we are having a blog hop to showcase the Buttons Galore and More buttons that coordinate with Laura Kelly Pirate Island and Princess fabrics.  The fabric is manufactured by General Fabric and is available through Hancock Fabric both in stores and online.  The Laura Kelly button blends are custom dyed to match the fabric.

What Is A Blog Hop? New to Blog Hops? Here’s the low-down on how they work.  A blog hop is a list of blogs sharing a similar theme.  The blog “host” lists of links to other blogs on their page, along with the Blog Hop rules.  As the reader, you hop from blog to blog looking at fun projects.

Rule to this hop – Visit each blog, leave a comment if you want.  Come back here to the main blog.  Leave a comment on this post saying what is your favorite project and  if you would want the BOY prize or the GIRL prize.  It is that simple.

These are the blogs participating in the hop

Laura Bray www.katydiddys.blogspot.com

Cristal – www.blueyecicle.blogspot.com

Keri Lee – www.pinklemonade.typepad.com

Niki- www.nikimeiners.wordpress.com

Jen- http://www.100directions.com

Allie –http://welltrainedpaper.blogspot.com/

Ann – http://www.creativitystirsthesoul.com/

Elise – http://mamacowcreations.blogspot.com/

Now for a quick project using fun material and Buttons Galore and More  buttons by Laura Kelly

If you are not a fan on Facebook please “LIKE”  us.  We have so much button craft ideas to share.  We also have  a PIN IT TO WIN IT CONTEST  going through April 27.

If you are interested in obtaining the material you can check out Hancock fabric stores or click the links below for online purchases.

Pirate Fabric

Fleece Pirate Fabric

Princess Fabric 

***Contest now closed  *** Two winners will  be announced by 5pm April 11, 2012 on this site.

19

Happy Frog with Buttons Wall Art

Sometimes a few buttons can finish off a piece perfectly. This month is National Frog Month, so I thought it would be fun to create some wall art with one of my printable images… a frog, of course! I found some cute little flower shaped buttons in my green button bonanza which I thought would be a perfect fit for this project.

Happy Frog and Fly wall decor with button accents by Jen Goode

Happy Frog and Fly wall decor with button accents by Jen Goode

Materials you need:

Tools and other supplies:

  • Cardstock, scissors, craft glue, coloring materials

Steps to make your own Happy Frog and Fly wall decor with button accents

  1. Print out, color and cut out the Happy Frog and Fly image and adhere to background paper/s.
  2. Cut ribbon to size and adhere to edges of picture card.
  3. Tie embroidery thread on each button, trim and glue on each corner of picture card.
  4. Frame as desired.
Print, color and adhere frog art on background papers

Print, color and adhere frog art on background papers

Add ribbon and buttons to edge of art card

Add ribbon and buttons to edge of art card

Finished Happy frog art with cute flower buttons

Finished Happy frog art with cute flower buttons


This same wall art can also be created as a greeting card, just leave out the frame and adhere to a blank card. You can turn your pretty colored art into super cute decor with a few fun accents. Buttons add dimension and interest. Find interesting button shapes and add them to your craft projects for an added touch.  If you are looking for more button craft ideas you can check us out on Pinterest and while you are there enter our Pin it to Win it Contest

0

Button Embellished hand painted Bunny Characters

Depending on what part of the world you’re living in, it may or may not seem like Easter is right around the corner.  Where I live, Mother Nature has been up to her old tricks: there have been days where I’m not sure if it’s time for Christmas OR Easter, but I’ve had it on the brain, so Easter Craft is WHAT I’m sharing with you today, these adorable hand painted bunny characters.

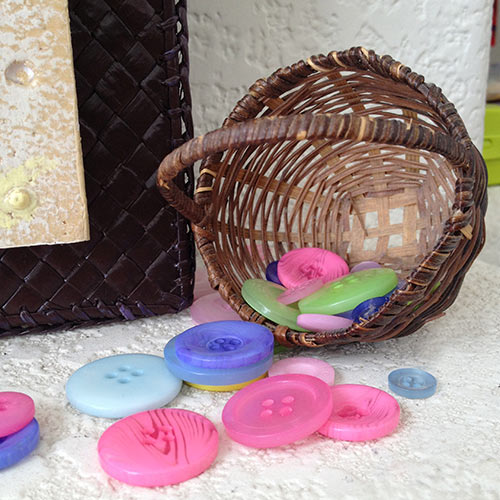
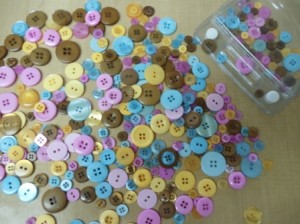
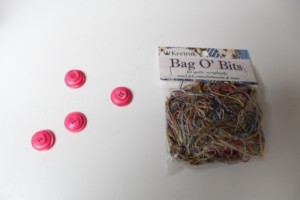
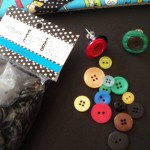
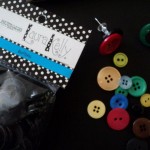
Beautiful buttons from Buttons Galore & More, Rose Garden, button tote collection, was such a splendid influence, so with a little help from some seasonal friends, and some re-purposed tin scraps, I met the Easter Bunny and his gal pal, halfway down the bunny trial: CHECK IT OUT!

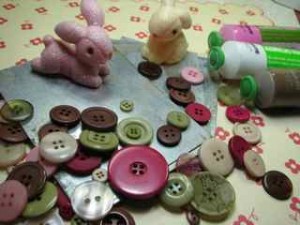
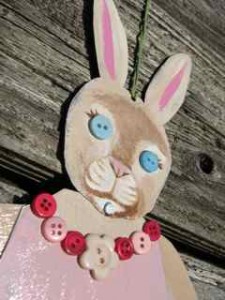
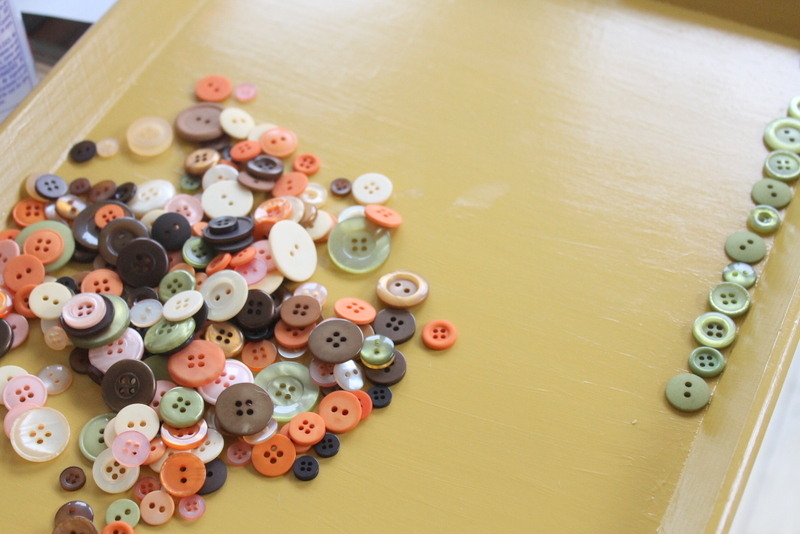
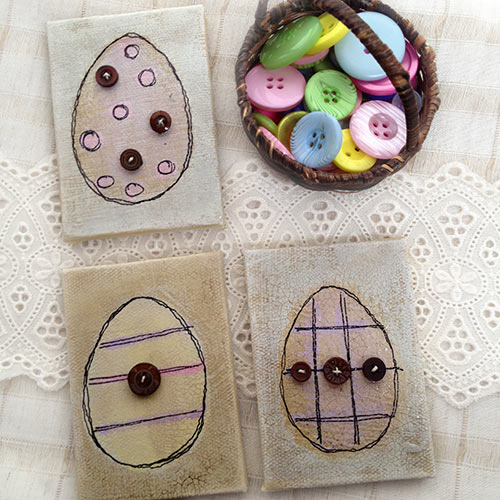
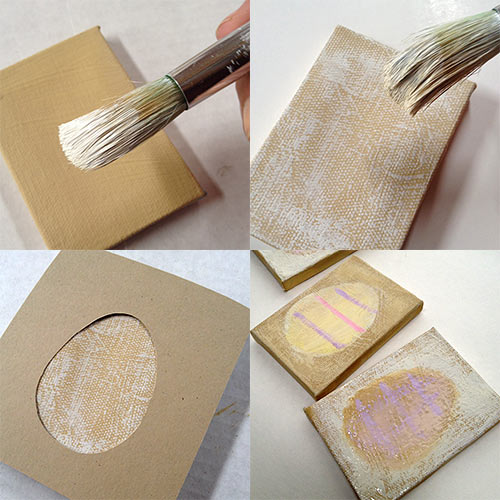
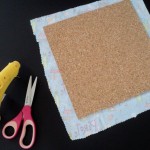
The thought of our standard Easter display feels a little out of date, these days.  Since I’m crafting with SUCH extraordinary buttons from Buttons Galore & More,  I decided to conjure some images of Peter Cotton Tail, to make something “keepsake” and classic feeling, created with my own two hands.  It all started with some sketching…

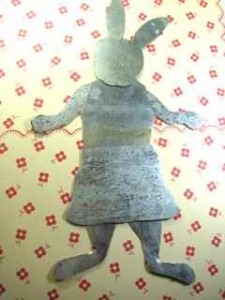
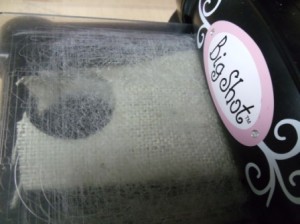
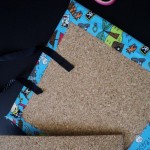
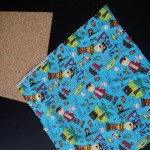
And then CUTTING!  Scissors indicated for metal, cut this material easily.  Using a standard, crafting felt pen, I made my marks, that could easily be removed by rubbing.  From 5 individual squares of 4 x 6″ galvi/tin, I cut bunny body parts…  To be ENJOYED, not harmed! {!}

These individual pieces will be joined with simple brads, with long shanks, once painted and embellished.  Careful planning in the early stages is the best way to ensure a great results to your seasonal {and ANY!} craft decor project.

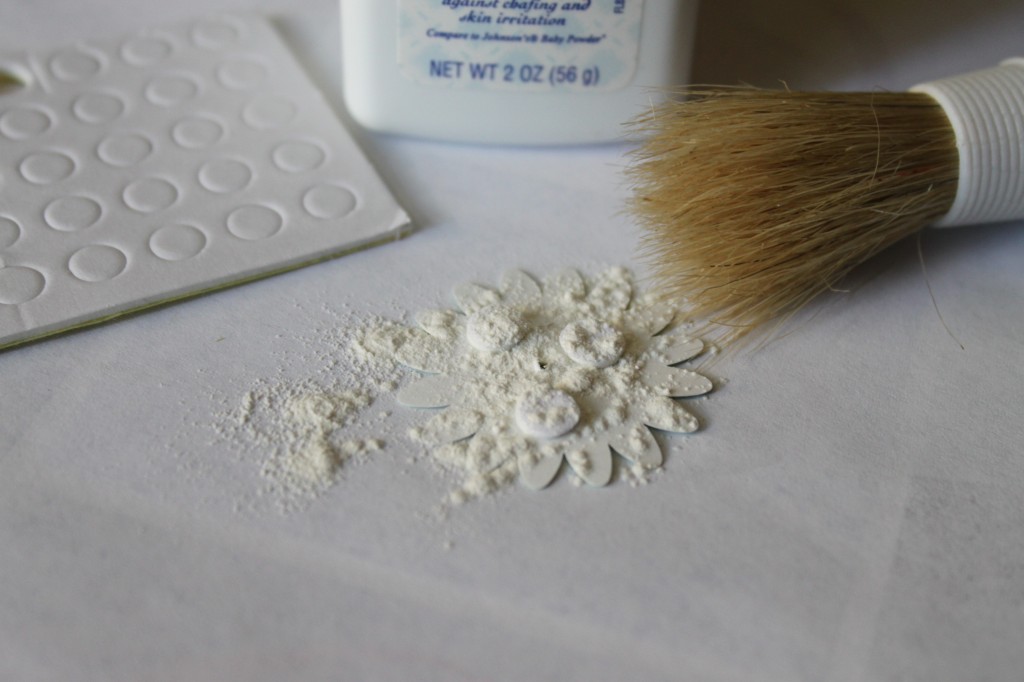
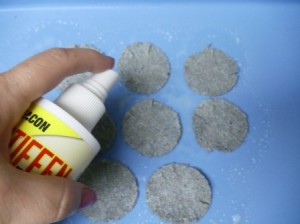
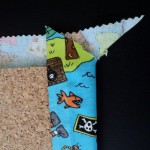
Mixing a desired shade of “bunny” creamy brown, I gave each piece two coats of paint.  Bunny “details” were added, as desired. Once dried, they were then painted with clear, crystal adhesive, then dried completely.  When dried, the edges were sanded.  More adhesive added where desired.

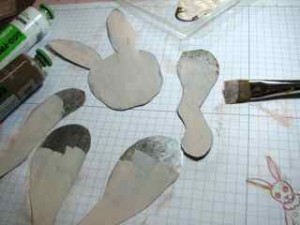
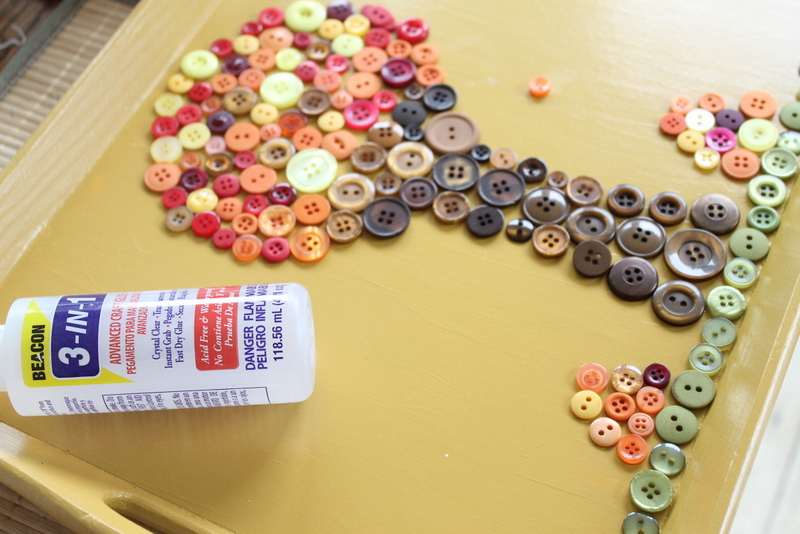
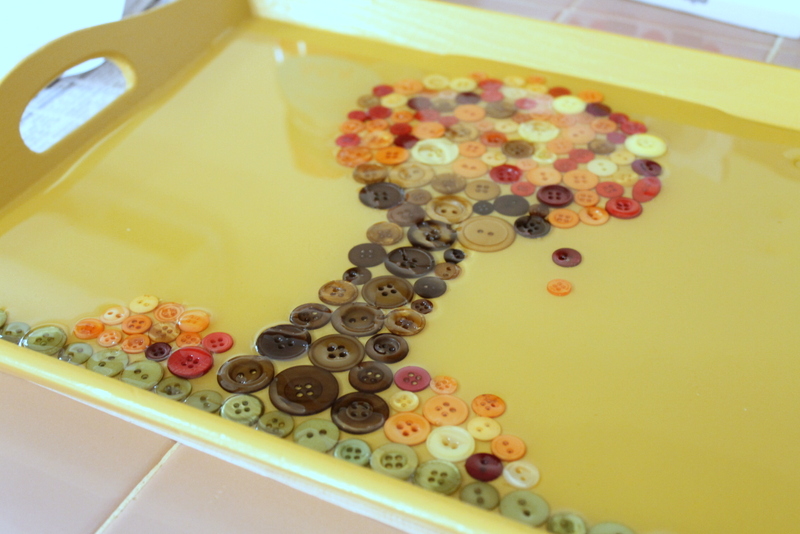
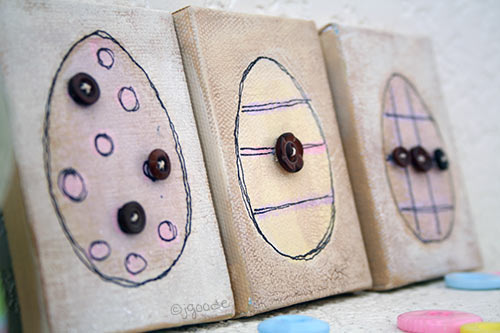
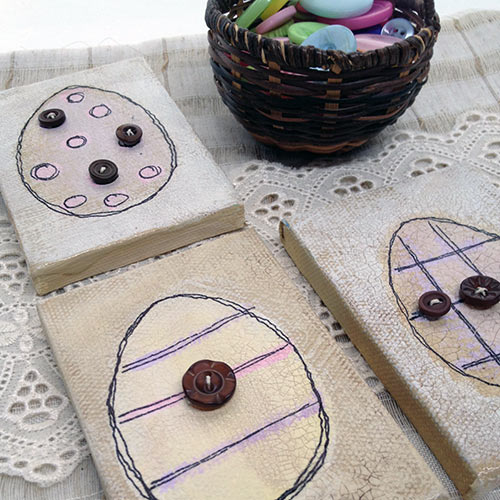
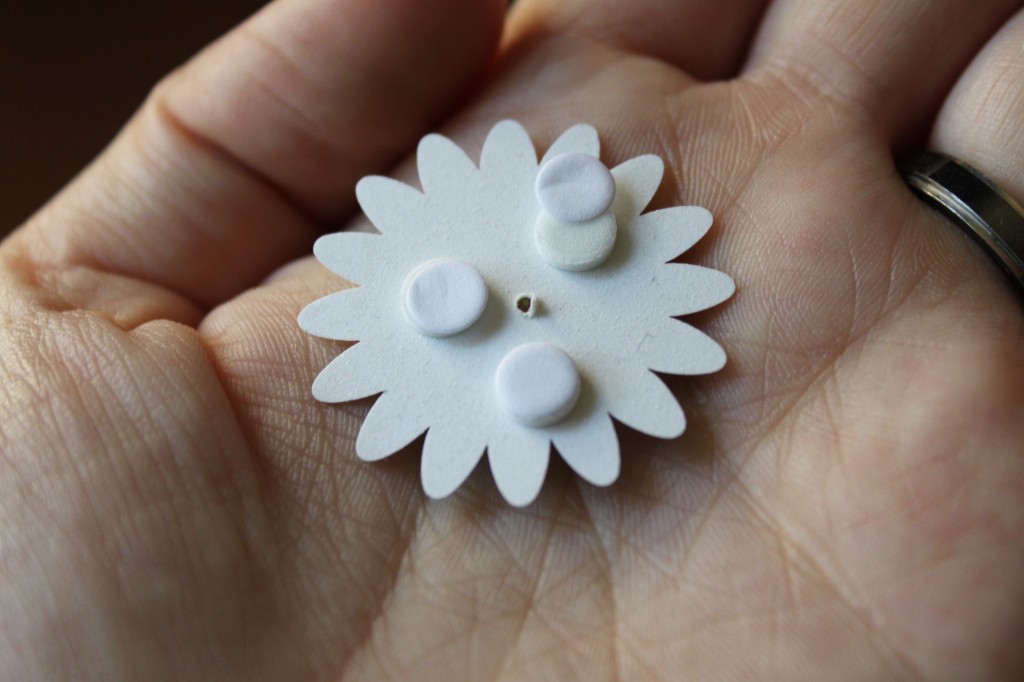
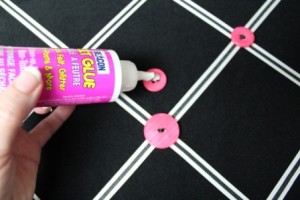
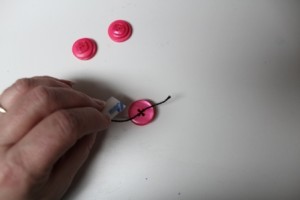
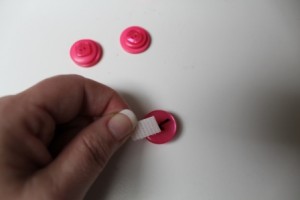
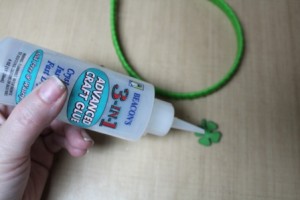
Once pieces were dried, they were assembled using a “metal friendly” punch, and then fitted with a brad.  Once in place, the brad was lightly smashed with a craft hammer to give a more vintage feel.  I’m hoping these guys will grow old with my family, so I need them to stay sound.   With the character’s parts, functioning, buttons were added to embellish and complete a classic flavor to these Easter Characters.  Adhered with Beacon’s 3 in One Craft Glue, with careful storage, these fabulous details should last for years!

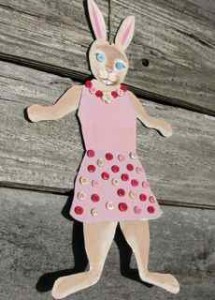
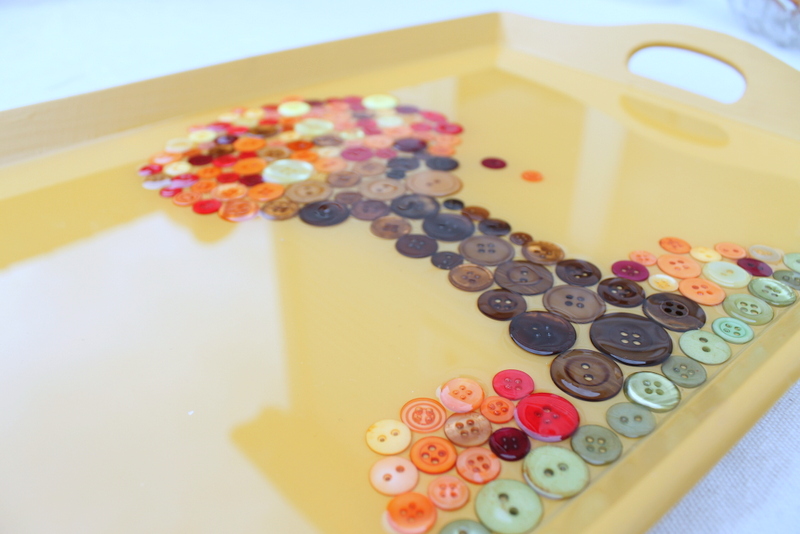
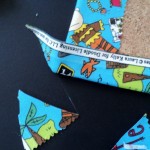
I’m rather smitten with lil’ Easter Girl!

But SHE appears smitten with Peter Cotton Tail!

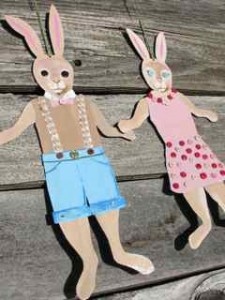
Aren’t they the cutest pair!

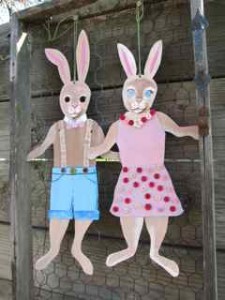
I hope they have inspired YOU to look at your personal inventory of “leftovers”, toss in some incredible buttons from Buttons Galore & More, and make a seasonal treasure for you and YOUR family to enjoy for years to come!   It was a pleasure to share this fun button embellished spring project with you!   Have a splendid day!

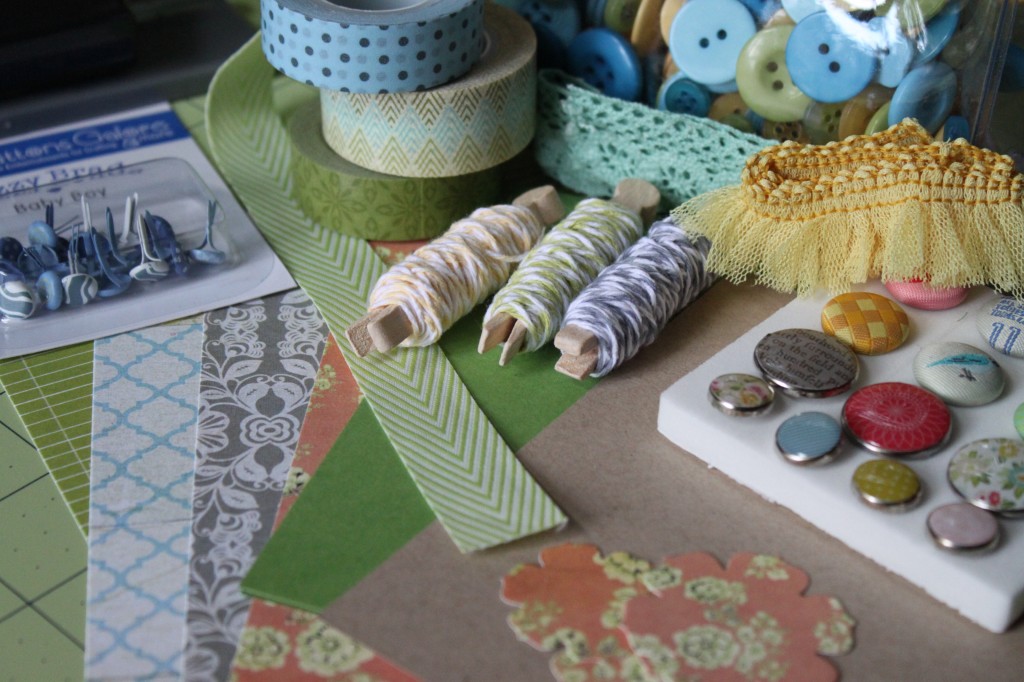
Buttons Galore & More Products Used:

Rose Garden Button Tote – HB104

Class Button Tote – HB108

3 in 1 Craft Glue

Cross Promotional Items –

Loden Colored Twine


0

Pinterest Pin of the Week Easter Egg Ideas

Pinterest is the most amazing visual candy.  If you are not familiar with pinterest… you really should be.  But I must warn you that pinterest can be a tad bit addictive.  Okay, not at tad bit, PINTEREST IS HUGELY addictive.  We are starting a new segment with a pinterest pin of the week. We want to share some of the great ideas that are out there on pinterest.  These pins might not use our button products, they might be created from a personal button stash, or from a grandmother or aunties button jar.  But, no matter where the buttons originated from we find the projects inspiring.  If you need an invitation to pinterest leave a comment in the comment section with your email and we will invite you.  If you click Pinterest it will take you to the pinterest page where the items is located for more information.

Pinterest Pin of the week 3-22-12

Pinterest Pin of the week 3-22-12


We also found this easter egg button art similar to the above.  If you want to order buttons similar to the buttons used on a this project click HERE.


If you are looking for spring buttons they are on special this week for $1.15 – check them out.


0

Spring Fling Button Garland

Spring Garland button art by Laura Bray

Spring Garland button art by Laura Bray

Has Spring arrived where you live?  If not, why not whip-up a few Spring Fling Button Garlands to drape around the house until the real thing makes its appearance?  Or use the garlands for your Spring holiday decor.

Spring Button Garland by Laura Bray

Spring Button Garland by Laura Bray

This project is versatile as you can be completely in charge of how you make it based on your skill level and materials available.  It’s all about the flowers.  The most important thing to remember is that this garland looks best with felt flowers and button embellishments, but you can create the flowers however you want.  I used my die cut machine to create the felt flowers and layered a couple of different sizes and colors together.  My color inspiration came from Buttons Galore & More’s Citrus Button Jar.  I just pulled some buttons out of the bag that inspired me and then matched my felt accordingly.  You can also just buy some felt flowers and then bring them up a notch with buttons.  Because buttons make everything cuter!

Supplies:

Instructions:

  1. Make or buy felt flowers.  To make a 50″ garland, you will need  3 large (3.5″) flowers, 4 small (2″ ) flowers and some felt flowers shapes or circles for the backs of each flower.
  2. Glue buttons to center of felt flowers.  Add embroidery to felt leaves and flowers if you desire.
  3. Fold ric rac in half and lightly mark center line.  Lay the ric rac flat on your work table.  Now, we want to center a large flower over the halfway mark on the ric rac.  Take the felt backing piece (a flower shape in the same size or a slightly smaller circle shape) and apply glue and lay it under the ric rac as shown in the photo below.
  4. Now take your top flower piece and attach to the felt backing, with the ric rac running through the middle.


5.  Using the same technique, attach a smaller flower to the right of the large flower.  Space the flowers approximately 3″ apart.  Make sure you glue all the flower fronts to the same side of the ric rac!

6.  Continue attaching flowers, to either side of the large, middle flower until you reach the ends of the garland.  Remember the pattern is to keep alternating large and small flowers.

Hang your garland and enjoy!

Project Designed by Laura Bray.


1

Easy St Patrick’s Day Headband with Novelty Buttons

St Patrick's Day Headband

St Patrick’s Day Headband

Make this Quick & Easy St Patrick’s Day Headband today and wear it this evening….using “Match Ups” makes it so easy to do!

Supplies:

• Match Ups Spring Collection #2133 (5 clovers)

• Thin White Headband

• 2 yards ¼” Green Grosgrain Ribbon

• Beacon’s 3 in 1 Glue

• 5 Rhinestones

Scissor

Instructions:

Glue small piece of ribbon onto ends of headband

Glue small piece of ribbon onto ends of headband

Then glue one end of ribbon at the end of headband and wrap around at an angle until headband is covered, glue end; let dry.

Then glue one end of ribbon at the end of headband and wrap around at an angle until headband is covered, glue end; let dry.

Glue rhinestones onto center of clovers.

Glue rhinestones onto center of clovers.

Glue clovers to headband starting on one side.

Glue clovers to headband starting on one side; you can stop with just one clover or

Glue and space clovers evenly onto headband as shown.

Glue the rest of the clovers onto headband as shown.


0

Super Simple – Super Chic Napkin Rings

Button embellished napkin rings

Button embellished napkin rings


I am helping a friend plan and prepare for her wedding and all of the events surrounding it.  The project today is one of the napkin ring ideas I proposed to her.  It is simple enough that her kids can help, not expensive, and very pretty all at the same time.  She wants to go with shades of olive ( his favorite color), peach ( her favorite color, coral and turquoise (mine).  Not that my colors matter at all.  By adding shades of the four colors it helps to expand our options and stretches our budget even further.  By limiting the colors it allows us to many things that we already own.

To make the napkin rings I used scrapbooking paper that had all of her colors.  I buttons I used are Avacado and adhered with a glue dot.


Cut 1.5 inch strips

Cut 1.5 inch strips

Add a glue dot to one end

Add a glue dot to one end

Wrap around napkin

Wrap around napkin

Viola!  Super Chic Napkin Rings

Add buttons with a glue dot and VIOLA!

1

Gusseted Girly Messenger Bag – Great Valentine Gift


Yo-yos on Girly Messenger bag by Niki Meiners

Yo-yos on Girly Messenger bag by Niki Meiners


This feminine messenger style tote is perfect for a Valentine’s Day gift.  It is soft and girly and it can be carried long after.  Plus the flowers on this bag will last a lot longer than a dozen roses.


Gusseted Messenger Style Tote

Gusseted Messenger Style Tote


Tools:  

Scissors, Cutting matt, needle, thread, pins, Clover Yo Yo Maker in extra small, small, medium, large, extra large circle, small and medium heart and the small and medium flower.

Materials:

Confection Button Collection and FabriTacCream canvas, cream burlap small dark pink rick rack, large light pink rick rack, various scraps of coordinating fabric. Two strips of 6×24”, burlap, Velcro ®

Directions:

1.  Cut burlap to 36″ by 22″ to make a bag about the same size as a grocery bag. So if you buy 44″ wide fabric, you can make two bags with a yard.  Cut in half.   to measure &&& Cut canvas to $x#.  Sew the burlap to the canvas.  Fold the top edge down 1/2 inch. Then stitch ¼” from edge.   Place wrong sides together and sew on the three remaining sides.

2.  To make a gusset, flatten the bag with the bottom seam on top.  (It looks like an odd triangular shape, but makes more sense when you actually do it). Then sew across the triangle so that your seam is about 3-4″ long (mark it by sliding a ruler down until it reads 3″). When you turn the bag right-side-out, it will stand up like a paper grocery bag just not as deep.

Gusset on Messenger Style Tote

Gusset on Messenger Style Tote

3.  Cut striped fabric for handles to 6×24.  Fold in one inch on each side finger press.  Then stitch ¼” from edge.  Fold ends of each tip to form a diagonal and sew along edges.  Sew the other end inside the bag.  Straps can be made of self-fabric, very sturdy ribbon, matching fabric remnants, nylon webbing, or whatever else seems you have handy.  I tied the fabric strips into a knot for a decorative effect.


Knot at the top of the straps

Knot at the top of the straps


4. To embellish the tote use Fabri-tac to adhere various lengths of rick rack.  The rick rack  mimics flower stems.  Mine vary from 4-10″.

5.  Follow manufacturers directions to make the yo-yos.   I used a variety of the sizes listed above.  Hand sew buttons in the center of each yo-yo.  You can either adhere the yo-yos with a quick stitch or you can use the Fabri-Tac.


Yo-yos flowers with button center

Yo-yos flowers with button center


1

Be Our Guest – How YOU Can Guest Post On Our Blog


Christmas Gift Idea - Crochet Dishcloth Embellished with a Useful Button


Do YOU have a great button project that you would love to share with our readers?


Trash to Treasure with Polymer Clay and Buttons


Did you discover a great technique or alter an object?


Looking for an ‘ATTA GIRL/BOY from someone other than your mom or best friend?

Would you like to have a button for your blog saying you’ve been Featured on Buttons Galore and More and maybe a little THANK YOU gift to boot?

Send a photo of your great idea, project or technique to buttonsgaloreteam (at) yahoo (dot) com and we’ll let you know if we can feature your idea/project on our blog. If your project is accepted we’ll ask for more photos (step out process photos if they are available) and written instructions. We’ll let you know when your project will be featured so you can share the good news with all your friends and we’ll even send you a little thank you gift!

  • All projects/ideas need to feature buttons from Button Galore and More.
  • Final decision as to weather a project gets featured or not rests with buttonsgaloreandmore.com & our social media coordinator
  • We will post your name and state, website or other info that is both approved by US and YOU
  • You own the rights to your project and photos


0

Concentric Circle Button Pillow

Concentric Circle Button Pillow

Concentric Circle Button Pillow


This modern pillow was created by die cutting leather flowers and adorning the center with buttons. The finished size is 12×18”- perfect to tuck into a corner of the sofa or on a small chair.

Materials

  •  Avacado Satin fabric
  • Sea Glass buttons
  • Leather
  • Sizzix 3-d Flower die cut
  • The Warm Company: Soft & Bright polyester batting

Tools

  • Sizzix Big Shot
  • Sewing Machine
  • Thread and needle


Other Supplies

  • Covered Work surface
  • Paintbrush for each color
  • Scissors
  • White fabric pencil
  • Circles in various sizes,
  • Straight pins
  • Needle


Directions

1. Cut fabric for front and back of pillow to 12.5 x 18.5. Die cut leather flowers 18 times.  Add a dab of glue to secure layers.  Sew button into center.

4. Place wrong side of fabric together.   Secure with straight pins.  Sew closed with a sewing machine leaving an opening large enough to fill interior with batting.  Turn pillow right side out and fill cavity with batting.

5. Sew the opening closed with either a machine stitch or by hand.


by Niki Meiners www.365daysofcrafts.com

1

Button and Rosette Frame

Button and rosette frame by Niki Meiners

Button and rosette frame by Niki Meiners

Looking for a holiday gift or a for a fun decoration? Why not make a frame embellished with buttons and rosettes?  I love the blank wood frames from Michael’s.  I usually purchase a dozen or so when they go on sale for $1.  They are great, low cost  homemade gifts. To make this project:

Tools and Materials:

Blank wood frame, paint brushes, 3 colors of paint ( similar colors work best), glue, floral decoration and buttons green, waterfall, and bittersweet.

Directions:

Paint wood frame with paint color of choice.  Dry brush on other colors.  Glue on rosettes and buttons as shown.

Toodles,

Niki

0

Make a Button Snowman Ornament

Button Snowman Ornament

Button Snowman Ornament

Need and ornament for a gift, package topper or an ornament exchange?  Why not make your own this year.  Button Ornaments are a great and inexpensive solution.  I made a few dozen while catching up on my favorite tv shows.  The buttons I used come in a great storage jar that also makes it easy to craft on the go.  For me on the go is not in my crafting cave.  I also made a cute wreath using green and red buttons.  Stop by http://365daysofcrafts.com after Halloween to check it out.

To make this cute and simple snowman you will need:

a wire cutter

14-20 guage wire. approx. 24 inches

one orange bead ( barrel or bicone)

two brown or black beads for mittens

Various size black buttons (5- 8)

White buttons ( 18-26)

I used buttons from a jar in the Portrait Collection


Directions

Cut a 12 in piece of wire.  Make a loop or add a crimp bead  at the bottom. Stack white buttons on to desired height.  Wrap a six inch piece of wire around to form arms.  Attach beads for mittens and cut off any excess. Cut off a3 inch piece of wire and attach orange bead as the nose.  Stack on more white buttons and then add largest black button to form brim of hat.  Stack on more black buttons to make hat.  Use the remaining wire to form a loop as shown.


Tada!  A snowman button ornament.  If you would like to see more of my work please visit  http://365daysofcrafts.com

Toodles, Niki


1

Country Chic

Country Chic

Country Chic

Burlap has been one of my “old favorites” and I am so pleased that it is back en vogue in the crafting world.  To create this chic candle holder I used a glass container that I purchased from the dollar store.

Button Detail

Button Detail

Tools:

Scissors, Embossing stylus

Materials:

Wood buttons, Blue and green burlap, Beacon Adhesive Fabri-Tac, Rusted Heart, Bo-Bunny Rub ons, glass marbles and a candle.

Directions:

Cut blue burlap into a 3×9 strip and fray edges.  Cut green burlap into a 2×9 strip and fray edges. Adhere strips to container.  Adhere buttons randomly around the center.

For a variation add rub-ons to rusted metal heart.  Trim heart with the tiniest buttons.  Add butterfly rub on to glass exterior.

Country Chic - Variation

Country Chic - Variation

Rusted Heart Details

Rusted Heart Details

I hope you have enjoyed this country chic candle container.

Toodles, Niki

0

Envelope Booklet Hostess Gift

Make an Envelope Booklet to hold coupons, photos, or stationery.

I love little gifts that I can make with items that I’ve got on hand and give as hostess gifts, thank you tokens, and teacher’s presents. Usually it’s on short notice- and I can whip up one of these Envelope Booklets in an hour. WIN!

Continue Reading →

1

Bandana Memo Board with Button Push Pins

Bandana Memo Board with Button Push Pins

I don’t know about your house but in my house we have FOUR young people. They are VERY BUSY young people and each one has a bulletin board. They are a super easy way to communicate within such a busy family. (Besides text messaging that they tend to read and then forget) A note on a bulletin board is a little harder to forget. It stays there, quietly reminding, until the event or reason for the note has passed.

Anyway, why have a boring bulletin board when you can have one that fits your decor, your personality or your hobbies?

Bandana Memo Board with Button Push Pins

This bulletin board uses a cork tile, a bandanna and a 12×12 frame along with a few other supplies.

Bandana Memo Board with Button Push Pins

Cover the cork tile in Mod Podge.

Bandana Memo Board with Button Push Pins

And then smooth the bandanna over the Mod Podge and let dry.

Here is a tip: Before spreading any Mod Podge decide which portion of the bandanna design you want to see on your bulletin board. Don’t cut it all out ahead of time. Just figure out where you want to place the bandanna. (Cutting out the fabric ahead of time makes it too hard to line up.)

Bandana Memo Board with Button Push Pins

While the Mod Podge is drying you can make your thumb tacks or push pins. I simply hot glued white buttons to a flat topped thumb tack. Be careful of that hot glue! You could also use Amazing Goop or a cool temp glue gun a well. Poke the tacks into a piece of corrugated cardboard or foam core while they are drying to keep them upright.

Bandana Memo Board with Button Push Pins

My button push pins.

After the Mod Podge is dry cut away the excess fabric and insert it into the 12×12 frame.

Bandana Memo Board with Button Push Pins

Now you can embellish to your little hearts’ content. I used hot fix rhinestones in two sizes, Thickers alphabet stickers and the heads from 4 “silk” daisies.

Bandana Memo Board with Button Push Pins

Isn’t this fun? Girlie but not too girlie. Country but not too country.

0

I Love Buttons – Grab Our Button

Do you love buttons as much as we do?

Now you can declare your love of buttons on your blog or website. Just copy the code in the box above and paste it into a text box in a side panel or footer.

0

Child’s Button Embroidery Sampler

Do you remember how much you loved to sift through your mom, aunt, or grandmother’s button boxes? I still play with my buttons all the time, and I know I can always keep my five year old daughter busy with buttons. I recently came up with a project that takes button play beyond just looking at buttons, but also uses them as a creative tool. The end result is a darling little sampler of all my daughter’s favorite buttons and artwork. It’s truly an heirloom piece that will be cherished for years to come. Here’s how to make a button embroidery sampler with your child.

Continue Reading →

1

Pretty Button Flower Wall Decor

Pretty little blooms button flower picture by Jen Goode

This project can be made using a variety of recycled materials combined with your favorite pretty buttons. Add a touch of color to your decor for a flower garden inspiration all year long. I created this project to accent pieces in my daughter’s bedroom, but you can adapt it to fit where ever you’d like some “pretty little blooms”.

Continue Reading →

3

Wood Button Monogram

Add texture and detail to a simple framed monogram using a variety of wood buttons from the Haberdashery collection. These buttons are a gorgeous mix of natural wood colors, and I couldn’t resist showcasing them in a project that let their beauty take center stage.

In order to play up the texture of the wood, I covered chipboard with neutral fabric to create a background that didn’t compete with the wood buttons. The buttons were then arranged to make the monogram, and glued into place using fabric adhesive (Beacon Fabri-Tac). A simple inexpensive Ikea wood frame painted navy gives just enough color to draw the eye to the project.

On a wall or on a table, this monogram is a great way to easily personalize a room.

Thanks for stopping by!

Carla Schauer

http://carlaschauer.com/carla-schauer-blog-whats-new/
0

Powered by WordPress. Designed by WooThemes