Header

Tag Archives | Card Tutorial

Celebrate a Star with this Handmade Birthday Card!

handmade birthday card

Hi, it’s Connie here today with the Buttons Galore & More design team sharing a handmade birthday card design using the themed buttons “Stars” by Buttons Galore & More. These star buttons come in four different colors – green, yellow, blue and red – plus two sizes. They are perfect primary colors, great for creating crafty projects with kids or for special occasions! Continue Reading →

0

Make a Fun Coffee Gift Card Holder for National Coffee Day!

coffee gift card holder

It’s National Coffee Day, and what better way to celebrate than with a gift card to your favorite coffee shop? Using 3D buttons from our Buttons Galore Sweet Delights collection, you can make a sweet card that doubles as a gift card holder!

Supplies Needed to Make Coffee Gift Card Holder:

Instructions for Making Coffee Gift Card Holder:

  1. Trace front of side stepped card onto the back of one sheet of patterned paper. Cut out with scissors and adhere to front of the card. Ink edges of paper if desired.
  2. Cut two 3/4″ strips from the second sheet of paper. Ink edges if desired. Adhere one strip to the bottom of the card. Cut the other strip in half. Adhere one piece to the top of the card, and adhere the other on the second “stairstep” of the card.
  3. Spell out “Thanks a Latte” by placing stickers onto leftover pieces of the 2nd sheet of paper and then cutting out rectangles around the words. Inks edges if desired. Adhere to card with foam pop dots to add dimension to the card!
  4. Remove shanks from back of “coffee cup” and “cupcake” buttons with a button shank remover. Adhere to card using red line tape.
  5. Adhere gift card to the last step of the stepped card using red line tape.

SaveSave

1

Embellish a Fiesta Birthday Card!

We’ve got birthdays on the brain around here in May. 28 Lilac Lane designer May Flaum was inspired to make her celebration a fiesta, with a card that features a watercolor pinata and a shower of 28 Lilac Lane embellishments!

Fiesta Birthday Card

Wondering what supplies May used? Here’s a look at her list:

This fiesta birthday card by May is so fun and easy to make – for the complete how to, check out her video tutorial below!

Did you notice that something was missing from the video? Here’s May’s explanation for that step that you don’t see in the video…

I did add the pink splatter you see here after filming. Intentional? Not quite… I was cleaning up spilled a bit then said oh to heck with it and went wild! Just a reminder you can always make it work.

Yes, even the fabulous May Flaum has crafting accidents! But as she proves with this cute fiesta birthday card, you can go from “whoops” to wonderful if you just are flexible and think creatively.

Fiesta birthday card close-up

This fiesta birthday card uses the pink and orange tones of the “Fruity Fun” embellishment bottle. But with a change of background cardstock and by using different colors of watercolors, you could make this design work with almost any of the 28 Lilac Lane embellishment bottles. How about the pink and green of Savannah Stroll, or the red, turquoise blue and green of the appropriately named Fiesta? Pick your favorite colors and make May’s fiesta birthday card your own!

0

A Crazy Bird Told Me…It’s Graduation Time!

Graduation season is here! Just because the big day is a formal affair, that doesn’t mean that the cards can’t have some fun. Our 3D buttons dress up this bird so he’s ready for the walk across the stage!

Crazy Bird Graduation Card

Supplies Needed:

This card uses our 3D buttons as accessories for some crazy stamped characters! This character gets a whole new dimension – literally – with a fun button graduation hat and his own button diploma.

To make this card, select a card base in one of the graduate’s school colors. (You’ll want to choose the darker of the two school colors for the card base.)

Cut a 3.75″ by 5″ piece of watercolor cardstock and adhere it centered on the cardfront. Use watercolors in the lighter of the two school colors to paint a block along the bottom of the paper. Stamp the sentiments at the top and bottom in waterproof ink, and then stamp the bird in the middle.

Crazy Bird Grad Card close-up

Use the watercolors to paint in the bird. (I used the yellow school color for the bird’s wings to hold the diploma.) Then cut the shanks off of the graduation hat and diploma buttons, and adhere them to your bird.

This bird will put a smile on the face of your special grad while bringing your good wishes to them! Happy Graduation, Class of 2017!

Easy Graduation Card using 3D buttons from www.buttonsgaloreandmore.com

0

Make a Pretty Button Flower Card for Mother’s Day!

The spring flowers are in bloom, and Mother’s Day will be here before you know it! So why not combine the two to make a pretty button flower card for mom for Mother’s Day?

Button Flower Card for Mother's Day

Supplies Needed:

This 5″ by 7″ button flower card is super simple to make but so cute! And it’s so easy to make that it would make a great kids’ project for the holiday.

To start this card project, cut a 10″ by 7″ piece of white cardstock and fold in half along the 10″ edge to create your card base.

Cut a 2.5″ by 7″ piece of cardstock from the scraps of the white sheet. Select buttons from the Glam Girl Button Bonanza to make your button flowers with. Then, using the PPA Matte Adhesive, adhere the buttons in place using dots of glue. Set the flower strip aside to dry.

While the glue dries, cut a 1.5″ by 7″ strip of paper for the top of the card, and a 2″ by 7″ strip of paper for the bottom. Adhere them in place along the top and bottom of the card front.

Stamp “Happy Mother’s Day” on a yellow cardstock scrap in dark blue ink. Trim the cardstock to slightly larger in size than the sentiment.

After the glue on the flowers is dry, adhere the flower strip in place across the card front. Glue the sentiment block down on the right side of the card front, over the seam between the flower strip and the bottom patterned paper.

Button Flower Card for Mothers Day

This card design is so versatile! Just by changing the sentiment, the design could also be used for a thank you card, or for a birthday, or for a variety of other occasions. It’s a classic that you can use over and over! To create a smaller card, just use smaller sizes of buttons. With theGlam Girl Button Bonanza bag, you can make this beautiful button flower card over and over!

0

Say Congratulations with a Button Balloon Card!

This time of year means graduations, and all sorts of other occasions for which congratulations are in order. Running out of time to make cards for all of them? Just dive into your Button Bonanza bags and dig out some of the largest buttons to make balloons!

Congratulations Button Balloon Card

Supplies:

I used the “primary” Button Bonanza bag for this but the beauty of a simple design like this is that you could use any color scheme that works for your occasion. For a graduation or sports-related occasion, use school colors! Recent graduate got a new job? Make your balloons the recipient’s favorite colors or their new employer’s corporate colors. With our huge palette of Button Bonanza colors, the options are endless!

Button Balloon Card

To make this card, select the buttons that you want to use and arrange them to make a row of “balloons”. Before you glue them down, nudge them up just slightly to get a pen in to draw your “string” lines and bows. Then use clear drying adhesive like PPA Matte Adhesive to glue the buttons down so that it looks like the strings are tied to their bottoms.

For the final step, get out a handwritten sentiment stamp (or a pen if you are braver than I am) and use black ink to stamp the sentiment in the lower right corner of the card front.

Button Balloon Card

Send some button balloons to someone special!

0

Use Trendy Circles for Making an Easy Birthday Card!

Circles are trendy right now – and they are a perfect match for buttons! This five minute card project pairs circles, buttons and a retro style patterned paper to create a look for an easy birthday card that is quirky and fun!

Button Circle Easy Birthday Card

Supplies Needed:

To make this easy birthday card, select a blank card base and use black ink to stamp a sentiment in the lower right hand corner. I chose a birthday sentiment for my card, but this card design is really suitable for a variety of occasions: hello, cheer, thank you, and many others. Simply choose a sentiment suitable for your desired occasion!

Cut a piece of paper to 5 1/2″ by 3 3/8″. Get out your circle punches and punch about a half dozen random holes in it. Adhere it across the card front, just above the sentiment.

Select buttons that fit in each of the circles and glue them down with a clear drying white glue such as PPA Matte. Try to pay attention to color balance when selecting your buttons – don’t choose too many large buttons the same color or use too many buttons close together in one area of the card that are the same color.

Button Circle Easy Birthday Card

When the glue dries, your card is ready to be put in an envelope and delivered! This easy birthday card project would also be great for doing with kids to make teacher thank you cards for the end of the school year, And the color scheme possibilities are as endless as our Button Bonanzas…check them out and get inspired!

0

Embellish an Easter Egg Card with 28 Lilac Lane

Embellishing an Easter egg card is a great reason to get out your 28 Lilac Lane embellishments and go crazy with color. The flat back pearls and buttons in our embellishment bottles will have your Easter egg card shining like a jewel!

Easter Egg Card

supplies needed:

One of the great things about having a large selection of 28 Lilac Lane embellishment bottles on hand is the ability to mix and match them to create colorful projects like this Easter egg card! By combining small amounts from five different bottles, I was able to create a jeweled effect on my Easter egg that allows the egg to stand as the entire design of the card.

How to Make An Embellished Easter Egg Card

Locate a decorative Easter egg design in your die cut machine software. (If your machine doesn’t have this particular design, it will certainly have a similar design that can be embellished in the same manner. Look for a design with lots of straight lines or wide spaces that can be filled with embellishments.)

Cut the Easter egg design out of cardstock scraps, and assemble with glue. Then glue the assembled Easter egg to the front of a coordinating blank card base.

Using 28 Lilac Lane embellishments that coordinate with each area of the Easter egg card design, add rows of embellishments to the card with a liquid adhesive like PPA Matte.

Finish the card with a sentiment sticker in the lower right.

Easter egg card

This is a great project for kids and grown-ups to do together….make the cards and then let the kids do the decorating!

0

Embellish a Spring Butterfly Card with 28 Lilac Lane

It’s officially spring, so let’s use some 28 Lilac Lane to create a butterfly card to send some spring greetings with!

Butterfly Card

Supplies needed:

  • 28 Lilac Lane “Love Story” embellishment kit
  • PPA Matte Adhesive
  • card base
  • smooth cream cardstock
  • foam adhesive
  • Ranger Tim Holtz Distress Ink in Abandoned Coral, Weathered Wood, & Peeled Paint
  • Graphic 45 “Nature’s Sketchbook” 6×6 paper pad
  • Hero Arts “Many Everyday Messages” stamps
  • Hero Arts “Newsprint Butterfly” stamp

This butterfly card uses the “Love Story” kit by 28 Lilac Lane. With cream ribbon, heart charms, and embellishments in shades of red, pink & white, this kit is as versatile as it is gorgeous! Although at first glance this kit is a Valentine’s Day, wedding, or “I love you” themed kit, projects like this one are a great reminder to look at the kits for the colors of their contents as well as their themes.

28 Lilac Lane Love Story embellishment kitTo start making this butterfly card, cut a piece of green patterned paper to 4.25″ by 5.5″, ink the edges, and adhere it to the card base.

Cut a piece of blue patterned paper to 3.75″ by 5″ and ink the edges. Tie the ribbon ends together, and then secure the ribbon around the back side of the blue patterned paper. Adhere the blue patterned paper panel to the card front.

Butterfly Card close-up

Stamp the butterfly and card sentiment on cream cardstock. Cut out the butterfly. Trim the sentiment into a 5/8″ wide strip, and snip the ends to make a banner.

Adhere the sentiment banner to the top left of the card front, and glue a button on top of it.

Squeeze a strip of glue down onto the body of the butterfly, and then layer seed beads on top of it. Once the glue is dry, use foam adhesive to attach the butterfly to the card front.

Butterfly card

And your butterfly card is all finished, except to choose someone special to send it to!

1

Make a Wreath Card with Wisteria Hues Mix!

I’m so excited to tell you that the new 28 Lilac Lane products are shipping now – and are available in online shops like Ellen Hutson and Simon Says Stamp, as well as local stores!

Use Your Wings Card by May Flaum using 28 Lilac Lane Bead & Sequin Mixes

Today I’m playing with one of my personal favorites from the new products- the Wisteria Hues Bead & Sequin Mix!

My inspiration for creating this Wisteria Hues mix was my backyard wisteria, but the arrival of Mardi Gras season got me in the mood to choose this mini bottle to use first of the new ones. I love this particular mix and I’m excited to share it – and all of the rest – with 28 Lilac Lane fans.

Despite the name mini, there really isn’t anything “mini” about how much is packed into these bead & sequin bottles! They’re a great value, and so easy to travel with that you’ll want to collect them all!

Wisteria Hues Bead and Sequin Mix

This ‘messy wreath’ is so quick and easy- and so much fun to create! Watch the video below to see the steps of exactly how I made it.

0

Craft a Button Collage Heart to Send Valentine’s Wishes!

I love making button collages on small items – you may remember my button collage apple on my teacher tag awhile back. Collaged die cuts are a fun and simple way to add some dimension and detail to a design. Today, I’m falling in love with a button collage heart for Valentine’s day!

Button Collage Heart Card

Supplies Needed:

  • Buttons Galore Strawberry Cheesecake Color Blends (online store, Amazon)
  • 28 Lilac Lane Pretty Princess embellishment bottle (online store)
  • PPA Matte Adhesive (online store)
  • Simple Stories “Love & Adore” 6×6 paper pad
  • white cardstock
  • white card base
  • Cricut Explore machine
  • Ranger Tim Holtz Distress Ink in Picked Raspberry
  • Crate Paper “Heart Day” stamps

I started this card by cutting my 3″ high heart out of plain white cardstock on my Cricut Explore using the software’s basic shape tool. Then, starting in the upper right corner, I gradually spread white liquid adhesive (PPA Matte) over small areas and filled them in with the Strawberry Cheesecake buttons.

Constructing Button Collage Heart

While my glue was drying on my button collage heart, I cut my background paper to the size of the card front and adhered it. Then I stamped the sentiment on a strip of the white cardstock. Once the ink was dry, I snipped the ends to create a banner look for the sentiment strip.

The button collage had white spaces showing through between the buttons after the glue was dry. To fill these in, I dropped spots of glue on them, and pushed seed beads from the Pretty Princess bottle down into them. Some of the white edges also weren’t entirely covered, so I ran beads of glue along those areas and pressed beads into there as well.

Button Collage Heart Card

After all the glue was dry, I simply attached my heart and my sentiment strip to the front of the card. This simple design has a lot of “pop” from the color contrast and the button detail. I can’t wait to share it with someone special!

3

Get Extra Life from your Stamps with Embellishments!

Stamps are a great investment because they are a tool that can be used over and over again. However, using them over and over again can quickly get boring…so how do you spice things up and put the fun back in your stamps again? 28 Lilac Lane has the answer!

Snowflake Happy Holidays Card

Supplies Needed:

  • 28 Lilac Lane Cotton Candy Embellishment Bottle
  • PPA Matte Adhesive
  • My Mind’s Eye “Sugar Plum” 6″ x 6″ paper pad
  • White cardstock
  • Ranger Tim Holtz Distress Ink in Iced Spruce, Victorian Velvet, and Embossing
  • Ranger White Embossing Powder
  • Stamper’s Anonymous by Tim Holtz “Simple Sayings” stamps
  • Stamper’s Anonymous by Tim Holtz “Christmas Blueprint” stamps

One of my favorite ways to make my old stamps look new again is to embellish them! And with the 28 Lilac Lane embellishment bottles, I have the choice of seed beads, sequins, flat back pearls, and buttons to embellish my stamps.

Cotton Candy Embellishment Bottle

I chose the Cotton Candy bottle because it matched my paper pad. [The 28 Lilac Lane “Cotton Candy” embellishment bottle is available at the our online store, Scrapbook.com, A Cherry On Top, Ellen Hutson, Simon Says Stamp, Create for Less, and others, or check your local retailer].

To create this card, I first made a card base by folding a half sheet of letter sized cardstock. Then I cut a 3.75″ by 5″ piece of the blue plaid paper, and inked the edges in Iced Spruce before adhering it in the center of the card front.

Next I used embossing ink to stamp the snowflake design on the top of the card front, and heat embossed it with white embossing powder. Once the heat embossing was cool, I selected embellishments from the Cotton Candy bottle and adhered them with small dots of clear drying white glue.

Embellishments on stamped image

The sentiment on the bottom of the card front was created by first stamping the label outline in Victorian Velvet on the pale turquoise patterned paper. Then I cut out the label using scissors, close to the edge of the stamped label. I stamped the sentiment in Iced Spruce, and adhered the label to the card front.

get-more-life-from-your-stamps-with

What stamps do have that could be given new life with embellishments?

0

Button Up an Ugly Christmas Sweater Card!

Nothing’s more fun at Christmas than an ugly Christmas sweater. So why not send one to a friend in the form of an ugly Christmas sweater card for the holidays?

Ugly Christmas Sweater Card by Nancy Nally for Buttons Galore

Supplies Needed:

  • Buttons Galore “The Merriest” Button Bonanza
  • PPA Matte Adhesive
  • White cardstock
  • Pinkfresh “Oh Joy” Stamp Set
  • Ranger Tim Holtz Distress Embossing Ink
  • Ranger Tim Holtz Distress Ink in Twisted Citron
  • Ranger Embossing Powder in Clear Super Fine Detail, Gold, & Red Tinsel
  • Black pen
  • Ranger Tim Holtz Distress Marker in Candied Apple (optional)

This card’s technique is simple – just creating two strips of paper by stamping the sweater knit stamp over and over, alternating the color and embossing it. The Twisted Citron ink is embossed with clear embossing powder, and the red is clear embossing ink that is heat embossed with Red Tinsel powder. The strips need to alternate to create the effect on the front of the card.

Ugly Christmas Sweater Card construction

Doing all that stamping and embossing while changing colors takes a bit of time, but the result is a great effect!

Once strips are made, they can be adhered to a card base. Start by attaching the one on the right side of the front. Position it, glue it down, and then trim off any excess. The front is layered, with the left side overlapping the right panel, so there’s no need to worry about how wide the panel is on the card front.

To emphasize the layered effect and create bulk in it as if it really is a sweater placket, adhere two inch wide strips of paper underneath the right edge of the left panel before attaching it to the card front. This will slightly raise the area under the buttons up, creating depth and shadow that look like a true sweater! For a little extra shadow, run a dark red pen or inkpad along the paper edge where the pieces overlap as well.

Ugly Christmas Sweater Card by Nancy Nally for Buttons Galore

Now that your sweater has a placket, it needs buttons to fasten it! “The Merriest” Button Bonanza has red and green shades that match the card base. Adding in the the pink and blue shades that are also in the assortment looks a bit random on top of all of that red and green, and is the perfect way to “ugly” up your ugly Christmas sweater card. Glue your buttons down with a clear drying adhesive like PPA Matte Adhesive.

The finishing touch is the “patch” that has the sentiment on it. Just stamp and emboss the sentiment, and then draw stitching lines around it with a pen. Adhere it at a jaunty angle to your sweater’s “front” and you are done!

Who do you know that needs an ugly Christmas sweater card? Send them one today!

0

Tis the Season to make a Christmas Cat Card!

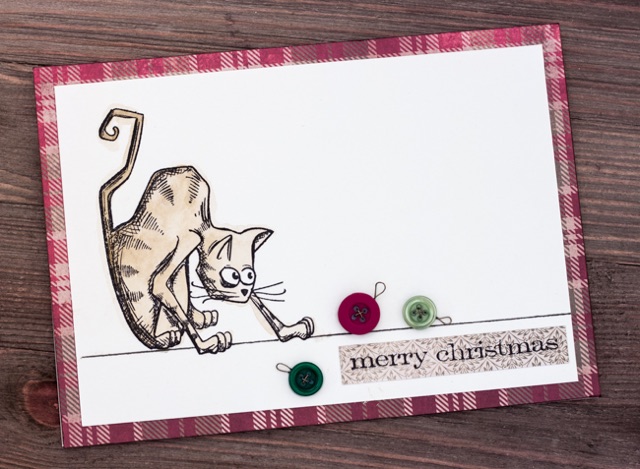
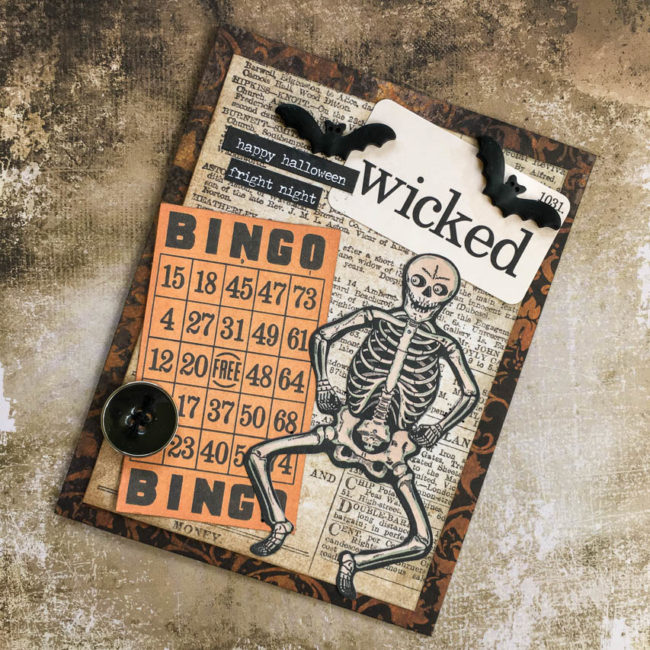
We’re cat owners at our house, and as anyone who owns a cat knows…it makes Christmas decorating extra, well, interesting. We decorate, the cat un-decorates. So today, my project is a Merry Christmas cat card that celebrates that annual feline-human war of December!

Christmas Cat Card by Nancy Nally for Buttons Galore

Supplies:

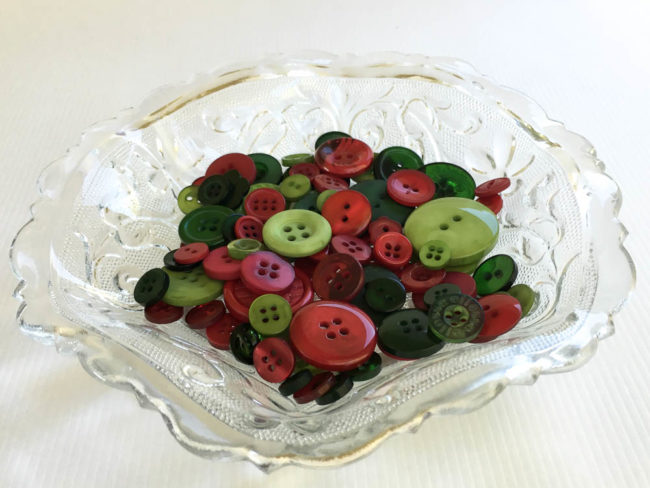
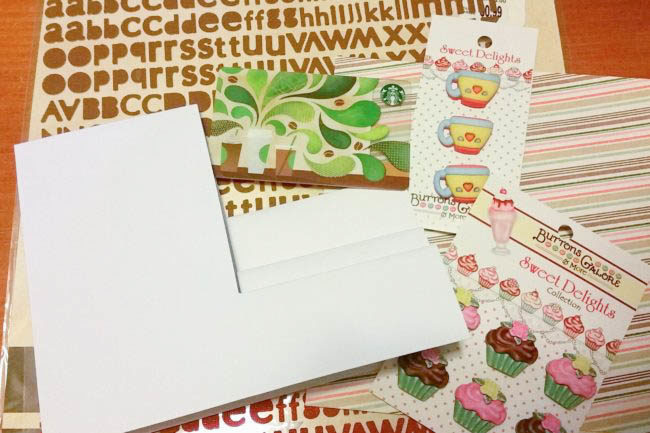
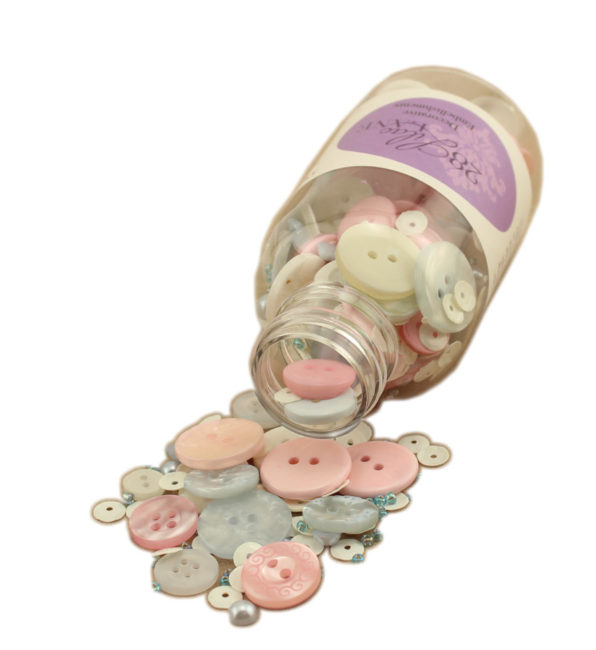
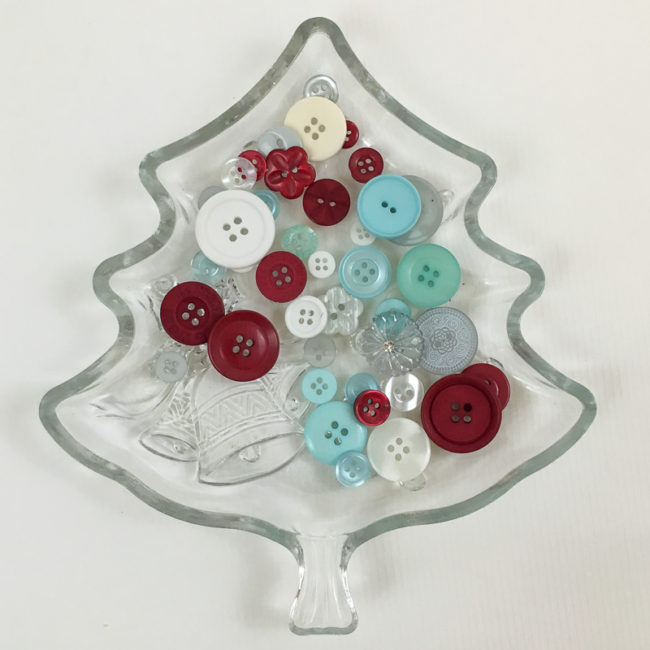
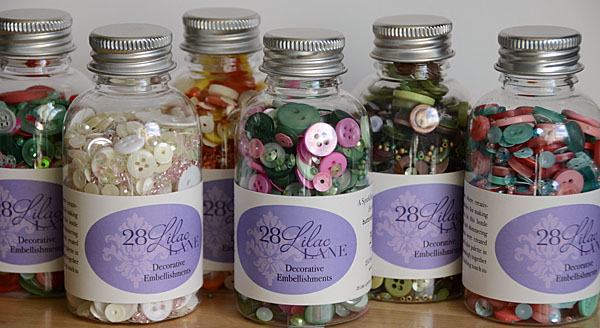
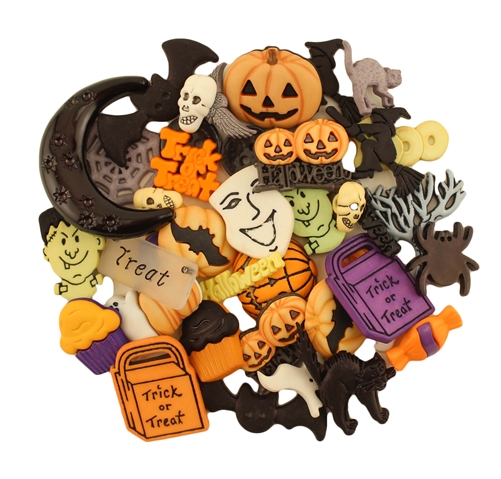
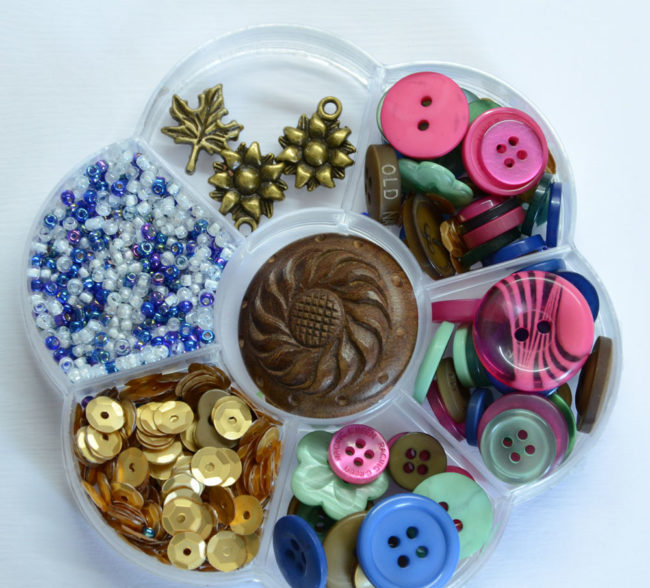
  • Buttons Galore “Tis the Season” Button Bonanza
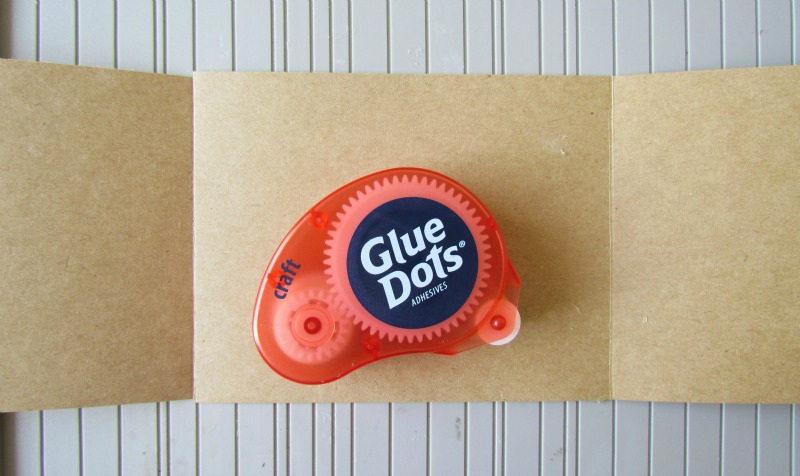
  • PPA Matte Adhesive
  • watercolor paper
  • Tim Holtz for Stamper’s Anonymous “Crazy Cats” stamps
  • Tim Holtz for Stamper’s Anonymous “Simple Sayings” stamps
  • Ranger Archival Ink in Jet Black
  • Ranger Tim Holtz Distress Crayon in Vintage Photo
  • Ranger Tim Holtz Distress Ink in Vintage Photo
  • Water brush
  • Black Pen
  • Tim Holtz idea-ology “Yuletide” paper
  • 26 gauge German style wire (antique brass)
  • Cream colored cardstock

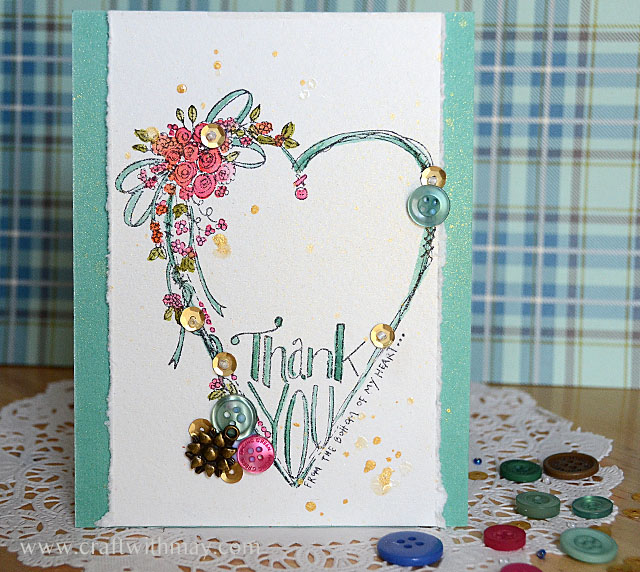
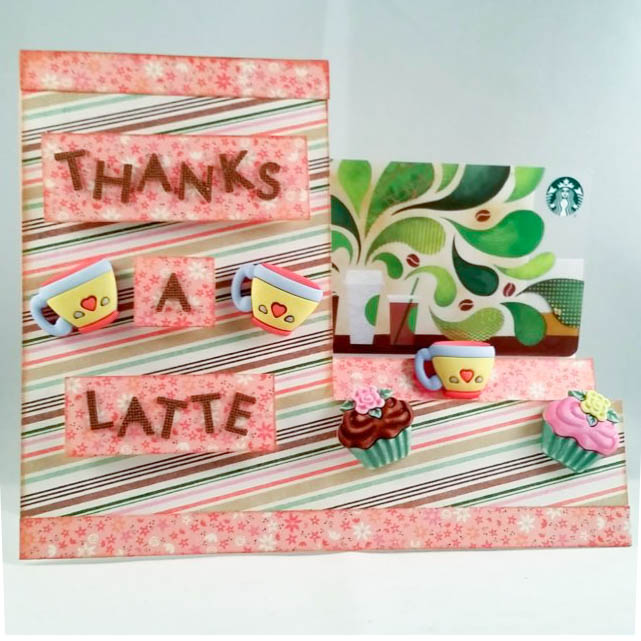
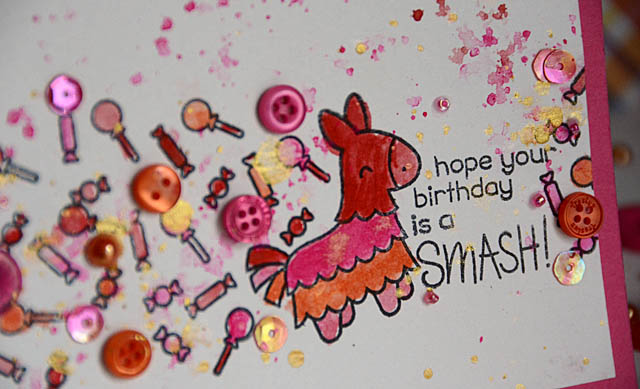
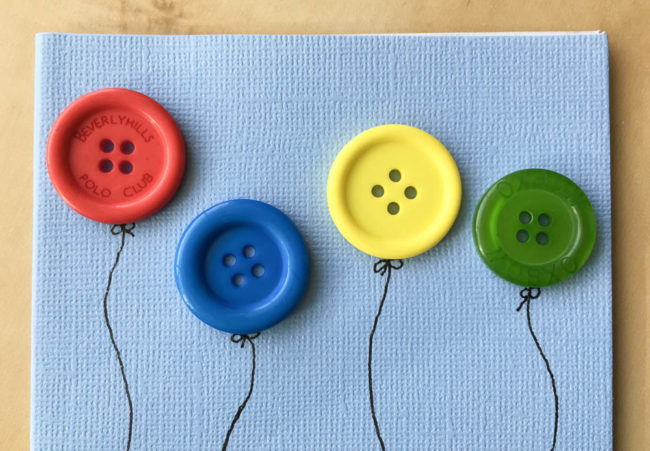
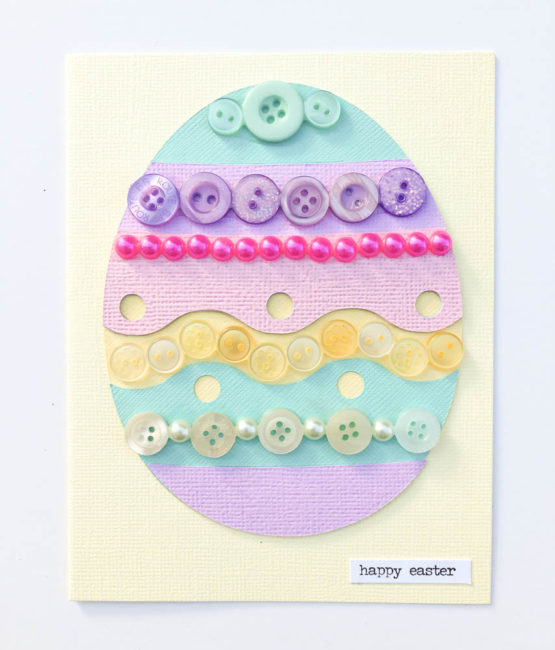
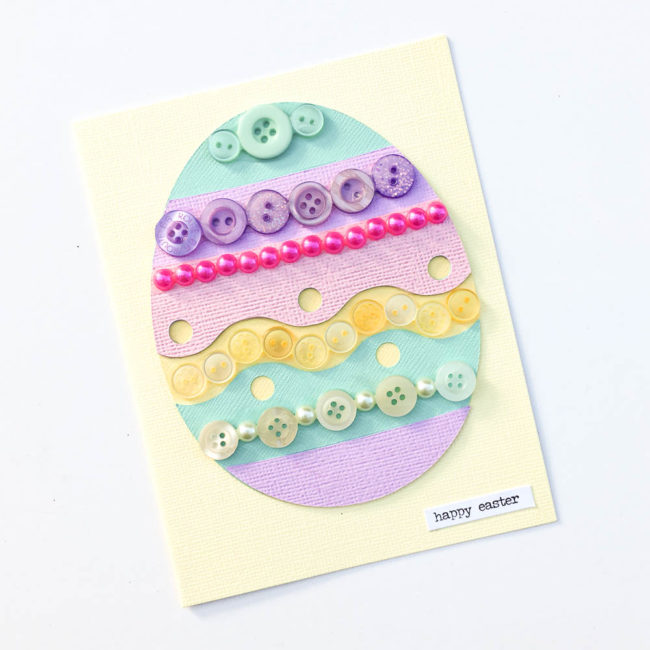
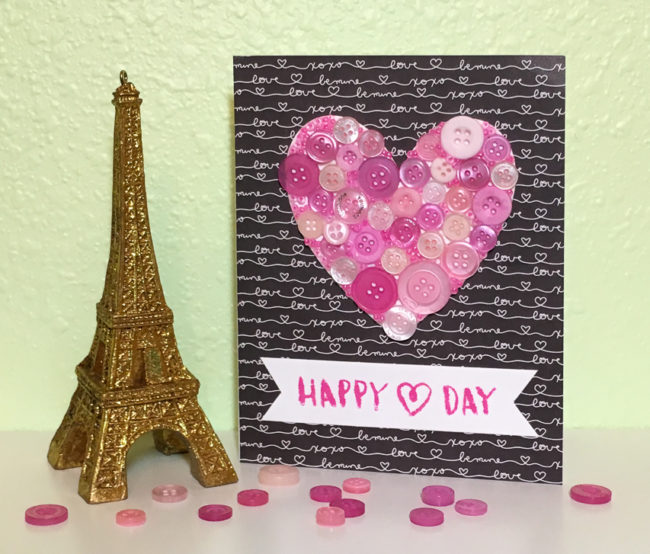
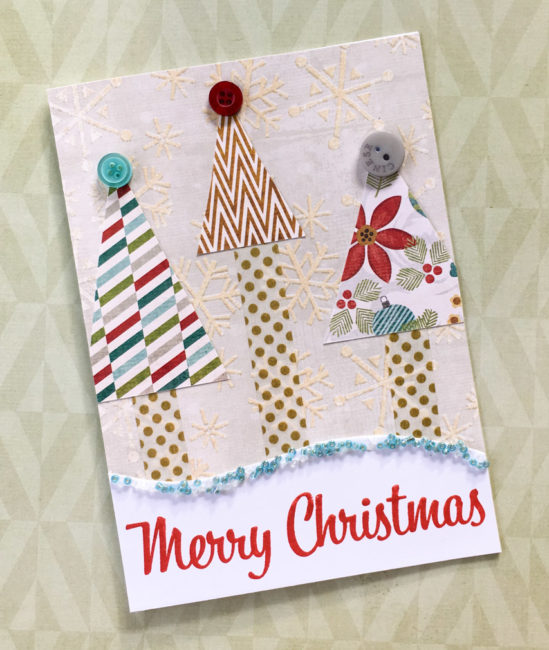
This Christmas cat card has a very simple design. It’s featured embellishments are Christmas ornaments made from buttons from the “Tis the Season” Button Bonanza that is brand new for this holiday season. Featuring deep red and green tones that are accented by a light sage green shade, “Tis the Season” is a versatile button mix for almost any holiday craft project.

Tis the Season Button Bonanza by Buttons Galore

Instructions: 

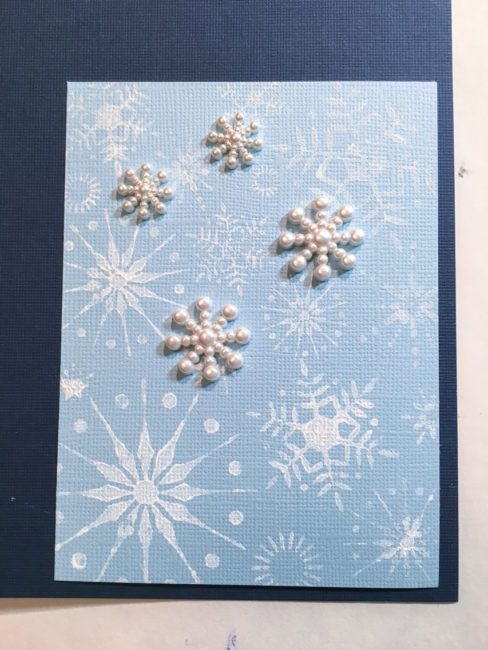
Cut a piece of watercolor paper to 4.5″ by 6.5″. Use Archival ink to stamp the Crazy Cat.

Use a ruler and the black pen to draw the line across the bottom underneath the cat. Don’t draw through the cat’s paws!

Scribble on a scrap piece of watercolor paper with the Distress Crayon. Using your waterbrush, pick up some of the color and use it to watercolor the cat.

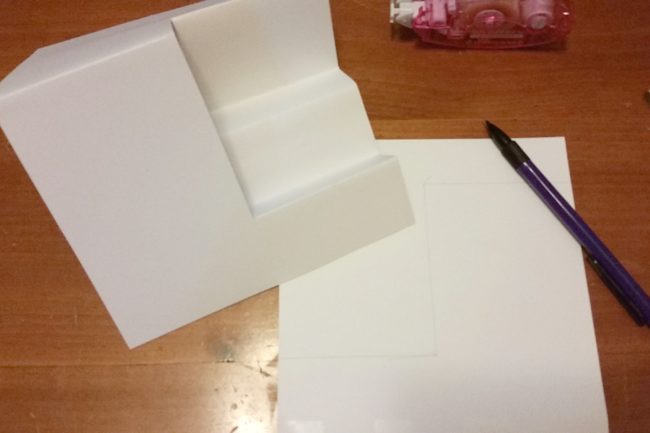
Cut a piece of patterned paper to 5″ by 7″ and ink the edges. Adhere the watercolor paper centered on it. Cut a piece of cardstock to 7″ by 10″. Fold in half to make a 5″ by 7″ card, and adhere card front to it.

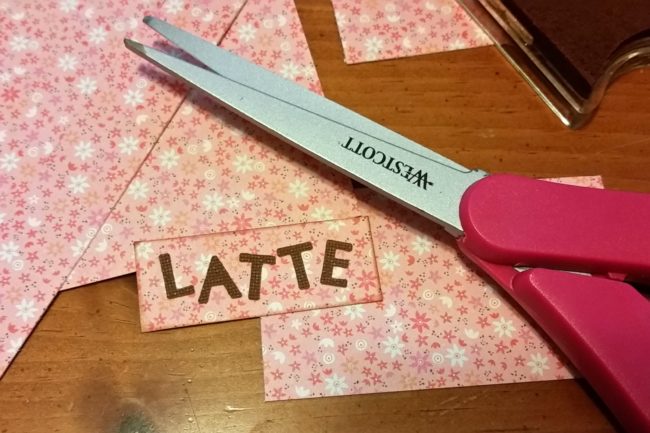
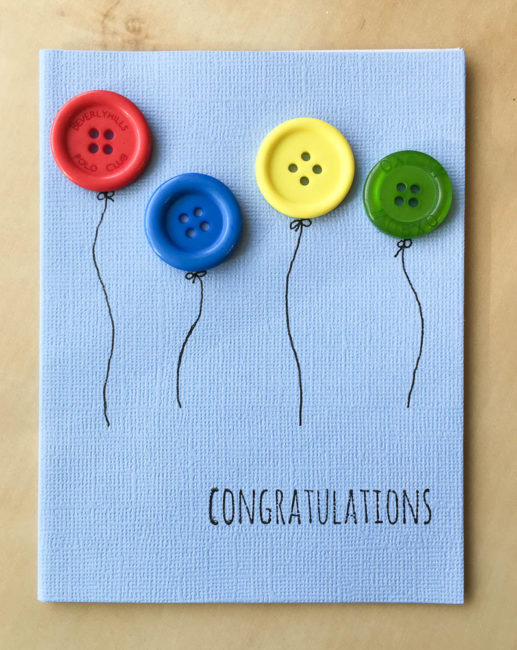
Cut a strip of patterned paper 1/2″ wide. Stamp the sentiment on it, and trim the ends. Adhere to bottom right of card.

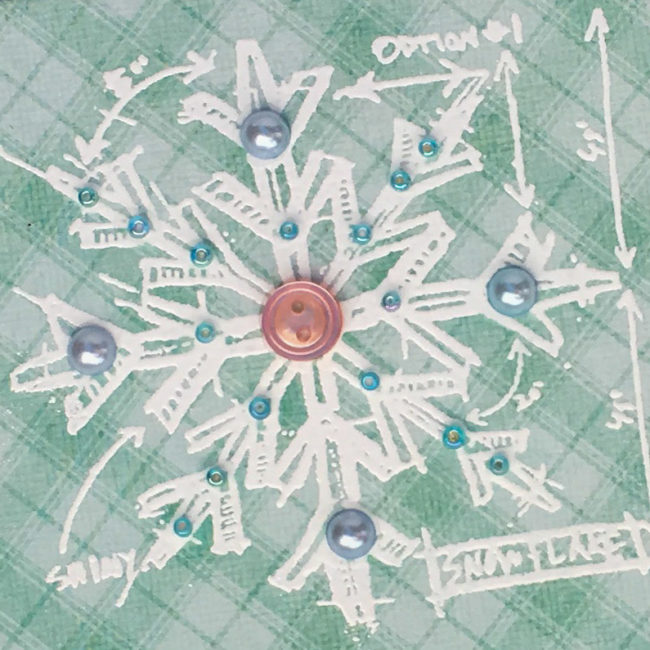
Select three buttons to serve as your “ornaments”. Thread the holes on the buttons with German style wire. Use the tail of the wire to create a loop for the ornament’s “hanger” before snipping off the excess wire.

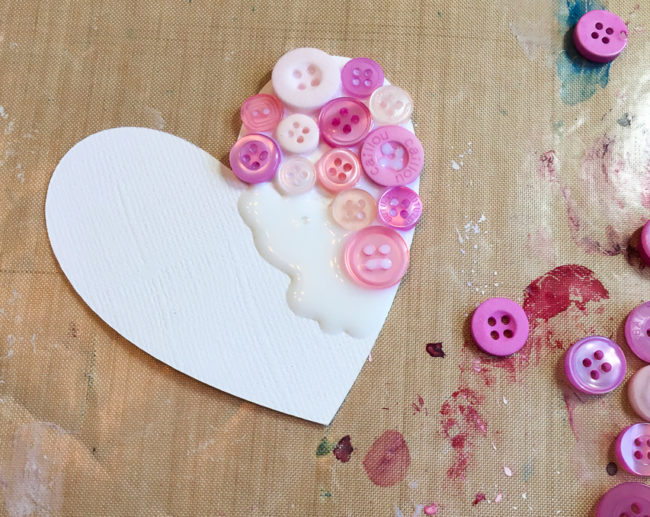
Use liquid glue like PPA Matte Adhesive to glue the button ornaments in place.

Since it mostly relies on bulk supplies like buttons and tools like stamps to make, this Christmas cat card could easily be made in quantity. Simply substitute cardstock or a variety of patterned paper for the paper used for the matted background and the sentiment strip. and you can make this card over and over with a Button Bonanza and your stamp! And since it is fast and easy to make, your cards will be done in no time!
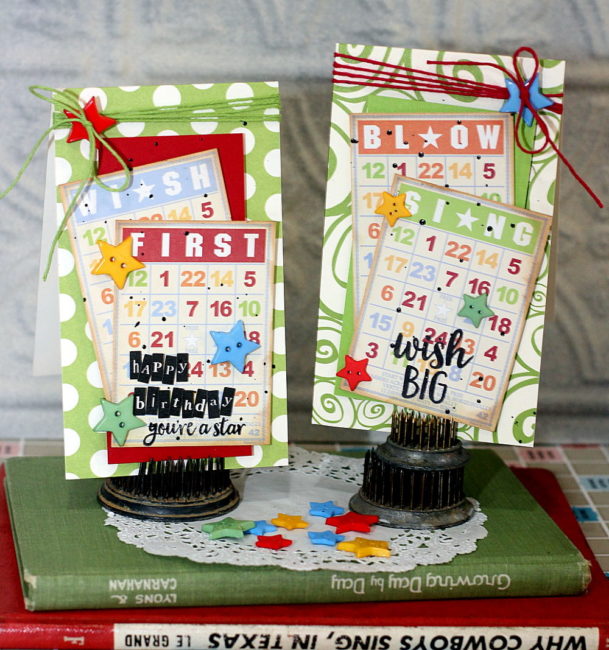
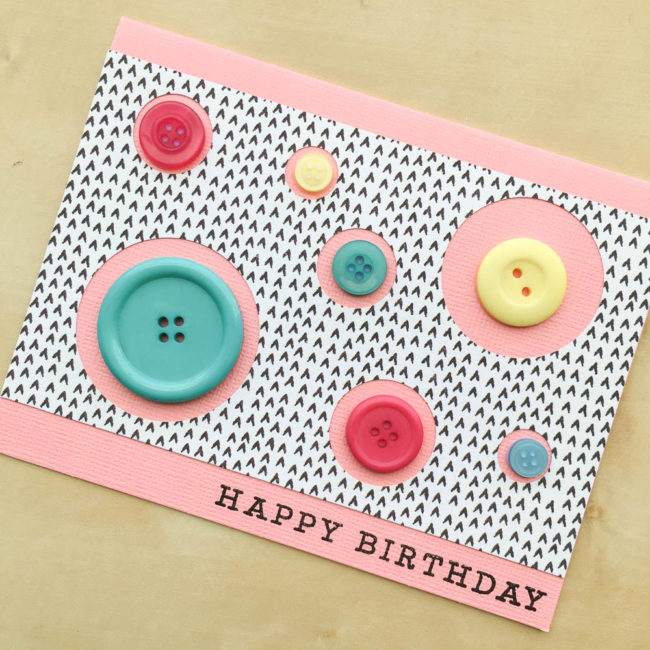
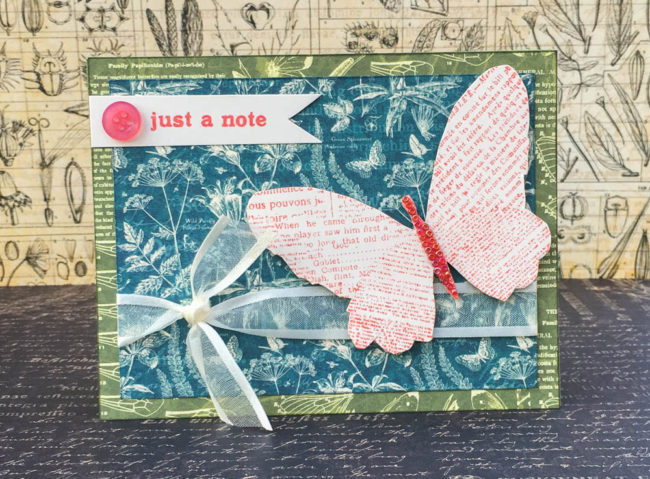
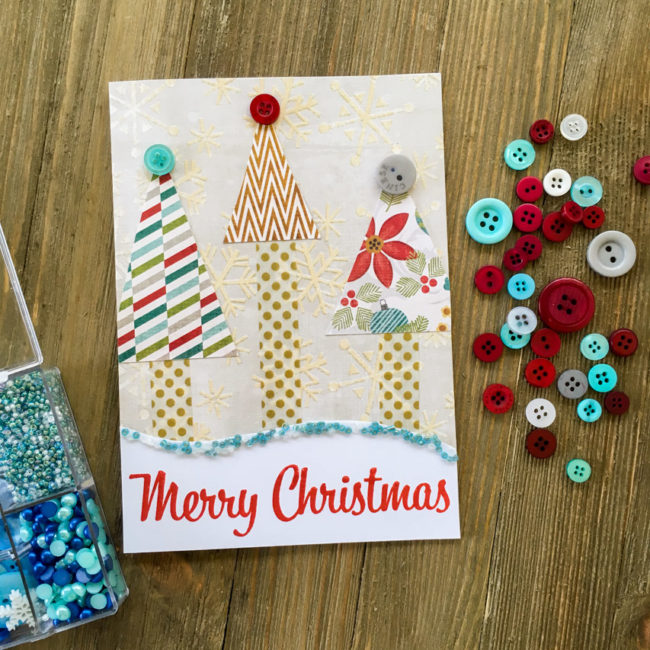
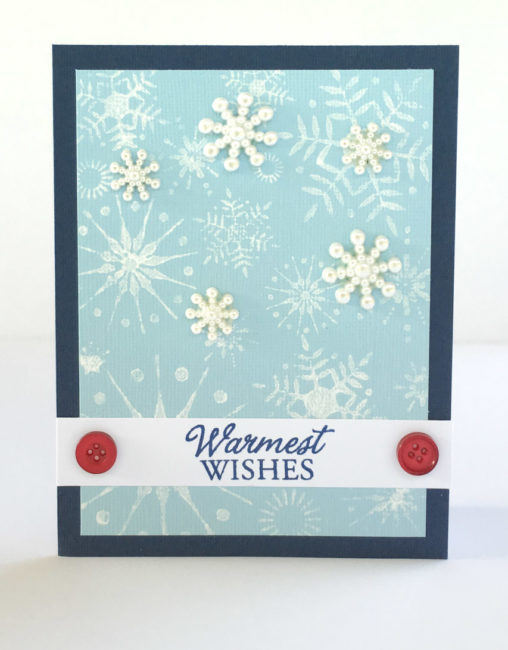
0

Send a Retro Merry Christmas Card Wish!

Tis the season to be jolly! Today I’m here to show you how to combine two of our holiday products that have a turquoise toned blue in their palette to make a fun retro Merry Christmas card!

Retro Merry Christmas Card by Nancy Nally for Buttons Galore

Supplies Needed:

  • patterned paper
  • washi tape (or patterned paper)
  • red ink
  • Merry Christmas stamp
  • white cardstock
  • clear drying glue (such as PPA Matte Adhesive)

This project pairs seed beads from our beloved 28 Lilac Lane “Let It Snow” embellishment kit with buttons from our new “Cool Winters” Button Basics. With similar tones of blue, these two coordinate together beautifully to add a pop of trendy color to holiday projects of all kinds.

Winter Flurries Button Basics

This card is 5″ by 7″, so to start my retro Merry Christmas card I cut the snowflake background paper to that size.

Next, I cut a 5″ wide strip of white cardstock that was a few inches tall. I stamped “Merry Christmas” on it with red ink, centering the image near the bottom. Then I used scissors to cut the top of the sentiment block into a wavy design.

To create the beaded edge, I started by spreading a bead a white glue along the edge. Then I sprinkled seed beads over the glue until it was covered, and set the sentiment block aside to dry.

Cutting the trees is easy! I simply used three scraps of paper and cut them into various sizes of triangles. The tree “trunks” are made from washi tape (but could also be made from strips of paper). Some of the tree triangles hung over the edge, so I just snipped them off. Once those elements were adhered in place, then I used liquid glue to adhere three buttons as toppers for the trees.

Once the glue holding the seed beads was dry, then I adhered the sentiment block across the bottom.

To finish my card, I used white cardstock to make a blank card and then adhered the finished card front onto it.

Retro Merry Christmas Card by Nancy Nally for Buttons Galore

I hope this cheery little retro Merry Christmas card greeting will help you brighten the holidays of someone special!

0

Make a Watercolor Card with new Coral Reef embellishments!

A few weeks ago we introduced you to our six new 28 Lilac Lane embellishment bottles. Candy Corn, Winter Wonderland, Yuletide Greetings, Savannah Stroll, Through the Woods, and Coral Reef embellishments bottles are currently shipping, just in time for holiday projects and stocking stuffers!

new 28 Lilac Lane embellishment bottles for fall 2016 from Buttons Galore & More!

Today, I’m here to show you an up close look at a project by 28 Lilac Lane designer May Flaum! This project uses the gorgeous and versatile 28 Lilac Lane Coral Reef embellishment bottle, a blend of coral pink and shades of green that is seasonal year round.

28 Lilac Lane Coral Reef embellishments

The delicate tones of Coral Reef are perfect for using with watercolors. With its natural floral color palette, Coral Reef works beautifully for watercolor floral cards! In the video below, designer May Flaum shows how she paired her 28 Lilac Lane Coral Reef embellishment bottle with a stamp to create a quick and easy floral greeting!

Here’s a closer look at May’s finished card…just a sprinkling of Coral Reef embellishments takes this card from simple to simply fabulous! It’s simple, quick, and easy to do, but makes all the difference in the finished card.

Watercolor Flower Card by May Flaum for 28 Lilac Lane

Check with your Buttons Galore local retailer or visit our online store to get your 28 Lilac Lane Coral Reef embellishments today!

0

Use 3D Buttons for a Quick Snowflake Card!

World Cardmaking Day is coming soon, and that means lots of crafters will be starting to think about making Christmas cards! Today’s holiday card idea uses 3D buttons to create dimension on a snowflake card that only takes minutes to make!

Snowflake holiday card

Supplies:

The key elements of this card’s design are very simple – a snowflake background stamp, stamped with acrylic paint, and 3D snowflake buttons. Layered together, these elements create a design this is simple, elegant, and dimensional.

To begin your card, cut a 5.5″ x 4.25″ background for the card from dark blue cardstock. Then cut a 5″ by 3.75″ layer of the light blue cardstock. Paint the snowflake stamp with the acrylic paint dabber, and stamp it onto the light blue cardstock. One dry, adhere the light blue cardstock layer on top of the dark blue layer.

Snowflake card layers
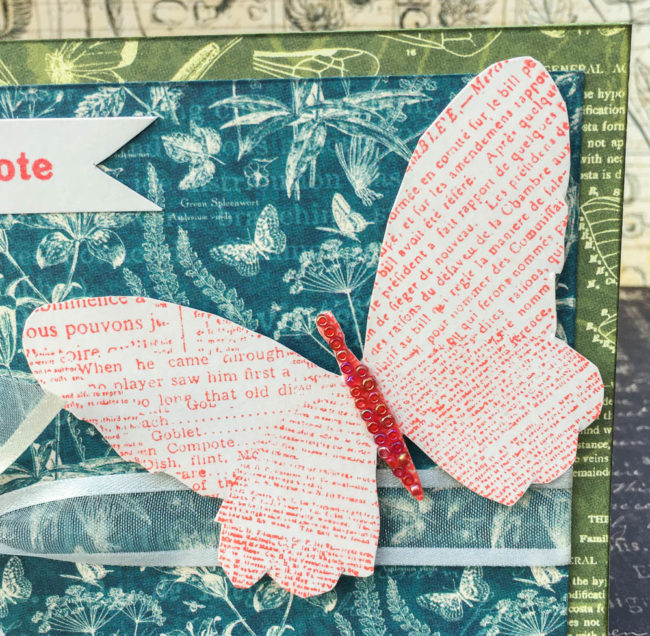
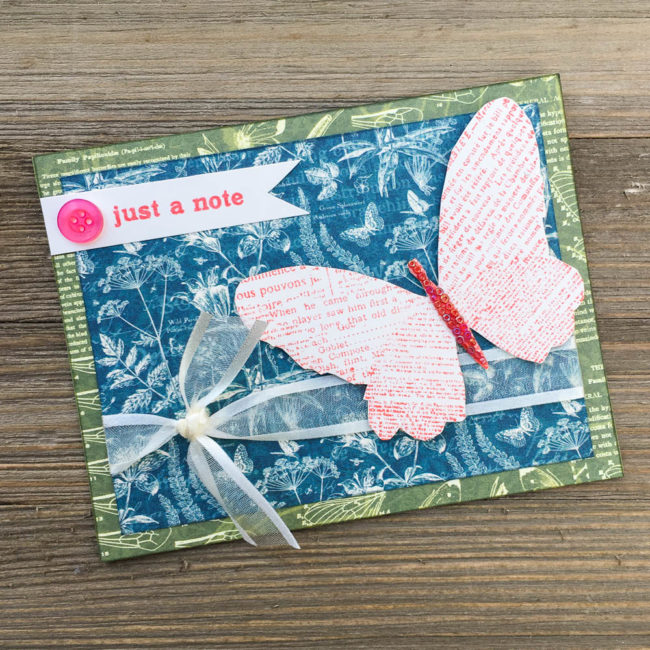
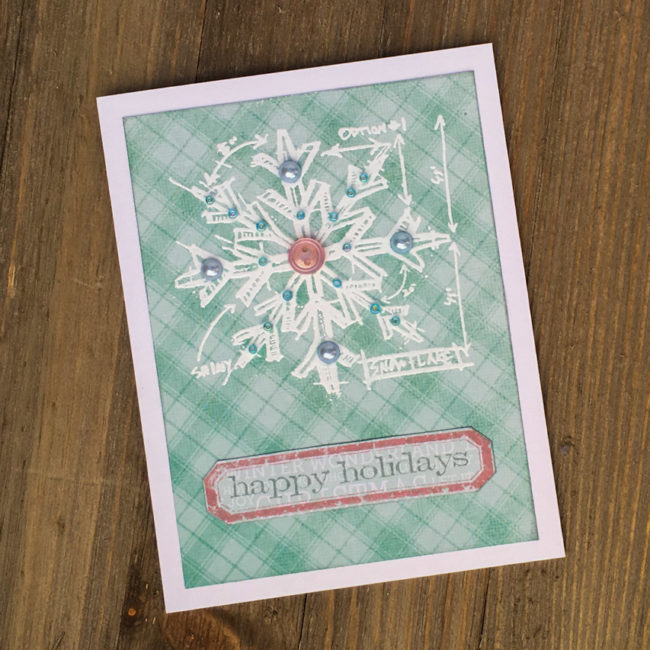
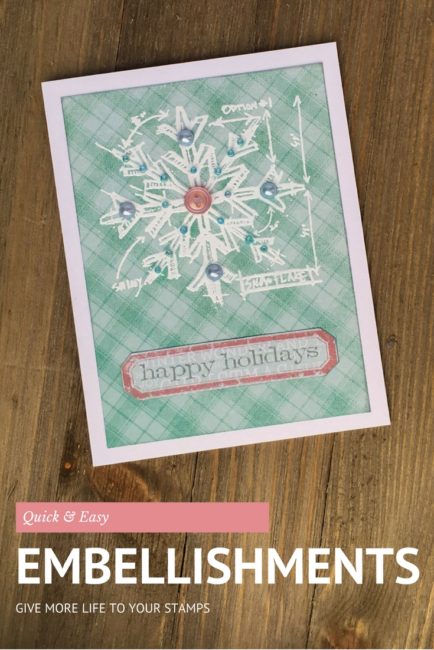
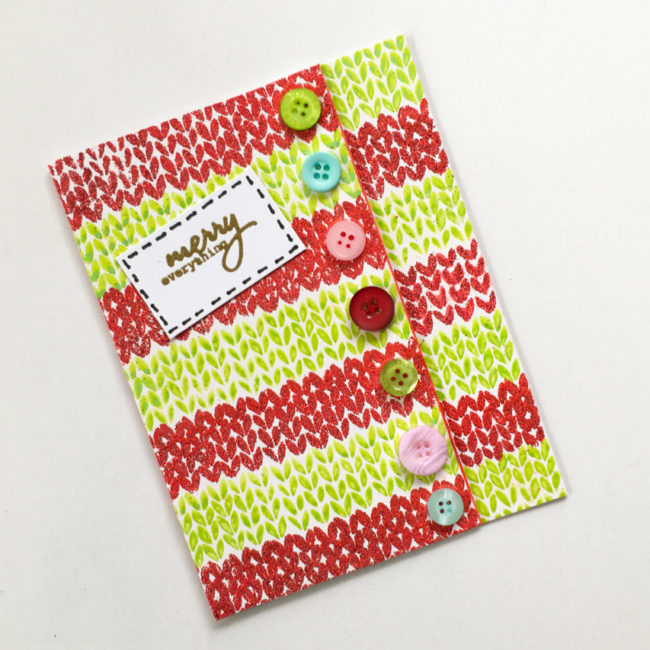
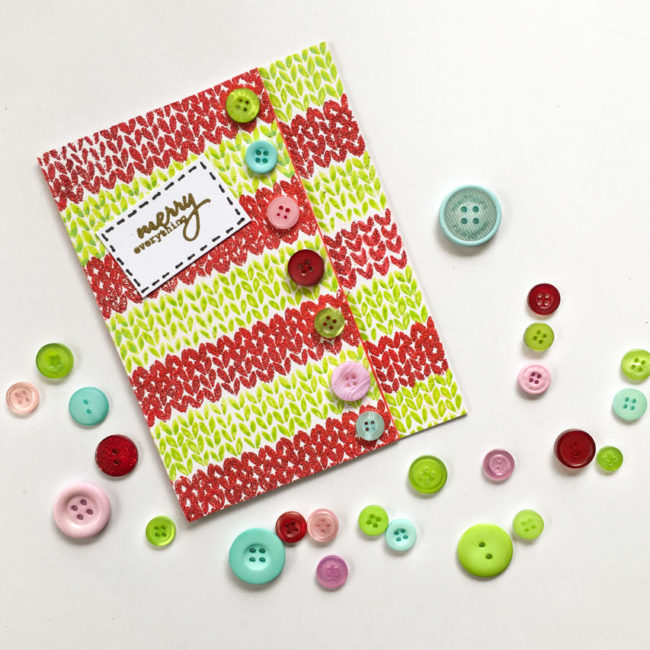
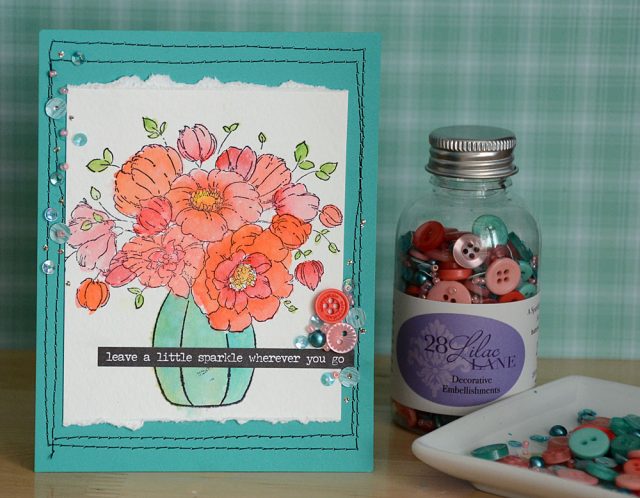
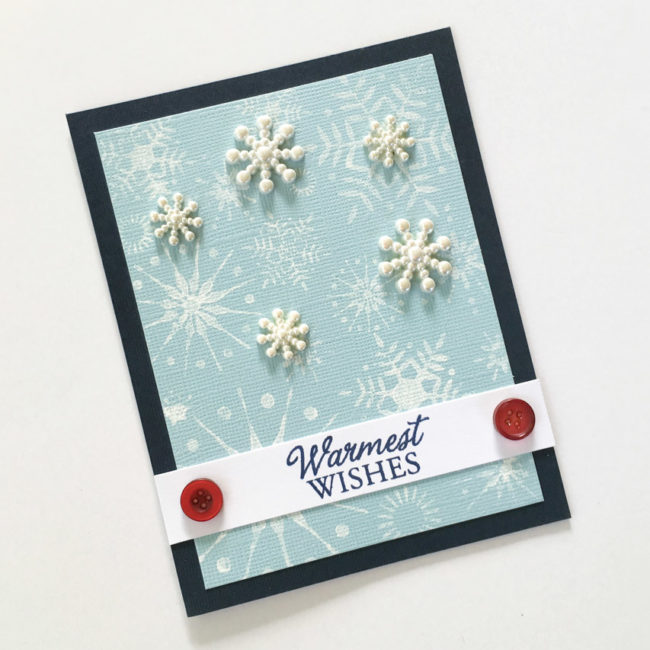
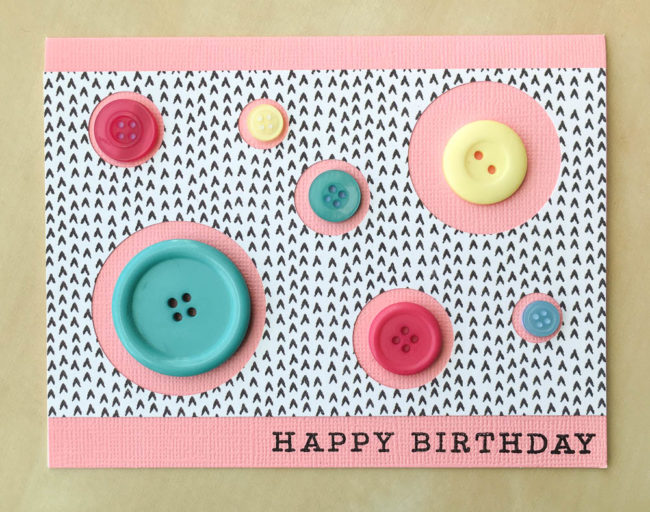
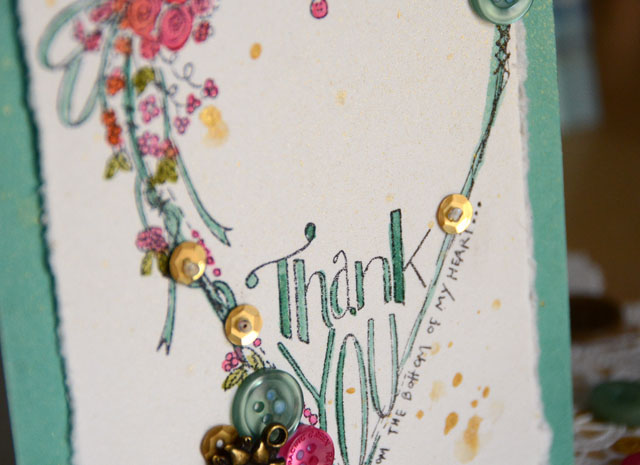
For the sentiment strip, cut a 3/4″ strip of white paper. If you stamp in the middle of that strip and then adhere it before snipping off the ends, it is easy to get your sentiment perfectly centered on the card front. Then you can arrange the red accent buttons around the edges of the sentiment strip and they will also be perfectly spaced!

assembling snowflake card

For the final touches on your card, remove the shanks from the 3D buttons using a button shank remover. Then adhere the the snowflakes with liquid glue in random places on the card front. You can choose to place them to accent a specific stamped snowflake (as I did in the upper right of my card) or randomly in open areas between the stamped designs.

Snowflake Card

This holiday snowflake card is quick and easy to make. If you’d like to produce this card in volume for your holiday card list, these pearl snowflake buttons are also available in bulk via custom order from our customer service department.

1

Make a Wicked Halloween Card with 3D Bat Buttons!

That September chill is in the air, and that means pumpkin spice, apple cider…and Halloween on the horizon! Our 3D buttons make great accessories for your themed cards, and I’m here today to share an idea you can make with bat buttons from our Halloween Value Pack.

Halloween Value Pack by Buttons Galore

Our Halloween Value Pack includes approximately 50 assorted buttons. The buttons range from 1/2″ to 7/8″ in size and include shank and sew-through buttons. Designs include fun options like pumpkins, monsters, spiders, bats, and everything you need for your Halloween-themed projects!

Wicked Halloween card with bat buttons by Nancy Nally for Buttons Galore

Supplies:

  • Buttons Galore Halloween Value Pack
  • PPA Matte Adhesive
  • Tim Holtz idea-ology “Materialize” 8×8 paper pad
  • Tim Holtz idea-ology “Curiosities” Ephemera
  • Tim Holtz idea-ology Small Talk Occasions stickers
  • Ranger Tim Holtz Distress Ink (Pumice Stone)
  • Blank Card Base
  • Embroidery floss (black)

To create the base of the card front, cut a 4.25″ by 5.5″ piece of the black and orange paper. Adhere to the front of the card base. Cut a 3.75″ by 5″ piece of the text paper, and adhere it centered on top.

Select the bingo card and wicked flashcard from the ephemera pack, and adhere them angled in the corners of the card front. Adhere the skeleton ephemera on top of them.

Wicked Halloween card with bat buttons by Nancy Nally for Buttons Galore

Tie embroidery thread through the large black button from the Halloween Value Pack and glue it on top of the bingo card using PPA Matte Adhesive. Use the PPA Matte Adhesive to also attach the bat buttons from the Halloween Value Pack on top of the “wicked” flashcard.

To finish the card, select some sentiment stickers from the Small Talk sticker set and stick them down in the upper left corner underneath one of the bat buttons.

This quick and easy card is a fun way to say “boo!” to someone for Halloween! Who do you want to send a friendly scare to this year?

0

Make A Thank You Card with new 28 Lilac Lane Fall Mix!

This week, we’re introducing a special Limited Edition 28 Lilac Lane “Fall Mix” embellishment kit by May Flaum! This kit is only available from the Buttons Galore online store – and stay tuned to the end to learn how to get a special introductory discount!

28 Lilac Lane Limited Edition Fall Mix

With jewel tones, soft green, brown – and gold! – this color mix by 28 Lilac Lane designer May Flaum is perfect for embellishing gorgeous fall projects that aren’t quite right for the traditional rust and orange tones of fall.

Here’s a peek of a thank you card that May created with the new 28 Lilac Lane Limited Edition Fall Mix, using a stamp from Tammy Tutterow:

Thank you card by May Flaum using 28 Lilac Lane Limited Edition "Fall Mix" from Buttons Galore & More
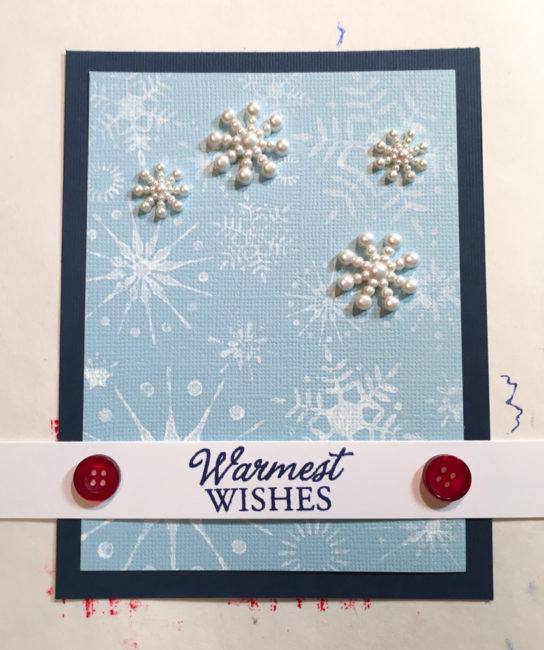
For the full how to tutorial about the card, check out the video below!

And finally, here’s May’s finished thank you card. The stamp is pretty by itself, but embellished with a few sequins, buttons and charms, it is extra special! This beautiful card makes the perfect thank you for any occasion.

Thank you card by May Flaum using 28 Lilac Lane Limited Edition Fall Mix from Buttons Galore & More

The new 28 Lilac Lane “Fall Mix” designed by May Flaum is a limited edition, so make sure to get it while it lasts! Use coupon code “LL400” until 11:59pm eastern time on Friday to get $1.00 off. Better yet, this coupon can be stacked with the Beat the Clock sale going on sitewide now through Saturday. The sooner you order, the more you save!

And don’t forget that orders over $30 get free U.S. shipping! We’ve got the entire collection of 28 Lilac Lane embellishments in stock, as well as six fabulous new Button Bonanza collections (including seasonal blends for Halloween and Christmas) as well as our perennial favorites like our Button Basics, 3D buttons, and Haberdashery collections. Stock up now for Halloween and Christmas projects and save!

1

Batter Up for a Baseball Father’s Day Card!

Is the dad in your life a sports fan? This baseball Father’s Day card may be the perfect way to send your love on Father’s Day!

Baseball Father's Day card

This simple Father’s Day card is based on only two main elements: a die cut and some of our fun 3D buttons!

A plain blank card takes on a baseball pinstripe look with the help of a background stamp. The texture of the blank card keeps it from stamping completely perfectly, giving it a vintage distressed look. A strip of patterned paper also helps to create a vintage vibe, which is perfect since baseball is a sport with such a strong sense of history. The die cut is cut from a red cardstock that matches to stitching on the baseball, and which creates a nice contrast to the blue. Once that is done, all that is needed is to attach the buttons. (The bat is attached with some embroidery floss, and the ball is glued.)

This baseball father’s day card could easily be themed for another sport with only a few changes. Simply change out the baseball buttons for other Buttons Galore sports themed ones such as basketball, soccer, or football, and then change the background stripes for stars!

Supplies:

  • Buttons Galore #4065 Baseball 3D buttons
  • Hero Arts Large Canvas Stripes Background stamp
  • Tim Holtz Distress Ink in Faded Jeans
  • Cricut Explore machine & cut file
  • Bazzill cardstock (red)
  • Blank card (blue)
  • Tim Holtz “Crowded Attic” Paper Stash
  • embroidery floss (brown)


0

A Criss Cross Card for the Man in your Life

Do you ever get stumped trying to come up with an idea on how to make a masculine card for the man in your life?  Have you thought of making him a Criss Cross Card? A  Criss… what???

Well, here’s a Criss Cross Card tutorial to make for that special man in your life embellished with a Haberdashery carved wood button.

fathersdaycard

Criss Cross Father’s Day Card

Most of us females would choose pretty flowers, glitter and anything cutesy before a brown and boring card.   But brown, especially brown wood can be fun!

I actually like brown.  I totally heart Kraft paper and when I received my Buttons Galore design team goodies, these Haberdashery wooden buttons totally caught my eye.

 Supplies needed to make Criss Cross Card

How to make a Criss Cross Card

Criss Cross Card

  • Cut a 8 1/2 x 11 piece of card stock in half, lengthwise.
  • Score each piece at 5 1/2 inches.

Criss Cross Card

  • Over lap the two pieces of card stock.
  • Adhere together with Glue Dots®.
  • Your card will now be 16 1/2 inches long.

Criss Cross Card

  • Using your paper trimmer, trim off the top corner of each end diagonally.

Criss Cross Card

  • Now, you have a naked Criss Cross card all ready to get manly.

<insert a manly grunt here>

  • To keep your card close, cut a 1 x 12 inch Belly Band to wrap around card.

<insert “belly size” pun here>

Criss Cross Card

  • Measure and trim out paper to embellish your card with.
  • Ink the edges of the paper with  Colorbox ink.
fathersday2

Inside of Criss Cross Father’s Day Card

Even without flowers and glitter, a masculine card can still be fun to decorate.  I chose to go for an “Old World” feel.

To embellish this Criss Cross card, I used paper from DCWV Industrial Chic  line, added some zig zag stitching inside and a Father’s Day die cut from a Loni Harris cut file.  Then, I embossed the belly band with a burlap folder and completed the masculine Criss Cross card with a Haberdashery wood button.

See, brown can be fun!


Hollysignature

Like Me on Facebook!

3

Powered by WordPress. Designed by WooThemes