Header

Tag Archives | mixed media

This Easy 3 Step Mixed Media Canvas is Fruity Fun!

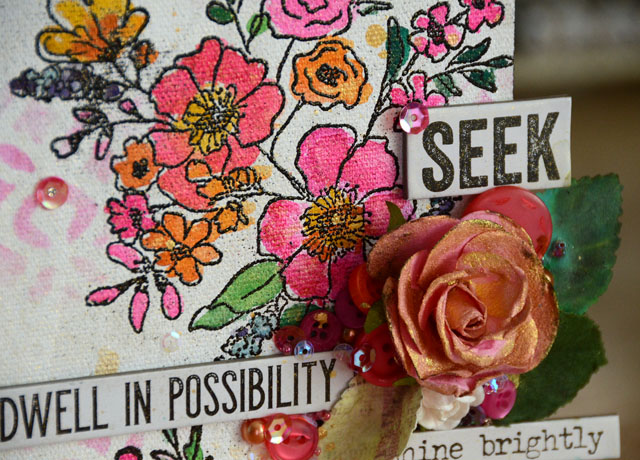
Our fabulous 28 Lilac Lane designer May Flaum is at it again, showing us all the beautiful things that can be done with her exciting new 28 Lilac Lane products that were announced at Creativation in January! This time, it’s a mixed media canvas with a profusion of pink flowers that will brighten your day – especially if winter is dragging on a little longer than you’d like!

Fruity Fun Mixed Media Canvas by May Flaum

This surprisingly easy mixed media canvas project can be made in only three easy steps, with just a few supplies, and is easy to customize o a theme or color scheme for your home or occasion.

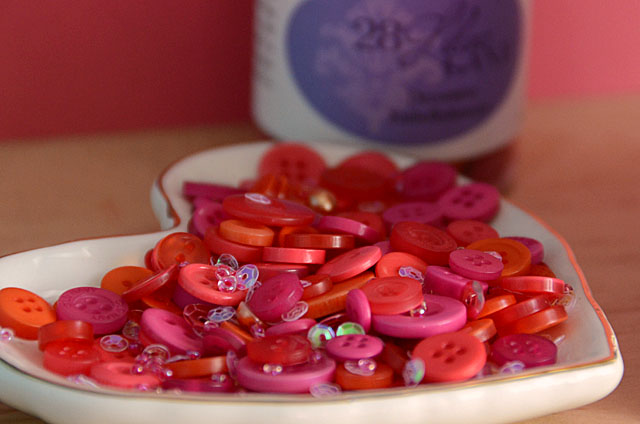
May’s project uses her fun new 28 Lilac Lane “Fruity Fun” embellishment bottle that features an assortment of shades of (what else?) fruity pink! These brilliant shades bring to mind summer berries, watermelon, a cool glass of punch, or  even flamingoes. It’s great for summer themes, flowers, and oh-so-many things!

28 Lilac Lane Fruity Fun

To see more of this mixed media canvas project – and get the full 3 step instructions – visit May’s blog. Also, don’t miss the challenge on the mixed media challenge blog this month that is based on this project! (Did I mention that there is a giveaway?)

Mixed Media Canvas close-up

Our “Fruity Fun” embellishment bottle is just one of six new 28 Lilac Lane embellishment bottles that are shipping now from our online store: Fruity Fun, Queen Bee, Fiesta, Gemstone, Stormy Skies, and Farmhouse. Get them all!

0

Make an Altered Notebook Travel Journal

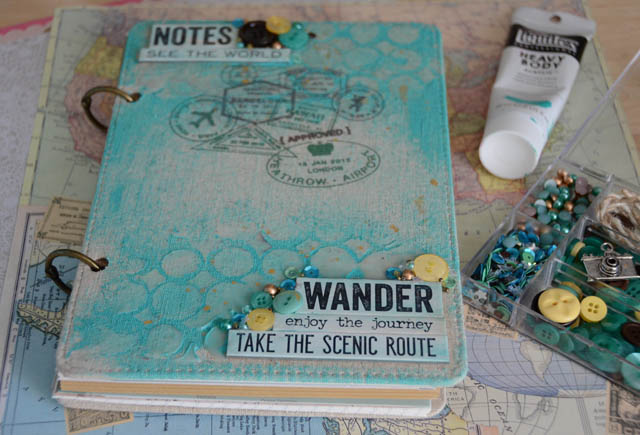
Travel journals are hot, and altering notebooks with mixed media is a great way to make them. In a recent journal project, 28 Lilac Lane designer May Flaum showed how her embellishment kits can make mixed media beautiful!

28 Lilac Lane travel journal by May Flaum

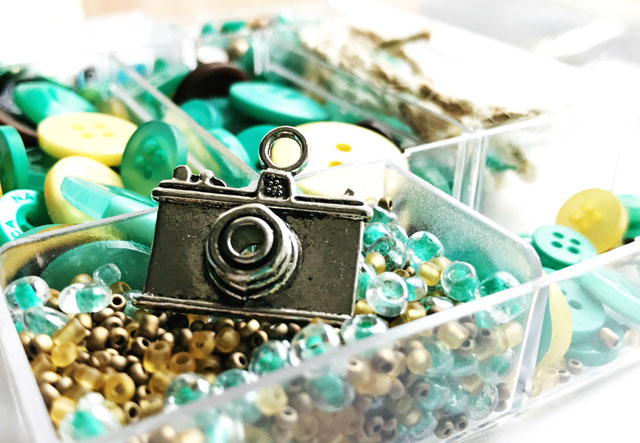
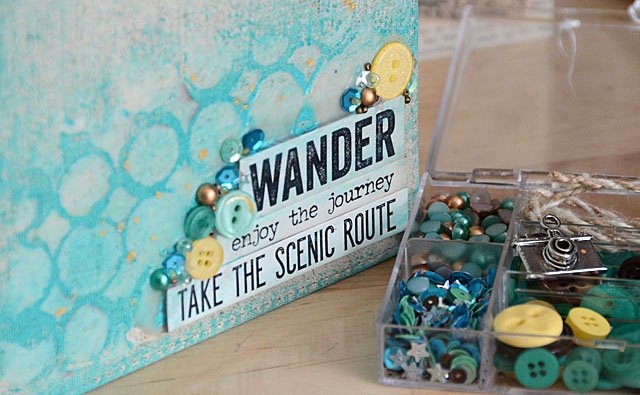
For this project, May used one of her brand new 28 Lilac Lane embellishment kits that was just unveiled at the Creativation show in January. “Let’s Go” is a beautiful combination of turquoise, brown and butter yellow with a few touches of gold mixed in – plus a gorgeous camera charm!

lets go embellishment kit

To see how to make this travel journal cover, visit May’s blog, or watch May’s video below to see the step by step techniques that May used!

With beads, sequins, pearls, and buttons, 28 Lilac Lane embellishment kits are a great match for mixed media techniques. Whether it’s a journal cover, a canvas, a scrapbook page, or another project…you’ll find just what you need in one of our handy embellishment kit boxes!

28 Lilac Lane travel journal by May Flaum

0

Simple Mixed Media Tag with 28 Lilac Lane

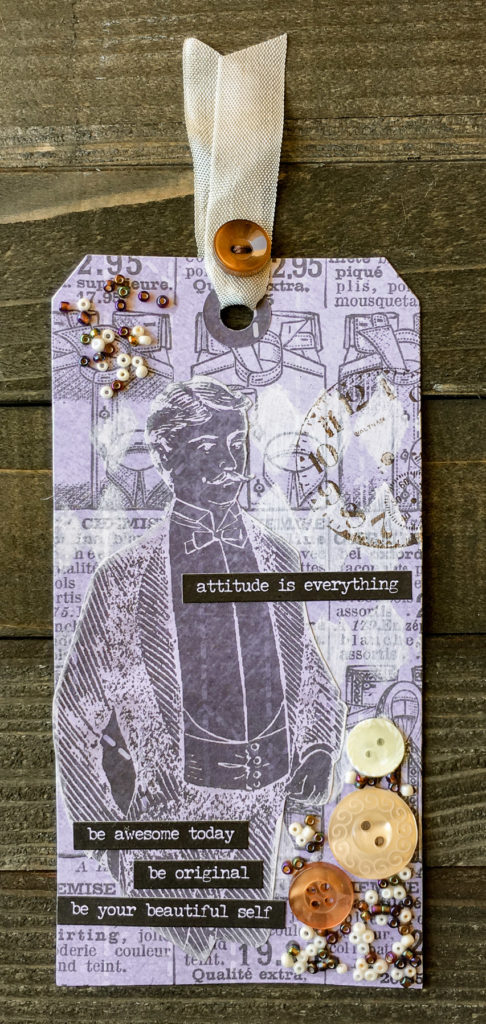
Our 28 Lilac Lane embellishment kits designed by May Flaum make the perfect finishing touch for projects like this mixed media tag! This tag thinks “outside the box” with our Paws & Pets kit, using its lovely brown tones as the perfect partner for some vintage style Tim Holtz products.

Mixed Media Tag by Nancy Nally featuring 28 Lilac Lane embellishment kits

Supplies:

To make this tag, begin by cutting the dapper man out of the patterned paper sheet. Then flip the sheet over and cut the tag base out of the Tim Holtz paper and glue down the hole reinforcer.

Paint and stamping on mixed media tag

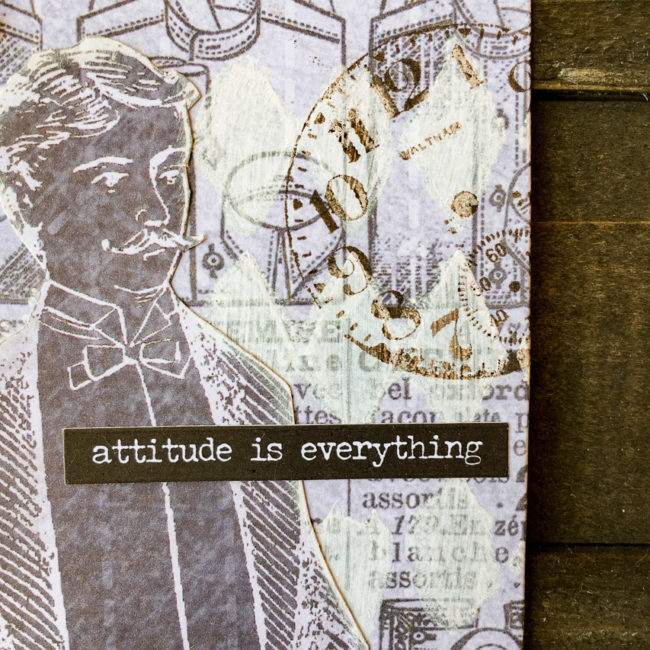
Using the Distress Paint dabber, stencil the harlequin design across the middle of the tag. Once dry, glue the dapper man on top of it. Stamp the clock image with Ground Espresso ink, allowing it to bleed off the edge of the tag.

Mixed Media Tag detail

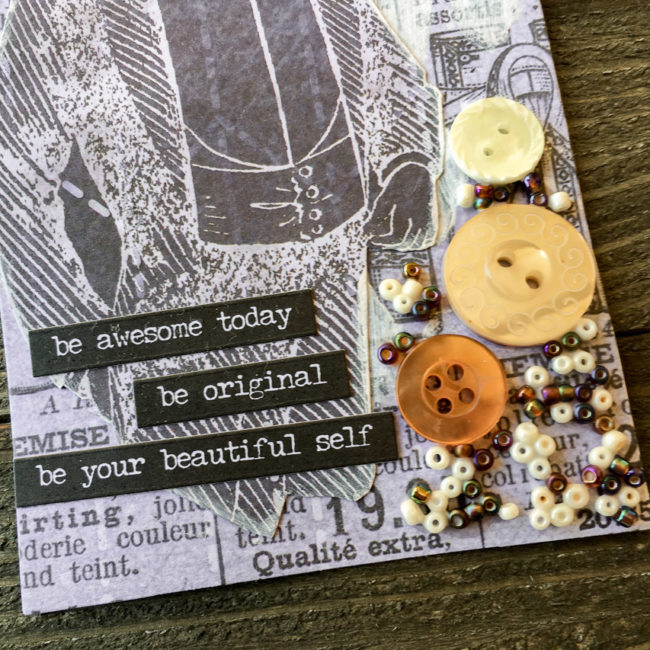
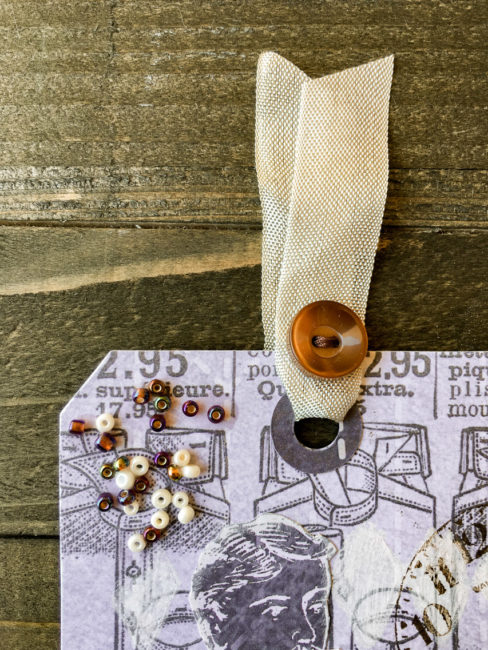
Lay down an area of glue in the bottom right corner of the tag and spread a random assortment of buttons and seed beeds throughout the area. (In addition to the Paws & Pets kit, I used one ivory button from the Vintage Findings kit.)

Mixed Media Tag close-up

Lay down another area of glue in the upper left corner and spread another assortment of seed beads in that area. Loop a short length of the Melissa Frances ribbon through the tag’s hole, and stitch a button through it to keep it in place.

To finish off the mixed media tag, select some phrase stickers from the Small Talk set and place them over the dapper man. I selected phrases that reflected the man’s confidence and effortless sense of personal style.

Our pre-coordinated 28 Lilac Lane kits are the perfect quick & easy embellishment for all your mixed media projects. Don’t forget to look past the name to the color scheme, and “think outside the box” about all the wonderful things that they can do!

0

Inspirational Mixed Media Canvas with 28 Lilac Lane

This time of year sees a lot of people we love embarking on new adventures, headed off soon to new schools, or new jobs. Wouldn’t it be nice to send a piece of ourselves, and a positive message, along with them? This inspirational mixed media canvas using 28 Lilac Lane products will remind them to reach for their dreams!

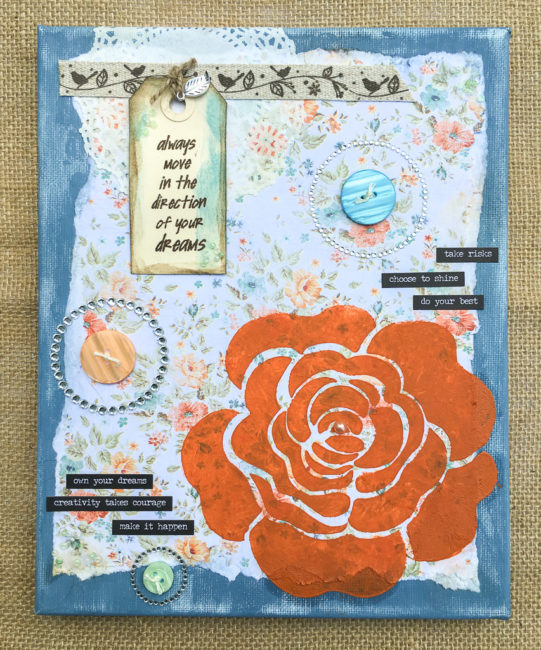
Inspirational Mixed Media Canvas by Nancy Nally using 28 Lilac Lane

Supplies from Buttons Galore:

Other Supplies:

  • Blank 8″x10″ canvas
  • Plaid Milk Paint (Lexington Blue)
  • Quick Quotes “Farmhouse” Paper Collection
  • Plaid FolkArt Stencil (Single Rose)
  • Plaid FolkArt Sencil Creme (Rainbow)
  • Ranger Tim Holtz Distress Ink (Antique Linen, Broken China, Ground Espresso)
  • Stamper’s Anonymous Rubber Stamp “Always Move…”
  • Prima “Say It In Crystals” embellishments
  • Wilton Doilies (4″)
  • Tim Holtz idea-ology Small Talk Stickers
  • Tim Holtz idea-0logy Jute String
  • Embroidery Floss
  • Manila Tag
  • Sizzix Big Shot Machine
  • Sizzix Tim Holtz Alterations “Tiny Tabs & Tags” Die

To get started on your inspirational mixed media canvas project, paint the front and edges of the canvas with the blue Milk Paint. Let the paint dry.

Tear the floral “Farmhouse” paper and adhere it to the front of the canvas using the PPA Matte Adhesive. Use a baby wipe or damp paper towel to smooth down the edges of the paper and adhere them firmly. (This will have the effect of also distressing the milk paint finish on the canvas.)

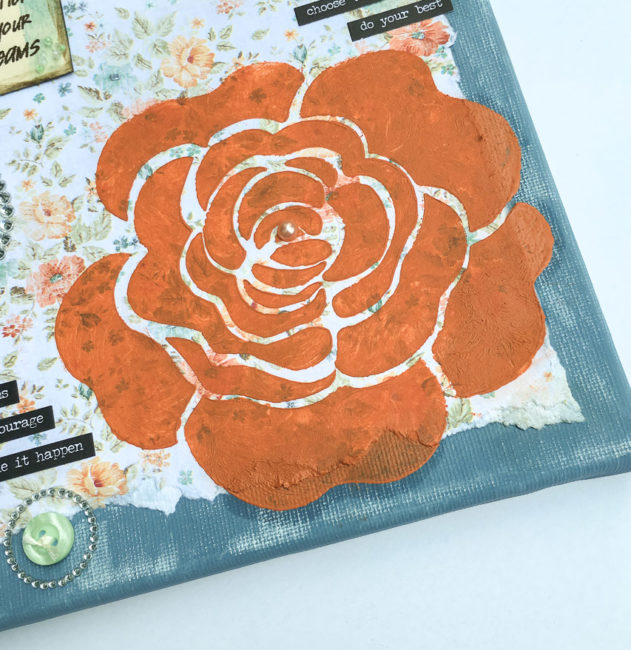
Once the paint and glue is dried well, use the stencil and stencil creme (in orange) to apply a rose design to the lower right hand corner of the canvas, over the paper.

Stenciled Rose on Mixed Media Canvas

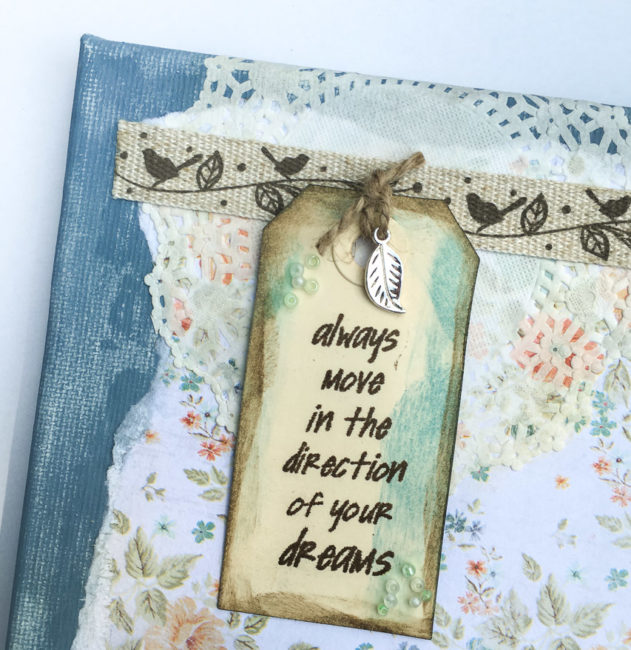
In the upper left hand corner, glue down a doilie on top of the patterned paper. When the glue is dry, smudge some Antique Linen Distress Ink on top of the cut outs in the doilie to highlight the design in them. Next, apply the twill ribbon from the “A New Leaf” kit across the top of the canvas.

To make the tag, die cut the tag shape out of a larger manila tag. Ink the edges with Broken China and Ground Espresso Distress Ink, and stamp the sentiment in Ground Espresso. Tie the charm from the “A New Leaf” kit onto the tag with some jute string, and glue some seed beads from the kit to the tag’s corners to finish it off. Glue the tag down.

quote tag on mixed media canvas

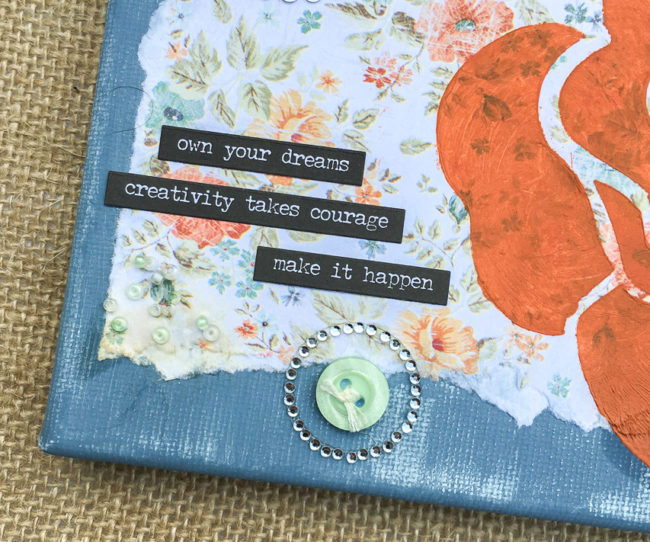
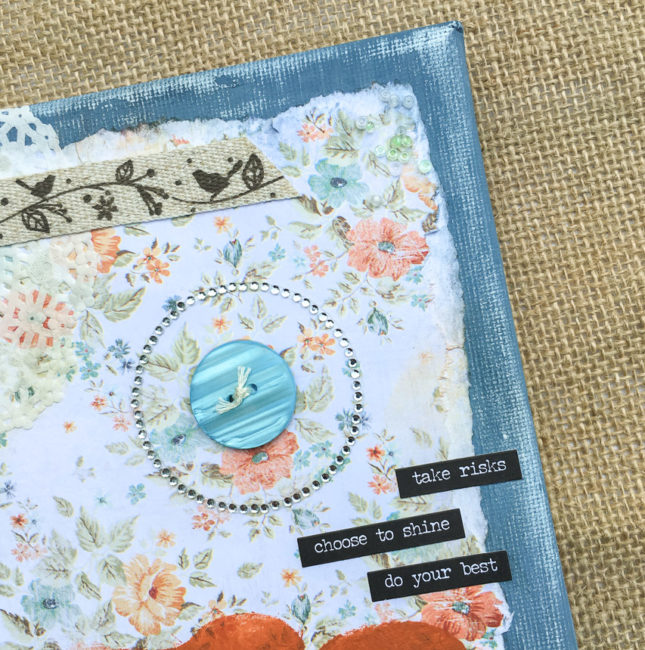
Apply some PPA Matte Adhesive in the corners of the canvas and embed some seed beads from the “A New Leaf” embellishment kit in it. Once that is dry, you can begin building the stickers, rhinestone and button elements in the rest of the canvas. Don’t forget to thread your buttons before adhering them so they look finished!

Mixed media canvas embellishments

mixed media canvas embellishments

This inspirational mixed media canvas is fun and simple to make…and will let someone you care about know how much you believe in them. Who will you give it to?

0

Dress Up A Button Dress Form

Today Buttons Galore is pleased to be welcoming guest artist Candy Rosenberg to share her beautiful button dress form project.

Vintage craft designer Candy Rosenberg

Going out on the town always requires a fancy dress, and this occasion is no different – 0nly this girl is dolled up with buttons from Buttons Galore! Buttons are so fun and versatile in crafting and I am really excited to show off this project.

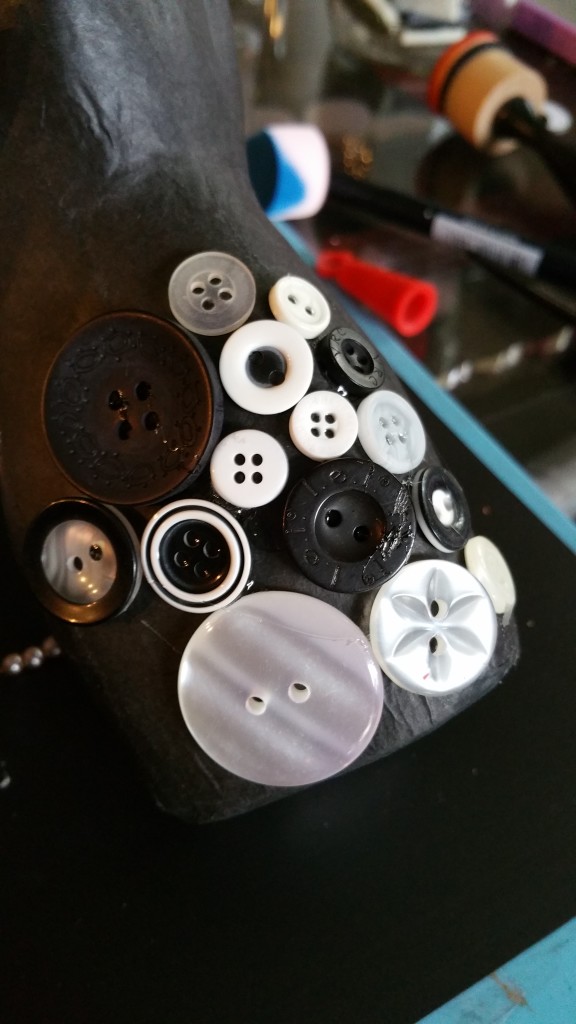
Button Decorated Dress Form

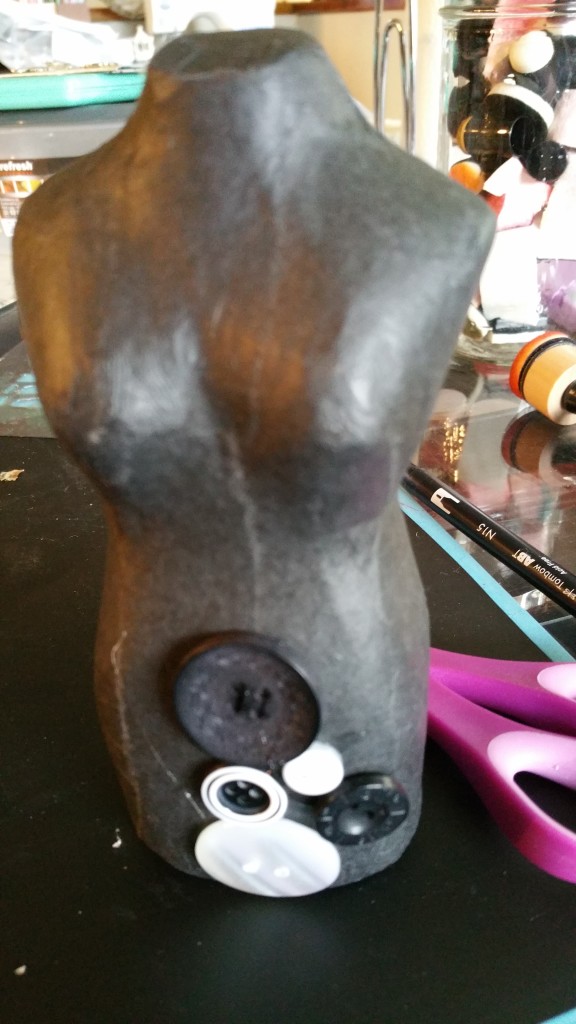
My button fetish is no secret to those who know me so I am always looking for ways to use them in unique ways. I’d had this bare “girl” laying around for awhile when I got this invitation to guest post for Buttons Galore. Buttons…dress form…The lightbulb went off and I thought that I could make a dress from buttons for my girl!

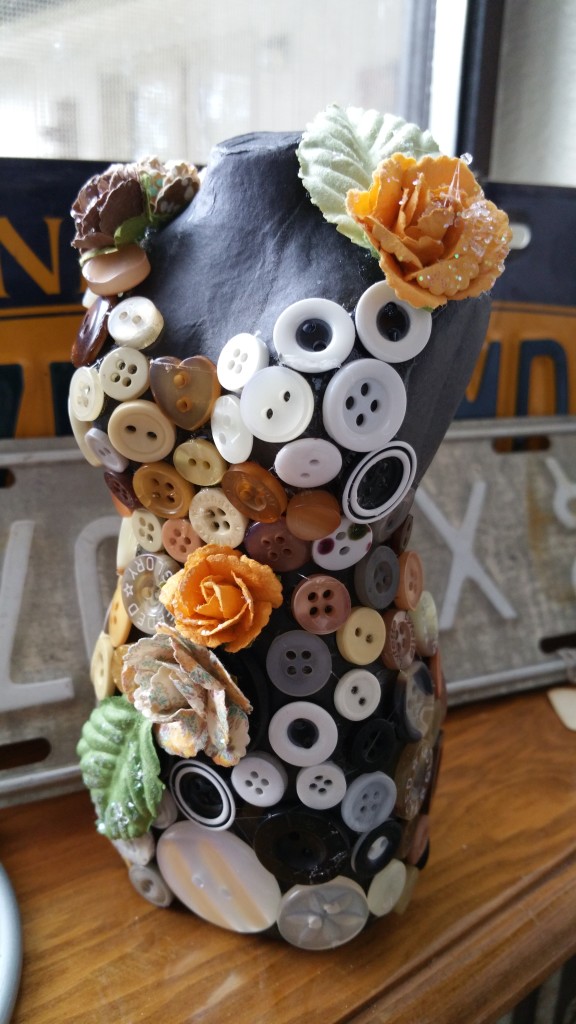
Button collage on dress formCovering an item like a dress form with buttons is not much different than covering a canvas or other flat surface. The major difference is that you have to consider three dimensions instead of two when placing a button in your collage. I poured out my bags of buttons and adhered them one at a time, seeing which ones worked best especially around her curves.

Button collage dress form close-up

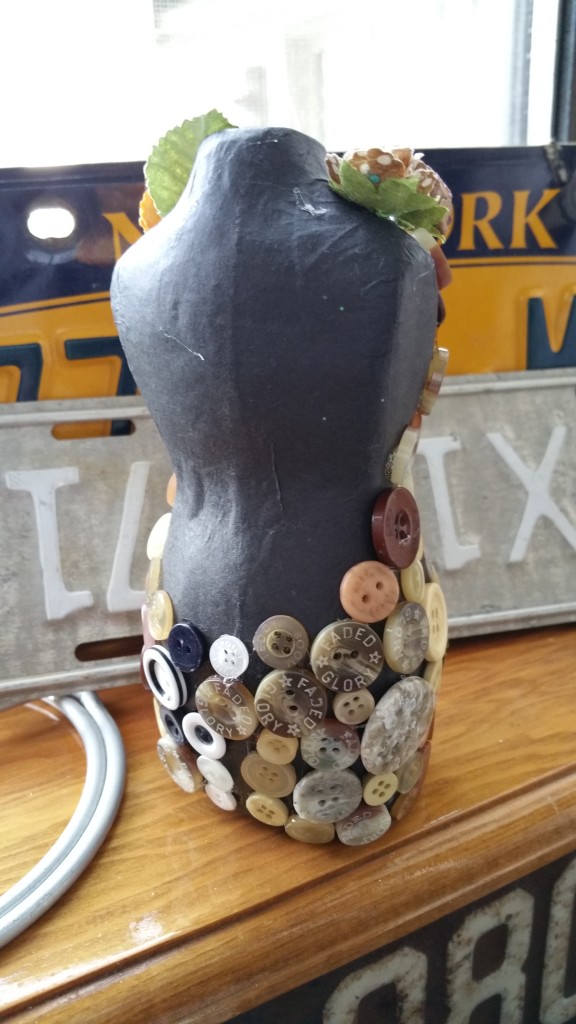
This button dress form is super easy and such a great project to give as a gift or to use to decorate a studio!
finished button dress form - rear
 Buttons Galore Supplies:

If you like Candy’s mixed media creations like this button dress form, don’t miss her previous guest post for Buttons Galore that featured Artist Trading Cards!

Candy Rosenberg resides in beautiful Southern Oregon and has been crafting since she was a little girl. Known for her vintage steam punk style and beautifully crafted dress forms, she still likes to color outside the lines so to speak. Keep tabs on her latest creations at her blog, A Vintage Girl, or follow her on Facebook,Twitter, Instagram, Pinterest, YouTube and Google+.

0

Mixed Media Necklace

I created a mixed media necklace to share with you today. Mixed media to me means having fun. It’s more about the journey, and not so much about the results.

I like to incorporate elements that have meaning to me, or to the person I’m creating for. I love butterflies. They are all about change.

Mixed Media Necklace

Supplies for creating a mixed media necklace

Note – this is what I used – use what YOU love. But of course, include some fun buttons! You don’t need everything on this list – you could play with paint, beads, remake an old necklace… The sky is the limit. Enjoy the journey!

  • buttons – Shop by color at Buttons Galore
  • chain and jump rings (Fire Mountain Gems)
  • shrinky dinks
  • napkin
  • dies (Spellbinders)
  • craft metal (Ten Seconds Studio)
  • glitter and liquid adhesive (Art Glitter)
  • copic markers and an ABS (air brushing system)

Here’s a fun little video showing some close ups and tips.

animoto_high_res

Thanks for joining me today. Please share something you make with buttons, I’d LOVE to see it.

You can find me at My Card Party.

0

Mixed Media Canvas by StudioBeeCreations – Guest Designer

Mixed Media Canvas by StudioBeeCreations

Mixed media Canvas

OH ME…OH MY!!!….I am soooo “over the top” excited about my guest designer post here at Buttons Galore & More!
Buttons have ALWAYS been a passion of mine…one of my favorite “collections”.
I have been crafting some way or another most of my life….Recently I have been drawn to mixed-media….because I can use bits & bobs of all my “stuff” to make ART!
I also enjoy music…and wordage….so, here I have encorporated my “loves” into this canvas.

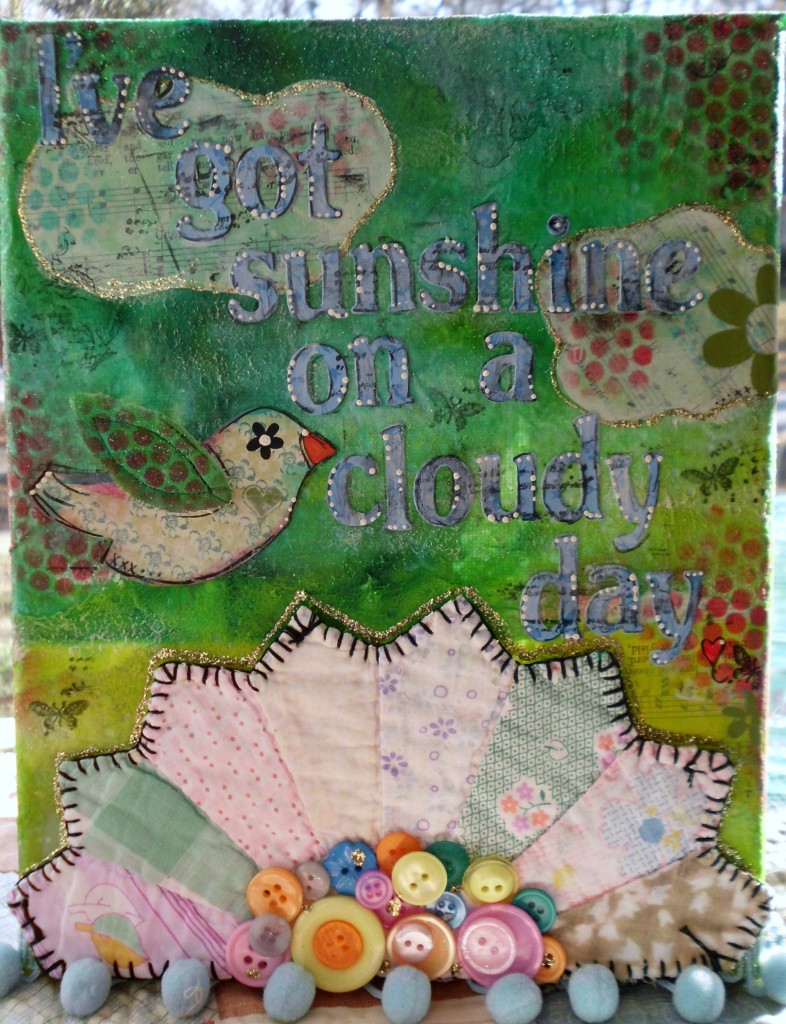
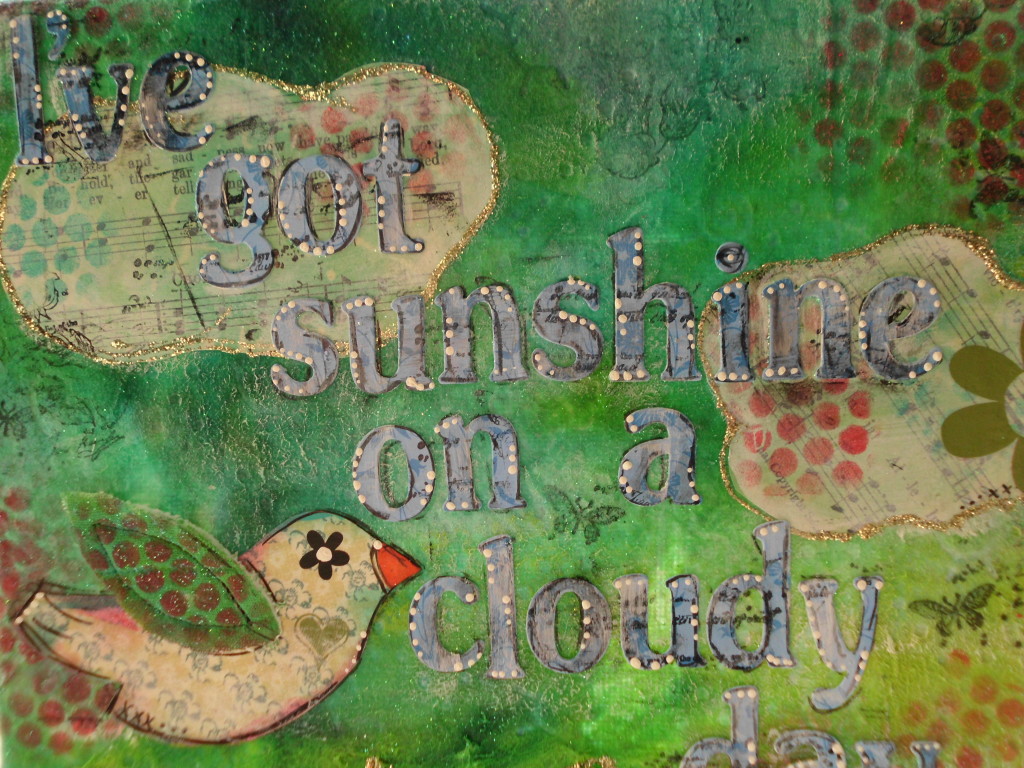
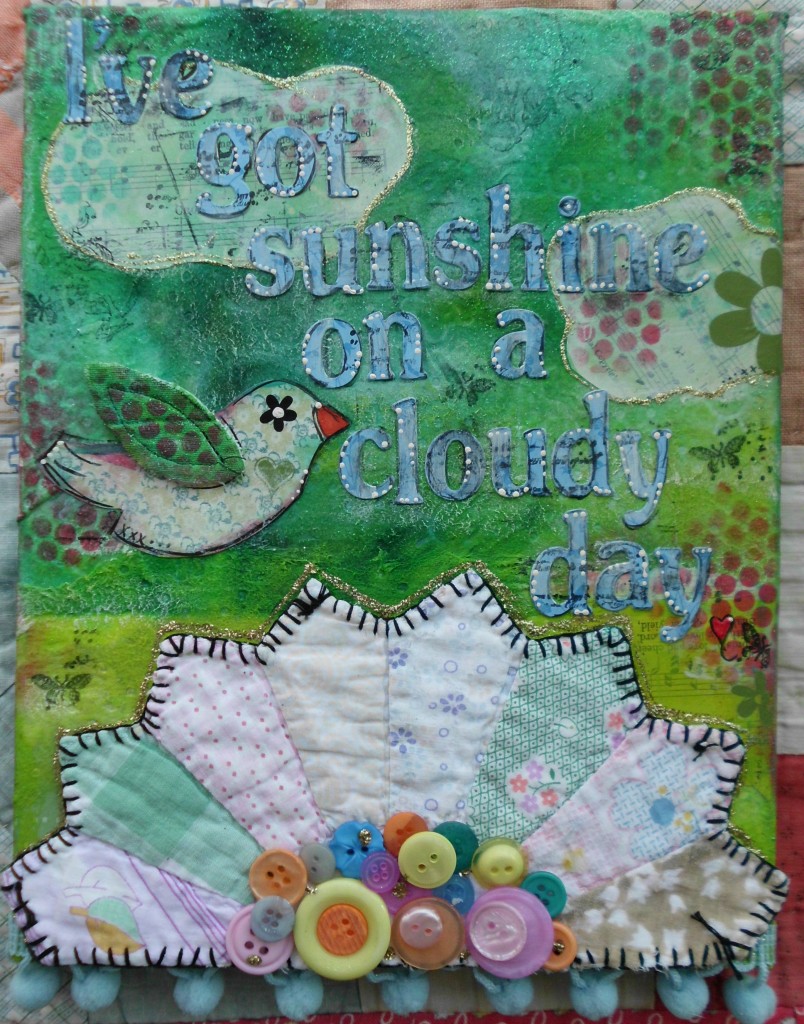
Mixed Media Canvas – “Sunshine on a Cloudy Day”

Mixed media Canvas

Directions and materials to make a Mixed Media Canvas:


I have taken an 8×10 canvas….added loads of texture….vintage music pages,along with (believe it or not) babywipes that I used to wipe up some inks and paints from a previous project…..some inks, rubber stamps,rub-ons, great alpha stickers from my stash and an ANTIQUE quilt piece “rescued” from a dresden plate quilt piece….it realy looks like sunshine…doesn’t it?…..and to top it all off….a YUMMY assortment of buttons from ButtonsGalore&More….these just make me HAPPY!
With my favorite medium Mod Podge, it all comes together in a fun piece of art…..Each time I create these canvases…even tho the same products are used, they all come out uniquely OOAK!(one-of-a-kind)
I currently have my wares for sale at my etsy shop http://www.etsy.com/shop/Studiobeecreations
..more items being added this week!
Loveeeeeeeeeeee all of the assortments BG&M offer for my creative pleasure!
creative blessings, Debbie

Mixed media Canvas

3

Create Personalized Monogram Home Decor using Buttons, Brads & Beads

It’s time to get busy making something to freshen up the house! We have been busy all summer and as the Autumn season fast approaches having a few handy tutorials on how to make personalized gifts and hand made home decor just seems fitting. So today I have a Personalized Monogram Home Dec project to share with you. Enjoy!

Supplies Needed: Buttons, Brads, Micro Beads, Gem Tac (R), Scrapbook Paper, Hot Glue Gun, Scissors, Frame


Print letter of your choice as large as you would like finished monogram to be. Place beneath paper and put against a well lit window to serve as a light box. Then trace onto scrapbook paper.


Outline one third of the traced letter with Gem Tac.

Fill in the area fully with Gem Tac.


Place as many buttons as fit onto the glue covered area.


Quickly cover the entire surface with micro beads.


Remove excess beads before moving onto next step.


Continue covering the entire traced area a bit at a time following the steps above.


Cut the prongs off of the brads using strong sharp scissors.


See how much flatter brads lie once the prongs have been removed?


Hot glue the altered brads to the surface of the monogram randomly. Here I chose to hide "barren spots" with the brads. :)

Once your piece has fully dried, place in a frame and you are ready to enjoy your brand new PERSONALIZED home decor!!!


I would love to see what you make! Please leave a comment with a link to your personalized home decor projects! :) I will be sure to pop over and leave you some love on your project!! :)


1

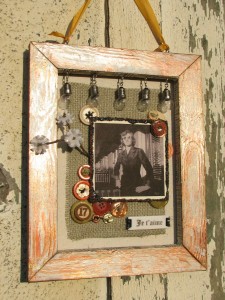
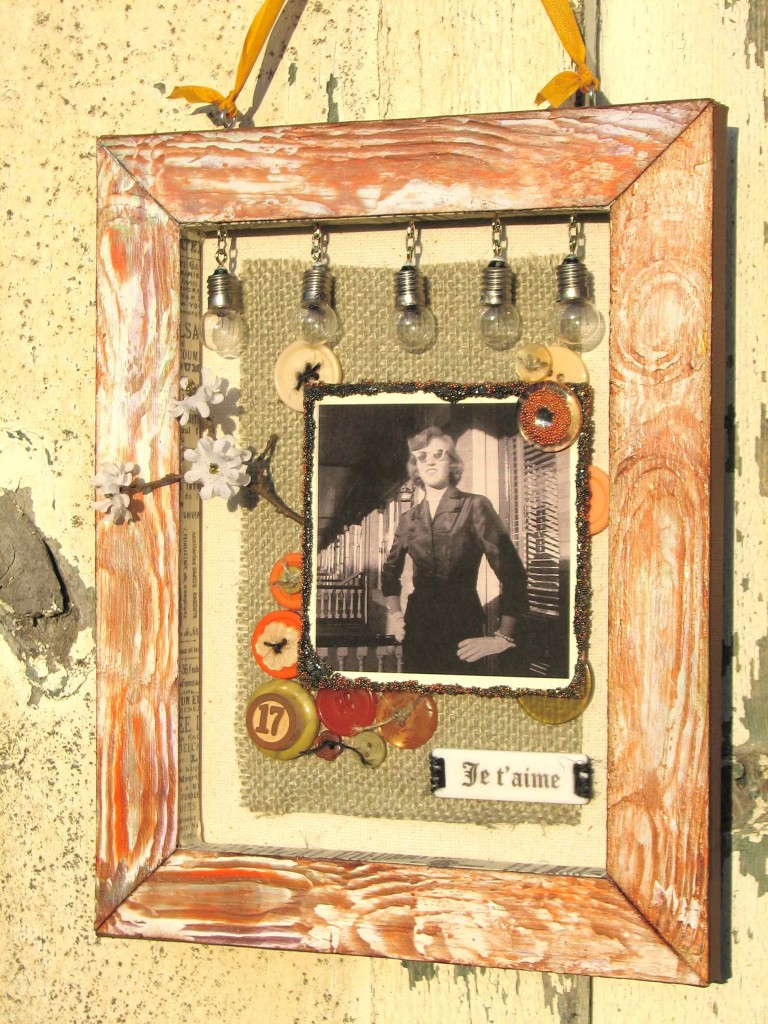
Button-embellished ~ GLAMOUR~ Keepsake Frame

Taking a little break from our “Christmas in July” theme we have a delightful project of Mixed Media Art in this great Keepsake Frame by Elise! :)

Glamor, art and intrigue – a perfect recipe to play with buttons!

Teaming up with some HEAVENLY materials, including burlap, Lumiere Dimensional Paint by Jacquard, Glitter, Ink and Smooch Accent ink by Clearsnap, MICRO PEARLS {Yes!  Micro pearls!} and a whole lot of GORGEOUS buttons form Buttons Galore and More, I was COMPLETELY inspired to alter this simple “value” artist canvas to become “priceless” in no time!

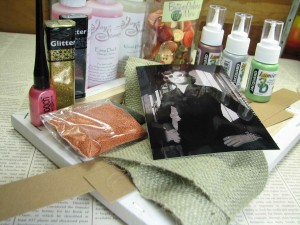
Supplies:

Button Tote Bag Assortment – Cornucopia

Mixed Rectangular Sliders

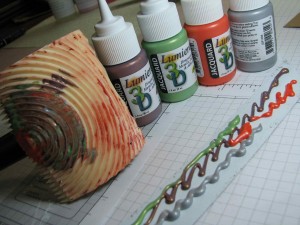
Lumiere 3D Metallic Paint and Adhesive

Glitter, Smooch and Ink – Clearsnap

Trimmer, Knife, Ruler & Mat – Westcott

Adhesive – Beacon via Buttons Galore and More

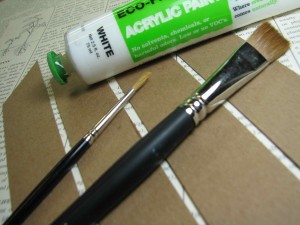
Acrylic Paint – Eco Green Crafts

Burlap

Micro pearls

Tissue Tape

Faux Wood Grain tool (Local Hardware supply)

Other – Vintage light bulbs, twigs and fabric flowers (Misc. stash)


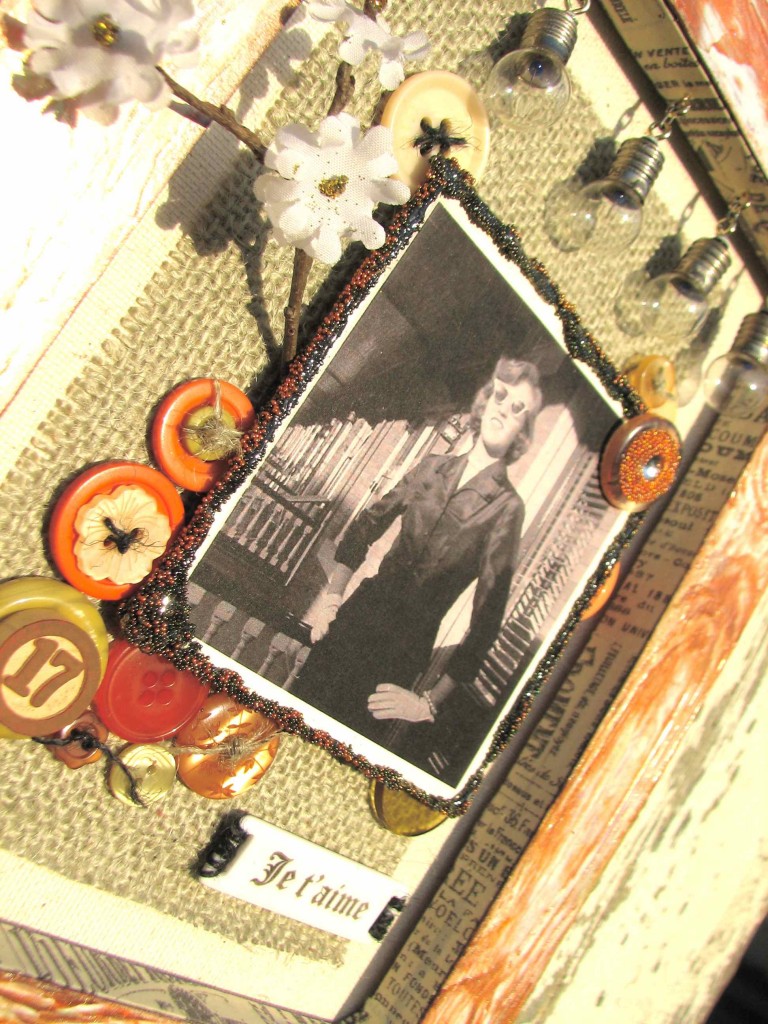
To begin, select a glamor shot of your choosing, to feature in finished frame. {I chose a cool, black and white shot of my sweet Mama at the wee-age of 17!  Wasn’t SHE a dish!}

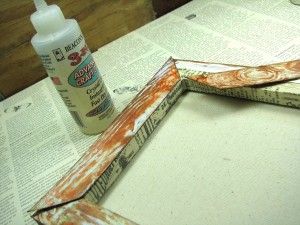
By accessing the back side of a traditional canvas, there is a whole wealth of crafty potential to play with.  To customize the “frame” of this look, I created faux wood grain with a simple wood grain tool (available at most hardware stores!), Lumiere 3D paint, as well as regular acrylic paint and some strips of chipboard, cut and sized to metier together to match the stretcher bar framework of the canvas.  Start by applying an acrylic base to the chipboard.

For rich wood grain effect, the MORE color, the better…  I used FOUR different Lumiere colors for this look!  In case you’ve never dabbled in faux wood grain – it’s TOTALLY easy and addicting…  Apply Lumiere on top of dried, painted (with regular acrylic paint) chipboard strips, then pull and rock the tool to create the MOST amazing effects!  If you don’t like how it looks, keep working!  The 3D quality of the Lumiere gives you some decent working time – you’ll see!  (G’head – TRY it!)  Once you get all four strips done, set to the side to dry.

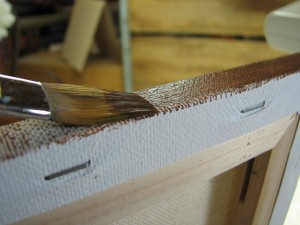
Paint the outside edge of canvas with color of your choosing.

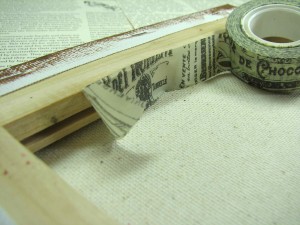
Line the INSIDE of the frame edge with printed tissue tape.

Glue faux wood grain strips to frame.  I love, love, LOVE how beautifully Beacon 3 in 1 works for an assignment like this!

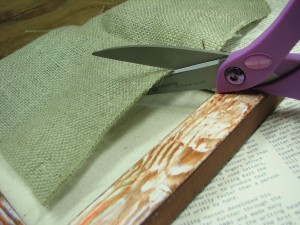
Westcott fabric scissors cut burlap, flawlessly!  Cut burlap to size of your choosing.  I decided to let some canvas frame the edge of the burlap, just because it looked YUMMY!  So many textures!  What’s a girl to DO!?!

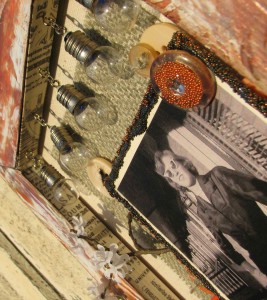
Arrange picture and embellishments to your liking.  For this project, I mounted the photograph on chipboard, mixed micropearls and glitter and then adhered with Beacon 3 in 1 adhesive for a luscious, tactile effect.  Having TOO much fun to stop there, I added micro pearls to button centers, as well…  OMG!  {My middle name is DANGER!}

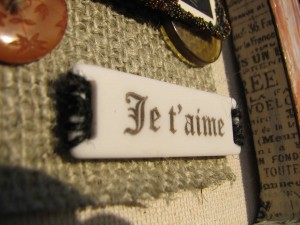
If you’ve never ventured, I can’t recommend HOARDING, uh, I mean, collecting some of our Blank Craft Shapes, in every size!  Love the mood that can be created with theses!  Easy to stamp and beautiful to behold – Je t’aime!  {See what I’m sayin’!}

YOU can get your glamor on, too!  Just pick up a selection (or TWO/FIFTEEN!) of some lovely button assortments from Buttons Galore and More, toss in some HEAVENLY crafty supplies, a canvas and old picture or two…  I guarantee you’ll beat the heat if you spend a few hours crafting away on a cool keepsake, like this!  I hope so!

Thanks for visiting!  Here’s to a glorious, button-craft filled day!  Keep CALM and BUTTON onnnnnnn!


1

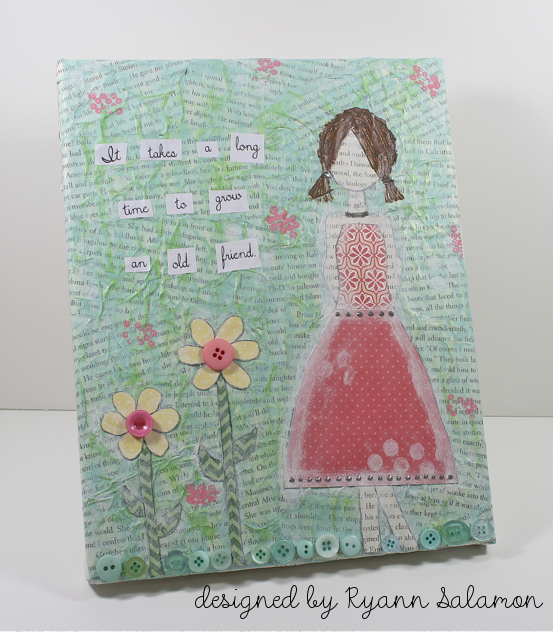
Friendship Mixed Media Canvas with Jacquard Lumiere

Hi all!  Ryann here with my take on a mixed media canvas piece.  Now I am first and foremost a card maker, but every once in a while I like to stretch my boundaries a bit and try something new. I recently took a paper doll tag class from Julie Nutting and left feeling inspired to create my own paper doll.  After deciding on a mixed media canvas, I began my project!

Supplies used:

Directions:
  1. Tear book pages into small pieces, tearing off any large white spaces (you want to work with just the words).
  2. Adhere onto canvas using Mod Podge.  Cover adhered book page pieces with a layer of Mod Podge and allow to dry.
  3. Lightly paint a layer of light blue acrylic paint.  Let dry completely and follow it up with a lightly painted layer of light green.  Allow to dry.
  4. On a book page, draw out your doll figure and cut out.  Draw doll clothes on patterned paper and cut out.  Adhere onto canvas using Mod Podge.  Apply layer of Mod Podge on top of doll and allow to dry.  Do the same for the flowers.
  5. Lightly go around edges of doll/clothes/flower with white paint and allow to dry.
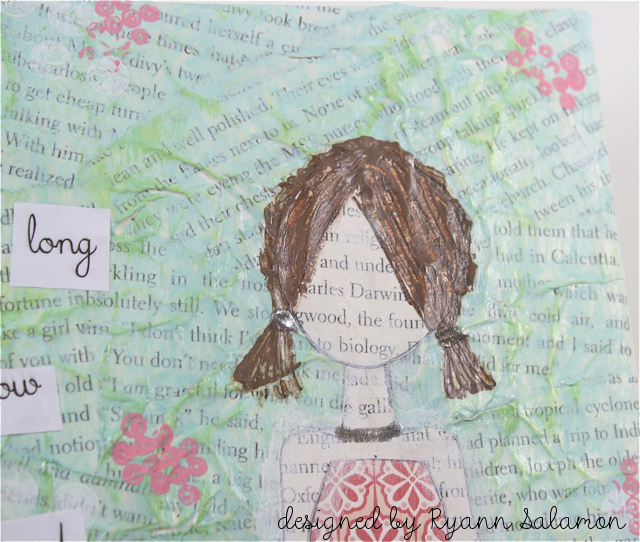
  6. Draw and then paint doll hair and allow to dry.
  7. Create sentiment in computer and print out.  Cut words out individually and adhere to canvas with Mod Podge.  Apply layer of Mod Podge on top of words and allow to dry.
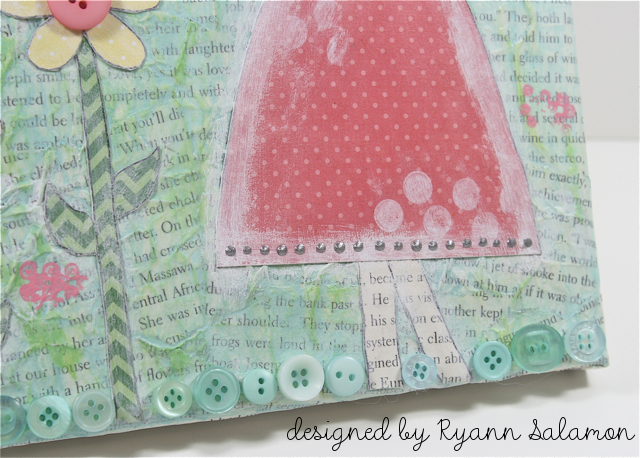
  8. Stamp large polka dots with white ink onto canvas.  Stamp small polka dots with pink acrylic paint randomly around canvas.  Allow to dry completely.
  9. Adhere buttons onto canvas.
  10. Apply Lumiere 3D paint to doll to create texture on dress, neck and hair.  Allow to dry completely.
Thank you for joining me today.  I hope my story of creating outside my comfort zone inspires you to give it a try it too!  :)
Signing off,
Ryann


5

Large Circle Start Ups: Charmed, I’m Sure

Hi y’all! Allie here… I got my hands on some of Button’s Galore’s Start Up craft shapes this week, the Large Circles. I had such fun making some charms with these blank circles. These blank craft shapes are blank poly plastic pieces that you can stamp on, rub on, ink, paint or embellish with anything you desire. I decided to get creative with some napkins and stamps, and some spritz.

I really love these blank craft shapes! They come in lots of shapes and sizes, from flowers to tags, to sliders and frames, and even holiday shapes. There are even start up packs, and collections including a variety of sizes. They are perfect for every project.


charms-cropped-edited-300x279


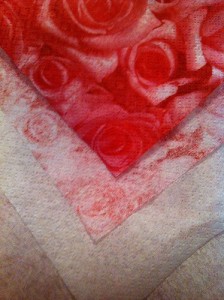
This picture shows the separate layers of the napkins I’m using. For my charms, I just used the very top layer.

I decided to collage with napkins. I start by separating the layers of the napkin, so I’m working with the top designer layer. I use Claudine Hellmuth’s Matte Medium from Ranger, with a flat brush. Some people like to use a wet Q-tip to “cut” through the napkin, but I prefer to tear, and sand off any excess.

I used a little round file to clean out the holes in the charms. You can use any decoupage medium, whatever you prefer. I also like to seal the top when I’m done.


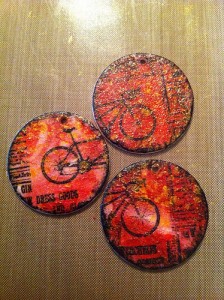
I skipped a few photos, but this is what happens after the decoupage step. I stamped the Large Circles with an Itty Bitty bicycle stamp from Unity Stamp Company. I used Jet Black Stazon ink from Tsukineko. I also lightly tapped around the edges of the Large Circles with the same black Stazon Ink. Once the ink was set, I gave the Large Circles a light spritz with Mr. Huey’s Gold spray from Studio Calico.

Use your favorite spritz, or you could even make your own.

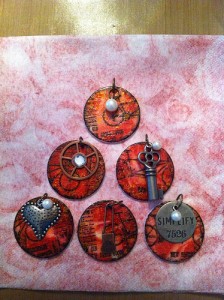
You can add anything you like to these little charms. I put a jump ring on each of them, and added little trinkets and bling. The metal pieces and the little pearls are from Ideaology, and are designed by Tim Holtz. I added bling to the sprocket, on the second row, the charm on the left. I love a little sparkle, don’t you?

Add some bling, little trinkets or baubles.

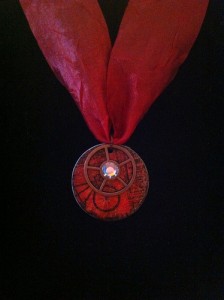
You could attach these charms to a chain, a hoodie, or anything you like. You can even keep it simple, and just thread it onto some crepe ribbon, as shown below. This ribbon is from Creative Impressions.


SUPPLIES AND MATERIALS

  • Blank Craft Shapes – Large Circles
  • Napkins
  • Decoupage Medium and a Brush for application
  • Stamps and Ink
  • Spritz
  • Trinkets and Jump Rings

0

Mother’s Day Canvas With Pinky

Can you believe Mother’s Day is quickly approaching? It is right around the corner and I love to make a handmade gift.

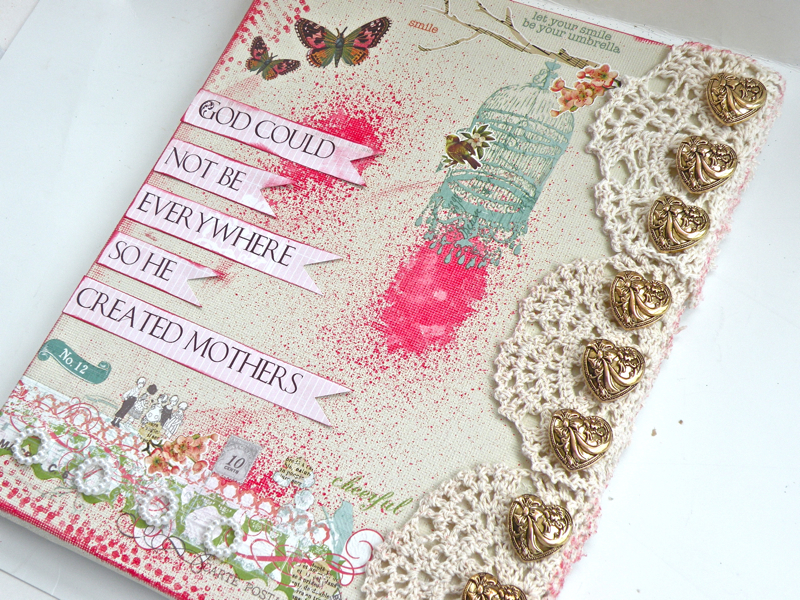
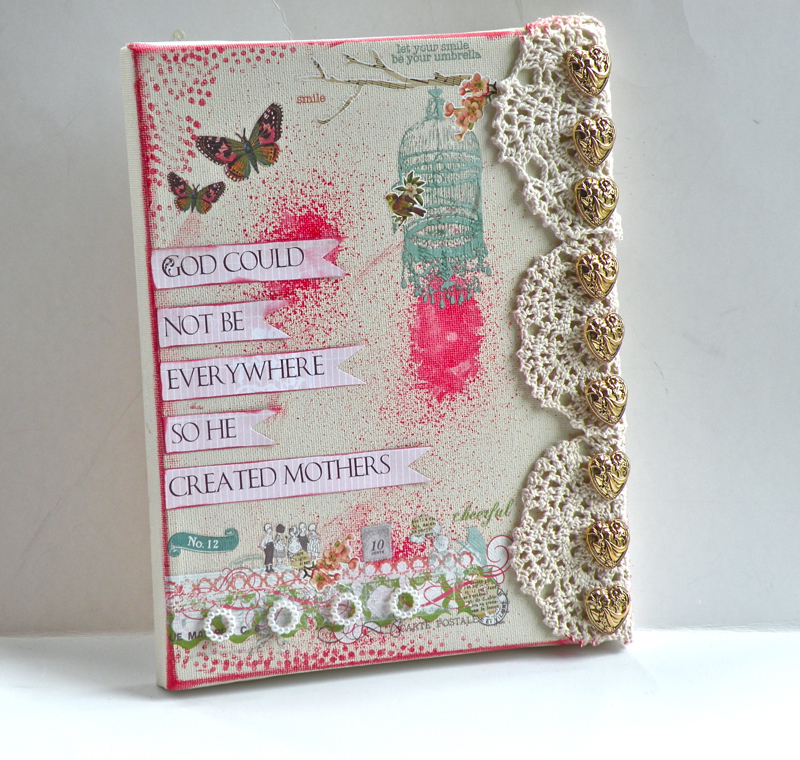
I want to share this artistic canvas made just for “Mom” using vintage doilies from around the house.

For this Canvas use an 8×10 canvas, and paint it with a sand colored acrylic paint.

After allowing the canvas to dry, take a craft spritz and carefully spritz canvas in random places. Set aside to dry for 10 minutes.

Using coordinating ink color, ink edges or canvas.

Take a pencil with eraser and dab into coordinating paint or ink, ink or paint onto canvas as shown in photos.

Adhere vintage doilies.

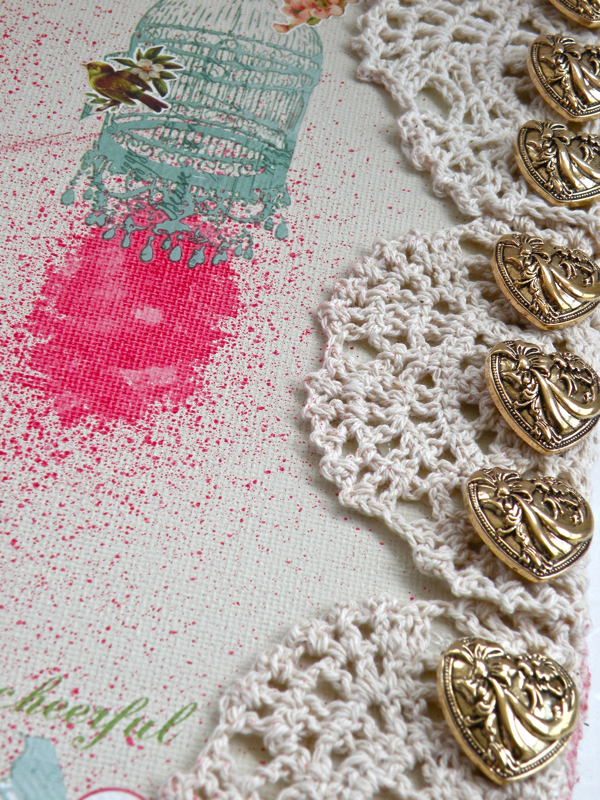
Grab some packages of beautiful Buttons’ Galore & More Vintage Gold buttons and apply buttons between doily stitches using hot glue.

Mothers Day Canvas

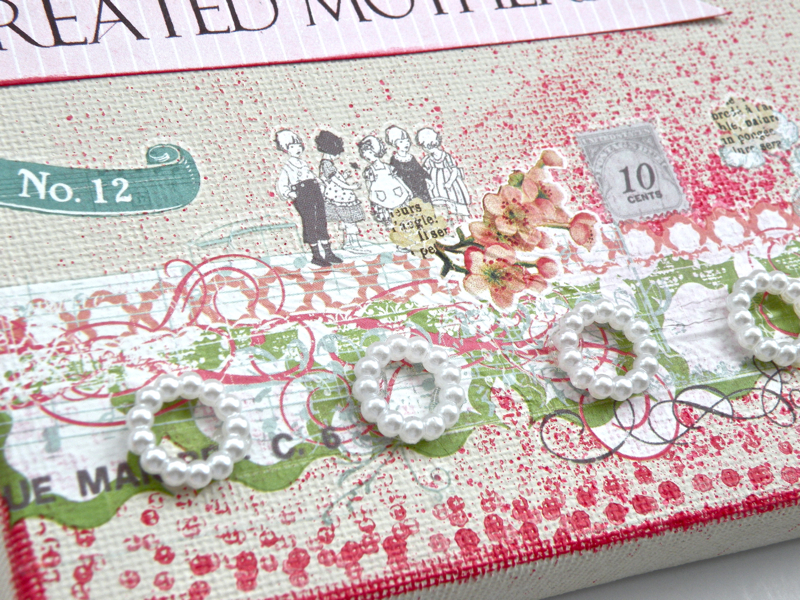
Using rub-ons, carefully apply rub-ons in desired locations.

Mothers Day Canvas

Using shank & pearl keepsake buttons, adhere over rub-on using hot glue gun.

Mothers Day Canvas

Set canvas aside.

Choose a lightly colored patterned paper, using home printer, print quote onto page.

Trim out words and hand cut pennant edging.

Ink edges.

Adhere quote to canvas.

Wrap it up and give with love.

I hope you enjoyed the post today- Pinky: Buttons Galore & More Design Team

 [Note: some products used in this tutorial have been discontinued so we have provided links to similar substitutes.]
1

Pin It to Win It – Contest Reminder- Closed

Pin-it-to-win-it-The pin it to Win It Contest ends on Friday and we would not want you to miss out on great inspiration, and a chance at being a GUEST DESIGNER or winning a prize.

We are celebrating spring and what better way to do it than with Pinterest.  The site makes our hearts swoon— we use it as a creative kick-start, to figure out what’s for dinner, and to get inspired by gorgeous color combinations for our own projects.

Now we’d like to turn the spotlight on YOU & your creativity. Show us your BUTTON-inspired pinboards!!  At the end of the contest we will send the Pinterest user with our favorite pin collection a tote bag filled with fabulous & inspiring crafting supplies. If you are the creator of our very favorite button project, you will receive an invitation to be a guest designer for a mutually agreed upon month at Buttons Galore & More and receive $25 worth of products of your own choosing from the Buttons Galore & More site. In addition, your creation will be featured on our website and in our newsletter — reaching thousands of crafters around the world who will turn your idea for a fabulous project into reality.

WHAT YOU NEED TO DO

Be sure you follow Buttons Galore and More on Pinterest.  Create a new Pinterest board entitledButtons Galore Pin It To Win It Party.

Fill that board with at least 4 pins (feel free to add more!).

-2 of the pins must be of your favorite projects from the Buttons Galore blog

-2 pins must be of your own creations featuring buttons of any kind.


All the pins (even those not from ButtonsGaloreandMore.com) must have a caption explaining the pin’s relation to the party.Is it your favorite color mix? An awesome project? A card created by you? Your favorite scrapbook page? Tabletop decor?

All the pins (even those not from ButtonsGaloreandMore.com) must be hashtagged with both #buttons and #pinitparty.

Once your party pinboard is complete, enter the contest by posting a link to the pinboard in the comments section of April 2nds post Titled Pin it to win it starts TODAY.

This contest launches on April 2, 2012, and will run through 5 p.m. April 27, 2012. The Pinboards will be judged on originality, creativity, adherence to the contest rules, and a general sense of style, appreciation for all things interesting, authentic, and fun.

Note: You must be a member of Pinterest.com to enter, and you must be following ButtonsGalore. If you do not have a Pinterest account, you can sign up for one here or request an invitation in the comments section.

The Buttons Galore Party Pinboard Contest (the “Contest”) is sponsored by Buttons Galore and More (“Sponsor”).

ONE (1) GRAND PRIZE:  A gift bag filled with craft supplies approx. retail value $75.

ONE (1) FIRST-PLACE PRIZE:  approx. retail value $25

All federal, state and local laws and regulations apply; void where prohibited.  PRIZES MAY BE SUBJECT TO TAX; ALL APPLICABLE TAXES ARE THE RESPONSIBILITY OF THE WINNER.

ELIGIBILITY: The Contest is open only to individuals, eighteen (18) years or older at time of entry, who are legal residents of the United States and Canada, excluding the Province of Quebec. Employees and Creative Team Members of Buttons Galore and More, their immediate families (defined as parents, children, siblings, spouse and grandparents), and those domiciled with any of the foregoing are not eligible.

ENTRY:  All entrants must submit a Pinterest board entitled Buttons Galore Pin It Party, containing at least 4 pins, 2 of the pins must be of your favorite projects from the Buttons Galore blog and 2 pins must be of your creations featuring buttons of any kind.

Submissions to the Contest must be received by April 27 2012 at 5:00 p.m. Eastern Time (“ET”) in order to be eligible; entries received after that date will be deemed ineligible to win.  Sponsor is not responsible for lost, late, inaccurate, incomplete, damaged, illegible, or misdirected entries.

Each entry must be submitted on an individual basis (i.e., no team, joint, or corporate entries) the entries created by the contestan must be the original creation of the submitting participant.

Entries may not contain profanity, nudity, pornographic images, violent images, anti-competition messages, illegal material, or material that violates the rights of third parties. Entries may not include confidential information, trade secrets, trademarks or copyrighted material belonging to any person or entity other than the entrant absent a suitable license or permission agreement, proof of which is required. Entries containing any forbidden matter or material otherwise deemed by Sponsor to be inappropriate will be disqualified.  Online entries will be deemed submitted by the authorized account holder of the email address submitted at time of entry.  One entry per person; multiple entries will be disqualified.

JUDGING:  The Creative Team members and editors will select the winning entry based equally upon the criteria of originality, creativity, adherence to the contest rules, and a general sense of style appreciation for all things interesting, authentic, and fun.

By entering, you agree to be bound by these Official Rules, and that the decisions of the judges are final and binding in all respects.  Judging will be completed by April 30, 2012, and potential winners will be notified by Pinterest comment on or before May 1, 2012.  Sponsor reserves the right not to select any winning submissions based upon the quantity or content of submissions.

If required winner announcement is not in contact with Buttons Galore within seven (7) business days of notification, or if notification is returned as undeliverable, any prize will be forfeited and an alternate winner will be selected.

PRIZE AWARDS:  Prizes will be awarded within sixty (60) days after winner verification.  No prize substitution or transfer is permitted, except that Sponsor reserves the right to substitute a prize of equal or greater value for any reason.  Sponsor is required by law to report prize values to taxing authorities; all taxes and any other incidental expenses on prizes are the sole responsibility of each winner.

For GENERAL RULES & LIMITATIONS please read this post.
1

Altered Frame

Suzi Blu in Paris

Suzi Blu in Paris


Hi, this is Allie, shivering in Minnesota, getting ready for some snow. I hope you are warm and happy wherever you are today!

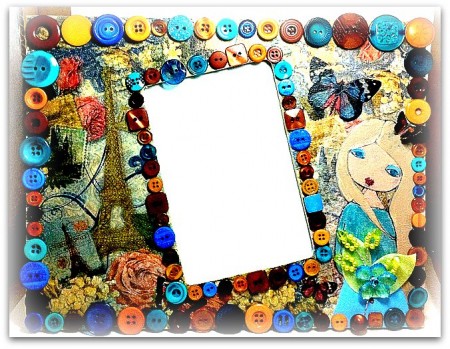
I have a fun altered frame to share with you today. I started with a blank MDF frame from my local craft store.

I used the following supplies:

  • Buttons Used:  Vagabond Buttons in a Jar
  • frame from craft store
  • napkins from Punch Studio
  • Suzi Blu stamps from Stampavie
  • Tuxedo Black Memento Ink from Tsukineko
  • paints from Claudine Hellmuth Studio (Ranger)
  • Liquid Pearls from Ranger
  • Stickles from Suze Weinberg (also Ranger)
  • beaded spray from Hydrangea Hippo (Etsy)
  • leaves from Creative Impressions
  • crystal flower from a local wedding supply
  • adhesive :  Matte Medium from Claudine Hellmuth to apply the napkin and seal the project. I used Beacon’s 3-1 glue to adhere the buttons to the project.

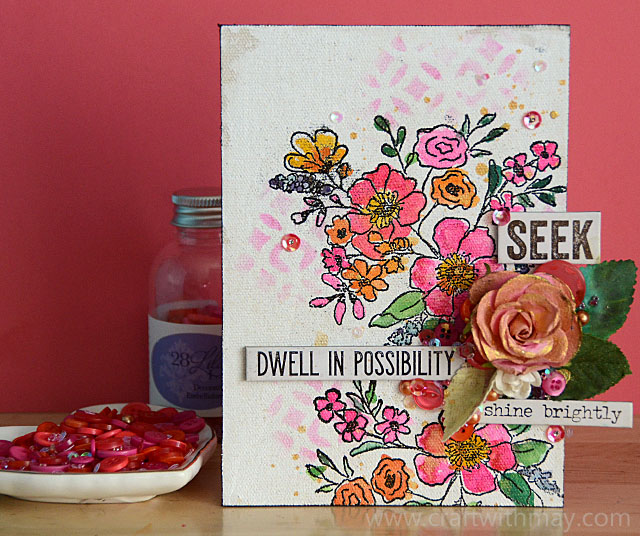
I decoupaged a pretty napkin onto the frame. The frame was rather dark, so I actually decoupaged a second layer on top. It is layered slightly askew, to give the frame a little more of a 3D effect. Once everything was dry, I stamped the girl and painted her. I added Ruby Slippers Stickles to her lips. Every girl loves to sparkle!
The butterflies you see above Suzi Blu and in her hair are from the napkin – they were cut and decoupaged onto cardstock and then mounted to the frame. I arranged the buttons as desired, then glued them into place.
To finish it off, I gave the girl a small bouquet.

The project was simple decoupage and paint. I am sure you have an old frame that needs a new look. Buttons are great for dressing up everything. This particular set of Vagabond buttons was the perfect assortment of colors and sizes for the project. The jar is chock full of buttons, and I still have plenty left for another project!

Thank you for stopping by.

2

Mixed Media Memories

Button memory quilted art

Button memory quilted art

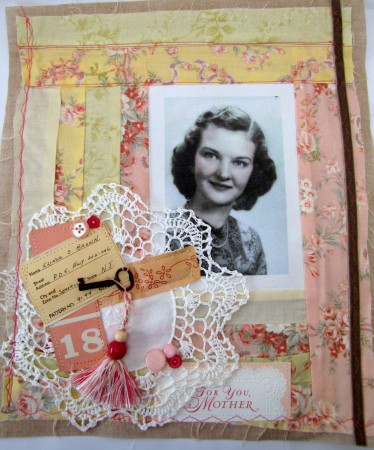
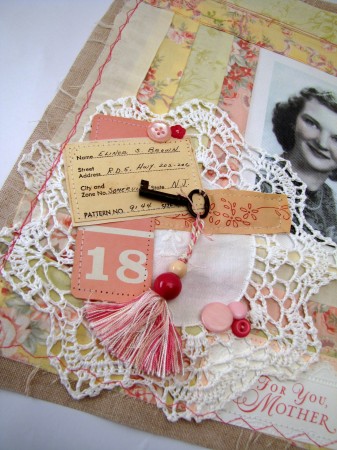
This is a mixed media piece I made with items I found while cleaning out my Mother in Laws’ home.

The background is created like a Log Cabin Quilt by stitching strips of fabric one to another and around the photo that is printed on printable canvas. The pieces are not the same width or length. It’s more of a free form kind of piecing. I added some top stitches in pink.

I also used buttons from Bubble Gum Button Bonanza,  and added some fabric, buttons, a doily, piece of embroidery iron on, a flash card with the number 18 (which is about how old she was when the photo was taken), part of a greeting card, a key, the address from an old envelope and a small tassel.

Mixed Media Memories

I did a lot of remembering while I was putting this together. My mother in law has always been good to me.

Have you created a piece of art/craft to remember someone you loved?  What did you make?

0

Valentine Theme Keepsake Book


Supplies from Buttons Galore & More:

Oh, the wonderful things we can do with buttons!  This blog is choc FULL of ideas!  And thanks to the bountiful assortment from Buttons Galore and More – we keep comin’ up with NEW ways, to make amazing crafts with buttons…

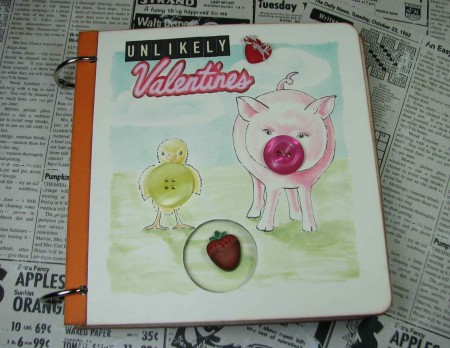
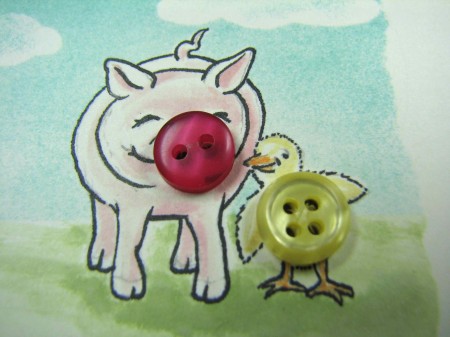
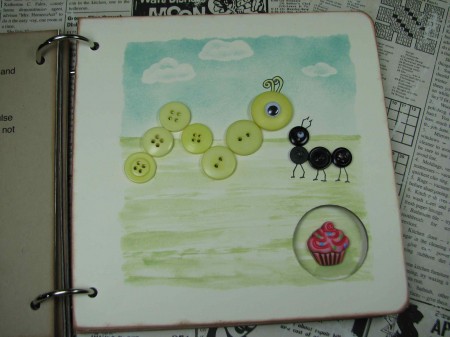
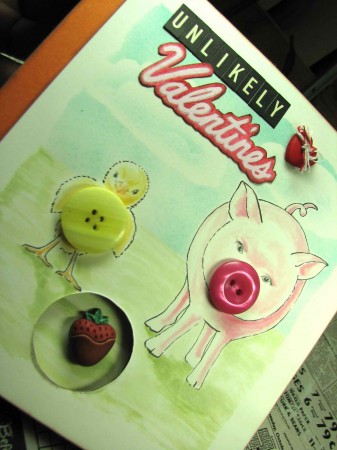
Recently, while doodling on my desk blotter, I created some fun characters by sketching around some colorful buttons.  Like seeing circus animals in the clouds, and messages in coffee froth – THIS little book idea, and the characters within, were born.


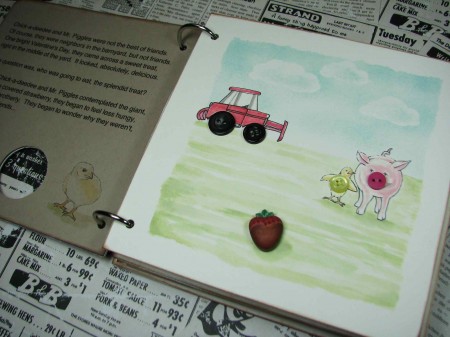
I was so taken with the characters, I decided to showcase them by creating a keepsake story, from a re-purposed children’s book.  For YOUR creative consideration, I’m sharing some ideas on how to take your doodles and buttons from desktop to KEEPSAKE – it’s a fun and crafty ride, so I hope you enjoy!

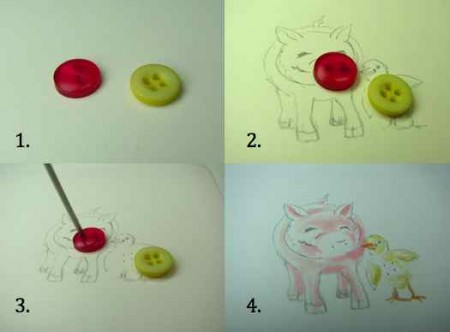
Steps 1 – 4

1.)  Select buttons that inspire you.

2.)  Doodle or sketch as desired.  When satisfied, re-create artwork onto good quality card stock.

3.)  Plan for button holes with a paper piercer, poked through holes and into cards stock.

4.)  Color and ink drawing as desired.


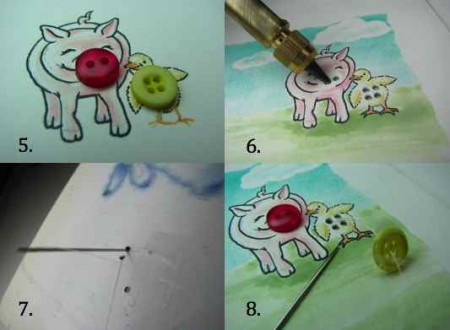
Steps 5 – 8

5.) Check button placement, then color the rest of the drawing or scene to your liking.  Secure artwork to card board page with adhesive.

6.) Drill holes to correspond with pierced marks, through cardstock and cardboard.

7.) From opposite side, using clear thread and needle with a small knot, and secured with tape, push threaded needle to the front side of the artwork.

8.) Thread button and pull tight to secure the button into place.  Tie off and tape down excess thread on the back side of the card board.


Take a MOMENT to enjoy the adorableness of your creations and then CARRY on!


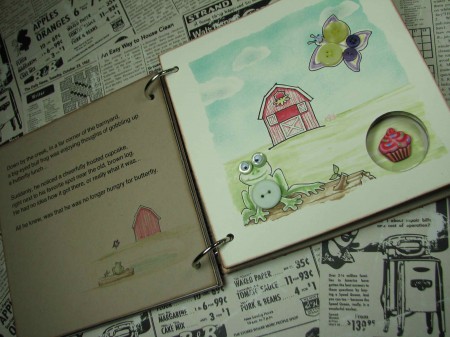
The opposite side of the board, where thread is secured, can be covered with more cardstock and the copy for the story telling, if desired.  This could also be made into a darling scrapbook or memorabilia holder – let your imagination and button characters take you on an adventure and then write about it!


That’s how these creatures came to be!


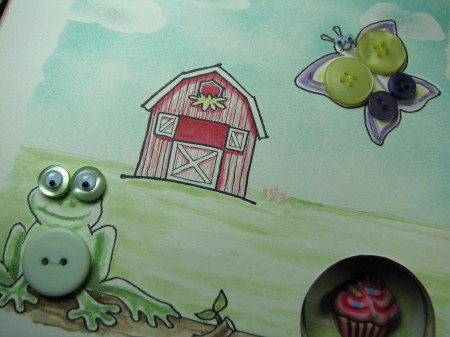
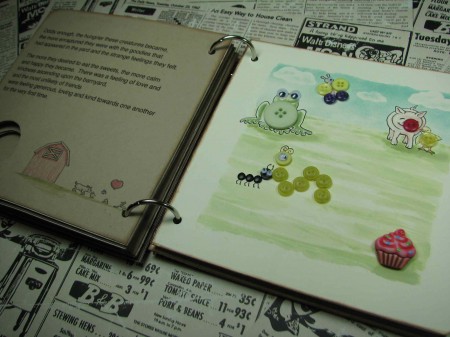
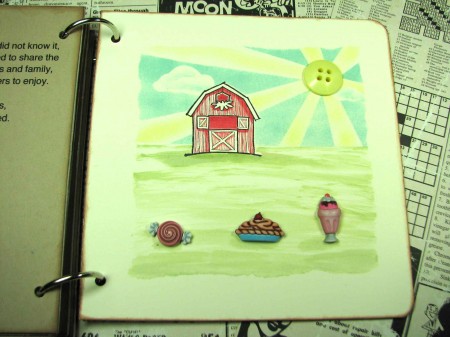
The scene: the BARNYARD.


The characters: unlikely friends who are moved to acts of generosity and sharing as a magical mood is created, by mysterious sweet treats…


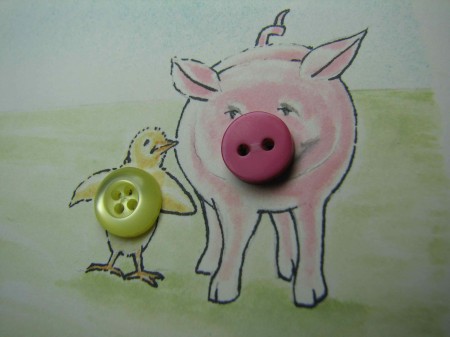
The most unlikely of friends become the most UNLIKELY VALENTINES, as they share and bond on Valentine’s day.


And a darling, button filled lesson that life can be so much sweeter, when you share!


Just ask Mr. Piggles and Chick-a-deedee!


The MOST unlikely of Valentines!

Super fun!  Super BUTTONS!  The very best store: Buttons Galore and More!


8

Start Up’s for Mixed Media Projects

Mixed media bracelet tag

Mixed media bracelet tag


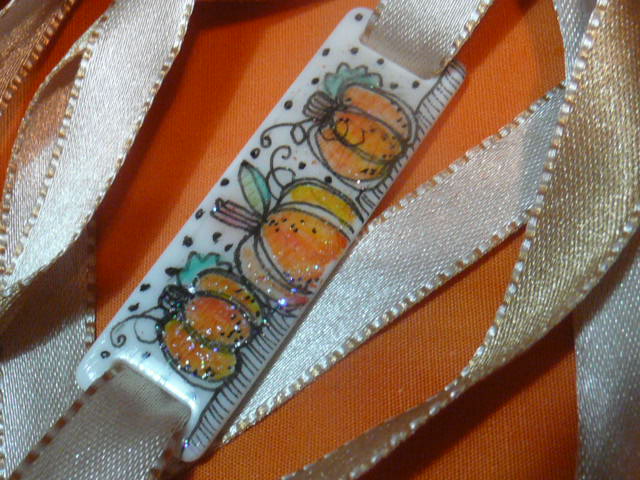
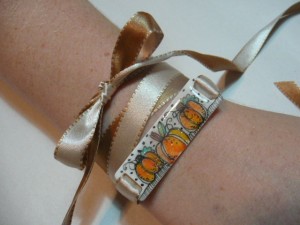
I cannot help myself when I am given anything flat and white. It’s like a blank canvas to me and I have to doodle! This was so so so much fun to make. I started with the Start Up’s Large Rectangle Slider piece. This would be great on a card, scrapbook page or a mixed media piece. I made this one a ballet style bracelet.


I love the finished piece on my daughter’s tiny wrist! So, to begin, you want to sand the surface of the Start Up piece just to rough it up a bit and take off the shinny coating. Dust is off and start to doodle.

I used a Faber Castel PITT pen and doodled some different size pumpkins. The coloring was done by using just colored pencils.

Let it dry for a few hours before you coat it. I coated the top with DG3 from Judikins and spinkled in a bit of Ultra Fine Prisma Glitter and went to bed. This is important. The DG3 takes about 4 or 5 hours and I always want to touch it before it’s totally dry. So going to bed helps! I added a two toned piece of satin ribbon and it was all ready to wear.


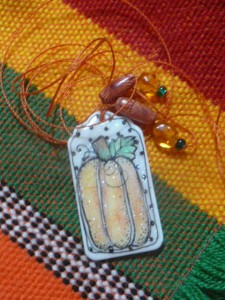
The tall pumpkin pendant was done the same way. I used a Large Tag Start Up for my blank canvas on this one. I used some beading cord and a few beads on the ends to finish it off. I am having a great time playing with the new Start Ups… you will too!


8

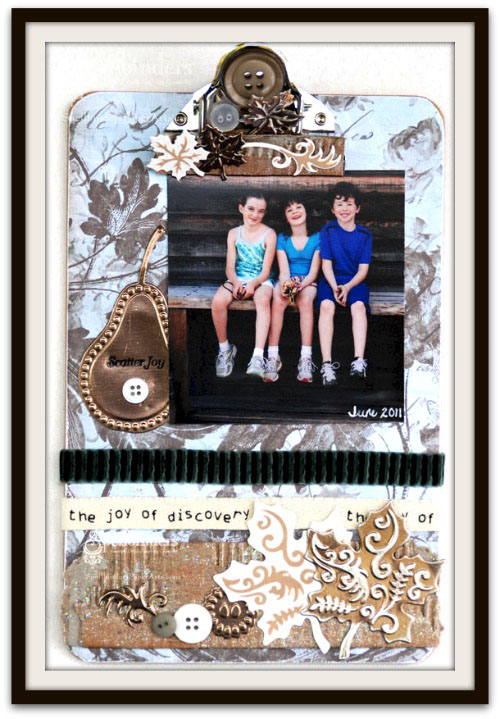
Fabulous Fall Clipboard from Spellbinders

Fabulous Fall Clipboard from Spellbinders

Fabulous Fall Clipboard from Spellbinders

The gals over on the Spellbinders blog have been making some very cute projects with Buttons Galore and More buttons.

Please visit the Spellbinders blog to see the instructions.

Oh! There are lots of cream and brown colored buttons for this project in our Confection button jar.

0

Mixed Media Home Decor

365 Days of Crafts

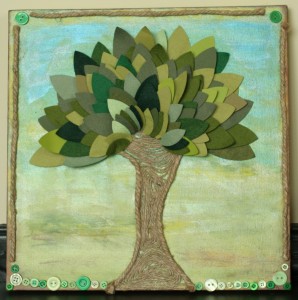
This is a very peaceful and beautiful bit of mixed media art from our own Design Team member Niki Meiners. Handmade home decor. You can’t go wrong with that!

You can read more about it on 365 Days of Crafts.

And here are some supplies to get you started:

“Spring Green” Button Bonanza Bag

“Emerald Green” ToHo Seed Beads

“Luck” Button Tote

“Natural Mix” Bulk Buttons for the trunk if you’d like

Beacon’s 3 in 1 Glue

1

Mixed Media- Encaustic Art

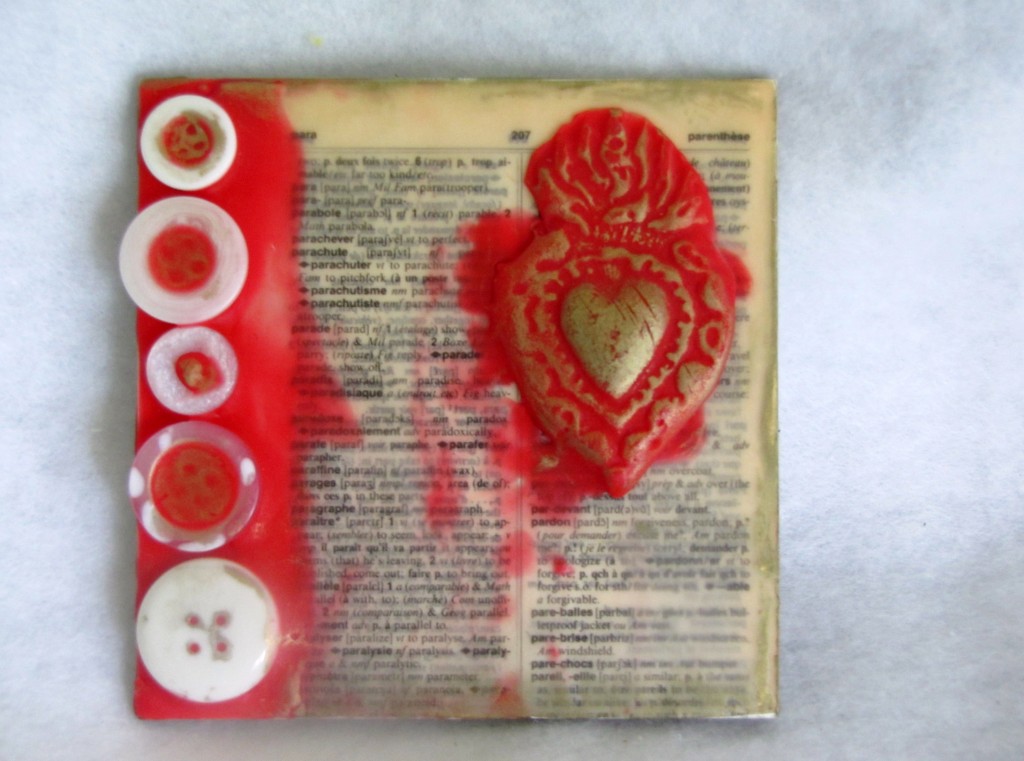
Encaustic Art mixed media collage with buttons

Encaustic Art mixed media collage with buttons

I wanted to share a piece of Encaustic Art that I made (using beeswax medium, both in natural and pigmented red.) If you’ve ever wondered if you can use three dimensional objects with beeswax collage, I’m here to show you that you can! And buttons make nice embellishments.

I used a kit to make this piece along with some Buttons Galore and More buttons, (you can read more about that on the Craft Test Dummies blog).  I found out that if you want to add heavy bits-like the buttons- you’ll want to build a base of wax where you want them to go, and then keep it warm with a heat tool. Then place your buttons and immediately drop some hot wax on top, so that it drips through the holes and bonds with the wax underneath. Let it cool completely- it’s hard not to keep fussing with it!

Bottom line: don’t be afraid to add your favorite buttons to Encaustic art- they add a wonderful texture and dimension.

0

Powered by WordPress. Designed by WooThemes