
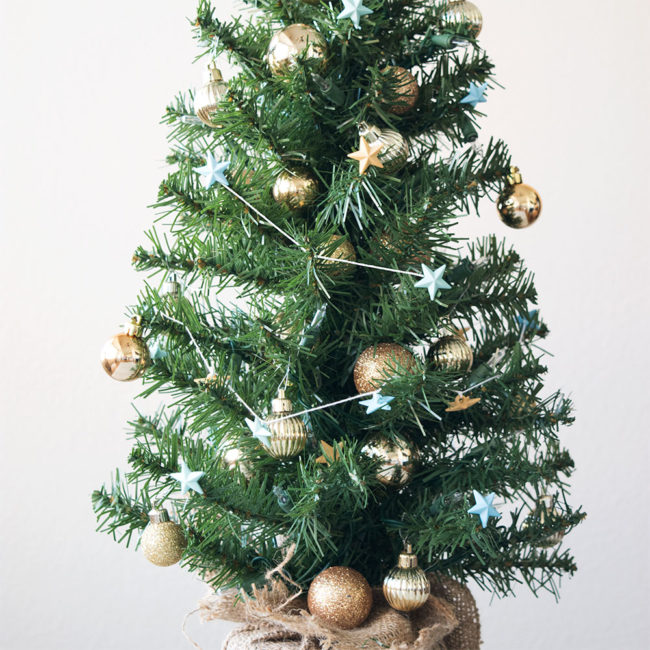
My favorite holiday decorations are lovely Christmas trees. I have my big full-size Christmas tree, of course. And several medium sized trees. But I also have at least a dozen cute little mini trees throughout the house. I think that the adorable little mini trees are just as fun to decorate as the bigger ones. Sometimes the small size ornament selection is lacking and they all seem the same from store to store. So I like to get creative and make my own! Continue Reading →
Tag Archives | 3D Buttons
Easy Thanksgiving Day Candle Holder Table Decor
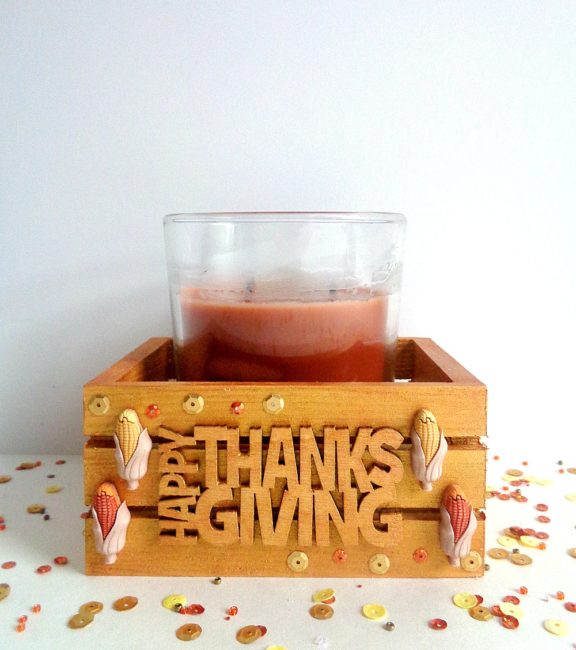
Hello Everyone! This is Katie from the Buttons Galore & More Design Team and today I will be showing you how to make a Thanksgiving candle holder for super easy decoration for your Thanksgiving!
Making decorations for Thanksgiving Day may not be on your radar, simply because you are most likely too worried about making Thanksgiving Day dinner. However, making some type of decoration for Thanksgiving does not have to be difficult or time-consuming. To prove it, today I am going to be showing you how to make your own Thanksgiving Candle Holder! Continue Reading →
The Stockings Were Hung Christmas Mantle Decor
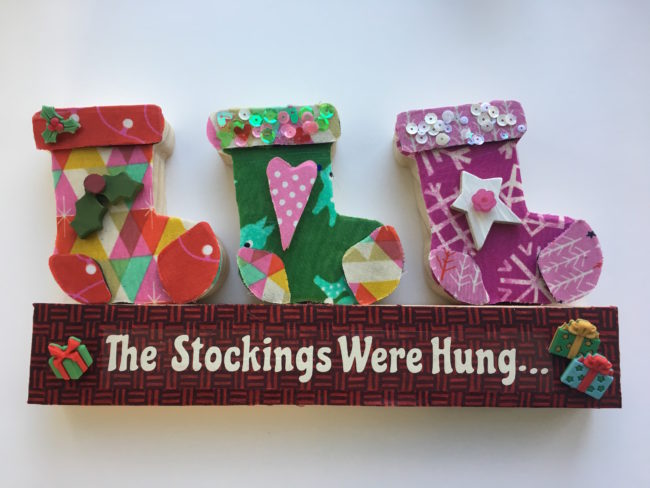
Hi! It’s Aimee here with a great project to add to your Christmas mantle decor this year. Using the new stockings set, I added a little fabric and some button bling to dress up these simple wood decor pieces. Continue Reading →
Easy DIY Thanksgiving Napkin Rings for your Table
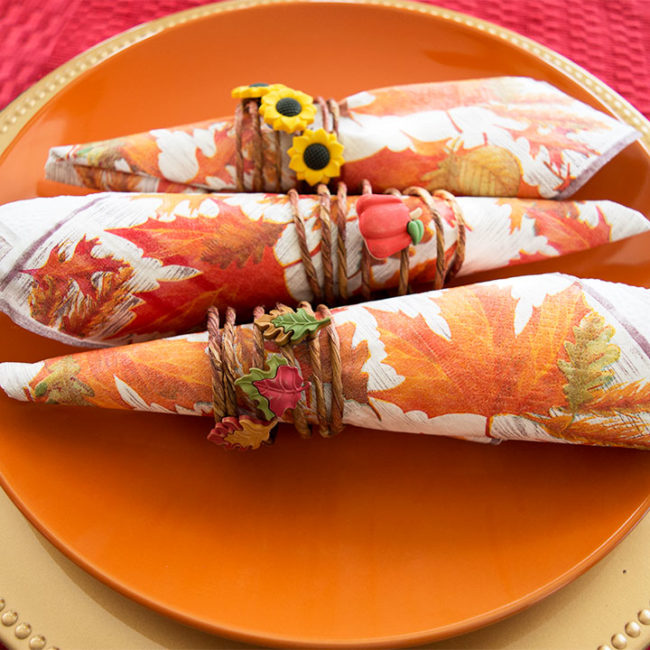
With Thanksgiving right around the corner, I’ve been thinking about how to dress up my holiday table a little bit more this year. I’ve never actually used napkin rings before, and I thought it might be a fun addition to my Thanksgiving table. These easy Thanksgiving napkin rings only take about 10 minutes to make. Thanksgiving table decor couldn’t get any easier! I love the fun fall vibe they add to the table. And the buttons from our super adorable Fall Friends button collection were so perfect for the project! Continue Reading →
Make a Christmas Tree with Presents for Holiday Home Decor!

Hi, it’s Connie here with Buttons Galore & More design team! I have a fun and festive project to share today using “Christmas Tree with Presents“, one of the new Foundations Decor pieces that are now available from Buttons Galore. The 28 Lilac Lane O’Christmas Tree embellishment bottle added some green sparkle alongside some really cute Buttons Galore 3D Christmas buttons. Continue Reading →
Make DIY Sparkling Snowflake Ornaments with 3D Buttons
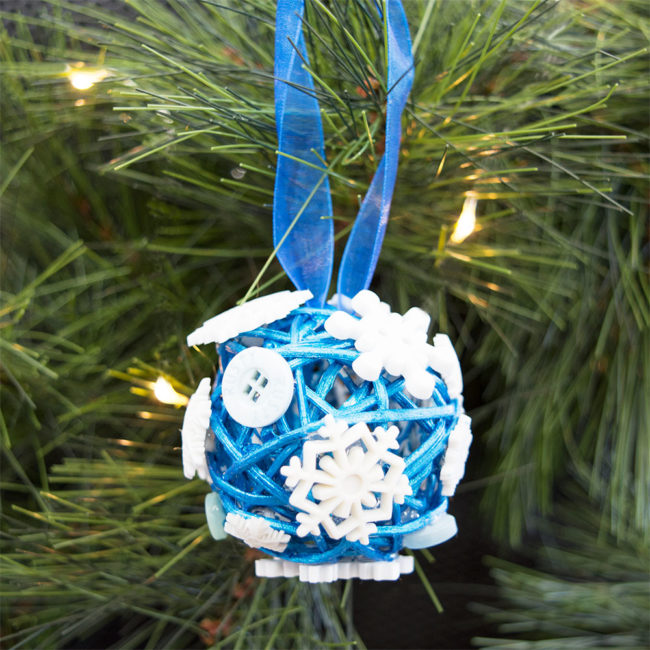
I’m not quite ready for Christmas just yet, but it’s never too early to start planning! Snow is not my most favorite thing in the world. It’s wet and much too cold for this desert girl! I’m a summer fan for sure. However, I do love beautiful snowflakes. Every year I decorate my kitchen with lovely, sparkly snowflakes. I always say that it’s my favorite kind of blizzard! This year I have plans to put a small white tree in the kitchen, decorated with more snowflakes, of course. I wanted to make some of the ornaments myself, and the adorable snowflake buttons in the Snowflakes Value Pack were just perfect for the task of making snowflake ornaments! Continue Reading →
DIY Flower Button Brooches for Fall Fashion Cheer!
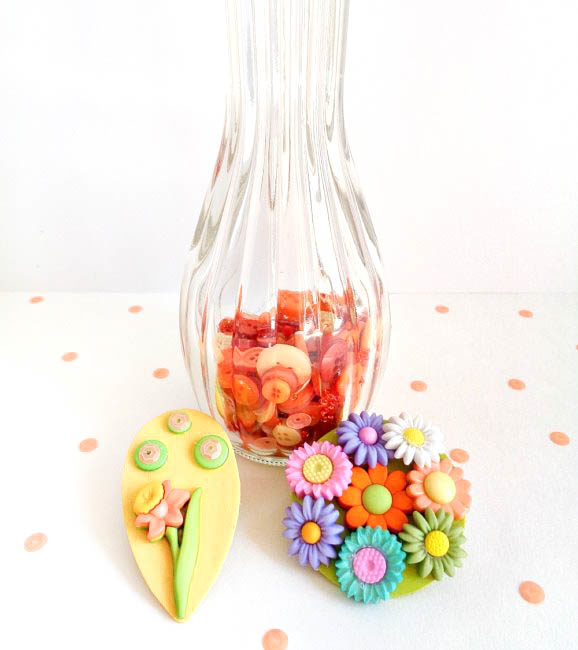
Hello button lovers! This is Katie from the Buttons Galore & More Design Team, and today I have a fun DIY flower button brooches project if you are someone who is just not ready to make that transition into the fall season!
Now, as a fall season girl at heart, I know making flower button brooches sounds a bit weird in September. However, there are those folks who just love spring and summer. If this is you, then these flower button brooches should make the fall season a bit more bearable and make those warm cardigans a bit cuter! Continue Reading →
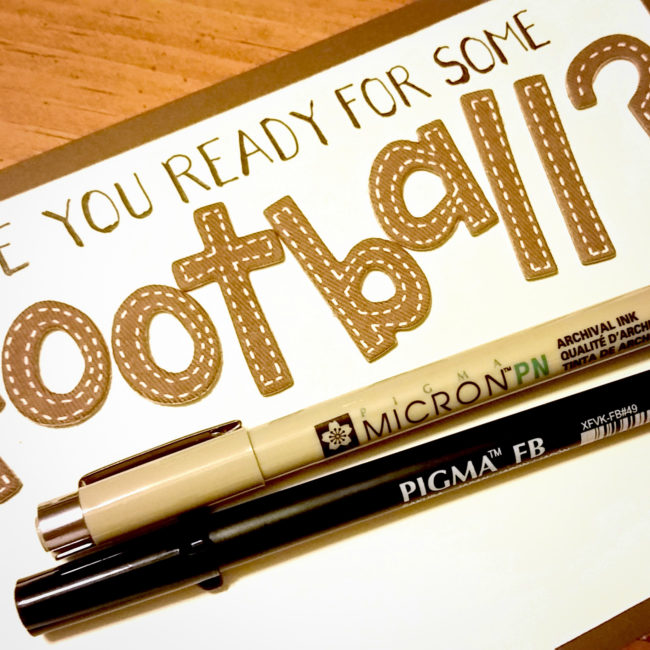
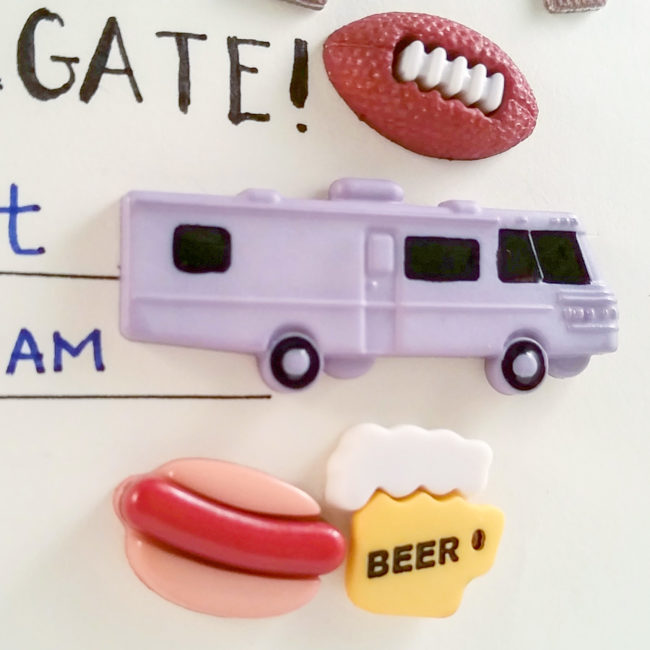
Make a DIY Tailgate Party Invitation with Buttons Galore
Fall is quickly approaching, and we all know that fall means FOOTBALL! Today, I will show you how to make the cutest DIY tailgate party invitation using football themed buttons from Buttons Galore. So get ready to fire up the barbecue and cheer on your favorite team!

Supplies needed for DIY tailgate party invitation:
- Buttons Galore “Football” 3D buttons
- Buttons Galore “Footballs” 3D buttons
- Buttons Galore “Tailgating” 3D buttons
- tan and brown cardstock
- alphabet stickers
- black fineline pen
- black brush pen
- brown chalk ink
- paper trimmer
- adhesive tape runner
- red line tape
- button shank remover/side cutters
How to make a DIY tailgate party invitation:
Using a paper trimmer, I cut the brown cardstock to 5″ x 7″ and the tan cardstock to 4.5″ by 6.5″. I then inked the edges of the tan cardstock with brown chalk ink to add dimension. I used a tape runner to attach the tan cardstock to the brown cardstock to make the base of the invitation. Next, I hand lettered the words on the invitation. I used a fineline pen to do the lettering, then used a brush pen to darken all my downstrokes. This is an easy way to make your hand lettering look great, even if you aren’t that good at it! The word “football” made from alphabet stickers was then added.
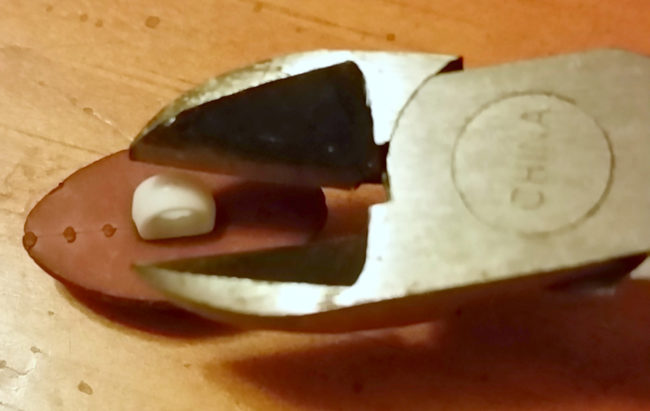
I then chose the buttons I was going to use. Most of these buttons had shanks on the back. In order to use them on a flat surface like this one, I had to remove the shanks. This is easy to do using a button shank remover or a pair of side cutters. I clipped off the shanks, then attached the buttons to the invitation using red line tape. This tape is strong enough to hold these buttons securely!
I placed the buttons all around the card in the white spaces. The buttons give this invitation a fun feel and cool dimension that you just can’t get with any other embellishments… plus they are absolutely adorable!
Your guests won’t be able to resist this super fun invitation! Go team!
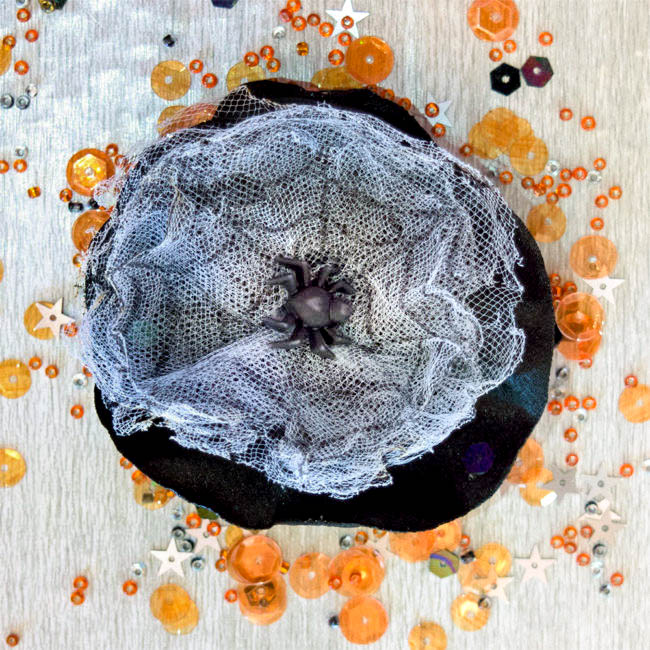
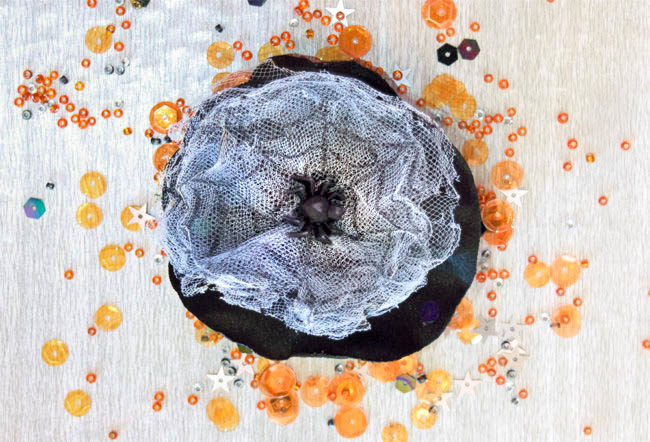
How to Make a Cute Halloween Spider Web Hair Bow
Halloween is coming soon – can you believe it?! You can make this fun Halloween Spider Web Hair Bow in less than 30 minutes. This is one spider web your little girls won’t mind having on their heads because it’s just so cute! It’s easy to customize too, using the same technique with different kinds of fabric, different colors or different accessories.
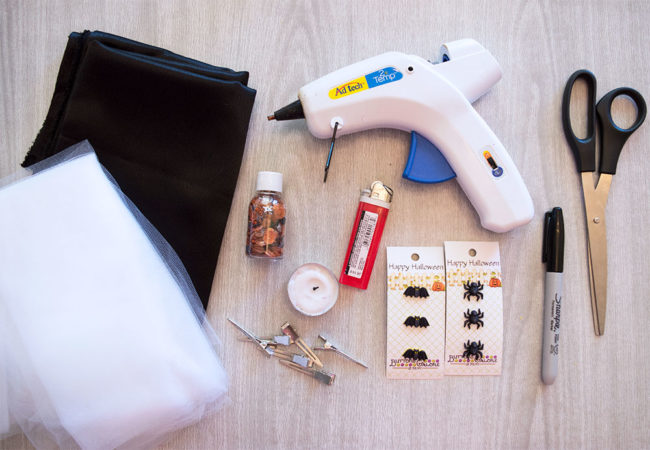
Supplies needed to make a Cute Halloween Spider Web Hair Bow:
- Buttons Galore “Happy Halloween – Spiders” 3D buttons
- 28 Lilac Lane “Trick or Treat” Sequin and Bead Mix
- White Tulle
- Black Satin or Chiffon fabric
- Black Marker
- Hot Glue
- Candle and Lighter
- Alligator hair clips
- Scissors
Step one:
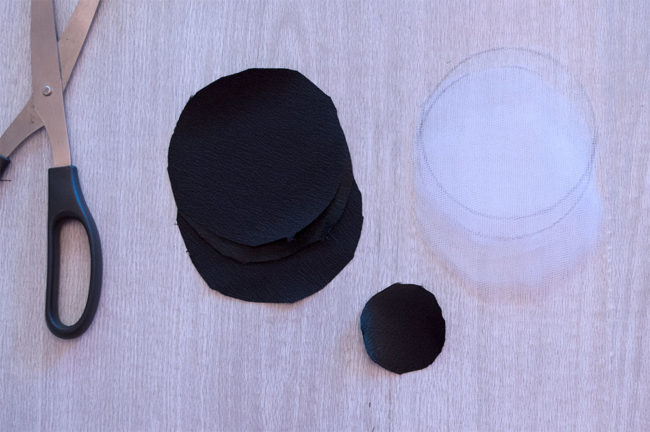
Cut circles in the tulle and black fabric. You will need two 3-4″ black satin circles, and one 1″ black circle. You will also need to cut six 3-4″ circles from the white tulle as well. I used a styrofoam cup to trace my circles. It was the perfect size.
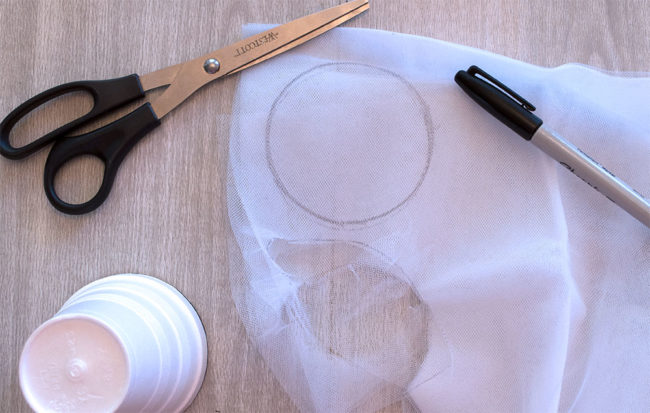
Lots of fabrics will melt great for this project, but I find cotton fabrics don’t melt as well as the synthetic blends. My favorites to work with are satin or chiffon fabrics. This is a great project to use scraps, and you should use whatever you have on hand. It doesn’t take much!
Step two:
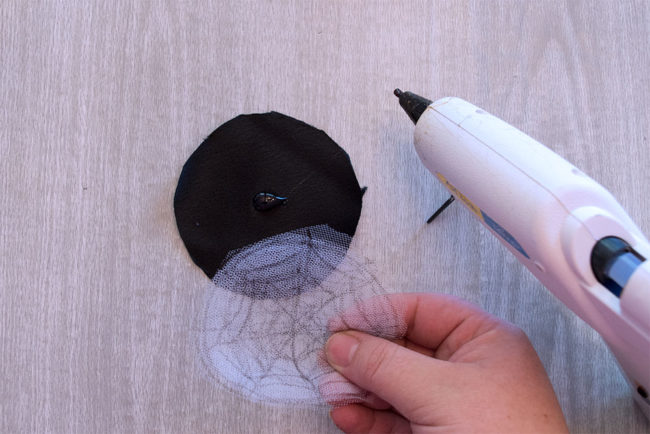
Use a black marker to draw spider webs on the tulle circles. Be sure to put a piece of paper under the tulle so you don’t end up with black spider webs all over your work surface.

Step three:
Assemble the fabric circles. I use hot glue to assemble mine, but you could easily sew them together if you prefer. Place a dot of hot glue in the center of each circle and press two circles together.
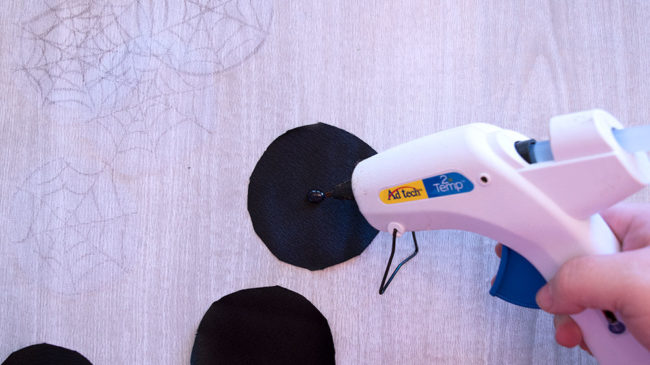
Stack the two black circles on the bottom, and the white tulle circles on top of those with a dot of hot glue between each layer.
Step four:
*Please use caution when working with an open flame. The melting fabric is hot to the touch. Always keep a bowl of cool water next to your work station when working with a flame in case of burns or fabric that accidentally catches fire.*
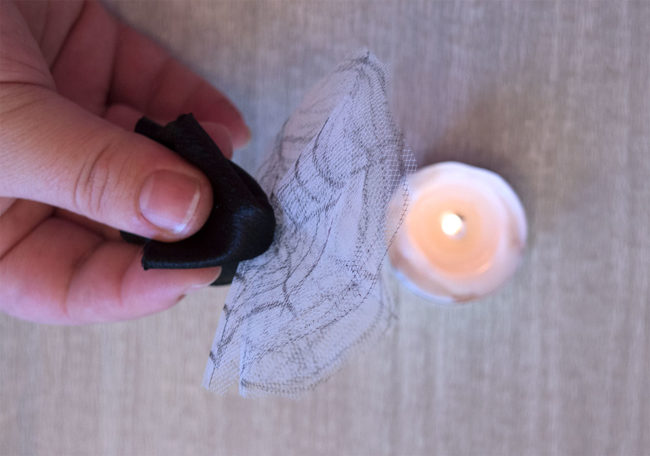
Using a small candle flame (I use a small tea light candle), melt the edges of the tulle and satin fabrics. Carefully hold the fabric down next to the flame. Don’t get it too close. It just needs the heat from near the flame to curl and melt the fabric.
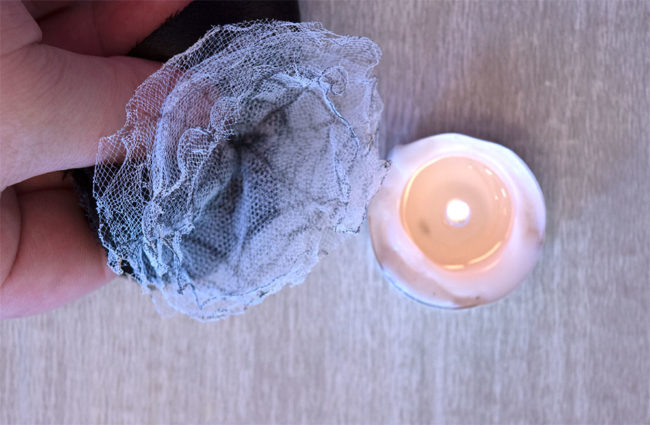
The tulle is very easy to burn. It does not need much heat to curl and melt. A little bit of charing on the edges of the tulle just adds to this cute Halloween spider web hair bow though! Satin fabric needs just a little more heat to curl and melt. Please be careful not to get your fingers too close!
Step five:
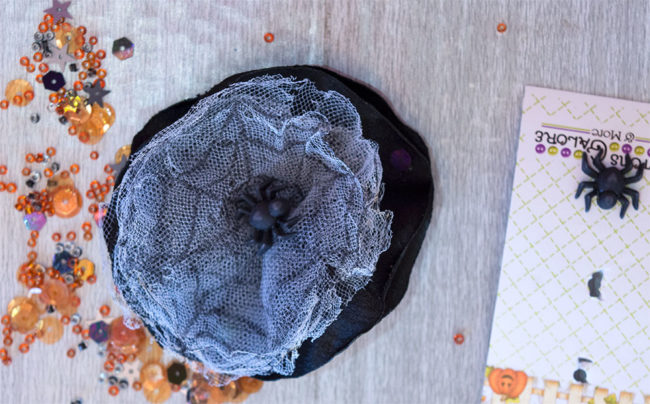
Use glue to attach the adorable 3D Spider Button to the center of the Spider Web Hair Bow. Glue some sequins from the Trick or Treat Bead and Sequin mix to the bow. I used black sequins from the mix and some black seed beads.
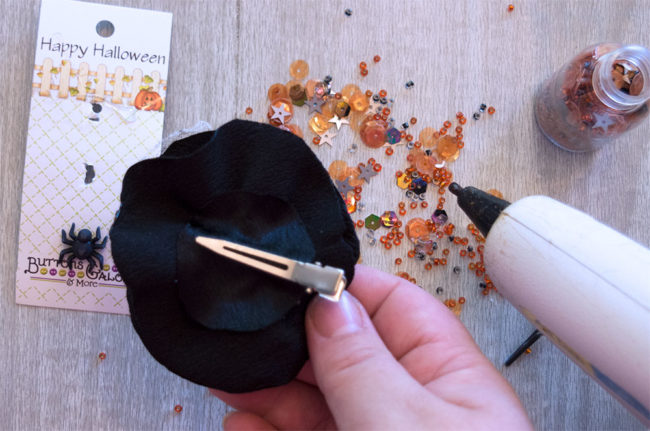
Step six:
Attach the alligator hair clip to the back of your spider web bow using hot glue and the 1″ circle of black fabric.
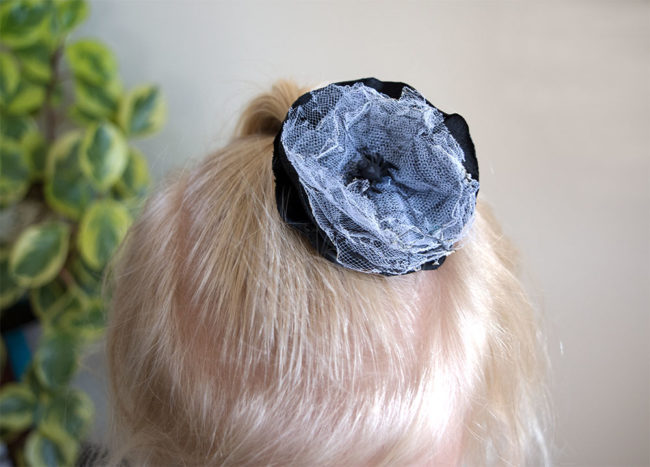
Isn’t it the cutest little spider web you’ve ever seen? I love how the adorable little spider buttons have a cute little heart shape on their backs. Even my spider phobic four-year old didn’t mind wearing this cute little spider in her hair!
You can easily change this technique to suit any style or holiday! Chiffon is my favorite fabric to melt. The curl is fantastic! Change the color of the fabric and the tulle and add other fun embellishments for endless combinations! I want to make one with red chiffon, white tulle, and these adorable 3D Candy Cane buttons for Christmas!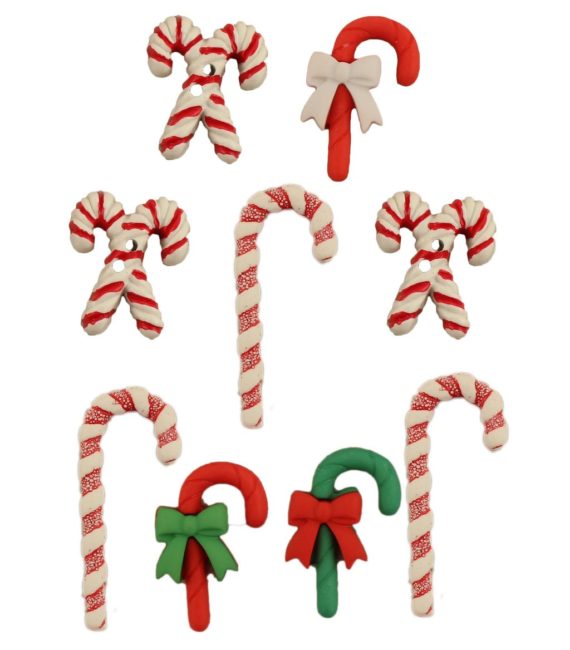
Which 3D buttons would you put in your hair bows?
Make a Fun Coffee Gift Card Holder for National Coffee Day!
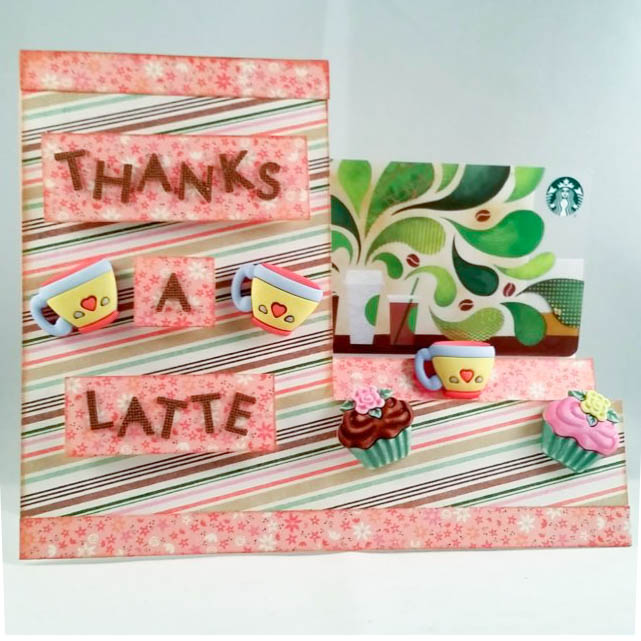
It’s National Coffee Day, and what better way to celebrate than with a gift card to your favorite coffee shop? Using 3D buttons from our Buttons Galore Sweet Delights collection, you can make a sweet card that doubles as a gift card holder!
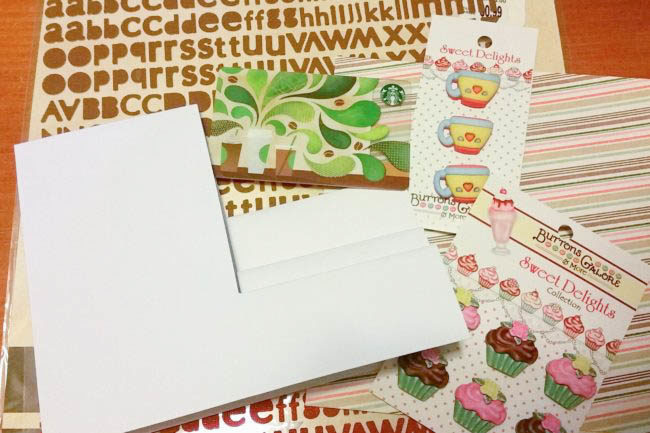
Supplies Needed to Make Coffee Gift Card Holder:
- Buttons Galore “Sweet Delights: Coffee Cups” 3D buttons
- Buttons Galore “Sweet Delights: Gourmet Cupcakes” 3D buttons
- Side stepped card
- 2 – 6″x6″ sheets of coordinating patterned paper
- alphabet stickers
- scissors
- paper trimmer
- pencil
- tape runner
- foam pop dots
- red line tape
- ink
- button shank remover
- gift card
Instructions for Making Coffee Gift Card Holder:
- Trace front of side stepped card onto the back of one sheet of patterned paper. Cut out with scissors and adhere to front of the card. Ink edges of paper if desired.
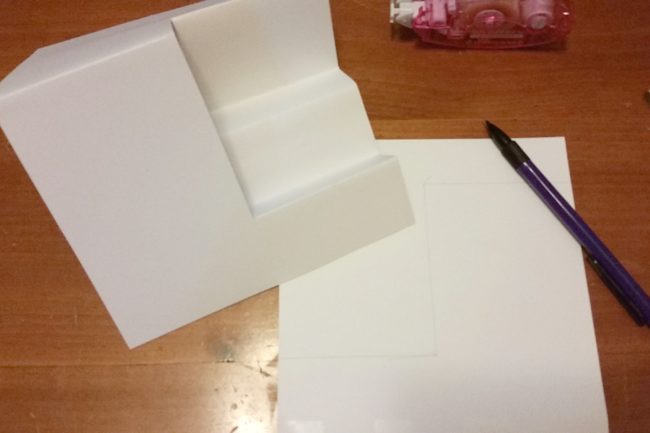
- Cut two 3/4″ strips from the second sheet of paper. Ink edges if desired. Adhere one strip to the bottom of the card. Cut the other strip in half. Adhere one piece to the top of the card, and adhere the other on the second “stairstep” of the card.
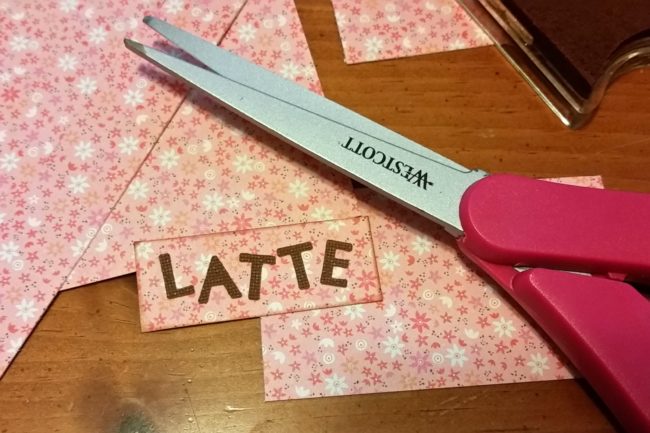
- Spell out “Thanks a Latte” by placing stickers onto leftover pieces of the 2nd sheet of paper and then cutting out rectangles around the words. Inks edges if desired. Adhere to card with foam pop dots to add dimension to the card!
- Remove shanks from back of “coffee cup” and “cupcake” buttons with a button shank remover. Adhere to card using red line tape.
- Adhere gift card to the last step of the stepped card using red line tape.
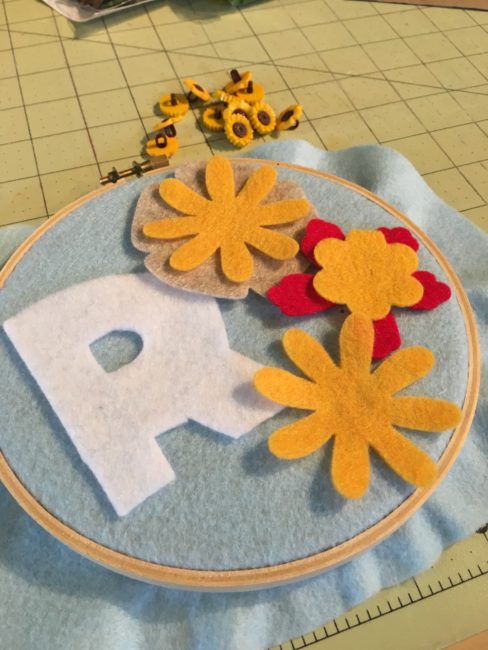
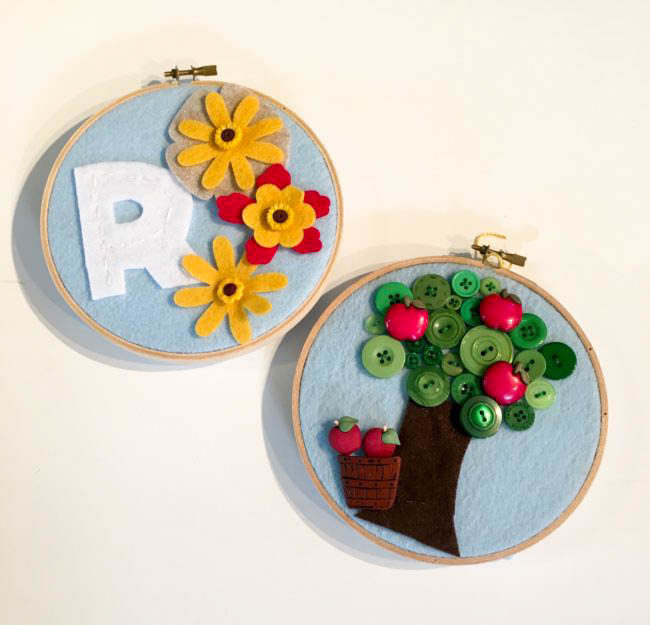
Learning To Sew with Buttons on a Fall Hoop Project
I’ve had the joy of teaching sewing in our community for the past few years to children of all ages. When people discover that I teach sewing to children, the first question they always ask is “what is a good beginner project?” This little hoop project is always my number one go-to project for anyone who has never used a needle and thread and wants to learn to sew. Even better, including buttons in the project ensures that they will also walk away with a great life skill for those days when a button pops off their shirt at the most inopportune time – and you know we’ve all been there!
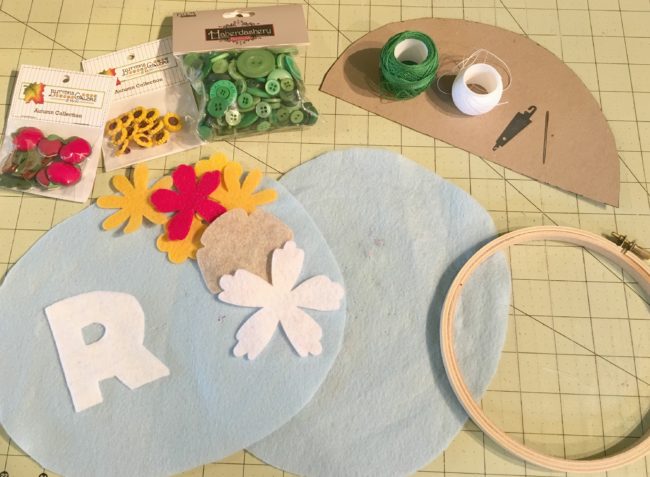
First up, let’s talk supplies. You will need the following to complete the two hoops:
- Buttons Galore “Sunflowers” 3D Buttons
- Buttons Galore “Apple Pickin'” 3D Buttons
- Buttons Galore Green Haberdashery Buttons
- scraps of blue craft felt
- felt flowers of various shapes and colors
- scrap of felt (for your initial and the tree trunk)
- DMC cotton pearl embroidery thread – size 5 in green & white
- 2 – 6″ wooden embroidery hoops
- circle template measuring roughly 8 inches diameter
- initial patterns – hooplettersA-I hooplettersJ-Q hooplettersR-Z
- chenille needle size 22
- craft glue (optional)
- needle threader (optional, but helpful)
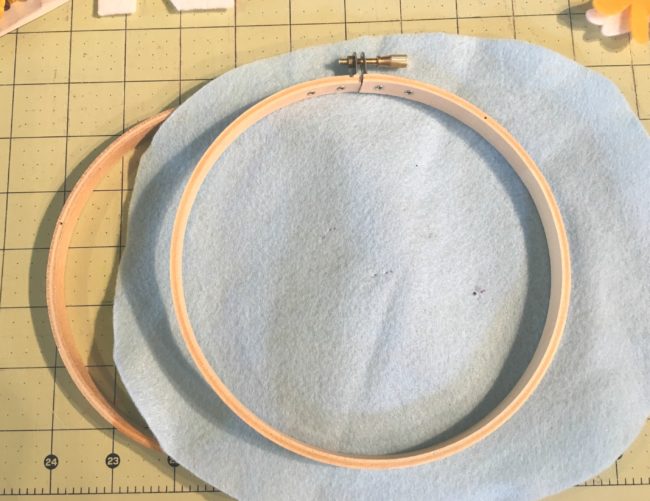
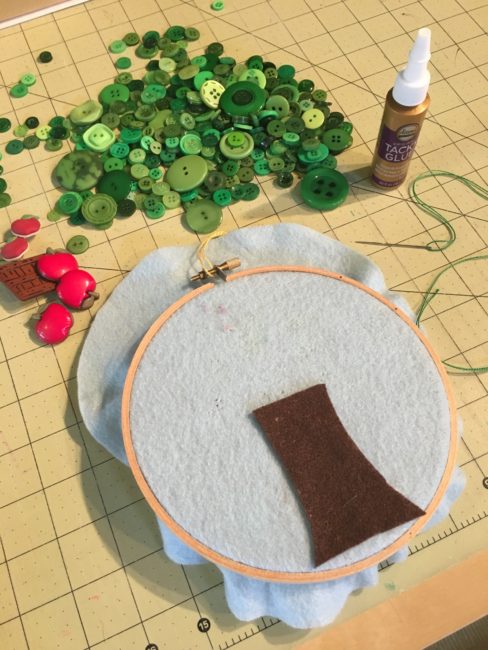
Now that you’ve gathered up all your materials, let’s get started and learn to sew! First, you need to find something to make a roughly 8-inch circle. Find a bowl or something round to trace around and cut your blue felt into two circles.
Next up, let’s set them in your embroidery hoops. This is often the most daunting thing for new stitchers, but all you need to do is make an embroidery hoop “sandwich”! Unscrew the bolt just a little and separate the hoops into two parts. Take the part without the bolt and lay it on your workspace. Then lay your blue felt circle on top of the bolt-less hoop and sandwich them all together by setting the hoop with the bolt outside the bottom hoop and the felt. Tighten up the screw and pull on the edges of the felt just a little to make everything tight.
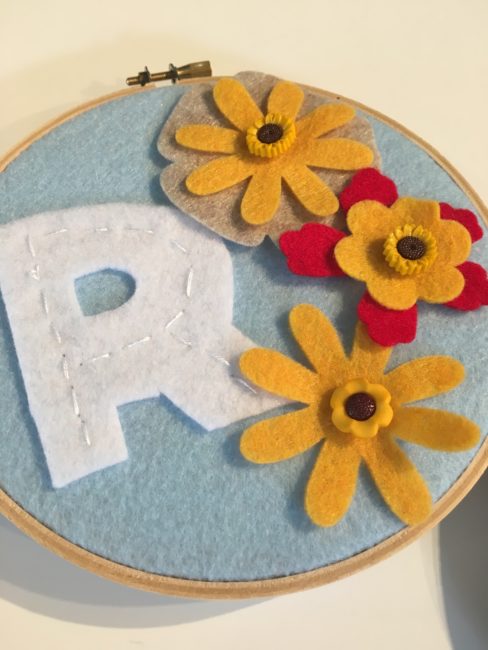
Now, print out the pattern page with your initial on it and cut out the correct initial for you. Use the paper pattern to cut out your initial with whatever color felt you would like. Then gather up your Sunflower buttons, the felt flowers, and your initial. Lay them all out on top of the hoop in whatever design you like best.
Now it’s time to stitch down your initial. Take your white thread and needle. Thread your needle and make sure to put a knot on the end! We are going to stitch down our initial with a running stitch.
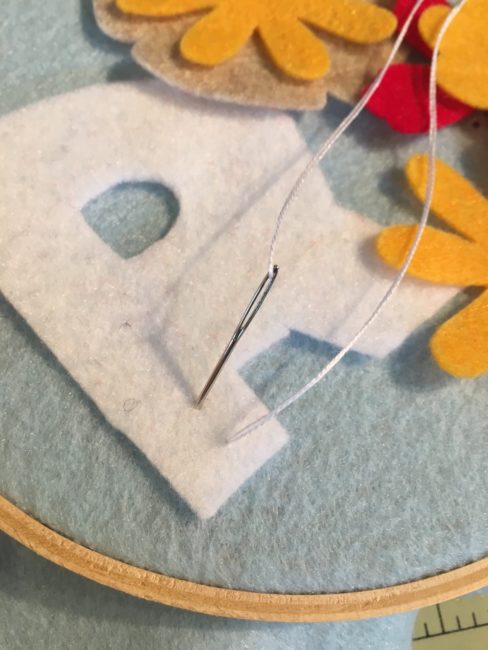
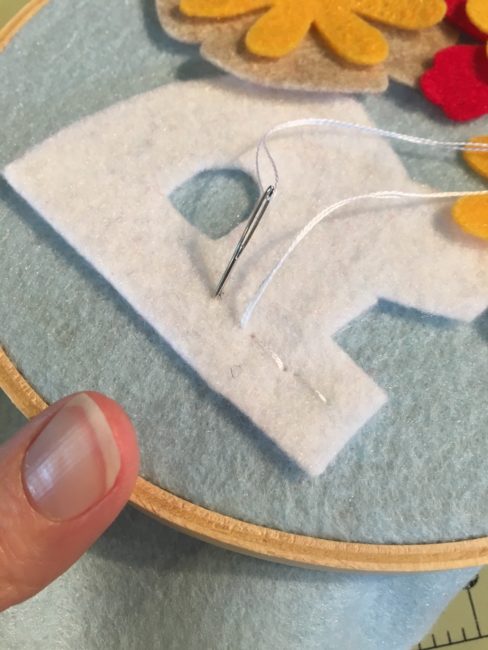
First up, bring your needle up from the bottom and pull gently until your knot stops the thread. Don’t pull too hard or you will pull your knot all the way through! Then bring your needle back down about a pinky finger width from where you started and pull the thread all the way through. Then bring your needle back up and then down as you stitch along the middle of your initial letter. Always remember to “follow your thread” and stitch with a rhythm of up and down.
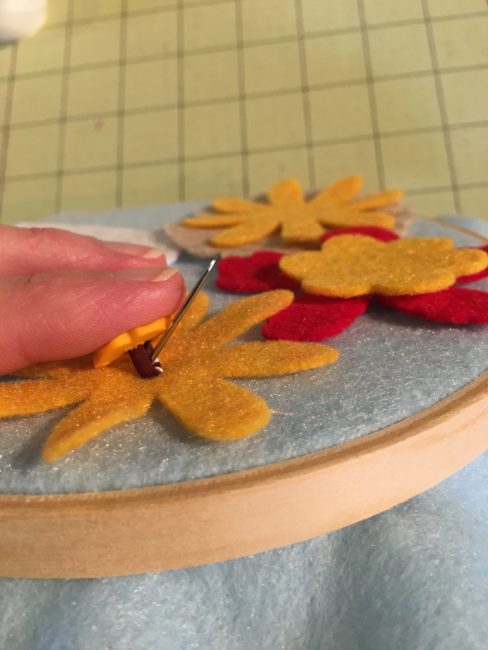
Lastly, grab your Sunflower buttons and lay them on top of your felt flowers. These are shank style buttons and can be a little more tricky for little hands to sew. Start out by bringing your needle up from the bottom and pull it all the way through till the knot stops you. Then take your button shank and thread it onto the needle and thread. Let it fall all the way down and then put your needle back through the top of the felt, pulling the button tight to the felt as you pull the thread from underneath. Continue to sew the button on a few more times and then move down to the next flower.
To finish off my hoops, I like to take a hot glue gun and glue the rim of extra felt around to the inside of the back. But sometimes I like to leave it open like a little ruffle fringe! Your choice!
Put a pretty ribbon through the top and you are done!
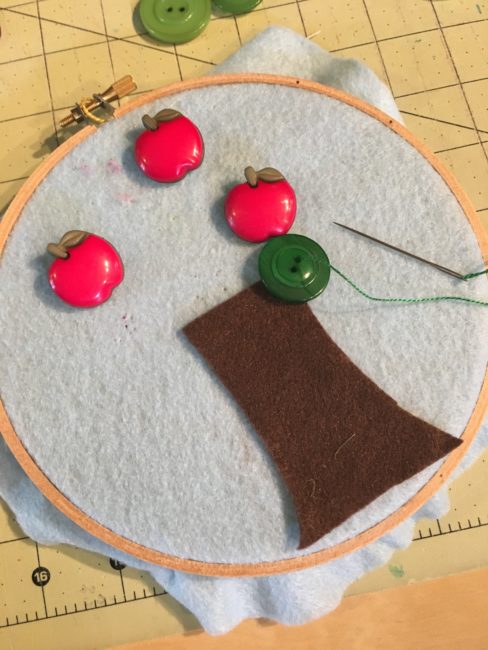
To make the tree, gather up a scrap of brown felt and cut out a little tree trunk. You have the option of sewing down your tree trunk with a running stitch or you can use some craft glue to glue it down.
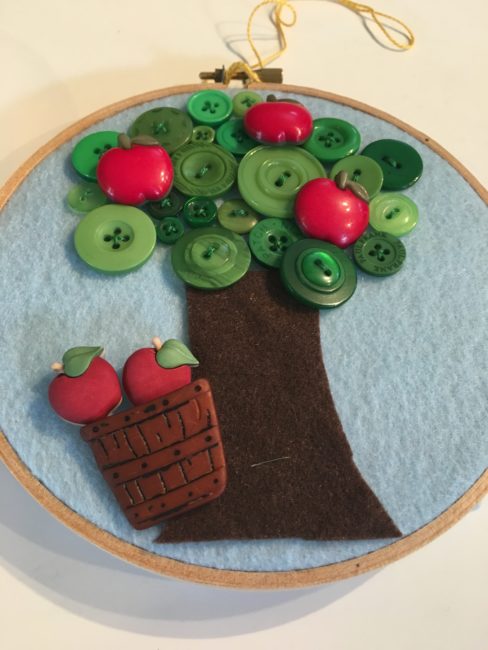
After gluing down the trunk, grab your green thread, a needle and the Apple Pickin buttons from the pack and stitch those down in random spots above your tree trunk. These are the same shank style as the sunflowers. Next, pour out your bag of Green Haberdashery buttons and choosing those that fit best, stitch down green buttons around your apples to fill in the tree.
After you sew all the button “leaves” down, take your apple basket and apples and stitch those down near the bottom of the tree. Add a little ribbon for hanging, finish the back by gluing the felt edge to the back or leave it like a ruffle.
And there you go, two little Fall inspired hoops – these are perfect projects for beginning stitchers!
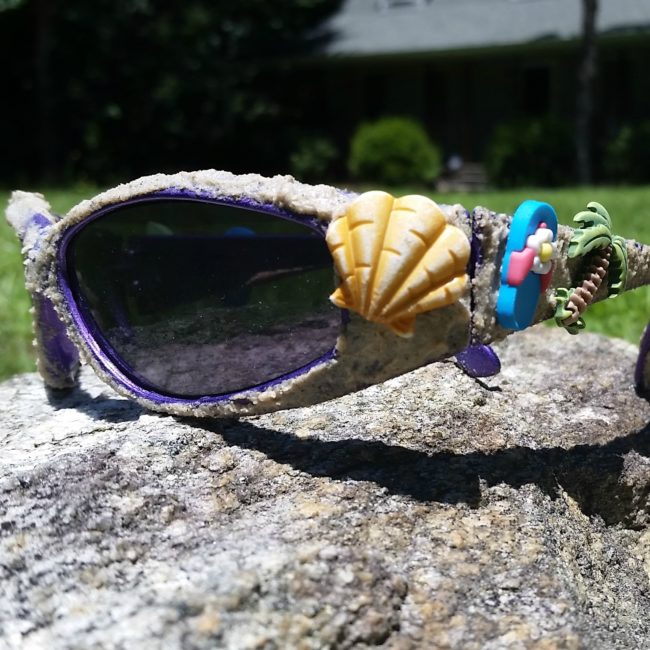
Hit the Beach with Summer Fun Crafty Sunglasses
Hi! It’s Lorrie here, visiting the Buttons Galore blog today! Buttons are a fun and easy way to embellish your summer fashion, but have you thought of adding them to your accessories? Who cares if you can’t make it to the beach this summer? Bring the beach to you every single day with these super cute crafty sunglasses (that look and feel like they are covered in sand) featuring summer-themed buttons from Buttons Galore!
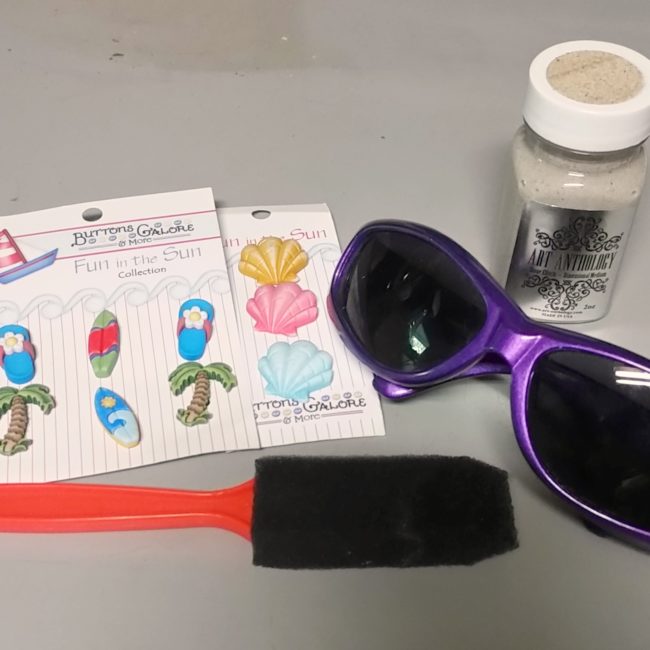
Materials Needed:
- sunglasses
- Paradise Found and Fan Shells buttons from Buttons Galore
- Stone Effects Dimensional Paint from Art Anthology in “Sandstone”
- foam brush or palette tool
- hot glue gun
- button shank remover
How to:
- Apply Stone Effects paint to the sunglasses with a foam brush or palette tool. If you are using a foam brush, apply the paint with a tapping motion to get better coverage and to add even more dimension.
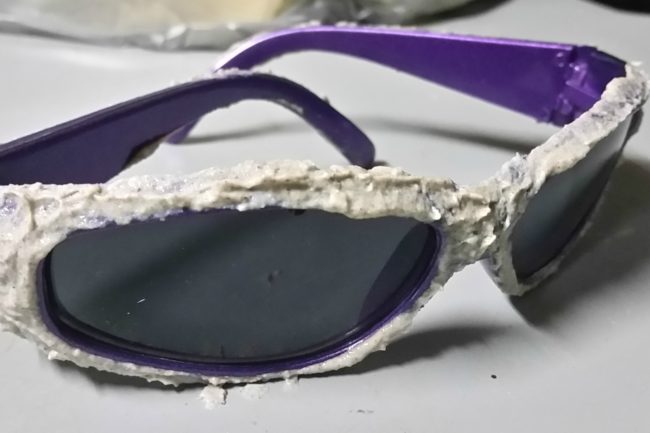
- While the paint on your sunglasses is drying, remove the shanks from the buttons using a button shank remover.
- Once the dimensional paint is dry, place the buttons onto the sunglass frames and the ear pieces by attaching them with hot glue.
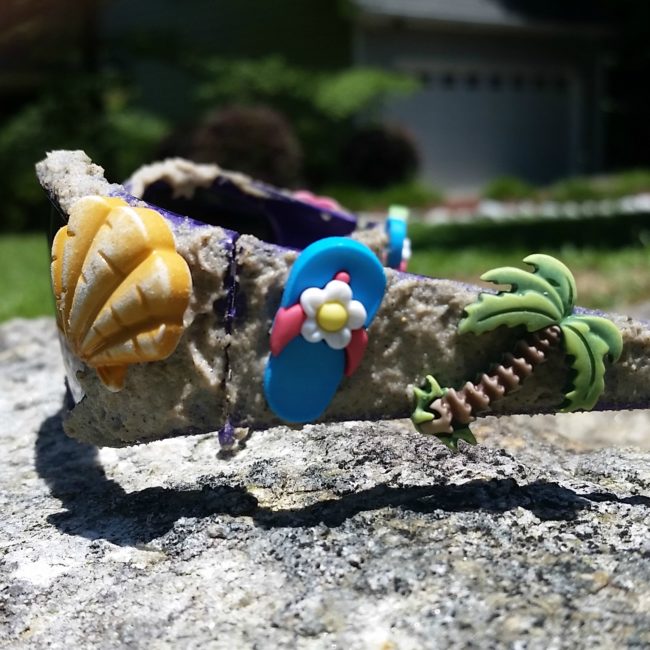
Now you are ready to hit the beach with your summer fun crafty sunglasses – whether the “beach” is your local pool or an expanse of tropical sand!
A Crazy Bird Told Me…It’s Graduation Time!
Graduation season is here! Just because the big day is a formal affair, that doesn’t mean that the cards can’t have some fun. Our 3D buttons dress up this bird so he’s ready for the walk across the stage!

Supplies Needed:
- Buttons Galore “Grad” 3D buttons
- Buttons Galore “School Value Pack” 3D buttons
- button shank removers
- black card base
- watercolor paper
- black solvent ink
- Tim Holtz for Stamper’s Anonymous “Crazy Bird” stamps
- Tim Holtz for Stamper’s Anonymous “Crazy Talk” stamps
- watercolors & paintbrush
This card uses our 3D buttons as accessories for some crazy stamped characters! This character gets a whole new dimension – literally – with a fun button graduation hat and his own button diploma.
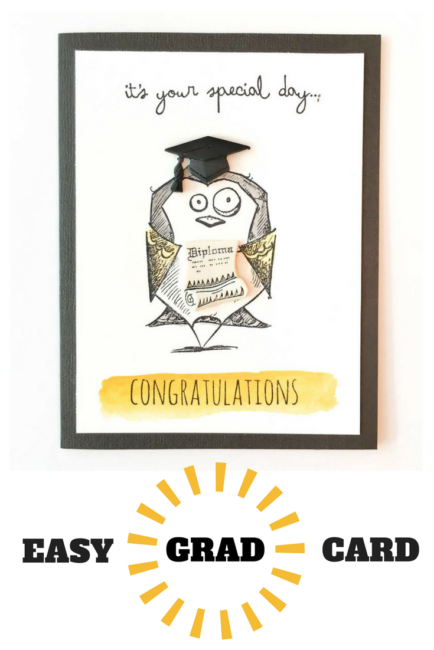
To make this card, select a card base in one of the graduate’s school colors. (You’ll want to choose the darker of the two school colors for the card base.)
Cut a 3.75″ by 5″ piece of watercolor cardstock and adhere it centered on the cardfront. Use watercolors in the lighter of the two school colors to paint a block along the bottom of the paper. Stamp the sentiments at the top and bottom in waterproof ink, and then stamp the bird in the middle.
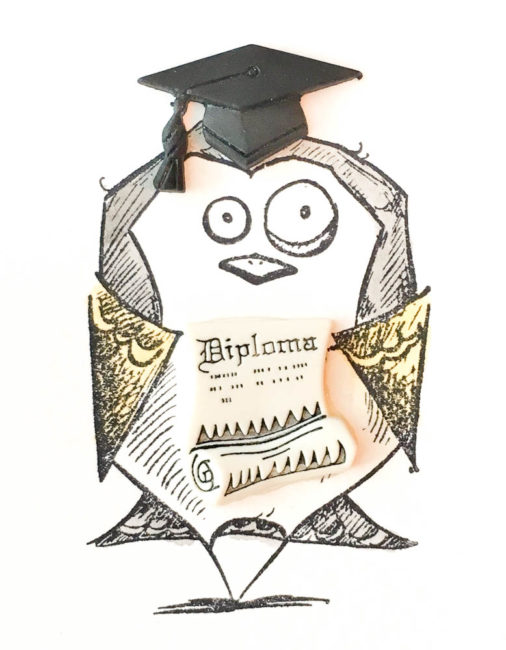
Use the watercolors to paint in the bird. (I used the yellow school color for the bird’s wings to hold the diploma.) Then cut the shanks off of the graduation hat and diploma buttons, and adhere them to your bird.
This bird will put a smile on the face of your special grad while bringing your good wishes to them! Happy Graduation, Class of 2017!
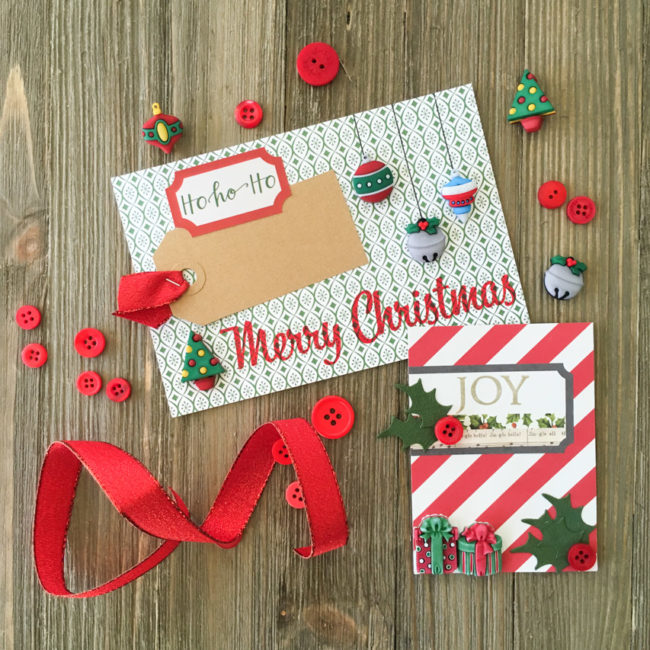
Embellish Your December Album of the Holidays with Buttons!
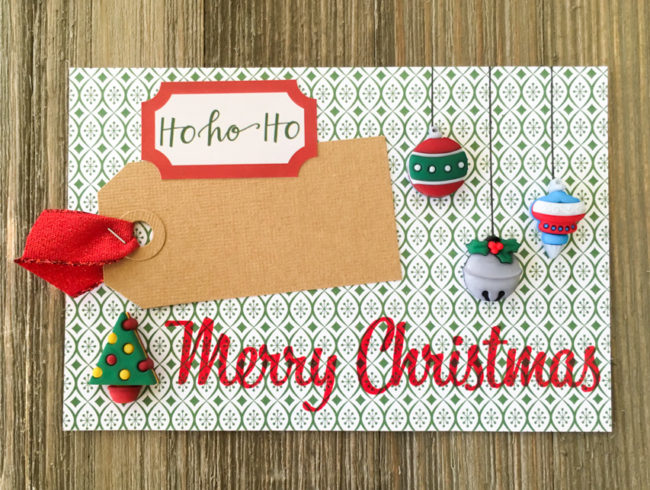
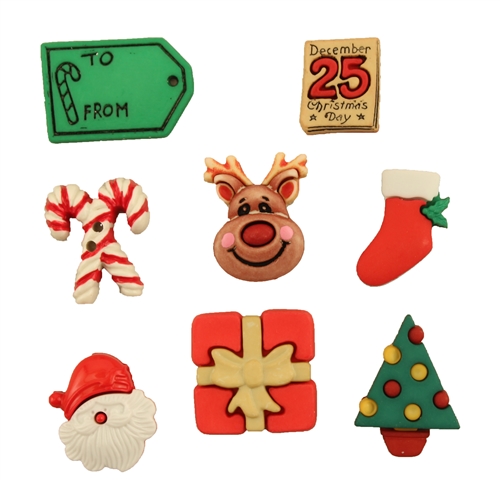
In only a few weeks, December will be upon us! For many scrapbookers, that means recording our December holiday celebrations in special page-a-day pocket scrapbooks. Our 3D buttons are a fun and simple way to add embellishment to your December album!
Most of us using pocket scrapbooks for our December album will have at least a few 4×6 cards in our album to highlight important topics or days. This journaling card could hold very large number stickers to put focus on a special date (such as #25) or the kraft colored tag could be used for journaling space!
Supplies:
- Buttons Galore 3D “Jingle Bells” buttons
- 28 Lilac Lane “Holly Jolly” embellishment kit
- Button Shank Remover
- PPA Matte Adhesive
- Photo Play Paper “Dear Santa” 6″x6″ paper pad
- Photo Play Paper “Dear Santa” element stickers
- Ranger Tim Holtz Distress Ink in Festive Berries
- Ranger Super Fine Clear Embossing Powder
- Stamper’s Anonymous Tim Holtz “Retro Merry Christmas” stamp
- Sizzix Tim Holtz Alterations “Tiny Tabs & Tags”
- Core’dinations Tim Holtz Kraft Core
- Mini stapler
- Black Pen
To make this card, I cut a 4″ x 6″ piece of patterned paper. Then I stamped “Merry Christmas” on the bottom right and embossed it with clear embossing powder. After I die cut the tag from cardstock, I looped ribbon through the hole, and secured it with a staple. I adhered the tag in place and laid the sticker in place on top of it.
The buttons were the final touch. These buttons are shank buttons, so I had to use button shank removers to give them a flat back. Before gluing them down, I used a pen to draw “strings” from the top of the card to the locations of the baubles that I wanted hanging. Then I glued all three buttons down on top of the drawn strings, and also added the Christmas tree in the bottom left corner.

Supplies:
- Buttons Galore Button Basics in Red Hot
- Buttons Galore 3D “Christmas Presents” buttons
- Button Shank Remover
- PPA Matte Adhesive
- Simple Stories “Claus & Co” paper
- Simple Stories “Claus & Co” washi pack
- Hero Arts “Holiday Sayings” stamps
- Clearsnap Susan Weckesser Color Pop Ink in Shimmer
- Sizzix Tim Holtz Alterations – Mini Pine Tree & Holly set
- Green cardstock
I also started this 3×4 card by stamping the sentiment in the upper part of the white box. Then I added the washi strips in the bottom part of the box, trimming them so they fit the decorative shape of the bottom corner. I die cut the small holly leaves and adhered them, adding small red buttons as berries. Finally, I cut the shanks off of two 3D present buttons and glued them down in the bottom right corner using PPA Matte adhesive.
Whether you are using a kit or doing it yourself, we’ve got the perfect buttons for your December album. Visit the Christmas category on our website, or our new section to see our latest releases to find great options for your album!
Announcing…New 3D Winter Holiday Buttons!
October is flying by, and that can only mean one thing…that chill in the air is going to bring snow soon – and Christmas!
Today we’re excited to be announcing new 3D buttons that are perfect for your winter and Christmas crafting. We’ve got snowmen and snowflakes perfect for all of your project needs. (And don’t miss the peek at the end of even more new holiday goodness!)
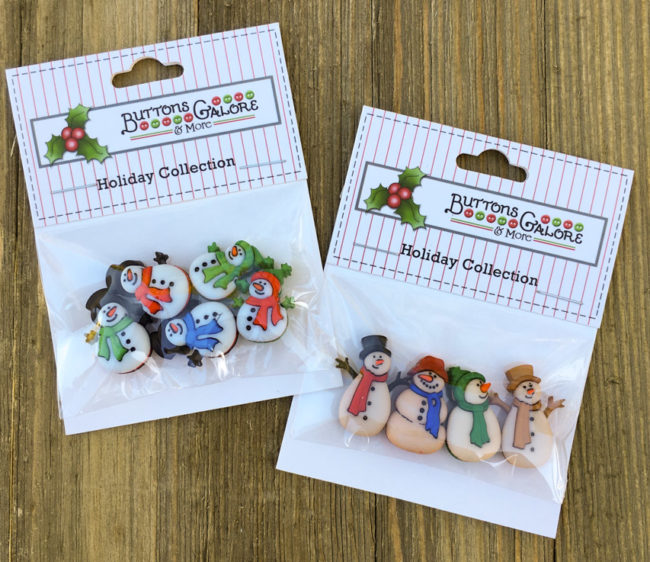
Adorable snowmen are a holiday must-have, and we’ve got two versions – a bright one and a more rustic one. No matter what your style…we’ve built the snowman for it!
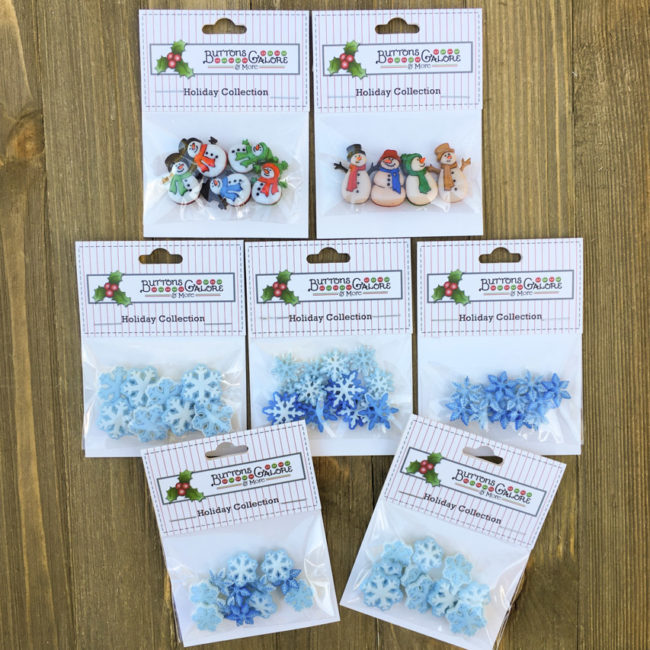
If you are dreaming of snow…snow…snow…in your winter holidays (and your winter craft projects), we’ve got a huge new selection of 3D snowflake buttons!
Our new 3D snowflake buttons come in three different styles that are available in several sizes and shades of blue. Packaged in five different assortments, there’s a perfect one for your needs no matter what your project!
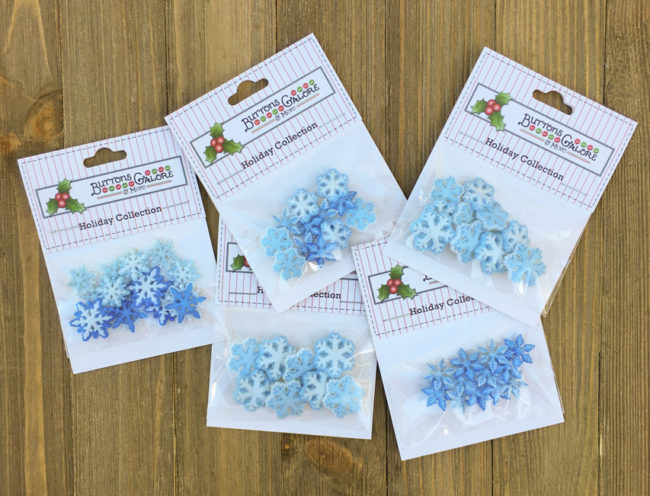
All of these buttons, except for the snowflakes on the far left above, have shank backs for sewing them on to projects. But for crafters who prefer flat backs, the shanks can be easily removed with scissors or a button shank remover. (The set of snowflake buttons that doesn’t have shanks has a flat back and holes that can be used for sewing it onto projects.)
In addition to our snowflakes and snowmen, we’ve also got a great selection of new 3D Christmas designs such as gingerbread men, Christmas trees, stars, adorable holiday icons, and more!
All of our new holiday 3D buttons are available now on our website – click to see the entire selection!
Make a Spooky Halloween Tag with Trick or Treat Button Basics!
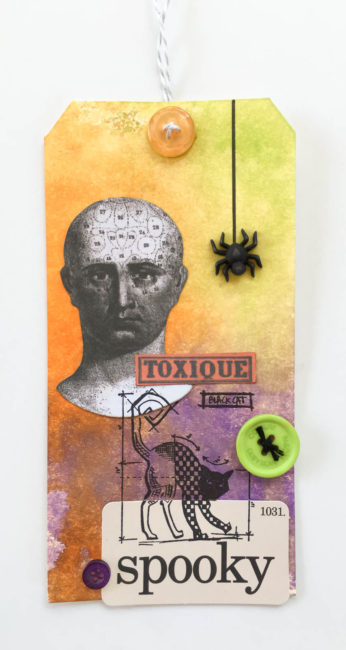
Today we’re taking a walk on the creepy side of Halloween, with a spooky Halloween tag that makes a great attachment for a treat bag or can be a unique holiday greeting by itself!
Supplies:
- Buttons Galore “Trick or Treat” Button Basics
- Buttons Galore Happy Halloween 3D Spider Buttons
- Button Shank Remover
- PPA Matte Adhesive
- #8 Manila Tag
- Ranger Tim Holtz Distress Spray Stain in Carved Pumpkin, Twisted Citron, and Wilted Violet
- Ranger Tim Holtz Distress Ink in Hickory Smoke and Fired Brick
- Ranger Tim Holtz Distress Marker in Black Soot
- Ranger Archival Ink in Jet Black
- Stamper’s Anonymous Tim Holtz Halloween #3 Mini Blueprint stamps
- Tim Holtz idea-ology “Curiosities” Ephemera Pack
- Black Embroidery Floss
- Doodlebug Designs Doodle Twine in Gray
1. Create the background of the Halloween tag by spraying the three colors of Distress Spray Stain in a triangle arrangement on a craft mat and then dragging the tag across the ink. Allow to air dry, or dry with a heat gun.
2. Ink the edges of the paper elements with matching ink to hide the white edges, and glue them in place.
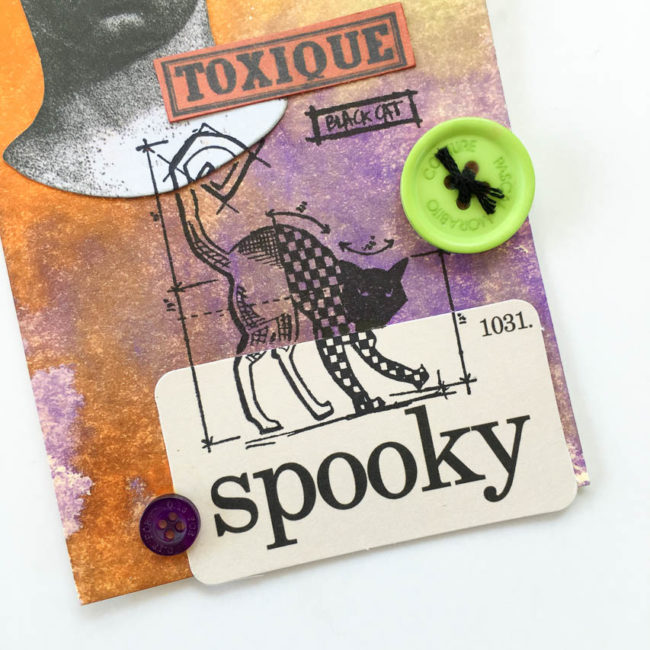
3. Using Archival ink, stamp the creepy cat on top of the background and paper elements.
Tip: If the stamp image is incomplete where the paper layers meet, use the fine point end of the Distress Marker to fill it in!
4. Draw a line for the spider web in the upper right corner using the brush end of the Distress Marker and a ruler.
5. Thread black embroidery floss through the green button and tie off.
6. Use a button shank remover to cut the shank off from the back of a spider button.
7. Glue all of the buttons into place using the PPA Matte Adhesive. (Make sure to center the orange one over the hole in the tag.) Let dry.
8. Thread twine from the back through the button and ending at the back again, to tie off the tag.
9. Enjoy your Halloween tag!
New Buttons Galore Products for Fall Quilt Market 2015!
It’s time for the Fall Quilt Market trade show, and that means new products from Buttons Galore!
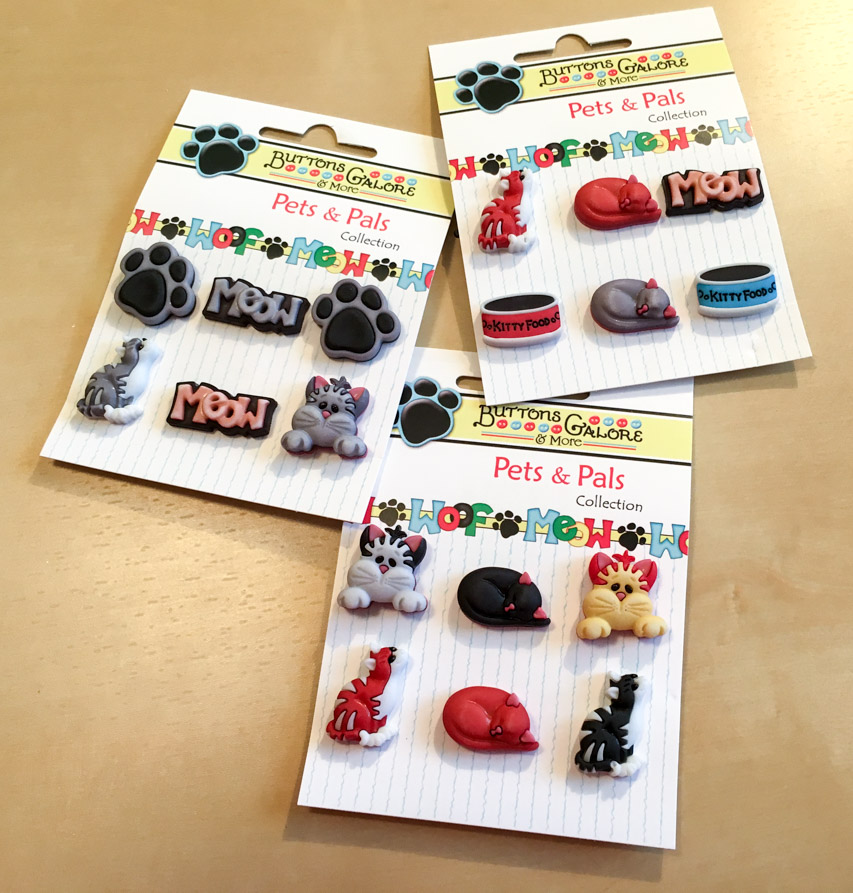
This fall, we’re debuting products that fit perfectly with one of the hottest trends in the craft world: pet-themed projects. Buttons Galore is going to the dogs – and cats – with our new “Pets & Pals” collection!
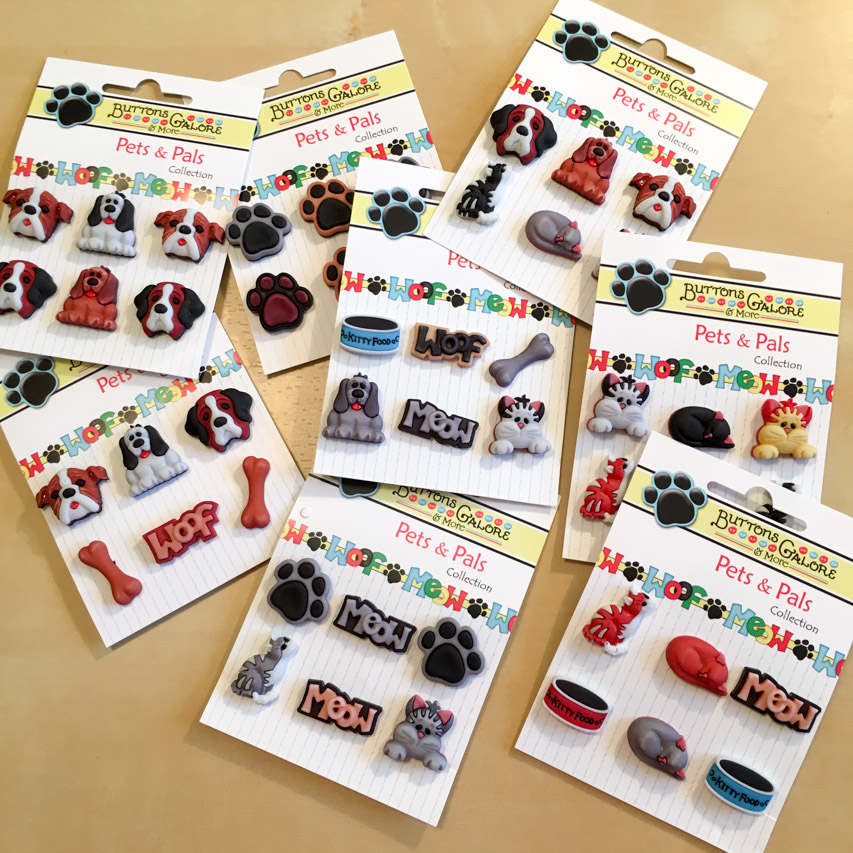
These buttons come in a variety of assortments and individual design packs.
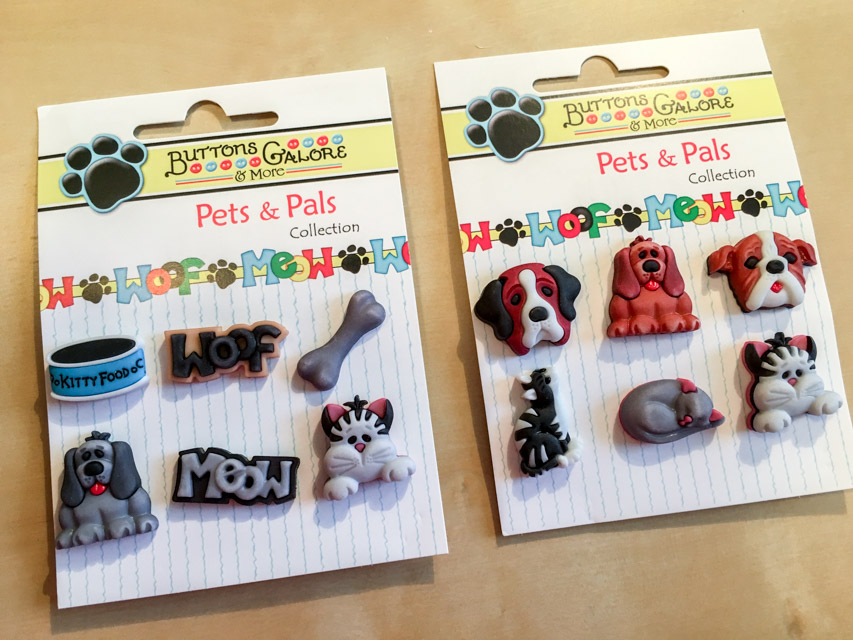
With shank backs, these fun 3D buttons are perfect for sewing projects or craft projects!
 These new products can be seen now on our website, or if you are at Quilt Market in Houston this weekend you can stop by our booth #562 to check them out in person!