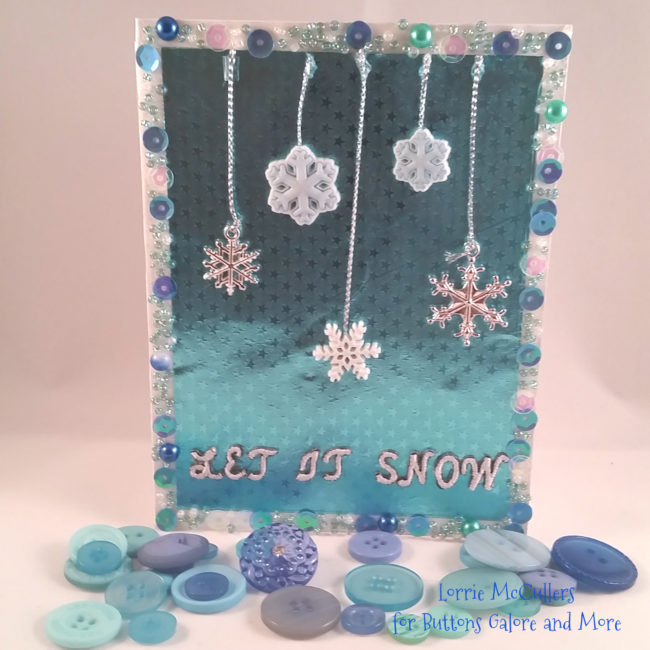
Nothing says Christmas like a flurry of snowflakes! Using adorable buttons and a beautiful sequin mix from Buttons Galore and More, I am getting into the Christmas spirit with this Let It Snow Christmas card. Continue Reading →

Nothing says Christmas like a flurry of snowflakes! Using adorable buttons and a beautiful sequin mix from Buttons Galore and More, I am getting into the Christmas spirit with this Let It Snow Christmas card. Continue Reading →
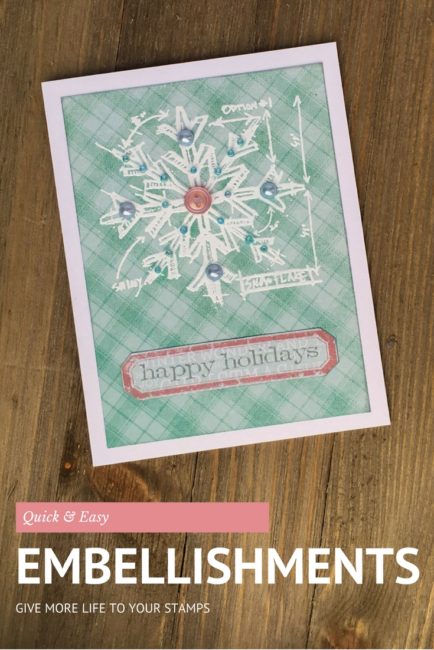
Stamps are a great investment because they are a tool that can be used over and over again. However, using them over and over again can quickly get boring…so how do you spice things up and put the fun back in your stamps again? 28 Lilac Lane has the answer!
Supplies Needed:
One of my favorite ways to make my old stamps look new again is to embellish them! And with the 28 Lilac Lane embellishment bottles, I have the choice of seed beads, sequins, flat back pearls, and buttons to embellish my stamps.
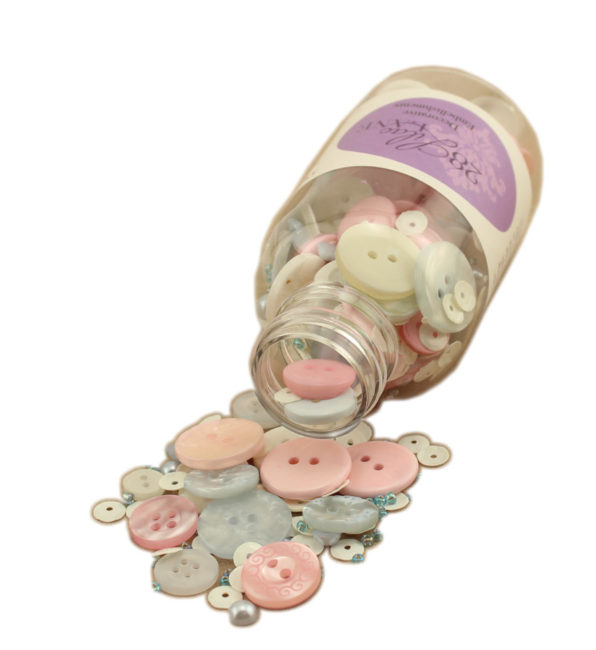
I chose the Cotton Candy bottle because it matched my paper pad. [The 28 Lilac Lane “Cotton Candy” embellishment bottle is available at the our online store, Scrapbook.com, A Cherry On Top, Ellen Hutson, Simon Says Stamp, Create for Less, and others, or check your local retailer].
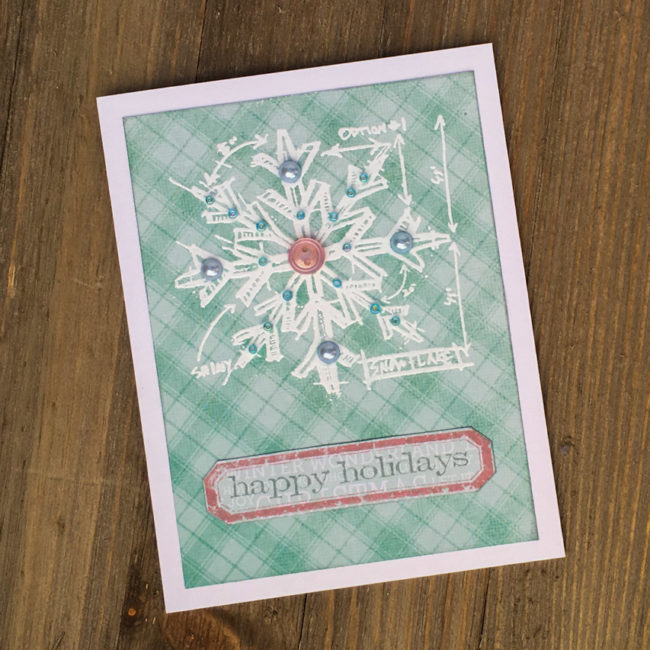
To create this card, I first made a card base by folding a half sheet of letter sized cardstock. Then I cut a 3.75″ by 5″ piece of the blue plaid paper, and inked the edges in Iced Spruce before adhering it in the center of the card front.
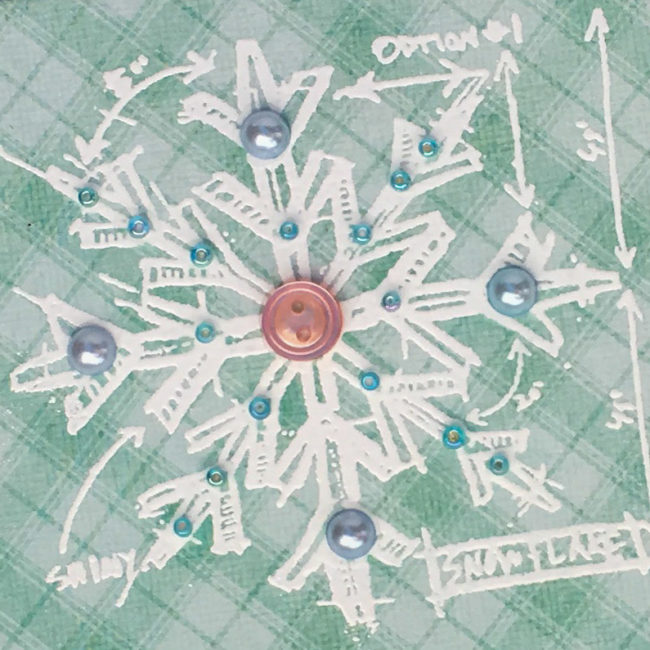
Next I used embossing ink to stamp the snowflake design on the top of the card front, and heat embossed it with white embossing powder. Once the heat embossing was cool, I selected embellishments from the Cotton Candy bottle and adhered them with small dots of clear drying white glue.
The sentiment on the bottom of the card front was created by first stamping the label outline in Victorian Velvet on the pale turquoise patterned paper. Then I cut out the label using scissors, close to the edge of the stamped label. I stamped the sentiment in Iced Spruce, and adhered the label to the card front.
What stamps do have that could be given new life with embellishments?
Wishing you a day stuffed with reasons to be Thankful … with this set of Thankful Cards. Create clean and simple Thank you cards with a stamped sentiment, two colors of card stock and the lovely leaf buttons from the Autumn Value pack. Adhere everything together with Mini Glued dots and you have a wonderful set of thankful cards to use this holiday season.
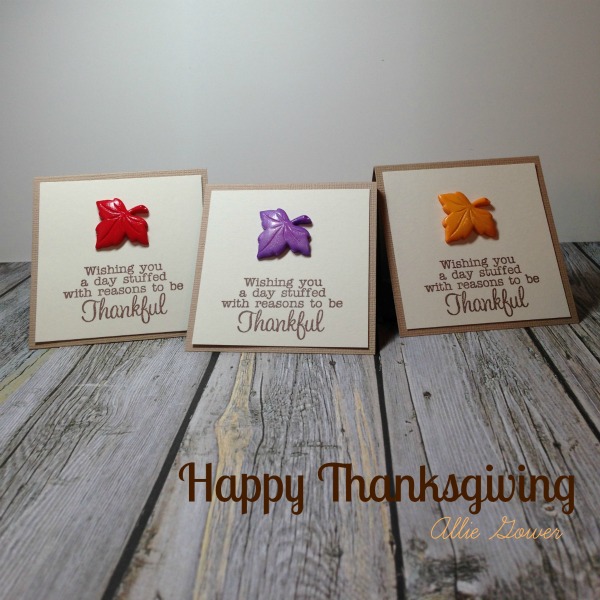

Autumn Value Pack
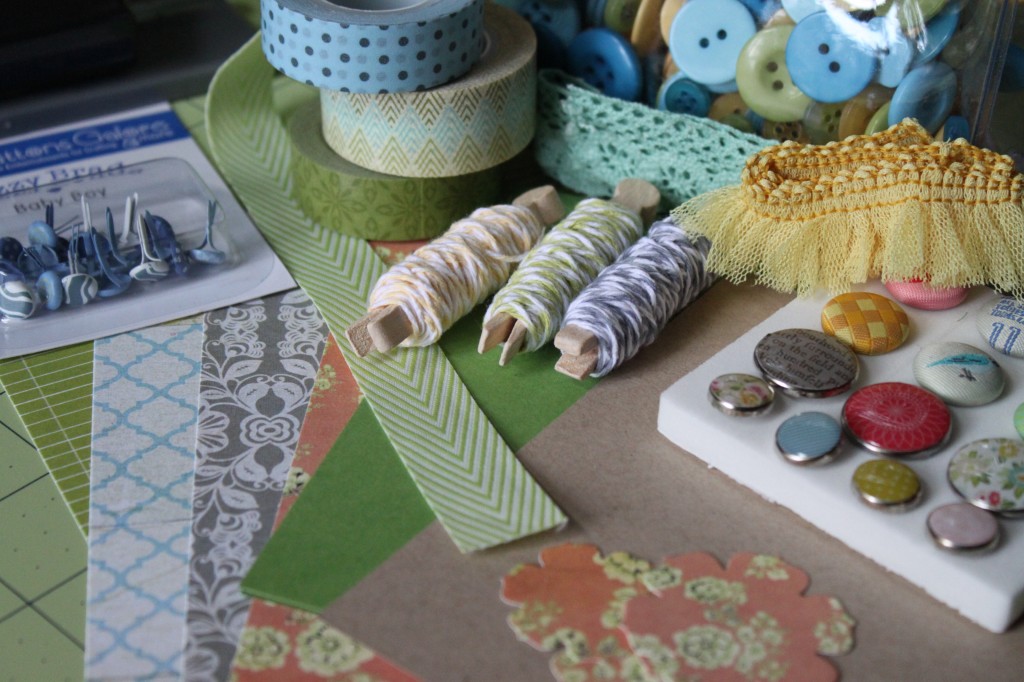
It’s that time of year where we all start looking for quick and easy gifts. Being able to make them homemade is a bonus!!! Why not make a handmade note card set? Mine is not Christmas themed, or Fall themed…I like generic…it works well when I am in a pinch! I can just grab & go! BUT I do like to make my gifts in good seasonal colors. So for this set I thought I would show you my “thought process” on how to make a set of cards in a quick and easy assembly fashion. :) Just add in your papers, matching buttons, ribbon and bling of your choice and you are all set and ready to get creating your very own quick and easy gifts!

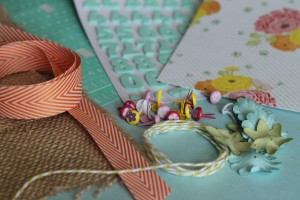
Gather up supplies. I generally like to pick my papers first, then cardstock, ribbon and embellishments. As you can see, I have chosen three different colors of Button Bonanza Bags just to be sure I have the perfect color when the time comes for embellishing. You can also see I have printed out my sentiments panels using Duetica Lettering Arts Studio’s Mandolyn Font in the Outline feature then colored it in using my Copic markers. Another neat trick to PERFECTLY matched sentiments that say JUST what you want in just the perfect size for your project. :) Once I was done coloring them in I die cut each sentiment panel using Spellbinders Nestabilities and I was all set!

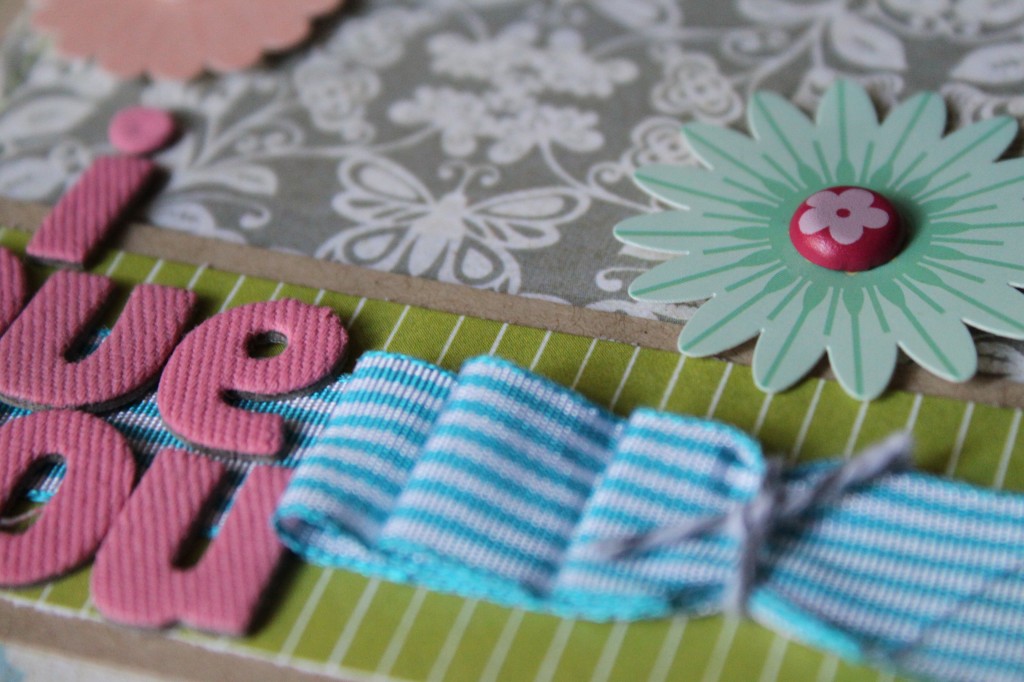
Using a Bow Easy Ribbon Tool REALLY helps make the set look polished, all of my bows look exactly alike!

Add an extra touch by outlining the first letter using a glue pen then shake on a bit of coordinating glitter.

Another great touch that really doesn’t take too long is to embellish the embellishments! I love to add a bit of bling to the center of my buttons.

And here you have it! A cute set that took less than an hour start to finish! Not bad….
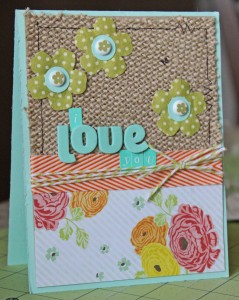
I can’t believe it’s August! I feel like the summer has really flown by. I haven’t had time to enjoy any summer festivities this year being in school the whole time, but it’s finally coming to an end. I can’t wait to get a few days off before the next semester starts. I don’t know about you, but I love it when all the kiddos go back to school. My tot is only two, but I do love those rare days when I get the house all to myself. I can actually make something! Today was one of those days, so let me take you through my design process…
As usual, the first thing I do when I start a project is to create a palette. This is what I laid out…
…and here’s what I ended up using on my project:
Assembly Instructions:
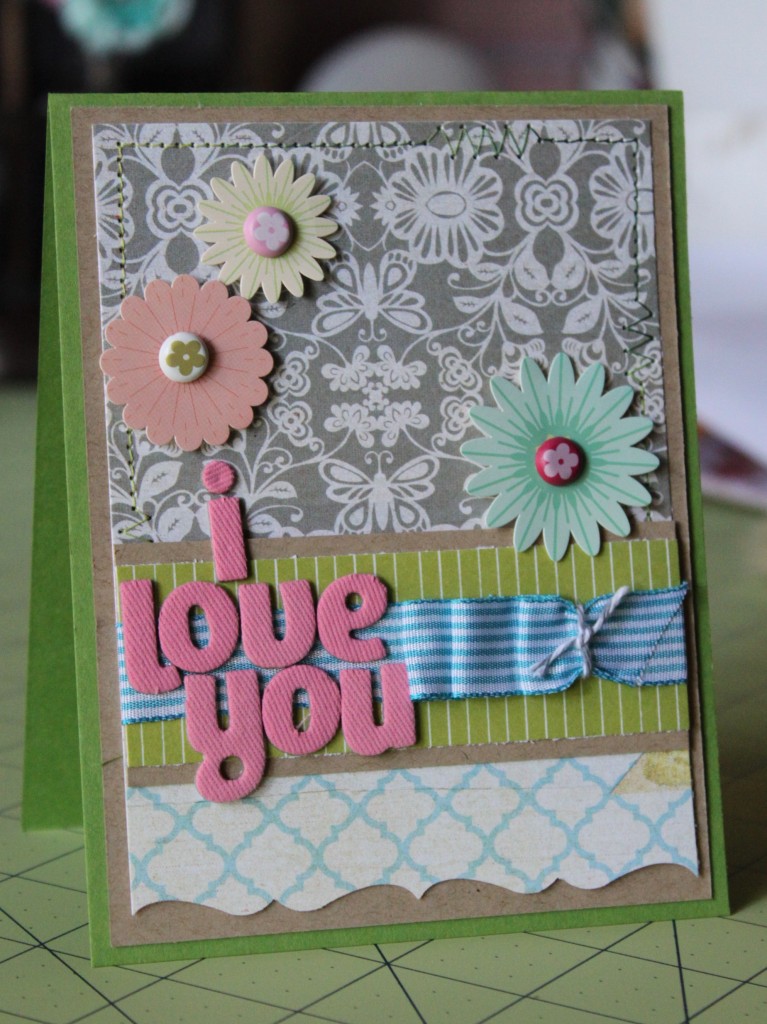
1. Trim Caterpillar green cardstock to 8.5″x4.25″ and fold in half for card base. Trim Kraft cardstock to 4″x5.25″.
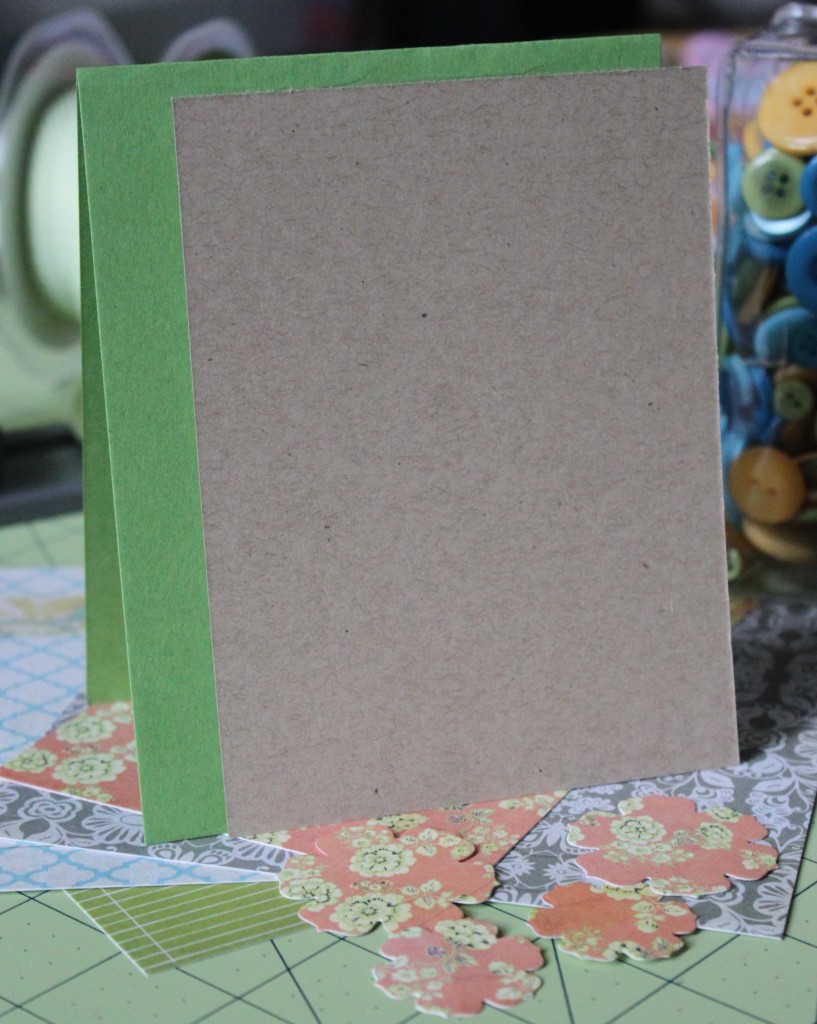
2. Trim Grey floral patterned paper to 3.75″ square and scantly secure to upper portion of Kraft piece. Trim blue/white quatrefoil tp 3.75″ x 2.75″ and use border punch along the bottom edge before securing to bottom edge of Kraft cardstock. Use sewing machine for decorative edge.
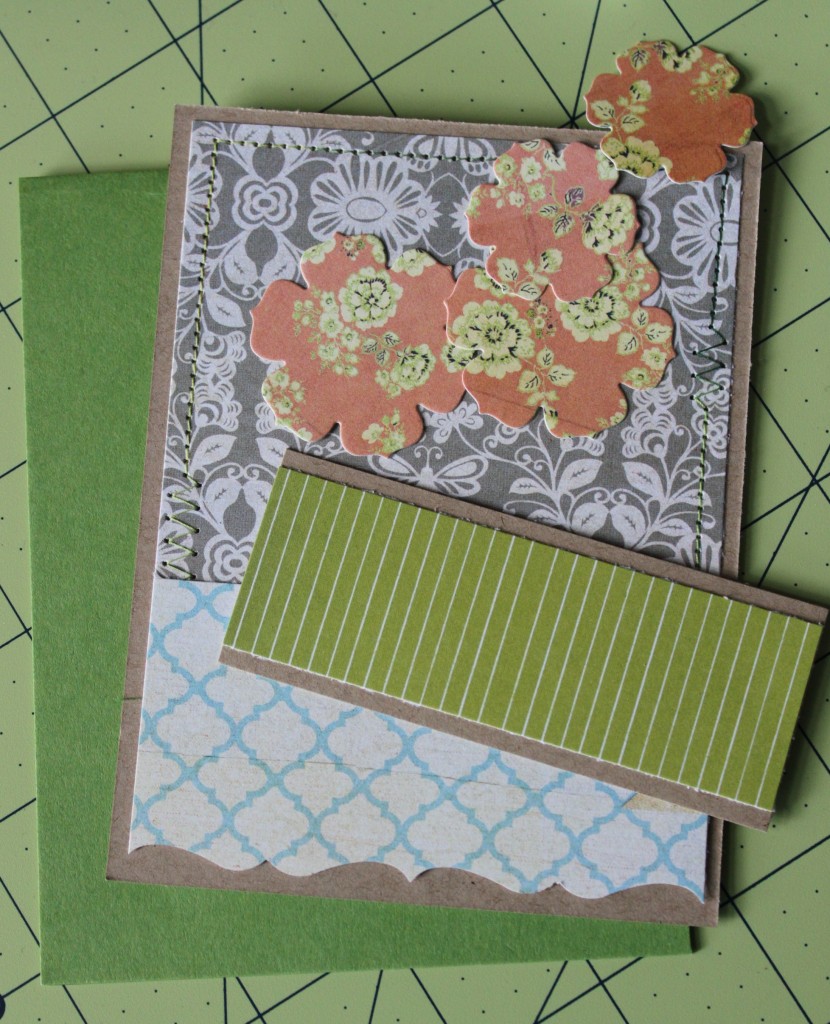
2. Next, trim a 2.25″ wide strip of Kraft and layer on top of it a 2
wide strip of green stripe paper. Wrap a strip of ribbon around this piece before securing to card front.
3. At this point I decided to leave out the punched flowers and go with some cardstock stickers I found in my stash. I wanted them to pop off the card, so I put foam adhesive on the back.
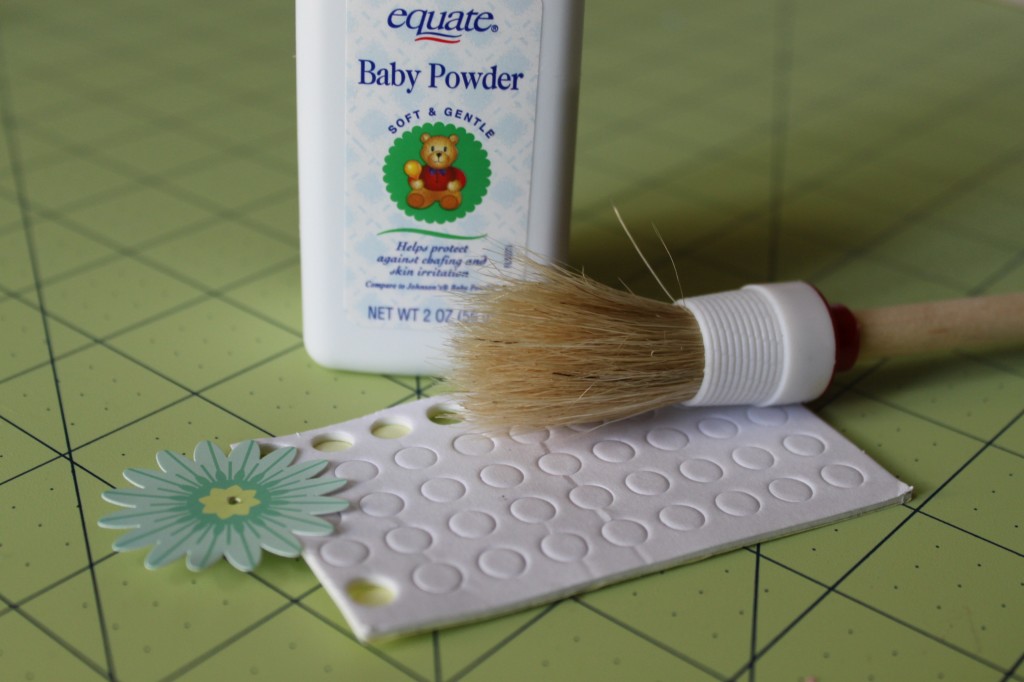
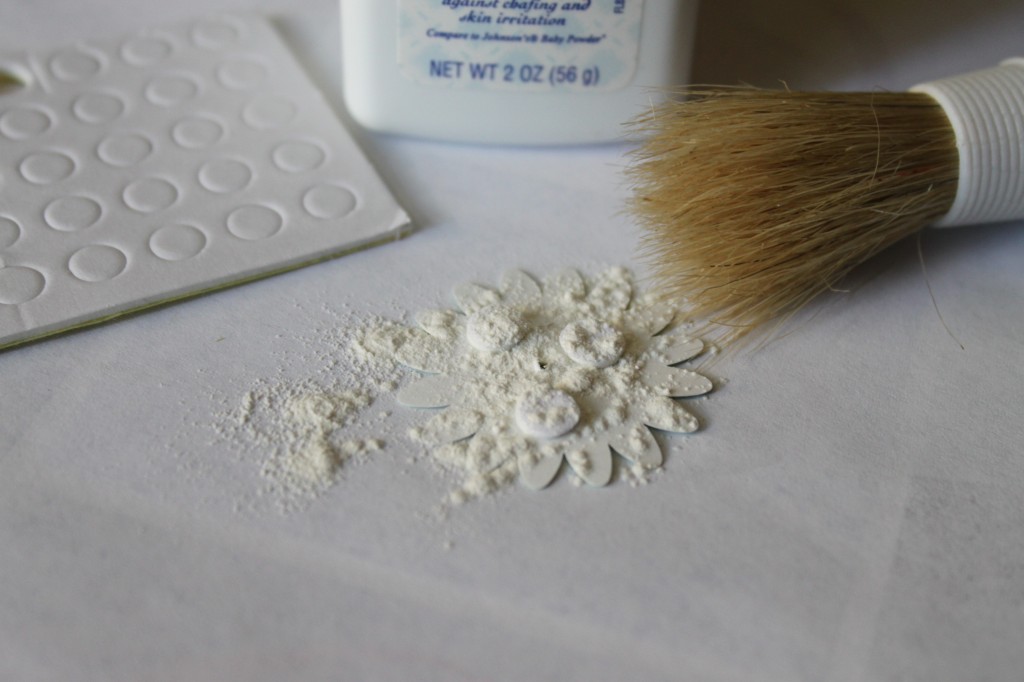
I left on the second sticker backing, so that I could then brush baby powder on the back of the sticker without getting powder on my foam dots. I still want to use that part of the adhesive to stick the flowers to my card, but I didn’t want the actual sticker to be sticky, so it wouldn’t catch stuff and end up looking weird.
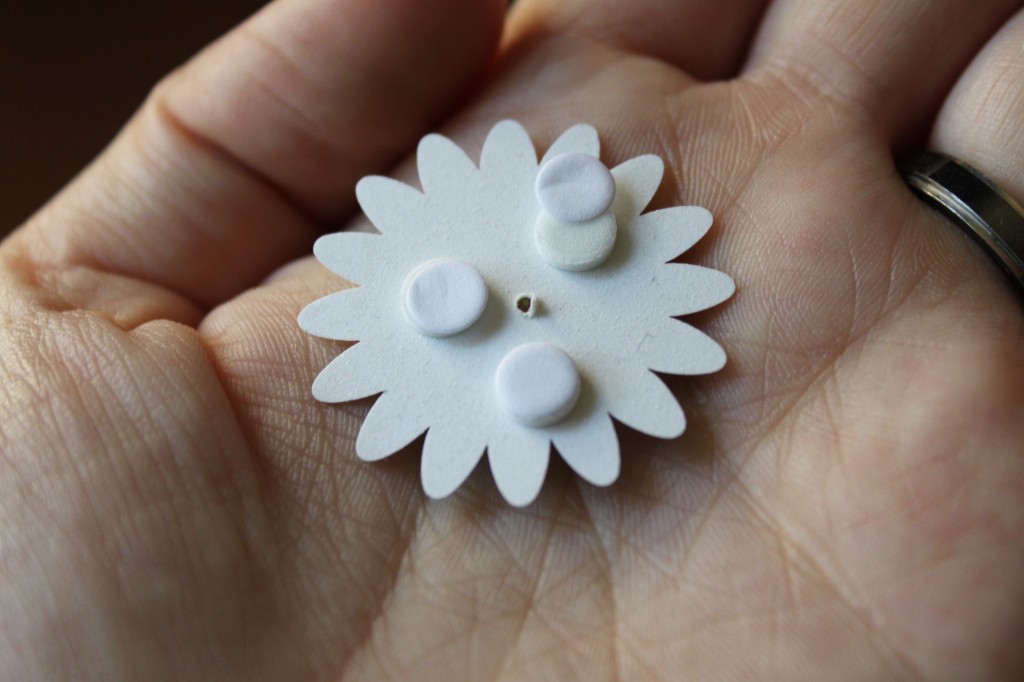
4. I poked a hole in my flowers here with a sharp point and added brads. The brads will push through most paper alright, but to keep the cardstock from buckling and wrinkling, you should always use a small hole punch, paper piercer, or even a tack or needle.
5. The final step is to assemble all of your embellishements and sentiment where you like it. I hope you enjoyed this project today.
Here’s the finished card all ready to give to your special loved one…

Hand stamped card ideas and mixed media projects by the MFT stamps team and the Buttons Galore team lead to an overwhelming amount of comments. We appreciate each and every one. The designers especially send their THANKS for all of the wonderful comments that you left on their Buttons Galore and More and My Favorite Things Blog Hop Projects.
We hope that you had as much fun visiting with all of the designers as they had working on their projects. If you missed the blog hop for any reason, you can find all the participants here. We’re pleased to announce the two winners of the MFT Gift Certificates.
MFT winners, be sure to check your email boxes, MFT sent vouchers today via email!
From Laura Evangeline’s Blog Sue Ann said…
“MY DEAR is right ~ this is BEAUTIFUL!! All the elements are pulled together SO beautifully. What a way to wake up with such a beautiful card on this blog hop!!!”
From Jessie’s Blog Thelma said…
Great hop excited to glance at your buttons Who doesnt love buttons
Buttons Galore and My Favorite Things have teamed up to bring you an inspiration filled blog hop. You’ll want to leave a comment on EACH designer’s blog because there is $100 in prizes up for grabs. MFT will give away 2 MFT Gift Certificates for the blog hop. One $25 gift certificate to one randomly chosen winner from commenters on the MFT Designers’ blogs and one $25 gift certificate to one randomly chosen winner from the commenters on the Buttons Galore Designers’ blogs. We will give two $25 button assortments the same way. We will take care of choosing the winners and sending the prizes and will announce it on the BGM Blog on July 30. Deadline to comment will be on July 29. Same for MFT.

Grab a cup of coffee, sit back and relax and enjoy the inspiration that is being brought to you by the many talented designers from both Buttons Galore and More and My Favorite Things.
Don’t forget to leave a comment to be entered to win one of 4 great prizes!
Tell us which project you like best. What products you like from My Favorite Things, what your favorite button set is… whatever you like. Then make sure to leave a comment on each designer project page for another chance to win!
Greetings!
The three cards on the blog today are handmade by our featured guest designer Beck Thompson. Becky is and artist, a photographer and an all around great soul. I have admired Becky’s work for as long as I have been in the creative industry. At various Scrapbooking shows I was lucky enough to be her assistant and I even worked with a product line she designed. She is a joy to be around and and she puts lots of details in her pieces.
![]()


Becky’s cards are simple and classic with added touches that never cease to inspire the creative individual.

Products used:
Breathe Card:
Lighthouse flat back button
Bazzil Cardstock
Patterned paper (SEI)
Washi Tape – Recollections
Ink – Tim Holtz
Stamp: Stampendous

Blank Card:
Seaside Big Ole Button
Fashion front Brads
Stamp – Stampabilities
Ink – Tim Holtz for Ranger
Kraft card blank – Stampabilities
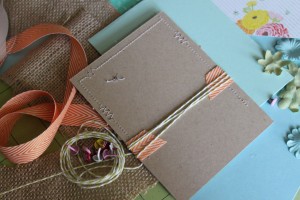
When I initially started creating a card starting with burlap, I thought I would be creating a very masculine project, but it some morphed into a lovely fun card instead. I absolutely love the way this project turned out, so I hope you do too.
Supplies:
Burlap
Paper Flowers
Alphabet stickers
Twine & Ribbon
Patterned Paper
Sewing Machine & Thread
Circle Punch
Cardstock
Adhesive
Assembly Instructions:
1. Attach a piece of burlap to to the upper half of a piece of kraft cardstock cut to 4″x5.25″ and stitch around the border .25″ from the cardstock edge. Trim excess burlap with pinking shears.
2. Attach a piece of patterned paper trimmed to 4″x2.5″ to the lower half of the cardstock, and cover the seam with a strip of ribbon.
3. Layer brads, punched cardstock circles, and flowers together before adhering them through burlap & cardstock.
4. Attach letter stickers for desired sentiment and add baker’s twine.
5. Secure entire card front to an A2 (4.25″x5.5″) card stock base.
(Tip: I always create my card front entirely before attaching it to the card base in order to hide any artistic imperfections.)
Here’s the finished card all cute & ready to give to your special loved one…
Good morning, Pinky here again,
I love making cards and scrapbooking but sometimes they just need a special embellishment to make them POP.
The cards I am sharing today really shine with the beautiful soft Buttons Galore & More buttons.
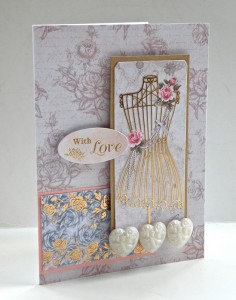
On this card I used the beautiful Buttons Galore & More Ribbon Heart buttons
First cover white cardstock 6X9″ with patterned paper.
Use alternating colored cardstock to matte dress die cut and patterned paper.
Adhere matted patterned paper as shown.
Using thick pop dots, pop up dress die cut as shown in photo.
Pop up sentiment die cut using foam pop dots.
Using hot glue gun adhere 3 Buttons Galore & More Ribbon Heart buttons as shown above.
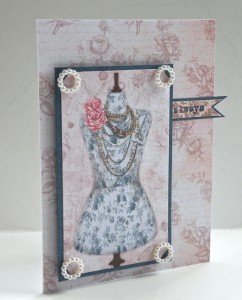
For this card:
First cover white cardstock 6X9″ with patterned paper.
Use alternating colored cardstock to matte dress die cut and sentiment.
Using thick pop dots, pop up dress die cut as shown in photo.
Tuck sentiment underneath dress die cut.
Using hot glue gun, adhere Buttons Galore & More Classic Circle buttons as shown.
2 beautiful cards in just 30 minutes!
Today I thought I would share a quick tutorial on how to use Lumiere 3-D one more way! :) I had used this technique on my “Mother” scrapbook layout earlier this month but didn’t really showcase it so I figured it would be a great way to end the month here… :) I hope you enjoy!


Before the painted surface has time to dry, apply a light dusting of ultrafine glitter to the surface of the Pearl painted flowers if desired.


Taking time to recognize all the wonderful fathers out there is important & not just once a year, but the entire year through!
For this card I simply wanted to design something that my husband would love. I happen to love the colors kraft, red & blue together, no matter what the shades.
For the sentiment I had the notion to use a chipboard letter from Want2Scrap in place of the printed “F” but still use the fun swirls that come with that uppercase letter. To achieve this I opened a file in Photoshop, created a total of three layers, one for each word I was planning on using. I made the word “Father’s” larger than both of the other words. I then made sure that the “F” was even larger than the rest of the word. Finally, I created another layer. Then using the rectangular selector tool I created a selection over top of the “F” and filled it with white but kept the swirls that were coming off. My last step was to arrange the layers so that the sentiment was placed together so that there would be room to add the chipboard “F” as I had planned. I then printed the sentiment and die cut around it using Spellbinders Labels Four. To finish off my sentiment panel I simply inked the chipboard “F”, applied glue to the entire surface and applied red glitter to really give it “POP!”.
After that it was simply a matter of putting the card all together as you see here. I again used the Lumiere 3-D to adhere the buttons and fill the “naked” button holes, just like I did on my scrapbook layout earlier this month.
What a fun texture the strips of buttons add beneath the main focal image, don’t you think? Enjoy!

Supplies:
Sentiment: Duetica – Woodwynds Font
Cardstock: Bazzill: Red, White & Light Teal
Stamps: Gina K Designs – Vintage Backgrounds
Ink: Clearsnap Fluid Chalk Ink – Creamy Brown, Lipstick Red
Glitter: Clearsnap – Ruby Slippers
Ribbon: Really Reasonable Ribbon – White Seam Binding
Buttons: Buttons Galore & More – Button Tin in Sea Glass, red
Chipboard Letter & Gems: Want2Scrap
Other: Jacquard Lumiere 3D (To adhere buttons and fill button holes)
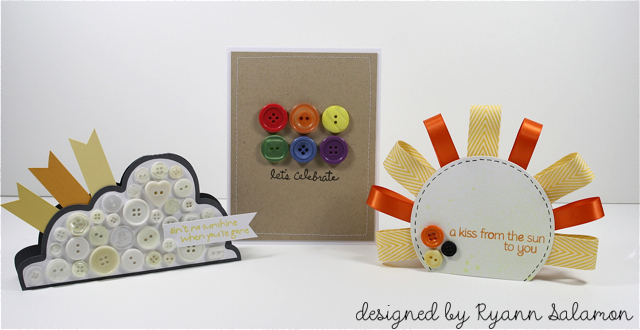
Hi all! Ryann here with my first Buttons Galore & More design team post and I couldn’t be more thrilled to be here with you today! I have a fun handmade card set to share with you today in a weather theme using lots of buttons! Now I know not everyone makes cards so I thought it would be neat to have a project for each type of card maker. So whether you are a beginner, intermediate or more seasoned card maker, there is a project here for you!
Supplies used:
Cloud card: cardstock, ink, stamps, Neutrals buttons
Rainbow card: cardstock, ink, stamps, sewing machine, thread, Primary buttons
Sun card: cardstock, ink, stamps, ribbon, marker, circle die, yellow spray mist, Harvest buttons, Tuxedo buttons
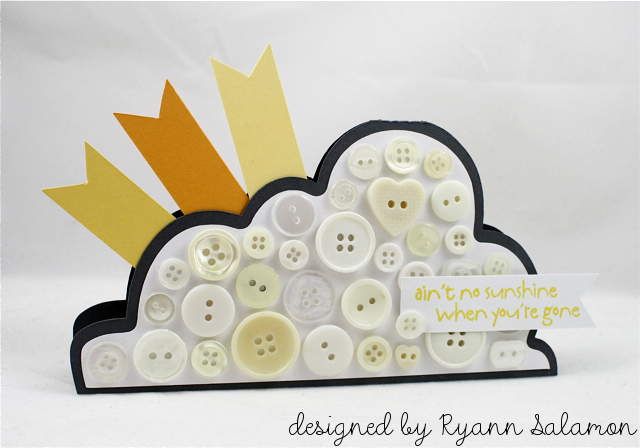
Cloud Card Directions:
1. Sketch out the shape of your card onto a piece of sturdy cardstock and then cut out. This will be your template to trace onto your gray card base and white mat layer.
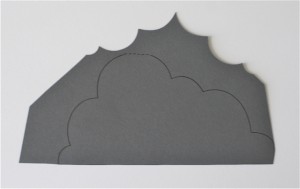
2. Trace the cloud shape onto your card using the template. The top of the template should match up to the top of your card (at the fold). Cut out and set aside. (Note: You’ll notice the template is backwards from the card pictured. When you turn it around, your trace lines will be on the backside of your card, so they won’t be visible when decorating!)
3. Trace the cloud shape onto white cardstock using the template. Draw a cloud just a little bit smaller than the cloud you traced. Use the traced cloud as your guide. Cut out the inside cloud. This piece will be the layer you adhere the buttons to.

4. Turn over your white cloud so the trace lines are on the back and adhere to your cloud shaped card base. Adhere buttons onto card.
5. Cut out three long strips of yellow/orange shades of cardstock. Notch the ends to look like banners and arrange them how you want them to be placed behind the cloud. Adhere the three strips together using scotch tape. Adhere the sun rays behind the card front panel, NOT the backside of the card.

6. Stamp sentiment onto strip of white cardstock and adhere onto card base. Notch end of strip hanging off side of card.
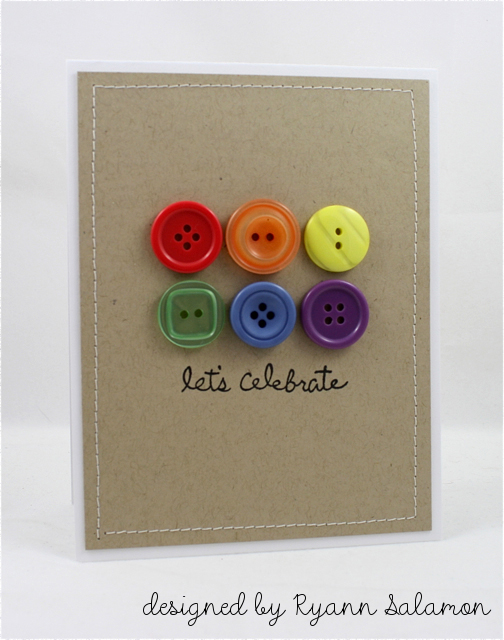
Rainbow Card Directions:
1. Create A2 card from white cardstock.
2. Cut kraft cardstock to measure 4″ x 5-1/4″. Sew along edges of kraft panel then adhere onto card base. (Note: If you don’t have a sewing machine, faux stitching made with a marker will look just as good!)
3. Stamp sentiment onto card, then adhere buttons in rainbow pattern.

Sun Card Directions:
1. Cut out two circles. Place them on top of each other and cut off a small section that will be the bottom of your card. Set one circle aside.
2. Stamp sentiment onto circle (card front) and create faux stitching along edges using marker. Spray with yellow mist.
3. Turn card front over and begin creating your sun rays from ribbon. Create a loop from a small length of ribbon with your fingers and secure onto backside of card front.
4. Alternate ribbons going along the edge of your card front, securing as you go.
5. When done, use a piece of foam tap at top of your card, on the backside, to adhere your card front and back together. Turn over and adhere buttons onto the card.
I hope this handmade card set has inspired you to get crafting today! Thanks for joining me in my first post with Buttons Galore and More. We’ll see you again tomorrow for more crafty button inspiration!!
Signing off,
Ryann
![]() Please welcome Teri – A great paper crafter and fantastic card maker. She is a Go-To Gal For PaperCrafts magazine, and I know why! She is very talented, creative and never ceases to amaze me with her fresh ideas. I love her style and I hope you enjoy the card she made to share with you! It is a fun technique that makes new buttons look like vintage or distressed buttons. She gives them the perfect touch of vintage.
Please welcome Teri – A great paper crafter and fantastic card maker. She is a Go-To Gal For PaperCrafts magazine, and I know why! She is very talented, creative and never ceases to amaze me with her fresh ideas. I love her style and I hope you enjoy the card she made to share with you! It is a fun technique that makes new buttons look like vintage or distressed buttons. She gives them the perfect touch of vintage.
Supplies:
Classic Circles: Simply Pearls
Tangerine Tango: Color Blends
Other:
Patterned papers from Jillibean Soup, Studio Calico, Crate Paper and My Mind’s Eye
Wood clothespin from Darice
“You’re Sew Nice” sentiment stamp from April 2012: Sew Nice stamp set by Avocado Arts
Jute by May Arts
White floss by DMC
Dressing Up Buttons for Cards
Hi everyone!
Don’t you just love buttons?
There is just something so fun about them and being able to add them to paper crafting projects.
I get bored using them the same old way they come so often times I’ll alter them up before I use them on a card or scrapbook page.
One of the easiest ways to dress them up is to sand them.

Take a sanding file or distressing tool. Hold it firmly in your hand and then brush a button over it repeatedly. This will scruff it up so you get something like what I got with this button from the Tangerine Tango: Color Blends (http://www.buttonsgaloreandmore.com/product/CB100.html) pack.

Take things a step farther by adding a circle from Classic Circles: Simply Pearls (http://www.buttonsgaloreandmore.com/product/4207.html) on top of the distressed button. Just be sure to use a strong glue and let the button sit awhile so the glue has time to dry.
I also like to stack them up.

Take a large button, place a small button on top of it and then tie the two buttons together with floss. When it comes time to use them, use a strong adhesive to put them on your project.
Another thing I like to do is add paper to them.

Start with a Clear Rounds (http://www.buttonsgaloreandmore.com/product/CF80.html) button. Add clear glue under it and then place it on any patterned paper. Let the glue dry completely and then use your scissors to cut away the excess paper. The end result is a cool patterned button.
Here’s a whole collection of buttons I made with these tricks. They look pretty spiffy on a card.

The trick to getting them to stay on the card is to use a good strong glue. I prefer Zip Dry (http://www.buttonsgaloreandmore.com/product/ZipDry.html).
Teri Anderson
Bio:
Hi! I am Teri, and I’m just girl who loves to play with all things crafty. I’m card maker and scrapbooker. And I am a Go-to Gal for Paper Crafts magazine and on a number of design teams. When I am not making stuff, I am going to concerts, spending them with my family and friends (and two fluffy dogs) and taking a whole lot of pictures. I blog at terisplace.wordpress.com.
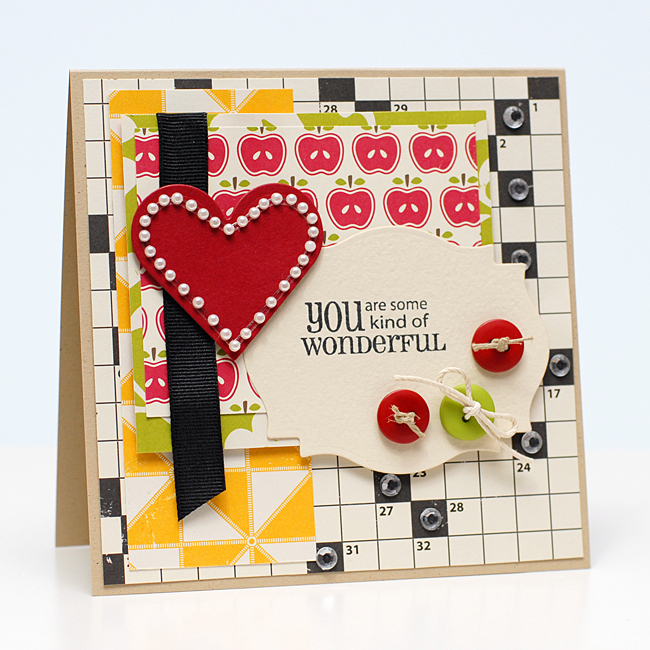
A few weeks ago I was stuck. I had to make my weekly card for Card Positioning Systems and I had everything but the finishing touch just wasn’t working. The sentiment I wanted to use was too small for the label die cut I was working with and I really wanted to use THIS SENTIMENT. You know how you can just get stuck with the image in your mind and nothing else works?? Yeah I was there…so I decided to embellish my main image…and not just with one, not two, but THREE fun buttons. Here you can see I chose some buttons from the Girly Button Pack. They were JUST THE RIGHT COLORS to go with my chosen patterned papers. So I kinda played around with the color balance and felt the two reds and one green was just what I needed. To spice things up I decided to use natural colored hemp in the red buttons, tied in a knot and snipped short. For the green button to add balance and interest I tied white twine, tied a big loopy bow and snipped the tails a bit longer. I felt it gave the card fun whimsy! If you’d like more info feel free to pop over to my blog Pink Lemonade. Enjoy!!
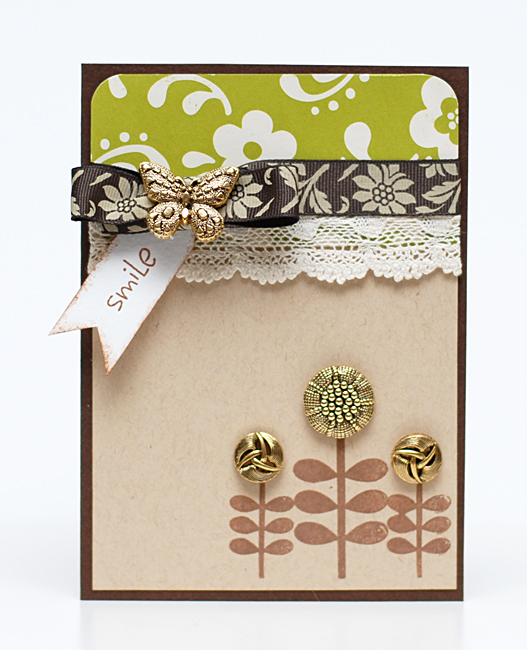
Have you ever been in the middle of a project and felt you needed just the “right touch” but couldn’t really put your fingers on what that “right touch” was? Well I thought I would share my card that shows just such a moment.
I had this cute little stamp that was the flowers’ “stems & leaves” and I wanted to go 3-D with the flowers themselves…so I put my thinking cap on~ I sorted through my fun Gold Buttons and found three that were JUST THE RIGHT THING!!! So I snipped the shank off the back using some Hefty Duty Scissors….the shanks are plastic so you will not need wire snips or anything but I certainly recommend that you use a good strong pair of scissors!!! (And eye protection is a good idea too because the shanks can kinda take off on you! LOL)
Anyway, here’s my card…can you spot my BONUS HAPPY FIND? Yep! That is right, the butterfly on the knot of the ribbon is ALSO one of the buttons I found while pecking through my Gold Buttons! If you’d like more details about this card just pop over to my blog Pink Lemonade…enjoy your day!

Gertrude and Friends - BZ100
Handmade cards are extra special when they contain a gift cardI had some fun with the butterfly from this cute set of BaZooples novelty buttons. I paired it with a BaZooples image from Inky Antics that I colored with pencils and gamsol.

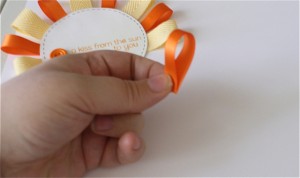
Handmade hippo card
The card is a little larger than usual and has a mini card on top. Notice the “LIFT HERE” pennant? When you lift that, you have a space for a gift card! I didn’t have a gift card,yet. So I placed a post it note just so you can see where that gift card would go. Inside the main card, there’s a panel of patterned paper, and plenty of room for a nice note. The sentiment reads “Just wanted to let you know… Love you tons!” Isn’t that the perfect sentiment for a Hippo card?

close up lift here
The gift card portion of the card was created using circle and scalloped circle dies from Spellbinders Paper Arts. The paper is from Authentique, and is accented with bling from Want2Scrap and some flowers from Creative Impressions. I used some additional buttons from my Buttons Galore jar for the flower centers.

inside close up gift card

close up flowers and buttons
I finished off the handmade card with a quick bow using some ribbon from my local craft supply. Sheer ribbon is so pretty and easy to tie.
Thank you for stopping by today!
Browsing the internet can provide so much inspiration, and when we found this site we hit the jackpot! The Paper Players blog not only did a challenge using buttons, they also have a section for their readers to share their creations. Check out their site http://thepaperplayers.blogspot.com/2012/03/challenge-87-cas-with-buttons-from.html . This card below is one of the many fantastic creations they have for your viewing pleasure.

Paper Players Card with Buttons
The card Annie made is crisp, clean and full of sparkle. What is not to love? Check back here again. There is so much inspiration from crafters who use buttons in their projects.

Tropical Flower Btuttons #4033
I played with Tropical Flowers buttons this week. I used them as an accent for my stamped image, and as part of my card’s sentiment, Mahalo. Mahalo means THANK YOU!
Directions:
Make card black card base to 6×6.
Adhere pattern paper from My Little Shoebox to card base.
Begin card by die cutting a two circles using dies from Spellbinders Paper Arts.
Embossed the yellow circle. I added some stripe to make a lantern.
I embellished the flower in the little girl’s hair (Image – Greeting Farm) and on either end of the beaded sentiment, Mahalo.
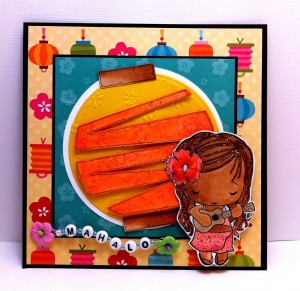
Mahalo means thank you.

feeling-better-soon -Ryann Salamon - Fresh Squeezed
While scouring the internet for Tuesday Internet Inspiration, I cam across Ryann Salamon. She is not, new to us as an artist. We noticed her adorable business cards with handmade accents, while at CHA. They were wrapped with twine and adorned with a button. What is not to like? After visiting her blog a mental note was made, that she must be featured. So many of her fabulous handmade cards have buttons as accents. She creates cards with simple embellishments, crisp stamped images and minimal amounts of material and they look stunning. She makes CAS ( clean and simple) handmade cards that are awesome.
So when you have a moment, please peruse her site. You will not be disappointed. For more information about the card above visit this handmade card post.

Cute Button and Ribbon Valentine by Jen Goode
You can make pretty little button Valentines for your true love, or with the kids for their class using buttons and felt. I created these three pieces using scraps of felt and ribbon and a bit of glue, that’s it! You could use fabric scraps, paper or cardstock. You could even paint a background and use the buttons to access the art.
This is a great Valentine’s Day project to do with the kids. Cut shapes for the little ones and let them glue everything together.Easy peazy, right? Tip: lay out everything before adding glue. Then put glue in the shape where buttons will be placed, example: I make a heart outline using glue and then placed all the buttons on the glue.
Supplies you need:
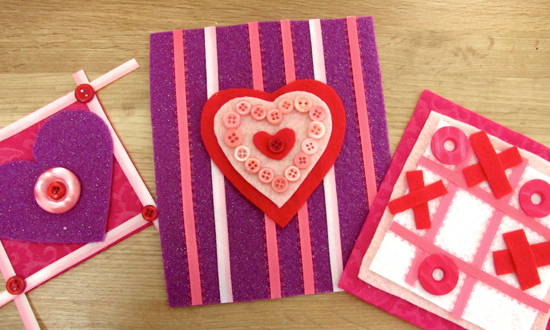
Button Valentines by Jen Goode
Mix and match your supplies with different layouts to create a wide selection of Valentines using your buttons. If you have a little frame, you could even turn these pieces into pretty Valentine’s Day art. Gotta love the buttons!
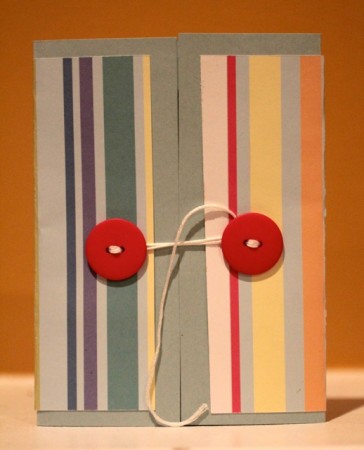
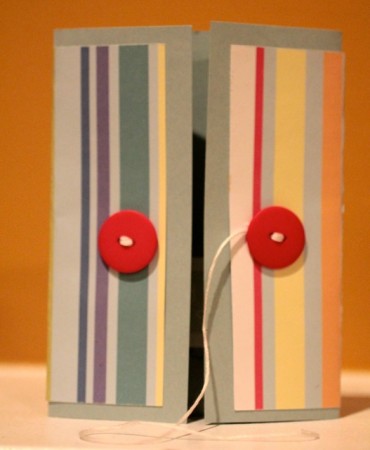
Button Closure
Create a cool closure for your handmade cards by sewing on two buttons. The card above is a a birthday card. You can use this technique for any occasion. Very few tools are involved and little skill is needed. It is quick and easy yet it makes the card feel extra special.
Button closure untied
Tools:
Needle with large opening
Embroidery floss in color of your choice
Paper cutter
Mouse pad
Material:
Contemporary Christmas Button Jar
12 x12 Cardstock of your choice
Pattern Paper of your choice
Rubber stamped sentiment of your choice
Adhesive
Directions:
1. Cut paper to 6×12. Make a score line 3 inches from each end. Fold flaps in so that they meet in the middle.
2. Trim pattern paper to 5.5 x 11.5 and adhere to card.
3. Stamp sentiment and add to center of card.
4. Measure in one inch on each flap. Place card open on mouse pad and use needle to make holes for floss.
5. Using floss sew on one button. Tie knot to secure and trim off excess.
6. For the second button cut a generous piece of floss. Sew on button and tie a knot. Do not trim off excess. Use it to fasten the card closed
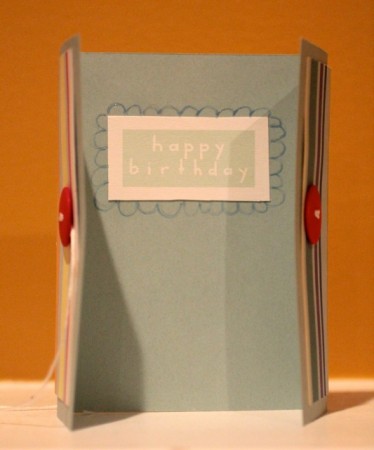
Inside of card
Let’s face it, the light is changing, shadows are deeper and FALL is a comin’!
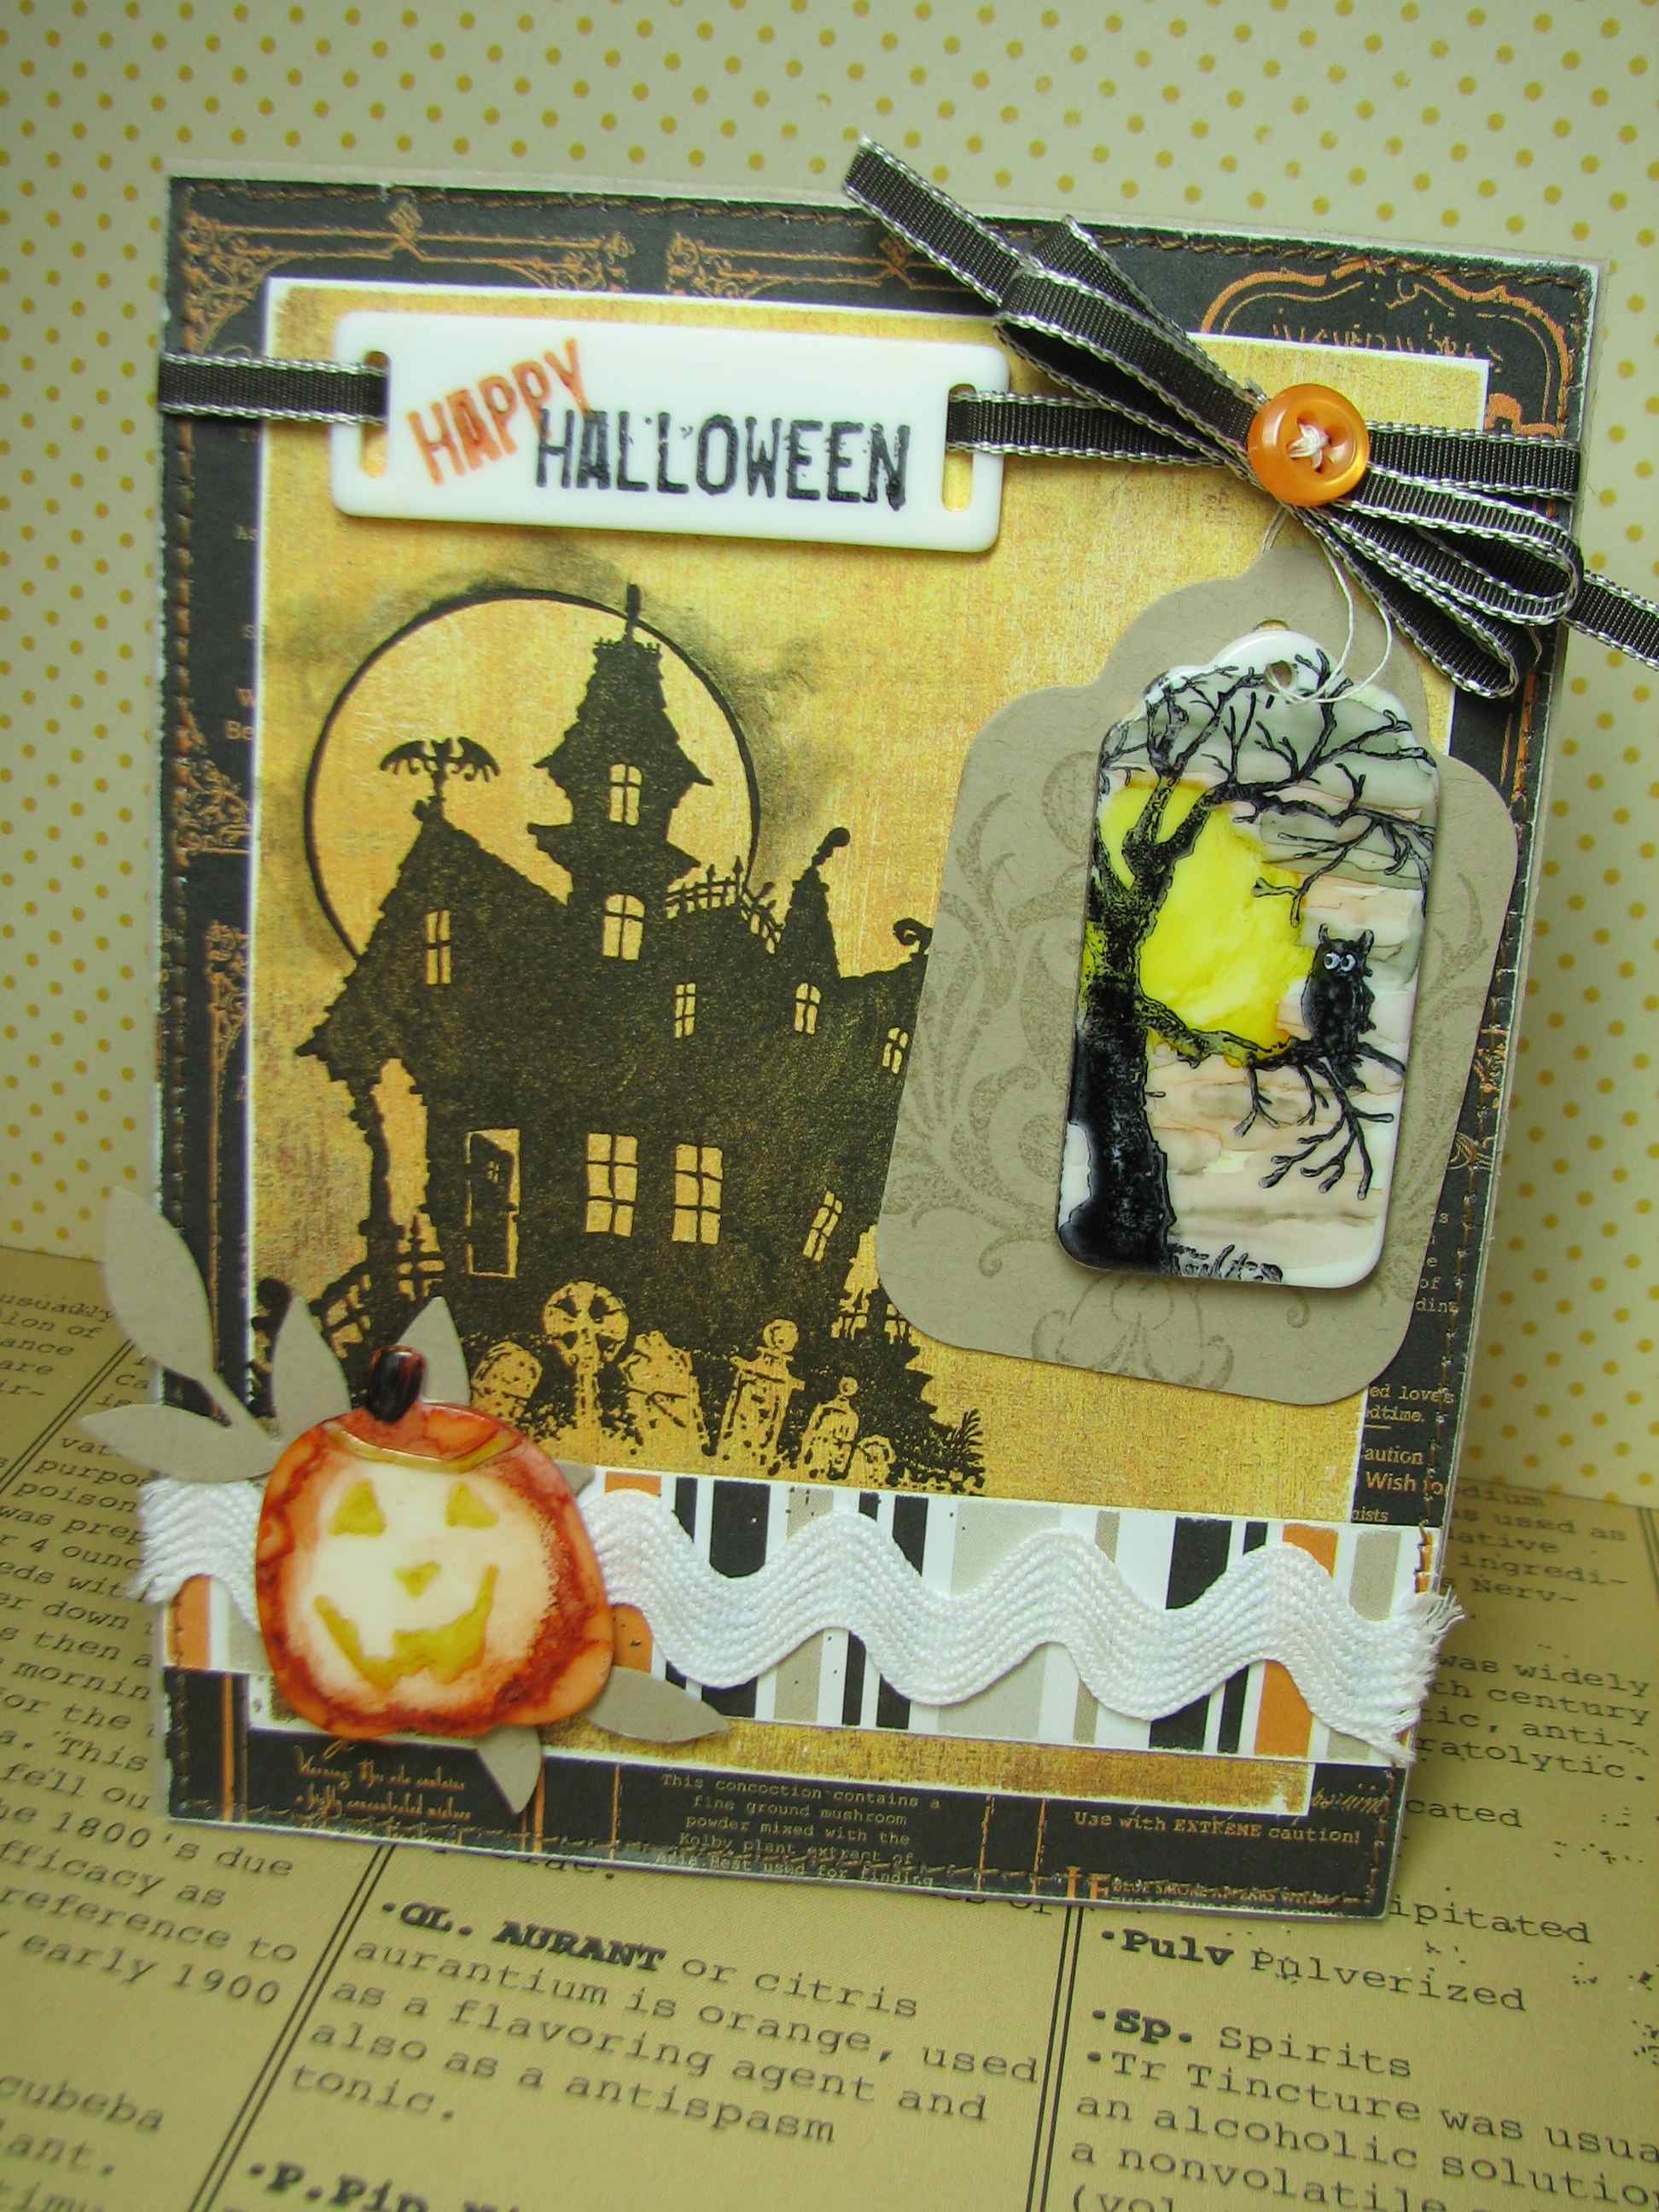
TIME to get your HALLOWEEN on! And what a send off: HAVE YOU SEEN the START UPS? NOT even exaggerating – they are AWESOME!

How could I resist these ADORABLE lil’ pumpkins?
Some materials just have PERSONALITY!
It’s up to US crafty folks – to RELEASE it!

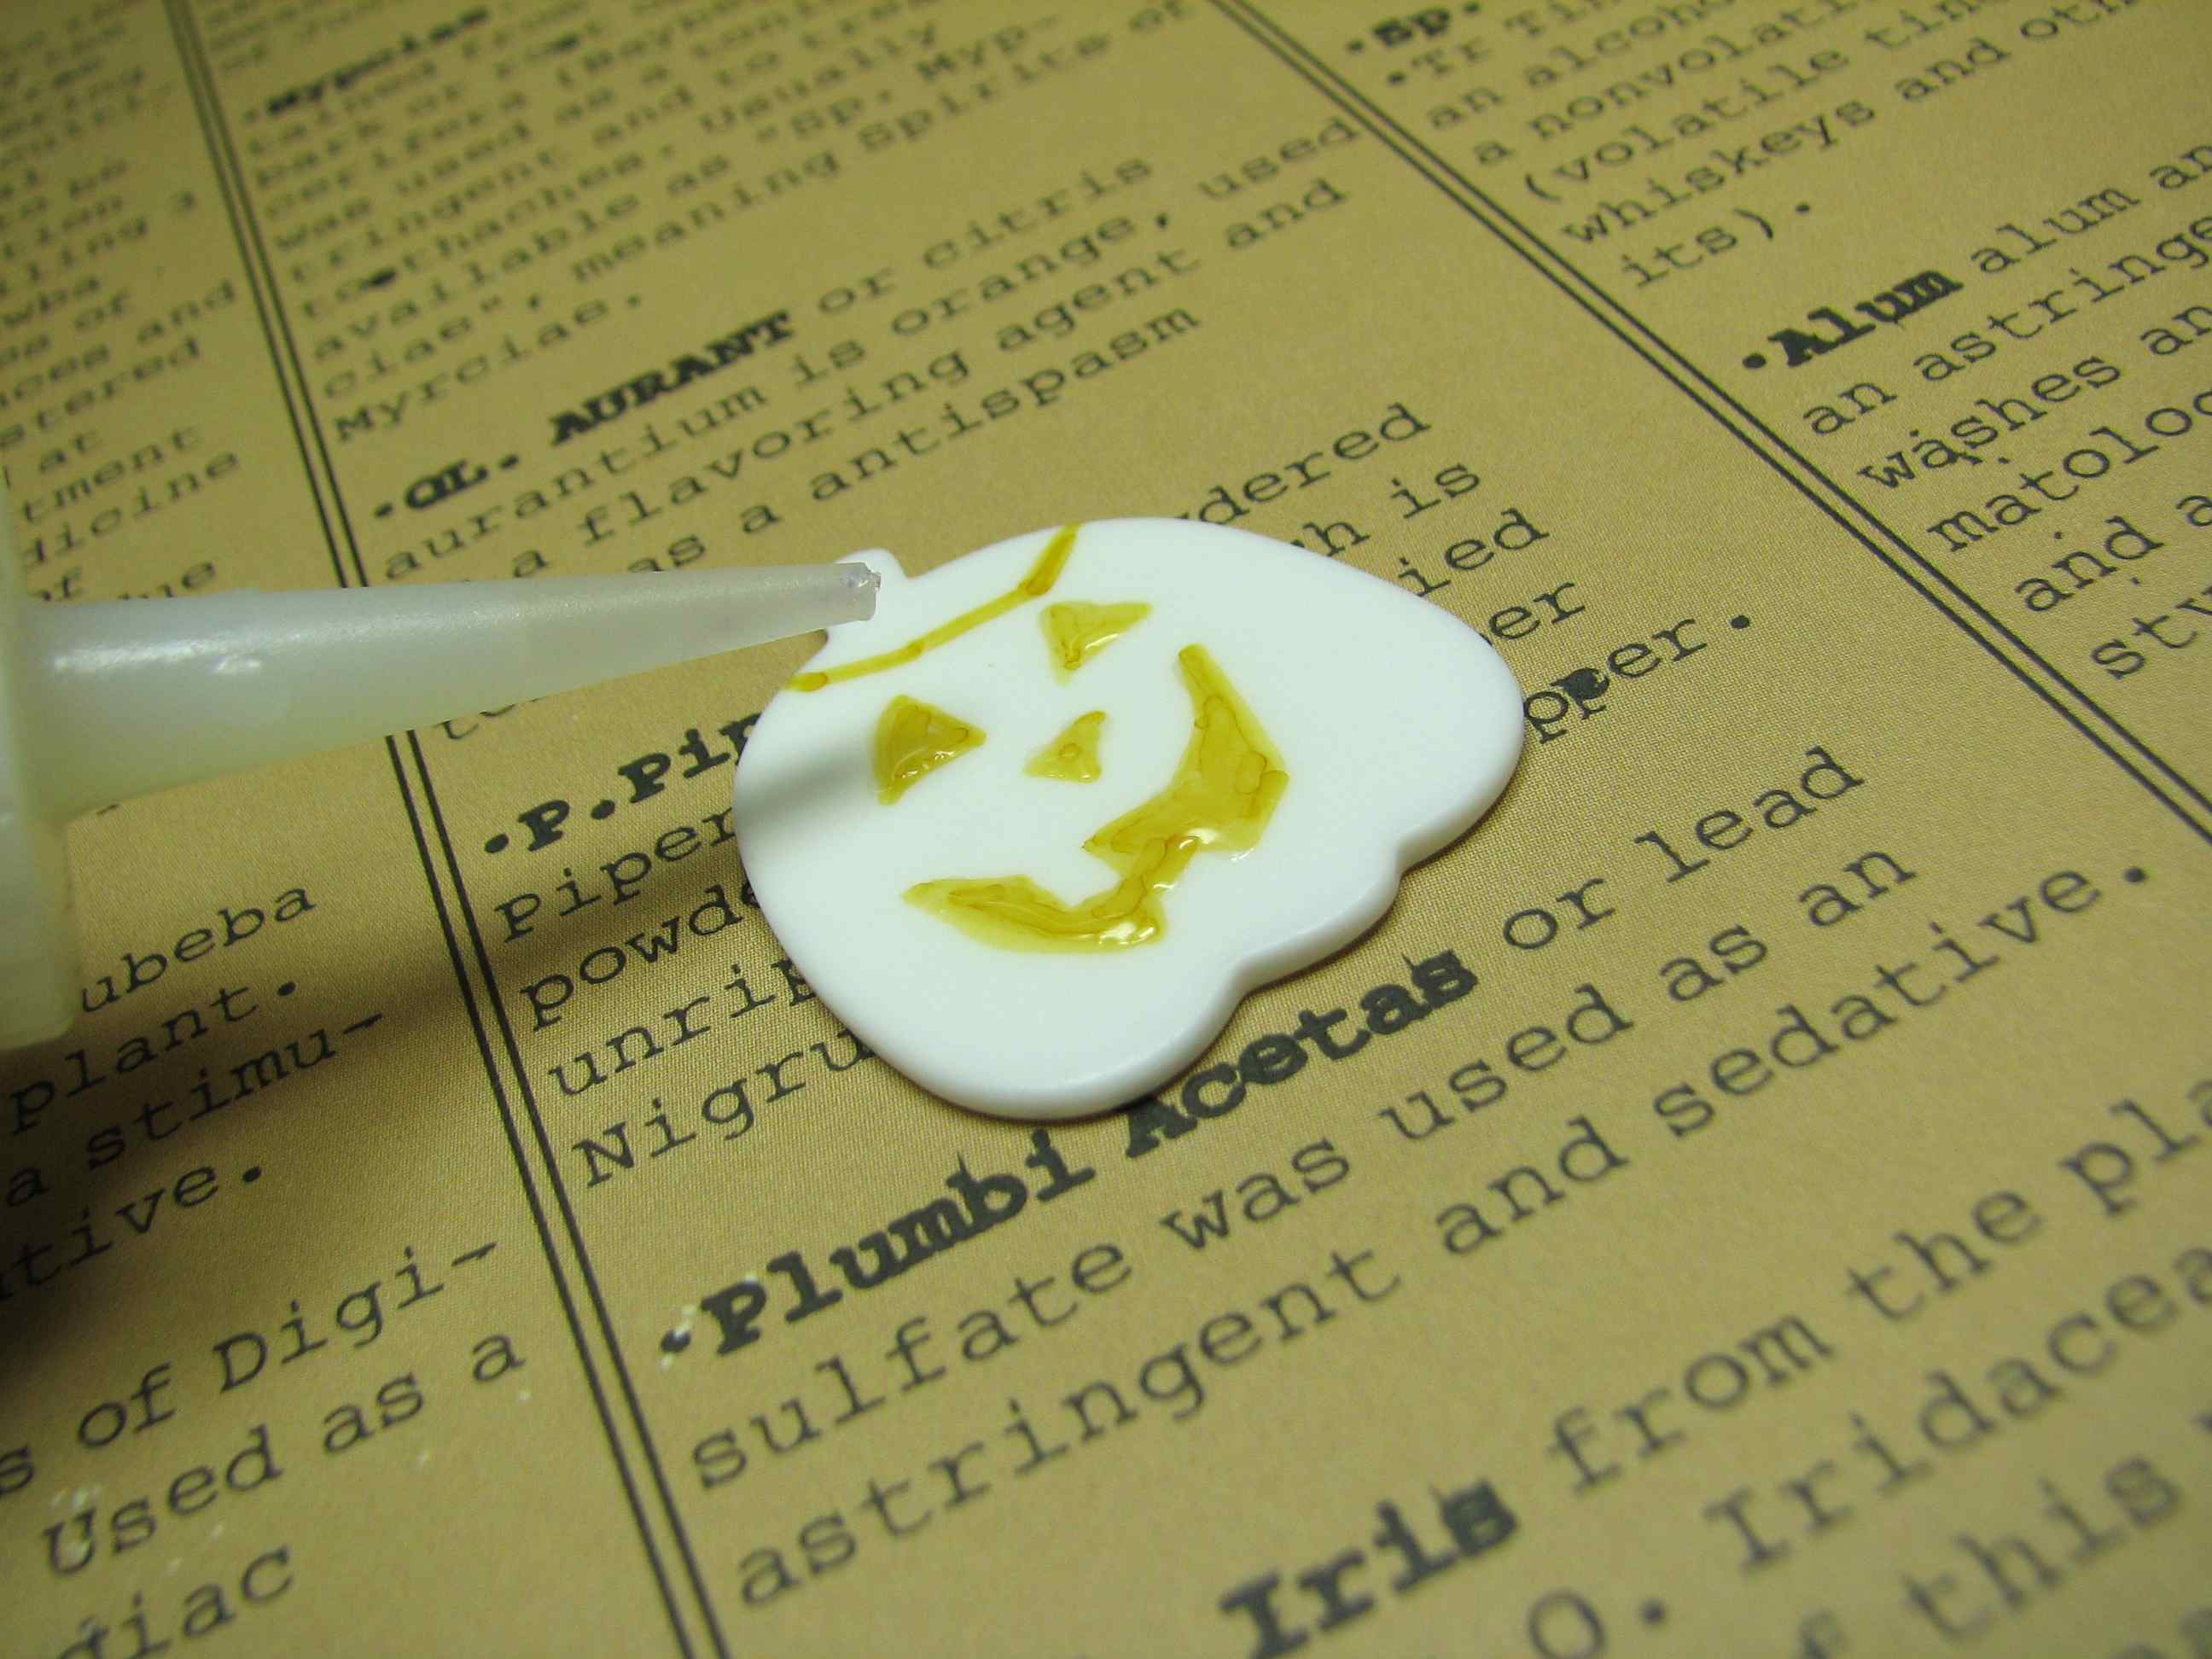
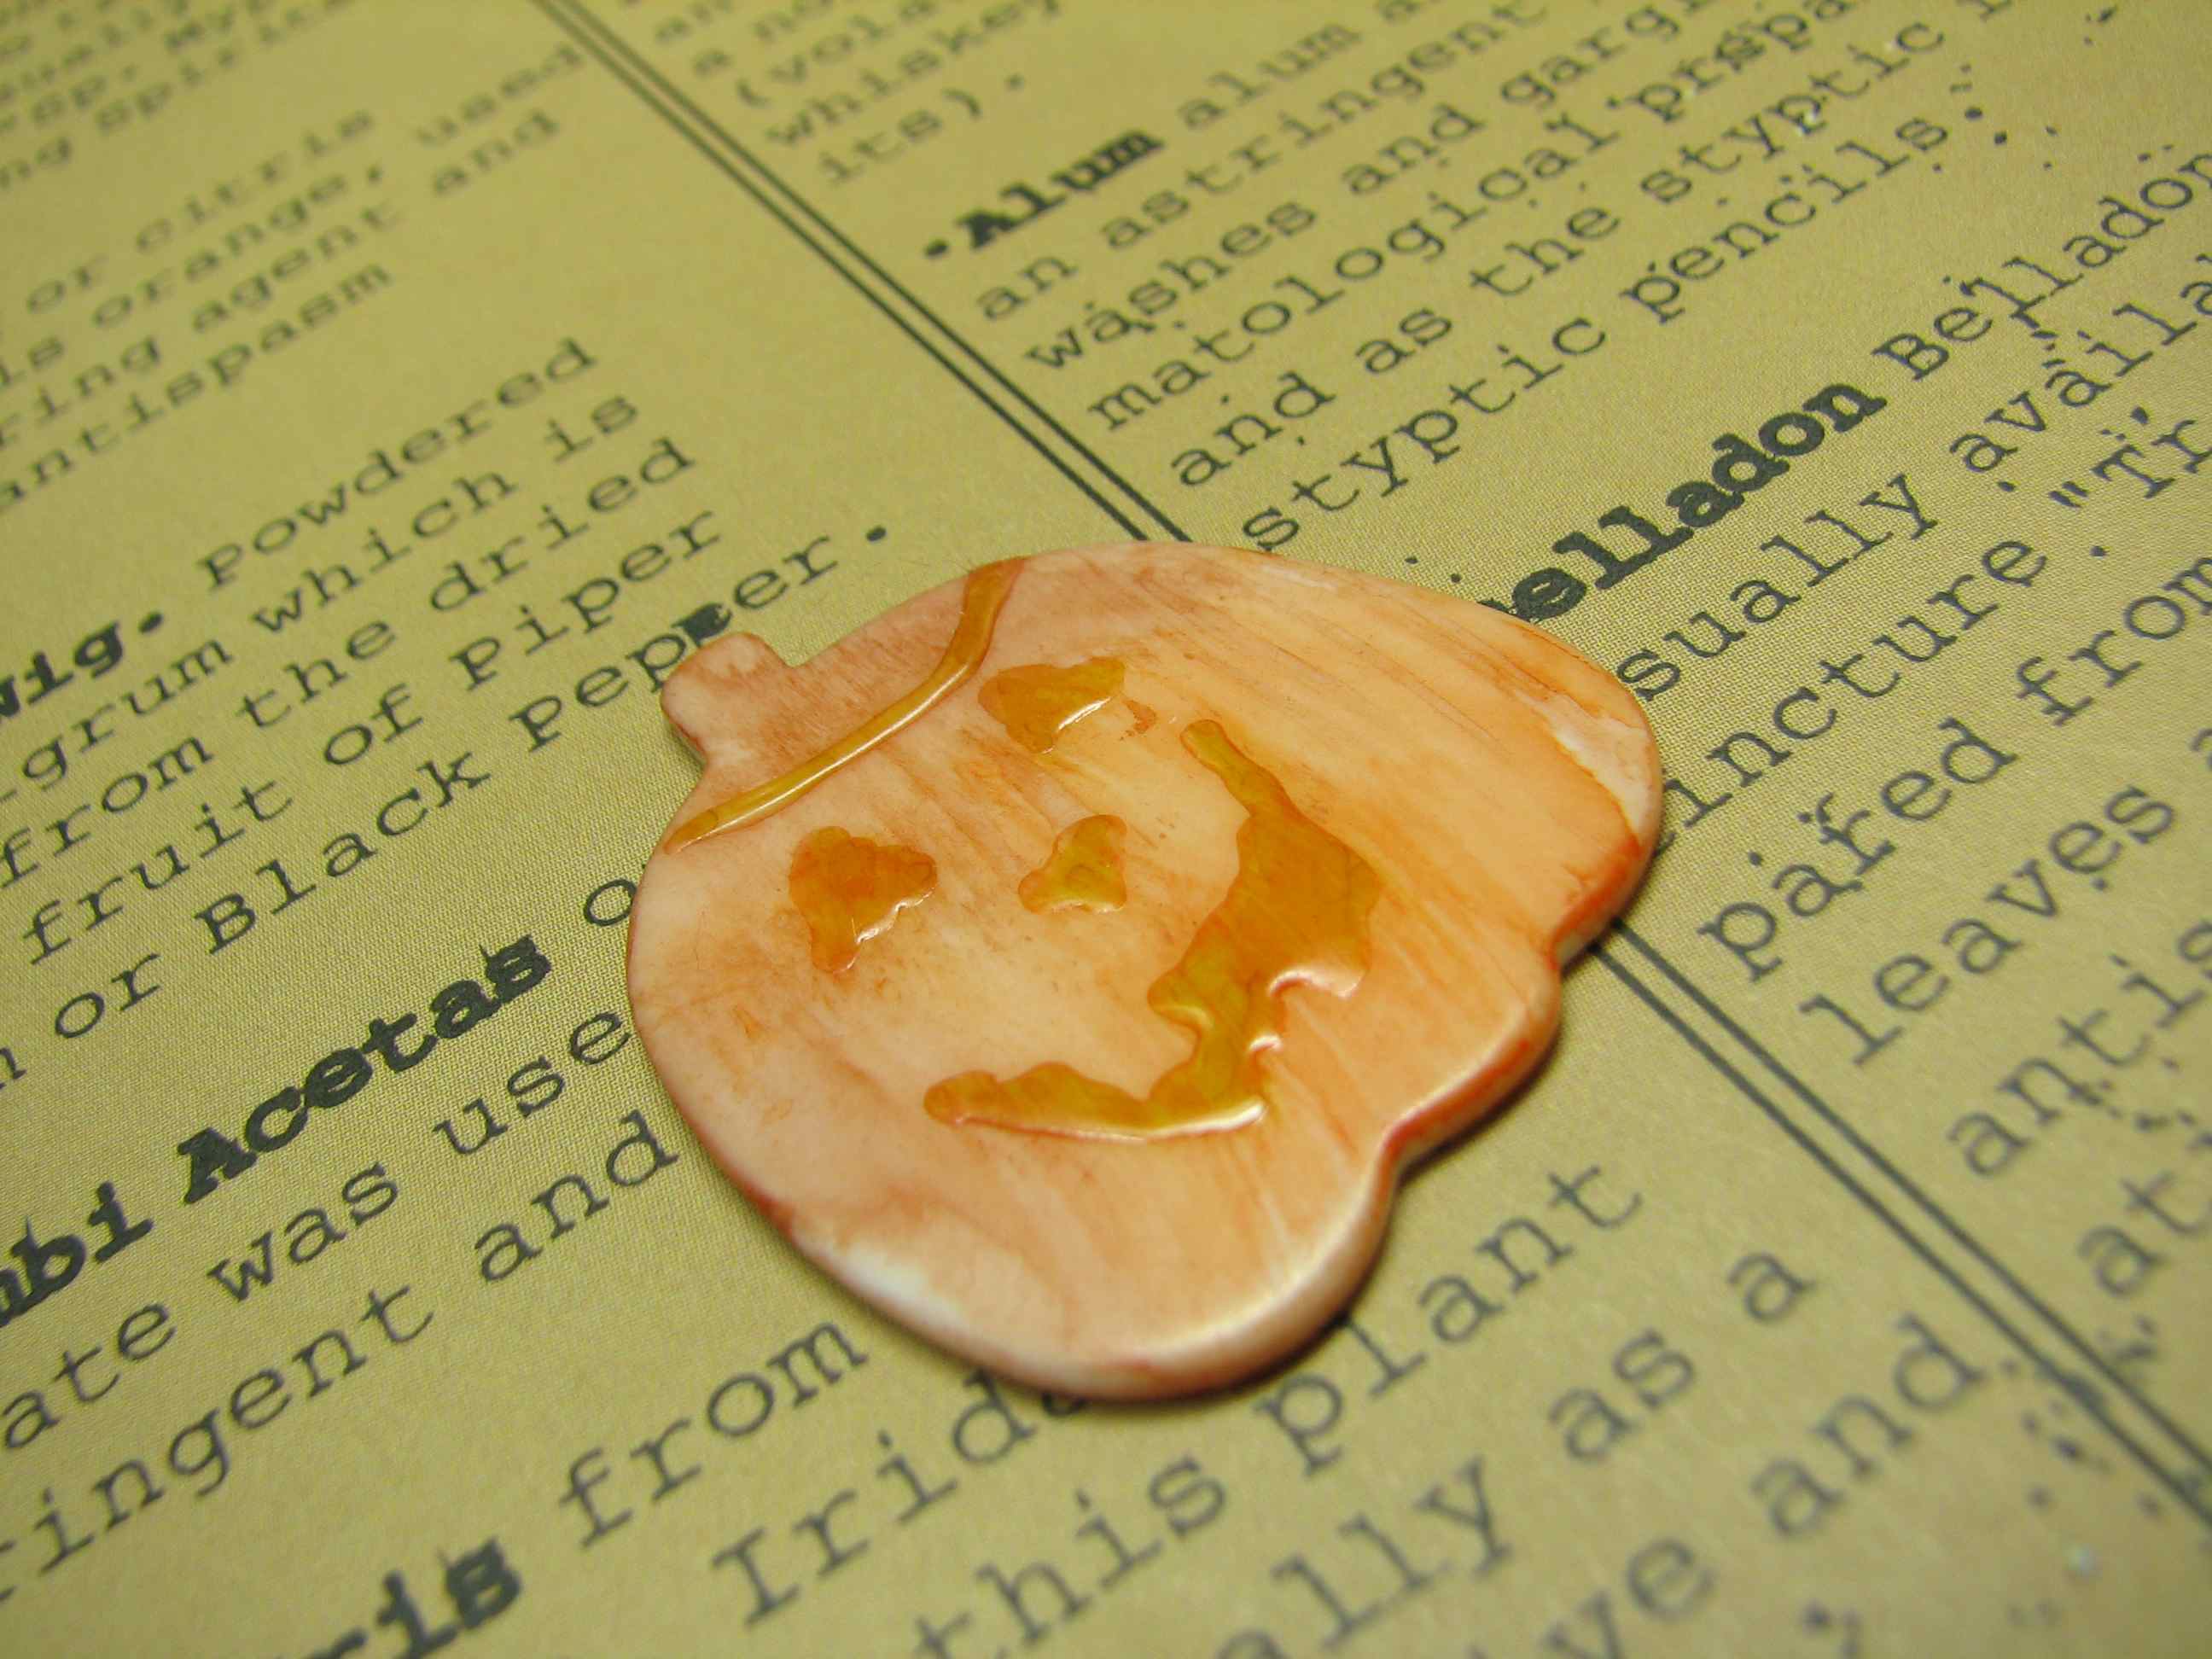
Start Ups are stampable, alterable and ADORABLE! With permanent marker for face accents, some dimensional glaze to preserve the “glow” factor, and some alcohol ink for all over color – THIS darling pumpkin character is ready to greet the world! Mwah ha ha!
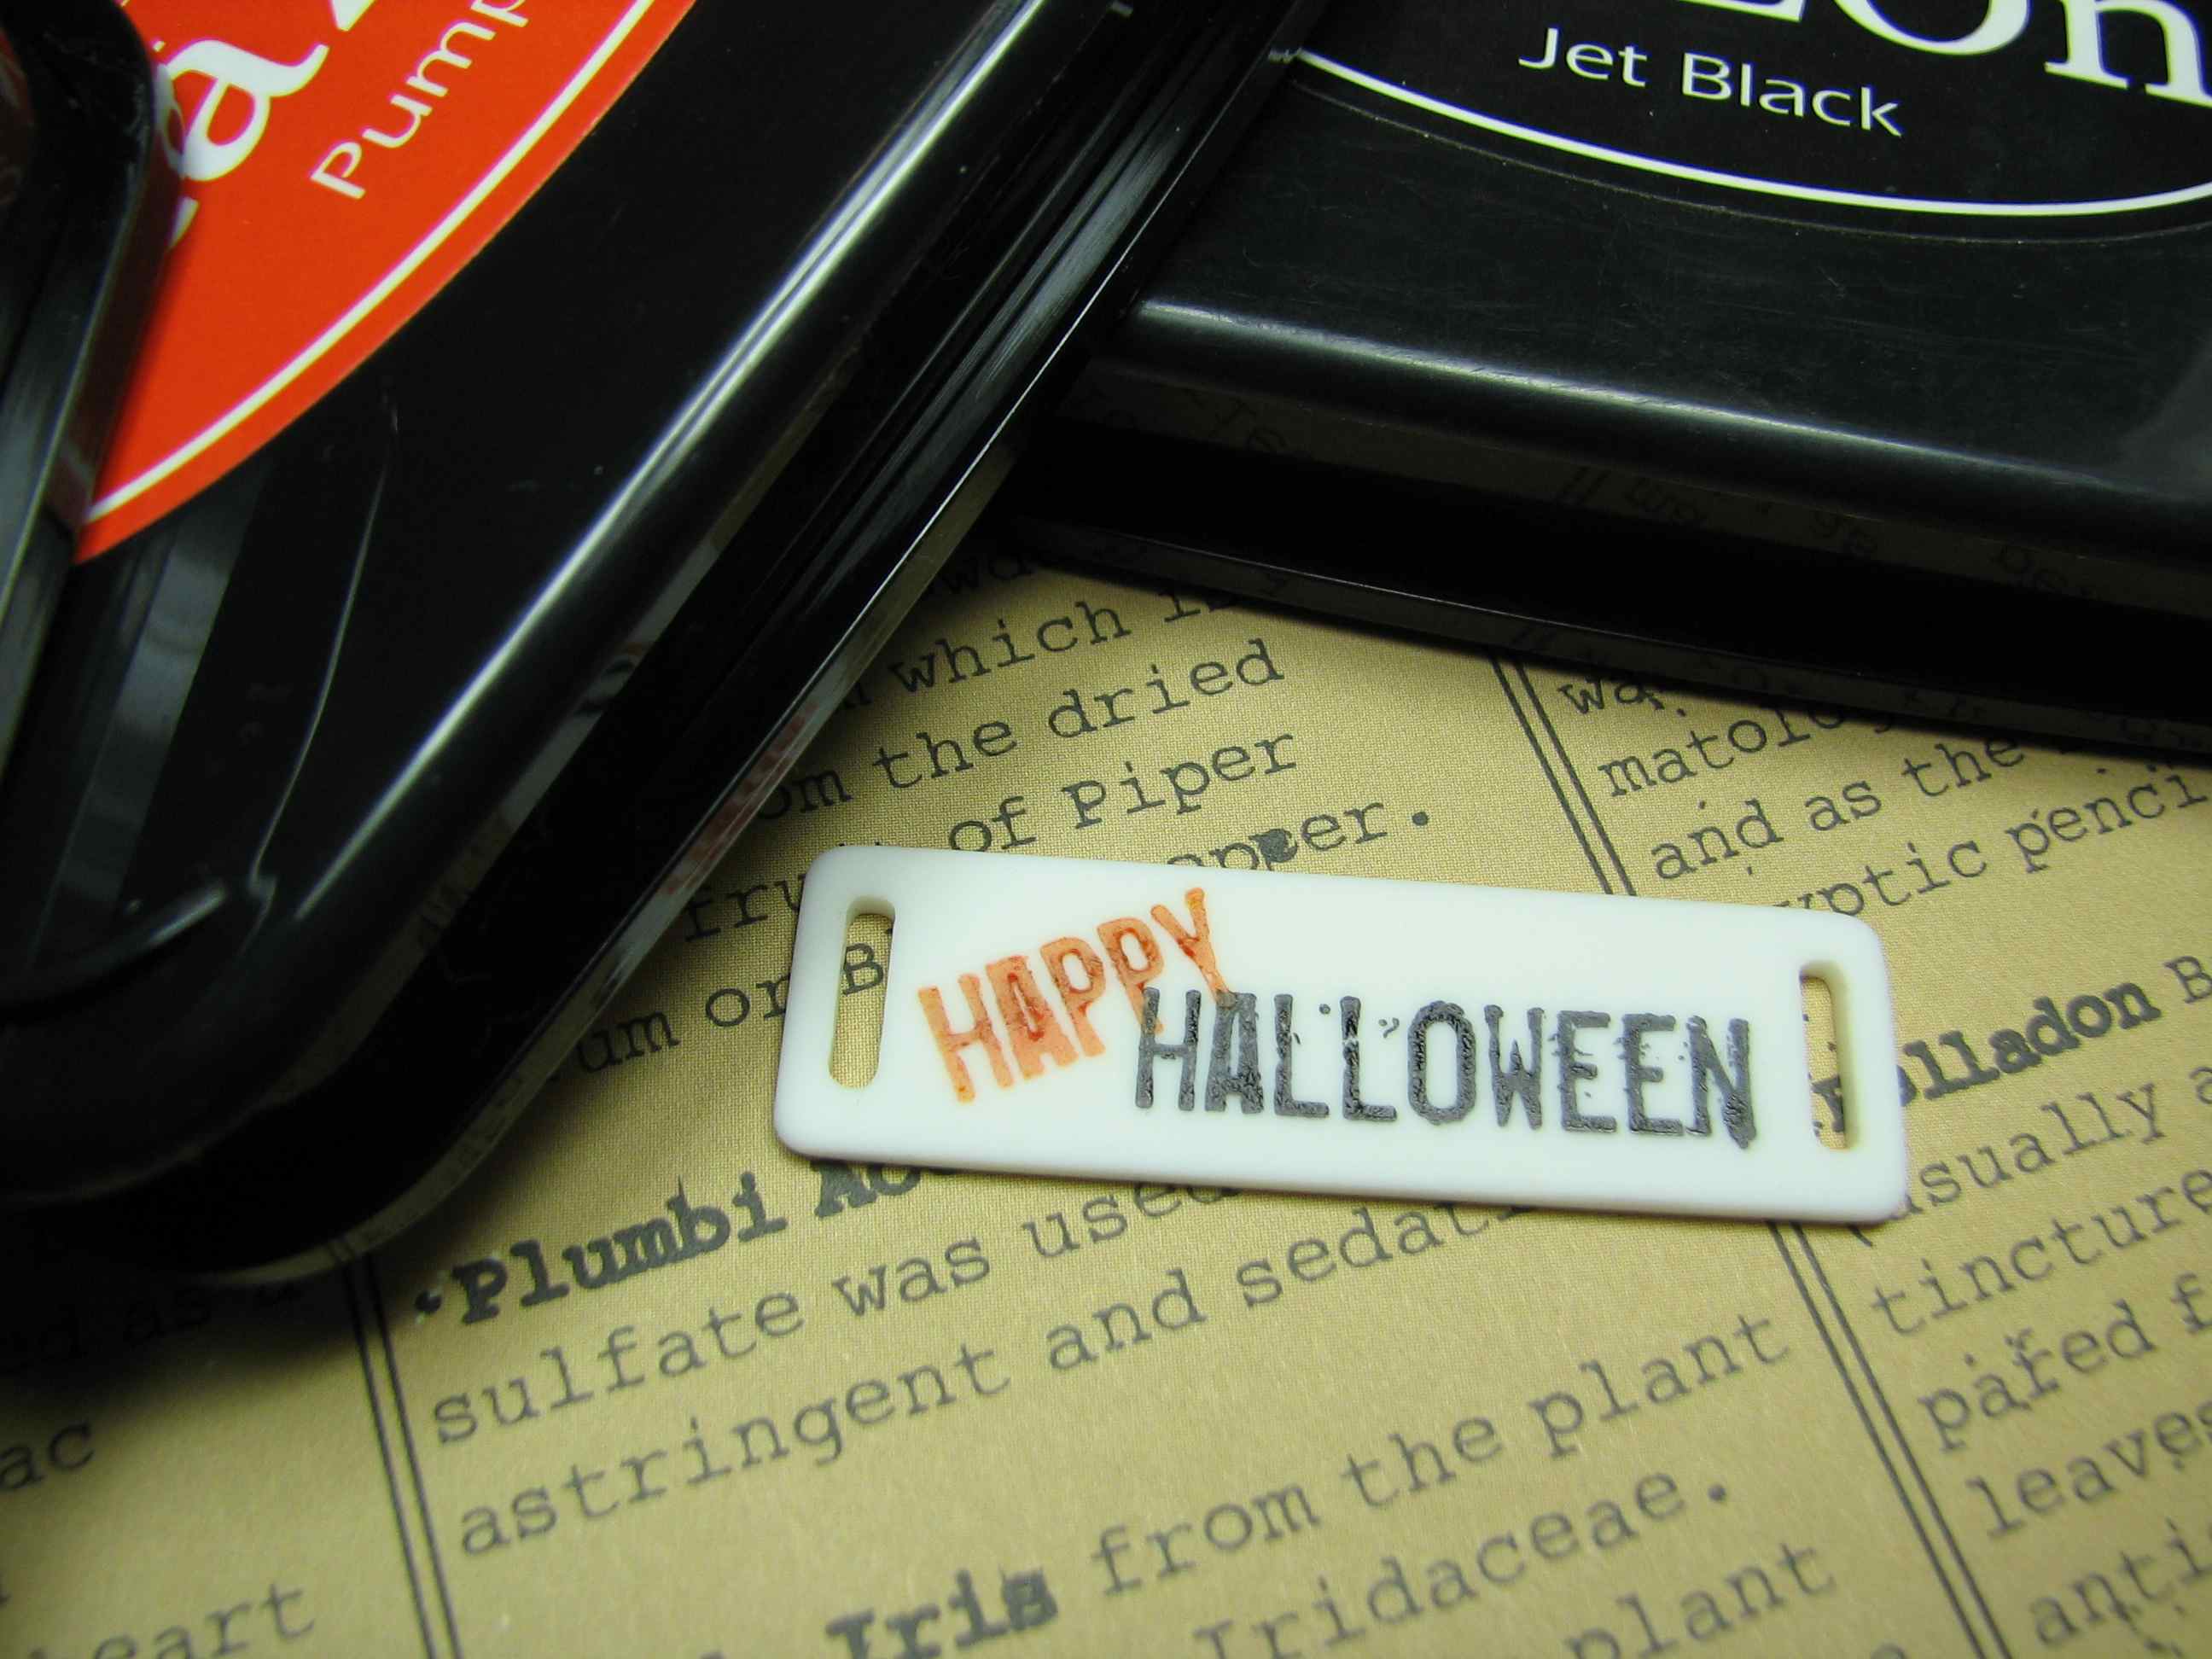
Solvent based inks STAMP like a dream on these babies!

Alcohol ink provides a plethora of crafty magic on Start Up material! Aren’t these tags darling? The material for Start Ups is like DOMINO ingredients – BECKONING to become a keepsake! I could get LOST in these babies!
So, I got busy, creating a LITTLE SCENE! {I LOVES me a little scene!}

Easy to stamp, but for my detailed ambition, I pressed this tag shape DIRECTLY to a well inked stamp for ultimate control…

If you’re not happy with your results, clean Start Up with alcohol blending solution and PLAY again! BOTH sides are ready for love, so you REALLY cannot make a mistake!
Bust OUT the candy corn, Pumpkin Spice Lattes and START UPS!
Let the CRAFTY season begin! THANKS for letting me share the wonders of the season and BUTTONS GALORE AND MORE!
Supplies –
C/S – Stampin’ Up!; D/P – Echo Park & Basic Grey; Stamps – Stampin’ Up!; Ric Rac – Brytex; Die Cut leaves – Sizzix; Ribbon – Stampin’ Up!; Button – Buttons Galore & More; Start Up Shapes – Buttons Galore & More;
It may be a little early to start thinking of fall leaves… but maybe not.
Last week I introduced you to Start Ups here and I made an easy “metal” piece to put on all sorts of Mixed Media or Scrapbooking projects.

This week I used the Start Up Leaves and my trusty collection of Ranger Alcohol Inks to create multi-colored fall leaves.

The colors I used were Oregano, Butterscotch and Red Pepper.
Oh, the possibilities!
What would YOU use Start Up Leaves on?

“Amazing Plastic Crafty Goodness” is what they really ought to be called! :)
What are Start Ups? They are small, white plastic shapes. Perfect blanks for lots of scrapbook, mixed media and even jewelry projects.

Button name plate
My very first Start Ups project. :)
I spray painted the blank silver and let it dry, then I rubbed my thumb over it to take out some of the shine. I stamped VICKI with a small set of alphabet stamps and Staz On ink in black. Finally, I gave it a quick spray with a Matte Sealer and it’s all ready to go on… well, WHATEVER I want to make! I love that it looks like an old piece of metal. Cool!
Keep checking back as I continue to explore all of the crafty fun to be had with these little gems!
And click HERE to see the available shapes of Start Ups that Buttons Galore and More Carries!
Make an Envelope Booklet to hold coupons, photos, or stationery.
I love little gifts that I can make with items that I’ve got on hand and give as hostess gifts, thank you tokens, and teacher’s presents. Usually it’s on short notice- and I can whip up one of these Envelope Booklets in an hour. WIN!
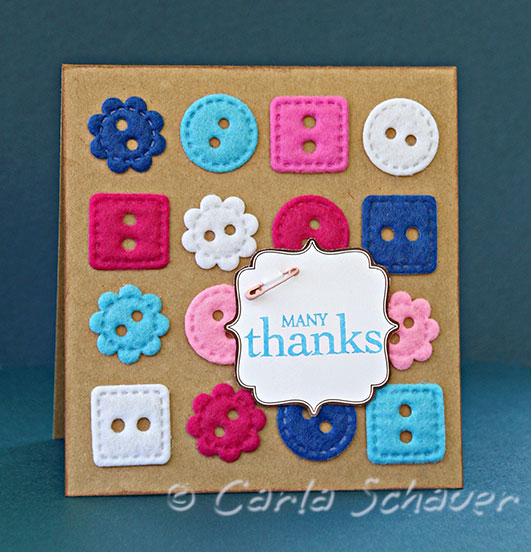
I love a simple grid arrangement when creating a quick card. In this case, the grid combined with a neutral kraft cardstock really lets the texture and color of the Fiesta Felt buttons take center stage. Tie embroidery thread through button holes, or leave them open as I did to make the card even more quickly.

Here is another card from the super talented Elise of Mamacow Creations.
I don’t think she posted step by step instructions but I had to share anyway. For inspiration purposes you know. ;)
Here is the post on her blog Mamacow Creations so that you can see more photos!

Thank You Card and Party Favor
Read more about making this adorable Thank You Card and Party Favor project on 365 Days of Crafts.
Recently, my son participated in an Invention Convention- and when he didn’t win a prize, I could tell he took it kinda hard. So I whipped up this little card to encourage him to “Shine On” and not get discouraged.
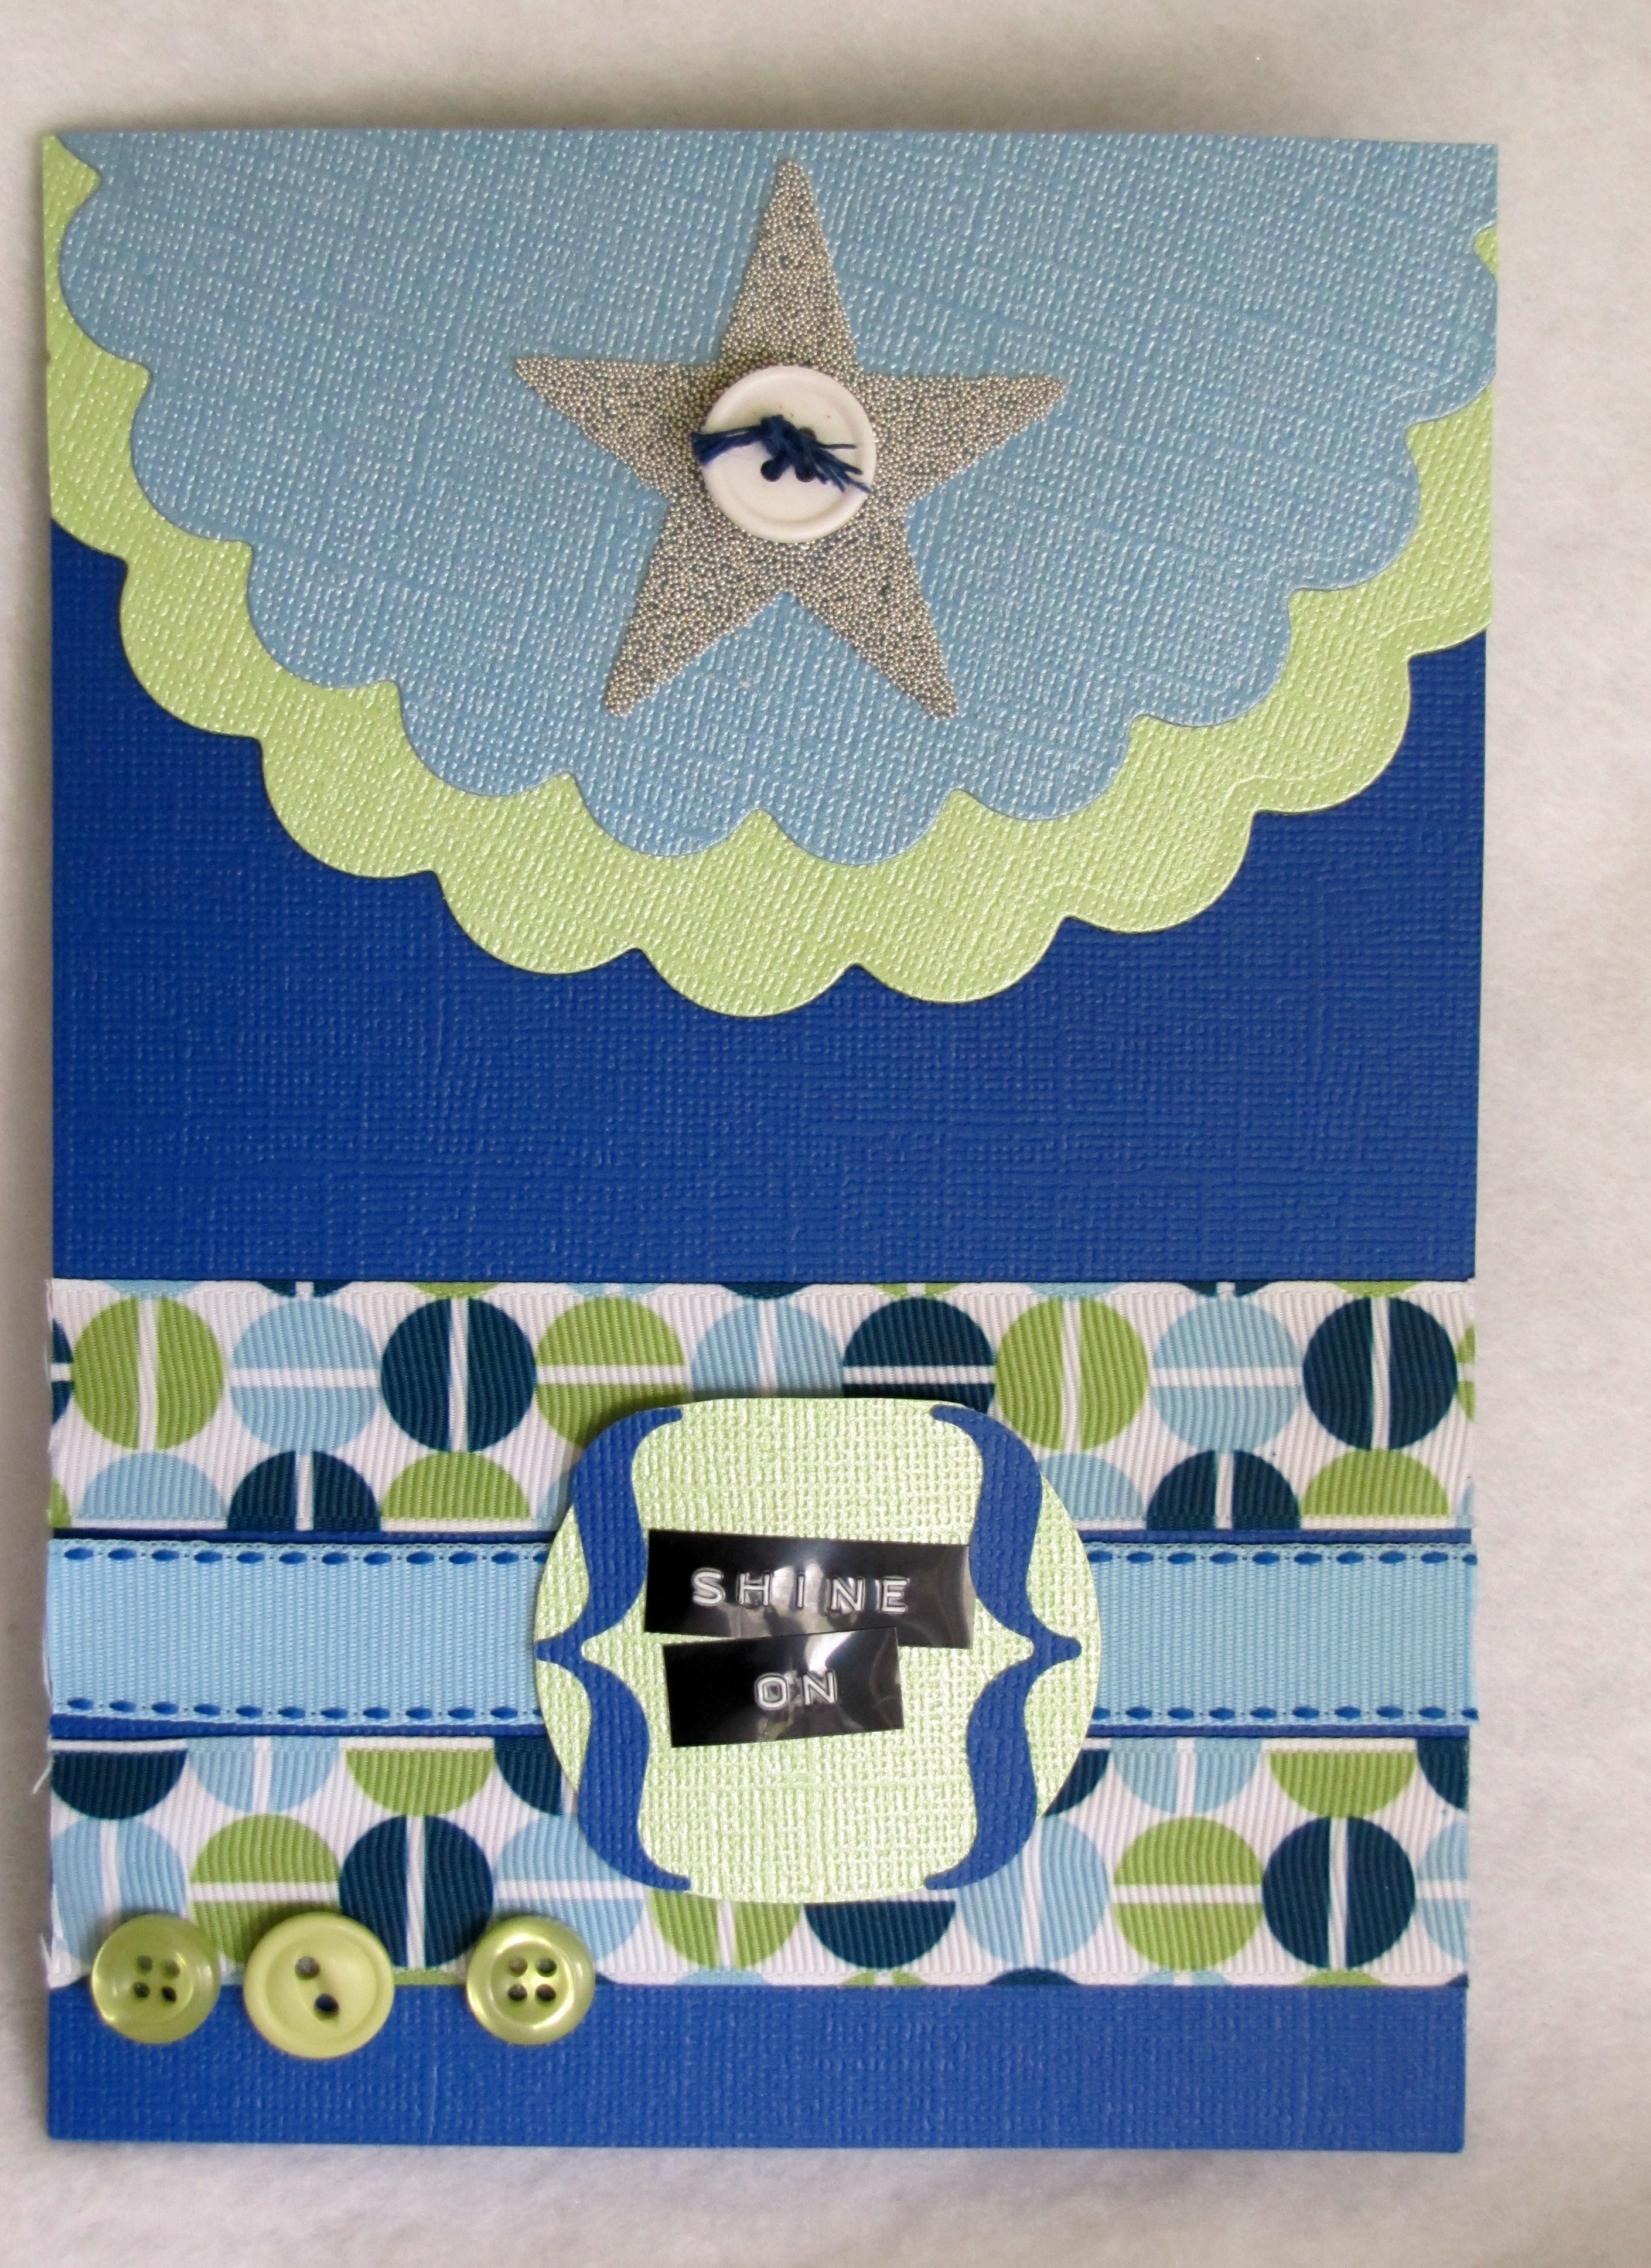
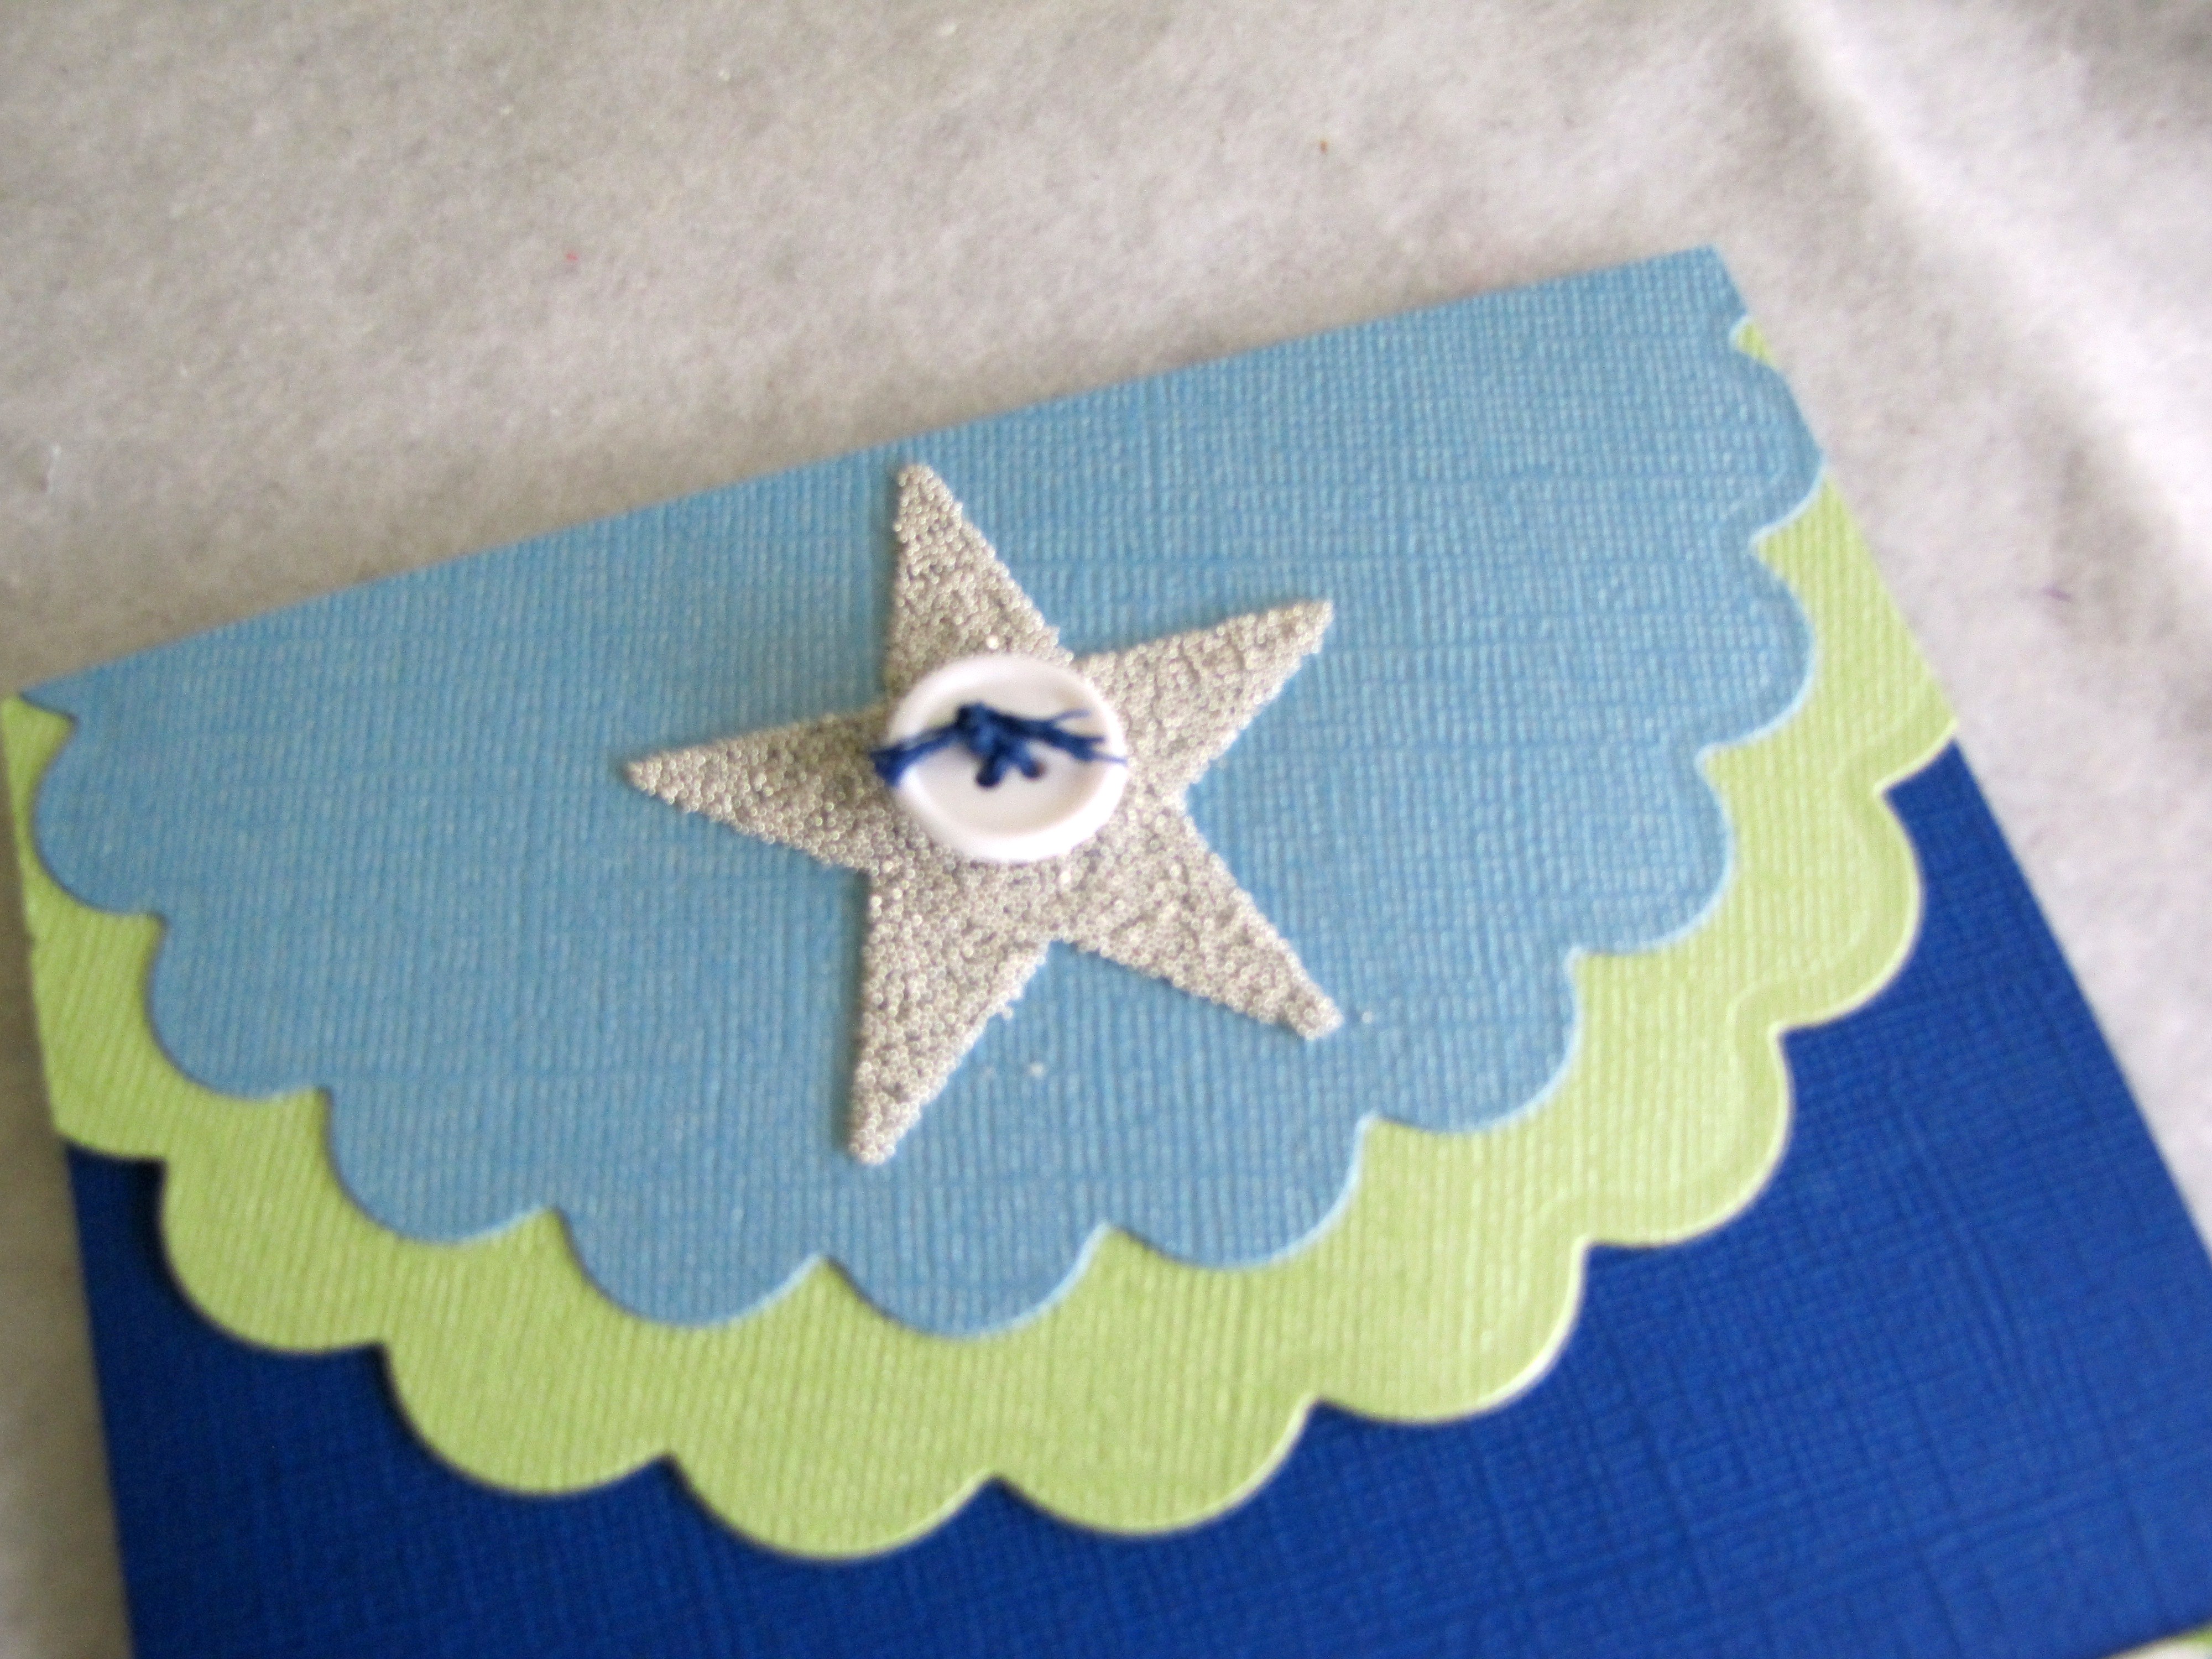
To make it, I cut 2 circles from Core’Dinations cardstock Gemstones Collection and mounted them at the top of the card. Then I applied a Wacky Tacky Tape star shape and sprinkled silver microbeads on top. I finished it off with a white button threaded with a little embroidery floss, held in place with a mini Glue Dot.
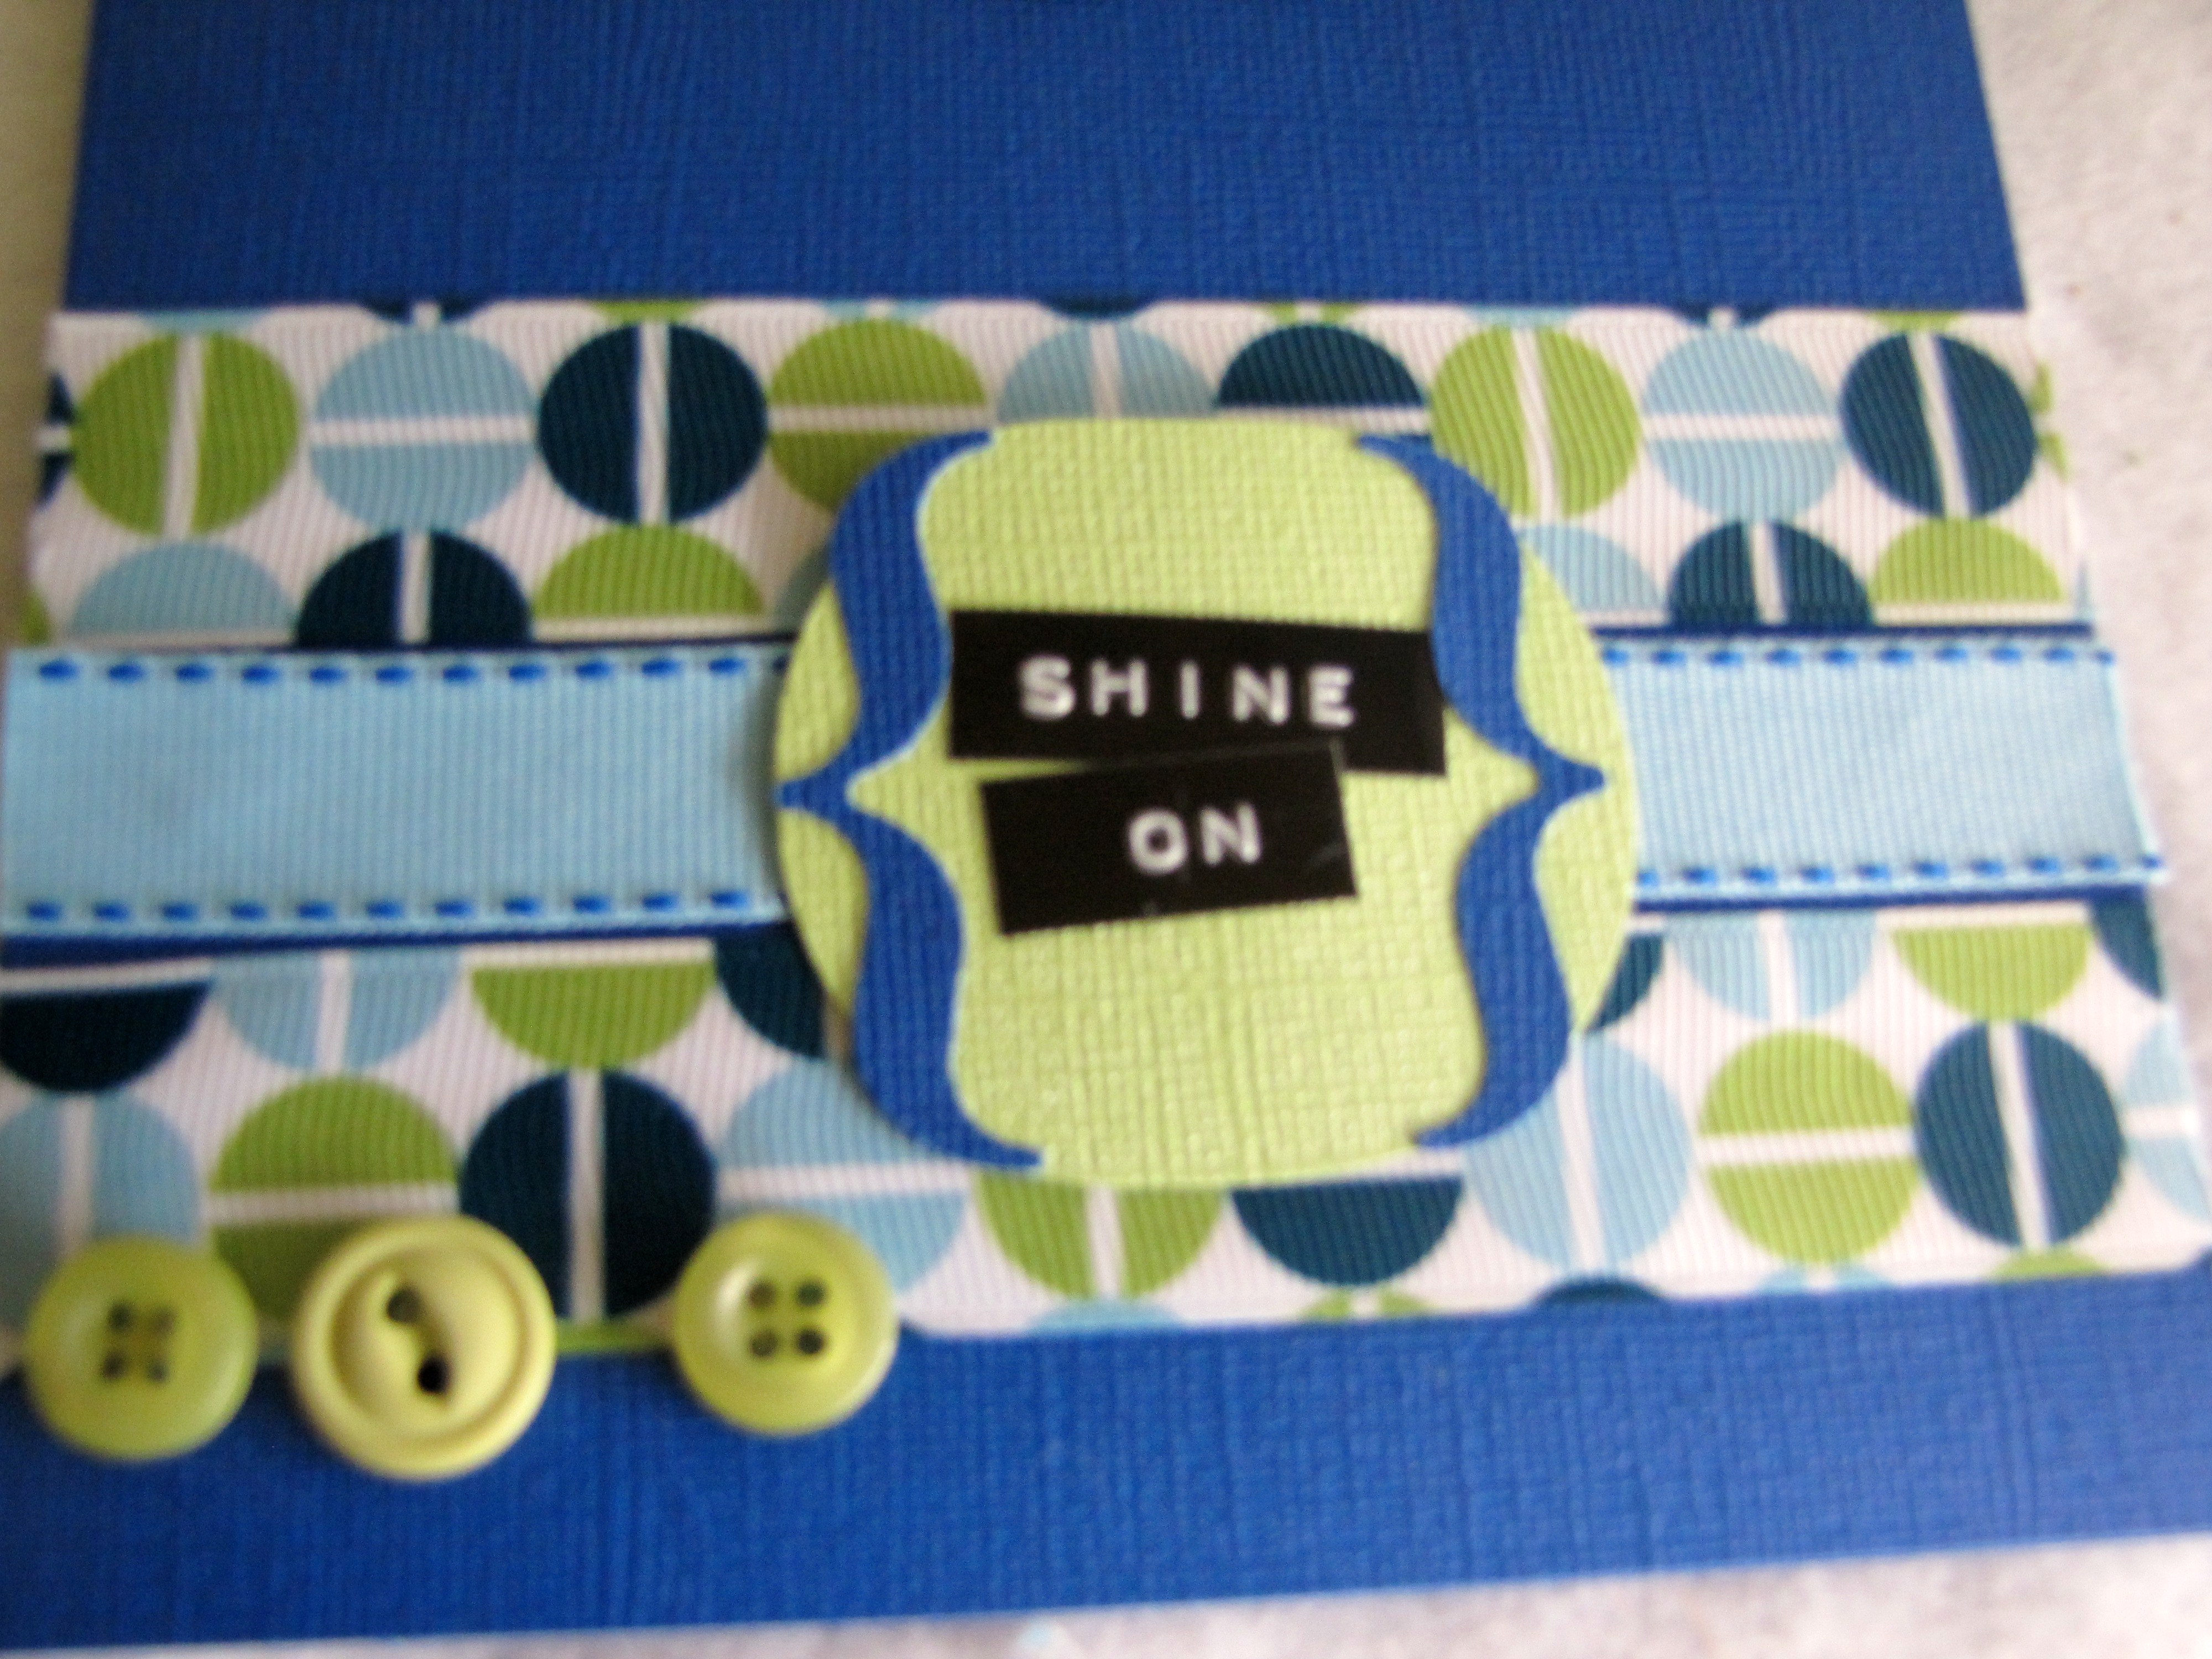
To create the texture at the bottom, I “stacked” three rows of patterned and solid ribbon from the Retro Blue Button & Ribbons collection and adhered it with Zip Dry. I made a text block and brackets with more cardstock and used my trusty Dymo Label Maker to create the words. A few more coordinating buttons finished off my design.
You could also use the sentiment, "Reach High."
I really love this color scheme, and it would be lovely for either a boy or a girl…and could easily stand in for a graduation card, too! Now wouldn’t it be a lovely card to send to someone who needs a little “pick-me-up?”
To see another card using another color scheme and a flower/ladybug motif, visit my blog, CraftTestDummies.com.
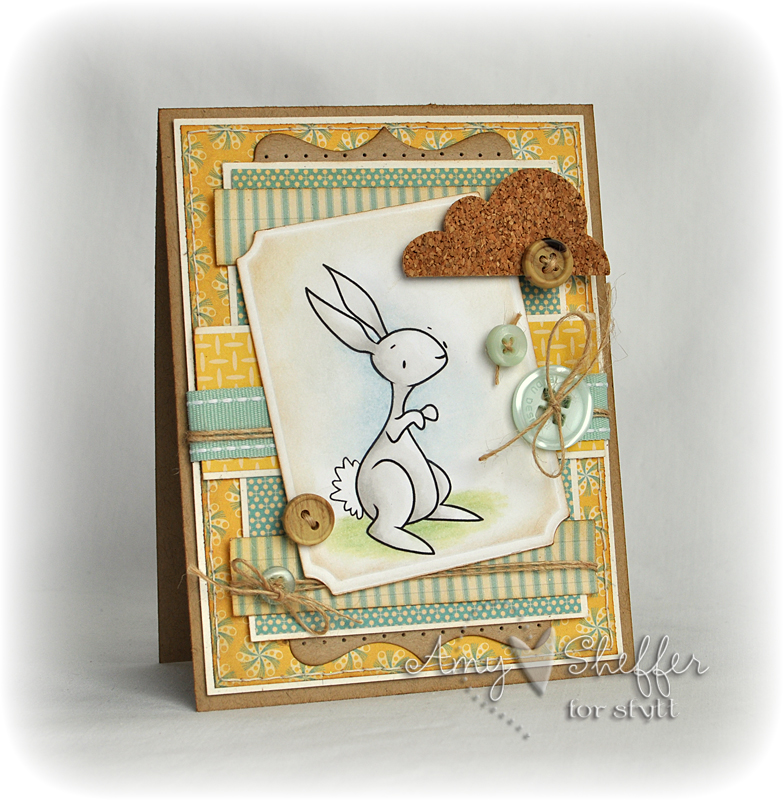
Isn’t this little bunny simply adorable? This card is by Amy over at Pickled Paper Designs. She has a serious talent for card making. You really should check out her blog. Even if you don’t think you are into card making I’m sure her beautiful work will make you want to make a card or two!
Oh! And to learn more about how to make this card visit Amy here.

Oh, I started paper crafting as a scrapbooker and now make my own cards. Still not sure of my skills with card layouts. So, I love these ideas to use my MFS and buttons galore! thanks for the chance to win!