Header

Tag Archives | Easter

Easy DIY Flower Placemat for Easter & Mother’s Day

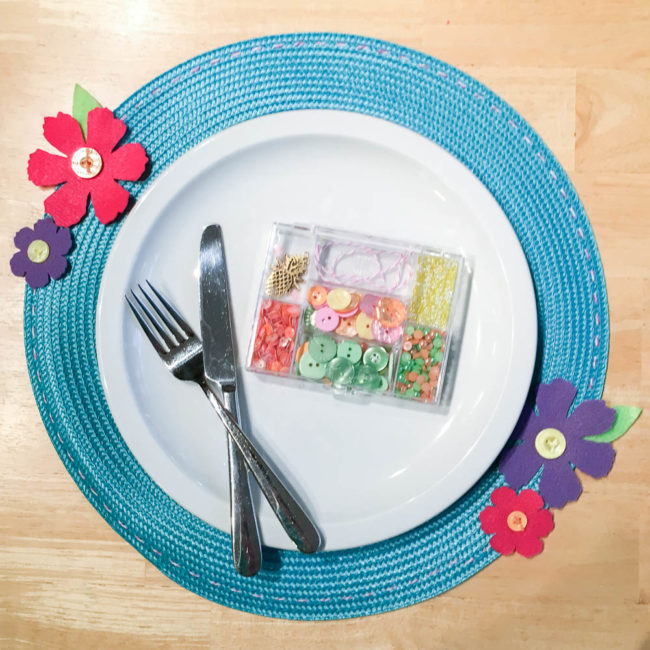
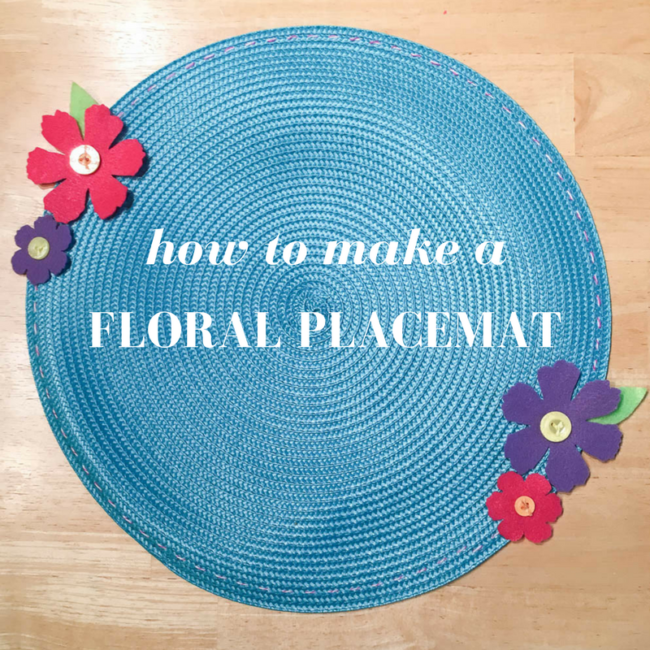
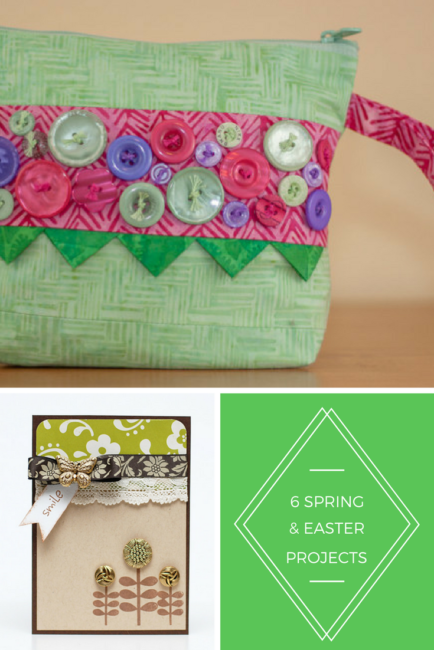
Spring means lots of special occasions! This flower placemat design is great for Easter, Mother’s Day, or for making a birthday girl feel extra special – and it’s super quick and easy to make!

Easy DIY Flower Placemat

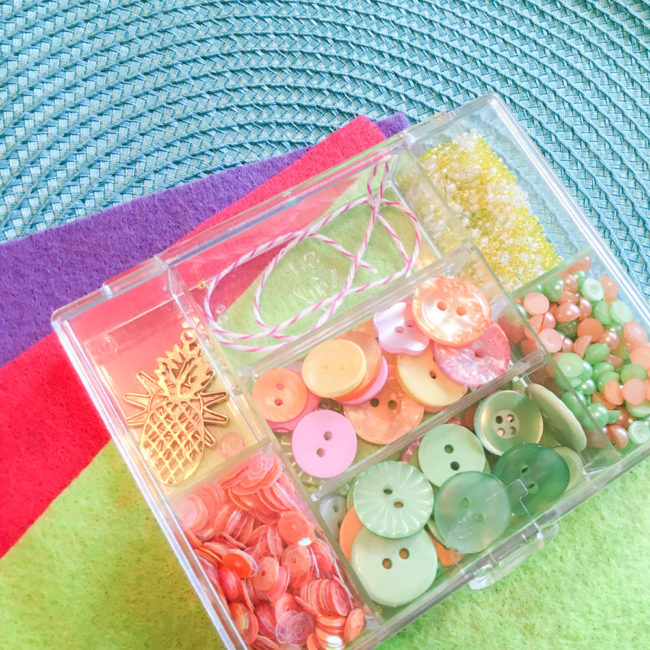
This flower placemat uses supplies from the popular 28 Lilac Lane “Tropical Twist” kit. You can tell that it’s definitely one of my favorites since many of the supplies are used from it! Although the name of this kit, and its themed charms, are definitely summer themed, this project is a great reminder to look at your kits not just as themes but as color palettes as well.

Easy Floral Placemat color palette

Supplies Needed:

To start making this flower placemat, get out a large needle. Thread it with the baker’s twine from the Tropical Twist kit, and stitch around the outside edge of the placemat. (I recommend doing this is several short lengths to avoid abusing your twine and for efficiency.) To make more than one placemat, use embroidery floss for this step as the kit only contains enough twine for one.

Next, use a flower die to cut flowers out of felt (or hand cut your own). Use scissors to hand cut the leaves.

Easy Floral Placemat close-up

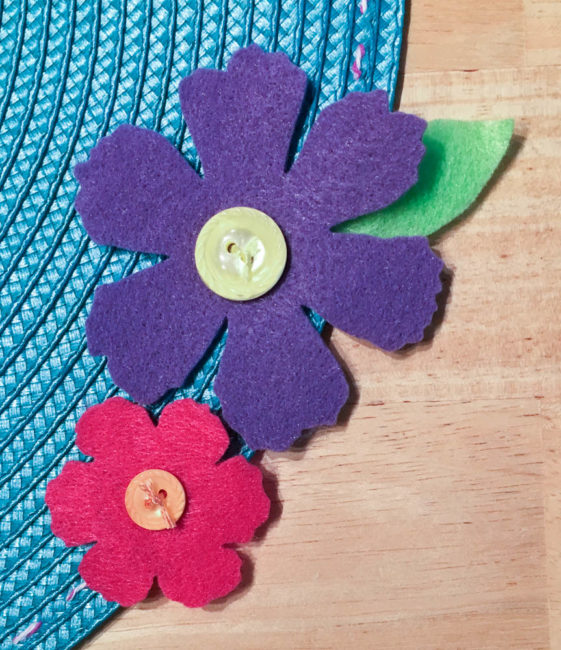
Position your flowers, and select buttons from the Tropical Twist kit to create their centers. Stitch through both the buttons and the flowers with a needle and embroidery floss to attach the flowers to the placemat. Use a needle and thread that matches the felt to stitch the leaves in place under the edges of the flowers as well.

Easy Floral Placemat close-up

Whether the occasion is Easter, Mother’s Day, or something else…this flower placemat will definitely brighten your spring table!

Flower Placemat graphic

0

Spring & Easter Project Round-Up

Springtime is a great time for crafting! There’s so many occasions to craft for, and spring flowers are so inspiring. Here’s a sampling of some of our favorite past spring and Easter crafts from the blog to get you inspired!

Spring Crafts Round-Up

Flower Embellished Tote

This mixed media tote by designer Melony Bradley uses dyed cotton strips to make flowers and then finishes them off with buttons! There’s no mistakes, or right or wrong way to create this beautiful spring garden that will earn compliments wherever you take it.

Button Flowers Wall Decor

Pretty little blooms button flower picture by Jen Goode

If you are looking for a way to bring some bright spring flowers inside without bringing sneezy pollen with them, try some buttons! These pretty little blooms by designer Jen Goode are easy to make and oh-so-springy!

Spring Zip Pouch

You can travel in style with your essentials in the button embellished zip tote that I made from bright spring colors using a simple pattern. It also makes for a wonderful gift for mom or a new graduate!

Vintage Garden Card

Spring flowers don’t have to mean bright colors…designer Keri Lee Sereika used gold buttons to create flowers for a beautiful vintage look on this handmade card! Send this card for a touch of more formal cheer on any occasion.

Easter Table Display

Bunny in a Button Jar

Speaking of vintage, do you have vintage (or vintage looking) Easter figurines that you would like to keep little fingers off of? Designer Dana Gustafson’s mason jar displays filled with buttons in the bottom are the perfect way to display them beautifully and safely!

Easter Egg Treat Pouches

Mini felt Easter Egg treat pouches

Designer Jen Goode has a fun way to decorate those special Easter treats – and these felt Easter treat pouches are so easy to make that the kids can help, too. Use them year after year and make a new family tradition!

Whatever spring craft that you choose, don’t forget to stock up on all of your favorite colors of buttons before you start!

0

Embellish an Easter Egg Card with 28 Lilac Lane

Embellishing an Easter egg card is a great reason to get out your 28 Lilac Lane embellishments and go crazy with color. The flat back pearls and buttons in our embellishment bottles will have your Easter egg card shining like a jewel!

Easter Egg Card

supplies needed:

One of the great things about having a large selection of 28 Lilac Lane embellishment bottles on hand is the ability to mix and match them to create colorful projects like this Easter egg card! By combining small amounts from five different bottles, I was able to create a jeweled effect on my Easter egg that allows the egg to stand as the entire design of the card.

How to Make An Embellished Easter Egg Card

Locate a decorative Easter egg design in your die cut machine software. (If your machine doesn’t have this particular design, it will certainly have a similar design that can be embellished in the same manner. Look for a design with lots of straight lines or wide spaces that can be filled with embellishments.)

Cut the Easter egg design out of cardstock scraps, and assemble with glue. Then glue the assembled Easter egg to the front of a coordinating blank card base.

Using 28 Lilac Lane embellishments that coordinate with each area of the Easter egg card design, add rows of embellishments to the card with a liquid adhesive like PPA Matte.

Finish the card with a sentiment sticker in the lower right.

Easter egg card

This is a great project for kids and grown-ups to do together….make the cards and then let the kids do the decorating!

0

Doodle Button Easter Eggs – Fifteen MINUTE Friday

These little  Doodle Button Easter Egg are quick and fun to create.  You can use them to decorate cards, place cards, wreaths and so many other fun holiday things.  You will only need a few materials…Laura Kelly Buttons, Paper, Embroidery Floss and Aleene’s Tacky Tape Runner Adhesive.

SharpieDoodleEgg

The first step is to doodle your eggs and cut them out, mount them on decorative paper and then cut again.

EggSharpieDoodles

Next, tie embroidery floss through buttons to create little color stacks.

DoodleEggButtons

Add the color stacks to your eggs with a strong adhesive.  I used hot glue.

DoodleEggHotGlue

Then add them to card to create a fun way to send a holiday message!  Ta Da.  That is it.  You can do this in fifteen minutes and create some Easter fun.

Happy Creating,

Laura


0

Sunday Cardmaking: Make an Easter Magnet

Make an Easter Magnet.

Do you keep a calendar on the fridge? When my kids were little we would keep our calendar on the fridge and mark special days with a holiday magnet.

I used an Inky Antics stamp set to make my ears and face for this project, but you could EASILY cut some and draw your own face! This is a fun magnet that can be used on the fridge. You could easily swap the magnet for a pin back and have a holiday pin.

Happy Easter Magnet

How to Make an Easter Magnet:

  1. Stamp or draw and cut out ears. Stamp or draw a face and cut out with a circle punch.
  2. Sponge on pink ink on ears.
  3. Stack two Big Ol Buttons, nestling ears between them.
  4. Adhere a magnet to the back of the button bunny. I use Beacon’s Adhesive
  5. Die cut and emboss scalloped squares and classic squares.
  6. Stamp sentiment and assemble card.

I slid a small disc of metal under the top square, so that the magnet could stay in place and be removed easily. This is also how I wear the magnet.

Buttons Galore Supplies Used to make an Easter Magnet:

Cross Promotional Products Used to make an Easter Magnet:

Additional Supplies Used to make an Easter Magnet:

  • Sponge – Tsukineko/Imagine Crafts
  • Cardstock – Bazzill


0

Felt Easter Egg Treat Pouches

Use felt scraps and buttons to create cute little felt Easter eggs with a hidden surprise. Each little egg is actually a pouch. Each has a pocket in the back so you can put a little treat. You can make your eggs whatever size you like, I made these just big enough to hide a single little chocolate kiss. Add buttons to accent each egg, complimenting colors and adding a little bit of cute fun to each piece.  If you want to make them larger to hold a gift card you can.

Mini felt Easter Egg treat pouches

 Directions and materials to make the felt Easter egg:

Fiesta buttons are perfect for this Easter project! It’s a nice mix of spring colors you can mix and match with purples, greens, blues and yellows too. You can find the full tutorial to this project on my site. Learn how to make your own Mini felt Easter egg pouches.

0

Sunday Cardmaking: Create an Easy Ombre Easter Card

Let’s Create an EASY Ombre Easter Card. Ombre is a Spanish word that simply means graduated colors. I really wanted to make a simple, sweet Easter card, and I did not want to use traditional colors. These blues are calm and happy to me. I like the tone on tone bunnies on the blue strips, and the bunnies and button eggs add a little bit of fun. I used a paint sample as my inspiration. This simple construction allows you to make a lot of cards, without a lot of work.

Easter Card

Material used to create an EASY Ombre Easter card:

Buttons Galore Product used:

I also used:

  • Dies – Quickutz
  • Embossing Folder – Sizzix
  • Cardstock – Bazzill
  • Dimensional Adhesive

Directions for making the EASY Ombre Easter Card:

  1. Create a 5×7″ card base.
  2. Cut four pieces of graduated blue cardstock 4 3/4 x 1.5″ and emboss. Place on card, leaving room in between each strip. Adhere to card base.
  3. Die cut four bunnies from same graduated card stock. Adhere to graduated blue rectangles with dimensional adhesive.
  4. Add buttons.

I hope you enjoyed this Ombre Easter card. When I’m making a lot of cards, I love to do something simple, but different. You can get a lot of strips out of each piece of blue card stock, and cut all your bunnies out of the scraps. When my kids were little we used to have their friends over and make fun cards for friends and family.

Thanks for stopping by.

Allie

1

Sunday Cardmaking: Making an Easy Easter Card and Treat Containers

Making an EASY Easter Card and Treat Containers to match.

Easter is so much fun for the kids, but it doesn’t have to be expensive or difficult to make treats. I love to make these little treat containers for the children at Sunday School, along with friends’ children. They are EASY PEASY to make. The card couldn’t be easier. With a sticker sheet, you can quickly make 8 cards out of one sheet of 12×12″ paper and some scraps.

It’s so easy, and I’ll walk you through it!

BGM Carrot Easter Bunny 2013-02-27 11.55.51

Directions for making Easy Easter Card

  1. Cut a card base 3 x 6 and fold in half.
  2. Create a green mat 2.75″ square and adhere to card base.
  3. Add a small strip of patterned paper 2.75 x 1″ and adhere near bottom of  green mat.
  4. Tie a bow through a white button and adhere to card.
  5. Place dimensional foam on back of bunny sticker. Leaving release paper in place, dust the back of the sticker with baby powder. This deactivates the adhesive. Tap off excess. Remove release tape and adhere bunny to card.

Directions for making Treat Containers:

  1. Cut a piece of patterned paper in a square – I made small containers – they are 4 x4″.
  2. Roll patterned paper into a tube and seal edges with redline tape.
  3. Squeeze at one end – seal with tape. Fill with treats. Squeeze at the other end, being sure to squeeze the tube “perpendicular” to your other end. These will look like Minute Maid popsicles or those old fashioned tubes of sour cream.
  4. Die cut circle and doodle around edges. Die cut green inverted circle. Fold in half and adhere to tubes.
  5. Add some Laura Kelly buttons with Beacon’s Adhesive and let dry.

2013-02-27 11.55.18

Buttons Galore Materials used to create EASY Easter Card and Treat Containers:

Cross Promotional Materials used:

Additional Items Needed:

  • Paper, Sticker, Twine – Doodlebug Design
  • Ink – Copic Multiliner
  • Dimensional foam adhesive
  • Baby powder and a small brush

Thanks for joining me today. These are super simple craft ideas that would be fun to do with the kids.

0

Create Unique Easter Jewelry

When I lived in Ohio, I remember all too well covering up my beautiful Easter outfit with a heavy winter coat.  The way the weather has been going lately, I’m thinking this Easter might be the same so I created a piece of unique Easter Jewelry to pin to your coat.

Easter Pin Beauty Shot

If the weather clears up (let’s hope it does) you can pin it onto an Easter basket or tote bag, or you can even hang it on the wall.

Easter Pin Supplies

Supplies for unique Easter Jewelry:

Instructions for unique Easter Jewelry:

1. Using the Quick Grip glue, attach buttons to the wood rectangle.  I visually split the wood in half and filled the top in with the blue, Mint Cooler buttons and the bottom with the green, Candy Apple buttons to represent the sky and grass.Easter Pin Glue the Buttons

2. Glue the lamb onto the center of the piece, on top of the buttons.

Easter Pin Glue the Lamb

3.  To add some dimension, glue more buttons on top of your original button layer.  Don’t completely fill it in this time.  You want to have different levels of buttons in the background.

Easter Pin Layers

4.  Glue the flower embellishments on to the piece.

Easter Pin Glue Pin Back

5. Turn the piece over and glue the pin back on.

It’s actually a very easy project, that gives you really impressive results.  I hope you’ll wear your pin proudly on Easter Sunday-no matter what the weather may bring!

Easter Pin Close-Up

www.laurabraydesigns.com


1

Easter Basket Ideas for Crafters

I’m always on the look-out for unique Easter basket ideas.  I have found that the easiest way to put together an Easter basket is to start with a theme and a basket with a button theme is sure make a sewer, or even a paper crafter,  hop up and down for joy. It’s also a great way to use up all those plastic eggs you’ve been saving!

Easter Basket Ideas for Crafters www.buttonsgaloreandmore.net

Supplies for Easter basket ideas:

Instructions for Easter basket ideas:

1. Glue buttons onto basket.  Add a fabric yo-yo, bird and other embellishments.  Fill the basket with grass

2. Glue ribbon bows and buttons onto plastic eggs.

Easter Basket Ideas for Crafters www.buttonsgaloreandmore.net

3. Fill eggs with buttons. I coordinated the color of the eggs with the buttons inside.  Tuck the eggs into the basket.

Easter Basket Ideas for Crafters www.buttonsgaloreandmore.net

Laura Bray www.laurabraydesigns.com


2

DIY A Simple spring tablescape with buttons

Hello there!  Today I am bringing you a super simple tablescape idea for spring using buttons, ribbon and clear glass jars…a “button-scape” if you will!  I’m willing to bet we all have a hodge podge of glass containers around the house (mason jars are one of my favorites) along with small spring and Easter themed nic-nacs.  Why not pull them together and make them a cohesive tablescape with the unifying ingredients of buttons, jars and ribbon?

Materials from Buttons Galore and More:

Other items needed:

  • various glass containers/jars/vases
  • spring themed collectibles
  • silk floral picks
  • pink/white gingham ribbon

Are you ready for the super complicated directions????  Just kidding, this process is simple.

  1. Partially fill jars with a single color of pastel buttons
  2. Add a figurine to the jar on top of the buttons
  3. Tie a ribbon around the top of the glass jar
  4. Arrange in a pleasing way on your table or display area

Check out the various items I used in my tablescape…

I loved the glass domed effect of the jars on my little treasures and the buttons are just the perfect pretty stage to show them off with!

Thank you for hopping by my post today!  I hope it inspires you to put your buttons to work this spring!

4

Thank You Easter Bunny

For my first blog post here on Buttons Galore… I chose my new obsession. Art quilting. I can eat, sleep and breathe it (and I used to be a paper girl ). It’s fun to go out of your comfort zone to test your creativity and try something new! Give it a try.

Continue Reading →

2

Button Adorned Easter Eggs

Aren’t these adoable? I think they would look great at Easter brunch place settings or mixed in with other decor down the center of a Easter dinner table.

Click the link to find out how to make these super cute Button Adorned Easter Egg decorations.  

Oh! And if you like these eggs you must check out Lynda’s other egg craft; Easter Sewing Basket.

0

Powered by WordPress. Designed by WooThemes