
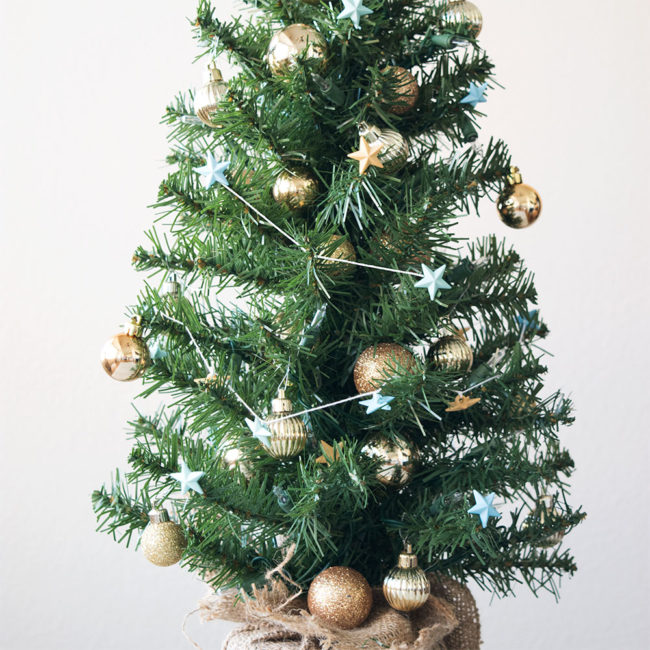
My favorite holiday decorations are lovely Christmas trees. I have my big full-size Christmas tree, of course. And several medium sized trees. But I also have at least a dozen cute little mini trees throughout the house. I think that the adorable little mini trees are just as fun to decorate as the bigger ones. Sometimes the small size ornament selection is lacking and they all seem the same from store to store. So I like to get creative and make my own! Continue Reading →
Author Archive | Kelli Stradling
Make Easy Adorable DIY Candy Earrings
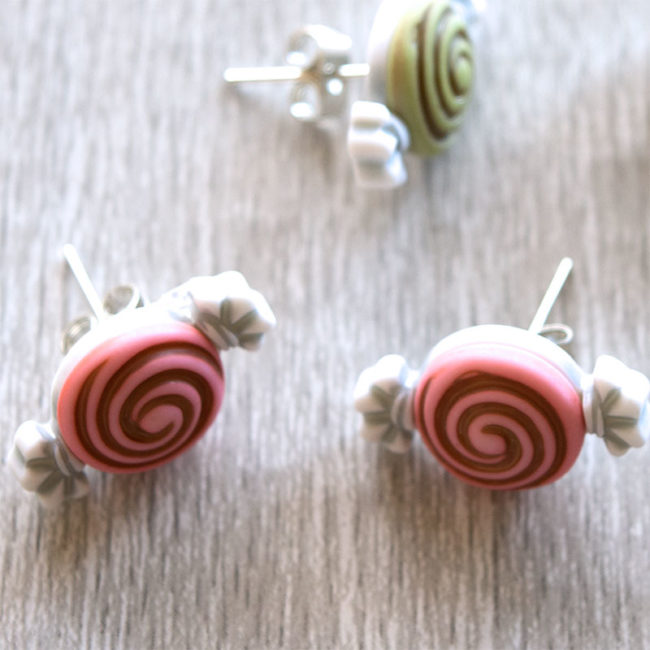
I love wearing fun holiday jewelry, but sometimes it can be expensive or difficult to find! Especially considering the limited amount of time you can wear cute holiday jewelry! Buttons make really great jewelry options, and it’s so easy and inexpensive to make your own earrings using your favorite holiday buttons. I turned these sweet “Candy Treats” 3D Buttons into some simple, but adorable DIY candy earrings in just a few minutes! With all of the cute Buttons Galore 3D holiday buttons, there are so many adorable options for your own holiday style! Continue Reading →
DIY Easy Sequin Christmas Candy Cane Gift Tags
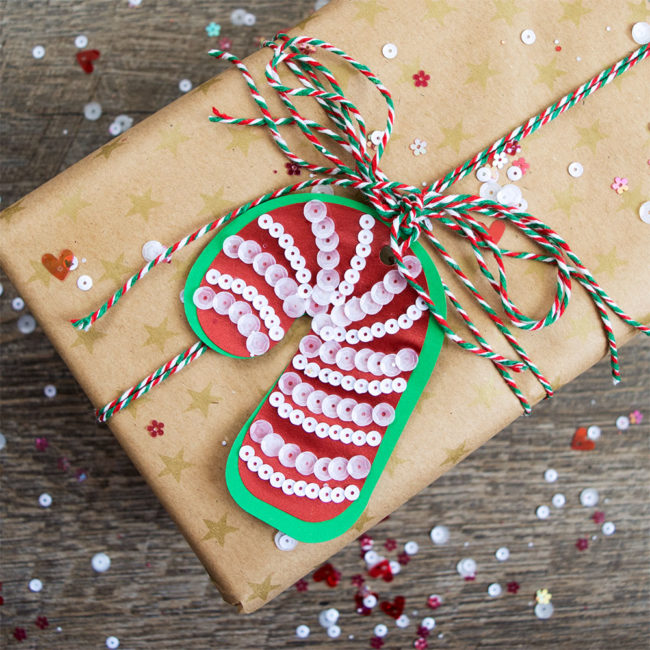
One of my favorite things during the holiday season are handmade gifts. But even more fun than making just the gifts, I love to make the tags and even the wrapping paper to wrap the handmade gifts in. I start making my holiday gift wrap and tags super early in the year and I put them on everything! These fun 28 Lilac Lane Candy Cane Sequins were perfect to make candy cane Christmas gift tags! It’s such a lovely mix of red and white sequins for the holiday season. The candy cane gift tags turned out so festive and cute. It’s the perfect little tag for a cute little package! Continue Reading →
Easy DIY Thanksgiving Napkin Rings for your Table
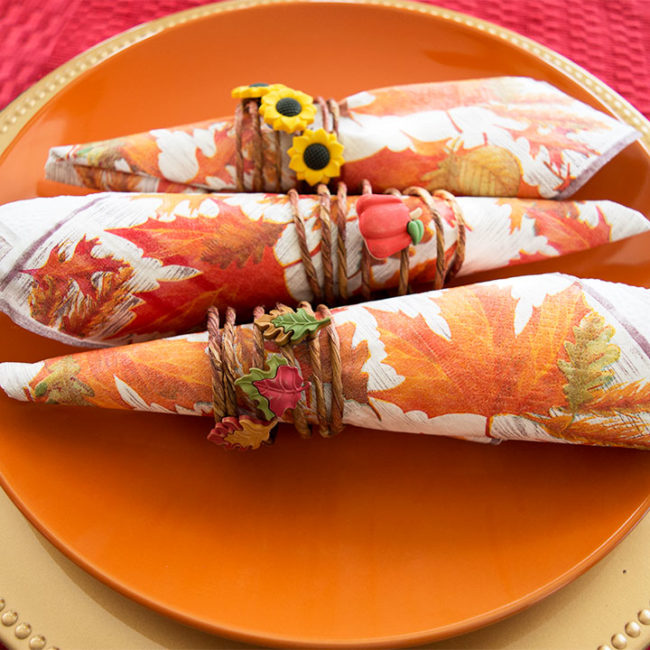
With Thanksgiving right around the corner, I’ve been thinking about how to dress up my holiday table a little bit more this year. I’ve never actually used napkin rings before, and I thought it might be a fun addition to my Thanksgiving table. These easy Thanksgiving napkin rings only take about 10 minutes to make. Thanksgiving table decor couldn’t get any easier! I love the fun fall vibe they add to the table. And the buttons from our super adorable Fall Friends button collection were so perfect for the project! Continue Reading →
Make DIY Sparkling Snowflake Ornaments with 3D Buttons
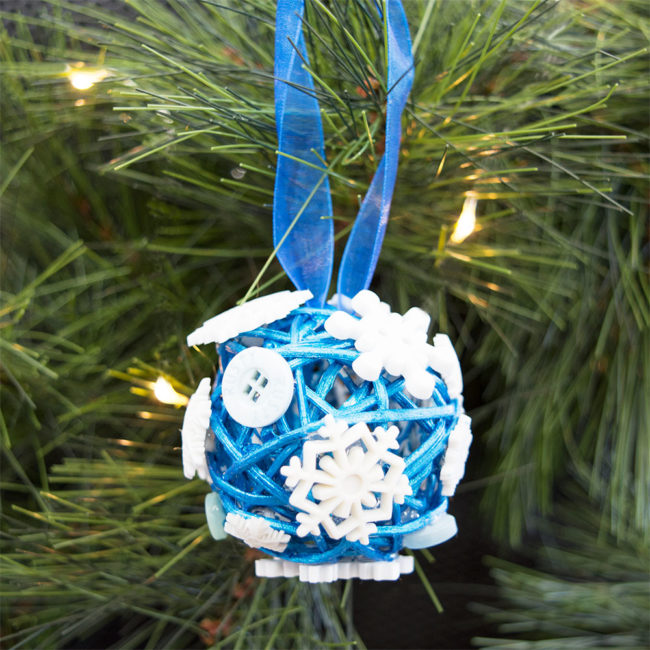
I’m not quite ready for Christmas just yet, but it’s never too early to start planning! Snow is not my most favorite thing in the world. It’s wet and much too cold for this desert girl! I’m a summer fan for sure. However, I do love beautiful snowflakes. Every year I decorate my kitchen with lovely, sparkly snowflakes. I always say that it’s my favorite kind of blizzard! This year I have plans to put a small white tree in the kitchen, decorated with more snowflakes, of course. I wanted to make some of the ornaments myself, and the adorable snowflake buttons in the Snowflakes Value Pack were just perfect for the task of making snowflake ornaments! Continue Reading →
How to Make DIY Pom Pom Pumpkins with 28 Lilac Lane
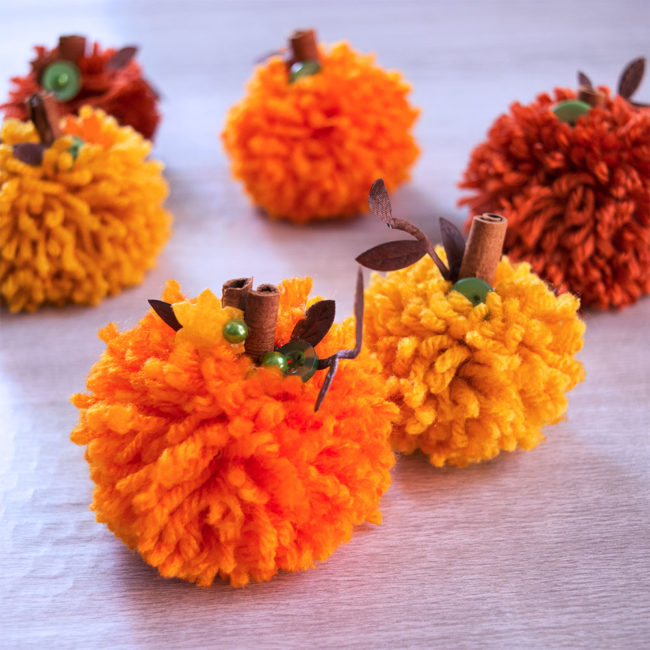
The weather here has started to cool down this week and so I’ve decided it’s time to bring out those pretty autumn colors. Pumpkins are my favorite seasonal decoration in the fall – I love using both fresh pumpkins and artificial pumpkins in my decor. Yarn pom poms are such a fast and easy craft to make. They can add a bit of whimsy to any decor. I wanted to make some DIY pom pom pumpkins to add to my fall decorations, and the beautiful Autumn Afternoon Embellishment Kit from the 28 Lilac Lane collection was the perfect addition to finish off these cute little poms! Continue Reading →
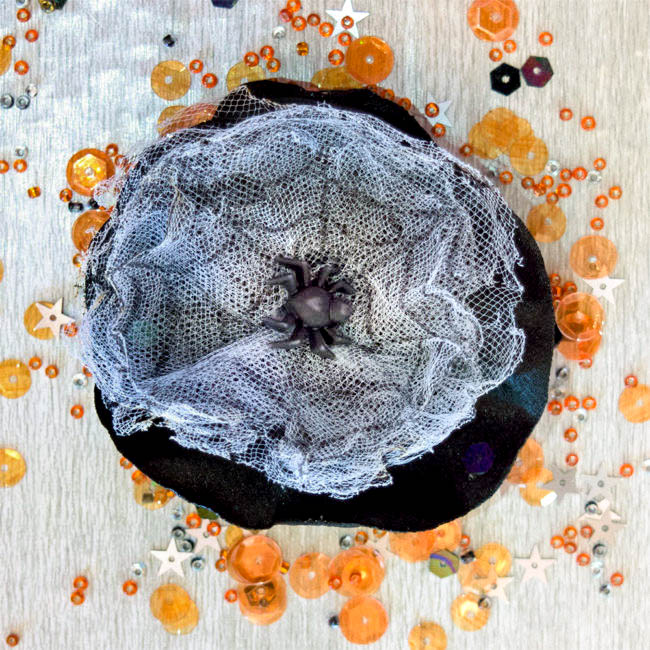
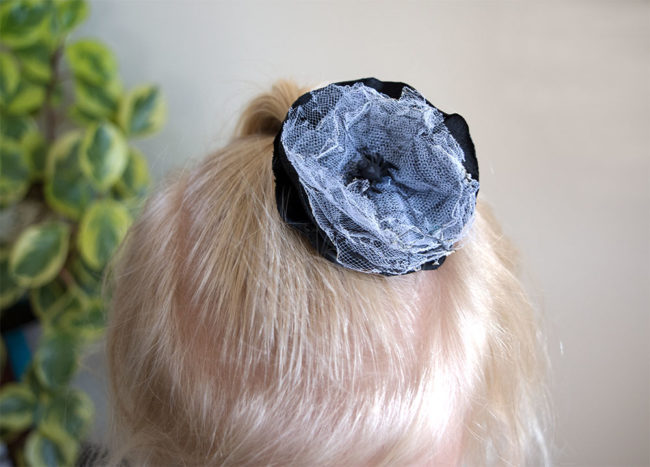
How to Make a Cute Halloween Spider Web Hair Bow
Halloween is coming soon – can you believe it?! You can make this fun Halloween Spider Web Hair Bow in less than 30 minutes. This is one spider web your little girls won’t mind having on their heads because it’s just so cute! It’s easy to customize too, using the same technique with different kinds of fabric, different colors or different accessories.
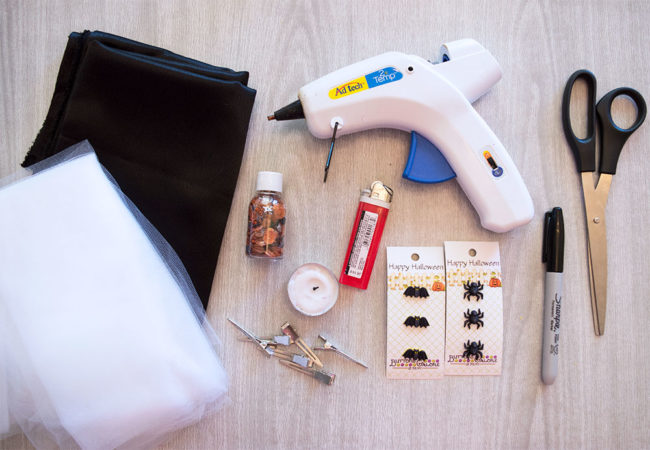
Supplies needed to make a Cute Halloween Spider Web Hair Bow:
- Buttons Galore “Happy Halloween – Spiders” 3D buttons
- 28 Lilac Lane “Trick or Treat” Sequin and Bead Mix
- White Tulle
- Black Satin or Chiffon fabric
- Black Marker
- Hot Glue
- Candle and Lighter
- Alligator hair clips
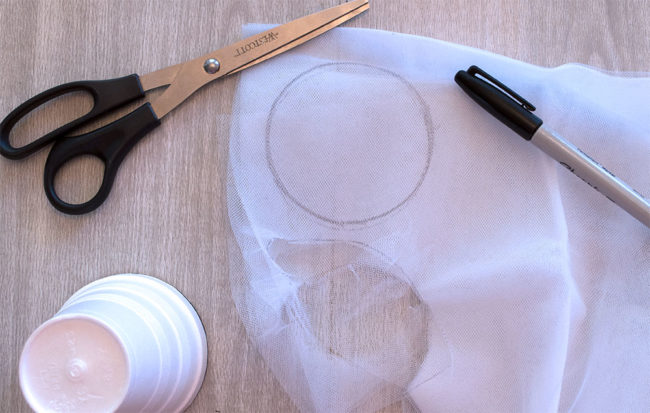
- Scissors
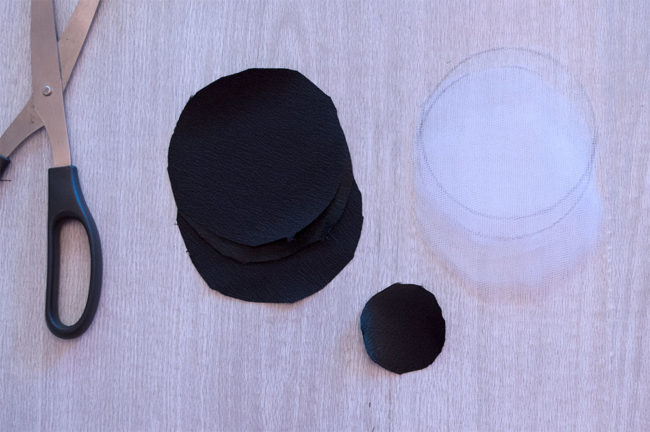
Step one:
Cut circles in the tulle and black fabric. You will need two 3-4″ black satin circles, and one 1″ black circle. You will also need to cut six 3-4″ circles from the white tulle as well. I used a styrofoam cup to trace my circles. It was the perfect size.
Lots of fabrics will melt great for this project, but I find cotton fabrics don’t melt as well as the synthetic blends. My favorites to work with are satin or chiffon fabrics. This is a great project to use scraps, and you should use whatever you have on hand. It doesn’t take much!
Step two:
Use a black marker to draw spider webs on the tulle circles. Be sure to put a piece of paper under the tulle so you don’t end up with black spider webs all over your work surface.

Step three:
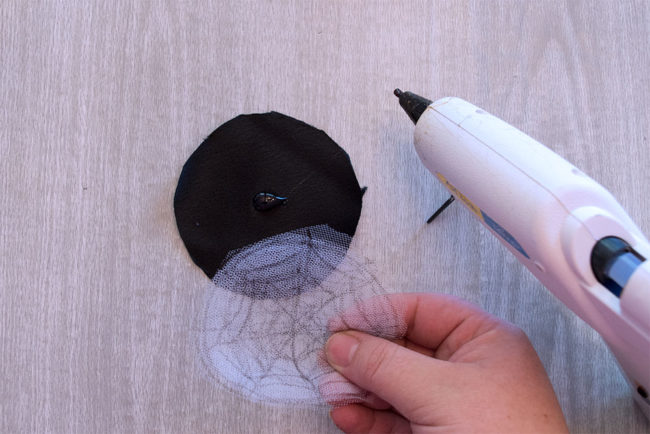
Assemble the fabric circles. I use hot glue to assemble mine, but you could easily sew them together if you prefer. Place a dot of hot glue in the center of each circle and press two circles together.
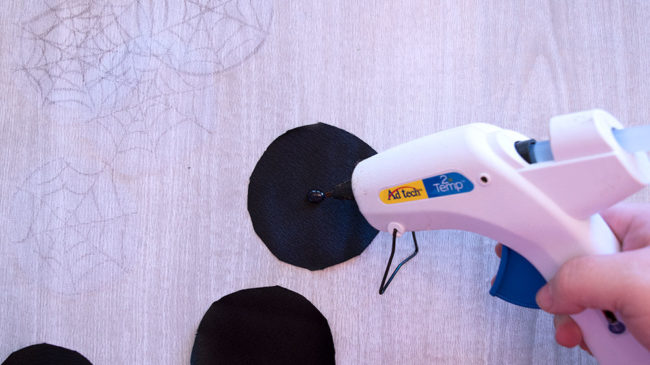
Stack the two black circles on the bottom, and the white tulle circles on top of those with a dot of hot glue between each layer.
Step four:
*Please use caution when working with an open flame. The melting fabric is hot to the touch. Always keep a bowl of cool water next to your work station when working with a flame in case of burns or fabric that accidentally catches fire.*
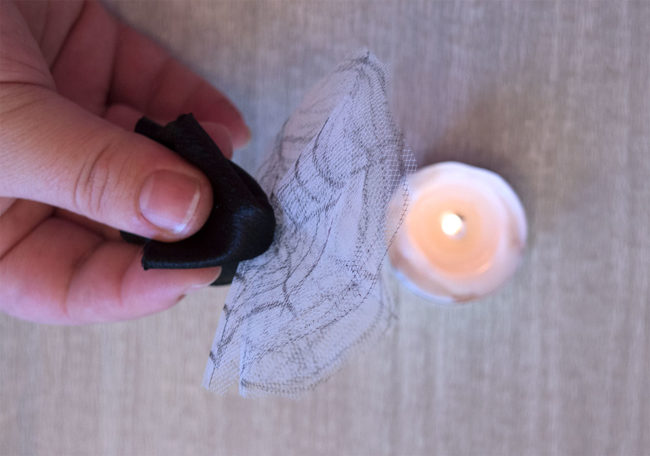
Using a small candle flame (I use a small tea light candle), melt the edges of the tulle and satin fabrics. Carefully hold the fabric down next to the flame. Don’t get it too close. It just needs the heat from near the flame to curl and melt the fabric.
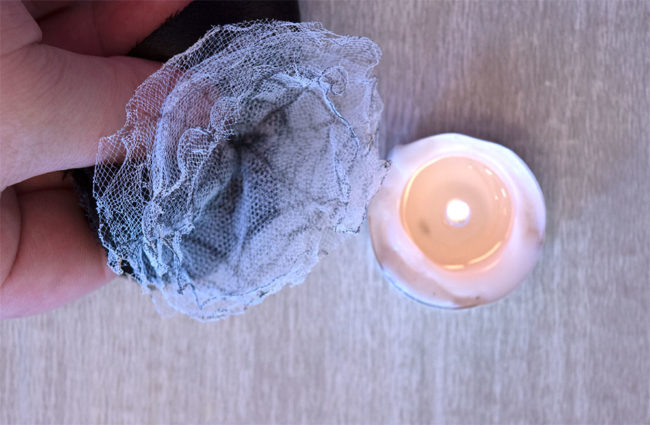
The tulle is very easy to burn. It does not need much heat to curl and melt. A little bit of charing on the edges of the tulle just adds to this cute Halloween spider web hair bow though! Satin fabric needs just a little more heat to curl and melt. Please be careful not to get your fingers too close!
Step five:
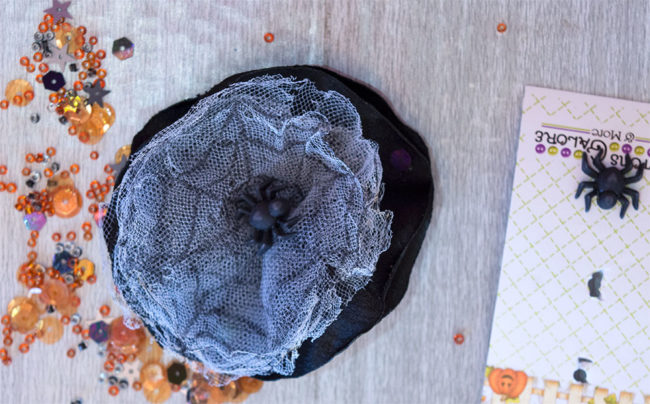
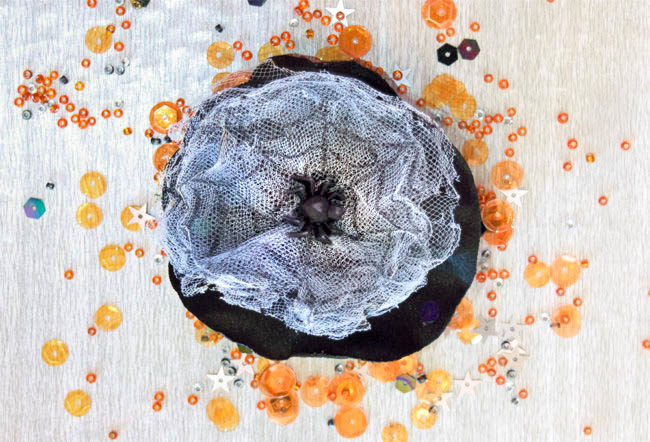
Use glue to attach the adorable 3D Spider Button to the center of the Spider Web Hair Bow. Glue some sequins from the Trick or Treat Bead and Sequin mix to the bow. I used black sequins from the mix and some black seed beads.
Step six:
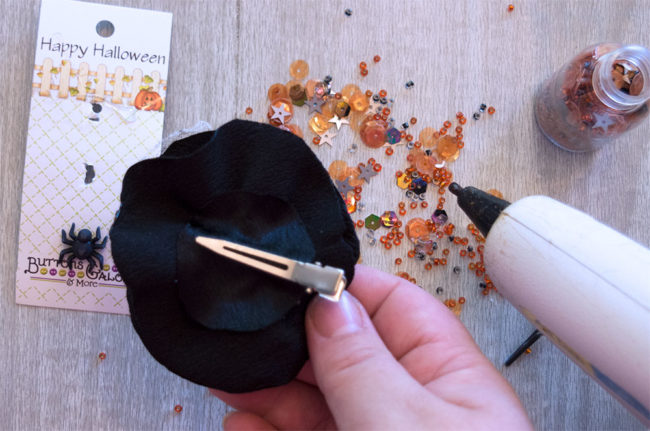
Attach the alligator hair clip to the back of your spider web bow using hot glue and the 1″ circle of black fabric.
Isn’t it the cutest little spider web you’ve ever seen? I love how the adorable little spider buttons have a cute little heart shape on their backs. Even my spider phobic four-year old didn’t mind wearing this cute little spider in her hair!
You can easily change this technique to suit any style or holiday! Chiffon is my favorite fabric to melt. The curl is fantastic! Change the color of the fabric and the tulle and add other fun embellishments for endless combinations! I want to make one with red chiffon, white tulle, and these adorable 3D Candy Cane buttons for Christmas!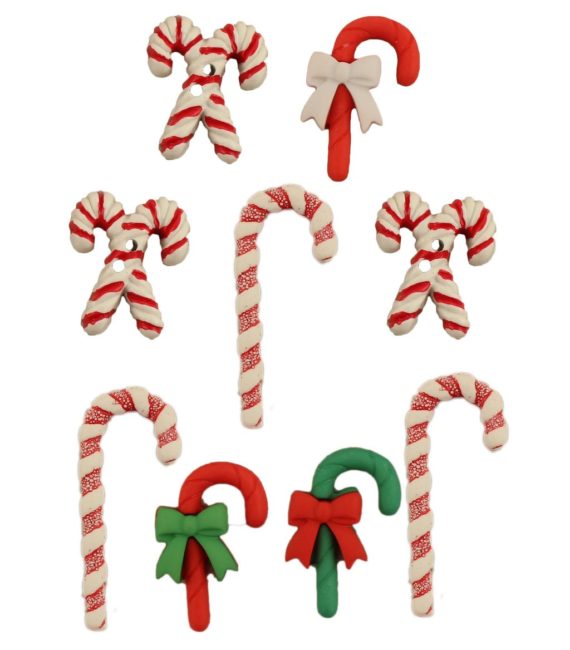
Which 3D buttons would you put in your hair bows?
Celebrate Fall with Button Vase Fall Canvas Wall Art
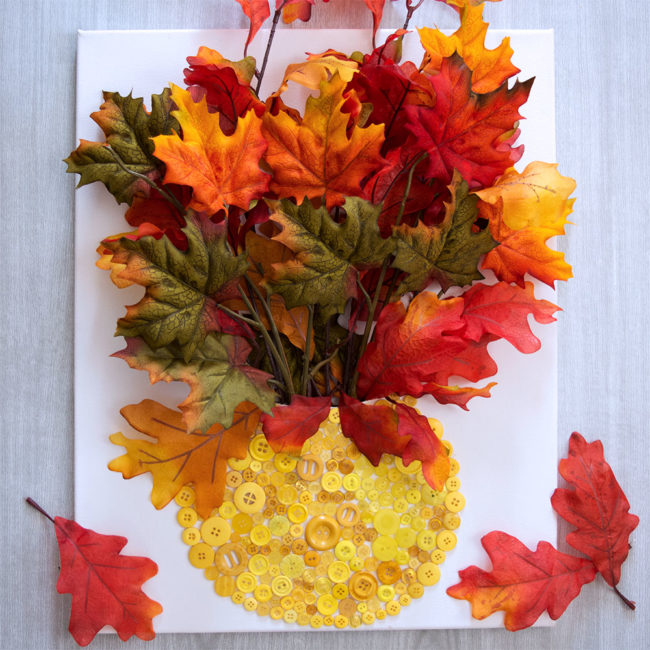
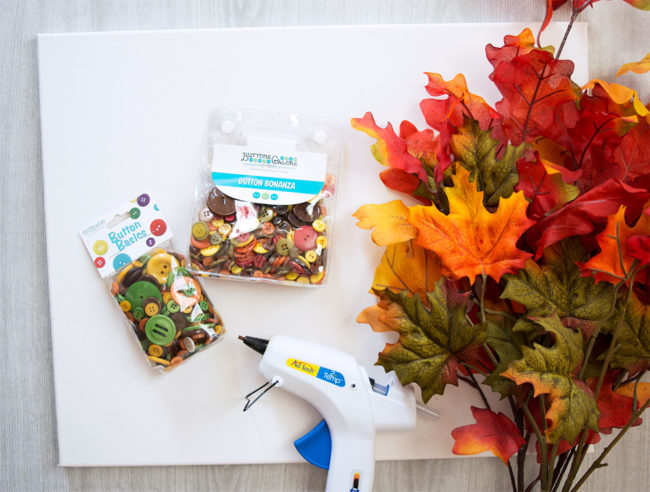
Autumn is one of my very favorite seasons. I love the cooler (but not cold) temperatures and the gorgeous bright colors that appear in nature. This Button Vase Fall Canvas wall art is the perfect project when you’re short on table space but want to add those beautiful fall colors to your home.
Supplies needed to make a Button Vase Fall Canvas Wall Art:
- Buttons Galore “Harvest” Button Bonanza
- Buttons Galore “Fall Festival” Button Basics
- 16×20 Stretched Canvas
- Silk Florals or Leaf Stems
- Hot Glue Gun and Hot Glue Sticks
- Pencil
- Sharp Craft Knife
How to make a Button Vase Fall Canvas Wall Art:
Step one:
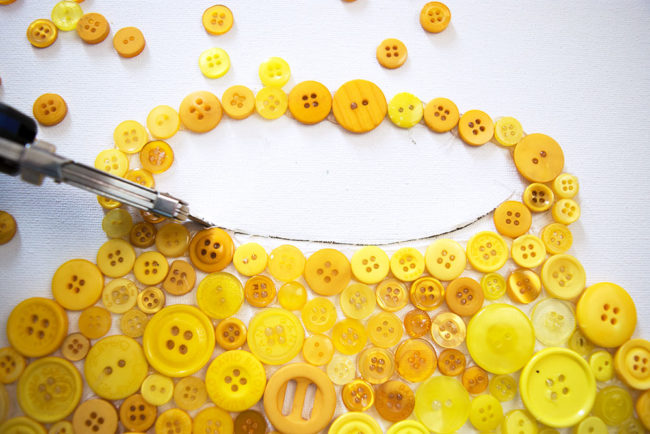
Use a pencil to draw (or trace) a simple vase shape to the bottom half of your blank 16×20 canvas.
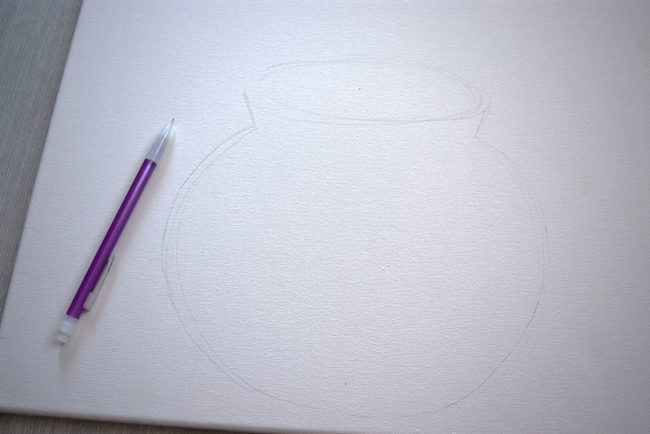
It doesn’t need to be perfect, just a rough outline so that you know where to place the buttons for the button vase. The buttons will cover up any pencil marks. I drew a round vase, but you can make it any shape you want. Whichever shape you use, make sure to keep it on one end of the canvas.
Step two:
Glue buttons to the outlined vase you drew on the canvas. I used a hot glue gun to attach the buttons.
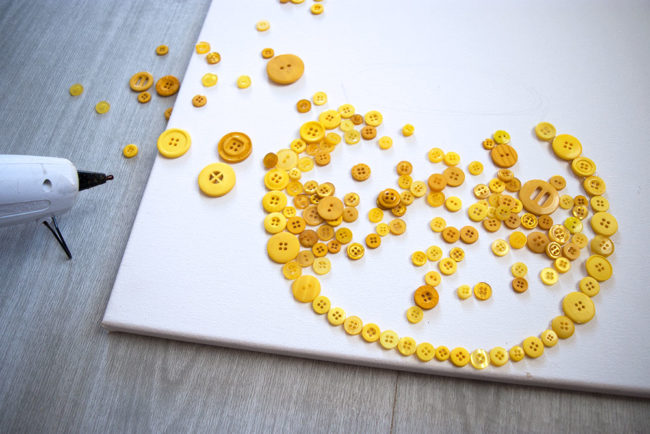
Because I was using Silk Autumn Leaves in my vase with beautiful red and orange colors, I made my vase Yellow to complement them. I used every yellow button in the Harvest and Fall Festival button sets to fill my round yellow vase. I liked that the shades of yellow in these two sets were in line with the yellow you’d actually see on fall leaves.
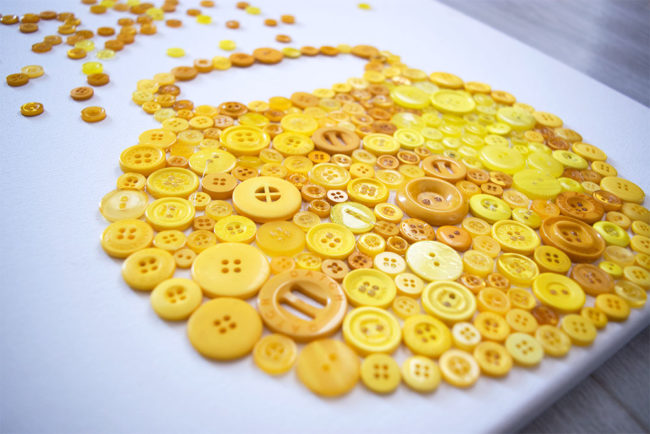
Don’t glue buttons inside the mouth part of the vase at the top but fill the rest of the vase.
Step three:
Use a sharp craft knife to cut a line in the canvas just above the buttons in the mouth of the vase.
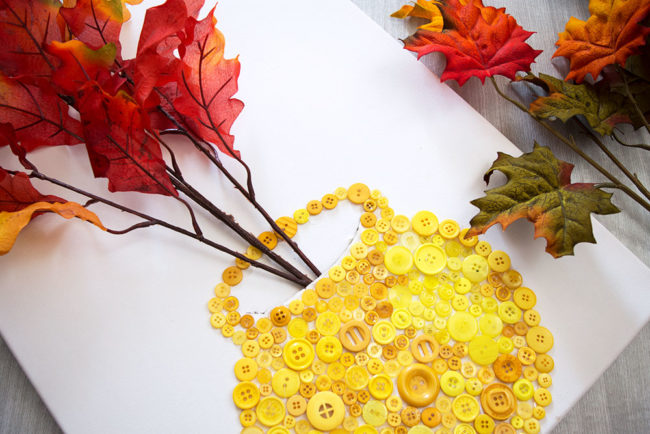
Step four:
Insert your Autumn Silk Florals or Leaves through the hole in the canvas. Arrange them however you like. I find that the canvas vase looks best when it’s full. I used four Silk Leaf stems to fill my vase.
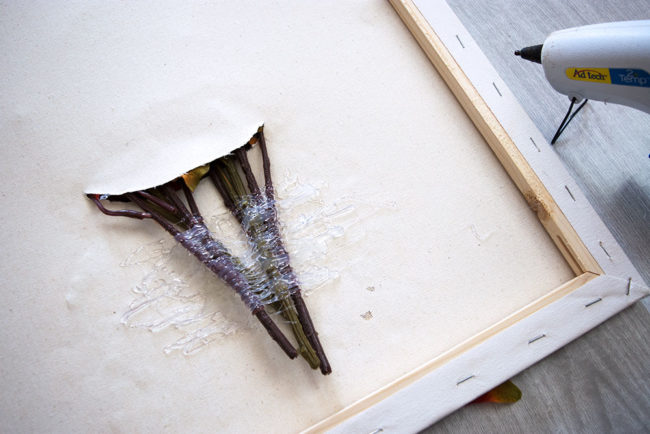
Step five:
Turn your canvas over, and use hot glue to secure the stems in place for added stability. I used an entire small glue stick to fix my stems in place.
Step six:
Use single leaves to fill in any blank spaces or gaps at the base of the stems. Secure them in place with hot glue.
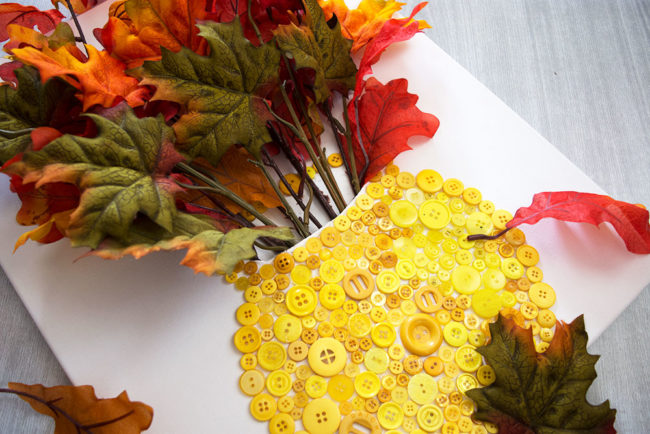
If you have some unruly leaves on the stems that aren’t laying quite right, a dot of hot glue can help secure them to the canvas in a more pleasing way.
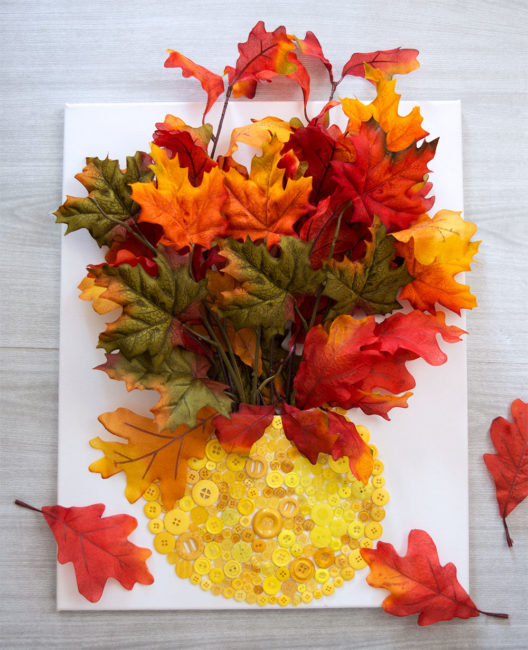
Hang your canvas on the wall, or prop it up on a table for a beautiful bright pop of autumn colors! I think that I will take a slightly smaller canvas and use the red buttons in the Fall Festival and Harvest button packs to make a smaller red vase with some pretty silk sunflowers! The pair will look great together with my fall decor. The possibilities are endless if you just change the color of the buttons for your vase to complement the flowers or leaves you have! Happy Fall Crafting!
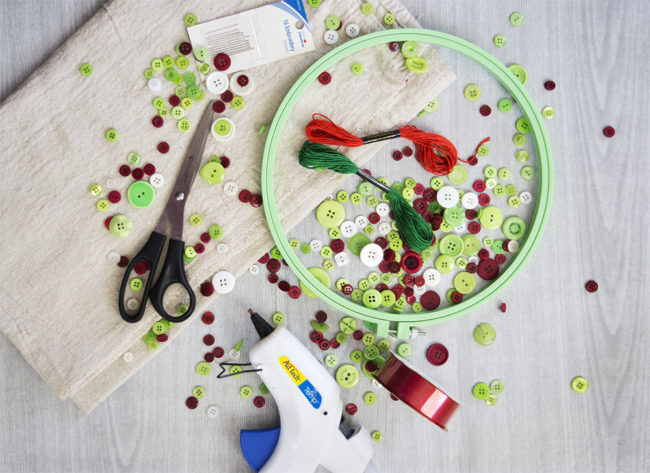
Christmas in July | Embroidery Hoop Christmas Card Holder
You can celebrate a little bit of Christmas in July by crafting this fun and easy Embroidery Hoop Christmas Card Holder. This simple craft is a great way to get your kids involved and teach them basic button sewing. It will look so cute on the wall holding your Christmas cards! You can customize it by changing the button shapes, or colors to suit your decor needs.

Supplies Needed to Make Embroidery Hoop Christmas Card Holder:
- Buttons Galore “Contemporary Christmas” Button Basics
- Buttons Galore “Christmas” Button Bonanza
- 10″ embroidery hoop (a larger hoop would work too)
- 1/4 yard of fabric (I used canvas fabric)
- scissors
- red and green thread
- needle
- ribbon
- hot glue
Step one:
To start making your embroidery hoop Christmas card holder, lay your embroidery hoop on your fabric and trace around the outside edge of the hoop. Don’t trace right along the edge of the hoop, since you want the fabric circle to be bigger than the embroidery hoop. The circle doesn’t need to be perfect. You will need two fabric circles. I used a canvas drop cloth that I already had, but you could also use a cotton fabric or even burlap. You don’t want the fabric to have too much stretch though, since it needs to hold the weight of the buttons and the cards firmly.
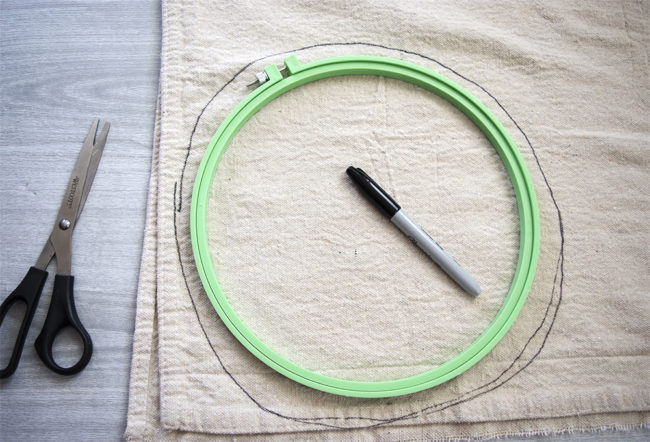
Cut out the circles of fabric, and then cut one circle in half. Don’t waste too much time trying to get the cuts perfect. You won’t even be able to tell if they are or not once the project is finished!

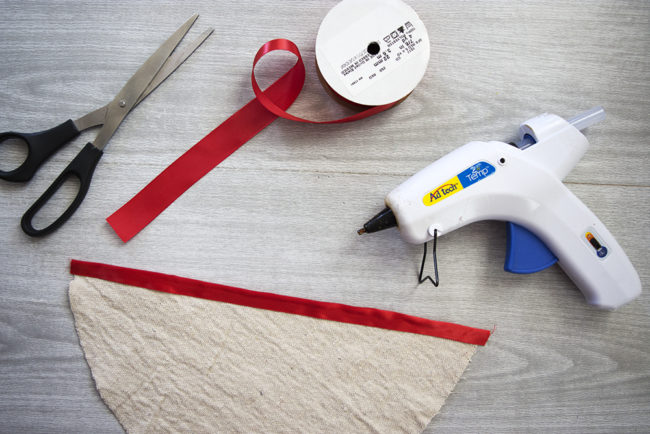
Step two:
Finish the straight cut edge of your half circle by gluing ribbon to the edge and folding it over.
Step three:
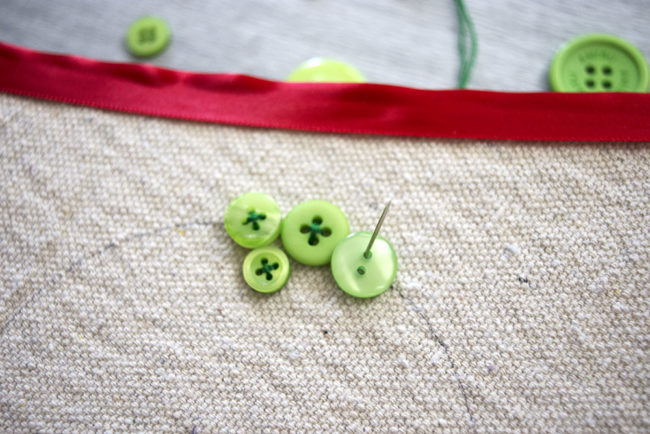
Trace a small circle onto the half circle of fabric. I used a wide mouth mason jar lid to trace the circle for my wreath.It was a perfect size. You can make your wreath bigger or smaller as desired.
Step four:
Stretch the half circle fabric piece into the embroidery hoop for stability. Sew green buttons around the circle that you traced on the fabric. Tie a knot in your string and start under the fabric. Bring the needle up through the button and back down into the fabric.
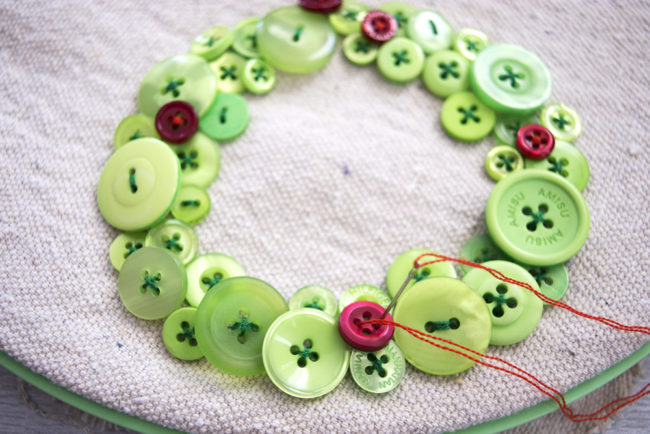
Repeat this step again so that your button is firmly attached to the fabric.

I used big buttons and small buttons around my wreath for some visual interest, and I used green buttons from both the Contemporary Christmas mix and the Button Bonanza Christmas Mix to vary the colors.
Step five:
Use a few small red buttons for berries in the wreath. Sew them randomly into the green buttons using the red thread.
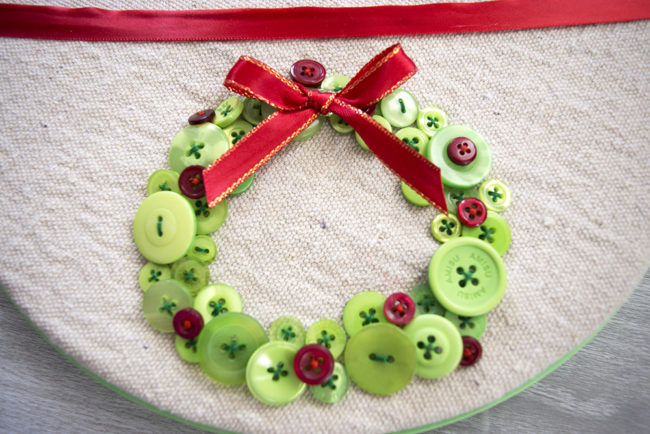
Step six:
Add a small red ribbon bow to the button wreath. You can sew the bow to the wreath with your red thread, or you can use hot glue to attach it.
Step seven:
Lay your button wreath half circle of fabric over the full circle you cut in step one, and stretch them into the embroidery hoop. This creates the pocket for your cards to go into. Trim any extra pieces of fabric on the back of the hoop. Hang your completed embroidery hoop Christmas card holder on your wall!
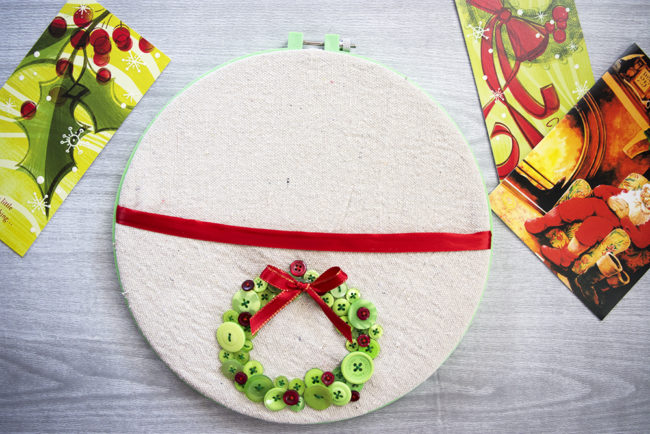
You can fit quite a few cards in one hoop, but if you typically get lots and lots of cards from your friends and family, you might want to make a couple of these fun hoops and hang them in a fun arrangement on the wall.
I think I will make two more hoops and put a Christmas tree shape on one, and perhaps some Christmas holly on another. The buttons are such a fun and cute way to add the colorful shapes to the fabric. Do you do any Christmas in July crafts? If Christmas in July isn’t your thing, this fun card holder can be customized to any time of the year! Create a fun button flower shape and hang it on the wall year round to hold other special occasion cards you might receive, or even just to hold your mail!
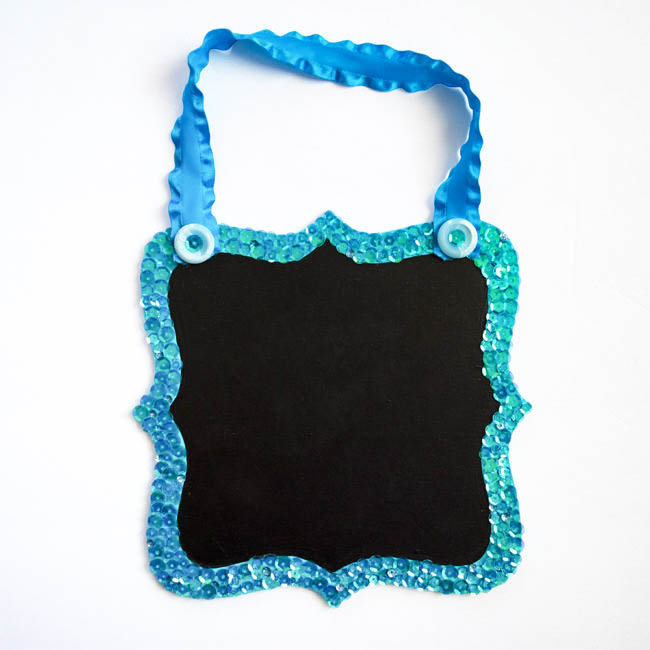
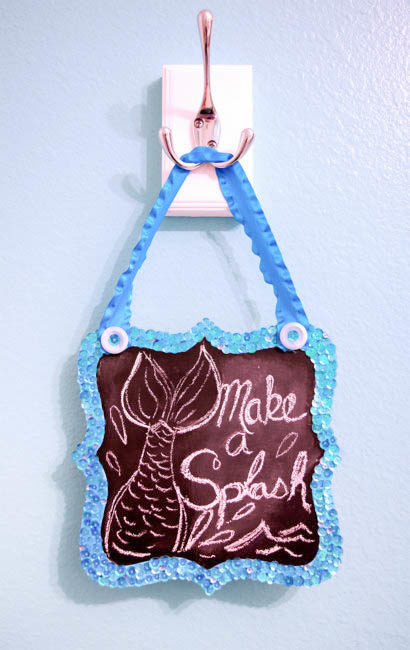
A Mermaid Tale Sequin Chalkboard For Summer Kid Fun!
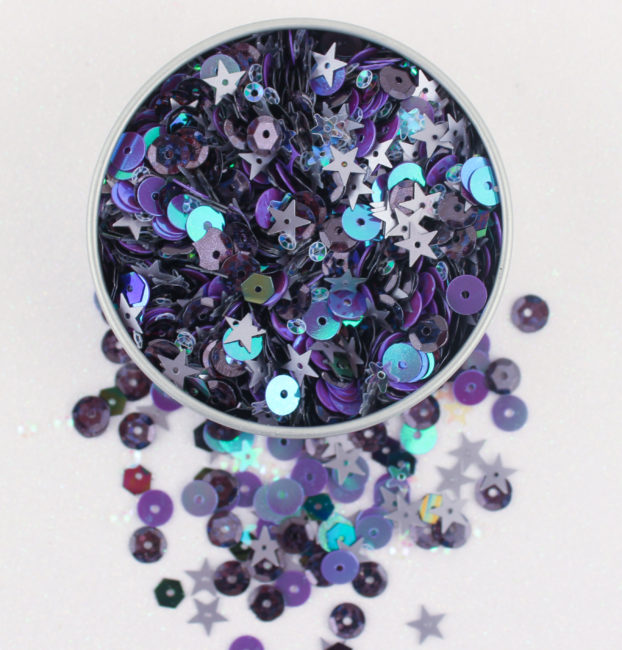
You don’t have to know how to sew to use sequins! Besides using them on cards, and in fun little shaker packs, you can glue sequins to just about anything for a fun shimmer and shine! I glued some gorgeous turquoise blue sequins from the new 28 Lilac Lane “Mermaid Tale” Premium Sequin Tin to a wood surface for a fun Mermaid Tale Sequin chalkboard. This craft is simple enough for a child to participate in as well!
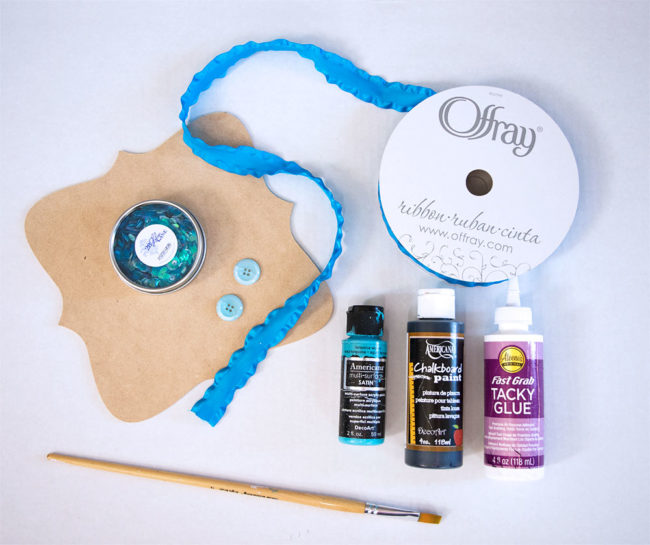
Here’s what you’ll need to make your own Mermaid Tale sequin chalkboard:
- 28 Lilac Lane “Mermaid Tale” Premium Sequin Tin
- Buttons Galore “Sky Blue” Button Basics
- Adornit Pointed Bracket Shaped Wood Surface
- blue ribbon
- clear drying glue
- acrylic craft paint (blue)
- chalkboard paint (black)
- paint brush
Step one:
Paint the wood bracket shape with the acrylic craft paint. (This is a perfect step for little hands to help with!) I painted the front and back of my shape. Let the paint dry completely.
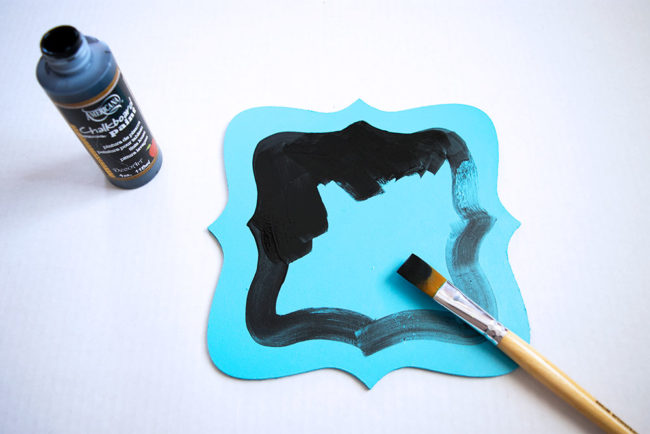
Step two:
Paint the inside of the bracket-shaped board with black chalkboard paint following the instructions on your specific bottle. My chalkboard paint instructed to use two coats of paint and allow a relatively long cure time.
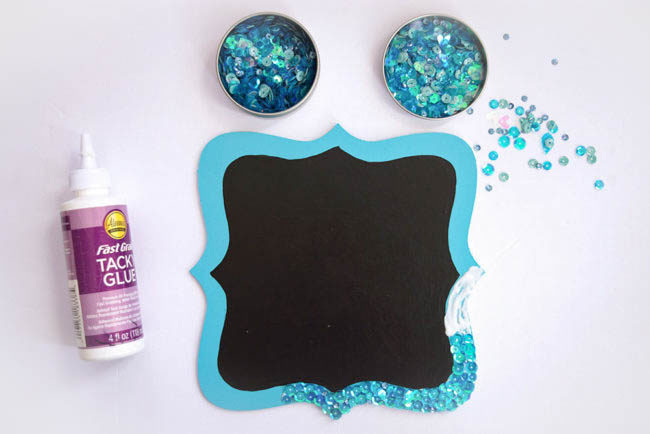
Step three:
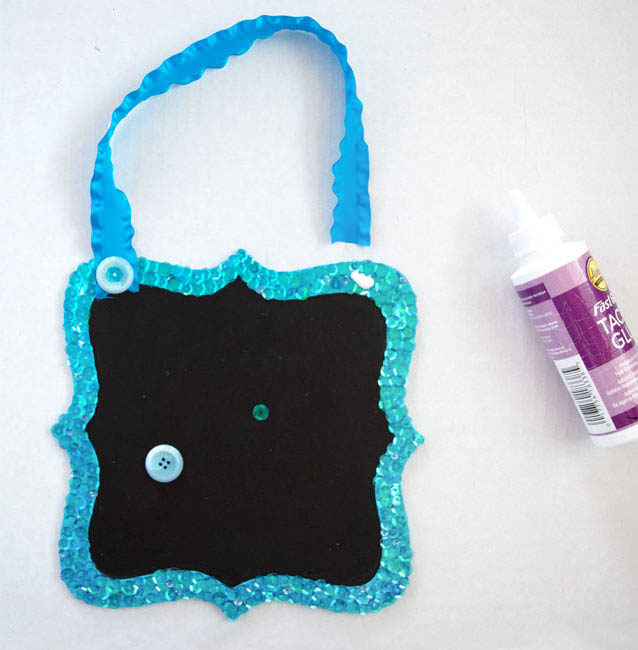
Glue the blue sequins from the 28 Lilac Lane “Mermaid Tale” Premium Sequin Tin around the outside edge of your bracket shaped board. I used three different size sequins from the tin all the way around the edge of the board. My kids had a lot of fun helping with this step! I had one helper finding the perfect sequins from the tin, and the other helper situating them just right on the glue I was spreading. In less than 30 minutes, we had the perfect Mermaid Tale border around our chalkboard!

Step four:
When your glue has dried completely, add a ribbon to hang your chalkboard. I cut a length of ribbon about 12 inches long. Add a dot of glue to the top of each side of the board, and add the ribbon. I glued a blue button to each end of the ribbon and added one more sequin inside each button (at the direction of my little helpers).
My daughter took the fun little chalkboard to hang in her room so she can write and draw her mermaid-y messages on it.
Using different sequin tins from the new 28 Lilac Lane Premium Collection could result in completely different little chalkboards. I want to make a house shaped Halloween themed one next, using the Haunted House Sequin Tin!
What shape and sequins would you use?
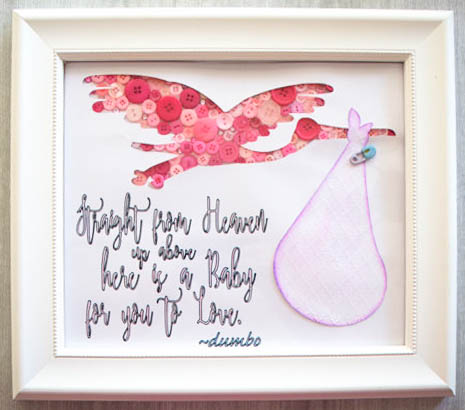
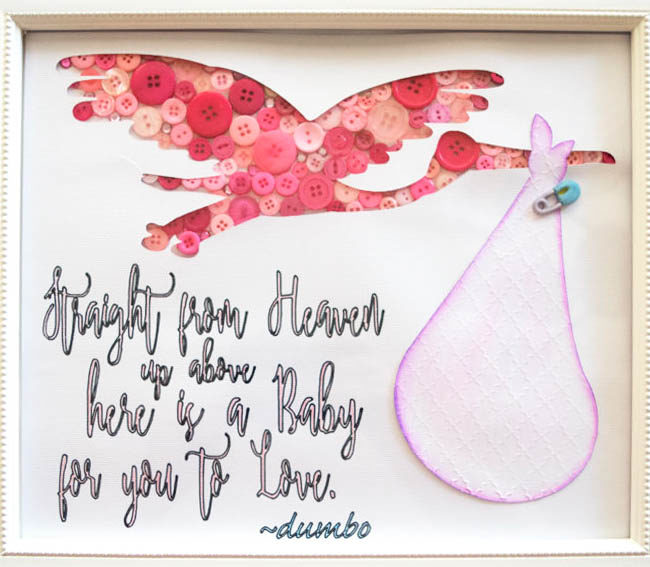
Straight from Heaven Baby Nursery Wall Decor [Free Template]
Hello! Kelli here. I am excited to share this sweet button nursery decor with you today! A dear family member is having her first baby soon – a girl! My family member is a Disney fanatic, and so I thought this sweet little project would be just right up her alley for nursery decor.
I wanted to create a button silhouette, but sometimes it can be difficult to get those round buttons to fit into a certain shape. I solved the problem and saved some time by using a cut out to go over the buttons, giving it nice crisp lines.
Supplies needed:
- Buttons Galore “Baby Girl” Embellishment Set
- Buttons Galore “Pastel Grab Bag” buttons
- Buttons Galore “Paradise” Apothecary Jar
- Buttons Galore “Baby Hugs – Diaper Pins” buttons
- “Straight from Heaven” PDF template (download below)
- heavy cardstock (3 sheets)
- scissors
- colored pencils or markers
- glue
- picture frame (I used a 10×12 frame)
Step one:
Start by printing out the design templates. I used three sheets of 12×12 cardstock. The heavier the cardstock is the easier this project will be. The first sheet you print should be the quote with the stork outline. The second sheet will be the bag cutout, and the third sheet will be blank.
You can download the PDF templates here:
Step two:
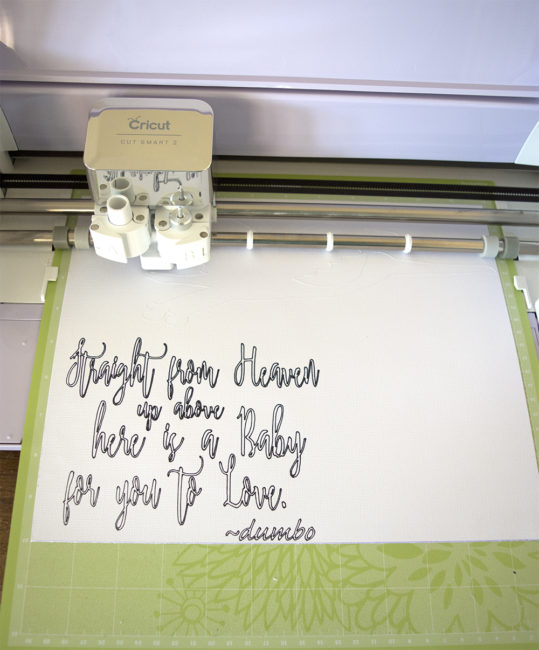
Cut out the stork outline. Use a sharp knife or the point of your scissors to poke a hole in the center of the stork, and then cut it out. Alternatively, if you have a Cricut or a Silhouette cutting machine, you can upload the template into the machine’s software and use the machine to draw the lettering and cut out the stork for you, which is what I did.
Step three:
Lay the sheet with the cut out stork on top of the blank sheet of cardstock. Use it as a template to trace the outline of the stork onto the blank sheet.
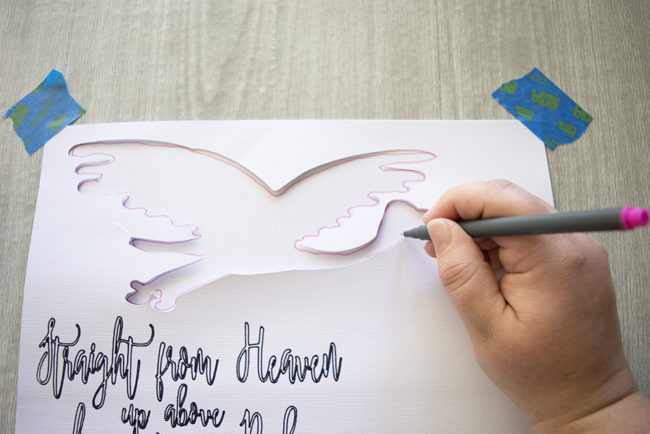
The outline will give you an idea of where the buttons need to be placed.
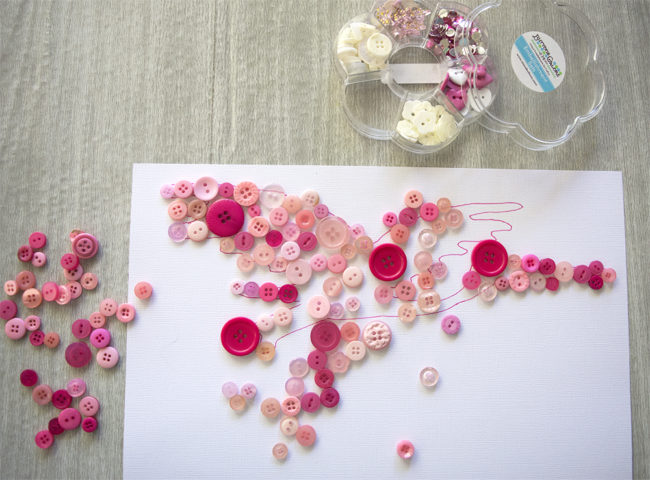
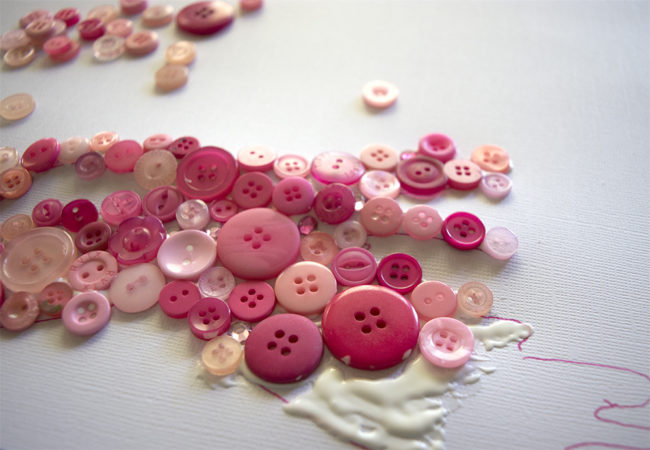
Glue pink buttons to the blank sheet of cardstock, filling in the stork outline. You don’t need to worry about going outside the lines with the buttons.
Step Four:
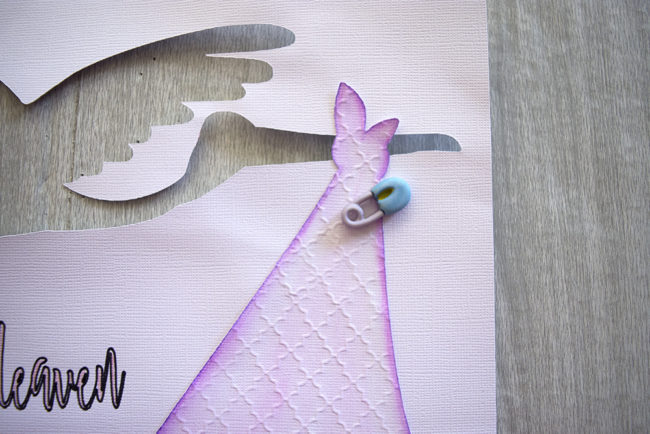
Cut out and color the stork’s bag. I ran it through my manual die cut machine with an embossing folder to give it a little bit of extra depth. Alternatively, you could use a patterned paper to print the bag template on for an extra something. Glue the stork bag onto the cardstock sheet with the cutout stork silhouette, making sure to line up the knot on the bag with the stork’s beak. Glue an adorable clothes pin button to the bag. (Cut off the shank first with scissors or a shank remover.)
Step five:
Layer the pages into your picture frame. First, the stork cutout sheet goes in face down.
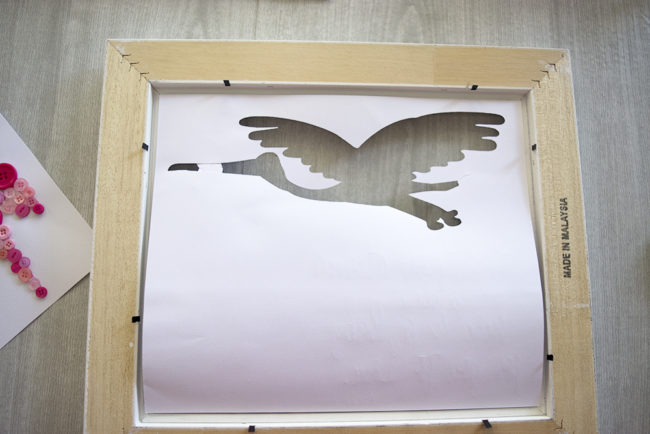
Lay the cardstock sheet with the glued buttons on face down on top of the first sheet, and line them up. Replace the frame back and you’re done!
Now your buttons have a perfect silhouette line without any fuss, and you have some adorable nursery wall art for a sweet new baby. Change the pink buttons to blue ones for a boy (or yellow if you don’t know the baby’s gender), and it works for both!
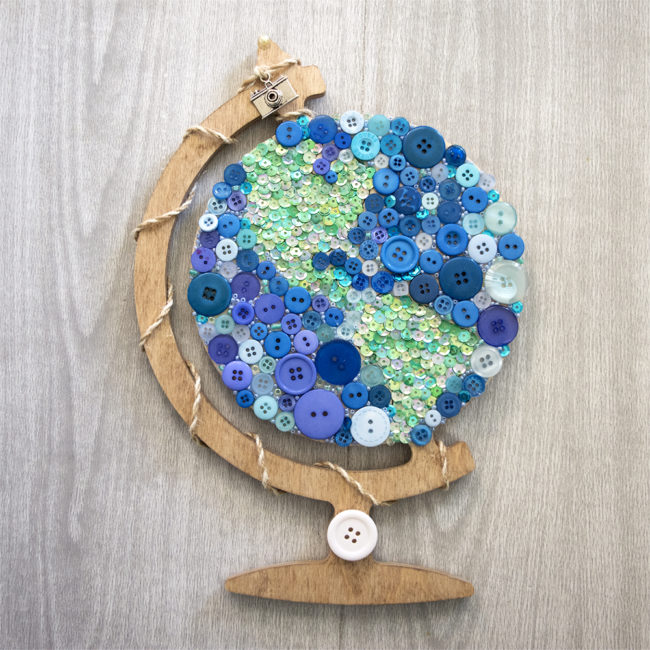
Decorate Your Walls with a Button Globe Mosiac
Hi! I’m Kelli, from the Craft Shack Chronicles blog and I’m so excited to be joining the Buttons Galore Design team! For my first project, I wanted to make a piece of home decor. I’m working on a gallery wall above my piano and I am having fun adding in lots of different colors and textures. You can easily add interesting depth and texture to your home decor pieces by using buttons and sequins to add color instead of paint. I used two 28 Lilac Lane kits to make this fun Button Globe Mosaic.
Supplies needed for Button Globe Mosiac:
- 28 Lilac Lane “Tea Time” Embellishment Kit
- 28 Lilac Lane “Let’s Go” Embellishment Kit
- Blue Buttons (I used blue buttons from Button Basics Bright Mix and Button Basics Blueberry)
- Walnut Hollow Wood Globe Shape
- Fast Grab Tacky Glue
- Wood Stain

Step one:
Draw the design outline onto the wood globe surface. You can trace it, transfer it, or freehand it. Draw the design onto the globe using a pencil. You won’t be able to see it when it’s covered in buttons and sequins so it doesn’t need to be perfect.
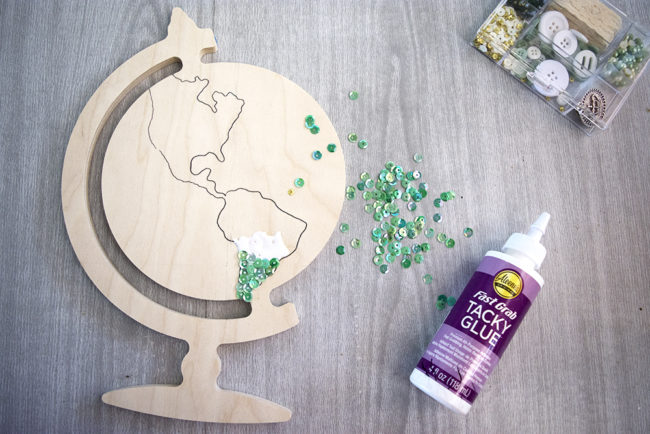
Step two:
Use green sequins from both Lilac Lane kits to fill in the land shapes. Add a little bit of glue and spread it out. Drop the sequins onto the glue one at a time. I find it easy to use a toothpick to arrange the sequins in the glue but you could use whatever you have on hand.
The glue will dry clear, so you don’t need to worry if you get a little messy.
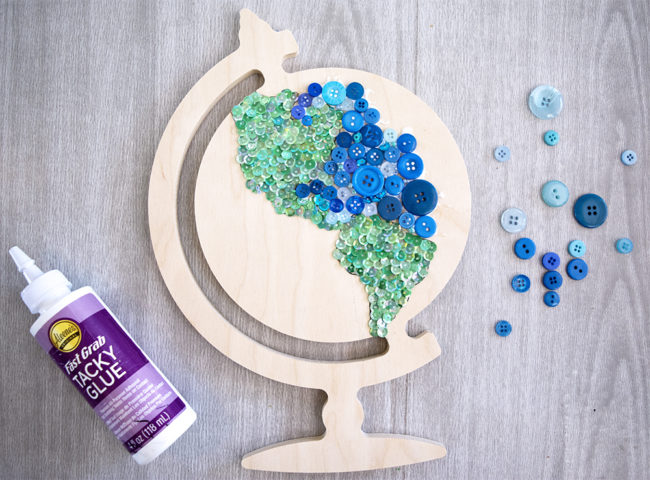
Step three:
Fill the in the oceans with blue buttons. Try to mix large and small buttons into the mix to add interesting variations in the texture. The smaller buttons fit nicely in some of the small curves around the land, while the bigger buttons were easier to use further out in the ocean.
Cover the entire globe with buttons and fill in any gaps with seed beads, or blue sequins from the Lilac Lane Kits.
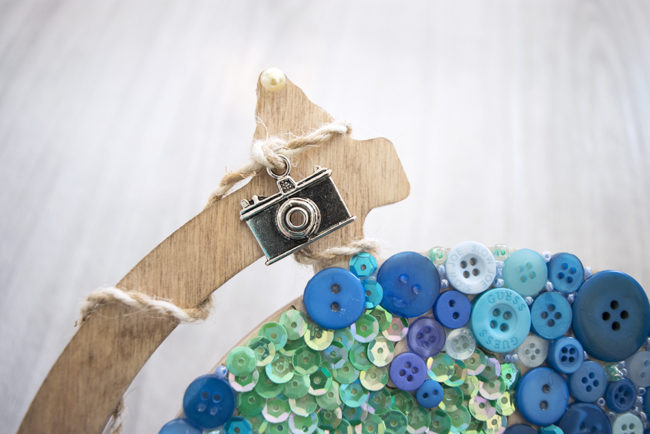
Step four:
Use wood stain to finish the remaining wood part or fill it in with buttons that complement your home decor colors. Finally, use the beautiful rope trim from the Let’s Go kit to attach the camera embellishment from the same kit to the top of the globe. A big white button from the Tea Time kit was the perfect size to put on the globe base.
I’m thinking about adding a little red button heart in the general area where we live on the globe. Would you add it, or leave it as it is? I can’t decide! I’m so excited to hang my new Button Globe Mosaic on my gallery wall soon!