Header

Tag Archives | Christmas gifts

Gift a DIY Friendship Sign to Someone Special This Holiday!

DIY Friendship Sign

Hello Everyone! This is Katie from the Buttons Galore & More Design Team, and today I will be showing you how to make a fun handmade gift that can be given during the holiday season!

As a gift-giver, I have always loved making handmade signs for my friends and family. This is because handmade signs are super easy to make and are so fun to personalize. Also, from a gift-giving perspective, handmade signs can be very inexpensive to make if you are on a tight budget. With all that in mind and with the holidays fast approaching, today I am going to show you how to make a DIY Friendship Sign. Continue Reading →

0

DIY Dangle Earrings For Every Occasion

DIY dangle earrings
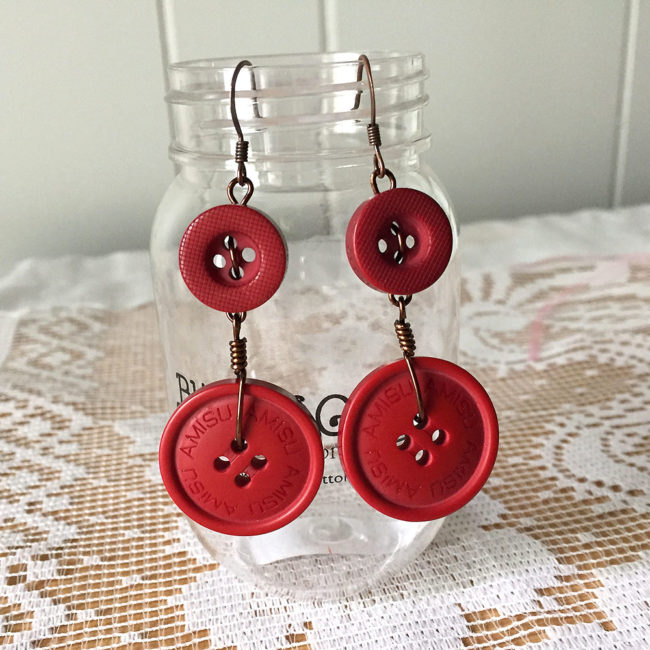
Hi! It’s Anaya from the Buttons Galore & More Design Team. With the holidays fast approaching, you’ll surely want to dress to impress for all of the upcoming parties and celebrations. If you’re like me, you get tired of showing up in the same old boring earrings. Well, today I’ve got the perfect project for you – DIY Dangle Earrings! Continue Reading →

1

Gift A Beautiful Beaded Pendant

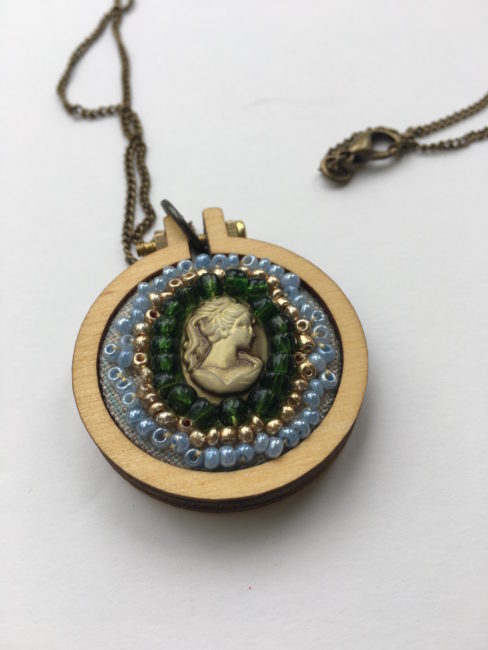
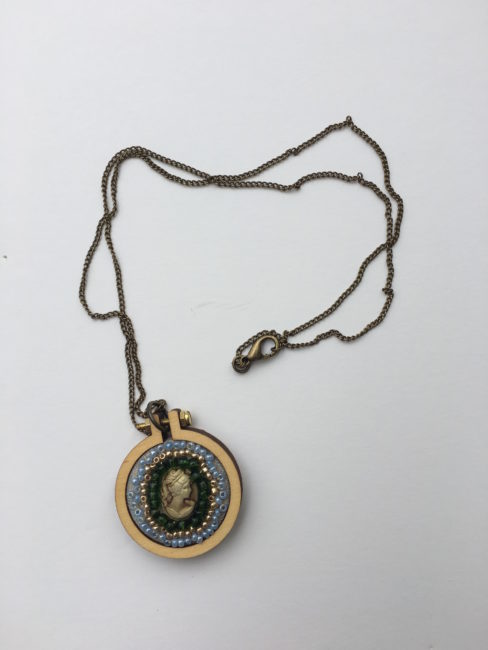
My project today is a sweet little pendant necklace that comes together pretty quickly and makes a great gift.

Don’t be daunted by the idea of sewing on the beads! It’s true that sewing beads can be a little fiddly because of their tiny size, but once you get the hang of it, it’s a great beginner project for jewelry making.

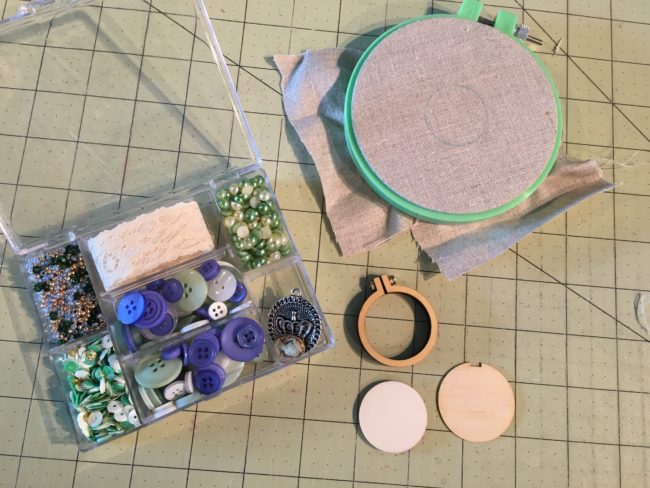
Here’s what you need to make this little beaded pendant necklace:

Put your scrap of fabric inside your embroidery hoop for sewing and outline the inside circle of the mini embroidery hoop with a pencil onto your fabric. Using the little cameo from the 28 Lilac Lane set, use craft glue to glue this to the center of the circle you just outlined. Let dry completely before moving on.

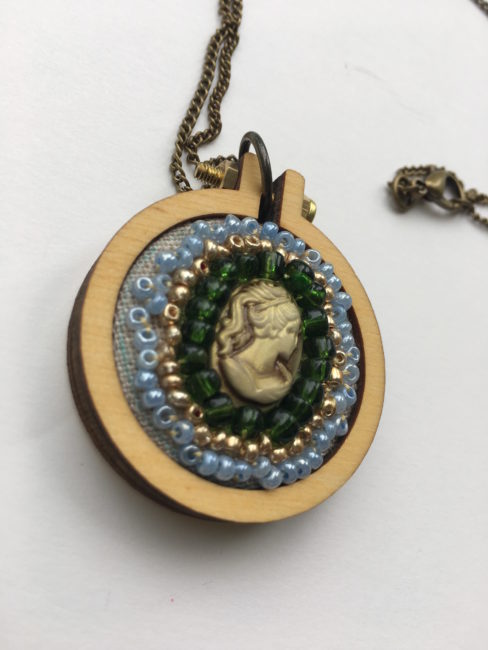
After your cameo is completely dry and securely attached to your beaded pendant, take a small plate (or use the lid of the Tea Time set) to pull out the beads. From your divisible embroidery floss, pull out one thread strand and thread your needle, making sure to leave a knot in the end. Sew a row of the larger green beads around the edge of the little cameo. Then repeat with the gold beads and then the blue beads.

To finish your beaded pendant, position the mini hoop on your design and draw a cutting line approximately 1/2 inch around the hoop. Cut it out. Place the cut design on the center plate. Then place the mini hoop on top and push it down to secure it. Flip it over and using a hot glue gun, place the glue around the inner edge. Push the fabric down in a circular motion. Add glue to the backing piece on the inner edge. Position it on the back of the hoop with the notch top and center.

You can either add a jump ring to your beaded pendant for your necklace chain to go through or thread the chain through the bolt in the center of the hoop.

Voila! You have a sweet little beaded pendant necklace ready to wear on a fun night out or to gift to a friend!

0

Make a fun DIY Sequin Coaster Set with the Kids

Hello everyone! This is Katie from the Buttons Galore & More Design Team, and today I have a super fun DIY Sequin Coaster Set that you can make with your kids!
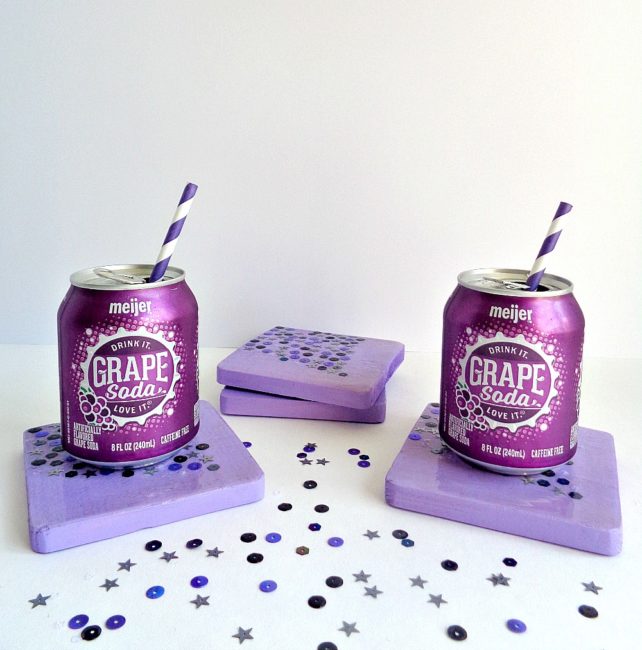
DIY Sequin Coasters

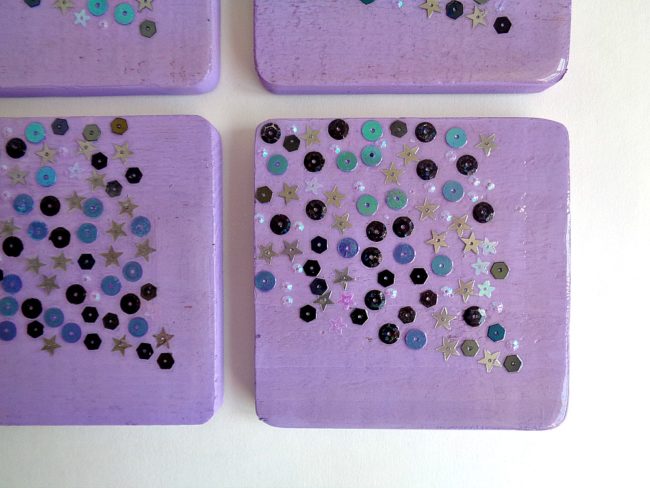
The project I will be showing you how to make today is a DIY Sequin Coaster Set! Now, you may be thinking that sequins and coasters don’t belong together. However, this DIY Sequin Coaster Set has a protective coating on top which seals in all the sequins and creates a barrier between your drinks and the actual coasters. In addition, this project is kid friendly and can be completed in just 3 easy steps!

To decorate my sequin coasters, I decided to use the brand new 28 Lilac Lane Sequin Tin in Haunted House. Now, even though the haunted house name sounds like it’s made for Halloween, these sequins have a more holographic look to them. For example, the tin contains silver, purple, black, white, and hologram colored sequins. In addition, the sequins are round, hexagon, and star shaped.  For this particular project, I paired the sequins up with some purple paint. However, I think with the holographic look that they have could be paired with a variety of paint colors.

So, to find out how to make your own Sequin Coaster Set, keep reading below!

Supplies Needed:
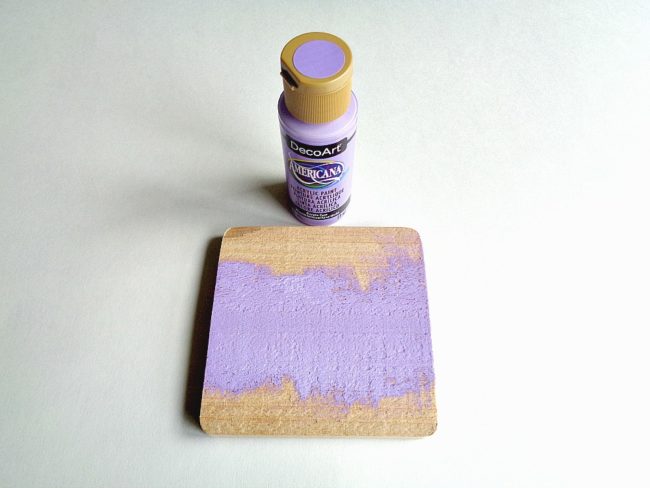
DIY Sequin Coaster Set

Step 1: Paint your wooden coasters on the front and back. Then set each one aside to dry.
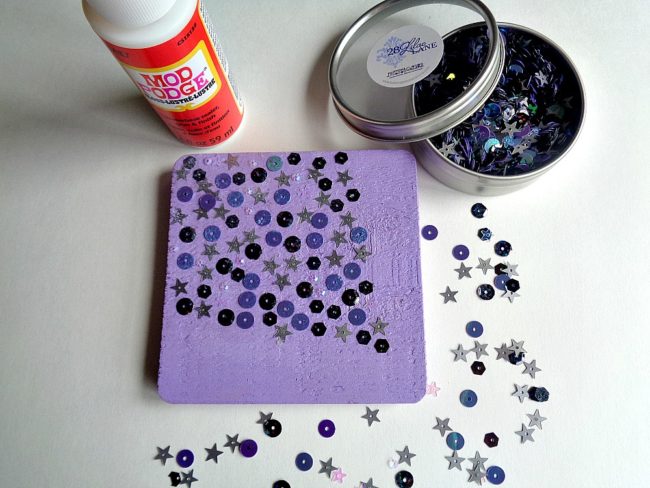
DIY Sequin Coaster Set

Step 2: Apply a layer of Mod Podge onto your coaster then begin adding sequins from the 28 Lilac Lane Haunted House Sequin Tin. While doing this step, you could add your sequins to your coasters in one of two ways. The first way would be to sprinkle the sequins onto the coaster and then spread the sequins out with a toothpick. The second way would be to add each sequin on by hand.

With that being said, no matter what method you use, you want to make sure that your sequins are lying flat on your coaster. This means that sequins should not be glued on top of each other and that each sequin should be lying flat by itself. Also, when making these coasters, I felt that that less was more. For example, I found that using a smaller amount of sequins (in a particular pattern) really gave the coaster a finished look. However, you can do whatever floats your crafty boat.

Once you are done adding your sequins, apply another thin layer of Mod Podge and set the coasters aside to dry.
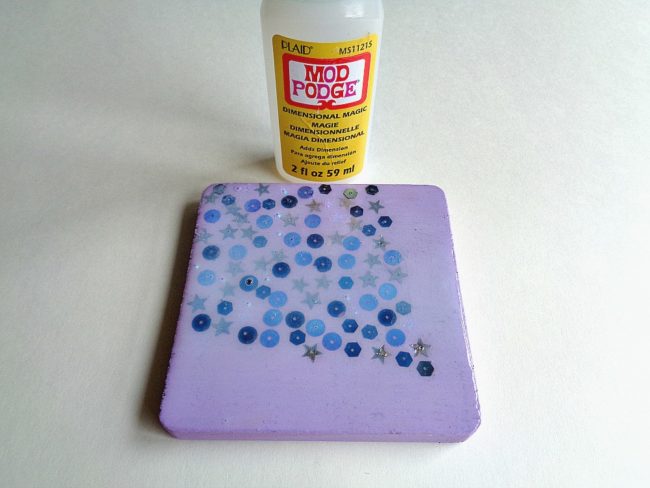
DIY Sequin Coaster Set

Step 3: Now apply a thin coat of Dimensional Magic to the top of your coaster. When applying the Dimensional Magic you may want to have a tooth pick handy so you can pop any air bubbles. At first the top of your coaster may look ”cloudy” but that’s ok because it will dry completely clear. After you finish applying the Dimensional Magic set your coaster aside to dry for 24 hours.

Keep repeating this process with your other coasters.

When the Dimensional Magic is completely dry, you are ready to start using your new coaster set!
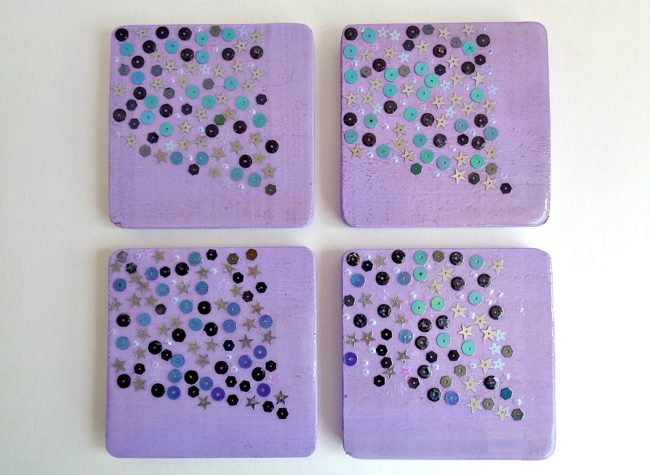
DIY Sequin Coaster Set

DIY Sequin Coaster Set

I loved how this DIY Sequin Coaster Set turned out! Now, I want to make a bunch of different coaster sets in different patterns and colors.

With that being said, this sequin coaster set would be a great summer project to make over the weekend with your kids. Personally, I made these coasters in the afternoon and was able to use them (after the Dimensional Magic had dried) the next day. Also, as coasters, they have held up really nicely with both hot and cold drinks.

This project could be customized with any color scheme that you’d like, of course. If you made this DIY Sequin Coaster Set, what new 28 Lilac Lane Premium Sequin Tin would you use?

SaveSave
0

DIY Holiday Gift Ideas with Buttons

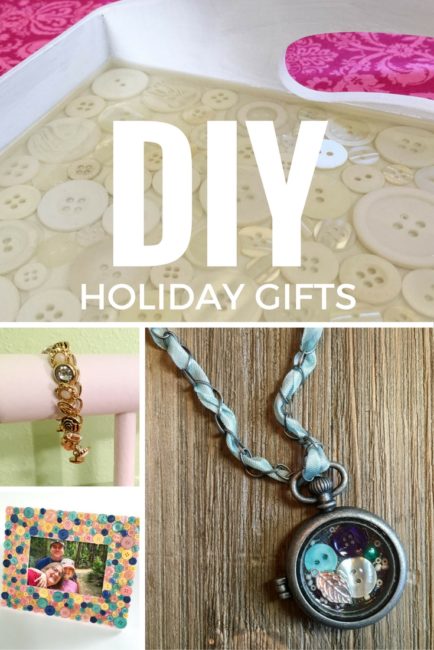
Nothing says you care at the holidays like a handmade gift! These DIY Holiday Gift Ideas with buttons will help you create a gift that matches everyone on your list.

diy holiday gifts

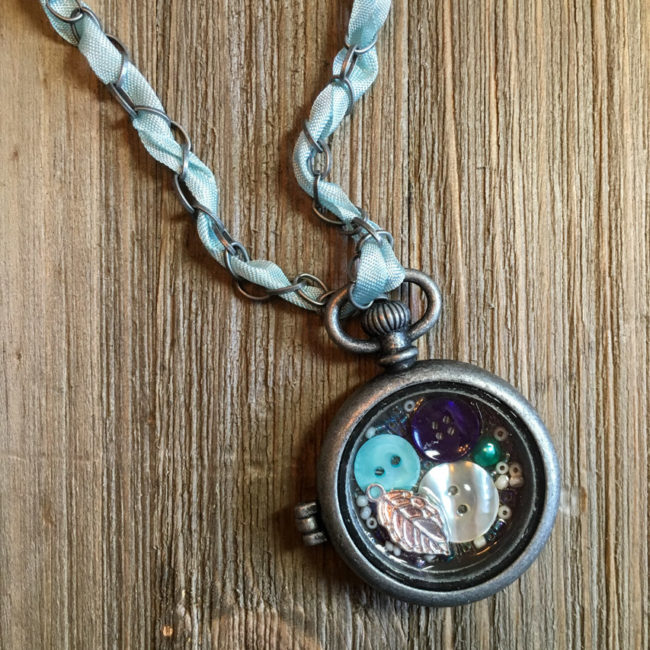
Mixed Media Locket

DIY Holiday Gift Jewelry close-up

With a few jewelry findings and one of our 28 Lilac Lane embellishment kits, you can make a one-of-a-kind locket for a special woman (or girl) in your life. Make it sweet, or make it dramatic…you decide and choose the embellishments!

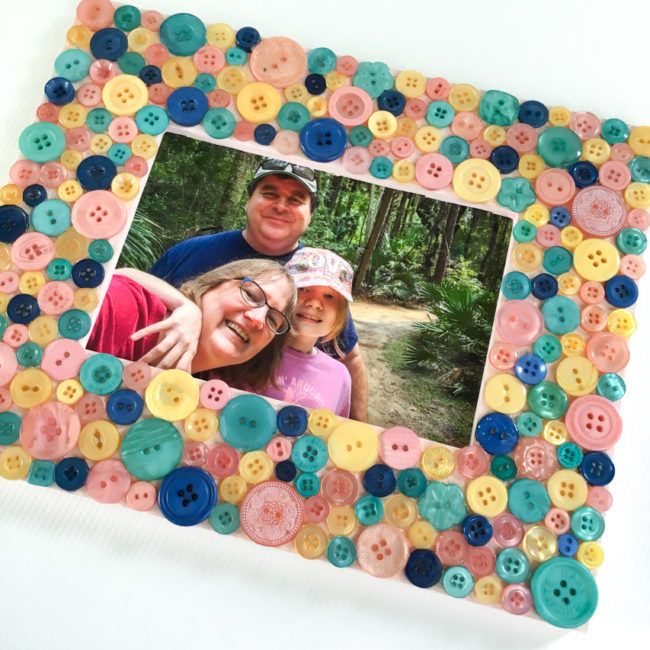
Button Collage Frame

Button Frame with Glam Girl Buttons by Buttons Galore

A button collage frame is so easy to make the kids can do it…but with the right color choices, it can be perfect for any decor from farmhouse to graphic. This one, made with our Glam Girl Button Bonanza, will fit in a tween room or a country decor. An all white version (like the tray below) could go shabby chic, or try shades of pink for a cute girl’s room accessory!

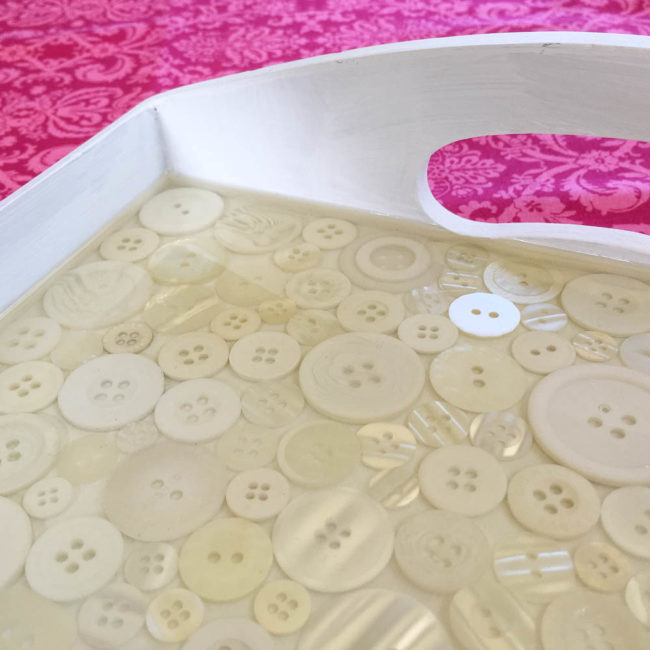
Button Tray

Button Tray close-up

A simple wood tray becomes a beautiful accessory for decor or entertaining with a button collage and some resin.  For a shabby chic look, choose the Ivory/Pearl Haberdashery buttons, or for a more rustic or beachy feel for poolside entertaining, try the Natural Haberdashery.

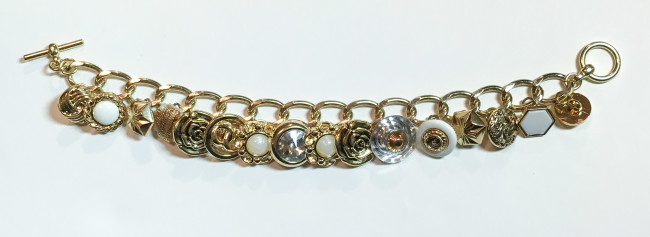
Button Charm Bracelet

gold button charm bracelet

How about a little button bling? Pair some of our Gold/Silver Haberdashery buttons with a chain link bracelet and you’ve got a retro Button Charm Bracelet. It’s a great piece to accessorize all of those trendy 70’s looks with!

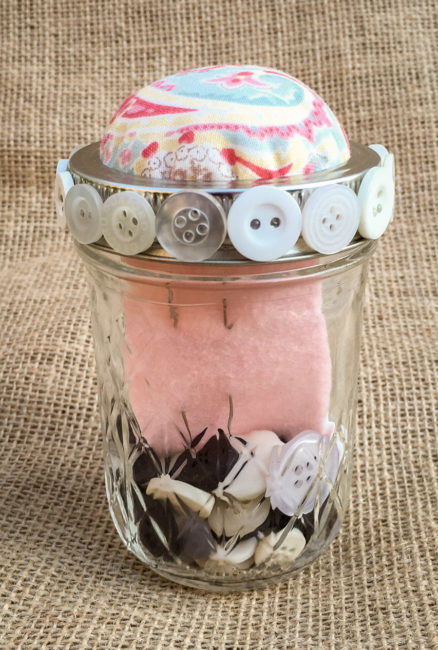
Mason Jar Sewing Kit

Mason Jar Sewing Kit

Looking for something pretty and practical too? This mason jar sewing kit will make it easy and fun for your college student or newlywed to replace that missing button. And it is decorative while it is waiting to be used!

0

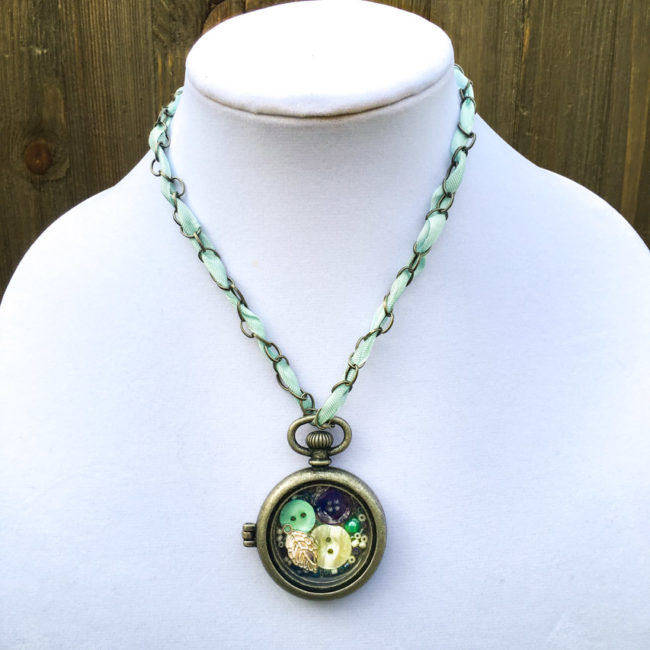
DIY Holiday Gift | Mixed Media Locket with 28 Lilac Lane

Christmas shopping time has arrived…and so has Christmas gift crafting time! A custom piece of jewelry is the perfect DIY holiday gift for a friend or family member…and with 28 Lilac Lane embellishments, a surprisingly easy one!

DIY Holiday Gift Jewelry

Supplies:

This locket is built using a very simple process. Fill the bottom of the locket with a single layer embellishments. Start with the large items (the buttons) and then fill in around them with the small items like the beads and pearls. Vary the color and placement of the items. Select a charm but don’t place it in the locket just yet!

Once you are satisfied with the placement of your bottom layer of embellishments, get out your Ice Resin. Following the directions on the package, use the Ice Resin to fill in a layer of epoxy on top of the layer of embellishments. Stop filling when the layer is just slightly covered. Before the resin dries, press the charm that you saved earlier into the top of the epoxy. It should just be slightly embedded, protruding out the top of the epoxy layer.

DIY Holiday Gift Jewelry close-up

To create the ribbon embellished chain, thread a large needle (or a knitting darning needle) with the ribbon. Then weave it in and out of every other link the chain so that it is threaded into it. Tie the ribbon off to the chain at each end.

The fun thing about these DIY holiday gift lockets is that they can be created for any theme or color scheme, to perfectly match the recipient it is intended for! To see a different interpretation of this project in a pink color scheme, check out our previous mixed media locket article.

0

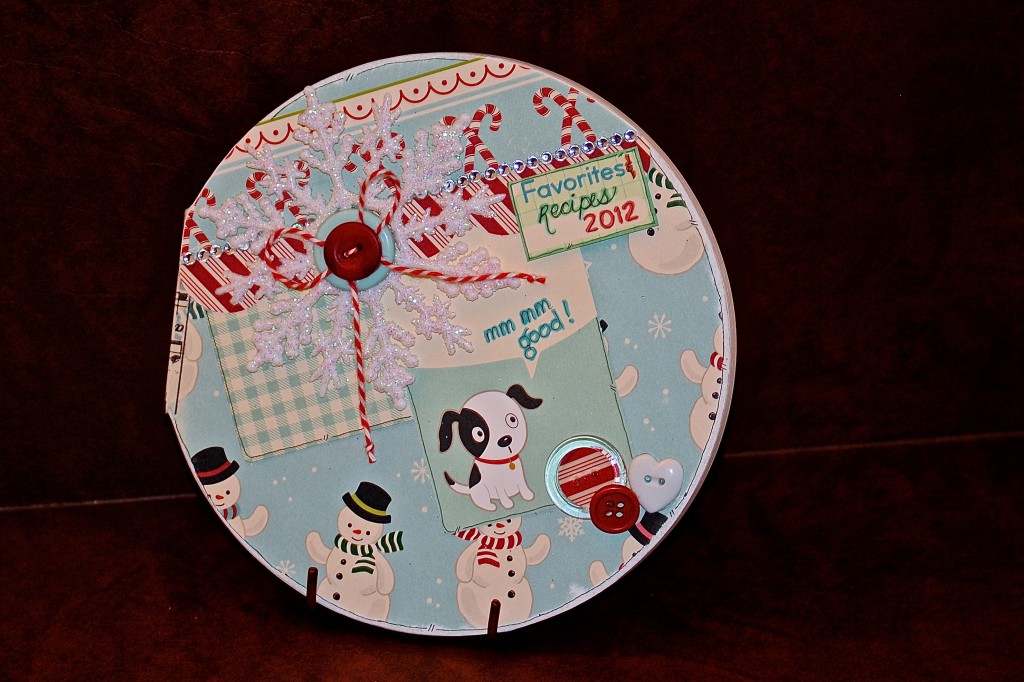
DIY recipe book – holiday favorite Recipes

Holiday Album


Recipe books make great gifts.  They are fun to create and pass down to younger generations.  I created a fun Holiday recipe book using a Blank Board 7″ Circle Book from the Altered Arts Section at C&T Publishing.

Every year, we try new recipes or crafty tricks, or a new tradition. This year, we’ll be keeping track by making notes and taking clippings to add to this fun book. C&T Publishing was kind enough to provide us with a sample of their products, and I had a lot of fun playing.

Materials used in the DIY recipe book:

This book is covered with paper from October Afternoon, then embellished with matching journaling cards, a die cut scalloped border from My Favorite Things and a bling border from Want2Scrap. A glittered snowflake ornament was adorned with some buttons from Laura Kelly tied together with some Baker’s Twine.  When height doesn’t matter, I love to layer buttons! In the bottom right corner, there is a cluster of buttons from the Clear Button Grab Bag, a bulk package of Ivory Buttons, and Valentine Hearts. A small circle was punched from matching patterned paper and placed behind the clear button. It’s fun to match clear buttons to your project!

I found that Beacon’s 3-1 Adhesive worked best to hold on the elements. I also used some Glue Dots.

Thanks for looking, I hope your holidays are filled with lots of favorites and yummy goodness you’ll also want to cherish.  Make your own holiday recipe book


2

Holiday Gift Container Embellished with Christmas Buttons & GIVEAWAY!

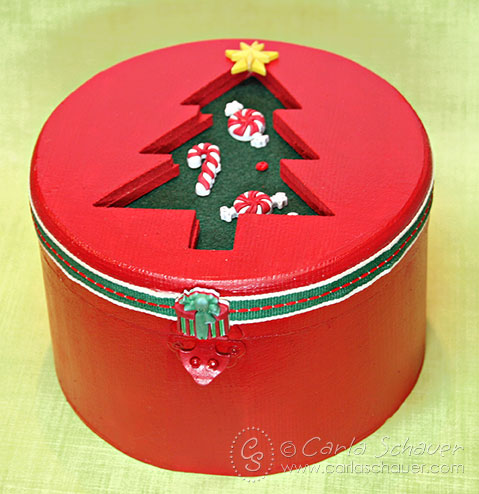
The Christmas season is getting closer, and along with the season comes cookie baking.  Giving baked goods as a gift becomes even more festive when delivered in a handmade gift box embellished with themed Christmas buttons.

Holiday Candy Gift Container with Themed ButtonsDirections to make a gift box with Christmas buttons:

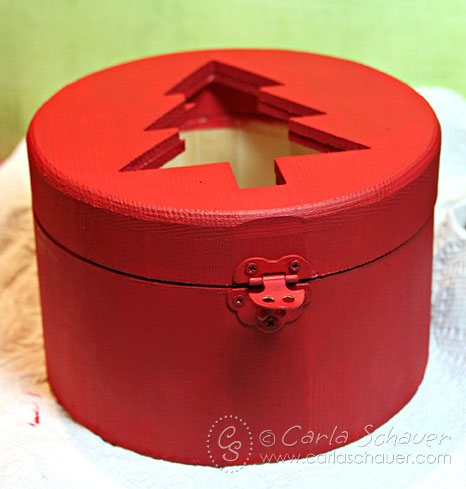
I began with an unfinished wooden box I purchased at a craft store, and painted using “Santa Red” (how appropriate!) on the inside of the lid and the outside of the box.  I also painted the inside of the box base a dark green to match the felt.

Red Painted Wood Gift Box with Holiday Buttons

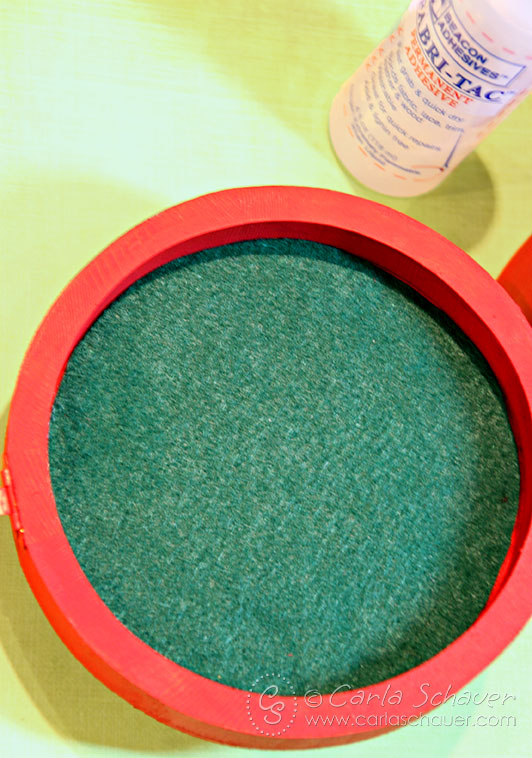
I lined the lid of the box with a circle cut from dark green felt, glued in place using Fabri-Tac Adhesive.  The dark green showing through the tree cut-out in the top of the box made the perfect showcase for the Christmas buttons.

Felt Lid Lining of Holiday Candy Gift Box with Buttons

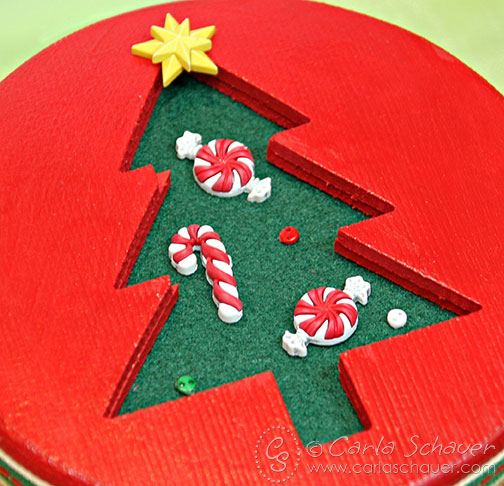
To embellish the felt tree using the Christmas buttons, I began by removing the shanks from the candy cane and peppermint swirl candy buttons using the Button Shank Remover and gluing them to the felt using the Fabri-Tac Adhesive.  I also glued on three of the micro buttons to simulate ornaments.  I glued the star to the tree top without removing the shank, since it fit nicely into the cut out area.

Button Embellished Holiday Gift Box Lid

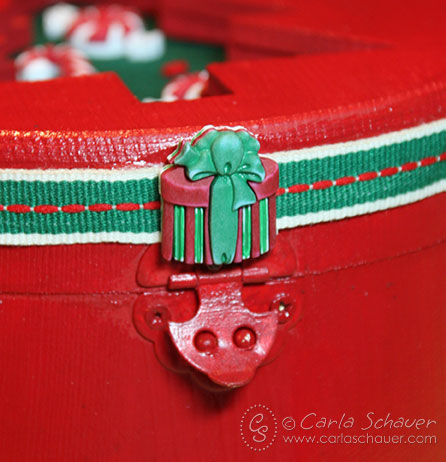
A red and green stitched grosgrain ribbon glued around the lid added another touch of texture to the wooden gift box, and I used a gift-shaped Christmas button as a final accent and to cover the ribbon ends.

Button Embellished Holiday Candy Gift Box Front


With a little paint, some felt, and some Christmas buttons, you can make a gift of goodies even more personal.  Make several at a time before the holiday season is in full swing, so they’re ready for y0ur fresh baked holiday gifts.

Thanks for stopping by,

Carla

November 16 is National Button Day.  Leave a comment here with your favorite button collection an you could win themed Christmas buttons.  Comments must be received by Sunday night at midnight est.


Powered by WordPress. Designed by WooThemes