
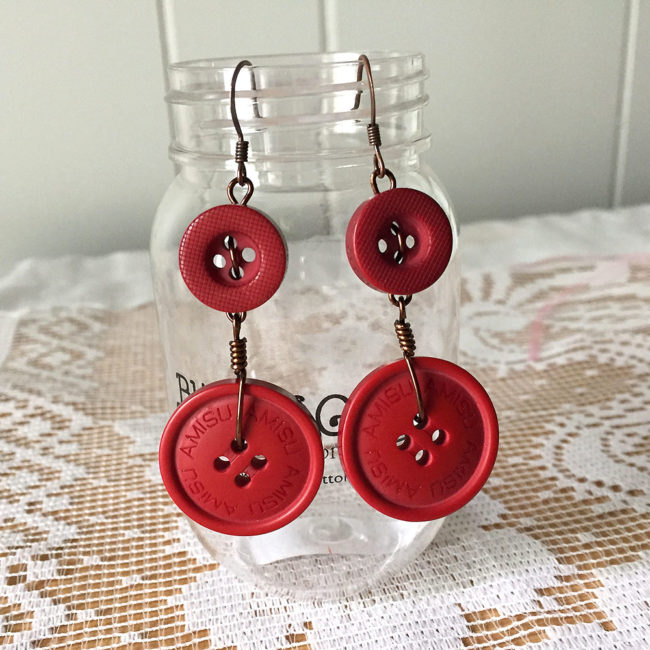
Hi! It’s Anaya from the Buttons Galore & More Design Team. With the holidays fast approaching, you’ll surely want to dress to impress for all of the upcoming parties and celebrations. If you’re like me, you get tired of showing up in the same old boring earrings. Well, today I’ve got the perfect project for you – DIY Dangle Earrings! Continue Reading →
Tag Archives | jewelry making
Party On Sequin Pendant Necklace
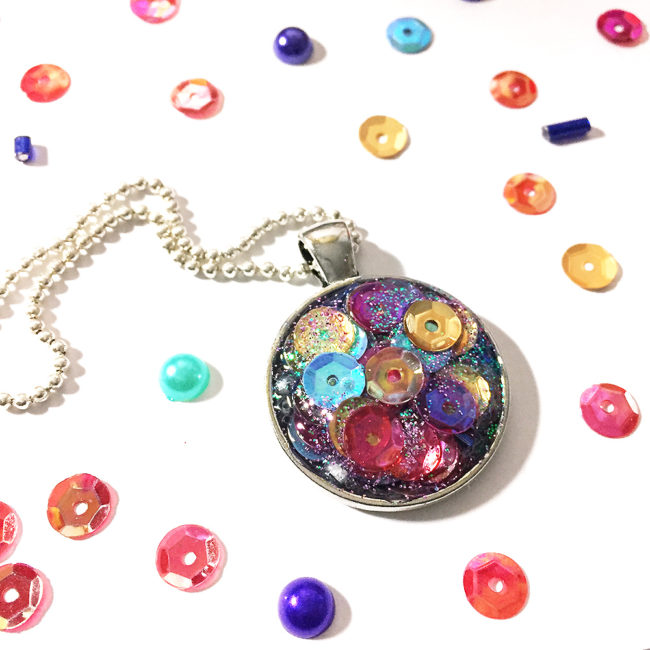
Who doesn’t love an invite to good party? I know I do! When you walk through the door (fashionably late, of course) you can be the center of attention in this quick, easy to make sequin pendant necklace! Continue Reading →
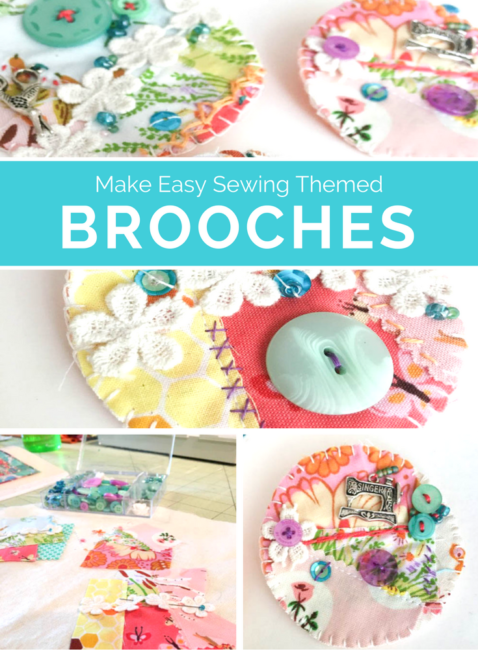
DIY Flower Button Brooches for Fall Fashion Cheer!
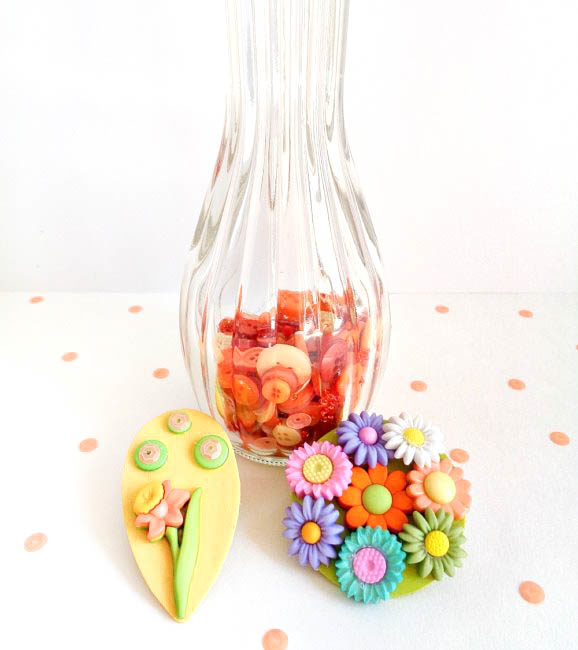
Hello button lovers! This is Katie from the Buttons Galore & More Design Team, and today I have a fun DIY flower button brooches project if you are someone who is just not ready to make that transition into the fall season!
Now, as a fall season girl at heart, I know making flower button brooches sounds a bit weird in September. However, there are those folks who just love spring and summer. If this is you, then these flower button brooches should make the fall season a bit more bearable and make those warm cardigans a bit cuter! Continue Reading →
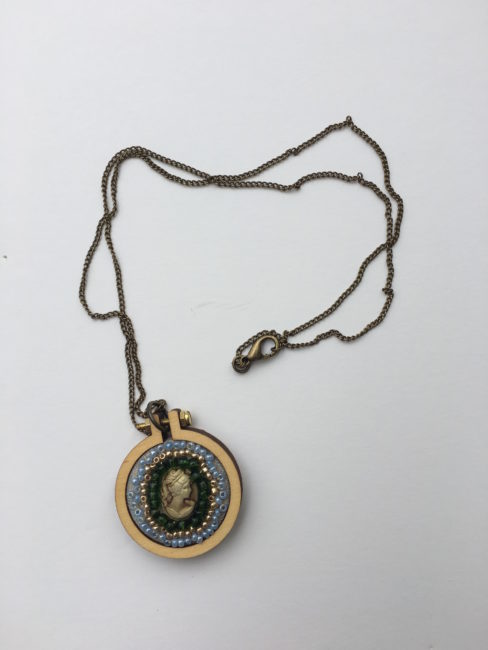
Gift A Beautiful Beaded Pendant
My project today is a sweet little pendant necklace that comes together pretty quickly and makes a great gift.

Don’t be daunted by the idea of sewing on the beads! It’s true that sewing beads can be a little fiddly because of their tiny size, but once you get the hang of it, it’s a great beginner project for jewelry making.
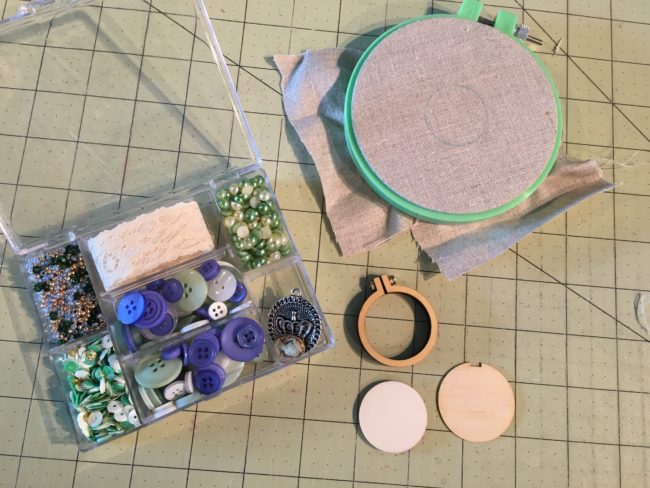
Here’s what you need to make this little beaded pendant necklace:
- 28 Lilac Lane “Tea Time” set
- mini embroidery hoop set
- DMC 3046 divisible embroidery floss
- scrap of natural colored fabric
- embroidery needle
- embroidery hoop
- scissors
- necklace chain + jump ring
- craft glue
- hot glue gun
Put your scrap of fabric inside your embroidery hoop for sewing and outline the inside circle of the mini embroidery hoop with a pencil onto your fabric. Using the little cameo from the 28 Lilac Lane set, use craft glue to glue this to the center of the circle you just outlined. Let dry completely before moving on.
After your cameo is completely dry and securely attached to your beaded pendant, take a small plate (or use the lid of the Tea Time set) to pull out the beads. From your divisible embroidery floss, pull out one thread strand and thread your needle, making sure to leave a knot in the end. Sew a row of the larger green beads around the edge of the little cameo. Then repeat with the gold beads and then the blue beads.

To finish your beaded pendant, position the mini hoop on your design and draw a cutting line approximately 1/2 inch around the hoop. Cut it out. Place the cut design on the center plate. Then place the mini hoop on top and push it down to secure it. Flip it over and using a hot glue gun, place the glue around the inner edge. Push the fabric down in a circular motion. Add glue to the backing piece on the inner edge. Position it on the back of the hoop with the notch top and center.
You can either add a jump ring to your beaded pendant for your necklace chain to go through or thread the chain through the bolt in the center of the hoop.
Voila! You have a sweet little beaded pendant necklace ready to wear on a fun night out or to gift to a friend!
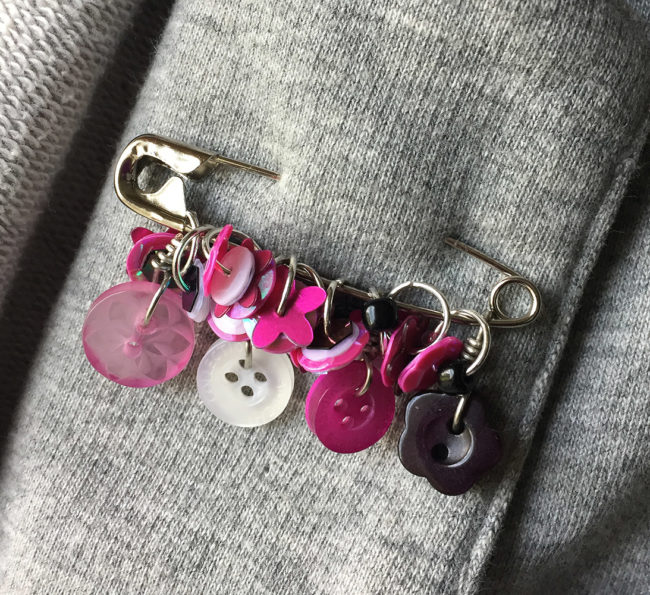
Sequin Safety Pin Jewelry will bling up your look!
I’m constantly on the look out for fun accessories. But what I love more than looking for cool things is making my own. If you feel the same way, I have a beginner project to help you accessorize. In just a few easy steps, you can make sequin safety pin jewelry!
Here’s what you’ll need to make sequin safety pin jewelry:
- 28 Lilac Lane “Hibiscus Bloom” Sequin & Bead Mix
- 28 Lilac Lane “On Lilac Lane” Embellishment Bottle
- Buttons Galore “Black & White” Button Basics
- 8mm jump rings
- 2″ safety pin
- jewelry pliers
- wire cutters
- 20 gauge jewelry wire
How to make sequin safety pin jewelry:
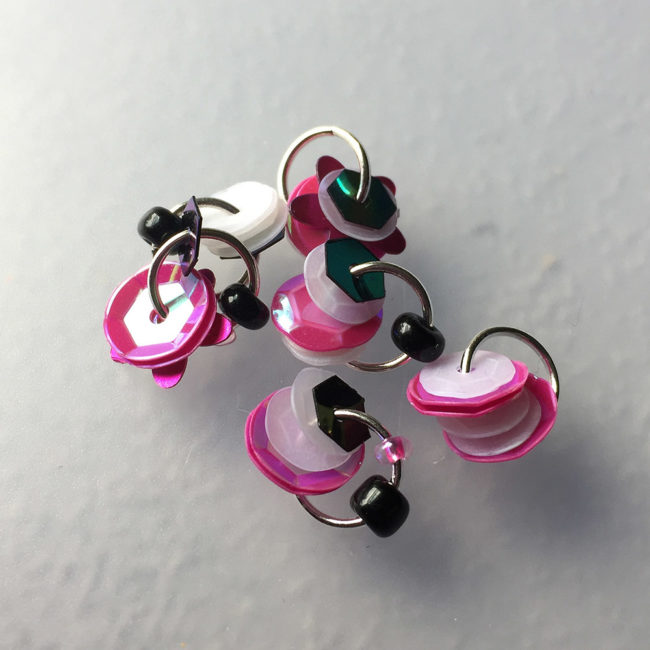
To start making your sequin safety pin jewelry, open the 8mm jump rings with jewelry pliers and add about 4-6 sequins to each ring along with a bead or two if you’d like. The rings will move around a lot if you start adding them to the pin as you go, so you may find it easier to just make a pile of completed jump rings.
Once you have about 10-12 rings finished, add them to the safety pin. The jump rings should be added to the immovable side of the pin. At this point the pin will look pretty awesome as is, but I just love to add buttons to everything! I find the buttons not only give the pin a unique look, but they will also help keep the jump rings from floating around the loop at the end of the pin.
Cut a 5 inch length of wire. Place wire through one of the buttons holes. Bend one end of wire toward the back of the button. Twist that wire around 3-5 times and trim it. Cut the other piece short, but leave enough wire to create a loop.
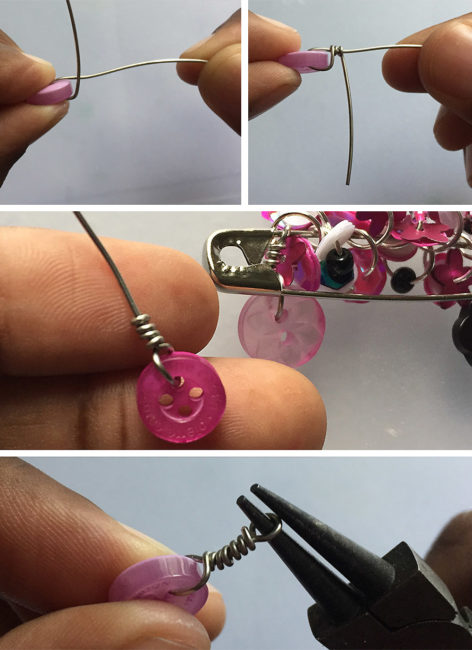
Be sure to add a button before the first jump ring and behind the last ring on the pin. This will keep the jump rings from sneaking past the loop and getting away.
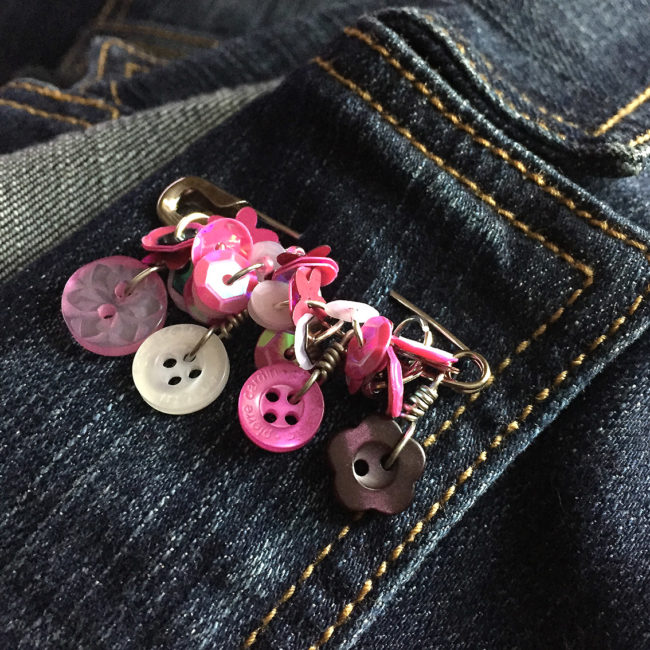
And your sequin safety pin jewelry is done!
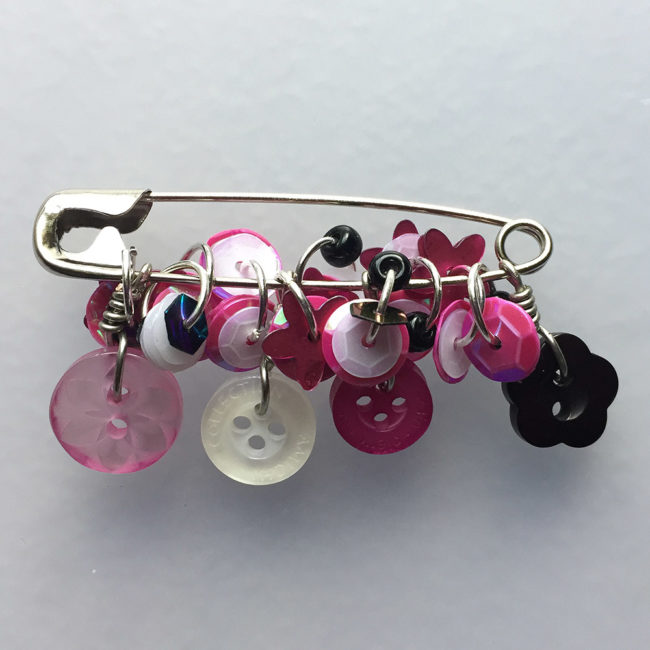
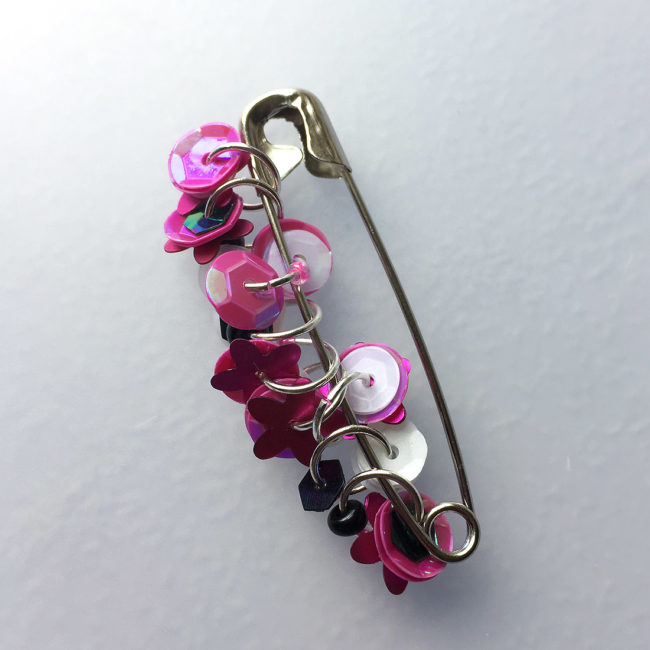
There are so many options and color combinations available that I have already made myself a nice variety of sequin safety pins! I hope you find this to be a fun and easy way to bring a unique jewelry touch to an old shirt, jacket, or backpack.
Sew Crafty Brooches Make Great Gifts for Crafters
These little crafty brooches make a great quick and easy gift for the lady in your life who loves to sew and create. Use up some scraps of fabric, spread your creative wings and add some bling with a sweet 28 Lilac Lane embellishment kit.

Here’s the supplies you will need:
- 28 Lilac Lane “Sew Crafty” embellishment kit
- scraps of fabric
- wool felt (for the backs)
- cotton fabric (for the tops)
- pins (Wonderclips are also super helpful)
- sewing needle
- embroidery floss (various colors)
- jar lid (or something 2-3″ round to trace)
- a sewing machine (not required, but helpful)
- safety pin or jewelry pin backs
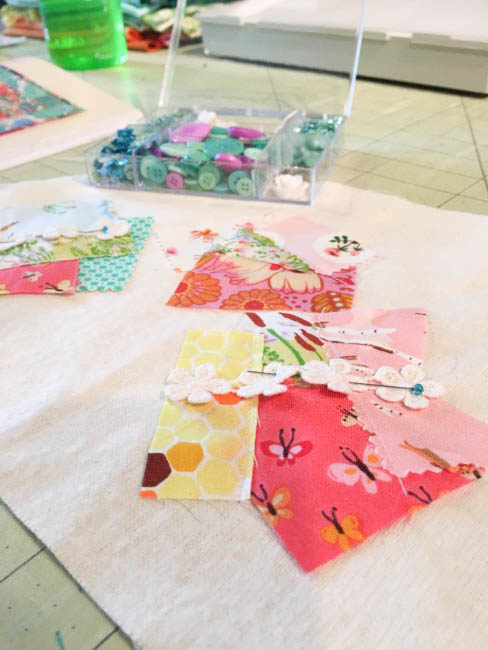
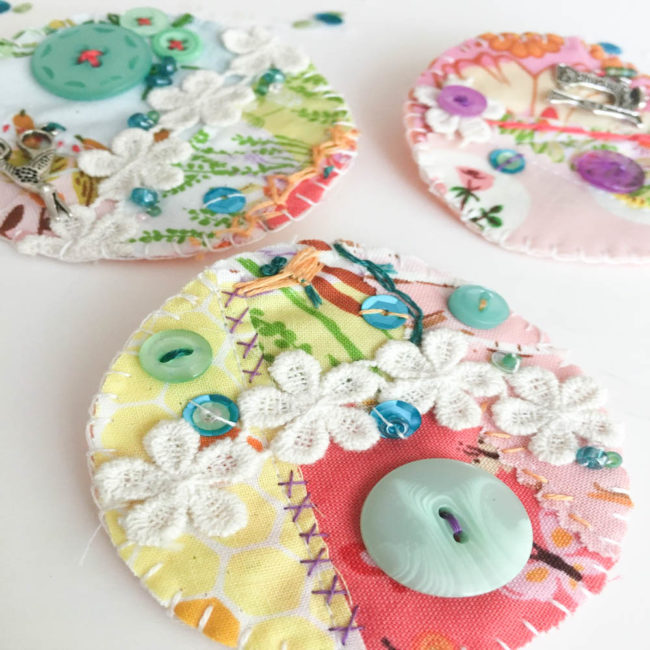
First, I laid out my backing fabric (I used a thicker cotton muslin that I had in my stash, but just a general cotton or even felt would work fine too). With a jar lid I had, I traced an outline of my circles onto the top of the fabric. Then I gathered up some various scraps of fabric and laid them out within the outlined circle. I used my sewing machine to sew down a few of the seams, but this could easily be done by hand with just a back stitch using a single strand of embroidery floss.
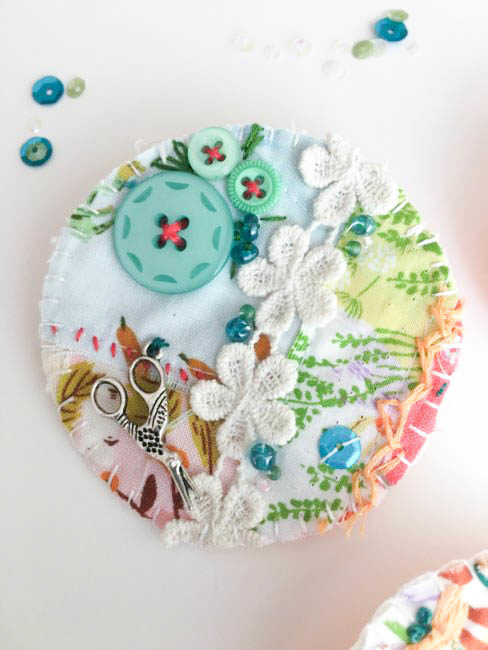
Next up, I laid out different elements from the 28 Lilac Lane “Sew Crafty” embellishment kit. The kit includes some trim, sequins, beads, buttons and a few charms. The trim lends itself greatly to being used as a typical trim or even cutting off each flower individually. This is where you can be creative and every brooch you make will be different!
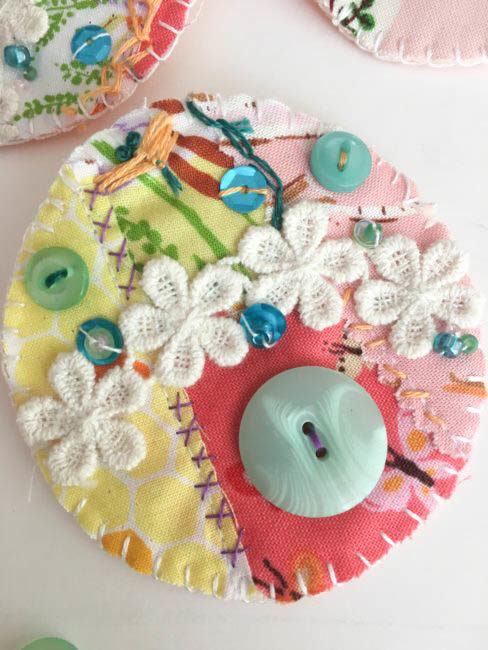
On a few of the seams I chose to add some simple embroidery stitches. I used two strands of divisible embroidery floss for all of my stitching. I made simple X’s, seed stitches, and a chainstitch. I sewed down the trim with a single strand of white embroidery thread and just stitched down on the flowers where the stitches won’t be seen.
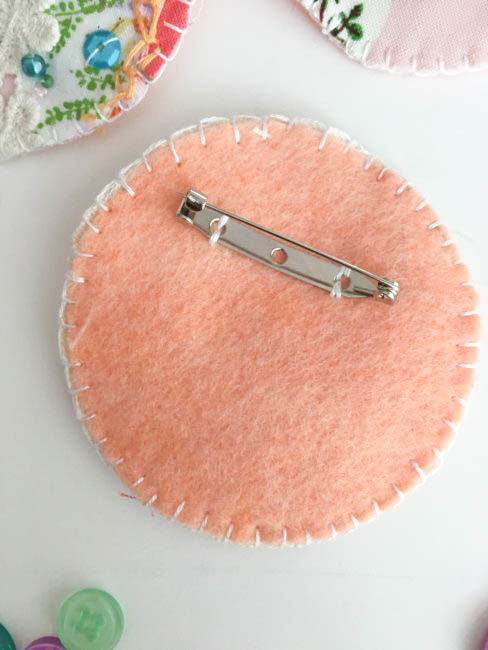
To finish out my crafty brooches, I took some felt and using the same jar lid cut out the felt and the brooch circles. The pin backs I used can be either sewn or glued down. I sewed down the pin back onto the felt.
Finally, I matched the top and backs of the brooches with wrong sides together. The brooches were sewn together using a buttonhole stitch to stitch the two layers together around the edge. There you have it!! Sweet little crafty brooches ready to wear!
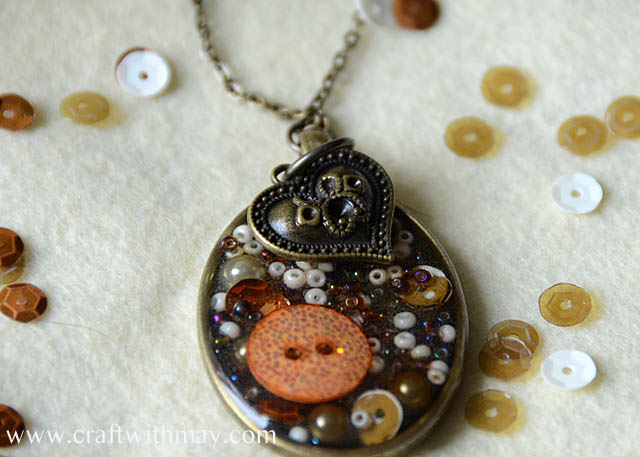
DIY Holiday Gift | Mixed Media Locket with 28 Lilac Lane
Christmas shopping time has arrived…and so has Christmas gift crafting time! A custom piece of jewelry is the perfect DIY holiday gift for a friend or family member…and with 28 Lilac Lane embellishments, a surprisingly easy one!

Supplies:
- 28 Lilac Lane “Attic Findings” embellishment kit
- 28 Lilac Lane “A New Leaf” embellishment kit
- Locket & Chain
- Ice Resin single use epoxy
- Pale Turquoise Ribbon
This locket is built using a very simple process. Fill the bottom of the locket with a single layer embellishments. Start with the large items (the buttons) and then fill in around them with the small items like the beads and pearls. Vary the color and placement of the items. Select a charm but don’t place it in the locket just yet!
Once you are satisfied with the placement of your bottom layer of embellishments, get out your Ice Resin. Following the directions on the package, use the Ice Resin to fill in a layer of epoxy on top of the layer of embellishments. Stop filling when the layer is just slightly covered. Before the resin dries, press the charm that you saved earlier into the top of the epoxy. It should just be slightly embedded, protruding out the top of the epoxy layer.
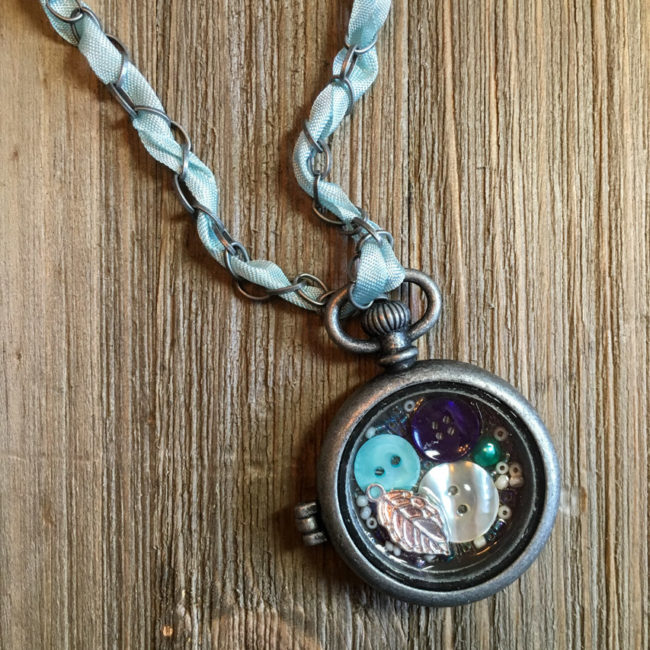
To create the ribbon embellished chain, thread a large needle (or a knitting darning needle) with the ribbon. Then weave it in and out of every other link the chain so that it is threaded into it. Tie the ribbon off to the chain at each end.
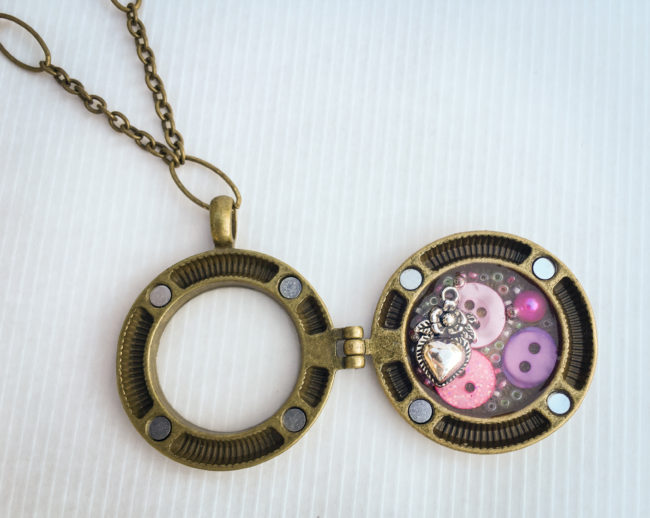
The fun thing about these DIY holiday gift lockets is that they can be created for any theme or color scheme, to perfectly match the recipient it is intended for! To see a different interpretation of this project in a pink color scheme, check out our previous mixed media locket article.
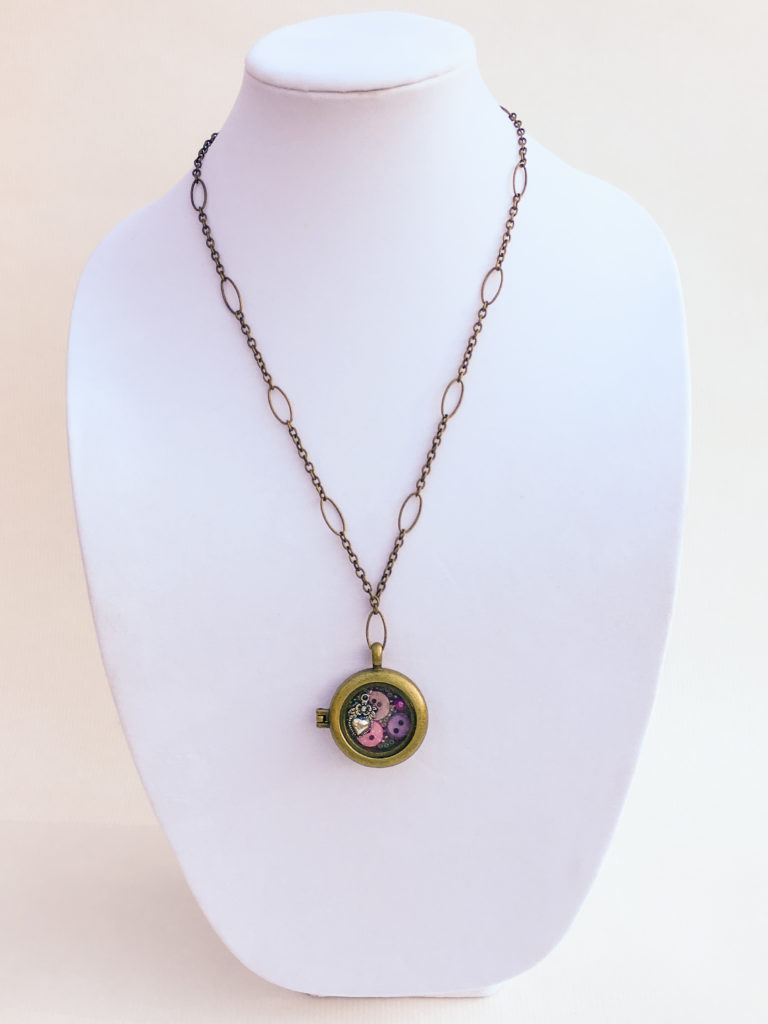
Wear Your Buttons with a Beautiful Mixed Media Locket!
Think our 28 Lilac Lane buttons are too beautiful to hide at home in your craft room? We do too! That’s why I made this this beautiful locket that showcases some of my favorite elements from the collection. This mixed media locket is a fun and eclectic piece of button jewelry that will let me show off my love of crafts in a fashionable way.
Supplies needed:
- Chain & Locket
- 28 Lilac Lane “Pretty Princess” embellishment bottle
- 28 Lilac Lane “Attic Findings” embellishment kit
- Ice Resin single use epoxy
This mixed media locket is created by encasing 28 Lilac Lane embellishments in Ice Resin, a clear drying epoxy that is available in single use syringe dispensers. It’s a fast and easy project that can easily be completed in an hour or so, except for allowing dry time for the epoxy.
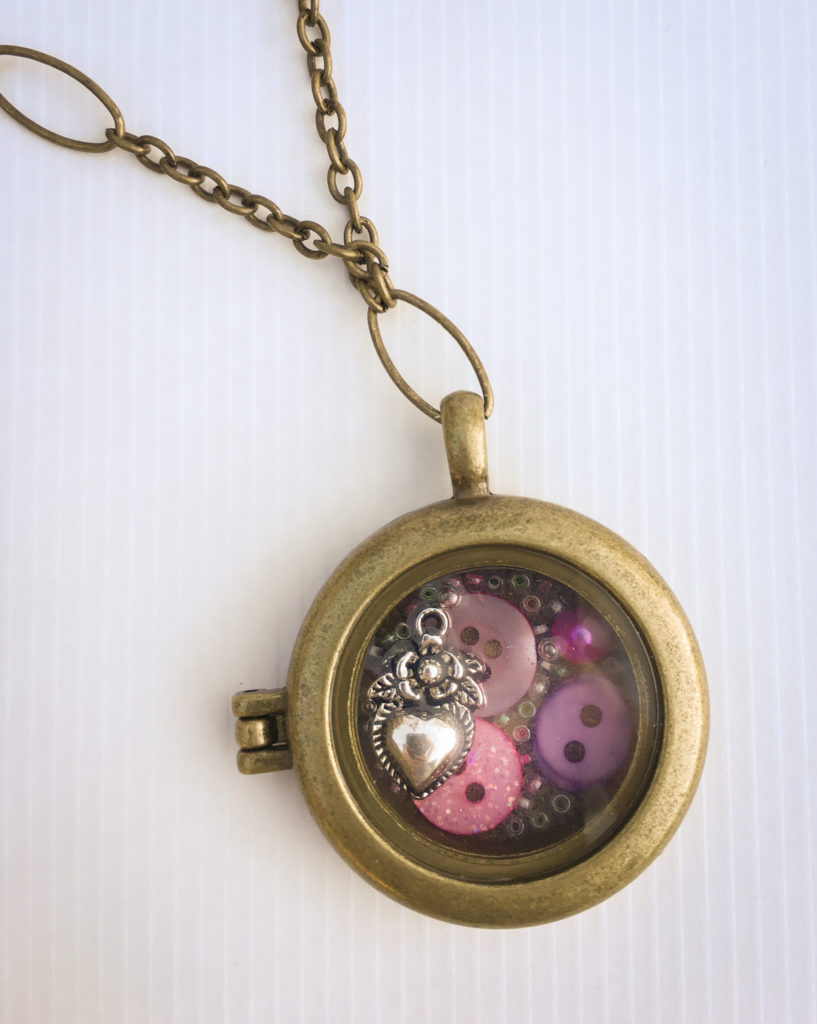
To make my design, I started by arranging the large colored items – the buttons and the flat back pearl – inside the locket. Once I was happy with how they looked, I gently filled in around them with the seed beads. This part of the process requires patience, as sometimes it means placing the beads one at a time.
Once the bottom layer of embellishments is placed, I selected a charm to place on top and set it aside.
Working with the epoxy was something I’d wanted to do for awhile but I was, I admit, a bit intimidated to try it. It turned out to be very easy – just push the plunger down to get the amount that you want, and stir! Once the epoxy was mixed well, I poured it over the bottom layer of embellishments to cover and hold them in place in the locket. Then I quickly pressed the charm down on top of the epoxy, so that it was just barely embedded and stuck out from the top. (Be very careful to not get your fingers in the epoxy! I suggest dropping the charm in and then using a toothpick or other tool to nudge it into place.)
Once the resin is dry, you can add a chain to your locket. Then you can wear and enjoy your mixed media locket masterpiece to share your love of crafts – and 28 Lilac Lane – through fashion!
28 Lilac Lane Pet Pendant with Ice Resin
I am new to the world of resin, but I’m really excited to test out possibilities and combine it with my new 28 Lilac Lane kits! Creating a dimensional piece for my daughter to wear in honor of our dogs seemed like a really fun place to start, and I hope that you enjoy this video tutorial. There are so many fun ways to utilize the Paws & Pets kit, and all of the kits in this line!
Jewelry Making – An Orange and Blue Necklace

Orange and Blue Button Necklace
I love the color combo used to make this necklace!
While it’s not a complete tutorial you can find the basic rundown of how this necklace was made over on Craftster. If you have any experience making jewelry a quick run down is all you need.
I think that our Button Bonanza: Summer Time would be a perfect choice for this.
Or what about the Button Tote: Cornucopia for more of a Fall look? Maybe with an antique gold or brass chain? Oh yeah. I like that idea…. might make one myself! :)