Header

Tag Archives | homemade Christmas ornaments

Make DIY Sparkling Snowflake Ornaments with 3D Buttons

Snowflake Ornament with the Snowflake Value Pack Buttons

I’m not quite ready for Christmas just yet, but it’s never too early to start planning! Snow is not my most favorite thing in the world. It’s wet and much too cold for this desert girl! I’m a summer fan for sure. However, I do love beautiful snowflakes. Every year I decorate my kitchen with lovely, sparkly snowflakes. I always say that it’s my favorite kind of blizzard! This year I have plans to put a small white tree in the kitchen, decorated with more snowflakes, of course. I wanted to make some of the ornaments myself, and the adorable snowflake buttons in the Snowflakes Value Pack were just perfect for the task of making snowflake ornaments! Continue Reading →

1

Make DIY Button Filled Christmas Ornaments with the Kids!

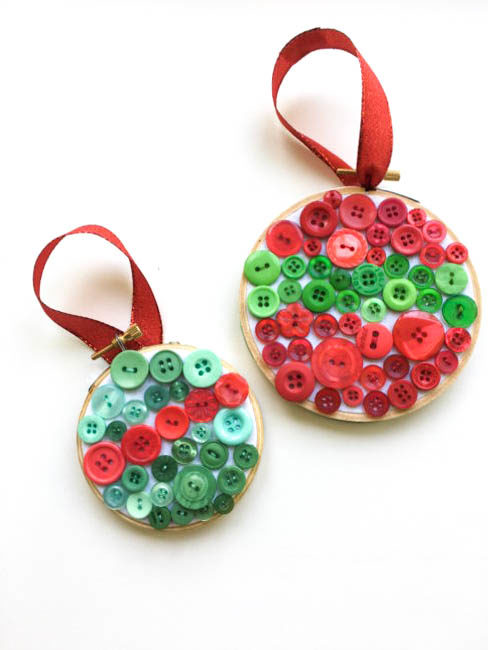
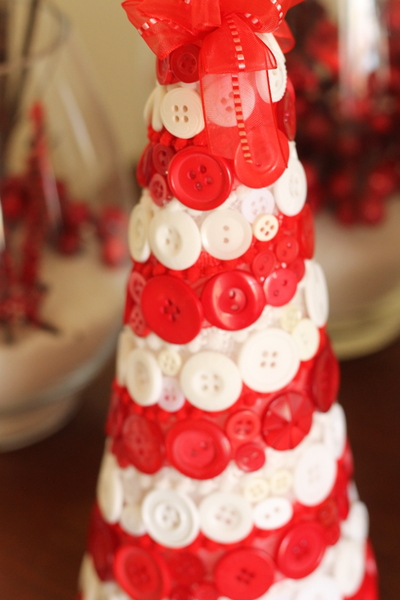
Hello Everyone! This is Katie from the Buttons Galore & More Design Team and today I have a fun button filled ornament project for you to make if you are loving Christmas in July!

The great thing about this button filled ornament project is that it doesn’t involve any type of special tools or glue. Because of that, these button filled ornaments are super easy to put together and would be the perfect project to make with your kids. In addition, since this project requires no drying time and is only three steps, you can make a ton of these ornaments over the course of a weekend!

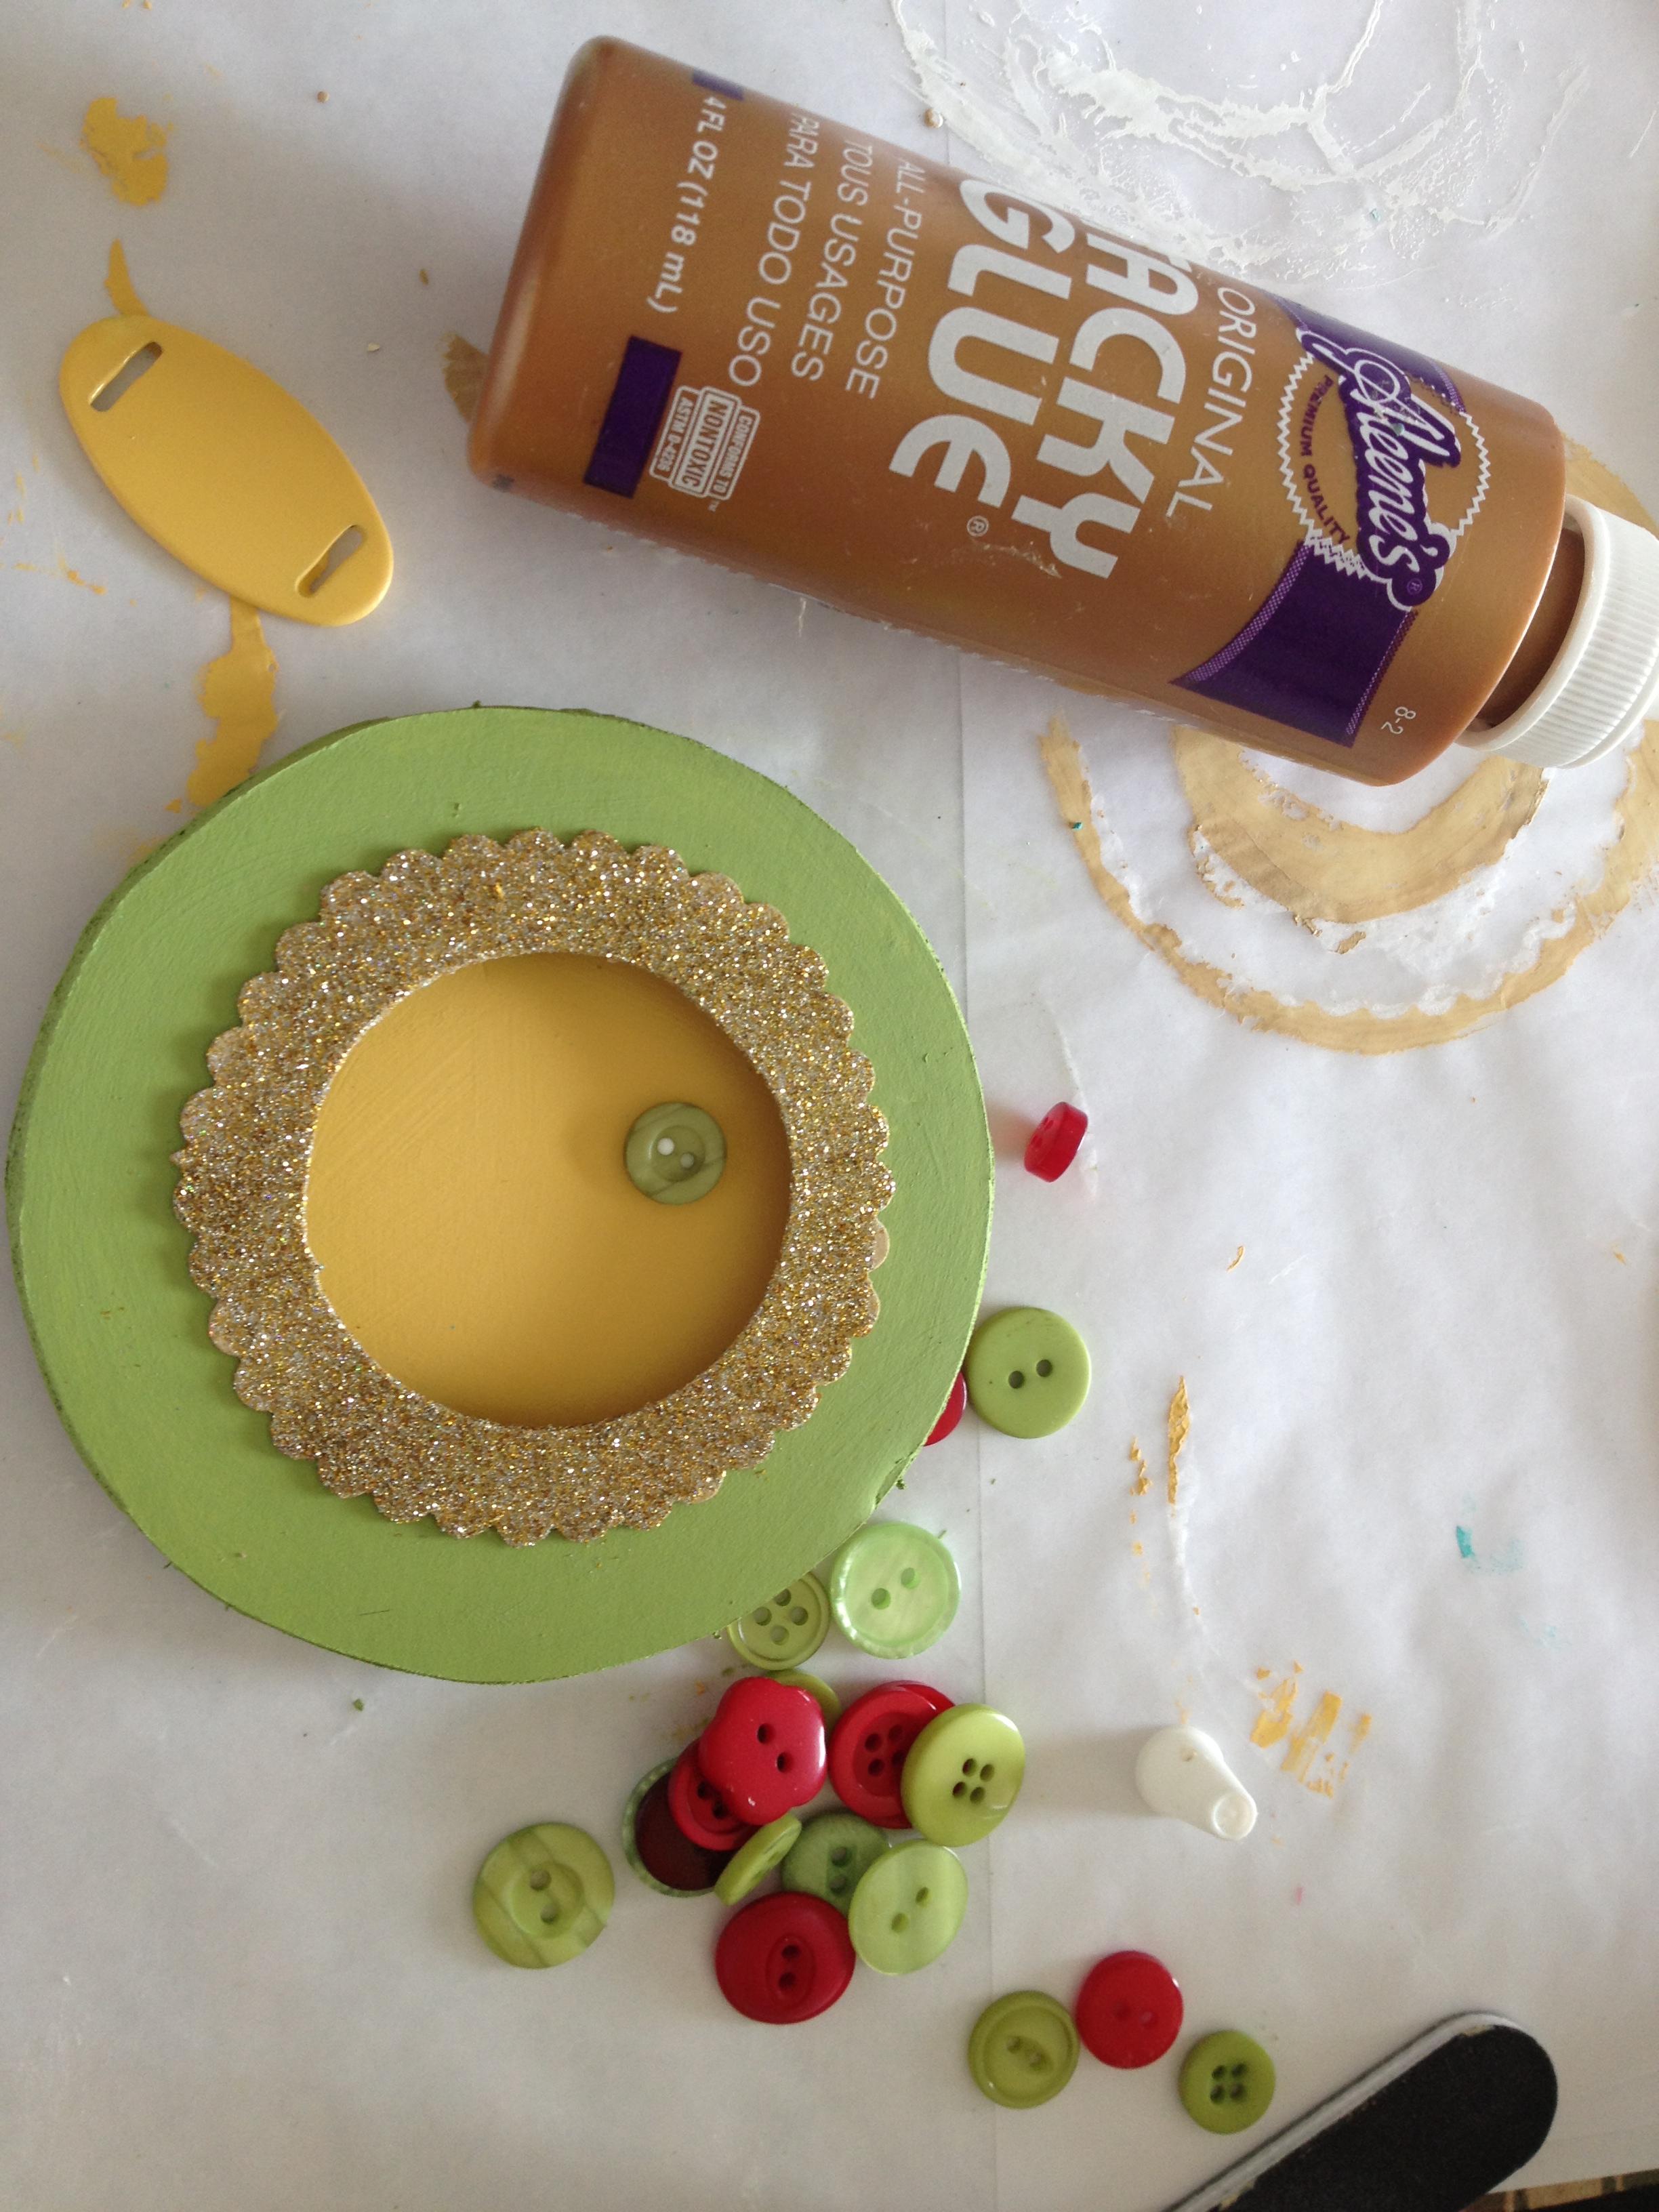
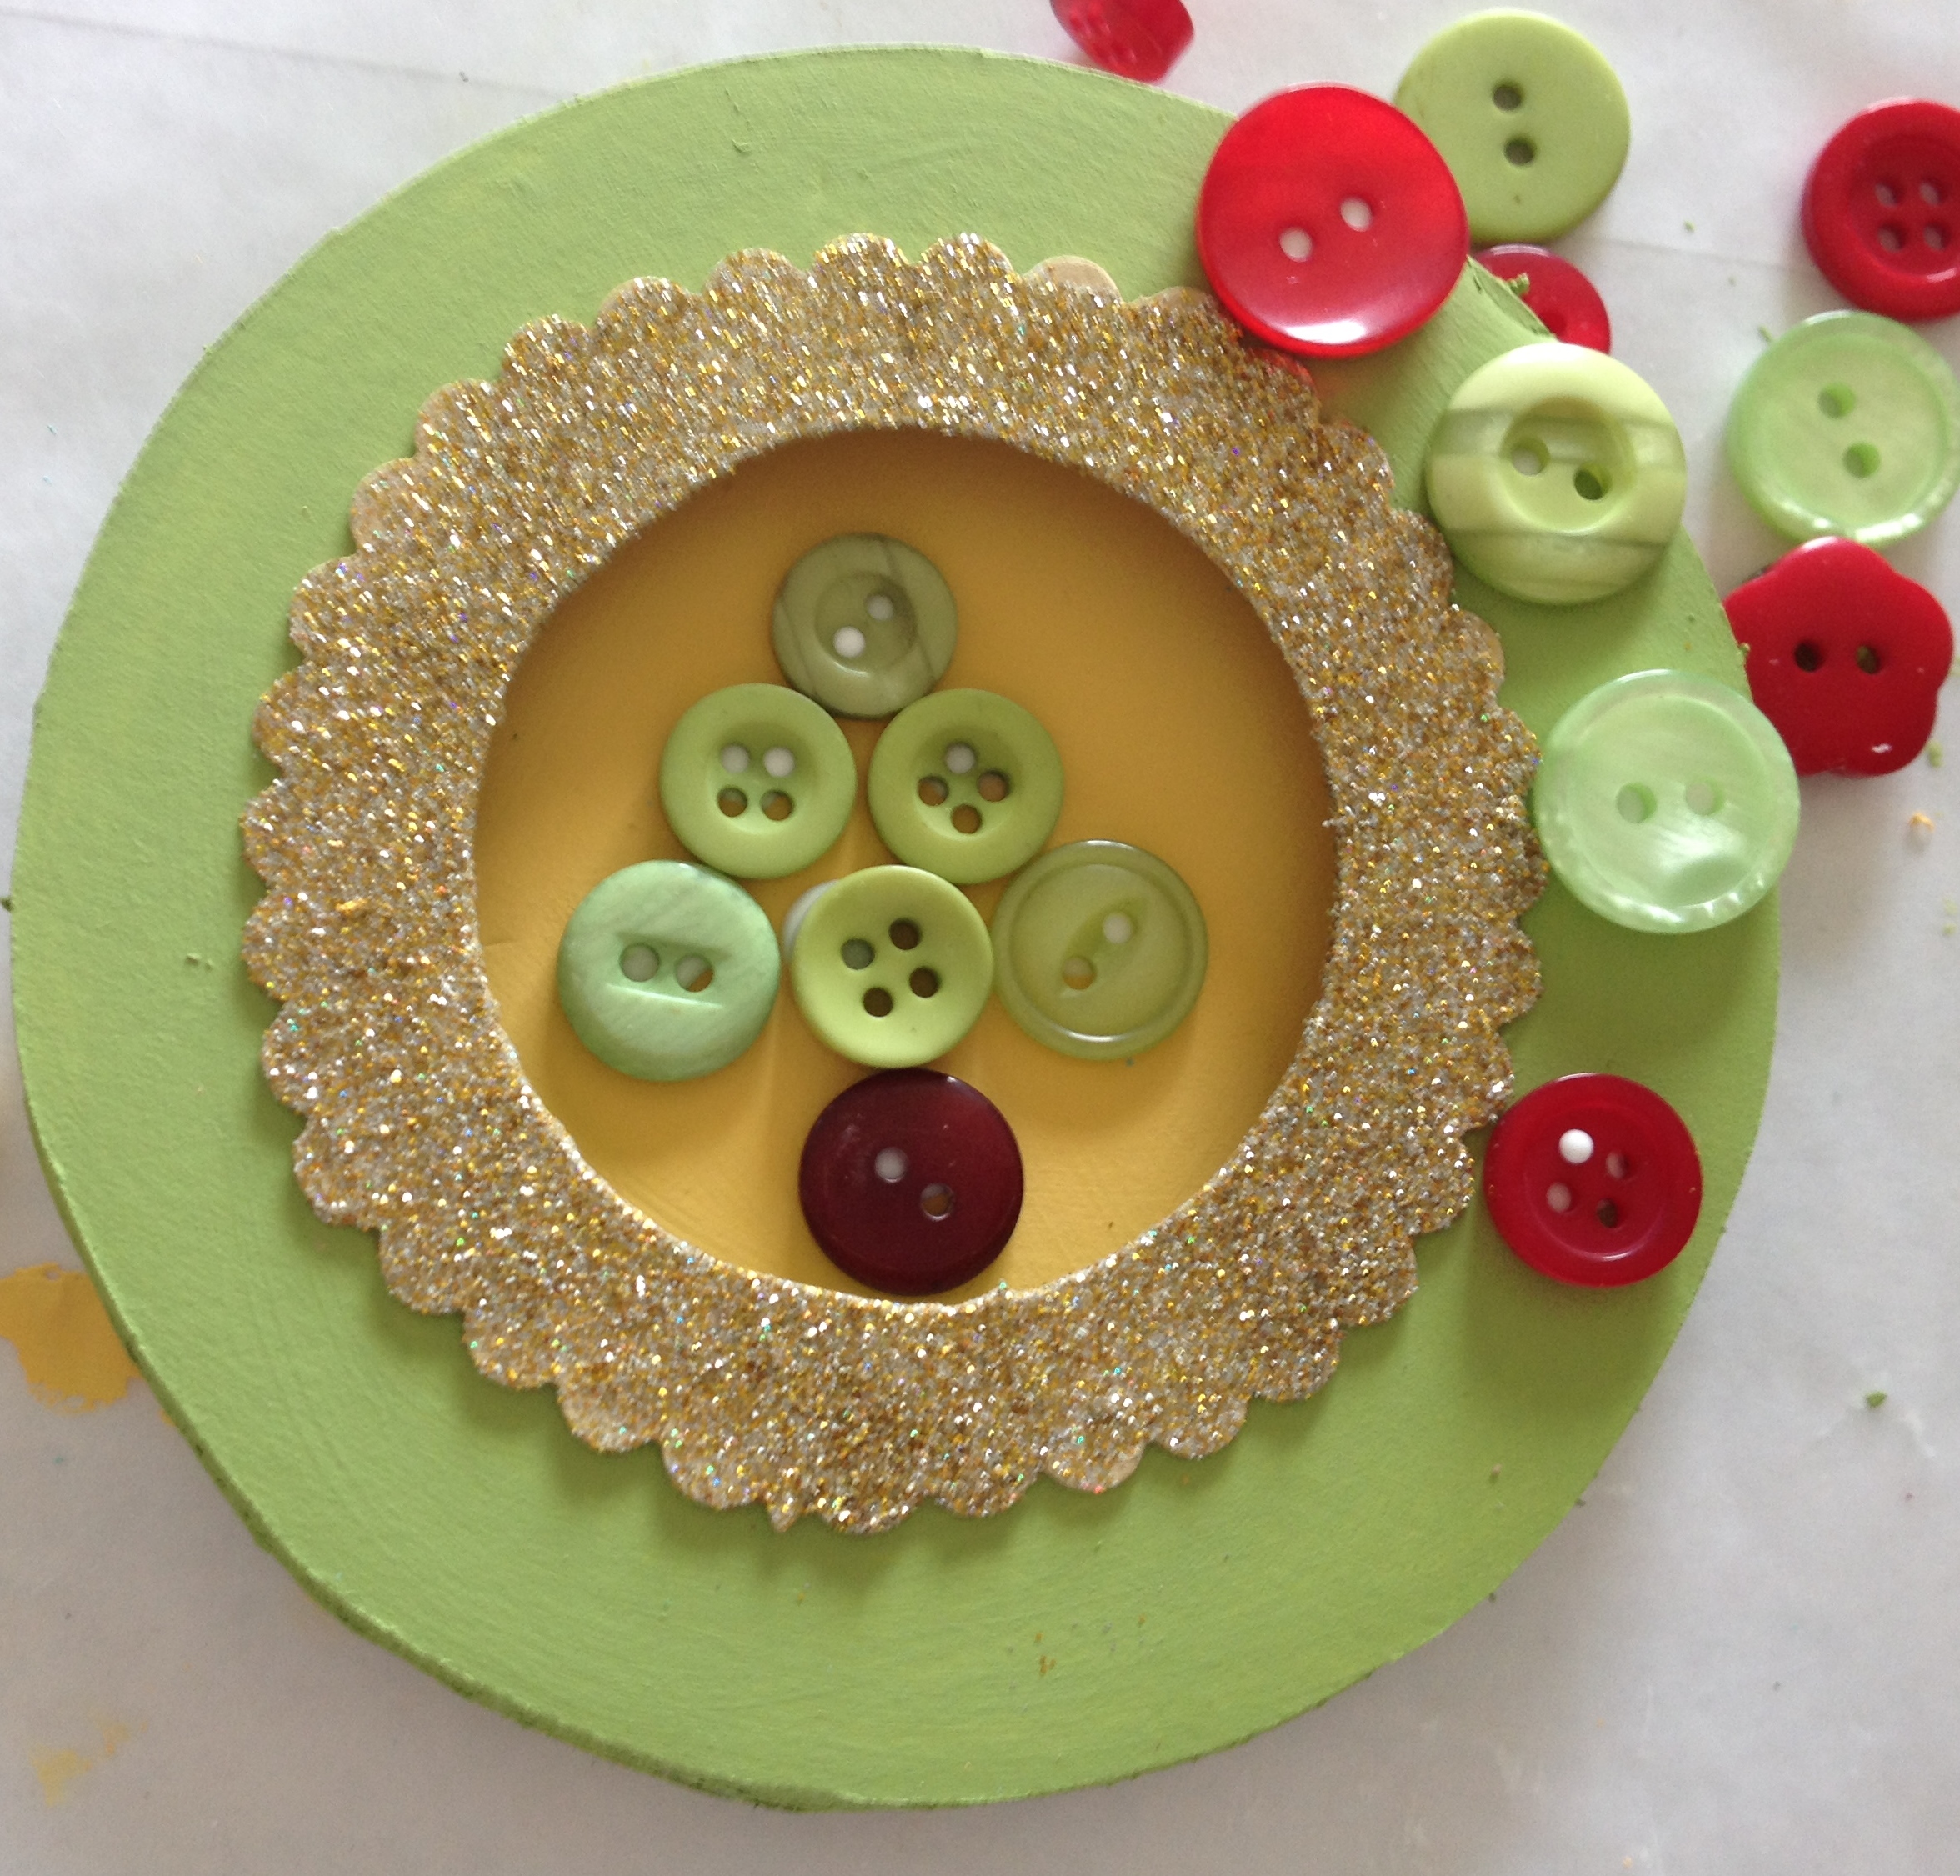
To decorate my ornaments, I used a combination of buttons and sequins. With that being said, I decided to stick with a traditional color palette of red, white, and green. So, in this tutorial, you will see buttons and sequins in those particular colors. But if you want to experiment with a more non-traditional palette, you could try using the The Merriest Button Bonanza, the Winter Wonderland Button Bonanza, the Contemporary Christmas Button Basics, or the Winter Flurries Button Basics.

So, to find out how to make your own button filled ornaments, keep reading below!
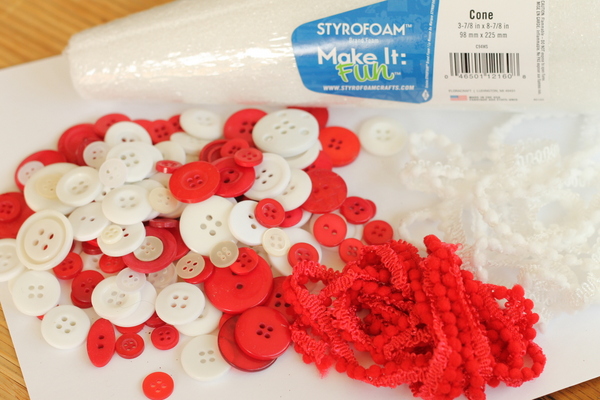
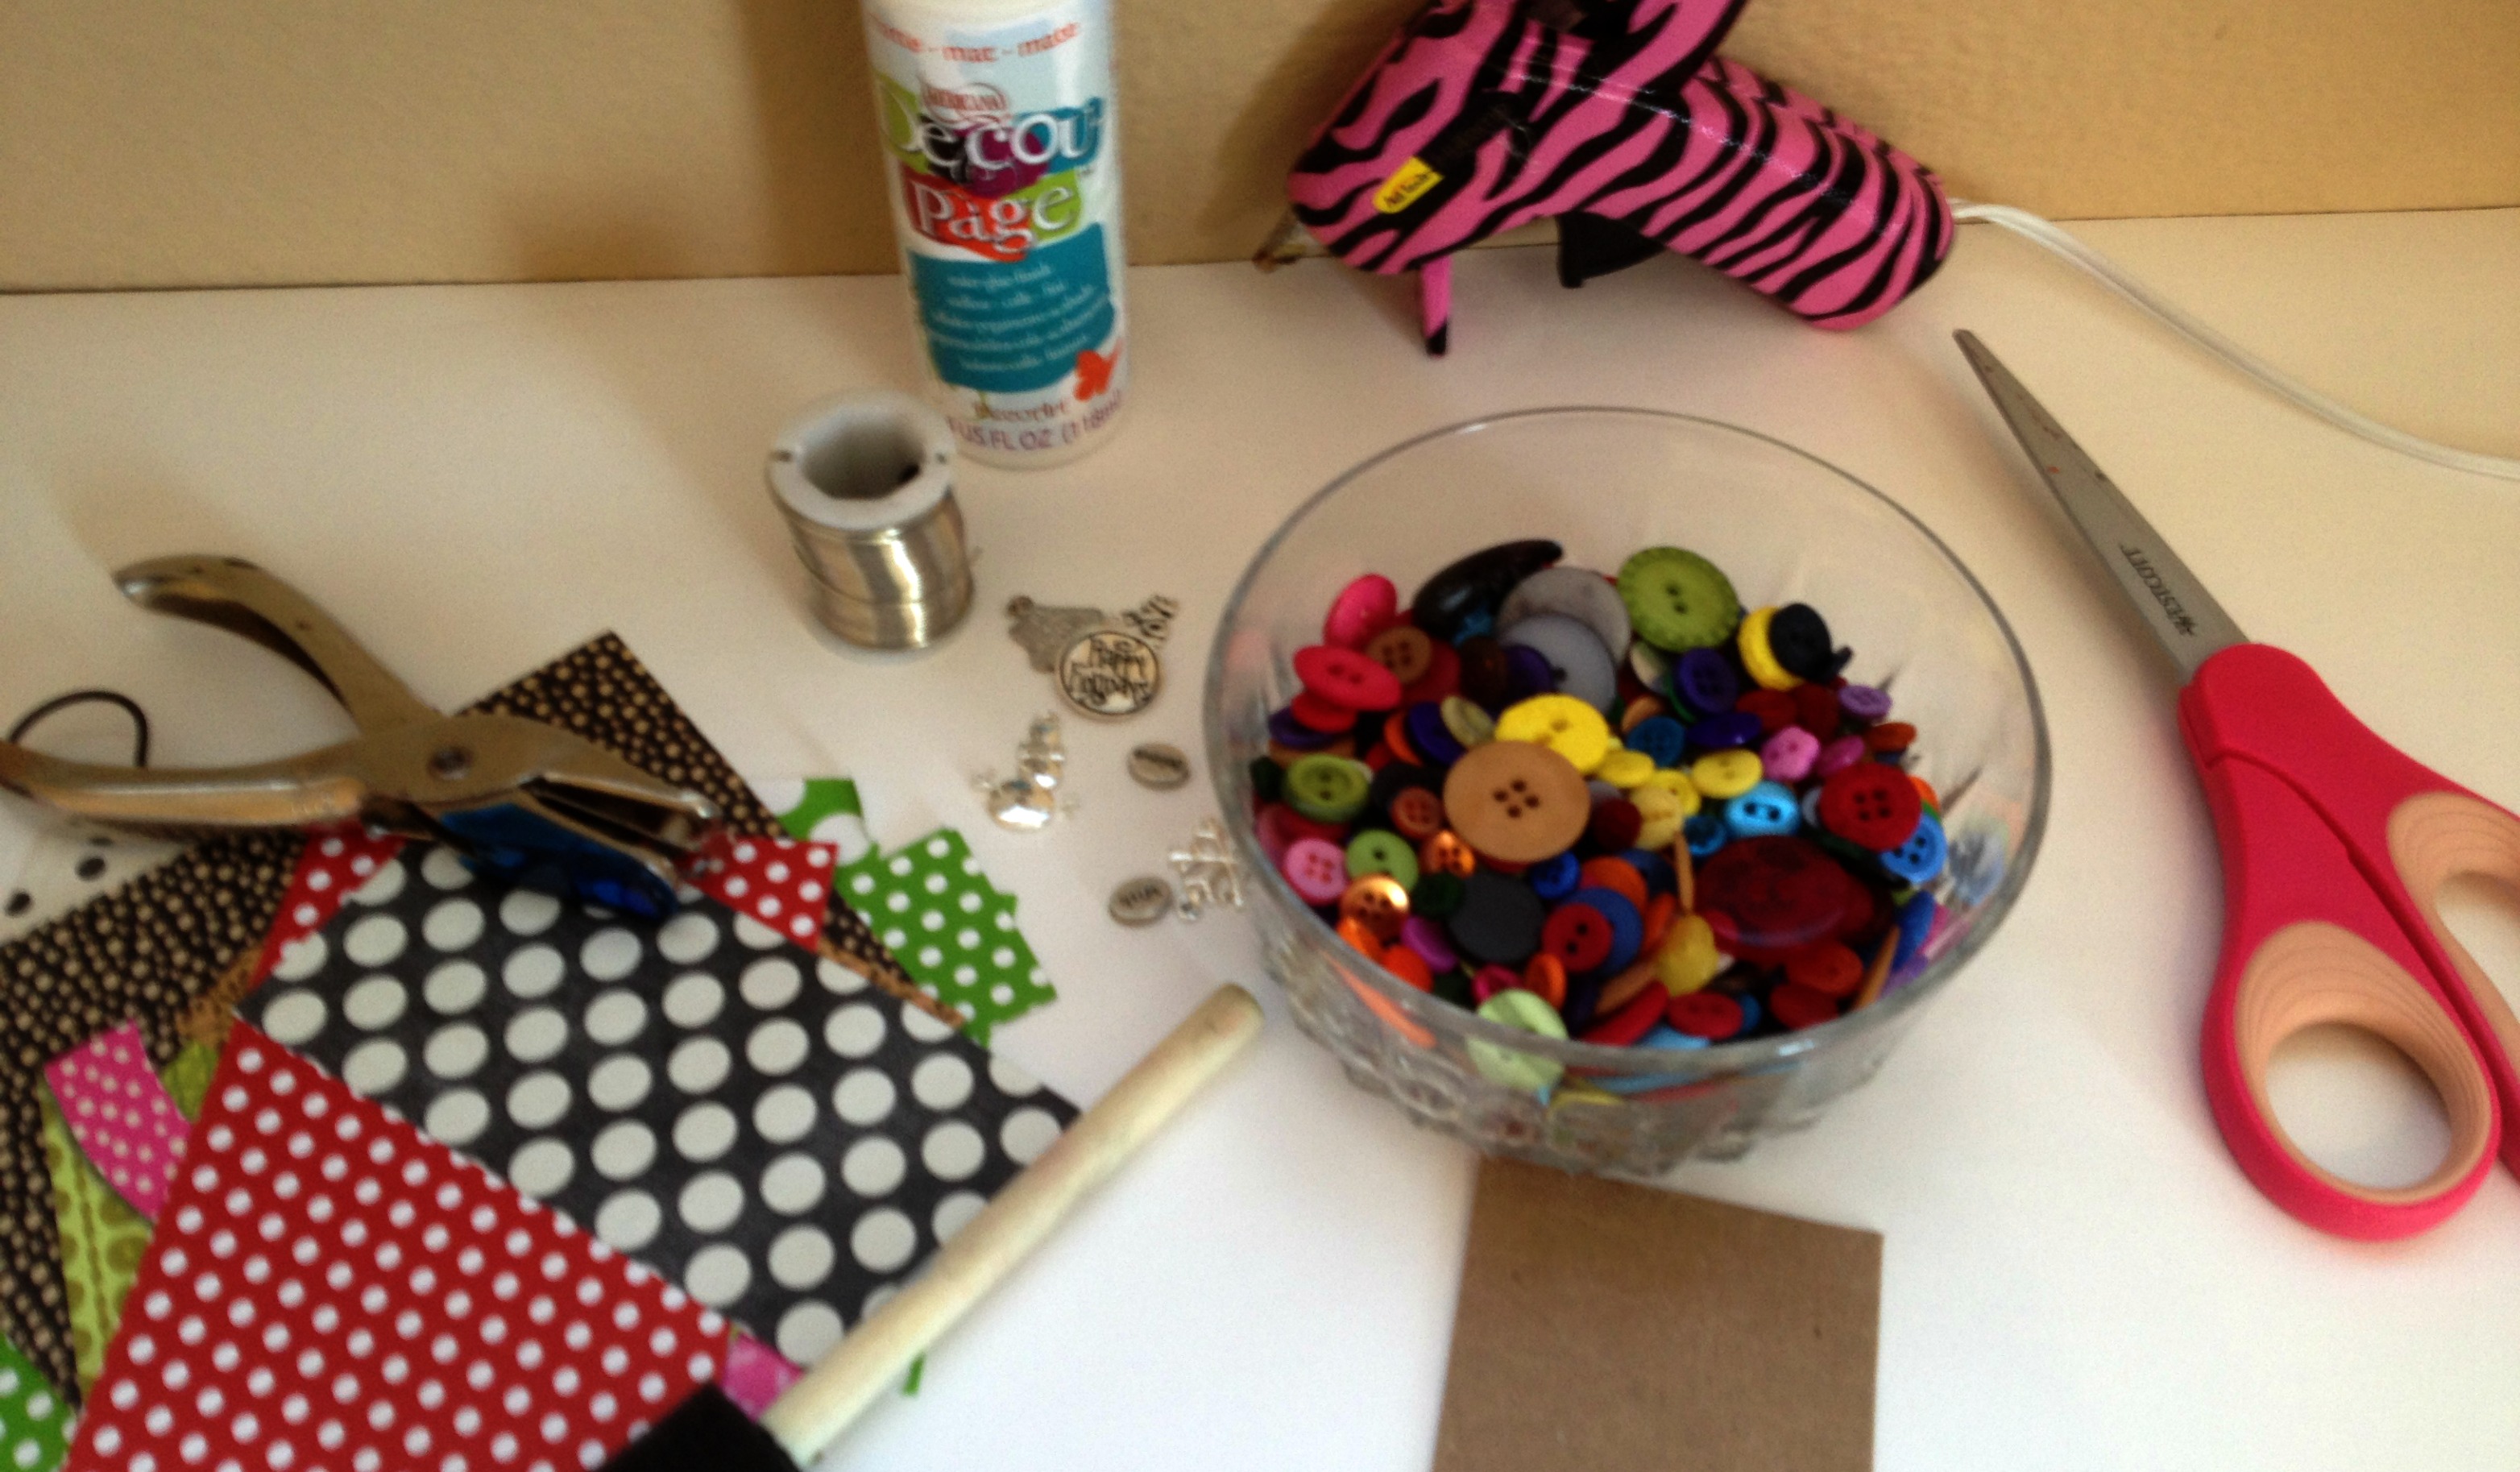
Supplies

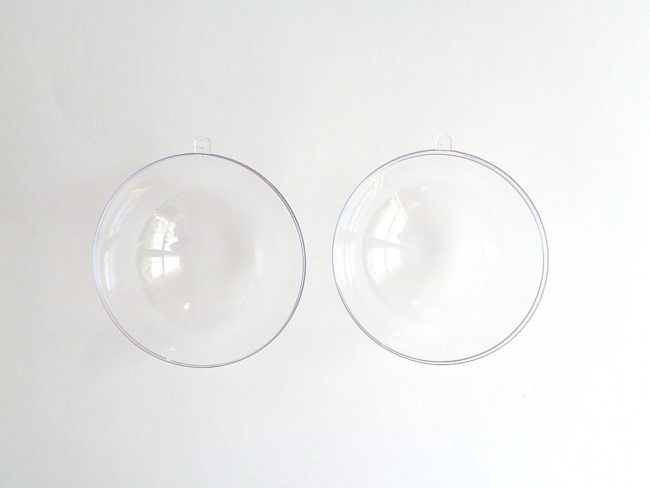
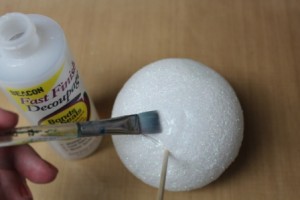
Step 1: Take apart the two sides of your clear ornament ball, and clean out both halves. (The reason why we are doing this is to make sure that there is no dust or small particles in your ornament.)

If you are using another type of clear ornament ball, simply take off the top and run it under some water to clean out the inside. But using the type of ball that separates into two halves is best as it lets you put larger items inside the ball.

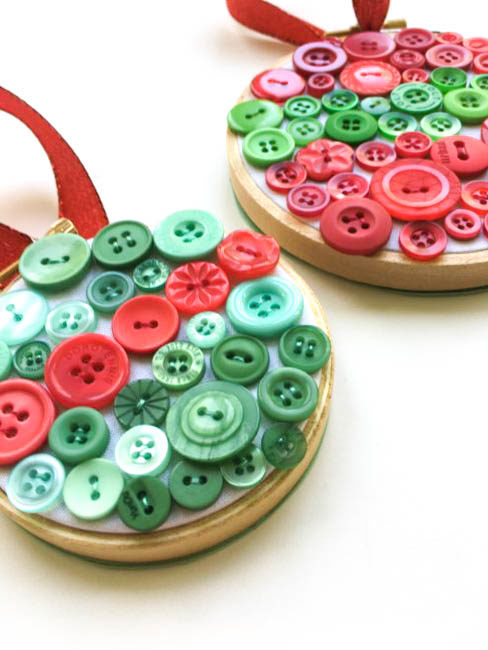
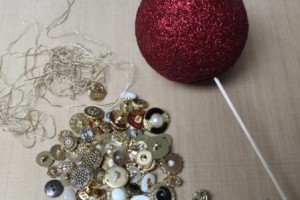
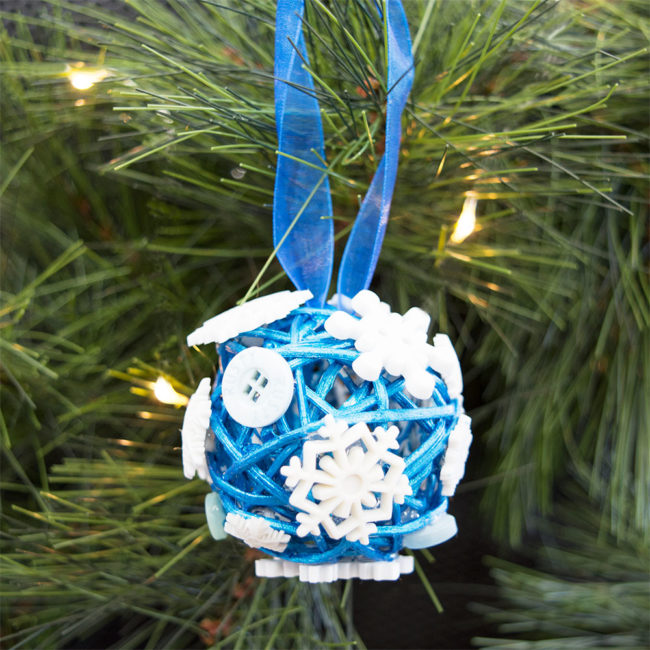
Step 2: Fill up your ornament with buttons, sequins, seed beads and whatever else floats your boat! In the ornament above, I used the following: “Christmas” Button Bonanza, “Holly” 3D Buttons“Sugarplum” 3D Buttons (I used the candy canes from the pack), and the 28 Lilac Lane ”Winter Wonderland” Embellishment Bottle.

When doing this step, I recommend filling up only one side of the ornament ball. Filling up only one side of the ornament will make snapping the two halves of the ornament back together much easier.

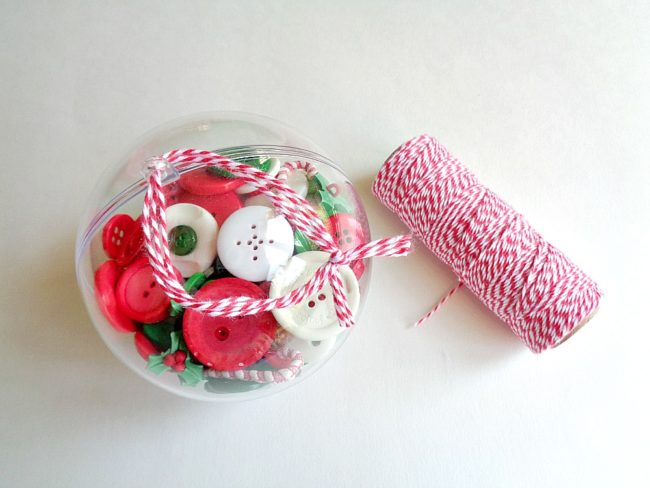
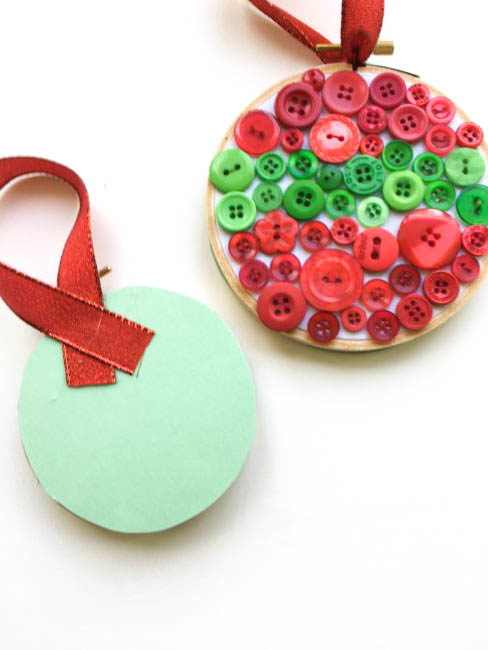
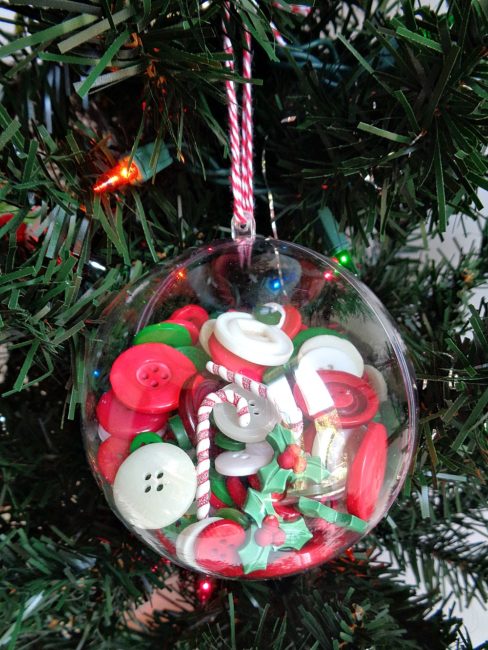
Step 3: Once your ornament has been filled, gently snap the two halves back together. Then tie on a string or ribbon to the top of the ornament.

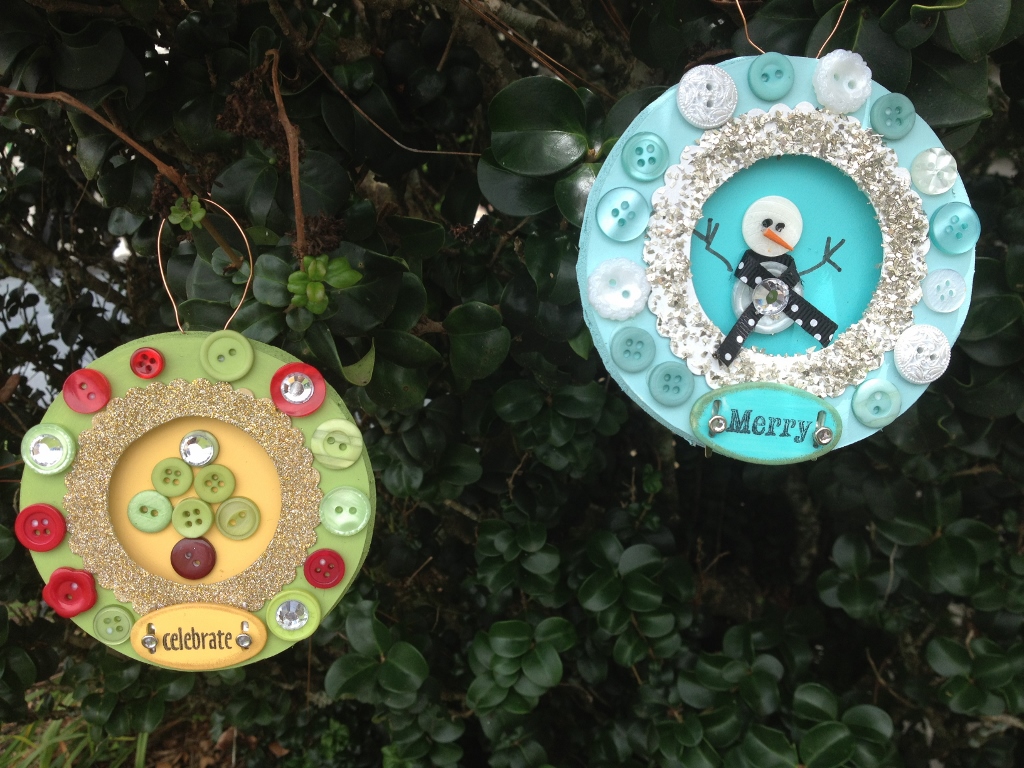
Once you are happy with how your ornament looks, you are ready to hang it on the tree!

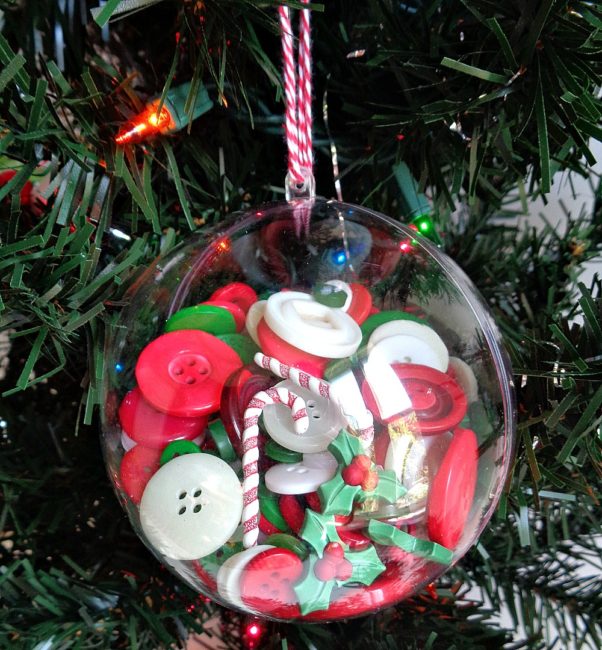
These button filled ornaments were so easy to make and were so much fun to put together! Creating this project actually got me really excited for Christmas!

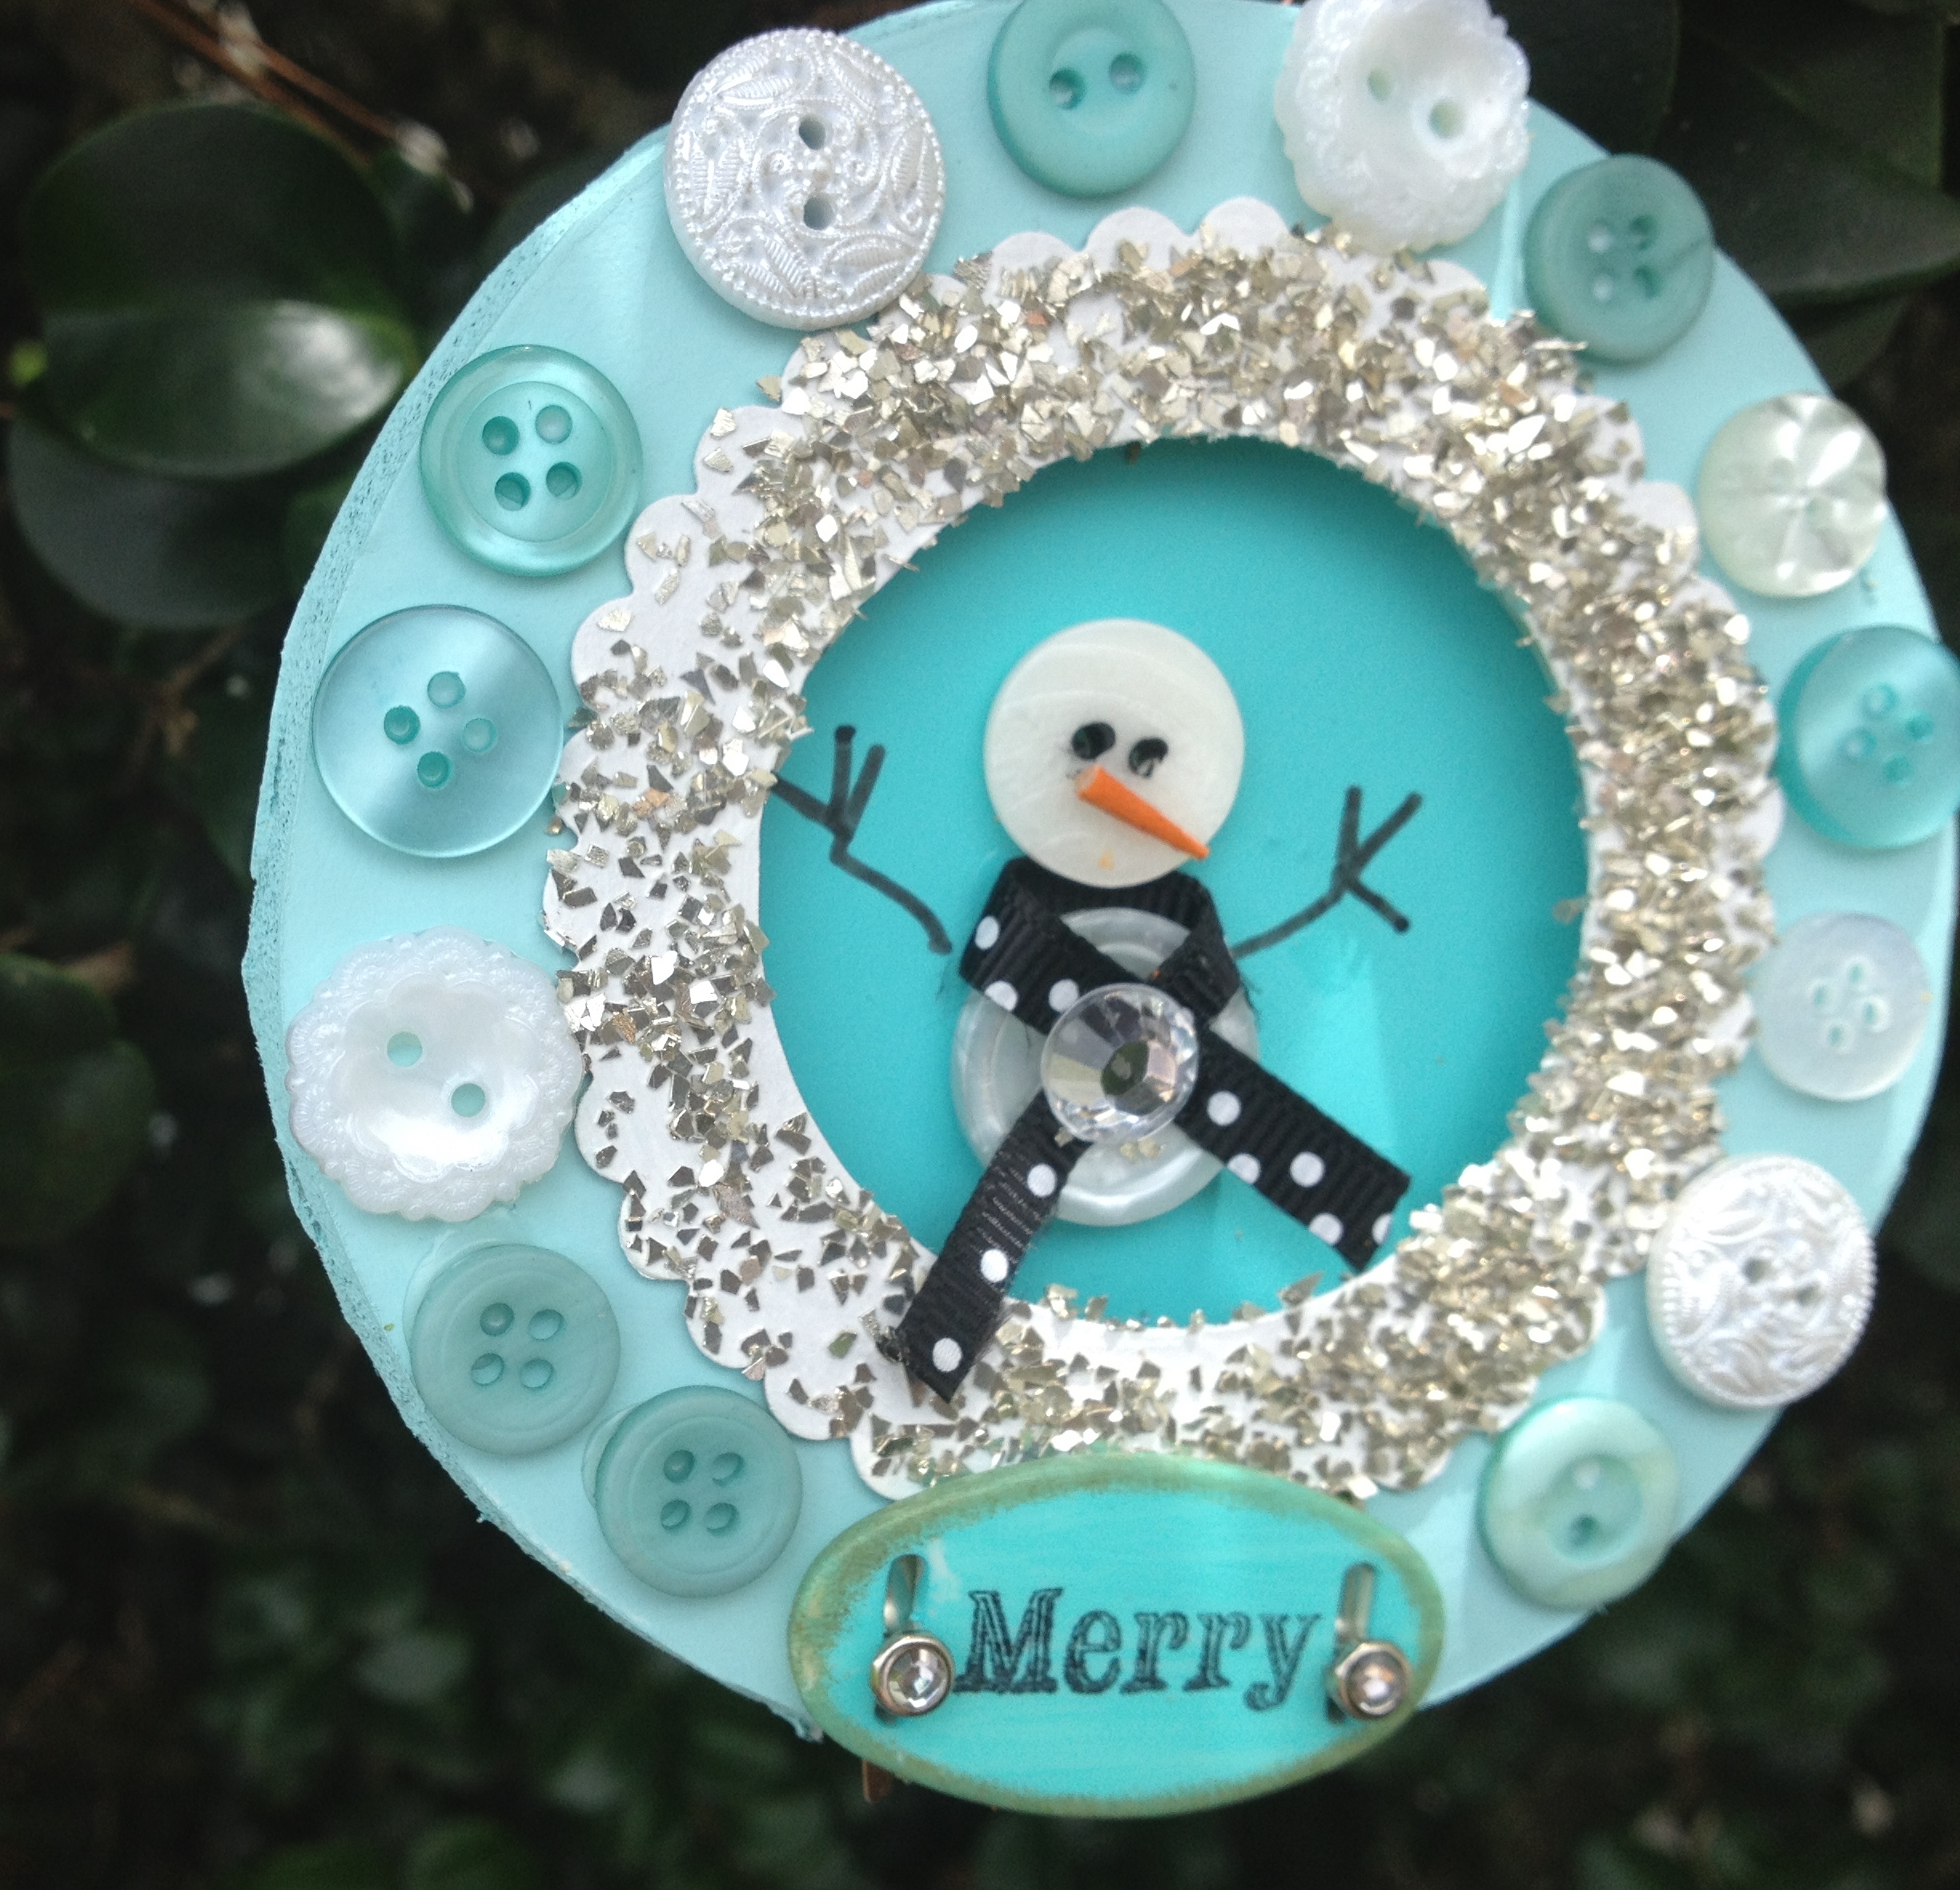
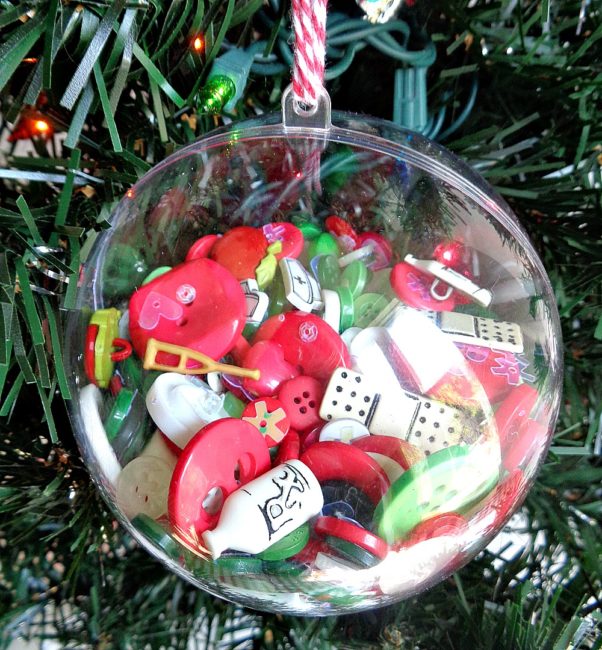
While creating this project, I started thinking about how these ornaments would make great gifts for co-workers, family, or friends. If this is something that you are considering, then you could personalize these ornaments even more by adding buttons related to that person’s career or hobby. For example (like shown in the last photo above), if you are giving this ornament to a nurse, you can mix in some buttons from Buttons Galore and More’s “Doctor Doctor” button set.

If you made these Button Filled Ornaments, what color or style of buttons would you use?
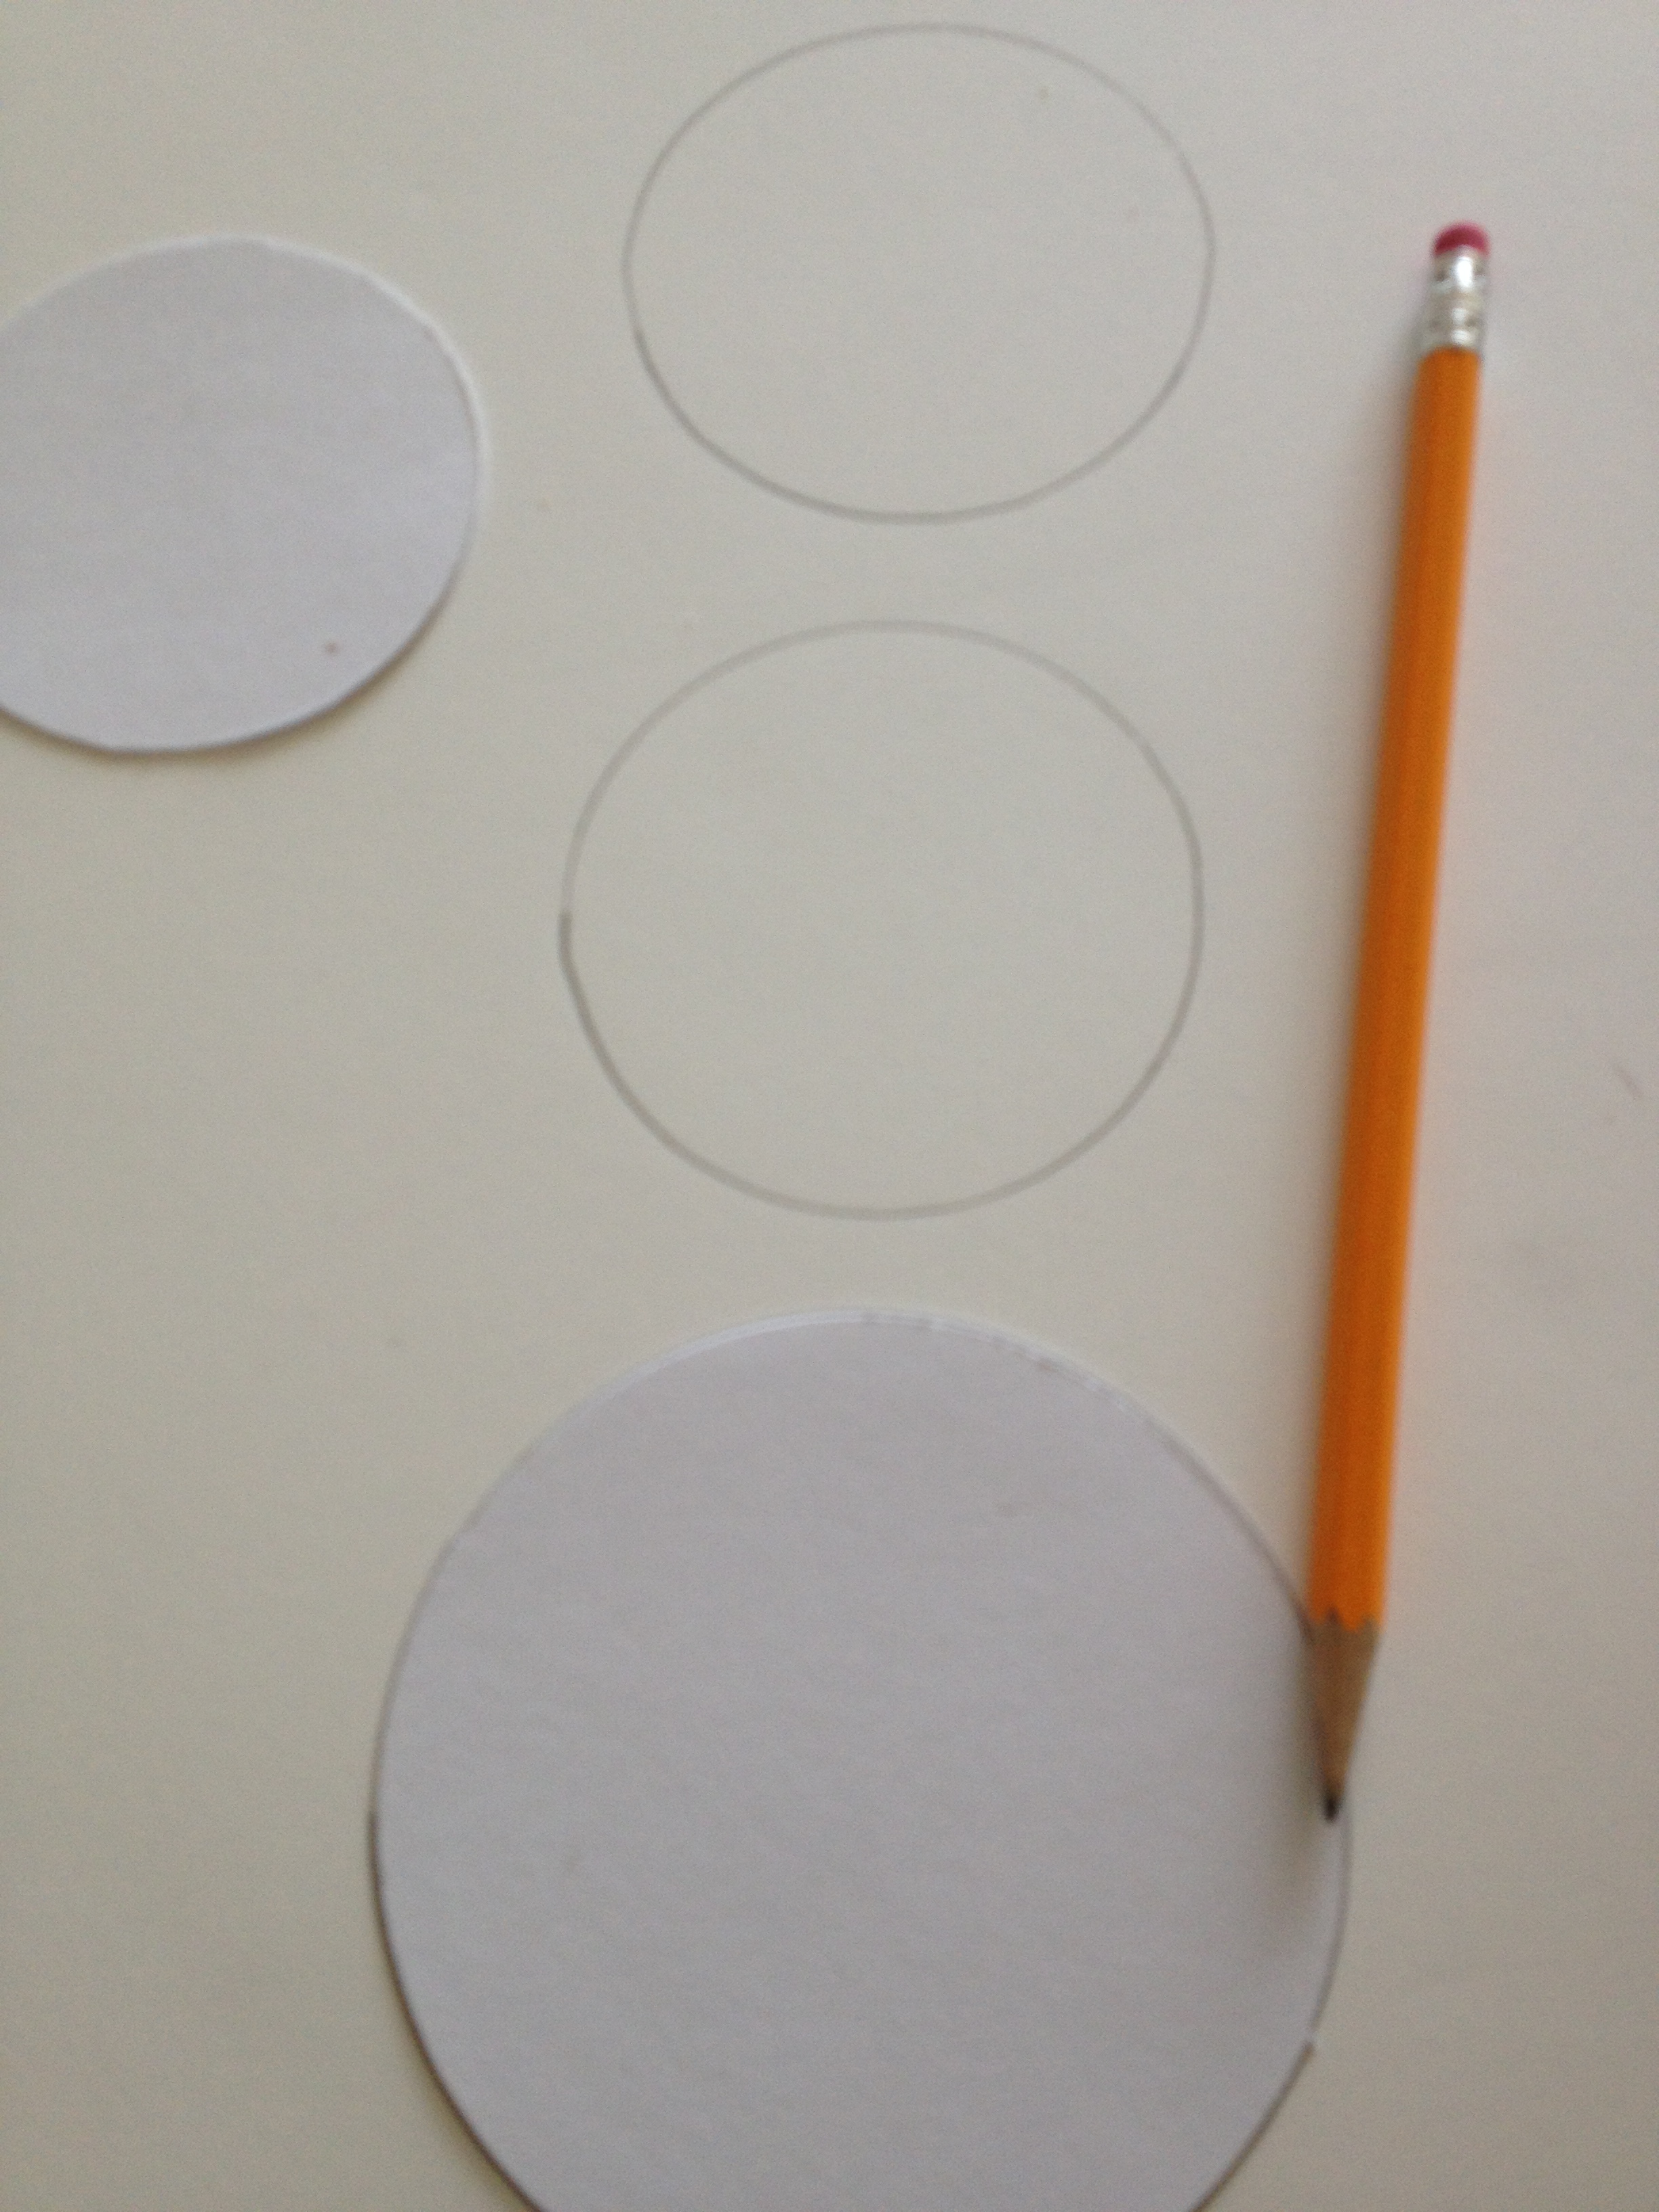
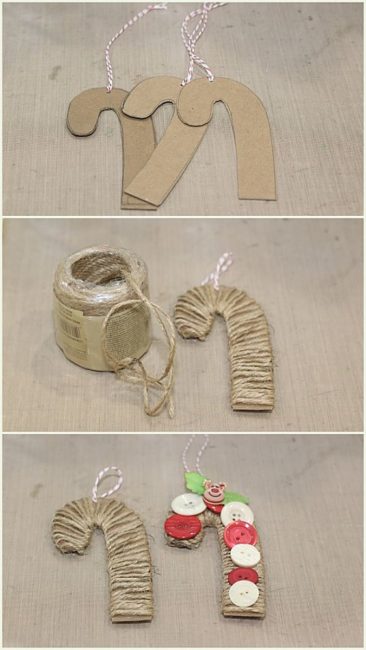
0

Christmas in July | Button DIY Candy Cane Ornaments

Hi, it’s Connie here with the Buttons Galore & More design team. We are celebrating Christmas in July, with handcrafted ornament ideas to create with the family.  Looking for a DIY Christmas ornament that is easy for little hands to make? These DIY candy cane ornaments with big red, green and white buttons are easy for little hands to pick up and glue down.

DIY candy cane ornaments

These DIY Christmas ornaments are fast and are very kid friendly to create!

Instructions:

  1. Create a pattern by drawing a candy cane on chipboard and cutting it out.
  2. Punch a small hole, in the top of the candy cane, and place twine through for the hanger.
  3. Wrap the candy cane with jute string, adhering to the top of the candy cane and the bottom. Adhere big buttons to the wrapped candy cane with a strong wet glue. Let dry. Add embellishments, if desired, to complete the ornaments.

DIY candy cane ornaments
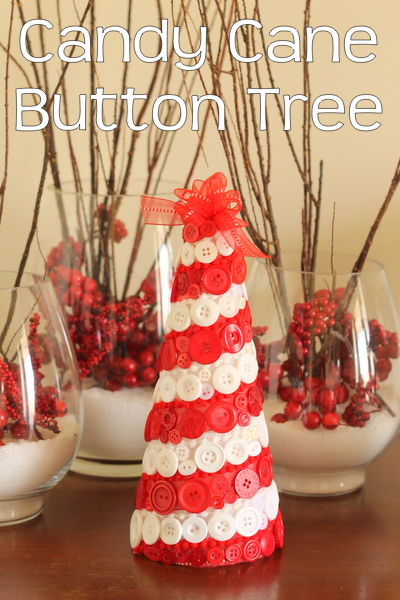
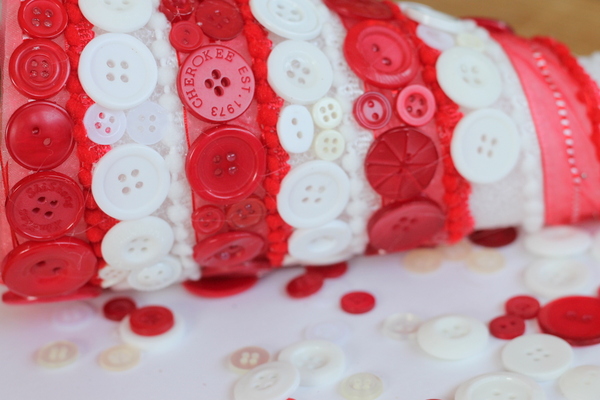
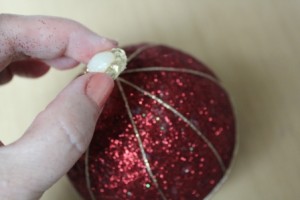
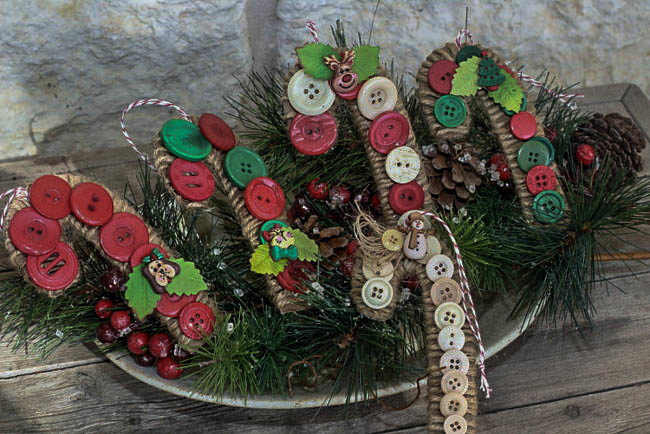
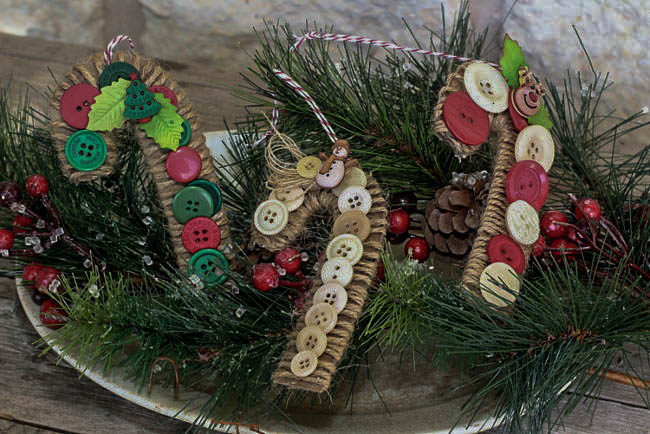
The candy canes are wrapped with jute loosely. Once the big buttons are adhered the jute is nice and secure.

DIY candy cane ornaments
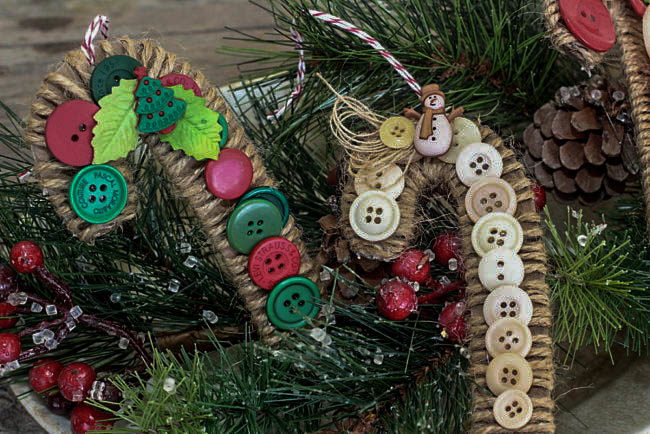
You may be familiar with our color mixes of flat buttons, but did you know that Buttons Galore & More also makes the cutest 3D buttons? Today, I’m using some called the Holiday Fun collection, that include snowmen, Christmas trees, stars, deer, and a cat and dog, just to name a few. They are so fun, just like their name! I snipped the shanks off and added these cute “Holiday Fun” buttons to the candy cane ornaments. Paper holly leaves are tucked in behind the “Holiday Fun” buttons.

These ornaments are great for gift exchanges and teacher gifts. Decorating a gift bag is another way to use these candy cane ornaments!

DIY candy cane ornaments
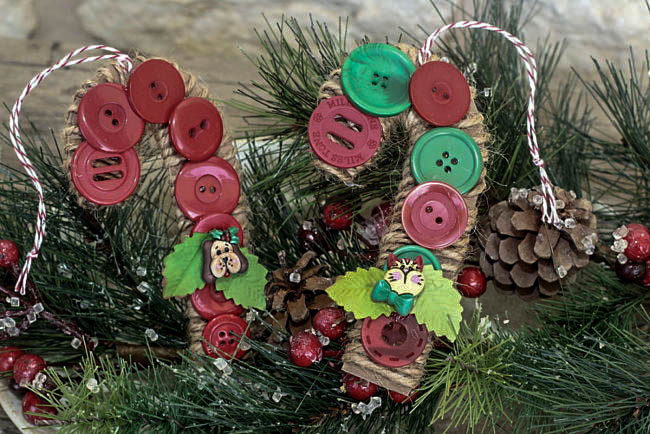
I’m looking forward to adding these handcrafted candy cane ornaments to my little Christmas tree this year, mixed with some real candy canes. That is sure to make everyone happy!

Supply list:

Thanks for stopping by~

Connie Mercer/DT Member

4

Christmas in July | Easy Button Christmas Ornament

July has come and that means we are half-way to Christmas! Even though the heat index is out of this world, it’s never too early to start working on Christmas crafts, ornaments and decor. I’ve got an easy button Christmas ornament craft that is simple for even the most beginner seamstress to do. All you need are a few easy-to-find supplies and a cozy spot to sew, and you are ready. This is a super craft for children learning to sew also.

Easy Button Christmas Ornaments

Here’s what you need:

Easy Button Christmas Ornaments

Put your cotton fabric scraps inside the hoop and gather up your buttons and sewing supplies.

You can attack this little project a couple of different ways, by planning ahead or by winging it! I prefer to go ahead and lay out all the buttons ahead of time, so I have an idea of how many I will need. Or you can just choose the buttons you want as you go. Either way works!

No matter how you decide to proceed, you do need to sew down the center row first. For the smaller hoop, it works best to make a center line with 4-5 buttons of equal sizes. For the larger hoop, it’s fun to mix and match and make it look a little zig-zag. Use one strand of a corresponding embroidery floss color and sew each button down with at least 2-3 stitches. After you have your center row stitched down, it’s time to start filling in the top and bottom of the hoop.

Easy Button Christmas Ornaments

To finish, cut your white fabric about one inch from the outside of the hoop and hot glue it to the inside of the hoop back. Then you can hide all your stitches by cutting out a piece of scrapbook paper and gluing it to the edge of the hoop back. Use the ribbon from the embellishment kit for hanging your ornament,  and find a fun place to display your new ornaments!

0

Candy Cane Button Tree

My candy cane button tree is the perfect addition to your holiday decor.  Grab a styrofoam cone and get started on this fun tree today.  It may look complicated but I will show you how to lay out your colors to get those perfect candy cane stripes every time.

candy cane button tree-005

Candy Cane Button Tree Supplies:

  • Red and white buttons
  • 3 7/8″ Styrofoam cone
  • May Arts mini pom pom fringe in red and white
  • May Arts shear red ribbon (not shown below)
  • Hot glue

candy cane button tree-001

Candy Cane Button Tree Instructions:

1.  Wrap your red and white mini pompom fringe around the cone.  Hold in place with sewing pins for now.  Adjust until you like the spacing and location of your candy cane stripes.  Hot glue your fringe into place and remove the pins.

candy cane button tree-002

2.  You don’t want the white cone showing through your red buttons so add the red shear ribbon just in the “red” stripes of your candy cane.  Again hold in place with pins for now.

candy cane button tree-003

3.  Because the ribbon is shear, there is no need to hot glue it down before you add your buttons.  The hot glue will seep through the ribbon with the buttons on top.  So start adding various size buttons with hot glue filling the red and white stripes all the way up the cone.  Remove the pins in the shear ribbon as you go up the red stripe.

candy cane button tree-004

4.  Once you reach the top, add a mini bow from some additional red shear ribbon.  Again attach with hot glue.

candy cane button tree-006

5.  Use a hair dryer to remove any glue strings.  You are ready to display your candy cane button tree for the holidays.  This is a super fun way to celebrate the holidays in your home.

candy cane button tree-007

I love candy canes and of course candy cane button trees.  How about you?  Will you be making a button tree this holiday season?

4

30 Christmas craft ideas with Buttons

30  Christmas craft ideas Round Up

Christmas craft ideas with buttons

Christmas craft ideas for kids, girls, boys, uncle Ed, aunt Martha and more.  Click the pictures below to find out how to make the projects and the material list.  Buttons Galore and More has novelty buttons with Christmas themes and solid color buttons in mixed colors.

Country Chic Cottage: Button Santa Ornament

Allie Gower: Holiday Bird Cage

Allie Gower: Christmas Tea

Allie Gower: Christmas Craft

Laura Kelly Designs: Holiday Gift Fun

Laura Kelly Designs: Christmas Aprons and Organization

Laura Kelly Designs: Festive Felt and Button Ornaments

Mel Bradley: Scrap Savvy Bird Ornament Tutorial

Mel Bradley: Painted Canvas Ornaments

Country Chic Cottage: Button Wreath Ornament

Country Chic Cottage: Button Ornaments with Kids

Country Chic Cottage: Bottle Cap Reindeer

Laura Bray Designs: Holiday Cards and Tags

Scrappy Chick Designs: Quick and Easy Holiday Cards

Laura Bray Designs: Holiday Headbands

Laura Kelly Designs: DIY Magic Reindeer Food

Plus 14 more Christmas Craft ideas

Country Chic Christmas Wreath

Styrofoam and buttons Christmas Money Tree

Christmas Home Decor

Vintage style Christmas Decorations

Needle Felt Wall Art

Aqua Christmas Wreath

Styrofoam Christmas Ornament

St. Nick Ornament

Table Top Tree Ornaments

Christmas Puppets

Christmas Tree Wall Art

Wine Glass Charms

Red Wall Art

Kids Christmas Ornaments

I hope you enjoyed looking at the wide variety of Christmas crafts with buttons.  Stop by the store if you would like to purchase the button, ribbon and glue supplies used in these projects.  We have daily deals and weekly coupons.  Stop by often as there are new items on the way.

christmas craft ideas 2013


0

Paper crafted Decou-Page and Button Ornament

Button Ornament for Craft lighting by Laura Kelly

Button ornaments are great for kids to make.  Here is a beautiful and easy to make paper crafted ornament using Decou-Page and buttons.  The final ornament works great for decorating a tree, using for a gift tag or even for a place card.

Christmas ornament

You will need scrapbook paper scraps, chipboard or cardboard, Decou-Page, wire ,buttons (I used Candy Apple Green and Radical Red), a brush, scissors, a hole punch and ribbon.

Supplies

  1. Cut out a cardboard rectangle.
  2. Brush a thick later of Decou-Page on it and place your scrapbook papers on it then apply another layer over the top.

GiftSteps

The next steps are as follows:

  1. Punch two holes in the top.
  2. Add a wire twisted with buttons through the holes.
  3. Add a ribbon with hot glue or whatever adhesive you like best.
  4. Add a charm if you like.

GiftSteps2

Ta Da!  You have a beautiful ornament.
Happy Holiday Creating,

Laura


3

Christmas in July- Shadow Box Button Ornaments

Christmas in July – let’s make some Shadow Box Button Ornaments!

Snowman ornament
To make Button Ornaments:

It seems like its never too early to be thinking about Christmas crafting. When I was asked to do a set of Christmas ornaments using Styrofoam and buttons from Buttons Galore and More, I asked if I could use foam core instead. Lately, I have become somewhat of an addict to manipulating the craft knife to cut various shapes. For these ornaments, I challenged myself to cut circular shapes rather than my usual safe square or rectangular shapes.

trace circles on foam core To make Button OrnamentsFirst I created cardstock circle templates in three different sizes. One for the back, one for the front and one to use to cut a circle in the center of the large circle. I used Elmers Foamboard for this project.

cut out foam coreNow for the hard part. Use a very sharp craft knife with and a self healing cutting mat to cut the circles out. First, score lightly along the traced line, then pass the knife back through cutting almost to the other side. Use a third and/or fourth pass to cut the circle all through way through. This is referred to as the “three pass rule” and when used with patience, will result in perfect cuts. If you do end up with stray bits of foam core, use a sanding block or file to smooth the edges.

cut out center

Trace a circle in the center of the cut circle and cut out with knife. Cut a slightly larger circle to enclose the back of the ornament to create a shadow box effect.


cut cardboard from cereal box


trim with scallop edged scissors

Trim the edges of the circle with scalloped edged scissors.

paint foam core

Paint the pieces of the foam board and cardboard with acrylic paint. I choose coordinating colors of DecoArt’s Americana Acrylics.

cover with glitter

Spray the cardboard circle with a sealer and coat with glitter.

assemble ornament

Next, assemble the ornament with a strong tacky glue.

form motifFor the green and yellow ornament, I formed a tree shape in the center of and used green and red buttons to decorate the edges.

Snowman ornament

Paint and stamp blank craft shapes with a holiday sentiment and attach it to the front of the foam core.

finished ornaments

I hope I have inspired you to try your own Shadow Box Button Ornaments! Choose from an array of inspirational buttons from Buttons Galore and More to come up with your own themes and designs. Start now and you will have plenty of these budget friendly creations ready by the holidays for your tree and to give as gifts.

Live Life Creatively,

Melony


0

Button up Christmas in July!

July is a great month to get a head start on those Christmas decorations and using BUTTONS in your creations is always FUN!  For this project I am using a Styrofoam Ball, Glitter, Kreinik Thread, Beacon Adhesives and beautiful BUTTONS!

Supplies:

  • Buttons Galore and More Buttons: Fancy Gold Grab Bag GB102
  • 6″ Styrofoam Ball
  • Gold Thread by Kreinik
  • Fast Finish Decoupage byBeacon Adhesives
  • Quick Grip Adhesive by Beacon Adhesives
  • Red Ultra Fine Glitter by Clearsnap
  • Skewer
  • Scissor

Instructions:

Apply Fast Finish Decoupage to entire Styrofoam Ball

Place Styrofoam ball onto skewer.  Sprinkle Glitter to cover; let dry.  Apply second coat of Fast Finish Decoupage; let dry.

Choose thread of choice and buttons.

Wrap thread around ball making 8 sections, then around center to create 16 sections.  Glue white and gold buttons at the top and bottom of ball where all threads meet.  Glue gold buttons around center where threads meet; let dry.

You have a beautiful ornament for your tree or a gift….Enjoy!

0

Powered by WordPress. Designed by WooThemes