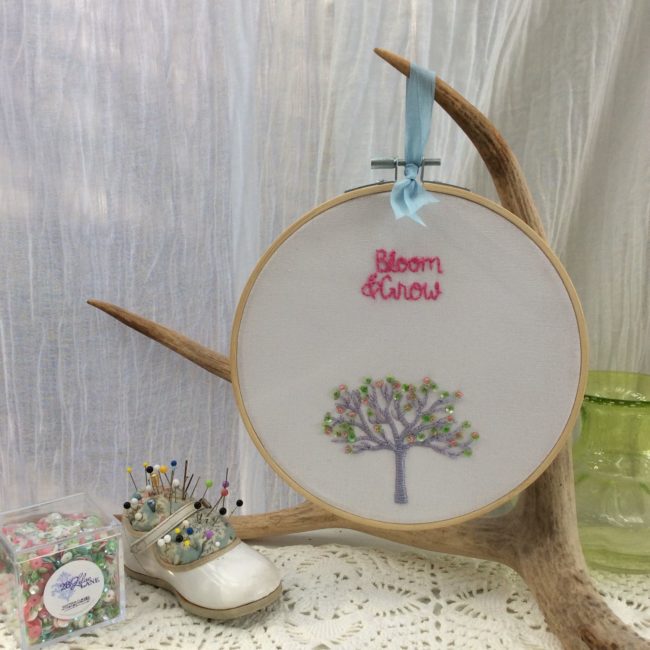
Tiny beads and sparkly sequins are the perfect companion to embroidery art.

Tiny beads and sparkly sequins are the perfect companion to embroidery art.
This is super easy! And you can do it with any word and any color sequins.
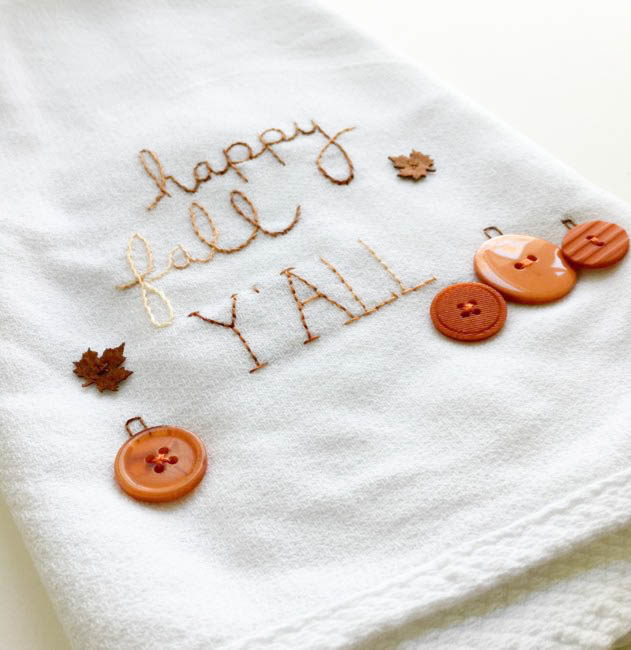 We’ve had so many crisp mornings lately, I have gotten so eager for fall! So bring on the pumpkins, acorns, orange and brown! Today’s project is a super quick embroidery project to add to your fall decor. Even the most beginner of embroiderers can easily stitch up this DIY fall tea towel. Continue Reading →
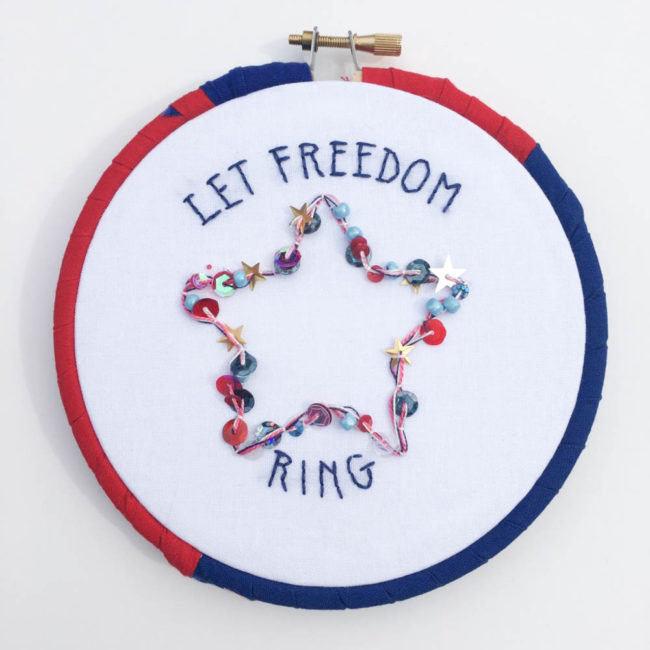
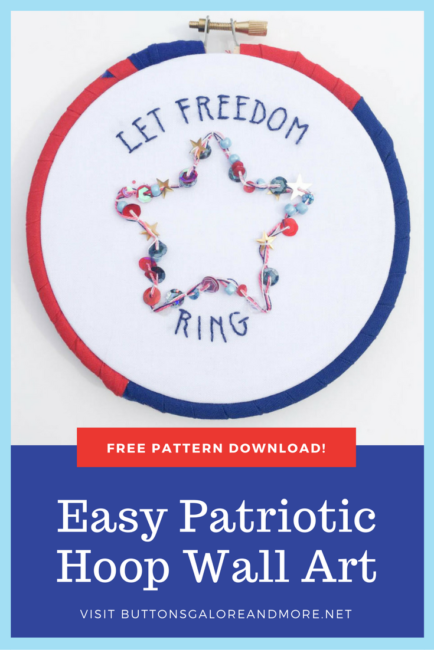
Summer time is kicking up into full gear and July 4th will be here before you know it! Red, white and blue and backyard BBQs are on the horizon! This little patriotic hoop is a great way to get started on those patriotic decorations.
Supplies Needed:
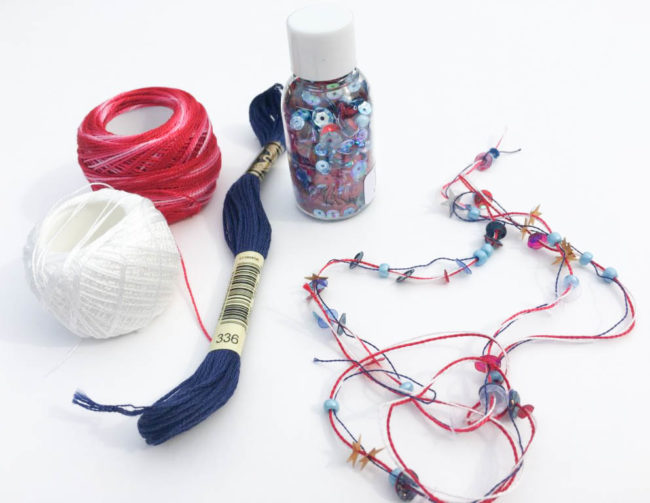
This patriotic hoop features the Stars & Stripes sequin & bead mix that is a mix of larger blue beads, small and large sequins, star sequins and smaller seed beads and glitter. I used the blue beads and sequins to create beaded thread for my hoop.
To get started: take about a yard of each thread; using only 1 strand of the blue divisible floss. Thread all three colored threads onto your needle and pick up different bits of the sequin and beads and push them along down your thread. Continue until you have distributed the beads and sequins sporadically along the thread. They don’t need to be in any sort of order, just make sure that they are spaced out well.
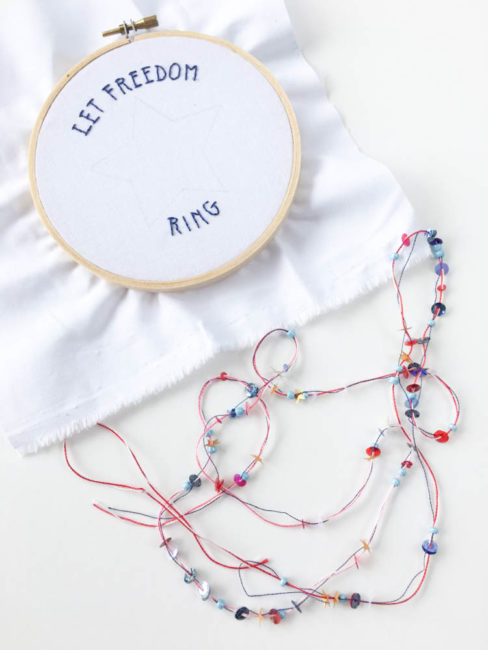
Find a sunny spot and transfer your embroidery pattern onto your fabric. Use three strands of the blue embroidery floss (#336) and backstitch the text. Lay your beaded thread on one of the star lines and with the white cotton perle, use a couching stitch to sew down the beaded thread along the outline of the star. Couch your beaded thread around the star two times.
To finish your hoop you can wrap it in a mix of blue and red fabrics, as I did, or you could even paint the hoop. Set your finished piece inside the hoop, trim your fabric about one inch from the edge of the hoop and hot glue it to the inside.
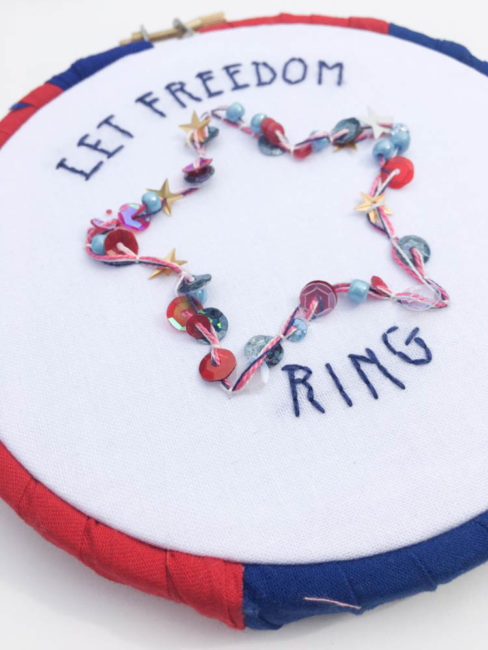
This patriotic hoop wall art is a great project for even a beginner at embroidery. It’s one that looks like it took hours and advanced skills, but is made up of basic embroidery stitches and techniques and can easily be finished in an afternoon!
Needles are easy to lose, and not the sort of thing you want to find accidentally in your sewing box (or on the sewing room floor). Our pretty and easy to make needle book will keep your needles safely organized and ready to use any time that you need them!

Supplies:
This needle book can be make in any size that you would like! Cut 2 pieces of felt the same size for the interior pages, and then cut a piece of fabric that is slightly larger than the felt to make your cover with.
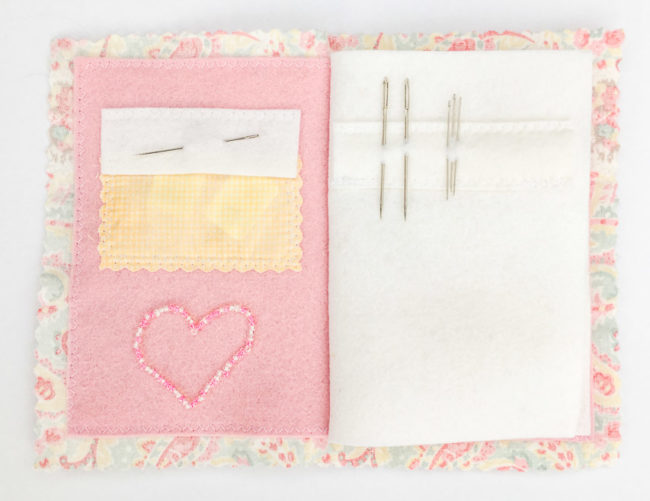 Start construction by working on the piece of felt that will make the inside of the cover (mine is pink).
Use pinking shears to cut a small pocket and sew it to the upper left side of the piece (inside the front cover). This will serve as a pocket for needle threaders! To keep them from falling out, cut a flap of felt and stitch it over the top of the pocket.
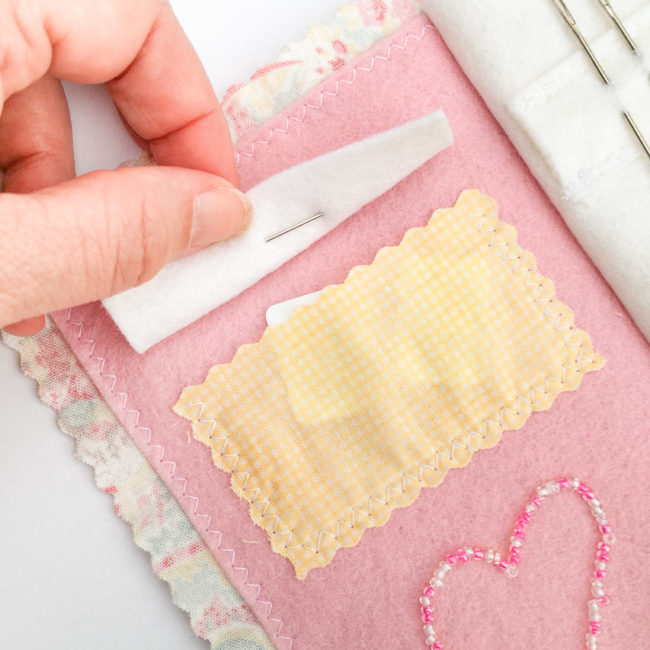
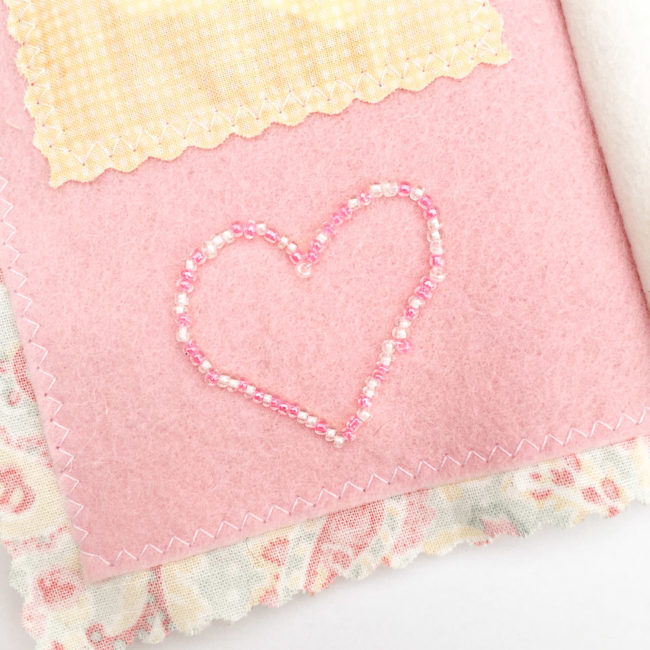
Below the pocket, draw a shape with a fabric pencil. I chose a heart. Use a needle and thread to sew seed beads onto the shape using backstitch.
When the inside of the front cover is done, center the pink felt on the reverse side of the cover fabric. Pin in place, and machine sew using zig zag stitch or by hand.
To create the center page, cut 4 small strips of felt slightly shorter than the width of your pages. (My strips are 1″ high.) Pin them so two strips make a “sandwich” of the page, and one set of stitching will attach both strips. These strips will allow you to put needles on the book’s pages without them going through to the other side.
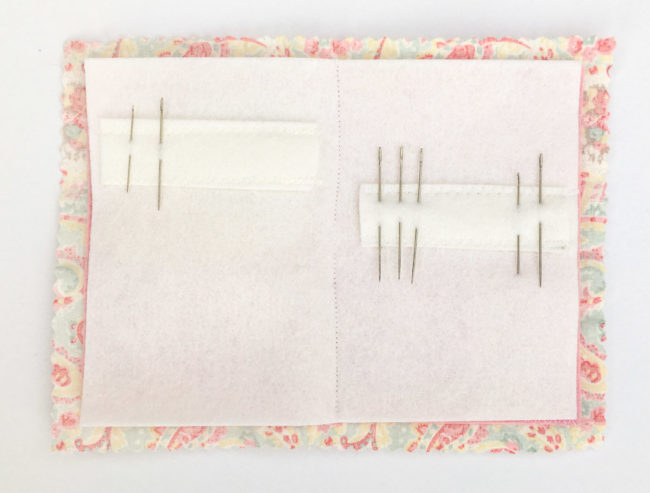
Lay the center page on top of the cover and stitch up the middle to bind your needle book.
For the final touch, finish your needle book’s cover by die cutting a piece of felt to make a flower. Use the flower and buttons from the 28 Lilac Lane “Hello, Cupcake” kit to embellish the cover. Attach them by sewing them through only the fabric layer of the cover so the stitching won’t show through to the inside.
This needle book is a great way to use your scraps, or to make a gift for a sewist or quilter! Putting pockets on all of the pages would allow it to hold packets of machine needles. Sewing in strips of Aida cloth instead of felt to slide the needles into would turn this into a great organizer for cross stitch and embroidery needles!
Welcome to Day 2 of the Handmade Holidays blog hop on Buttons Galore!  Today, we’re buttoning up a fashionable accessory that will keep someone you love warm and stylish this winter! This project started with an inexpensive store bought scarf, but some embroidery and buttons turned it into a one of a kind keepsake that is practical too!
 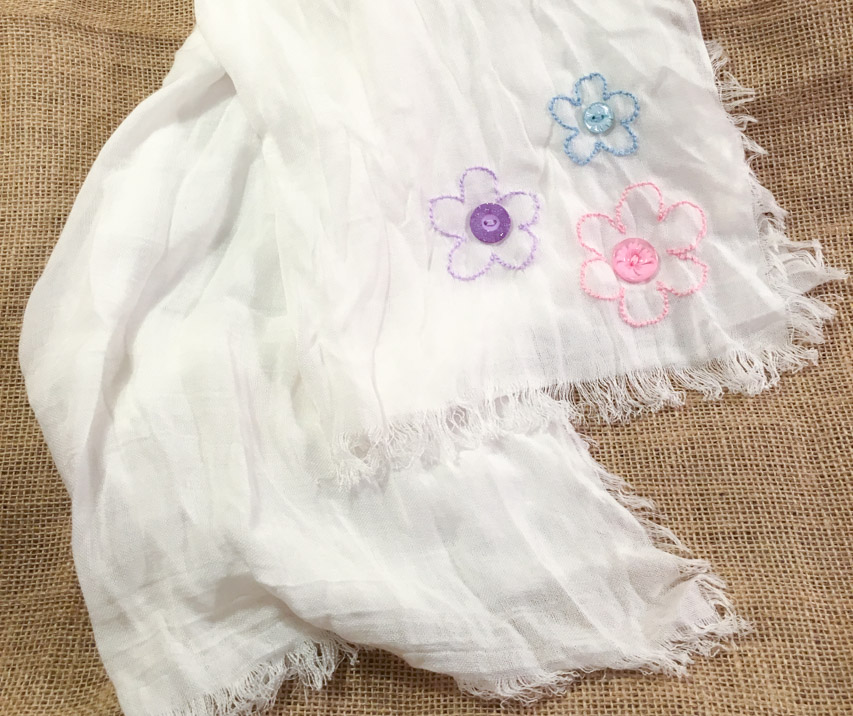 Supplies:
The fun thing about Button Bonanzas is that they are, like your grandmother’s button jar, full of an assortment of random sizes and styles of buttons. I love finding little treasures in them that have sparkles and other special designs. This scarf highlights several”fancy” buttons that I found in my Pastel Button Bonanza bag and turns them into feature elements on the scarf. 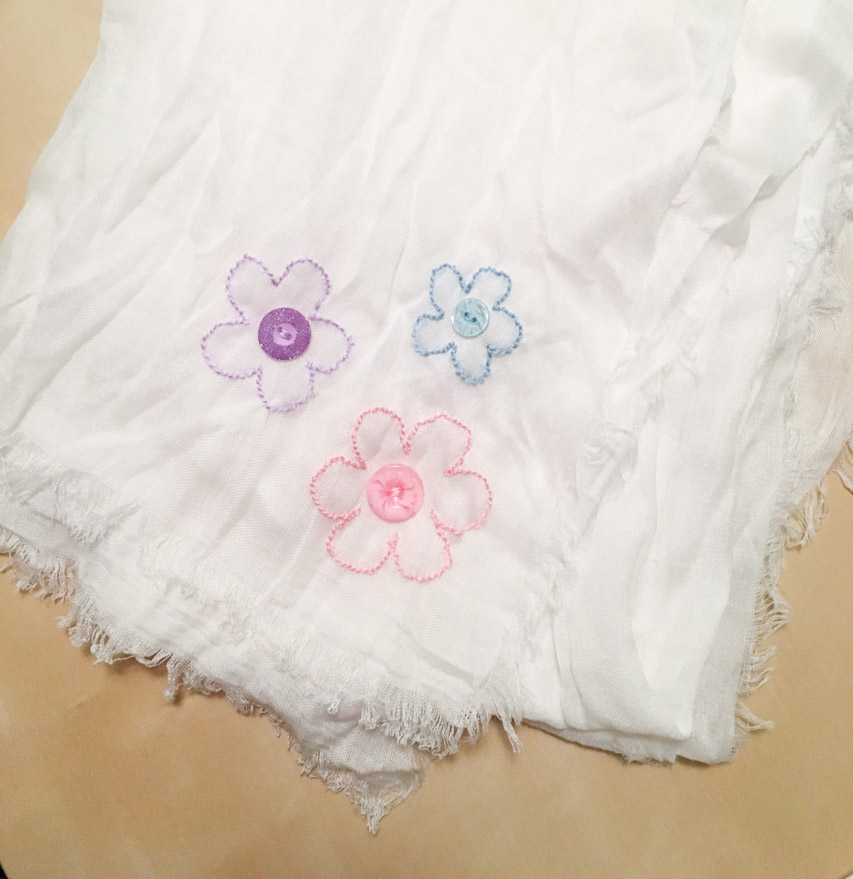 The design is fairly simple – the flowers are backstitched and the buttons are stitched in the middle of them. But how did I get my flowers the right size and shape? That’s where my secret weapon – my Cricut Explore – came in.
  First, I created the three flowers in Cricut Design Space, using files from the Cricut library. Then I used one of my Cricut pens to draw them onto some tracing paper. Once the flowers were sketched out onto the tracing paper, I cut them apart. One at a time, I attached them to the scarf with pins. Then I backstitched on the lines, through both the scarf and the paper.
 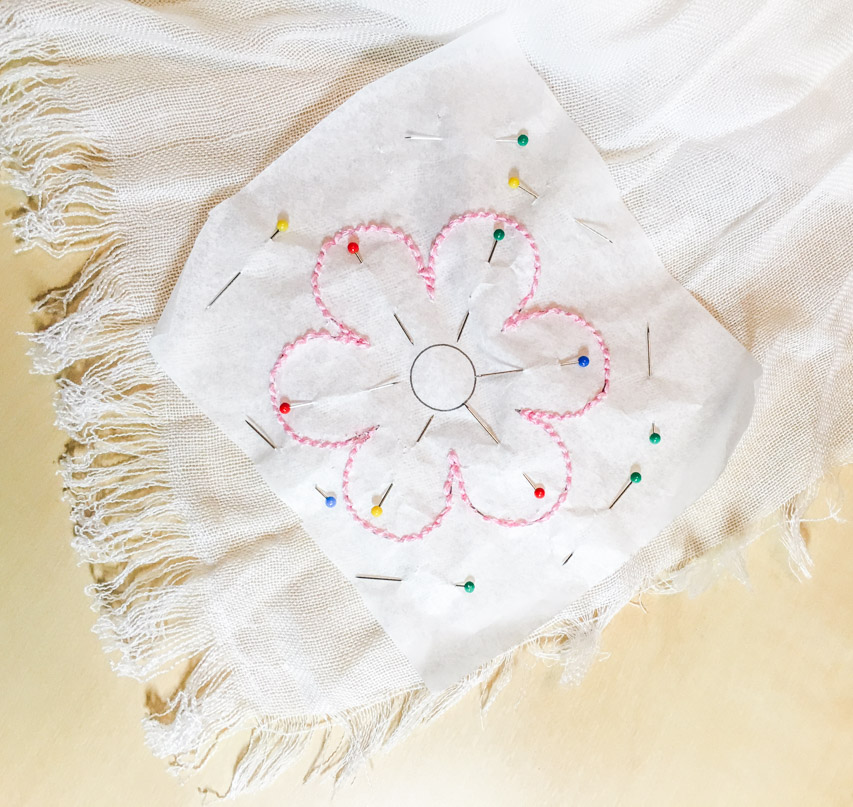 Once the stitching is done, the paper needs to be (carefully) removed. I used a combination of delicate tearing and a craft knife to tear the paper away from both sides of the stitching. The stitching holes serve as a sort of perforation that aid in the tearing away of the paper, but some effort is still required.
The final step is to use a few quick stitches through the holes to attach the buttons. And then you are ready to wear – or wrap! 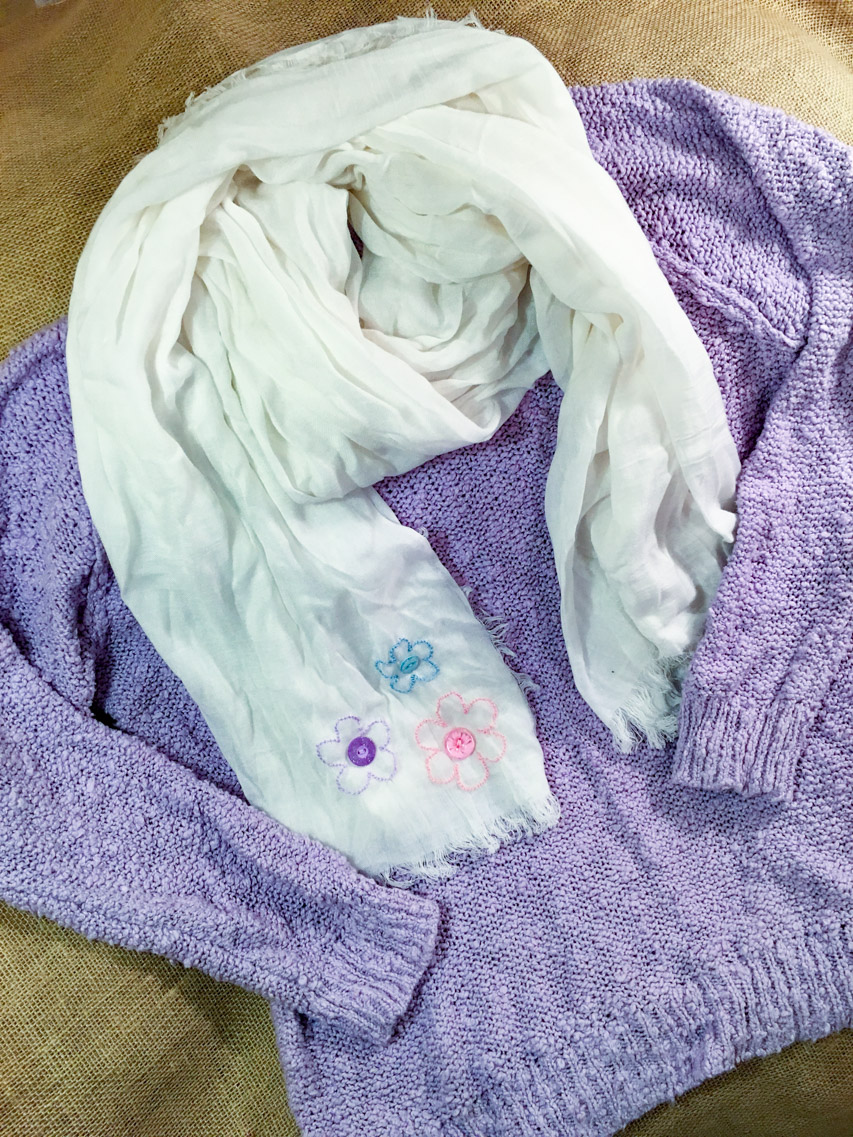
I recommend hand washing for this completed project, no matter what the recommendation is for caring for the scarf that is used for the base.
And now…it wouldn’t be a blog hop without fabulous prizes! 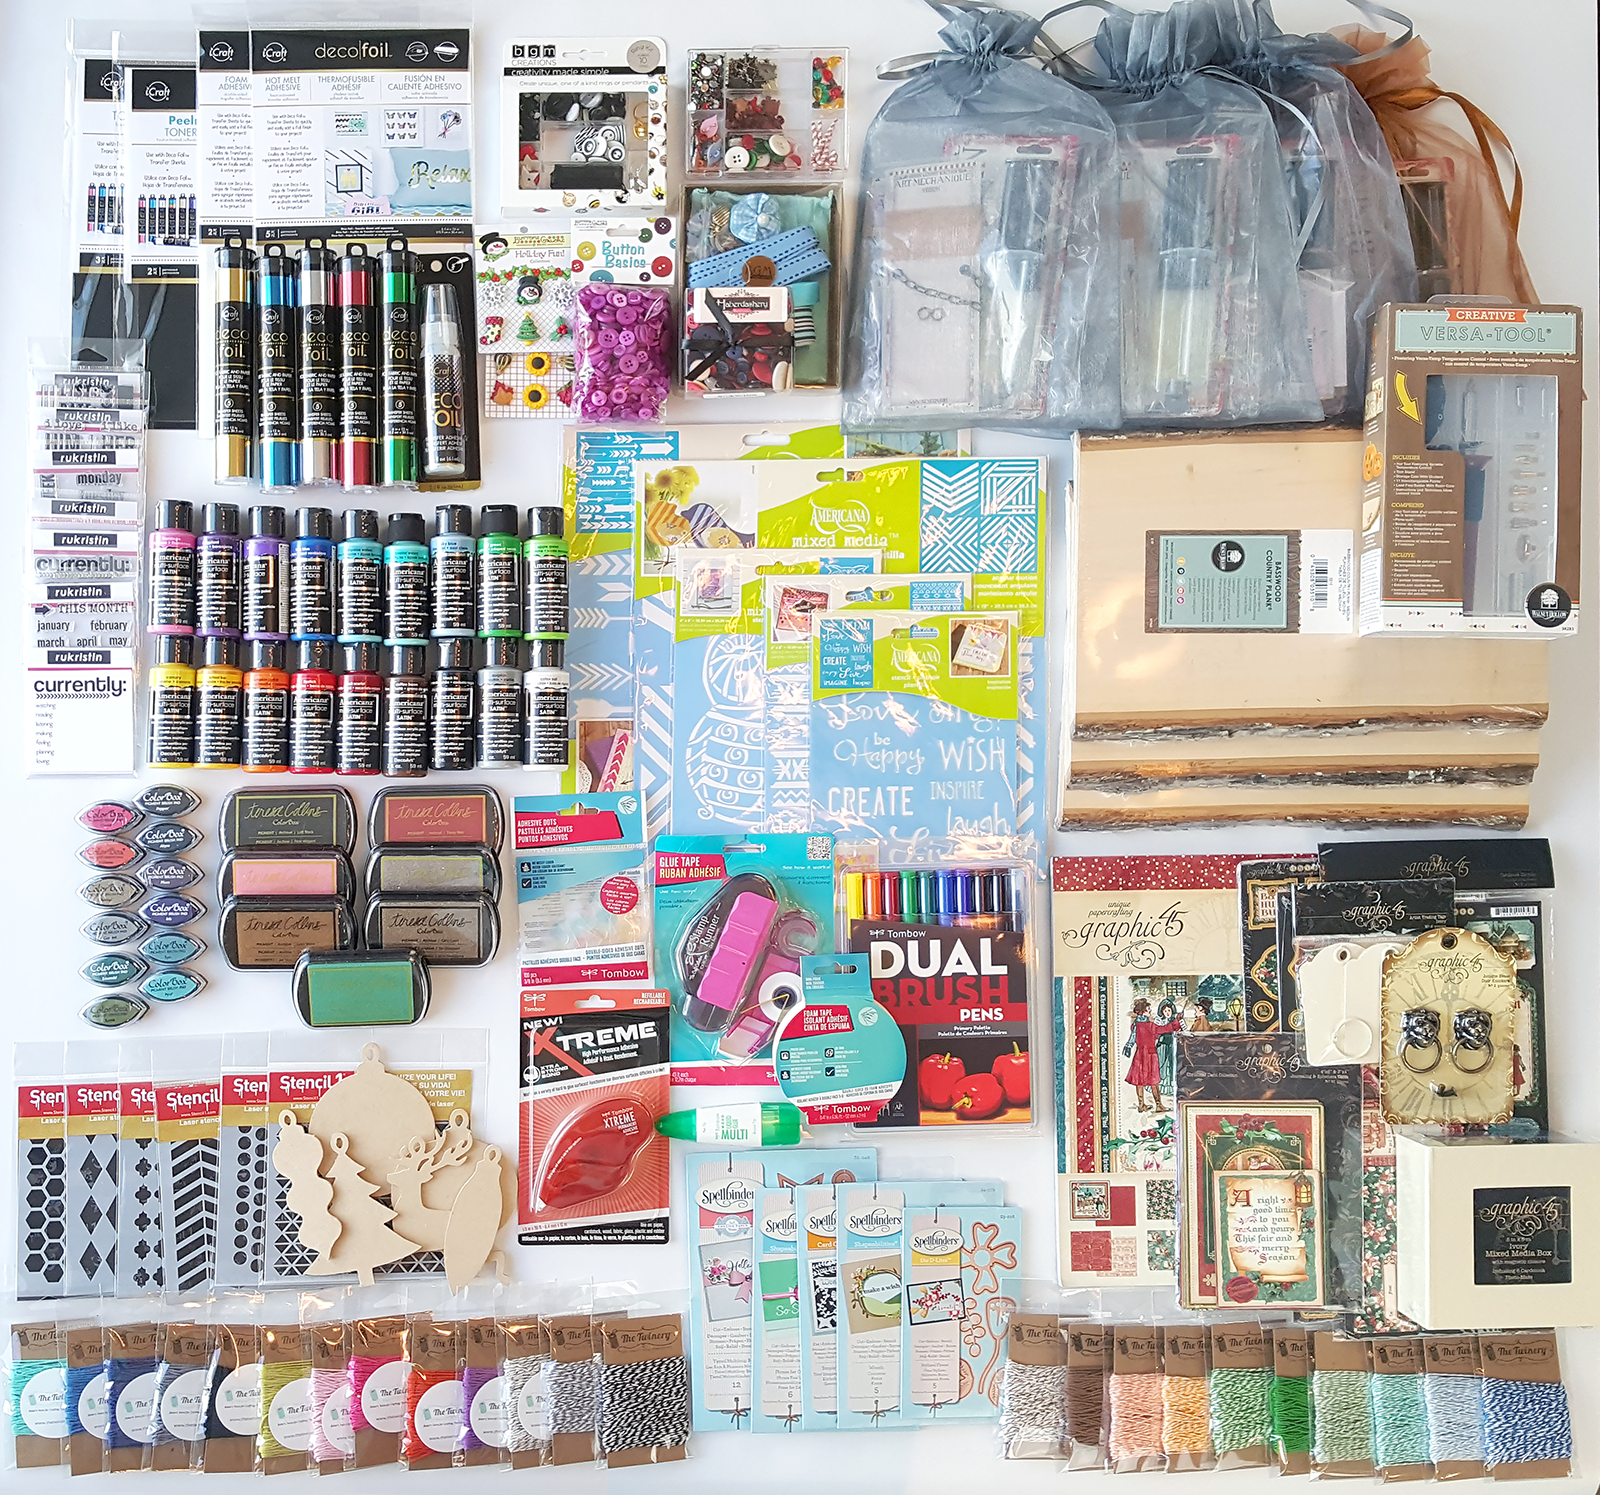 We are having a giveaway of over $600 in craft supplies to help you make this holiday handmade! Enter to win using the widget below:
Many thanks to all of the sponsors of the hop and giveaway!  Thanks for stopping by, and make sure to use the widget below to visit the other hop participants!
 ![]()
And don’t miss our contribution to day one of the hop….a practical and pretty zip pouch for the sewer or traveler in your life!

Buttons and Embroidery Line Work
Isn’t this gorgeous!?!? I love the simplicity and the colors and it could easily be made to match any decor or for any holiday season too!
Be sure to visit Doe C Doe for complete instructions and you’ll find our “Shades of Red” Button Bonanza in our store so that you can make one like this for yourself!