Header

Tag Archives | Beach

Embellish a Seashell Coloring Canvas with 28 Lilac Lane

seashellcanvas-650x650

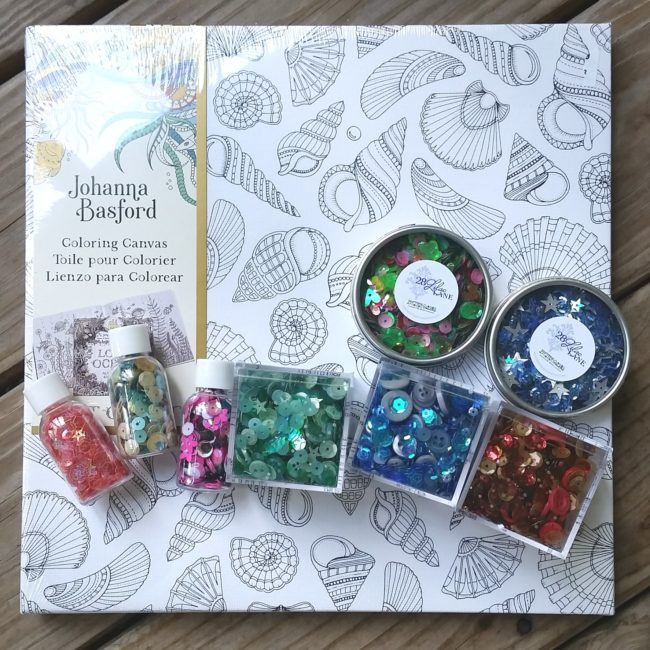
This project combines two of my favorite things: coloring and sequins! Using a pre-printed canvas, markers, and new sequins from 28 Lilac Lane, I made a fun project that is an easy way to decorate an ocean-themed room. This project is so easy that even the kids can do it!

To make this project, you will need:

How to:

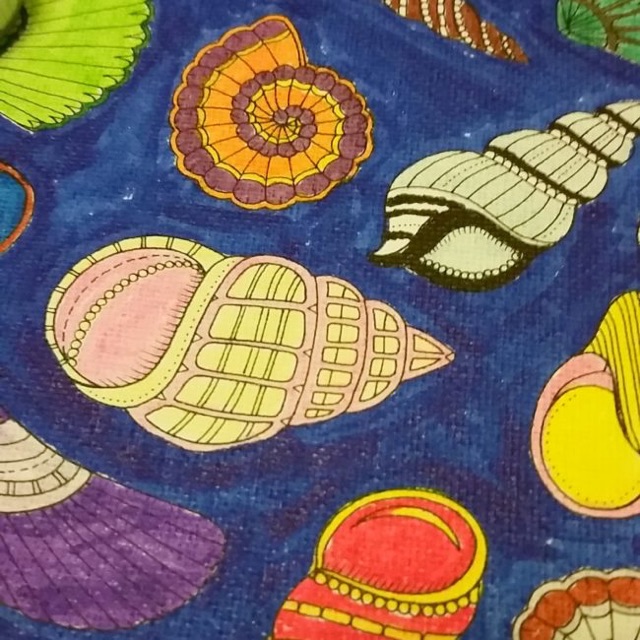
  1. Color in the coloring canvas using markers. 
  2. Fill in “water” areas of the canvas with clear drying glue. Only work on a small section at a time so the glue doesn’t dry before sequins have been applied.
  3. While the glue is still wet, shake on sequins from the 28 Lilac Lane Sequin & Bead Mixes and the 28 Lilac Lane Sequin Tins. When the glue has dried, shake off the excess sequins onto a piece of paper. You can then reuse those sequins!
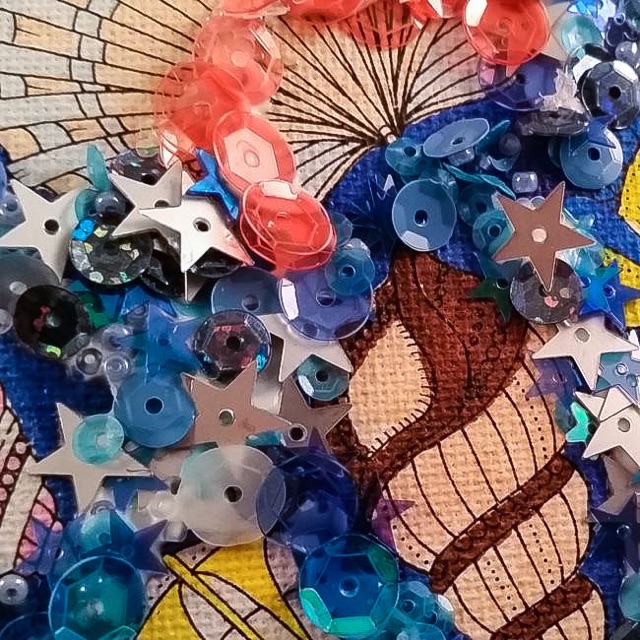
  4. Use clear drying glue to mark accents on selected seashells on the canvas. Use sequins from the 28 Lilac Lane Sequin Tins. Shake off the excess.

This canvas was so fun to make. I absolutely love to color so I really enjoyed getting out of coloring books and onto a canvas, and the addition of a little sequin bling just makes it even better!

0

Hit the Beach with Summer Fun Crafty Sunglasses

Hi! It’s Lorrie here, visiting the Buttons Galore blog today! Buttons are a fun and easy way to embellish your summer fashion, but have you thought of adding them to your accessories? Who cares if you can’t make it to the beach this summer? Bring the beach to you every single day with these super cute crafty sunglasses (that look and feel like they are covered in sand) featuring summer-themed buttons from Buttons Galore!
beach crafty sunglasses

Materials Needed:

  • sunglasses
  • Paradise Found and Fan Shells buttons from Buttons Galore
  • Stone Effects Dimensional Paint from Art Anthology in “Sandstone”
  • foam brush or palette tool
  • hot glue gun
  • button shank remover

beach crafty sunglasses supplies

How to:

  1. Apply Stone Effects paint to the sunglasses with a foam brush or palette tool. If you are using a foam brush, apply the paint with a tapping motion to get better coverage and to add even more dimension.beach crafty sunglasses in progress
  2. While the paint on your sunglasses is drying, remove the shanks from the buttons using a button shank remover.
  3. Once the dimensional paint is dry, place the buttons onto the sunglass frames and the ear pieces by attaching them with hot glue.

beach crafty sunglasses

Now you are ready to hit the beach with your summer fun crafty sunglasses – whether the “beach” is your local pool or an expanse of tropical sand!

0

Make a Button Mosaic Sun for Your Walls!

Today we’re sharing another project from our booth at Creativation. This button mosaic sun that I created brought a little bit of my home in the sunshine state to the show floor in rainy Phoenix!

Button Mosaic Sun

This sun looks yellow, but we call it….mango! It’s made with our “Mango Madness” color blend of buttons. This blend of delightful shades of orange and yellow is perfect for sunshine-y projects of all kinds.

Mango Madness Color Blend

Although they don’t look at first like they are at all the same color palette, I combined the Mango Madness color blend with a 28 Lilac Lane embellishment bottle called “Candy Corn“. I only used seed beads. flat back pearls, and sequins from the Candy Corn bottle. Used in small doses with these tiny items, the colors work well together.

candy corn embellishment bottle
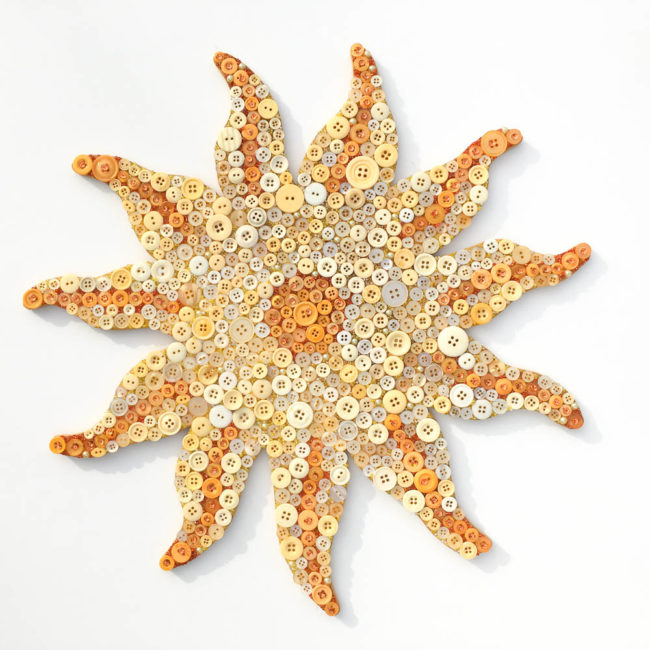
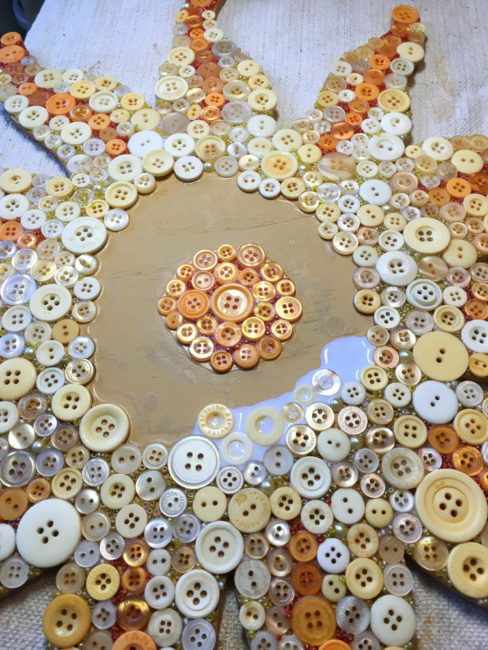
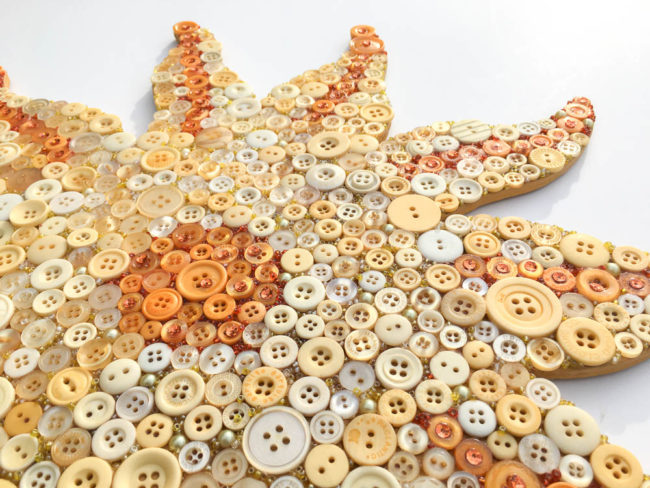
Button mosaics (or collages) are such a fun way to use buttons, and this one creates a beautiful piece of wall art home decor when you are done!

Button Sun Mosaic Construction

To get the full tutorial on how to make this piece of sunny wall art (or learn how to adapt this technique to make your own design), visit my website Craft Critique.

Sun Button Mosaic

This project can be adapted to a lot of different shapes…how about an apple for teacher? Or a heart or flower for a tween room? The possibilities are endless! What will you make?

1

DIY Paper Clip & Button Bookmarks

Secret Garden Bookmarks

It’s almost time for summer reading. These quick and easy Paper Clip and Button Bookmarks are a great kids project. With our selection of unique buttons, you can make bookmarks to match your child’s interests. Does your child love the book, The Secret Garden? How about creating a collection of garden themed bookmarks? A gift of the book and the garden bookmarks would also make a darling gift!

These would also be great teacher’s gifts. Give your favorite teacher a stack of books, some beach-themed bookmarks the kids made, and they will  be ready to hit the beach and rest up after a long school year!

Seaside Bookmarks

Flip Flop Bookmark Close-Up

Sea Bookmarks with Shell

The possibilities for these are endless! Here’s how to create your own Paper Clip and Button Bookmarks:

Supplies:

Instructions:

Slide the button onto the paper clip. Place a small drop of glue to hold the button in place. You can make dozens of these in only minutes!

Summer Reading Bookmarks

0

Fancy Straws with Buttons

We are on vacation at the beach and I am loving this opportunity to create in a new environment. We love to make up new drink concoctions when we are on vacation and I love to decorate them and make them fancy.  Here is today’s special…Popsicle drinks with fancy straws!

ButtonStrawDrinks

I used my Ad-tech hot glue gun (never leave home with out it) and buttons from my Laura Kelly mix to create a fancy straw collection for our drinks.  We stirred them with Popsicles and sipped through the straws. They were yummy and decorative and lots of fun.  Buttons are a great way to decorate when you are in a hurry or don’t want to spend a lot of time on something that might end up getting thrown away.  The color selection in the Laura Kelly mix is really festive and bright.

PopsicleDrinks

We made two versions of the drinks, one for kids and one for adults.  Which ones do you think look yummier.

ButtonStraws

Happy Creating Fun Drinks and Decorations with Buttons,

Laura


1

Powered by WordPress. Designed by WooThemes