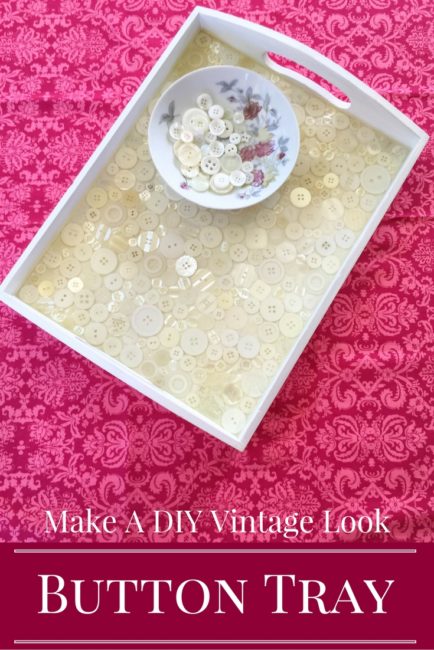
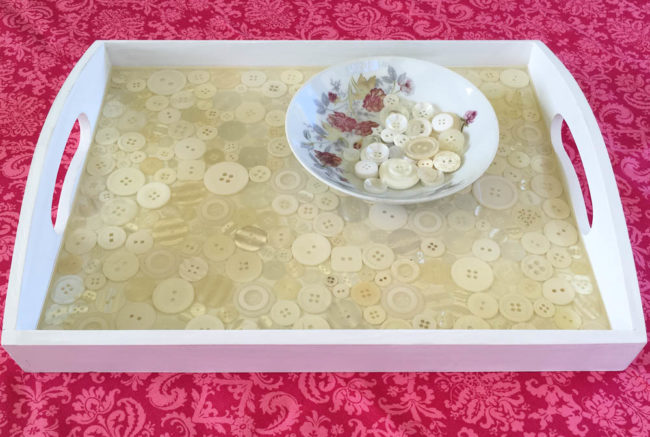
Most of what we do here on the Buttons Galore blog are simple, fast projects. But occasionally, we like to bring you a more complicated project that really shows how amazing – and beautiful – buttons can be. Today we’re sharing one of those projects, a vintage-look button tray that will look perfect in a farmhouse, shabby chic, or vintage french country style decor.
Supplies:
- Unfinished wood tray
- White paint (I used Plaid FolkArt Home Decor Chalk)
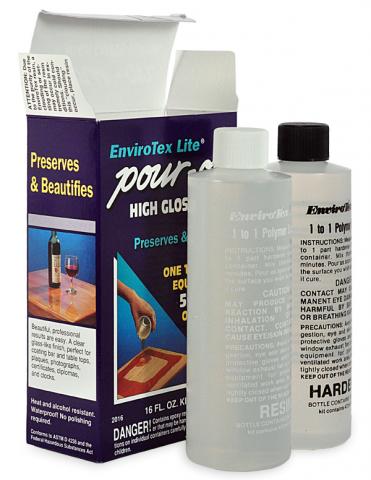
- EnviroTex Lite Pour-On High Gloss Finish resin epoxy
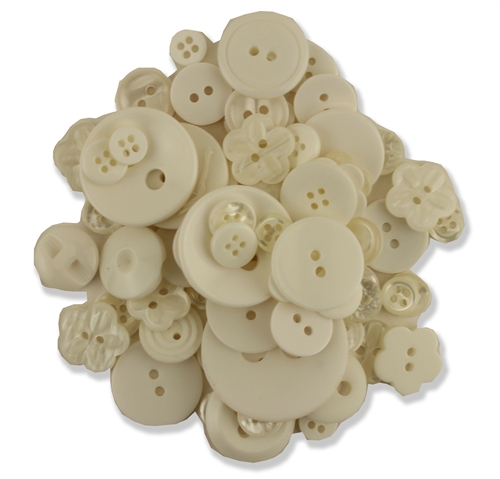
- Assorted White Buttons
To start my button tray, I painted the unfinished tray with two coats of chalk paint. I sanded with fine grit sand paper in between coats, and also after the top coat.
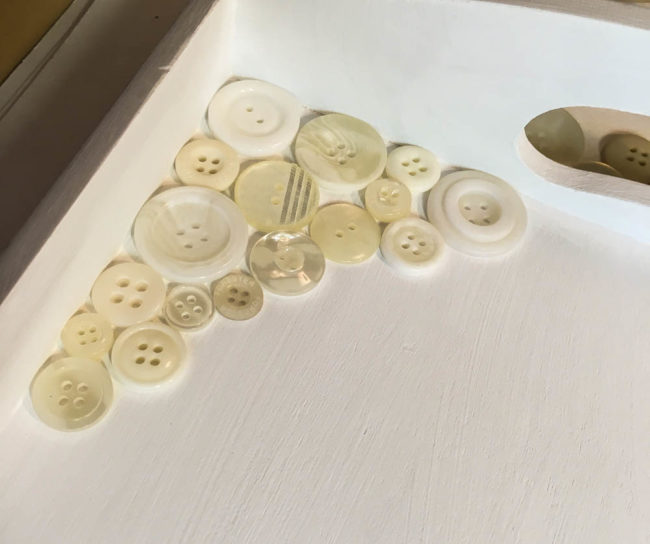
The next step is tedious work, but one I actually enjoy because I find it a very zen process. I dumped my various packages of buttons out of the surface of my work table and painstakingly began selecting ones to fill in the bottom of the tray. It’s like putting together a jigsaw puzzle that you don’t have a picture for!
Note that this step is just a “dry fitting” process with no adhesive involved. (Make sure that kids and pets are kept at a safe distance where they can’t disturb your work!) The buttons will be held in place by the epoxy resin.
To seal the buttons into the bottom of the tray and provide a flat cover over them, you’ll need an epoxy resin product. I used EnviroTex Lite Pour Over. It comes in two bottles that are poured together into a mixing container and stirred to make the resin, which is then poured over the tray. I used the 16oz package size and used almost all of it to fill my tray to the bottom of the handle cut-outs.
The trick to getting a perfect surface on your resin is to use a handheld kitchen torch to pop the bubbles that come to the surface of the resin as it hardens in the early stages. (The bubbles are caused by the mixing of the resin.)

After that, it just takes some patience to let your resin harden and after about two days you’ll have a beautiful button tray that can be used for serving or display!

In this close-up look, you can see how the resin floats over the buttons and provides a solid glass-like surface in the bottom of the tray. I poured the resin to the bottom edge of the handle cut-outs. A few buttons shifted from the pouring of the resin, and one was even sticking up though the top of the resin. I just used a disposable chopstick to nudge them back into the correct position.
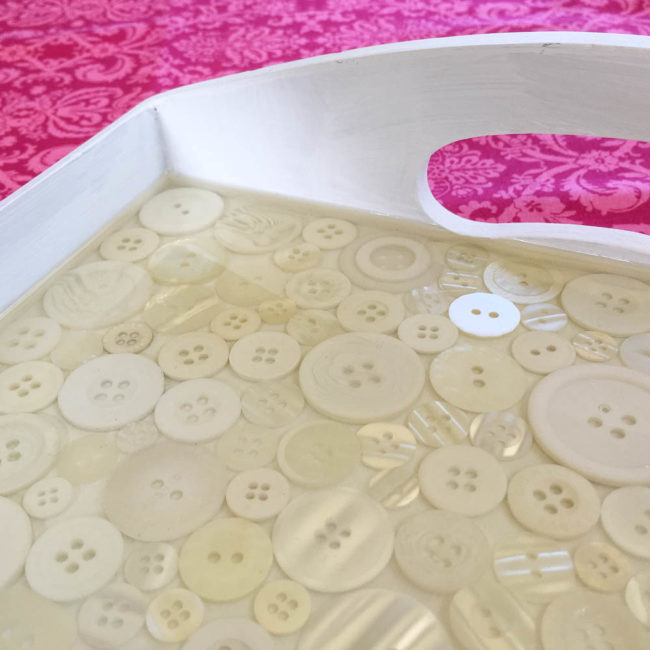
I used a combination of our “White” Button Bonanza, “White Wash” Button Basics, and “Ivory/Pearl” Haberdashery Buttons (pictured below) to fill the bottom of my tray. As long as you mix them throughout the project, it doesn’t matter if you mix the different products together to fill your button tray. And don’t feel limited to white in your color palette – this project would look great in a variety of colors, from pastels to holiday brights!
This button tray project is a bit time consuming but will bring years of beauty to your home! If you’ve made something with epoxy and buttons, we’d love to hear about it in the comments!