Header

Tag Archives | Patriotic

Announcing…New 28 Lilac Lane Premium Collection Sequin Tins!

We have an exciting announcement today for fans of our beautiful sequins: New 28 Lilac Lane Premium Sequin Tins by designer May Flaum are available now on our web store! This new collection of six sequin tins includes fun sequin options for fall and winter holidays, as well as for vacation and everyday.

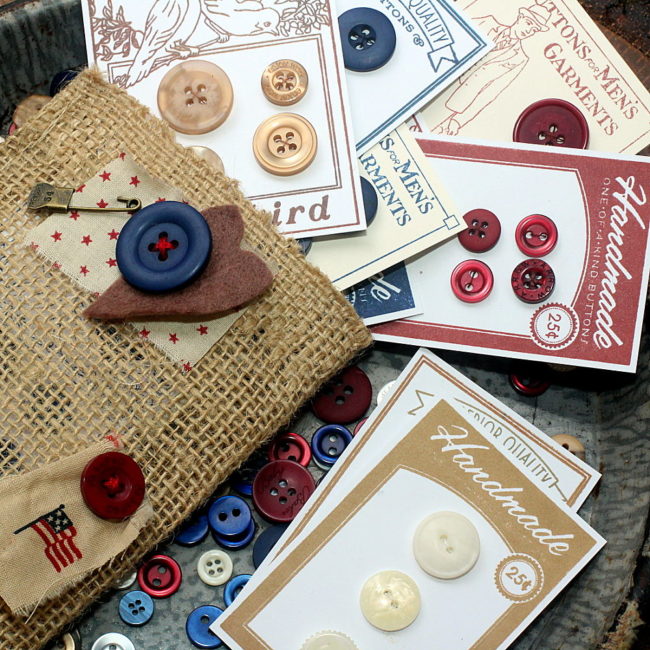
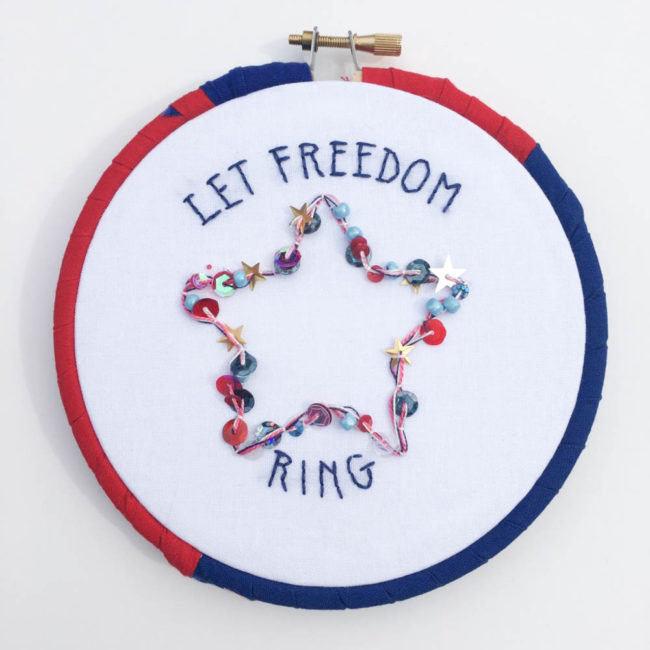
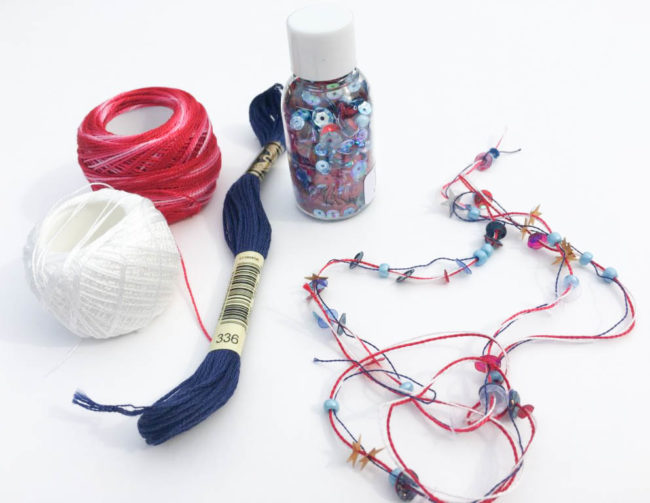
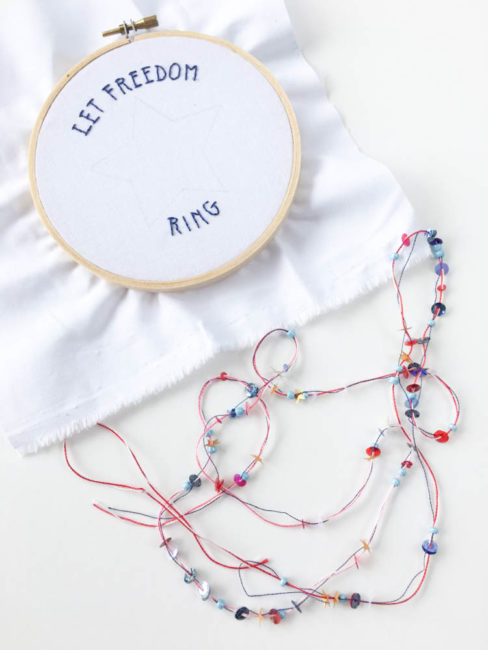
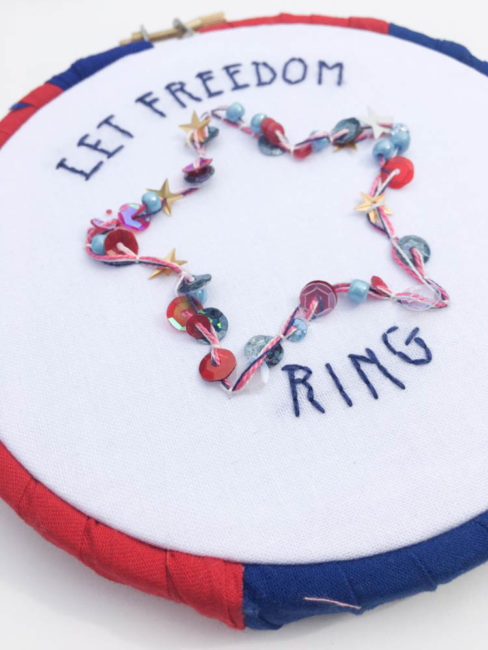
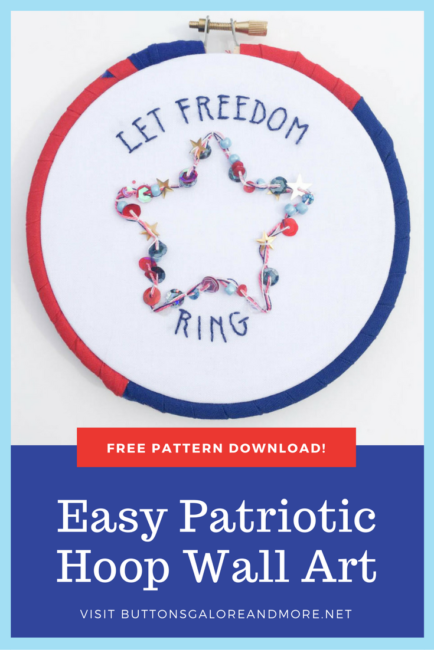
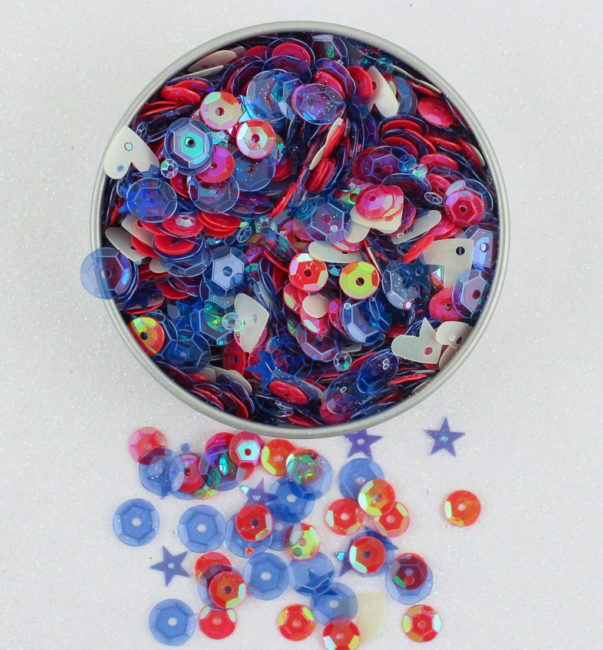
First, let’s take a look at Bon Voyage…a red, white and blue mix that includes 5 different kinds of sequins and features blue stars and white hearts! Use it for patriotic projects, scrapbooking trips to national monuments, and many other things!

28 Lilac Lane LL318 Bon Voyage sequin tin

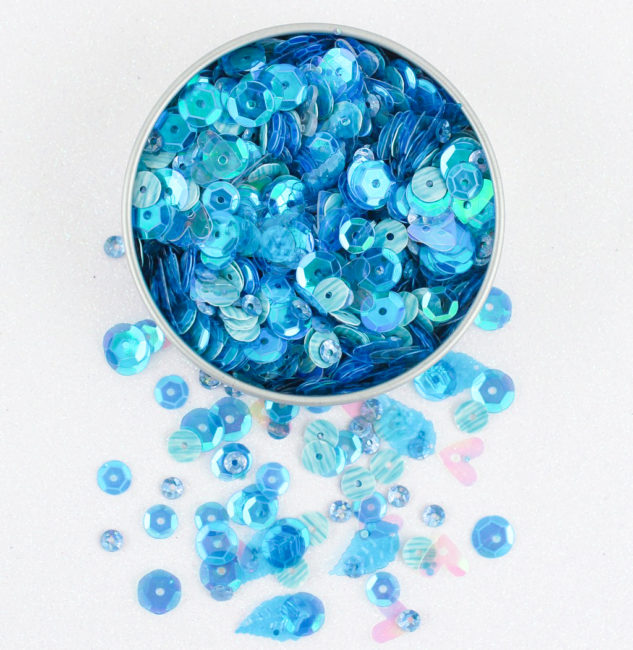
Next up is Mermaid Tale! In beautiful shades of turquoise blue, Mermaid Tale features pretty leaf shapes and stunning white sequins with blue tiger stripes. This mix is perfect for those beach or pool themed projects. (Or mermaids, of course!)

LL319 Mermaid Tale sequin tin

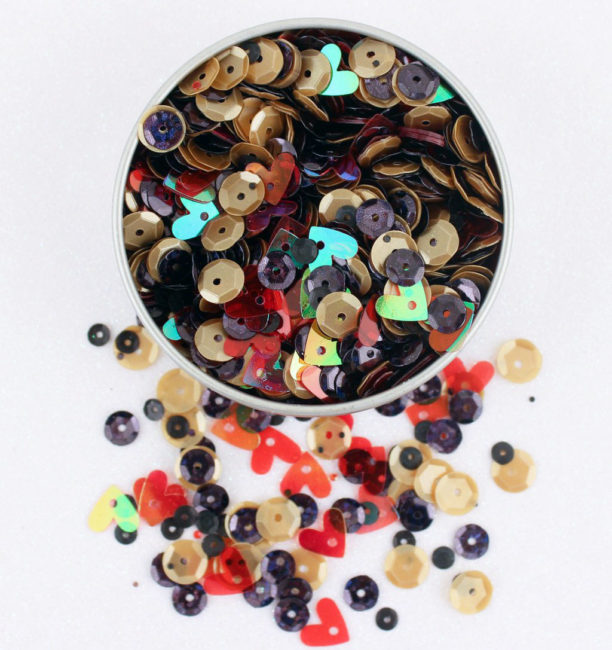
Pet lovers will love the new “Happy Place” sequin tin! This new sequin mix features red heart sequins, large gold sequins and a mix of brown sequins. Happy Place will be perfect for your pet projects, celebrating your love of autumn, or sending greetings to your favorite guy!

LL320 Happy Place sequin tin

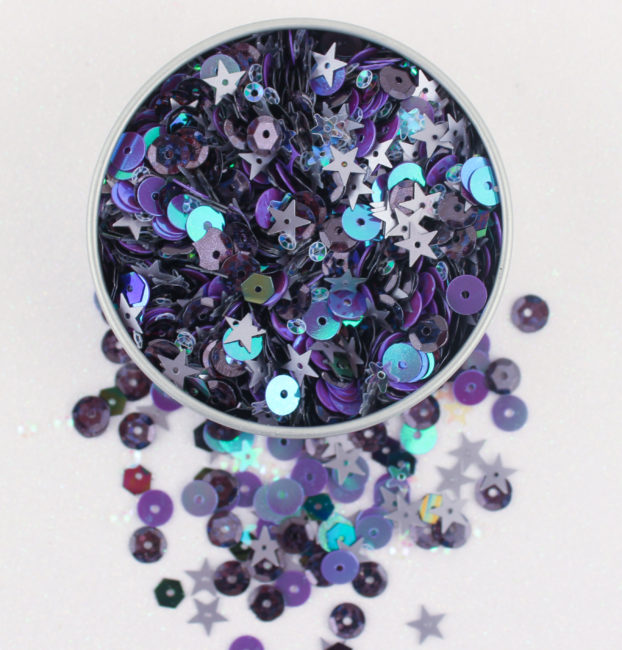
Halloween is coming fast, and we’ve got the Haunted House sequin tin for that! In a trendy purple and silver palette for Halloween, its clear and silver stars are paired with several shapes and sizes of purple sequins to create a mix that will give your projects the perfect spooky touch!

LL322 Haunted House sequin tin

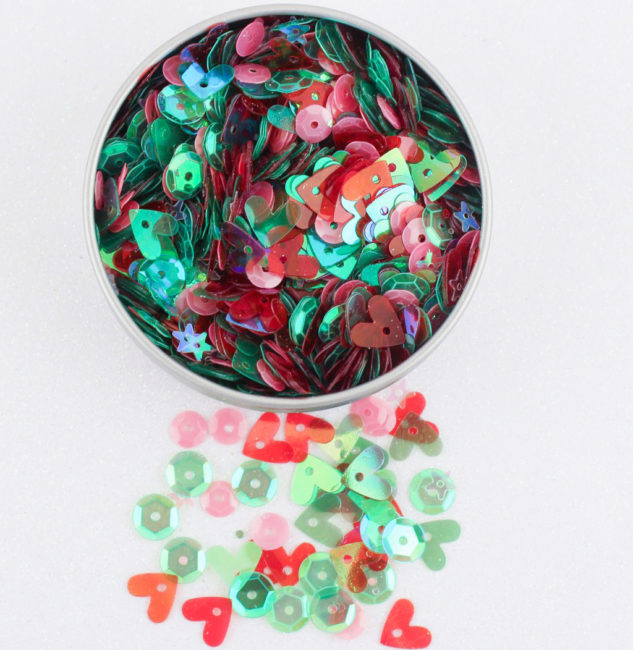
Of course, before we know it the Christmas tree will be going up…and you’re going to love the Retro Holiday sequin tin! This festive Christmas sequin tin features red and green hearts, clear stars, green sequins, and pink sequins (this year’s hot Christmas color!).

New 28 Lilac Lane LL321 Retro Holiday sequin tin

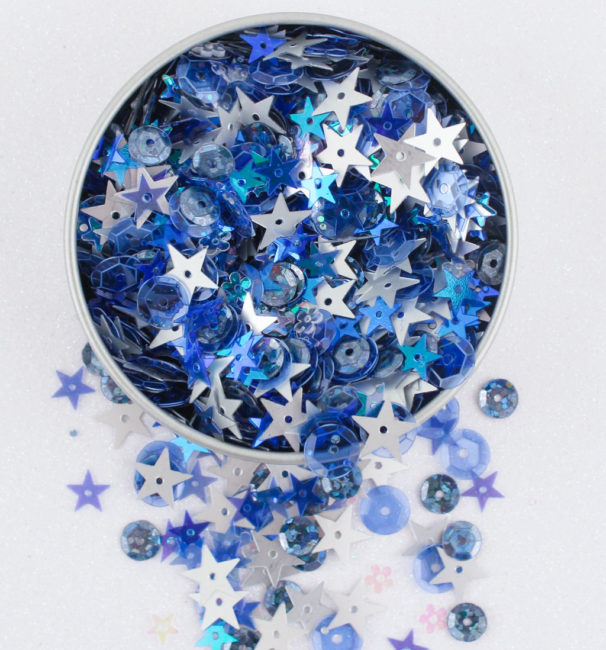
But just one holiday collection isn’t enough, so we’ve also got the shimmering Festival of Lights! This mix includes three different star sequins (silver, blue, and clear), clear flowers, and two types of blue sequins (large clear and deep blue metallic). This mix is perfect for many winter holidays (such as Christmas, Hanukkah, and New Year’s Eve).

New 28 Lilac Lane LL323 Festival of Lights sequin tin

All of these new premium sequin tins come packaged in a brush metal tin containing 30 grams of sequins, and are available now from our online store. Don’t miss out!

0

Give Your Buttons Beautifully with Faux Vintage Button Cards

Hi! It’s Connie here with my first post for the Buttons Galore & More design team! Today I am sharing a fun project using Button Galores’ “Patriot” Button Tote to make faux vintage button cards and a tote to store them.

Inspired by the navy, natural, deep red and white buttons in the tote, I created a button bag along with hand stamped faux vintage button cards. The buttons are beautiful and look gorgeous on the button cards! This isn’t a difficult project, just a project that requires time. The end result is a beautiful button bag, full of custom assembled faux vintage button cards, that can be used as a decorative way to store buttons, add them to projects, or for giving the buttons as gifts to fellow crafters.

faux vintage button cards with tote

Supplies needed:

The button cards were created using a button card stamp and beautiful buttons from Buttons Galore. Each card has a sample of the buttons that are included in the Patriot Button Tote. No card is alike, as each is created with different buttons. Each button is hand sewn on the card, for easy access and future use. They are created just like the faux vintage button cards (well almost)! Button cards come in all sizes – these are about 2.5″ X 3″. There is plenty of room to mix large buttons with small or medium buttons on the button cards. These are a great gift idea for a crafter or sewist who is crazy about buttons!

faux vintage button cards

The burlap bag is stitched with some scraps of material and more buttons, after all, it is a button bag. The embellishment layers are hand stitched, to the burlap, on the front of the button bag. The button cards fit nicely in the bag. and will work as a great storage idea or a gift that will be loved.

tote for faux vintage button cards

The finished project, with the faux vintage button cards inside the button bag, is all ready to tuck in a gift bag for a special gift!

Faux Vintage Button Cards in a tote - great for gift giving, storage, or using right on mixed media and paper craft projects!

3

Make Patriotic Hoop Wall Art with 28 Lilac Lane [free download]

Summer time is kicking up into full gear and July 4th will be here before you know it! Red, white and blue and backyard BBQs are on the horizon! This little patriotic hoop is a great way to get started on those patriotic decorations.

Patriotic Hoop Wall Art

Supplies Needed:

Patriotic Hoop Wall Art

This patriotic hoop features the Stars & Stripes sequin & bead mix that is a mix of larger blue beads, small and large sequins, star sequins and smaller seed beads and glitter. I used the blue beads and sequins to create beaded thread for my hoop.

To get started: take about a yard of each thread; using only 1 strand of the blue divisible floss. Thread all three colored threads onto your needle and pick up different bits of the sequin and beads and push them along down your thread. Continue until you have distributed the beads and sequins sporadically along the thread. They don’t need to be in any sort of order, just make sure that they are spaced out well.

Patriotic Hoop Wall Art

Find a sunny spot and transfer your embroidery pattern onto your fabric. Use three strands of the blue embroidery floss (#336) and backstitch the text. Lay your beaded thread on one of the star lines and with the white cotton perle, use a couching stitch to sew down the beaded thread along the outline of the star. Couch your beaded thread around the star two times.

To finish your hoop you can wrap it in a mix of blue and red fabrics, as I did, or you could even paint the hoop. Set your finished piece inside the hoop, trim your fabric about one inch from the edge of the hoop and hot glue it to the inside.

Patriotic Hoop Wall Art

This patriotic hoop wall art is a great project for even a beginner at embroidery. It’s one that looks like it took hours and advanced skills, but is made up of basic embroidery stitches and techniques and can easily be finished in an afternoon!

patriotic hoop wall art using 28 Lilac Lane sequin & bead mix. Design by Aimee Davis for www.buttonsgaloreandmore.net - easy embroidery project for 4th of July.

1

Cute as a BUTTON – Snacks for the Fireworks

It’s Fifteen MINUTE Friday and the 4th of July.  Here is a really quick and cute way to pack up some snacks for the fireworks show.  This little packaging idea would be great in a variety of colors for lots of occasions, goody bags and school treats too.

Button Snack

Put you snacks in bags that you can tie closed with ribbon or raffia then add the buttons with Aleene’s Turbo Tacky Glue.  The super cute label is from Expressionery.Com and was designed by me so totally matches the colors of the buttons that come in the Laura Kelly Patriotic Mix.

Buttons RWB

Happy Celebrating!

Laura

1

Patriotic Pail for USA Fun

Here is a festive, fun and simple to make PATRIOTIC PICNIC PAIL, great for holding snacks, silverware, candles, etc. and totally useable for Memorial Day, 4th of July and Veterans’ Day too!

PatrioticTinPail

I gathered the products and materials I would need first.  You can get my patriotic mix of buttons from Buttons Galore and save yourself from having to buy all of the colors individually.

LK_PatrioticButtonMix

I painted the tin pail with blue paint, applying three coats to get it bright and covered completely.  Then I added polka dots with white, applying two coats.  To complete the painting, I added polka dots inside the white ones with red, again applying two coats.  I also painted inside of the bucket.

Paint

When the paint was totally dry, I used decopauge to add a few “I Love the USA” additions.  I printed them out on the computer and cut them first.  My favorite choice here is Matte Collage Pauge from I Love to Create.

Collage Pauge

To decorate the handle, I added buttons from my Patriotic Mix from Buttons Galore by threading them onto red wire and twisting in onto the handle as I went from one end to the other.  I added a few ribbons tied in knots.

Button Handle

Then I added my favorite red, white and blue packaged snack to complete the project and turn it into a great hostess gift!

Happy Celebrating the USA and Creating with BUTTONS,

Laura


0

Quick and Easy Patriotic T-Shirt Makeover with BUTTONS

It is that time of year, the red…white…and blue time that is!  Here is a quick and easy way to up-cycle an old t-shirt into a festive masterpiece fit for the grandest of parades.  It is shown in patriotic style but could be done in any color theme for any occasion.

ButtonShirtMakeover

You only need a few things…buttons (Laura Kelly’s patriotic mix is best), embroidery floss (Coats and Clark is my favorite), HOT glue (Ad-tech of course)  and ribbon.

ButtonShirtMaterials

Make the ribbon flowers with button centers using your HOT glue.  It works best to do the ribbon part first and then add the buttons at the end.  Then sew them and additional buttons around the neck of the shirt.  If you want to go button crazy, you can sew red, white and blue buttons all of the shirt to look like polka dots.
ButtonPatrioticClothesMakeover

If you like the shirt and you want an additional patriotic button craft idea to upcycle these denim shorts, visit Laura on her blog for directions.

If you want to win this prize, (buttons in an awesome Viewtainer, Beacon Zip Dry, and a Laura Kelly notepad with a Sharpie,  go like Laura on her Facebook page or post a comment on this blog and you will be entered!

Prize

Happy Creating using BUTTONS, imagination and LOVE.

Cheers,

Laura

ButtonShirtPatrioticStrip


28

Button and Burlap Patriotic Welcome Decor

I don’t do as much decorating for the patriotic holidays as I’d like. I do have quite a few family members in the military, so I think I get more caught up in remembering their service than I do decorating. This year I wanted to change that, so when I was challenged with using burlap in a button project, I knew right away what I wanted to do…

paint burlap and button American flag decor

paint burlap and button American flag decor by Jen Goode

Make an American flag decor sign using buttons and burlap. Using some paint on the burlap, it’s easy to get that rustic look with lots of fun texture and interest without having to create a super detailed piece. This project can easily be created in just a couple hours. I used Decoart craft paints for this project. Feel free to use what you have on hand.

Burlap and button project supplies

Burlap and button project supplies

Materials you need:

  • Ivory buttons
  • Tan/natural colored burlap
  • American Paint in Alizarin Crimson, Primary Blue and Light Buttermilk.
  • Decoart Dazzling Metalics paint in Glorious Gold
  • Craft glue
  • 1/4″ Wood dowel
  • Natural colored twine
  • Paint brush and Scissors
  • Wood letters to spell “Welcome”
Tie twine and glue buttons for faux sewn look

Tie twine and glue buttons for faux sewn look

Welcome patriotic wall art

Welcome patriotic wall art

Step by Step instructions

Make your own Patriotic wall decor using buttons and burlap:

  1. Cut burlap to your desired size
  2. Paint an American flag on the burlap (make sure to protect your work surface under the fabric). Let dry.
  3. Attach buttons to blue area of flag. You can either sew or glue. I tied twine through the buttons and then glued the buttons in place.
  4. Cut second piece of fabric, paint blue.
  5. Paint wood letters and dowel using Gold. I used a paper towel to spread the paint to give a bit more aged look. Let dry.
  6. Glue letters in place.
  7. Attach Welcome piece to flag fabric piece. either sew or glue. Add final buttons on edges as shown.
  8. Attach to dowel. I pinned mine but you can sew or glue – whichever you prefer. Tie twine around the edges of the dowel and hang as desired.

Tips:

  • Using a flat, square brush helps make nice stripes and blocks of color with the paint.
  • To create frayed look, gently pull threads of burlap on top or bottom of fabric to remove. Repeat until desired frayed look.
Patriotic wall decor using buttons and burlap

Patriotic wall decor using buttons and burlap

1

Handmade patriotic pins – Show your pride!

Here in the U.S. we will be celebrating Memorial Day at the end of May.  We also celebrate Independance Day on the 4th of July.  Today I am sharing a simple way to show pride in your country with handmade lapel pins.

Gather a few simple supplies…

Supplies:

I  chose to decorate the stars in the value pack using dimensional paint from Jacquard.  Free handing dots and stripes is a breeze with the fine tip applicators on the bottles.  Let the dimensional paint dry completely before the lapel pin assembly steps.

Prep your ribbons by cutting at approximately 8 inches long.

Using a contrasting color of embroidery floss, sew the lapel pin together with the looped ribbon between the pin back and the embellished button.

Run a fine detail glue like Zip Dry along the edges of the cut ribbon to prevent fraying.

These are a snap!  Make a few and share them with your friends and family.  Not a lapel pin wearer?  I’ve pinned these on the side of canvas tote or they would look cute on a hat too.  Thanks for stopping by!  Have a great one!

1

Patriotic God Bless the USA Wall Hanging by Linda Auclair

Patriotic Collage trim Kit

PLease welcome this weeks guest designer – Linda Auclair.  Linda is an avid paper crafter who is know for her prolific work and her fantastic use of embellishments.  She is a natural pairing with Buttons Galore and More.  She does such fun and timely work  that we are going to feature today and next week too.  Both projects have a patriotic flair and are perfect to display for Memorial Day and the  4th of July.  If you would like to view more of her lovely work please visit her blog.


Materials used –

NicoleCrafts wooden décor heart (purchased at AC Moore)

Echo Park Paper’s “4th of July” Mini Theme Collection Kit    http://www.parttimesally.com/

HAB602 Nautical Trim Collage Kit    http://www.buttonsgaloreandmore.com/product/HAB602.html

DF93 Patriot Matte Round buttons     http://www.buttonsgaloreandmore.com/product/DF93.html

CH34 Star Charms     http://www.buttonsgaloreandmore.com/product/CH34.html

Tattered Angels chipboard alphabet

Jillibean Soup Alpha Beans alphabet stickers in Roma Red

The Twinery Twine in Marachino and Denim    http://thetwinery.com/

Stickles Glitter Glue (Ranger)

Mod Podge Decoupage Medium (Plaid)

Folk Art acrylic paint in Brilliant Ultramarine (Plaid)


Instructions:

  • Remove hardware from wooden heart.  Sand and paint the edges with the blue acrylic paint.
  • Trim patterned paper to cover wooden pieces and apply to surfaces with Mod Podge.  Allow to dry and trim with craft knife.
  • Cut 15 2 inch lengths of assorted ribbons from the Nautical kit.  Trim edges and apply to the back of the wooden heart with favorite liquid adhesive.


  • Embellish ribbon strips with buttons tied with twine and star charms.


  • Apply a thick coat of Stickles Glitter Glue to self-adhesive chipboard letters.  Let dry completely before handling.
  • Apply sticker alphabet and chipboard alphabet to wooden heart.


  • Embellish heart with ribbon rosette, and banner with buttons tied with twine and star charms.


button embellished wall hanging


  • Hang and enjoy.
Thank you for checking out this button embellished patriotic wall hanging by our guest designer Linda Auclair


3

Fireworks Napkin Rings

Happy Fourth of July to all our U.S. readers!   Today, I thought I would share a cute tutorial for festive napkin rings.  They are so easy you can probably whip-up a set for this afternoon’s BBQ!

Supplies:

  • Cardboard tube, cut to 2 inches long
  • Felt in red, white & blue
  • Sizzix™ Big Shot™ Die Cut Machine
  • Sizzix™ Originals™ Die: Flower Layers #3
  • Buttons in Patriotic (Product #MU358)
  • Craft Glue

Instructions:

  1. Die cut flowers using the red, white and blue felt.
  2. Measure the circumference of your cardboard tube and cut a white piece of felt in your length measurement, with a 2″ width.
  3. Glue felt strip and three of the largest size die cut flowers to the cardboard tube.
  4. Glue buttons into the center of each flower

Now, slip a napkin and maybe a little flag into the ring and you’ve got a party!

0

Patriotic Button Mini Art Set

Patriotic mini art frames by Jen Goode

Patriotic mini art frames by Jen Goode

There are so many great ways to create extra decor pieces for July 4th and other patriotic holidays. Add a little extra fun to your home with buttons in red, white and blue to show off your American spirit. This 3 piece button art requires only a few supplies and is fairly quick and easy to create. I used many recycled pieces and scraps including buttons from a grab bag button pack which added to the variations of sizes and colors I had available.

Continue Reading →

0

Powered by WordPress. Designed by WooThemes