Make a Zippered Bag with Buttons
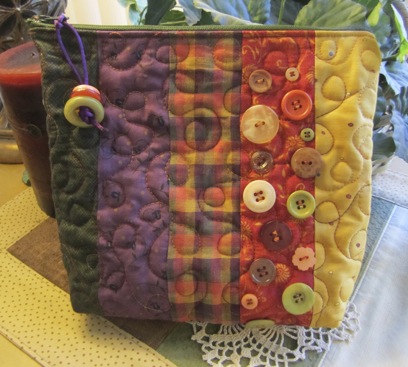 Zippered bag measurements 10×10 bag
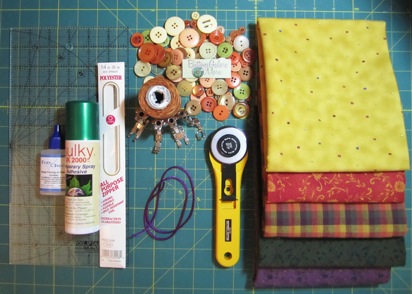
- *(5) Coordinating Fat Quarter (FQ) Prints or use scraps, minimum 10” x 10”
- *1 bag “Button Tote Bag Assortment” by Buttons and More, #1138473
- *(2) 10” x 10” scraps of cotton batting, Warm & Company
- *Star Multi-Color Machine Quilting Thread, to match fabrics, Coats & Clark
- *10” Polyester Zipper, Coats & Clark
- *Rotary Cutting Tools, Olfa
- *Temporary Spray Adhesive, Sulky (green cap)
- *Fray Check, Dritz
- *1/8” wide12” strand cording to match fabric
Supplies for zippered bag:
1/4” foot, zipper foot, multi-purpose foot, scissors, sewing machine, iron
All seam allowances are 1/4”.
Cutting Instructions for Zippered Bag:
From each FQ, cut (1) 2 1/2” x 10” strip (front of bag)
From one FQ, cut (1) 10” square (back)
From one FQ, cut (2) 10” squares (lining)
From cotton batting, cut (2) 10” squares

All seam allowances are 1/4”.
1. With 1/4” foot, sew each 10” strip RST, along 10” side, Press
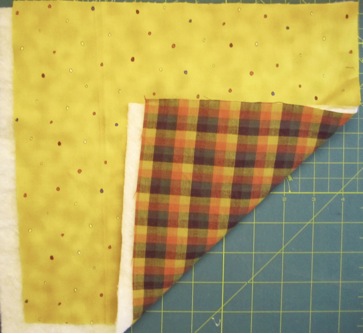
2. Layer backing (face down), batting, lining (face up) Spray Temporary Spray Adhesive between layers. Repeat with front and lining.
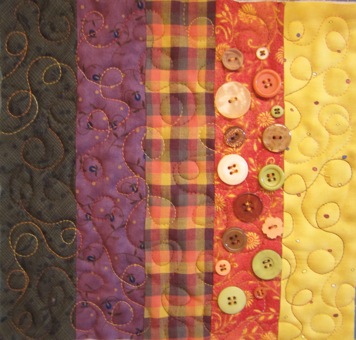
3. With darning foot and feed dogs lowered, quilt bag using loopy design. Repeat with backing layers. Use matching lining thread in bobbin.
- Trim Front bag approximately 10” x 10” and then trim Back bag the same size.
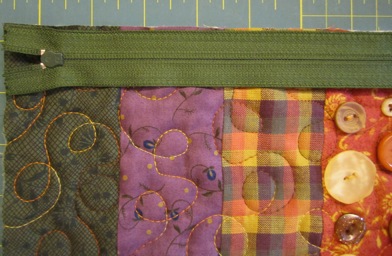
5. Position various buttons to front bag, in random places. Sew with machine or by hand. I used my machine and the variegated thread, it changed with the color of each button! Apply Fray Check to back of each button to secure.
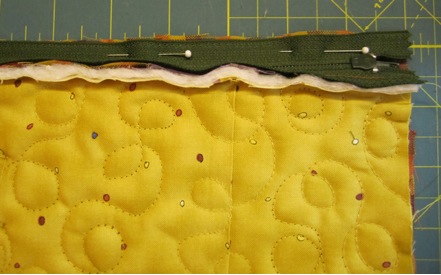
6. With Zipper foot, sew zipper RST onto front of bag along top raw edge.
7. Sew zipper RST to back of back. Use pins if necessary.
8. With the Multi-purpose foot, zig-zag along zipper edge.
9. Turn bag over to Right side and topstitch along zipper edge.
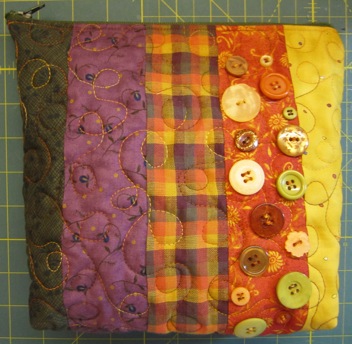
10. Upzip zipper! (for turning right side out) With 1/4” foot, and RST, sew bag along all three sides. Backstitch at each end. Zig-zag along seam allowances.
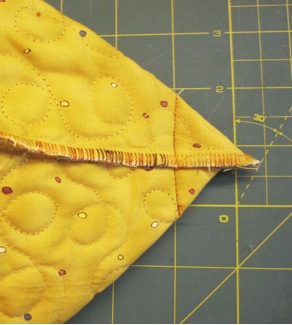
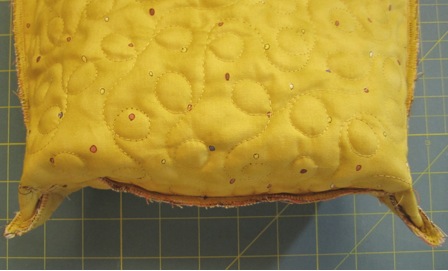
11. At corners of bag, match up side seam with bag bottom seam, pin on either side of seam. Check inside of bag to make sure they line up. Sew a seam, approximately 1 1/4”, from tip of corner . Backstitch at each end. Zig-zag and trim. Turn bag RSO.
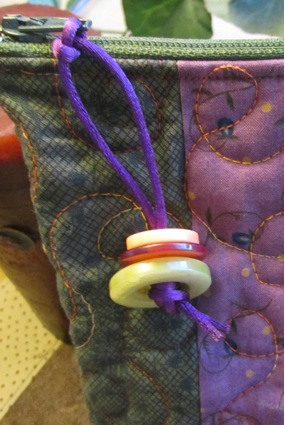
12. Thread cord through zipper pull and tie a knot. Thread cord through three different buttons and tie a knot. Trim cording even. Apply Fray Check to ends. Enjoy!
Denise Clason has been an artist/designer for over 35 years, selling her creative and beautiful designs to friends and teachers at an early age. She continues to design and has been published and licensed in the craft, decorative painting, sewing and quilting industries. Along the way she has designed product for several manufacturers. Denise is the author of 9 books. Her latest book, “Sewing Vintage Aprons” was published by All American Crafts”, released June 2011. Another two books were published by Krause Publication’s, “New Country Quilting,” released Spring 2005 and “Quilted Bags & Totes,” released Fall 2006. Denise is a Designer Member of The Craft & Hobby Association (CHA). Please contact her at denise@deniseclason.com or visit her website & blog: www.DeniseClason.com. She would love to hear from you!
Latest posts by Admin (see all)
- Ladybug Button Card - May 1, 2015
- Button Up a Teacher Gift in a Flash - April 10, 2015
- Don’t Get Pinched! Guest Blogger DIY Shamrock Accessory - March 2, 2015


Beautiful Denise!
Loved it!!!! I’ll make it as a mother’s day gift for my mom. Thank you for such a lovely idea!