
Welcome to the Handmade Holidays on Buttons Galore! We’re joining in by sharing ideas for handmade Christmas gifts using – of course – buttons!

Today’s gift is both practical and pretty! You can never have enough tote bags, and today our gift is a nice sized one that is made gorgeous using an easy rag quilting method.

Supplies:
- 15″ x 15″ tote bag
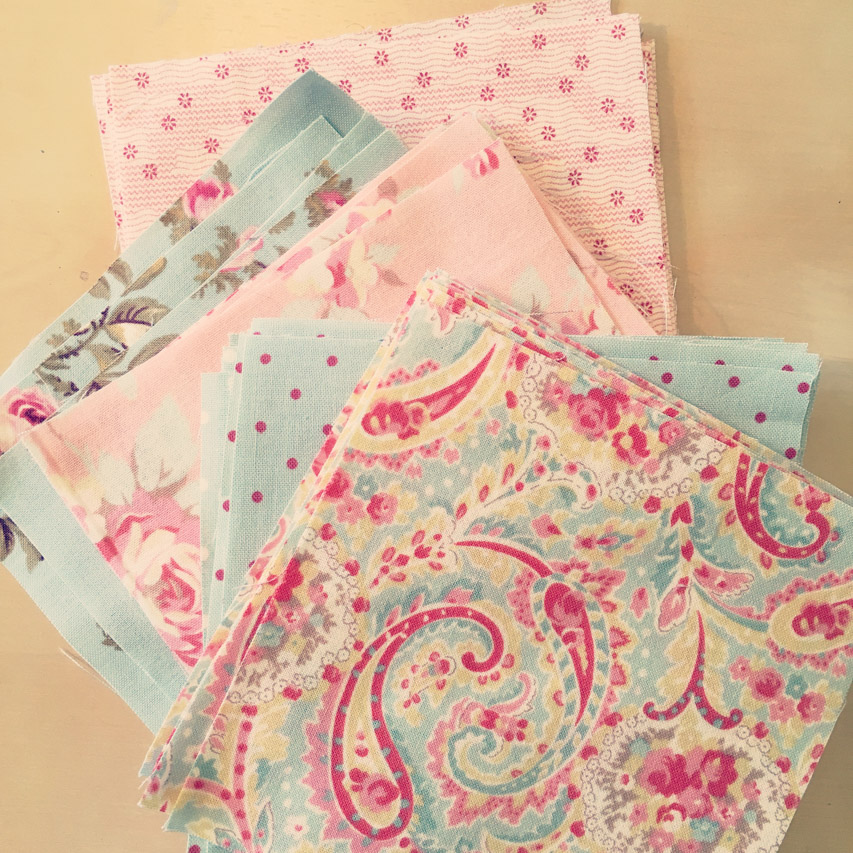
- 18 – 5″ charm squares
- Buttons Galore Button Bonanza in Bubblegum & Ocean Blue
This bag is quilted using convenient 5″ charm squares. I originally cut these to use on another project but when I switched fabrics for that project, these charm squares went unused. It took 18 of them to quilt this tote: 9 for the front of the squares, and 9 for the backside of them (to help create the bulk in the visible seams).
Laying out the pattern is the first challenge. I inserted a piece of cardboard in the tote to help make it nice and flat while I worked on the layout.

Once your layout is arranged, the next step is to prepare the edges that won’t be quilted of the squares.
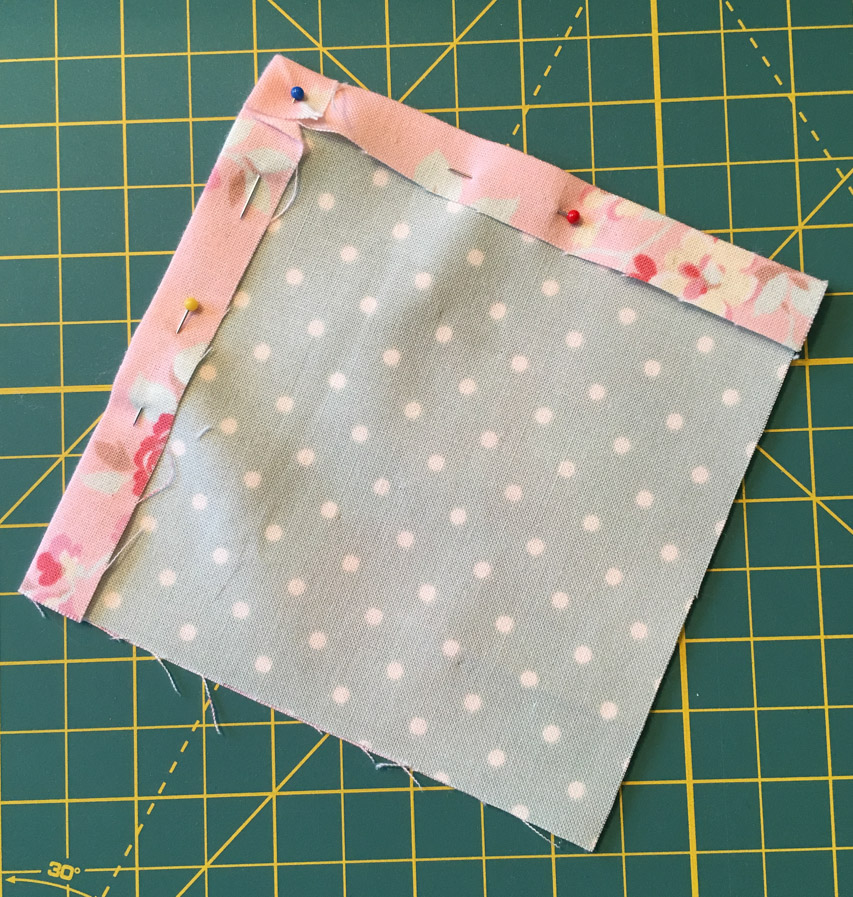
On the backing squares, each edge that won’t be part of a rag quilted seam should be trimmed by 5/8″.
On the front (visible in the finished product) squares, press under a 1/2″ seam on each edge that won’t be part of a rag quilted seam. Miter corners where pressed edges meet for best results.
Stack the backing squares on the front squares, folding the pressed edges over the backing squares. Make sure that the raw edges for the rag quilted seams are aligned. Pin together.
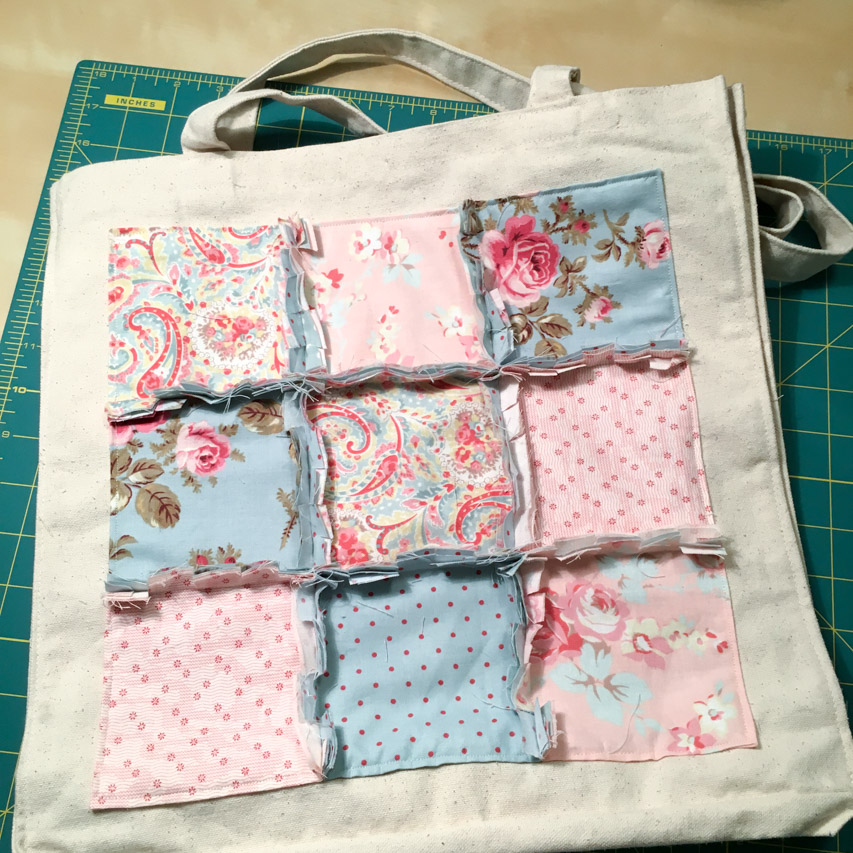
 Assemble the 9 blocks into a square by using rag quilted seams. (For easy instructions on assembling rag quilt blocks, see this wonderful article by Deby at So Sew Easy.)
Once the squares are all attached together, the block must be attached to the bag by sewing around the outside edge. This seam must be sewn one block at a time, without passing over the rag quilted seams. So it requires a lot of stopping and starting of your machine. Careful pinning is the key to success in this step.
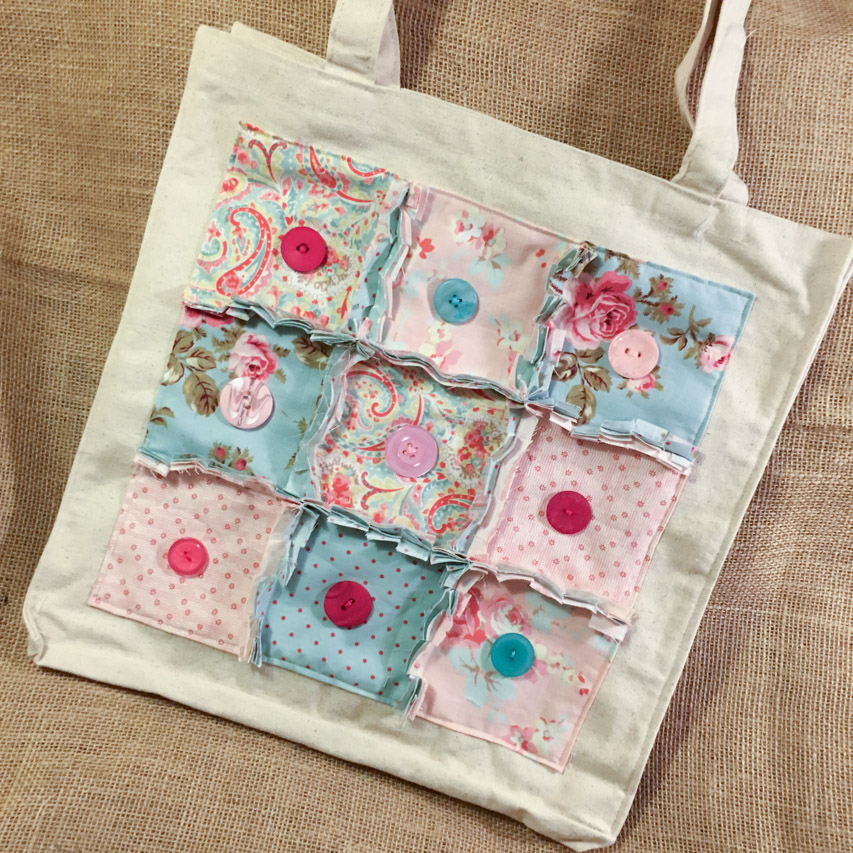
 The final step is to adhere buttons in each square. This project is a great way to use all of those really large buttons in your Button Bonanza bags! The buttons aren’t just decorative – they also serve a purpose as well, by helping to anchor the squares to the bag.
 And that is it! Your tote is ready to hit the street – or be wrapped for under the tree! The rag quilted seams will soften and fray as they are used and washed into an even more beautiful fuzzy fringe.
 Now, did I mention there are fabulous prizes?
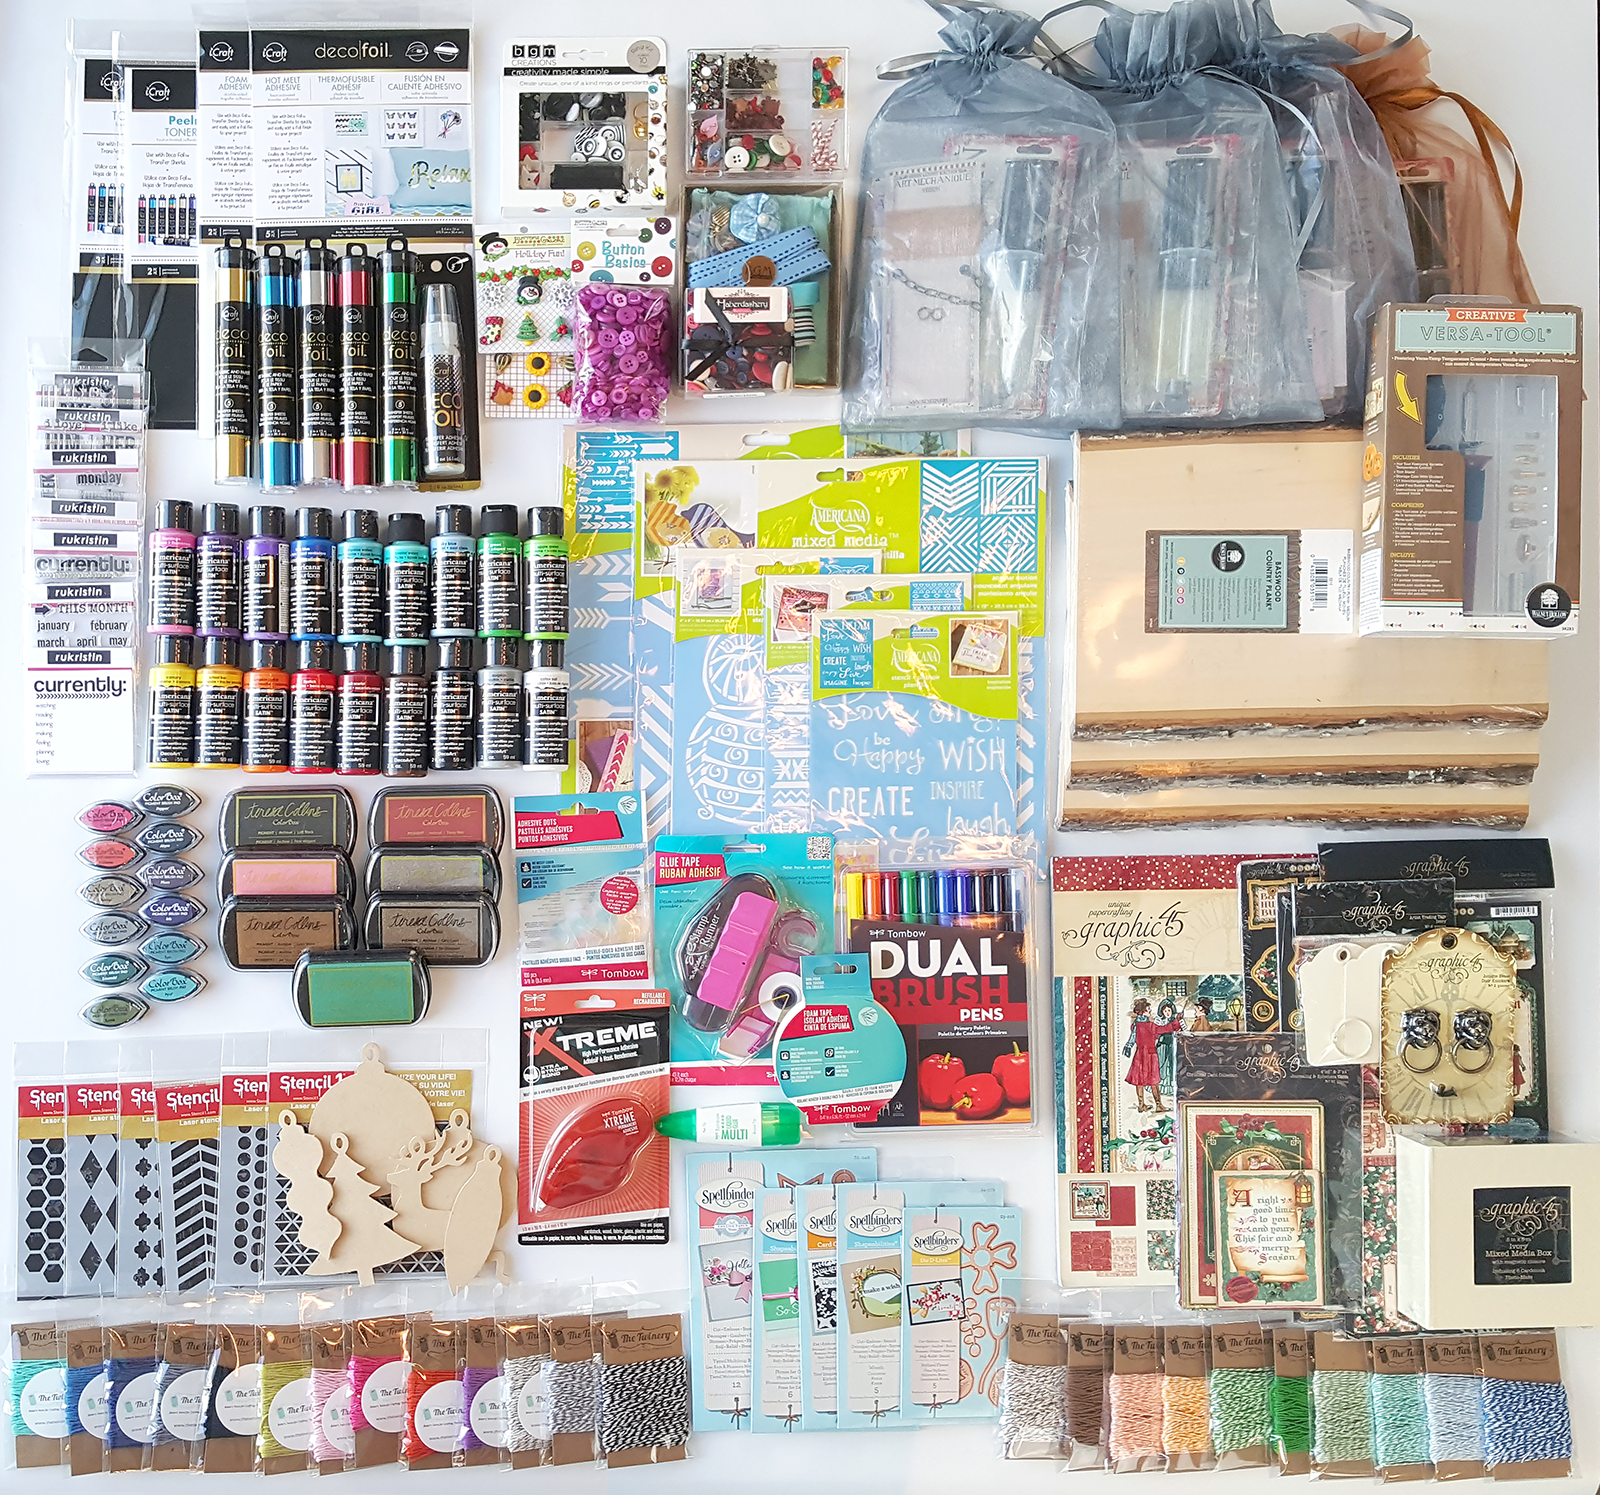
We are having a giveaway of over $600 in craft supplies to help you make this holiday handmade! Enter to win using the widget below:
Many thanks to all of the sponsors of the hop and giveaway!
 Thanks for stopping by, and make sure to use the widget below to visit the other hop participants!
![]()
Thanks for joining us for the three days of the Handmade Holidays blog hop! Make sure you don’t miss day one and day two of the hop, too!
 Zippered bag measurements 10×10 bag


