Header

Tag Archives | Wreath

Decorate Your Home Inside or Out with This Fun Fall Wreath!

Hi everyone! It’s Lorrie here with a fall wreath featuring autumn-themed buttons from Buttons Galore & More! This fall wreath will look great on your front door to greet visitors, or on the wall inside your home to add some seasonal flair.

To make this easy fall wreath, I started with a grapevine wreath and a plain burlap bow that I picked up at my local craft store. I decorated the wreath itself with some plastic leaves that I painted in beautiful autumn colors. But the real fun starts with the bow! Continue Reading →

1

How to Make a Rustic Vine Wreath with Buttons & Beads!

One of my favorite things to make are wreaths. There are so many ways to decorate them and endless opportunities to get creative. I put together this rustic vine wreath using the Victoria embellishment kit by 28 Lilac Lane.

rustic vine wreath with buttons and embellishments from 28 Lilac Lane by Anaya Whye

Supplies needed:

Start with the beading needle and invisible thread. Wrap the thread around the wreath and tie a knot to secure it. Stack beads and sequins onto the needle until you have about 1/2 inch or so on the needle. Wrap the thread around while keeping the majority of the beads and sequins in place on the front of the wreath.

Continue wrapping the thread around the rustic vine wreath until you get back to where you started. You’ll get the best results if you wrap the thread no more than about 1/2″ inch apart.

After adding the sequins and beads, I repeated the process with embroidery thread to add some little buttons.

rustic vine wreath close-up

I cut a few pieces of felt to create leaves and attached them to the wreath with a glue gun, while leaving space for some buttons. Cut a length of wire long enough to wrap around the wreath. Stack 2-3 buttons and push wire through 2 holes in each of them. Wrap the wire around the wreath, twist, and cut  the ends.  Tuck the excess wire into the backside of the wreath so there are no sharp ends left sticking out.

After you have added as many buttons as you’d like, the last step is to tie a ribbon to hang your finished rustic vine wreath! I used a small 6 inch wreath for this project, but of course it can be done in a larger size. I find this to be a perfect size to decorate with inside the house. I often hang small wreaths around the house on the walls alongside my photos and even hang them in my work space at the office.

rustic vine wreath with buttons and embellishments from 28 Lilac Lane by Anaya Whye

Looking for a wreath project but prefer a different style? Check out all our button wreath projects!

SaveSave

0

Button and Felt Halloween Wreath

Halloween Wreath

I’m not into the traditional, spooky look of typical Halloween décor.  I like cute and cute means buttons and felt.  I created this Halloween wreath with that in mind.  I love how the black and white reminds me striped witch’s stockings!

Supplies

  • 10″ Styrofoam wreath
  • Black and white felt, cut into 8″ x 2″ strips
  • Orange felt
  • Black buttons
  • Glue
  • Flower shaped die and die cutting machine.  (optional)

Instructions to make a button and felt Halloween wreath

  1. Wrap the black and white strips of felt around the wreath, alternating between the black and white felt. Glue into place.
  2. Die cut flower & leave shapes from white, black, and orange felt.  If you don’t have a die cut machine, simply cut the shapes by hand.
  3. Glue the flowers and leaves onto the wreath.

Halloween Wreath Close-Up

4. Glue buttons into center of flowers.  Tip: If you want the flower centers to have little extra pop, slide white-topped pins into the button holes.  So cute!

Thanks for crafting a cute Halloween with me today!  For my holiday inspiration, visit my blog at Laura Bray Designs

Business Card Logo in Black copy.


1

Seasonal Door Wreath – Red White and Blue

If you visit my house during the month of July this seasonal door wreath will welcome you at my front door. I decided to go big and bright this year using festive patriotic ribbon, painted stars, and red, white & blue buttons from Buttons Galore. I love the nostalgic look of the dimensional stars and the traditional Americana design.

Grapevine Star Wreath

Patriotic Wreath with Stars and Buttons

I’m a sucker for wreaths. It’s a rule in my house to have a seasonal wreath on my door at all times. Of course, if I made a new wreath for every season, I’d have a lot of them to store. My husband wouldn’t like this very much either. I have a little secret to share when it comes to my seasonal wreaths. I don’t make a new wreath – I just recycle this grapevine wreath into something new every season.

My secret is to use a heat gun to melt off the hot glued embellishments. It works great every time!

Supplies used to make seasonal door wreath:

painted paper mache star

Paint Paper Mache Stars with Plaid Craft Paints

Twine Paper Mache Star

Add a dab of hot glue onto each side of star and wrap twine around
Add festive button from Buttons Galore to center.

Hot glue painted stars onto a grapevine wreath

Hot glue painted stars onto a grapevine wreath

buttonbow

Add stacked buttons to the center of your patriotic bow.

I hope my idea of recycling the same wreath for the seasons inspires you to creative you own festive wreaths to welcome visitors at  your door. Seasonal door wreaths are a nice festive touch.

hollysignature

Like Me on Facebook!

0

Ribbon Wreath with Button Accents a DIY that is easy to make

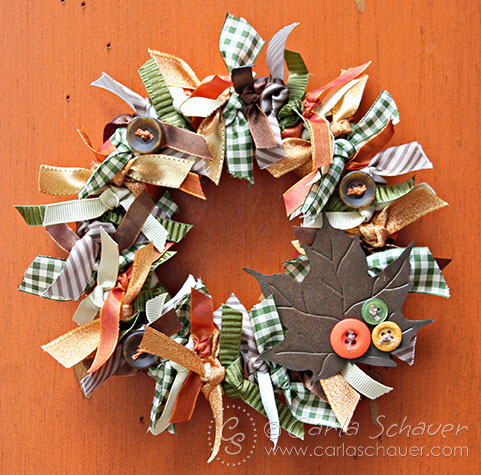
Ribbon Wreaths are trendy right now, with photos appearing on blogs and Pinterest.  This tied ribbon version with button accents is a great way to get autumn colors and textures in a wreath that is easy to create.

Fall Ribbon Wreath with Button Accents

 Directions to make a Ribbon Wreath:

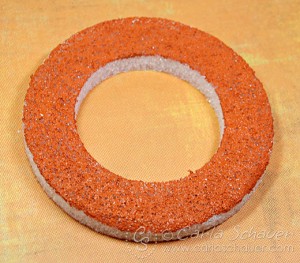
Making a ribbon wreath is a straightforward process that begins with a simple wreath form.  For this wreath, I used a STYROFOAM Brand Foam wreath form approximately 8″ in diameter.  I painted the front of the wreath using a foam brush and orange acrylic paint to camouflage the form in case it happened to peek through the ribbons.

Ribbon Wreath STYROFOAM base

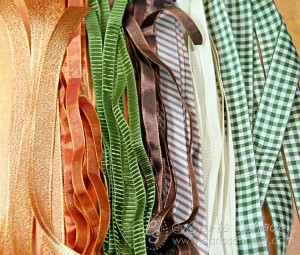
While the painted wreath form is drying, I gathered my ribbons and cut several lengths of each.  My form required around 50 pieces, each 10″ long.  Widths ranged from 1/2 to 1″.

Cut Ribbons for Ribbon Wreath with Buttons

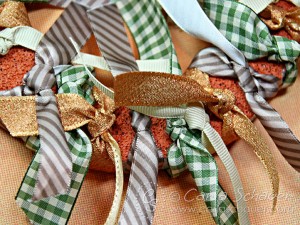
Once the form was dry and the ribbons cut, I tied the pieces around the form.  I began with the wider ribbons, and filled in the spaces with the narrower pieces, adjusting the location of the knots as necessary.

Tying Ribbons onto Ribbon Wreath with Buttons

Once all the ribbons were tied around the wreath form, the whole project looked pretty scary.  It resembled a big autumn-colored ribbon Medusa.

Ribbons tied on Ribbon Wreath with Buttons

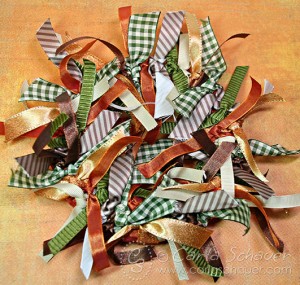
But once all the ribbon ends had been trimmed to approximately 1.5 inches long (use sharp fabric scissors for clean edges), scary Medusa transformed into a pretty tied ribbon wreath ready for embellishing.

Making Tied Ribbon Wreath

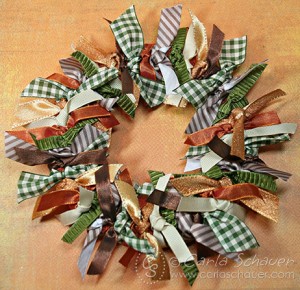
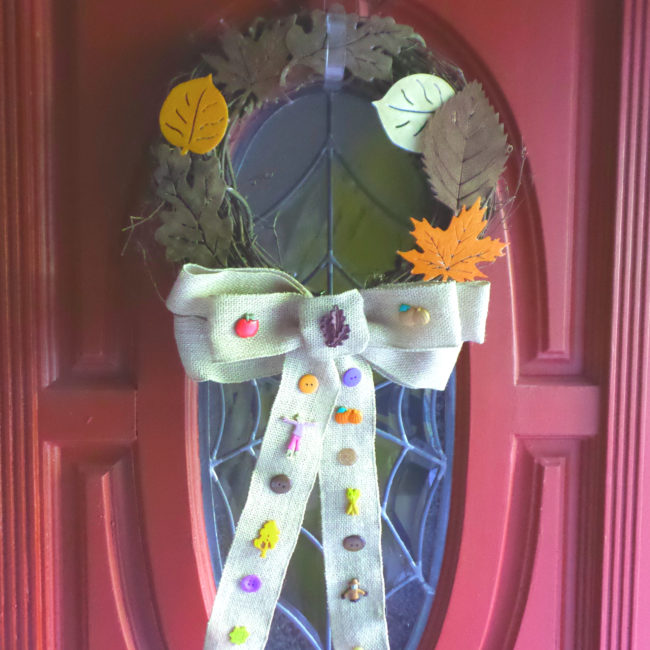
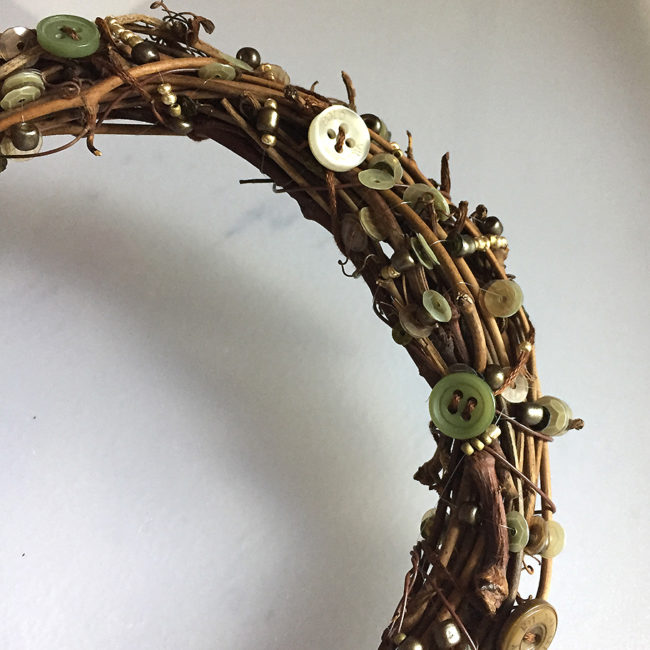
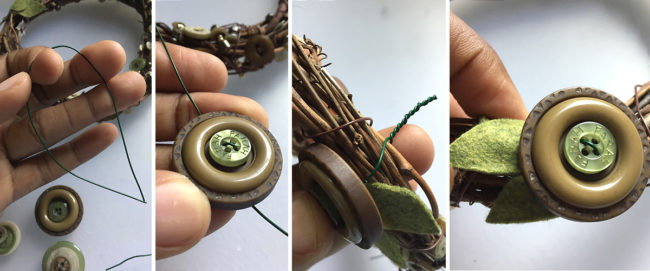
I added thick marbled dark brown buttons from the Natural Grab Bag tied with orange embroidery floss, and a large aged metal leaf as an accent.  Three additional buttons from the Autumn Grab Bag tied with cream floss top the leaf for additional coordinating color and texture.

Button Accents on Ribbon Wreath

With no time or labor-intensive techniques to deal with, this tied ribbon wreath can be assembled quickly and easily.   Dive into your ribbon stash and make one today!

Thanks for stopping by!

Carla


2

Powered by WordPress. Designed by WooThemes