Fall is quickly approaching, and we all know that fall means FOOTBALL! Today, I will show you how to make the cutest DIY tailgate party invitation using football themed buttons from Buttons Galore. So get ready to fire up the barbecue and cheer on your favorite team!

Supplies needed for DIY tailgate party invitation:
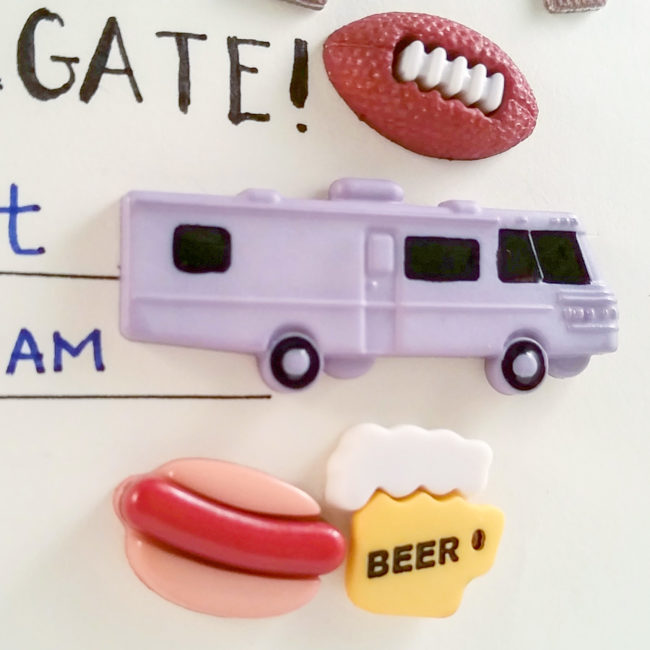
- Buttons Galore “Football” 3D buttons
- Buttons Galore “Footballs” 3D buttons
- Buttons Galore “Tailgating” 3D buttons
- tan and brown cardstock
- alphabet stickers
- black fineline pen
- black brush pen
- brown chalk ink
- paper trimmer
- adhesive tape runner
- red line tape
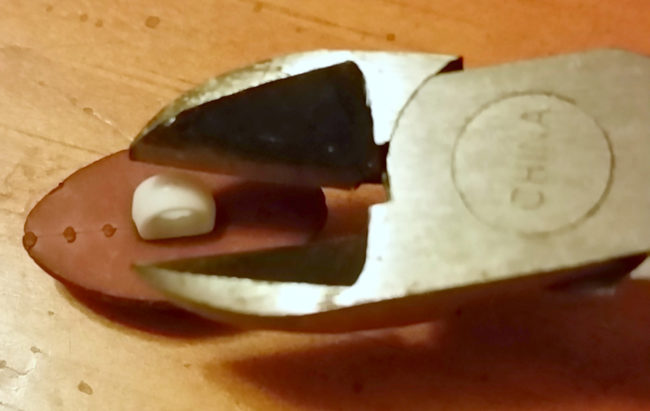
- button shank remover/side cutters
How to make a DIY tailgate party invitation:
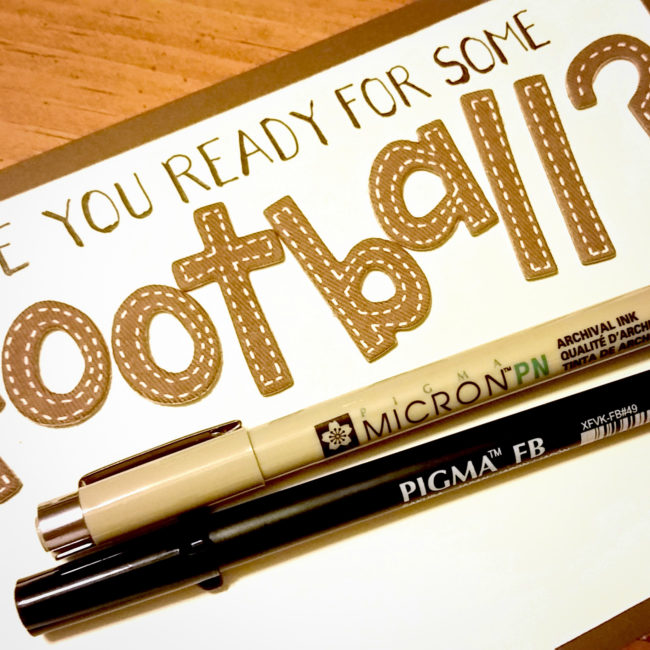
Using a paper trimmer, I cut the brown cardstock to 5″ x 7″ and the tan cardstock to 4.5″ by 6.5″. I then inked the edges of the tan cardstock with brown chalk ink to add dimension. I used a tape runner to attach the tan cardstock to the brown cardstock to make the base of the invitation. Next, I hand lettered the words on the invitation. I used a fineline pen to do the lettering, then used a brush pen to darken all my downstrokes. This is an easy way to make your hand lettering look great, even if you aren’t that good at it! The word “football” made from alphabet stickers was then added.
I then chose the buttons I was going to use. Most of these buttons had shanks on the back. In order to use them on a flat surface like this one, I had to remove the shanks. This is easy to do using a button shank remover or a pair of side cutters. I clipped off the shanks, then attached the buttons to the invitation using red line tape. This tape is strong enough to hold these buttons securely!
I placed the buttons all around the card in the white spaces. The buttons give this invitation a fun feel and cool dimension that you just can’t get with any other embellishments… plus they are absolutely adorable!
Your guests won’t be able to resist this super fun invitation! Go team!