Header

Tag Archives | Jacquard

halloween wall art with buttons idea -DIY

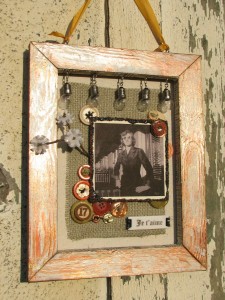
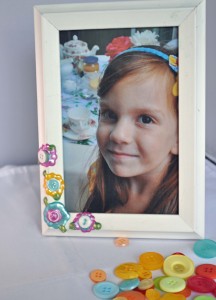
Halloween wall art?  Buttons Galore & More buttons and supplies make Halloween SO much fun, it’s spooky!

make halloween wall art with buttons

Autumn is the PERFECT time to get crafty, and I couldn’t help but be influenced by the most wonderful inventory of buttons from BG & M and the subtle changing of light and shadow as the days are becoming shorter…   So HERE I go, sharing with you a technique rich, button festooned project, to get your inner hoot owl, hooting!  Let’s make halloween wall art with buttons.

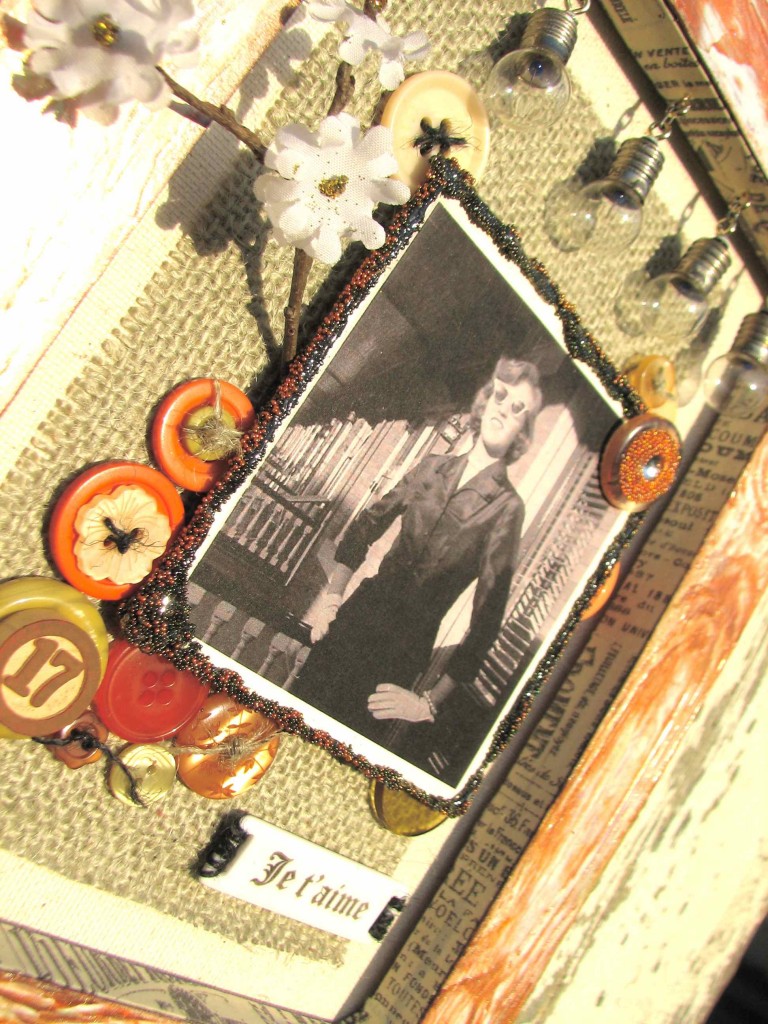
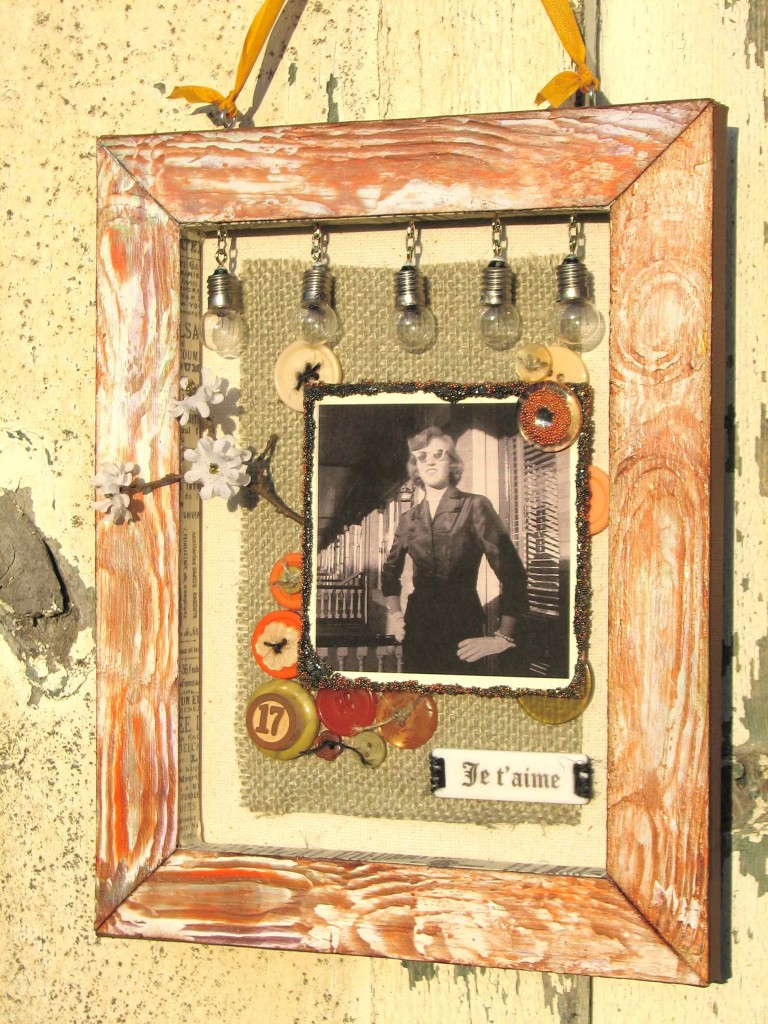
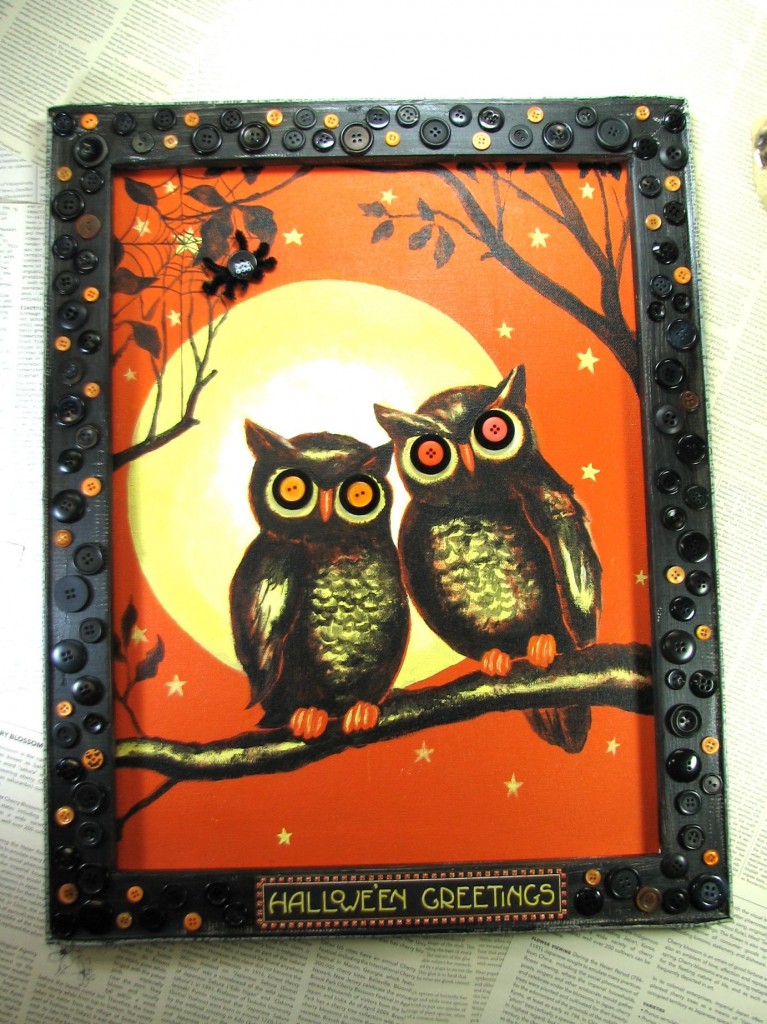
halloween wall art embellished with buttons from Buttons Galore & More:

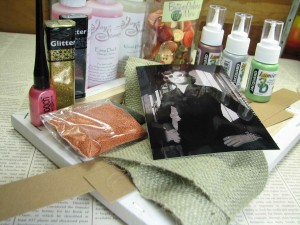
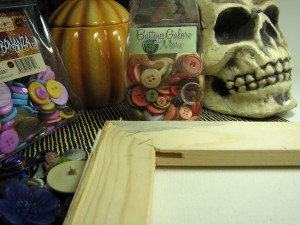
Suggested supply list –

1. Artist (value) canvas

2. Inspirational graphics of your choosing (i.e. scrapbook paper, free digital images, old print ads, etc.)

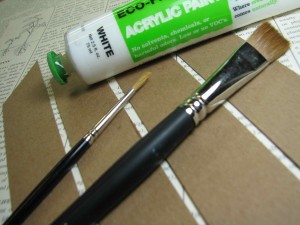
3. Acrylic paint/ Gesso/ Artist Paste

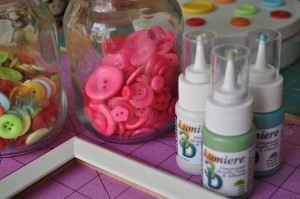
4. Seasonally colored buttons from Buttons Galore & More

5. Beacon adhesive

6. Decorative tissue tape

7. Pipe cleaners

8. Google eyes

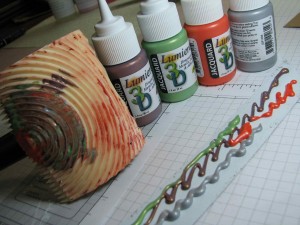
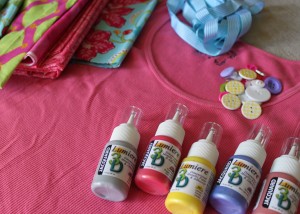
9. Jacquard Lumiere 3D acrylic paint

10. Sharpie Markers

halloween wall art directions:

This project is shared for YOUR inspiration – I hope you’ll create something specific to your needs for fun and holiday decor!  What follows is a guideline to assist you in  your creative travels.  Enjoy make halloween wall art with buttons.

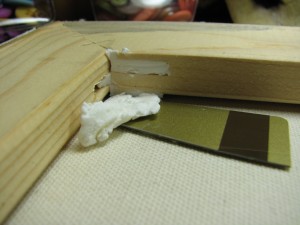
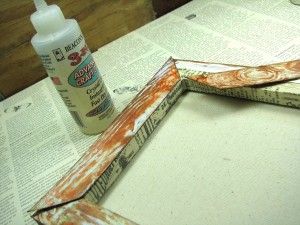
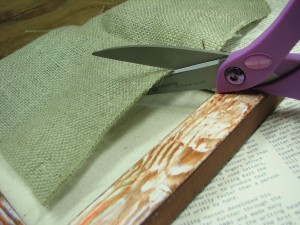
Remove packaging materials from value canvas, flip to the backside.  Fill support gaps in stretcher bars with Artist 3D medium (spackle!) using tool of your choosing.

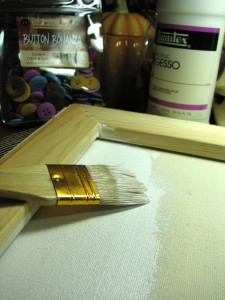
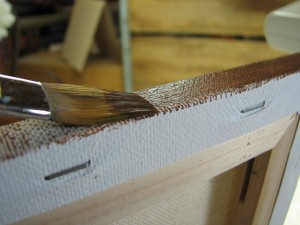
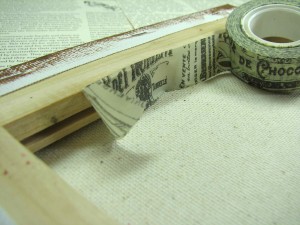
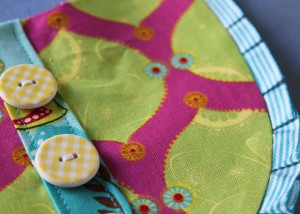
Prepare the raw canvas with gesso, so that acrylic paint can be applied.  Let dry.  Paint the wooden frame in a complimentary color for your project.  Finish the OUTSIDE edge of the frame with decorative tape.

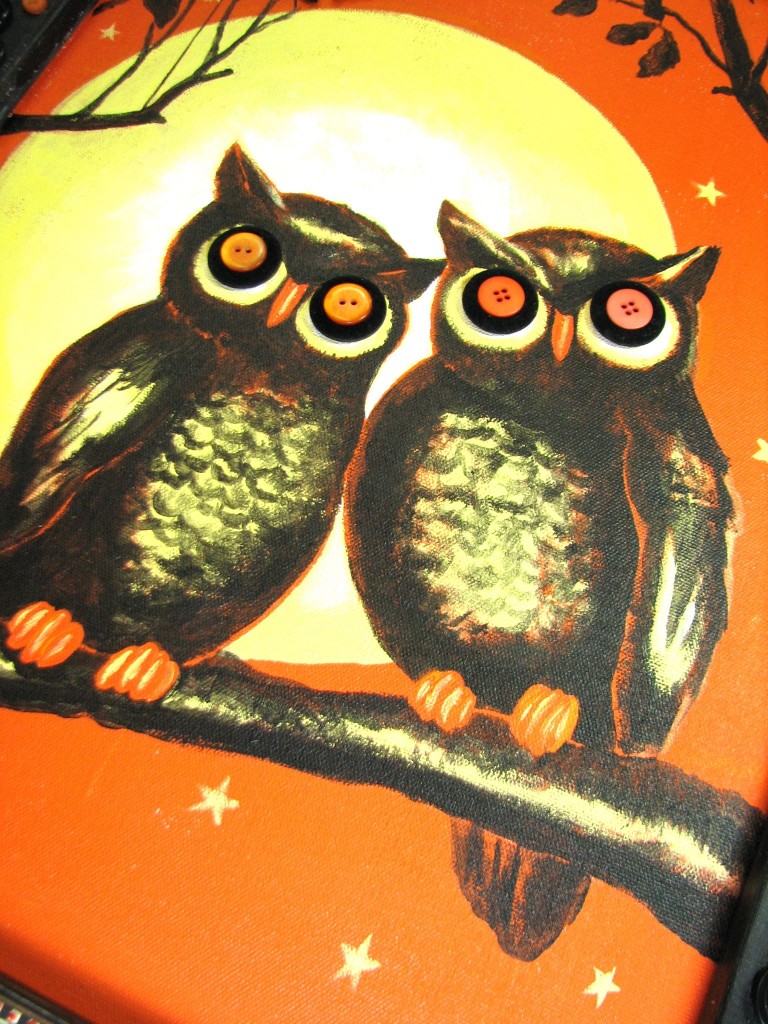
Since buttons were the inspiration for MY project, I sought a design that could feature buttons as eyeballs!  A pair of spooky, Halloween owls were the next logical choice for my decorative canvas.  By placing the buttons on the canvas, I sketched out owls at a scale that would really make the buttons stand out!  If you are not comfortable with sketching freehand, you can get beautiful results by blowing up a printed image and then using graphite transfer paper BEHIND the artwork, trace the image from the front and then have our lines appear, similar to this drawing.

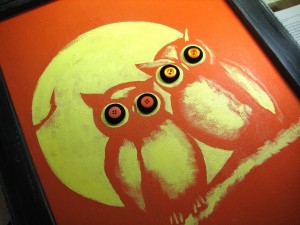
By painting in the highlights, first, I could confirm the scale, but mistakes could be easily covered with leftover background paint.  Using a limited palette makes this SO easy!  (And SUPER spooky!)

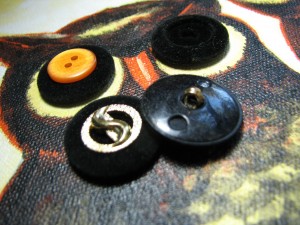
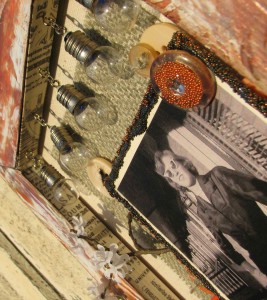
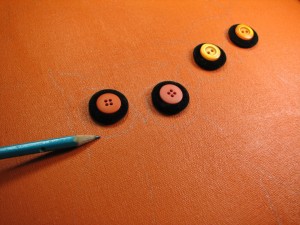
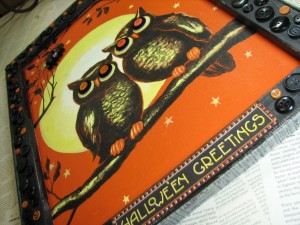
For this project, I immersed myself with buttons!  While Buttons Galore & More is a wealth of seasonal themed, as well as EVERY color and shape of buttons imaginable, I was searching for classic buttons, to create a spooky, vintage look.  In a FAT bag of miscellaneous goodies from a BG & M grab bag, I found a wealth of these snazzy, faux velvet and gold buttons.  It was easy to snap the shank off the back, remove the gold, and then fit a SCRUMPTIOUS orange button into the recess.

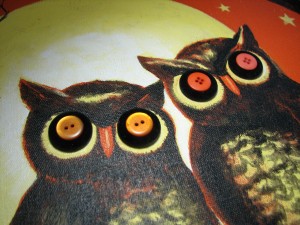
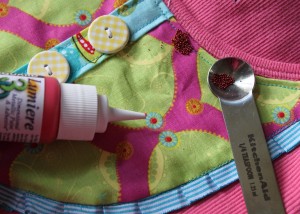
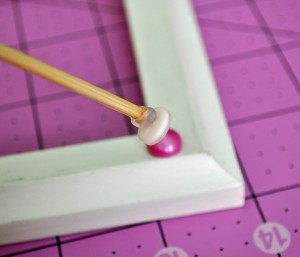
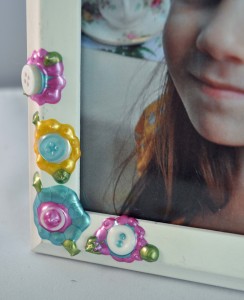
I LOVE the character that was created with these stunning buttons!  Beacon 3 in 1 craft glue makes for easy and secure button festooning… (Plus, it’s FUN!)

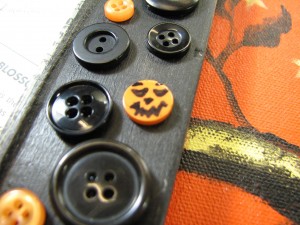
A button WITHOUT holes was a perfect, pumpkiny surprise for this craft-addicted girl…  Add SHARPIE marker = PUMPKIN FACE!  Trick OR Treat, babies! It’s ON!

Did I mention, I LOVE HALLOWEEN CRAFTS!?!

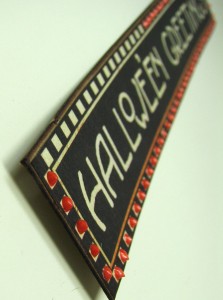
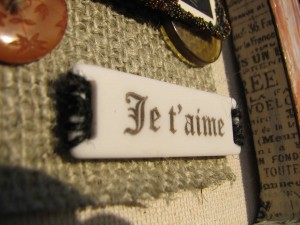
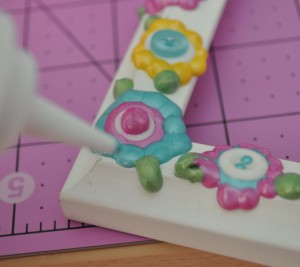
…   And GREAT materials!  Look how this gorgeous Lumiere 3D paint from Jacquard and some Sharpie marker brought this sentiment up a few zillion watts!

Oh, gawsh…  And did I forget to mention, SPIDERS?

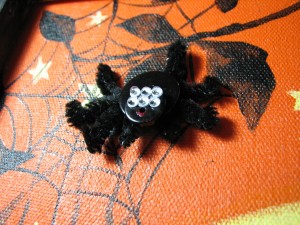
No need to shriek…  This one’s perfectly tame!  Pipe cleaners, buttons and GOOGLY eyes…!   Give the exterminator the day off, buttons BUGS are fun to make!

Thanks for taking this eerily creative and crafty journey with me!  I hope you’ll be inspired to make halloween wall art with buttons and supplies from Buttons Galore & More!  Have FUN!


1

Button-embellished ~ GLAMOUR~ Keepsake Frame

Taking a little break from our “Christmas in July” theme we have a delightful project of Mixed Media Art in this great Keepsake Frame by Elise! :)

Glamor, art and intrigue – a perfect recipe to play with buttons!

Teaming up with some HEAVENLY materials, including burlap, Lumiere Dimensional Paint by Jacquard, Glitter, Ink and Smooch Accent ink by Clearsnap, MICRO PEARLS {Yes!  Micro pearls!} and a whole lot of GORGEOUS buttons form Buttons Galore and More, I was COMPLETELY inspired to alter this simple “value” artist canvas to become “priceless” in no time!

Supplies:

Button Tote Bag Assortment – Cornucopia

Mixed Rectangular Sliders

Lumiere 3D Metallic Paint and Adhesive

Glitter, Smooch and Ink – Clearsnap

Trimmer, Knife, Ruler & Mat – Westcott

Adhesive – Beacon via Buttons Galore and More

Acrylic Paint – Eco Green Crafts

Burlap

Micro pearls

Tissue Tape

Faux Wood Grain tool (Local Hardware supply)

Other – Vintage light bulbs, twigs and fabric flowers (Misc. stash)


To begin, select a glamor shot of your choosing, to feature in finished frame. {I chose a cool, black and white shot of my sweet Mama at the wee-age of 17!  Wasn’t SHE a dish!}

By accessing the back side of a traditional canvas, there is a whole wealth of crafty potential to play with.  To customize the “frame” of this look, I created faux wood grain with a simple wood grain tool (available at most hardware stores!), Lumiere 3D paint, as well as regular acrylic paint and some strips of chipboard, cut and sized to metier together to match the stretcher bar framework of the canvas.  Start by applying an acrylic base to the chipboard.

For rich wood grain effect, the MORE color, the better…  I used FOUR different Lumiere colors for this look!  In case you’ve never dabbled in faux wood grain – it’s TOTALLY easy and addicting…  Apply Lumiere on top of dried, painted (with regular acrylic paint) chipboard strips, then pull and rock the tool to create the MOST amazing effects!  If you don’t like how it looks, keep working!  The 3D quality of the Lumiere gives you some decent working time – you’ll see!  (G’head – TRY it!)  Once you get all four strips done, set to the side to dry.

Paint the outside edge of canvas with color of your choosing.

Line the INSIDE of the frame edge with printed tissue tape.

Glue faux wood grain strips to frame.  I love, love, LOVE how beautifully Beacon 3 in 1 works for an assignment like this!

Westcott fabric scissors cut burlap, flawlessly!  Cut burlap to size of your choosing.  I decided to let some canvas frame the edge of the burlap, just because it looked YUMMY!  So many textures!  What’s a girl to DO!?!

Arrange picture and embellishments to your liking.  For this project, I mounted the photograph on chipboard, mixed micropearls and glitter and then adhered with Beacon 3 in 1 adhesive for a luscious, tactile effect.  Having TOO much fun to stop there, I added micro pearls to button centers, as well…  OMG!  {My middle name is DANGER!}

If you’ve never ventured, I can’t recommend HOARDING, uh, I mean, collecting some of our Blank Craft Shapes, in every size!  Love the mood that can be created with theses!  Easy to stamp and beautiful to behold – Je t’aime!  {See what I’m sayin’!}

YOU can get your glamor on, too!  Just pick up a selection (or TWO/FIFTEEN!) of some lovely button assortments from Buttons Galore and More, toss in some HEAVENLY crafty supplies, a canvas and old picture or two…  I guarantee you’ll beat the heat if you spend a few hours crafting away on a cool keepsake, like this!  I hope so!

Thanks for visiting!  Here’s to a glorious, button-craft filled day!  Keep CALM and BUTTON onnnnnnn!


1

Bulk Buttons: Be Free!

I have been having fun embellishing with buttons from the Color Bulk Button collection. I decorated a fun frame that houses a favorite picture of my son going away on his first fishing trip. This was his first sleep away experience and he had such fun. While he got to get away, and be free, my daughter and I had the first of many mother daughter nights. FUN! June kind of kicks off vacation season for most families.

I started with a simple wood frame and papered it and added a few embellishments. I then set to work on the big embellishment, a jumbo bottle cap from Maya Road. I cut some burlap that I received in my monthly box from Buttons Galore. It was a gift from our DT Coordinator, Niki Meiners. I die cut the burlap and placed it in the bottle cap.

color bulk buttons be free frame close up allie gower

Also in our DT box was some Jacquard products, these wonderful bottles of 3D Lumiere – which is a glue, and a dimensional paint. I painted some Maya chipboard letters. Before they dried, I actually stuck them to some scratch paper and ripped off some of the paint, then went over them with ink and added some copper balls (also in my DT Box). I decorated with some buttons from the Color Bulk Buttons set. This is a great collection of buttons on all colors and sizes. It’s perfect for all projects!

color bulk buttons be free frame allie gower

I finally added a punched butterfly and some beaded letters, and it reads “BE FREE!” At the top it says “The end is nothing, the road is all.” from Willa Cather – this was a rub on from the paper collection – which is from my very old travel stash.

Supplies

  • Buttons – Buttons Galore
  • Bottle Cap and Chipboard Alphas – Maya Road
  • Scrapbook Paper and Die Cuts – unknown
  • Burlap – Niki Meiners
  • Ink – ClearSnap
  • Paint – Jacquard
  • Beacon Adhesive

Thanks for looking today!

0

How to Watercolor using Lumiere 3-D, a shimmery way to paint!

Today I thought I would share a quick tutorial on how to use Lumiere 3-D one more way! :) I had used this technique on my “Mother” scrapbook layout earlier this month but didn’t really showcase it so I figured it would be a great way to end the month here… :) I hope you enjoy!

Supplies Needed: Cardstock, Stamps, Ink, Lumiere 3-D in Pink & Pearl, ButtonsPretty Girl Cozy Brads, Ribbon, Watercolor Brush, Small Container of Water, Palette for mixing on


Dip tip of watercolor brush into water then into Lumiere 3-D to thin.


Apply water thinned Rose Lumiere 3-D to each petal individually


Repeat steps one & two with Pearl colored Lumiere 3-D, Only this time just paint the entire surface of the flower image.


Before the painted surface has time to dry, apply a light dusting of ultrafine glitter to the surface of the Pearl painted flowers if desired.


Remove the excess glitter from the surface of the paper and then finish the card using your watercolored panel.


Here’s the finished card once assembled. The gentle shimmer is so subtle yet so pretty, I only wish I could have caught it in the photo as it really appears in real life.
2

Bib Tank Tutorial

I keep seeing adorable clothes for little girls, but never for us “big girls” like me. I want cute clothes too! So… I decided to see what I could do with my sparse sewing skills.  After rummaging through my tank top drawer and fabric scrap bin, I came up with a plan to work up a cute little bib tank.

LauraEvangeline

Supplies:

Tank Top or T-Shirt

Fabric Scraps

Aqua Striped Ribbon

Plaid Round Buttons

Scrap Paper

Fabric Marker

Scissors

Sewing Machine/Kit

Iron

Fusible Web/Stabilizer

Lumiere 3D

MicroBeads

LauraEvangeline

1. Take a scrap piece of paper and draw out a template that suits you and trim it out. This is your pattern. I sketched my design, folded it in half, and then cut it out to ensure it was symmetrical.

2. Once you’ve come up with a pattern that you like, cut out your pattern in a fun fabric. The fabric I chose was an old drawstring bag used to keep shoes nice when traveling.

3. To make the center strip, measure the top of your pattern to the bottom and add an extra inch to fold over later. You can create the strip as wide as you’d like, but I made mine 1.5″ wide keeping in mind that I’d be folding over 1/4″ on each long side to hide my raw edges.

4. For the outside ruffle, measure around the bib of your pattern and double it. This is about how much fabric or ribbon you’ll end up using once you ruffle or pleat it. You can also purchase a trim that is already ruffled if you like. If you’re using ribbon, you may want to consider the materials to ensure it can be washed (won’t bleed or melt). All of your cut pieces should end up looking like this:

5. To ensure that my center piece would be mid-line, I took a washable fabric marker and drew a line to mark the center of my bib.

6. You’ll then want to fold and iron the top edge of your bib down about 1/4″. I snipped the fabric in a bit about every 1/2″ so there would be less bulk and puckering. Fold and press over 1/4″ on each long side of your center strip fabric and apply a strip of fusible web 1/2″ narrower than the width of your fabric strip to the back before ironing to the bib. You’re then ready to sew the strip to your bib and attach the buttons. It should look something like this…

7. Sew the ribbon on top of the bib around the bottom 1/4″ from the edge. (If the material you choose to make a ruffle or pleat is single sided, you’ll want to ensure that is facing down for this portion.)

8. Carefully iron your ruffle/pleat out flat, add fusible webbing to the back, and iron on to your tank top.

9. Sew the bib to the tank top ensuring you don’t sew all the way through to the back (like I did). Now for bling… Use the Lumiere 3D to embellish the existing pattern on your chosen fabric and sprinkle on microbeads. I pressed the beads in lightly with the back of the measuring spoon once a hefty amount was sprinkled over each dot. Once the Lumiere dries for 72 hours it’s completely washable.

10.  And… that’s it! Wear it, enjoy it, and maybe even make a few more!

LauraEvangeline

I hope you’re feeling inspired, and have a crafty kinda day!

0

Happy Father’s Day Card

Taking time to recognize all the wonderful fathers out there is important & not just once a year, but the entire year through!

For this card I simply wanted to design something that my husband would love. I happen to love the colors kraft, red & blue together, no matter what the shades.

For the sentiment I had the notion to use a chipboard letter from Want2Scrap in place of the printed “F” but still use the fun swirls that come with that uppercase letter. To achieve this I opened a file in Photoshop, created a total of three layers, one for each word I was planning on using. I made the word “Father’s” larger than both of the other words. I then made sure that the “F” was even larger than the rest of the word. Finally, I created another layer. Then using the rectangular selector tool I created a selection over top of the “F” and filled it with white but kept the swirls that were coming off. My last step was to arrange the layers so that the sentiment was placed together so that there would be room to add the chipboard “F” as I had planned. I then printed the sentiment and die cut around it using Spellbinders Labels Four. To finish off my sentiment panel I simply inked the chipboard “F”, applied glue to the entire surface and applied red glitter to really give it “POP!”.

After that it was simply a matter of putting the card all together as you see here. I again used the Lumiere 3-D to adhere the buttons and fill the “naked” button holes, just like I did on my scrapbook layout earlier this month.

What a fun texture the strips of buttons add beneath the main focal image, don’t you think? Enjoy!


Supplies:
Sentiment: Duetica – Woodwynds Font
Cardstock: Bazzill: Red, White & Light Teal
Stamps: Gina K Designs – Vintage Backgrounds
Ink: Clearsnap Fluid Chalk Ink – Creamy Brown, Lipstick Red
Glitter: Clearsnap – Ruby Slippers
Ribbon: Really Reasonable Ribbon – White Seam Binding
Buttons: Buttons Galore & More – Button Tin in Sea Glass, red
Chipboard Letter & Gems: Want2Scrap
Other: Jacquard Lumiere 3D (To adhere buttons and fill button holes)

0

Create a Cute as a Button Frame!

You probably know by now that I love all things bright, cute and floral.  I found a plain, white, photo frame in my closet and knew that plain just wasn’t going to cut it around here, so I grabbed a few bottles of Jacquard’s Lumiere 3D paint and some buttons and got to work.  The great thing about using the 3D paint is that it’s also an adhesive, allowing you to have a seamless look without dealing with a glue mess.  I also love how the paint squeezes through some of the button holes to give more interest to the design.

Supplies:

Instructions:

  1. The best way to create a flower design with paint is to use dots.  Squeeze a large dot of paint for the center of your flower.  While the paint is still wet, press a button into the center.
  2. For petals, simply squeeze dots around the center.  Try to use the same pressure when squeezing the bottle to ensure that the petals are roughly the same size.
  3. Once you have all your flowers on your frame, set aside to dry for 72 hours.  Put your favorite photo in the frame.


0

Mixed media button art with a little love

I really love collage and mixed media. I’m sure I’ve said it before already, but really, I love collage. The idea of mixing textures to create a cohesive piece of fabulousness is a fun challenge I really enjoy. It’s neat to see what you can come up with when you mix odds and ends and some fantastic color. So, today’s project is an example of such fun… button art using Jacquard Lumiere dimensional metallic paint, fabric, old book paper and of course buttons!

Heart and Swirls button art by Jen Goode

Heart and Swirls button art by Jen Goode

Materials you’ll need to make this button art:

steps to make button art

steps to make button art

How to make your own button art

This dimensional paint is also as adhesive, so while you can use it to create pretty pieces, you can also use it to “glue” things in place.

Something to note, The directions I’m sharing are not in the order I did things… I painted the heart and then did the background which turned out to be a bit backwards, so instead, I’m sharing steps in the order I should have done them.

  1. Download and print the heart art onto a piece of book paper or newspaper.
  2. Color the background. Put some paint onto a paper plate for easy use. Using a damp paper towel, rub some Brass paint on to the paper. Add a layer of Copper directly to the edge of the paper and then rub using the damp paper towel. Add dots of Brass paint to create a bit of a pattern inside the heart, then add another line of Brass paint directly to the paper on all 4 sides and let dry as it.
  3. Using a paint brush, paint the heart and flowers first Brass and then add accents of Copper.
  4. Once all paint dries, gently tear both the top and bottom of the art completely off, creating two strips of paper. Tear a bit to trim down the size, adhere extra embellishments as desired.
  5. Cut burlap to fit your frame opening. Adhere heart image in place and then both top and bottom pieces, leaving a bit of space to allow the burlap to show through.
  6. Finish by tying twine through buttons and then adhering in place.
  7. Frame as desired.
Button art and illustration by Jen Goode

Button art and illustration by Jen Goode

Layering buttons creates a more interesting look and compliments the dimensional paint. Choose buttons of different sizes and finishes to create a more interesting art piece. I really like mixing shiny buttons with flat finish buttons to add more dimension between  them. Use buttons in your own decor to add a little fun interest and detail!

Tell me about your favorite button art!


3

Powered by WordPress. Designed by WooThemes