Header

Tag Archives | cards

Holly Jolly Snow Globe Christmas Card

Hi, Connie here with Buttons Galore & More design team sharing a Snow Globe Christmas card using the Holly Jolly embellishment kit by 28 Lilac Lane. It is never too early to start thinking of creating special, one-of-a-kind Christmas cards for those special people you love. Our 28 Lilac Lane collection has put together embellishments kits that take the guess work out of creating special cards. Holly Jolly is the Christmas embellishment kit that is full of festive embellishments that will make beautiful cards – the cards people will want to keep and display! Continue Reading →

1

Make a Watercolor Card with new Coral Reef embellishments!

A few weeks ago we introduced you to our six new 28 Lilac Lane embellishment bottles. Candy Corn, Winter Wonderland, Yuletide Greetings, Savannah Stroll, Through the Woods, and Coral Reef embellishments bottles are currently shipping, just in time for holiday projects and stocking stuffers!

new 28 Lilac Lane embellishment bottles for fall 2016 from Buttons Galore & More!

Today, I’m here to show you an up close look at a project by 28 Lilac Lane designer May Flaum! This project uses the gorgeous and versatile 28 Lilac Lane Coral Reef embellishment bottle, a blend of coral pink and shades of green that is seasonal year round.

28 Lilac Lane Coral Reef embellishments

The delicate tones of Coral Reef are perfect for using with watercolors. With its natural floral color palette, Coral Reef works beautifully for watercolor floral cards! In the video below, designer May Flaum shows how she paired her 28 Lilac Lane Coral Reef embellishment bottle with a stamp to create a quick and easy floral greeting!

Here’s a closer look at May’s finished card…just a sprinkling of Coral Reef embellishments takes this card from simple to simply fabulous! It’s simple, quick, and easy to do, but makes all the difference in the finished card.

Watercolor Flower Card by May Flaum for 28 Lilac Lane

Check with your Buttons Galore local retailer or visit our online store to get your 28 Lilac Lane Coral Reef embellishments today!

0

Use 3D Buttons for a Quick Snowflake Card!

World Cardmaking Day is coming soon, and that means lots of crafters will be starting to think about making Christmas cards! Today’s holiday card idea uses 3D buttons to create dimension on a snowflake card that only takes minutes to make!

Snowflake holiday card

Supplies:

The key elements of this card’s design are very simple – a snowflake background stamp, stamped with acrylic paint, and 3D snowflake buttons. Layered together, these elements create a design this is simple, elegant, and dimensional.

To begin your card, cut a 5.5″ x 4.25″ background for the card from dark blue cardstock. Then cut a 5″ by 3.75″ layer of the light blue cardstock. Paint the snowflake stamp with the acrylic paint dabber, and stamp it onto the light blue cardstock. One dry, adhere the light blue cardstock layer on top of the dark blue layer.

Snowflake card layersFor the sentiment strip, cut a 3/4″ strip of white paper. If you stamp in the middle of that strip and then adhere it before snipping off the ends, it is easy to get your sentiment perfectly centered on the card front. Then you can arrange the red accent buttons around the edges of the sentiment strip and they will also be perfectly spaced!

assembling snowflake card

For the final touches on your card, remove the shanks from the 3D buttons using a button shank remover. Then adhere the the snowflakes with liquid glue in random places on the card front. You can choose to place them to accent a specific stamped snowflake (as I did in the upper right of my card) or randomly in open areas between the stamped designs.

Snowflake Card

This holiday snowflake card is quick and easy to make. If you’d like to produce this card in volume for your holiday card list, these pearl snowflake buttons are also available in bulk via custom order from our customer service department.

1

Clean & Simple Baby Boy Card

A handmade card is the perfect finishing touch to a gift for a new baby. With the Buttons Galore 3D “Baby Hugs” collection of buttons by Vicki Schreiner, it’s fast and easy to make cards like this simple baby boy card! The only supplies needed are paper and buttons and a pen.

Supplies for Baby Boy Card

Supplies Needed:

That looks like a long list, but it’s really just a package of buttons, two sheets of cardstock, and some glue. I used a sentiment stamp for adding “it’s a boy” but it could easily be added with just a marker.

Simple Baby Boy Card

Assembling this card is simple – and fast! Just cut a piece of white cardstock sized 8.5″ x 5.5″ and fold it in half to make a card base. Cut a piece of yellow patterned paper that is 4.25″ x 5.5″ and glue it to the front of the card base.

Cut a 3/4″ strip on the leftover white cardstock to make the sentiment strip. Use scissors to snip the ends of it to create a banner. Write or stamp the sentiment on it, and glue it about 2/3 of the way down the front of the card.

Simple Baby Boy Card

For the final step, use scissors or a shank remover to cut the shanks off of the 3D buttons. Glue the buttons down with a white glue like PPA Matte Adhesive or Aleene’s Tacky Glue.

This quick and simple baby card can be make in less than 10 minutes. This simple design can be adapted to many other occasions (like birthdays and weddings) as well with the help of our other 3D button collections such as Sweet Delights or our wedding collection.

Simple Baby Boy Card using 3D buttons by Nancy Nally for ButtonsGaloreAndMore.com - great quick baby shower card or to welcome baby!


0

Clean & Simple Baby Card with a Button Monogram

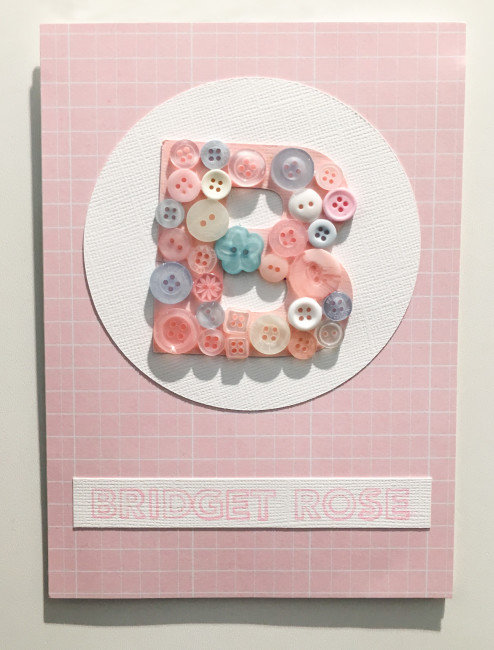
Today we are continuing with the theme that we started on Monday of using button monograms for babies! Only this time, the button monogram is the central piece on a clean & simple baby card.

If elegant and simple is more your style than the typical baby cutesy, this card may be just what you are looking for. The pastel color palette and the use of the buttons add delicate touches of a baby theme, but the overall design is understated, simple, and more mature.

Button Monogram Baby Card

Supplies:

  • Buttons Galore Lt Blue/Light Pink/White Color Blend buttons
  • Simple Stories “So Fancy” patterned paper
  • White textured cardstock
  • Pink textured cardstock
  • Cricut Explore Machine and cutting files
  • Arial Black font
  • Tsukineko Memento Ink in Angel Pink
  • Hero Arts Clearly Kelly “Kelly’s Outline Alphabet” stamps

Directions:

Cut and fold a card from the white cardstock. Adhere pink patterned paper to the front.

Using the die cutting machine, cut a large circle from the white cardstock. Adhere to the top front of card.

Cut a strip of white cardstock wide enough for the alphabet stamps to fit on. Stamp name on it, trim ends, and adhere to bottom of card front. (If necessary, use two strips placed one on top of the other for longer names.)

Using Arial Black font, cut the monogram from the pink cardstock. Cover the monogram in buttons, using white clear-drying glue. Adhere the monogram to the middle of the white circle.

With the monogram and baby’s name, this clean & simple baby card would be great for a baby announcement, shower invitation, or mom’s thank you cards!
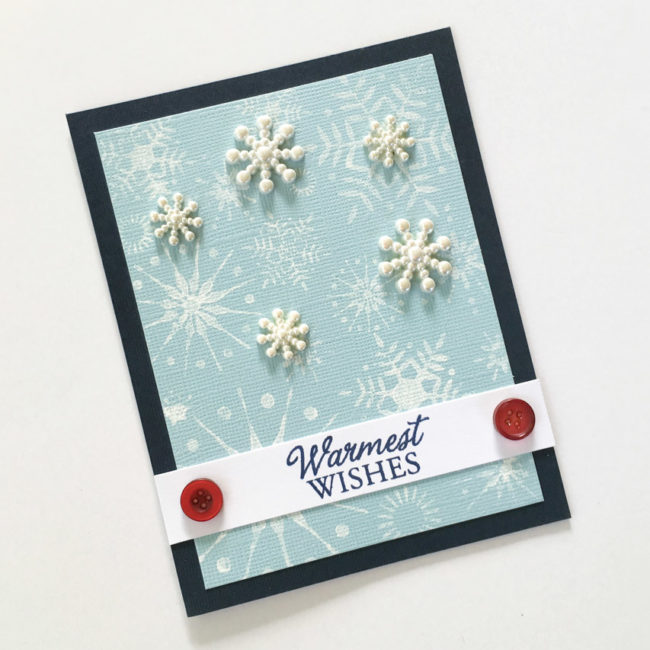
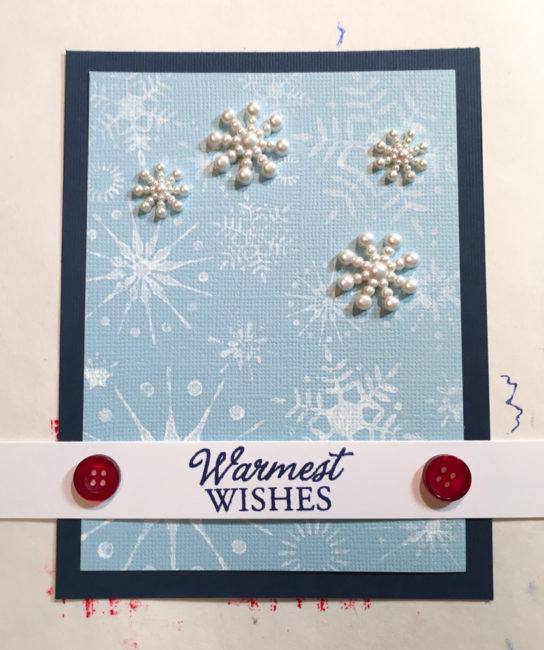
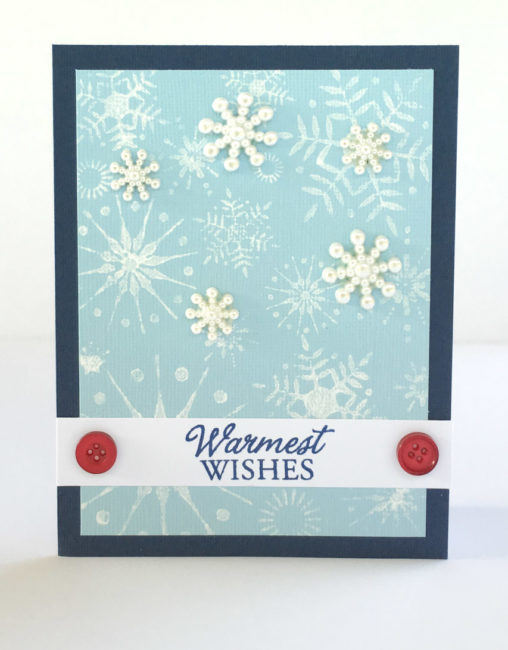
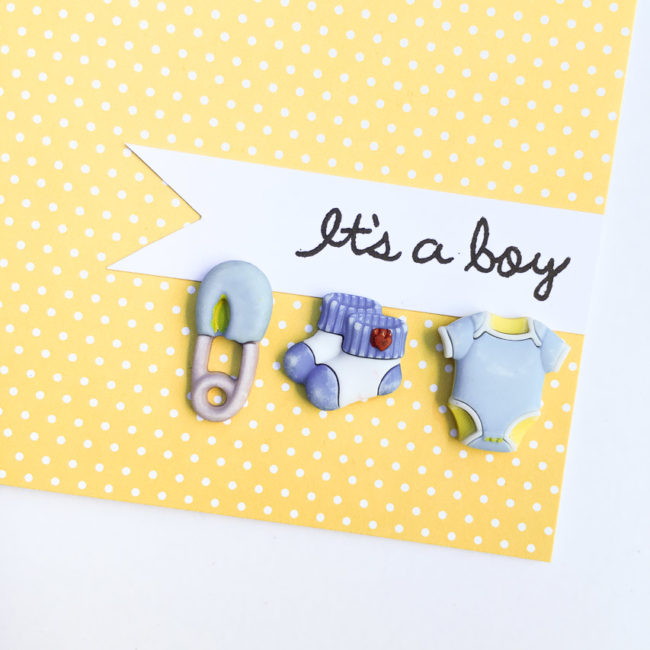
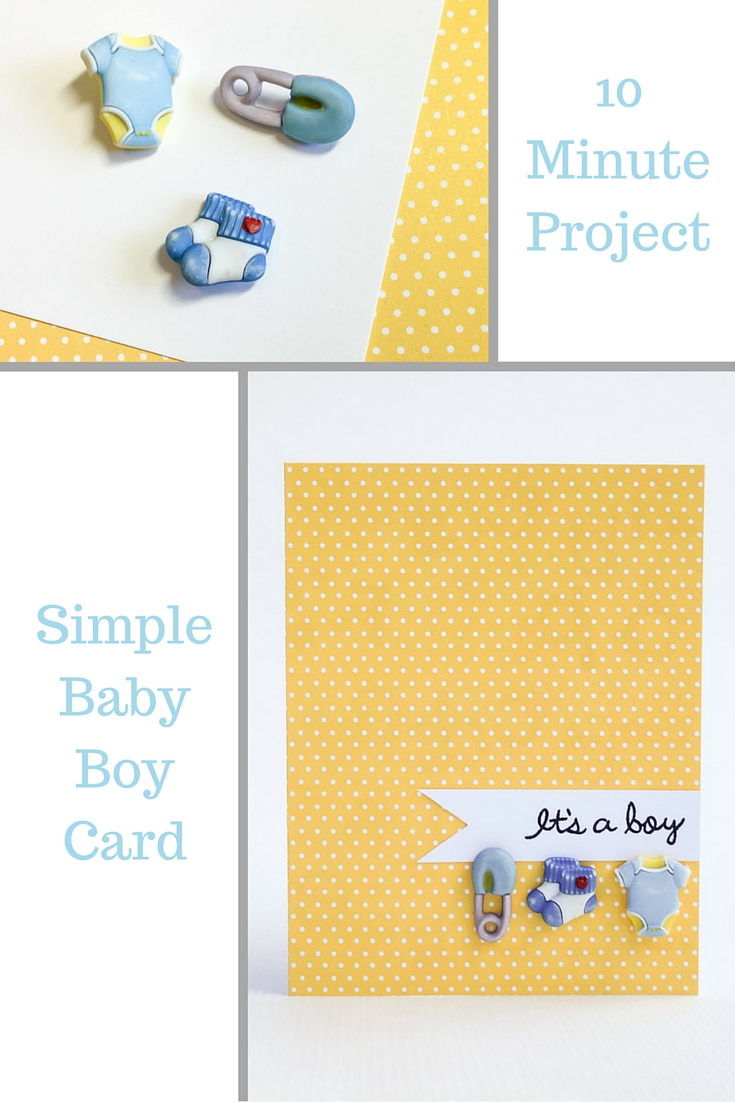
0

Felt and Fabric Thanksgiving Card

When it comes to Thanksgiving I don’t do a lot of home decorating, but I do enjoy creating cards for a few special people. This card is a lot of fun to make with fabric scraps, though using patterned paper would work just as well. The harvest Button Bonanza bag is perfect for all your fall crafting needs and just screams Thanksgiving to me.

Thanksgiving card

Supplies Needed: Felt, fabric with iron-on backing, word stickers, thread (hand or machine stitch), liquid adhesive, and harvest Button Bonanza bag

Steps:

Felt Heart

  1. Stitch a scrap of fabric, white trim, and felt heart onto a piece of white cardstockSewing Felt Heart
  2. Cut out hearts from a fabric scrap that have adhesive backing and iron them onto the card. Ironing fabric hearts
  3. Ink around edges of white cardstock if desired
  4. The final and fun part – adhere down buttons as desired and add word strips as well.

Beyond Thanksgiving, this simple card would be great for any holiday or occasion – and is a lot of fun to make! Don’t forget that you can create this design with either fabric or patterned paper.

0

Send Some Halloween Love with Buttons

Even though summer is in full swing, Halloween is sneaking up on us (boo!). Today’s project will show you how to use some Halloween products without having to wait for Halloween – and how to kick it up a notch with buttons!

Halloween love card

You won’t have to wait until Halloween to give someone this card! With it’s message of love, it can be delivered anytime during the Halloween season.

The buttons are a critical element in this design. They add a pop of color that breaks up the dark purple, but more importantly they add dimension to a design that would otherwise be entirely flat.

Supplies:

  • Patterned Paper (all patterned paper from Graphic 45’s “Rare Oddities” collection – 6×6 & 8×8 pads)
  • Cricut Explore machine & Cutting Files
  • Inkpads in black, purple, green and brown
  • Adhesive dots
  • Black thread & needle
  • cream cardstock
  • Buttons Galore “Vacation” button pack

1. Cut a 3.5″ by 8″ piece of background paper for the card base. Ink edges. (While this is a non-standard card size, it will fill in a standard business sized envelope.)

2. Use die cut machine to cut out vine and flowers. Ink edges of all pieces.

3. Cut sentiment block from patterned paper. Ink edges and mat on patterned paper.

4. Adhere all pieces to background.

button flower centers

5. Sew thread through buttons and tie off. Adhere buttons on the center of the flowers.

6. Cut an 8″ x 7″ piece of cream cardstock to use as cardbase and fold. Adhere card front to base.

Who would you like to send a bewitching message of Halloween love to this season?

1

Powered by WordPress. Designed by WooThemes