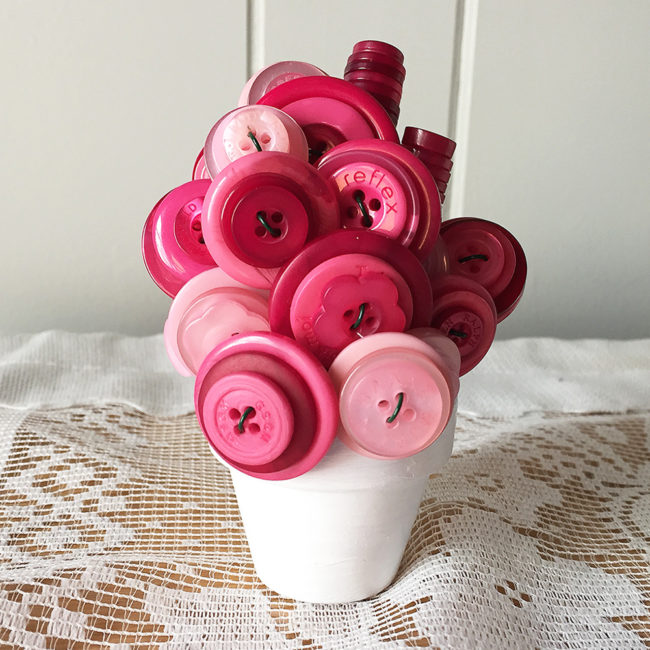
Flowers are pretty, but they are also expensive and don’t last very long. A button bouquet is affordable and simple to make and will add some vintage charm to your home, wedding, or shower – and never needs watering! Continue Reading →

Flowers are pretty, but they are also expensive and don’t last very long. A button bouquet is affordable and simple to make and will add some vintage charm to your home, wedding, or shower – and never needs watering! Continue Reading →
Hello Everyone! This is Katie from the Buttons Galore & More Design Team and today I have a fun wedding decor idea!
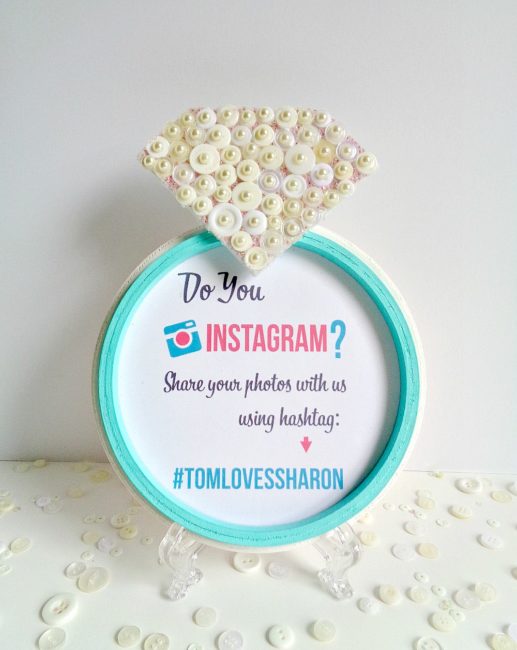
When I was given the task to make a wedding decor project, I wanted to create something that was cute, useful, and that could be saved in the long-run. With that in mind, I decided to create a diamond ring frame that could be customized to fit your wedding decor, be useful (since it’s a frame), and be saved by the bride. In addition, this project is super inexpensive to make because it’s made from a wooden plaque, an embroidery hoop, and a piece of foam board!
To decorate the diamond part of the ring, I decided to use the 28 Lilac Lane Embellishment Bottle in Winter Wonderland. Even though “winter wonderland” sounds wintry, this embellishment bottle could easily be used for wedding décor as well because the embellishment bottle contains several shades of white/cream colored buttons, along with seed beads and flat back half pearls. The flat back half pearls (in my opinion) really make this embellishment bottle perfect for wedding projects!
So, to find out how to make your own Diamond Ring Frame, keep reading below!
Supplies needed:
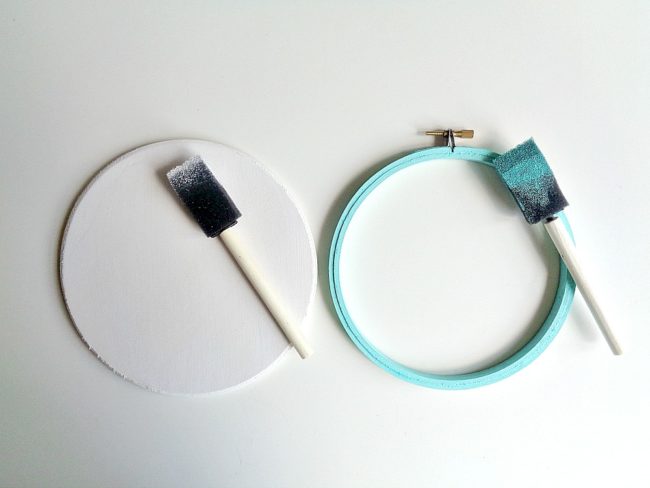
Step 1: Paint your wooden plaque white and your embroidery hoop mint. Then set both items aside to dry.
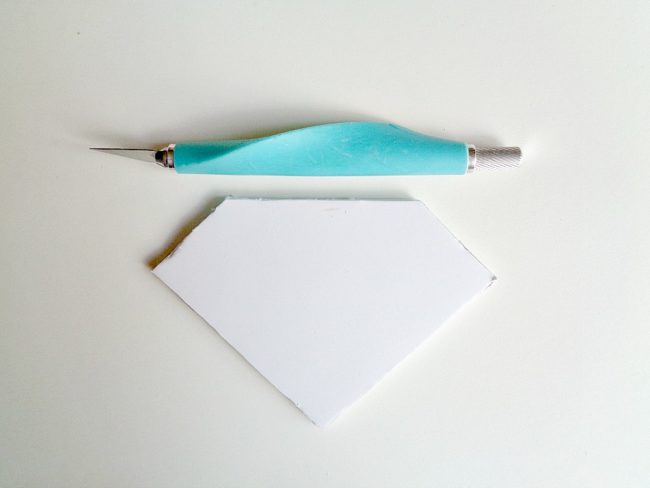
Step 2: Grab your foam board and cut out a diamond shape. The diamond I cut out for my 6-inch embroidery hoop was 5 inches by 3 ½ inches.
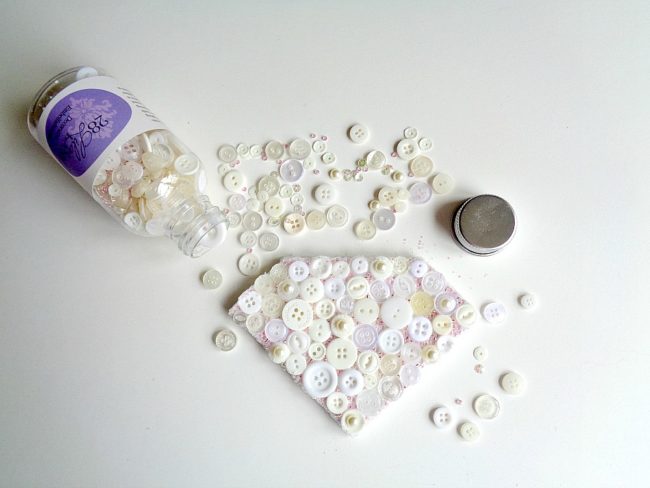
Step 3: Grab your 28 Lilac Lane Embellishment Bottle in Winter Wonderland and start decorating your diamond cut out. To do this, simply brush on a layer of decoupage glue onto your diamond cut out and begin arranging your buttons. While doing this, I also sprinkled on seed beads to fill in the gaps between the buttons. Finally, as an extra touch, I glued on a flat back half pearl to each of the buttons.
Once your diamond has been decorated, set the whole thing aside to dry.
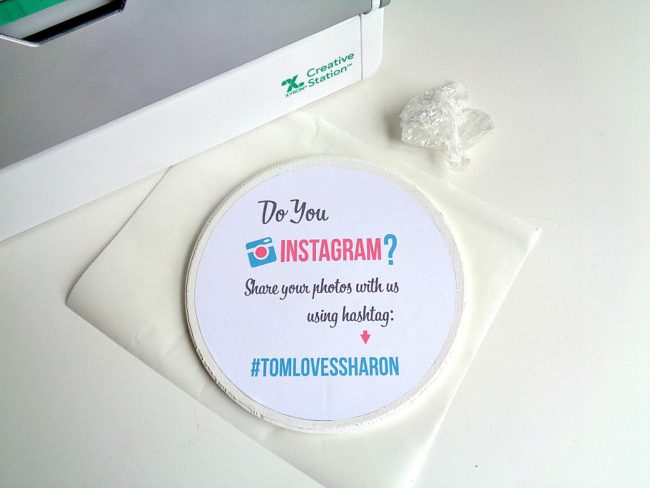
Step 4: Take your picture, sign, or image that you want to use for your frame and cut it down to size to fit on the inside of your embroidery hoop. Then take that image and run it through your Xyron 9” Creative Station. Once you have run your image through the Xyron Creative Station, rub the top of the sticker paper. Finally, peel the image off the sticker paper and adhere it to your wooden plaque.

Step 5: Using a hot glue gun, glue on your embroidery hoop to your main wooden plaque and then glue your diamond on top of the embroidery hoop.
Once all your pieces have been glued on, you’re ready to display your new Diamond Ring Frame!
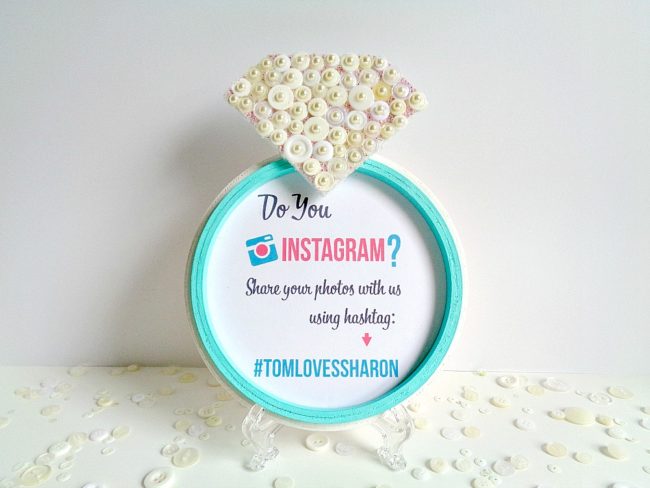

As you can see, I used my Diamond Ring Frame to hold a sign about taking Instagram photos during the wedding. However, this frame could be made to hold a variety of things. For example, the frame could hold photos, it could direct the guests to do something (like signing a guest book), or simply be used to display a favorite quote. Along those same lines, this Diamond Ring Frame does not have to be used at the wedding. It could also be used as a decoration for the bridal shower or bachelorette party instead!
What 28 Lilac Lane items would you use for your wedding or shower decor?
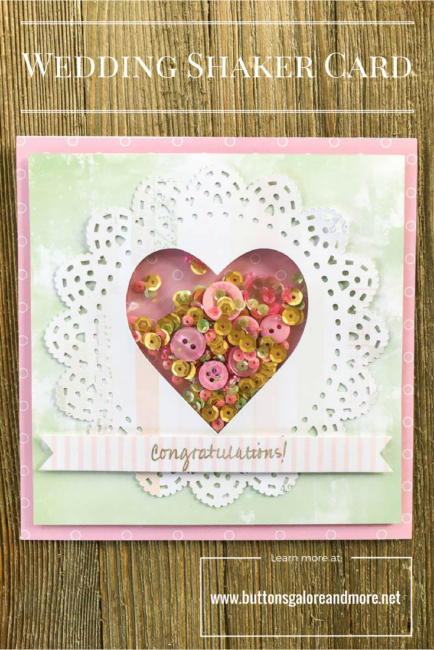
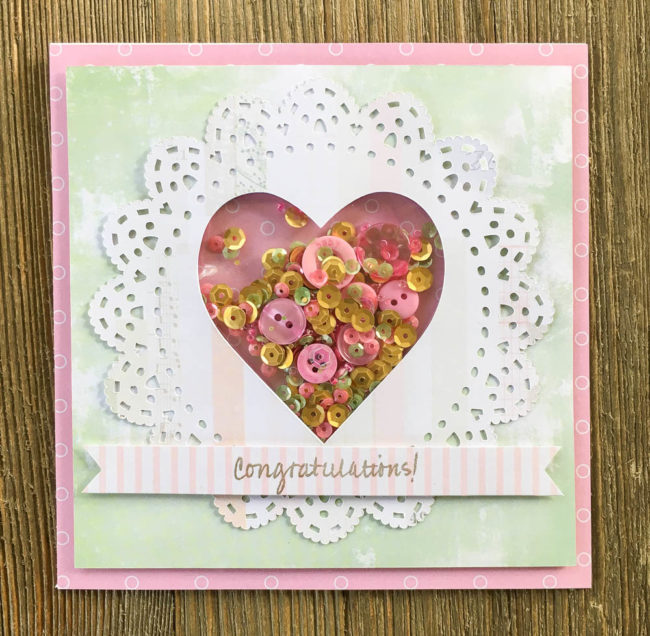
Shaker cards aren’t just a way to celebrate birthdays…they can also be a beautiful way to celebrate a more formal occasion like a wedding! This wedding shaker card pairs a sparkly shaker mix with a doily and die cut heart to celebrate the love of a special couple.
Supplies Needed:
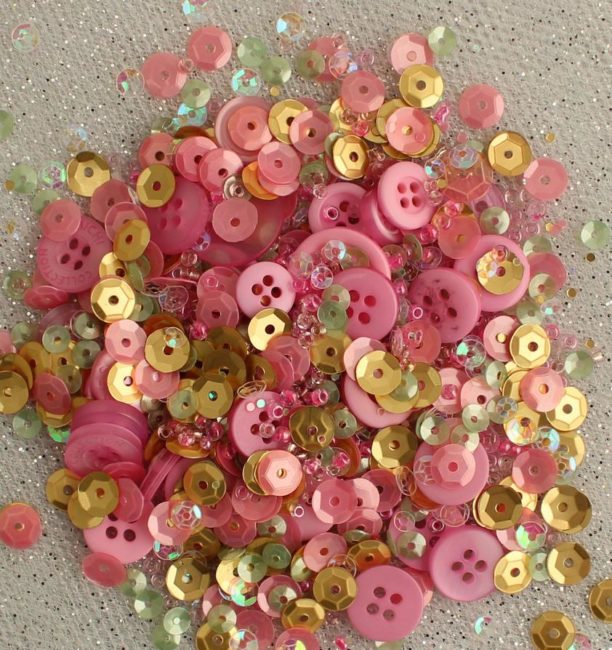
This shaker card features our versatile 28 Lilac Lane “Rose Garden” Shaker Mix that is a mix of gold, clear, pink, and green sequins, pink beads, and pink buttons to create the perfect shaker mix! Use this mix for occasions like weddings, to welcome a baby girl, or for a special birthday message.
Making this wedding shaker card is simple. Just die cut the doily for the card front, and then die cut the same heart shape out of both the doily and green layer of the card so they can be layered to create the card front with the shaker window. Glue the two pieces together and flip them over.
Using either a scrap of page protector or a Fuseable Pouch and Fuse tool, create a pouch that is slightly larger than the shaker window opening. Fill it about 1/2 full with the 28 Lilac Lane “Rose Garden” Shaker Mix, and then seal it with red liner tape or a Fuse Tool. Then use red liner tape to attach it to the back of the card front so that it shows through the shaker window.

To finish the wedding shaker card, attach the pink paper to the card base. Then use foam tape to attach the shaker card layer on top of the pink layer. Finally, cut a 1/2″ strip of paper and stamp the sentiment on it. Snip the ends into a banner and attach it with foam tape for dimension.